md1400cs
-
Posts
2,816 -
Joined
-
Last visited
Content Type
Profiles
Forums
Gallery
Events
Everything posted by md1400cs
-
 Patrick, comme toujours un très bon travail. !! Je ne sais pas si votre deuxième langue, après le néerlandais est le français - je suis né en France donc c'était ma première .... Je pratique juste haha - J'ai aussi vécu au Mexique quand j'étais adolescent, j'ai épousé un Brésilien donc juste par «chance» pas par intelligence, je peux parler quatre langue hmmmm Many Europeans speak three - two are very common indeed.
- 756 replies
-
- 2
-

-
- galleon
- golden hind
- (and 2 more)
-
Jim, Just catching up - as always with your log I need to refill my coffee and stay a while - brilliantly worked out details. Regards,
-
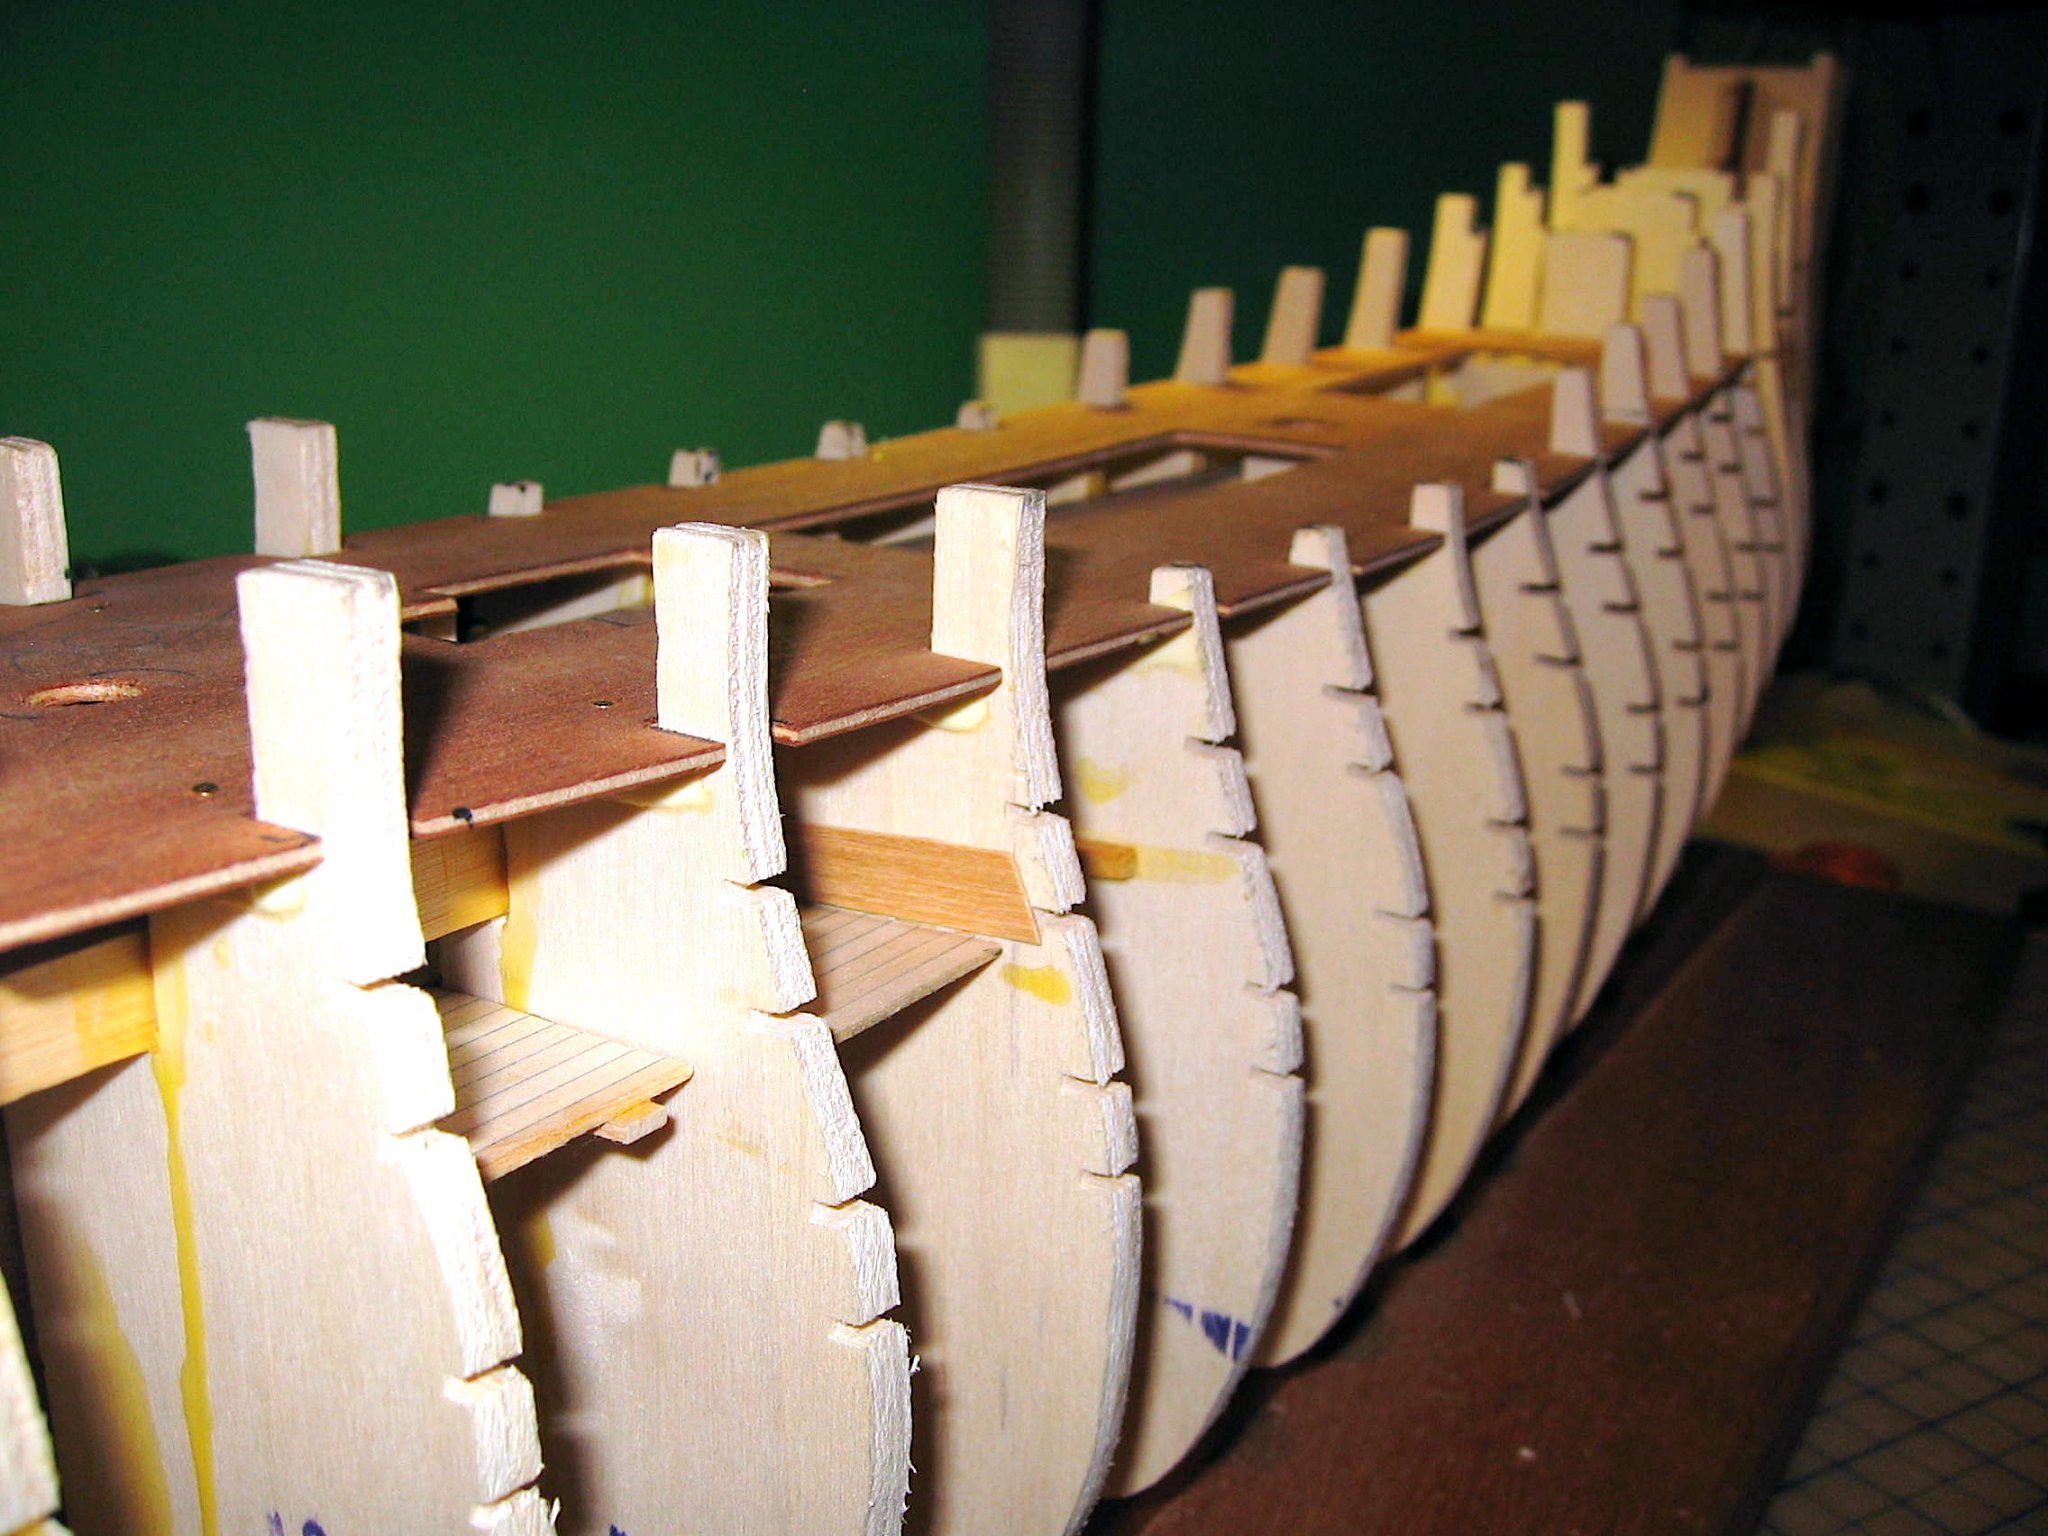
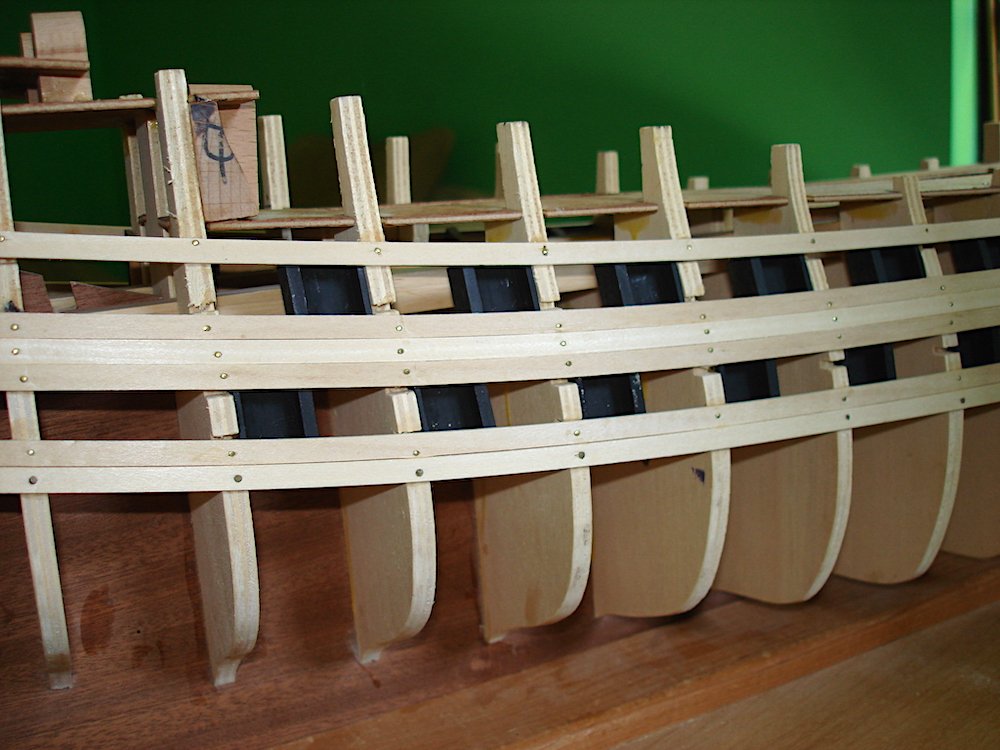
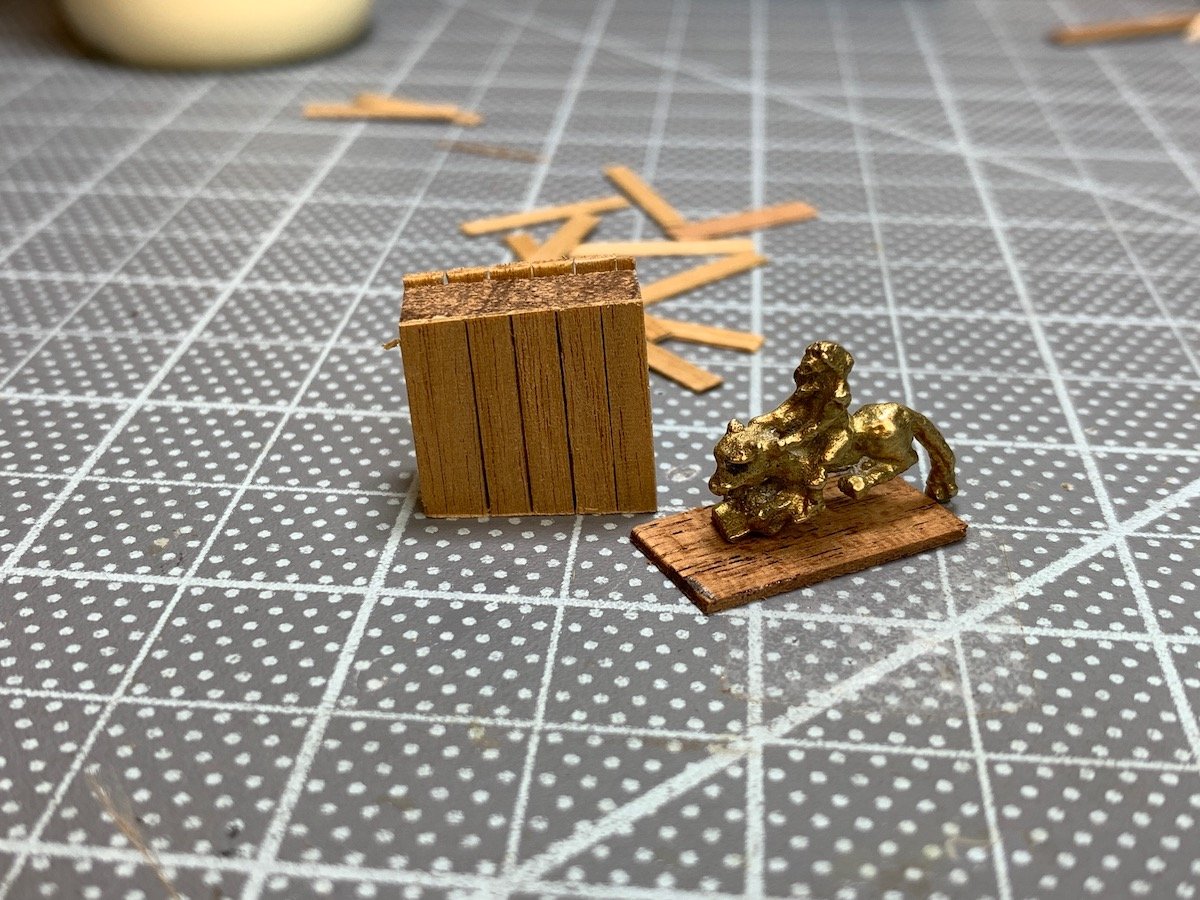
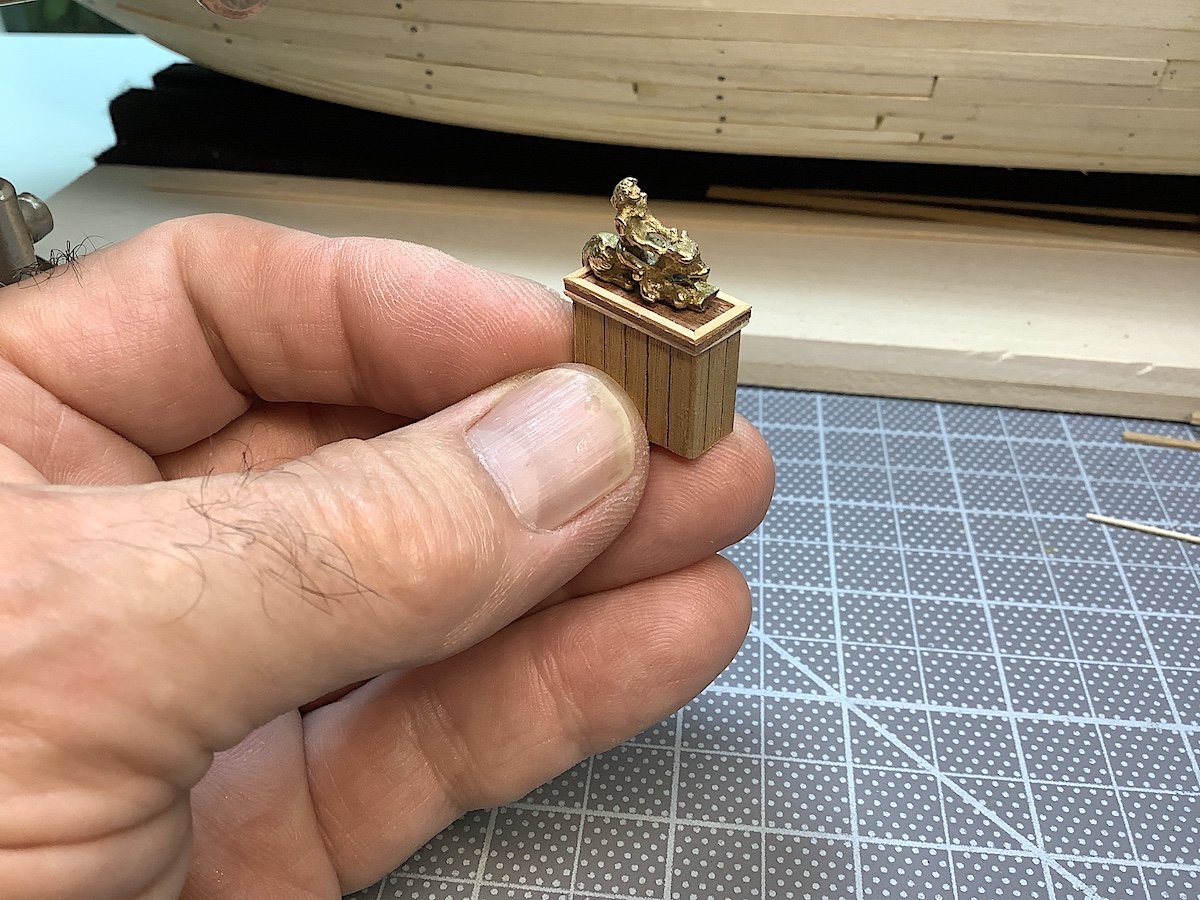
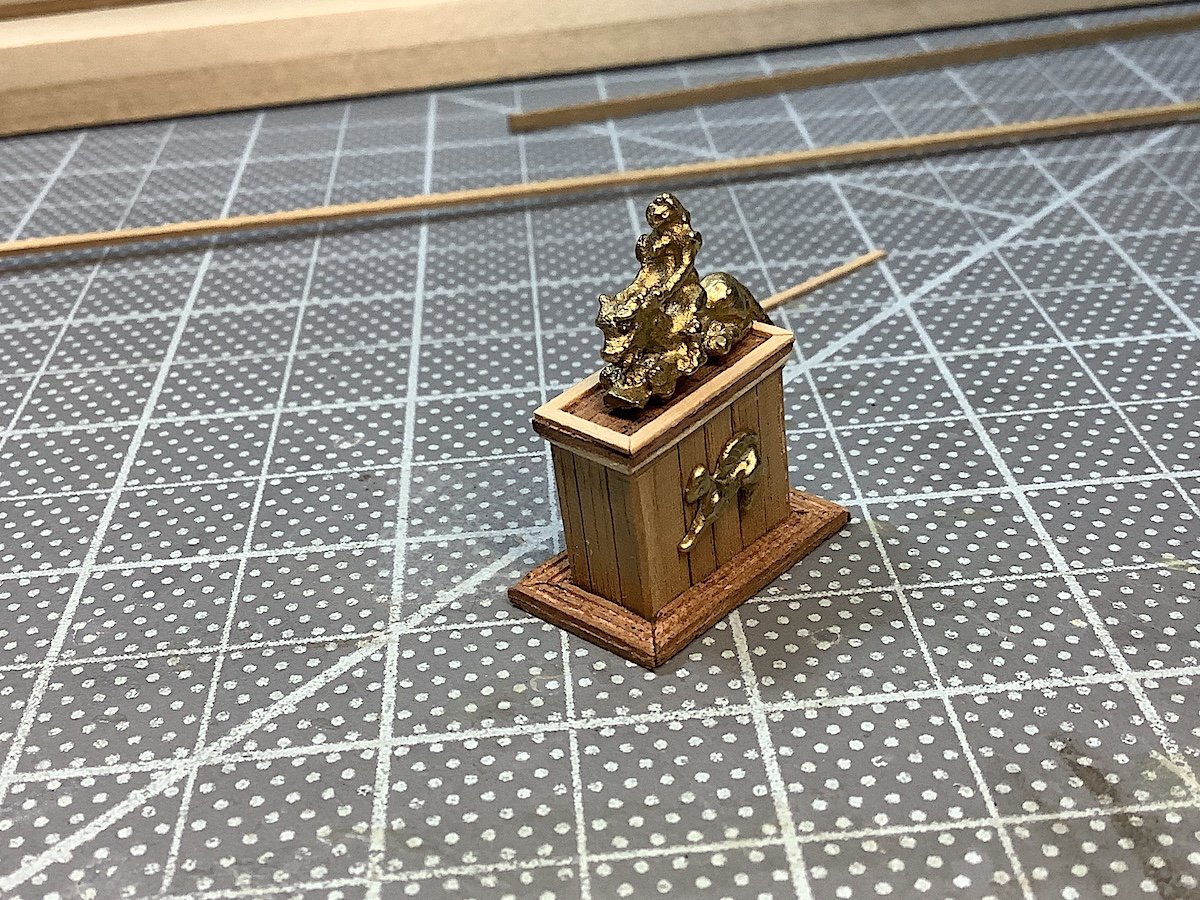
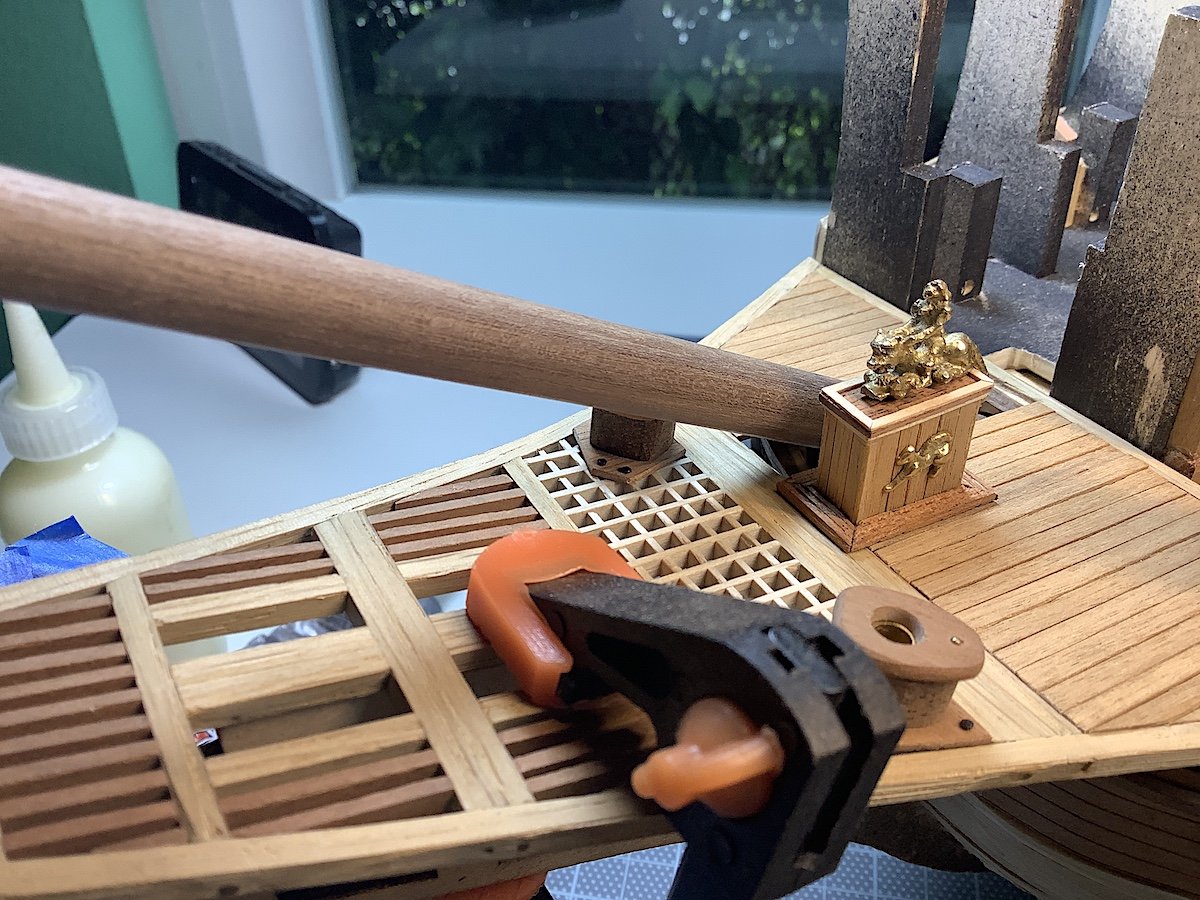
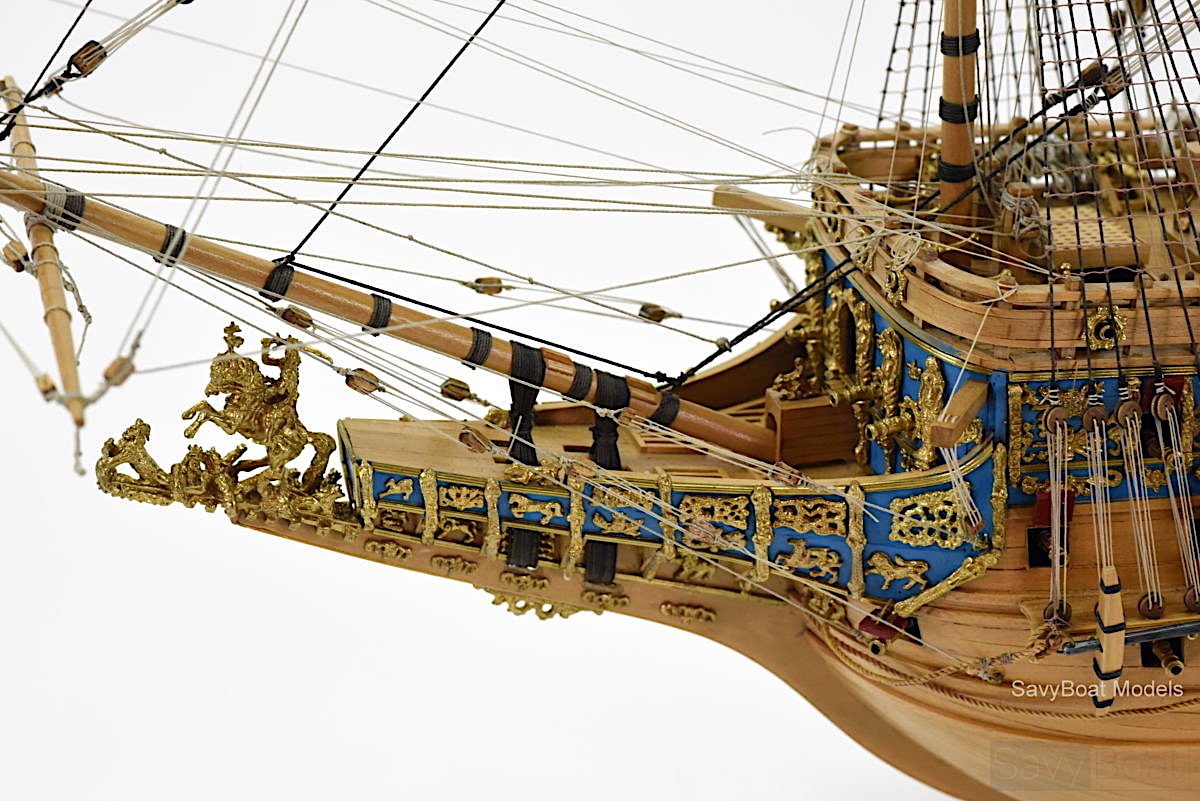
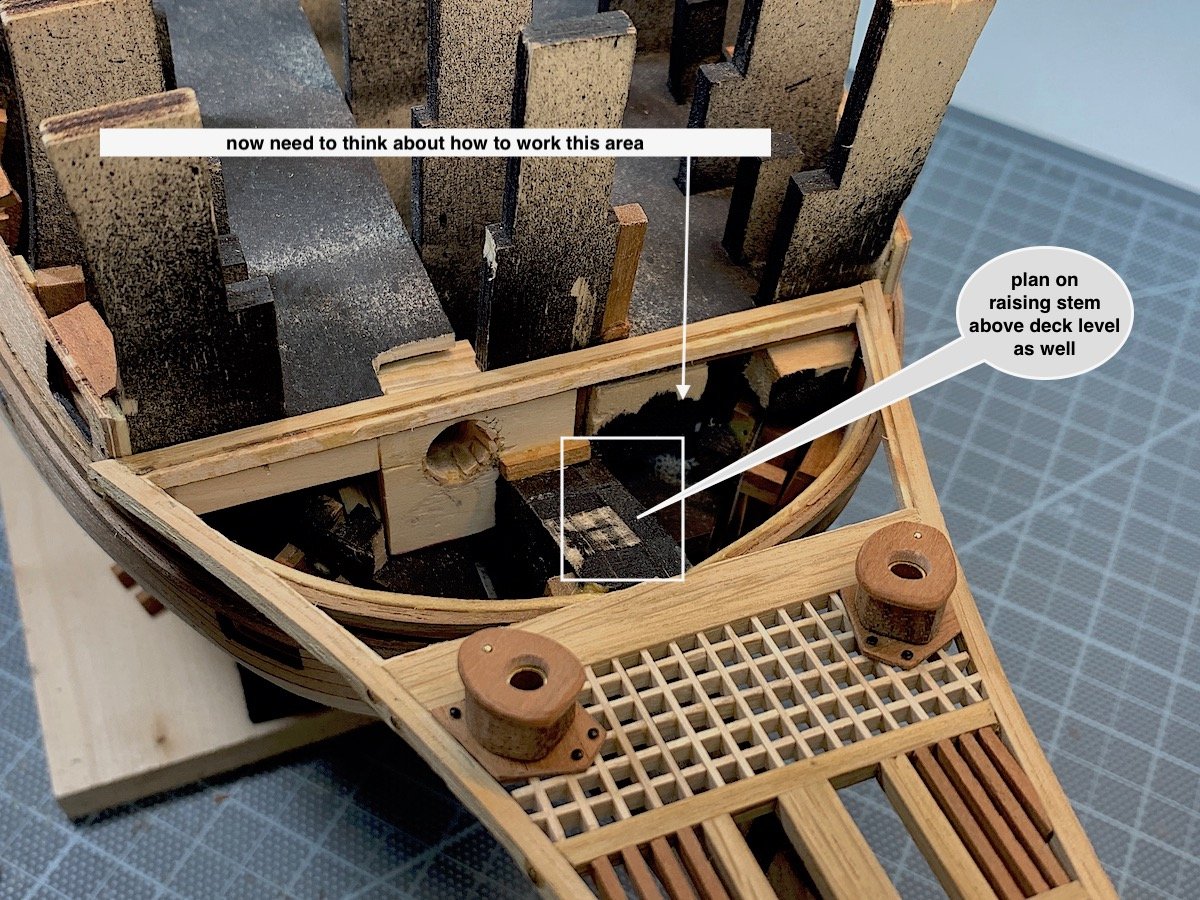
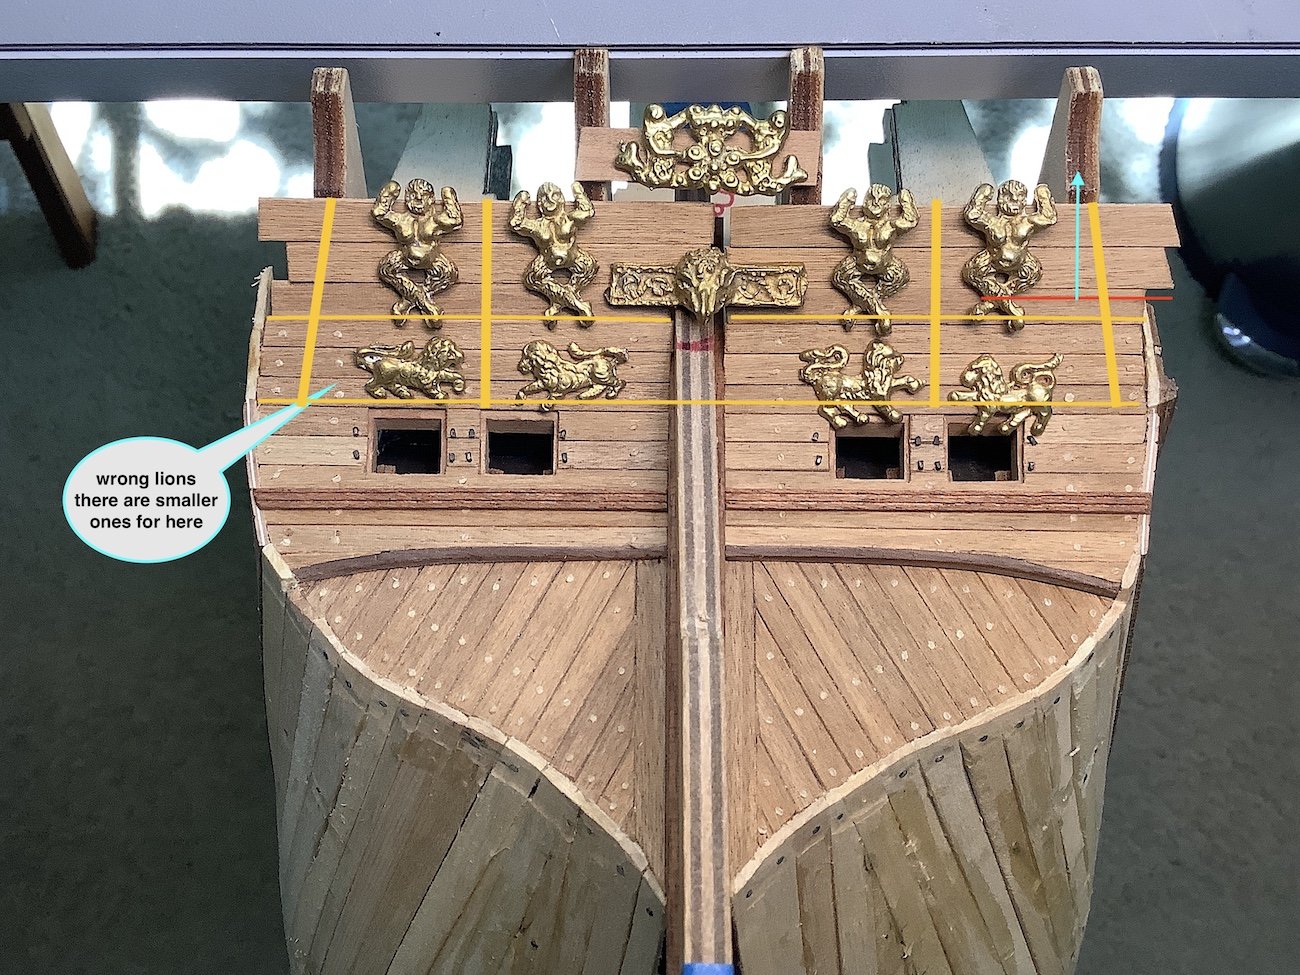
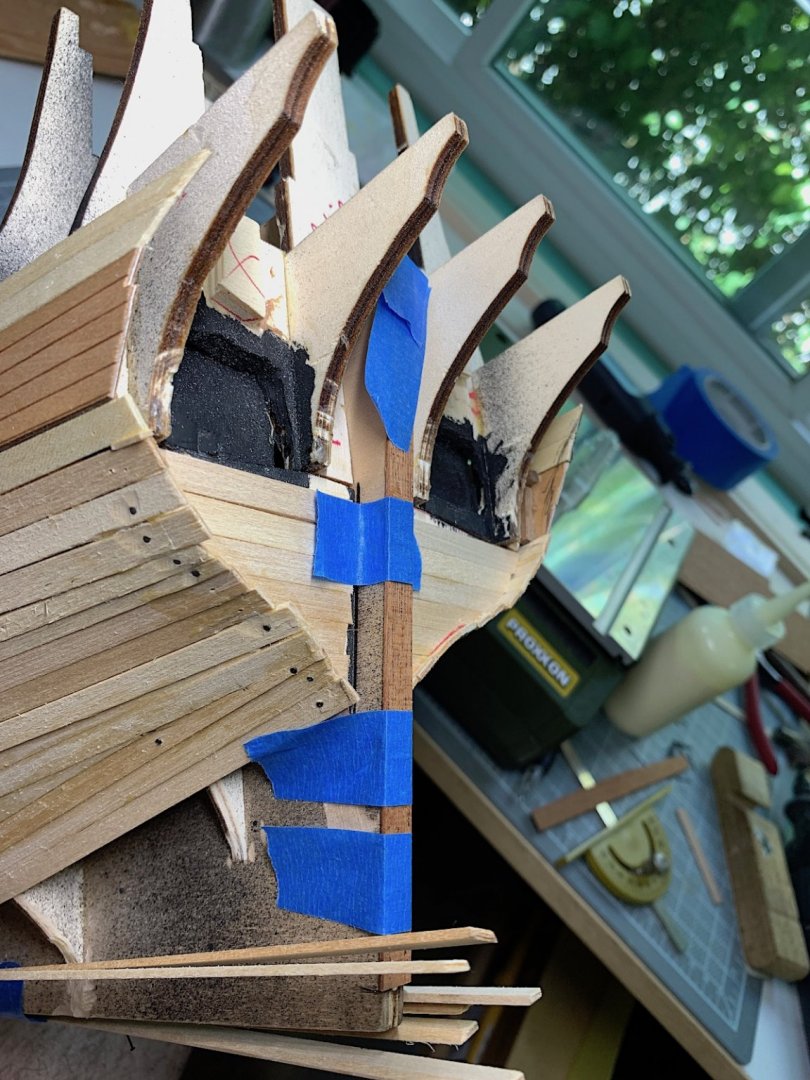
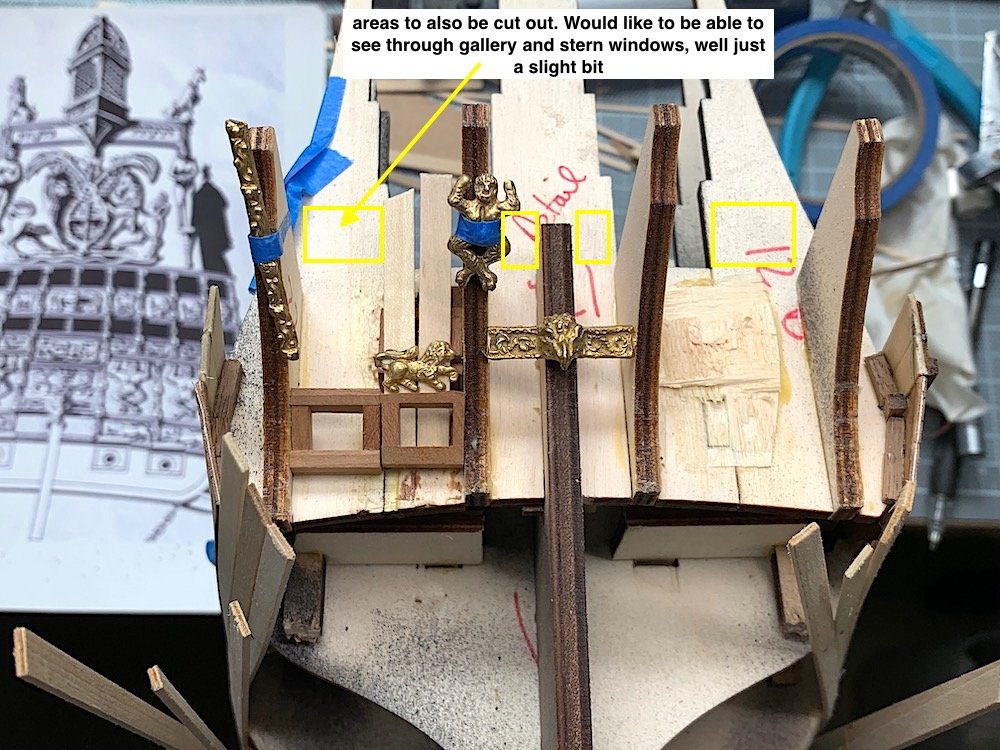
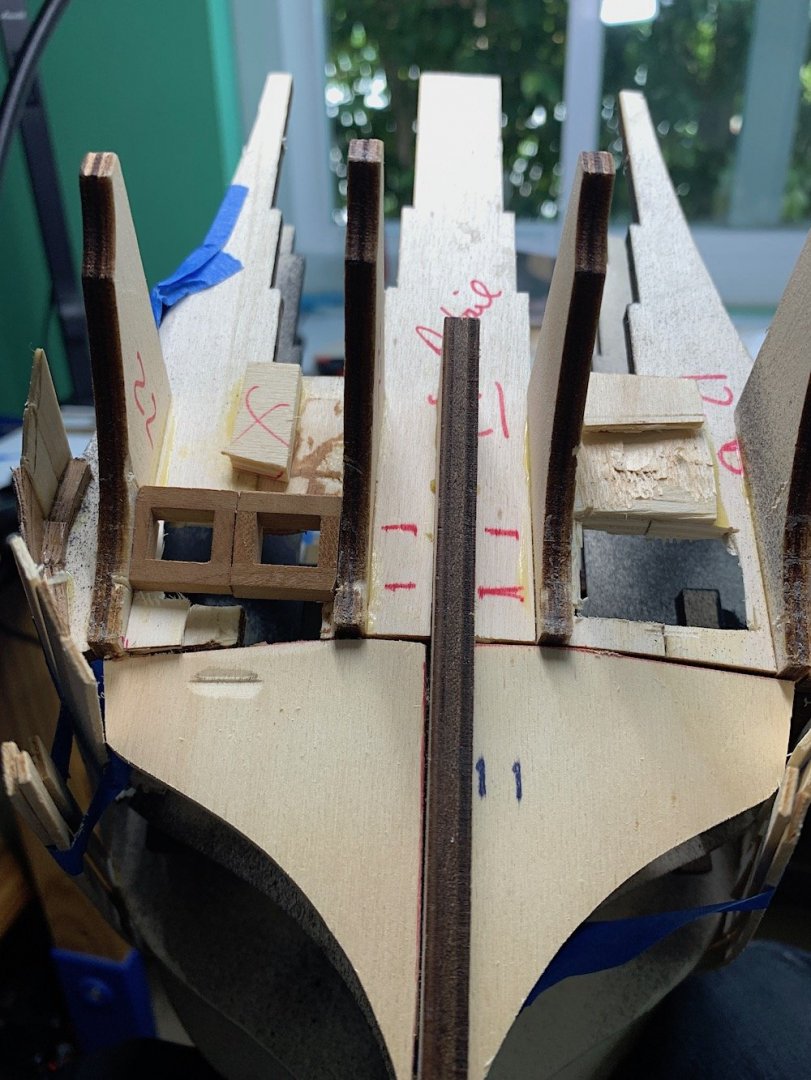
Hi, Richard: As always big thanks – glad that you like this log – your work is so over the top Boxbuilds: Thanks for your kind words. Regarding this Sovereign, as I had noted in my first post I did not intend to follow Sergal’s instructions for exactly the reason you state for your Soleil, along with other reasons as well. The template for cannon doors that Sergal included (for this kit) made this part of the build obviously much easier. I don’t know of a generic guide for locating the gun openings. For my previous Vasa, Corel intuitively added segmented grooves in their framings indicating location spaces for doors. That made it much easier indeed. My current Sergal SoS does not have these clever grooves. Hence I did not follow their instructions of covering the entire hull with basswood, then having to sorta blindly hunt for properly cutting holes for openings. ================ A build update I had intended to raise the stem above the bowsprit beakhead area – but having already done all the framing for the deck area, would again need to remove and re-do more pre done framing. As it is, given the offset mast re-work as well I thought against it -- instead --- went to plan B. I looked through some brilliant museum examples and decided to emulate their work by just framing a cover above and around my missing “stem” and just affix the needed cupid and lion on top visually it works as a good “go around” The Sergal kit does indicate for a frame to be constructed above the non-offset mast with the cupid/lion then affixed above. see last image. As is known, a mast offset was required, given how close the foremast is sunk through the forecastle. This came out pretty well. Now really need to get back to finishing and prepping first planking. Thanks for your kind posts as well as likes or just dropping by....


-
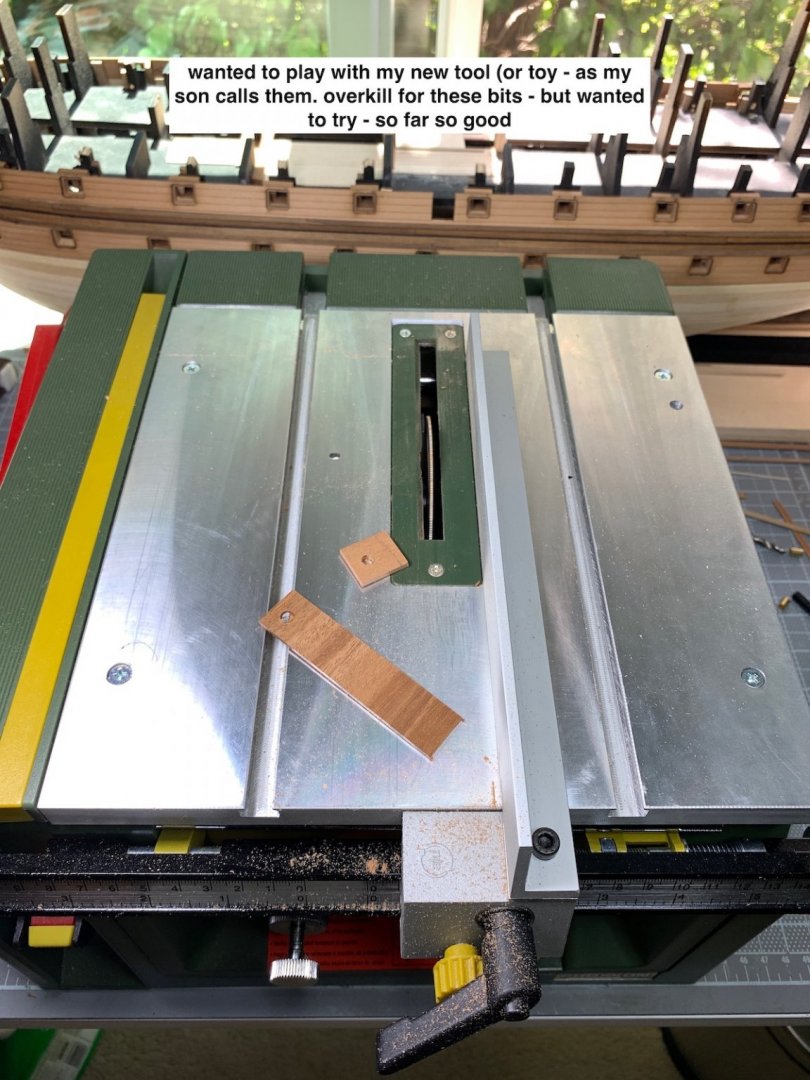
Frank, Yes – perfect idea indeed. When I looked at saw reviews on Youtube one of the reviewers indeed made just what you suggested. I later realized that Proxxon now encloses just what you suggested. I may make one out of thin oak planks that I can cut to size. Need to set that bit up – on my list – as soon as I need to cut very small planks – been using my very, small and old Proxxon KS-115 in the meantime Stuglo: funny – that would have indeed been a disaster back then – No actually it is supposed to be a “slider” pin – creative silliness on my part. That said back in those days is where the “he’s a sun of a gun”, came from: sailors (gunners) enjoying the working girls who would sometimes get them pregnant hence the phrase. Though some etymologists dispute this particular use of the phrase. The most plausible is this; there was an allowance for some women (spouses or working girls) to live on English Navel ships. Any child born on board who had uncertain paternity would be listed in the ship’s log as “son of a gun”.
-
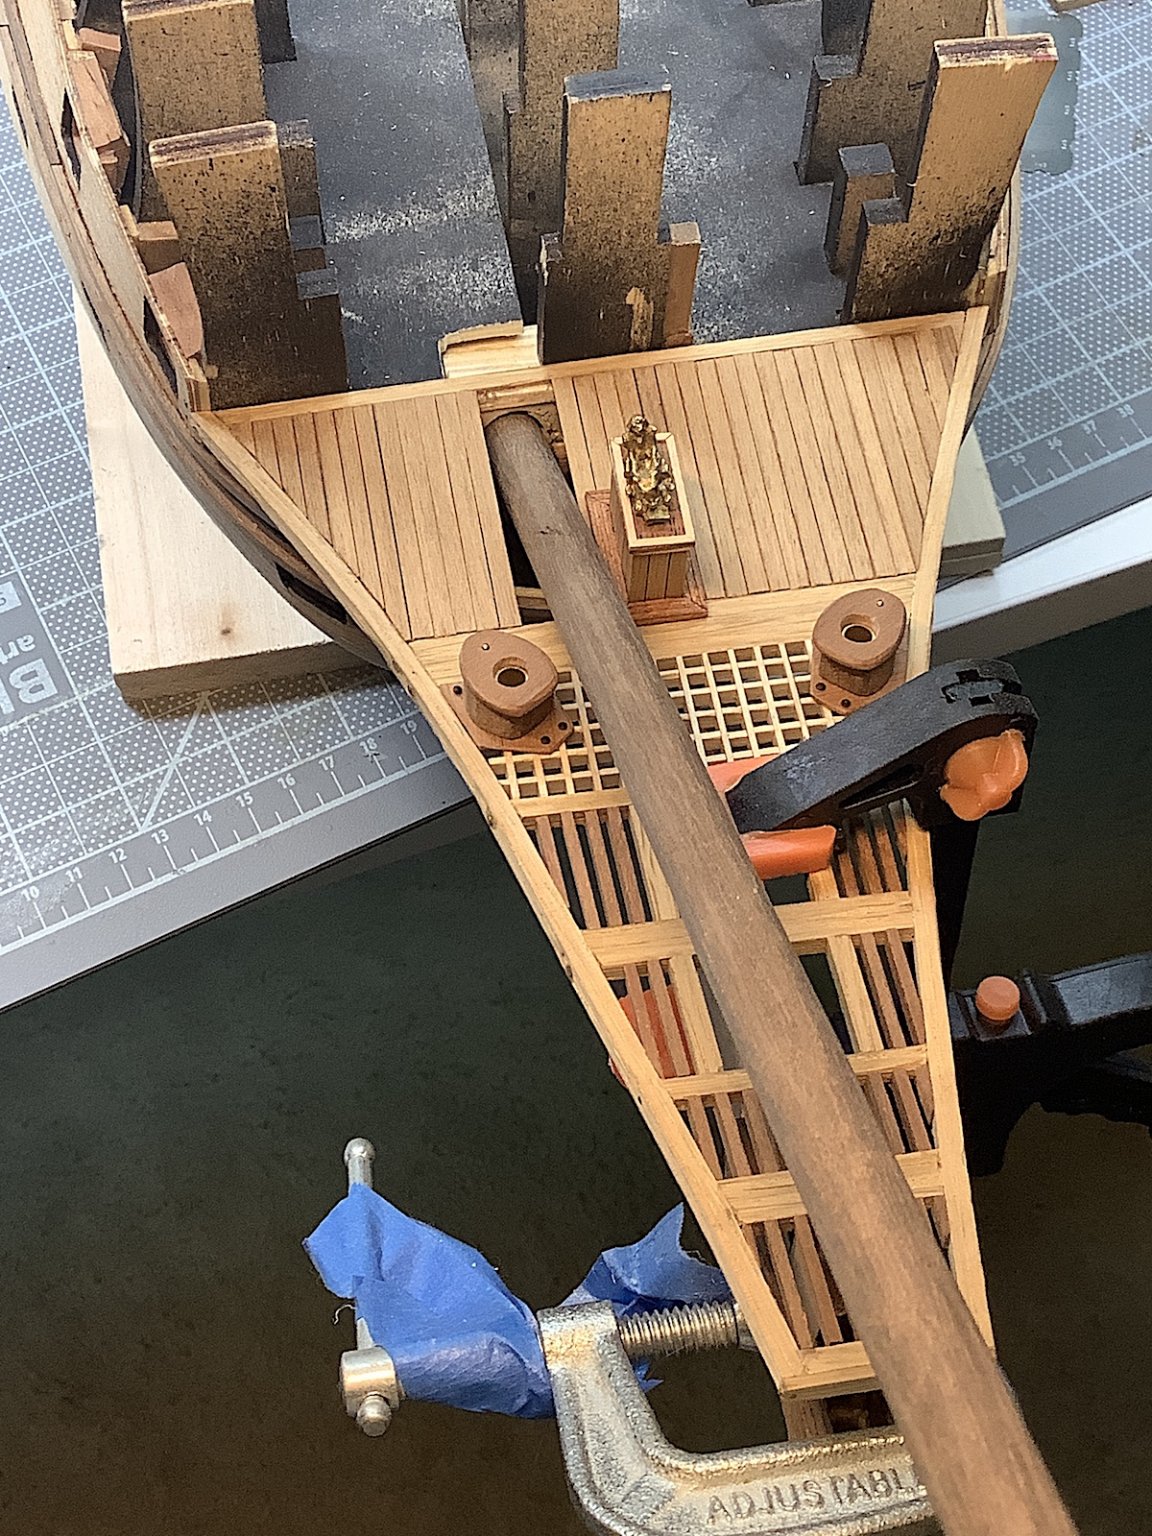
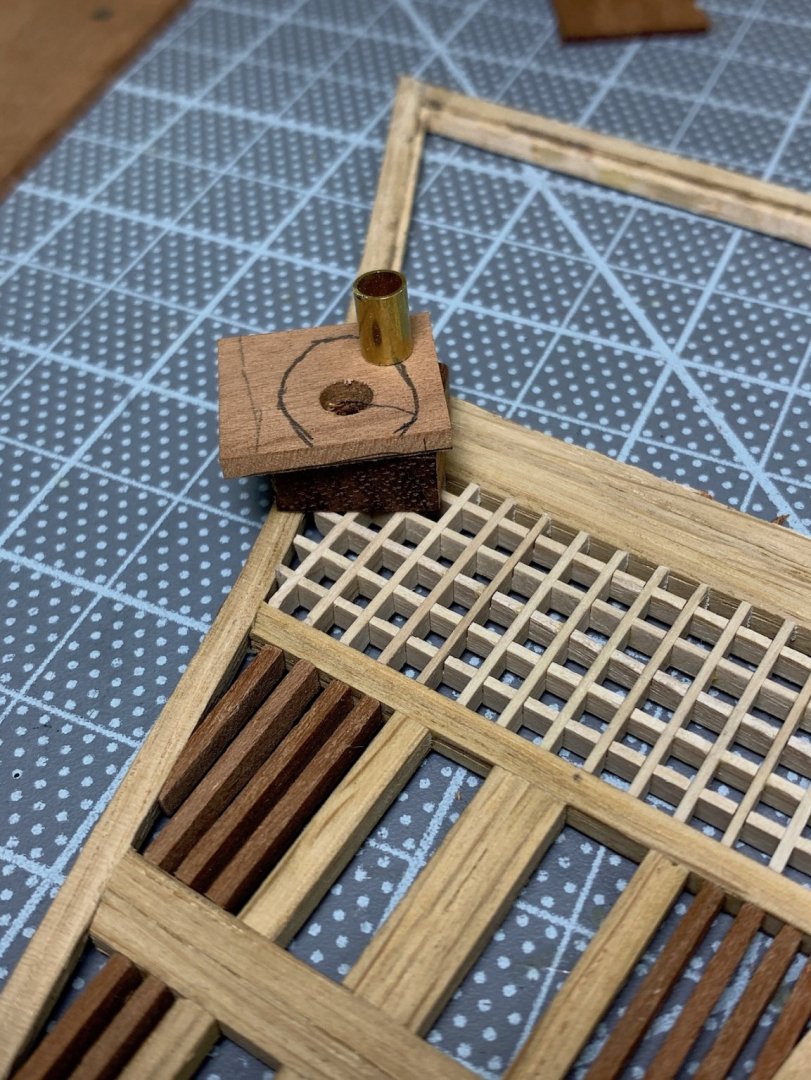
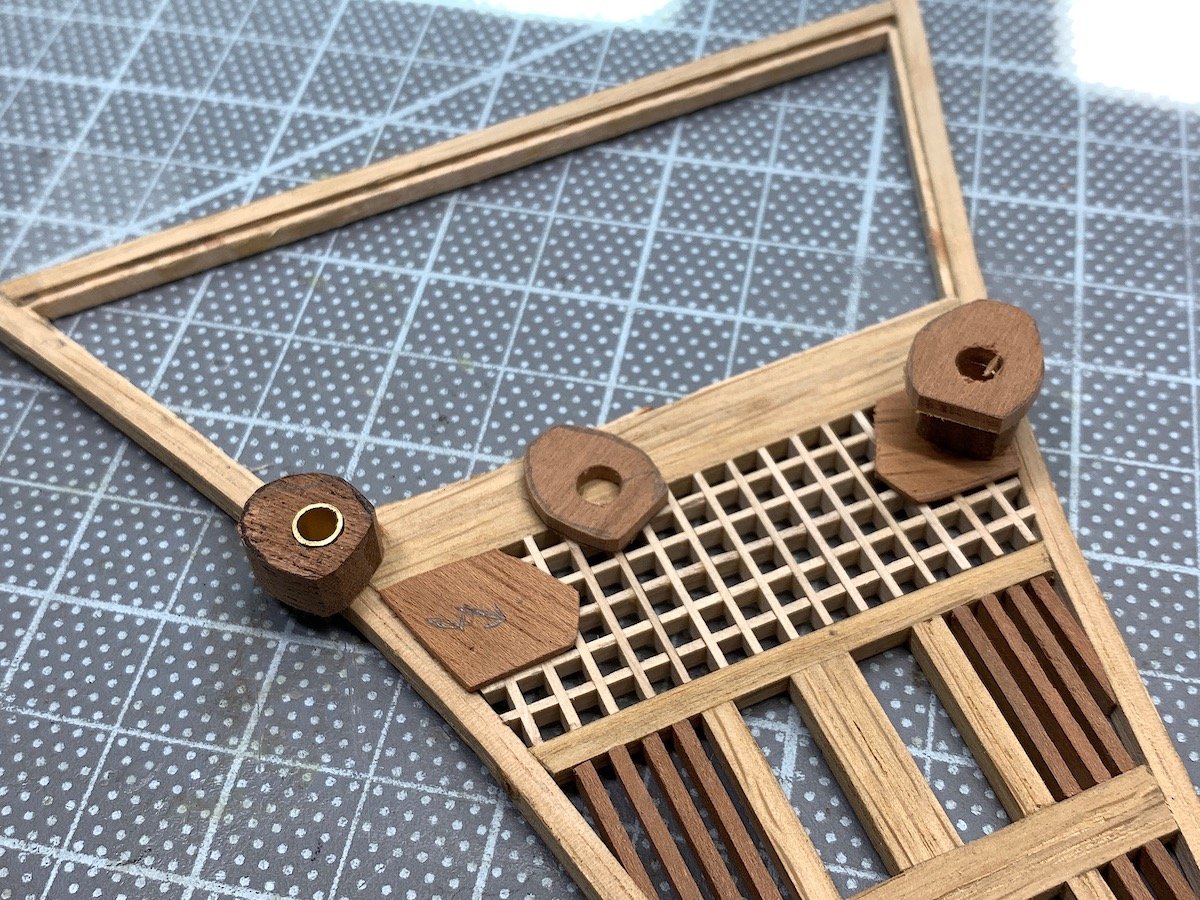
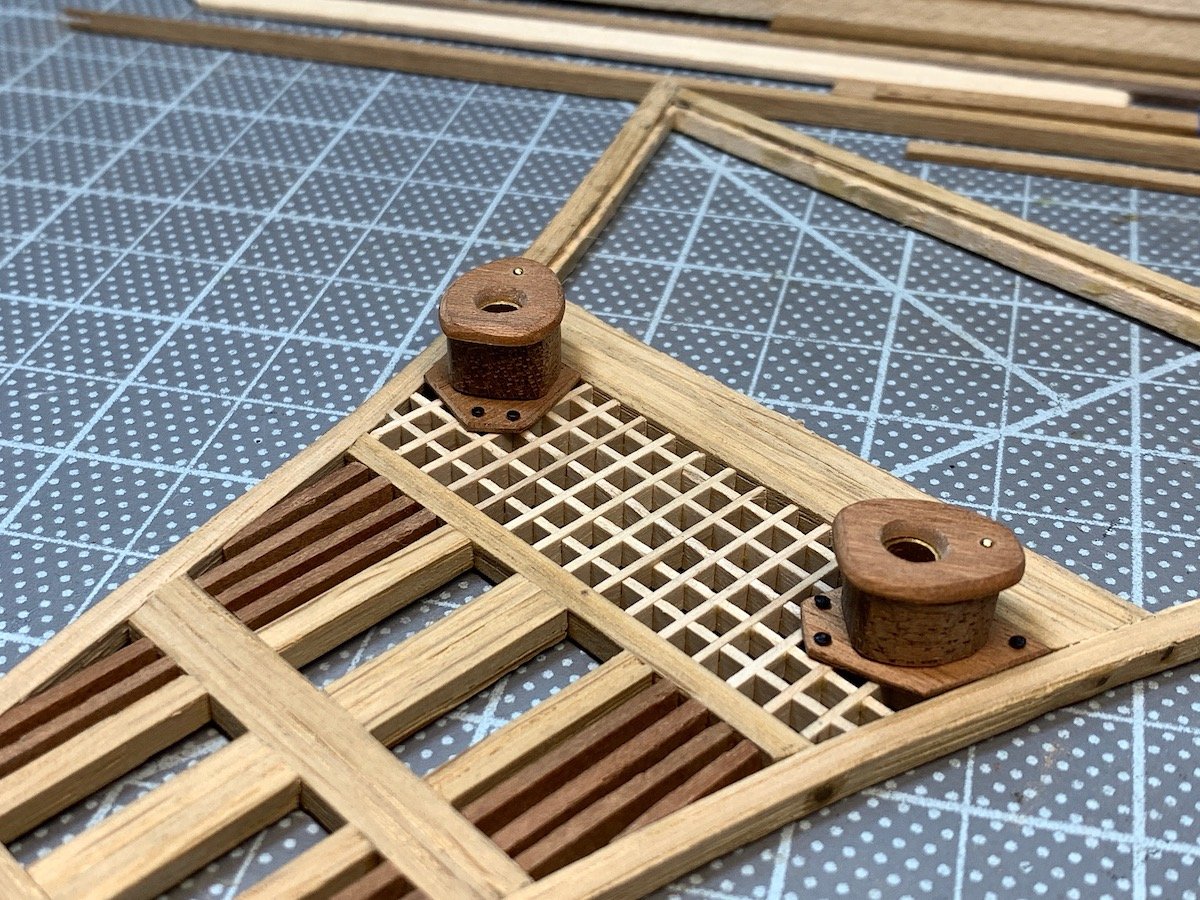
Patrick, As always thank so much - As you know I'm a huge fan of your work. Minor update - need to re-do bowsprit area so thought I would add these two bits. Added the gratings as well. Regards,


-
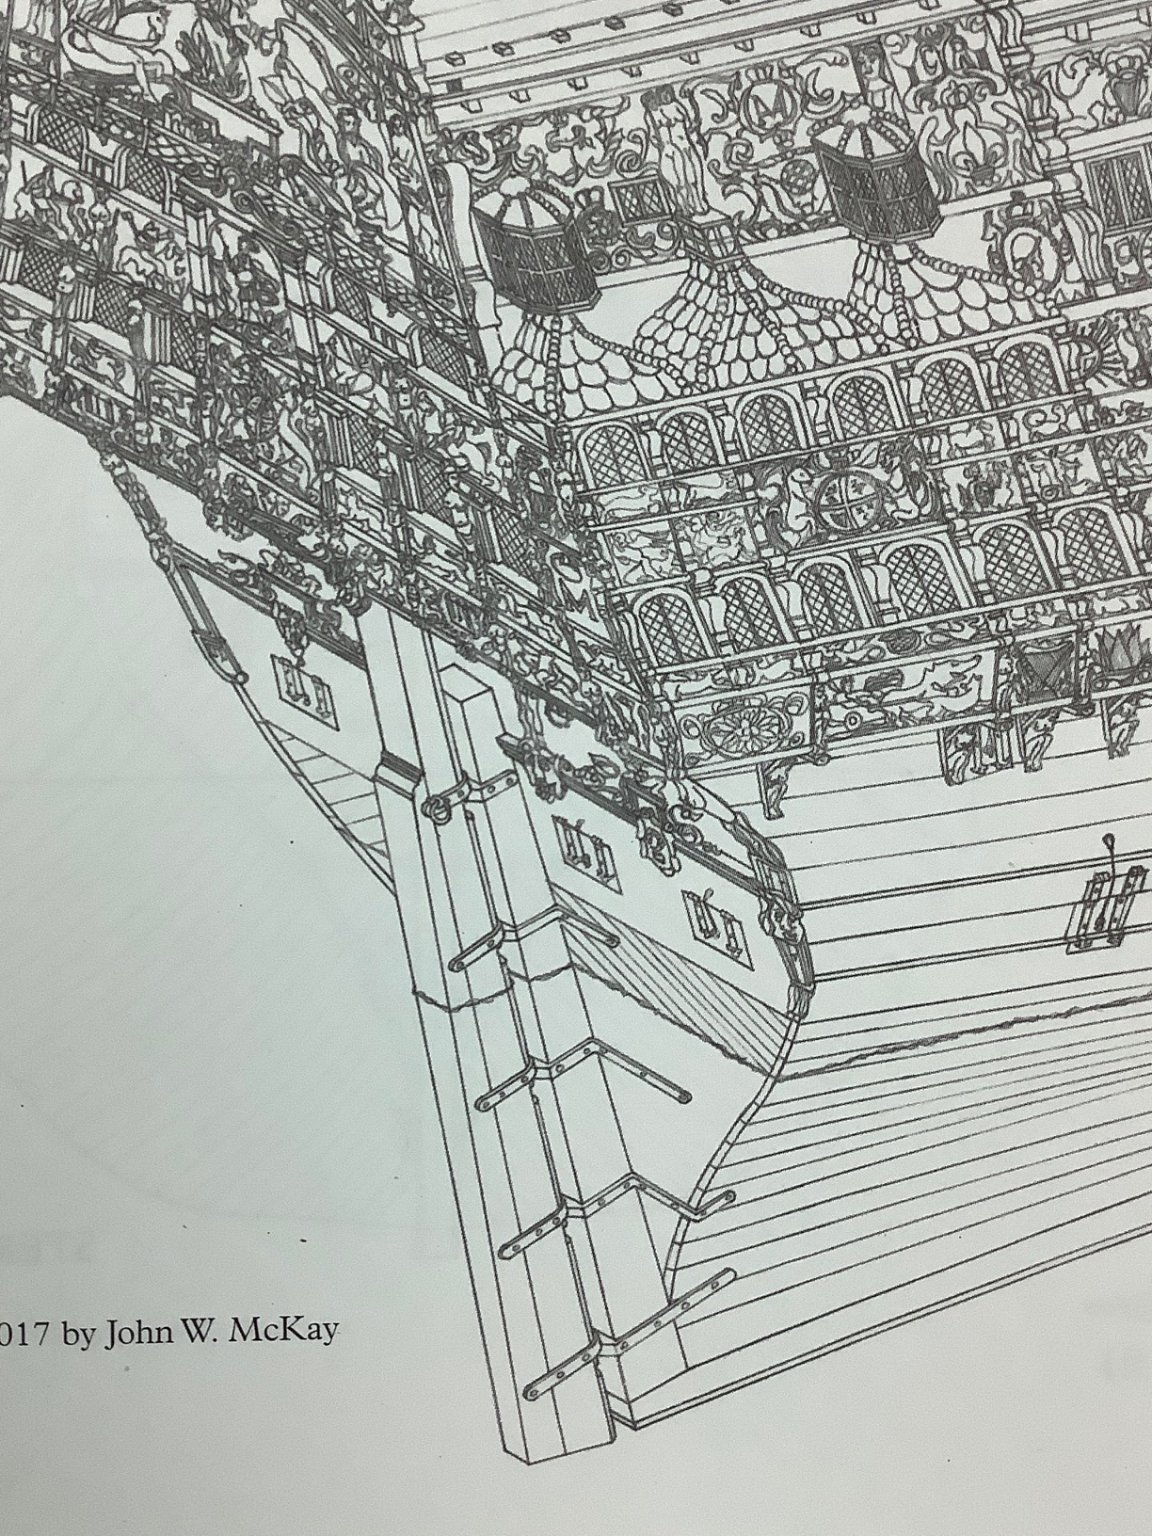
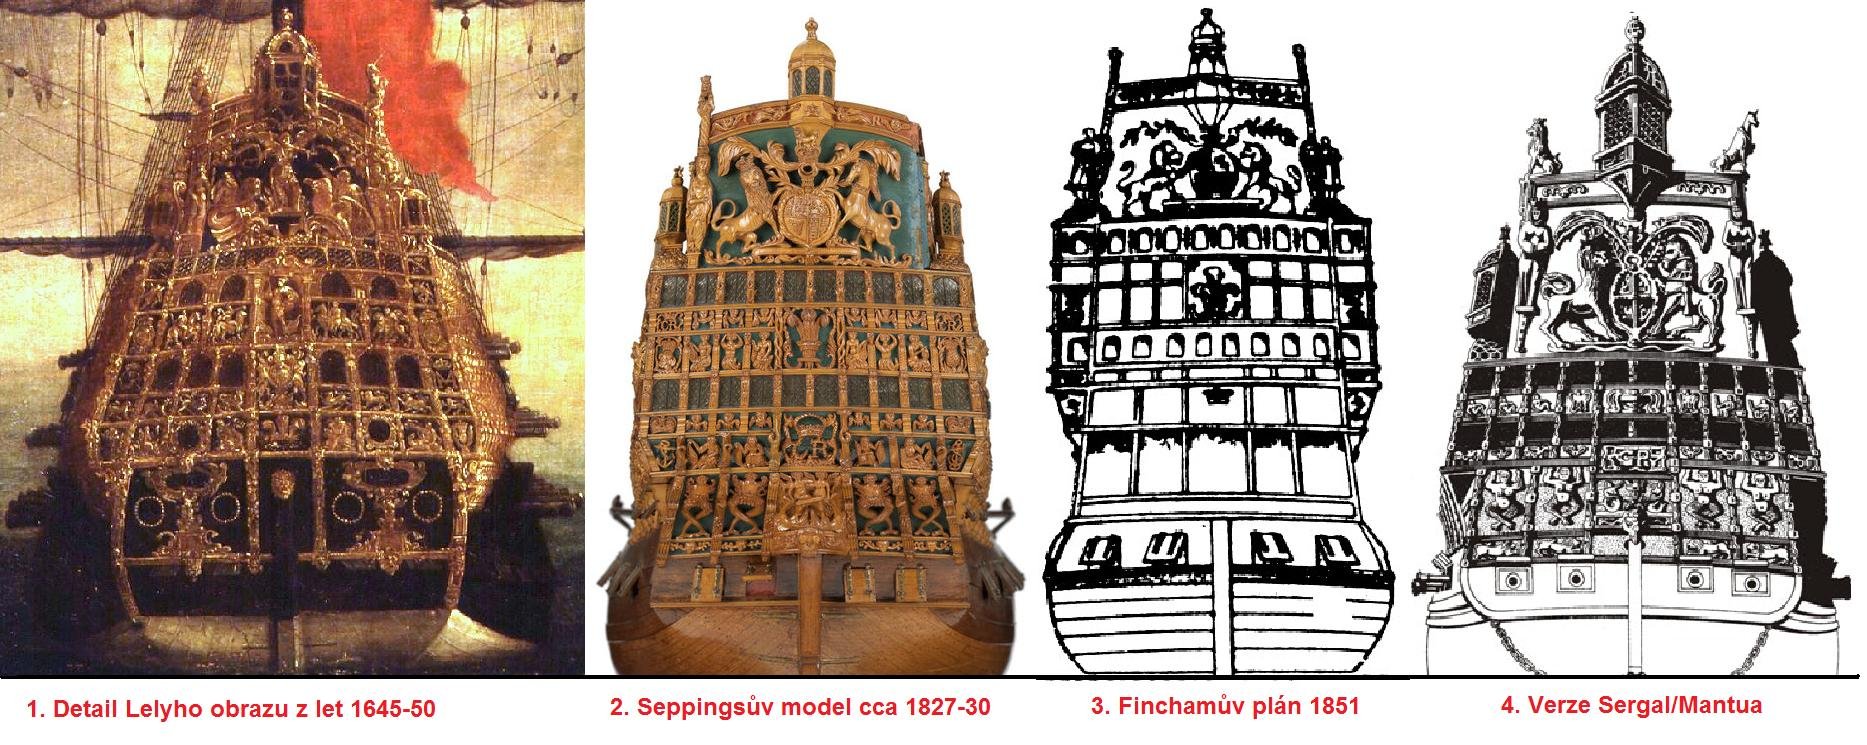
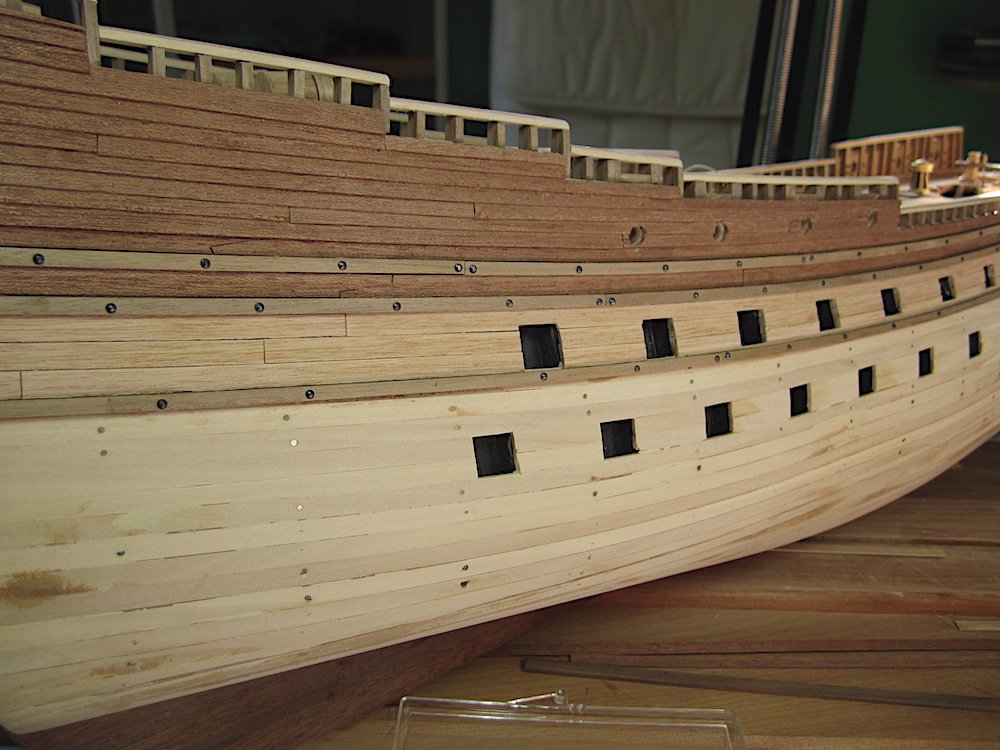
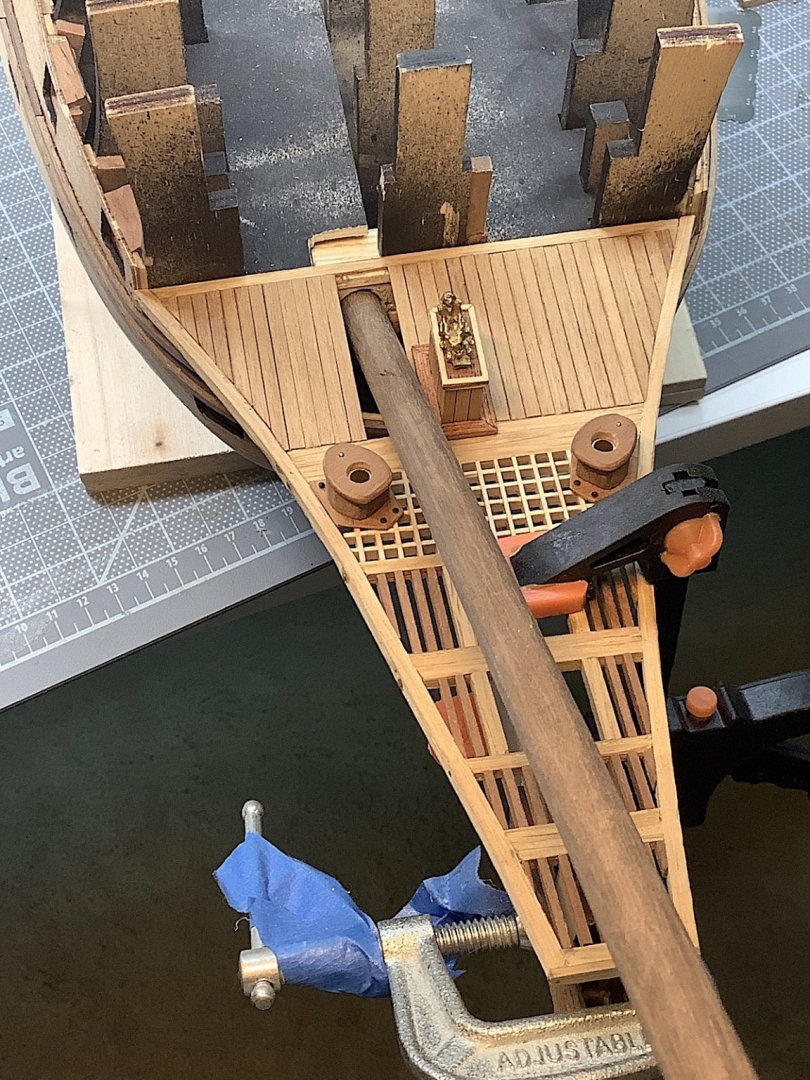
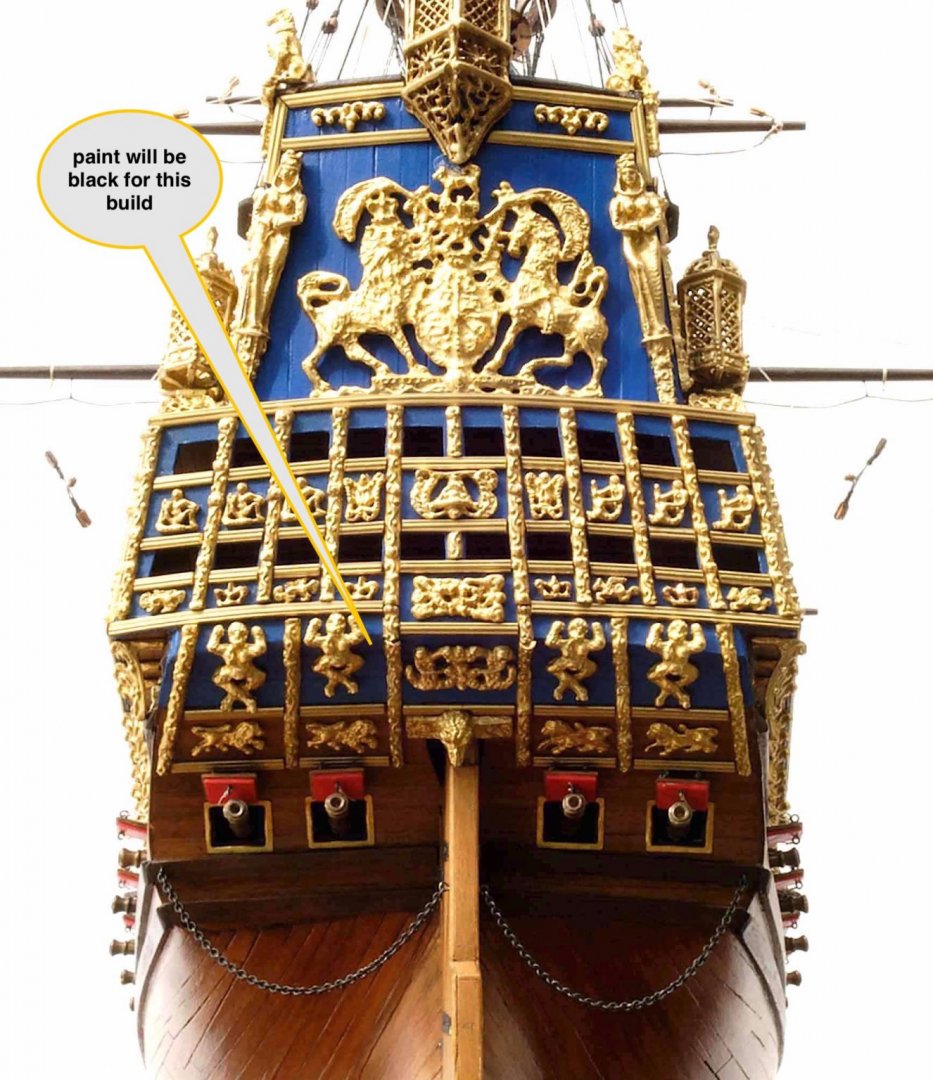
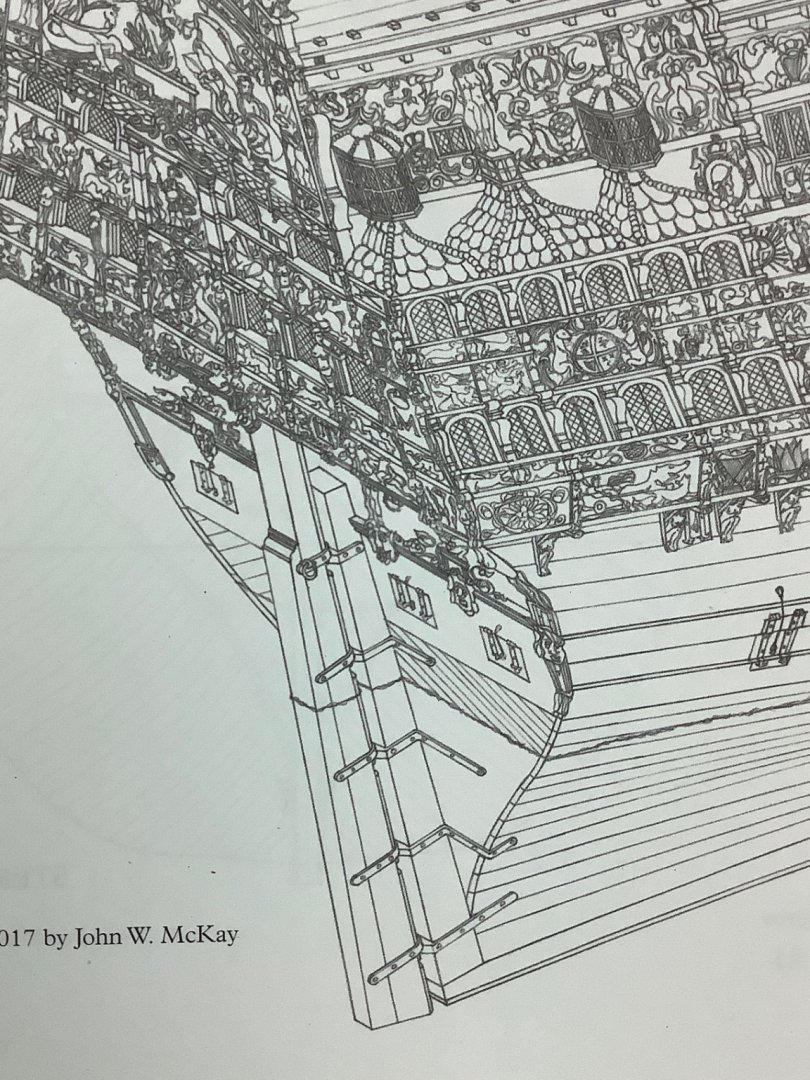
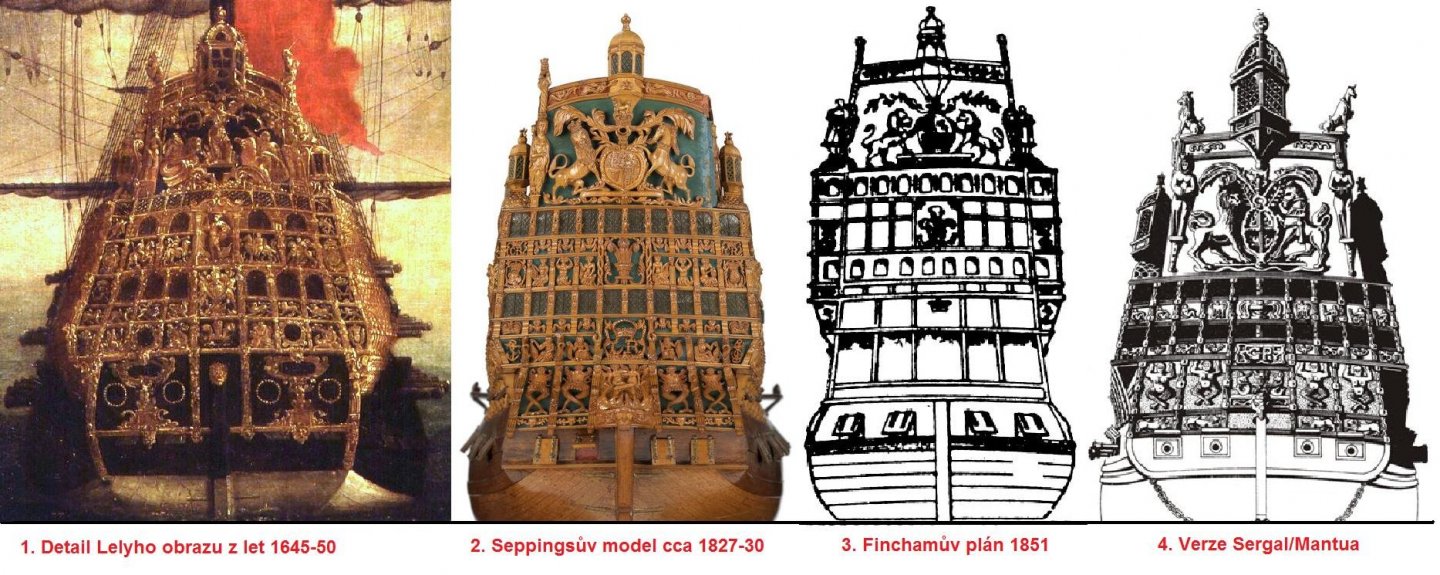
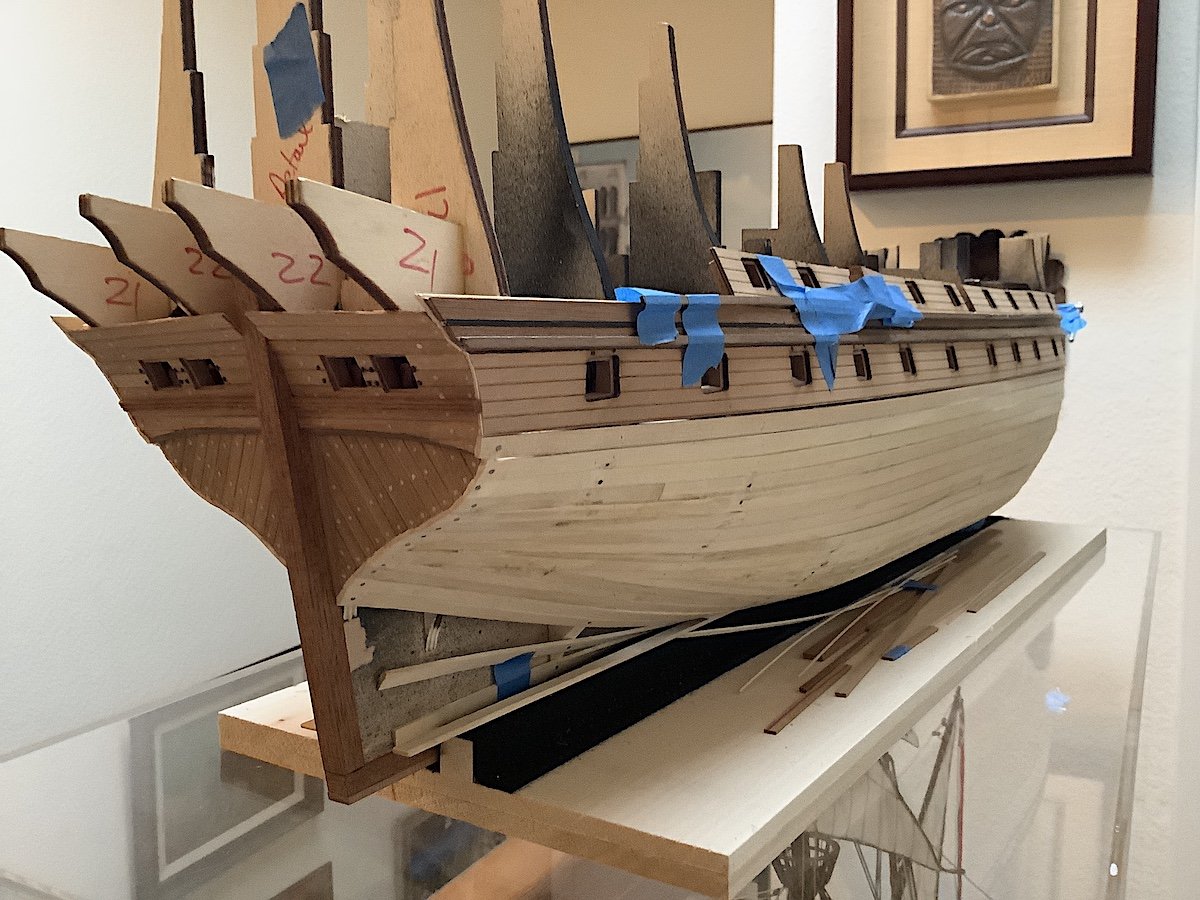
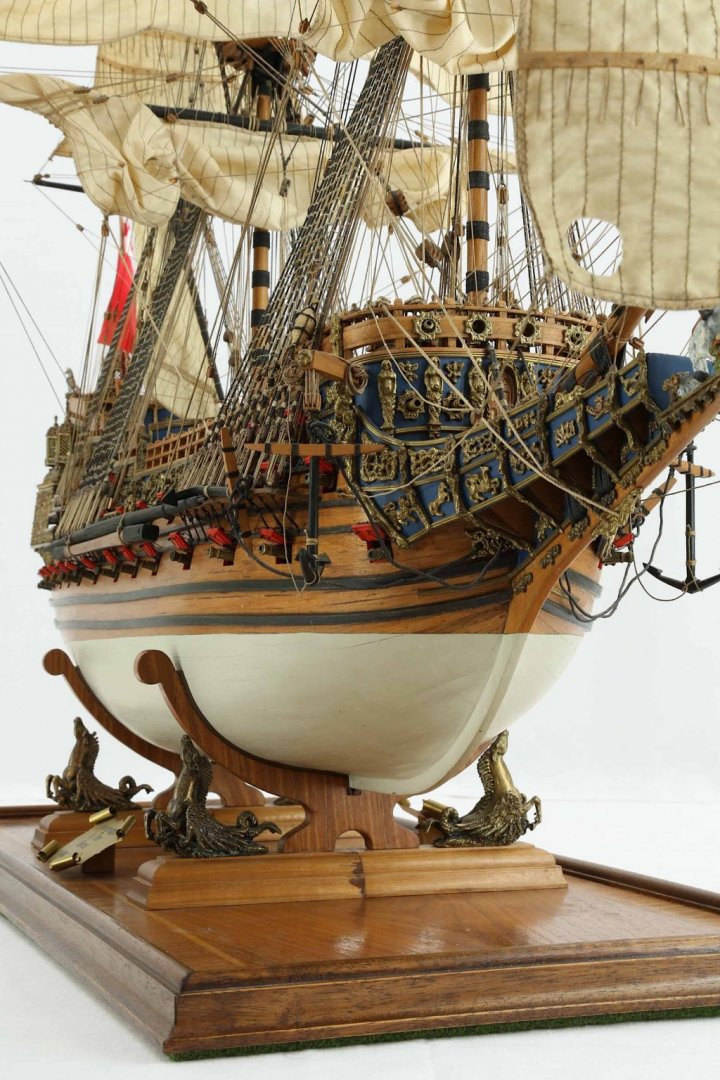
Thanks Frank, Though treenails, as we all know, should be two bits in tandem across planks. So not too satisfied with how this looks. That said when all of the ornamentation is added they won't look too out of scale (will re-think "how to" for sides of hull). Some builders use very thin brass wire resulting in perfect scaling. For the Vasa I drilled holes and used wood filler - came out very nicely. Many builders like this method. But for now at least I think that I got the stern cannon openings in just about the right places - the bronze pieces will locate as they should. Thanks for dropping by and your nice comment - Don't know whom to credit for that great SoS (below) that I have been using as a guide. Speaking of which, you have all been so nice not asking about the round tucked stern. Sergal's kit is certainly not representative of the 1637 Payne engravings and the Heck painting, and the Levy portrait is inconclusive. It could be that Sergal used a much later re-build of the SoS to emulate its stern, lanterns and galeries (though instructions do suggest a tucked stern). I do believe, however, that McKay does have the stern totally wrong (the book is an otherwise a brilliant study of this ship). His drawings would make the rudder totally useless - see image below - In that regard I have raised the stern waterline planks a bit more. Also there are no credible plans in existence - AND given my lack of confidence along with inconclusive historical data I have put this issue to sleep. Regards,
-
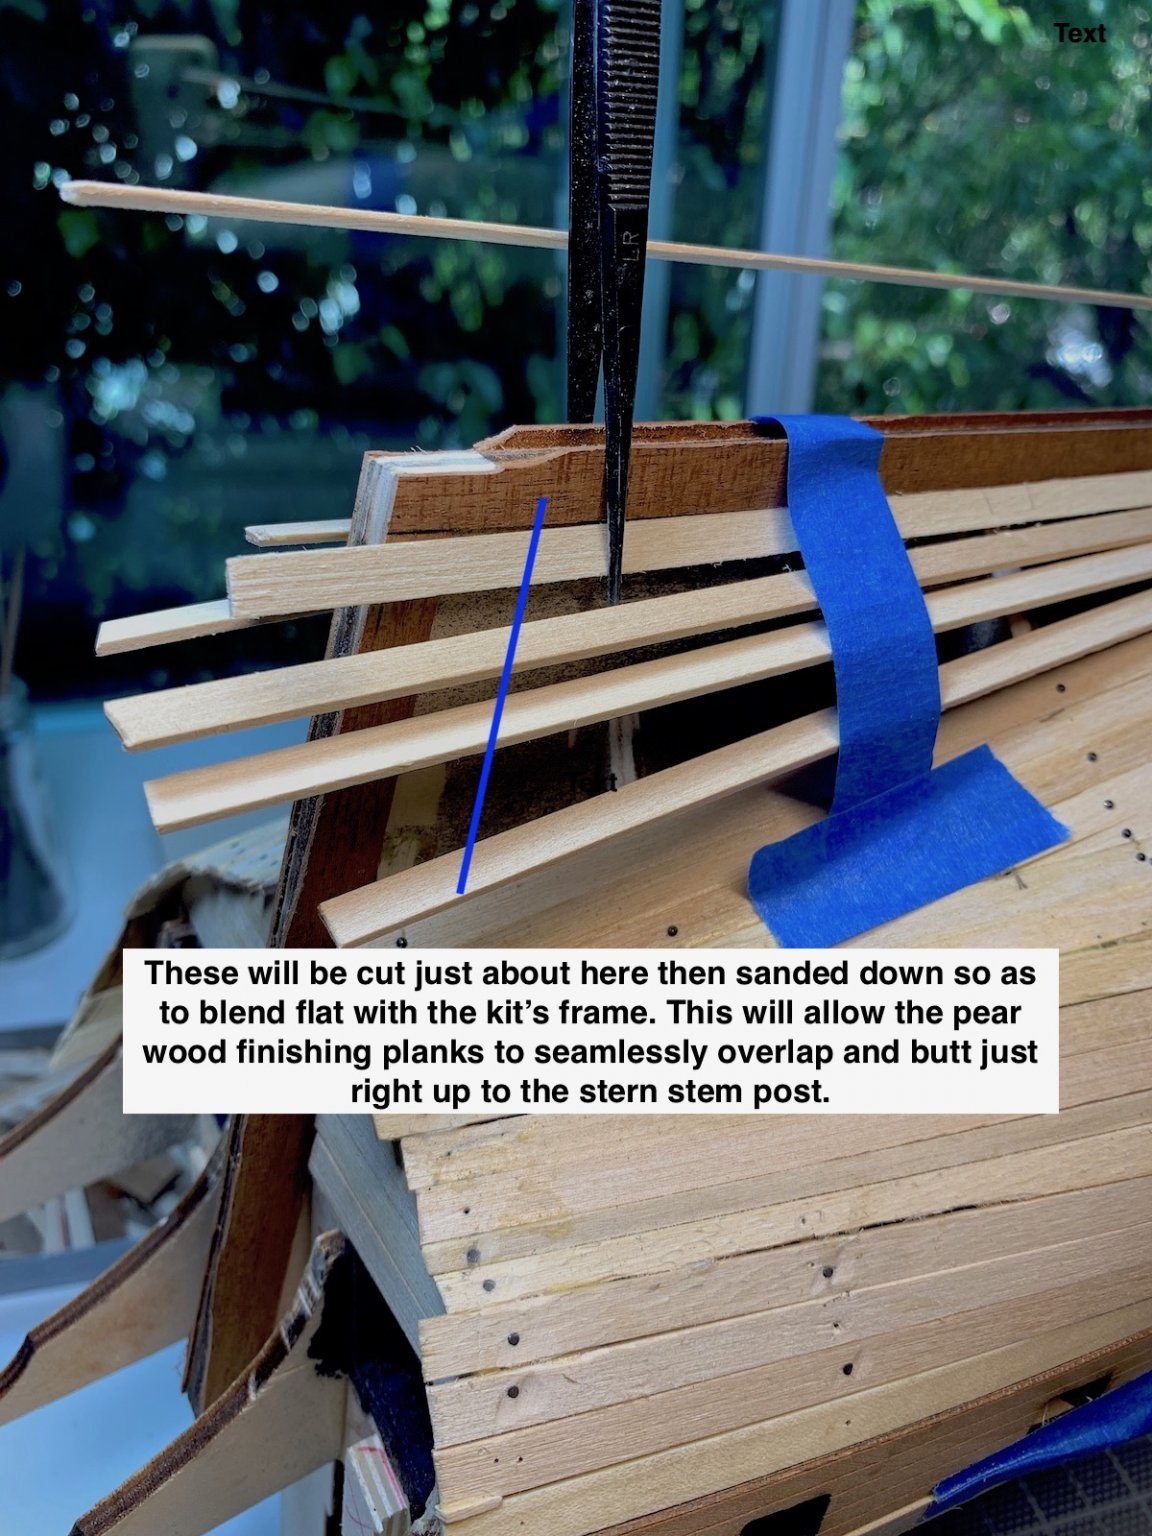
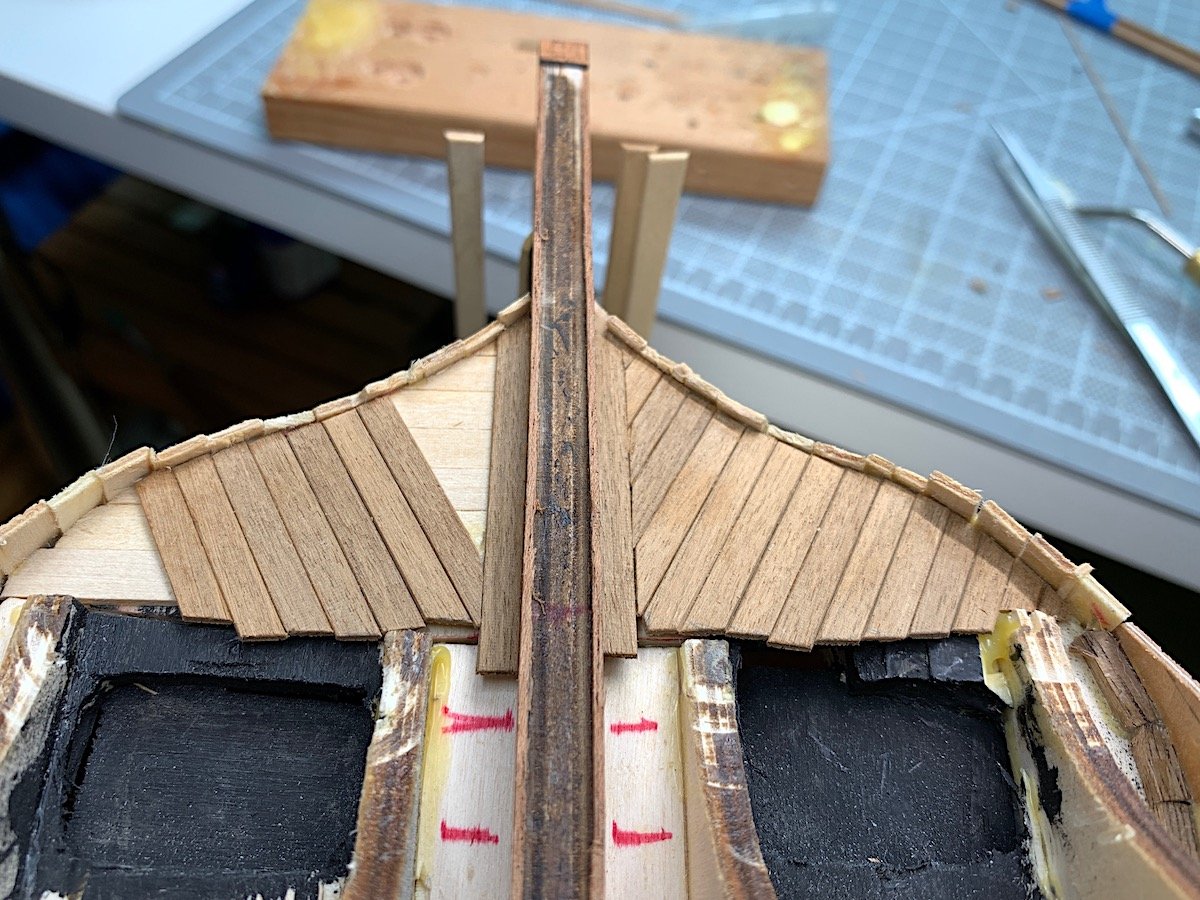
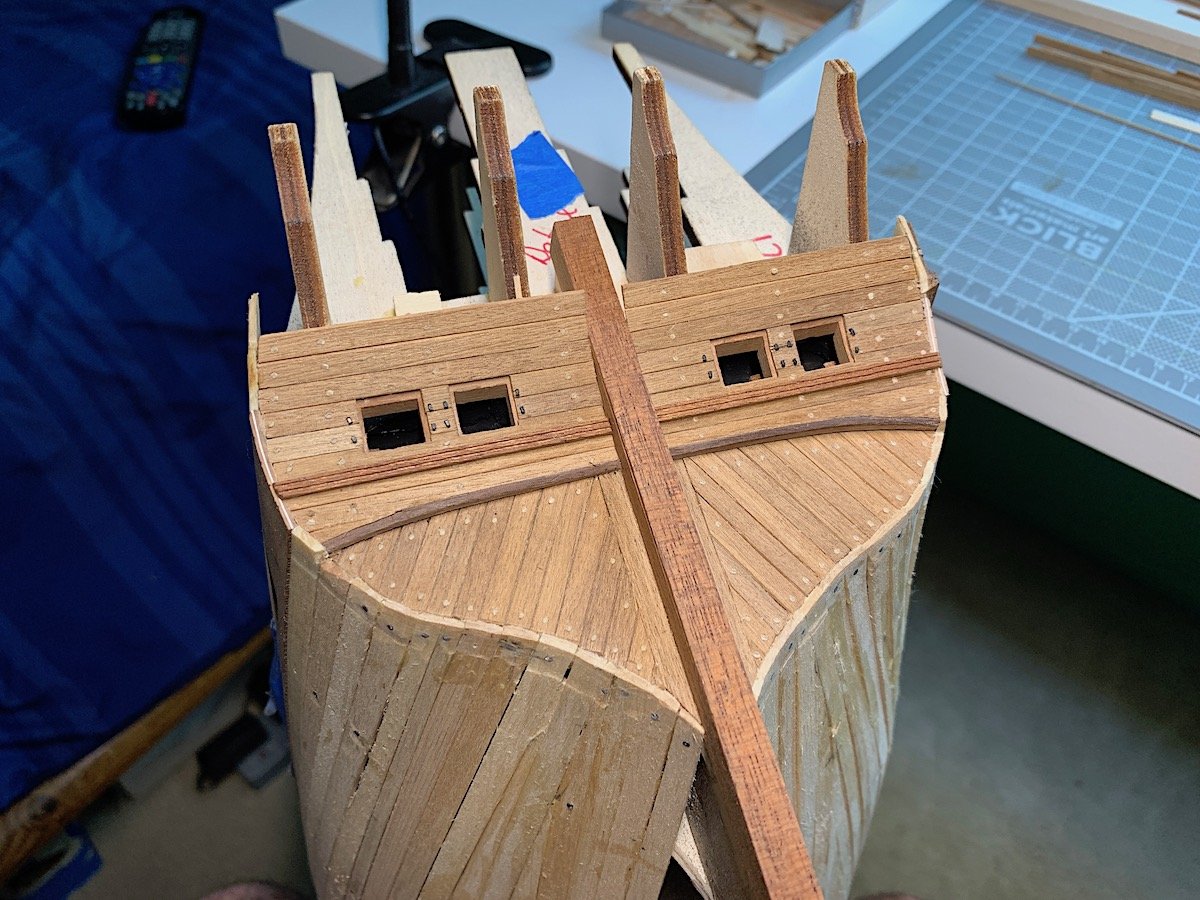
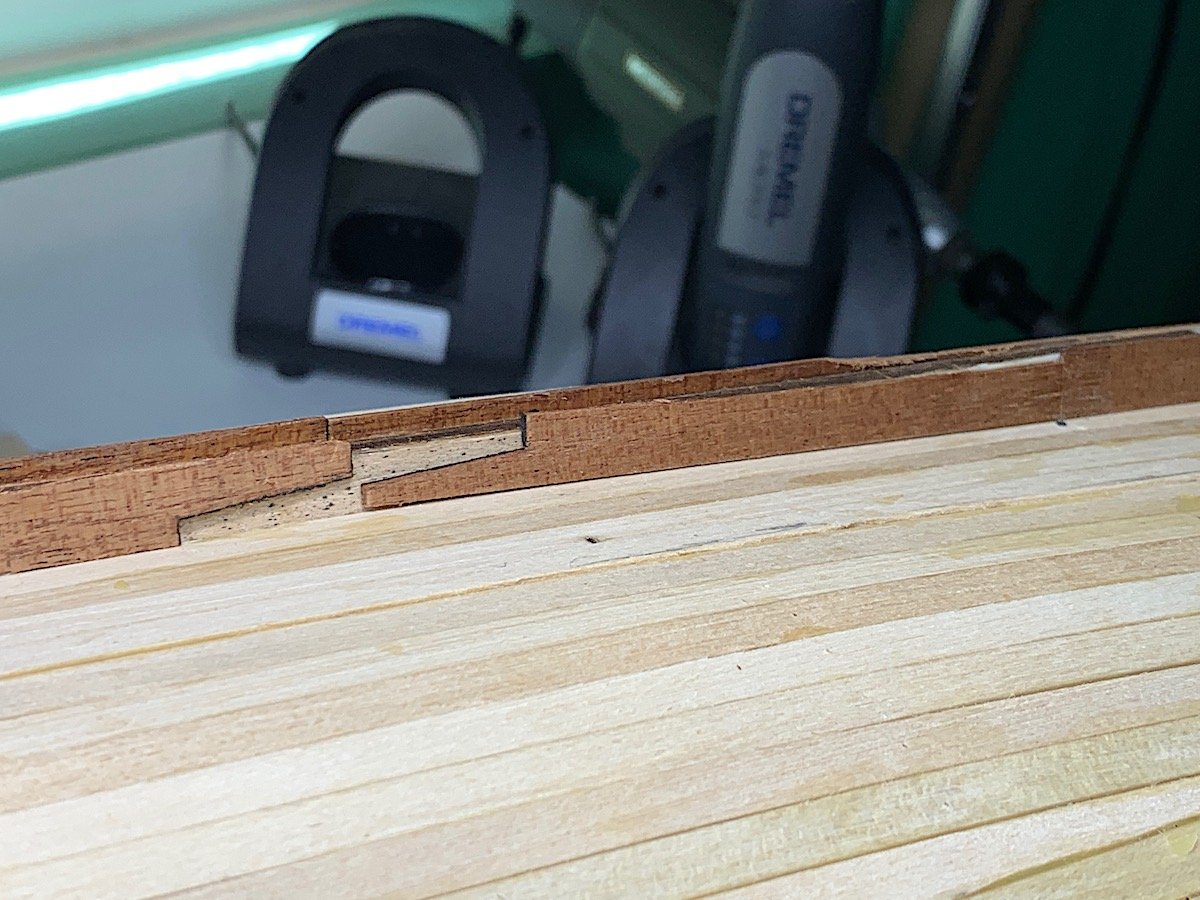
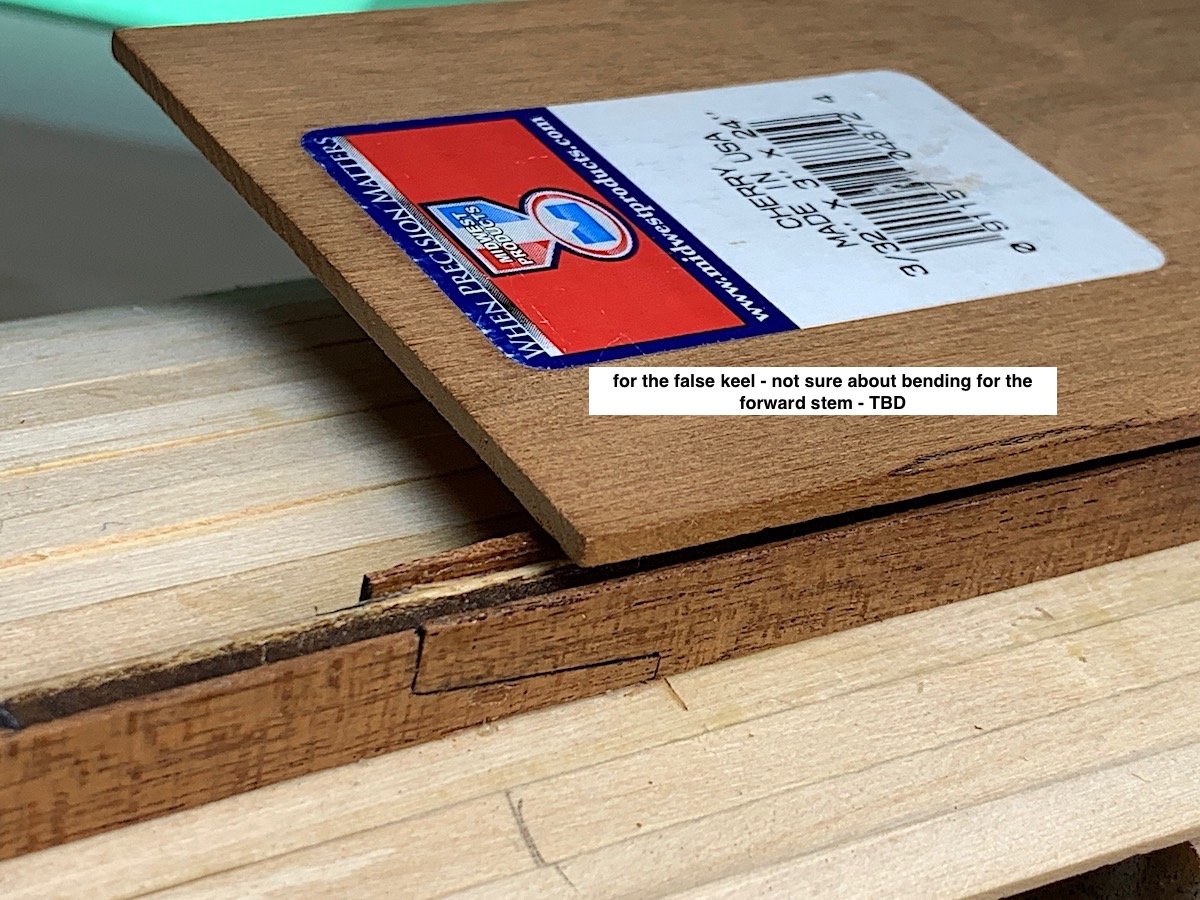
Took a detour to work on the transom, sternpost and false keel as well. As always thanks so much for dropping by.

-
Hi Frank, I've clicked a lot of likes - but said little. 🙁 Well your current build is really brilliant. The needed accurately spaced bits to really give justice to this very complicated boat (ship?) are so impressive. Superb work - in all areas - indeed. Cheers my friend - hope all is well for you and yours in our Brave New World. MJD
- 510 replies
-
- 1
-
-
- reale de france
- corel
- (and 1 more)
-
2021 NRG CONFERENCE
md1400cs replied to kurtvd19's topic in NAUTICAL RESEARCH GUILD - News & Information
Good news. Excellent smaller maritime museum located in a nice small town north of Los Angeles. Ed Marple also has his, arguably the best scratch built Sovereign of the Seas on permanent display within. Looking forward to attending as well. Regards, -
As Steven just said - yes! - and Vasa platform are indeed helpful 😄 Cheers,
- 756 replies
-
- 3
-
-
- galleon
- golden hind
- (and 2 more)
-
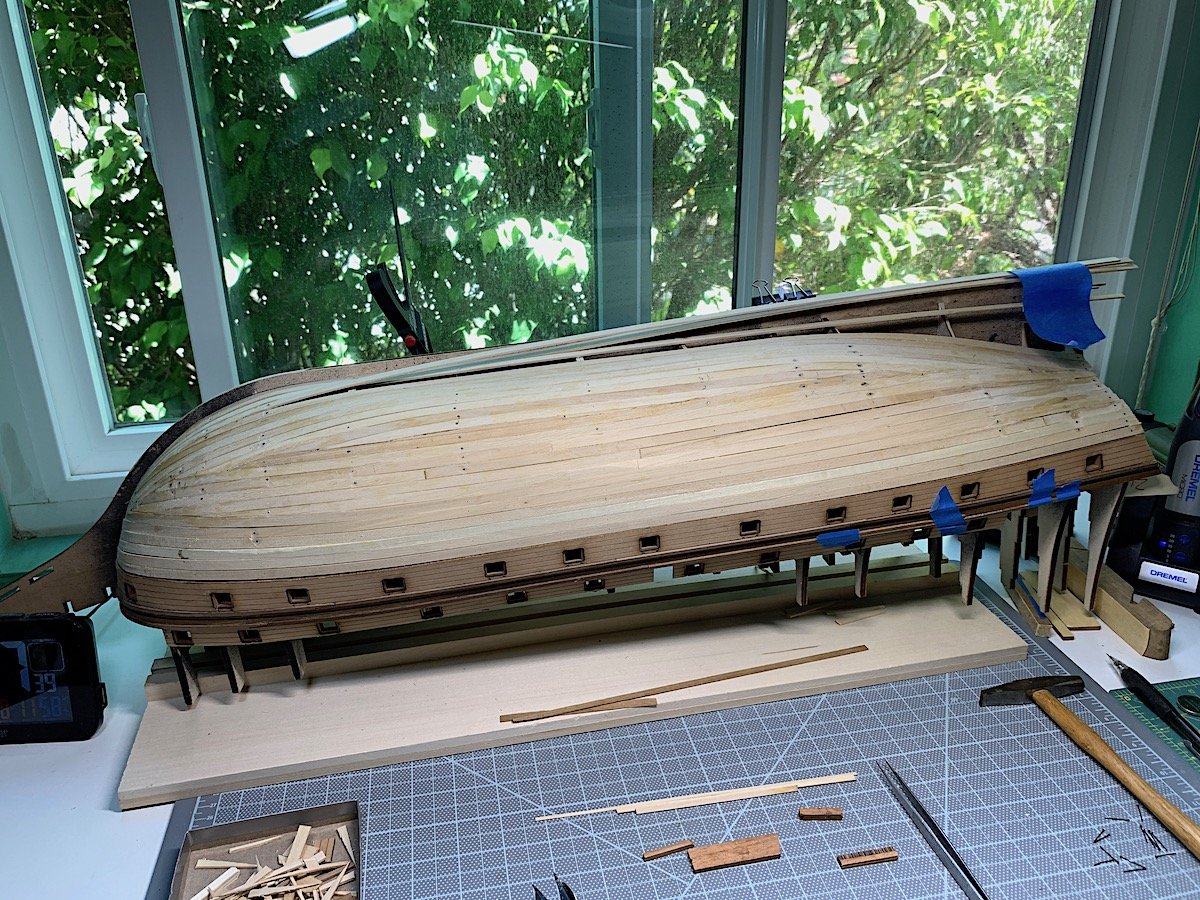
Frank, and OC - thanks - yes a "scary stage" needs to be just right - not such a "fun" part of a build (for me in any case) - but just can't mess this up. Here is what I need to do next, before sanding and so on....
-
EJ, Your tucked stern looks very good. Oh and the lights!!
-
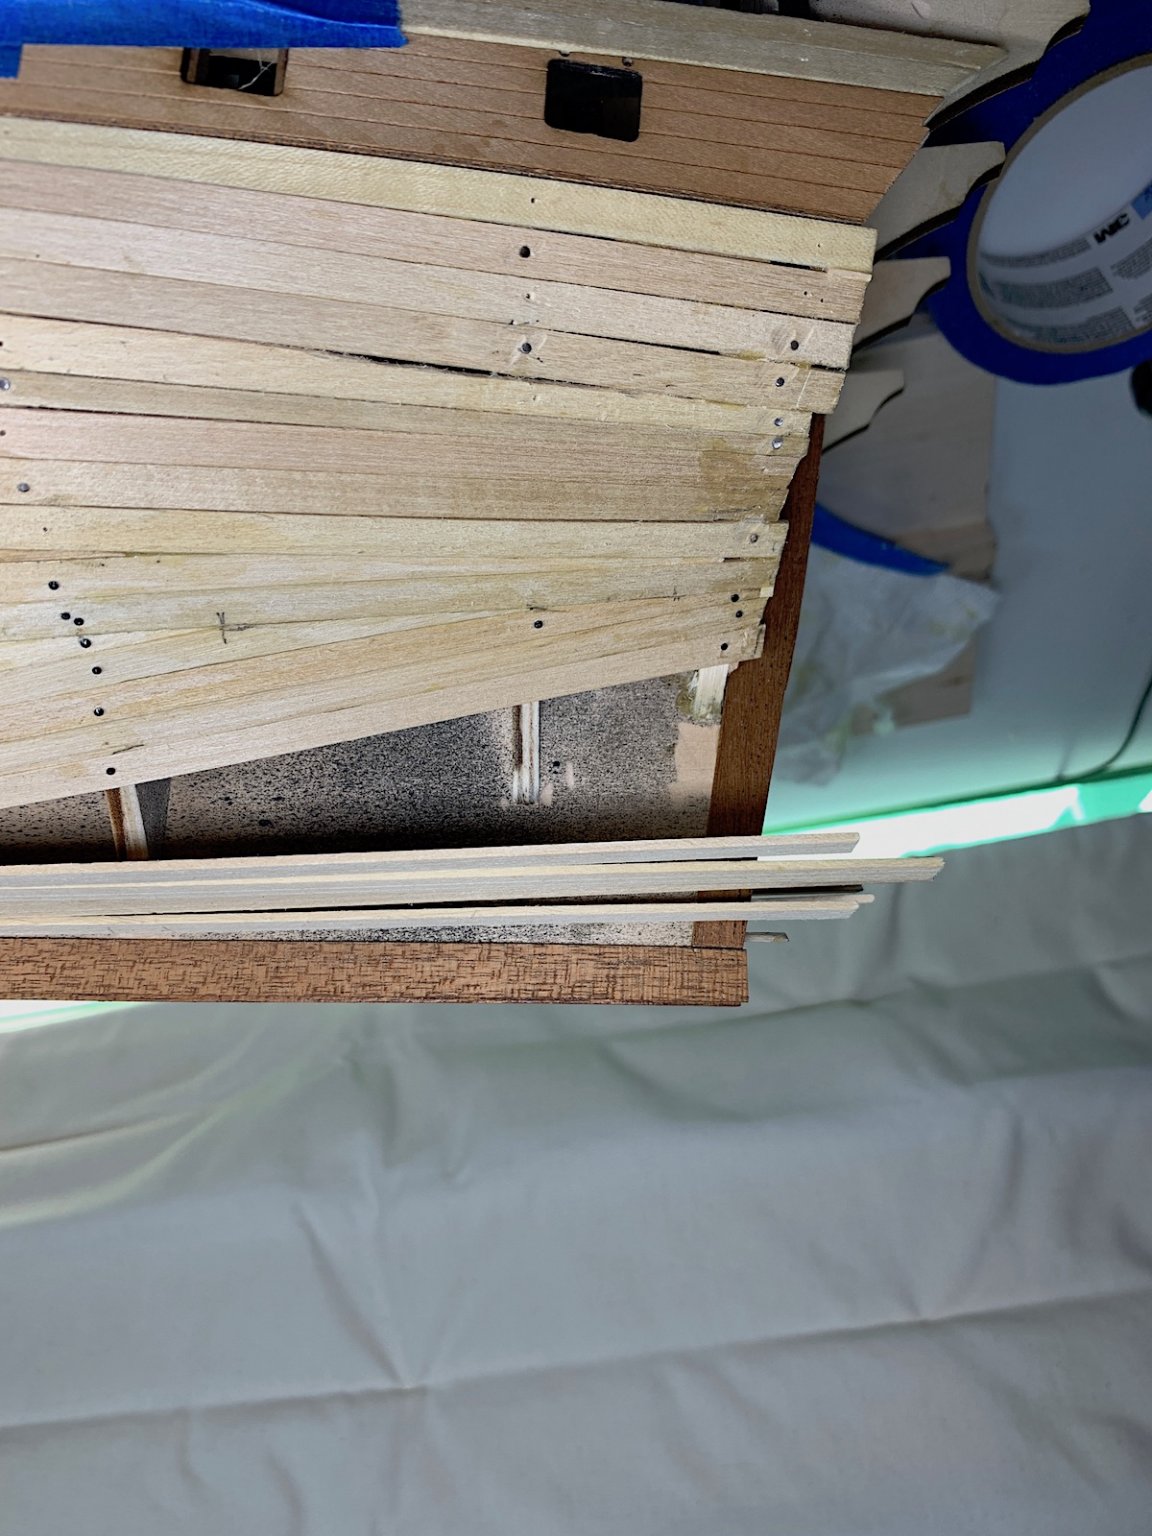
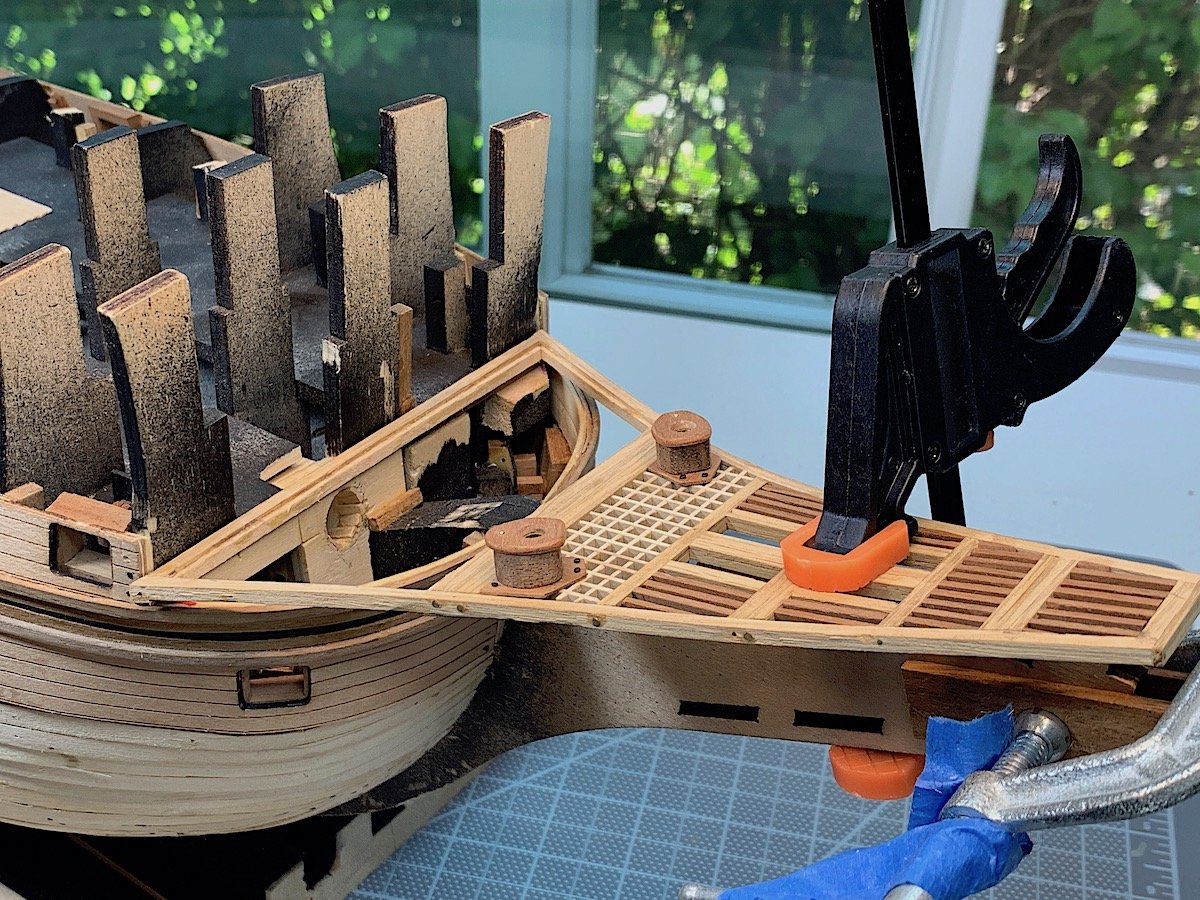
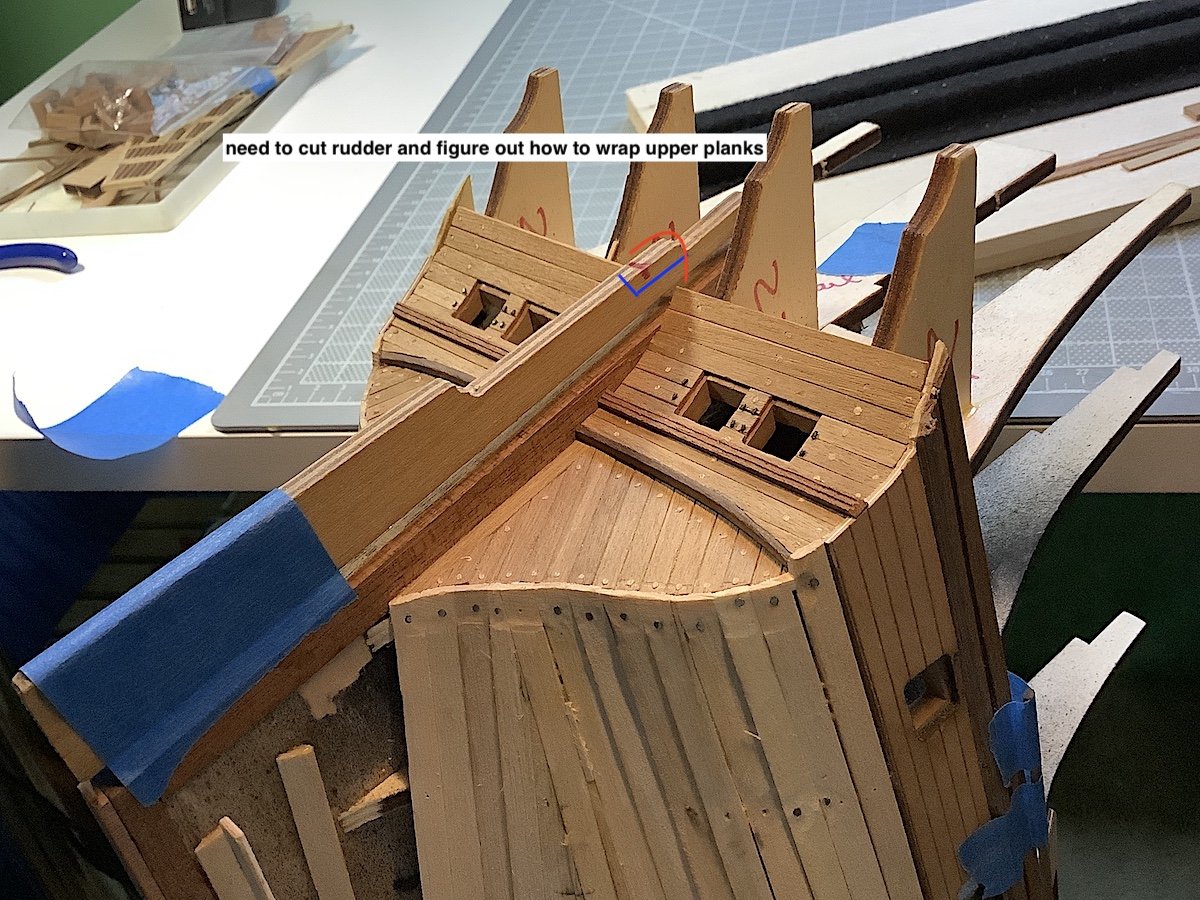
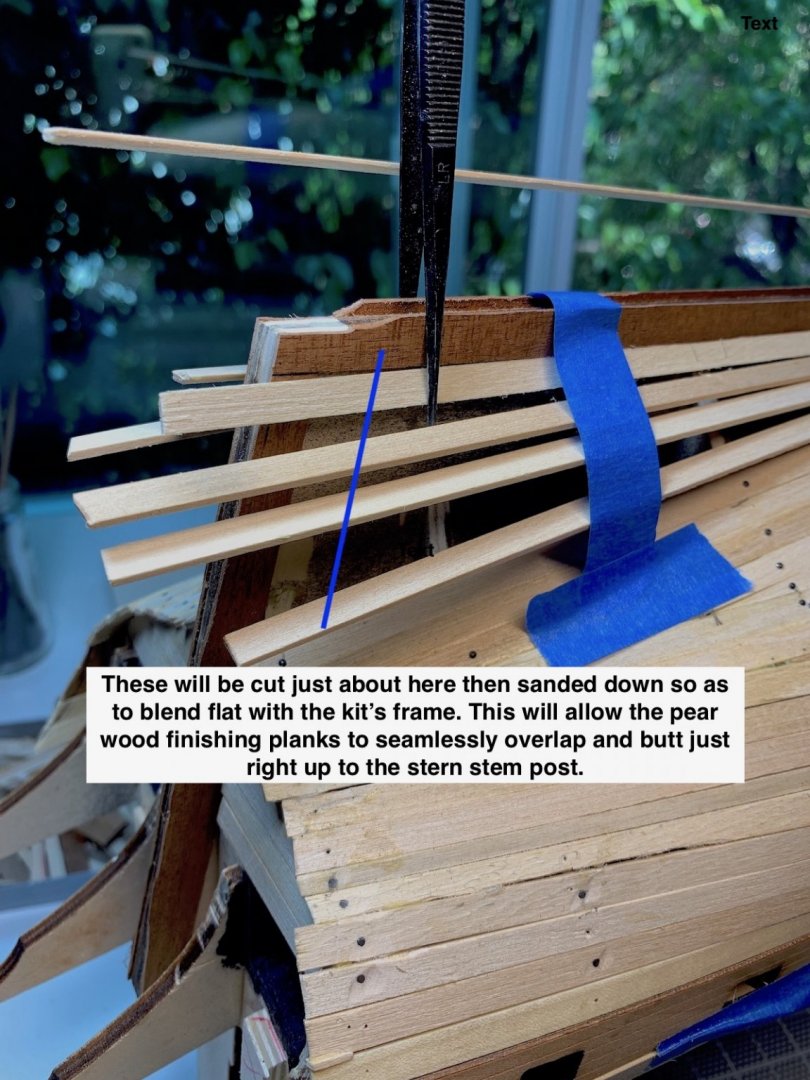
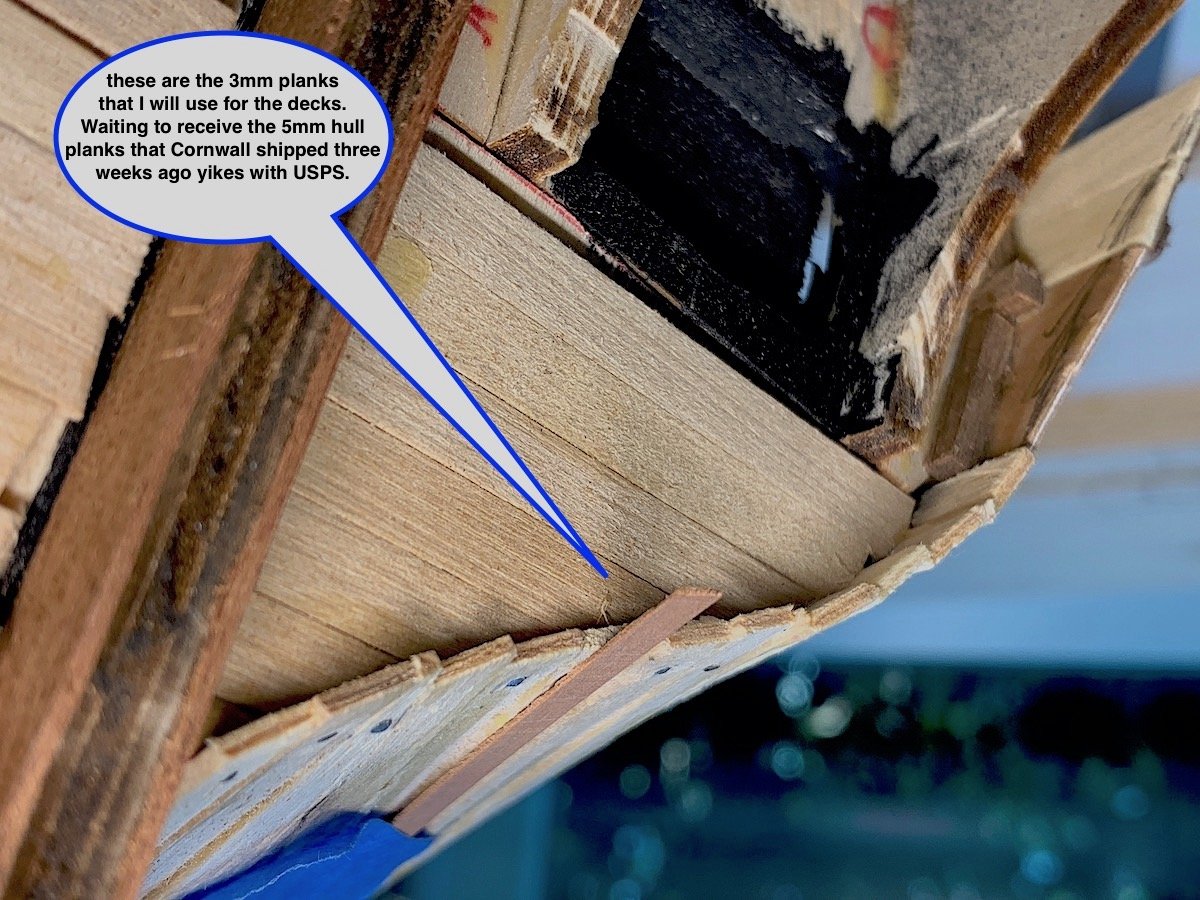
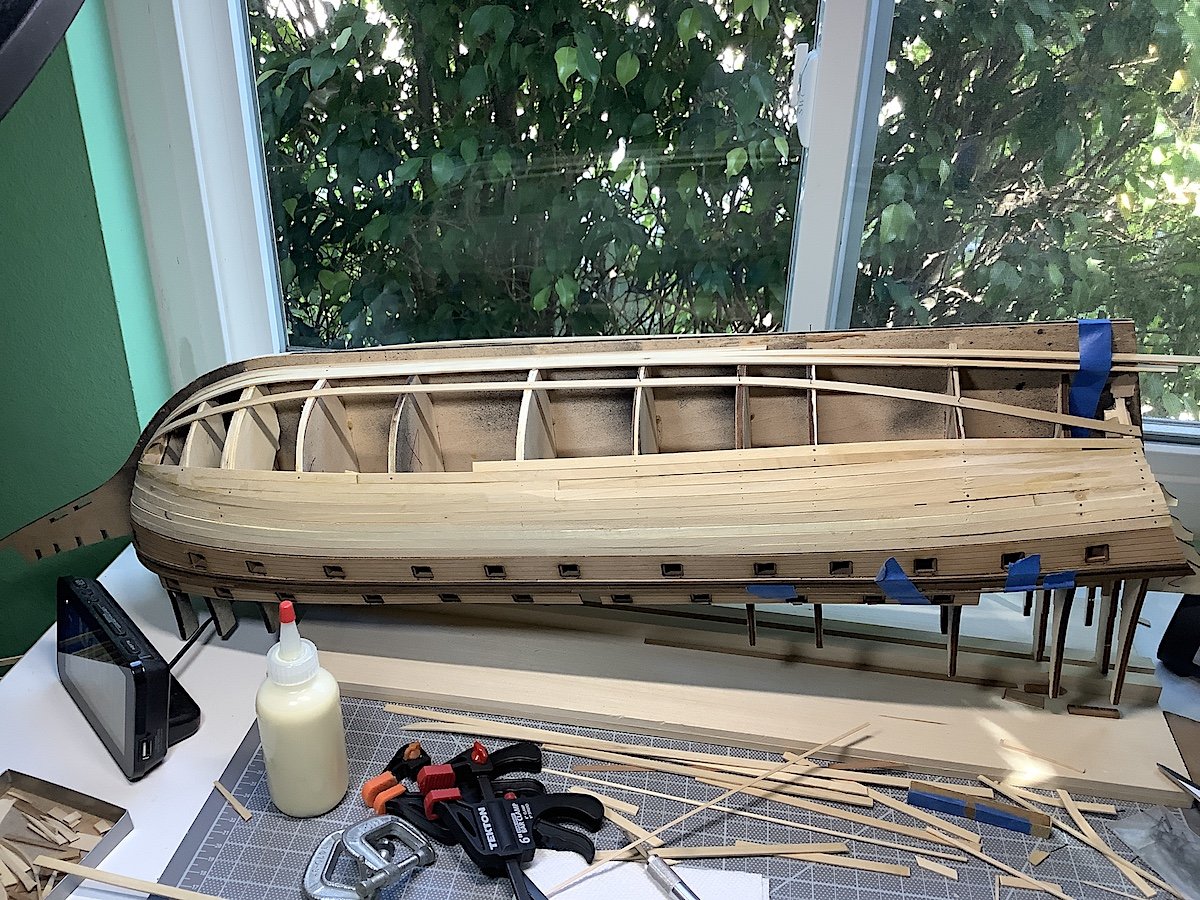
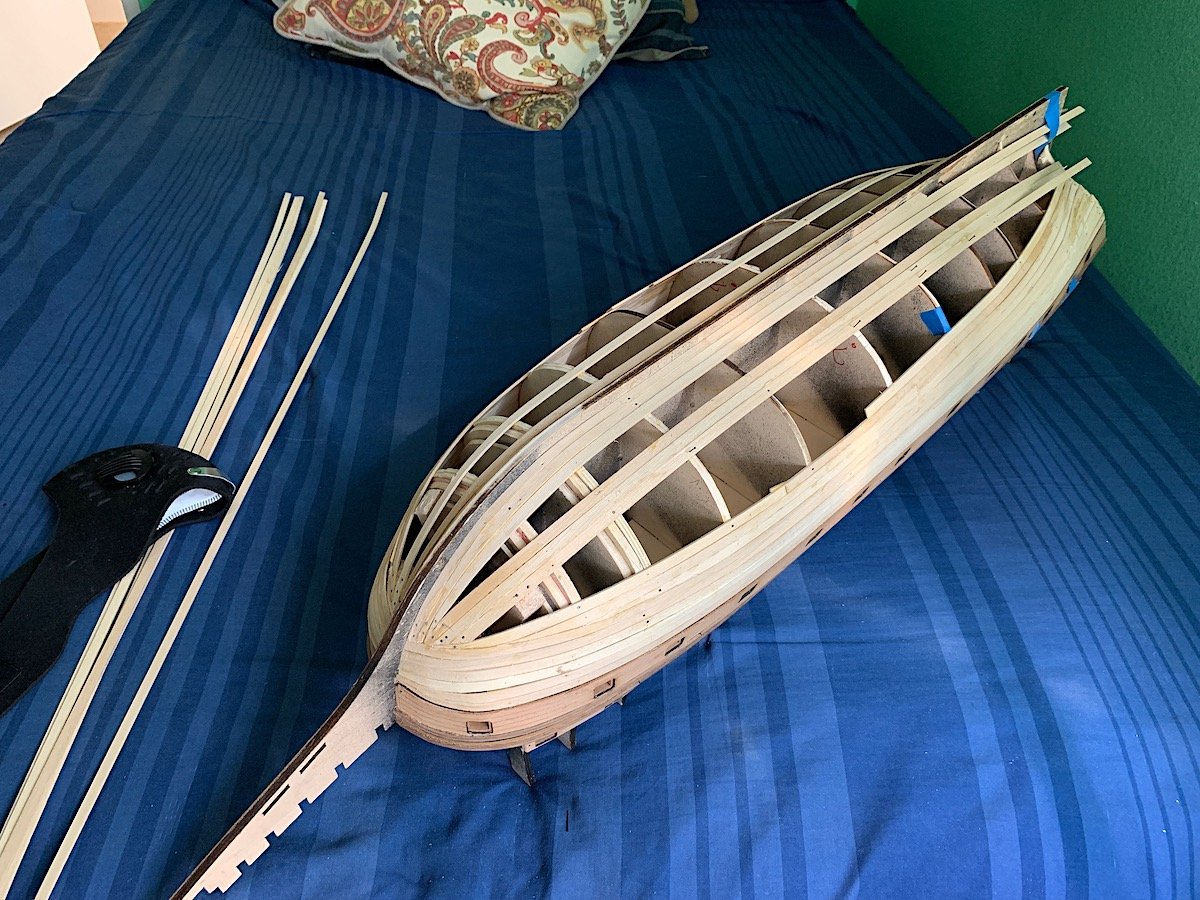
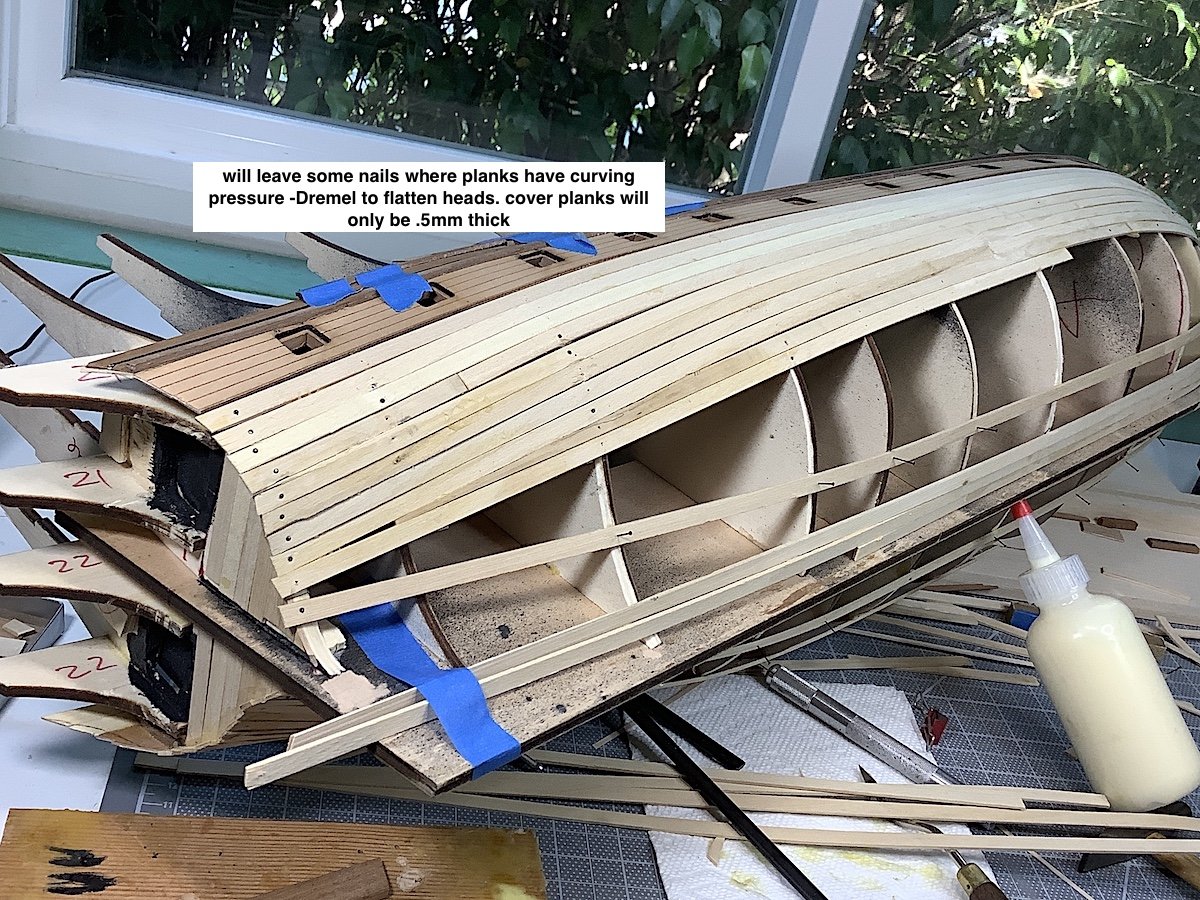
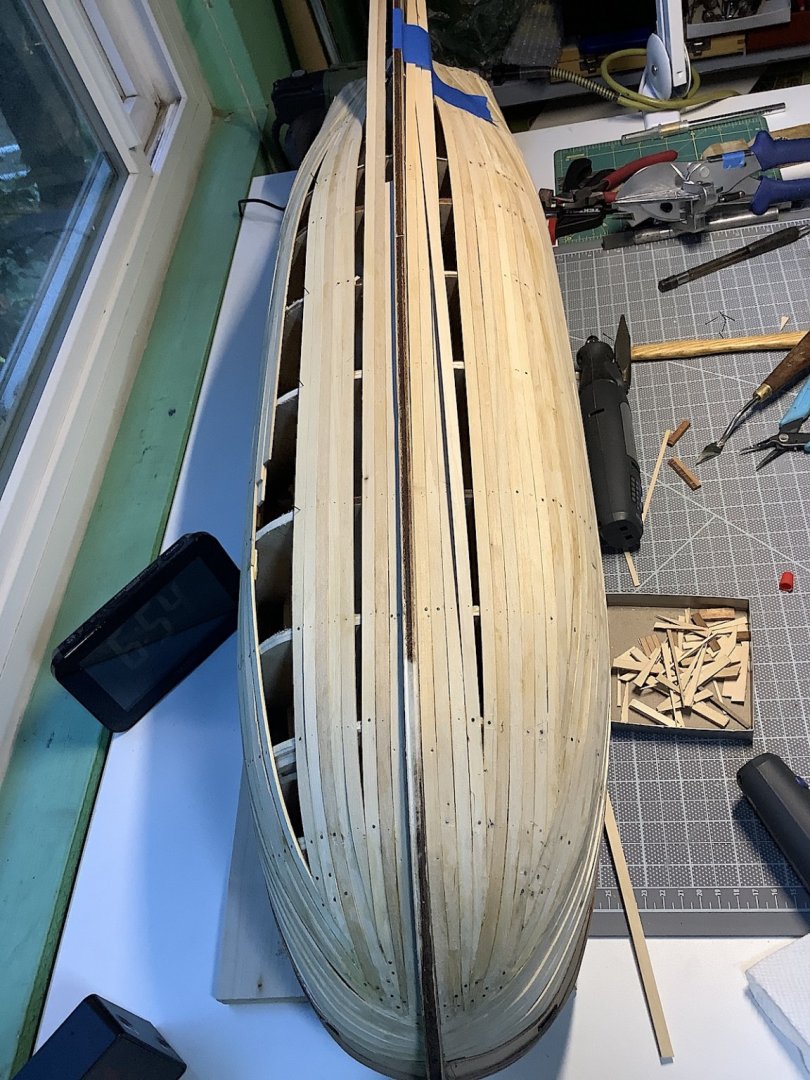
Hi all, Working on the first planking as well as fixing a stern stem post and the keel filler. Next, as you all know, will be sanding, sanding, filler and then sanding. Thanks for your visits always much appreciated.


-
Dave, Just found your log, saw current page first thought whoa this is huge! - then it became much smaller going back through your log 😀. As always brilliant work PS: Your backyard is awesome. Regards,
-
James, Grabbed my chair, but really needed a ladder your shipyard is, as it should be, already a very full one indeed. 👌 This kit does look to be of amazing quality. Will follow along, learn and enjoy as well. The Victory has and always intimidated me, still does. But so appreciate the talents of builders here who can do her proper justice. Regards,
-
Yes, great update. You raise the bar to levels hardly ever seen. That image - holding the bits in your fingers speaks volumes
-
4 jaw chuck for a Proxxon lathe??
md1400cs replied to md1400cs's topic in Modeling tools and Workshop Equipment
Hi Jimbyr, Looked on their site - no luck I then spoke with them - they told me that they don't make any chuck with 16m - largest is 14m - Hmmm But thanks anyway. I'll keep using the Proxxon plastic one -
Mark, Parenthetical question - one of your images above shows a sail with a hole in it, as in the image below. Certainly you would know why this was done. Any thoughts? - my guess is to make the sail "flap" less hmmm.... PS: Can't give credit to this amazing example - found in Google Images, with no credit - though it was from a builder in the UK.
- 2,444 replies
-
- 3
-
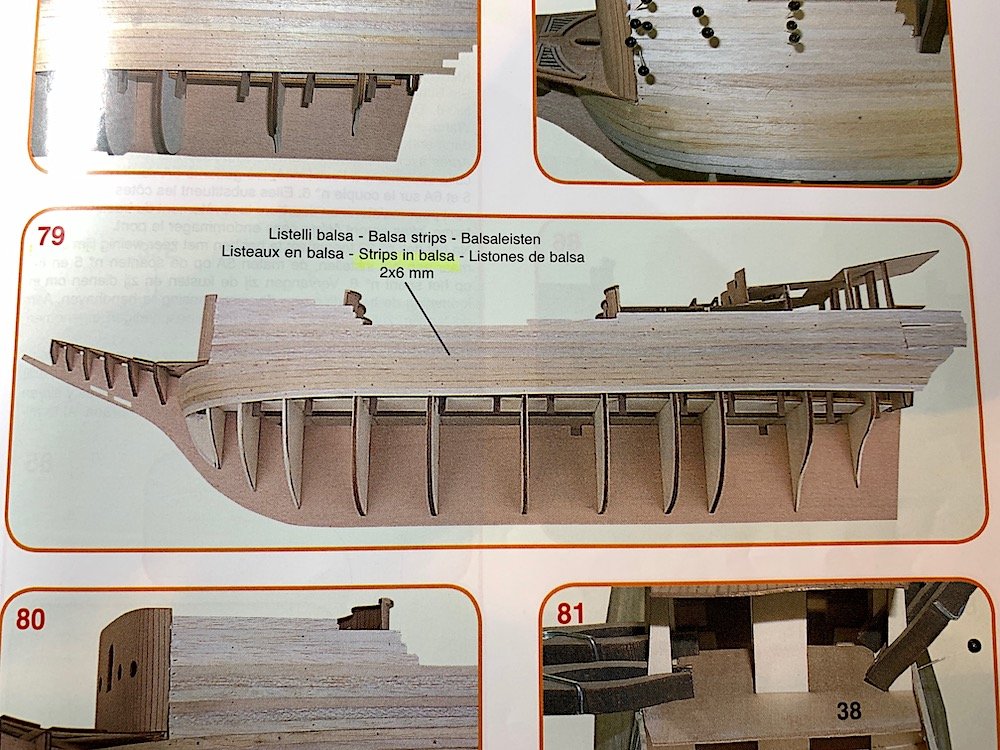
-
- heller
- soleil royal
- (and 9 more)
-
Flint, Nice second build. Your hull planking looks great as well. Will grab a seat. Regards,
-
Bob, Great - on my list - big thanks!!
-
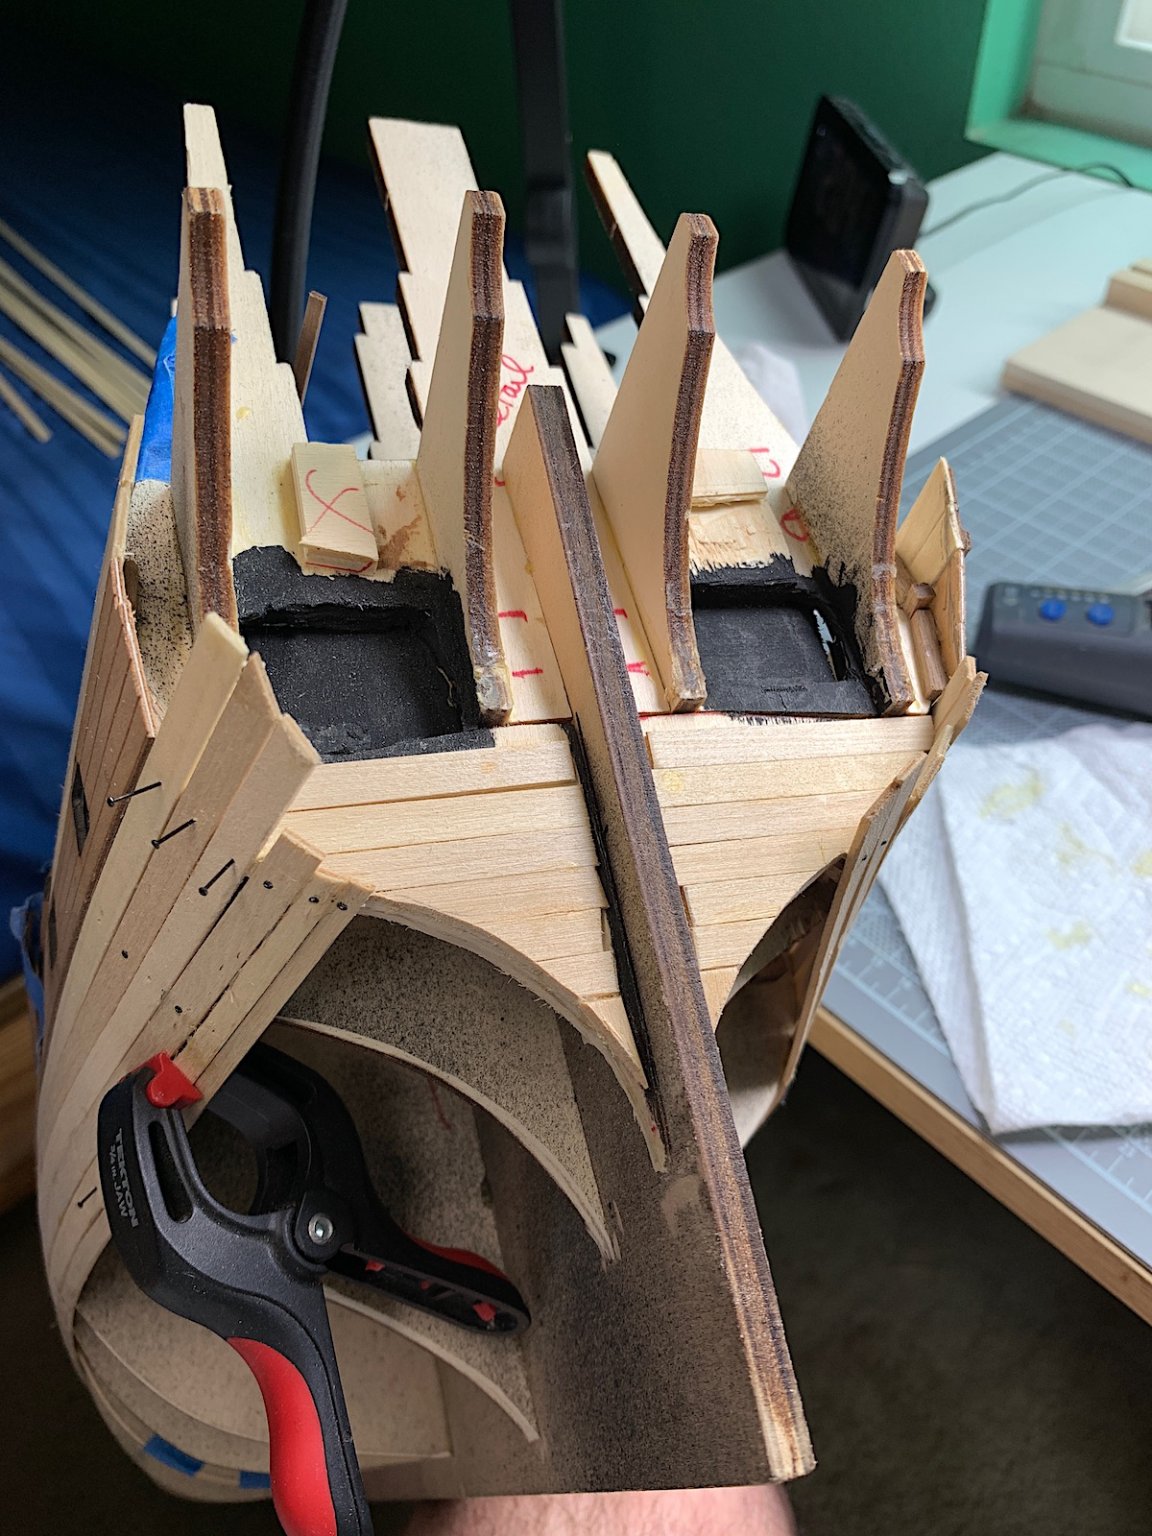
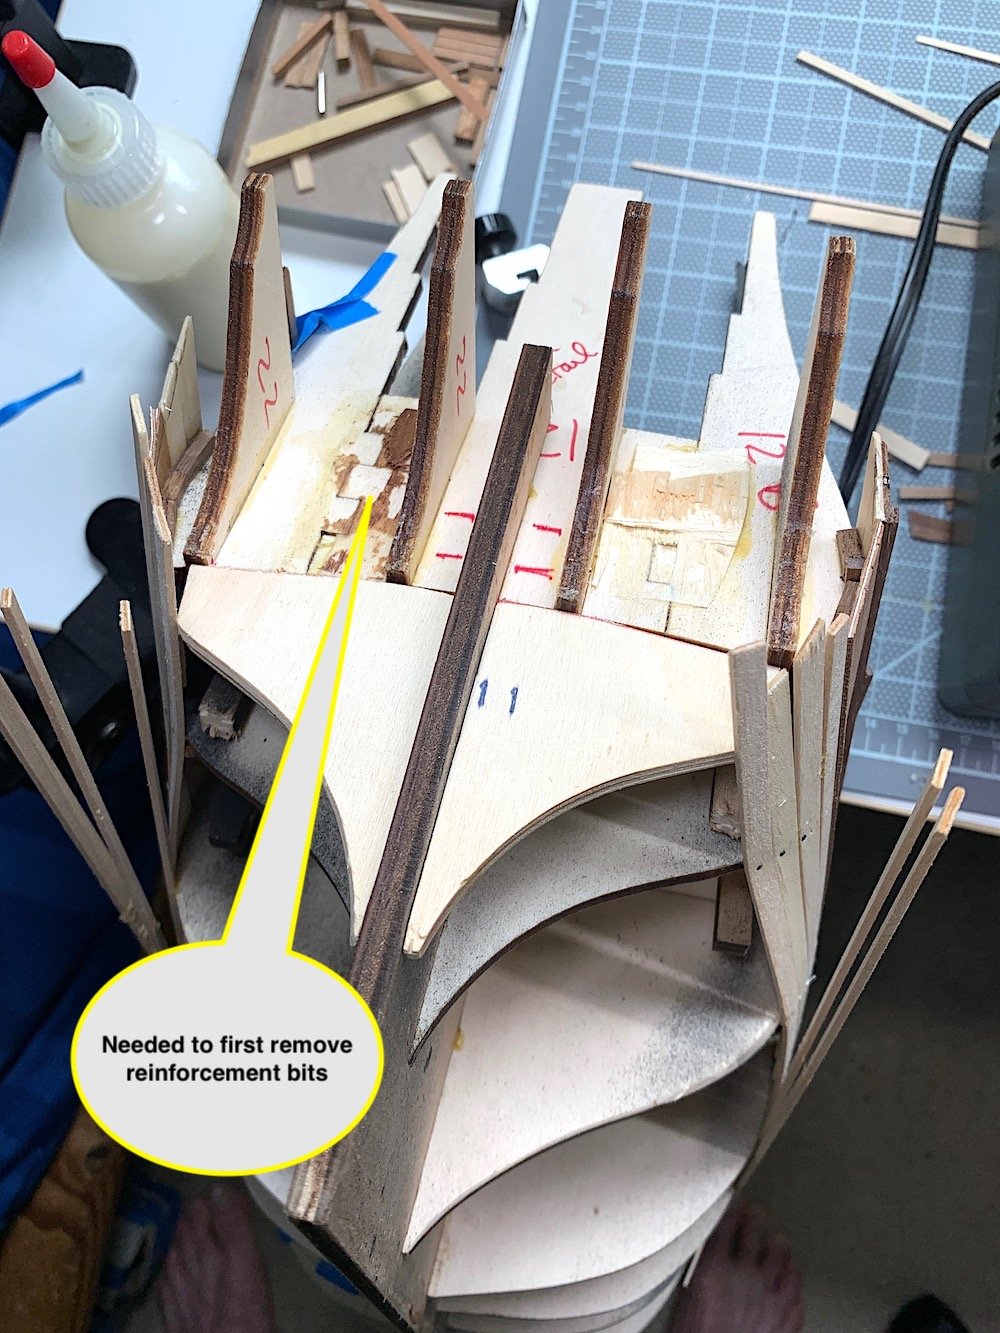
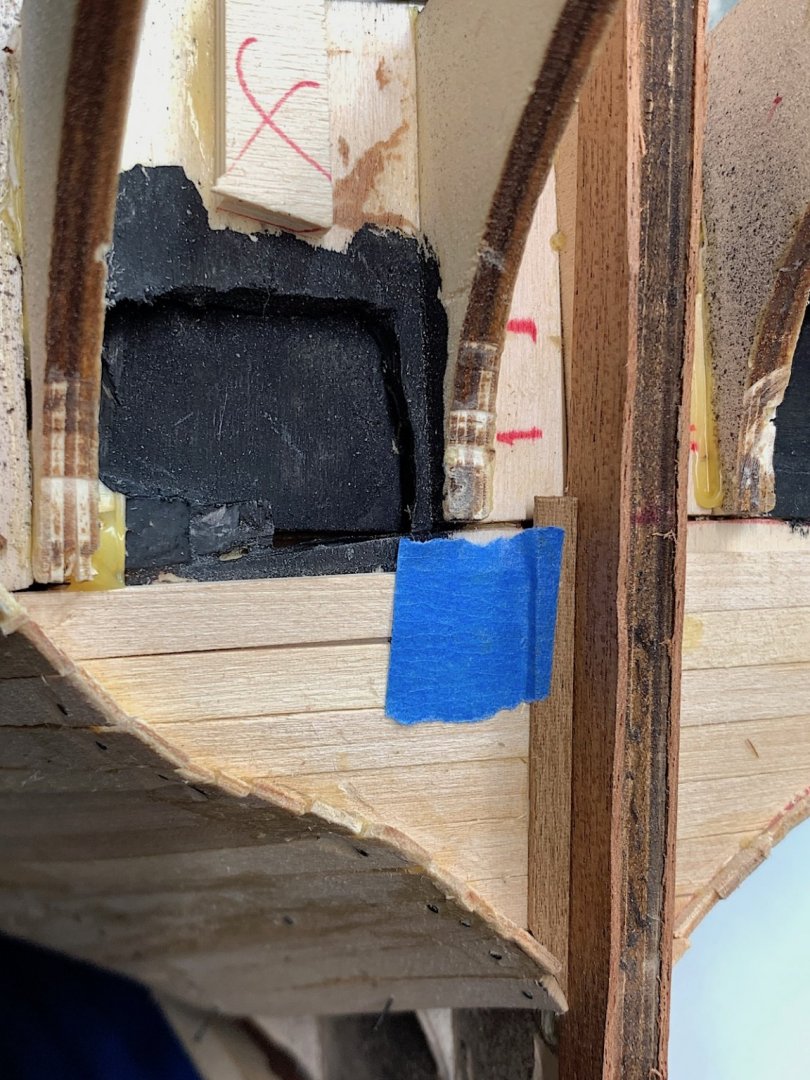
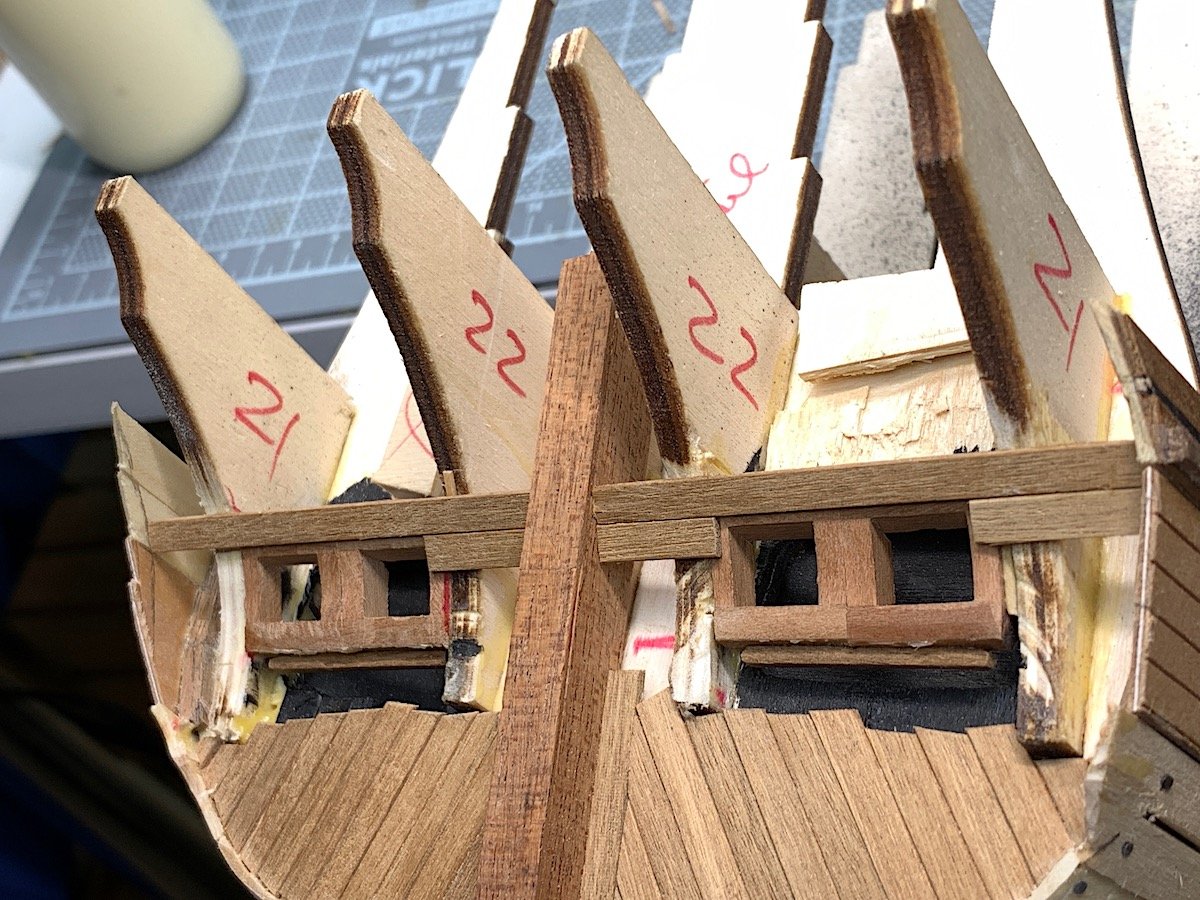
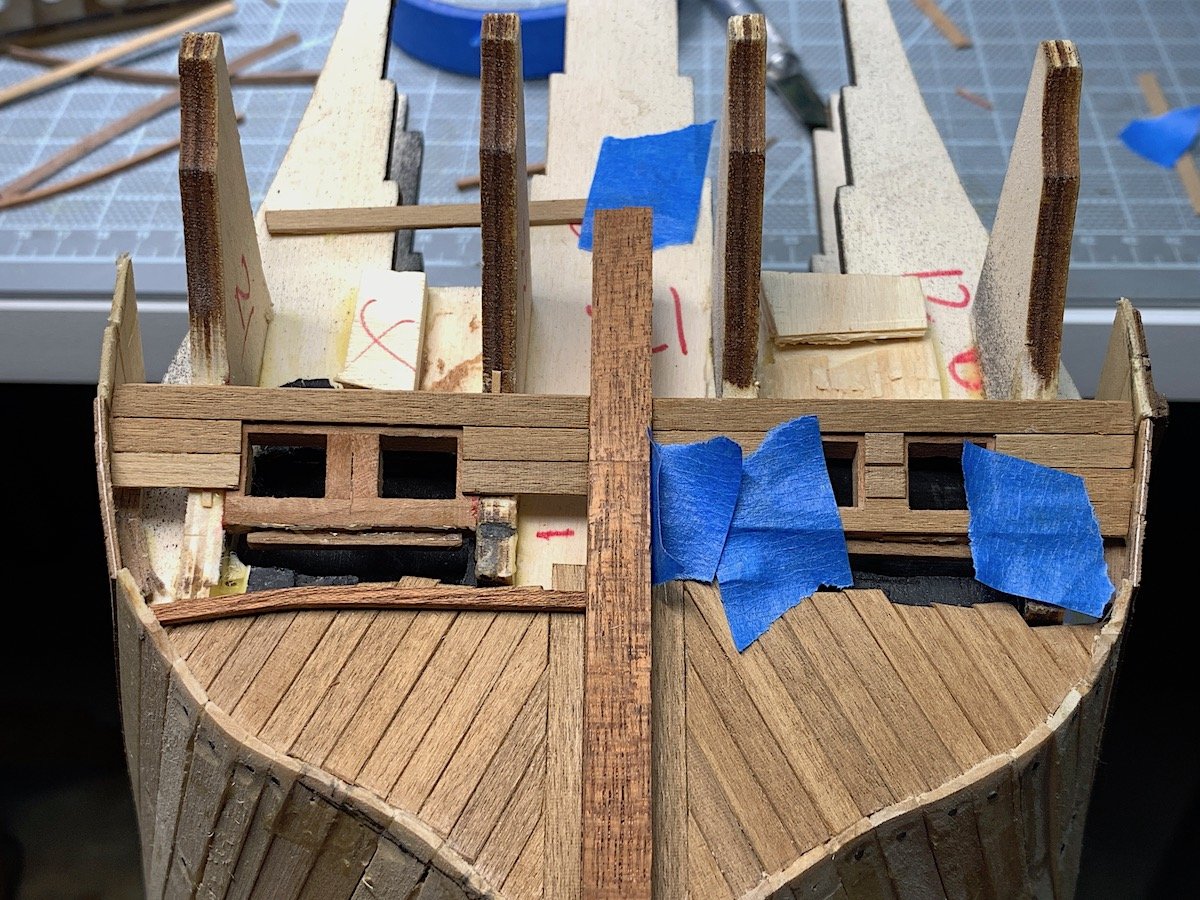
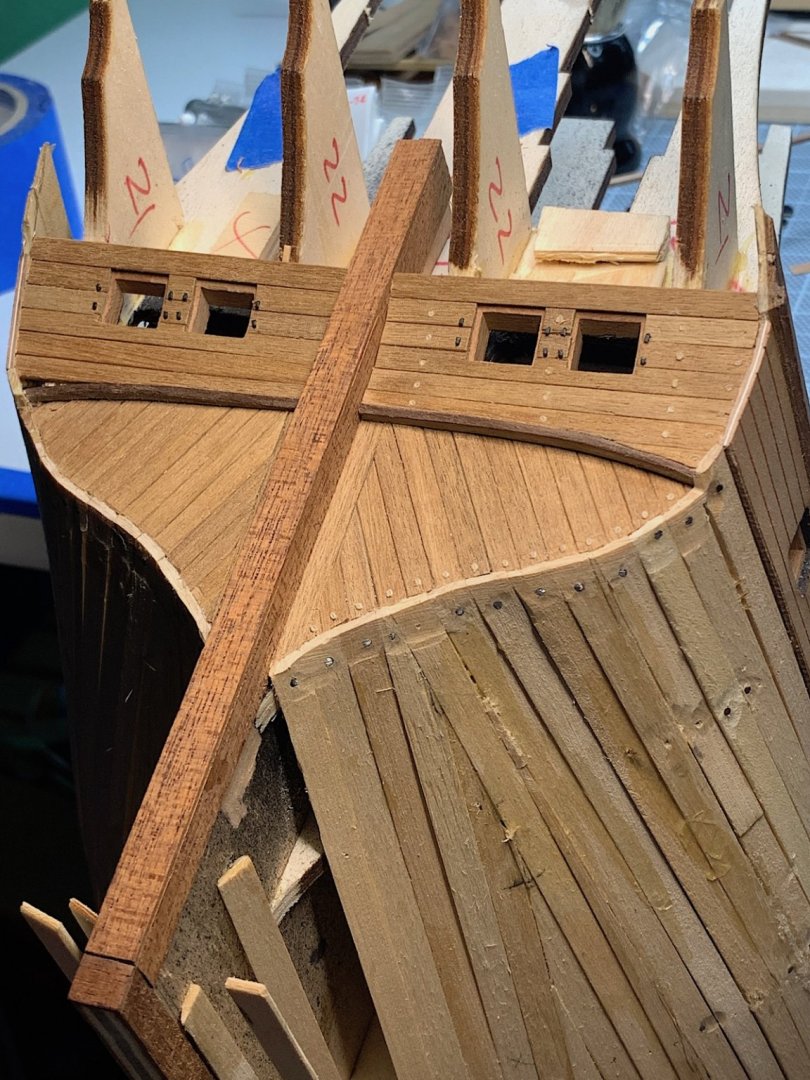
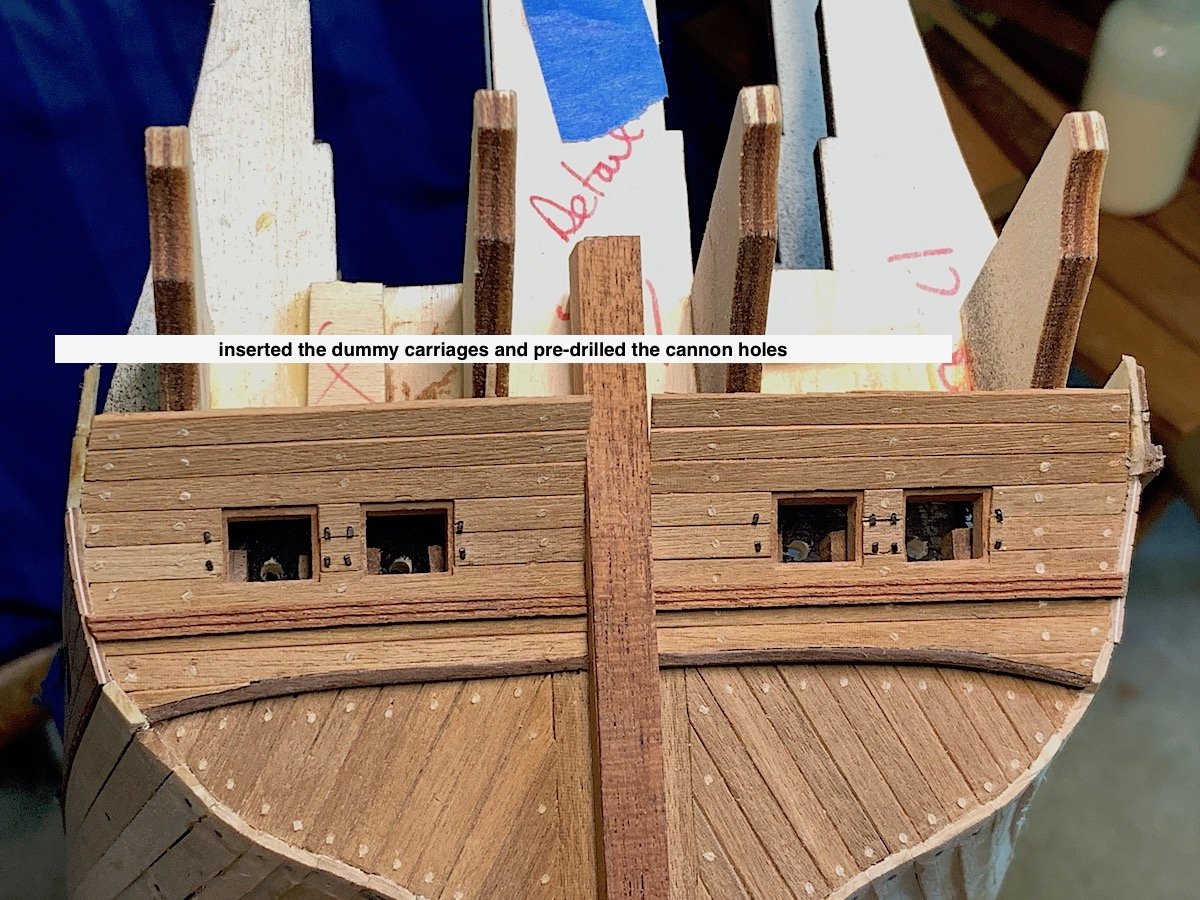
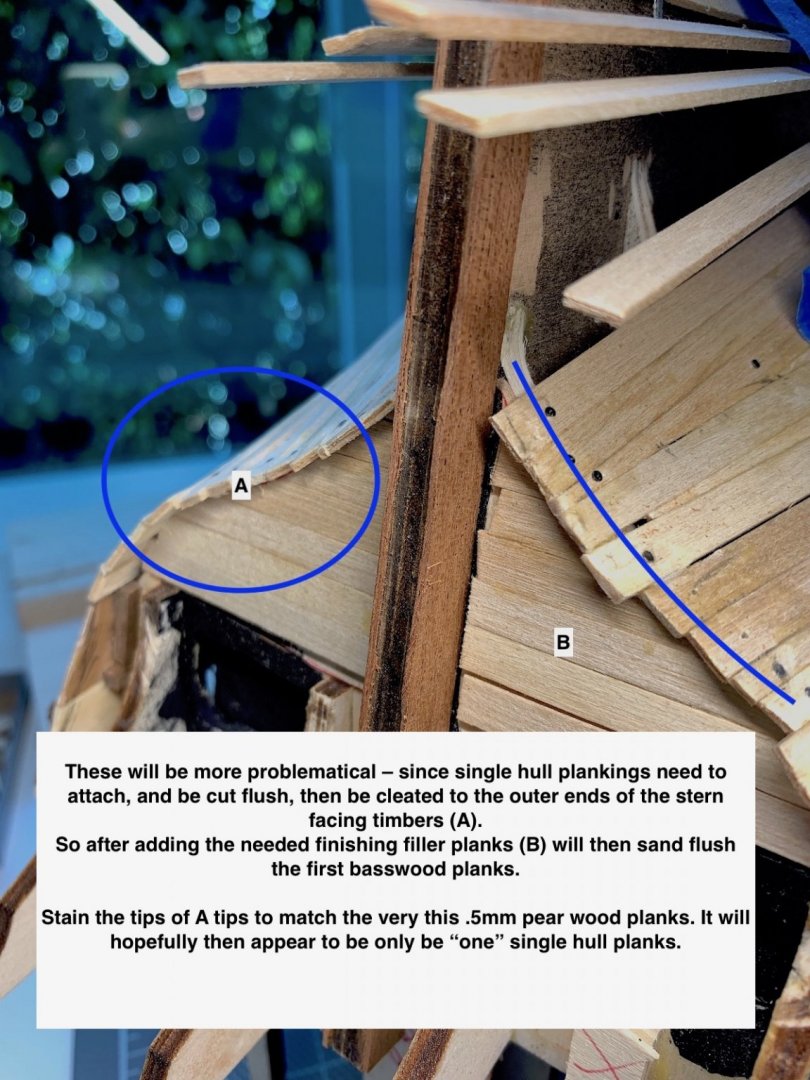
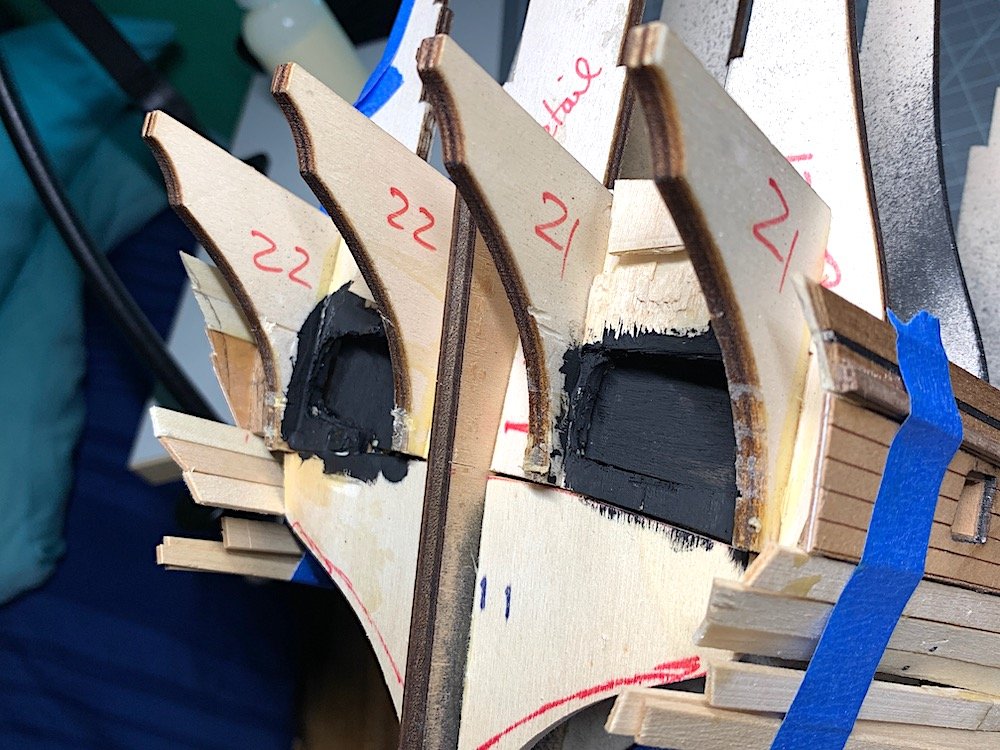
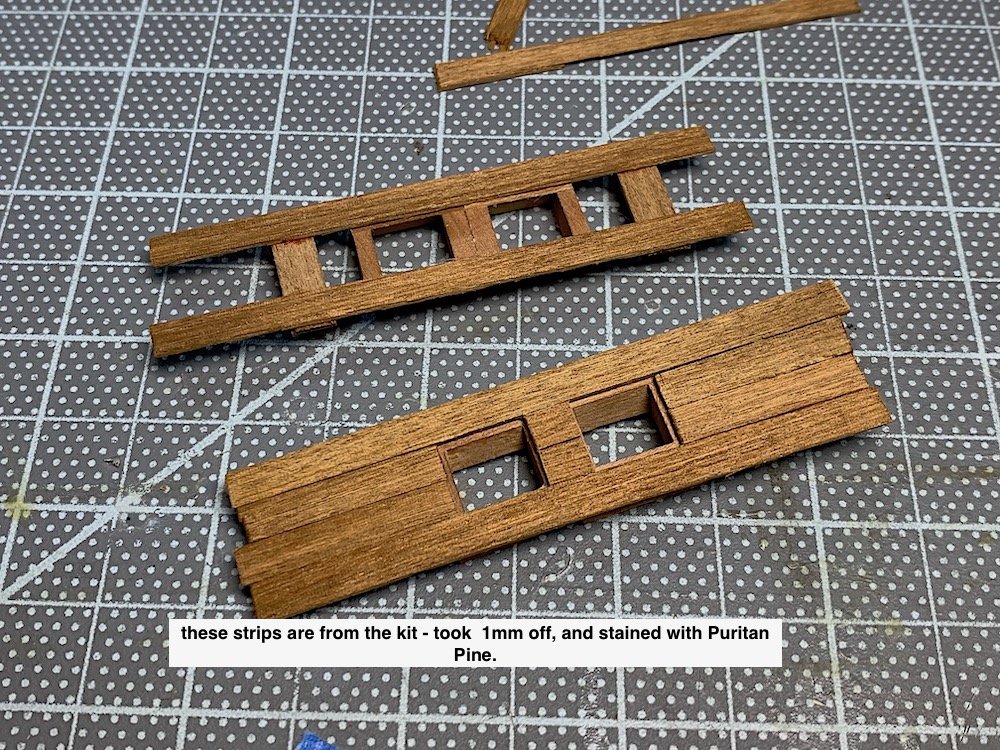
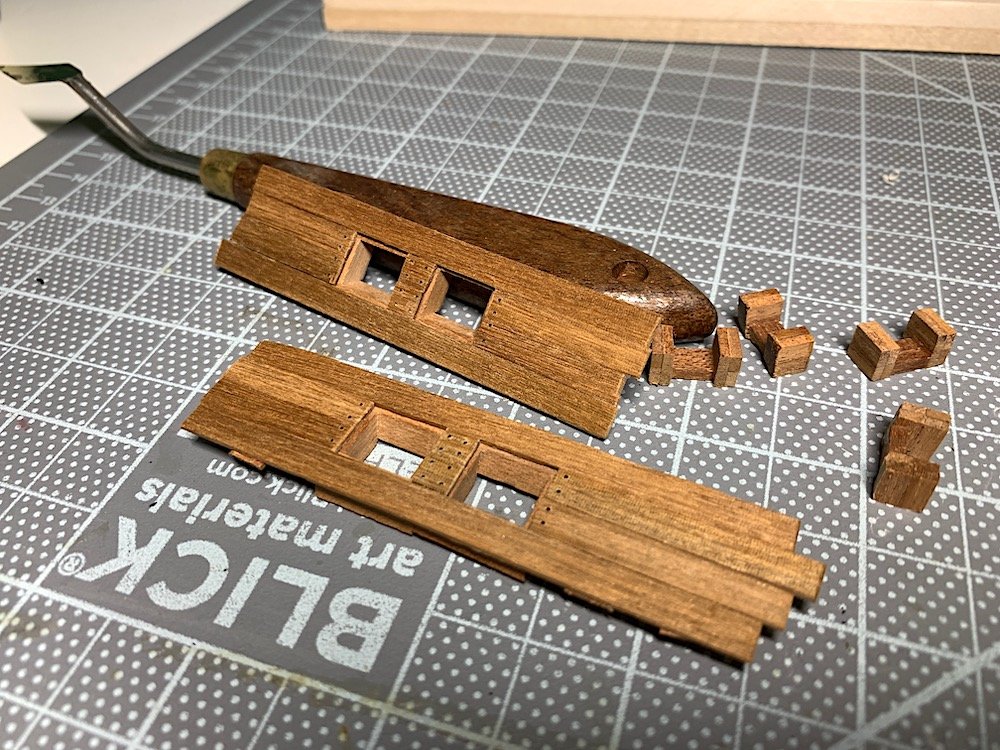
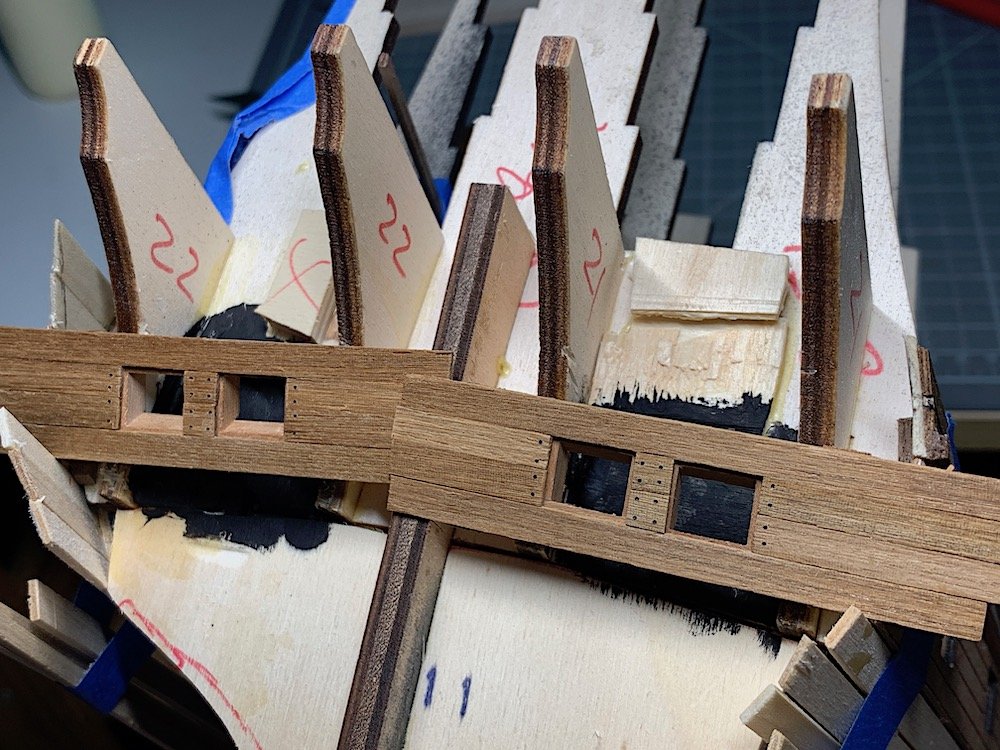
Minor update – did some work for the stern cannon doors. Needed to be sure that the required openings were not to high up. Looking at an image from old kit helped, along with positioning some decorative bits. Needed to also cut out two spaces because gun door frames and dummy carriages would not fit. Added a back filler and painted area black. Carriages will now also fit. Will drill the four gun holes after installation. Put together the gun frame facings. Now set aside – now back to first hull planking.


-
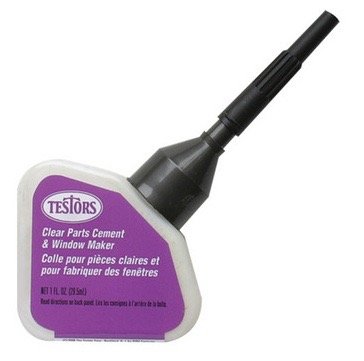
Jonathan, Hmmm Metal could be an issue? I tried experimenting with that idea on my current Sergal Sovereign, with their large solid bronze lanterns (from their 80s original kit metal bits). Did not go well. The Testors product dried opaque and greenish. There was an interaction with the metal. It was a mess to remove from one of the five lanterns that I experimented with. Have not thought of plan B. In your case just adding some clear plastic behind might be better???
-
Jonathan, Just a suggestion. You might want to use this to add clear windows to your stern area - It looks as if your frames are plastic, so it should work well. Airliner model builders sometimes use this for all the windows.. Just a thought