mtaylor
-
Posts
26,273 -
Joined
-
Last visited
Content Type
Profiles
Forums
Gallery
Events
Everything posted by mtaylor
-
Hi Greg. Welcome to MSW.
-
They're on tinypic.com, Carl. I've not had a problem seeing them so... <shrugs> Try pinging it and see if the site responds as there might be some "restriction" somewhere.
- 122 replies
-
- 2
-

-
- tamiya
- King George V
- (and 2 more)
-
Hmm.... I'm a bit behind here... pictures of the nuptials for those of us unable to attend? I'm raising a toast....
-
Cutty Sark by NenadM
mtaylor replied to NenadM's topic in - Build logs for subjects built 1851 - 1900
The old saying true then... "There will be blood.". I've cut myself more than once with the kitchen knives.. and hobby knives.. and just about anything sharp. Follow Princess's advice.- 4,152 replies
-
- 4
-
-
- cutty sark
- tehnodidakta
- (and 1 more)
-
Welcome to MSW, Mark. Just take your time, ask questions. Oh.. open a build log as it's the best way to get help and you'll be having folks looking over your shoulder.
-
Superb details, Johann.
-
I'm just speechless which is unusual for me. I think WOW... is not enough.
- 1,035 replies
-
- 8
-
-
- royal katherine
- ship of the line
- (and 1 more)
-
So the hull narrows in the middle and that narrowing is coverage by a facade? Did I interpret that correctly? <low whistle> Holy cow.
-
Hi Mario, Good to see you back and that the surgery part is over. Is the Hannah a single decker or is there a deck below? I'm thinking the orlop deck....
-
Beautiful and the size just amazes me with all the detail being clear and clean.
- 13 replies
-
- 1
-
-
- small
- moliceiros
- (and 1 more)
-
A wonderful piece and a fitting tribute to Muz.
-
It makes me happy to see you back and making some progress, Alex.
-
In the bed of a pickup truck? You're a braver man than I sir and for that I salute you. Those are some seriously nice looking ship's boats.

- 742 replies
-
- 4
-
-
- constitution
- frigate
- (and 1 more)
-
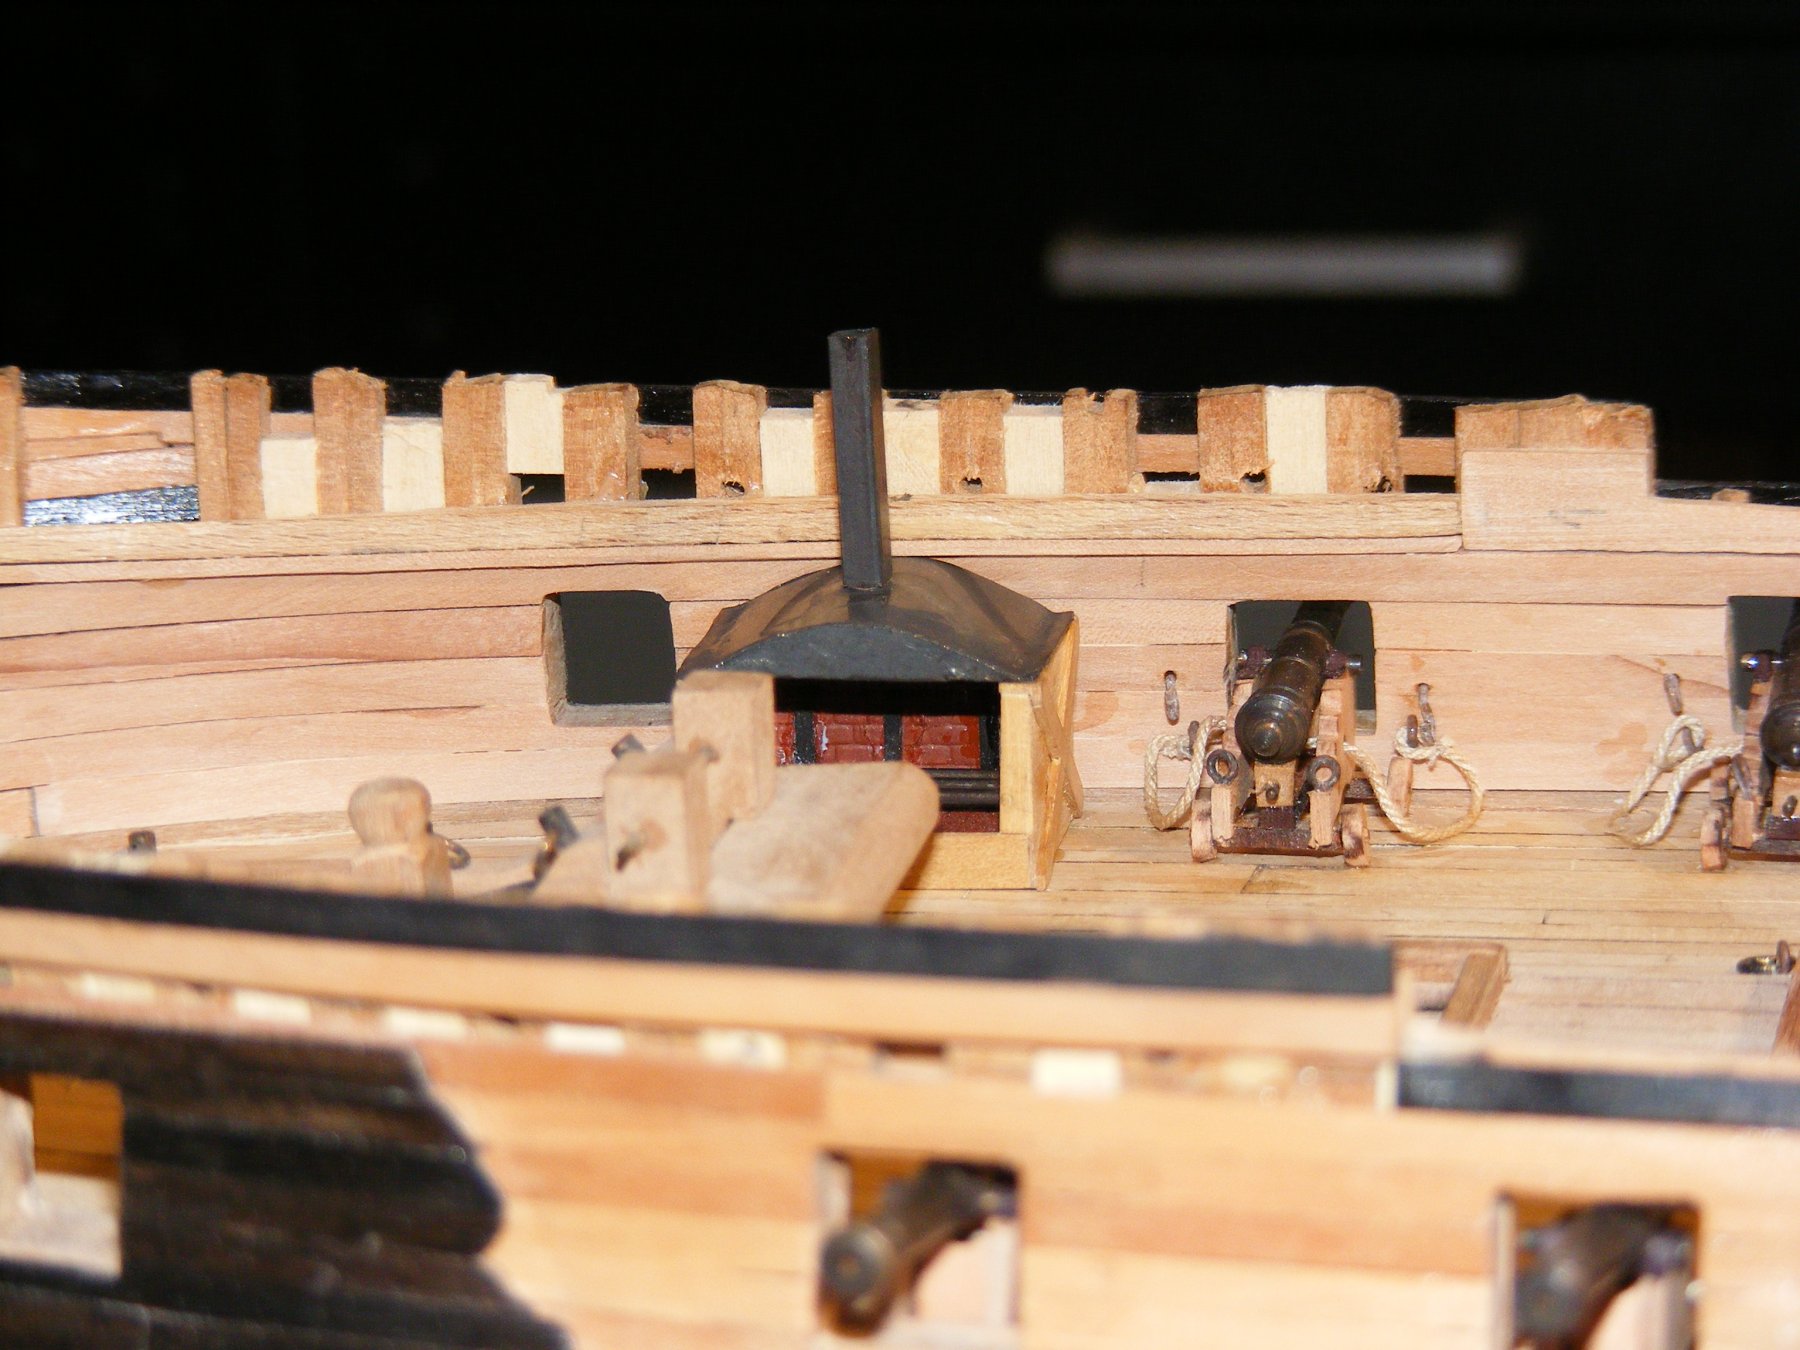
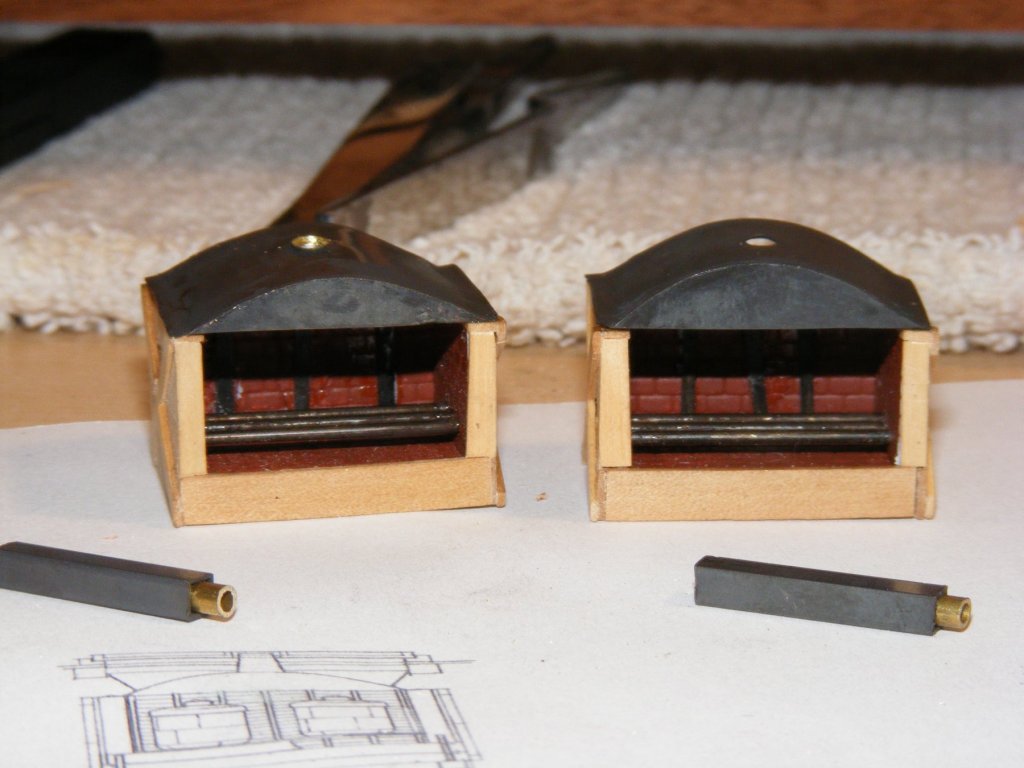
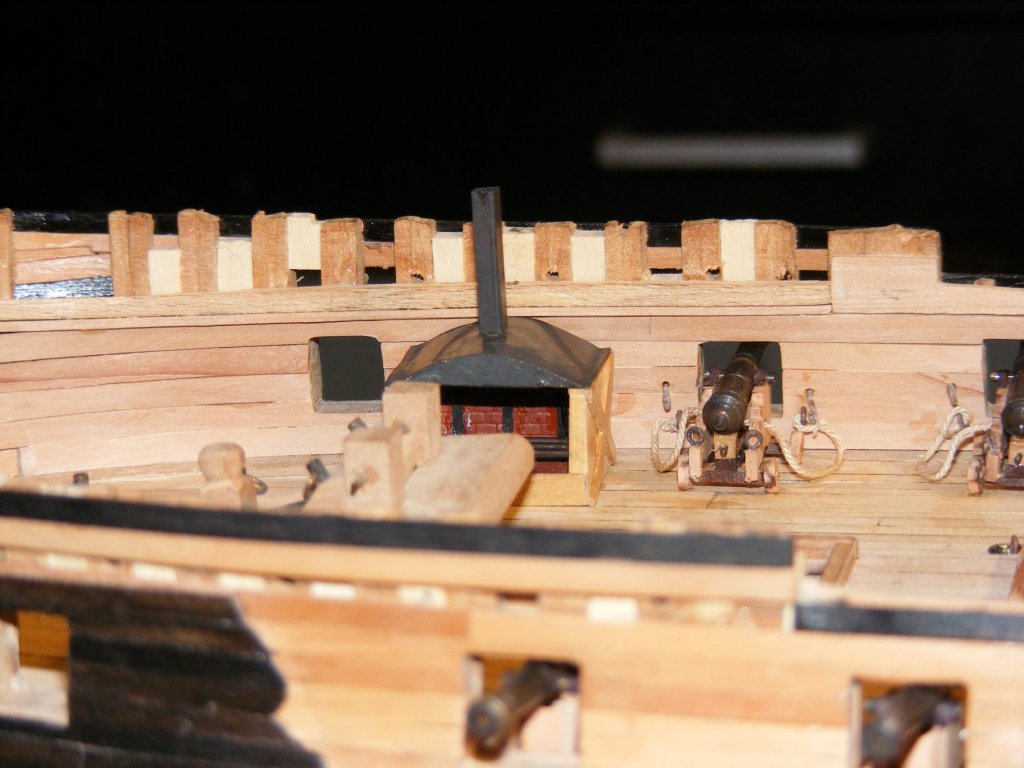
Thanks for the likes and comments. Stoves are on hold for a few days. The cutters on the lathe need to be sharper so I took a new and an old one over to the local sharpening guy.. I told him what I was doing and he's interested so hopefully by the weekend I can be cutting cookware. He's actually going to deliver as he wants to see the ship and also check the cut on the lathe. I put a small barrel (4 feet tall or so) next to each stove just for some interest. Not sure if any of this will be visible but I'll know it's there. Also starting a rigging table and did some testing. It looks like I'll be able to have access to the foot of the main mast for rigging so I added the eyebolts around it. I'll double check before I start doing the forecastle. Ovens were common on French ships... As for these stoves, I doubt that they anywhere near the capacity that the Victory had. As I recall, each pot is about 3 feet in diameter and 3 feet high. Maybe a bit more. Rats.. forgot the wine cellar. Mike, the tops are 0.010" brass. I used a pill bottle of the right size to bend the sheet brass around, cut to length and bent up the edges for securing to the stove. I also used an old piece of broom stick as a backing when I drilled the chimney mounting hole. There's a small round rod inside the square chimney to secure it to the top. The front and rear panels were rough cut out (larger than needed) and silver soldered to the top. Once cool, they were filed down to the roof. Then they were cleaned up with an acetone bath and blackened with Birchwood Casey Brass Black. I prefer this to the Jax even though the Birchwood Casey takes two "dips", it doesn't need as much polisining after blackening. I hope this helps. Now to go fiddle with making 3 ships boats.
-
Hi Archie, Welcome to MSW.
-
-
What Piet said, Lou. Scratching is fun... but you need the additional sub-skills of cursing, tossing stuff against the wall, burning the evidence, etc....
-
Laying out plans in a smaller workshop
mtaylor replied to alde's topic in Modeling tools and Workshop Equipment
Best to measure in both dimensions. I've seen scanners/printers that only one dimension not at 100%. Best to double check and be sure. -
Thanks for the likes, comments, and encouragement. These two parts were harder than I thought they'd be but worth the effort for the confidence even if they won't be seen once the foredeck is in place. Steak? BBQ? Either works for me. Although I'm sure the standard fare at that time was something less wonderful. Well.. the stoves/fireplaces are just about there. The chimneys currently aren't glued into place as with the work on the upper deck, I don't want to risk damage. But I did put one into position to see how it looks. I'm thinking mission accomplished. There is a small pile of scrap now in the bin from the failures but I'm very pleased with the final result. I still need to do the two pots per so will hit the mill hopefully tomorrow along with some planning for the next steps.... <looks at list of things to do><shrugs><pours fresh cup of coffee> Hmm... ship's boats it looks like... 3 of them stacked and secured over the hatches forward of the main mast. Here's the pics...
-
Laying out plans in a smaller workshop
mtaylor replied to alde's topic in Modeling tools and Workshop Equipment
I totally misread/understood what you were needing input for... So I killed my answer. -
Looking great, Piet. I'm smiling form ear to ear because it's all coming together with no hitches.
- 378 replies
-
- 6
-
-
- java
- pacific crossroads
- (and 2 more)
-
I'd stain before gluing. I only use stain occasionally, like ebony as I'm trying to get away from the toxicity of that wood.