mtaylor
-
Posts
26,273 -
Joined
-
Last visited
Content Type
Profiles
Forums
Gallery
Events
Everything posted by mtaylor
-
Beautifully done, Patrick.
-
Precise and gorgeous work, Tiziano.
-
Grant, It's a pity I have only one "like" for that video...
-
What Carl said..I'll had "ouch" and it's a PITA for sure. Hopefully, you're not left handed.
-
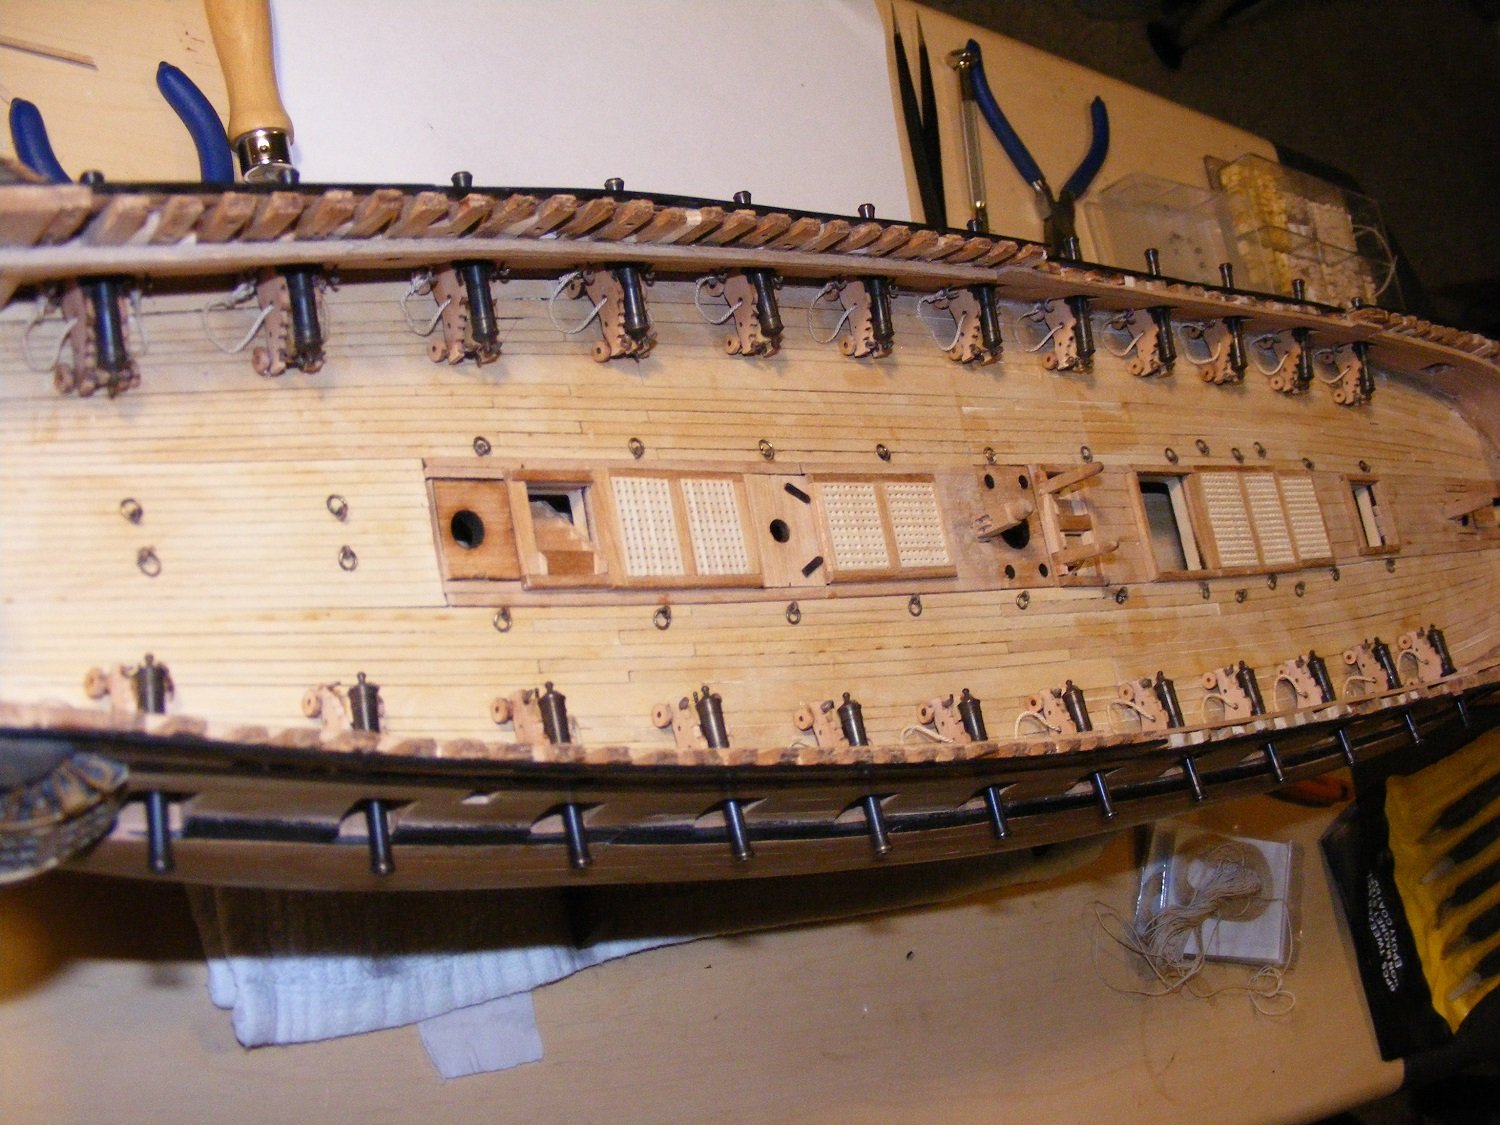
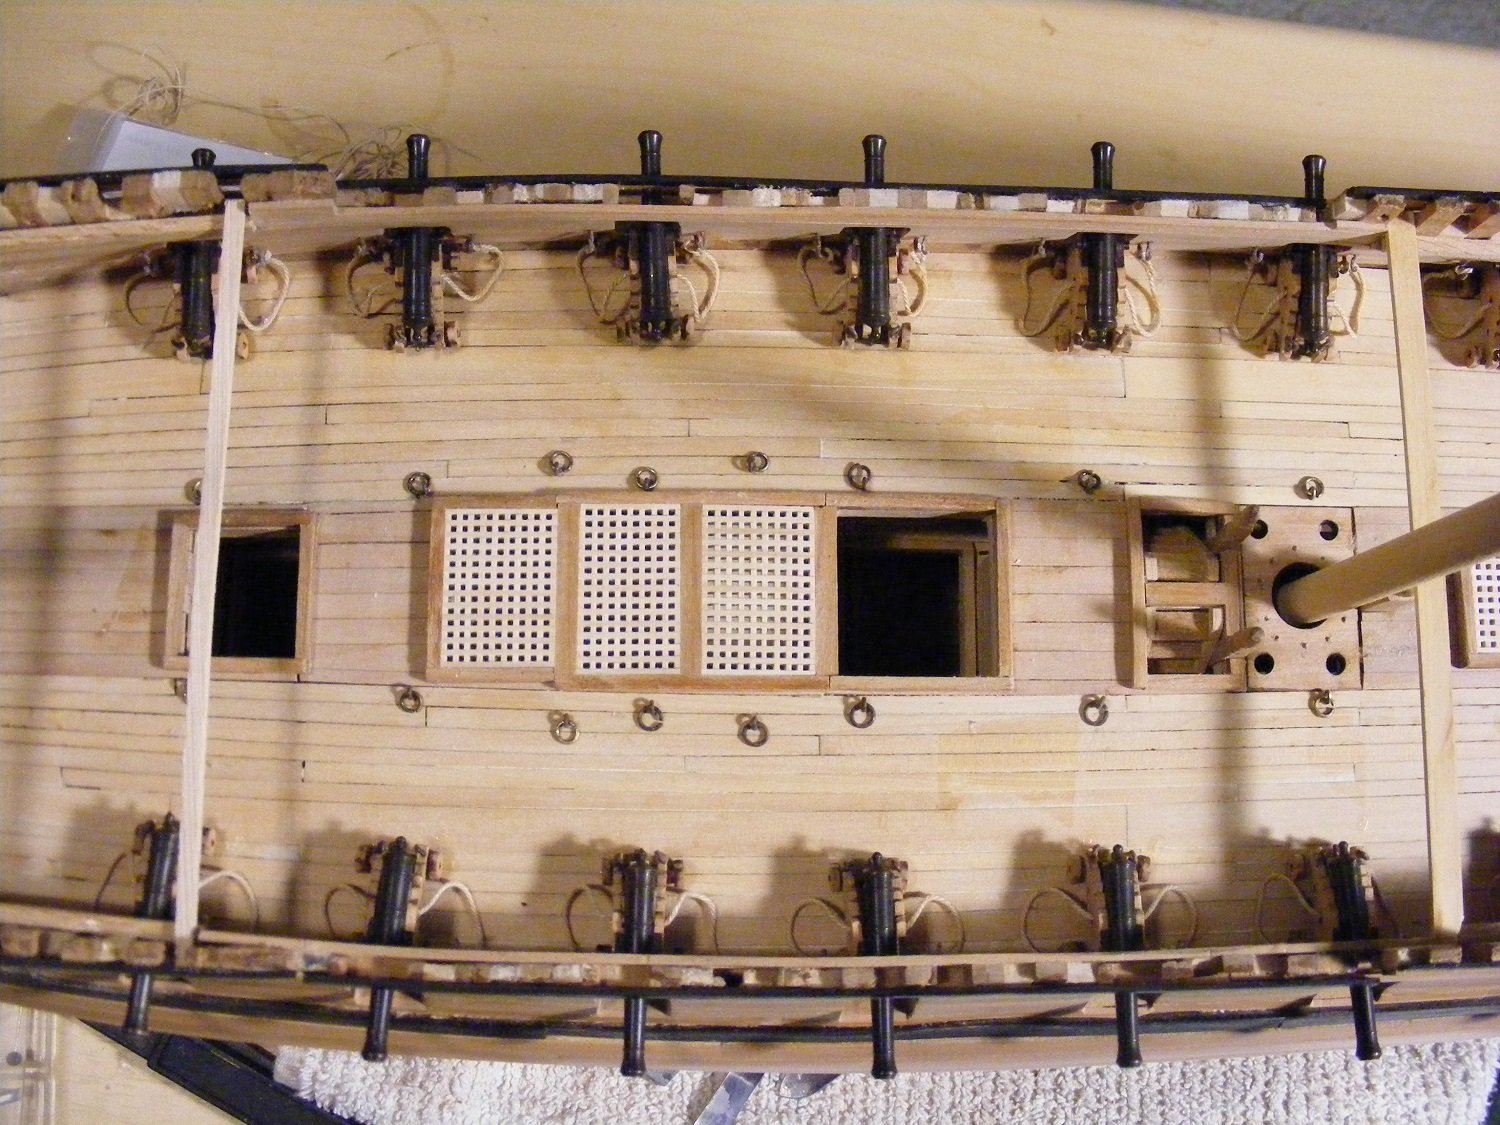
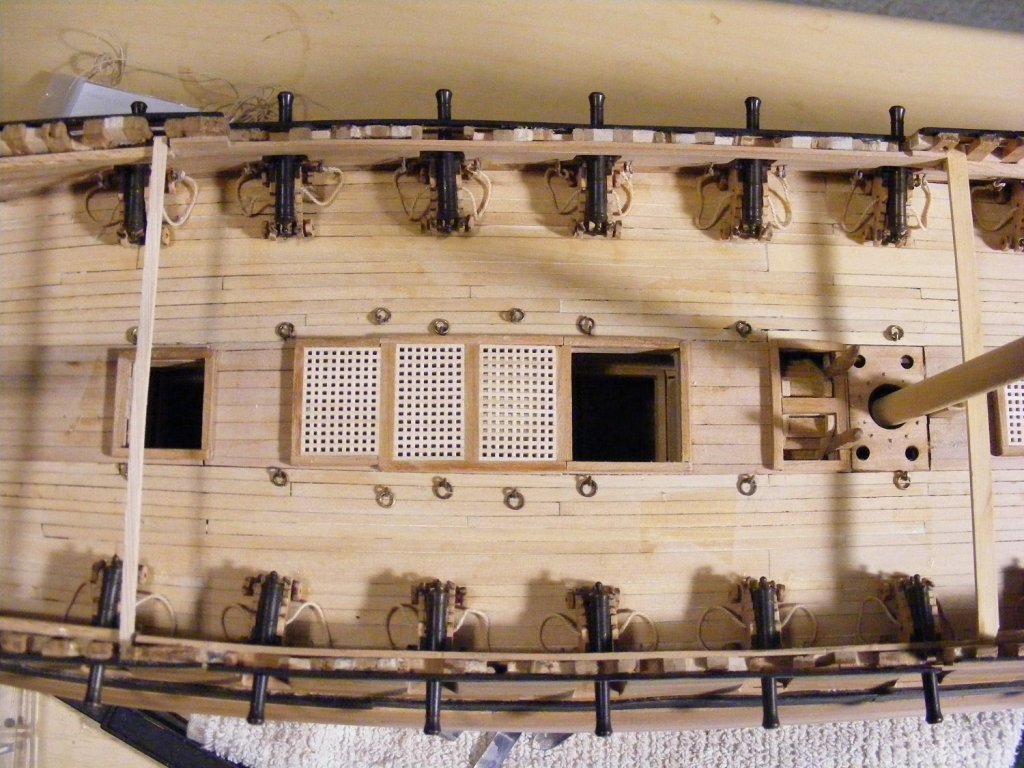
Thank you for the likes and the comments. Meanwhile back in the shipyard, the guns are all installed and have their breeching ropes. I put in temporarily two markers for the ends of the quarter and fore decks to check for tolerances and to think things through more on the rigging of the mainmast. So far, so good. There should be about 12 or 16 eyebolts with blocks for rigging behind the mainmast but that's not going to happen so I'll have to move those lines up to the quarterdeck. Next up is making and installing the cannon traversing tackle which will be fun but also a pain as the parts are so tiny. I'm using 5/16 inch Chuck Blocks for these. I thought about using the 1/8" blocks but they're too tiny for these guns. Oh well.. maybe for the 4 pounders topside and also for some of the rigging. Here's the photos...

-
I will like the work but not the tragedy and a terrible one at that.
-
Nice work, Mike. I'd vote for the half-and-half just because of the detail. But you're pilot or maybe squadron commander....
-
Sherline mill and lathe questions
mtaylor replied to Landlubber Mike's topic in Modeling tools and Workshop Equipment
Mike, I don't have the Sherlines but my lathe just sits on the work bench. At 90 pounds, it's not (and doesn't) wander about at the bench. The mill on the hand, is bolted to 3/4" particle board and that is then screwed to the bench. Mills are very top heavy and I don't want this one falling over. The particle board is about 6" on a side bigger than the mill footprint. -
What Carl said. Paper is good and should never be tossed after scanning, etc. The tech is changing and what works today, may not work tomorrow.
-
I think Lou has a better picture. Just make sure the Marine handling the small signaling cannon is "enlisted" and not "officer"... We can't have officers doing manual work now can we? <hehehehe>
-
I don't recall green but there's a couple of pics from early uniforms that show "green".... Here's a link to Google: https://www.google.com/search?q=US+Marines+uniform+history&tbm=isch&tbo=u&source=univ&sa=X&ved=0ahUKEwjZr-m1vJXaAhXM7VMKHRy1CxYQsAQIaw&biw=1337&bih=769 Some of the pics blow up quite nice. Marine on board is good... But then, I'm speaking as a former Marine.
-
Make a drill stop by putting a piece of blue tape on the drill bit to mark the depth. When the tape touches wood, stop drilling. It will take some fiddling to set this depth stop
- 120 replies
-
- 5
-

-
- queen anne barge
- Syren Ship Model Company
- (and 1 more)
-
Darrell, The anchors came out perfect. As for the posting order of pictures...It's one of those little gifts from the software company that our guys can't fix. Maybe this will help with the posts: Steve, Don't be shy about your ship, feel free to post. You'll be happy with the help you get. As for fear... I did too, and my first scratch ended up in the fireplace.
- 648 replies
-
- 2
-
-
- niagara
- model shipways
- (and 1 more)
-
Looking good, Mike. I hope you'll keep going as the skills learned and honed here will serve you well in scratch building. The French ships are beautiful.
-
Thanks everyone. Still working away at the guns. I'm setting the last 5 into the hull and rigging the breeching ropes now. I'm hoping to start mass producting and installing the traversing ropes and hardware maybe on Sunday. We are an emotional bunch aren't we. This has had it's issues but not like the first one. I think after I made the decision, I didn't cry long. I'm using the Birchwood-Casey Brass Black. It's a bit of a pain in that it takes 2 dips and wiping down after each when dry. I have a zillion (so it seems) eyebolts waiting for blackening which I'll use Jax Pewter Black for. I kind of miss the old Blacken-it but I want to see how the Jax works.
-
Most of the early WWI planes did use piano wire and turnbuckles for adjusting tension, if I remember correctly. Lightweight, readily available, and relatively simple to use. The caveat is that later in the war, the faster, heavier fighters and the bombers needed something stronger and went to braided cable.
-
Beautiful work, Piet. She really had the lines for speed.
- 378 replies
-
- 7
-
-
- java
- pacific crossroads
- (and 2 more)
-
And here, as usual, I'm late to the party... I have to admit that this something one doesn't see everyday much less a build log. Looking good.
-
Looks good and you'll get the hang of those windows. I think I went through 5 or 6 rounds of "draw, cut, test, curse, repeat" on mine.
-
Beautiful work, Ravier. I hope to see a build log someday so we can how you make those small models.
-
Piet, On the thread "problem"with the twist, etc.... one way is paint the thread (in place on the jig) with 50/50 water and white glue. The other would be starch. I don't envy your eyes and than holding your breath will doing all this.
- 378 replies
-
- 7
-
-
- java
- pacific crossroads
- (and 2 more)