


mtaylor
-
Posts
26,273 -
Joined
-
Last visited
Content Type
Profiles
Forums
Gallery
Events
Everything posted by mtaylor
-
Excellent work on the windows. The netting worked out great.
-
Thanks for the "likes" and the comments. Yes.. Admiral's orders are not to be questioned. Then to, part of my Christmas present arrived today, and that re-enforced the following of orders. Happy day is coming... the rest of the present is due in tomorrow. Please don't give up. I find a bit of patience, a bit of stubbornness, and a willingness to scrap something and start over goes a long way. This really is my first scratch build of a full ship. The Triton was a good learning experience and confidence builder. I'm not perfect but trying.... For the record, this is my second shot at this ship. The first was sent to the breakers yard due to stupidity and not thinking on my part. Janos, That's interesting you had problems with pear also. Very strange. Thanks Paul.. See my answer to Etcher.
-
Dremel Versatip Butane soldering kit
mtaylor replied to riverboat's topic in Metal Work, Soldering and Metal Fittings
The torch would be faster even using soft solder, Frank. No need to wait while the iron heats up and the joint heats up quickly. However, go with what you're comfortable with. -
Cutting Boxwood
mtaylor replied to mikiek's topic in Building, Framing, Planking and plating a ships hull and deck
At that thickness, about a 160-170 tooth blade for a 3" diameter hobby table saw. I use mine for that purpose a lot. -
Dremel Versatip Butane soldering kit
mtaylor replied to riverboat's topic in Metal Work, Soldering and Metal Fittings
There is one other consideration, Frank. With silver soldering, the joint has to be almost perfect. There really isn't any wicking and gap filling like with the soft solder. -
Darren, 30 feet isn't unrealistic. Depending on the shipyard and what they had for lumber stock, it could be a bit more or less. Are you doing a build log of her?
-
Sounds like a good read, Joss. I'll have to look for it. Thanks for the review.
-
Brian, Someone actually told you put a model on hold? You're not talking about the Yacht Mary, are you? Patrick, There was (might still be there) a frigate, as I recall in the Japanese Model site The Rope. The interesting part that applies is the builder used small hydraulics to lift the model into several sections such that each deck was visible. So instead of hydraulics, maybe something along the line of telescoping stanchions that would allow the interior to be raised and displayed as "layers"?
-
Fantastic stuff you're doing for the decorations, Dave. They look super...
- 962 replies
-
- 4
-

-
- sovereign of the seas
- ship of the line
- (and 1 more)
-
Nice work on the framing, Mark. I think cross-sections are a lot of fun.
-
I believe that E19/1 and 2 are the Quarterdeck to Poop ladder plans as the ladder seems to be at the middle of the beams.. Catch is, I can't find a poop deck plan, nor see any other ladder going to the poop. Maybe I'm misreading this E19 drawing. I assumed the label was correct but it shows stanchions around the ladderway which wouldn't be on a ladder at the end of the deck. Did the poop deck get totally missed by Lavery? I'll look at some other resources I have... I like a good mystery and this one is a puzzle... Edit: I'm shrugging my shoulders... this is getting a bit weird... and my apologies... Hero, Hercules, and Thunderer --- NMM plans and/or models indicate one ladder from the poop to the quarterdeck.... Ajax, Edgemont, Bellona --- NMM plans and/or models indicate 2 ladders. All these are contemporary of the Dragon.... It looks like either way could be right...
-
1mm metal disks on a laser would be difficult at best and it takes a certain type of laser cutter. Most cutters won't do metal very well. Photo etch is probably a better solution.
-
That is dead on, Rich.
-
Are the frames going to be exposed? If so, don't use plywood, you'll see the layers. Look for a tight-grain wood. Popular woods seem to be cherry, boxwood, pear, apple, (ok.. any fruit wood), maple. It's really your choice. I wish we had a Woodcraft where I live... or any woodworking store for that matter. <sigh>
-
Christian, As with all things.. Admiralty orders. "All ships are to be finished. Not left looking like they need more work." And it looks like this one will be getting sails as she's been pushing on that. So......... orders is orders. I've got a pile of different grades of Scotch-Brite that I forgot I had. Bought them for a different project. Hmm... we'll see. Once I get the other side done... It's actually looking less glossy today so maybe it wasn't fully cured when I took the pictures.
-
Bolt Heads on Brass Strips
mtaylor replied to mikiek's topic in Metal Work, Soldering and Metal Fittings
That I'm not sure of, Mike. I know there's also brass hammers available. What are the punches made of? If steel, then anything softer.. brass, wood, rubber. -
Bolt Heads on Brass Strips
mtaylor replied to mikiek's topic in Metal Work, Soldering and Metal Fittings
Mike, Would a rubber or wooden mallet be better? At least it wouldn't damage the punch. -
Thanks again for the "likes" and comments. It actually looks better in person, IMO. The pics have picked up quite a bit of glare. I have some 1600 steel wool that I'm testing some scrap and may just kill some the shine. We'll see....The Admiral says "leave it alone"... Do I dare?
-
Pete, I use the same stuff. 90%. Soak the joint and if it needs it, a paper towel soaked it in and then wrapped around the joint and covered in plastic wrap. For small parts (like maybe something went awry on some deck furniture), I just toss the whole part into a small tub of it.
- 258 replies
-
- 4
-
-
- buzzards bay
- herreshoff
- (and 1 more)
-
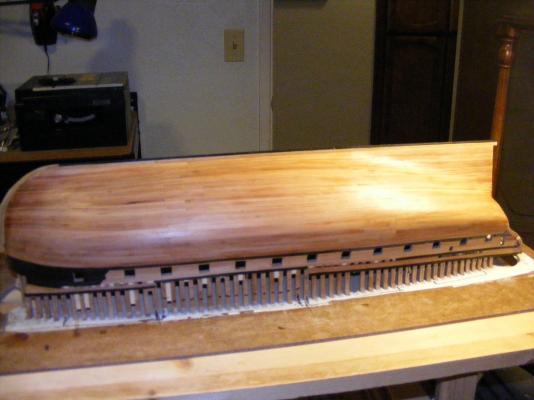
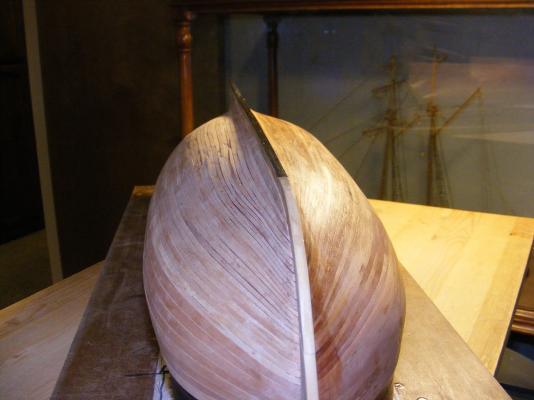
Thanks again for the "likes" and comments. Half an update.. I guess that's what I'll call it. I sanded, scraped, filled gaps and put on one coat of wipe on poly on the starboard side. There's a couple of dings I'll just have to live with. Had a weird reaction with the sanding dust and wipe on poly thought during gap filling. Some of the gaps (most) went black. I'm not sure why. Then again, the planking all looked one color until the poly went on. I'm still happy with it as the color variations give it something other than solid wall of wood color. Now focusing on the port side. Here's pics of the starboard side. And this last one is a "before" and "after" shot.


-
Nicely done, Cathead. That's a great idea on the prescribed wood. It'll save a bunch of time and look good as well.
-
Pete, Look for the 90% alcohol. I know Target carries it in big bottles. Less water will mean less warpage of parts. And, it works exceptionally well for ungluing joints.
- 258 replies
-
- 4
-
-
- buzzards bay
- herreshoff
- (and 1 more)
-
Looking good on rivets, Bob. I quite agree about the welds. Unless they used overlapping plates, welds shouldn't be seen.
- 348 replies
-
- 2
-
-
- pequot
- cable ship
- (and 1 more)
-
I agree with Toni... you are much too organized. And also too neat. There's no sawdust on that workbench... If my Admiral sees those pictures, I'm doomed. Doomed I tell you. Those are lovely and precise joints.
- 969 replies
-
- 7
-
-
- hahn
- oliver cromwell
- (and 1 more)
-
I was wondering about you and this build, Robert. I'm happy to see you back and in good health again.
- 241 replies
-
- 3
-
-
- royal caroline
- yacht
- (and 1 more)


