mtaylor
-
Posts
26,273 -
Joined
-
Last visited
Content Type
Profiles
Forums
Gallery
Events
Everything posted by mtaylor
-
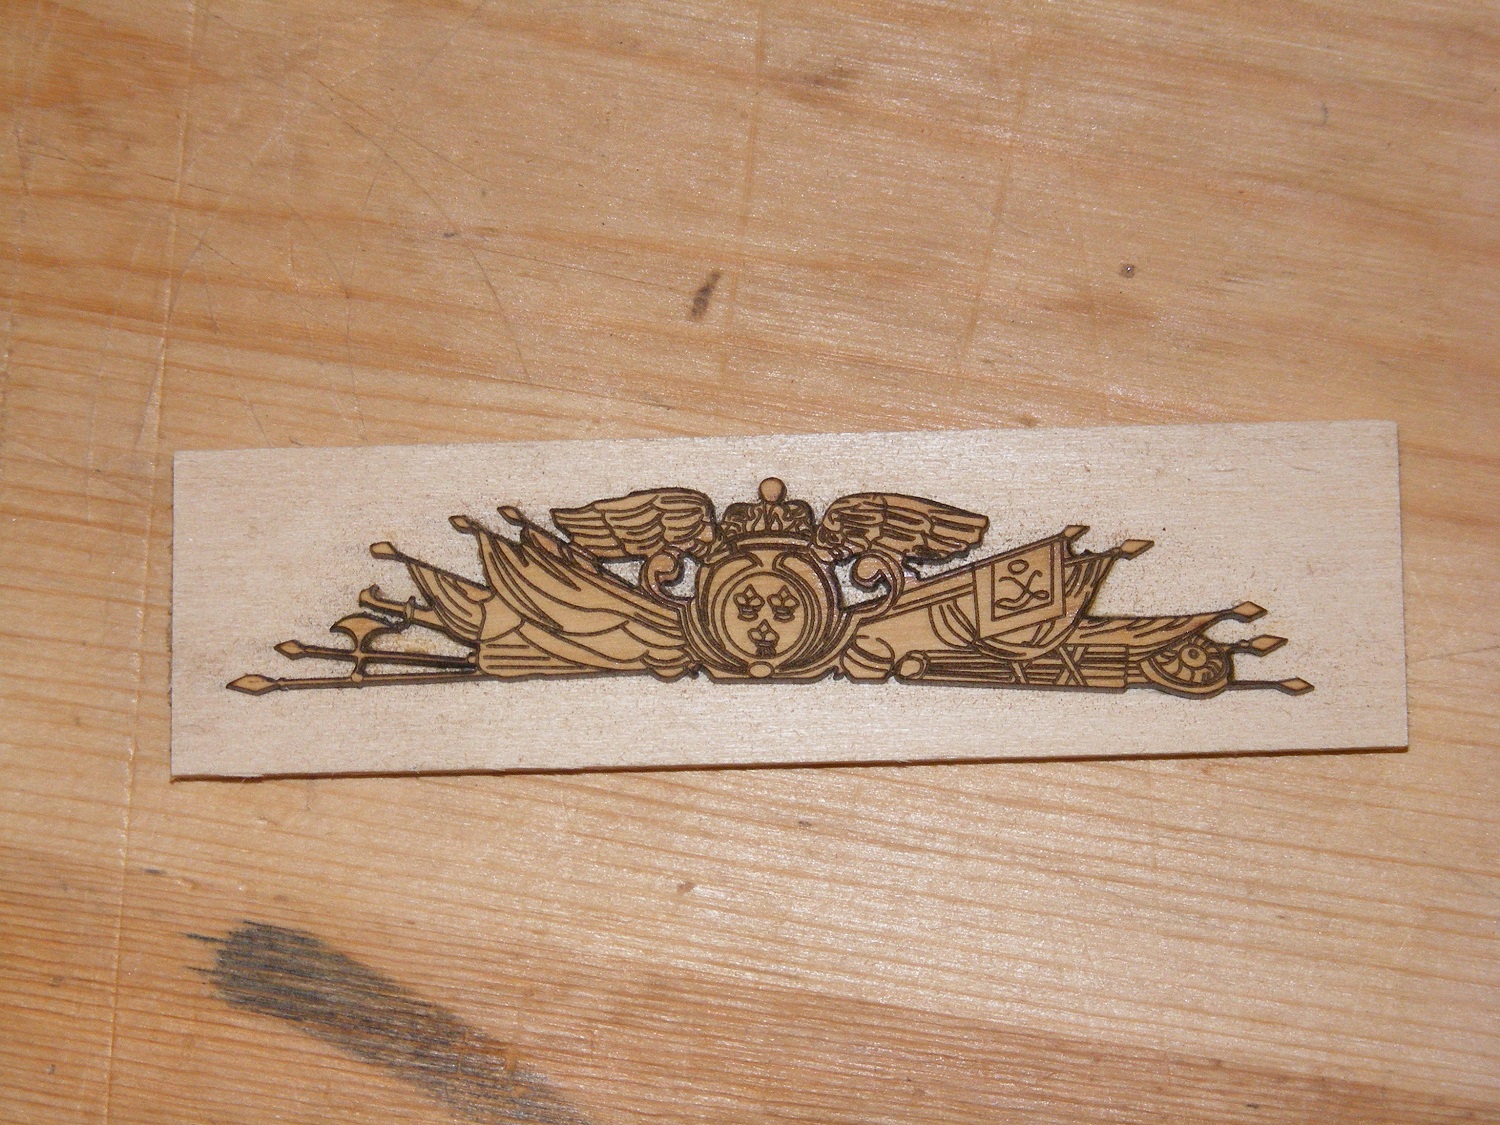
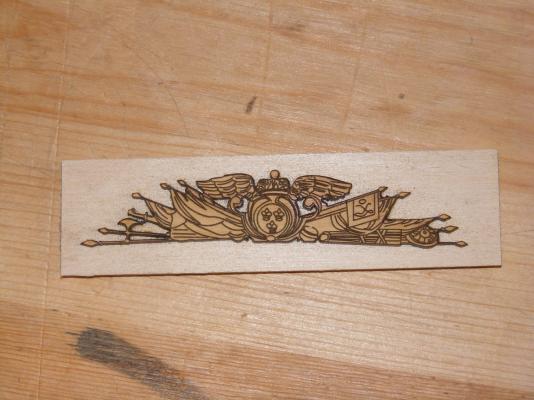
That would make a beautiful carving, Pete. Here's the piece I'm focusing on... I've re-cut it on the laser using thinner wood than before. Bas-relief will be applied next. It's some Euro Box from Crown that is now laminated to a piece of basswood so I can handle it.

-
I like the presentation you're doing... the thin rods supporting it. Beautiful work, Mike.
- 100 replies
-
- 3
-

-
- model shipways
- 18th century longboat
- (and 1 more)
-
First rigging job, indeed... looking great, Erik.
- 222 replies
-
- 2
-
-
- 18th century longboat
- model shipways
- (and 2 more)
-
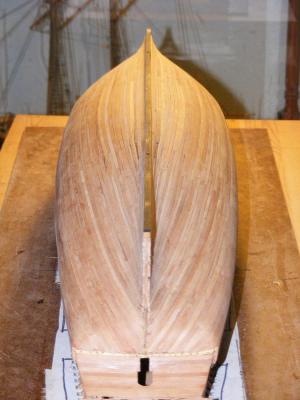
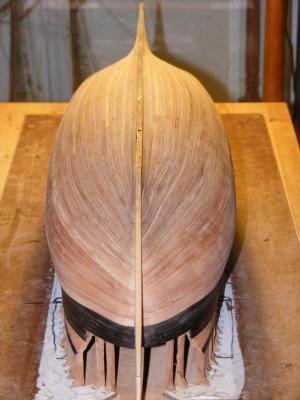
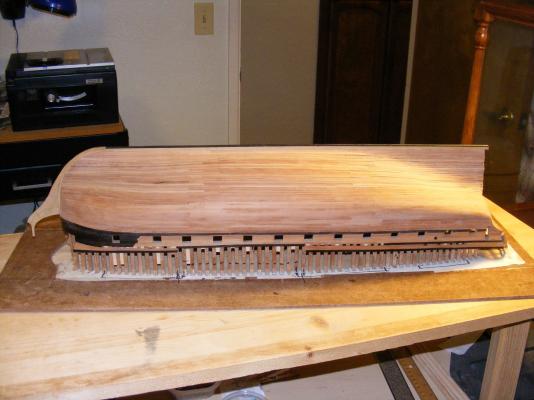
Wow... thanks of the "likes" and the comments. I'm a bit overwhelmed by it all. I'm feeling pretty good now that I've started sanding and scraping. I'm about 95% happy with it as is after the initial pass and hope to 100% happy by the time I'm done. I'm using a combination of thumbplanes, scrapers, and assorted sanding devices such sandpaper glued to flexible plastic sheeting, disposable fingernail files, and fingernail foam sanding blocks. I use a beauty supply house as they're cheaper and pick up points from the Admiral by offering to pick stuff up for her while them there. Gap filling is simply wiping on some poly after sanding, let it set and sand again. The wood dust gets trapped and held by the poly in the gaps. Works surprising well and doesn't leave the spots like glue and dust. Rough sanding is almost done using 220 grit paper (or equivalent) and then I'll finish sand. I'm finish sanding from the caprails (or at least where they will be) down to the keel. I'll use wipe on poly and realize that I'll have to scrape some off when I glue on the various bits and pieces on the outside of the hull. That's what I'm thinking, Remco. I'll have to make one. I have some ideas but I'll hold off until I'm about ready to make the guns. I only want to have to take the lathe apart once during the project and it's overdue for cleanup and calibration. Nigel, it will be a lot longer than one thinks. I want to have the exterior mostly finished and the interior done without the deck furniture on the quarter or fore decks. I've studied Hahn's method and he makes sense to me to leave it on the jig as long as possible. It prevents damage and makes handing and working on it easier. Jack, it's going to be bas-relief carved. I'm happy that it came out as well as it did and it's better than my other attempts as I got less char this time around. I think I'm finally getting the hang of the laser cutter. It's also more in line with scale thickness. Not closed Sjors... far from it. But it's getting there. Back to sanding.....
-
Small progress? Wow.... amazing work. I would not like to think what would be big progress.
-
Nice work, Bob. Well.. it's a tug so I guess there's a reason for doing things that way. Ease of line handling, perhaps?
- 348 replies
-
- 2
-
-
- pequot
- cable ship
- (and 1 more)
-
Sweet Panagiotis. You are a braver man than I. I would be afraid all that wonderful work would sink. I'll be looking forward to your next project.
- 116 replies
-
- 2
-
-
- kilkis
- mississippi
- (and 2 more)
-
Reading Boat Drawings
mtaylor replied to Julie Mo's topic in CAD and 3D Modelling/Drafting Plans with Software
Julie, As I recall, that link to the database, there's a multipart tutorial on using AutoCAD for this. I'm not sure what "level" it is for, however. By level.. newbie, mid-level that has some knowledge of AutoCAD and ship's lines, or expert. -
Interesting concept on laser cutting the planks. That has to be a lot of planks.
-
Greg, At stand off distance... maybe 5000 miles... yep... no filling needed. :D It does need some serious sanding and filling with sawdust and poly.
-
There's like 3 topics on this....
-
Corey, Are you using PVA glue? If so, isopropyl alcohol (90% is best) will dissolve the glue joints. Brush some onto the joint, soak a paper towel and wrap the joint. Might take a couple of tries, but it will break it free.
-
Chris, One suggestion.... don't get enthusiastic about putting poly on everything just yet. If (or maybe it's actually "when") you have glue a part to what has been polyed, the glue won't stick. Many of us have found this out the hard way. You doing good on the planking. Don't rush it, run some battens and work the planking in small areas. It's a pain, but worth it when the planking is done. I'm thinking you ran the garboard too far forward. It looks like your planks at the bow are running up. But then as I recall, they do on the replica also. Hmm.. since this is first planking, see how it goes and apply what you find to second layer.
-
Thanks for the likes and the comments... no hangovers but then, I haven't raised by glass yet. Later tonight. Michael, That was the best decision I could have made. Thanks for reminding me. And thanks to the members of this forum for the help and encouragement. I've learned a few lessons on this part of the trip. Ok.. many lessons, not a few.
-
You are close to the end, Tom. Looking very good with her sails billowed out.
- 212 replies
-
- 1
-
-
- constellation
- artesania latina
- (and 2 more)
-
Mike, I think this is a case of "Captain's Choice". Some ships had two-piece lids and the guns were left run out with the lid closing around the barrel. Running out does give the crew more room on deck. Also, given the location of this ship's theater of operations (the Great Lakes), my guess would be that any Captain would want the ship ready for action pretty fast.
-
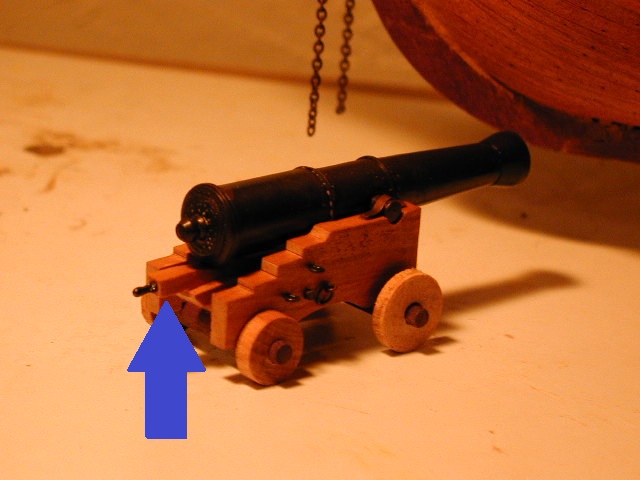
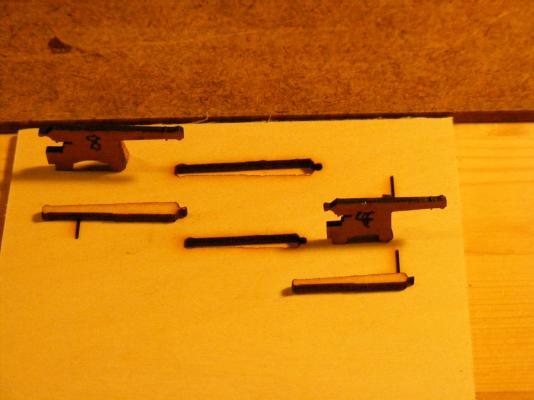
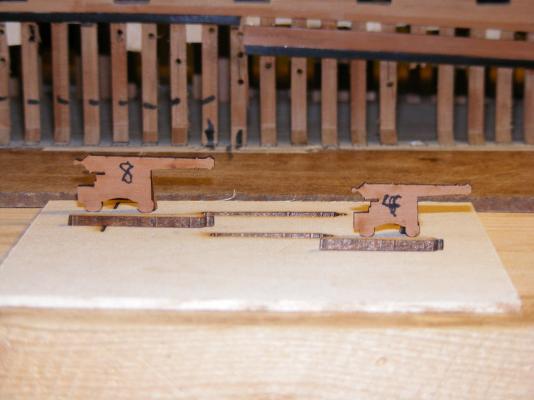
While I'm updating the log... a couple of side projects ongoing. I've not done much with the longboat other than some sanding to the mold. I did redo the laser cut out for the stern carving in Euro Boxwood and a more appropriate thickness after a discussion the other sub-forum. This one does look better in my opinion and won't be removing so much wood. Another one while waiting for glue to dry on the planks was to prepare the drawings for guns and carriages. I made two dummy guns to check the height once the deck is in and planked and couple of pieces for checking the guns after I turn them. I'm puzzling over a duplicator for the lathe. It'll have to self-made as there's nothing commercial that will work on mine.
-
Time to splice the main brace, methinks. Or maybe just a happy dance... Major milestone today... external hull planking (except for the transom is finished. Still needs a serious sanding and some gap filling which I'll start on after a bit of cleanup in shop. Next job (after the sanding is fitting the stern post, fashion pieces and doing the transom.. planking, windows, carvings, and the molding strips. Time to splice the main brace, methinks. Or maybe just a happy dance...

-
Clara May
mtaylor replied to Moxis's topic in Discussion for a Ship's Deck Furniture, Guns, boats and other Fittings
Matti, Those are the pumps it looks like. http://modelshipworld.com/index.php/topic/7526-i-too-am-new-to-msw-and-have-questions-about-the-log/ http://shipmodeling.net/photopost/showphoto.php?photo=775&size=big https://www.google.com/search?q=clara+may+ship&biw=1381&bih=744&tbm=isch&tbo=u&source=univ&sa=X&ved=0ahUKEwiohq_JhtfJAhUElh4KHeNCD7sQsAQIGw# -
Cutty Sark by NenadM
mtaylor replied to NenadM's topic in - Build logs for subjects built 1851 - 1900
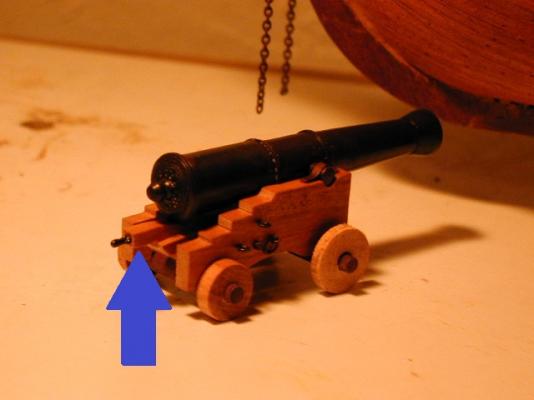
Nenad, The piece you have marked as "C" is the quoin. It's a wedge shaped block used to raise and lower the rear of the gun to make changes in elevation. See the pictures. This is of a 1:24 scale British 9 pdr, but the pieces are the same or similar. As for rigging... stowed, probably like the pictures show. Just ropes securing it eyebolts in the deck. I really don't know on the Cutty Sark. Here's a link that might help. It's all I could find. http://www.thegreenwichphantom.co.uk/2011/02/firing-the-one-oclock-cannon/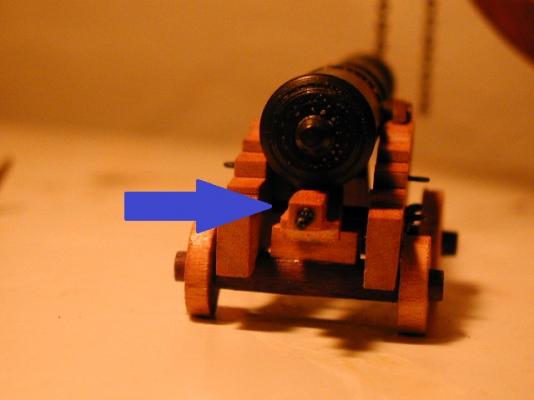
- 4,152 replies
-
- 6
-
-
- cutty sark
- tehnodidakta
- (and 1 more)
-
Excellent improvisation, Gabe. I agree, the fence on those saws is very problematical but I'm glad you got it sorted and are back building.
-
Reading Boat Drawings
mtaylor replied to Julie Mo's topic in CAD and 3D Modelling/Drafting Plans with Software
Julie, Have a look here.. http://modelshipworldforum.com/ship-model-plans-and-research.php The second article by Russell Barnes. He pretty much explains everything on the drawings. -
That is some very fiddly work and it is coming out nice, Ben.
-
Good approach, Joss. Would a bit of wipe on poly on the area not to be glued work? As far as removing the excess glue that is? I have some PVA that mixed in some pigment powder and it seems pretty strong. I used it on my stem but I'm just not impressed the way it came out as my joints weren't "perfect". I do need to work on my joinery.
-
Pete, I use PVA. Chuck, Thanks for that. I'm about ready to attack this carving for real, so based on what everyone says, I'm going to re-cut it from 1/16" material.