


Old Collingwood
-
Posts
11,524 -
Joined
-
Last visited
Content Type
Profiles
Forums
Gallery
Events
Posts posted by Old Collingwood
-
-
6 hours ago, SigEp Ziggy said:
Fantastic Work OC! And I agree, there's no stopping you now!
Thank you kindly.
OC.
-
Quite a large plane - kind of mosi size?
OC.
- Canute, CDW, popeye the sailor and 2 others
-
 5
5
-
Really nice tidy work Bob.
OC.
- FrankWouts, Osmosis and Elijah
-
3
-
Hi all,
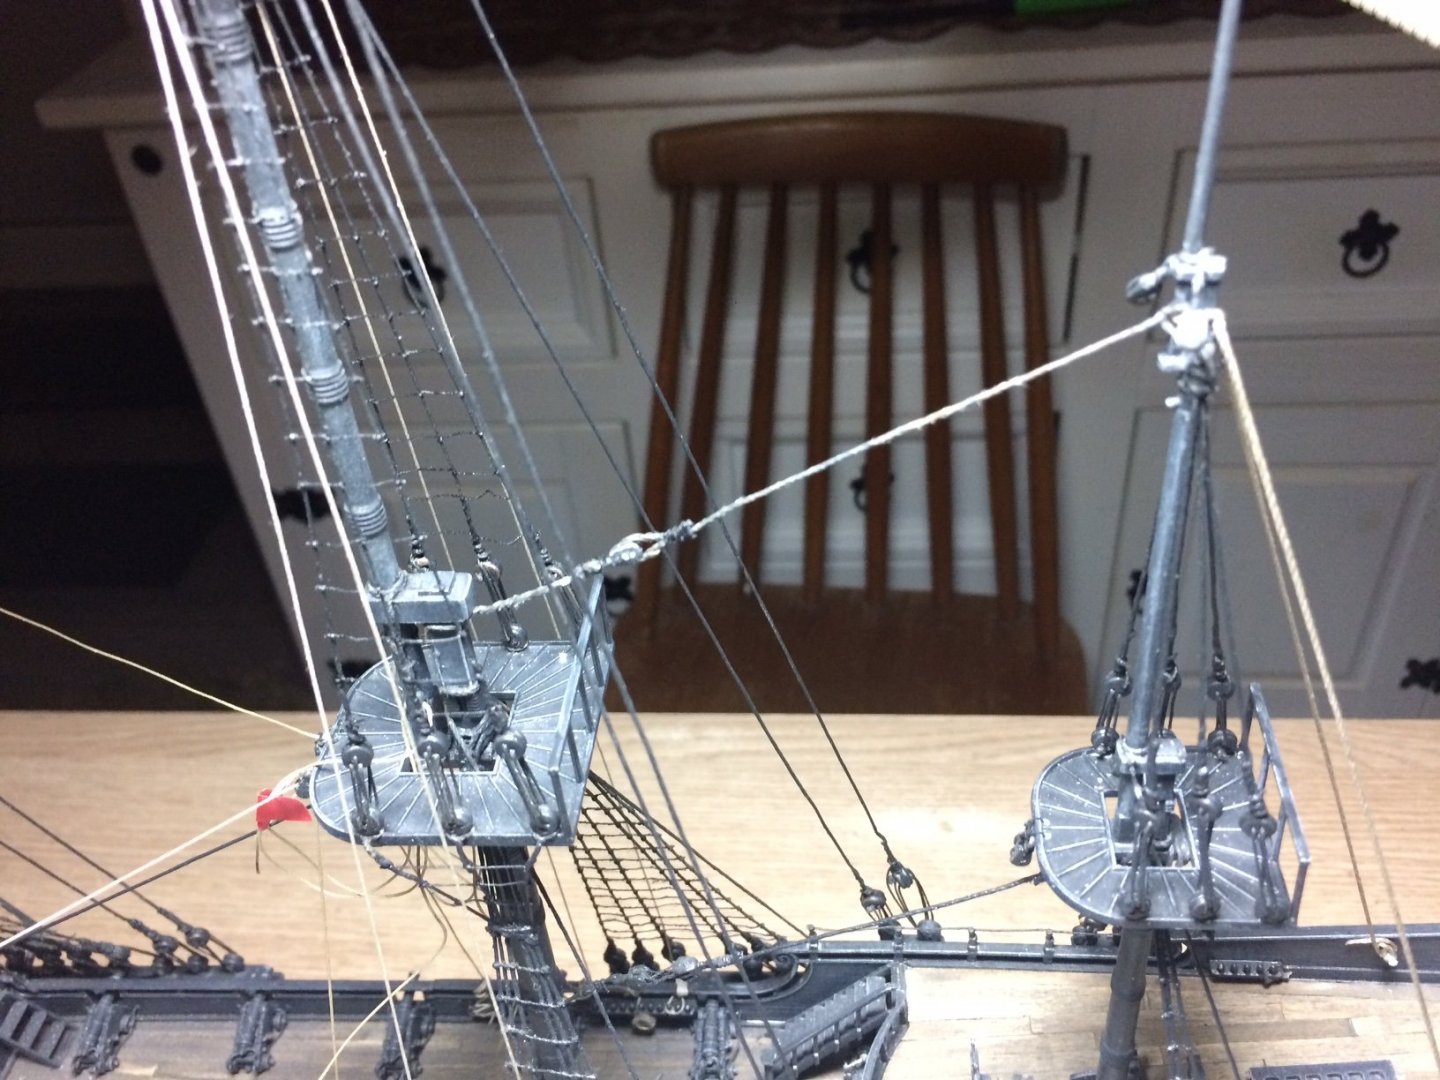
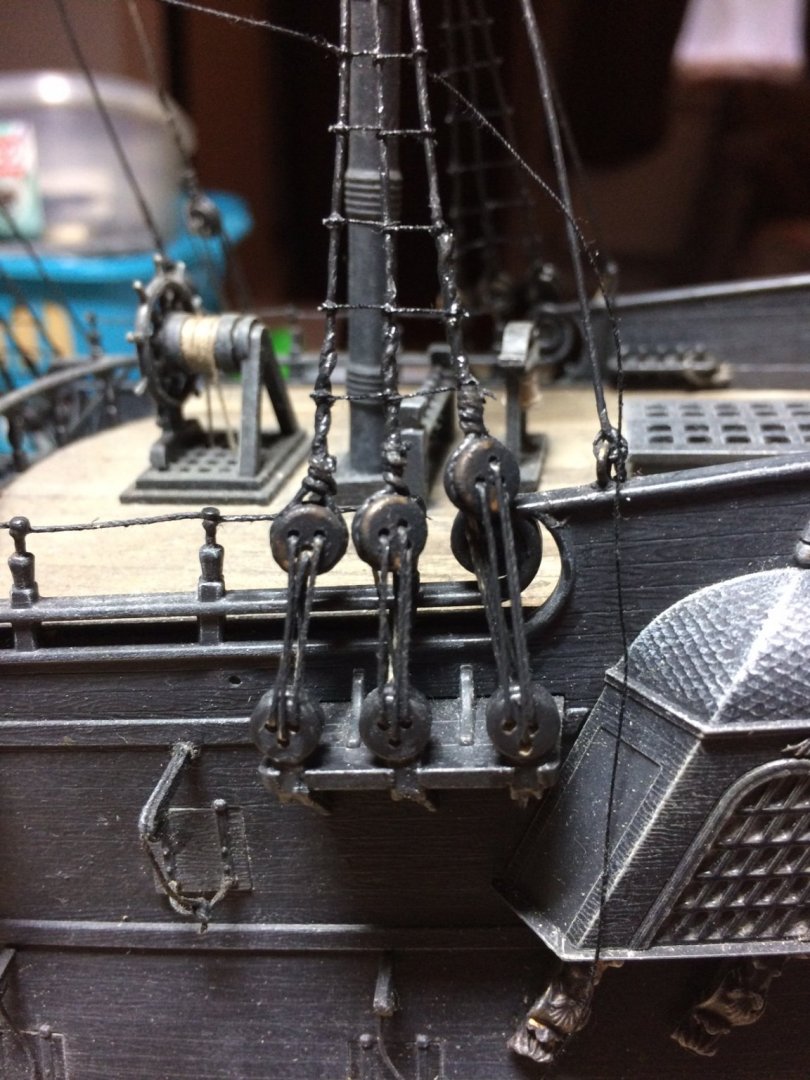
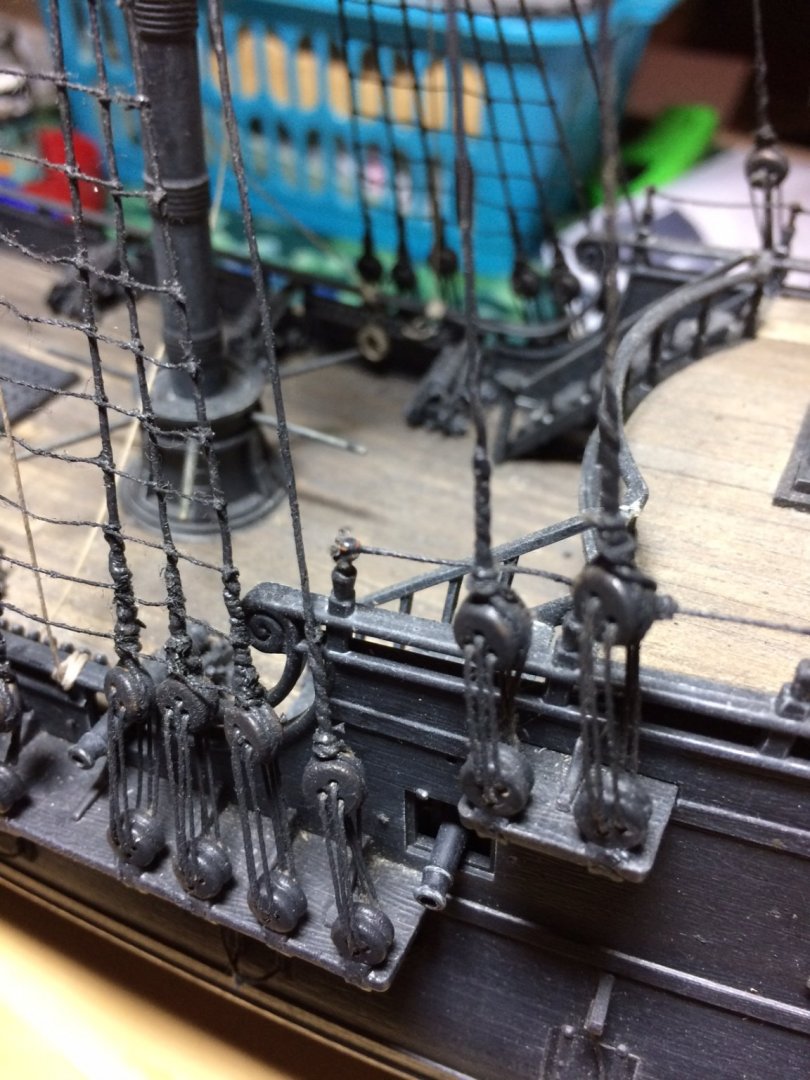
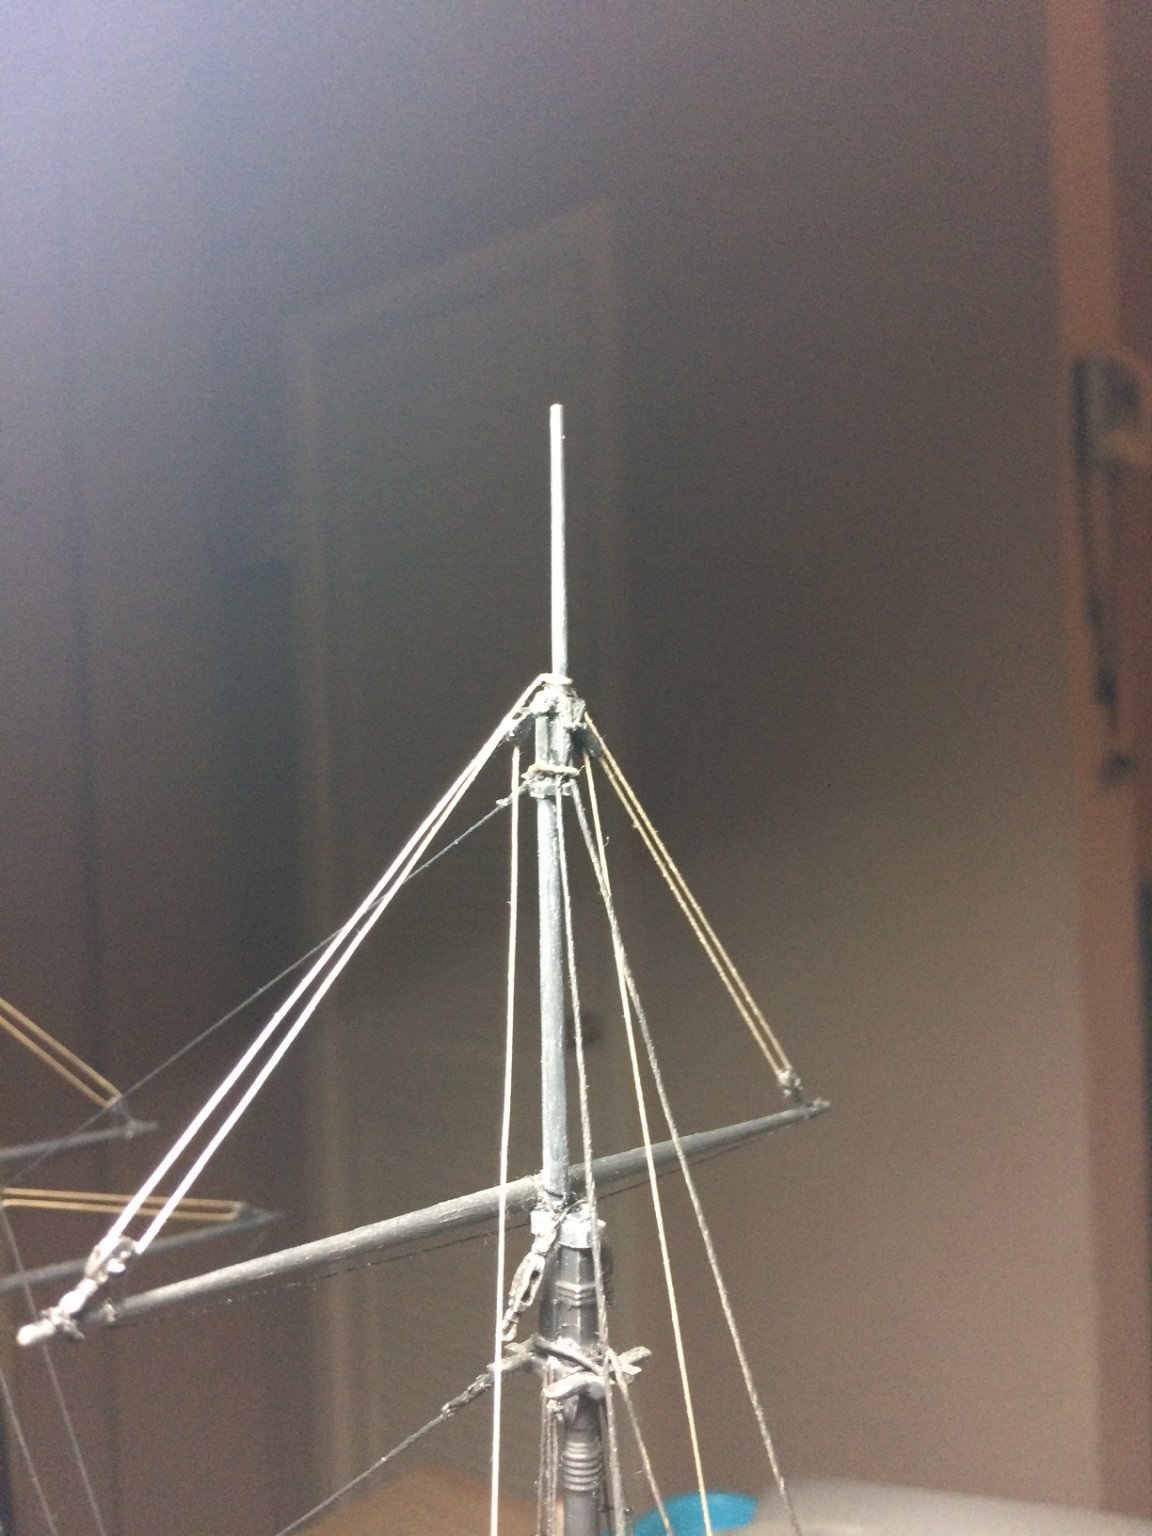
Another good day on the pearl, first job was to paint the mizzen shroud dead eyes - when dry I started lacing them up, a couple of hours later and celebration time as all the dead eyes are now fitted

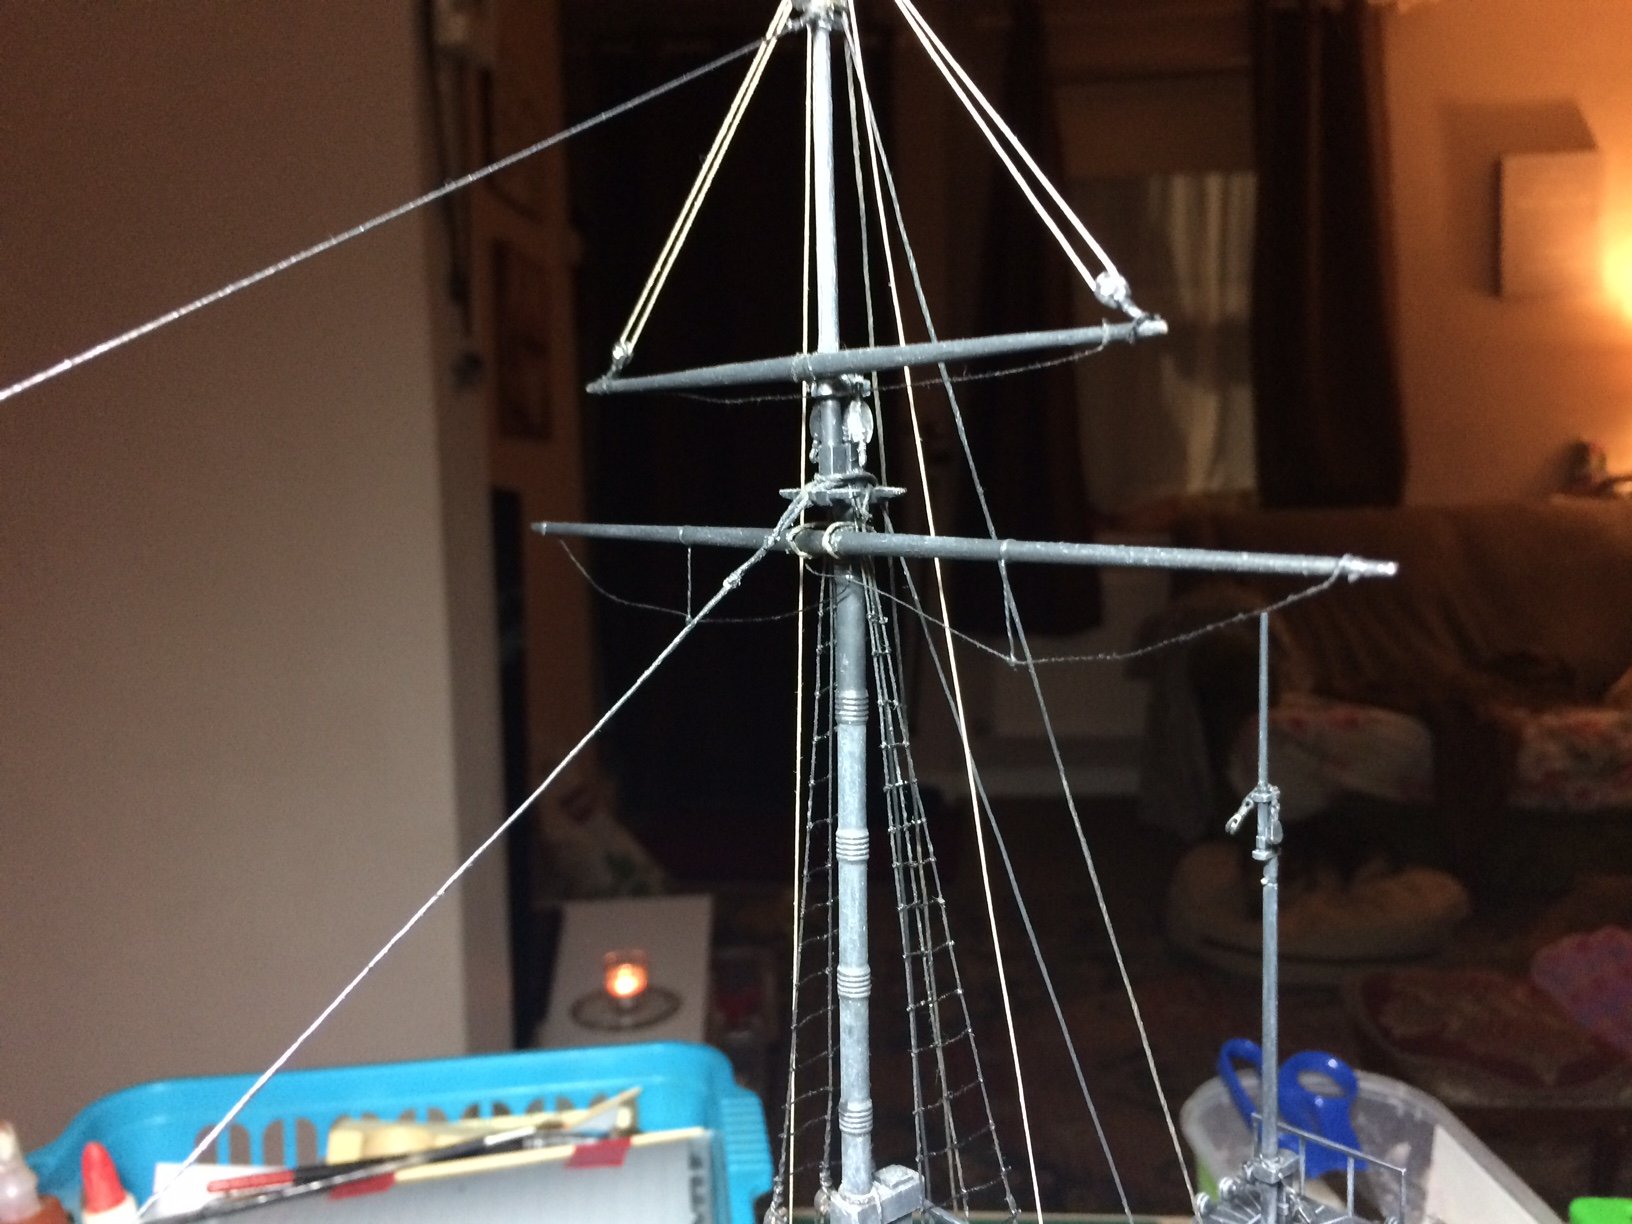
After I panted the dead eye ropes and set aside to dry, while they were drying I set about securing the upper mizzen to main stay, using a simple loop around the main upper and block attachment to a loop around the upper mizzen, I left the mizzen end un tied till I had created/fitted and tensioned two upper mizzen back stays - then I pulled all three to the right tension.
Three more pics to day.
OC.

- BLACK VIKING, lmagna, GrandpaPhil and 12 others
-
15
-
-
-
-
9 minutes ago, marktiedens said:
Love the weathering - really gives it a "ghostly"look
 .
.
Mark
Thanks Mark.
OC.
- EJ_L, popeye the sailor, Canute and 1 other
-
4
-
21 minutes ago, lmagna said:
Nice progress OC. One thing that is for certain, it makes little difference on whether it is wood or plastic, the rigging still seems to go one line at a time and it always seems so tedious and messy until you get to the last line and all of the sudden it becomes a masterpiece.
Thanks Lou, yep sometimes it seems that way - kind of need to take a break between doing different stages to break the routine.
OC.
- mtaylor, EJ_L, BLACK VIKING and 3 others
-
6
-
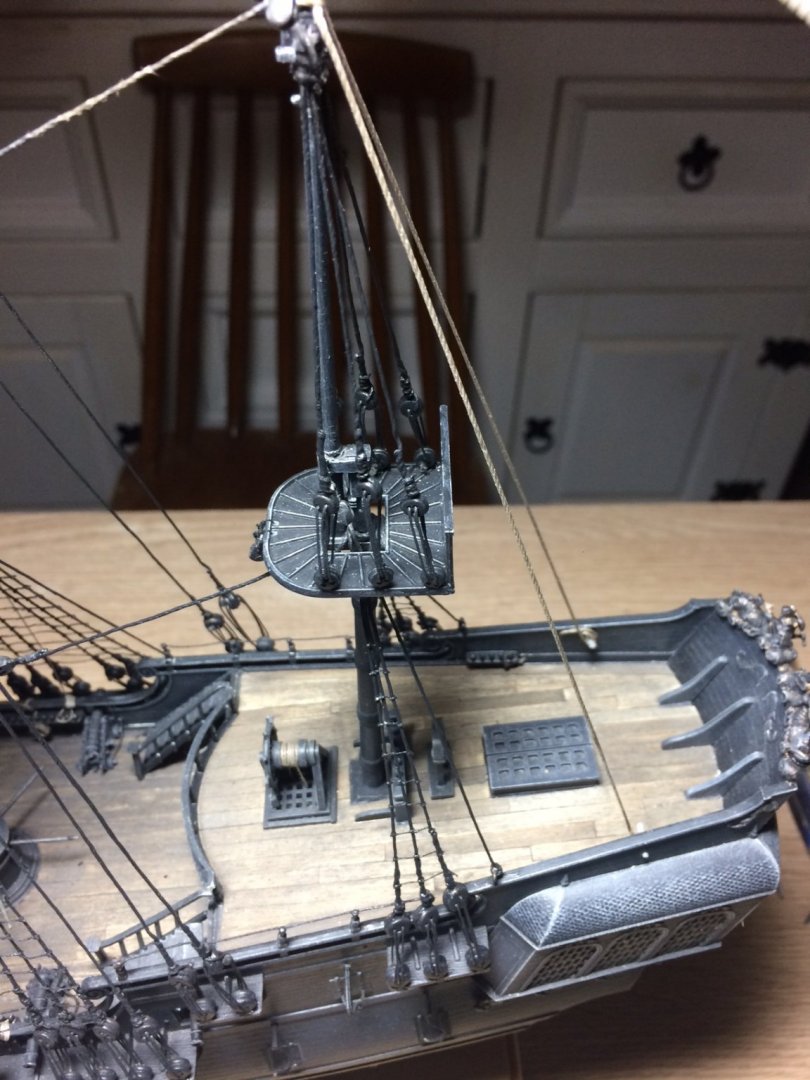
Good day all,
Some more good progress today - I made up the upper mizzen shroud ropes and attached the dead eyes (Just a bit of trivia I counted how many dead eyes I have fitted and roped up - 136) they just need lacing up and painting.
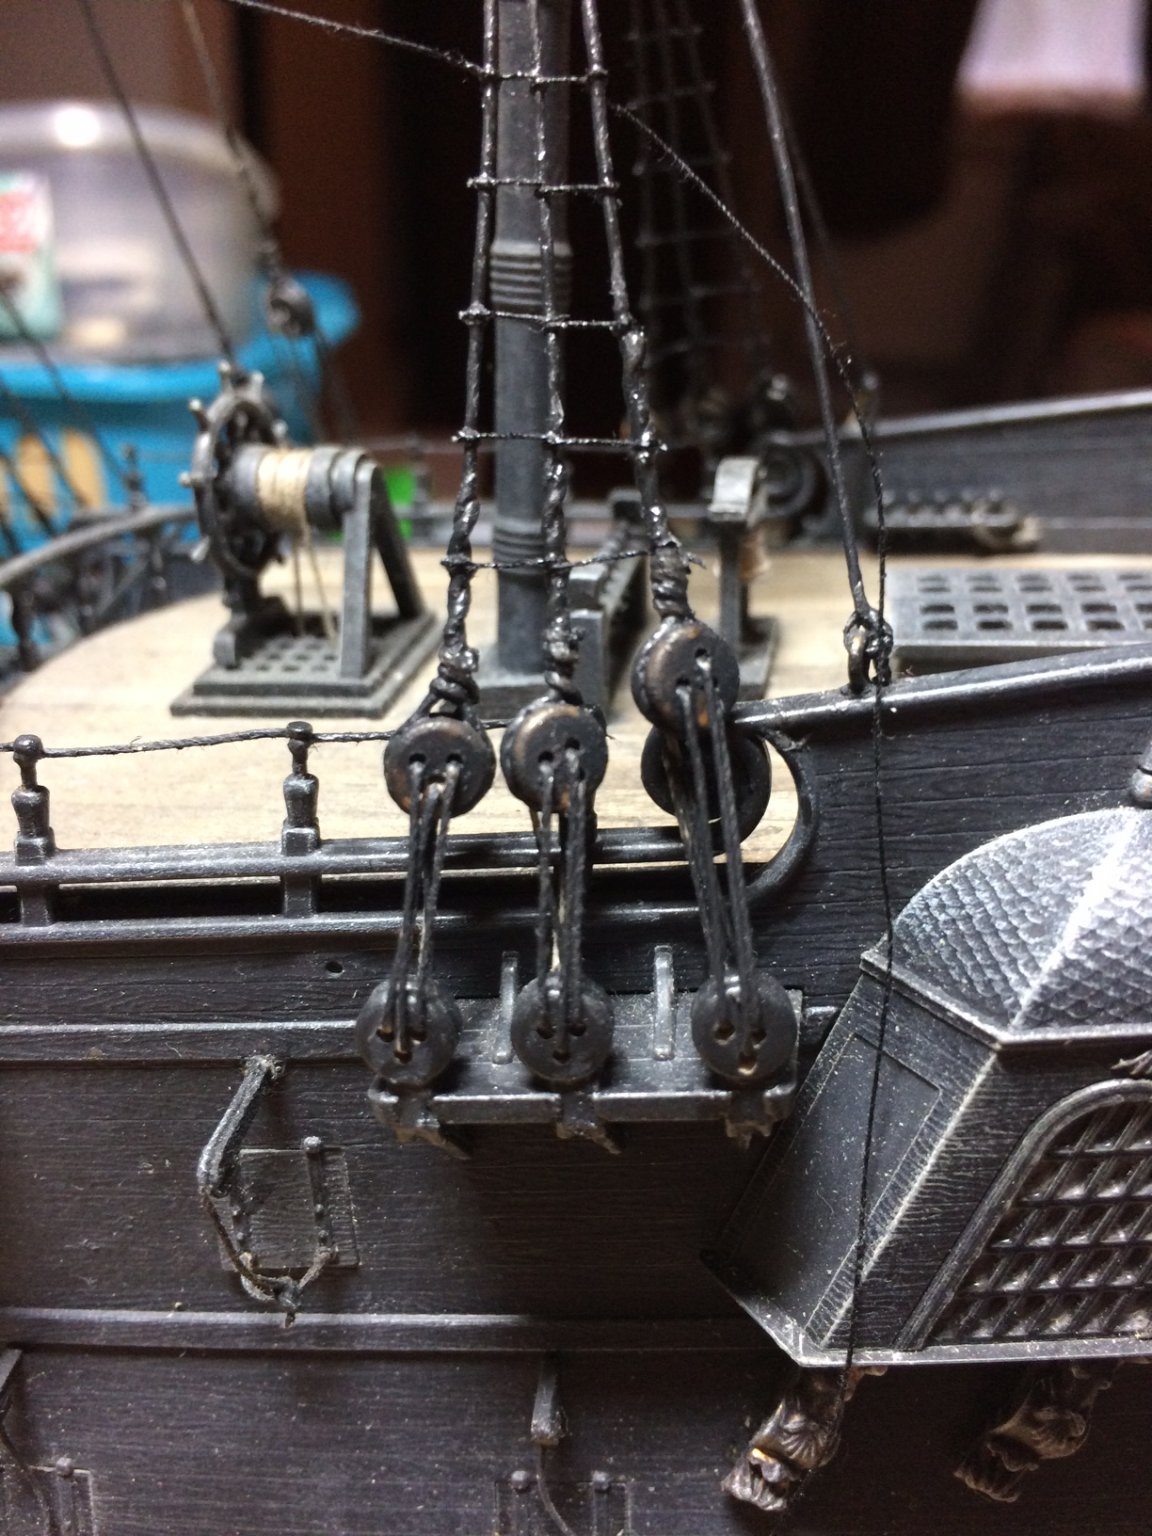
I also added the two blocks to the ends of the upper main yard - then starting on the one side a ran the lift rope through the blocks and down to the bulkhead handrail where it was tied off.
Added another pic of the deck.
OC.

-
4 minutes ago, marktiedens said:
Thanks for the info,but my camera has no focus mechanism - neither auto or manual. It only has a switch for either close-up or distant. Someday when I get around to getting a cell phone I will probably use it instead.
Mark
Just put the focus point slightly in front of what you want to capture, generally works for me.
OC.
-
6 minutes ago, marktiedens said:
Thanks Frank - those arches are photo etched brass from the kit. No way I could make them that nice. This kit has 11 or 12 sheets of etched brass - lots of nice details. The blue & yellow are not as bright in person as the photo shows - I used a very bright LED lamp to take the picture. I only have a point & shoot camera,so some of my photo`s are not that good - the range of focus is awful.
Mark
Quick tip with focus - most focus systems look for contrast and will often focus on the background and not the intended subject (especially with a macro shot) try to grab focus on something a bit closer that might make the distance more out of focus and bring what you want into focus.
OC.
-
1 minute ago, mtaylor said:
You're just flying along, OC. And it looks great.
Thank you kindly mark, I think the pics are looking better also after I fiddled with my cell phone camera settings - just exposure and anti shake settings.
OC.
- popeye the sailor, EJ_L, Canute and 1 other
-
4
-
I understand the idea behind the inflatable hangar - so they could take it with the Blimp.😉
OC.
- BETAQDAVE, popeye the sailor, Canute and 1 other
-
4
-
-
-
That looks mighty fine mark.
OC.
- marktiedens, Retired guy, fmodajr and 1 other
-
4
-
Stunning build - you should be very proud.
OC.
- md1400cs, paulsutcliffe, EJ_L and 2 others
-
5
-
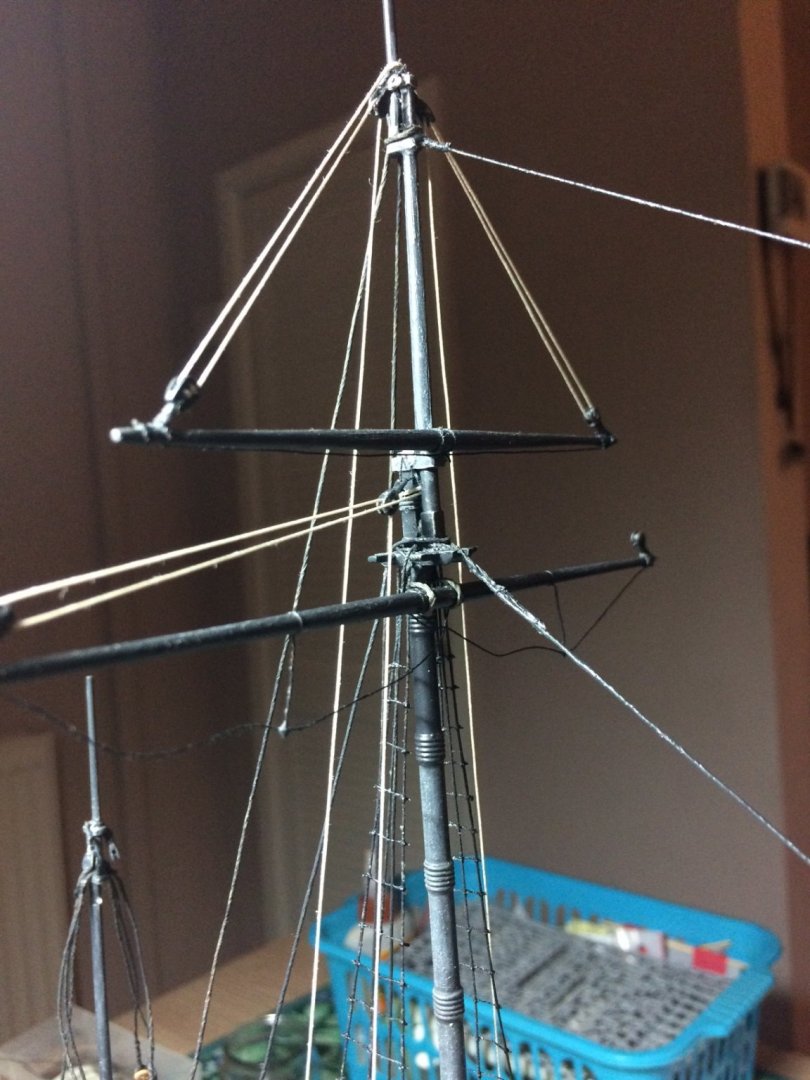
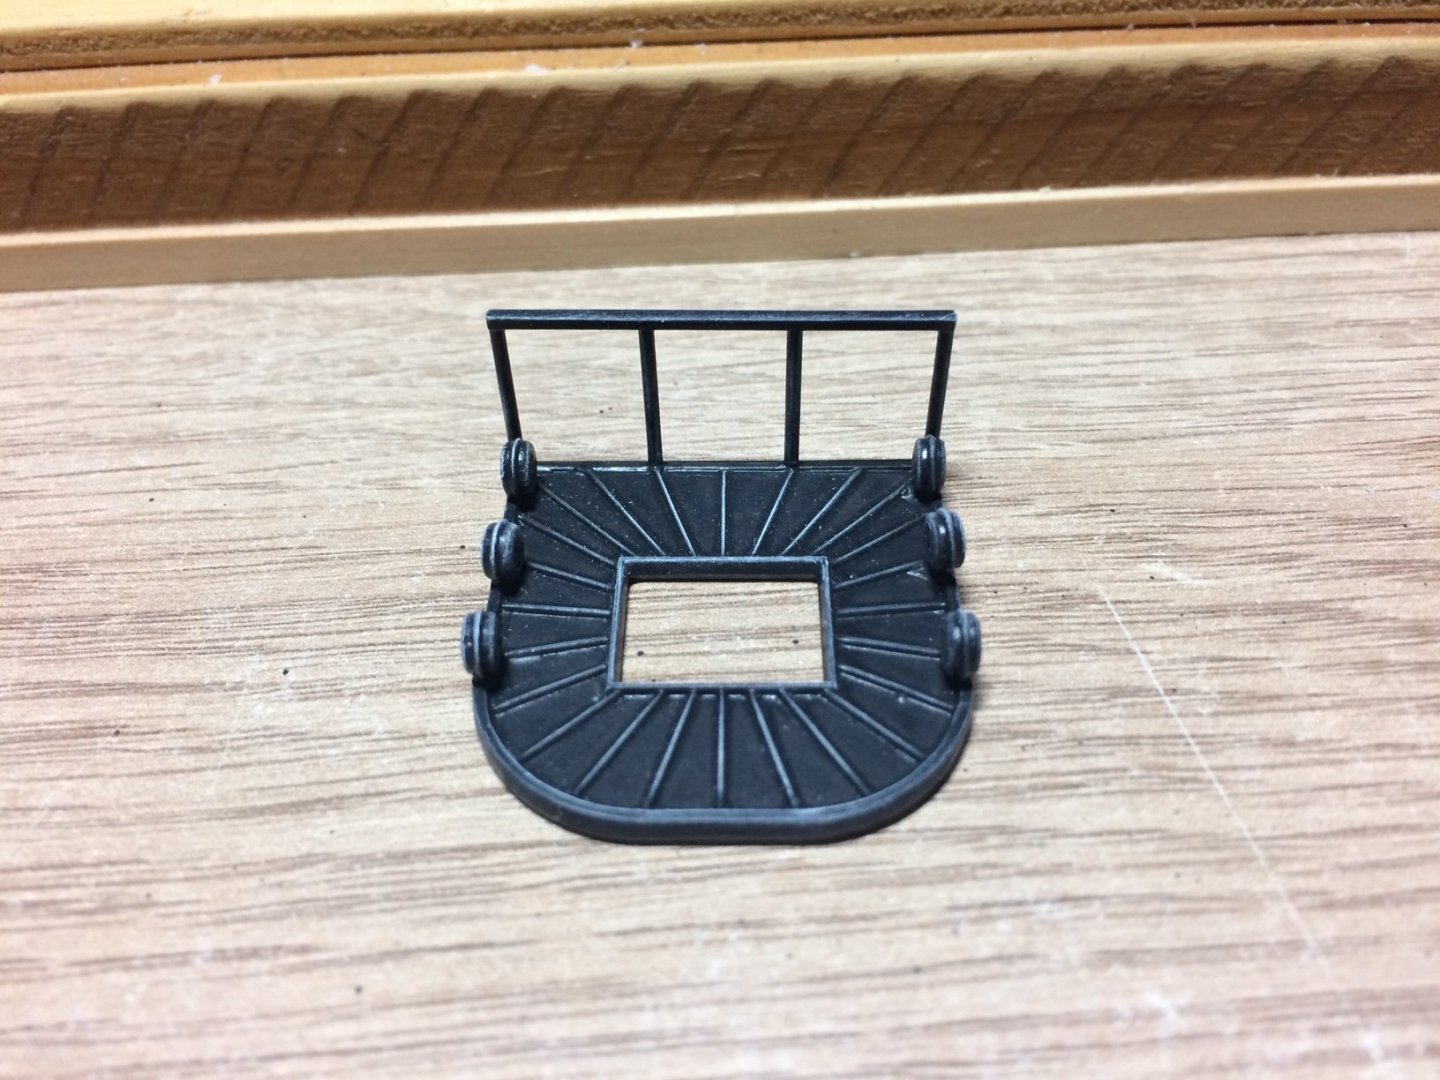
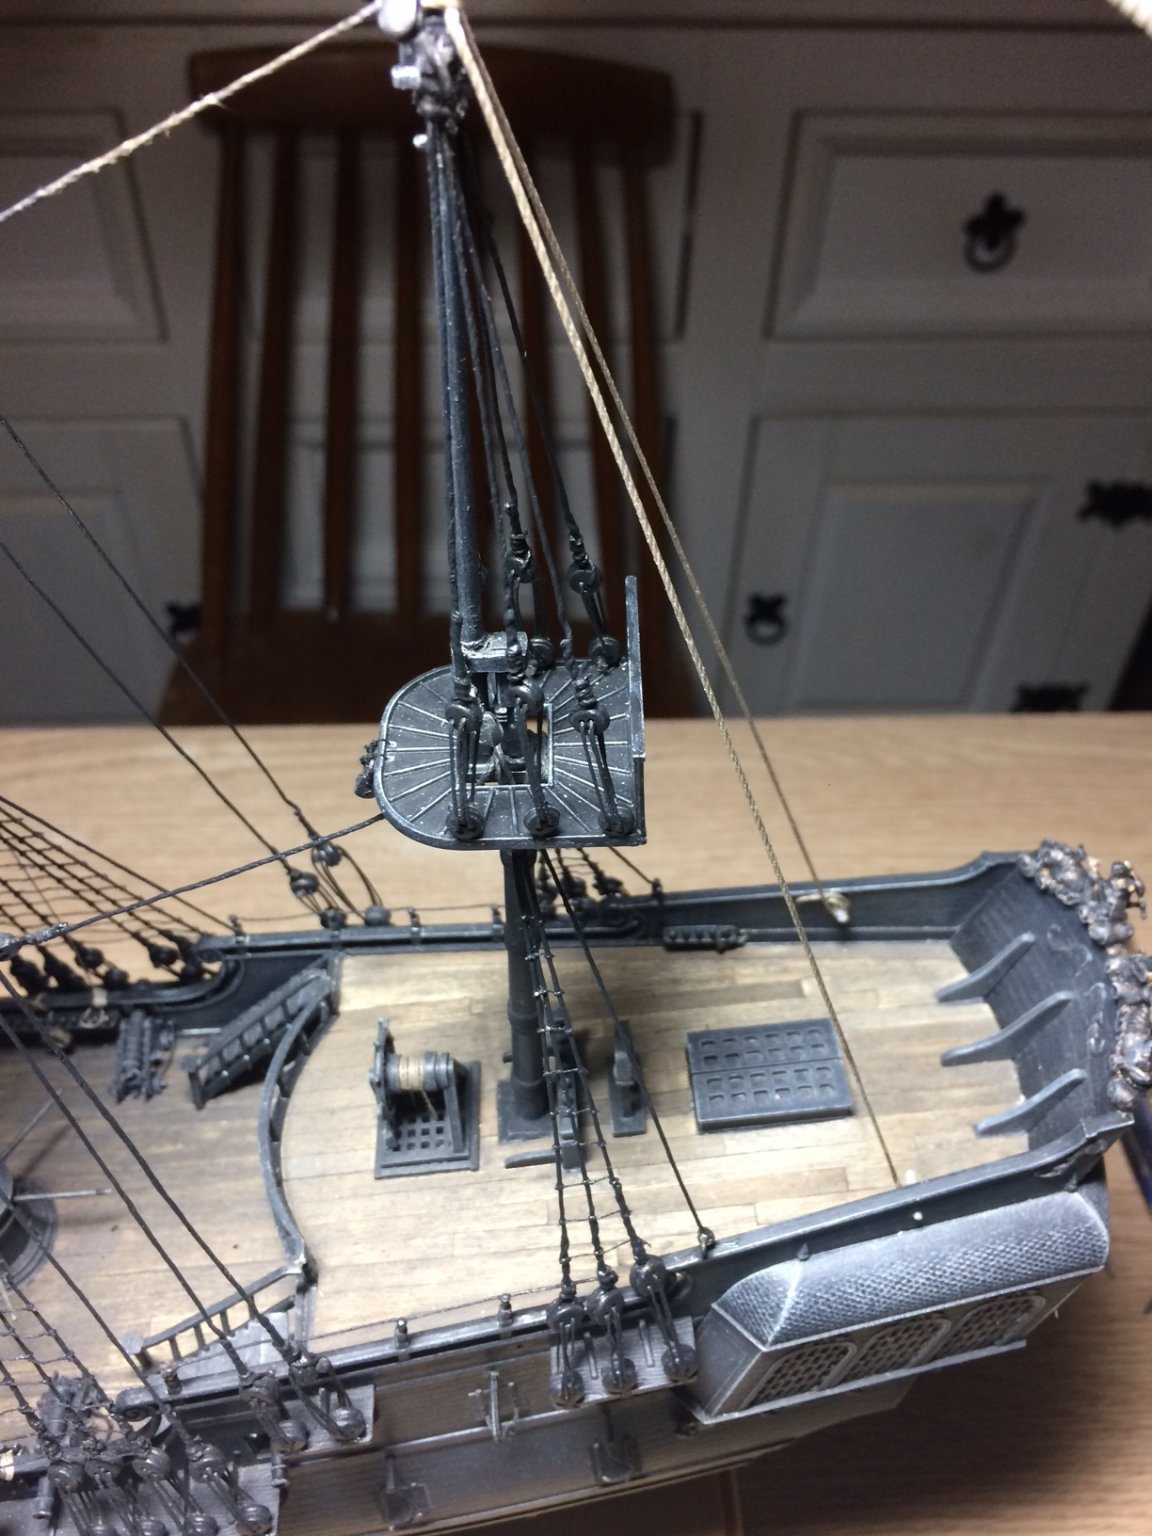
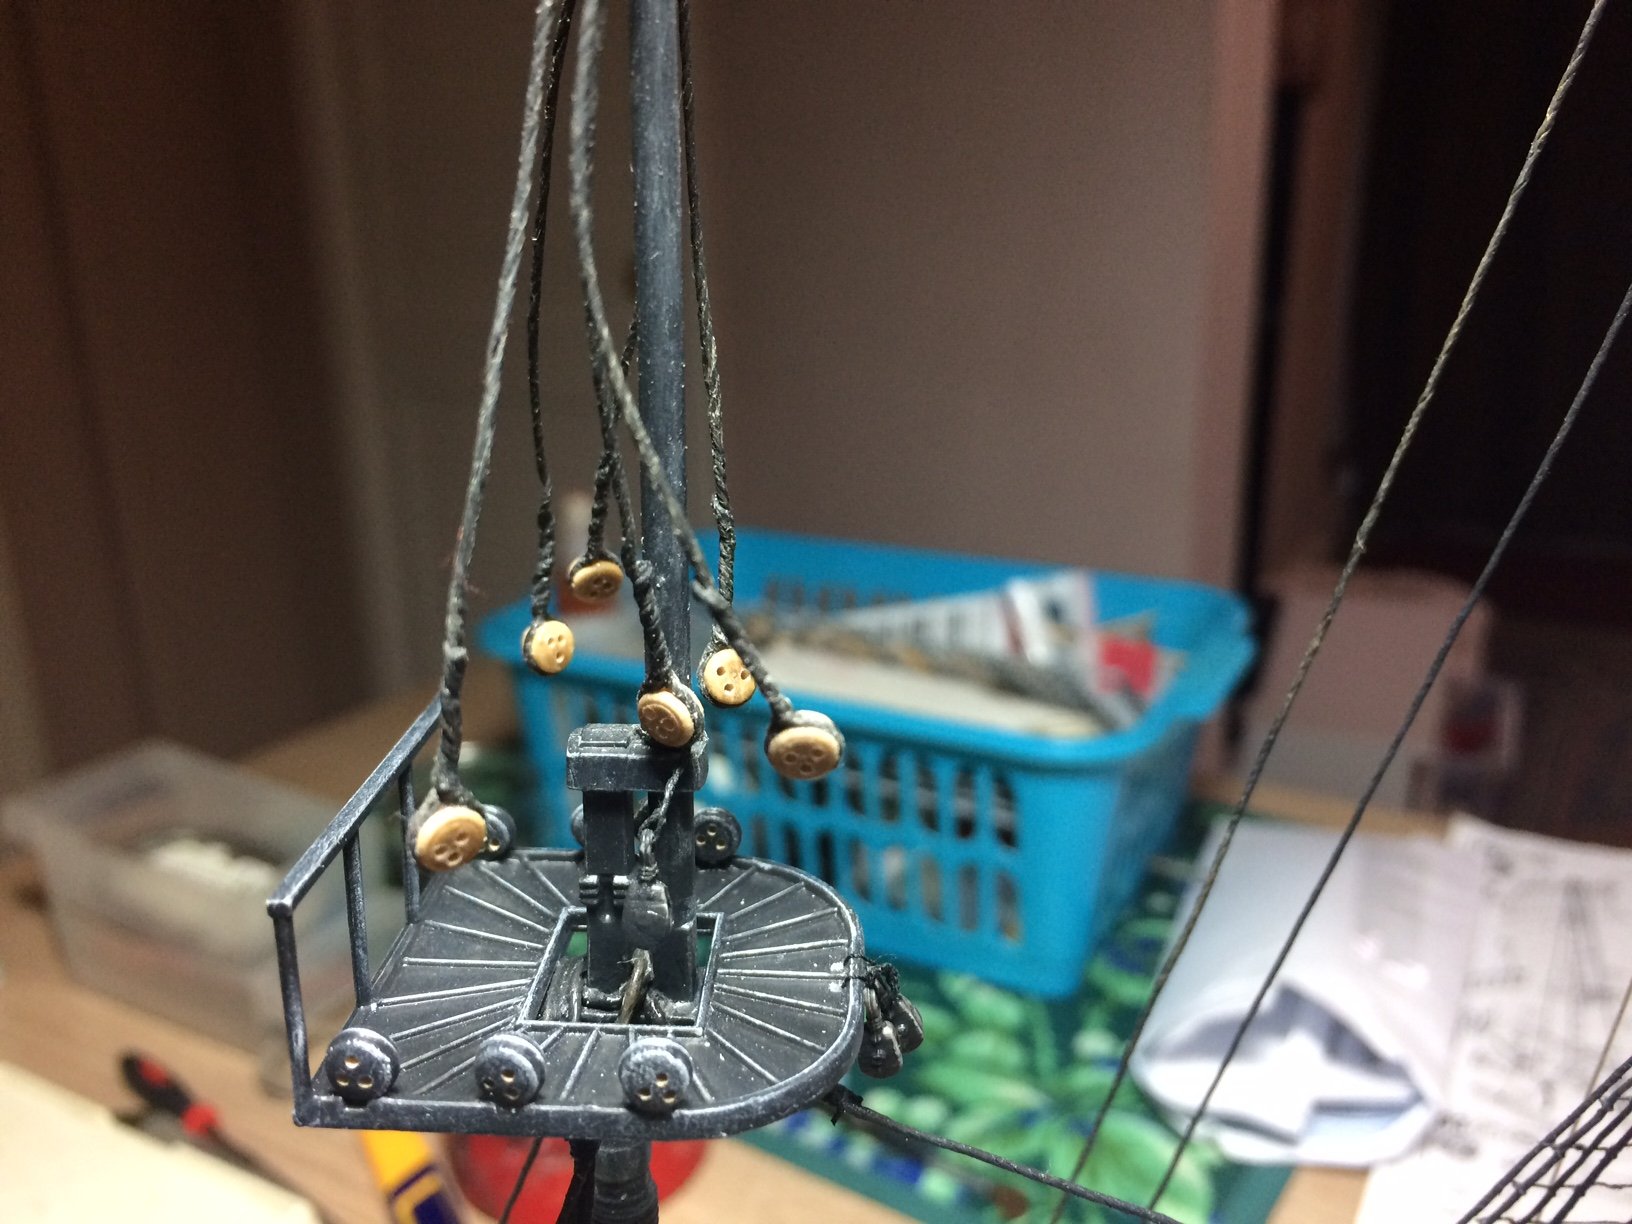
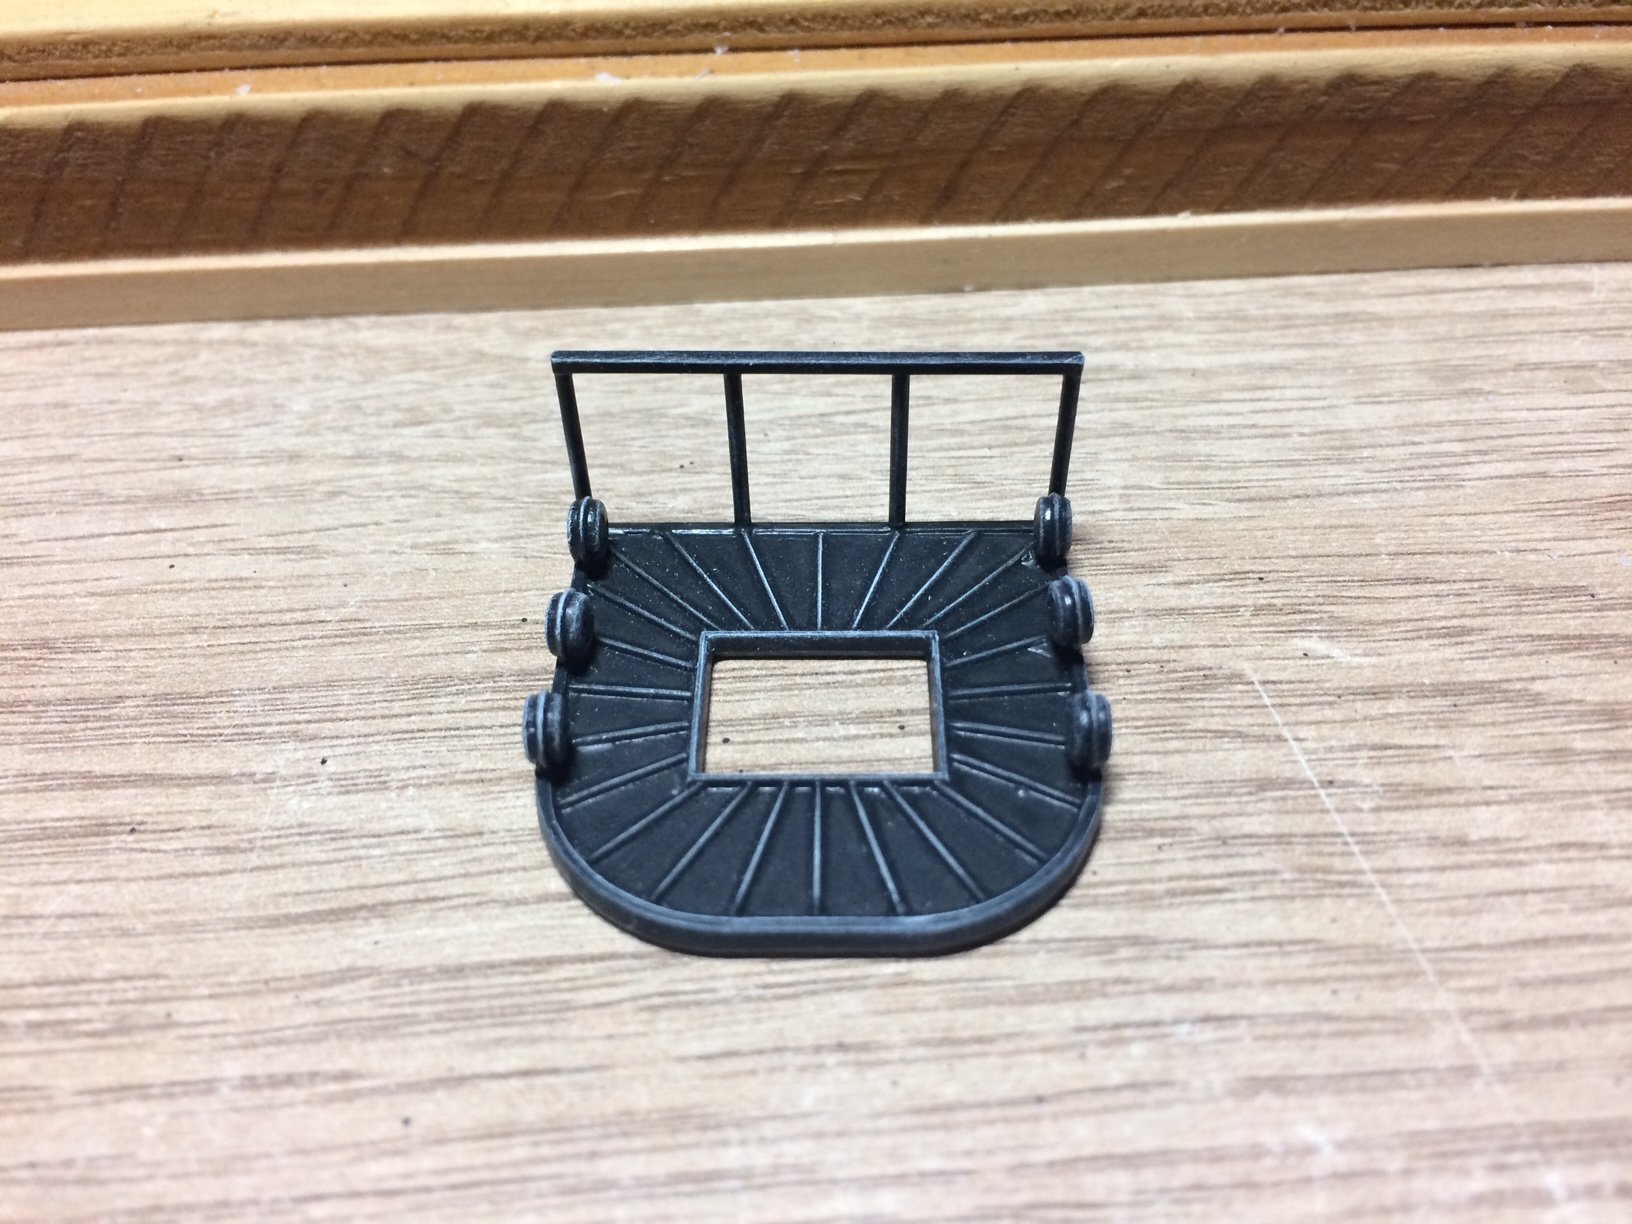
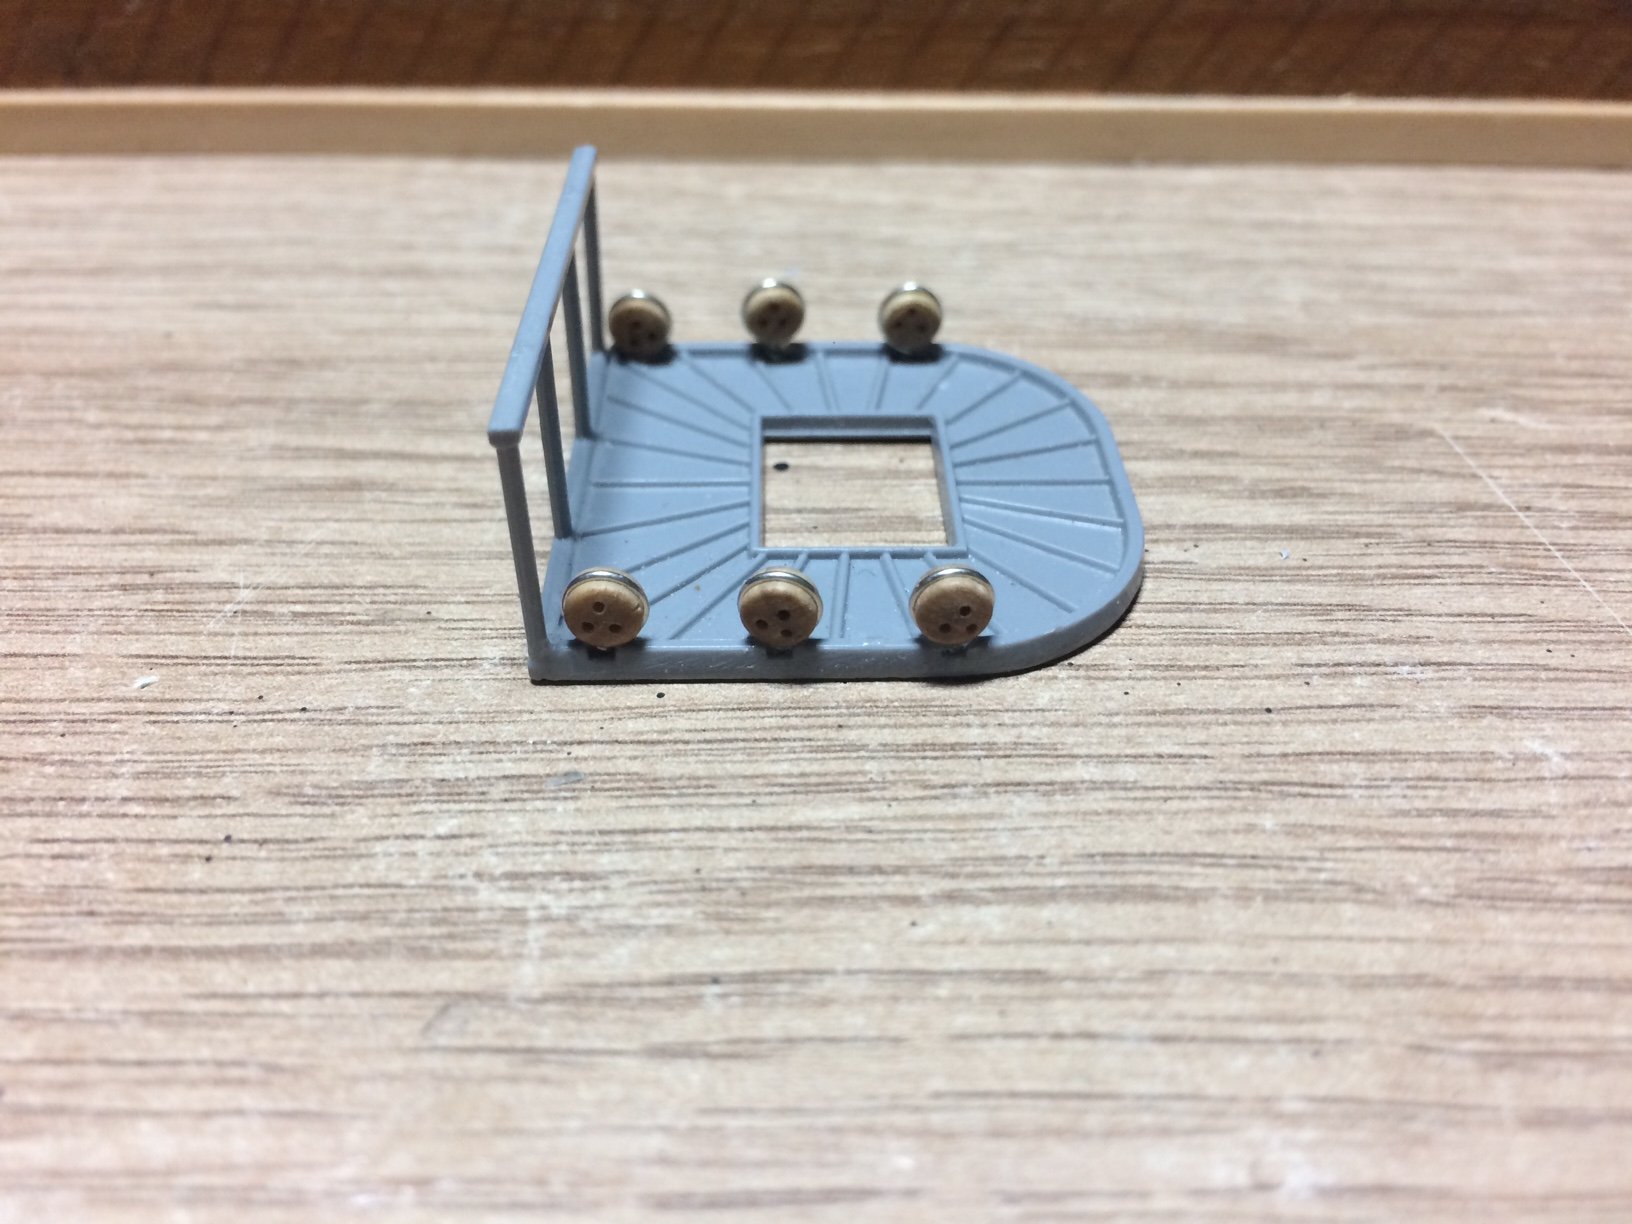
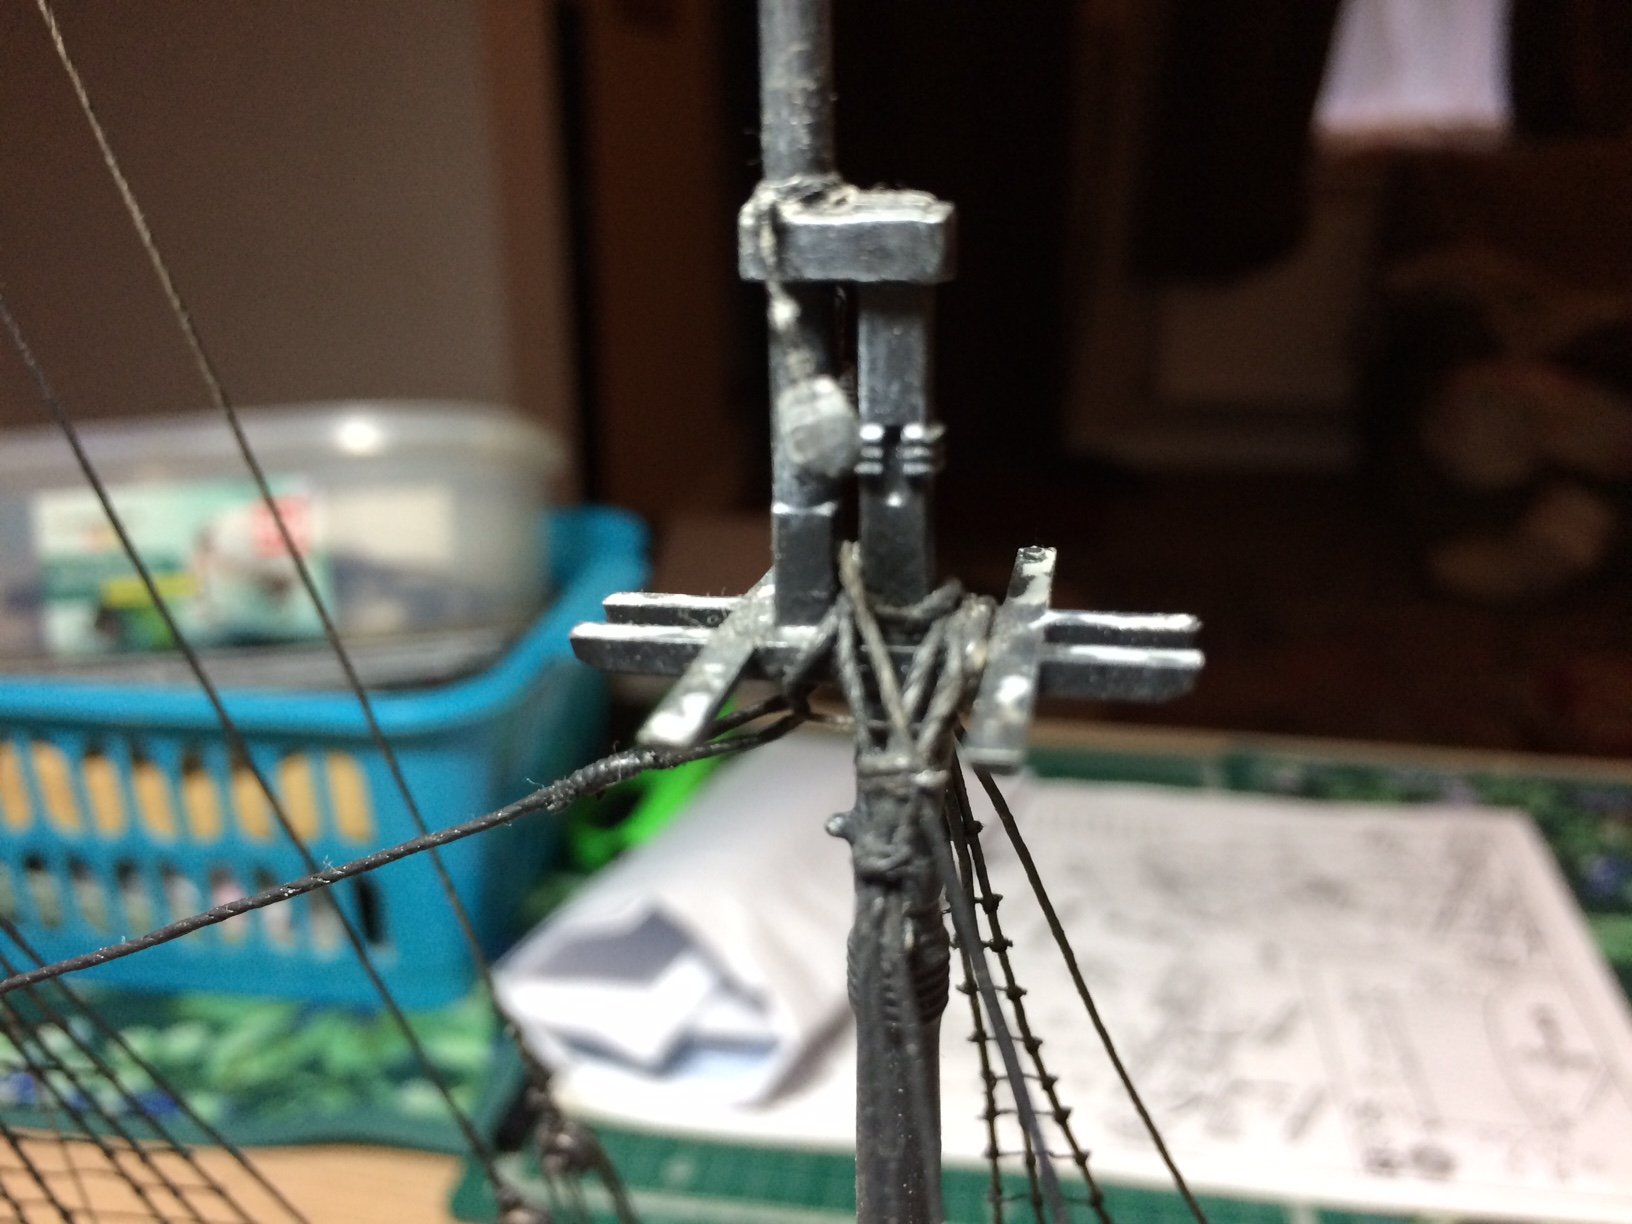
Next - was to work on the mizzen tops, I started by attaching the hand rail, then after cleaning up, I made my usual dead eyes by attaching fuse wire around the outside and twisting it to trap the eye, then I attached the tail of the wire to the tops, this was repeated six times, then a couple of coats of paint and a bit of dry brush highlighting.
OC.
- Kevin, lmagna, popeye the sailor and 9 others
-
12
-
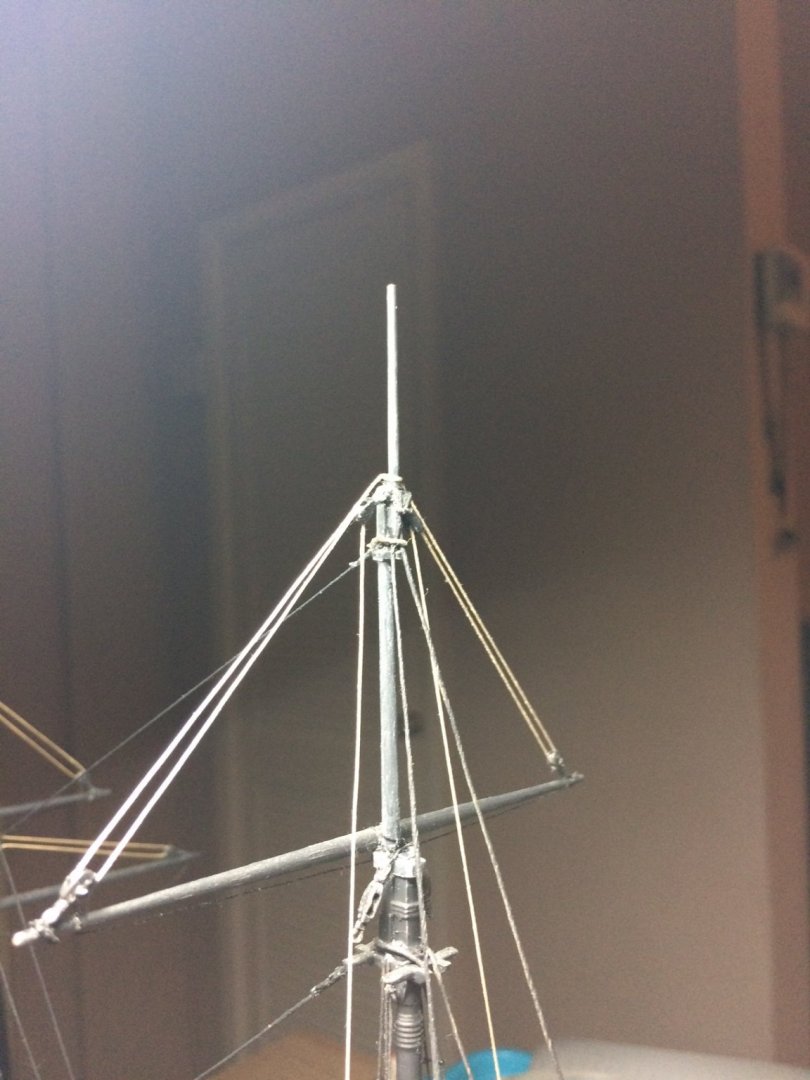
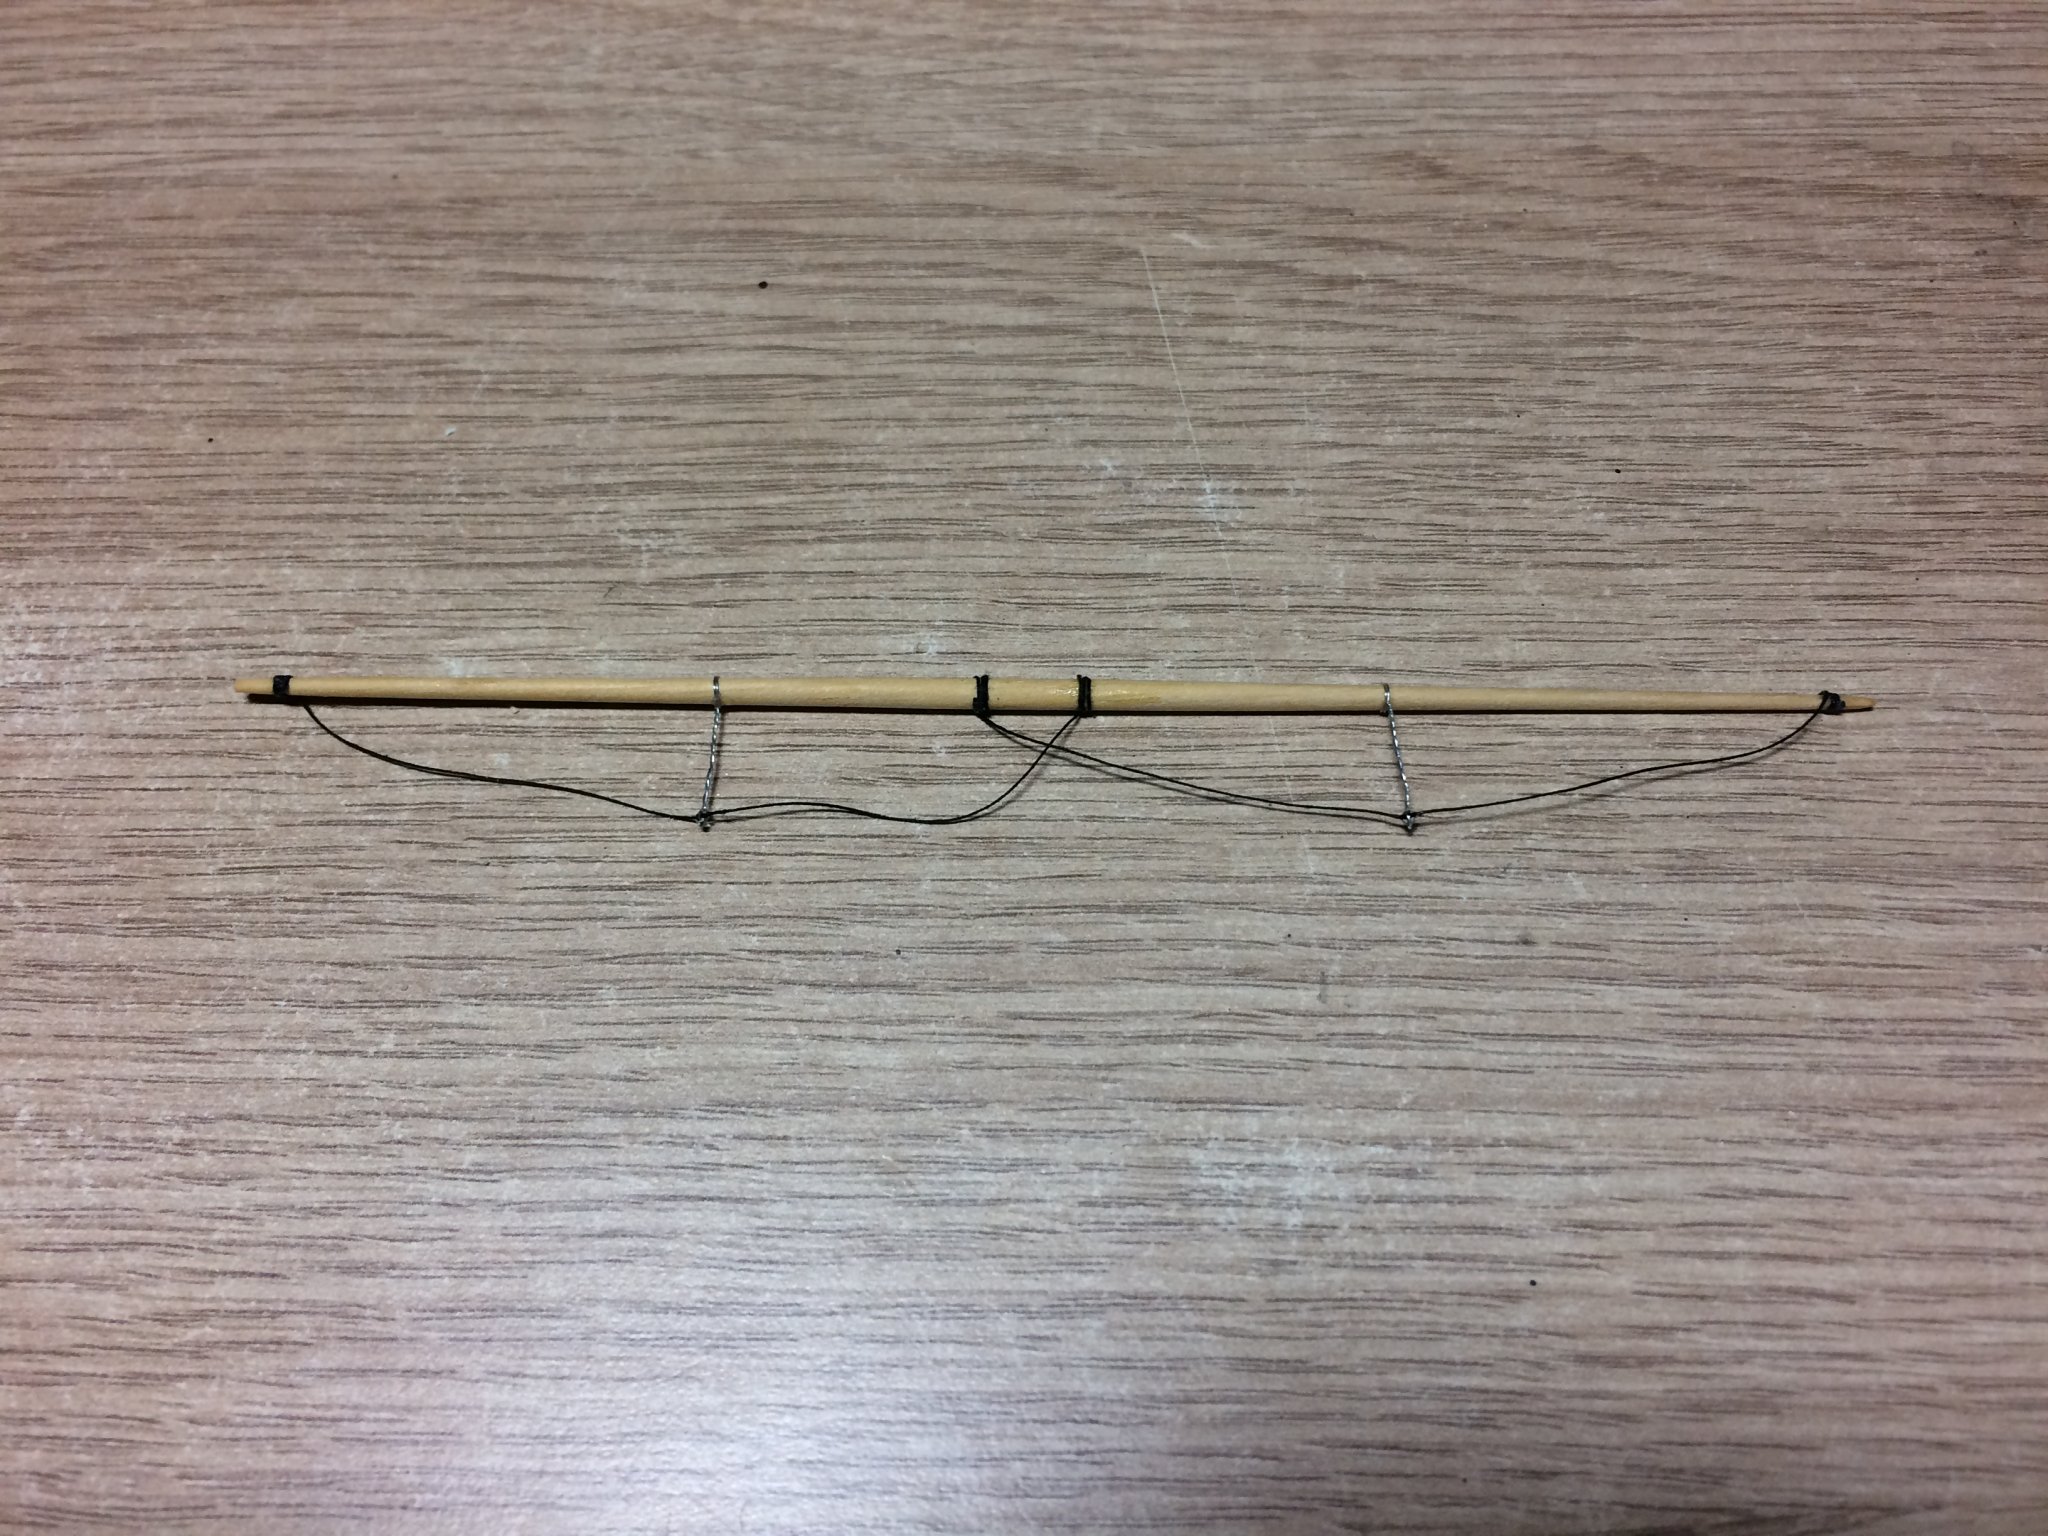
There's just no stopping me - another blast on the pearl, I started on the main upper yard - firstly I attached two lengths of fuse wire around each mid section of the yard then twisted them to form a thicker section sticking down (I left the ends un twited) then I attached the foot rope (thread) at on end and added a dab of ca, I then ran the thread through the bottom of the fuse wire - then twisted the fuse wire to trap the thread, I then wrapped the other end around the opposed mid section of the center yard, and added a dab of ca.
I then repeated the same on the other end - and added a couple of coats of paint.
After boring out a center point hole I attached by lashing and ca to the upper main mast.
The pictures show the un painted yard and with it in place.
OC.


- marktiedens, cog, Kevin and 9 others
-
12
-
2 hours ago, CDW said:
That looks very authentic OC. Glad your mojo is back. Carry on mate.
Thanks mate.
OC.
- mtaylor, popeye the sailor and Canute
-
3
-
A bit more work on the pearl I have now finished the rats on the lower mizzen, next stage is to work on the main upper yard attaching the blocks walkway ropes etc.
OC.

- egkb, SigEp Ziggy, BLACK VIKING and 12 others
-
15
-
Stunning work.
OC.
- fmodajr, BLACK VIKING and EJ_L
-
3
-
Tell you what mark - cockpits in model heli's you can basically add what you want to super detail them - like fuse wire for wiring runs, odds and sods of boxes anything really just adds to the sense that its a one off even if it is hidden.
OC.
- popeye the sailor, CDW, mtaylor and 1 other
-
4


Black Pearl by Old Collingwood - FINISHED - 1/72 Scale
in - Kit build logs for subjects built from 1501 - 1750
Posted
Evening all,
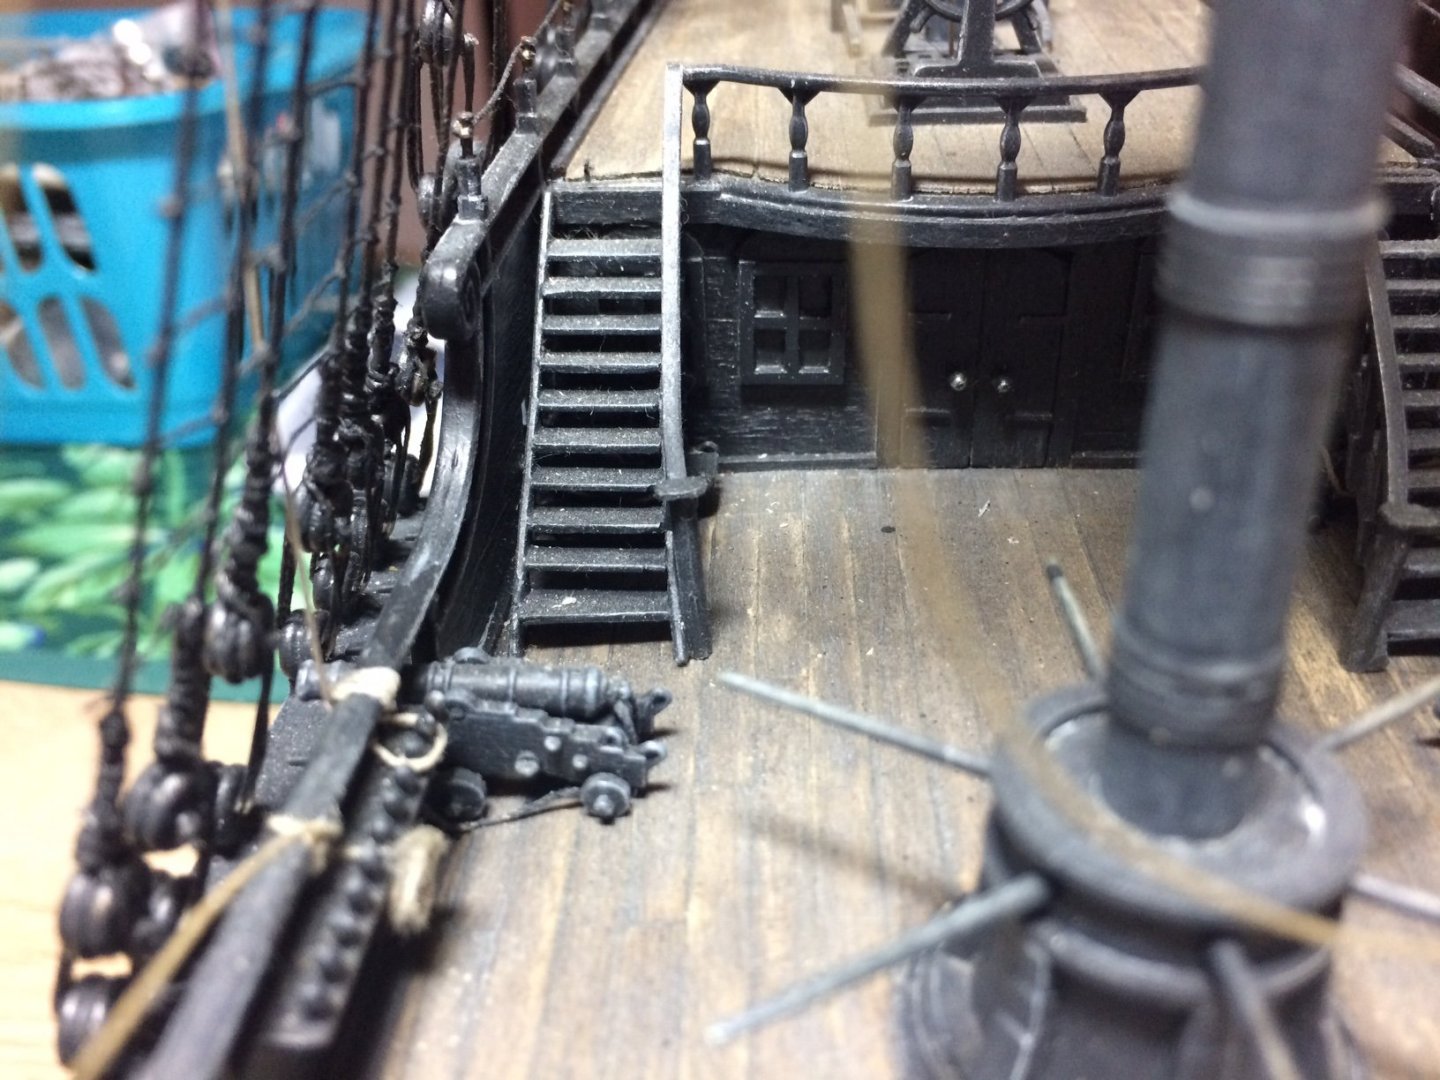
Some more good progress - firstly I painted the rear mizzen stays, then it was time to return to the main mast, It needed the lower yard making - first I started with a length of 5mm diameter dowel, this was cut to length then I slowly reduced its width and tapered both ends, then after some light sanding I worked on the foot ropes - this was made using fuse wire for the center supports, twisted and glued, then some fine black thread was used for the foot rope, tied and glued and attached at each end.
After set a couple of coats of black was applied.
Just the one pic showing the yard minus the paint.
OC.