Beef Wellington
-
Posts
2,249 -
Joined
-
Last visited
Content Type
Profiles
Forums
Gallery
Events
Everything posted by Beef Wellington
-
 David - you can rest easy, there is plenty of historical latitude at this specific time period when these ships were designed and built, which was a great period of change to really do what you want. Built up bulwarks were the fashion, then moved back to open bulwarks, and then finally built up again. Armament wise, carronades gradually added to, and final replaced the quarterdeck and foc's'l cannon. Available plans are not consistent for specific ships, probably because of the factors above and depending on when they were drafted and what they represent (as designed, or built, or when in service).
- 310 replies
-
- 3
-

-
- Diana
- Caldercraft
- (and 1 more)
-
Photos look great. That could be an interesting way to go Mort, and obviously personal choice. Would you need to add or adjust any of the f'c's'l sdeck beams as these would be much more visible? Also meant to ask you, what did you use to simulate glass in your pics of the side galleries.
-
Hi John, your Pickle is looking very nice. My suggestion would be to redo the mast, and instead of using a joining a separate section, just file down the dowel to the appropriate size. Aside from visually wanting the mast and topmast to be parallel, I suspect that this would be a potential area of weakness that may prove to be a problem when you come to rig the backstays.
-
They are still used today as a command flag for officers of flag rank and for Commodores. As shown above, the flag for a Vice Admiral is reversed as the red spot (or 'ball') should be on the same side as the hoist. A Rear Admiral would have an additional ball in the quadrant below below, and an Admiral would have none (!). A Commodore would have a broad pennant (meaning 2 points) of the same design as above with a single ball.
-
Just a quick comment after doing quite a bit of research on this before. The horizontal band (or bands) either seems to be a later development, and/or something used by other non-Royal Navies. I believe the USS Constitution currently has the horizontal band of copper plates in this fashion (open to correction here), but many contemporary references for RN ships indicate that the line of the plates around the hull continues up to the water line with no horizontal band. The copper pattern on Trincomalee also represents this, but of course this is not contemporary either.
-
Congrats on getting that completed. I would definitely recommend spending a lot of time with some filler and sandpaper to get the hull into a nice smooth form before starting on the 2nd planking.
-
Love these ships, and you seem to be very skilled with the PE. Definitely post more soon!
-
Love the "look" of her Joe, those shots really highlight not only your focus on the detail but also the way you've tied everything in together and achieved a very realistic scale look. Definitely something to aspire to.
- 140 replies
-
- 2
-
-
- benjamin w latham
- model shipways
- (and 1 more)
-
Will follow along as well if I may Luc, very interested in seeing you approach this. Best of luck.
-
The account sounds a little like the Warren Commission assertion of the 'magic bullet' in the JFK assassination...
-
Thanks Chuck, will do.
-
I am in need of various sizes of Syren line to help me plan to complete the rigging of the quarterdeck/foc's'l armament on my HMS Jason Build. Given that I've used this on the upper deck armament I would like to keep the the build consistent, and investing in a ropewalk for this is not really an option given the small quantities involved. I do not need huge quantities, but hoping that some people out there may have some spare or unused packets that they would be willing to part with. I would of course generously compensate you. Light Brown, 0.008" rope Light Brown 0.012" rope Light Brown 0.025" rope Cheers
-
Congratulations on battling through though doesn't sound like it was much fun, and we can all relate to that. You've got some very creditable results there despite the challenges, and the top and butt planking looks great. I know its not much consolation, think we are all struggling with the inconsistent, poor quality of even aftermarket providers. Each time I have had to order something from CMB, I've added in some maple strip which I will need for the quarterdeck and foc's'l. Aside from the poor quality you allude to, I've been supplied with wood that clearly wasn't even maple (limewood strip and sheets of something that looks like soft maple, cherry and something I can't even guess at after I explored cutting my own strip).
- 310 replies
-
- 1
-
-
- Diana
- Caldercraft
- (and 1 more)
-
That is some mighty fine planking BE at this size, really highlighted after your cleanup and finish.
- 70 replies
-
- 1
-
-
- 22ft Yawl
- Vanguard Models
- (and 2 more)
-
This looks like a fascinating project, off to a great start!
-
Looking great. Your bending contraption looks very intriguing, can you share more?
-
looking good, seems you are battling through Mike, although I do see copper in your future 🙂 That's a fascinating find re: the carronades on Scorpion. I have to believe that it was created to document the clear problem and mistake that someone made.
-
Thanks for kind words Walrusguy, Joe, Chris, Jean-Paul, Robert and all the likes. I hope this log is useful to others, just as I've benefited from so many others. @Carl - know you've been there from the start, so congrats on hanging in there @Ben - I have no doubt looking at your 'mockups' that you will end up with a fine model, seeing other models with upgraded rope made me green with envy (that is one of the things that I would have done differently) @Eamonn - maybe I'm being unfair to myself, maybe closer to 7 1/2 years, you'll get there as well buddy, the Ballier is looking outstanding @Mike_H - not going anywhere and will continue to follow your great work. I will be getting back to 'Jason' at some point but there are some decisions I need to make now, I'll make updates in due course. What my "vision" is probably the biggest @Vane - I'll be keeping up with your many builds, and will certainly be interested to see more progress on Snake @Martin - I have on the shelf a case I had ordered from BlueJacket, all I need is the glass I think and someone to put it together because I have no idea how to do that. Definitely open to recommendations here as I haven't clue who to ask! @Mike - There are some key decisions I need to make on 'Jason', most notably the decking and how to approach some of the detailing (e.g. scrolls etc). I have been having a horrible time trying to get my hands on some decent material for the deck (unfortunately CMB have been less than consistent there...). so I'll probably be moving forward with the Queen Anne Barge primarily
- 800 replies
-
- 2
-
-
- snake
- caldercraft
- (and 1 more)
-
Photoetch brass black problems
Beef Wellington replied to Seems ok to me's topic in Metal Work, Soldering and Metal Fittings
I would suggest diluting the solution more, the flaky finish seems to be common when the concentration is too strong resulting in an overly fast reaction - at least from my experience... -
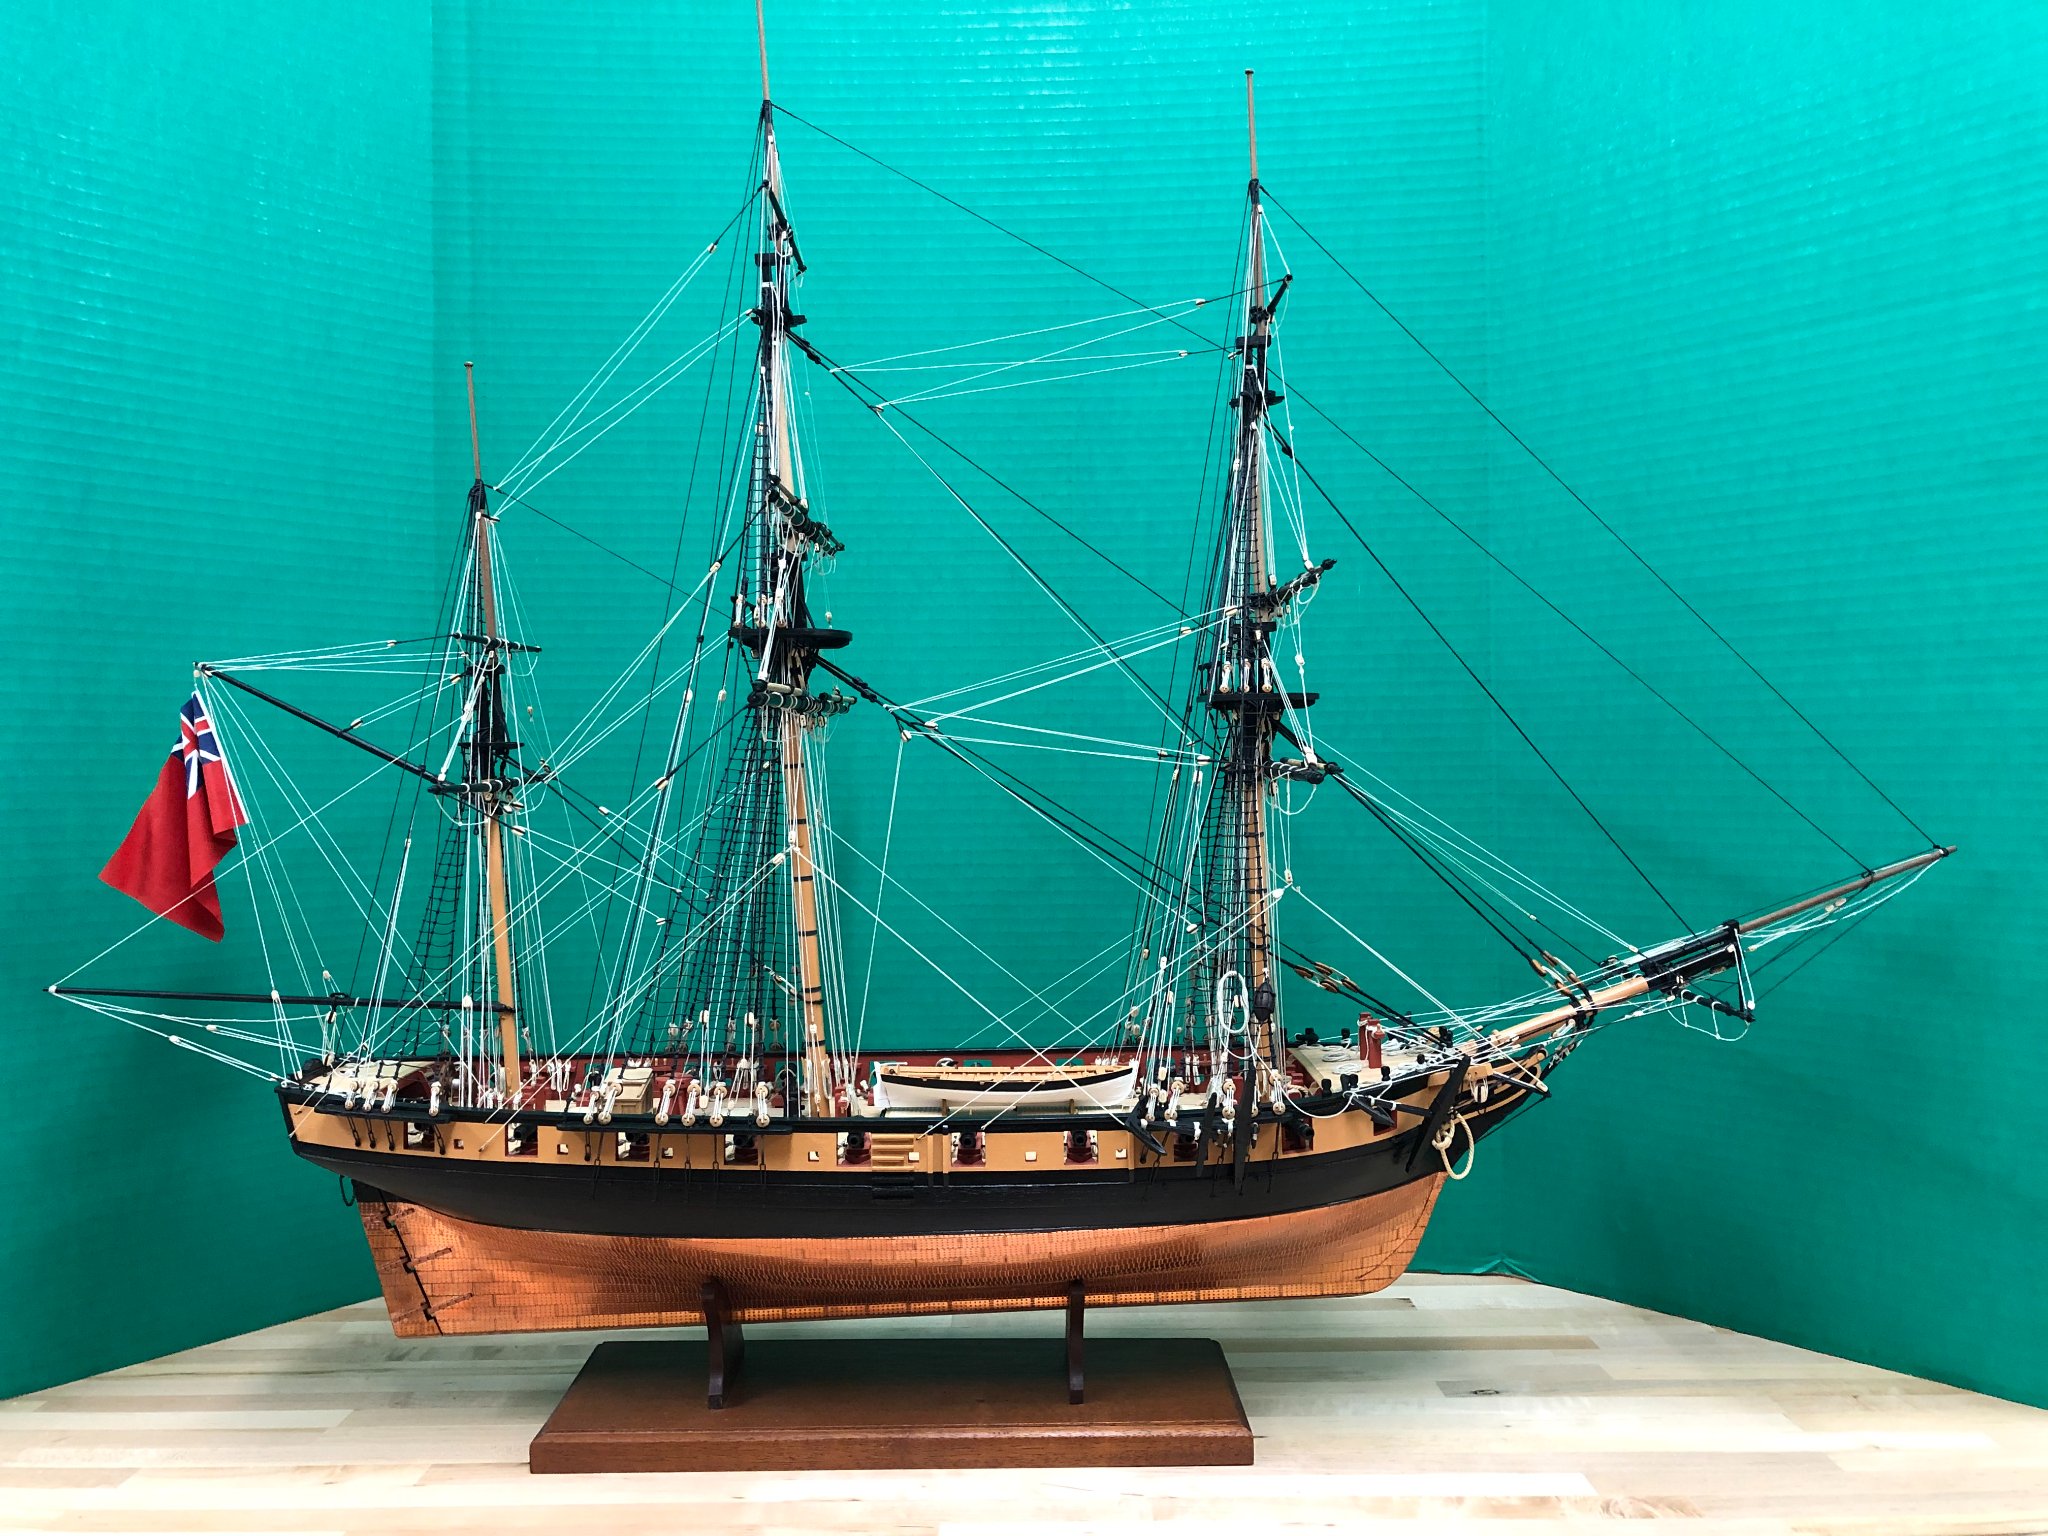
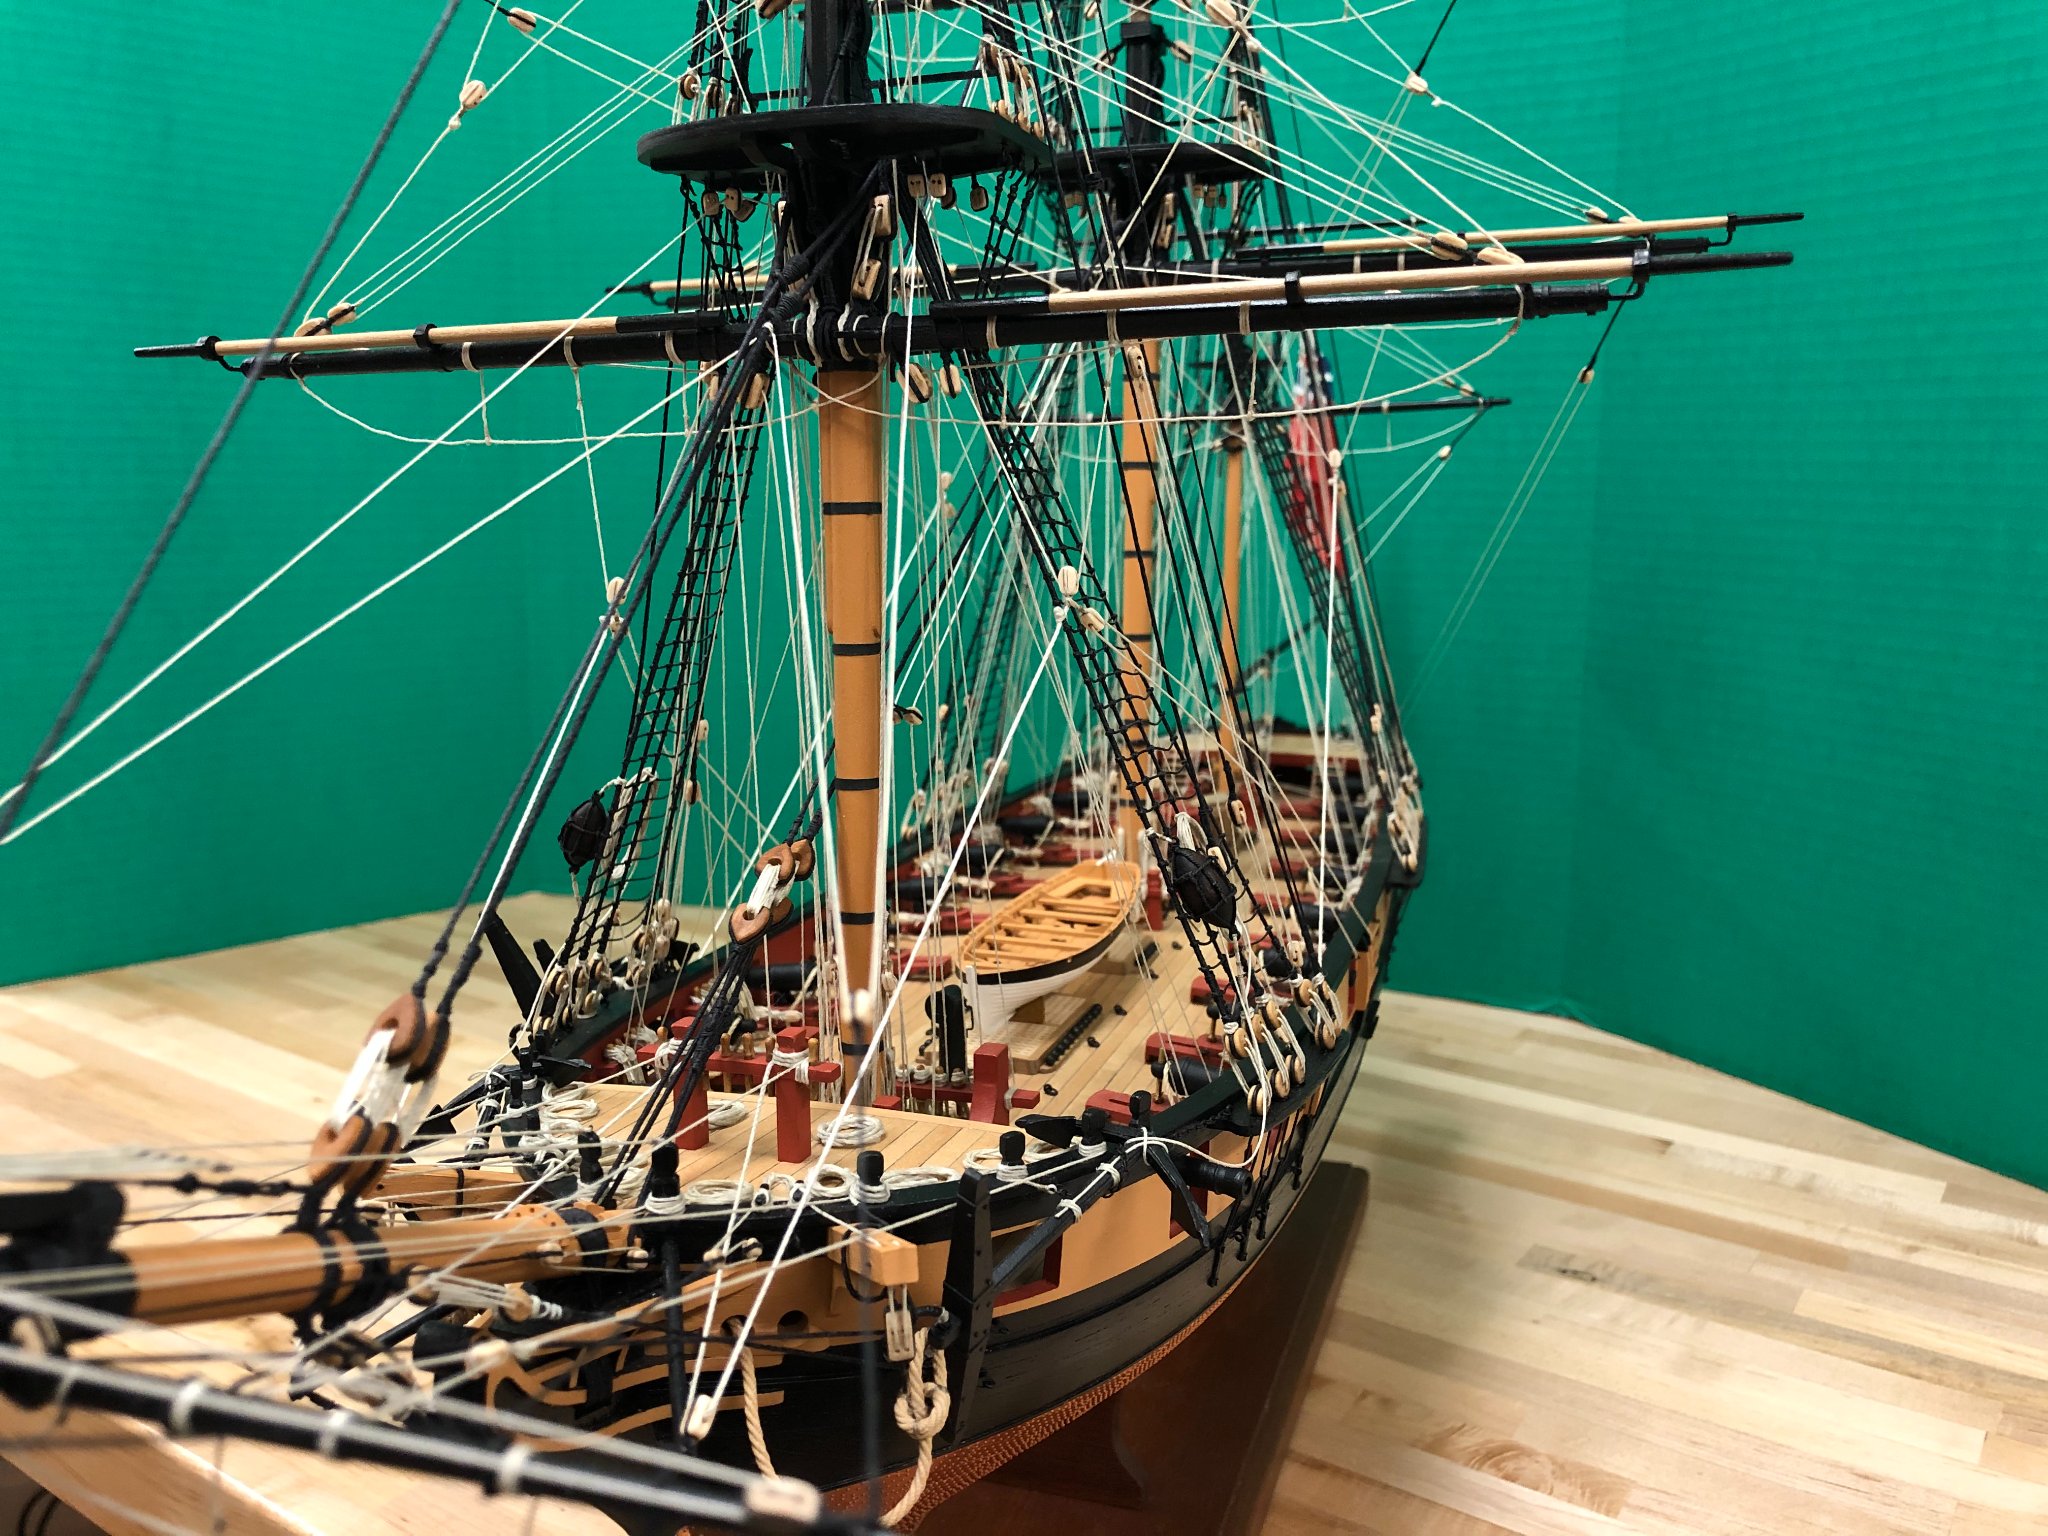
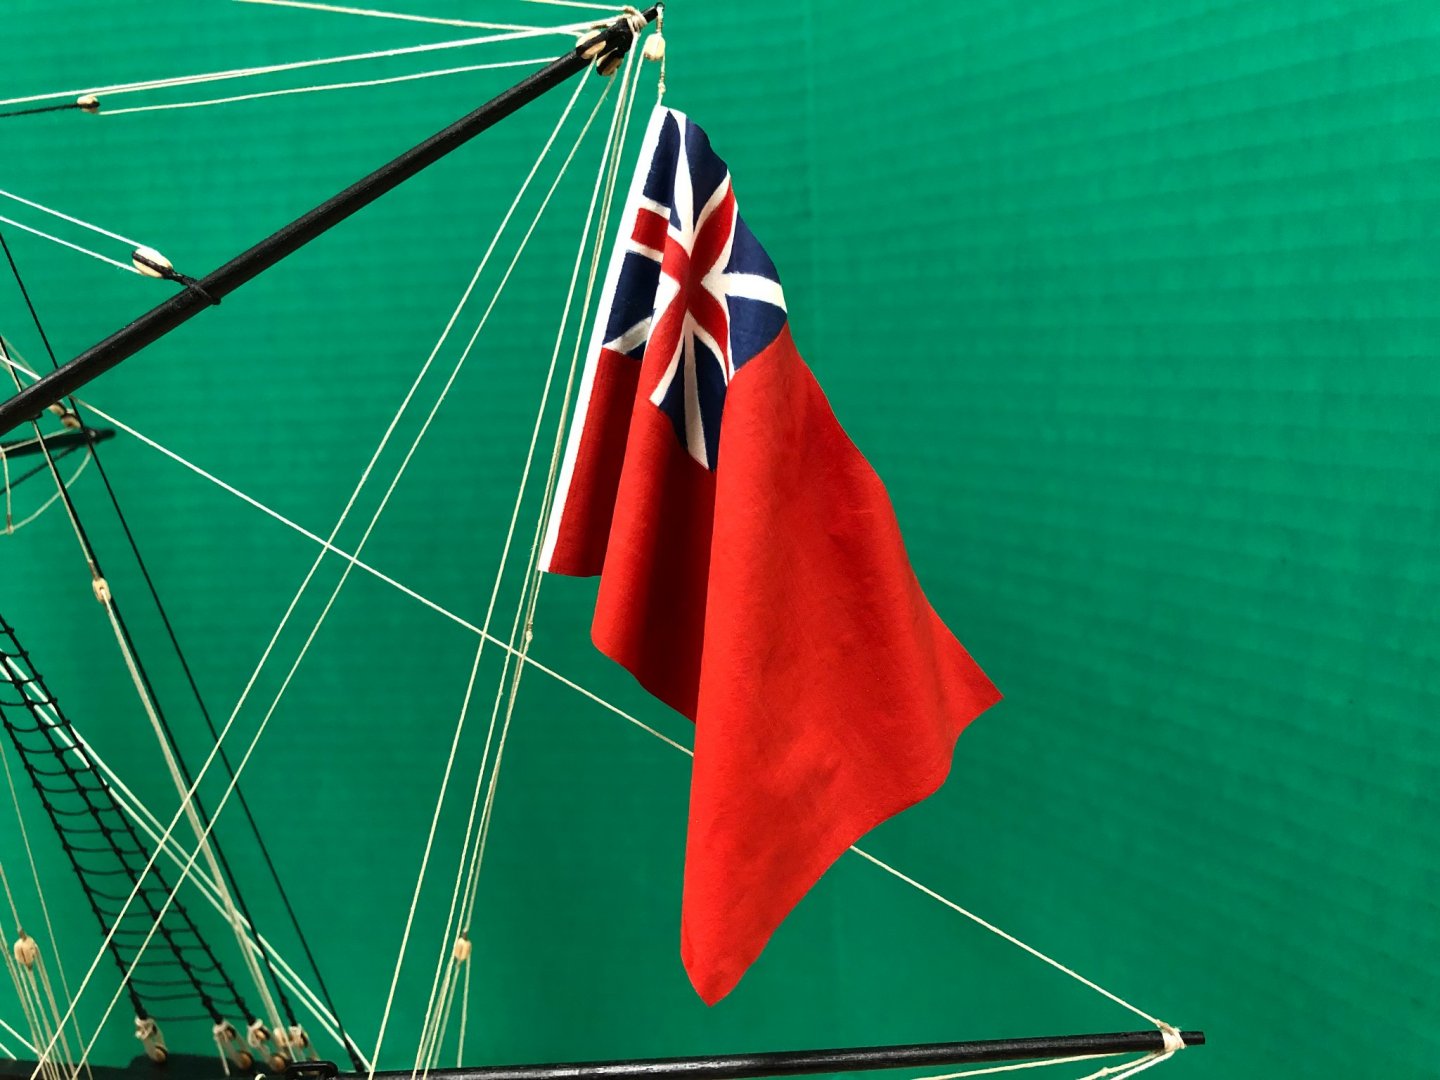
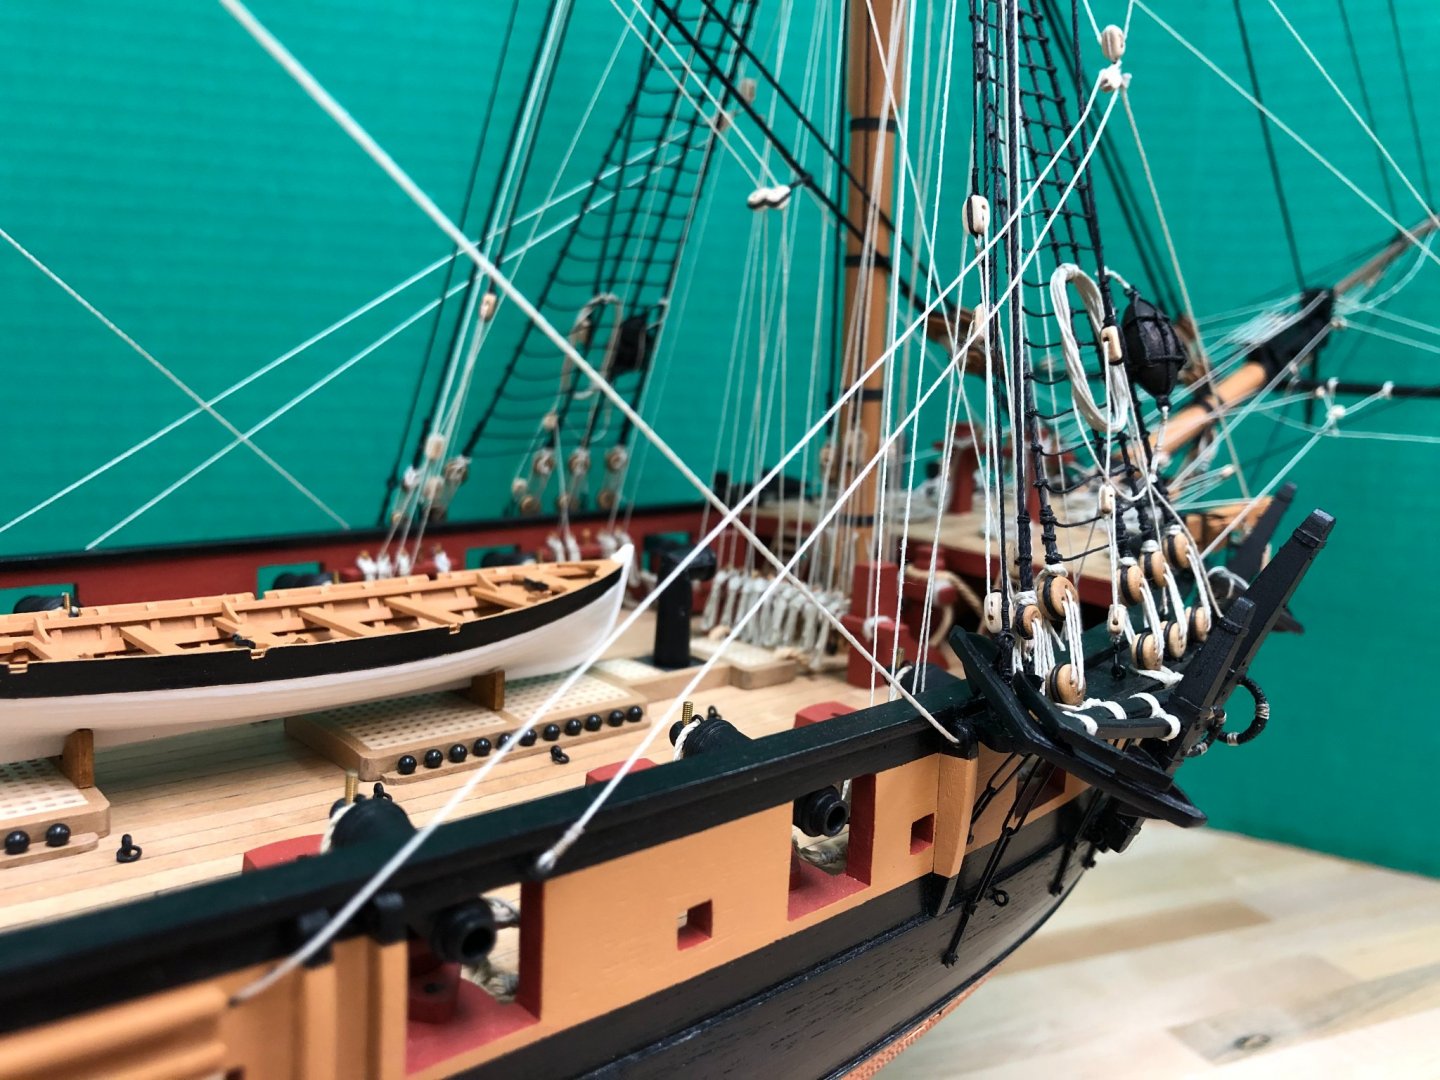
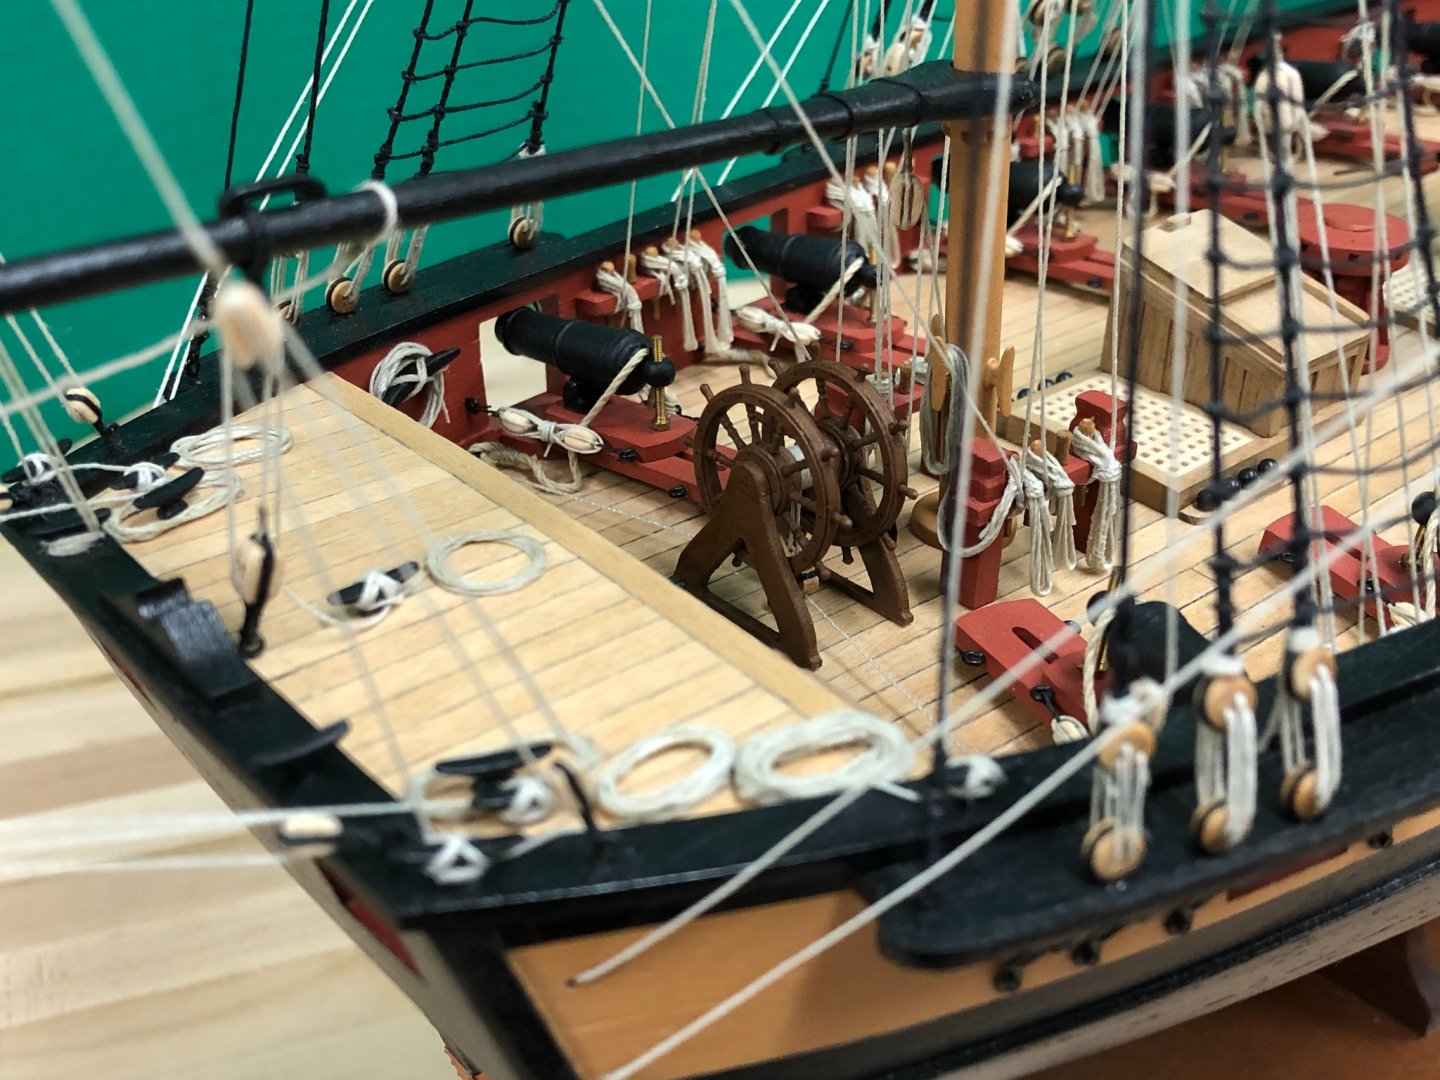
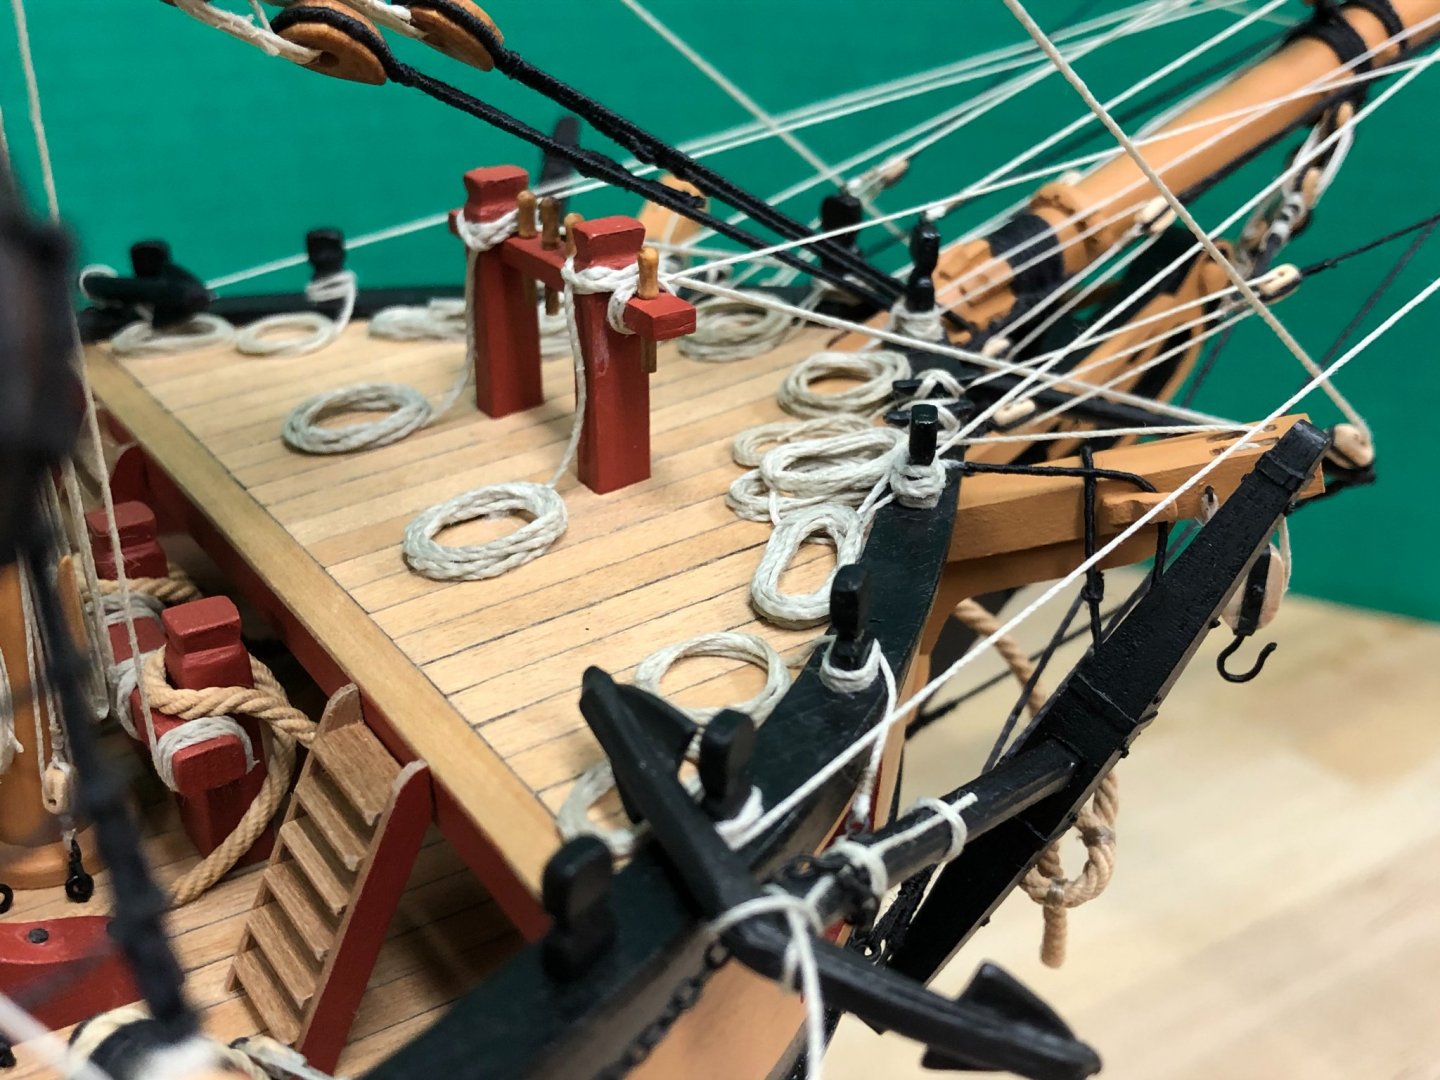
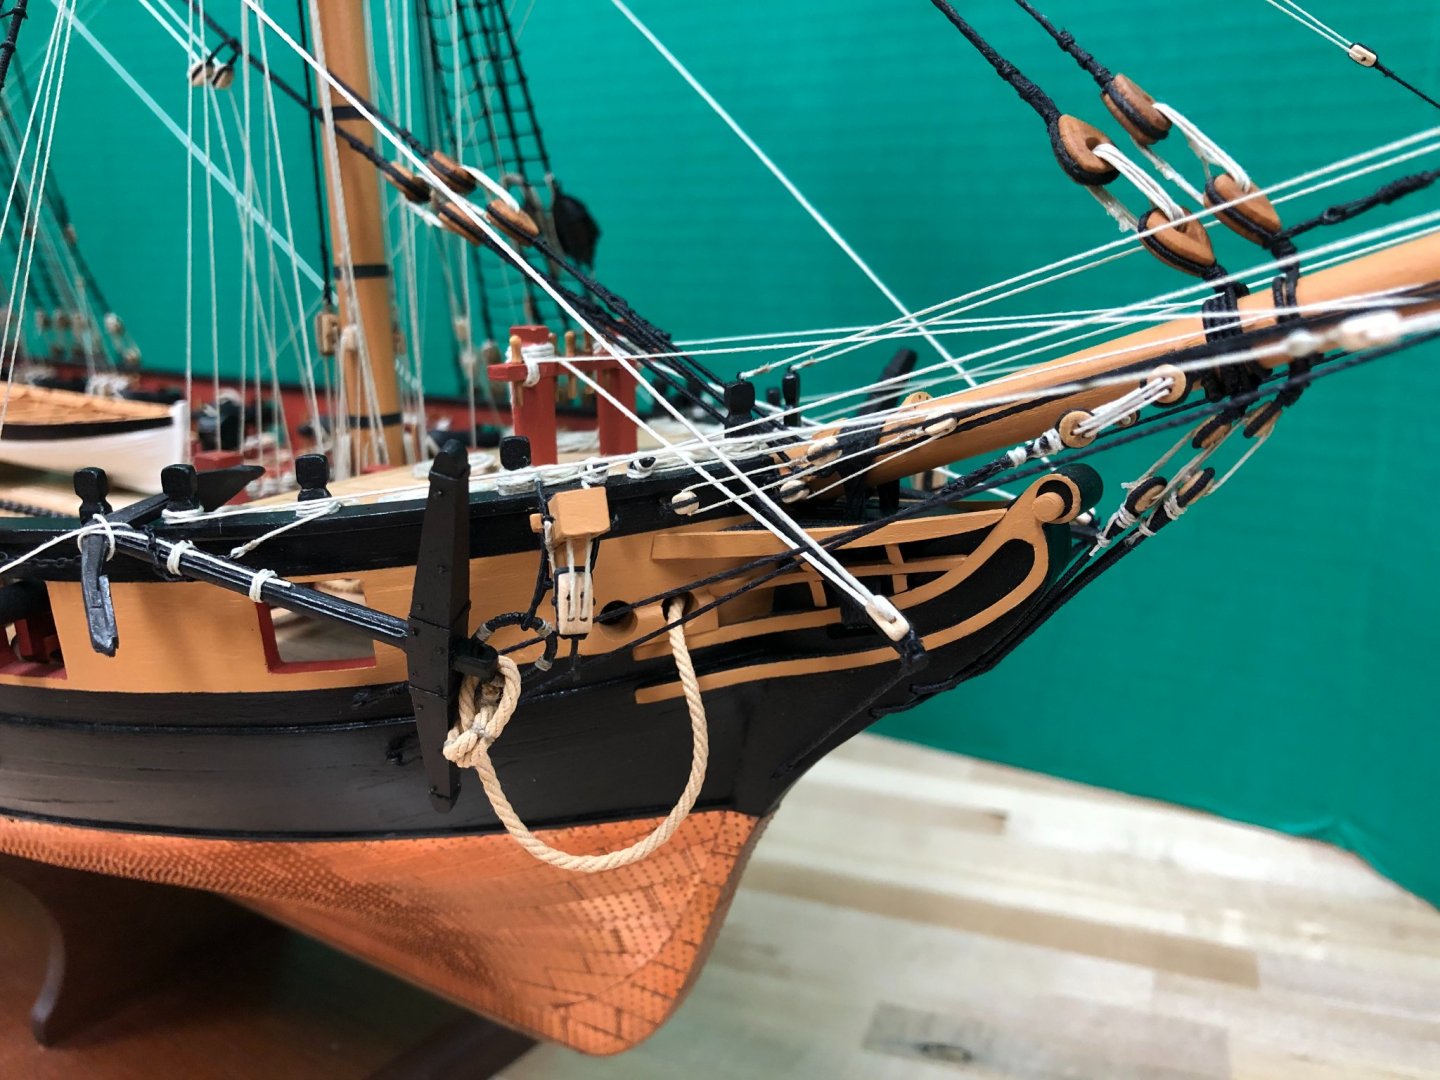
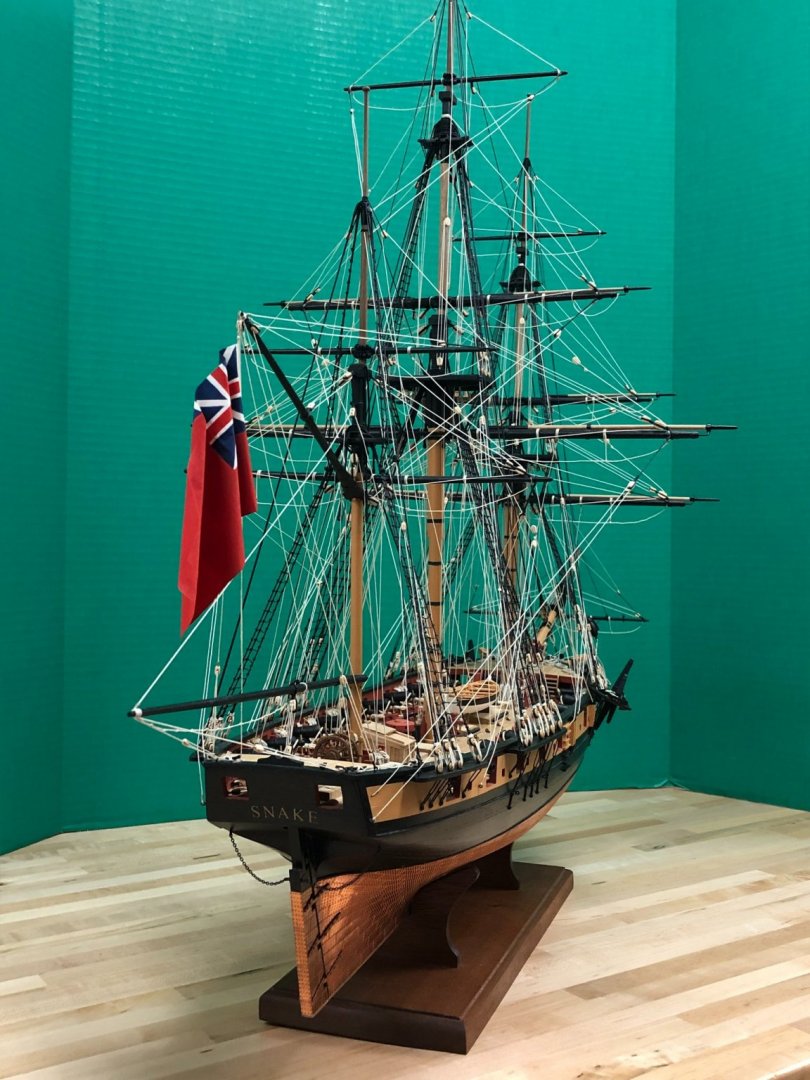
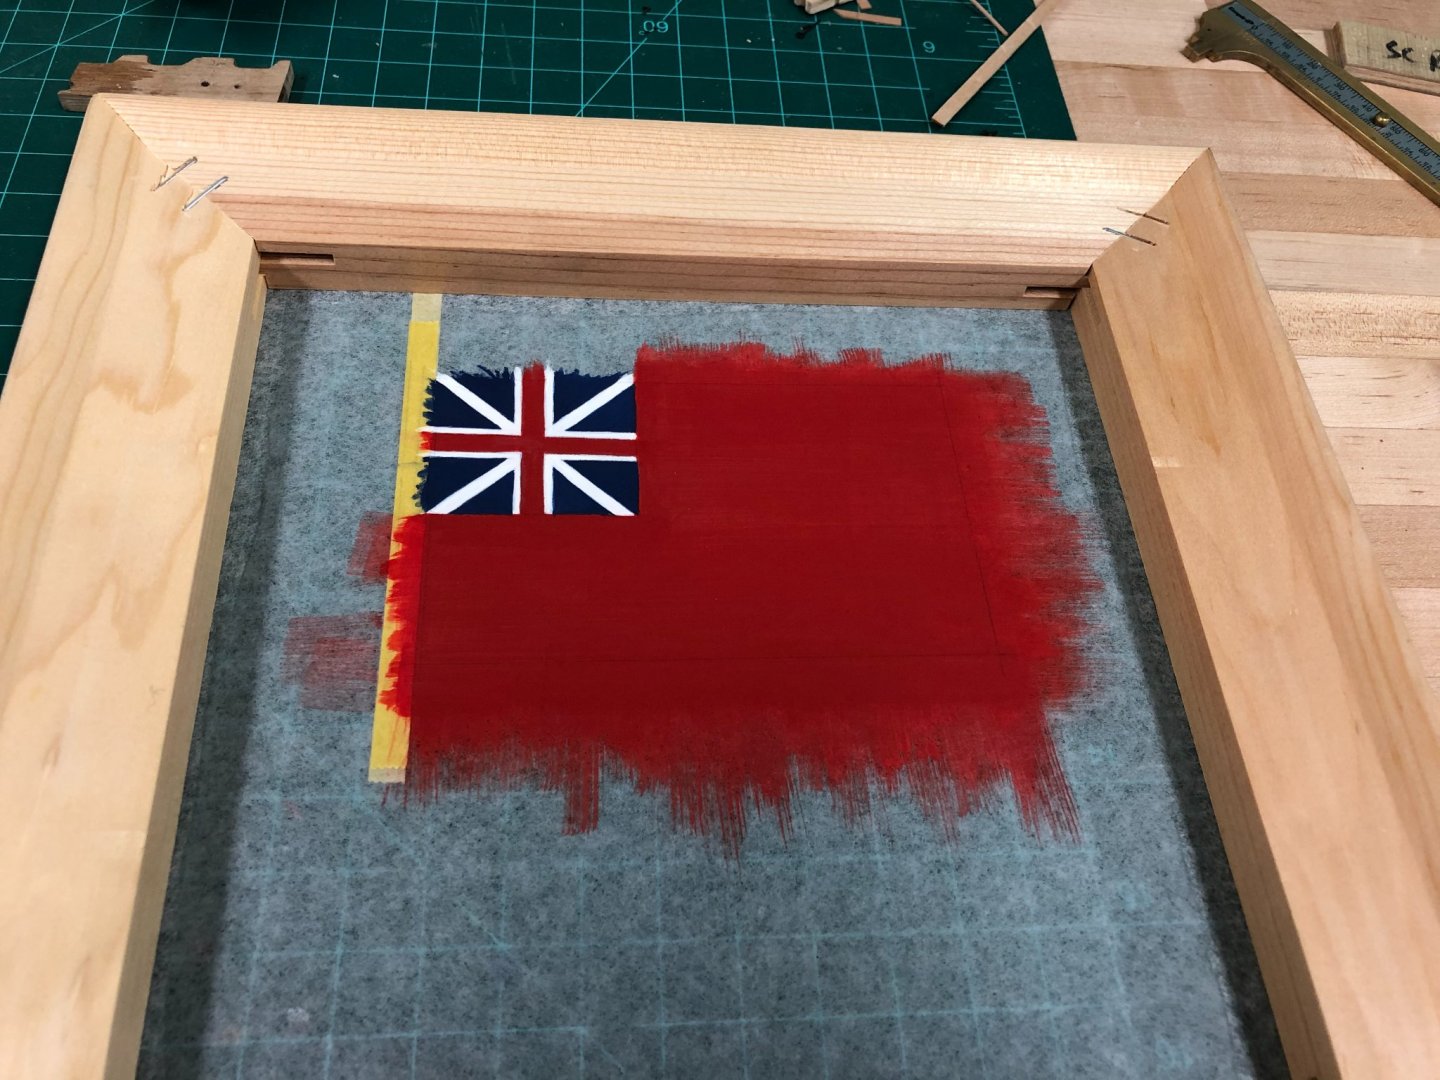
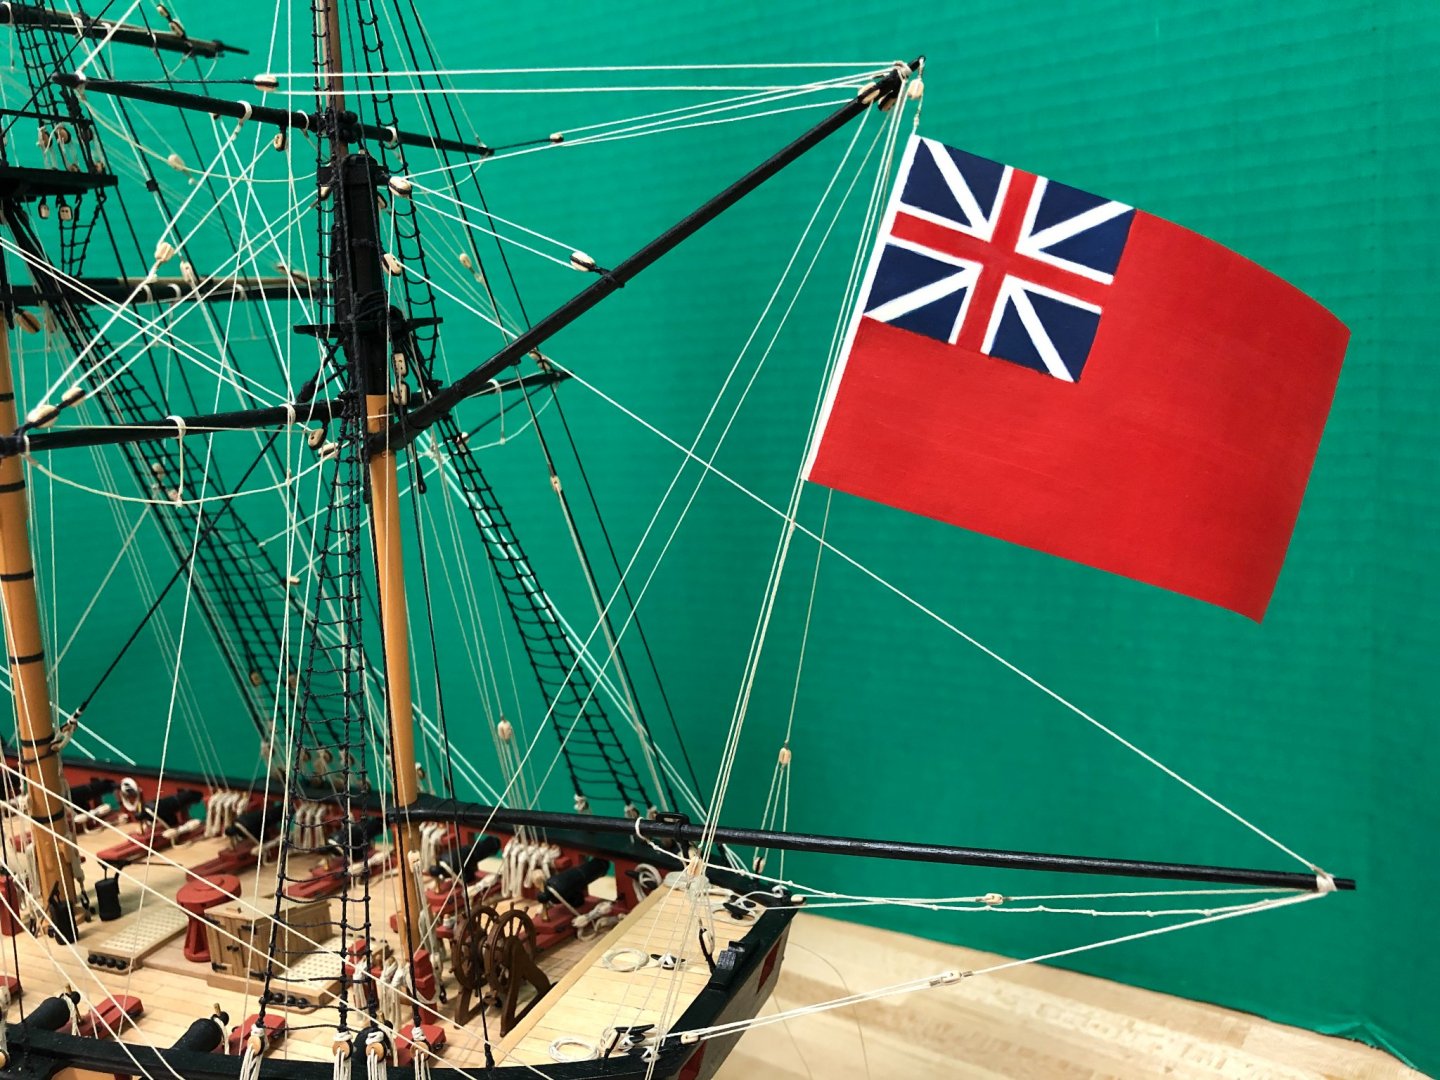
Ensign...conclusion: A tiny bit of steam was used to soften the ensign while various "rounded implements" with different radii (dowel, metal file shafts etc.) were used to try and introduce various folds. I'd love to be able to describe a reproduceable scientific process, but thats not what happened. It was really just a continual serious of tweaks, leaving to dry and most importantly trying not to introduce creases. Steam worked fine to initially soften and allow the structural folds to be introduced, but isn't really a good ongoing solution as it tends to undo any previous work. Real care is also needed to not 'over wet' the painted flag, not sure I was completely successful here. Final tweaking was done by wetting very gently any tools used and trying to hold in position while it dried and the fold takes. ...and with that milestone, I'm declaring this build FINISHED! This was my first wooden ship build, and first model I've built for over 30 years. Its taken probably 8 years to get this far off an on (probably 7 years more than it should), but I have to say I'm glad I was able to finish her. I've come to realize that I enjoy the journey more than the destination, and I certainly experienced moments when I could easily have put her aside permanently, mainly due to me recognizing unfixable mistakes or compromises that that could so easily been enhanced had I known more at the time. Given the length of time taken to complete, this progression in knowledge and execution is very apparent to me, but I hope is less apparent to others. All in all, this was a most enjoyable project that exposed me to the necessary knowledge and techniques that I hope build on and leverage in the future. I still need to make up a protective case, and will probably continue to see needed fixes and touchups before she (hopefully) is put in a place of rest. I would like to thank this entire community for the ongoing help, support and encouragement - without which I would not have reached this point. Few pictures to celebrate, apologies that these aren't exactly studio quality.


- 800 replies
-
- 30
-
-

-
- snake
- caldercraft
- (and 1 more)
-
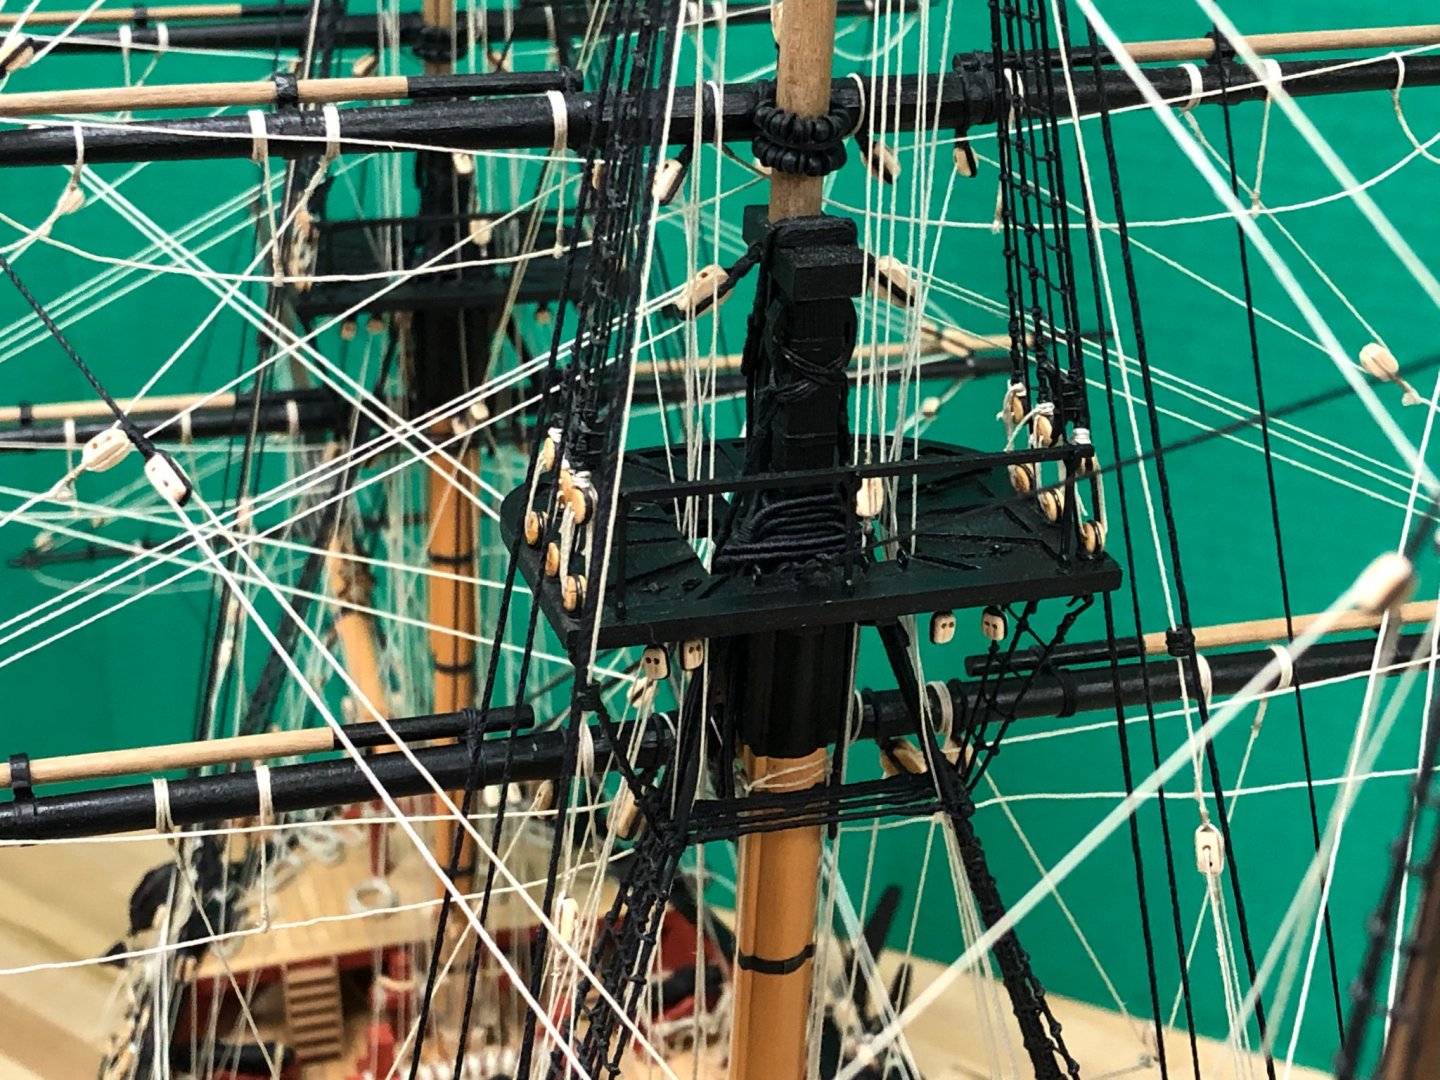
Joe, I'm ashamed to say I've only just seen your build here. You are doing an outstanding job, and your rigging looks fantastic. Taking the time to serve all those lines is definitely worth it, and something that is maybe possible (and remain sane) on a ship with less rigging than the typical man o' war.
- 140 replies
-
- 2
-
-
- benjamin w latham
- model shipways
- (and 1 more)
-
You know I'll be following closely Sjors, I'm sure you'll have fun with this.
- 53 replies
-
- 3
-
-
- brig-sloop
- Caldercraft
- (and 2 more)
-
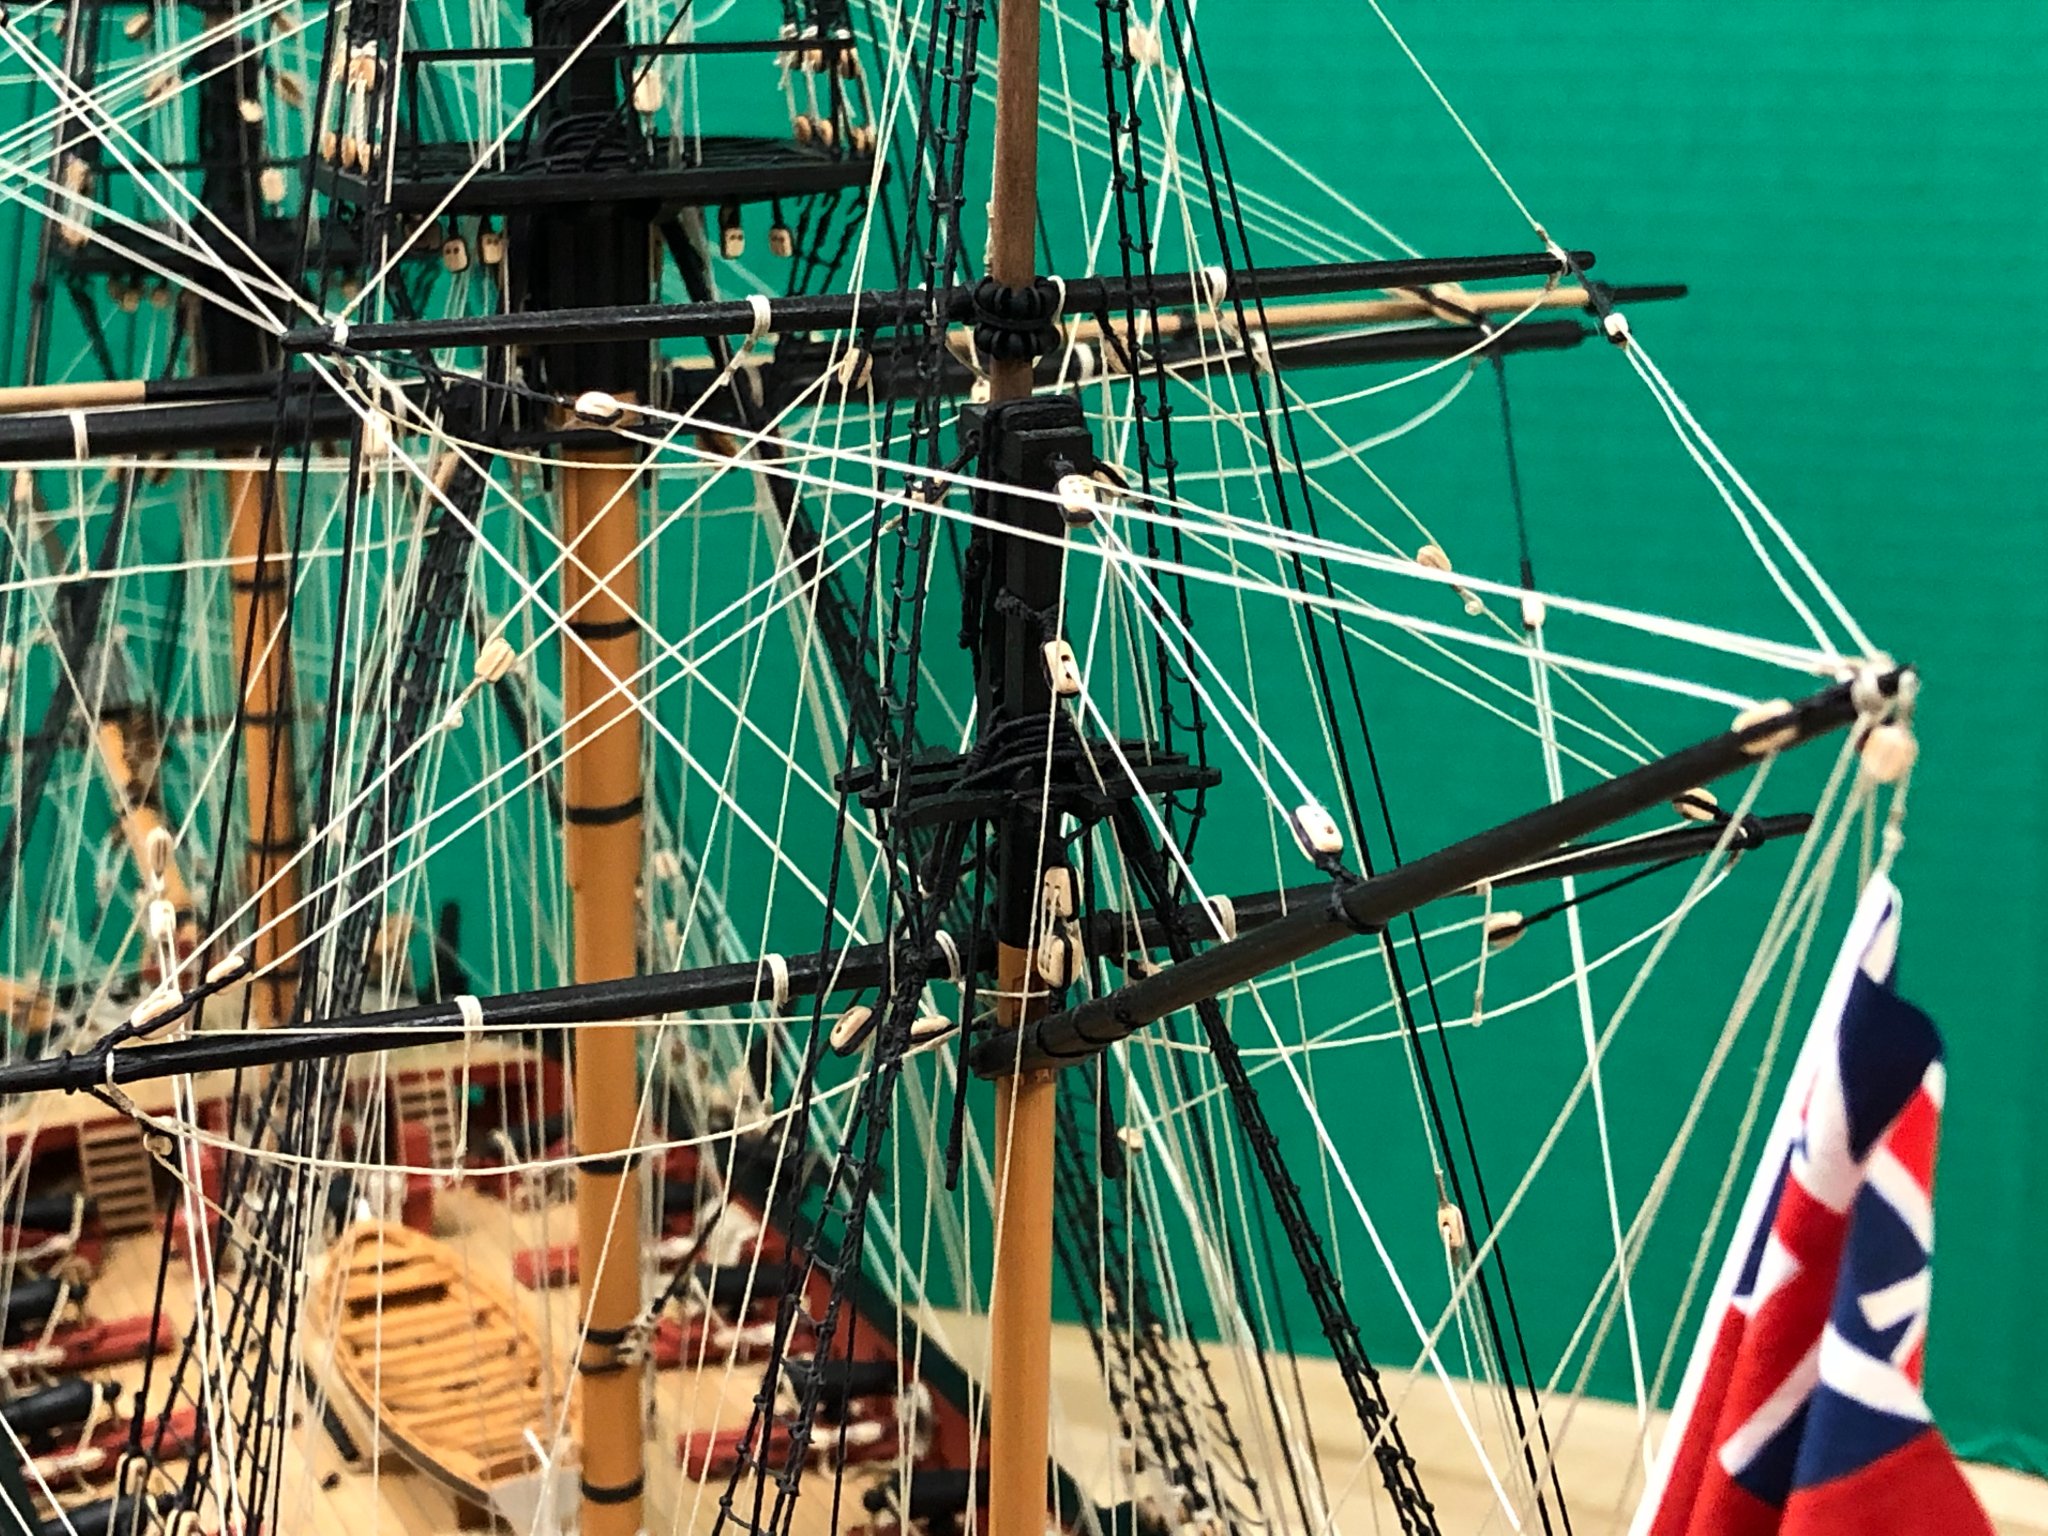
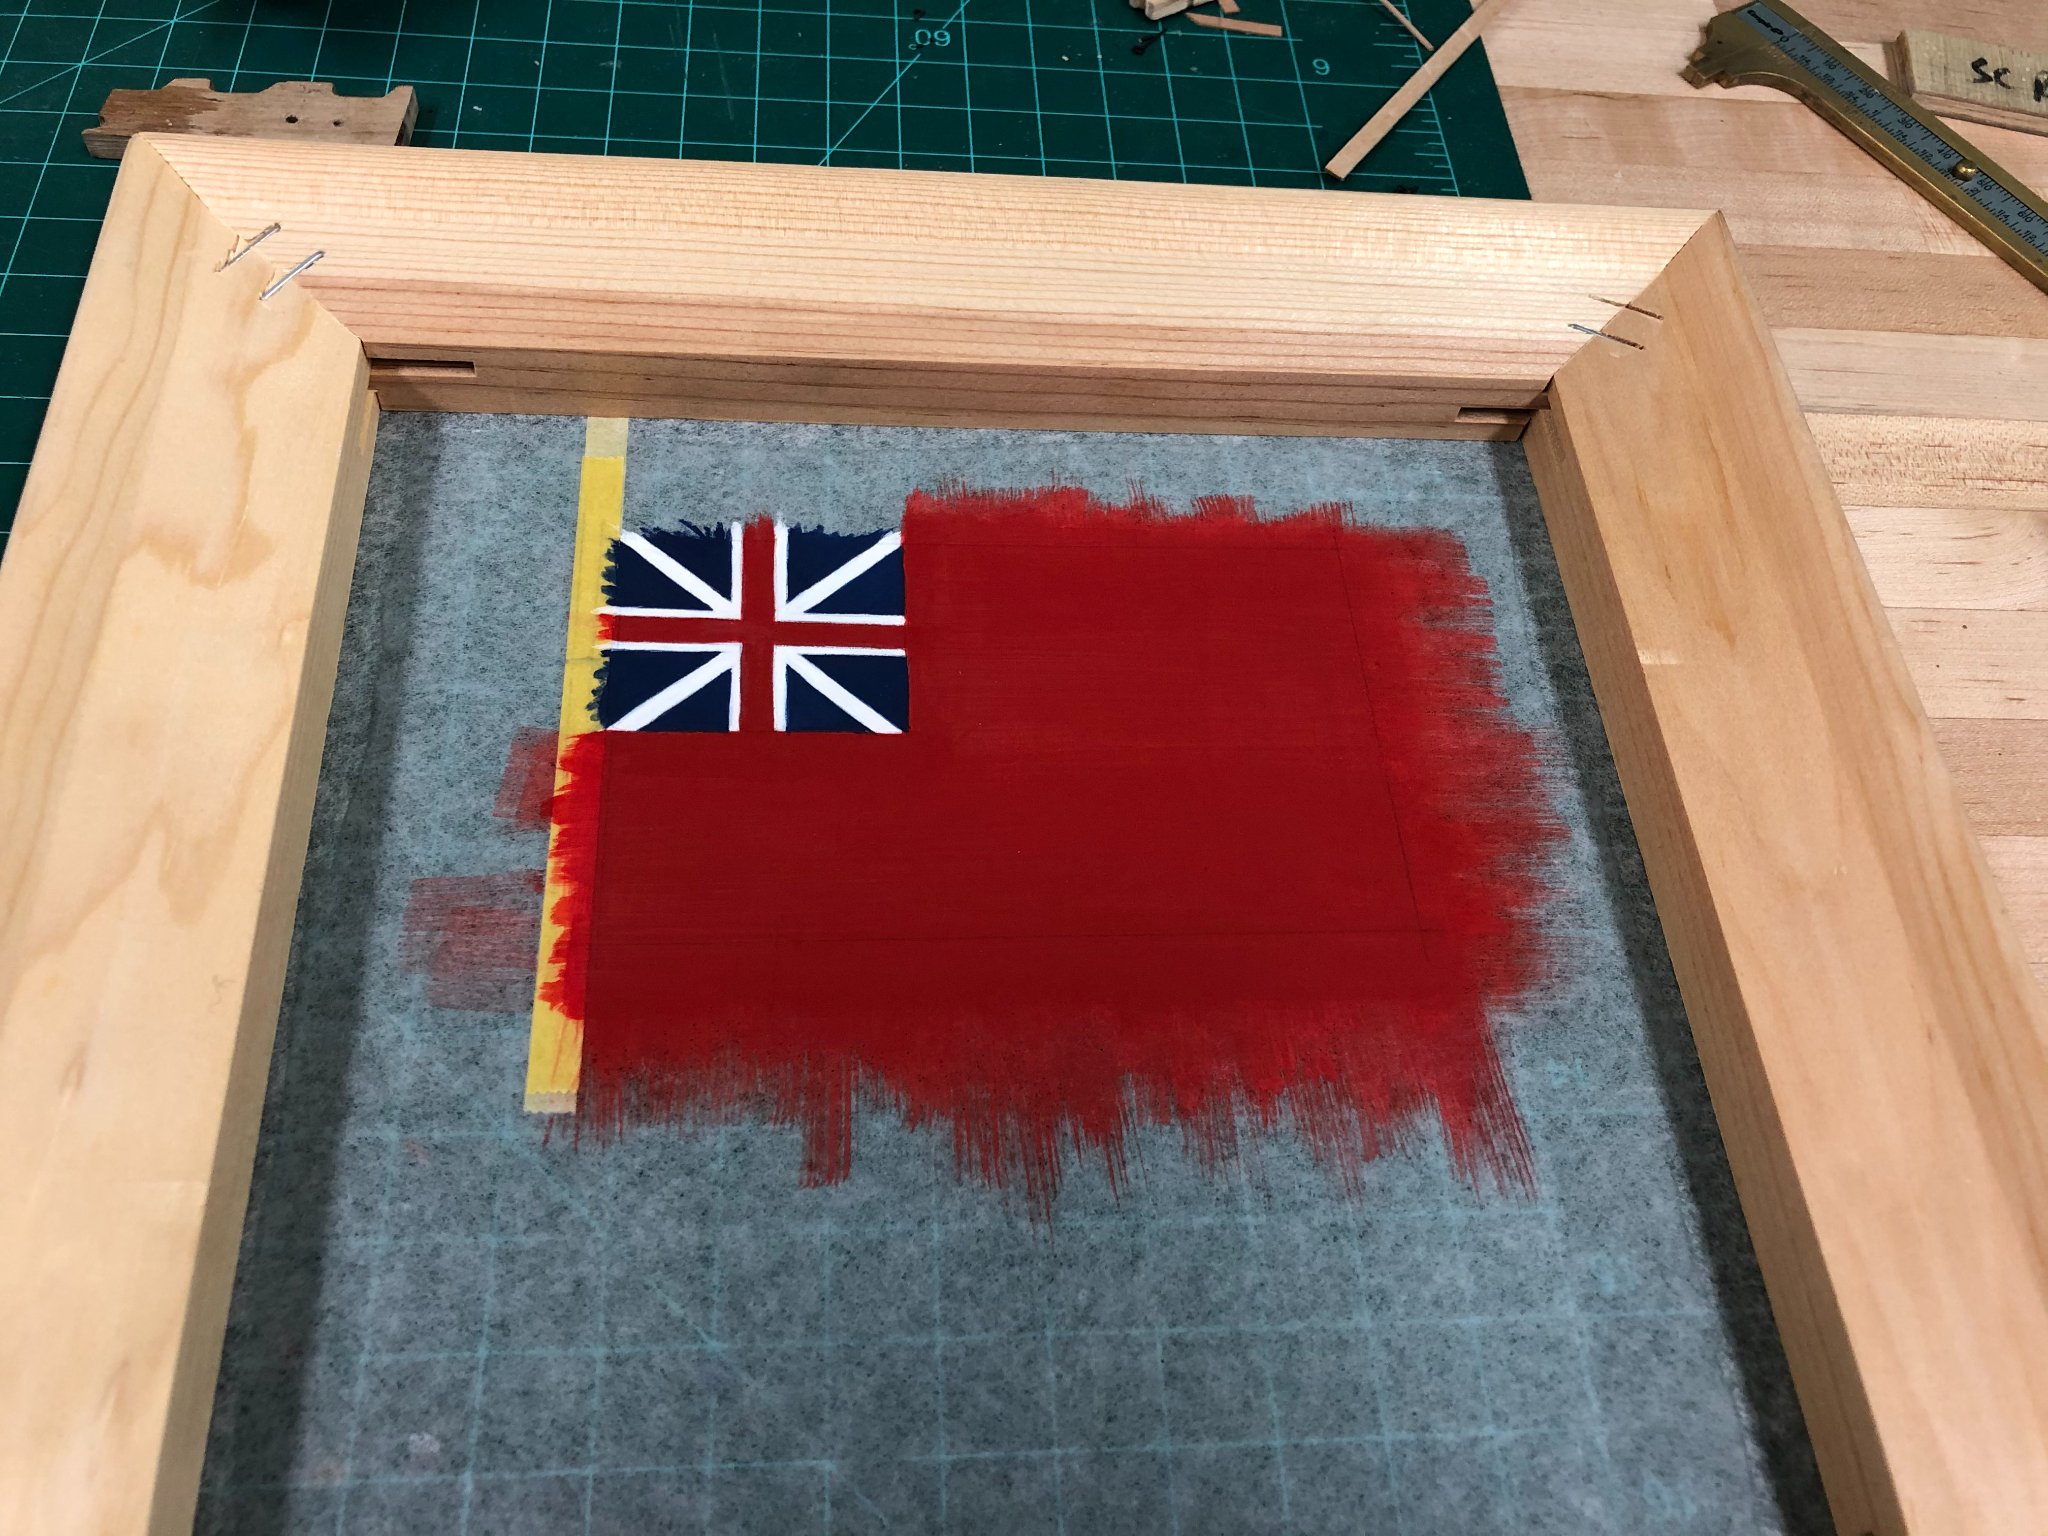
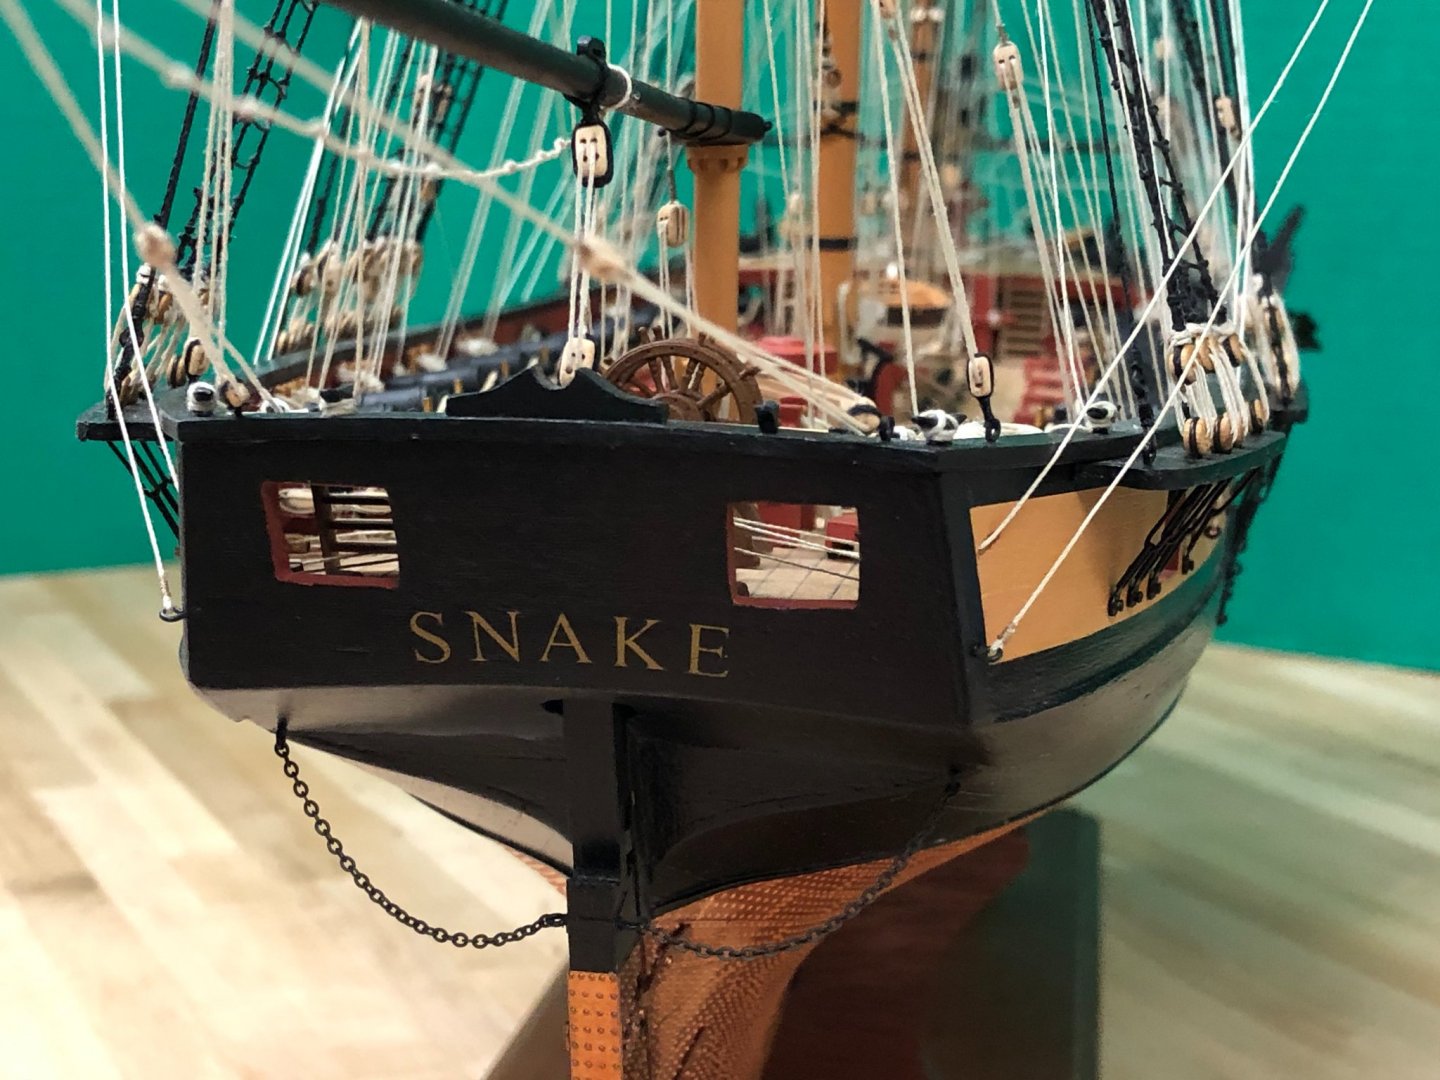
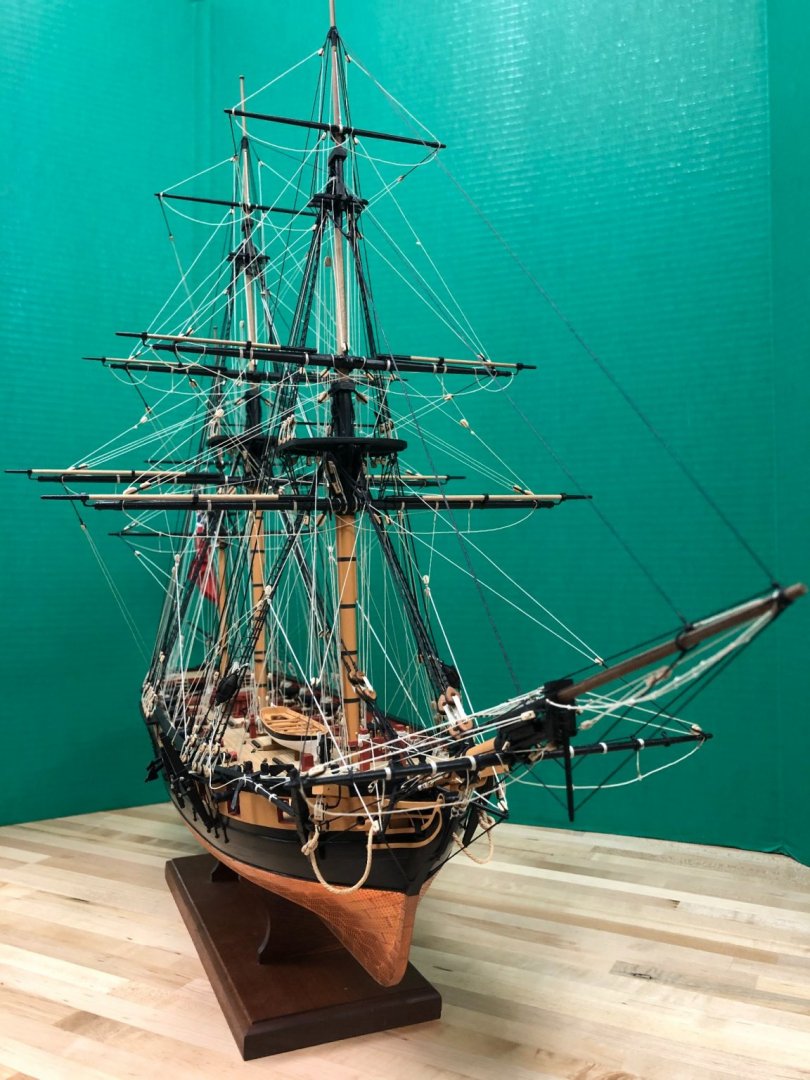
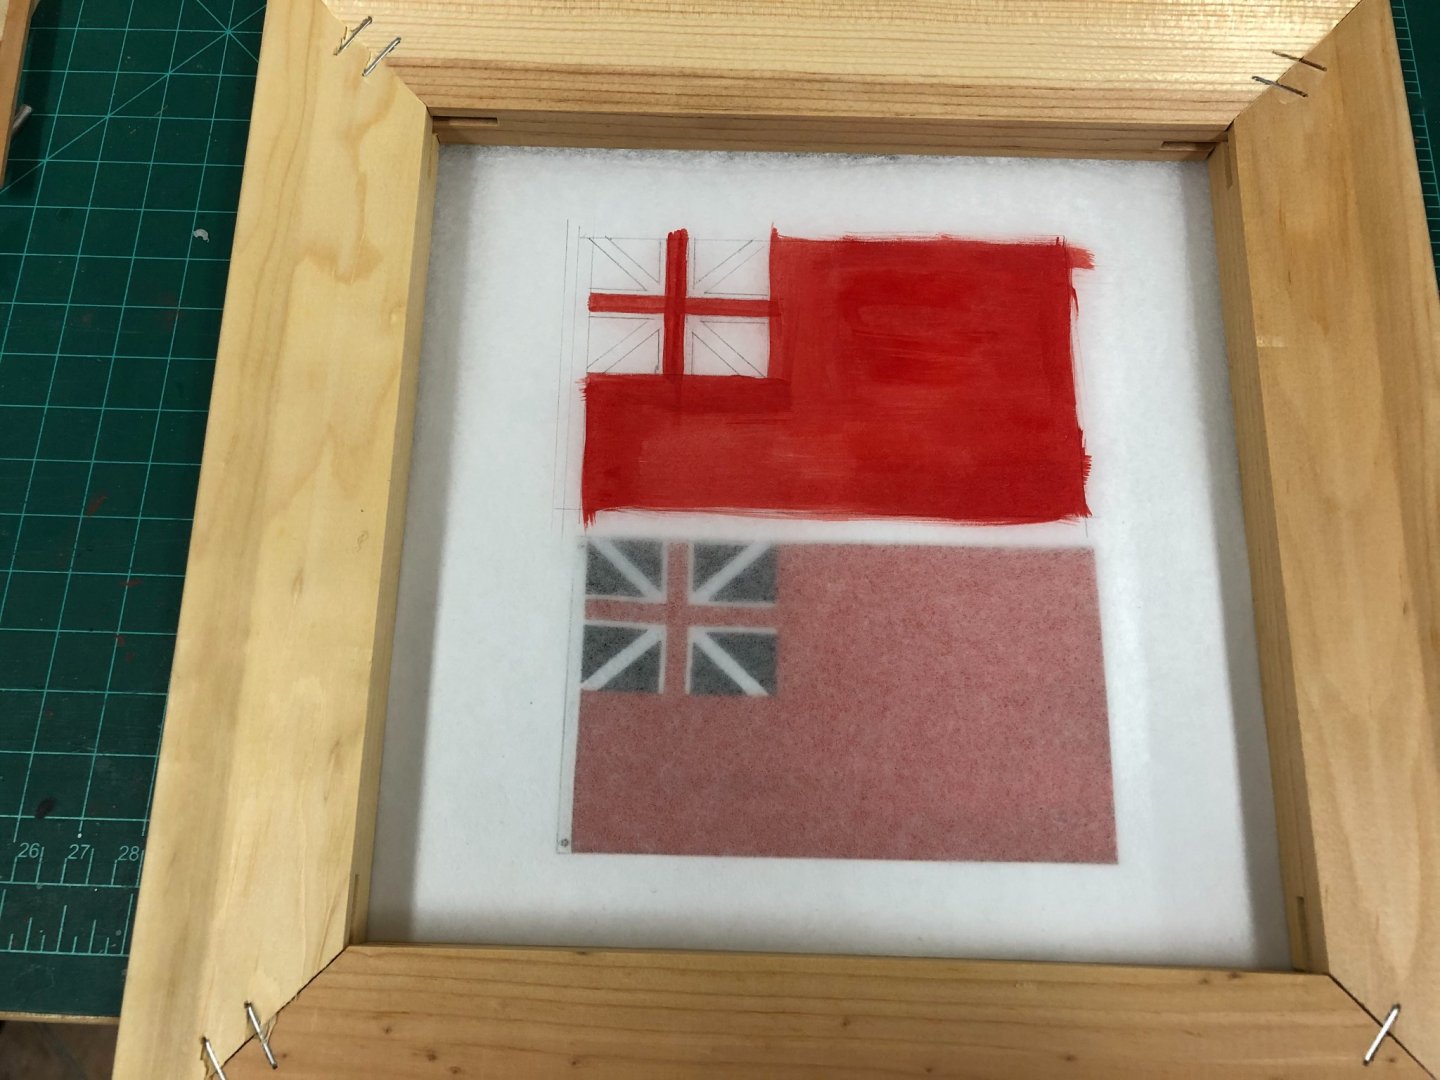
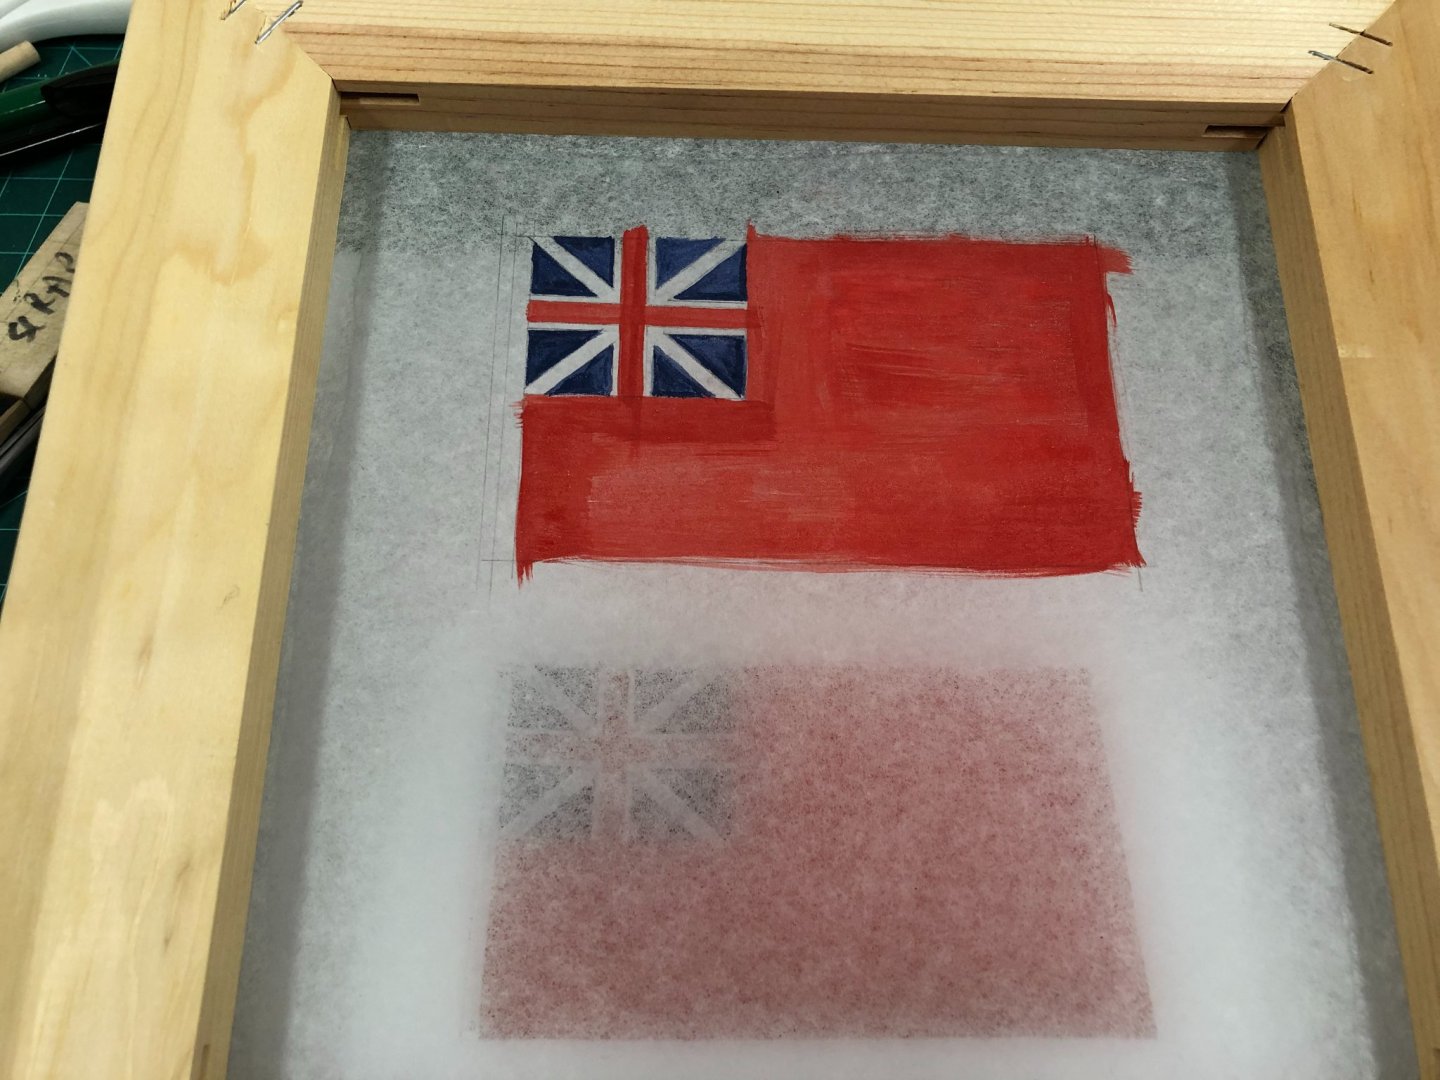
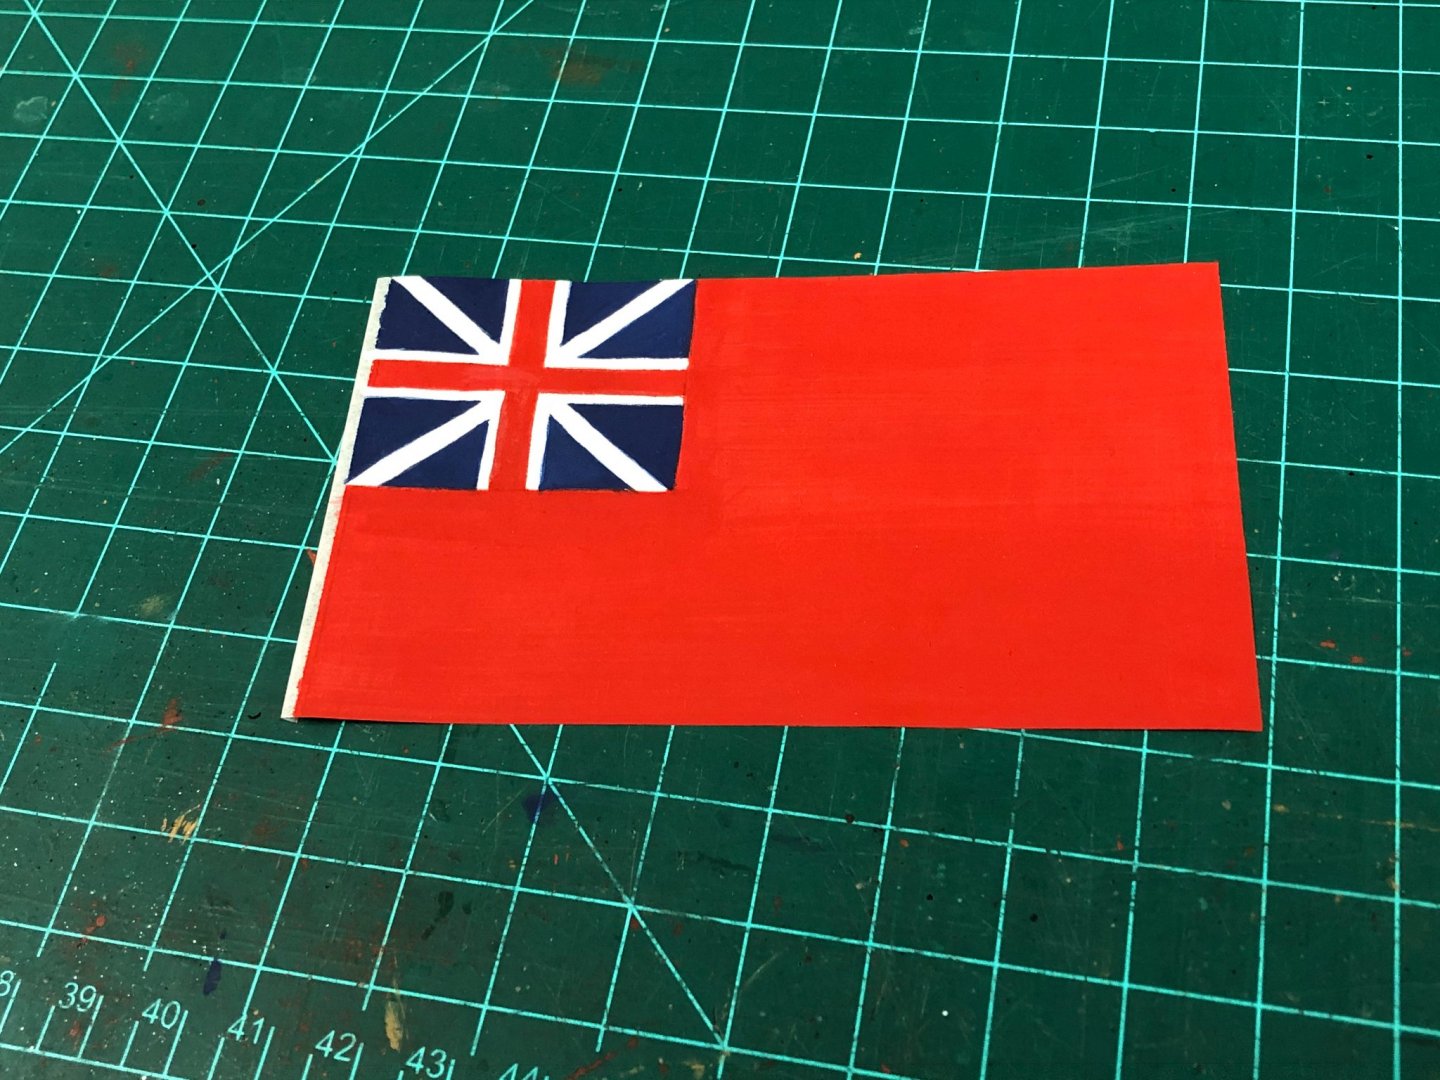
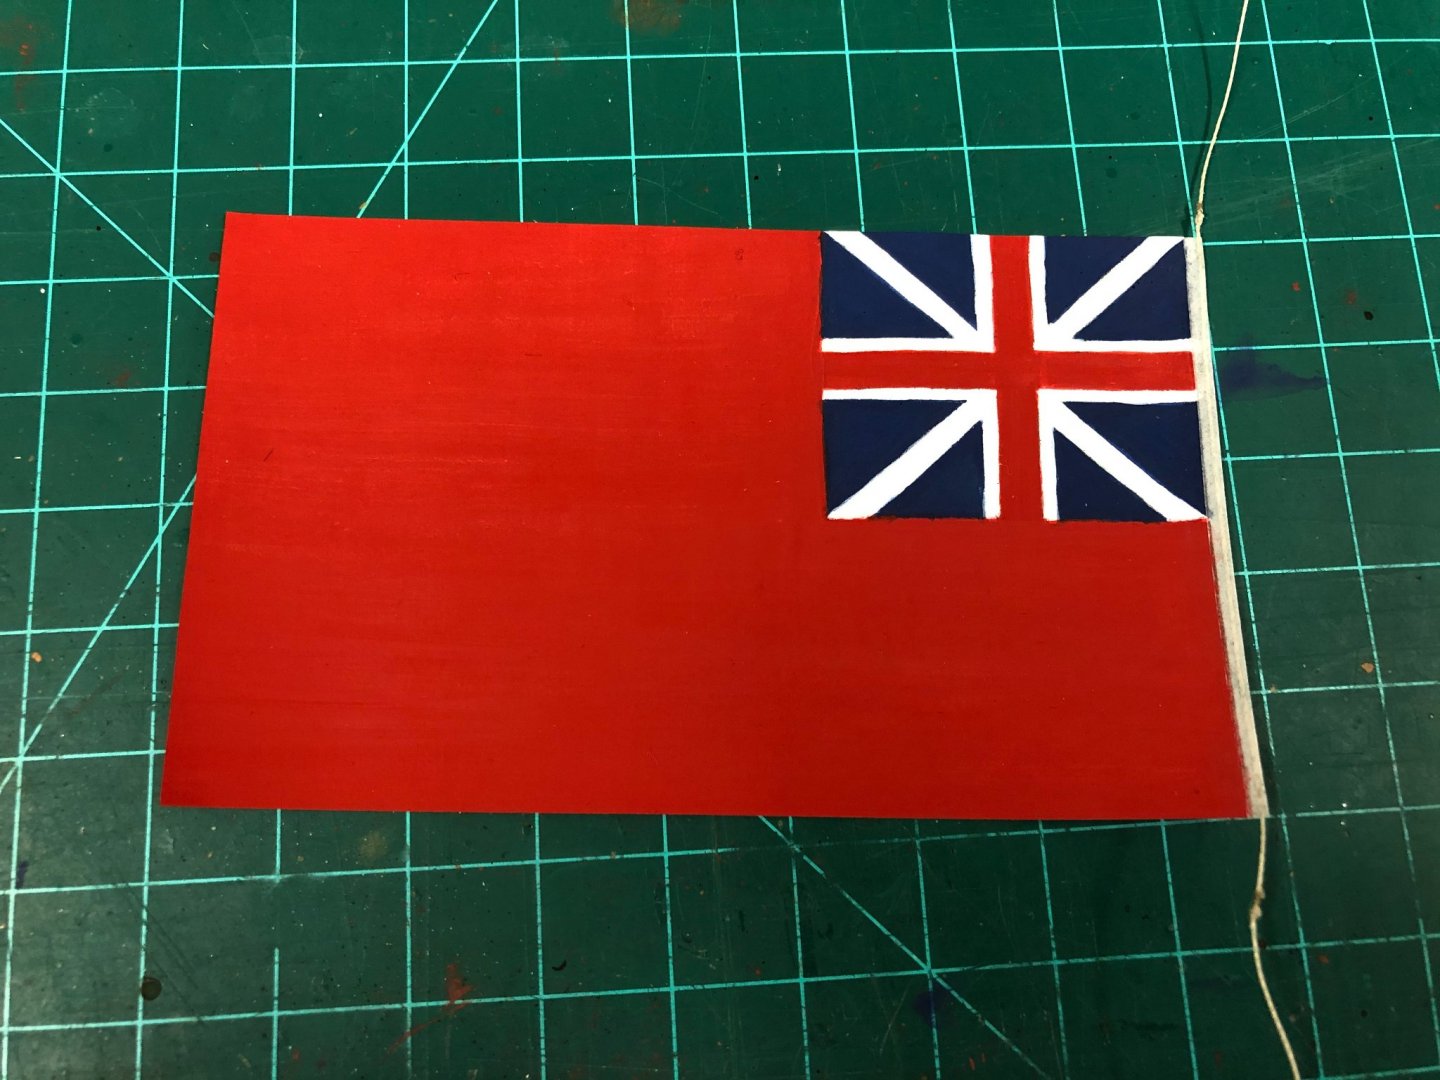
@ Eammon - I think you and many others deserve a perseverance award for sticking around @ Sjors - Its great that you'll be starting a Snake build as well, there are a number now in progress, and there is still a chance you will finish yours before me 🙂 @ Mike - Thanks for reminding me that you put these on your badger, she really is a nice looking model @ Martin - Hope it helps, like always, we stand on the shoulders of those who go before The Ensign: Really the only missing item at this point is an ensign. Making one's own is really the only option as aftermarket items are the wrong time period (the cross of St Patrick in the Union Jack was only introduced after the Act of Union in 1801), only white ensigns are available and they seem somehow a little too perfect, and the material they are made from seems overly heavy. There seem to be a couple of very similar approaches to making these, and here is how I approached it. This was my first effort, and although results are not the height of perfection, I'd say this is something that any modeler should feel comfortable taking on. I am not quite finished in that the final article needs to be 'folded' to sit more realistically, but I'm stepping back for a moment to think through options as I'll probably need to use some steam to help make permanent - and this seems like it could be a little catastrophic if approached incorrectly. Open to thoughts here! The first decision was to decide what sized ensign to create. I printed on paper various sizes to see what looked good to my eye before committing further. I'm rather taken with the majestic look of a large flag, and have erred on the side of larger size, even if it would be perhaps more appropriate to use a smaller size for a ship not under sail or in battle. If I could make one recommendation to a modern navy, it would be to use larger ensigns! The other factor that played into my decision to err on the larger side was that when tweaked to hang more realistically, it will look smaller and less obtrusive to the eye. The first step was to soak some modelspan tissue in water and stretch over a frame to dry. I used an old cheap picture frame which worked quite handily, and the modelspan tightened quite nicely. Once dry, dilute PVA was painted on, this causes the paper to stretch and wrinkle again. Once dry, it becomes taught again and the outline of an ensign was very lightly drawn on with pencil tracing from an appropriate pattern. After that it was a simple case of slowly layering dilute acrylic paints. I was somewhat limited to what I could get my hands on, using Tamiya XF-7 Red, XF-8 Blue and Vallejo 'Off White' used on the cutter. Some masking tape was used where the hoist will be to try and limit mistakes in that area, and while this did work, masking tape did not seem to be able to provide a clean edge for the rest of the flag so it was pretty much all painted free hand. Both sides were painted, and for the field of the flag, brush direction was alternated in horizontal and vertical directions. I forget how many dilute coats were applied, but I stopped before the colour became too solid and while there was still some translucency when held up to light (the horizontal and vertical lines were still somewhat visible). Once removed and cut to size, the hoist was trimmed to an appropriate size so it could be doubled back on itself and hard crease introduced. This is just visible below at bottom left of the flag. In reality, the ensign would have been attached with either toggles or loops to the halyard, I decided to avoid reproducing this exactly because it would likely look a little out of scale and introduce some unnecessary complexity. In the end, a length of rope was lightly glued into the crease of the hoist, which was then then lightly glued back into place. Two knots were then placed into the rope where this would normally attach, and a false seizing placed above (on the top) and below (on the bottom) to give the impression of a loop. The hoist was then tidied up with a little off-white paint. The ensign could now be trial fitted by threading the halyard through the small block on the end of the gaff. An ensign staff would have been used on larger ships, and even some earlier smaller craft seem to have a temporary mount to be able to place a staff. With the platform, there is really no space for such a feature, so I'm going to proceed with the ensign flying from the gaff. Given the spartan, utilitarian approach to the rest of the ship design, it does not seam unreasonable that this was the approach taken, similar to what I understand was done for smaller cutters. I'm also proceeding on the assumption that the ensign halyard would just have been secured to a cleat on either the side of the stern. I would welcome some additional insight or correction on this point.
- 800 replies
-
- 14
-
-
- snake
- caldercraft
- (and 1 more)
-
I seem to recall that the black lines are the 'as designed', the red shows 'as built', and the green would show alterations made after the fact. Of of course, how disciplined this update procedure was is unknown. Curious which plan this comes from, looking at the barricades, it looks like it shows a ship pierced for cannons (smaller ports) which would suggest an earlier design. I came to conclusion looking at a number of plans (which would have been drawn at slightly different times for different ships/yards) and considering the changes in approach at the time this class was built (esp. built up vs open bulwarks, adoption of carronades) that there are enough inconsistency to perhaps never know exactly how they looked at a specific time. I think it is also true that some of the plans are mis-labeled, typically identifying ships generally as Diana, when it may be representing the entire Artois class, or a different ship in the same class. I purchased the profile plan for "Diana" from NMM, which seems to be general for the Artois class. Interestingly, on that plan the mizzen position seems to be closest to that of the 'green' mizzen on yours (which adds to the confusion a little). FWIW, there is a notation on my plan indicating that the position of the foremast on both "Jason" and "Diamond" was moved forward 6 1/4 inches, and this is shown with a green X on the mast center only rather than showing in full.
- 310 replies
-
- 2
-
-
- Diana
- Caldercraft
- (and 1 more)