Beef Wellington
-
Posts
2,249 -
Joined
-
Last visited
Content Type
Profiles
Forums
Gallery
Events
Everything posted by Beef Wellington
-
 Really outstanding progress Bob, very nice. Just a comment on the main tack, I don't think the plans are inconsistent, just maybe not intuitive. I suspect that the tack goes first through a sheave in the chesstree and inboard through a sheave (or simplified hole as per plans) to then be belayed to the range cleat identified. Have been studying this for my own benefit recently 🙂
- 421 replies
-
- 3
-

-
- caldercraft
- granado
- (and 1 more)
-
Hi Chuck, appreciate you checking in and apologies for missing your post. Progress will hopefully start again shortly.
-
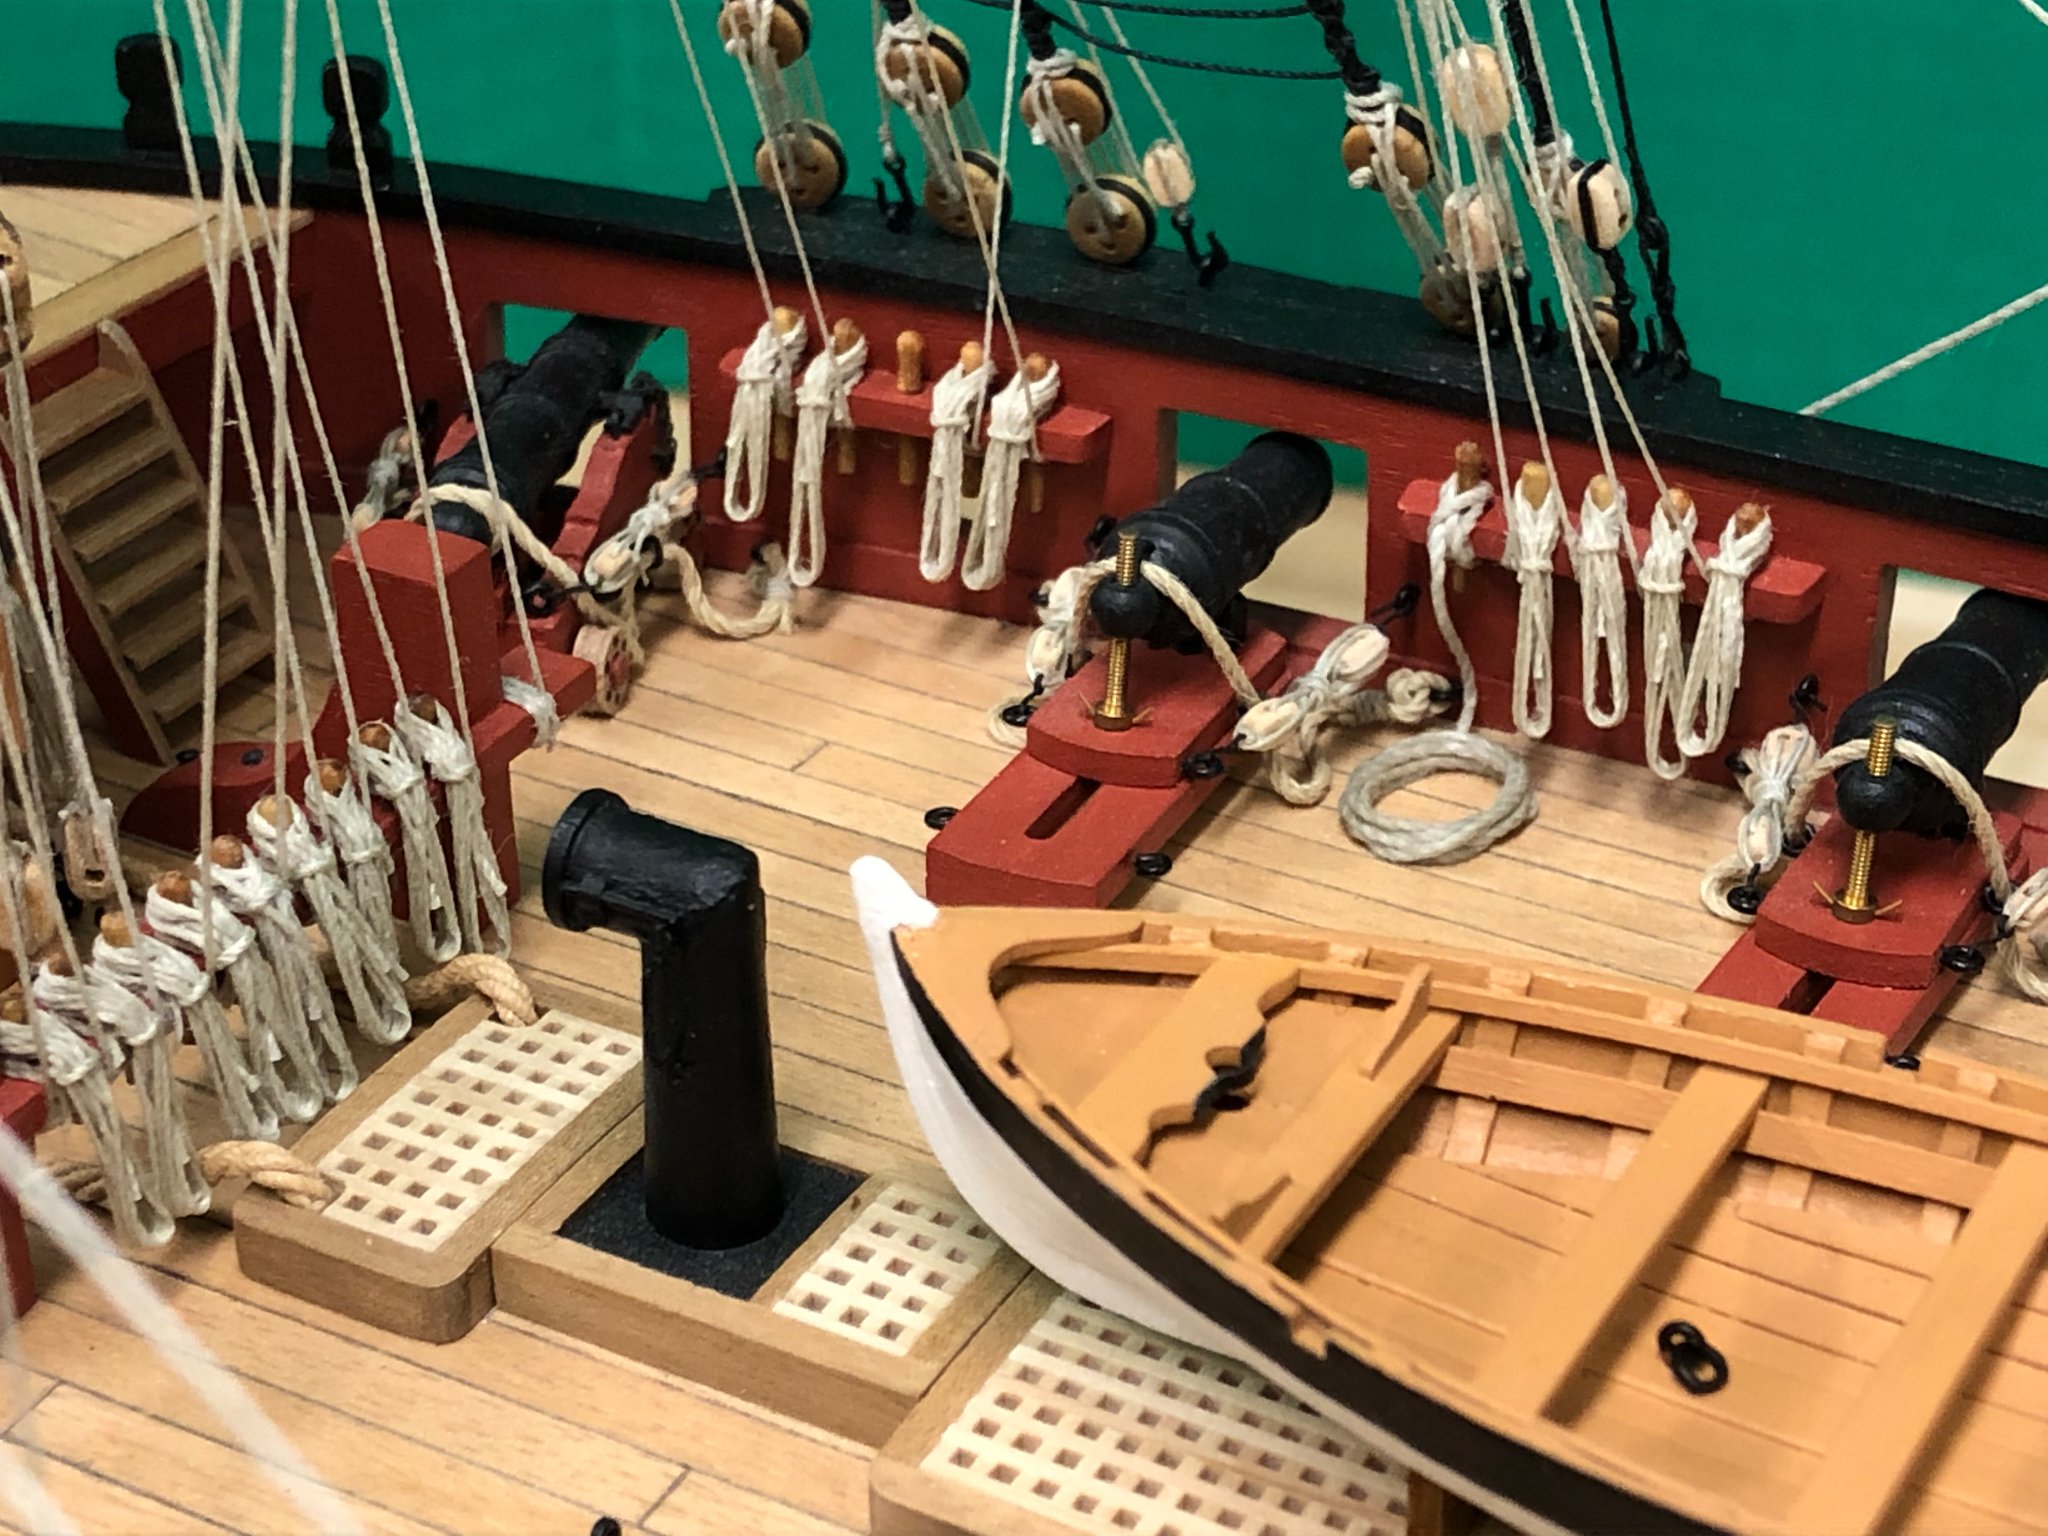
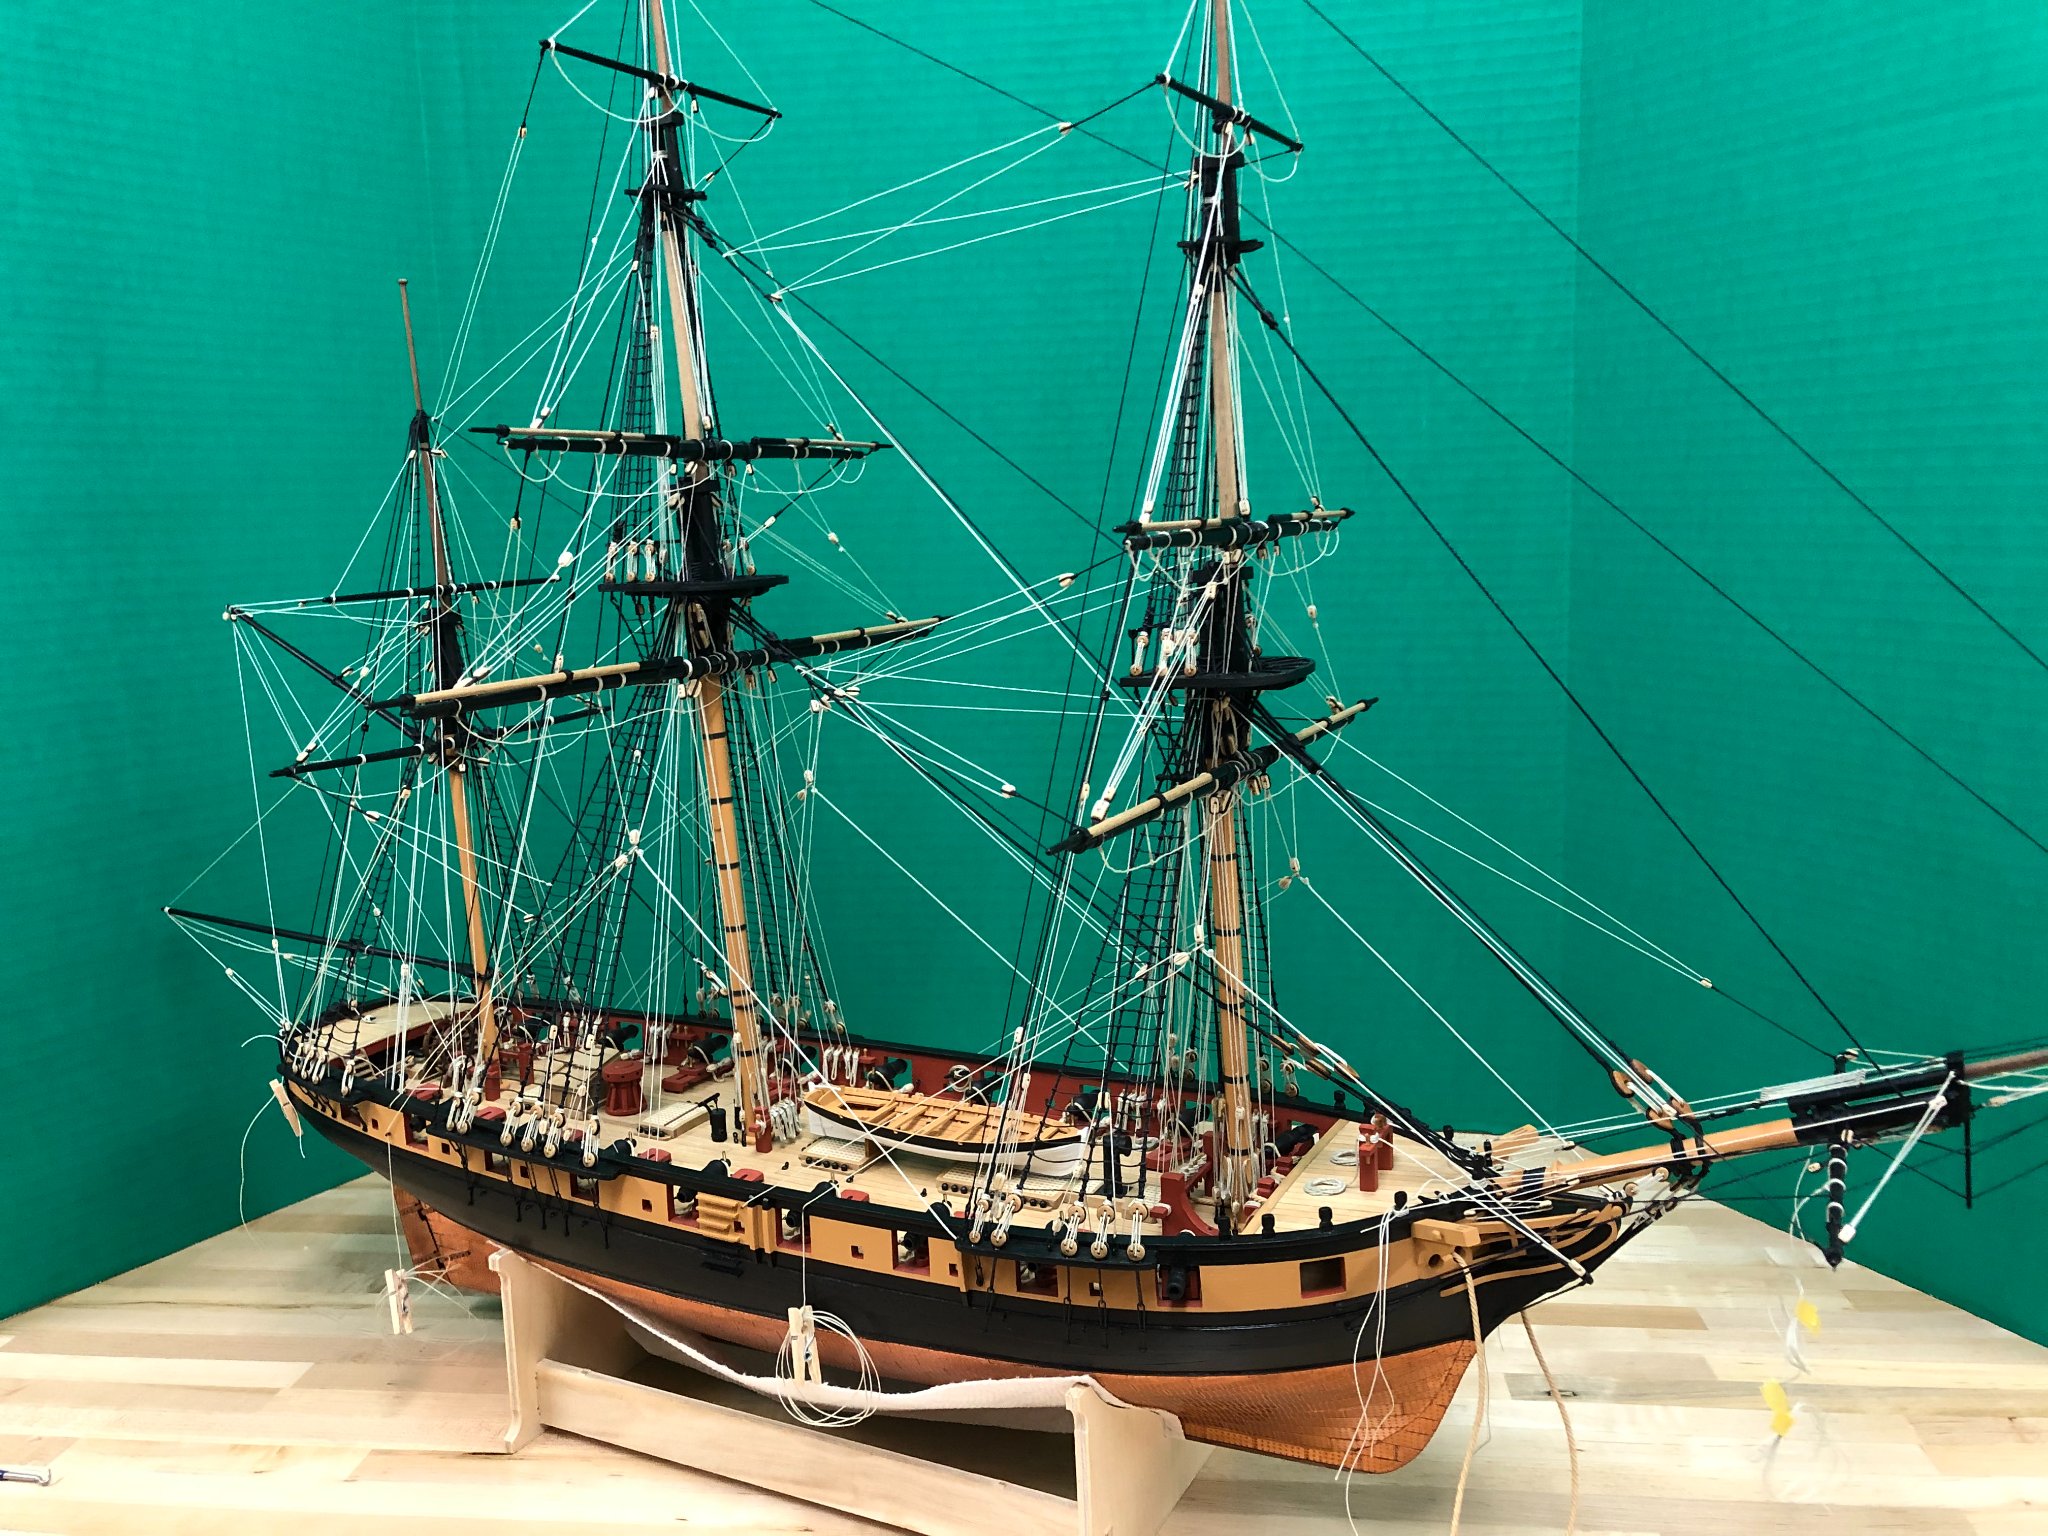
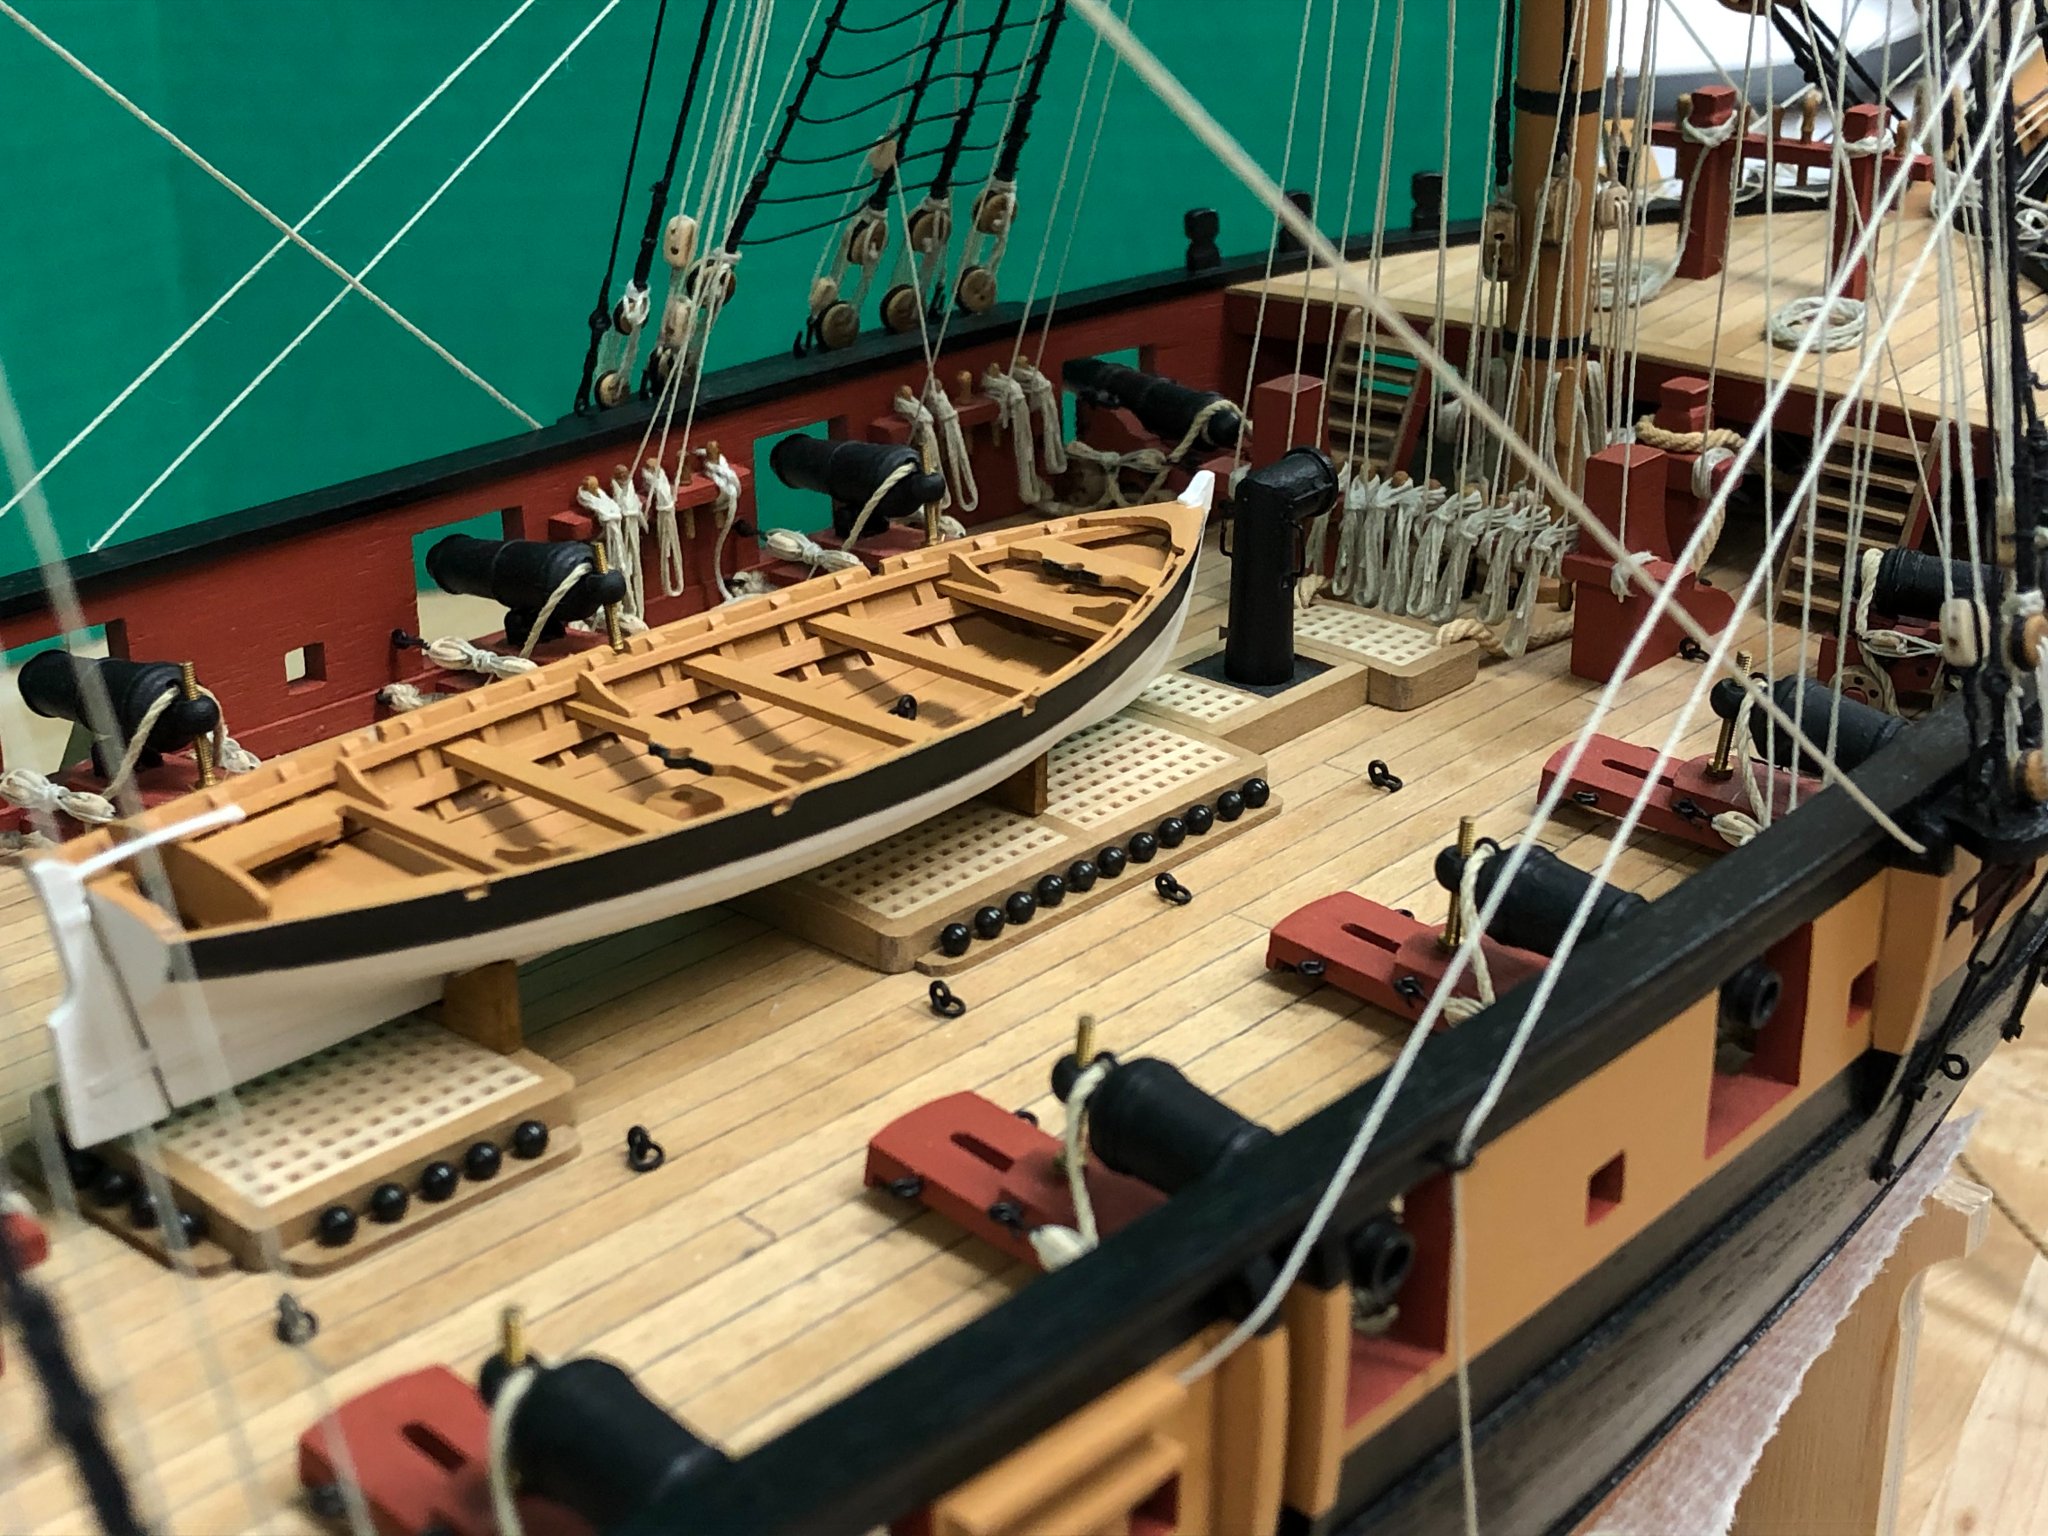
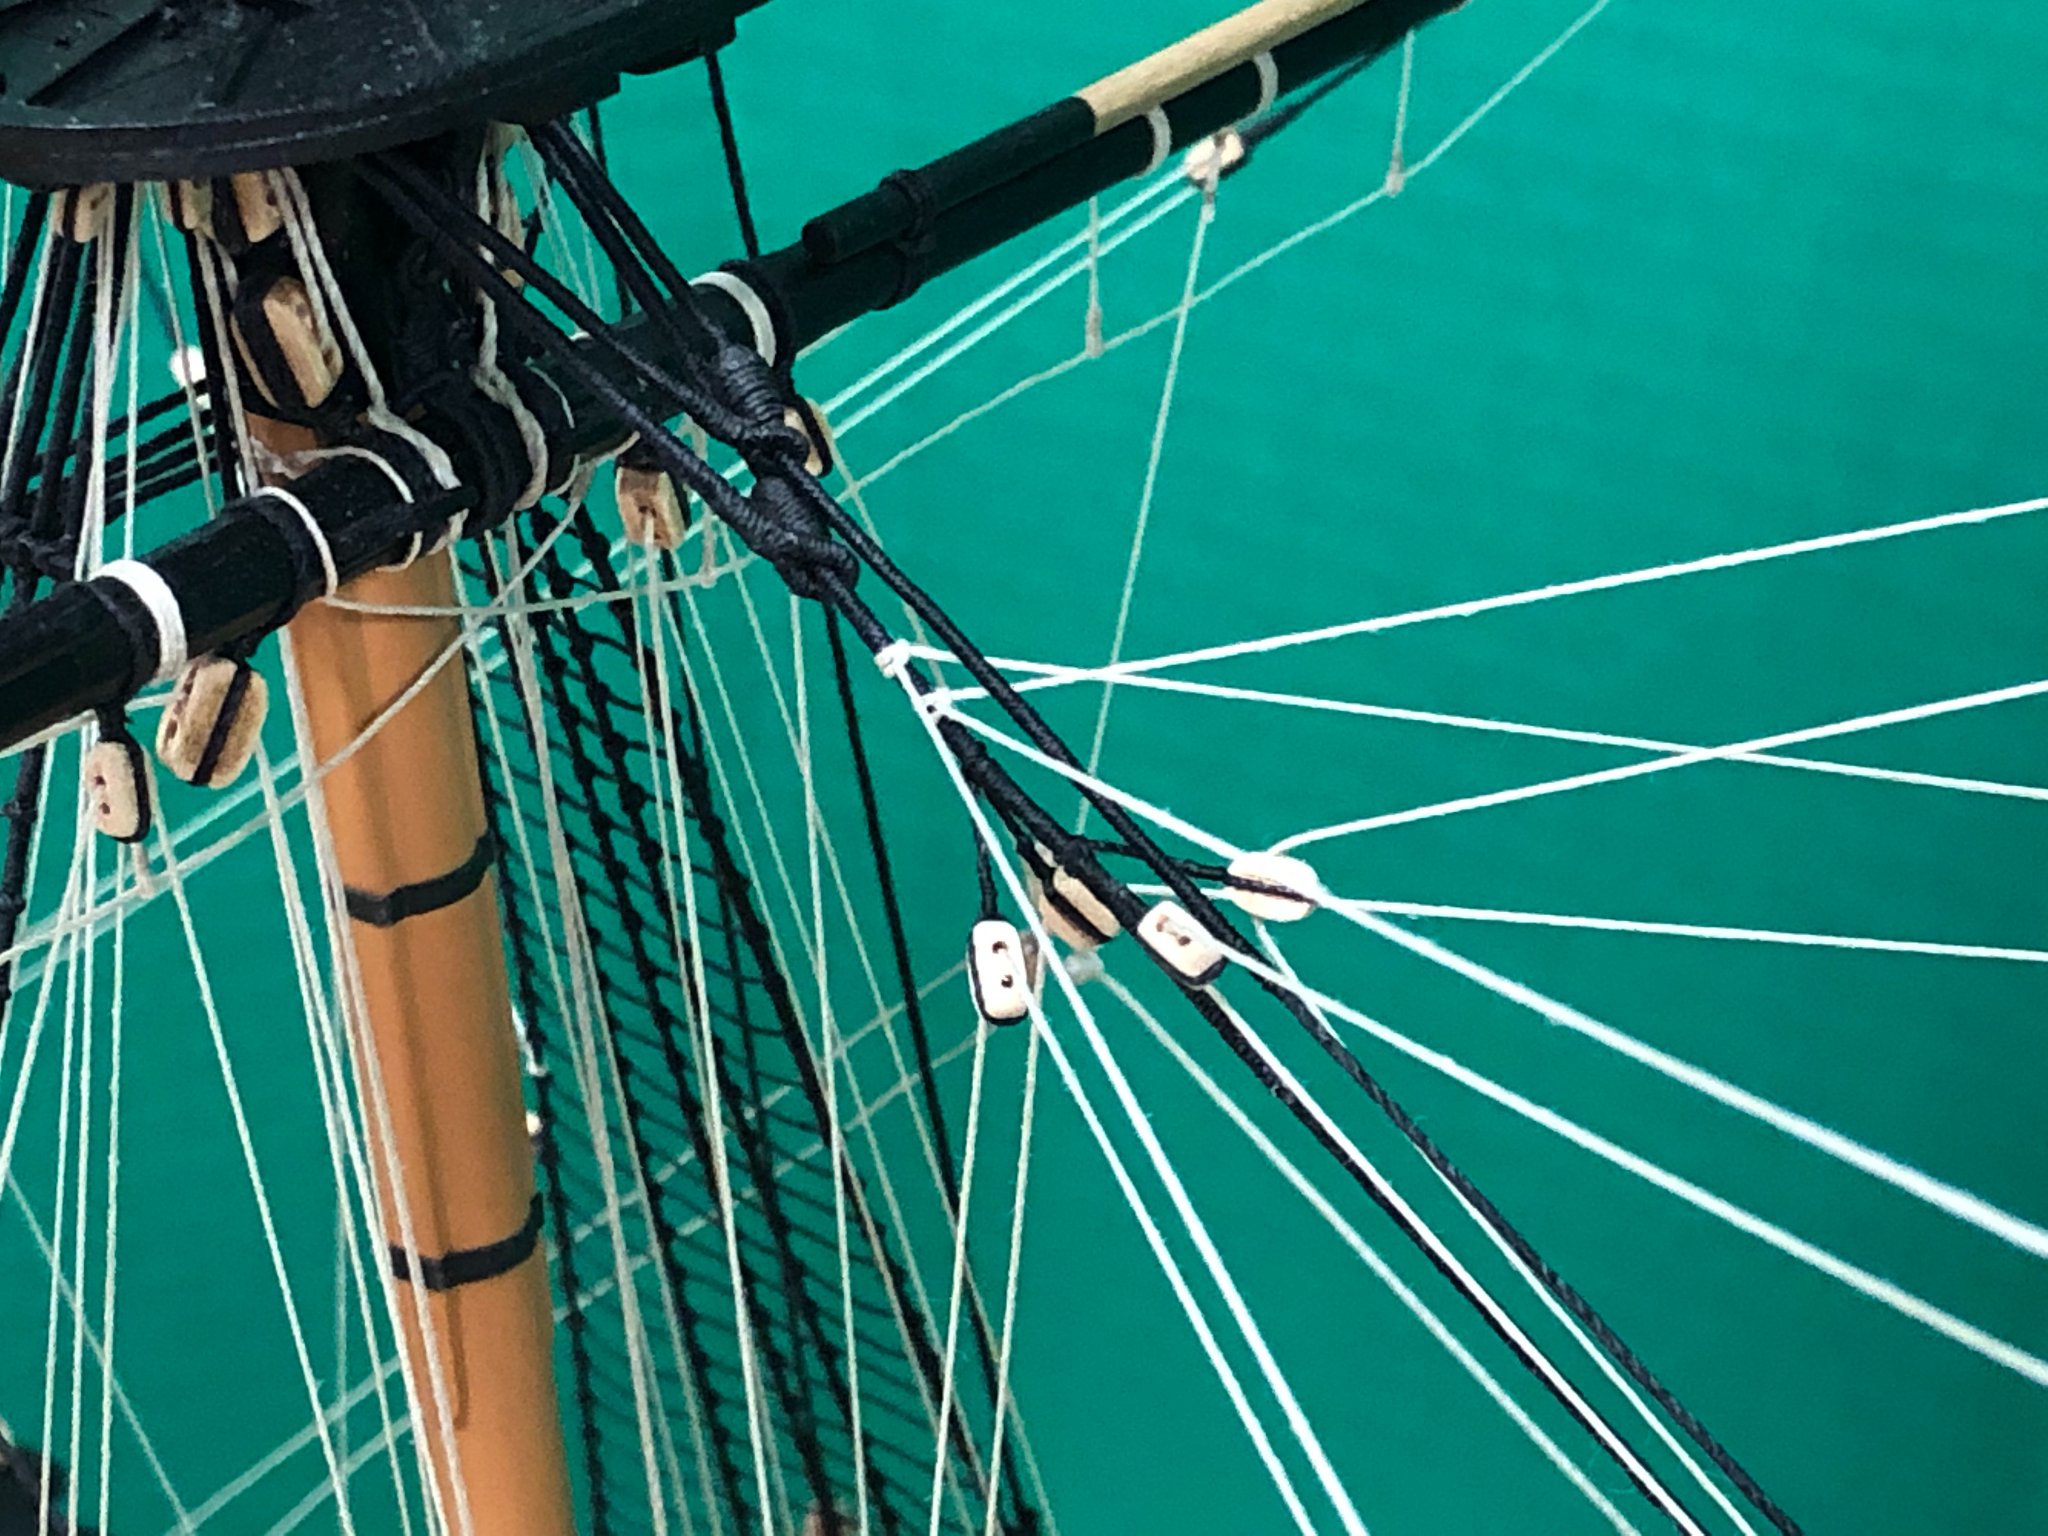
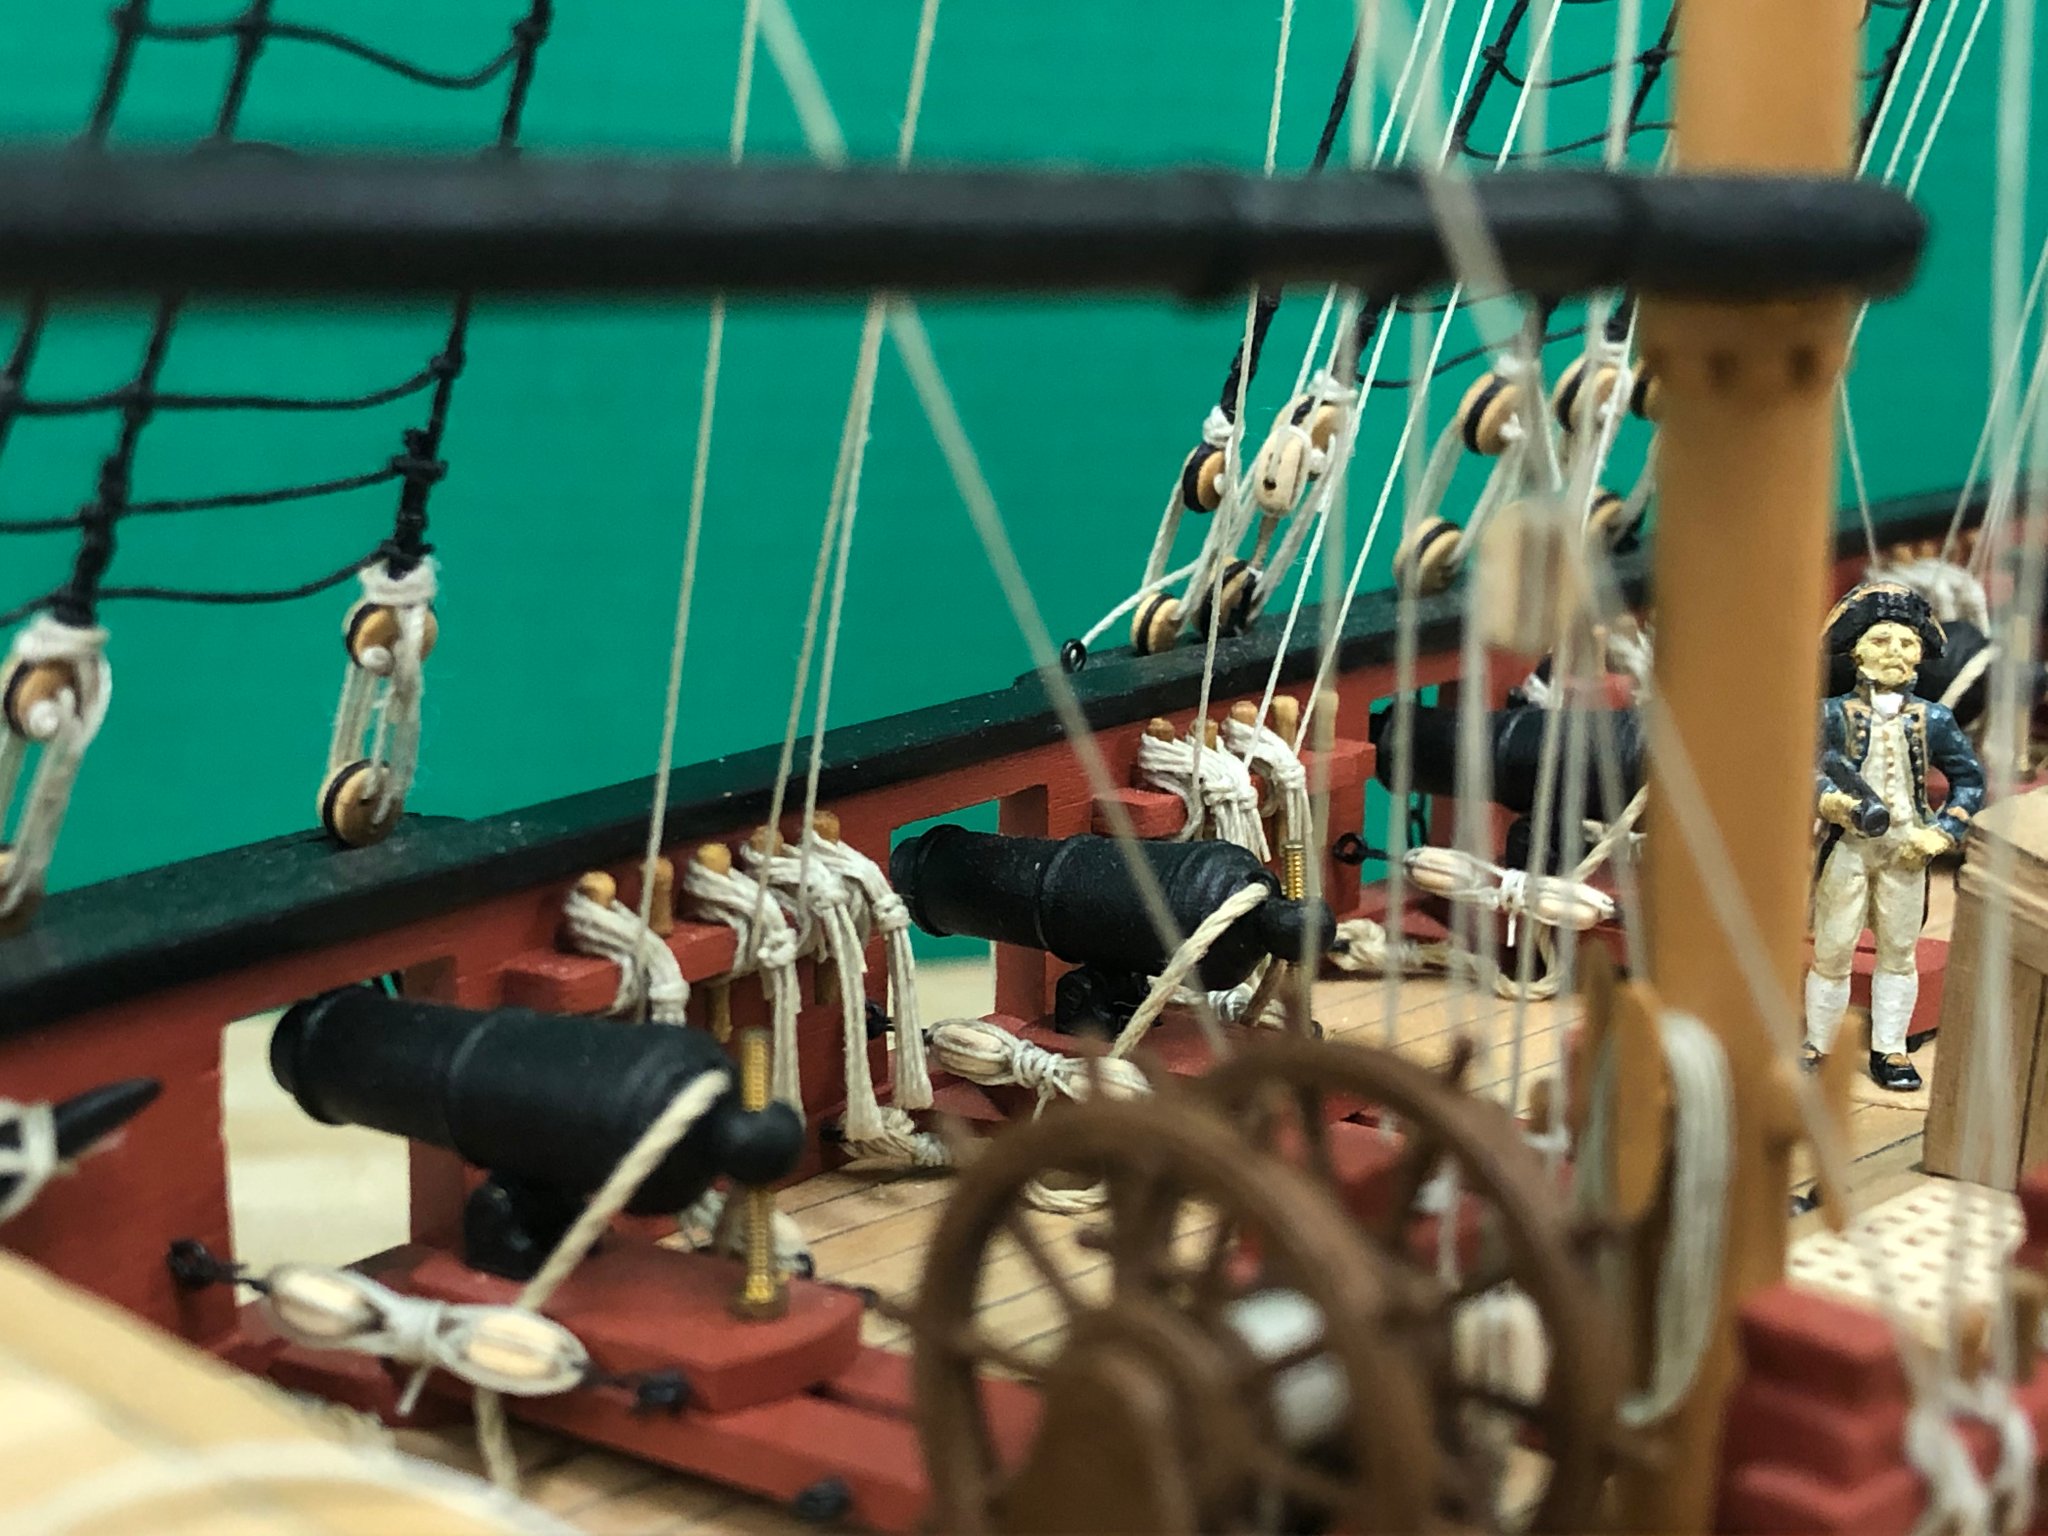
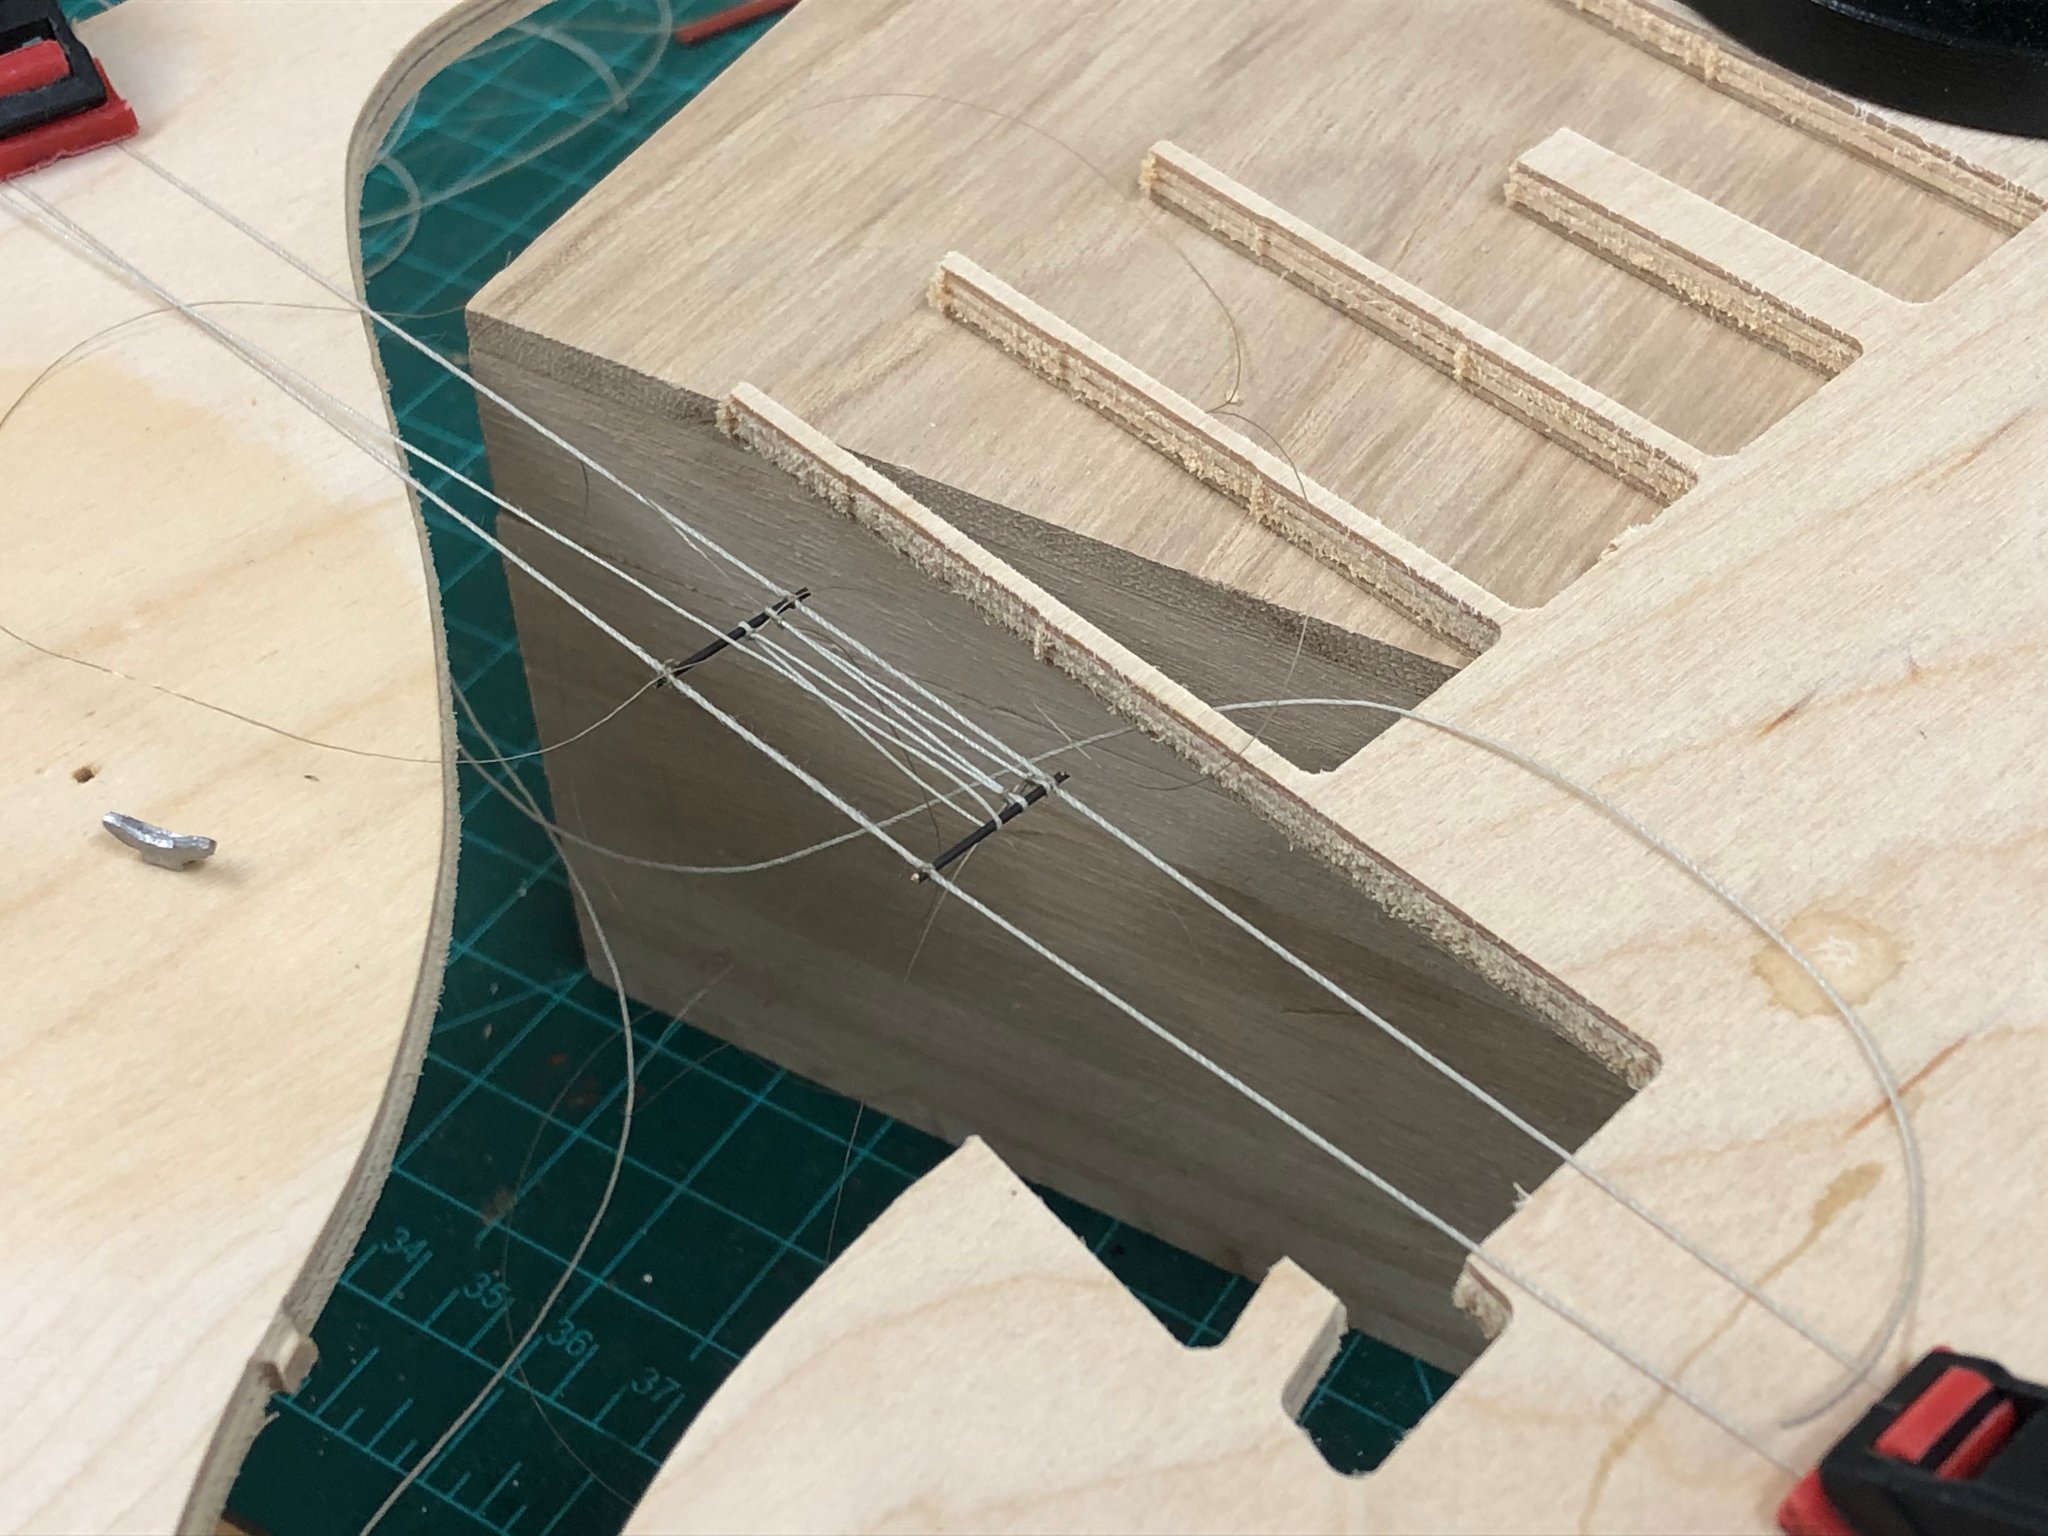
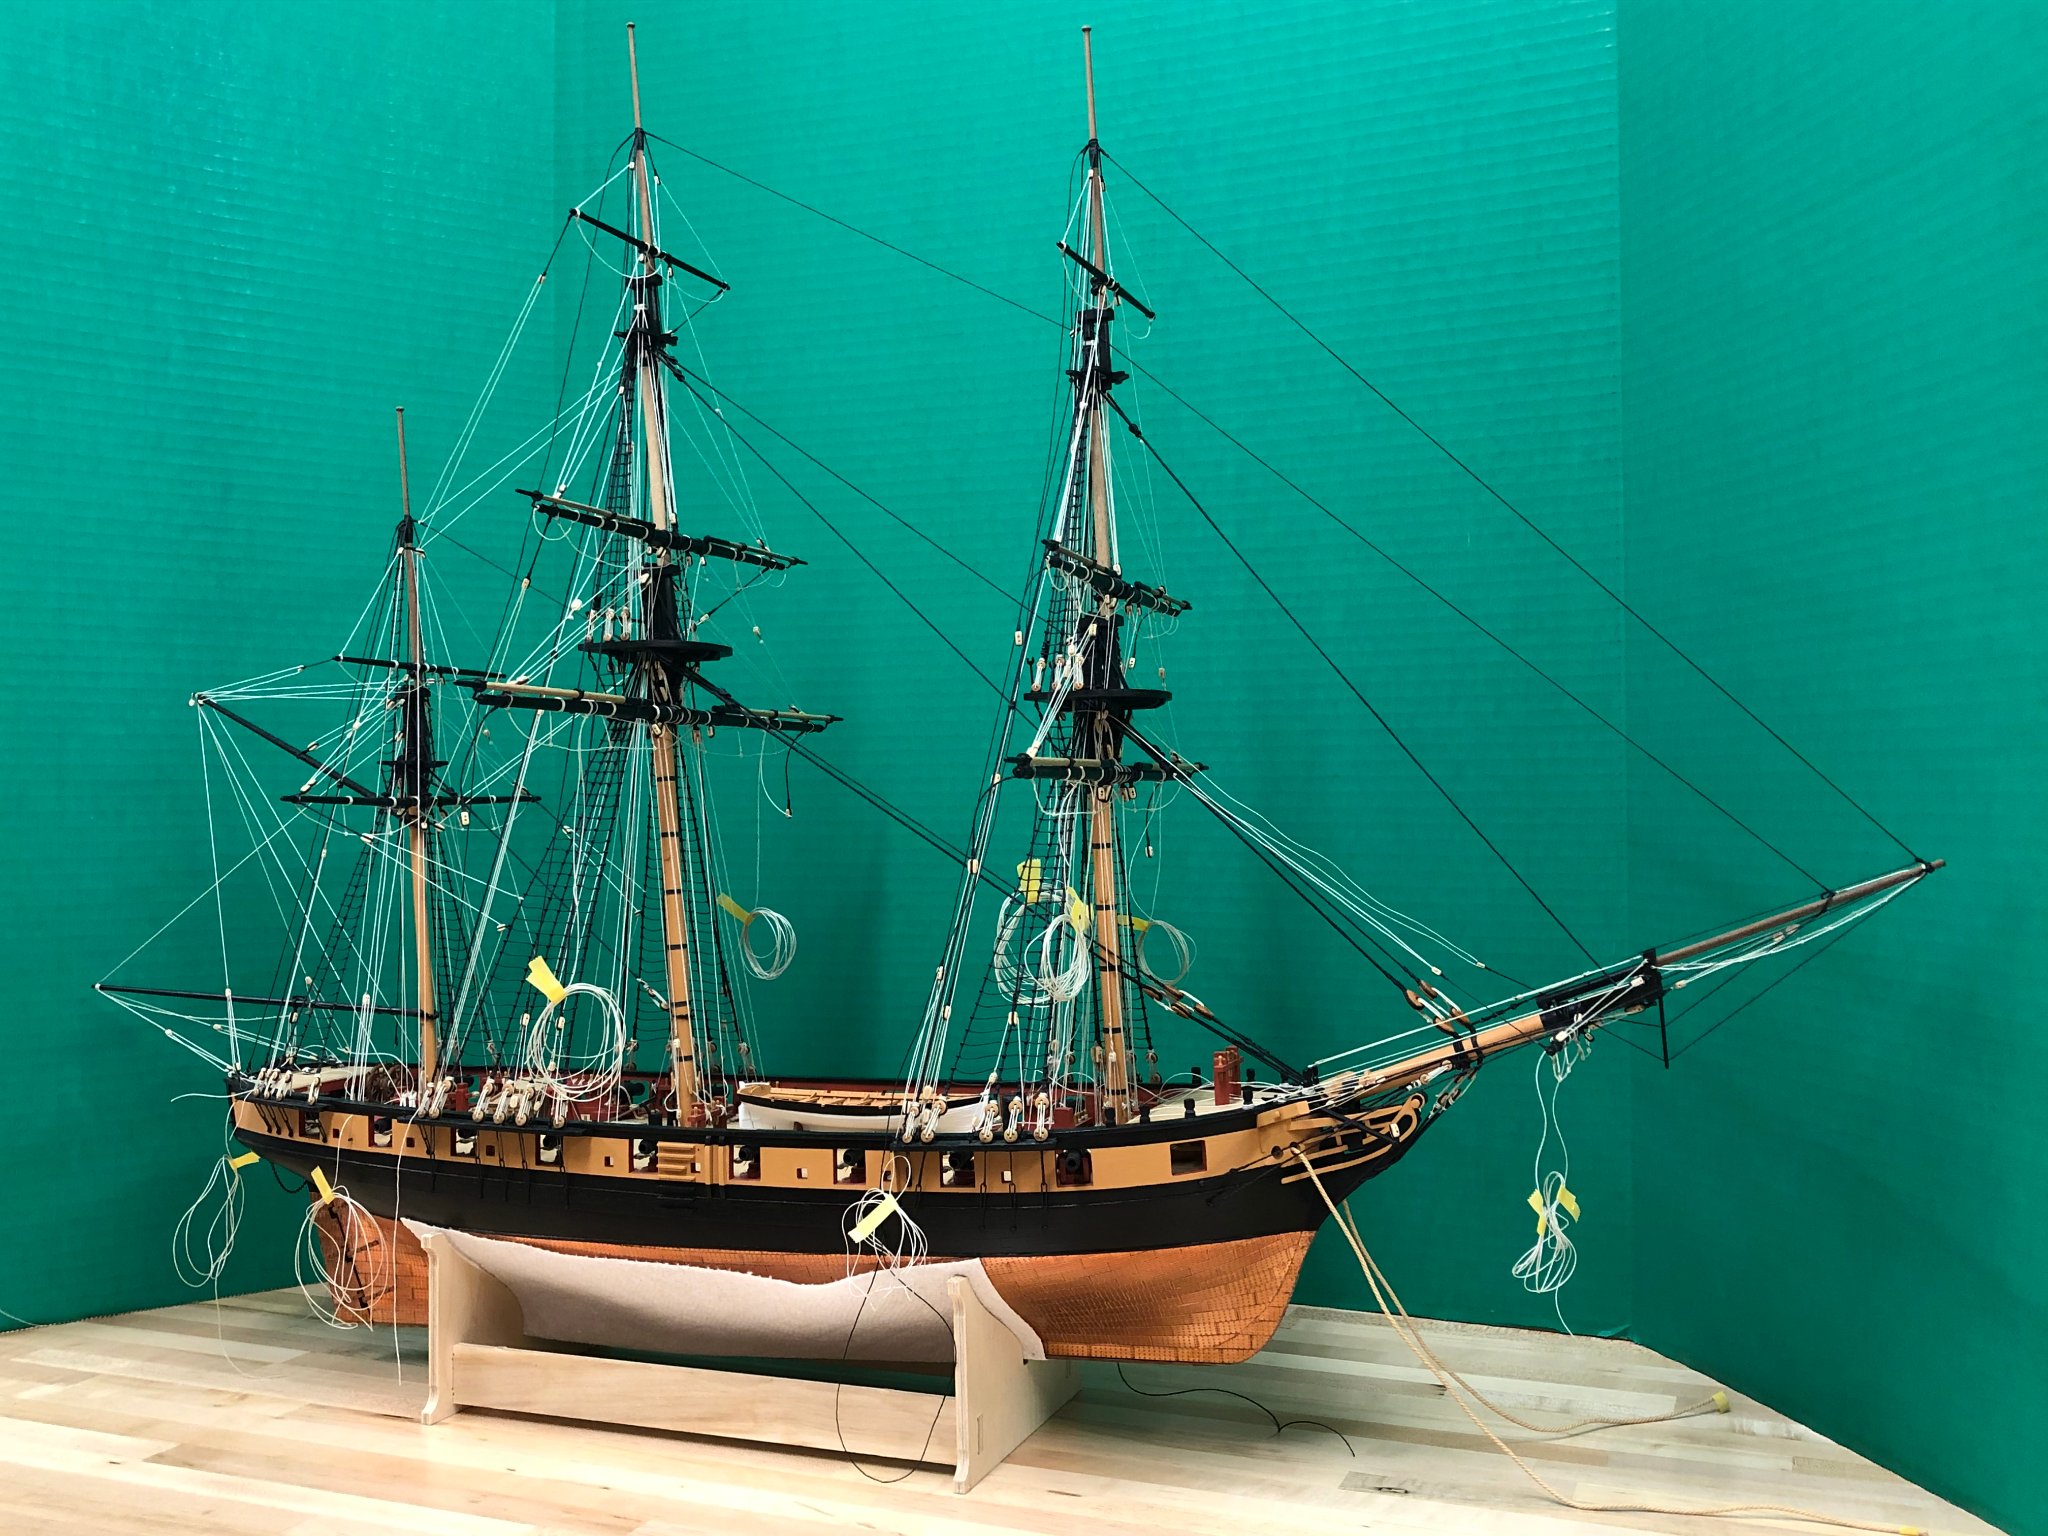
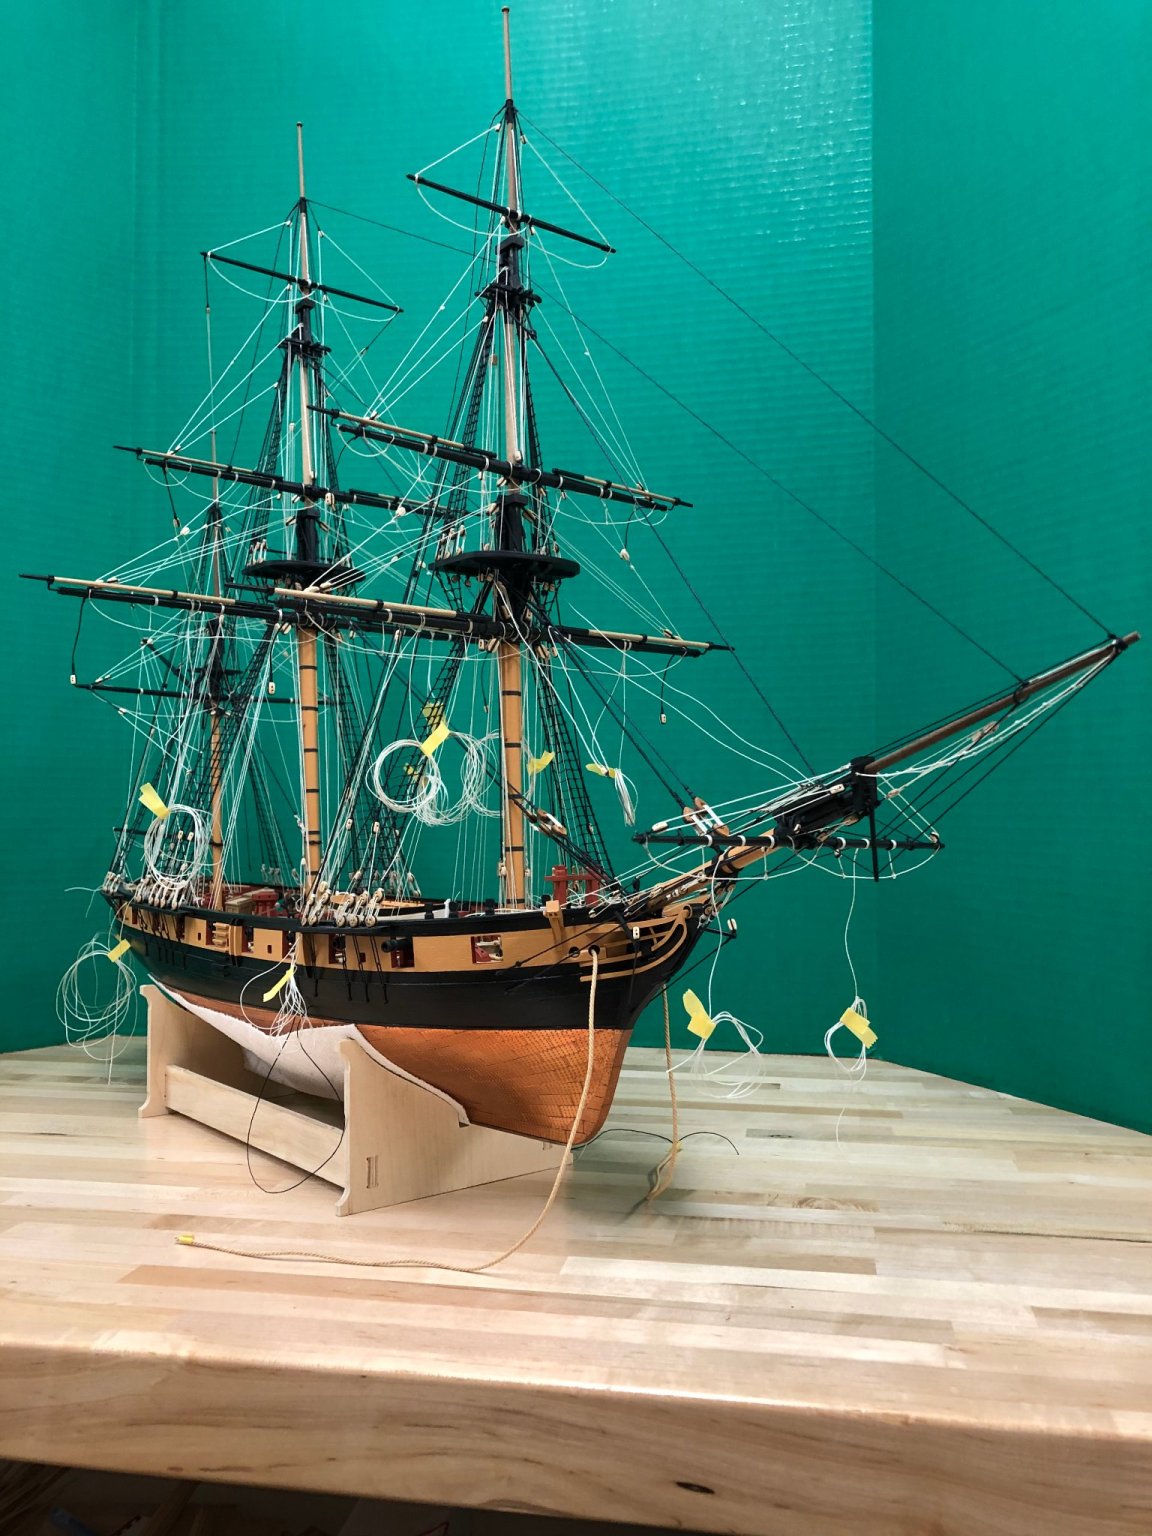
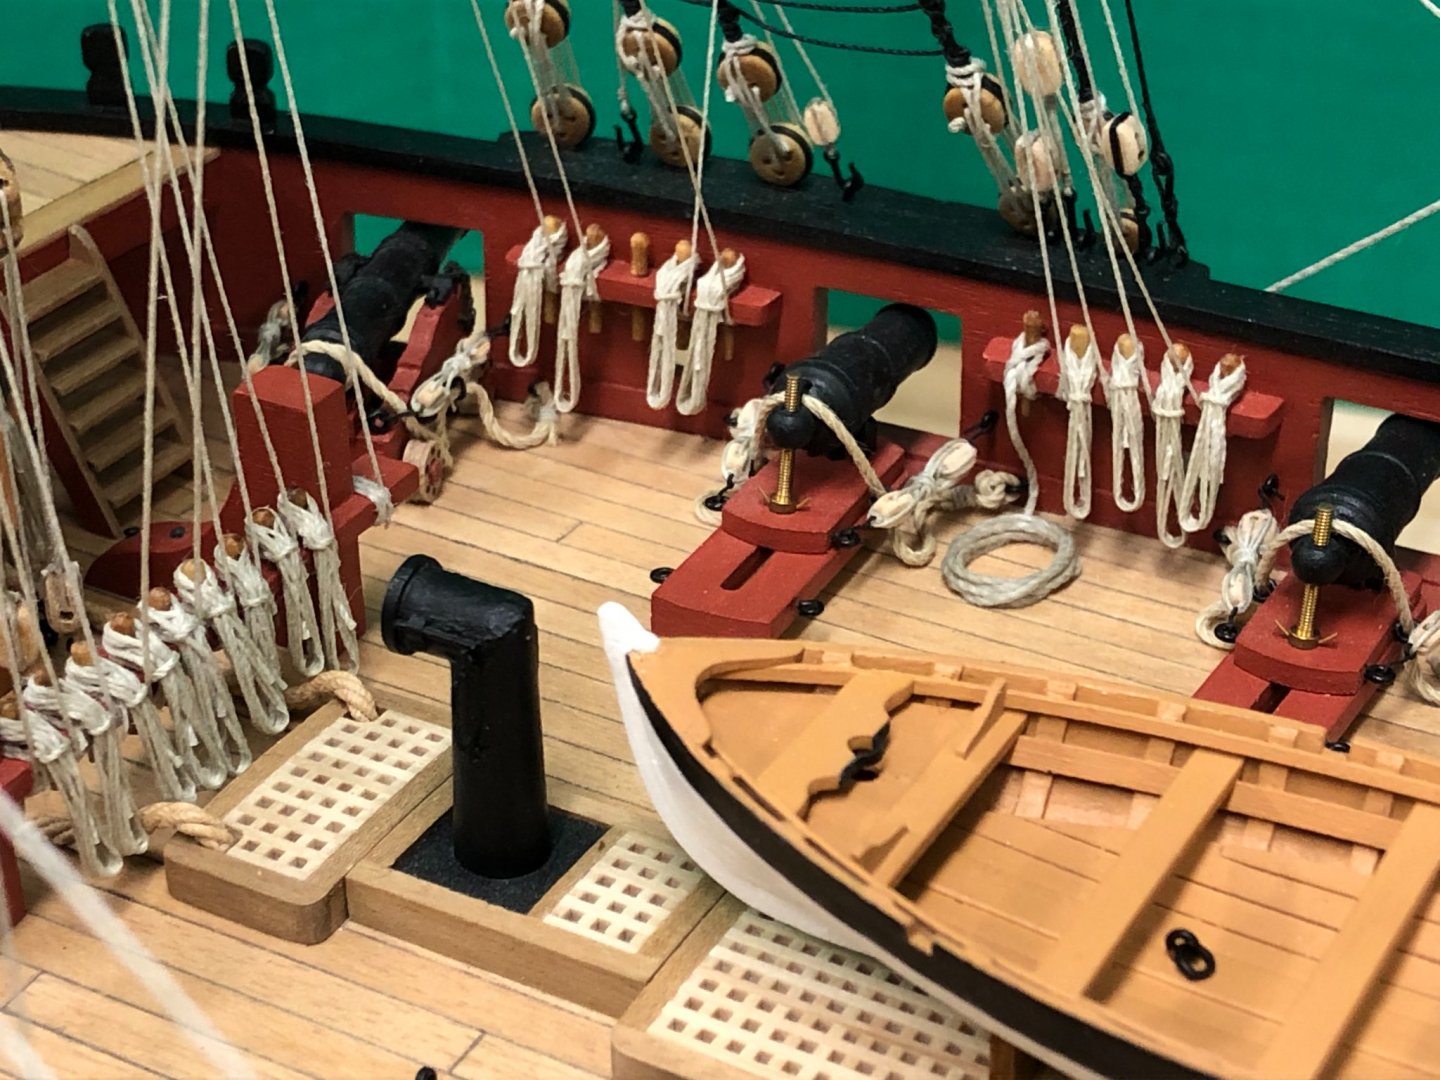
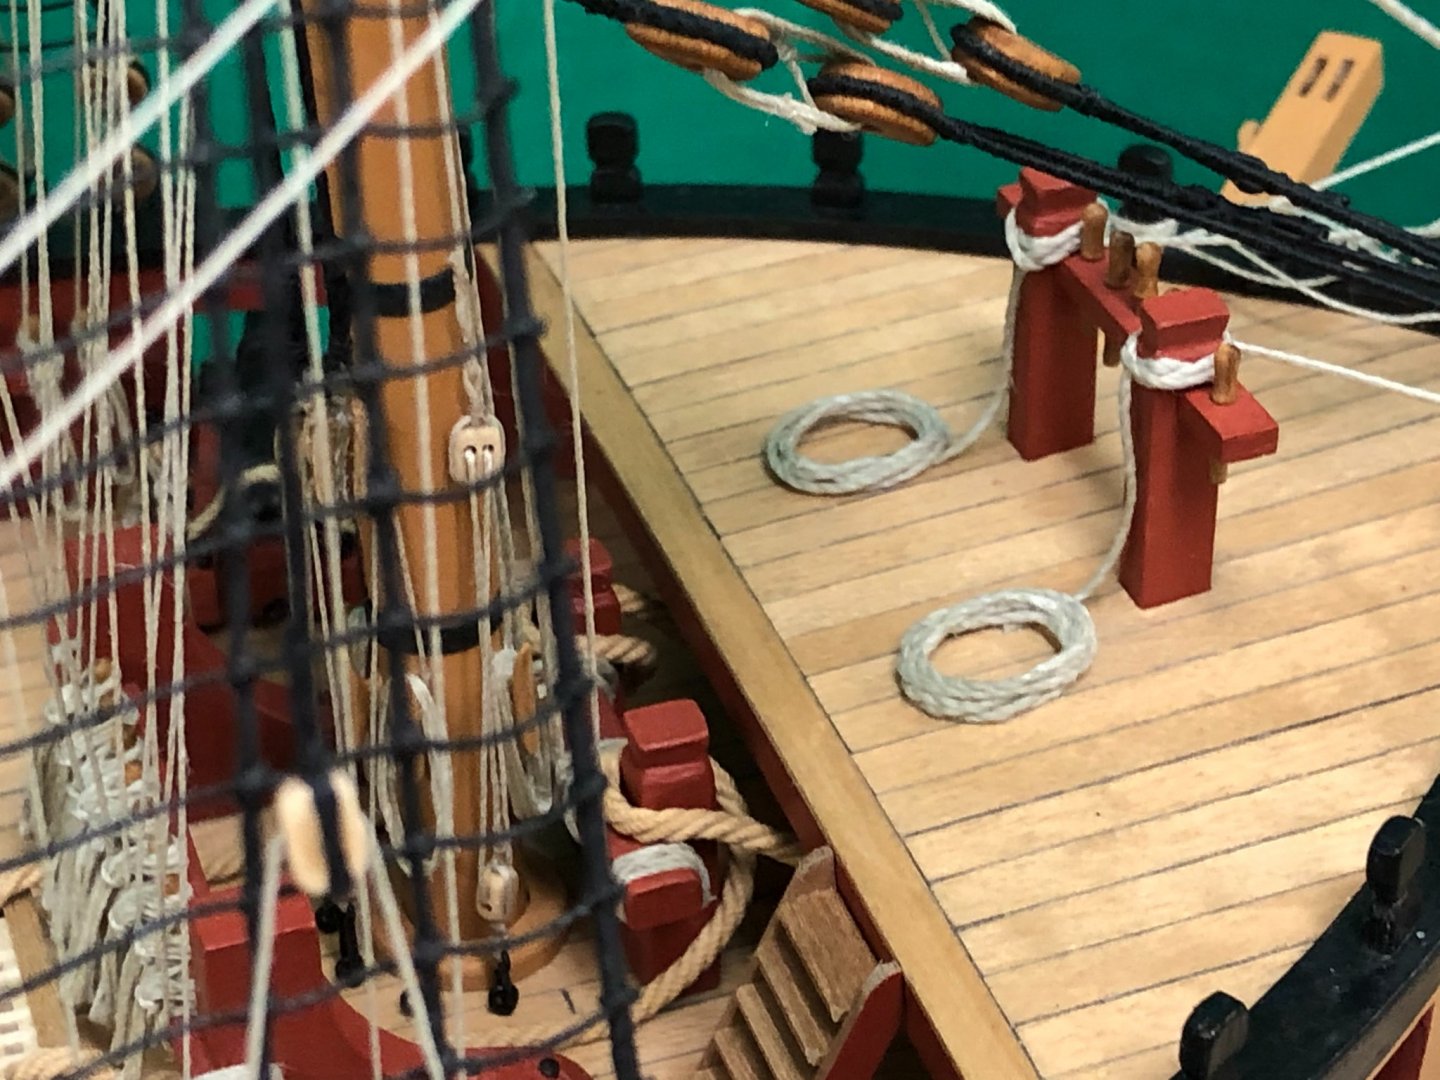
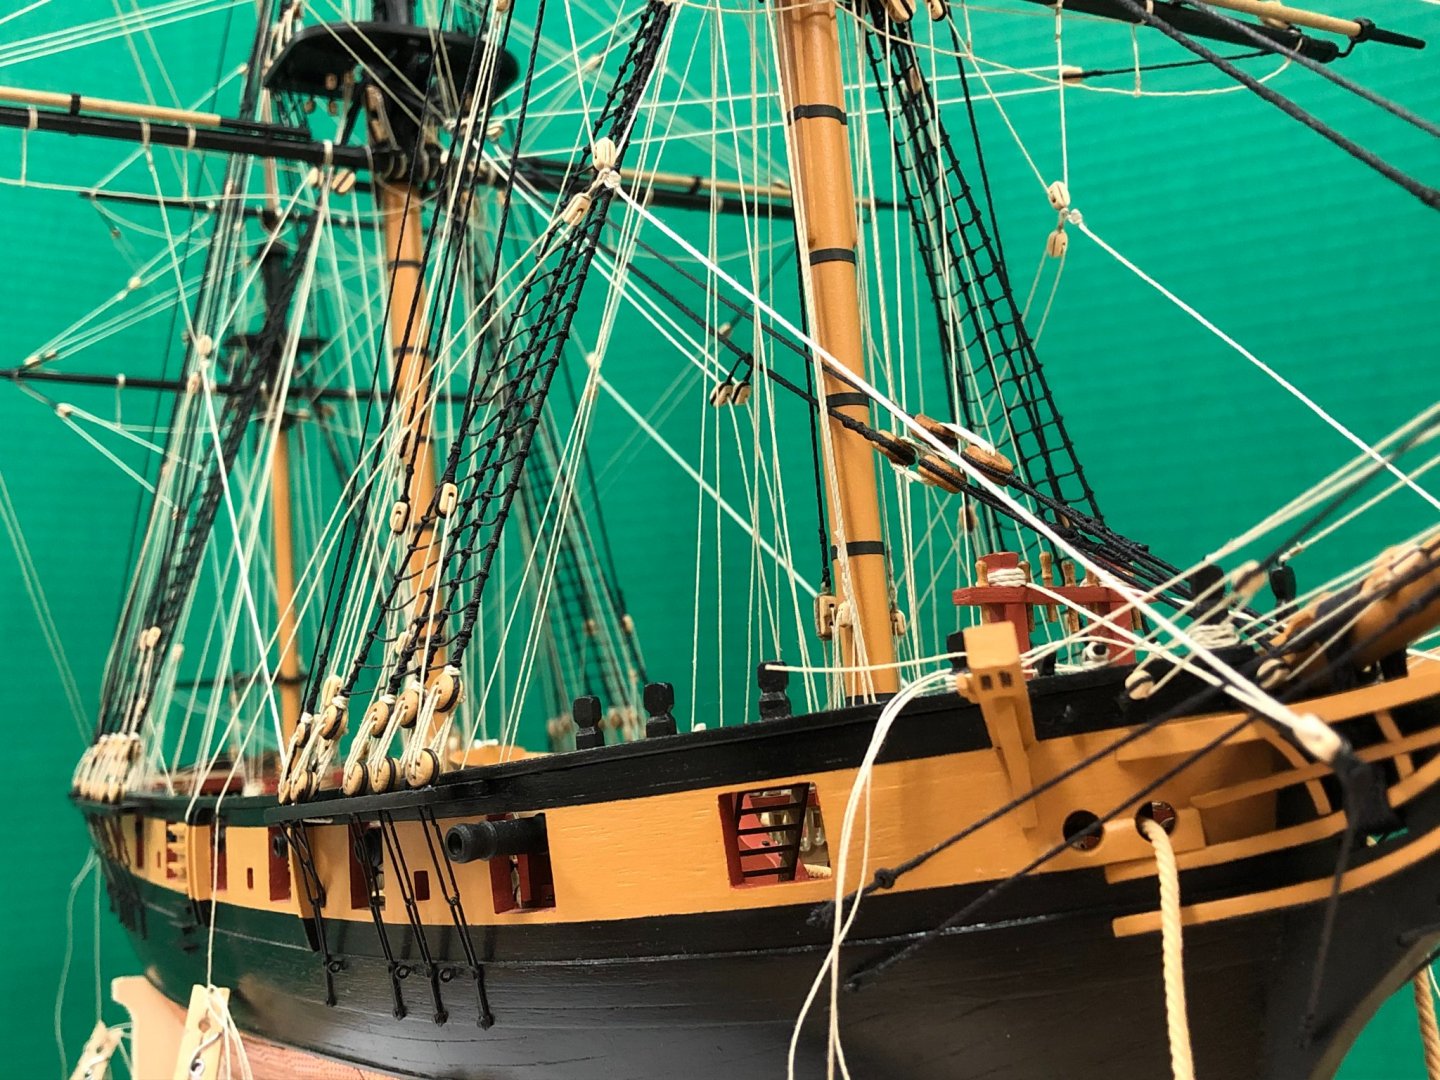
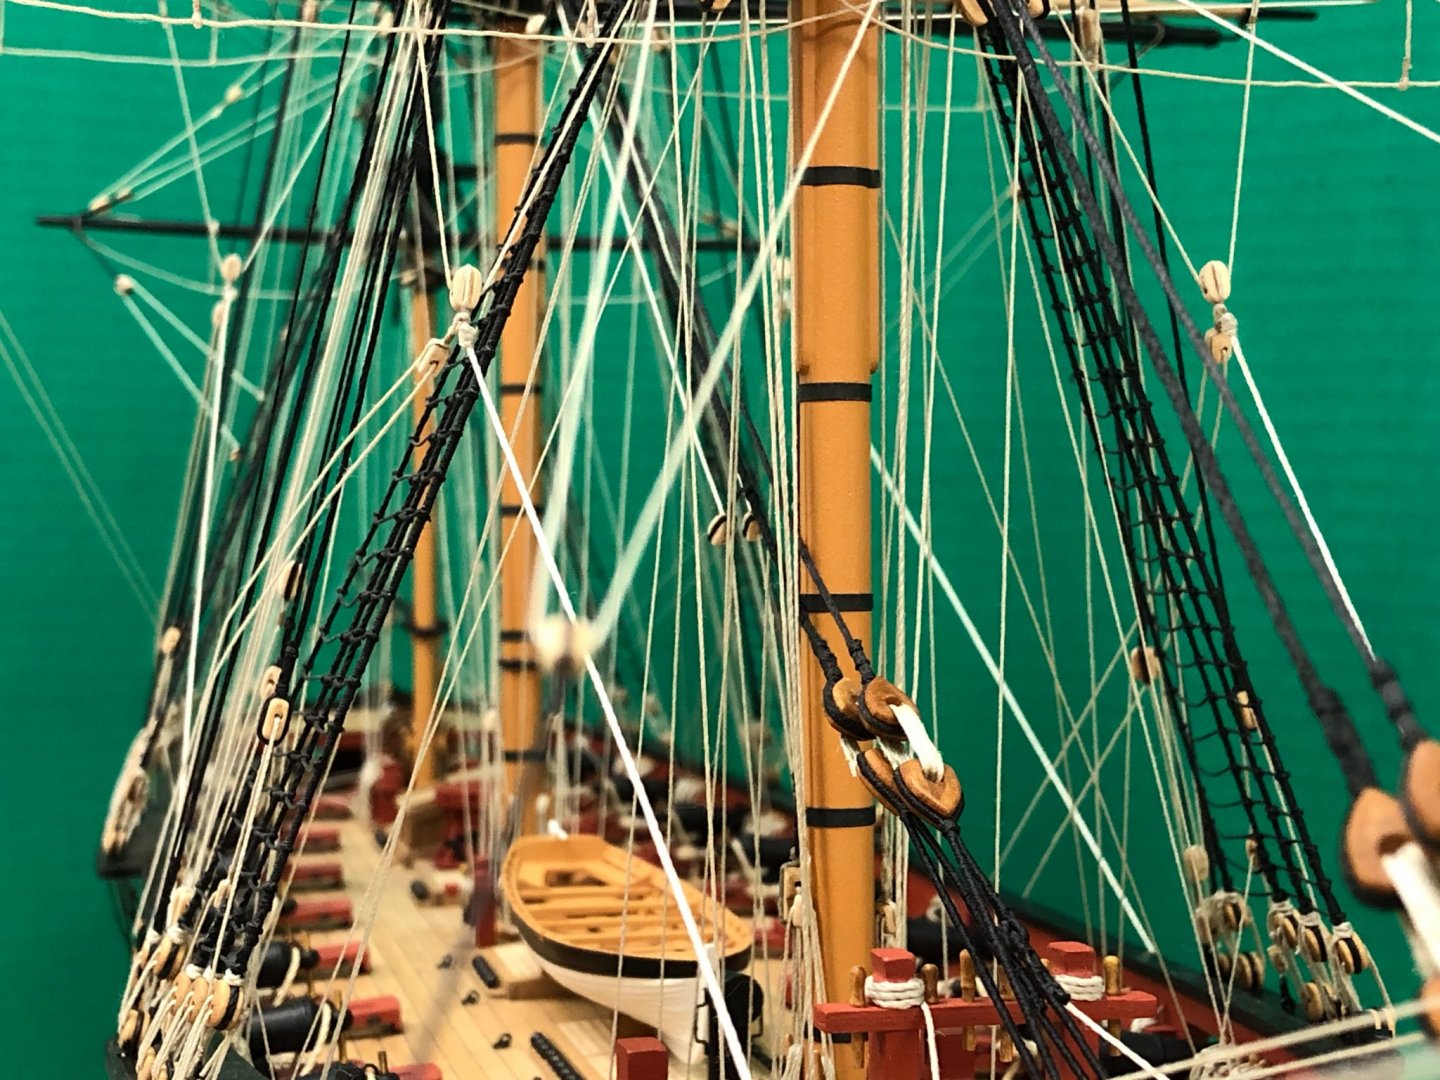
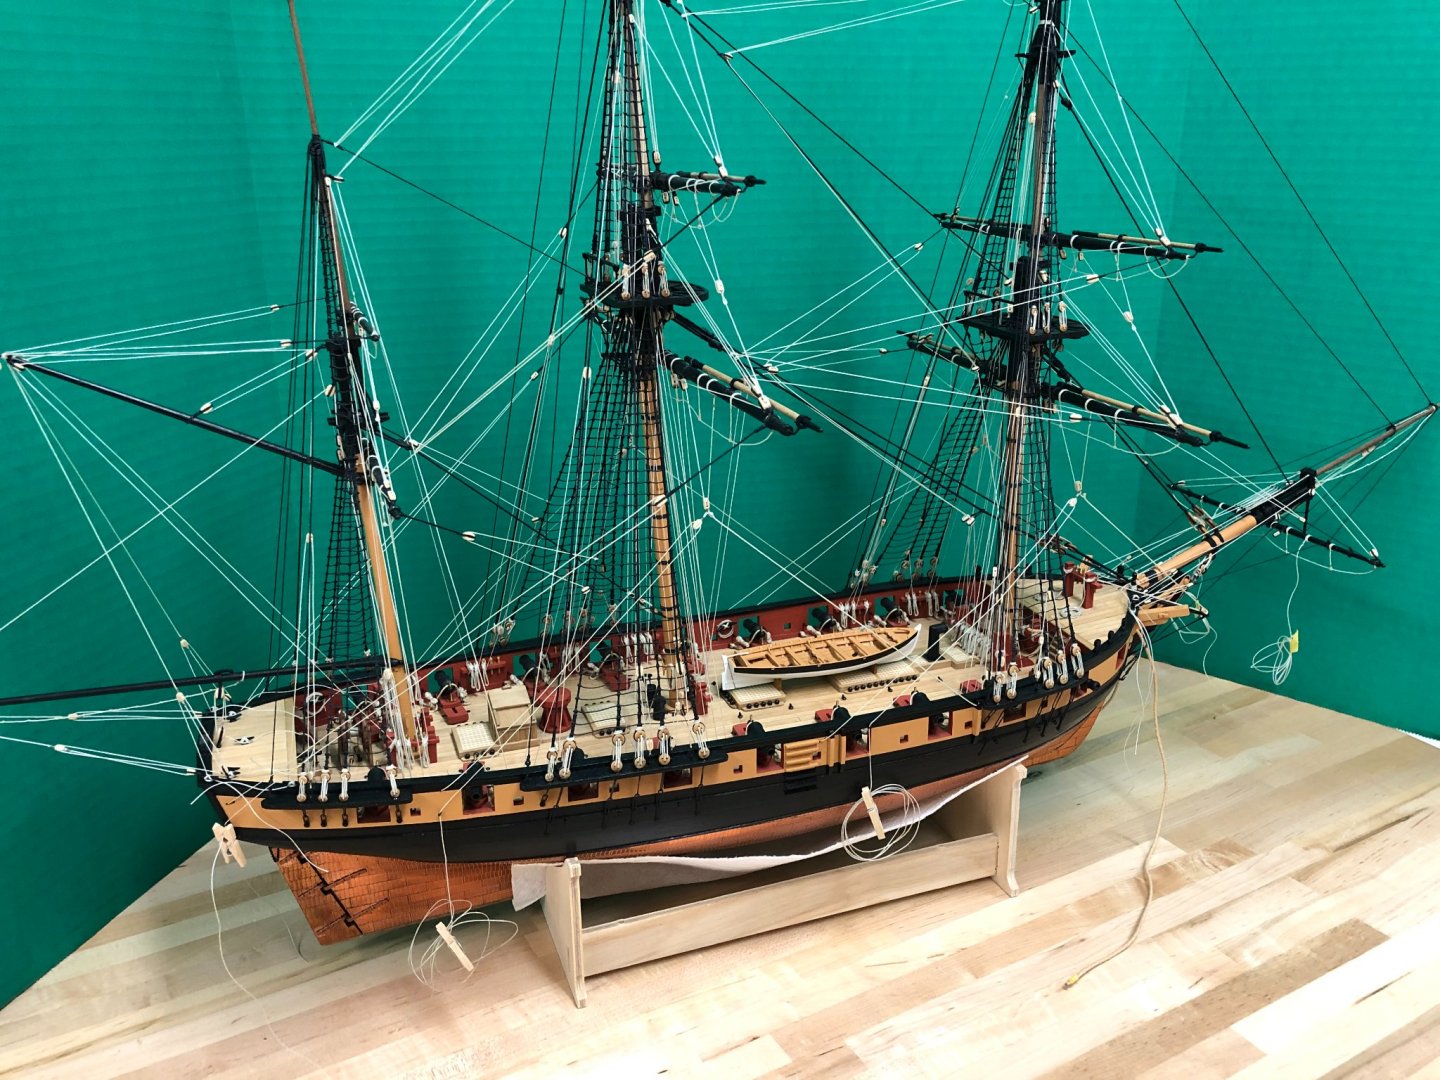
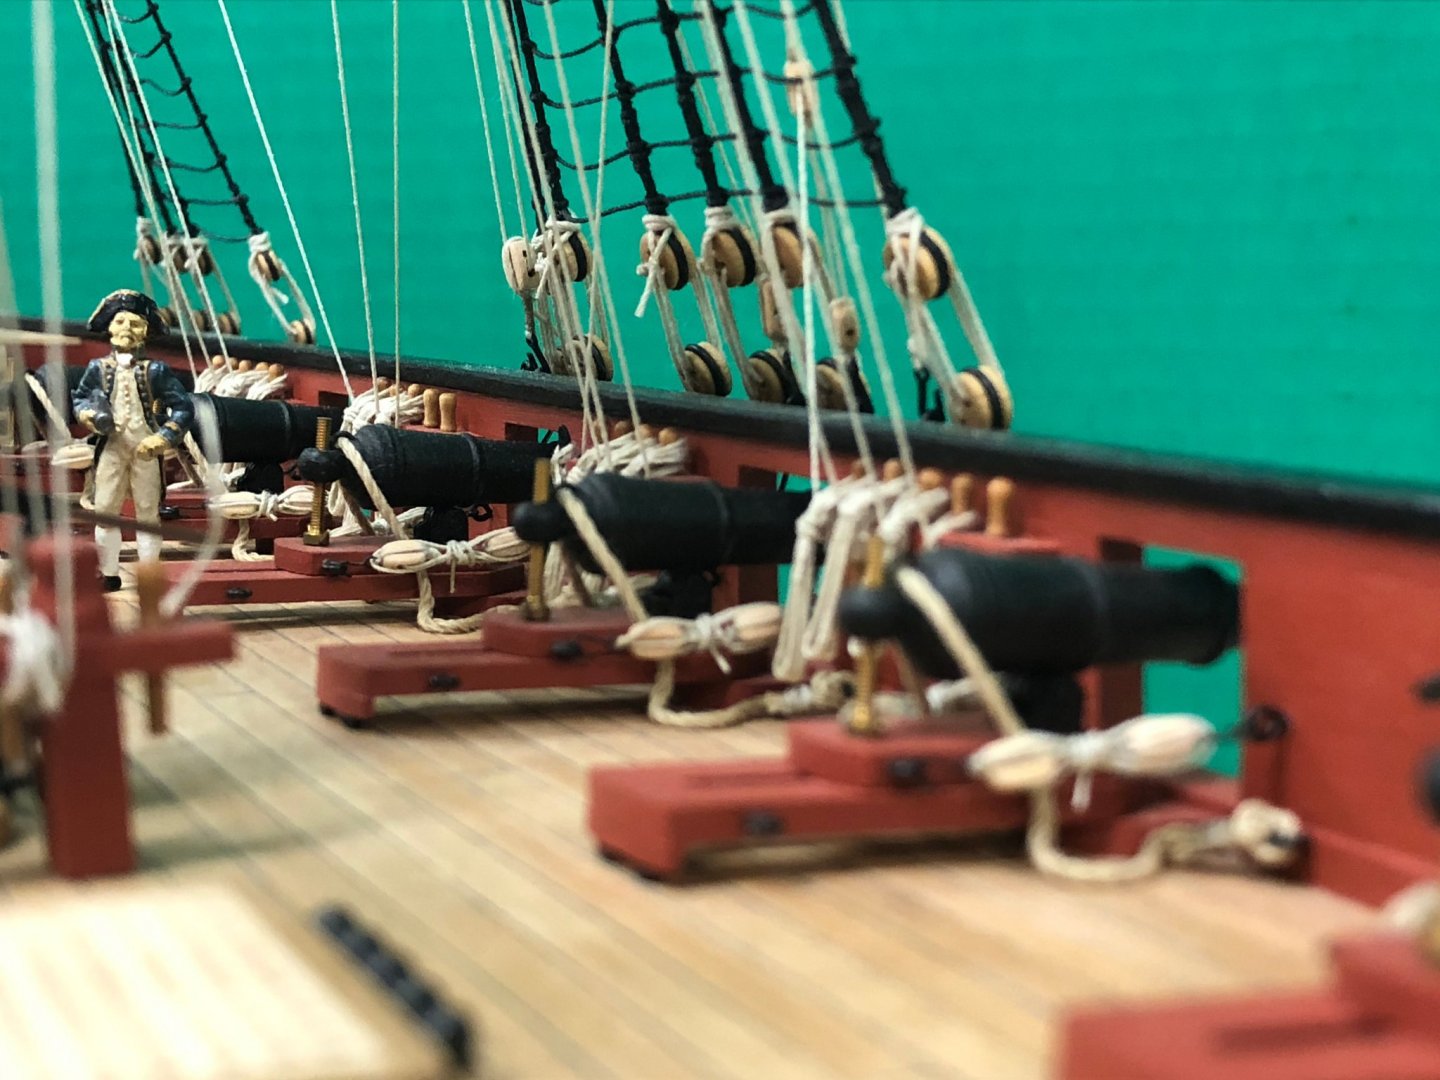
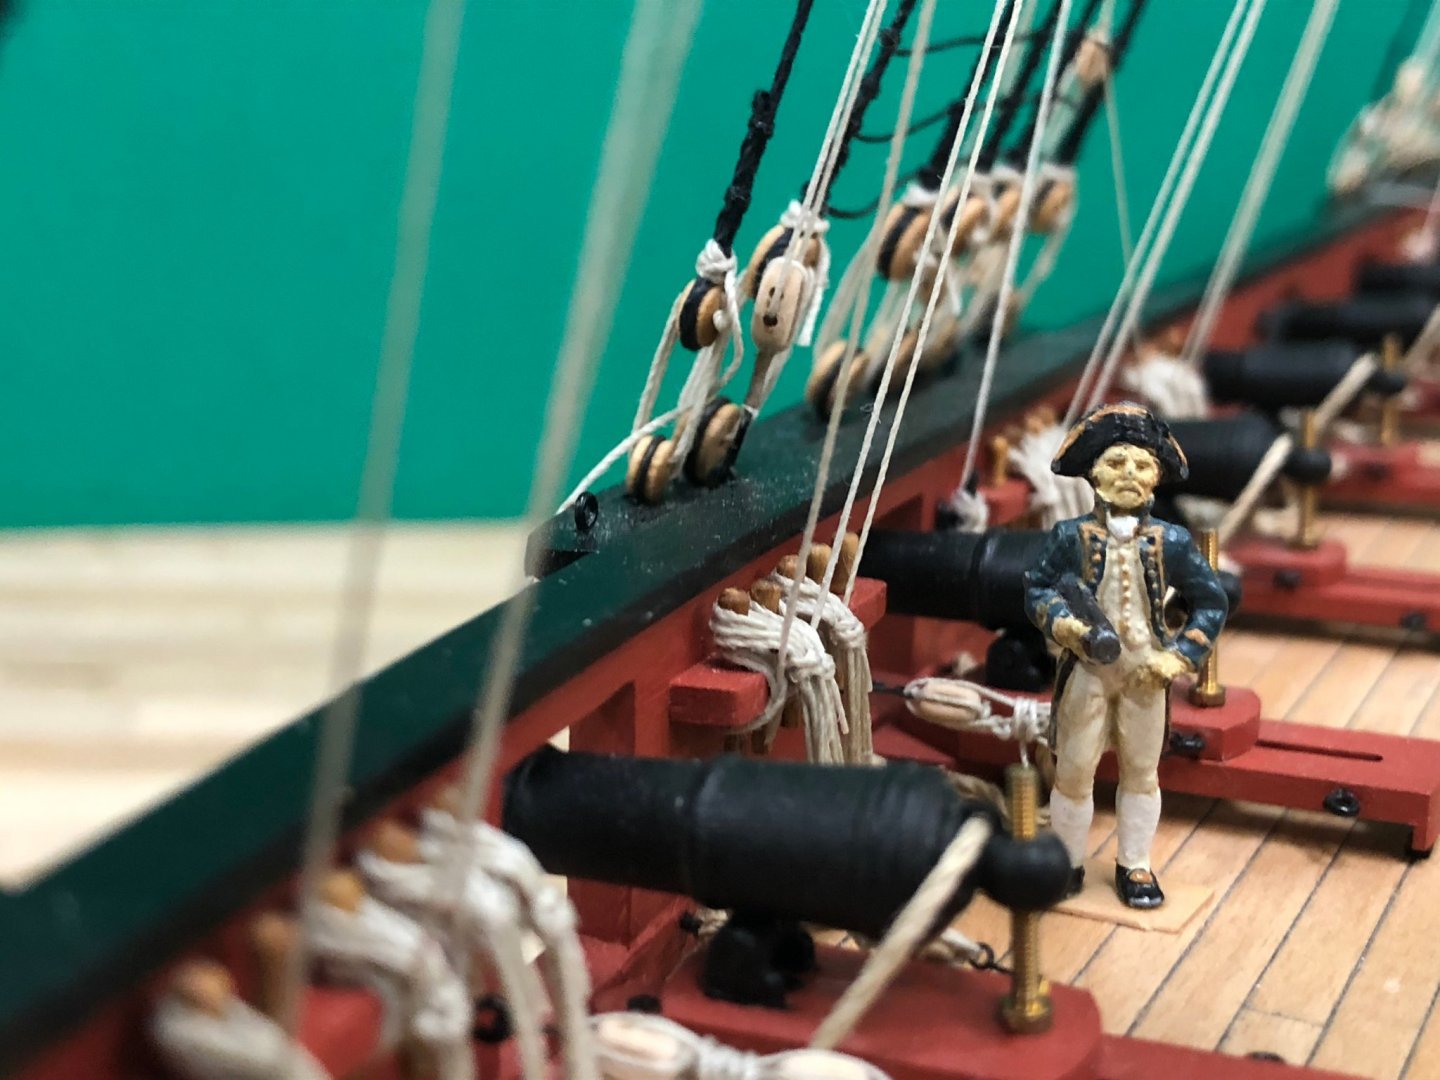
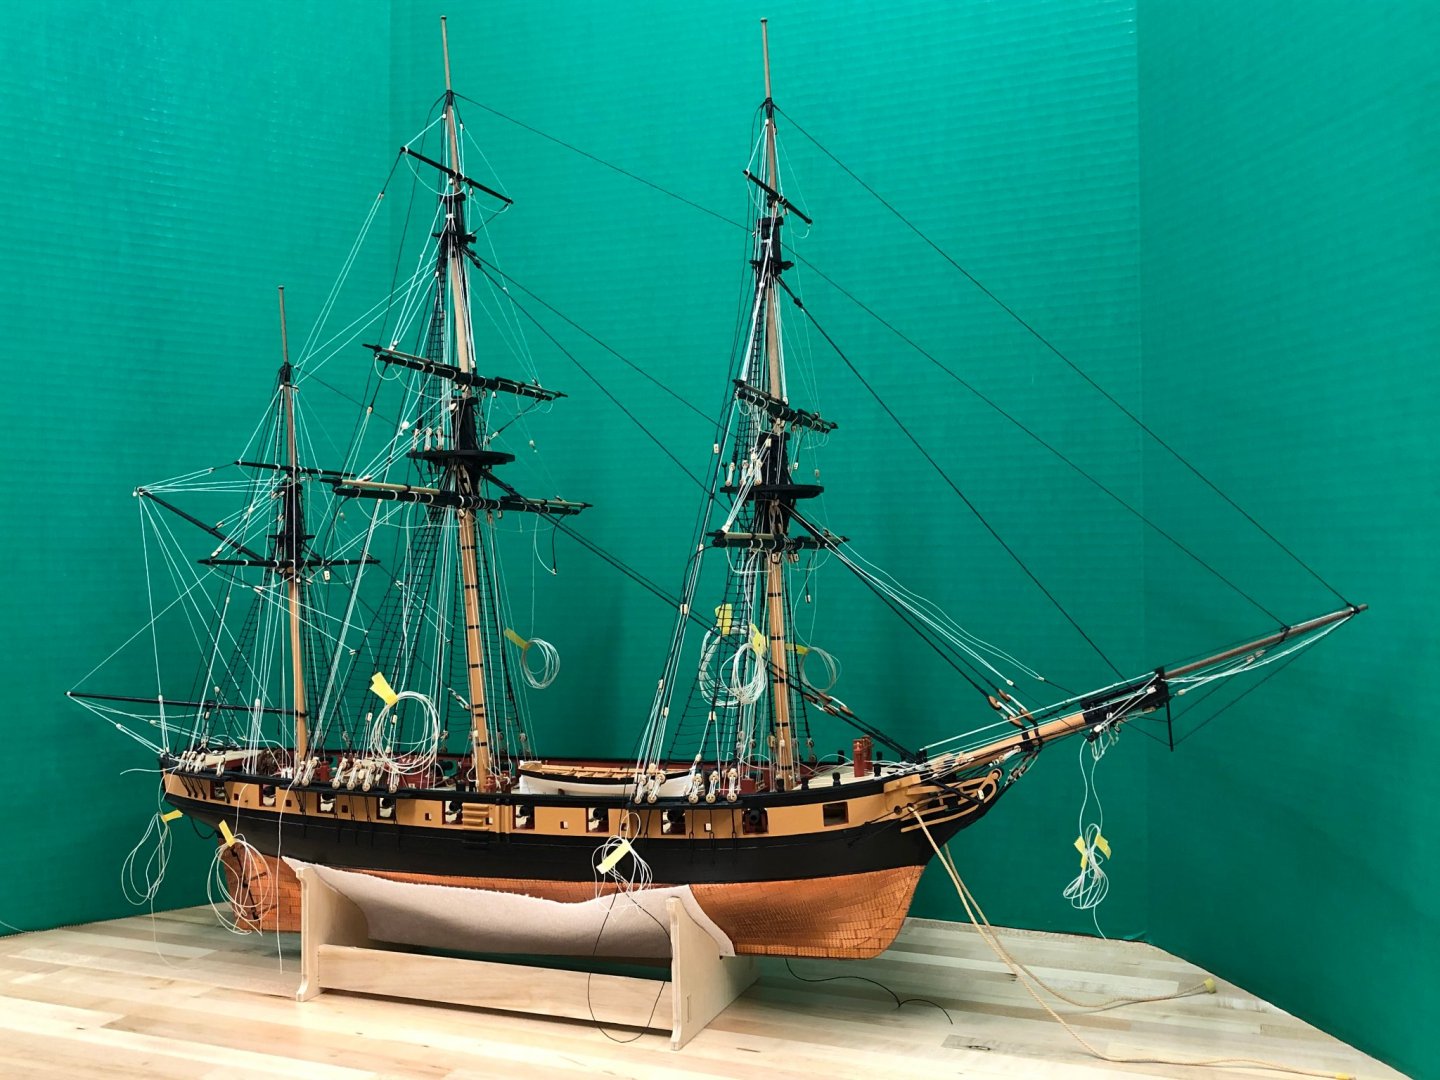
About time I caught up with myself... @Ben - I'm going to have to stand guilty as charged! Appreciate your post, this was something that I have been wrestling with for some time and fully recognize that the approach taken is a compromise. My thinking has been as follows, and I suspect that every model builder will arrive at a different place. Your coils are certainly excellently executed! Quality of rope used: Having used the Syren line on 'Jason', there is just no comparison between good quality custom rope and the 'stuff' supplied in kits. My skill levels are just not up to achieving consistent coils following a seamanlike practice (that look anywhere near acceptable). Scale: This seems to be a variable from modeler to modeler, but to my eye many of the coils using this technique just do not look right at scale, especially when many pins are used on a rail adjacent to each other. Much of the rope used per kit instructions are much thinner than your prototype - mostly kit supplied 0.25mm line which is not very substantial and subject to gravity making floating 'ovals' distracting Quantity of rope (on the actual ships): Looking at many older photographs of ships, the one thing that stands out to me is that the quantity of belayed rope used on contemporary working vessels just looks far more voluminous for whatever reason than that seen on modern 'museum' ships, maybe because of longer working lengths, necessity to be worked by many hands etc etc. The bottom line though is that there is enough on this build that continues to bother me (both mistakes and things that I have since learned) to push me to continue with an eye to completion. I'll apply for parole at the duly appointed time... Rigging (almost) complete: After nearly 7 years, with all the main rigging elements in place, I can start to smell the scent of completion. The only outstanding rigging feature (in addition to some remaining decorative coils) are the spritsail sail sheets which will be added when I'm confident that the anchor placement won't cause problems. Braces: One of the bigger challenges were the braces, mainly because many of these are bent onto various stays. At this scale the rope doesn't behave well, and preventing the stays being pulled into all sorts of unnatural alignments by the much thinner braces, and keeping the braces taught, meant taking this very slowly, ensuring line had time settle into place and in many cases using dilute PVA while attempting to keep the stays in position. This proved to be especially challenging for the fore and fore topsail braces which bend to the main stay in one rather tight spot. Sheets, tacks and cluelines: Petersson was a big help here to illustrate how these worked in practice as the instructions are simplified. Given that both the main and fore require these, with 3 belaying points for each, some planning is needed to ensure sufficient working room as once in position access is even more severely limited. The tack is the most substantial of the running rigging used and 0.75mm rope was used as per instructions. At this thickness, it proved necessary to coil rope on the deck after belaying to pinrails. I took the same approach to BE on his Pegasus build in having the sheets and tacks go outboard of any standing rigging, although the sheets are yet to be finally secured. And finally, some overall shots..


- 800 replies
-
- 28
-
-
- snake
- caldercraft
- (and 1 more)
-
And another one completed! Well done, she's looking very nice Sjors. You really are the most prolific of builders, think you manage to complete more ships than most people manage log updates! Seriously, something again to be proud of, a beautiful model!
- 164 replies
-
- 1
-
-
- vanguard models
- flirt
- (and 1 more)
-
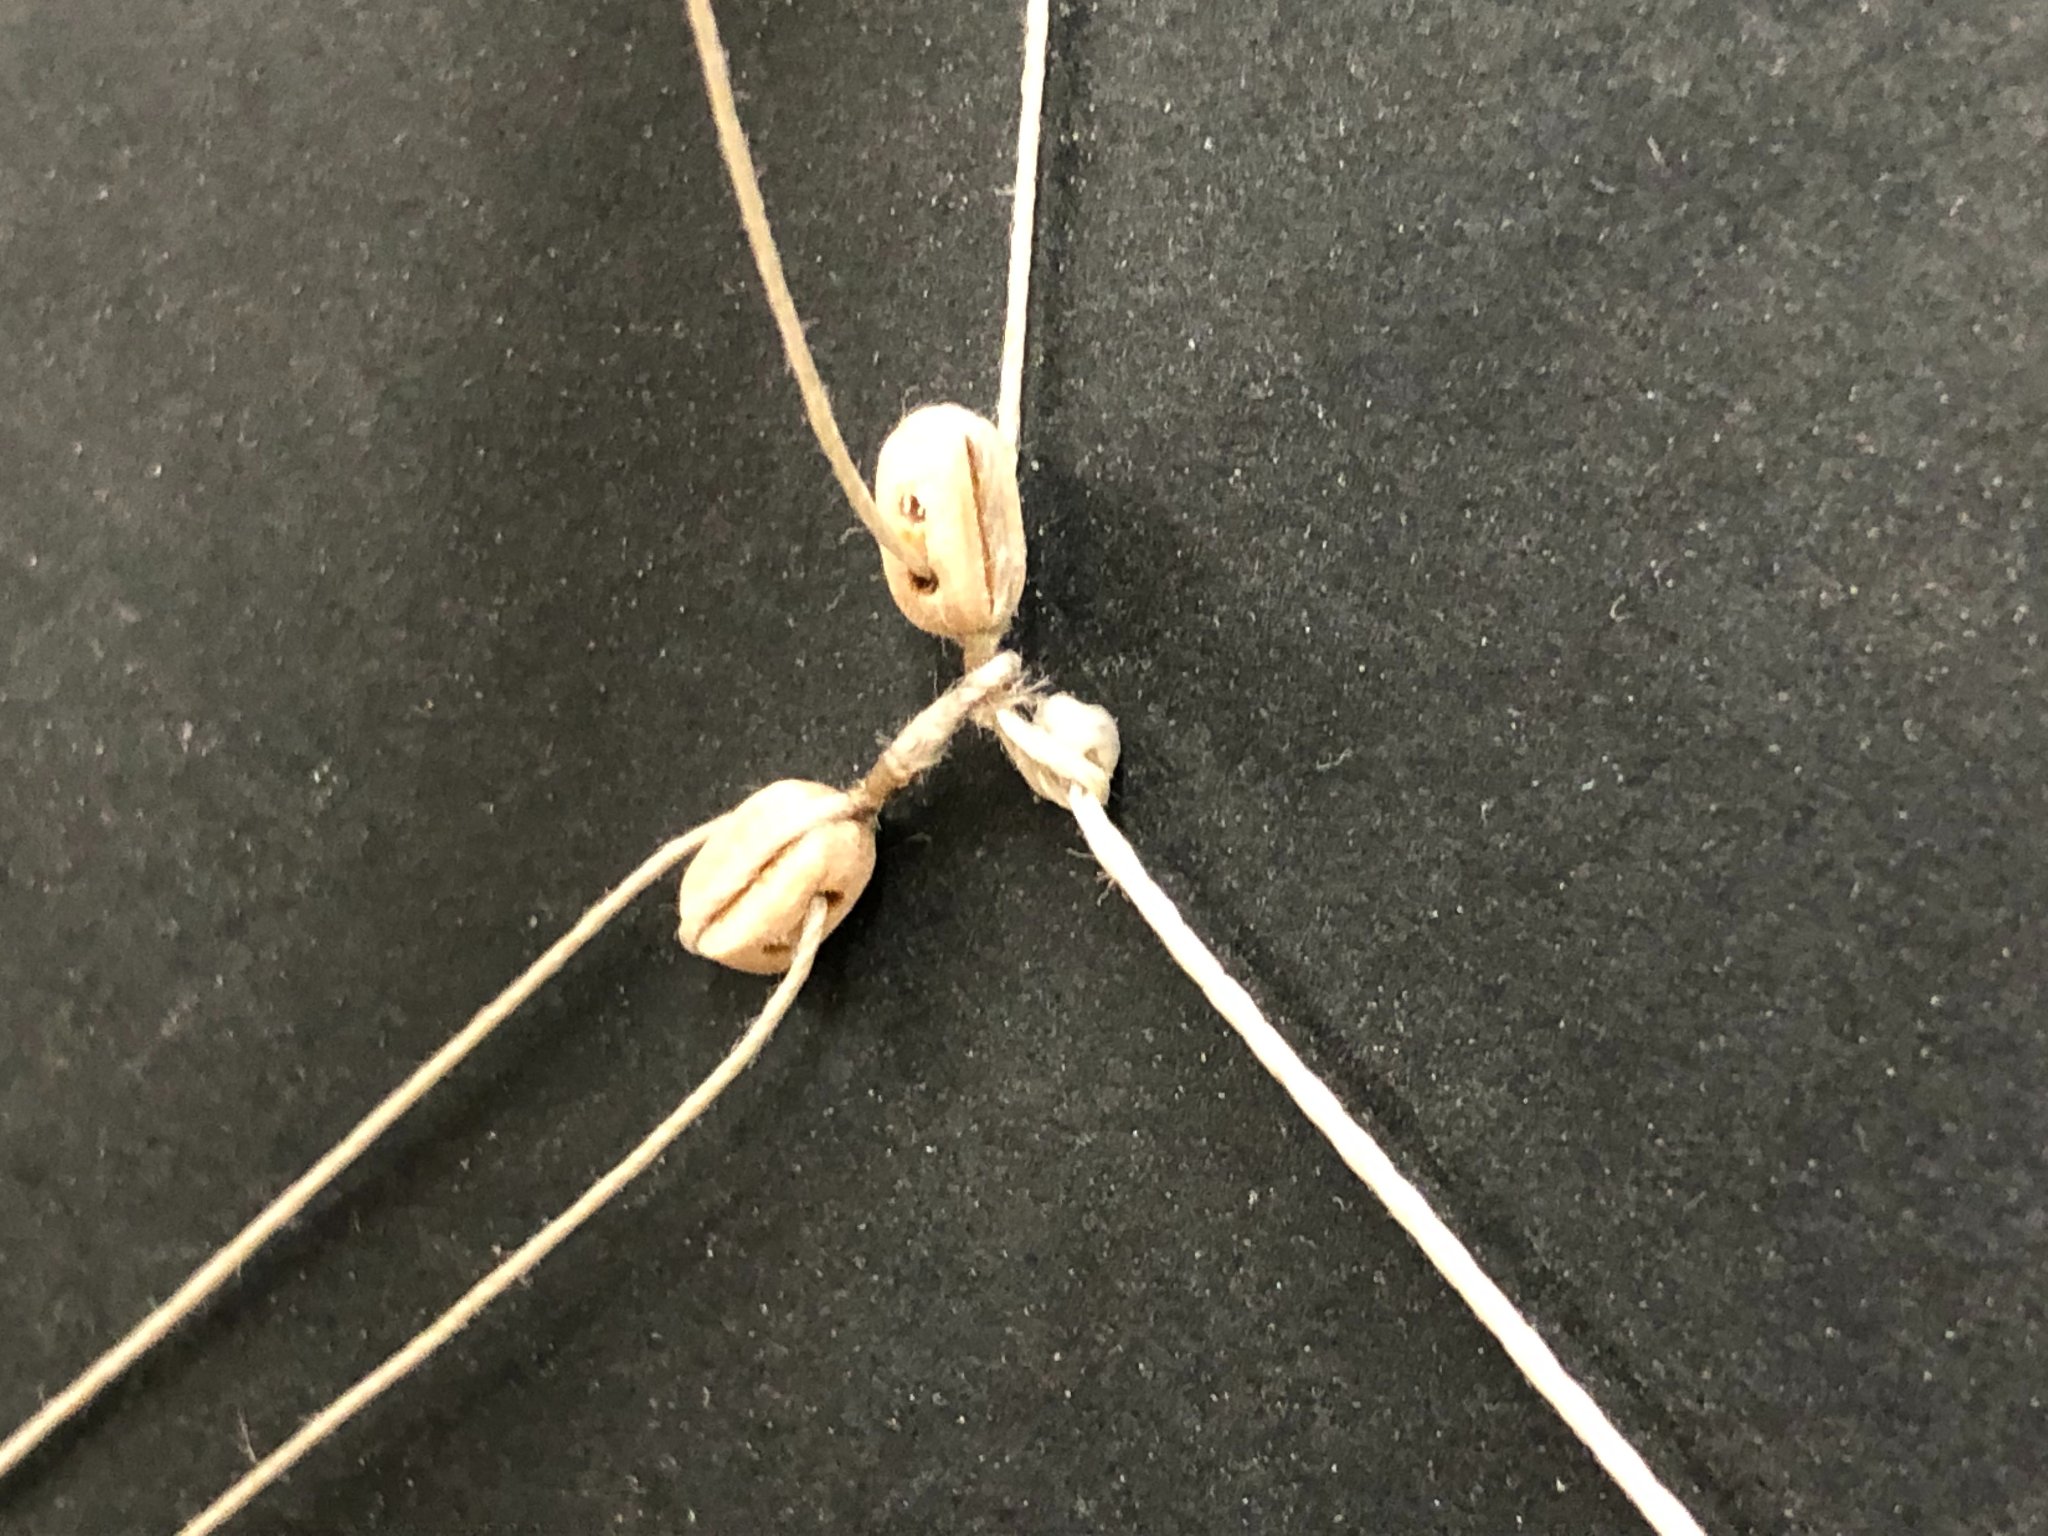
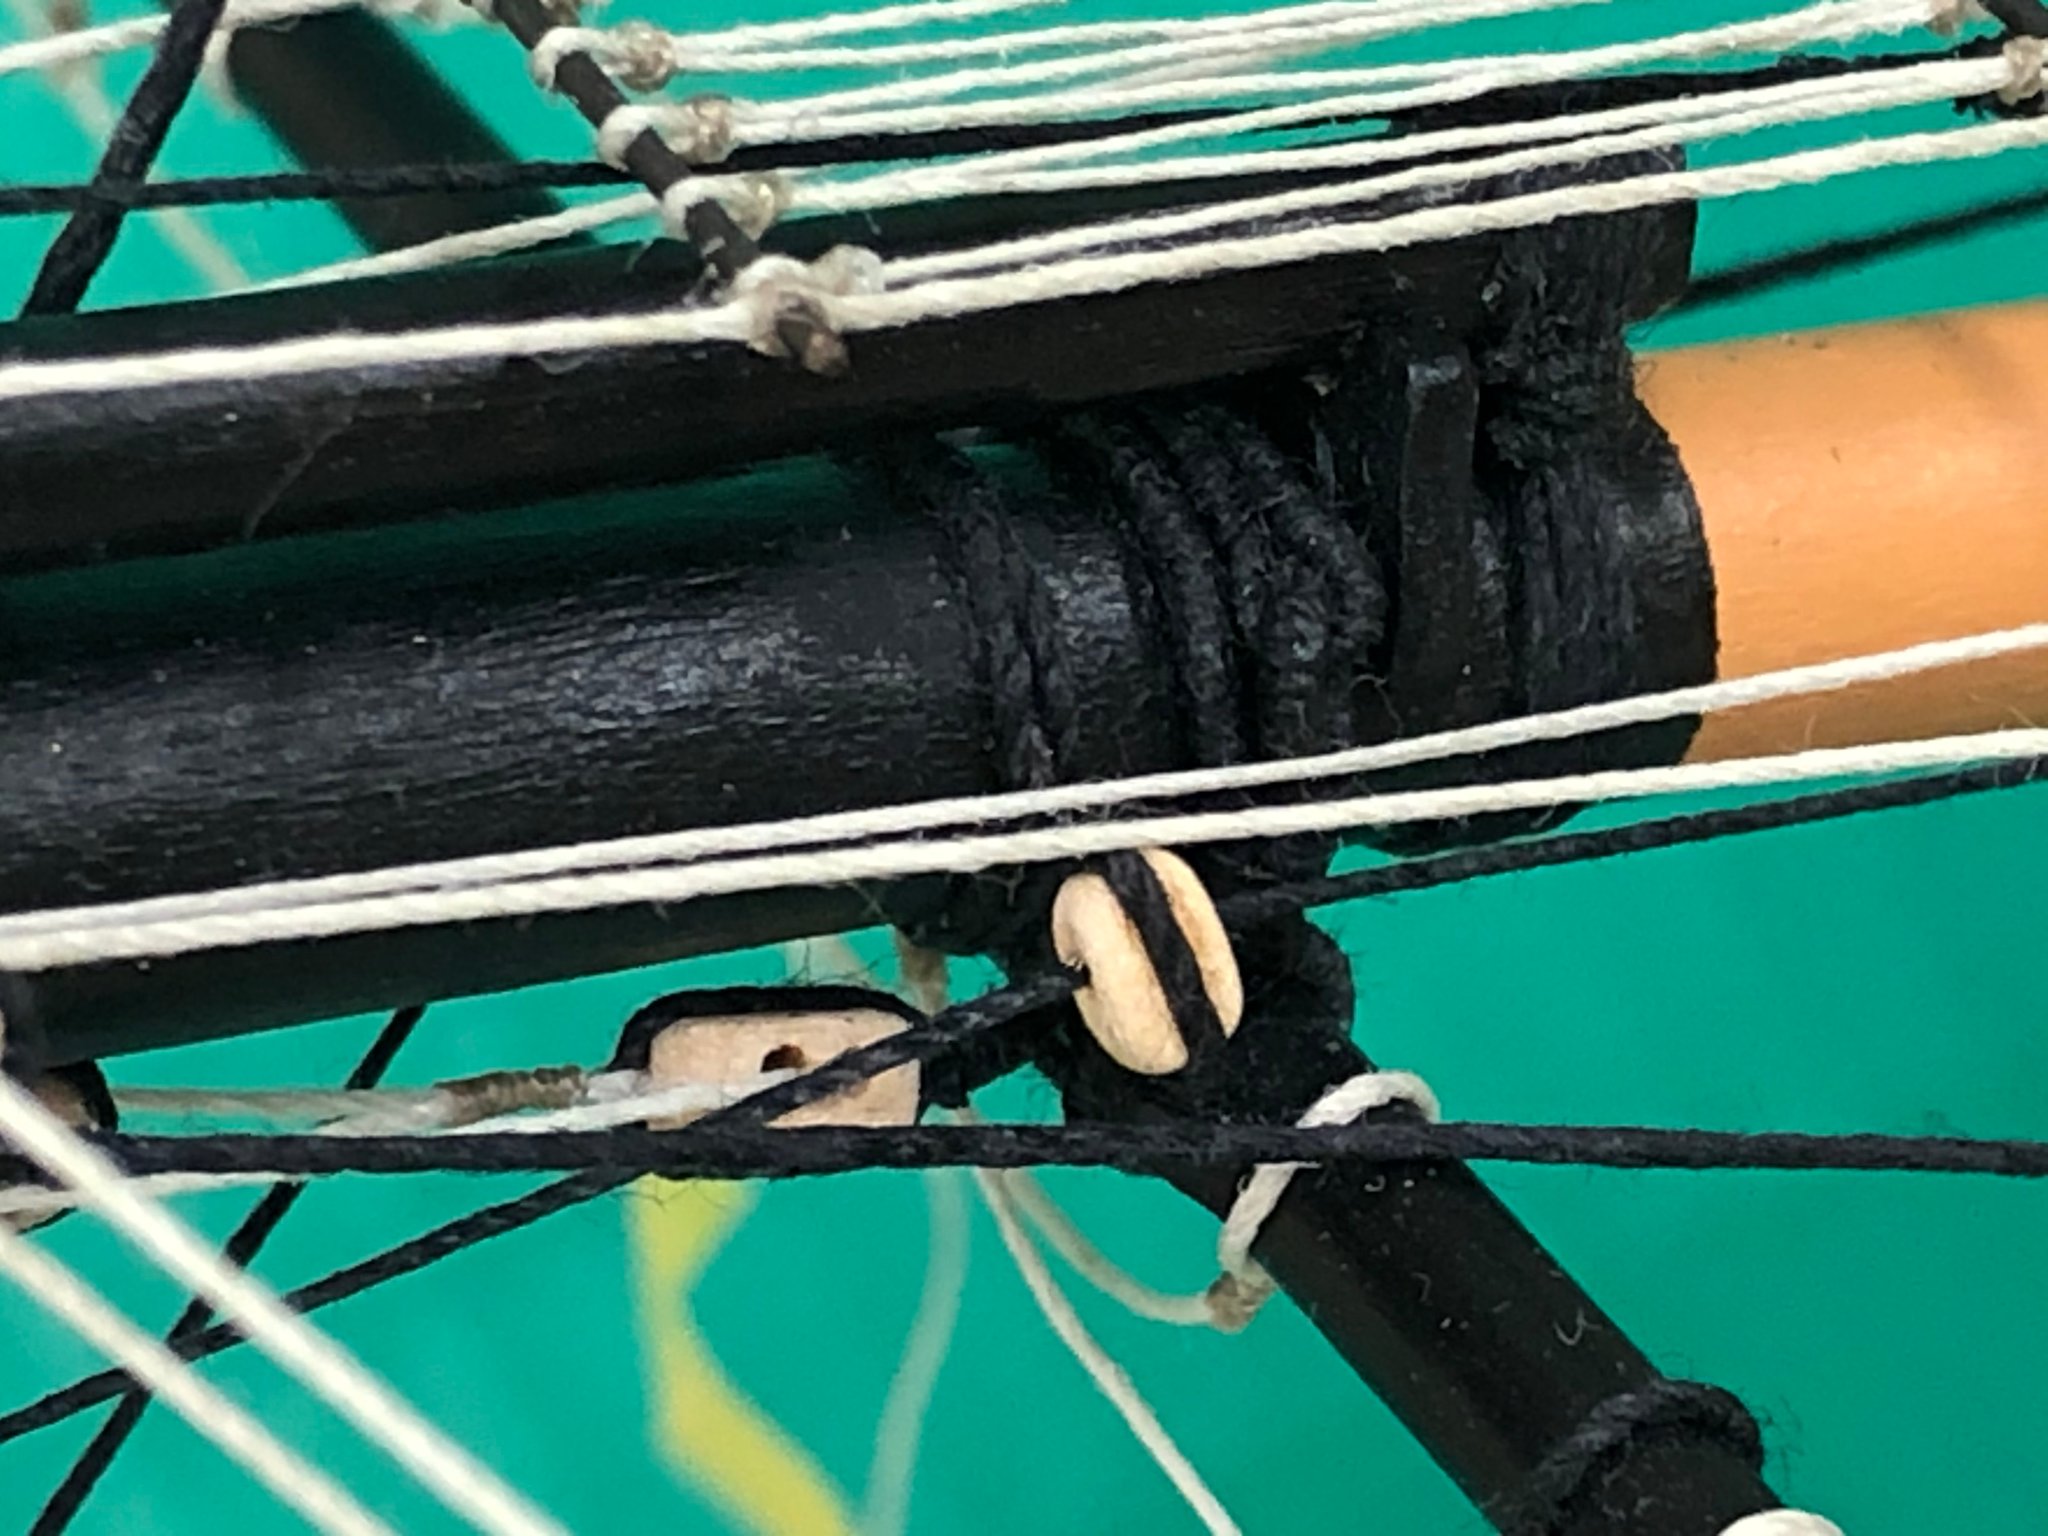
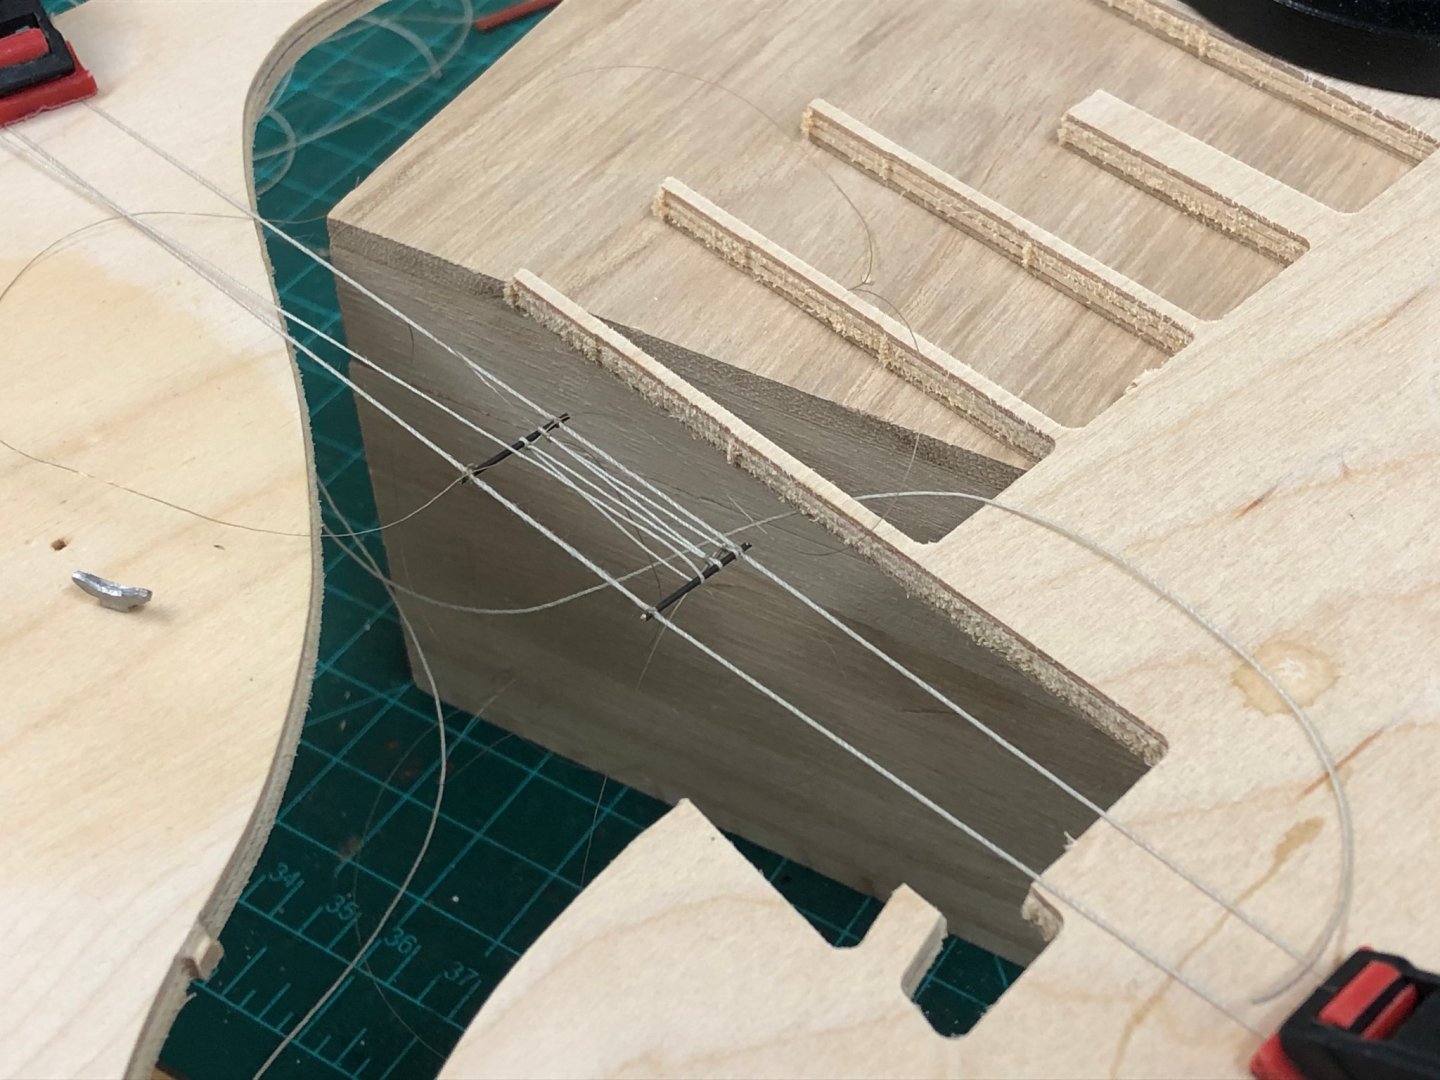
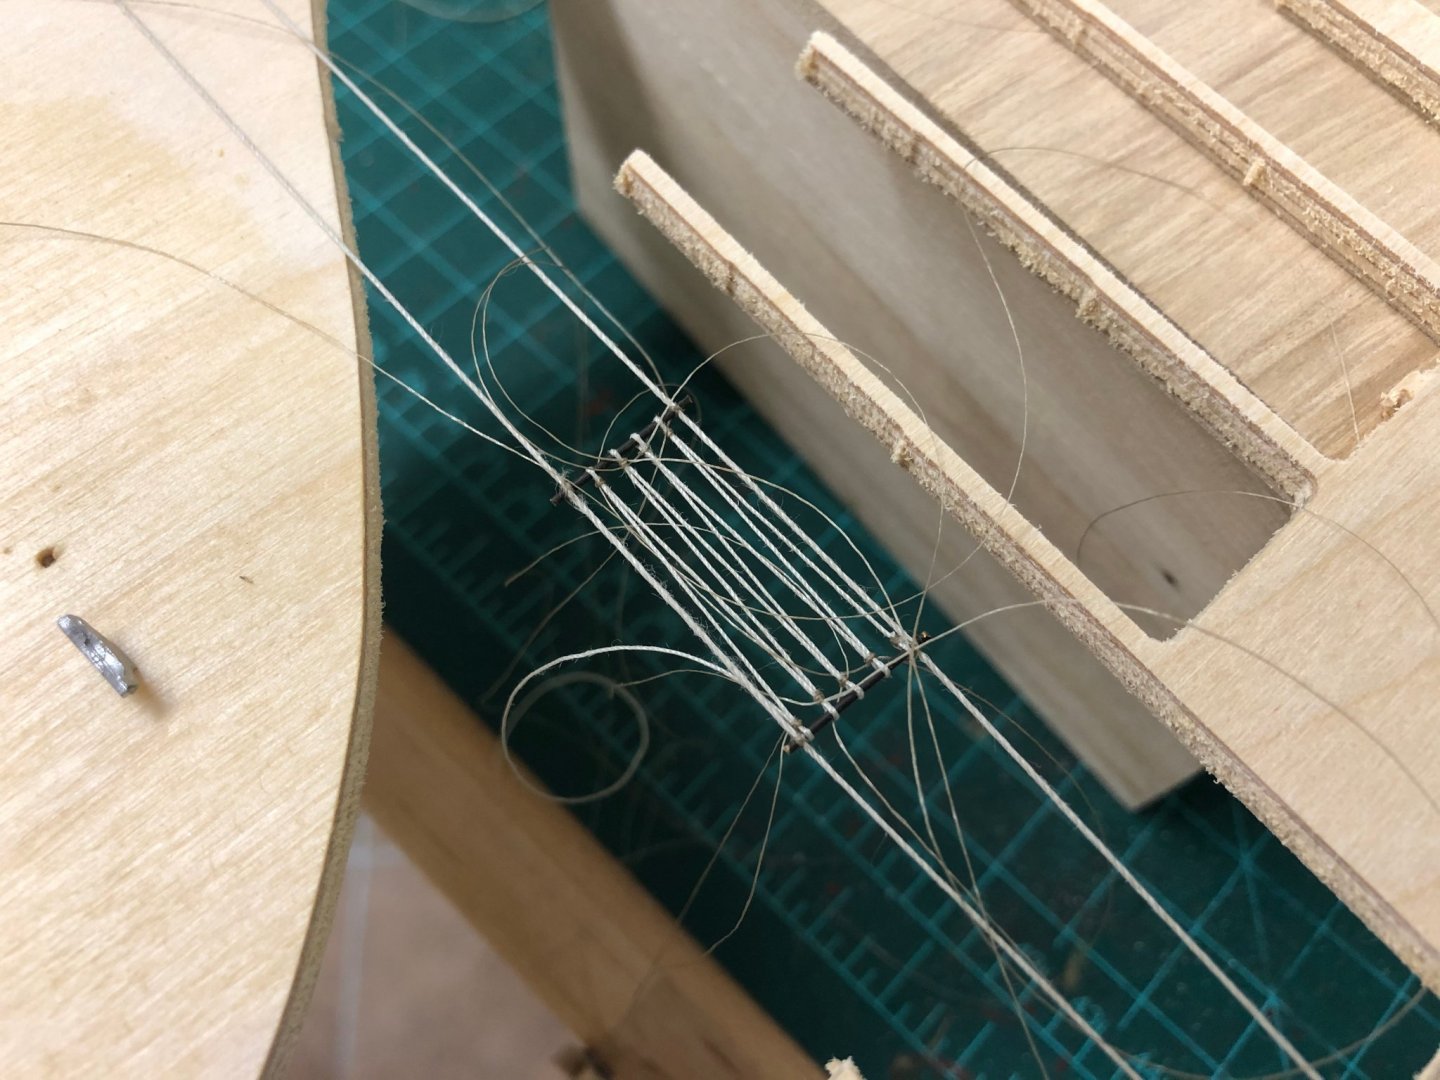
@Mike - thanks for the kind words! @Martin - I guess I'm located in the valley just over the hills from the Litchfield Hills of Connecticut 🙂 Rope Coils... Before any more rigging can be completed, rope coils really need to be attended to. Once the remaining braces, cluelines and sheets go on, access will be impossibly restricted. I'm not a fan of gravity defying suspended circular coils which don't quite look right to my eye. I really wasn't quite sure of the approach to take, but I knew I wanted to try to replicate the shear mass of heaps of rope often shown on period photos and try to give the rope some mass, but knew that doing so would be very difficult using the kit rope. After many attempts, a mock up of the pin rail was made up and the rope stretched around a belaying pin and some wire. Dilute PVA was then applied to ensure it kept its shape, and some extra rope wrapped around to keep the shape. Once trimmed and the glue has dried, these can be hung over the desired location. These still require some fettling and wanted to see how I feel about them in a few days with a number on position before securing or trying an alternative approach. I'd welcome thoughts and suggestions...


- 800 replies
-
- 10
-
-
- snake
- caldercraft
- (and 1 more)
-
Hi Christian, I'm ashamed to say that I have only just found your new build. Great techniques and execution, will certainly be keeping an eye on you now! I think your solution to the stern and lights worked very well, love the colour tones.
-
Thanks BE - thanks for checking in, your builds really got me fascinated with the minutia of rigging, this was a continued learning exercise...and something that you really have to do to confirm your understanding makes sense. Working with the kit supplied line is a frustration in many respects, but perhaps an apprenticeship test. Matthew - to your question...I can probably only provide an opinion. Access the deck is pretty good at that stage and a don't think you'd have too many problems. The bulwarks are pretty vertical so see no obvious reason why you couldn't plank the deck off the ship, but not having done it I couldn't say definitively. You've piqued my interest though and you should also check out the other Snake builds in progress. If you do move forward with Snake, definitely start a build log and you'll have lots of interest, including me.
- 800 replies
-
- 1
-
-
- snake
- caldercraft
- (and 1 more)
-
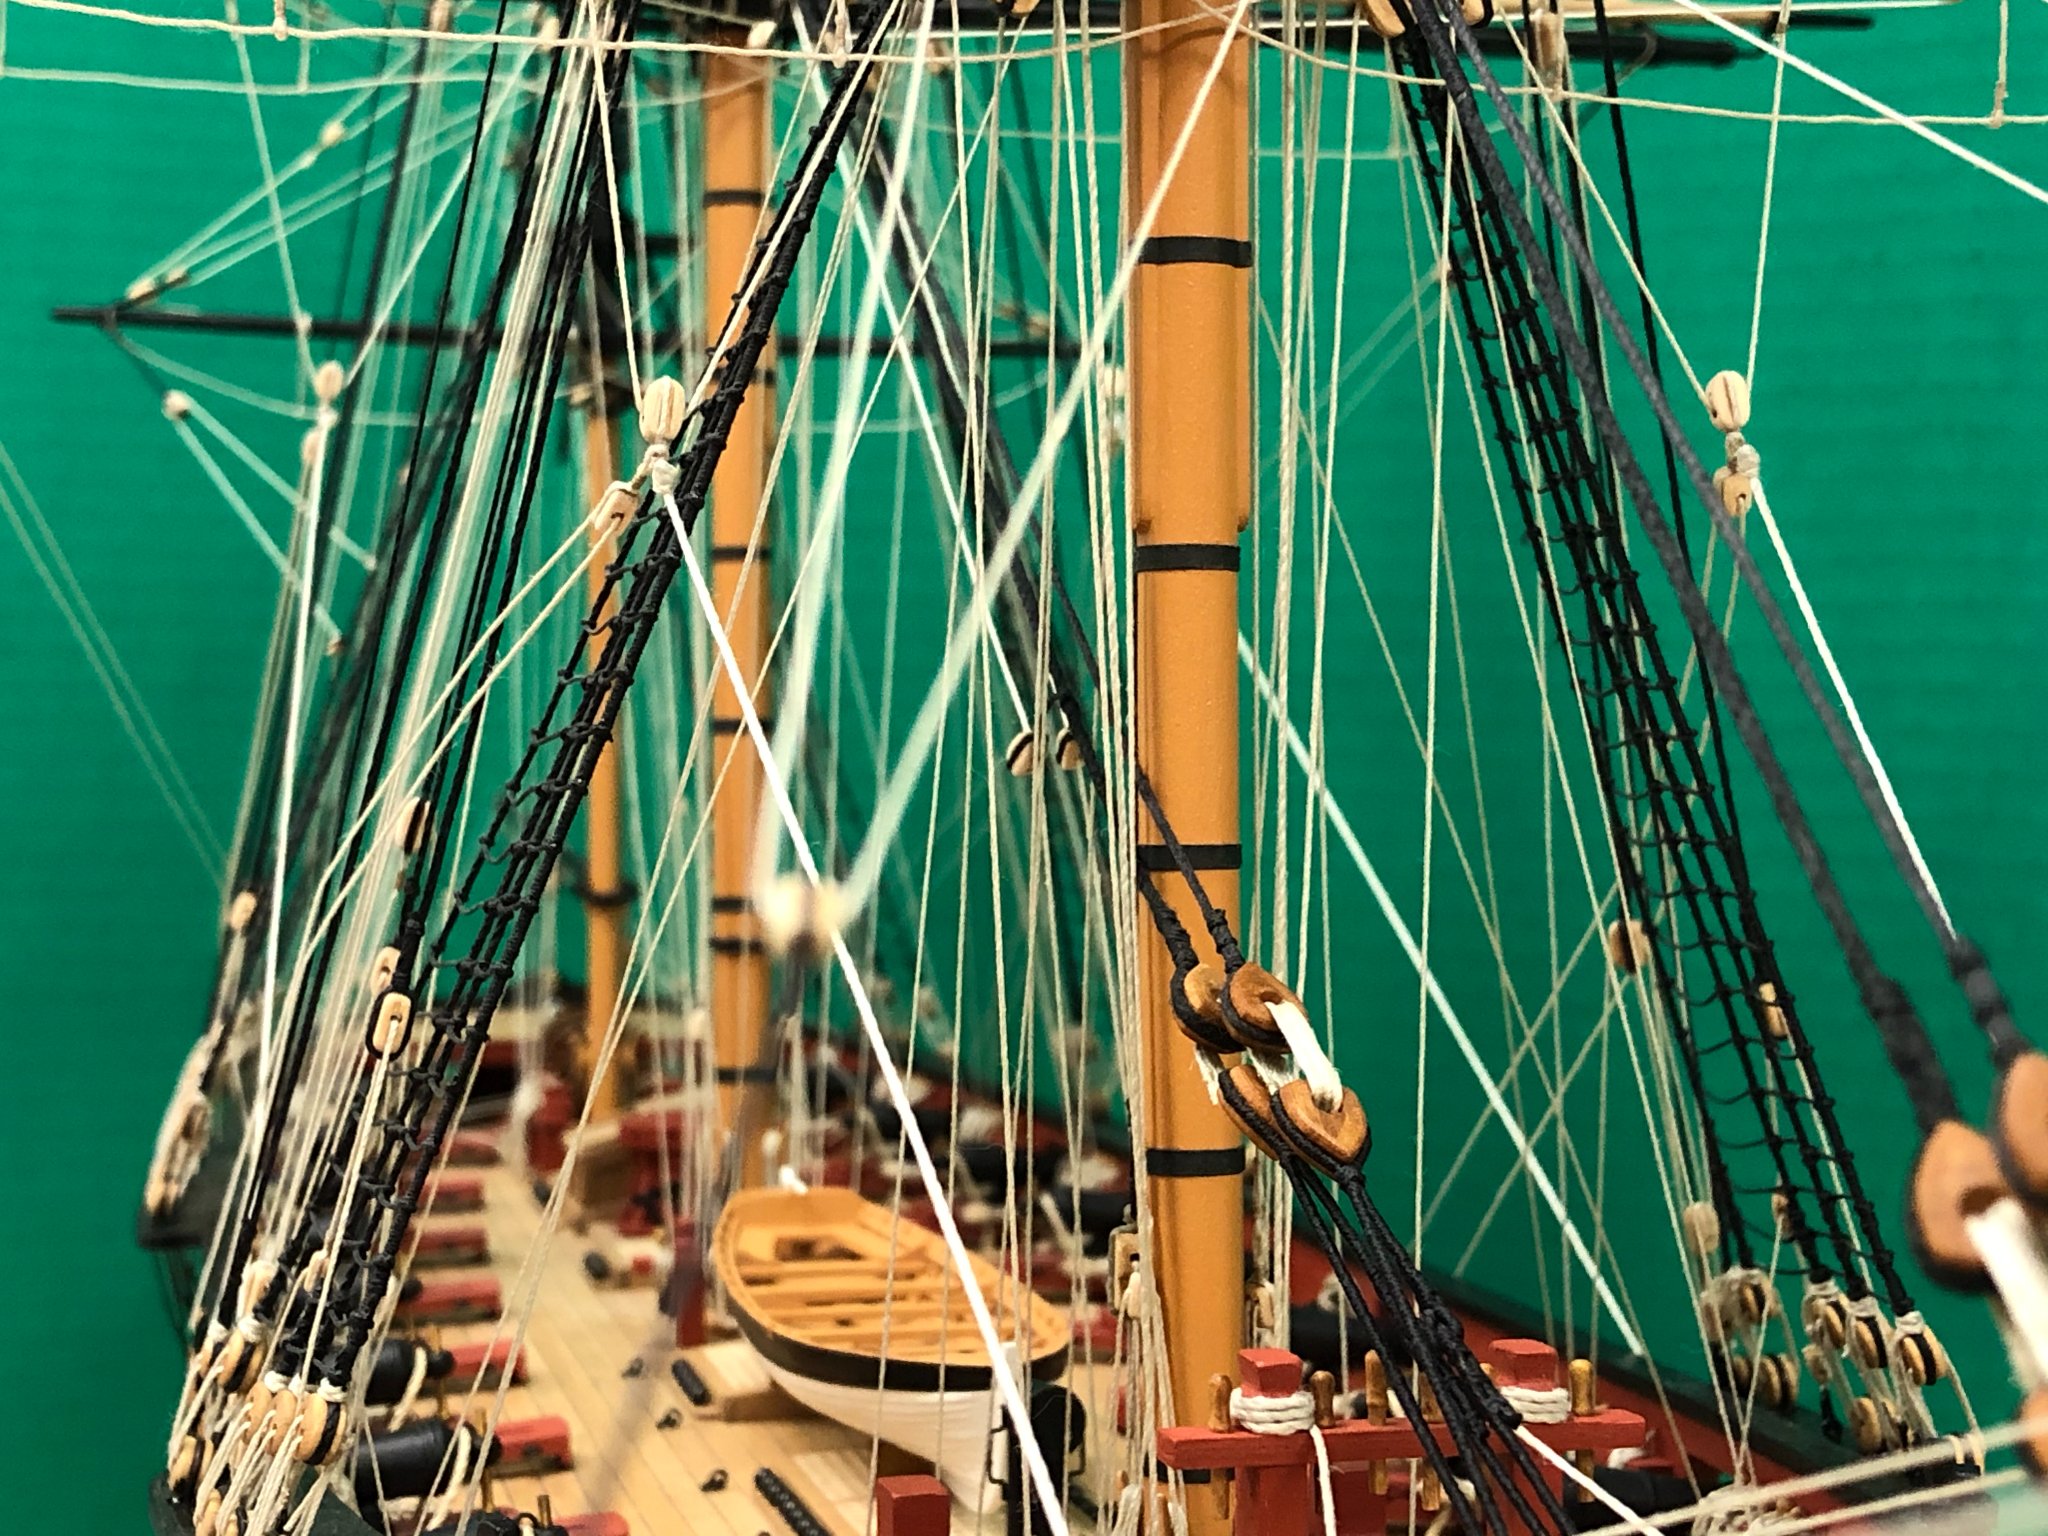
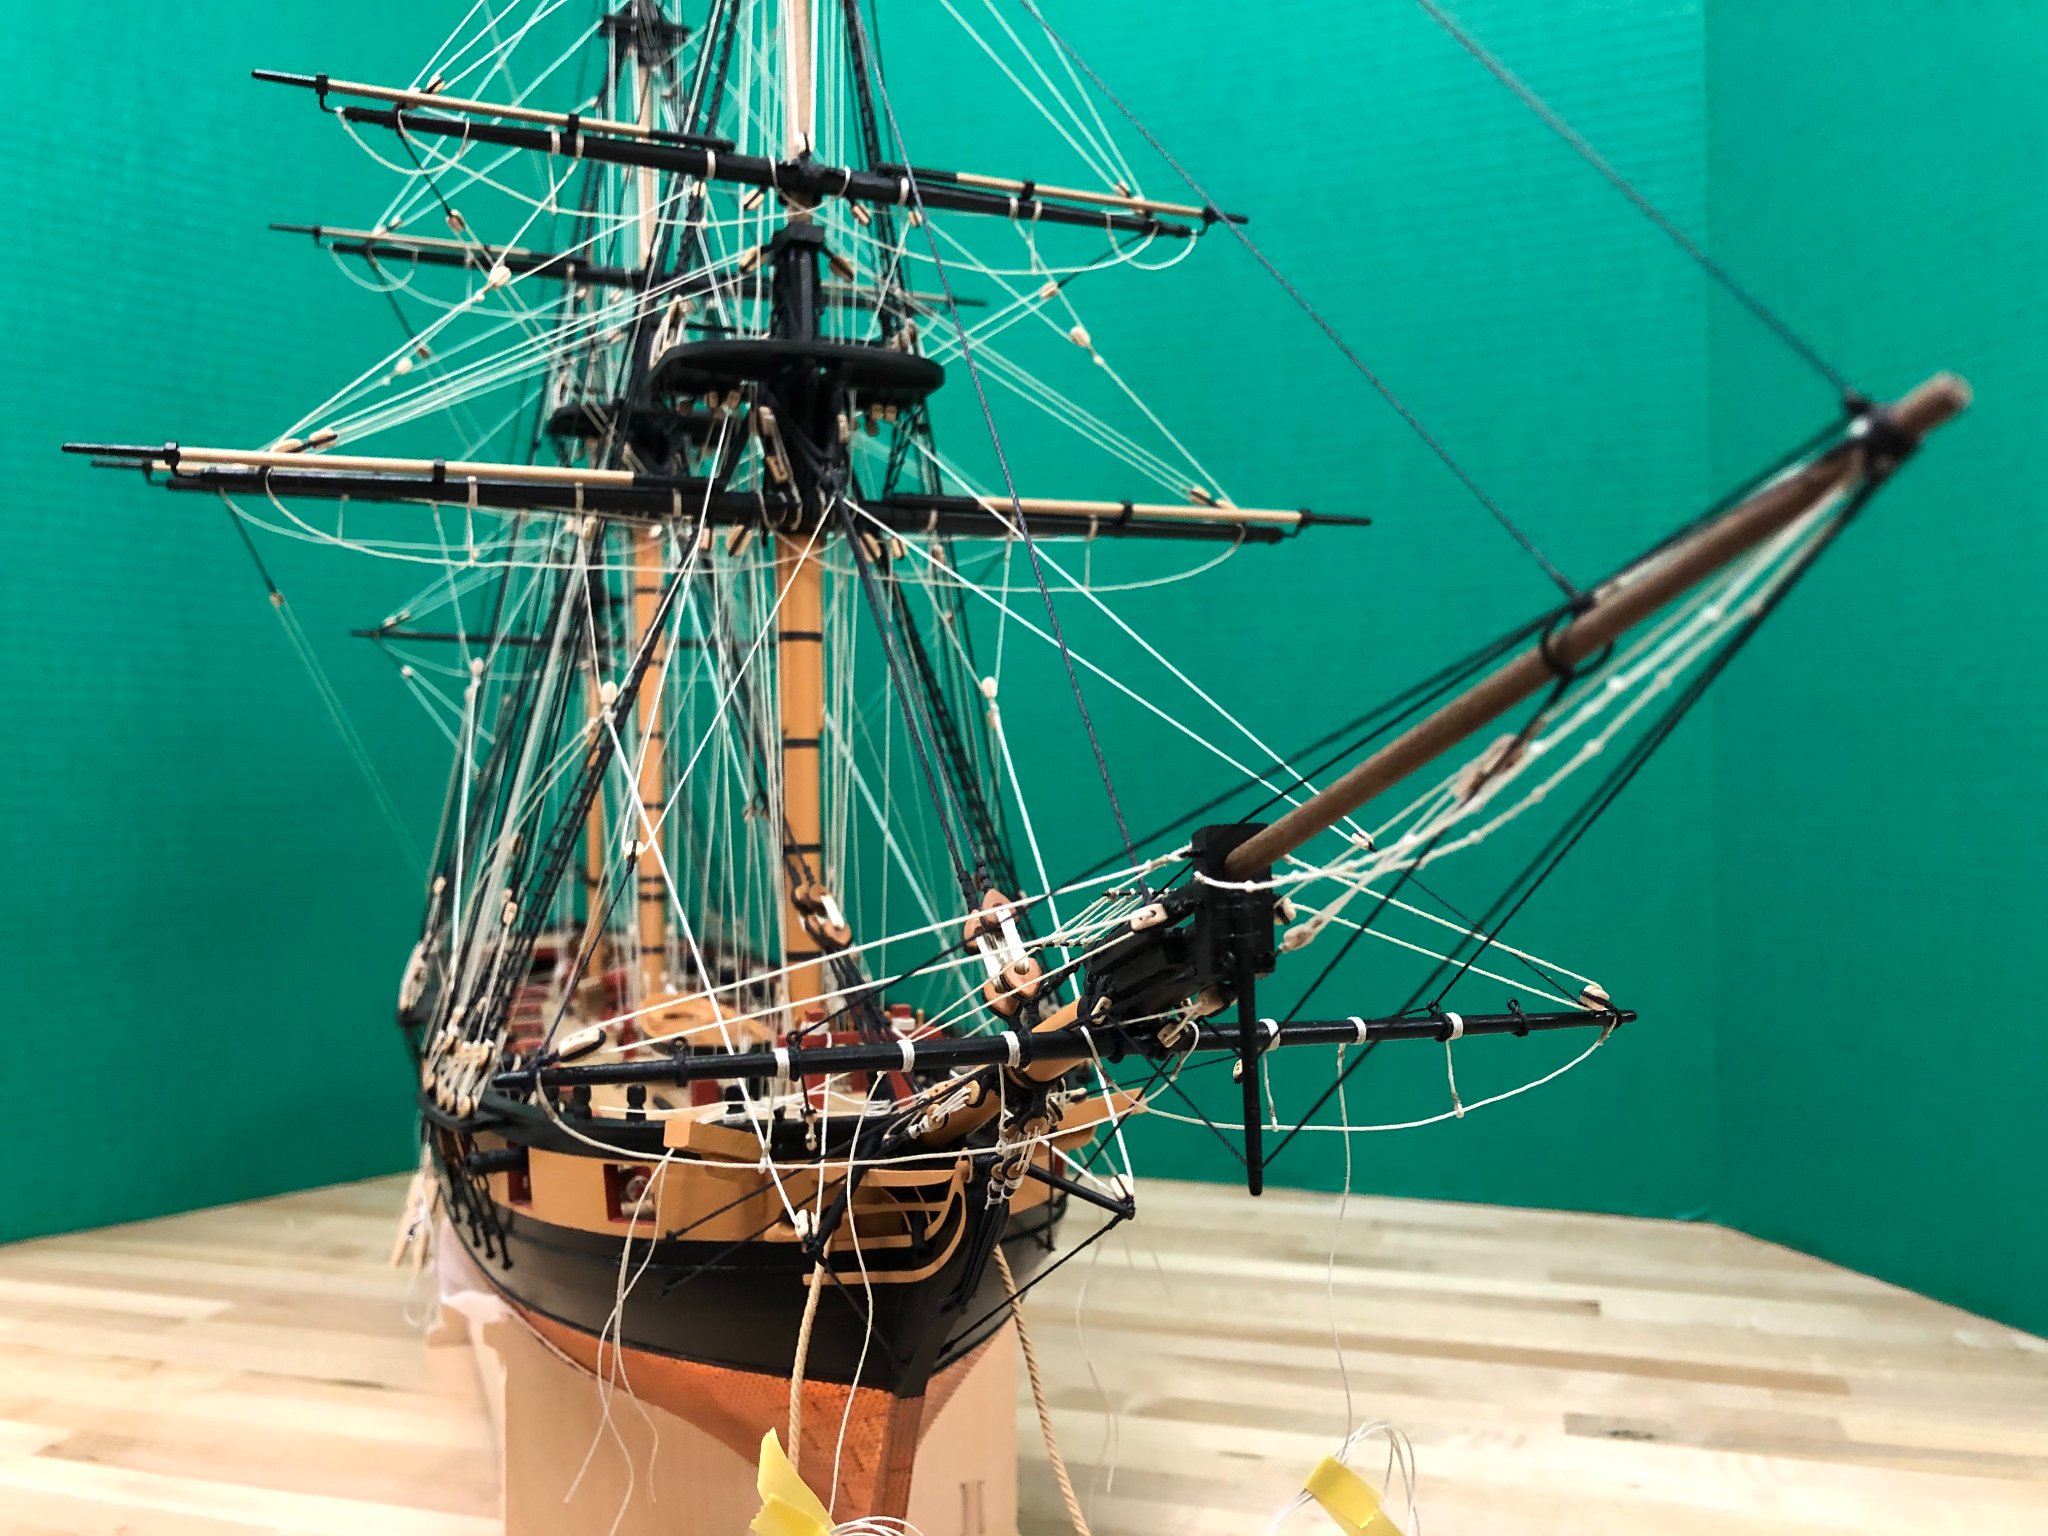
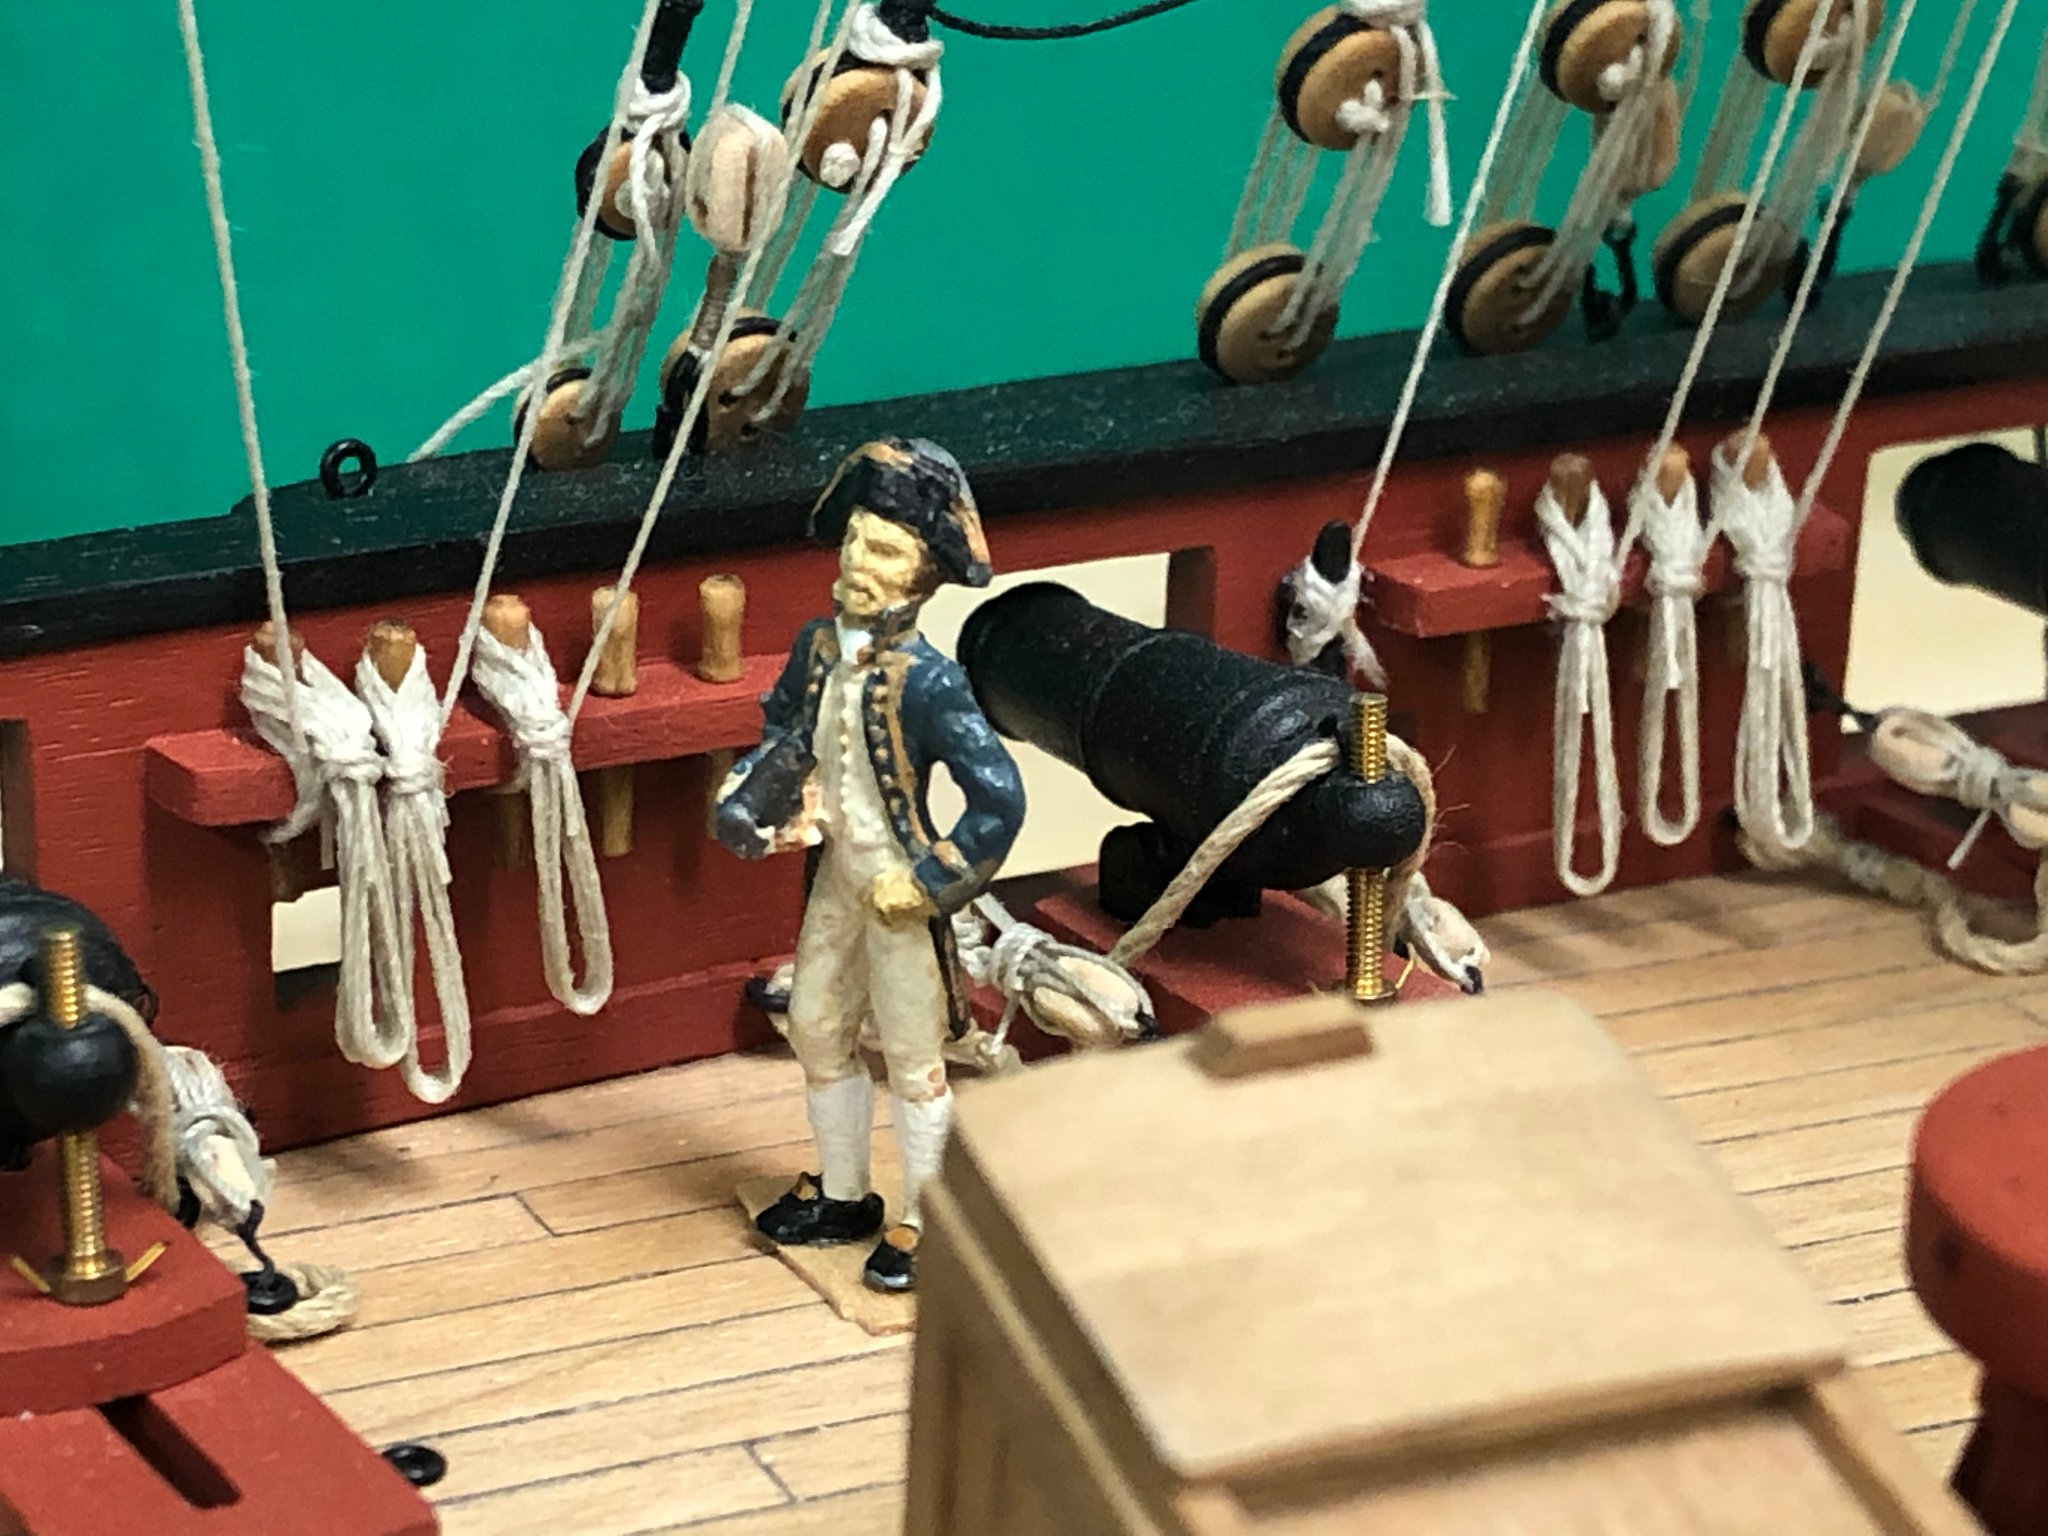
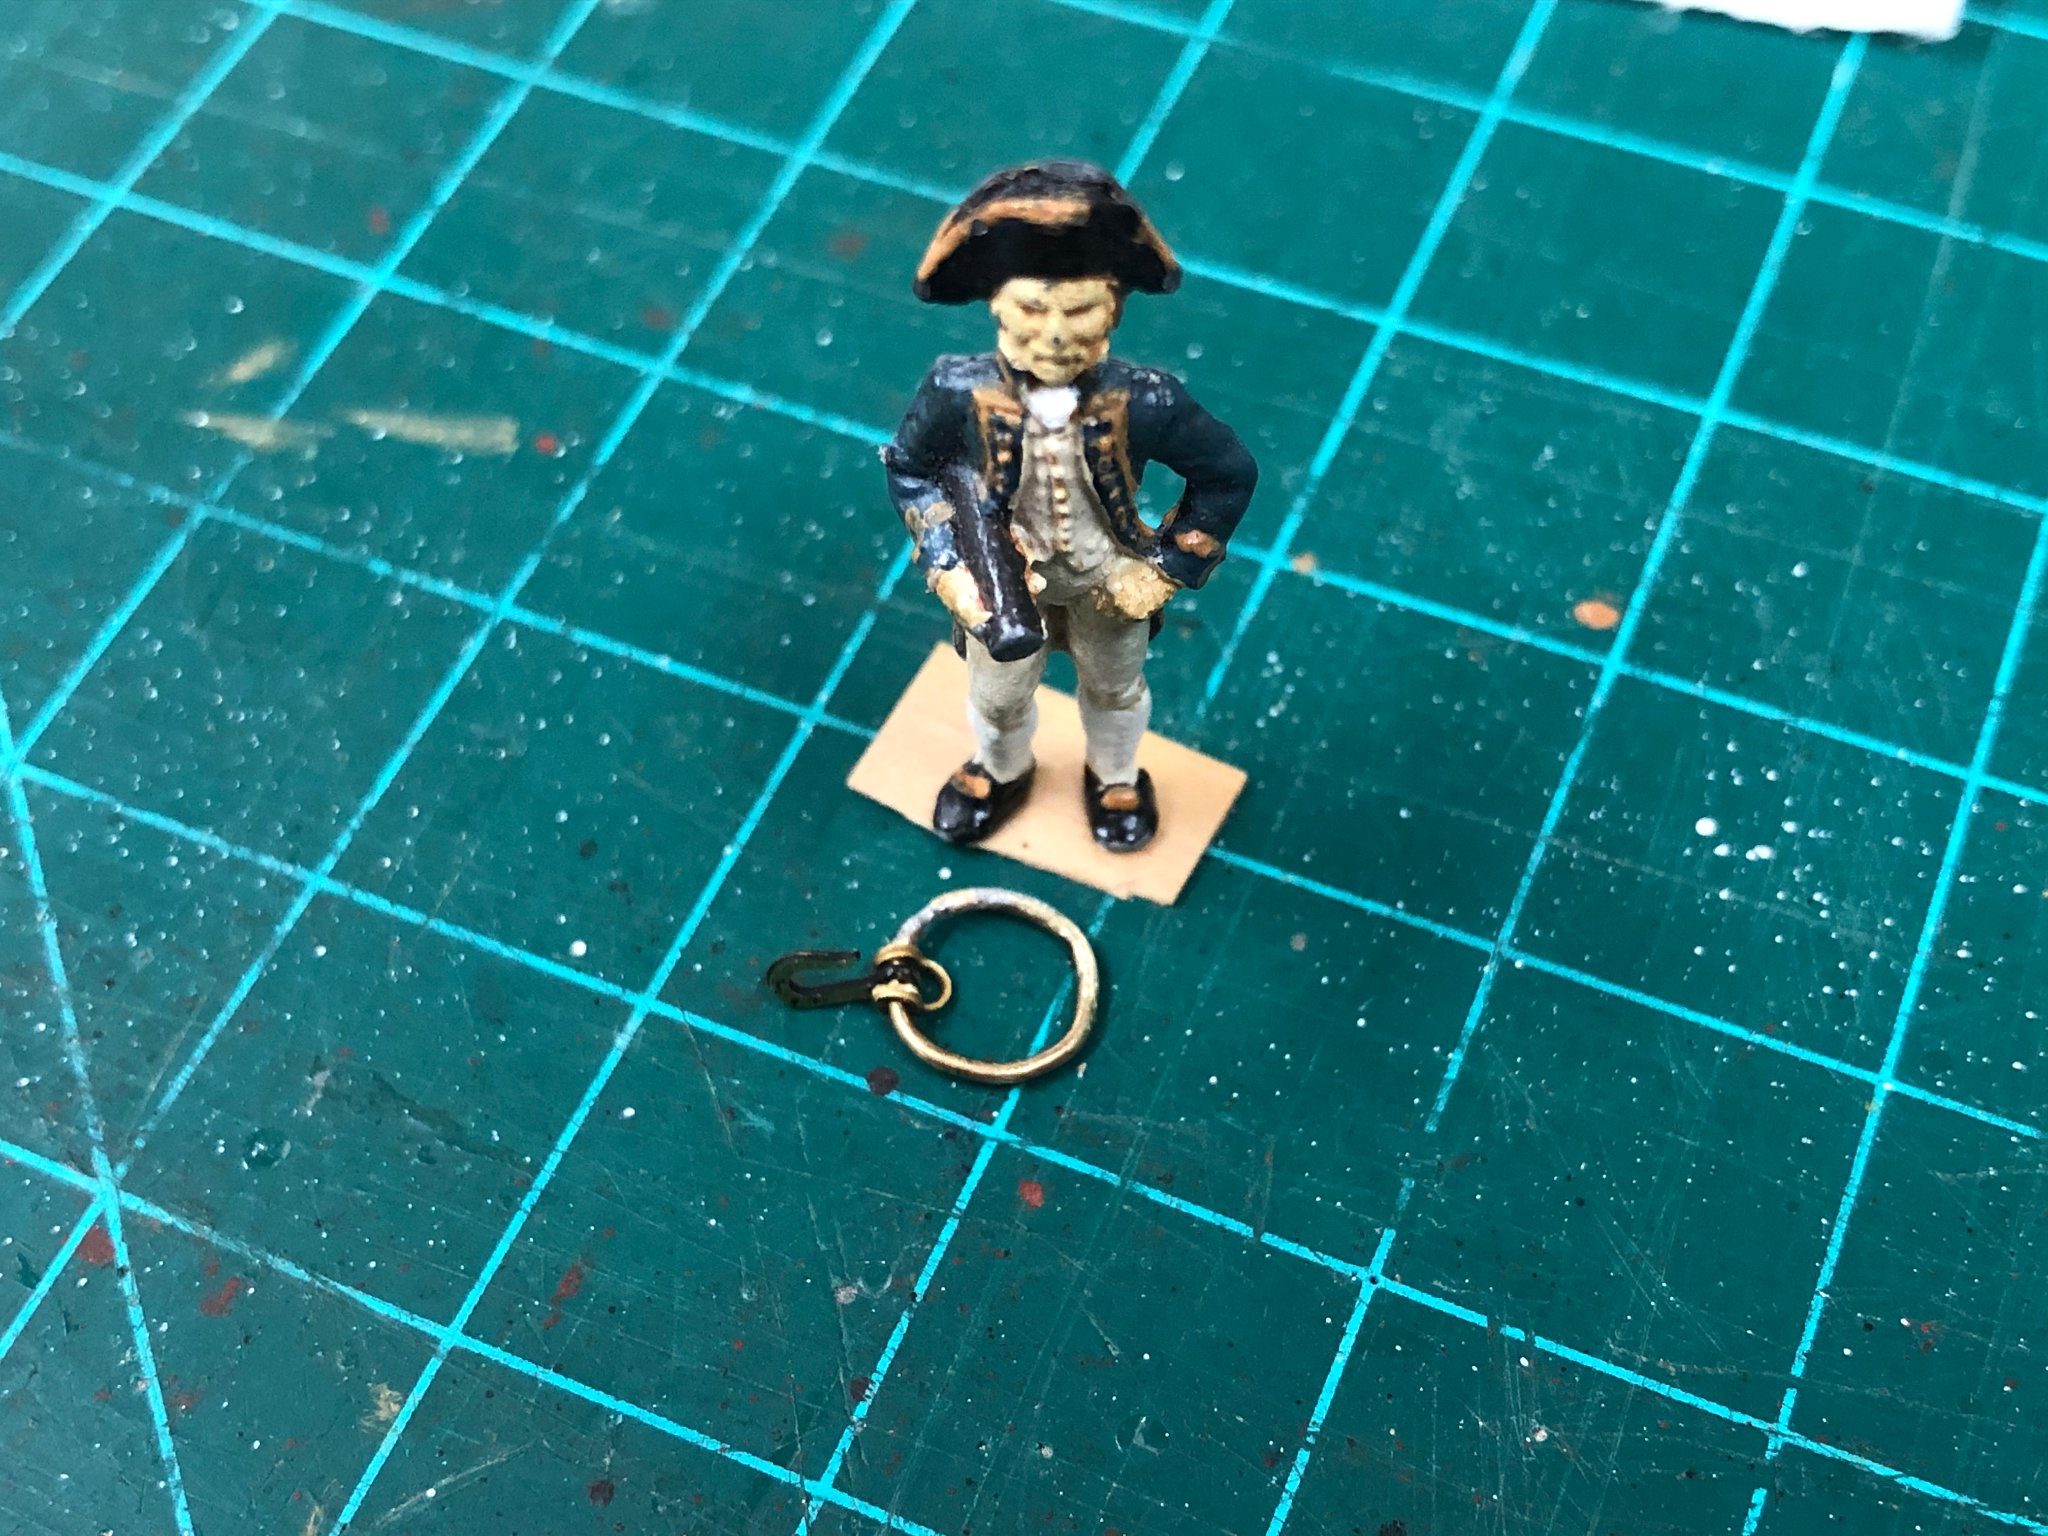
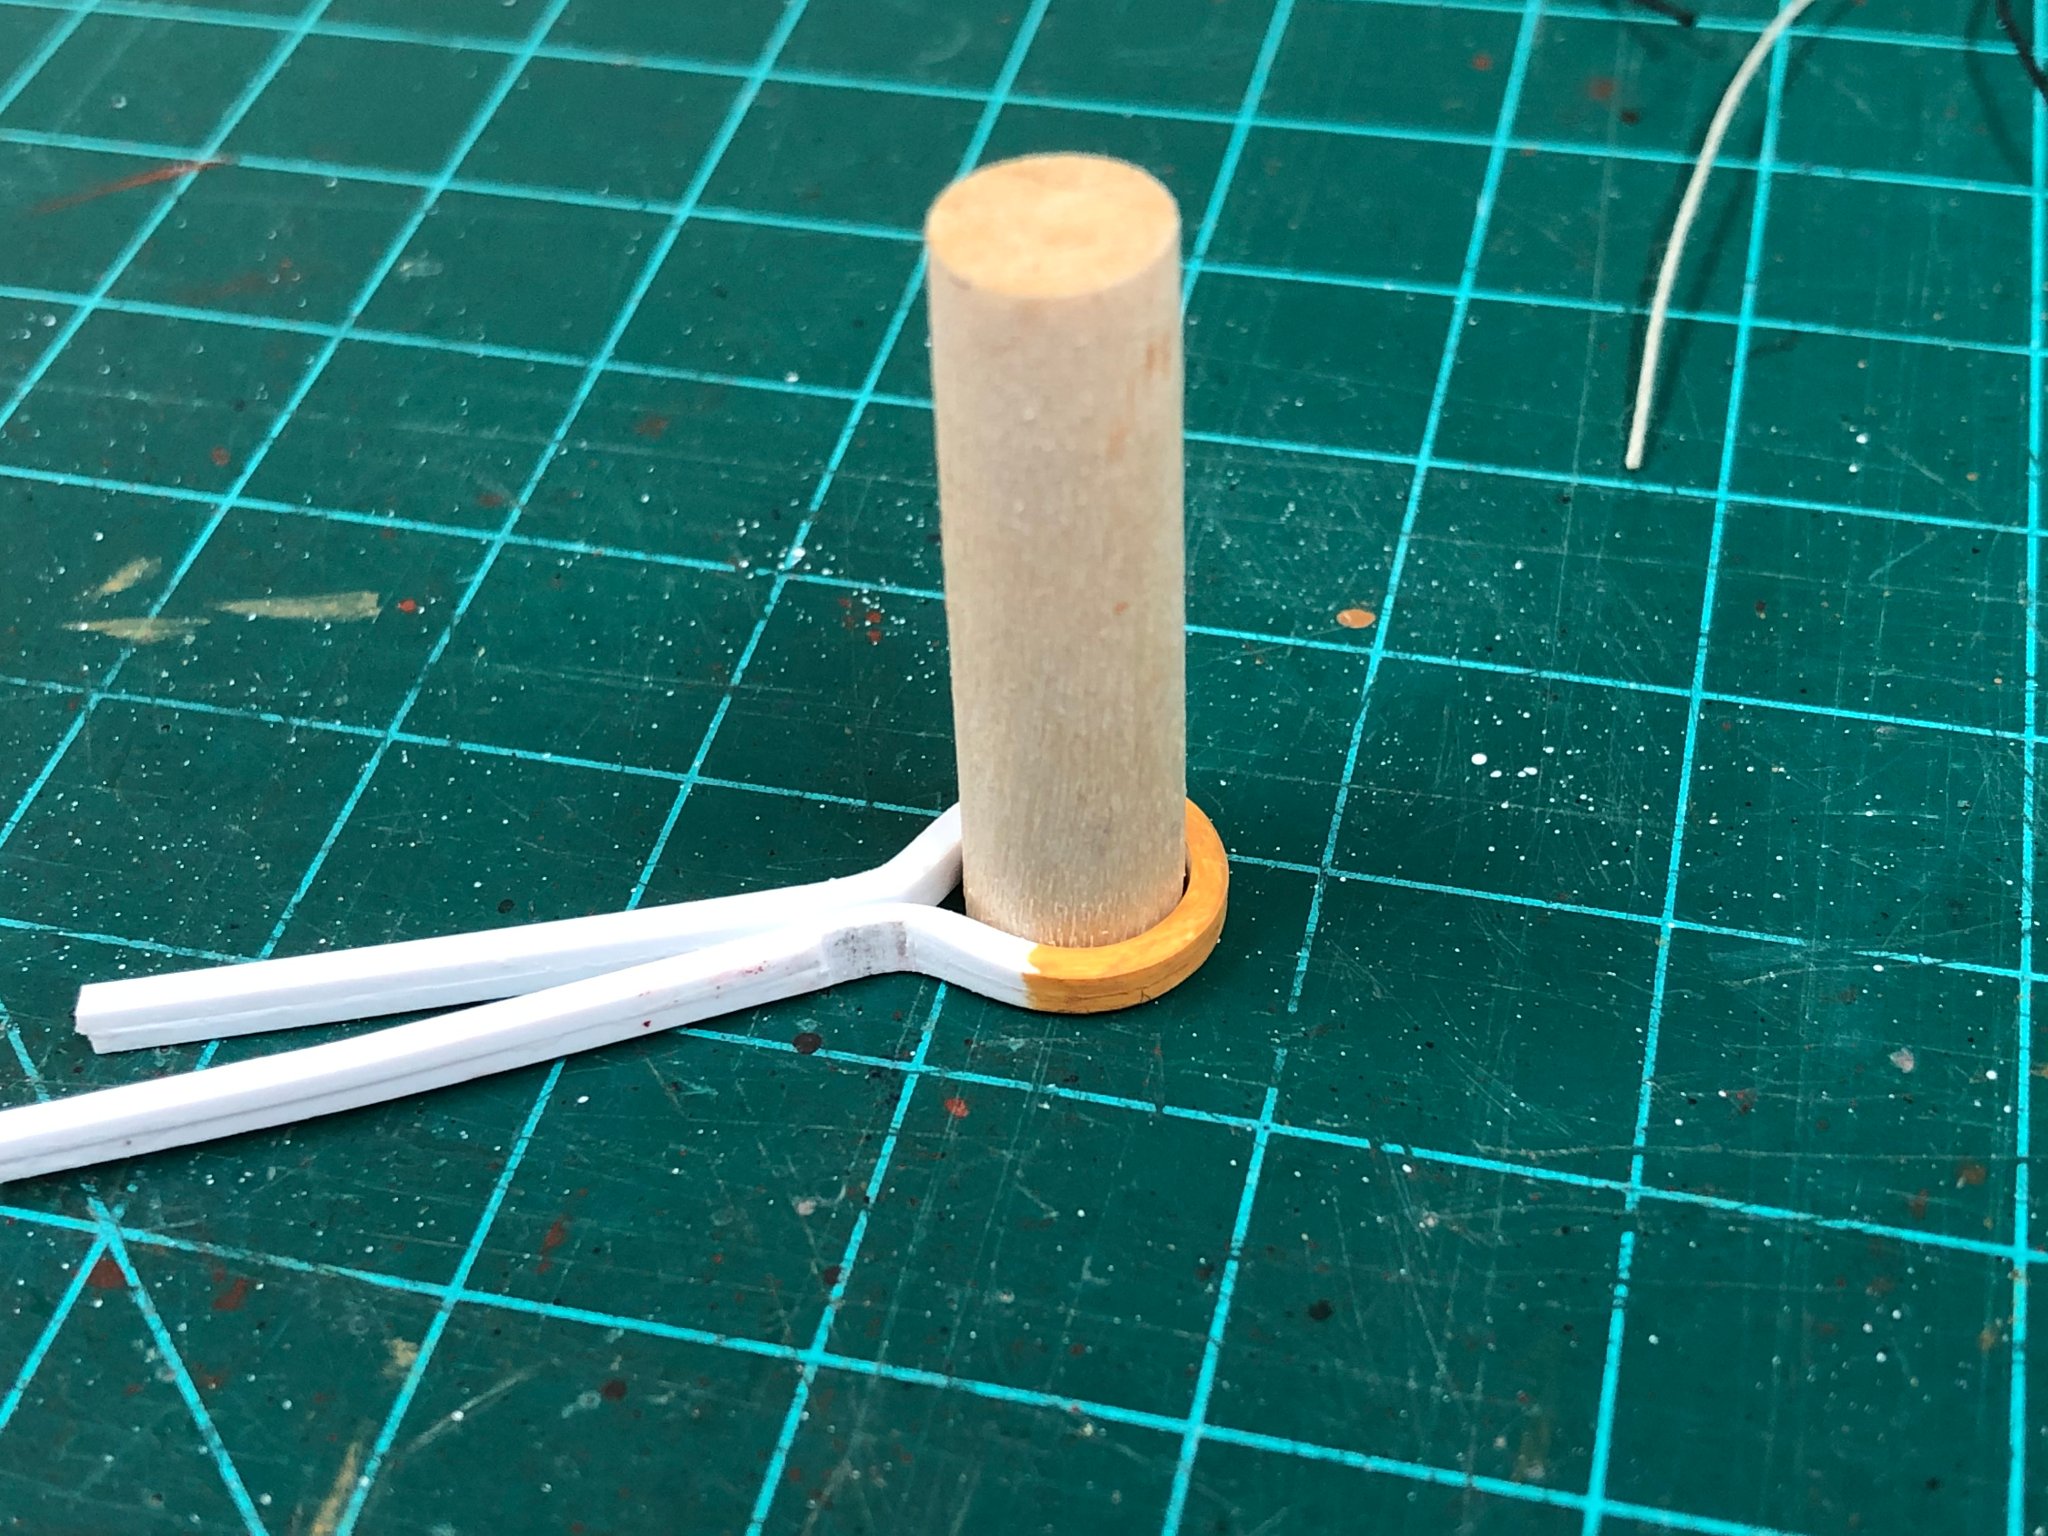
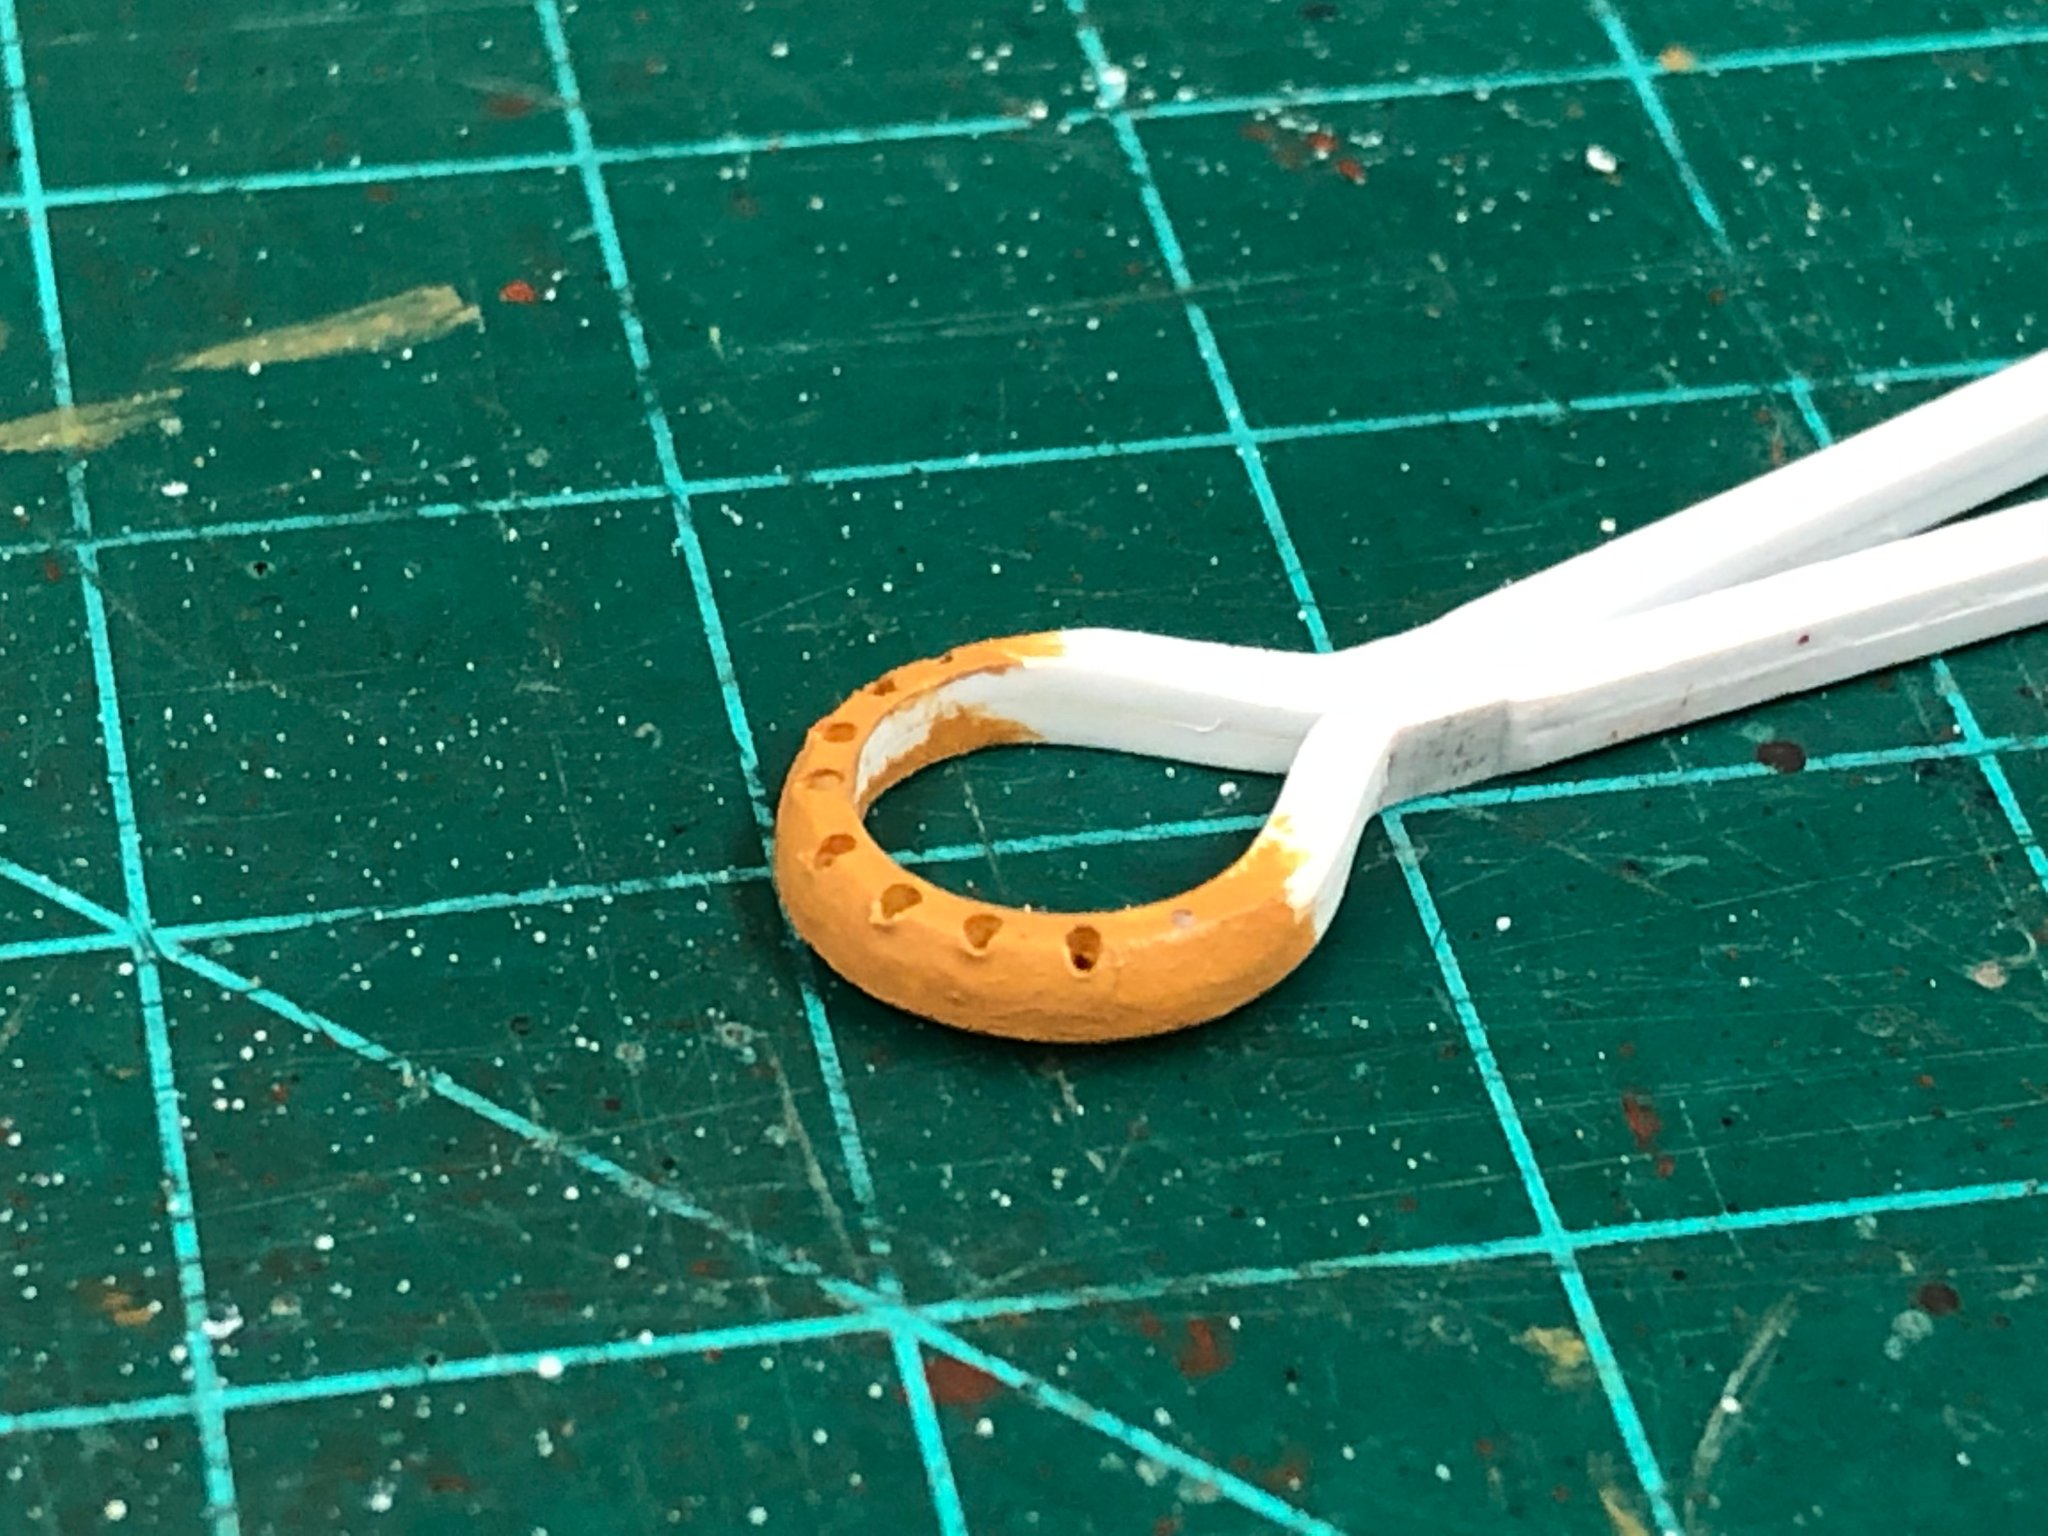
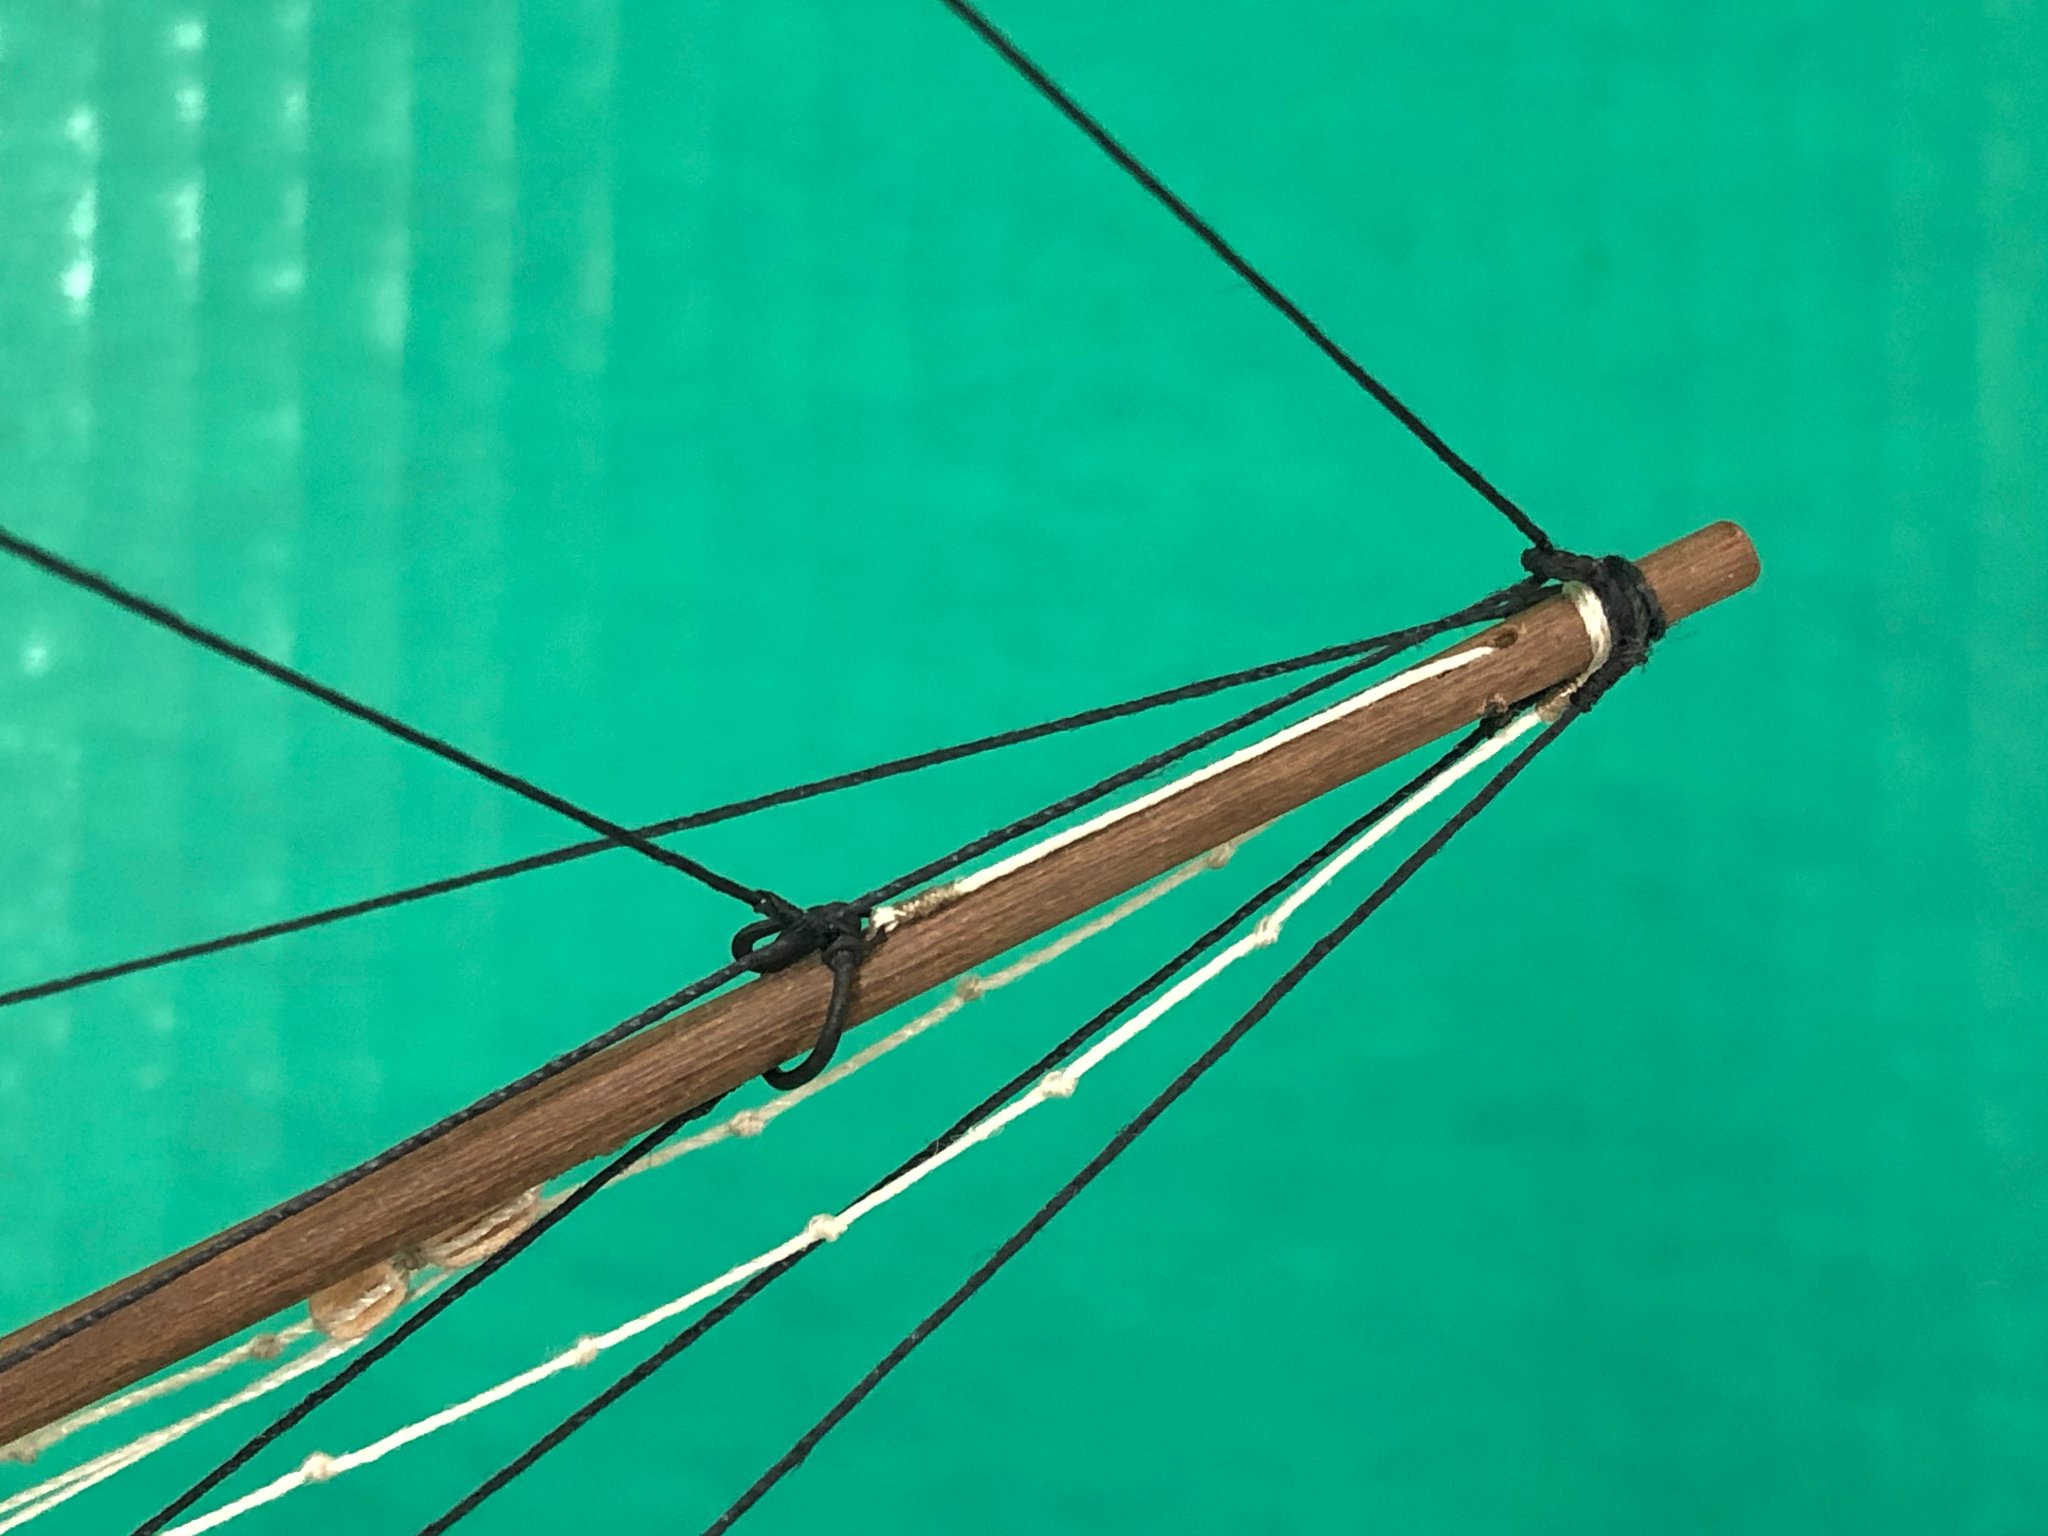
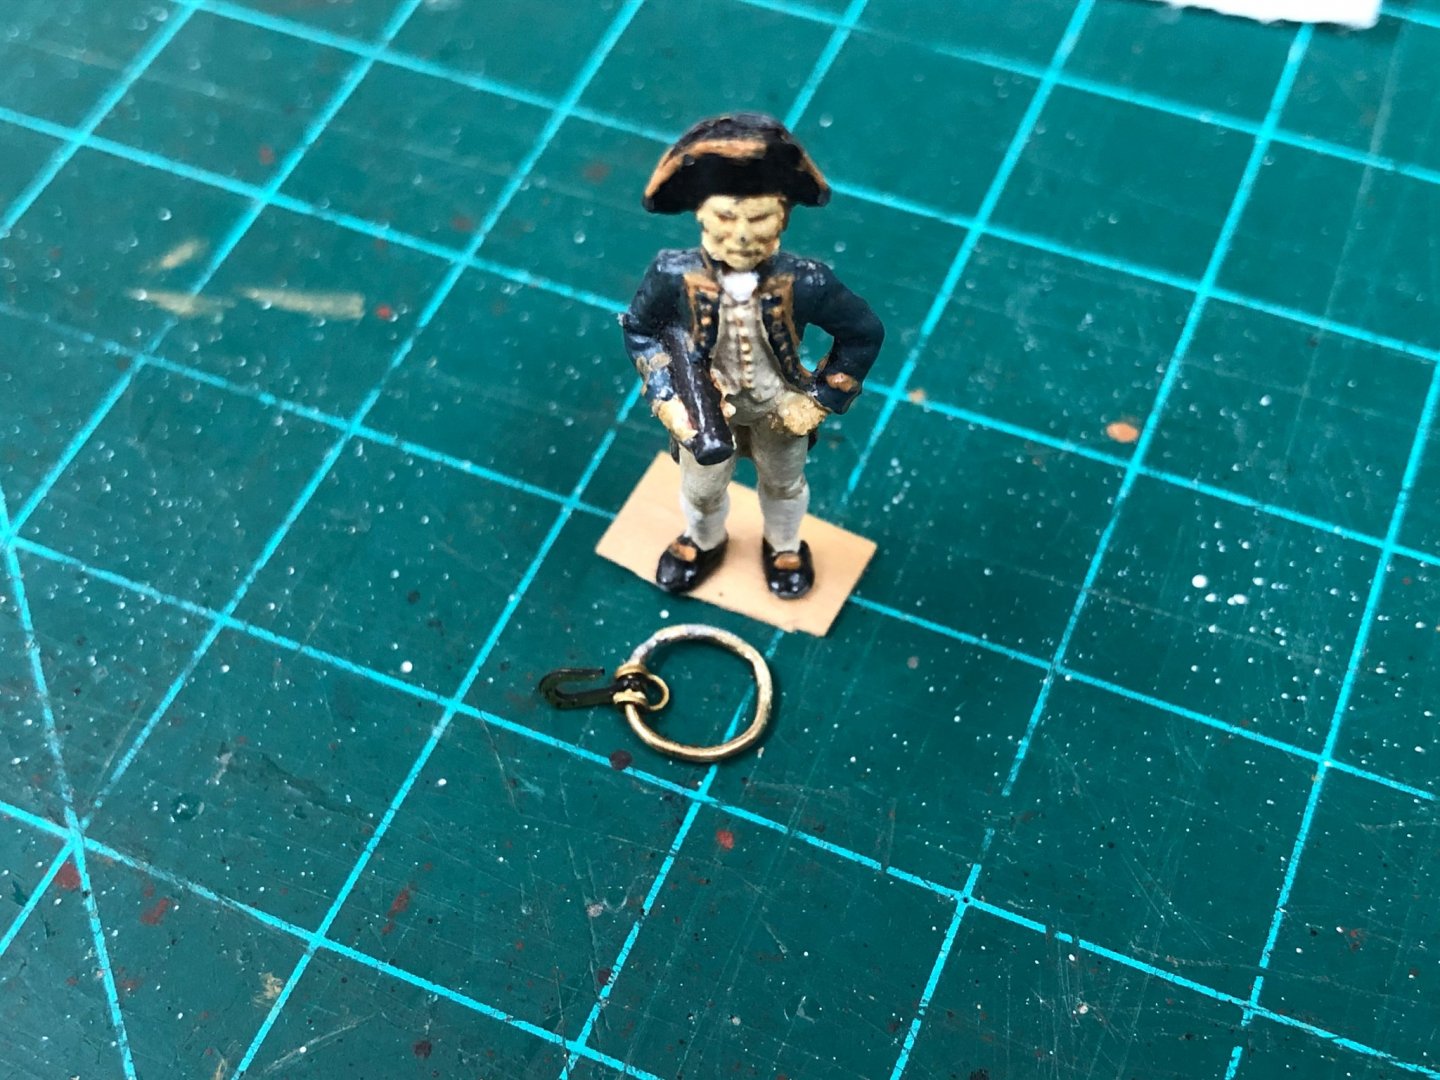
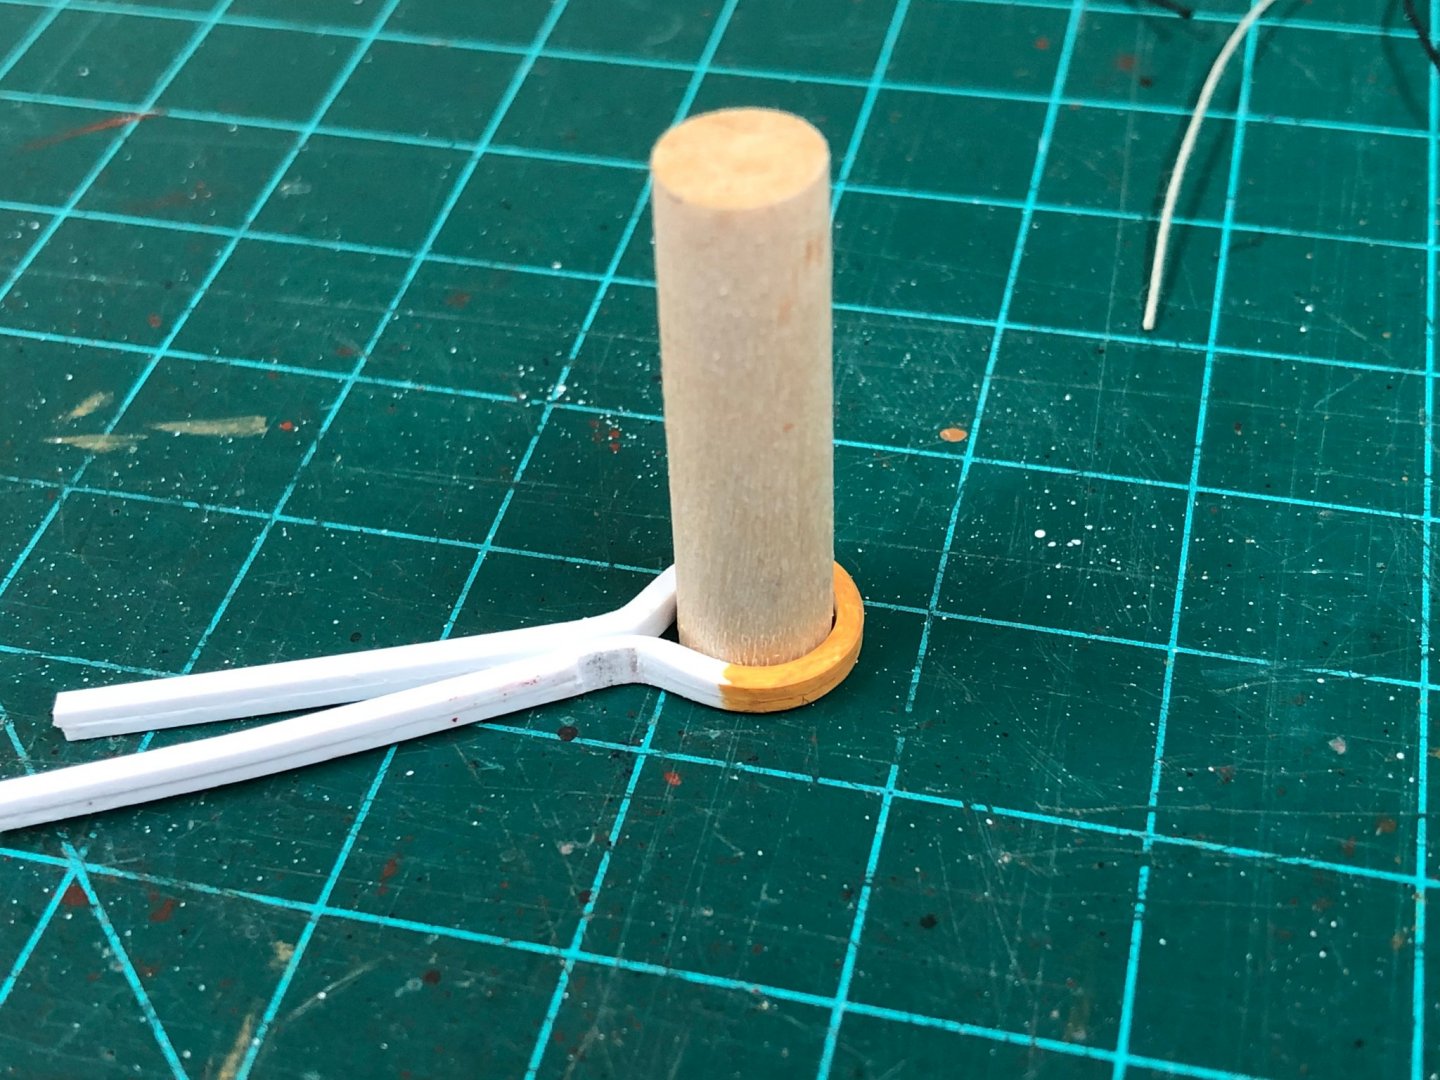
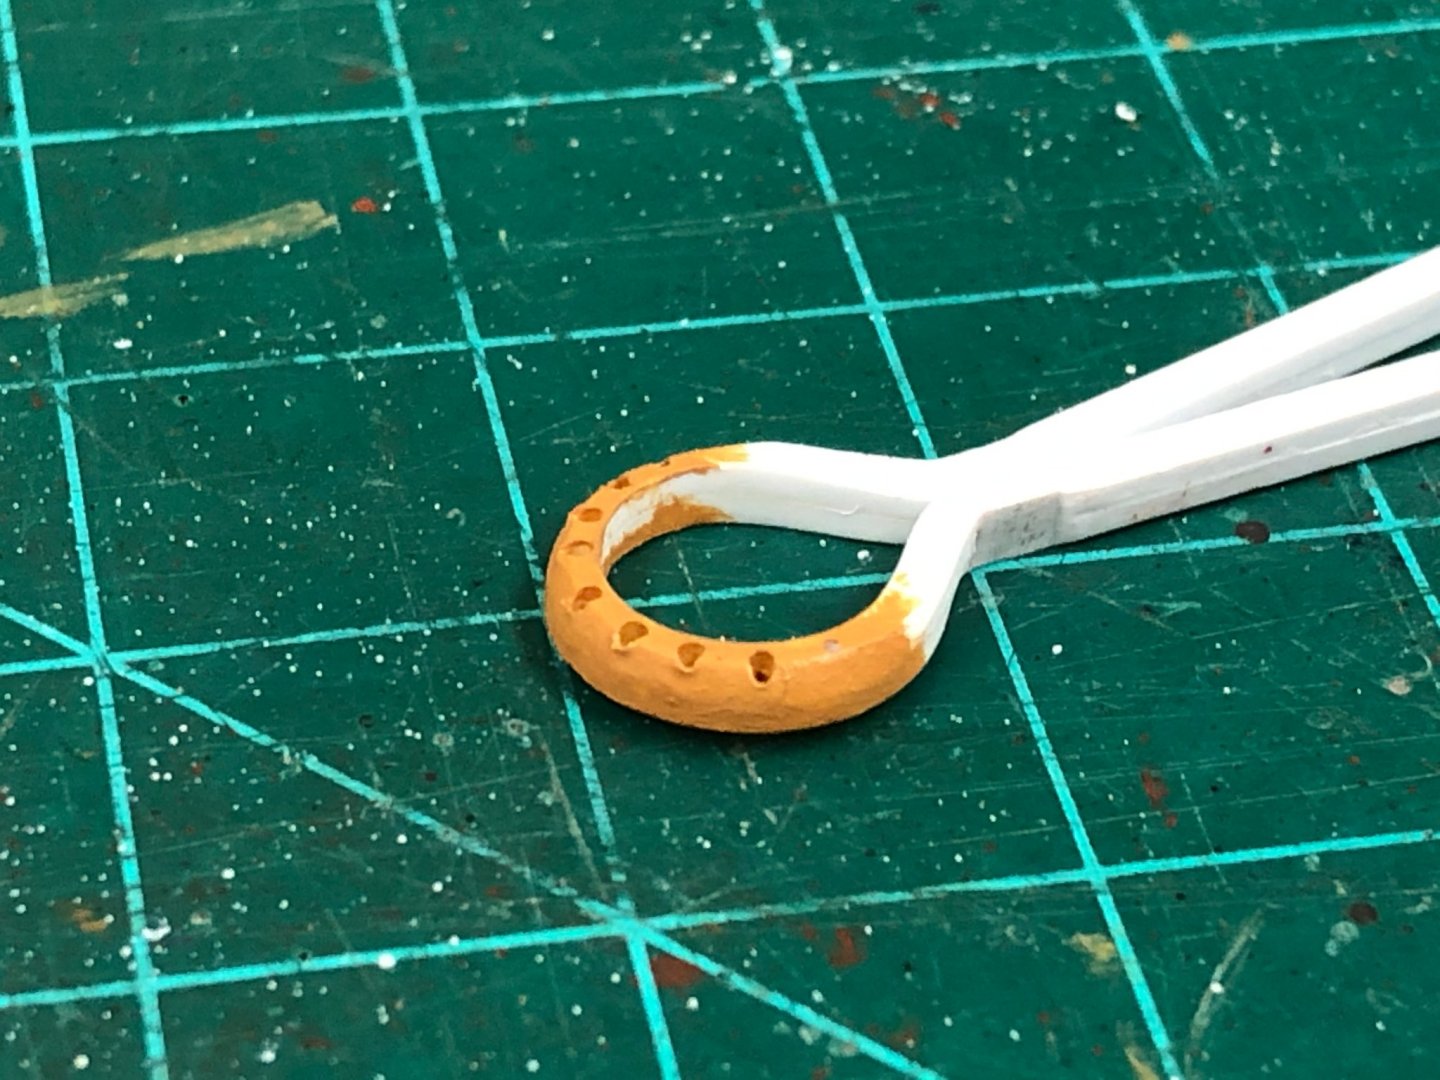
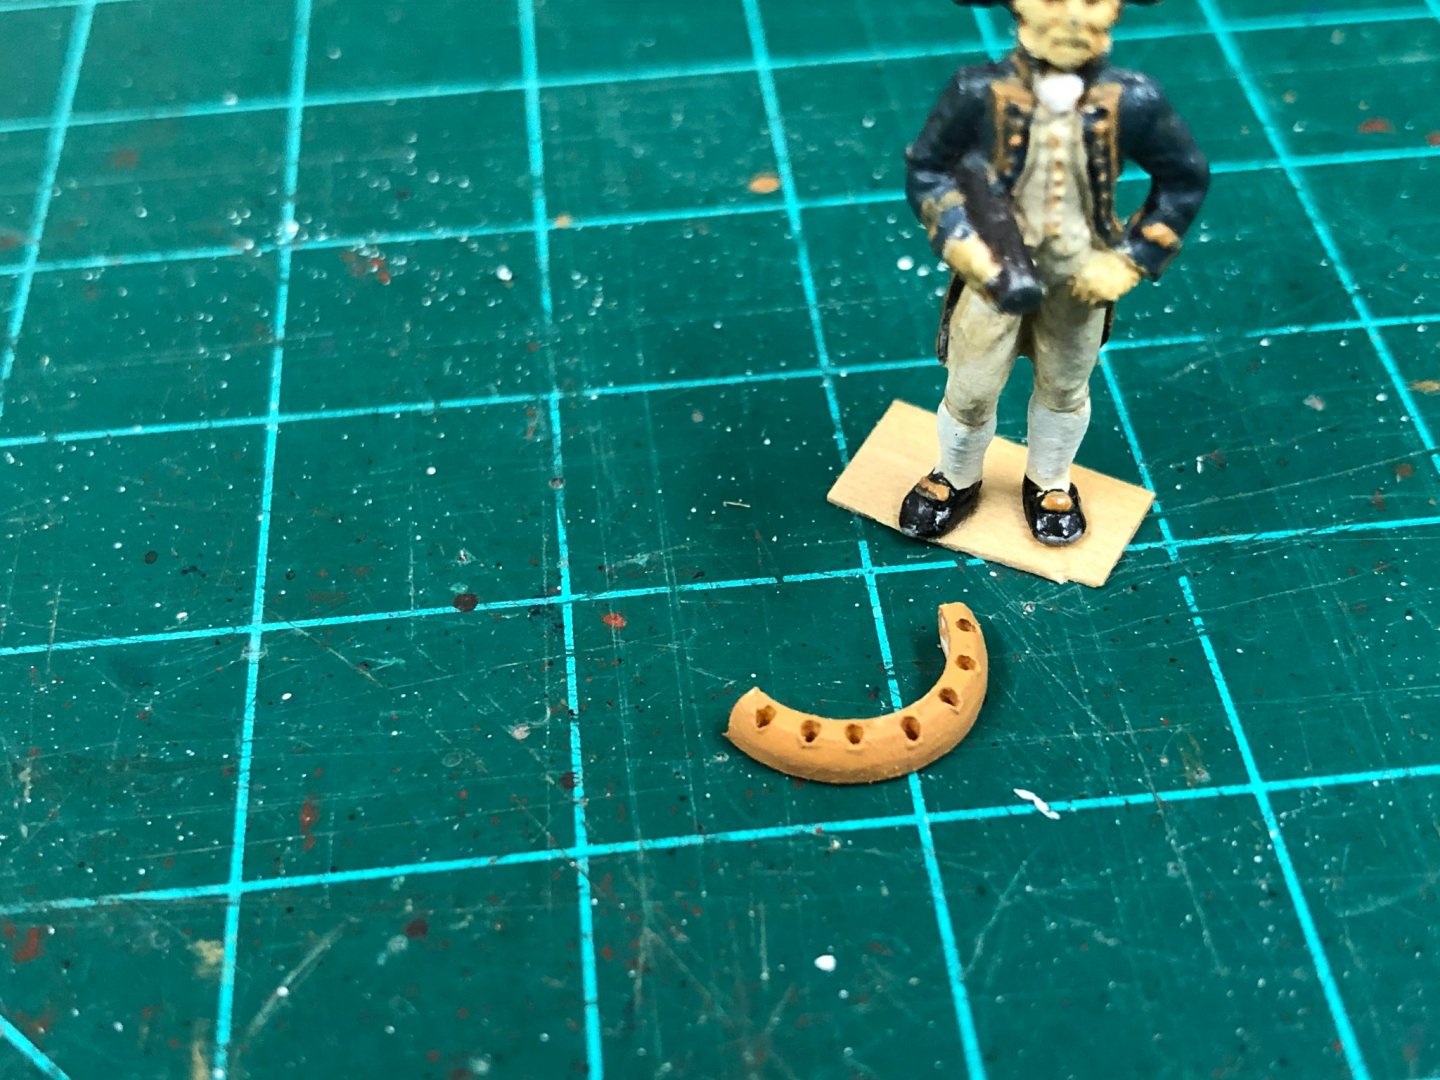
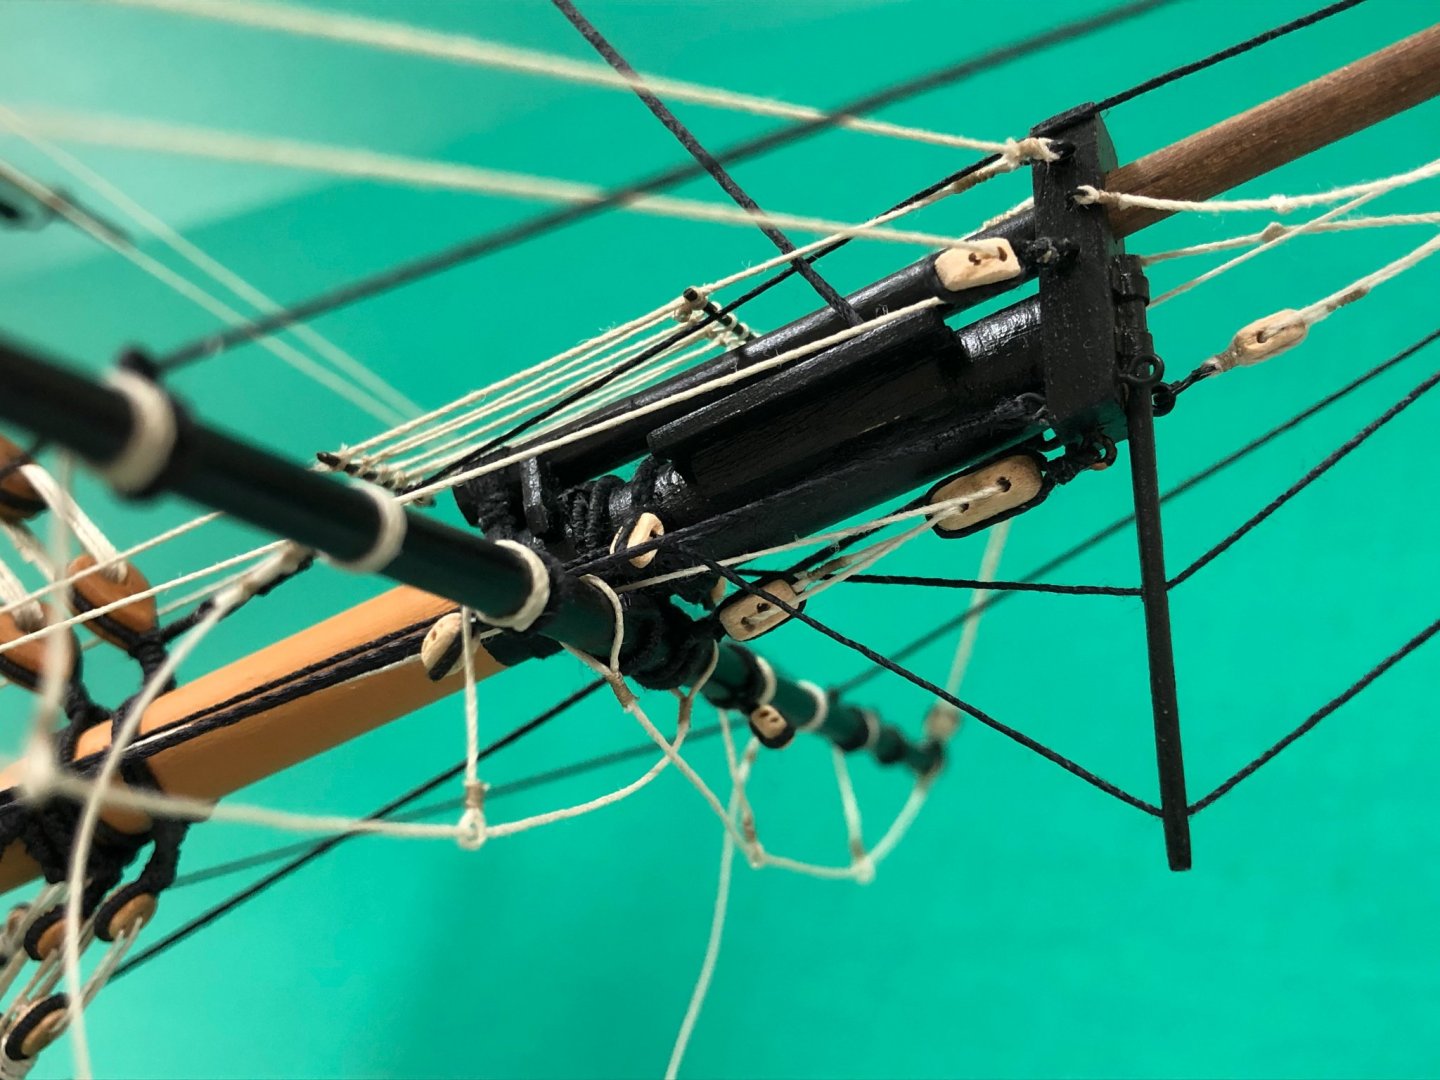
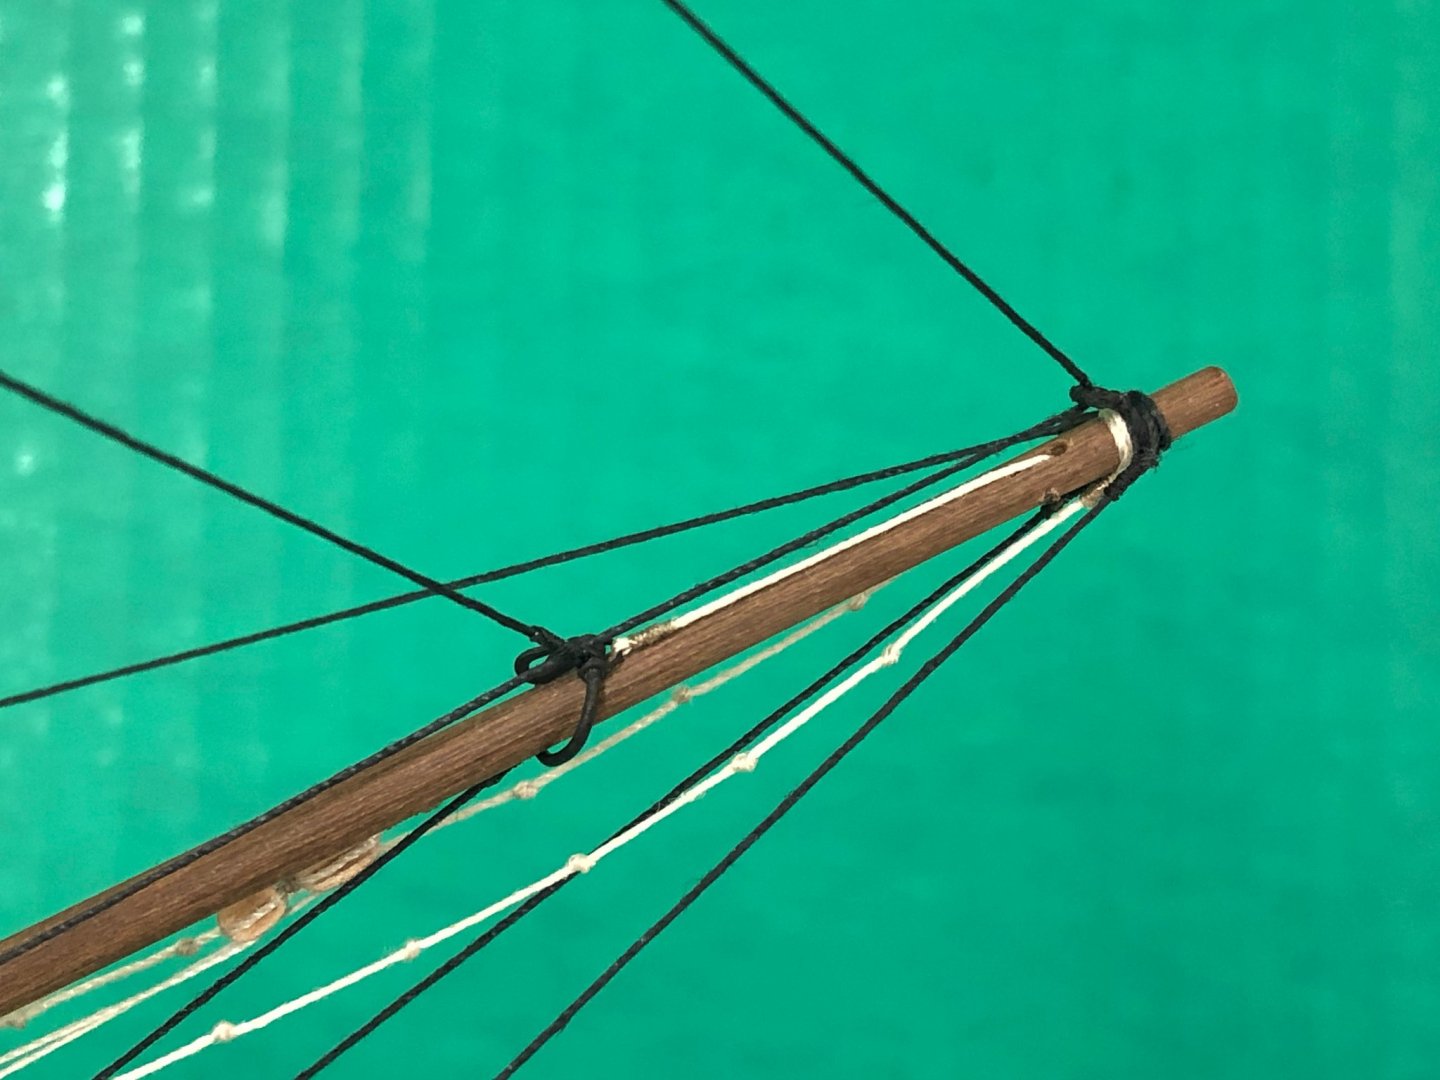
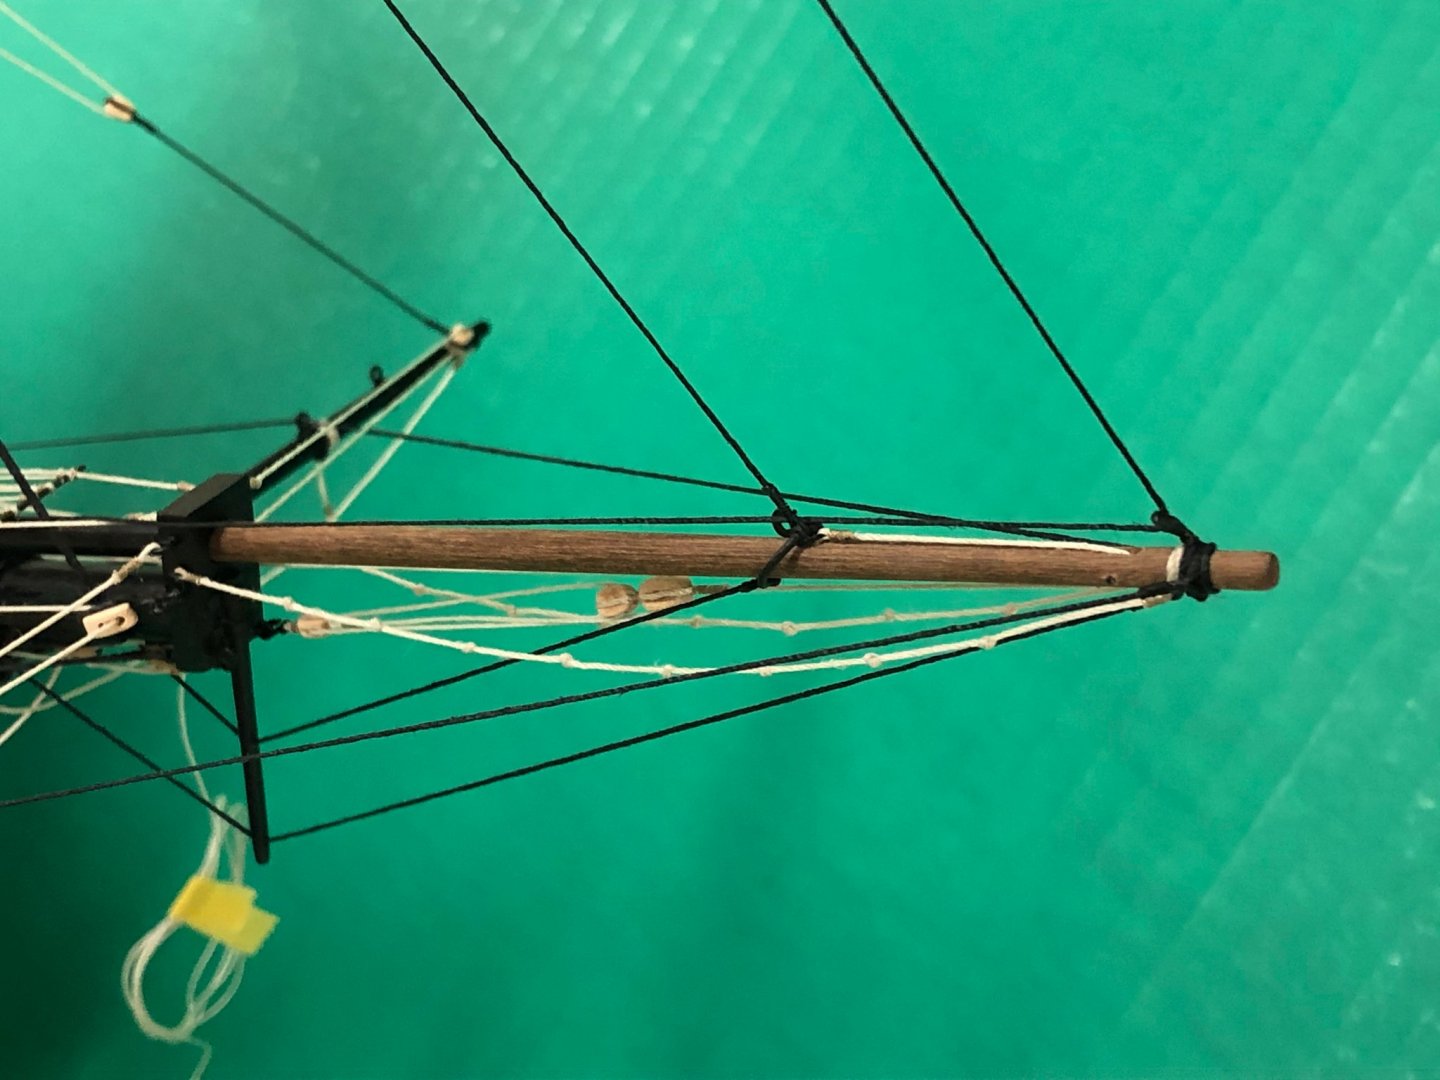
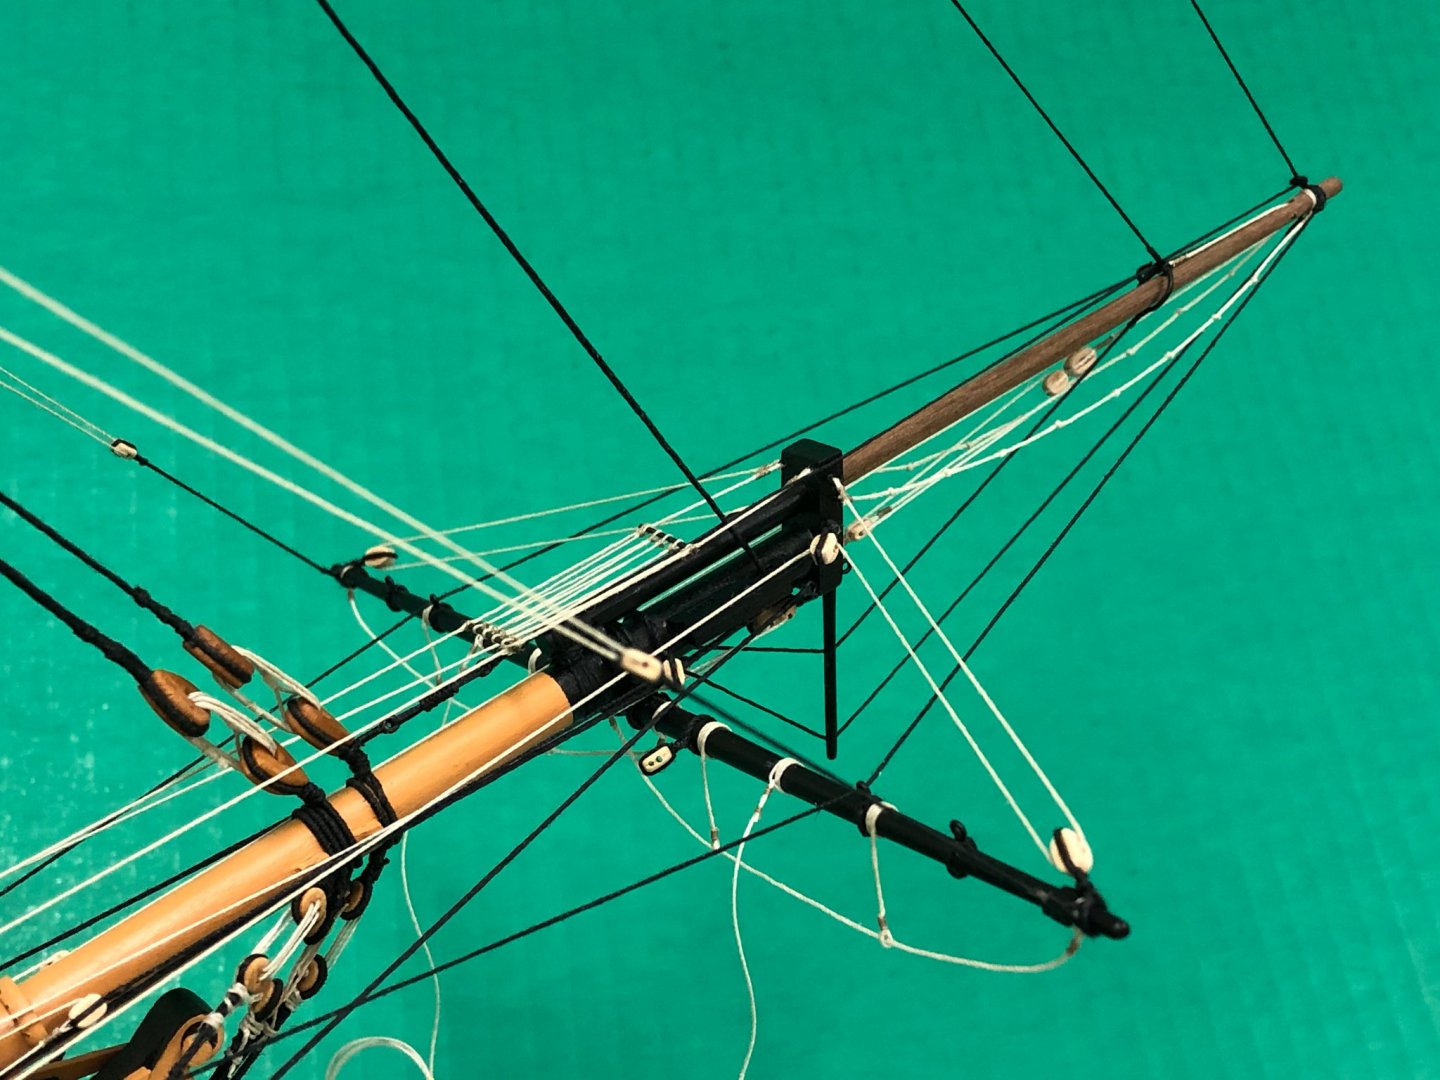
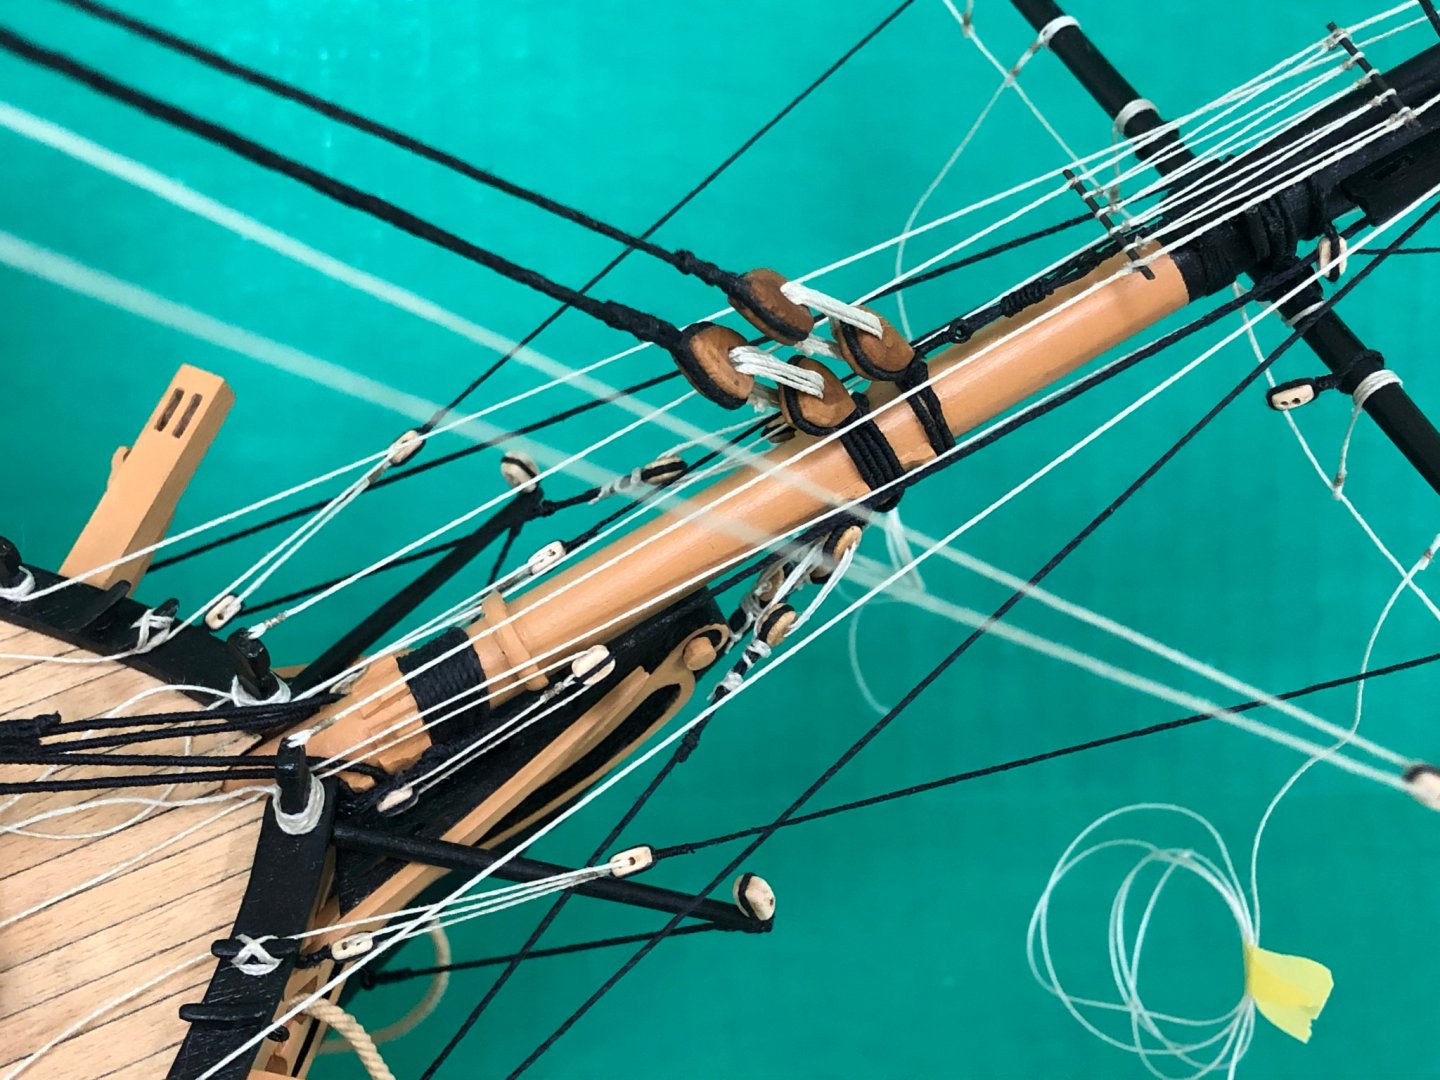
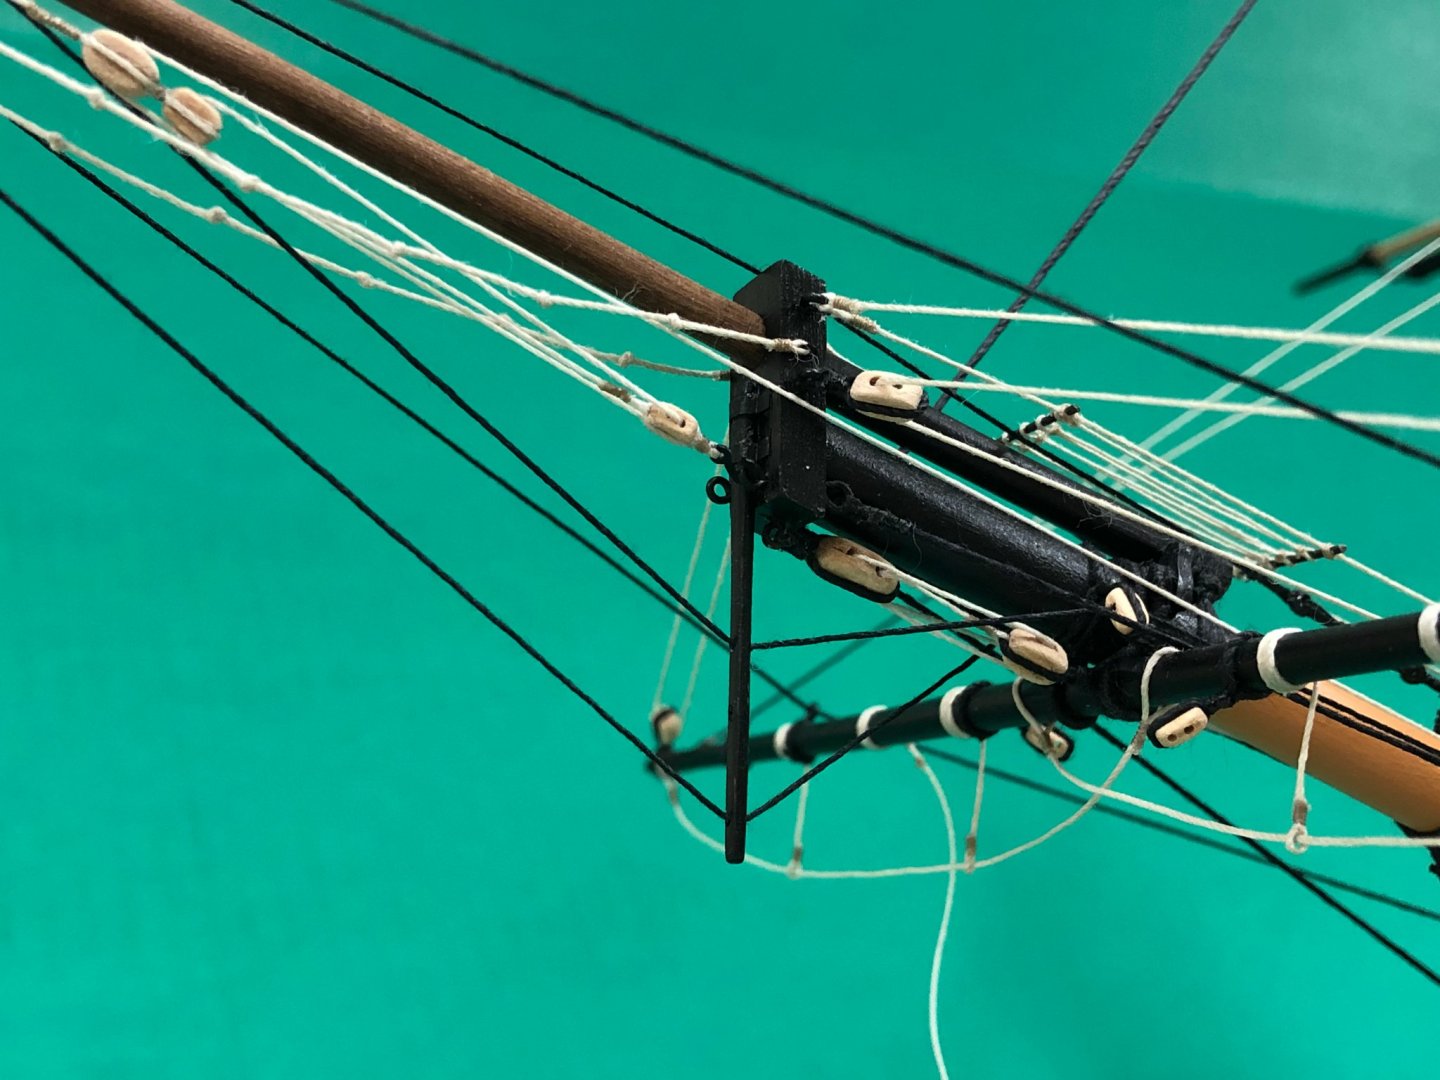
Cheers everyone, grateful for the continued interest to keep some wind in the sails... @Kevin - I think you and I have similar workstyles, the difference though is that you get a lot more done! Rigging Update... As previously mentioned, rigging just does not lend itself to updates as there always seems to be just one more job to complete before an update would be appropriate. Pretty much all rigging in the main and mizzen mast areas is complete. This definitely required some planning ahead to ensure room to work. The main topgallant braces were the last added as the place seriously limits access in an already tight space. Also redid a few completed rigging items in the bowsprit that have been bothering me, but before starting rigging in earnest, I felt the old girl needed a fairlead saddle. After trying, unsuccessfully to make something out of wood, I found that gluing a couple of styrene strips together and then bending around a dowel while steaming kept the styrene with the right curve. The profile could then be better approximated and the hole drilled...far from perfect but looks OK to the unaided eye (the paint was used at this point only to get some contrast on the surface). One item that continues to annoy me is the application of a single 'bee' as per the plans. I can find no other example of this and it just doesn't seem correct, and means that a fore topmast preventer stay cannot be rigged, but sadly that is just not fixable at this point... Bowsprit rigging: The bowsprit rigging shown on the plans has to be the least clear of any on this model, and it seems to have been significantly simplified to the point of non-utility/confusion in a couple of cases. I've decided to follow Lever and Lees (an excellent reference!) and leverage Petersson. Any mistakes in interpretation and execution are of course my own... I also felt that Snake deserves a 'traveller' (the jib stay being completely omitted from the plans) which needed to be installed before the jib boom horses. This was made from a single brass wire ring, a spare PE rigging hook, and mutilated PE swivel mount. This was my first attempt at soldering, which let me know in no uncertain terms that I have much to learn! The hook is a little big, but looks acceptable to my eye once fully installed. Moving on to the various rigging elements... Spritsail sling: The sling was made of a served line and fitted according to Lever and Lees - essentially the same as for the yard slings. Spritsail stirrups and horses: These were all fitted in situ once the spritsail yard was installed to ensure the stirrups hung vertically Jib Boom Horses: (Lees P51) Secured to eyes in the bowsprit cap, and lashed around the end of the jib boom Inner/Outer Martingales: There does not seem to be single definitive reference to help, and it seemed necessary to piece together info from a variety of sources. Lees indicates the late 18th/early 19th century was period of rapid changes in dolphin striker/bowsprit rigging over a pretty condensed 20yr period. I decided to rig 2 martingales. The inner martingale was seized around the traveler, and the outer martingale seized around the jib boom end. Both were taken through blocks lashed to opposite sides of the bowsprit to lead them over the spritsail yard, and secured using a gun tackle setup to a timberhead. Jib Stay: (Petersson P19) A block was added to the fore topgallant mast to carry the jib stay, one end lashed to the traveler and the other secured via a tackle to inboard starboard pin rail. Fore Topgallant Stay: (Petersson P61) Led through an eye seized to the bowsprit end and secured to the stay using thimbles, a collar and a lashing which was frapped. Jib Outhaul: (Petersson P21 & P62) One end seized to the traveller, led through a sheave cut into the bowsprit to a tackle. Petersson indicates use of a violin block, Lever suggest use of both a violin and a double block system. For a bit of variety (and because I’ve become increasingly unhappy with the look of the supplied items), a double block system was used and this was secured to a timberhead. Jib Boom Guys: Seized around jib boom end and secured using a gun tackle to a cleat on the capping rail Spritsail Yard Halliard: (Petersson P59) Secured to a timberhead per Petersson, rather than pin rail as called out on the plans. Spritsail Braces: (Petersson P47) Plans are reasonably Spritsail lifts: (Lever Ch40, Petersson P64 and plans) Secured to timberhead per Petersson, rather than pin rail as called out on the plans. Bowsprit horses and netting: (Petersson P91, Lees 84) The location of the eyebolts seems to be shown both on the front face and top of the timberheads, and settled on the top mounted option. These were simplified a little to and simply seized to the eyes rather than using an eye and lashing. The bowsprit netting was made from two brass wire pieces fed through the line, which were secured with some fine thread. This was then suspended using a couple of clamps on the keel former offcut from "Jason", which allowed the ropes to be secured and wrapped around the wire. Each turn was secured before moving onto the next. It helped having this under slight tension throughout. The following show how everything ended up.... And finally...the overall state of where things stand:


- 800 replies
-
- 15
-
-

-
- snake
- caldercraft
- (and 1 more)
-
Hi Mike, really nice clean start to your Snake. Nice to see you line up the deck beams to get accurate planking layout, that was something I was completely oblivious to when I was at that stage. Looking forward to seeing more progress.
-
Nice update, some nice rigging you have going on there. I would definitely echo Joe's good advice, especially with the variable quality of kit supplied rope you are using. In my experience, the kit supplied rope can continue to stretch after it is placed in constant tension. As I'm finishing up rigging Snake, I've been taking the approach of installing the various rigging elements and leaving them under small amount of tension for at least a day or two before finally securing.
-
I always marvel at your updates Thomas, such a beautiful model...thanks for sharing.
-
Fascinating research and excellent execution, the usual perfect combination. I to very much like weathered/grimy look on the funnels, and the colour tones blend very nicely and look very authentic. Very impressed with your silver soldering results, dipping my toes into that a little myself...safe to say still at the bottom of learning curve.
- 261 replies
-
- 3
-
-
- muirneag
- vanguard models
- (and 2 more)
-
Looks great Nic, will definitely try that, thanks for sharing!
-
Very nice details. Would you mind sharing your technique for making the rope coils that have been mounted. Always seems to be lots of discussion on the 'right' way to do these to keep them workable, but the main sense I see from looking at older pictures is that the pin rails just look like a heap of rope coils, very similar to how you have represented them.
-
Congratulations Kevin, you should be very proud of her and your fine craftsmanship.
- 1,319 replies
-
- 3
-
-
- caldercraft
- Victory
- (and 1 more)
-
Lovely progress Rob, I especially like the scale mini cooper (although I think the official compliment was four in differing colours 🙂 ) Your pinnace really turned out great, I've just finished the cutter, and really enjoyed the challenge, but I think the approach you are taking to make your own frames will give better results, so looking forward to seeing more. Oh, and very nice work on the ratlines...great stuff.
-
With the waterline in place , it really shows that you nailed the line of the wale. Very nice, you've got a beautiful foundation to build on.
- 101 replies
-
- 1
-
-
- caldercraft
- granado
- (and 1 more)
-
Wow, catching up from the very start, so glad you are creating a build log, you look to be making pretty speedy progress. This looks like an awesome kit and you're doing such a wonderful job. Looking forward to more....I want this one day 🙂
- 322 replies
-
- 4
-
-
- enterprise
- caf
- (and 1 more)
-
Hi Mitsuaki, I really like the additional detailing that you have put into the channels and the chains. I have been considering taking the same approach for making the preventer links with wire. It's a small detail, but the results you have achieved are such an improvement on the flat kit supplied part and add so much to be beauty of the model.
- 126 replies
-
- 3
-
-
- victory models
- amati
- (and 2 more)
-
Hi Peter, regular updates seem to be common malaise, appreciate you sharing your updates. The headworks look very good indeed, and those bow on views really are the beauty shots with Diana now in place. Very neat job on the cannon and corronade rigging, great results, its amazing how the empty expanse of the deck fills up with everything in position.
-
Glad to catch up on more progress on your Diana. Good decision to do the gun ports correctly, you'll be much happier I think. That last shot really shows off the great work on your deck - one of my struggles is finding more decent maple to do the upper decks.
-
Great start Sjors and nice to see another of your model builds. Your planking looks great and you seem to have overcome the challenges on some of the details. This looks like an awesome kit.
- 164 replies
-
- 1
-
-
- vanguard models
- flirt
- (and 1 more)