


James H
-
Posts
5,517 -
Joined
-
Last visited
Content Type
Profiles
Forums
Gallery
Events
Posts posted by James H
-
-
-
9 minutes ago, Keith_W said:
Single plank model with 2mm thick planks is a recipe for disaster. You have to become very very good at bevelling planks and use a lot of filler.
I think that's it. These kits aren't aimed at those who have little experience. I would be able to plank that hull, no problems, even in 2mm, but that's because I've some experience. For those who have little experience, it would be a nightmare, and buckets of filler would be needed.
- Ryland Craze, markjay, Canute and 2 others
-
 5
5
-
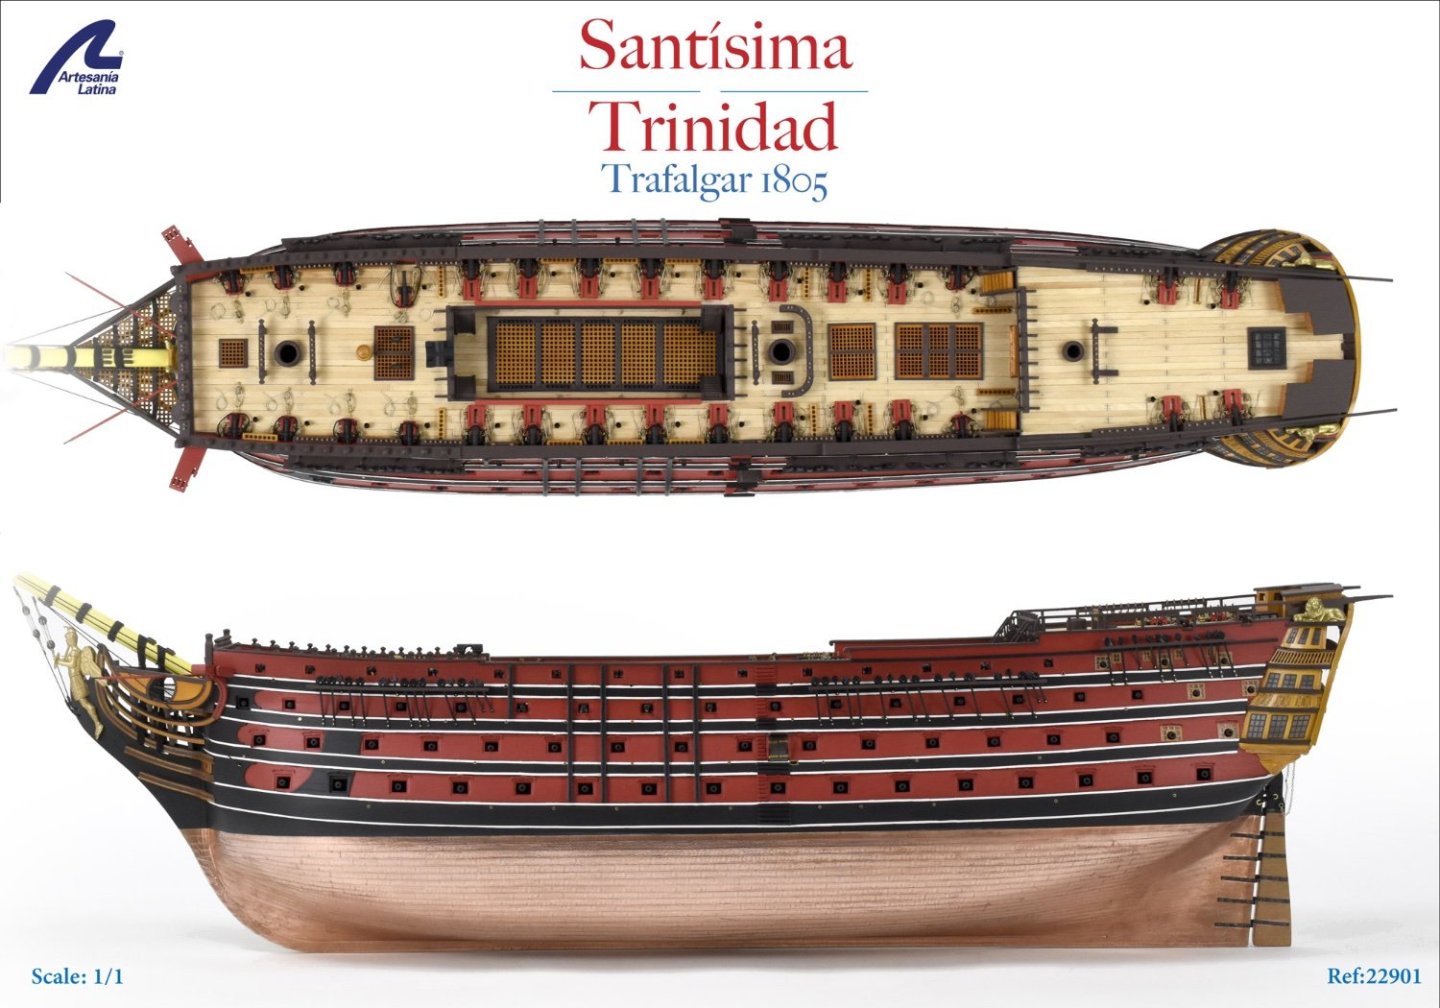
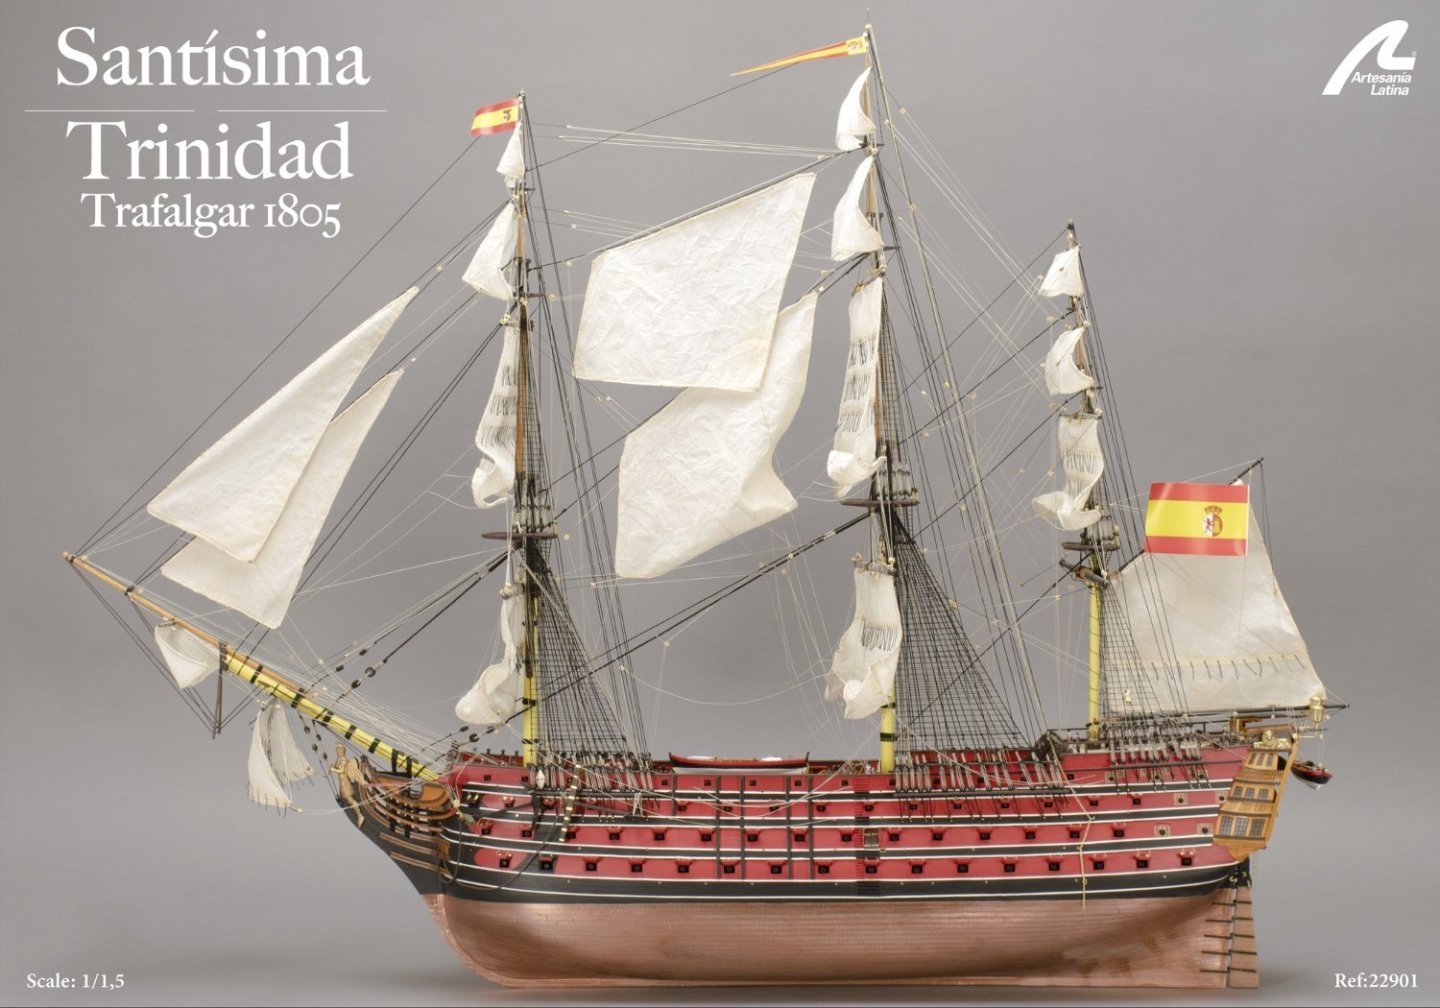
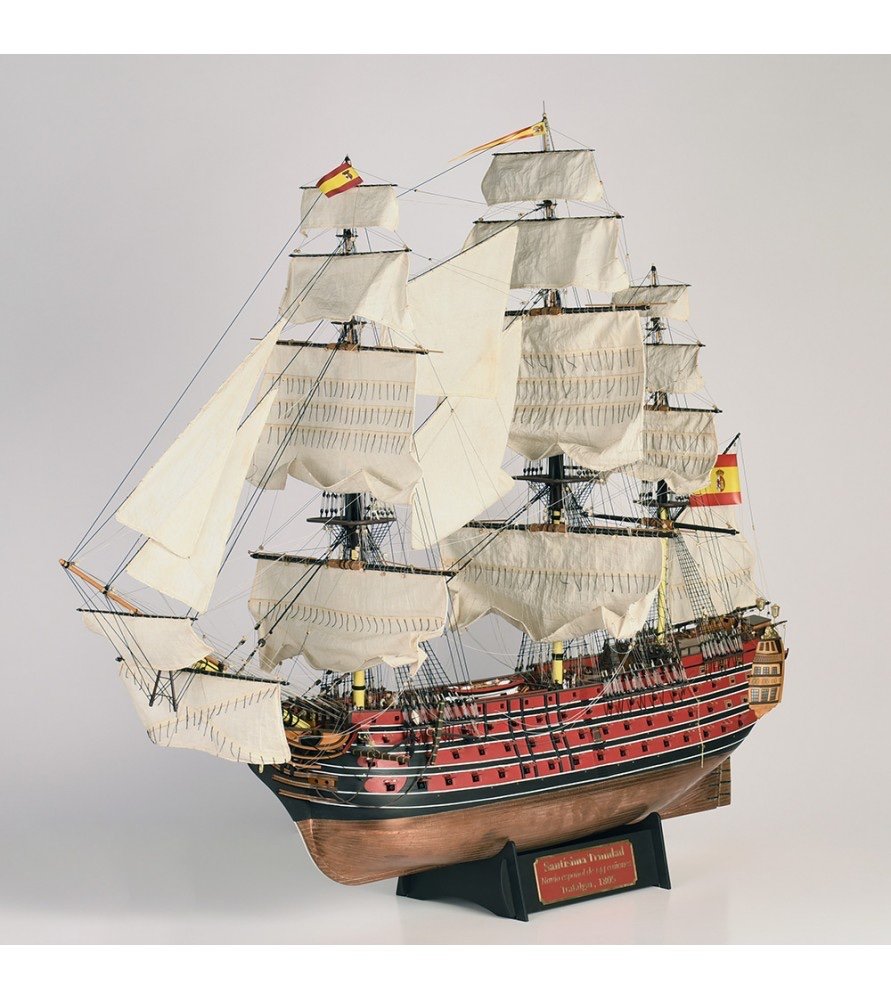
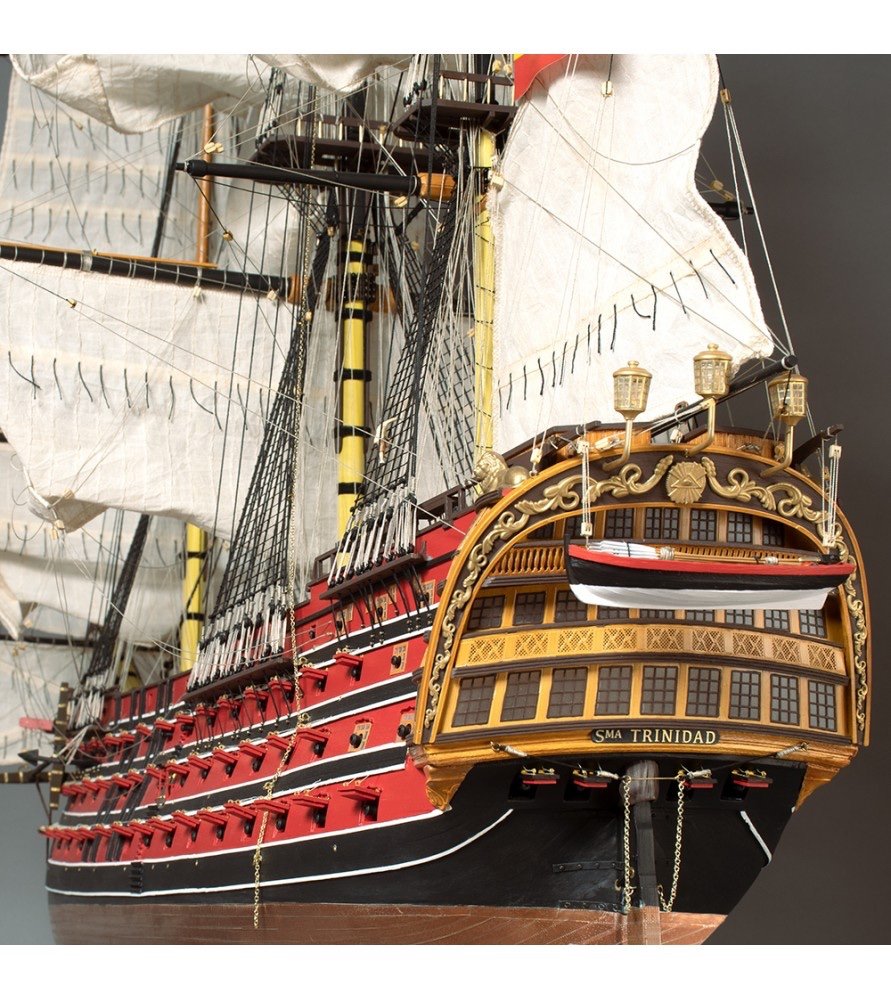
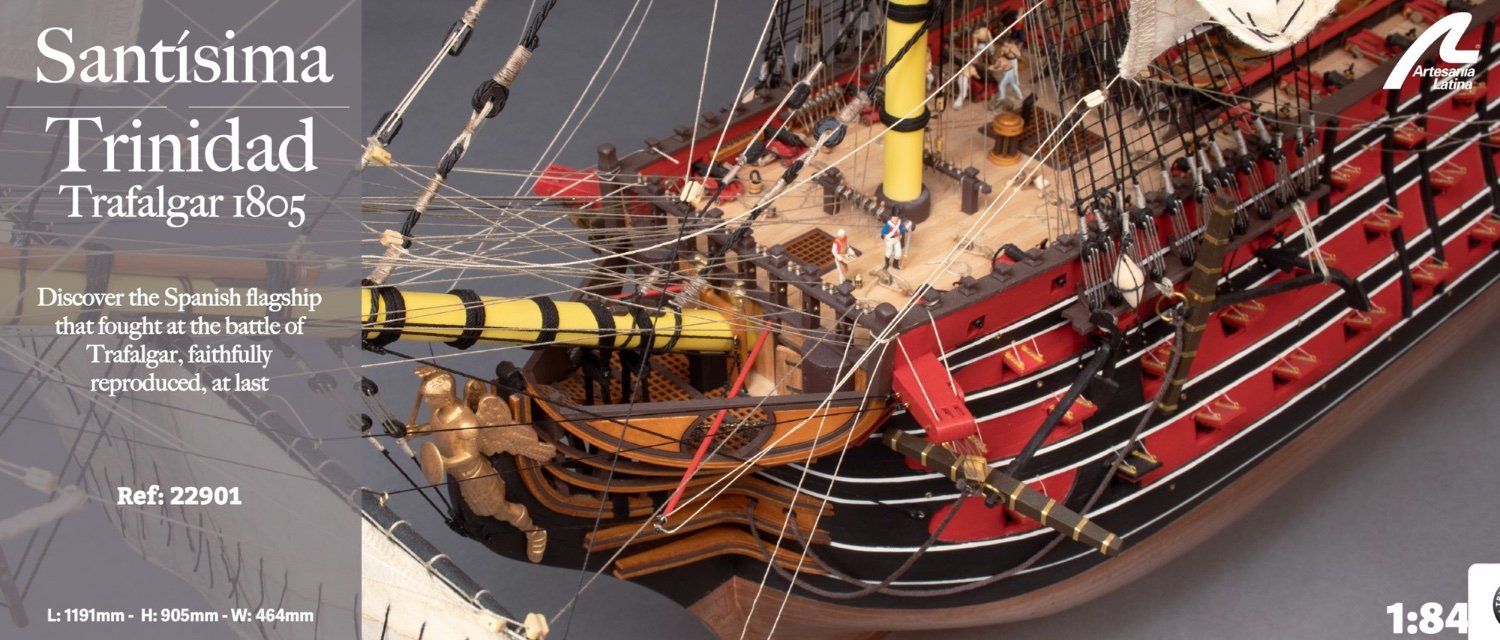
1:84 Santisima Trinidad – Trafalgar 1805
Artesania Latina
Catalogue #22901
Available from Artesania Latina for €749.99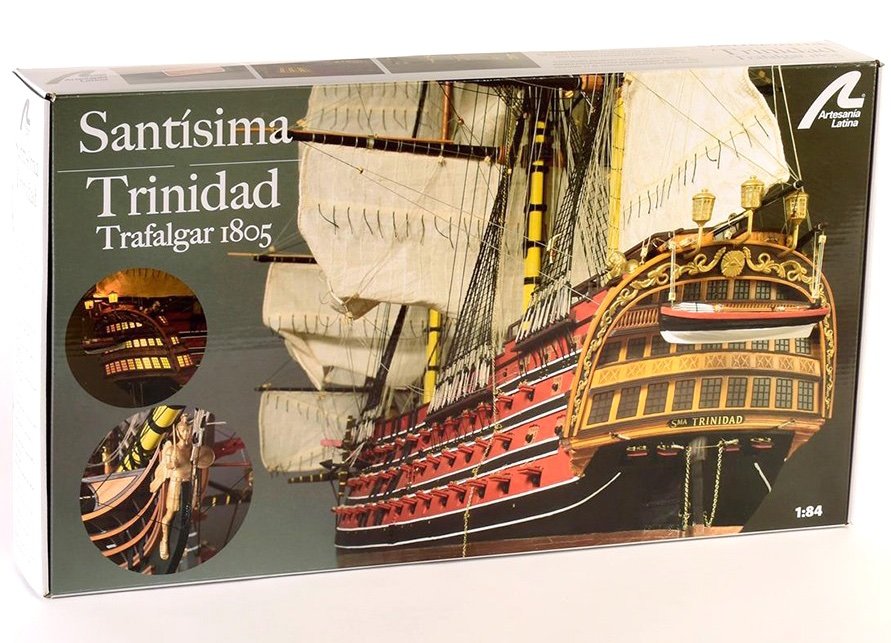
The Santisima Trinidad (full name: Nuestra Señora de la Santísima Trinidad), was a Spanish first-rate ship of the line with 112 guns. This was increased in 1795–96 to 130 guns by closing in the spar deck between the quarterdeck and forecastle, and to 136 guns around 1802 (plus 4 small guns on the poop), thus creating what was in effect a continuous fourth gundeck although the extra guns added were actually relatively small. She was the heaviest-armed ship in the world when rebuilt and bore the most guns of any ship of the line outfitted in the Age of Sail. She was built at Havana, Cuba, to a design by Irish naval architect Matthew Mullan (domiciled in Spain under the name Mateo Mullán), originally intended as a ship of 112 guns. He died on 25 November 1767, and the construction of the ship was continued by his son, Ignacio Mullán. and the ship was launched in March 1769 and completed in August 1769 as a 116-gun three-decker. She was considerably larger than her British contemporary Victory and somewhat bigger than the French Bretagne.
Commanded by Francisco Javier Uriarte and the flagship of Rear Admiral Baltasar Hidalgo de Cisneros, she took part in the Battle of Trafalgar on October 21, 1805, as part of the combined Franco-Spanish fleet. Due to her great bulk, her helm was unresponsive in the light winds on the day, contributing to her ineffective service in the combined fleet's cause. Her great size and position immediately ahead of the fleet flagship Bucentaure made her a target for the British fleet, and she came under concentrated attack by several ships. She lost her mast and eventually surrendered to the Neptune; a 98-gun second rate commanded by Captain Thomas Fremantle. She was taken in tow by the 98-gun second rate Prince but was eventually scuttled by her British captors northwest of Cádiz.
History abridged from Wikipedia.The kit
Before I post my own information on this new release, I’ll give you the details of the kit, as per Artesania Latina’s own blurb.
“In addition, the naval modeling kit of the Spanish vessel comes with several paper templates to make the building process of the model easier. Among other functions, they are used to arrange the elements on the decks and to place the embrasures and other objects on the sides of the hull. Speaking of the hull, its structure can be assembled as if it were a 3D puzzle. With this faithful 1:84 scale replica, you can represent correctly the appearance and artillery of the Santísima Trinidad in the battle of Trafalgar since it brings the howitzers that the ship carried in great detail -144 cannons-. Likewise, modelers who wish to line the hull of the magnificent model of the Spanish ship are in luck because the kit includes copper tape to be able to do it below the waterline.
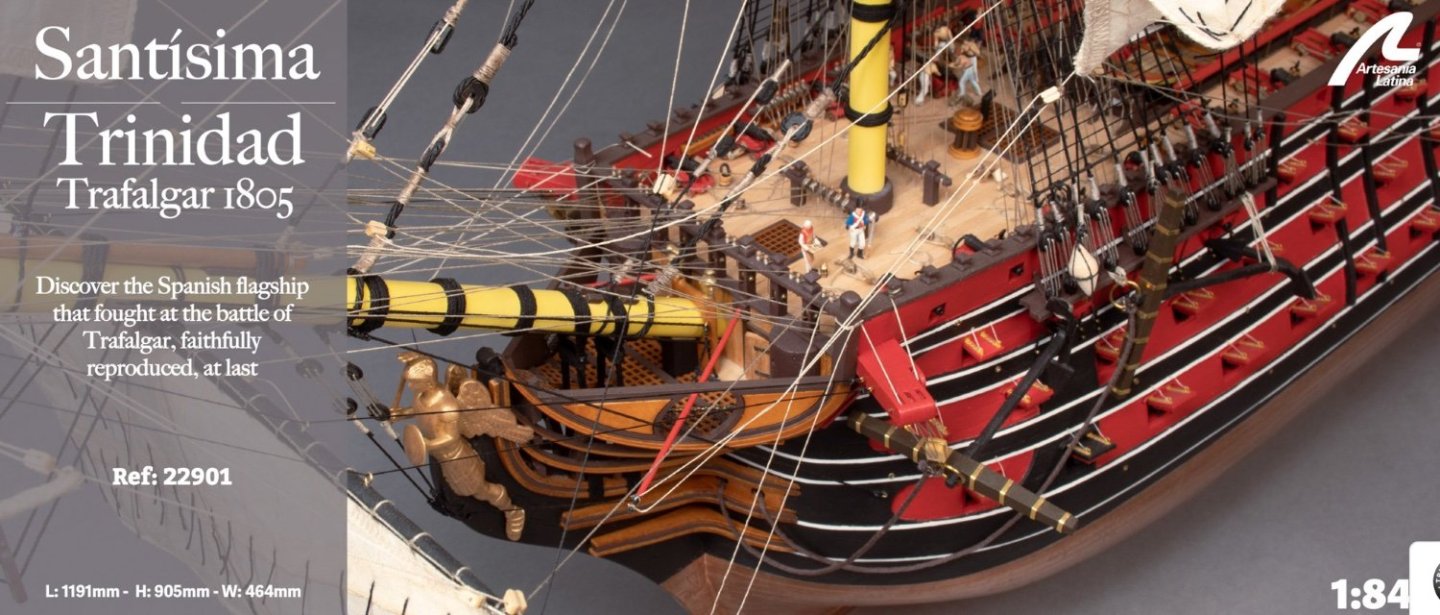
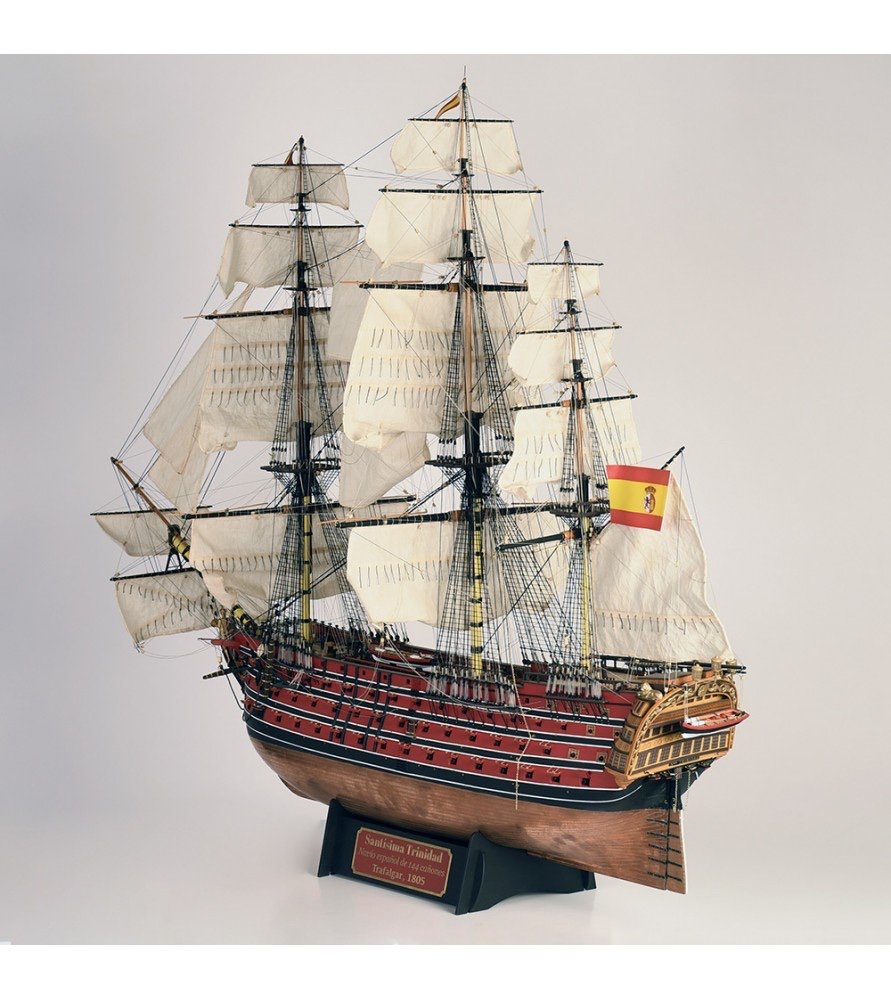
Once it is assembled, the model of Santísima Trinidad (22901), measures 46.88'' (1191 mm) length, 35.63'' (905 mm) height and 18.26'' (464 mm) width. Its design using a false keel and frames brings its assembly closer to the real ship. As a bonus, the kit of Santísima Trinidad comes with 5 die-cast figures.”
This new generation of large Artesania kits certainly pack a whole load of contents for your money, and of course, the boxes are very large…and heavy. Definitely another kit where you need to try hard to fit everything back under the lid if you intend to repack for a later date.


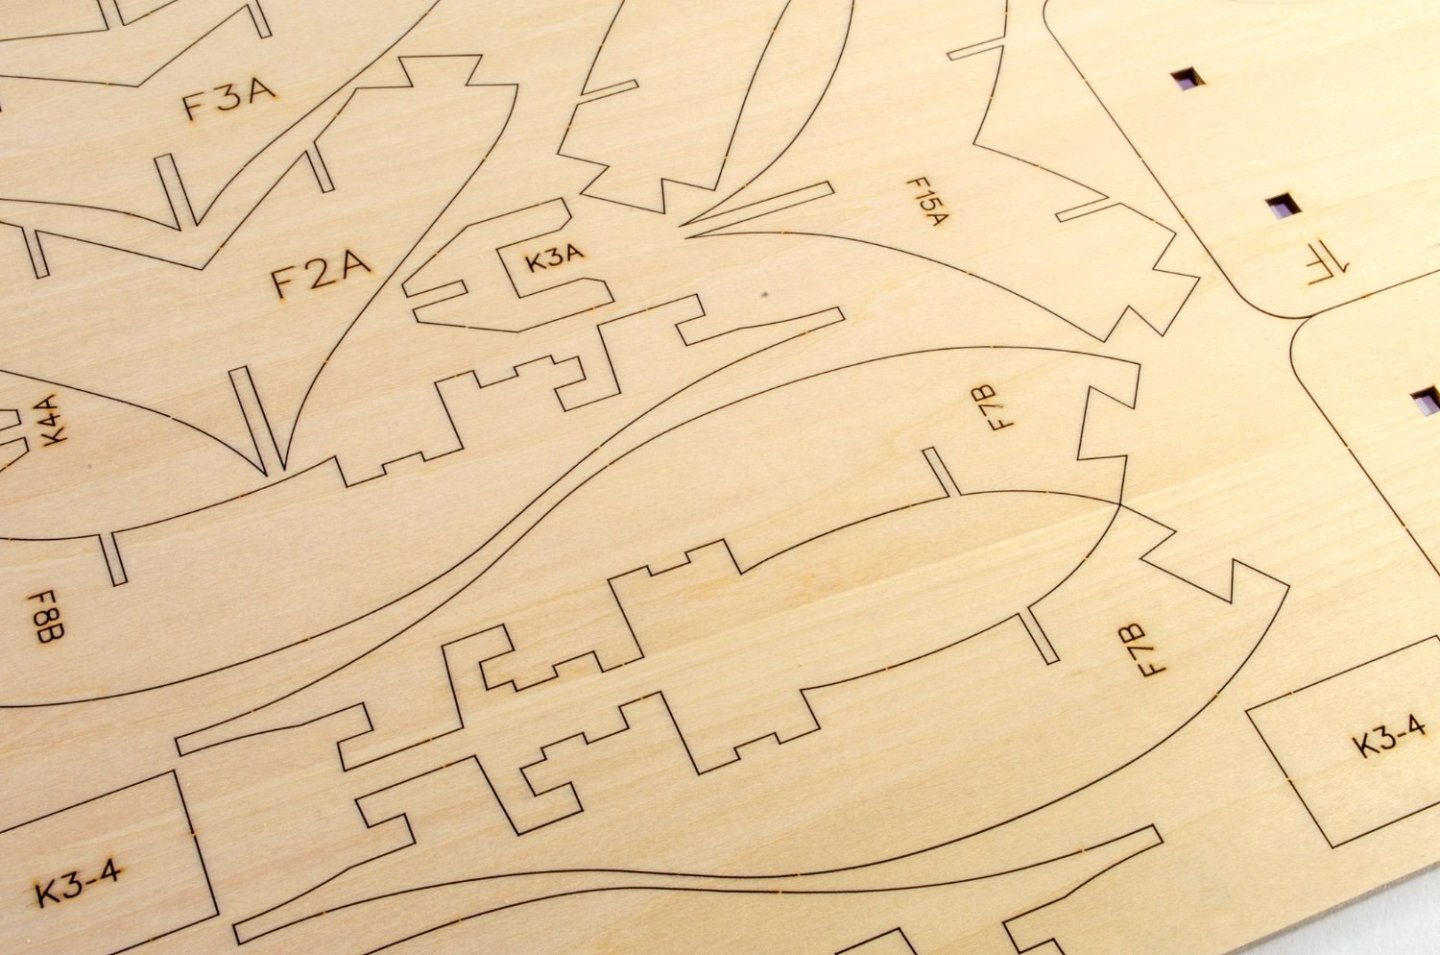

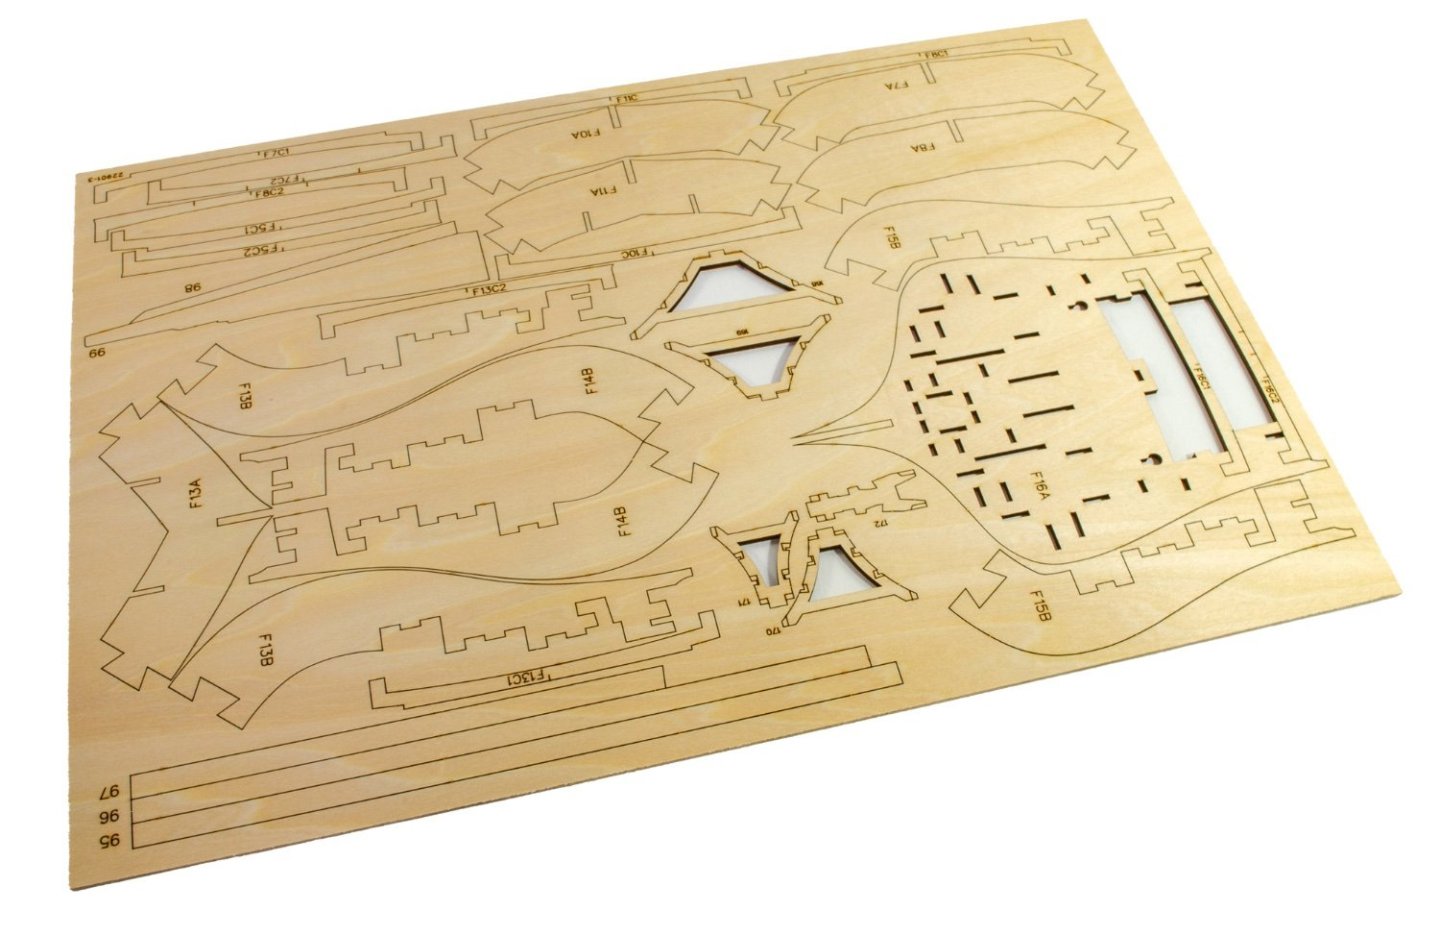
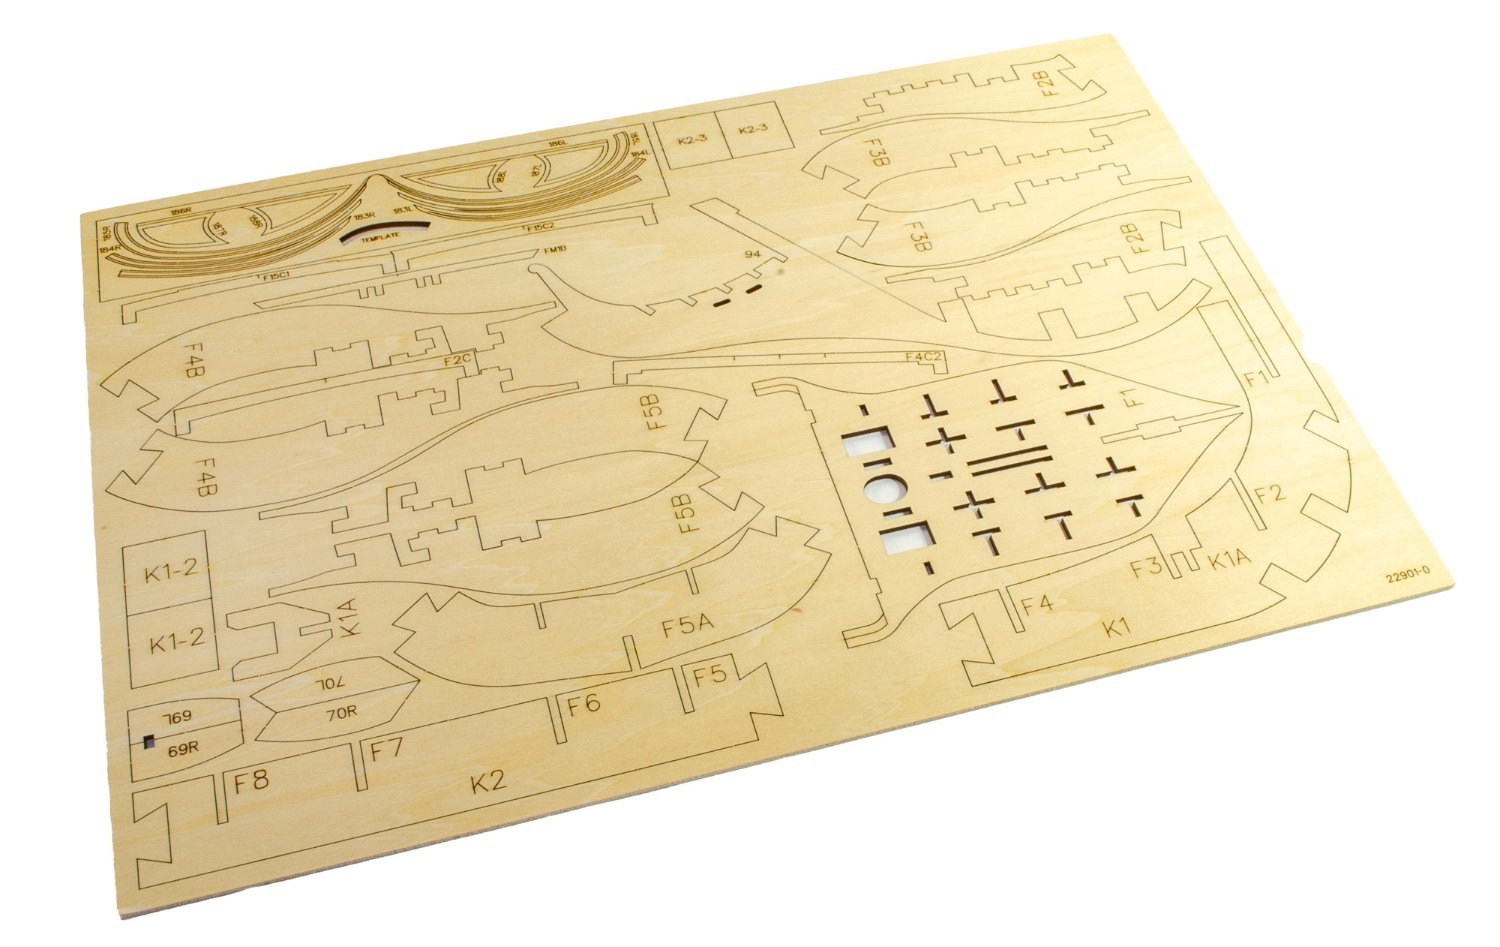
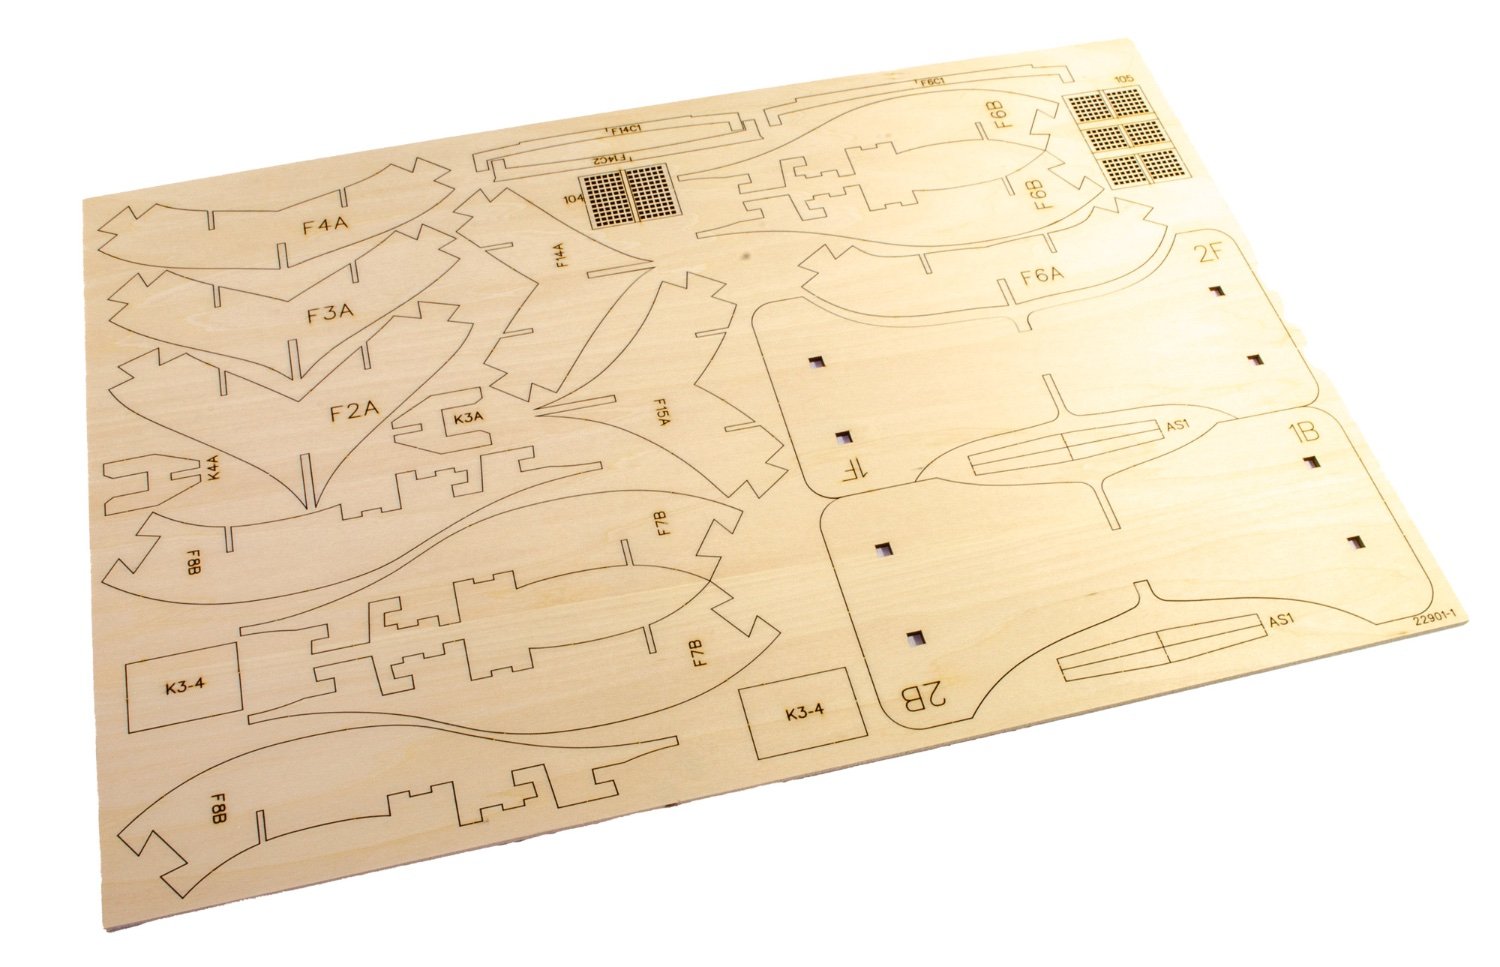
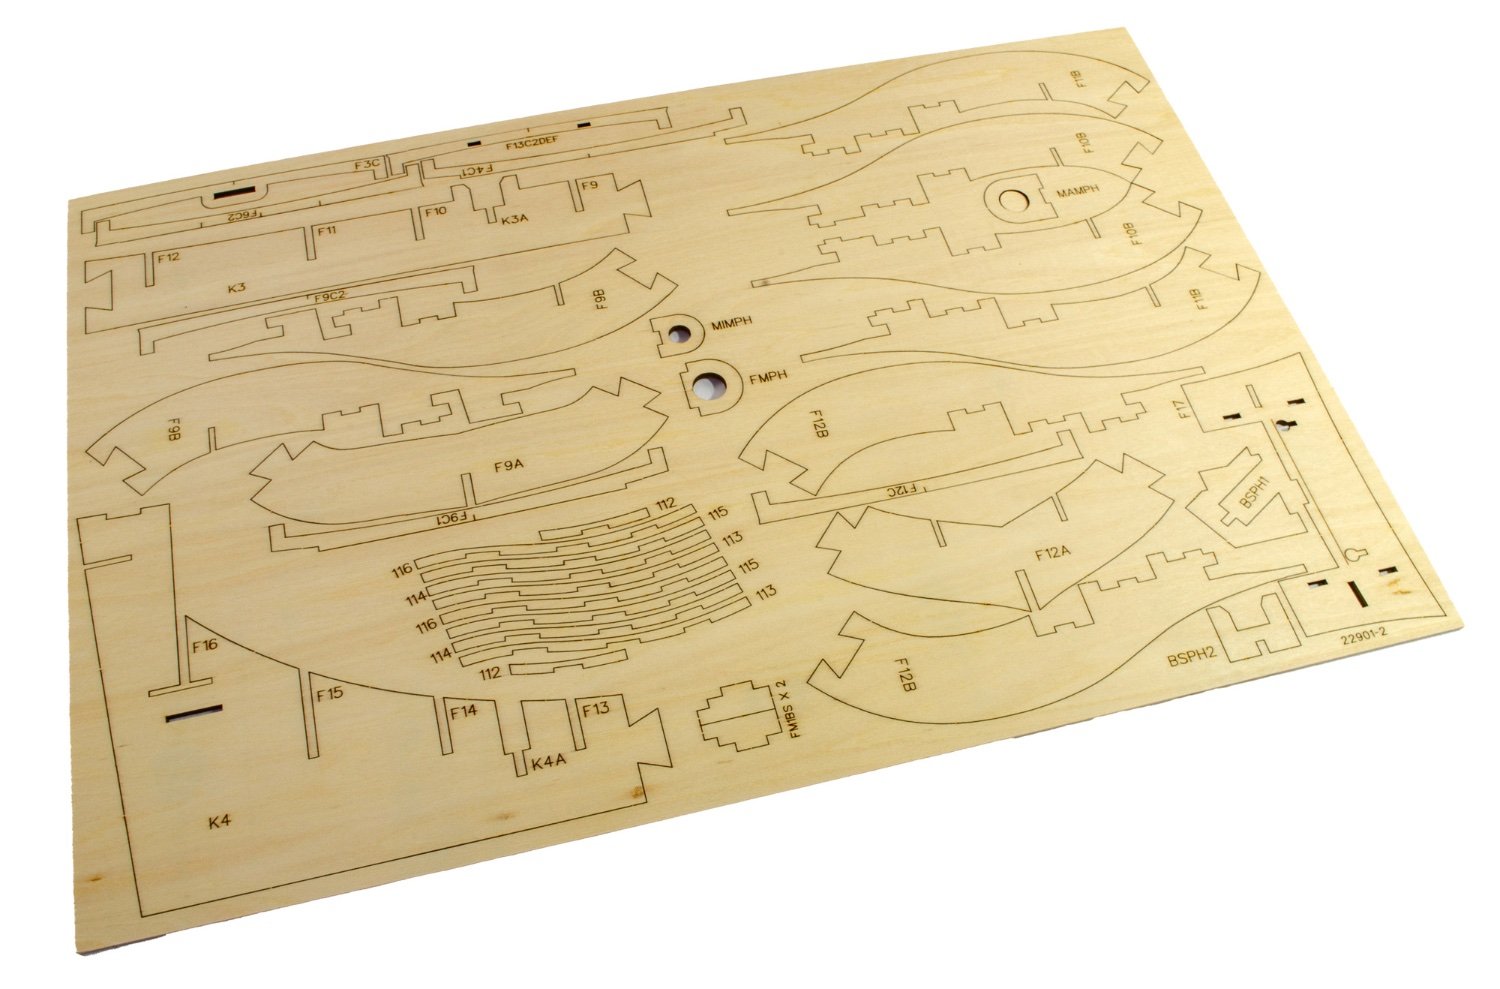
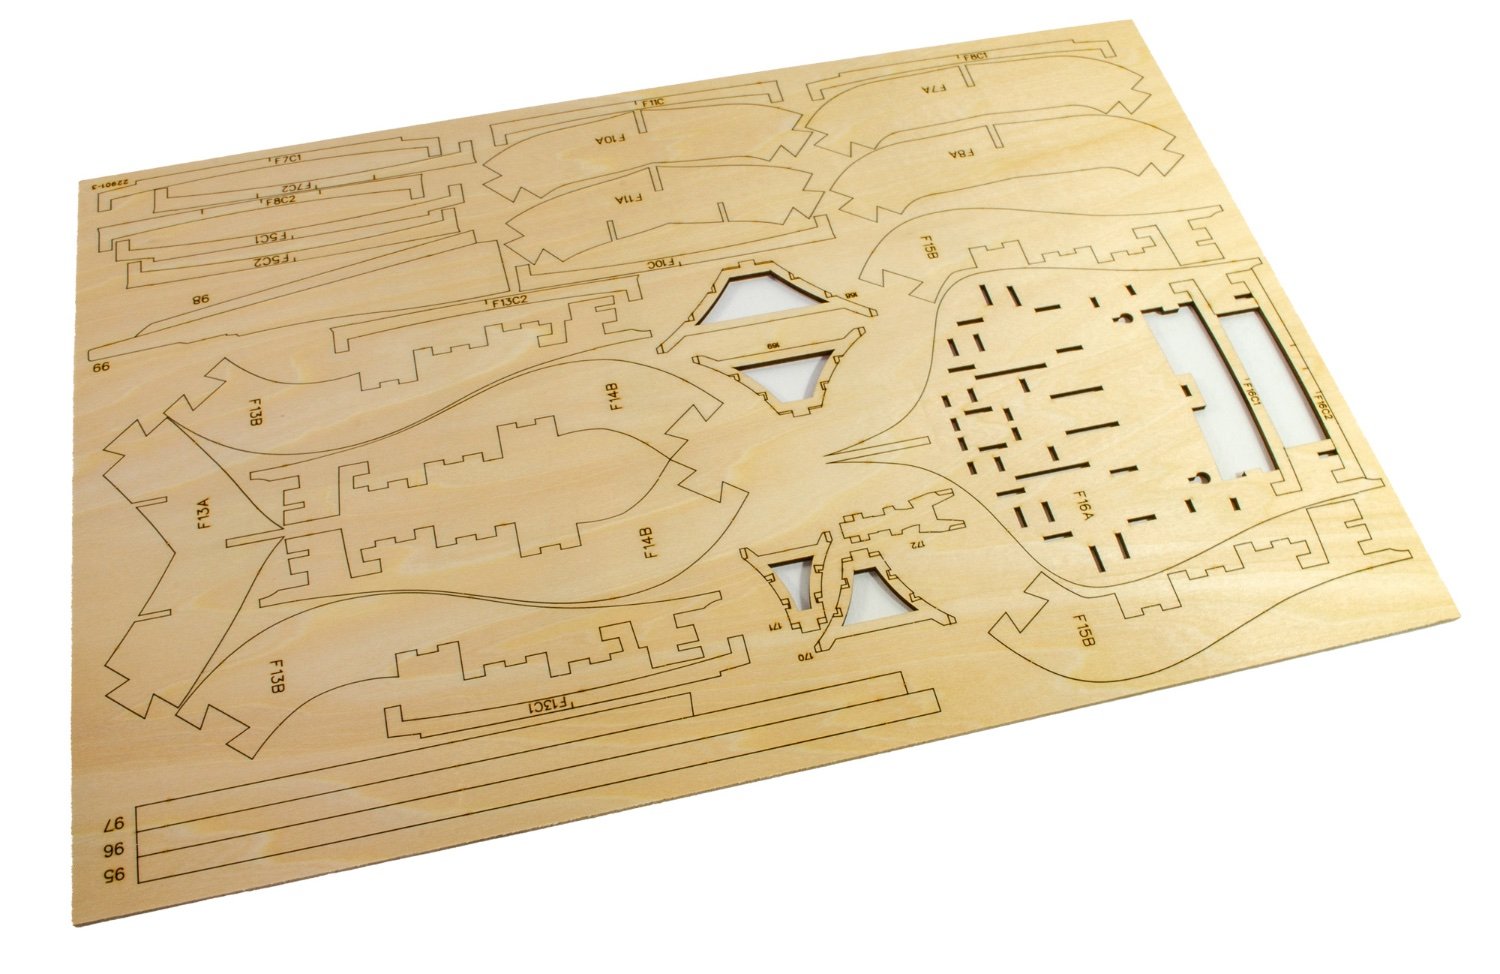
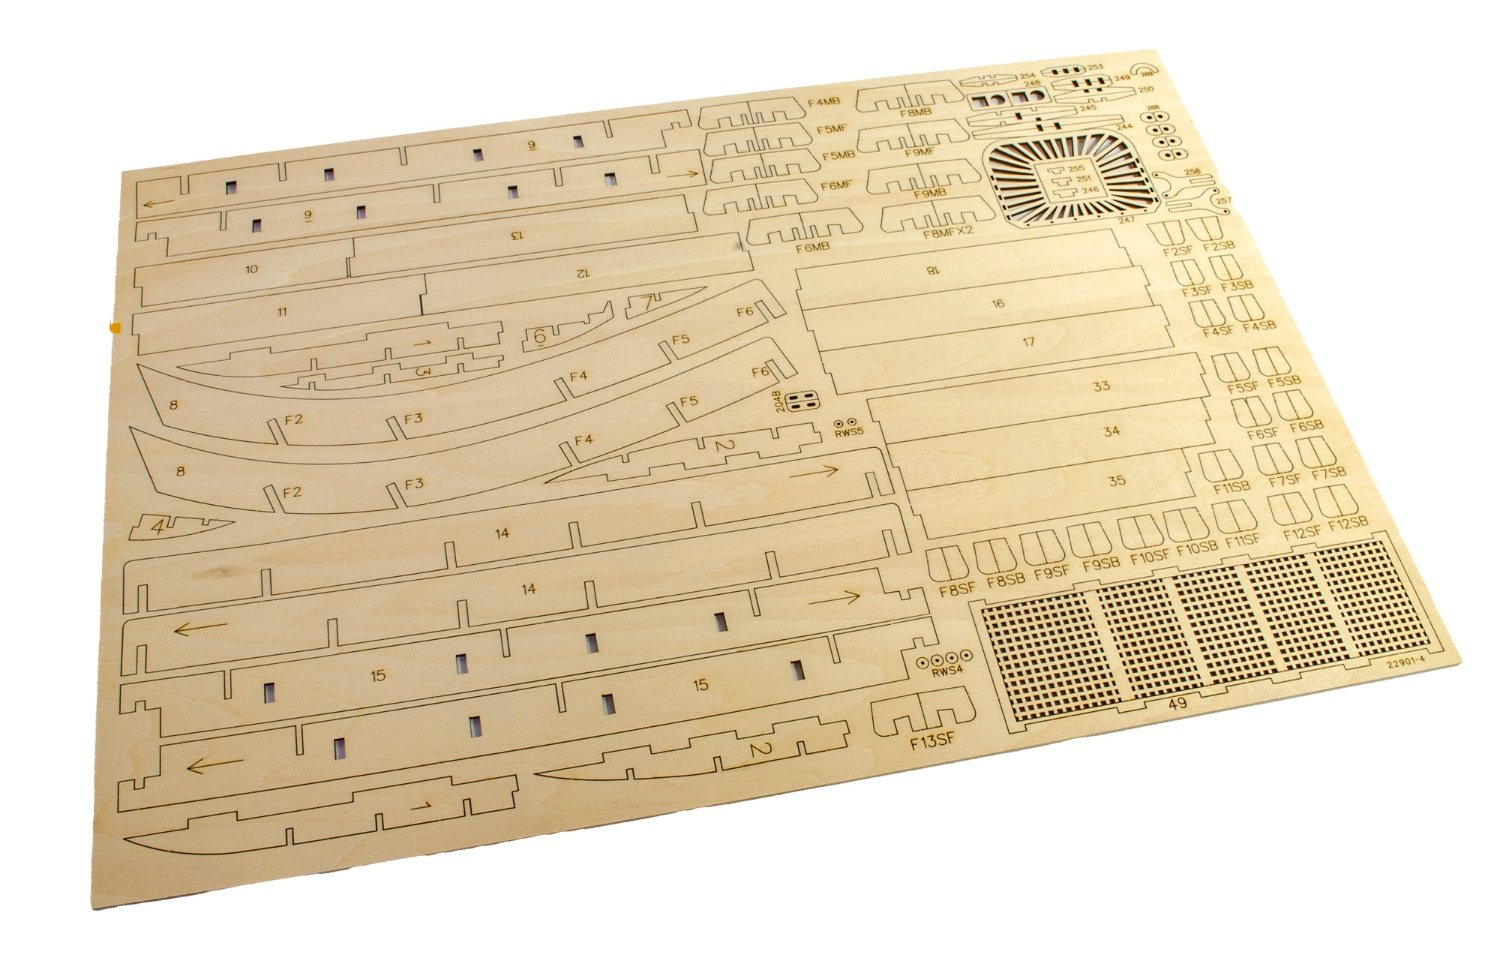
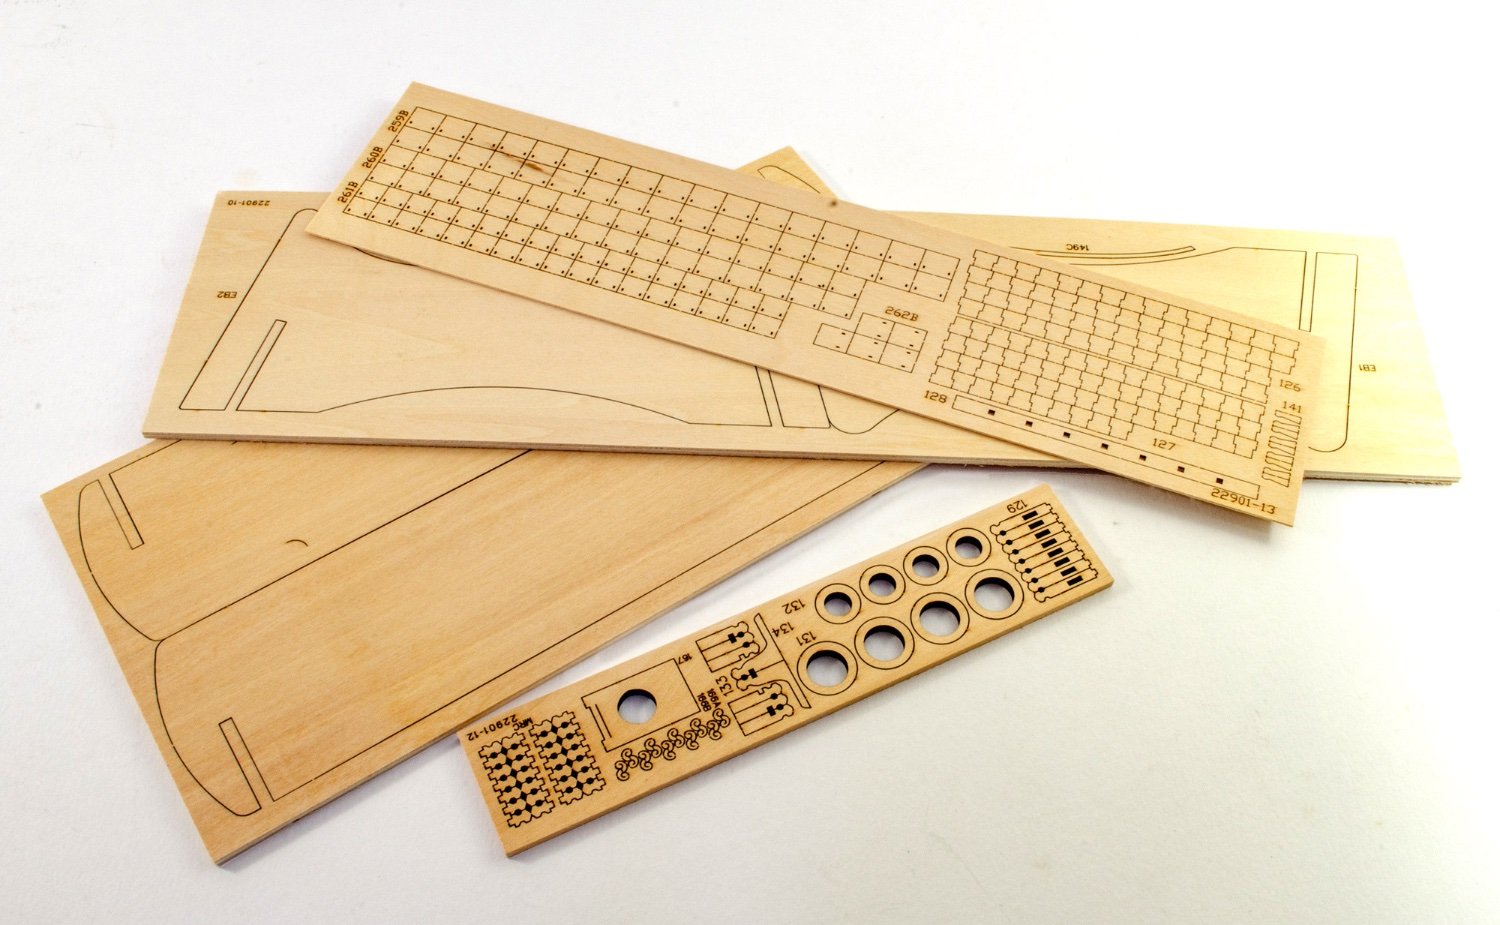
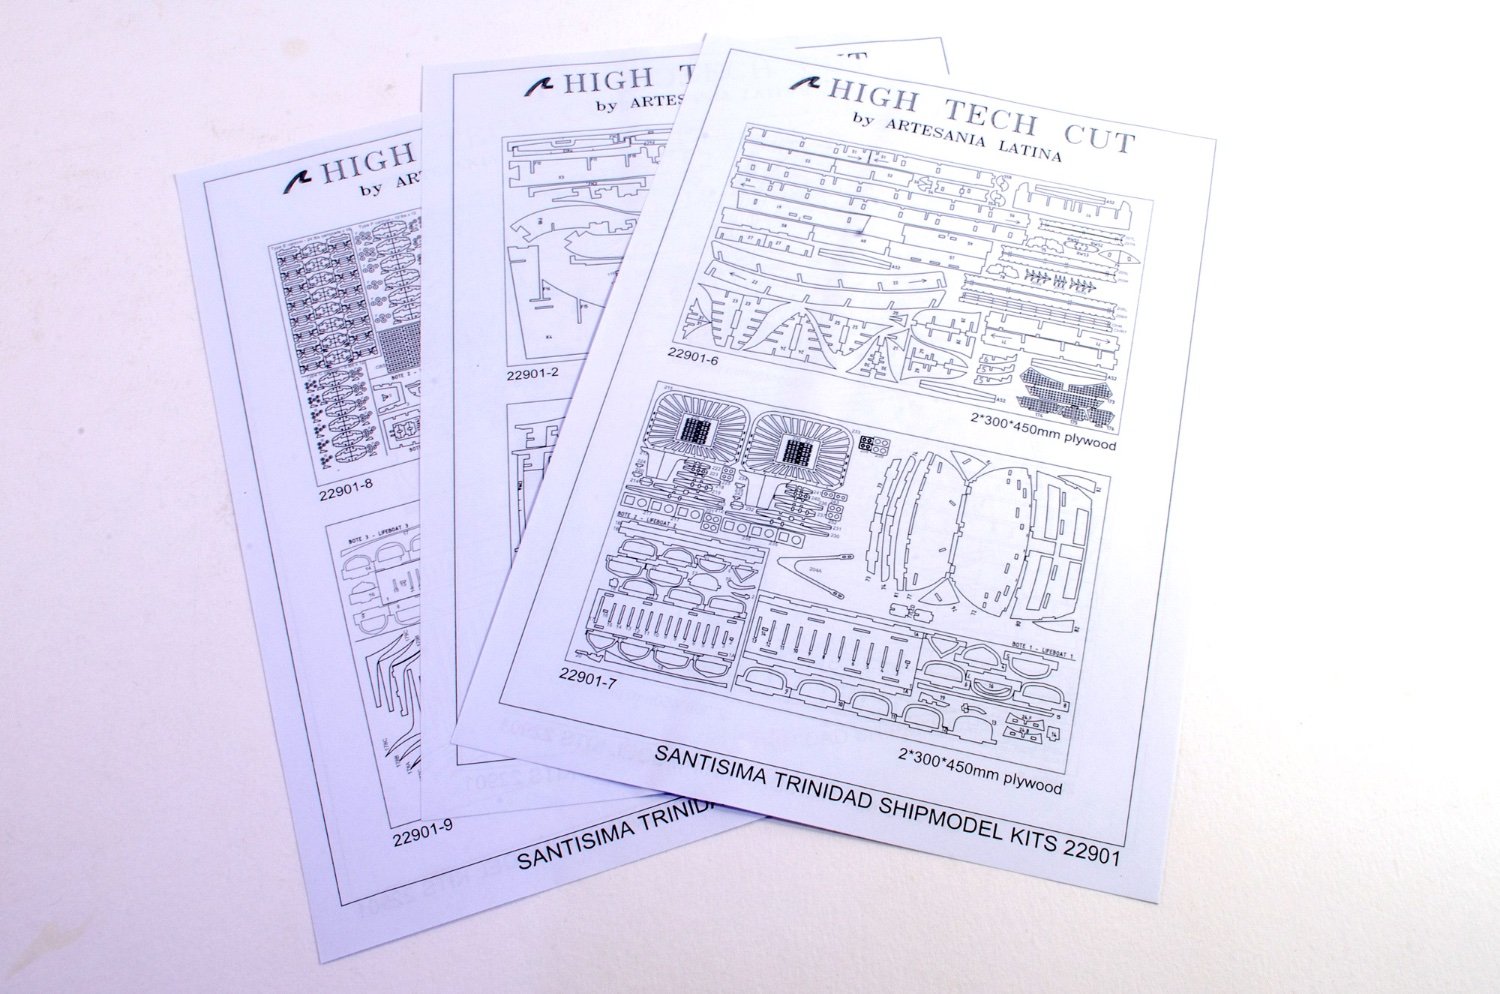
This new release comes with FOURTEEN sheets of laser cut and engraved ply sheet in a varying number of sizes and thicknesses. The material, in my sample kit, is perfectly flat, without warp or defect, and all of the cutting and engraving is clean with no laser blow-back. All parts are also laser numbered too. Included with the timber sheets is a set of three A4 parts plans which you can use to quickly locate the part you want without fumbling through the actual sheets. All of the timber parts in this kit are cellophane wrapped and not too tightly as to cause deformation.

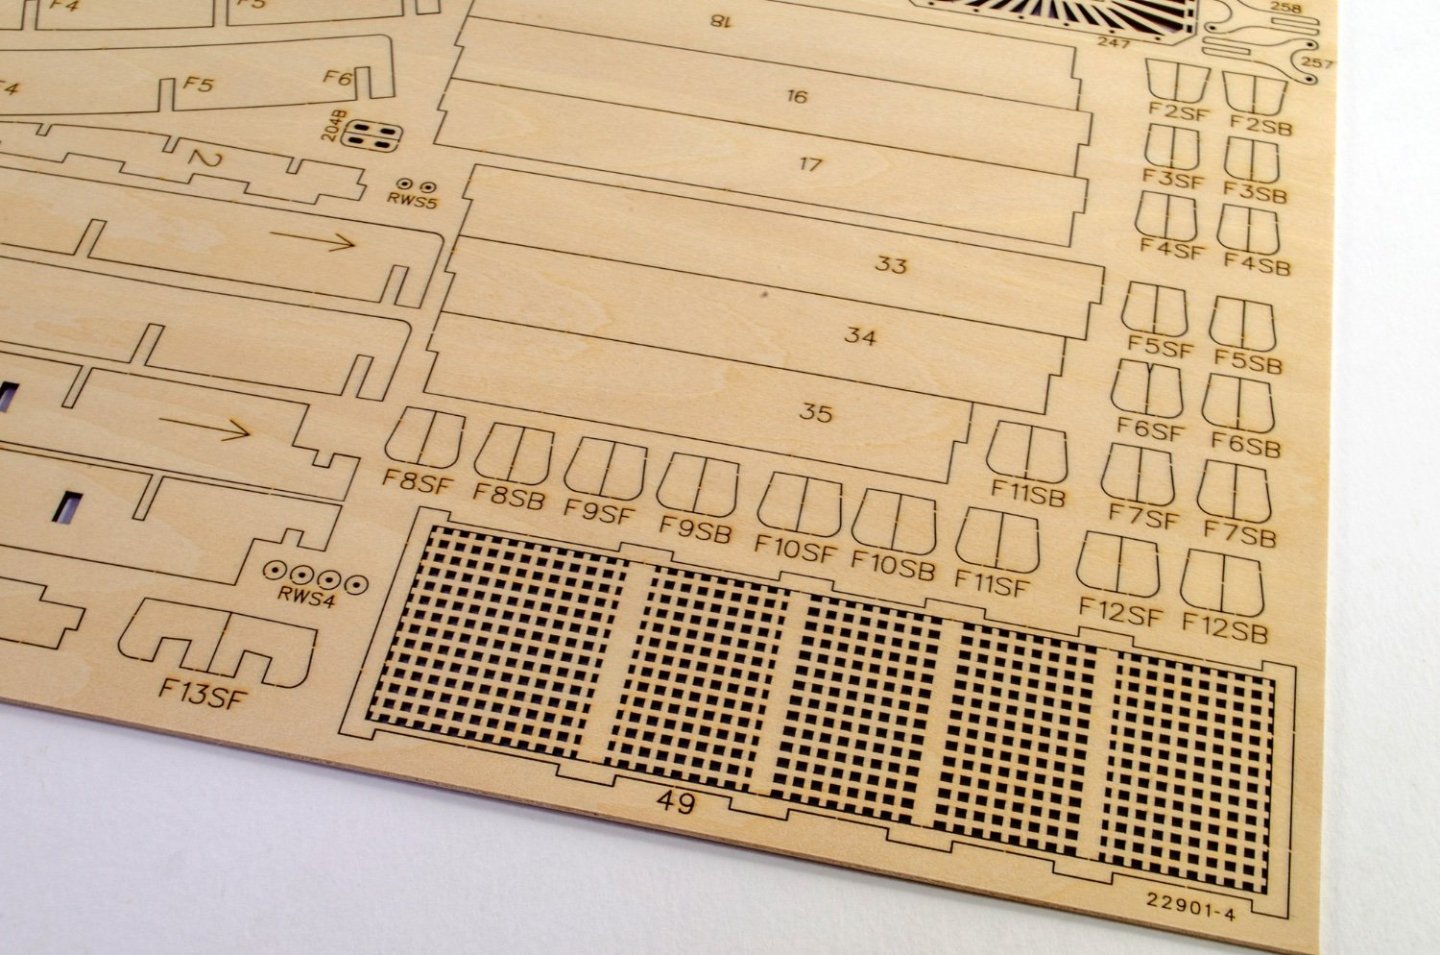
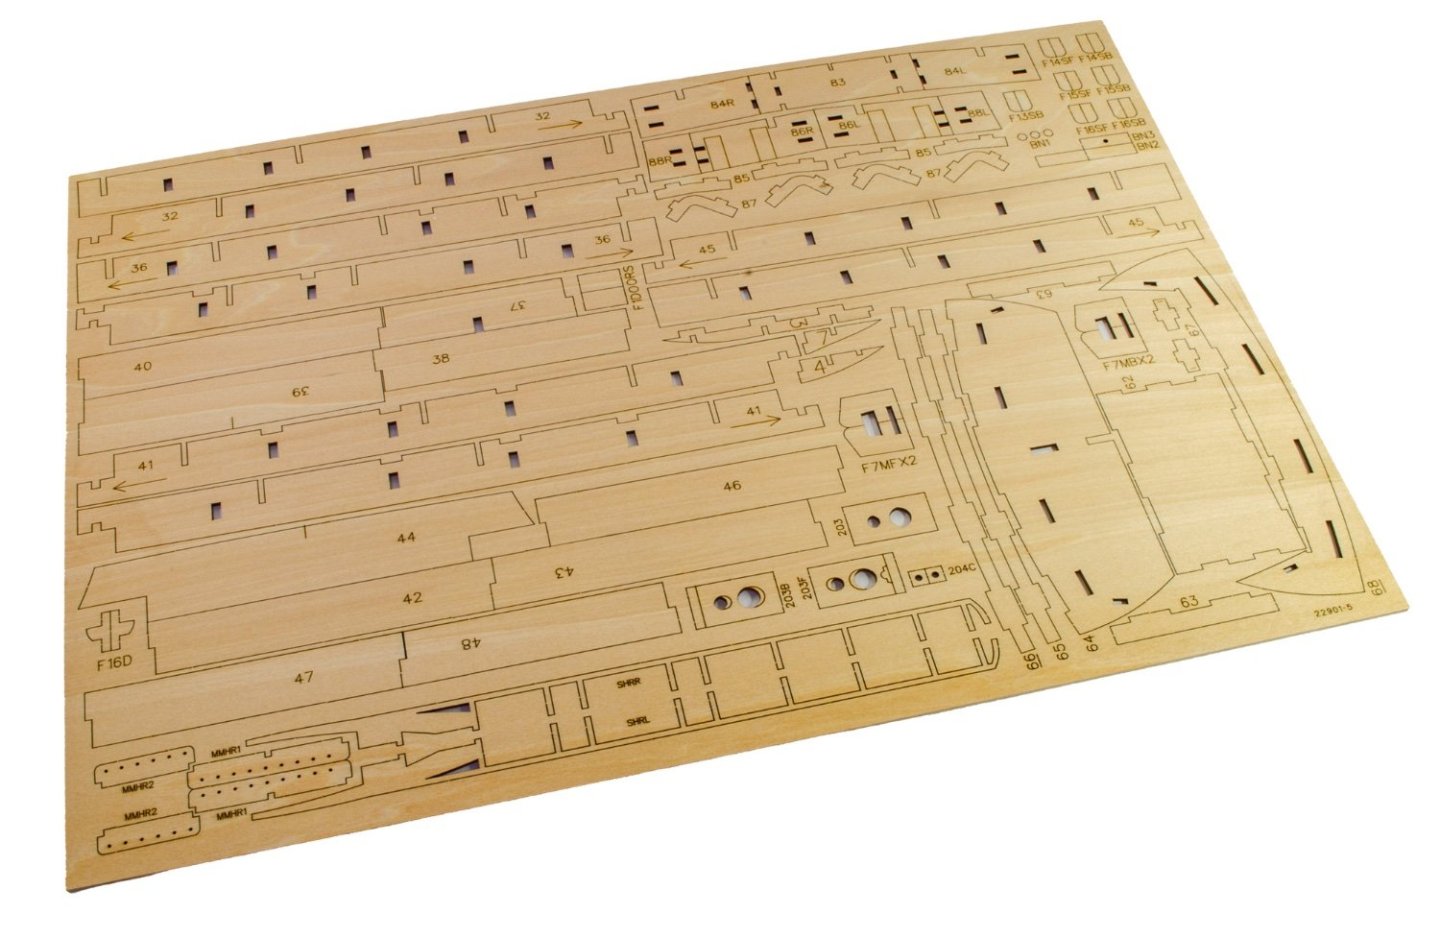
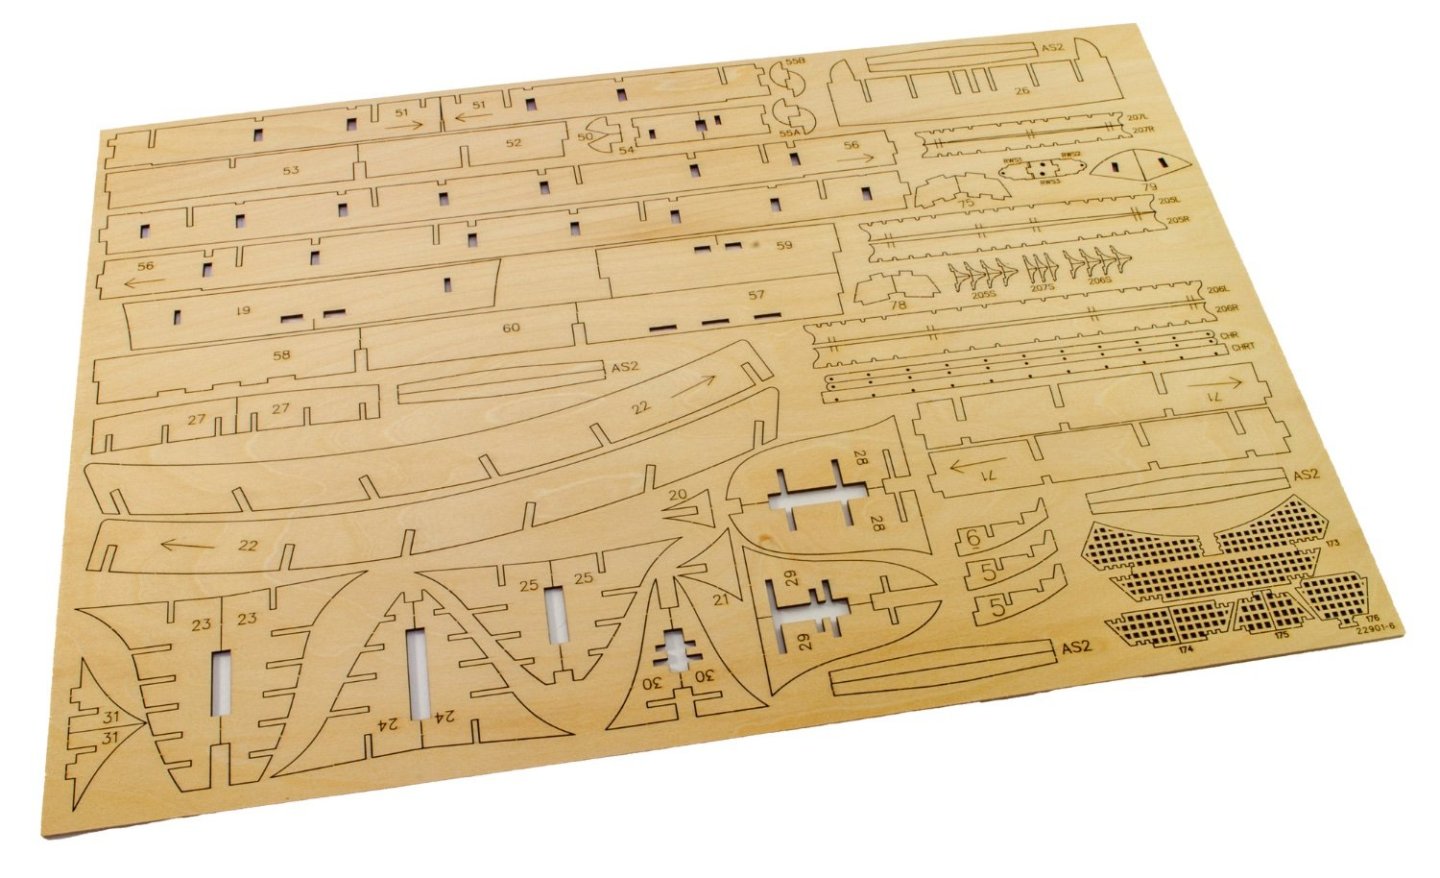
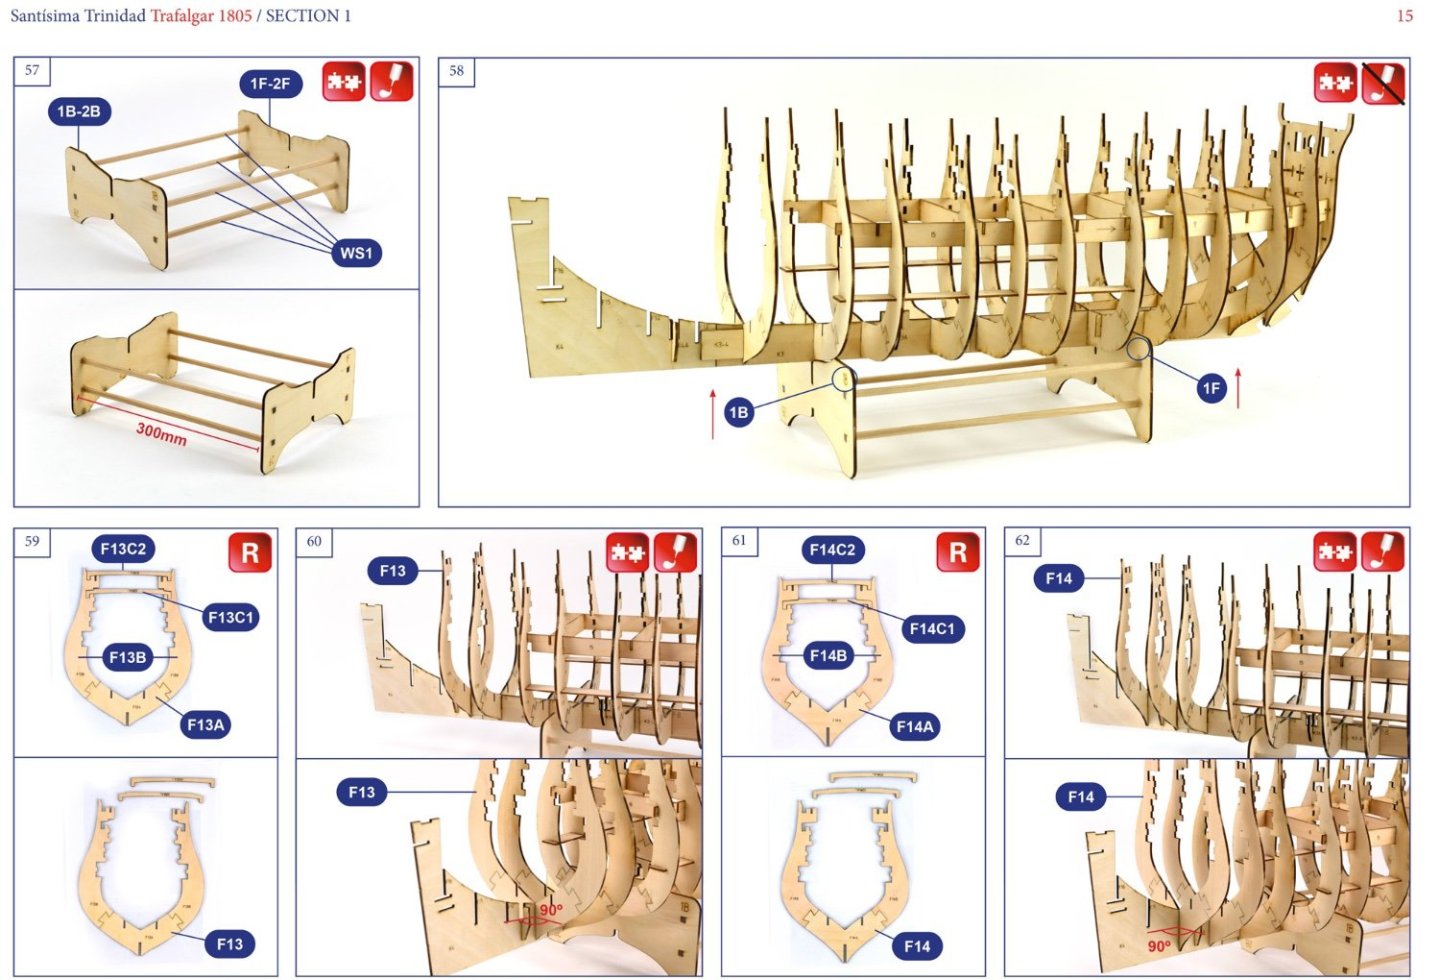
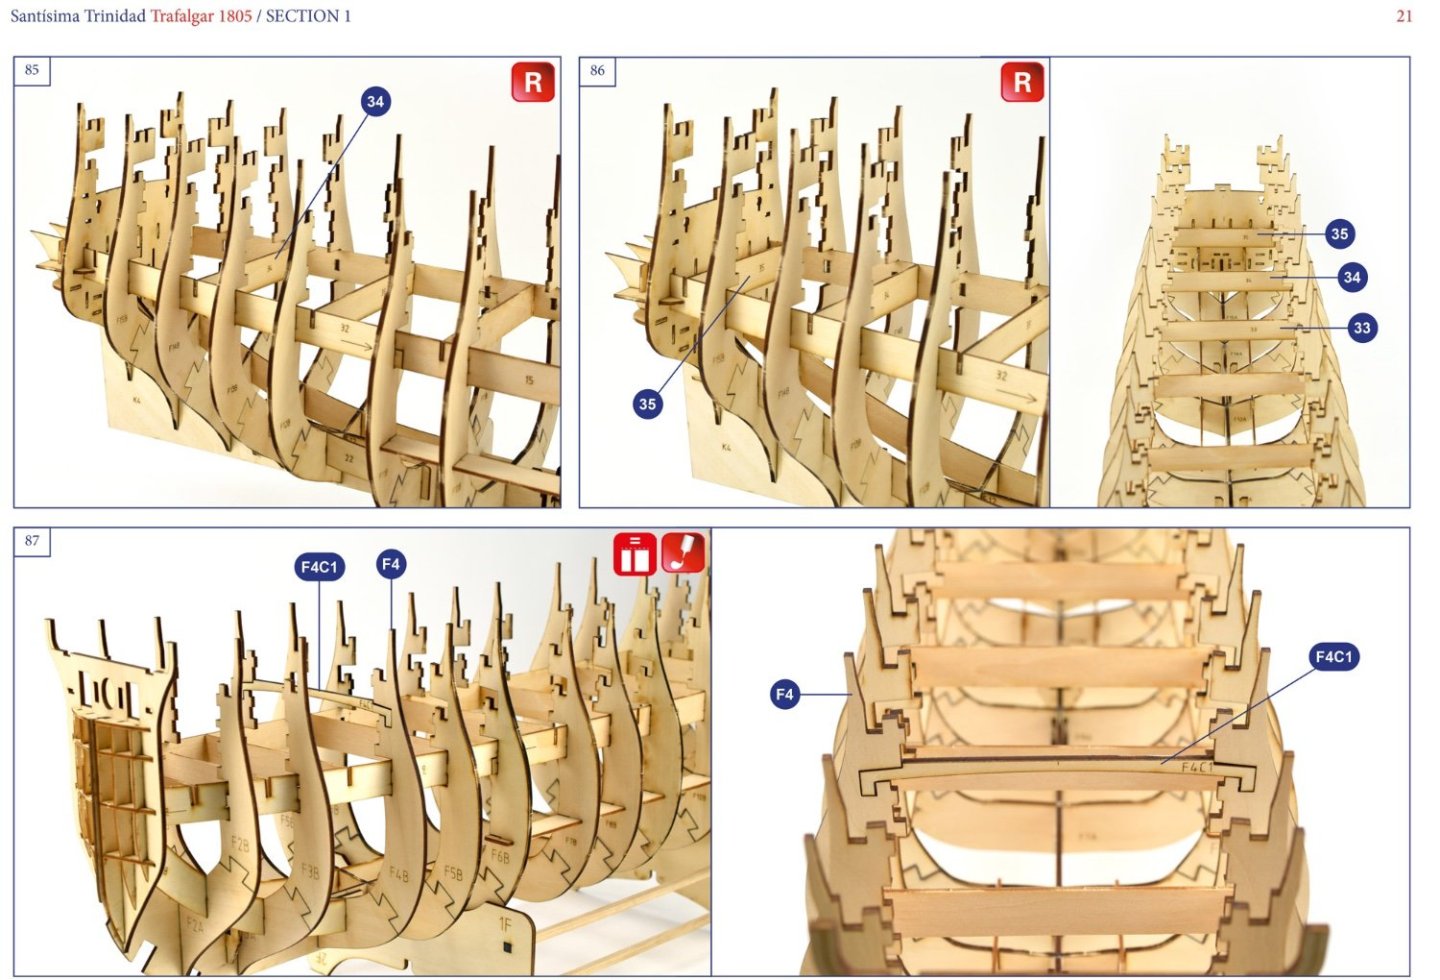
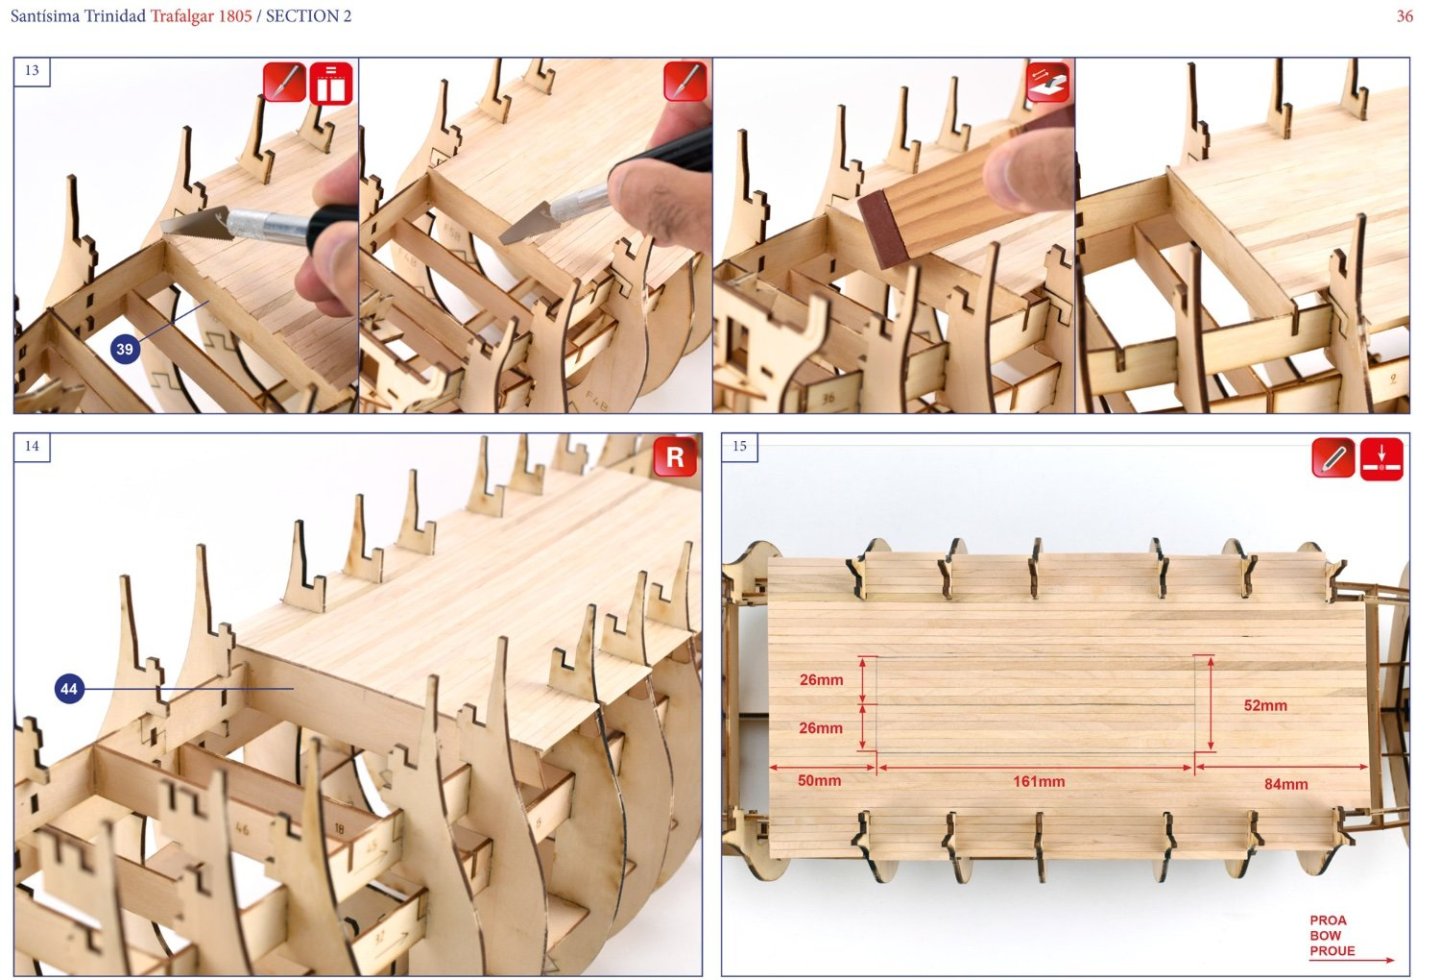
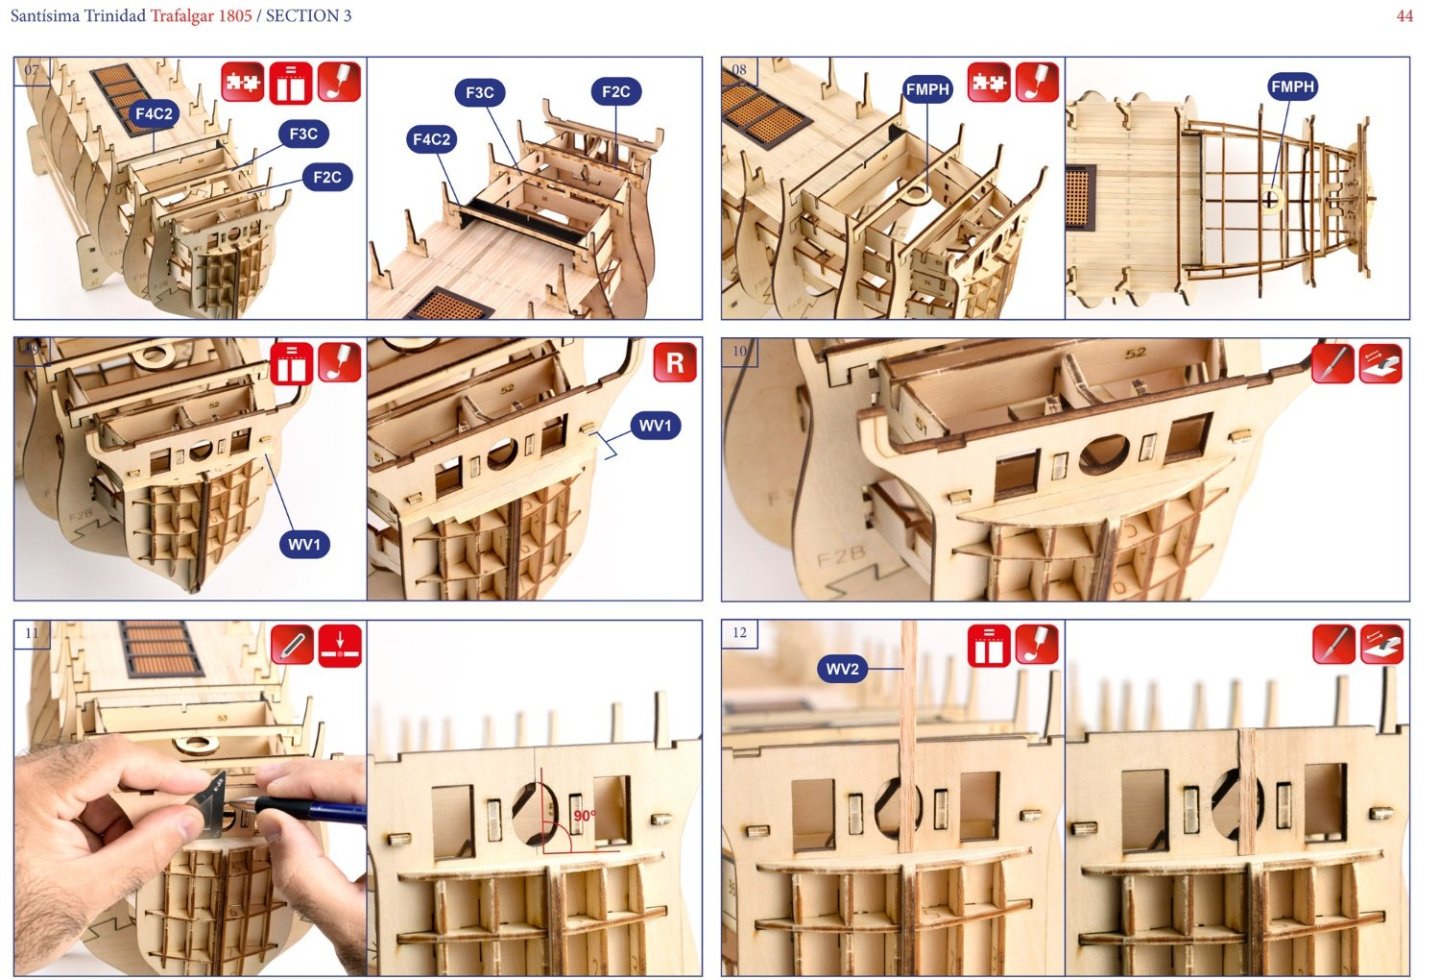
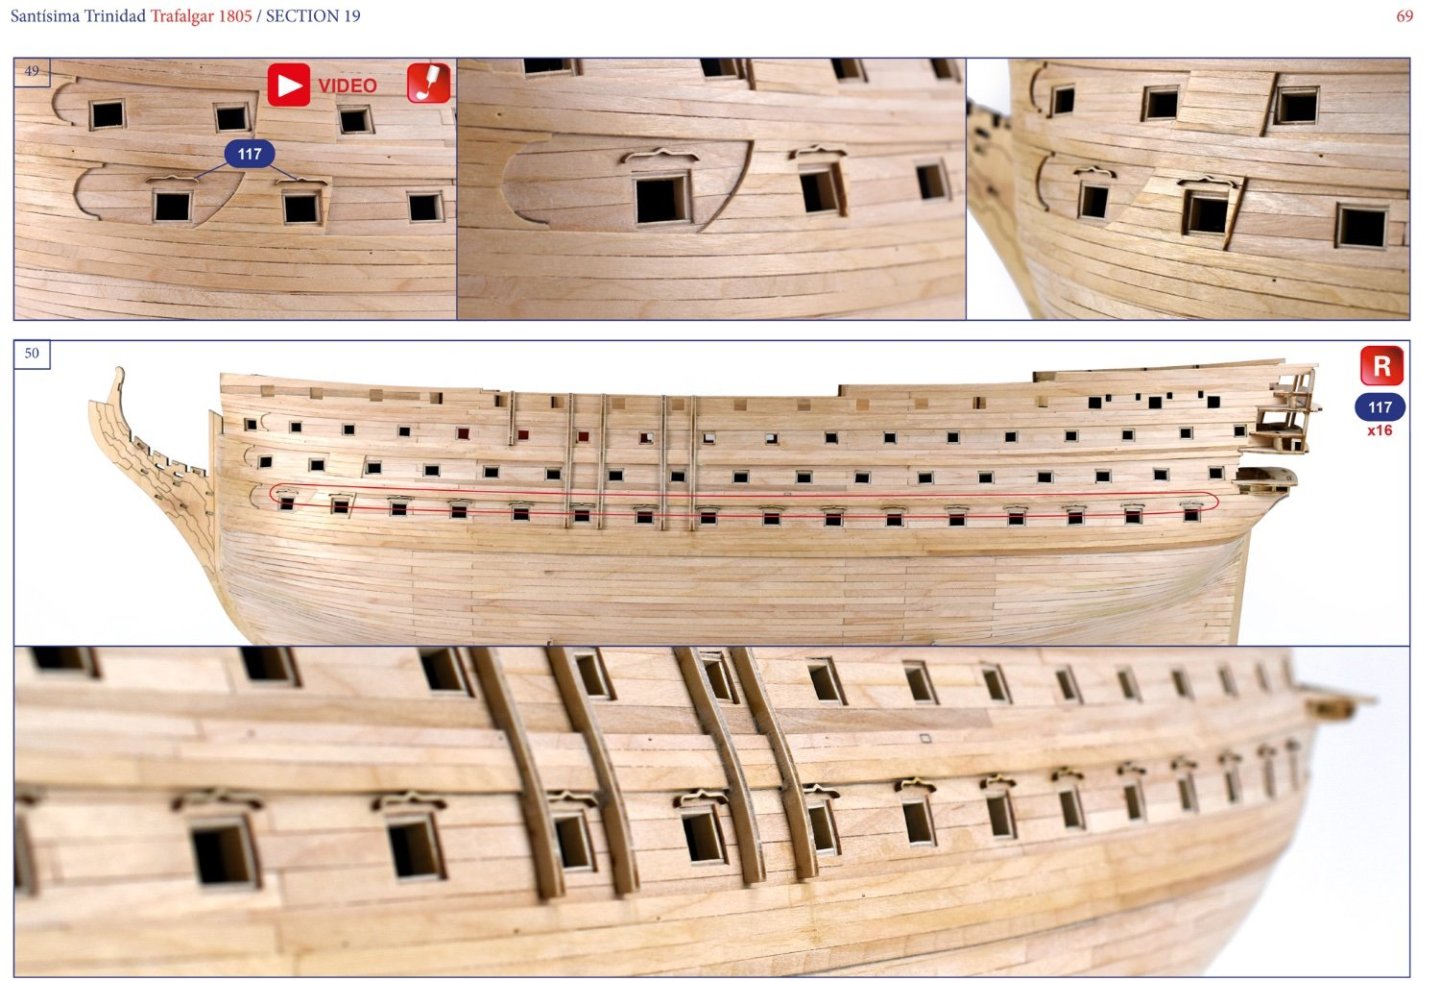
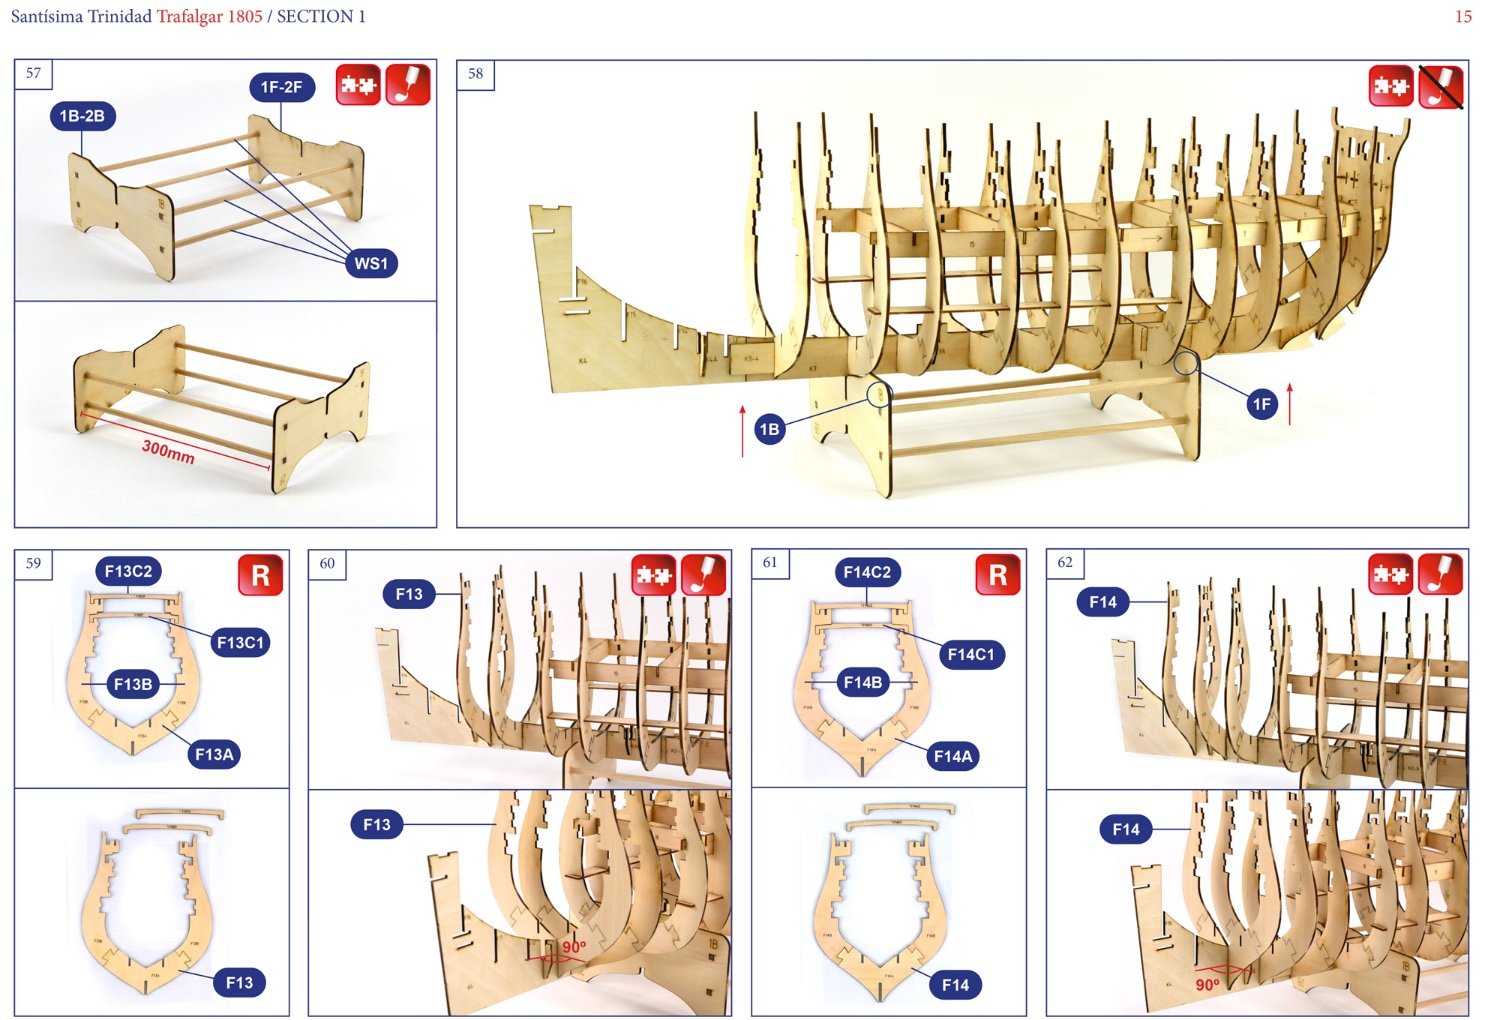
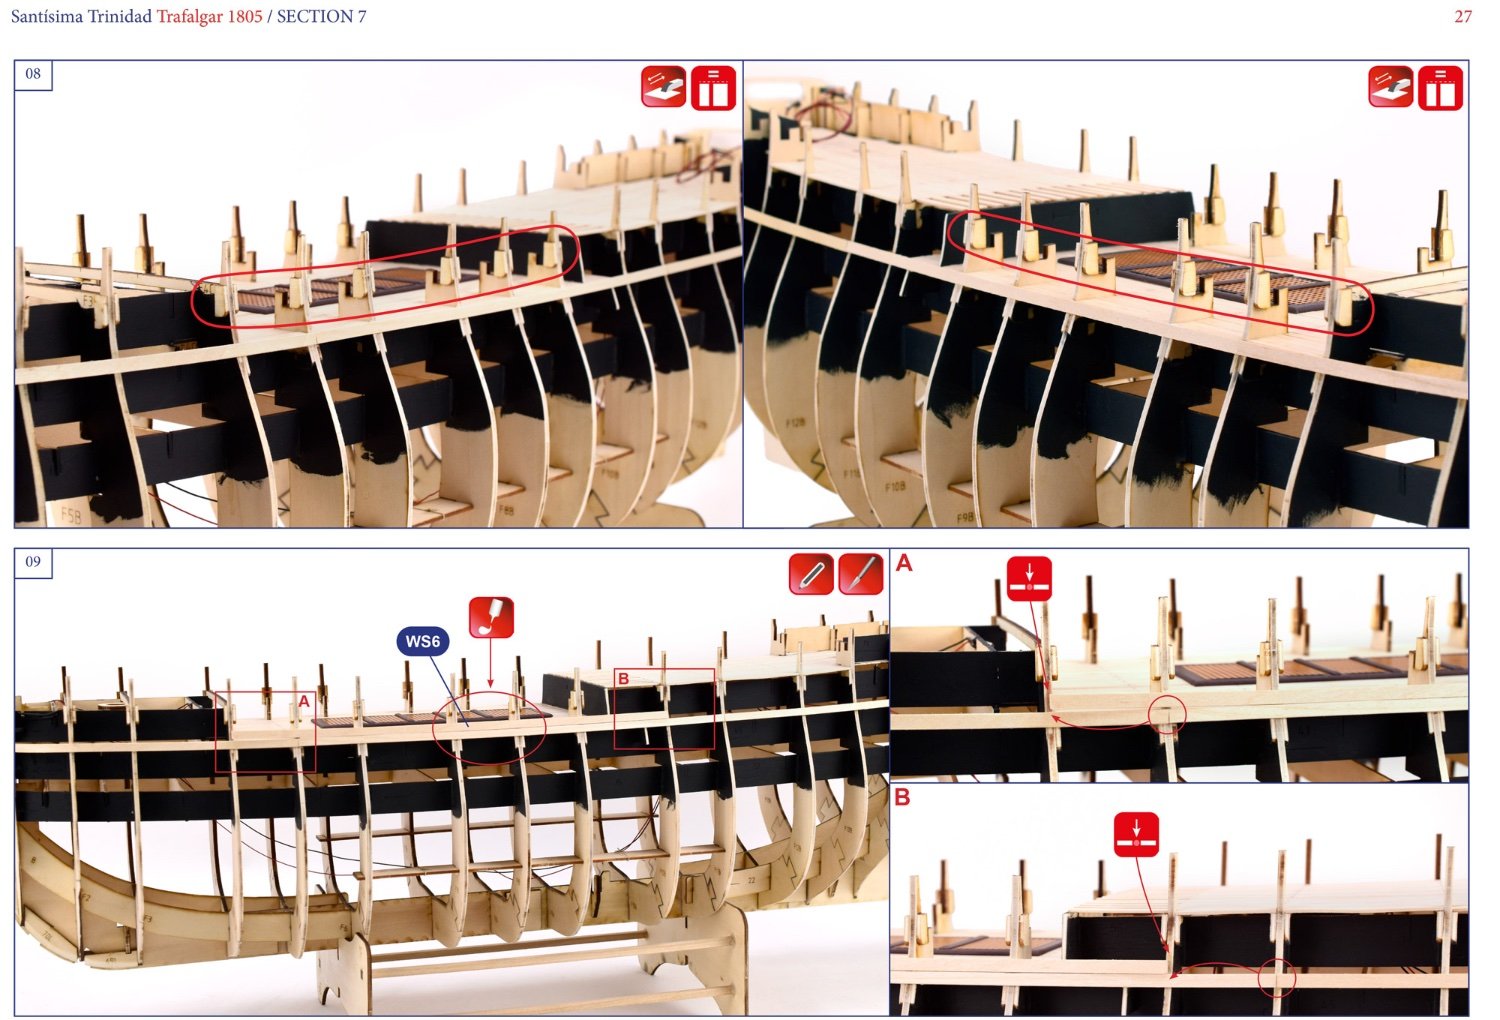
As you look through these sheets, you’ll see the unusual manner in which the parts are supplied. You won’t find a single-piece hull, or even a two-part solution. The hull is built up from three parts, and the bulkheads are multi-part creations that use dovetail joints to hold the parts under glue. The hull itself is built up in sections and expanded as you progress from bow to stern. This is a lot like the system used in the monthly magazine partwork builds. The various elements of construction should mean that the build proceeds with minimal risk of the keel being twisted (although I would always ensure this is the case, as you build).
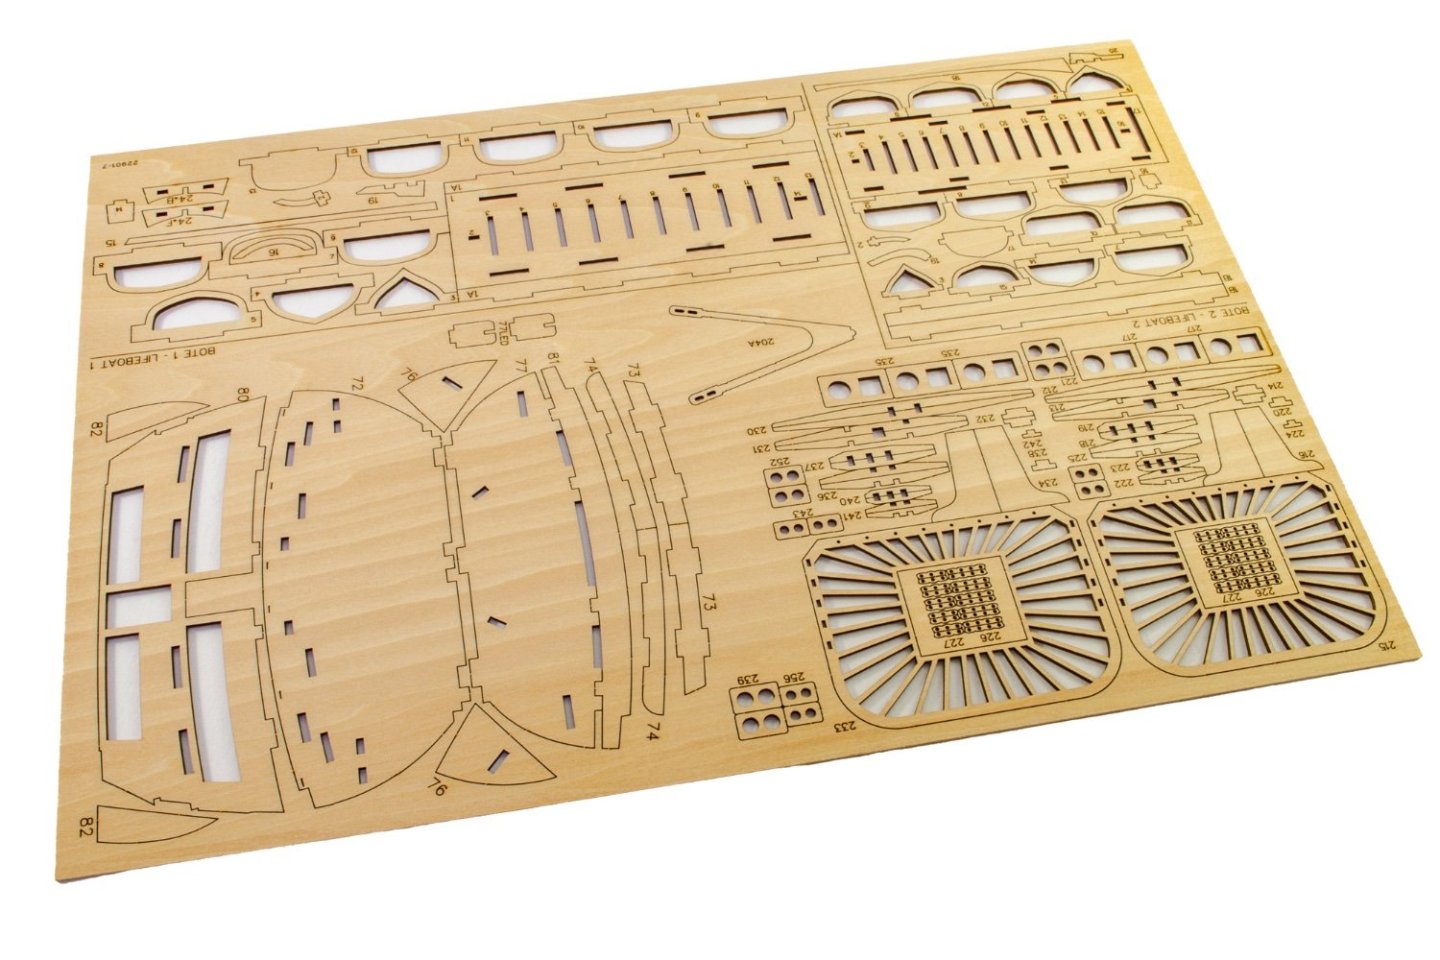
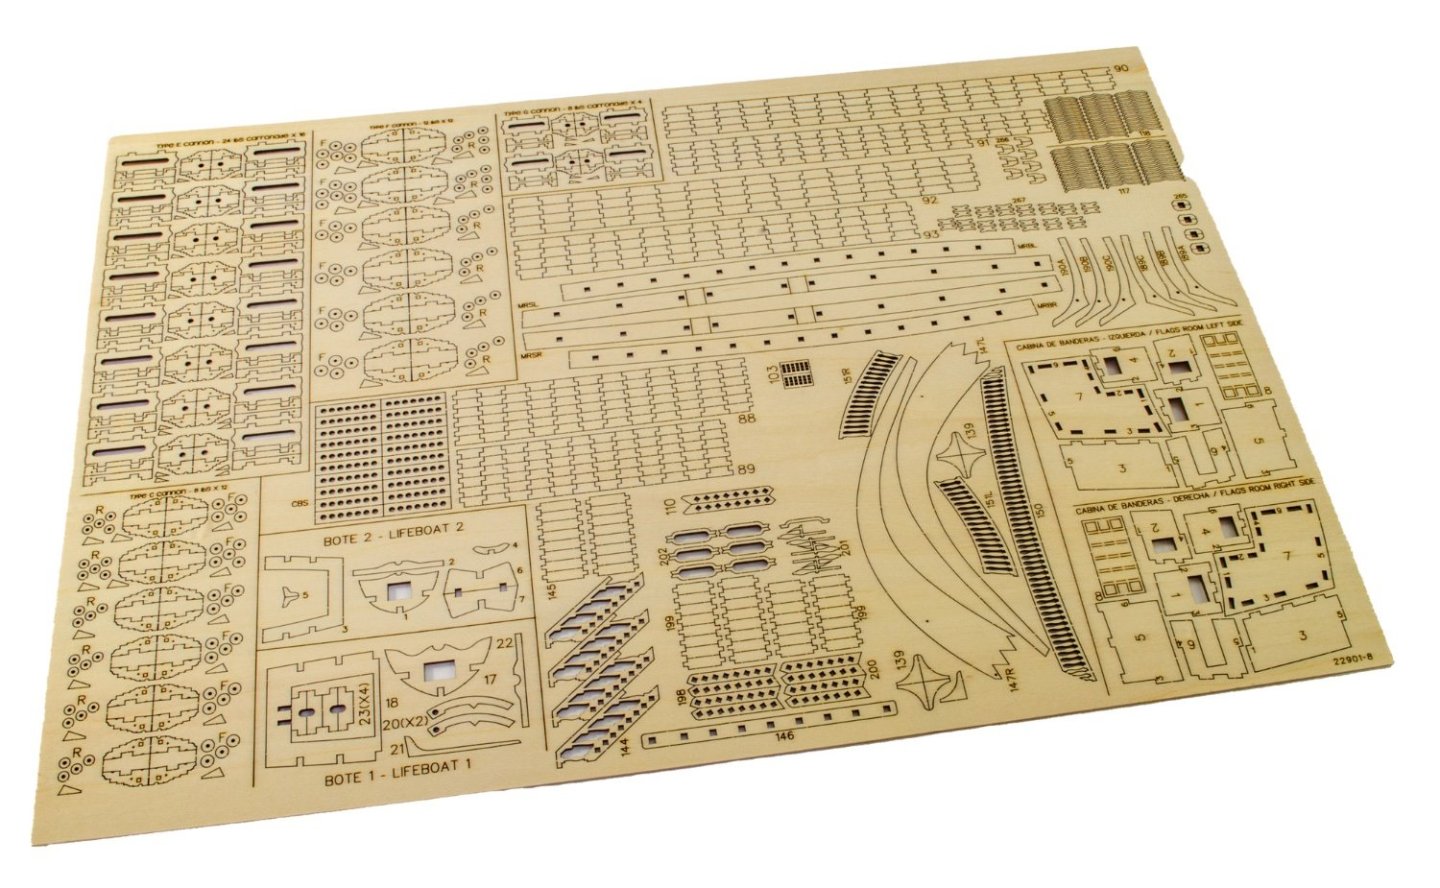


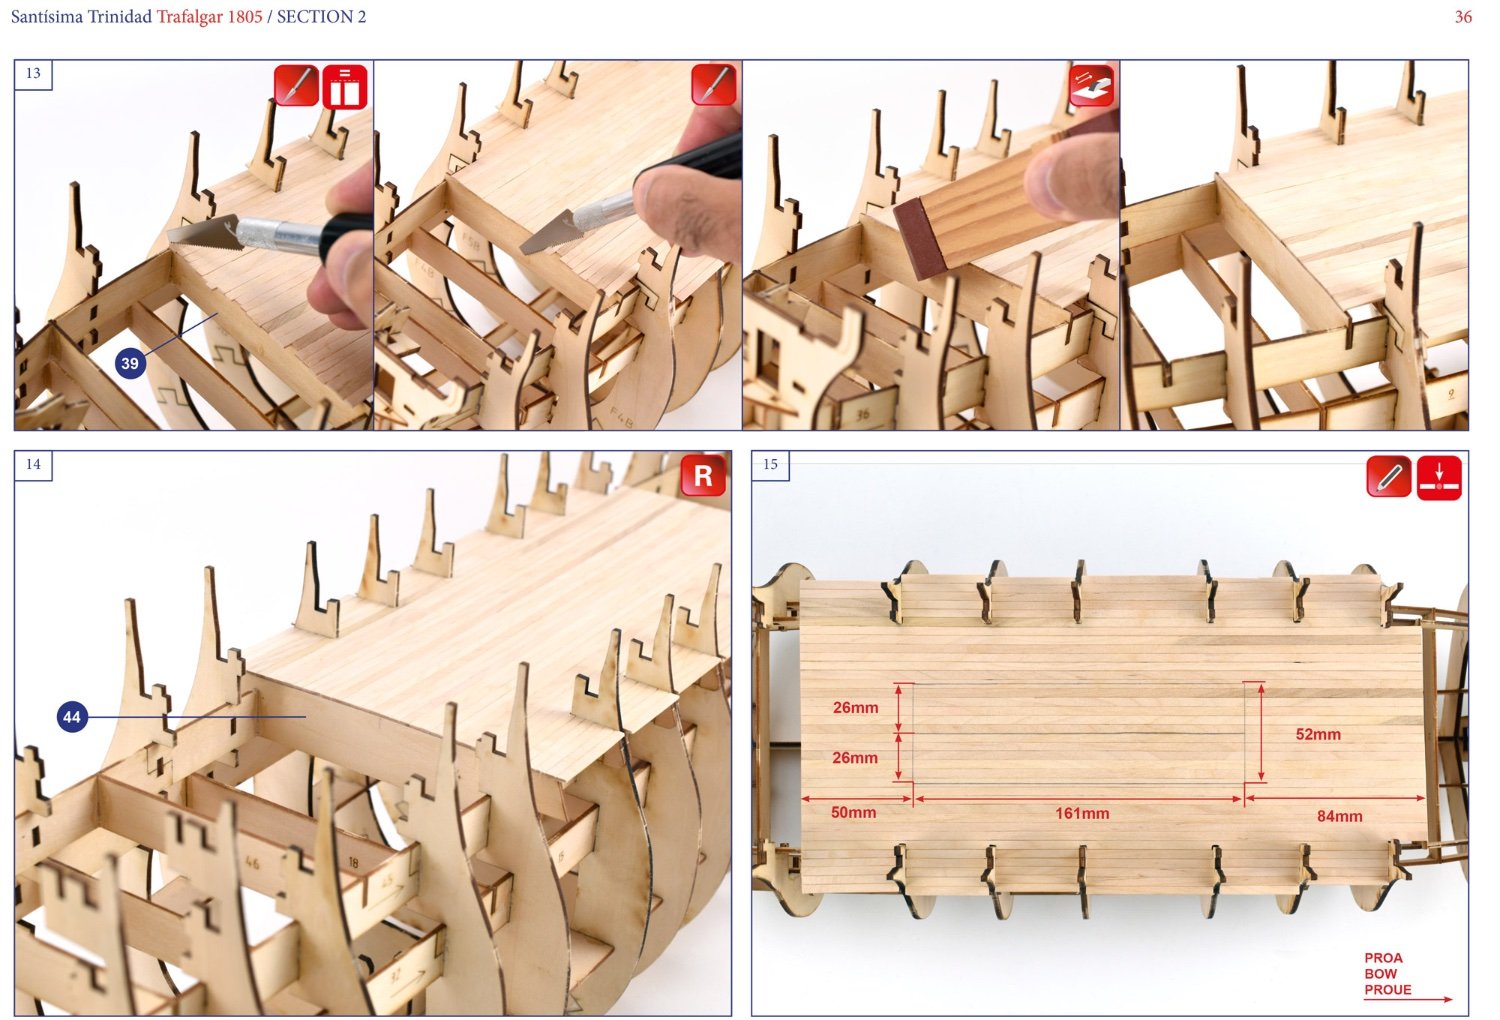
You will find a number of parts on these sheets that relate to things which aren’t frames or bulkheads etc. such as the deck grates. I’m not absolutely sure I like this aspect, as these aren’t engraved. To fix this, you would need to varnish, then score along the grates to show the main batons running bow to stern, and then apply a dark ‘wash’ to make the grate look like it’s made from individual parts. You also won’t see any deck sections in the parts sheets. There aren’t any. All decking is single planked, directly onto the top of the various frames/bulkheads. You will need to ensure that your plank joints are very tight together, and I would also think along each edge too, or the deck wouldn’t be solid.

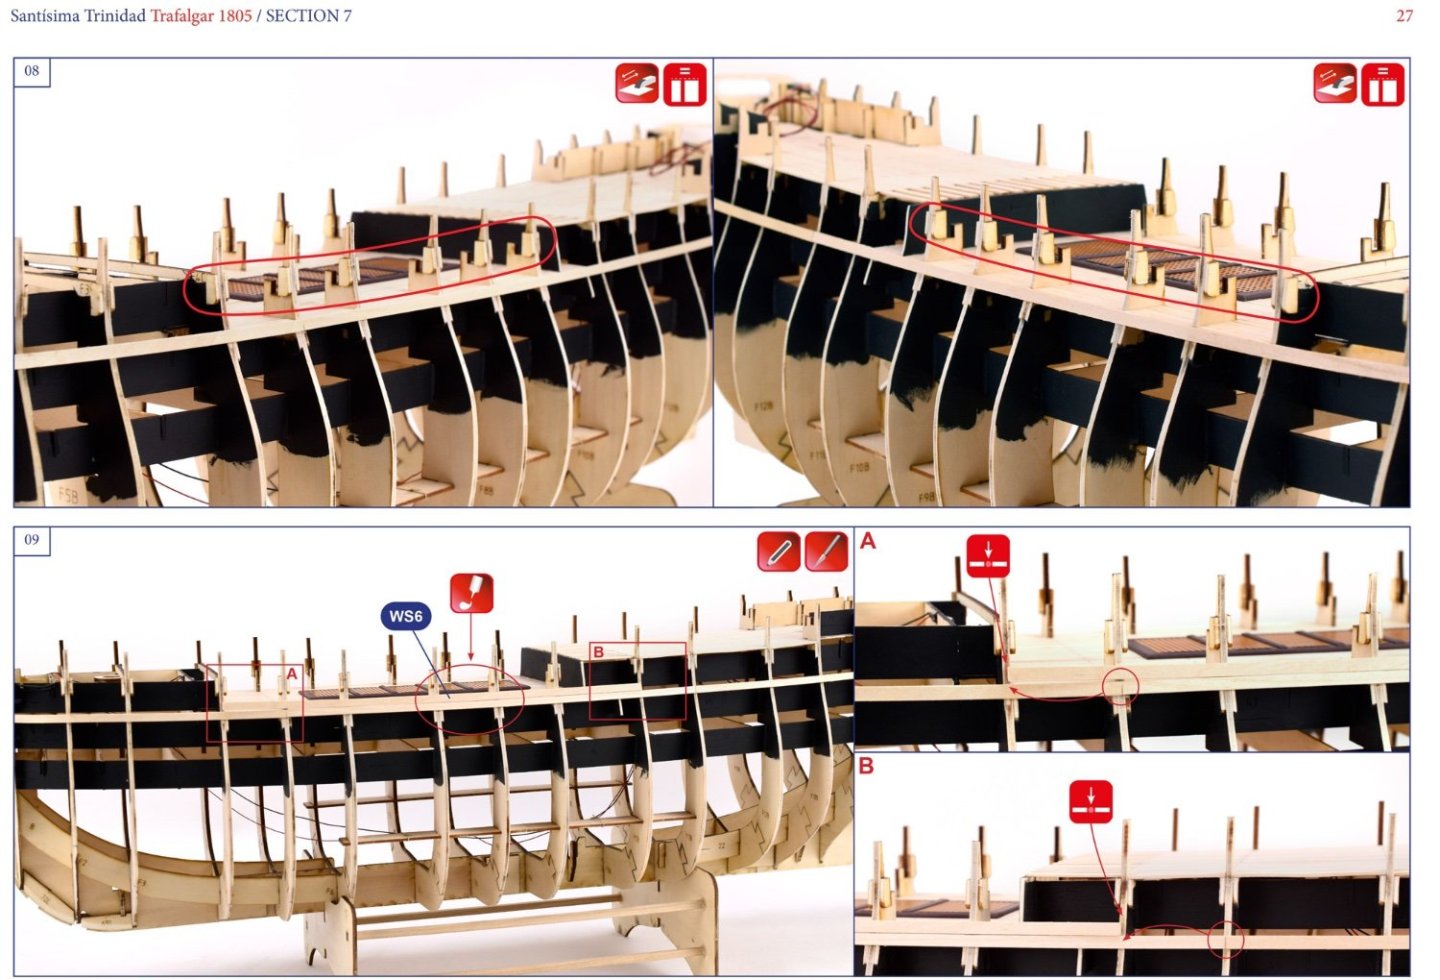
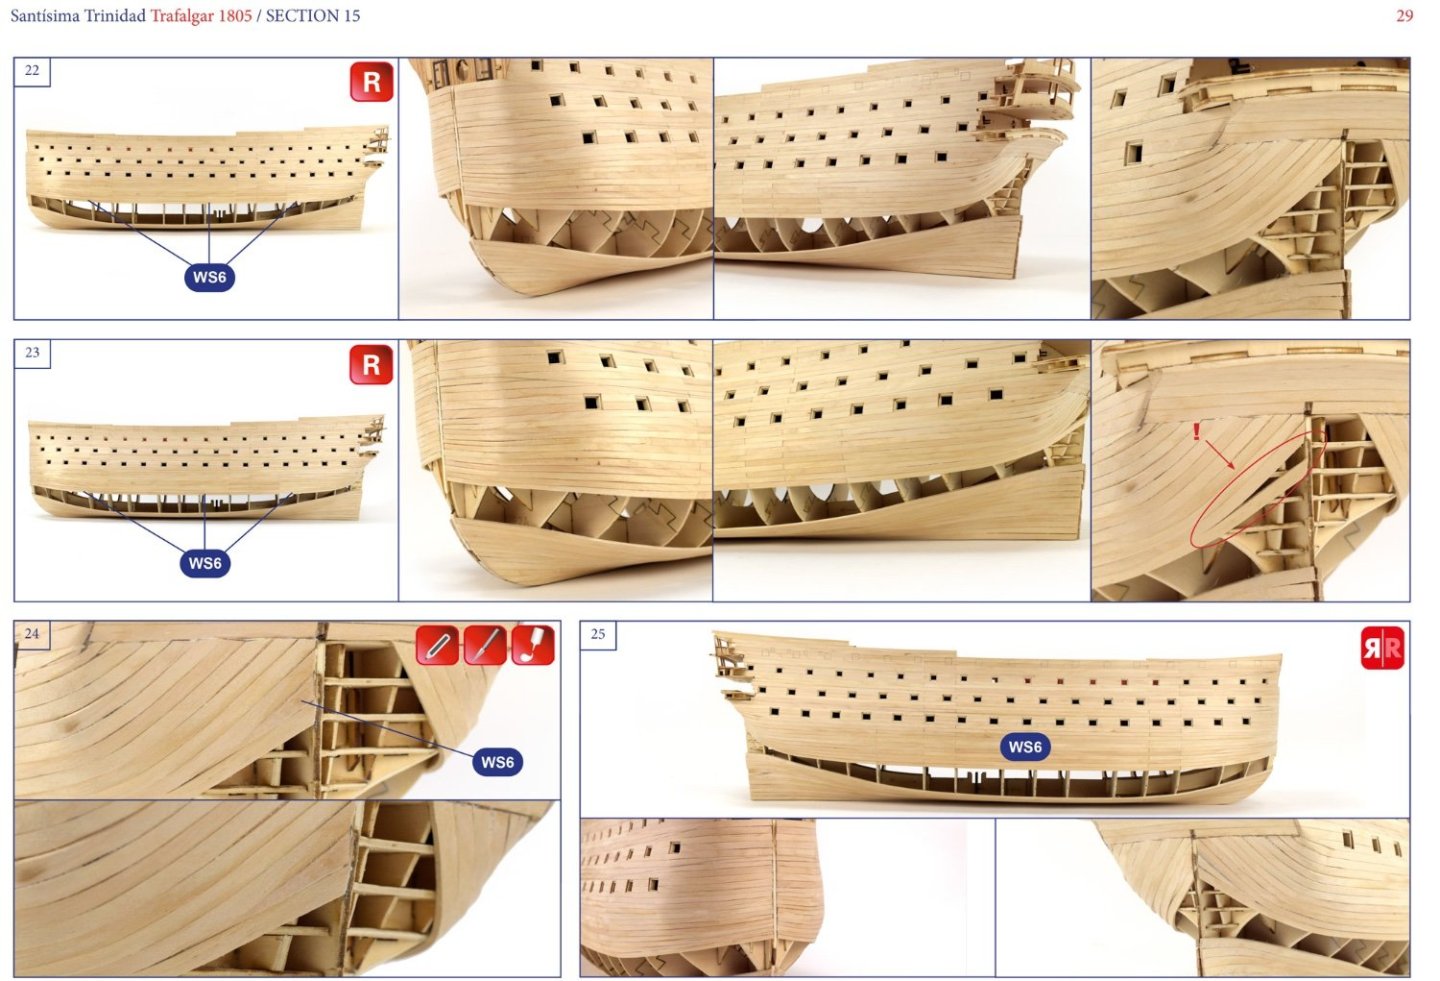
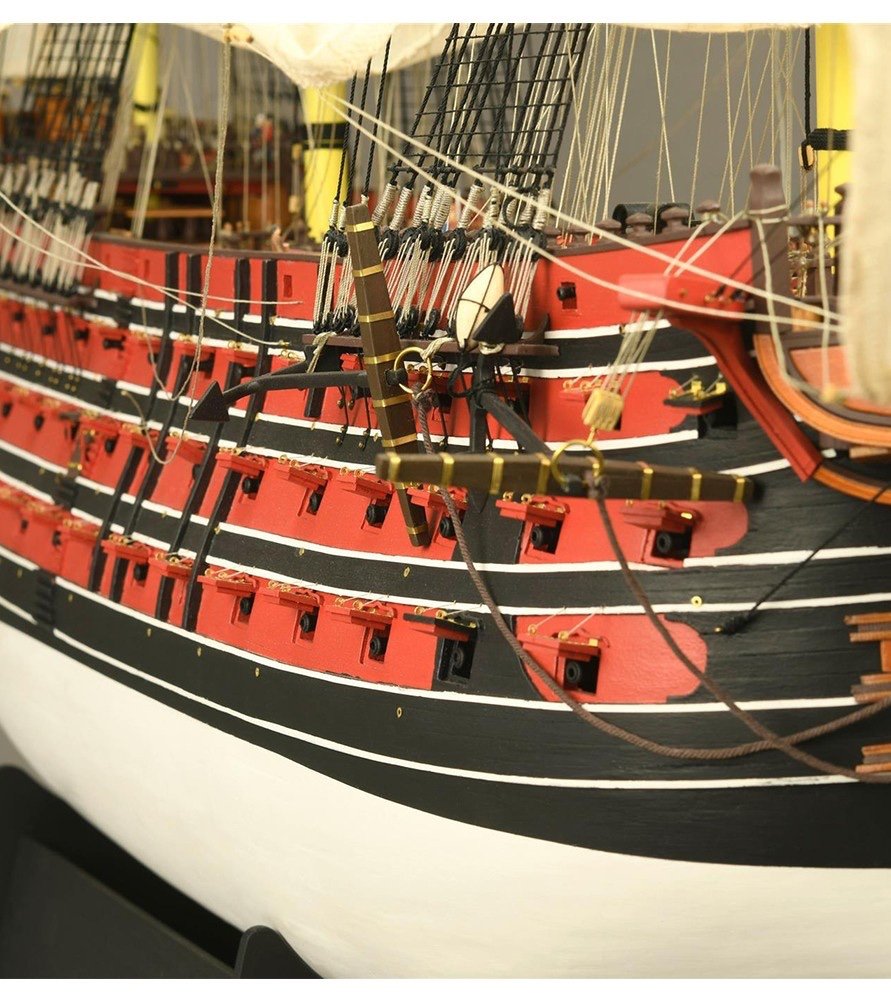
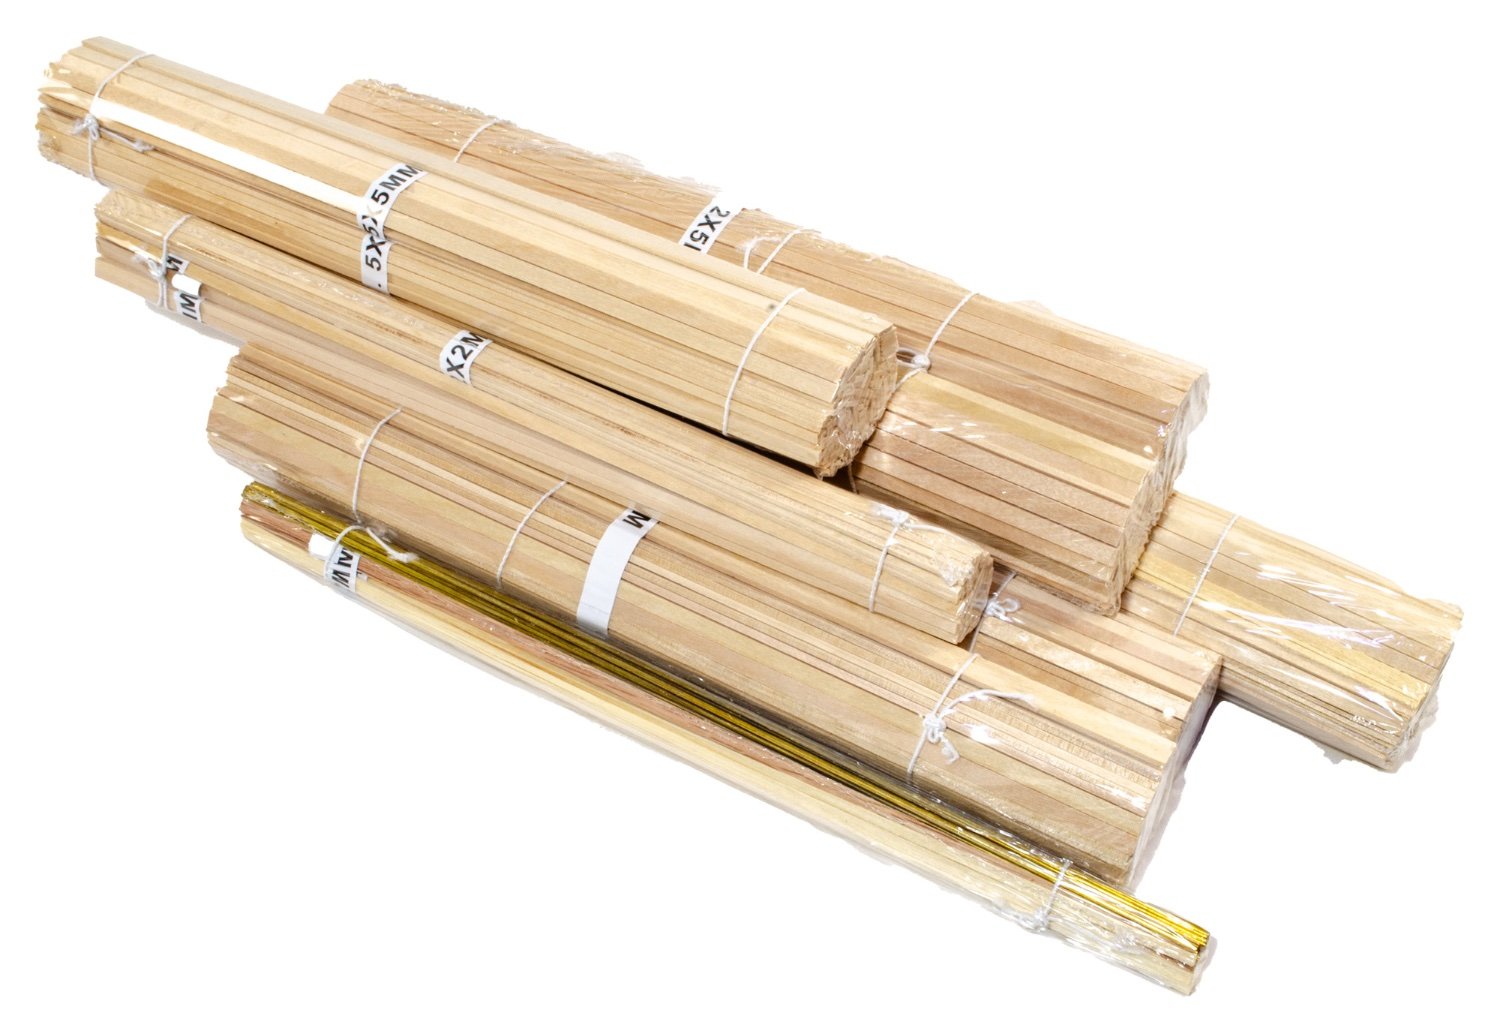
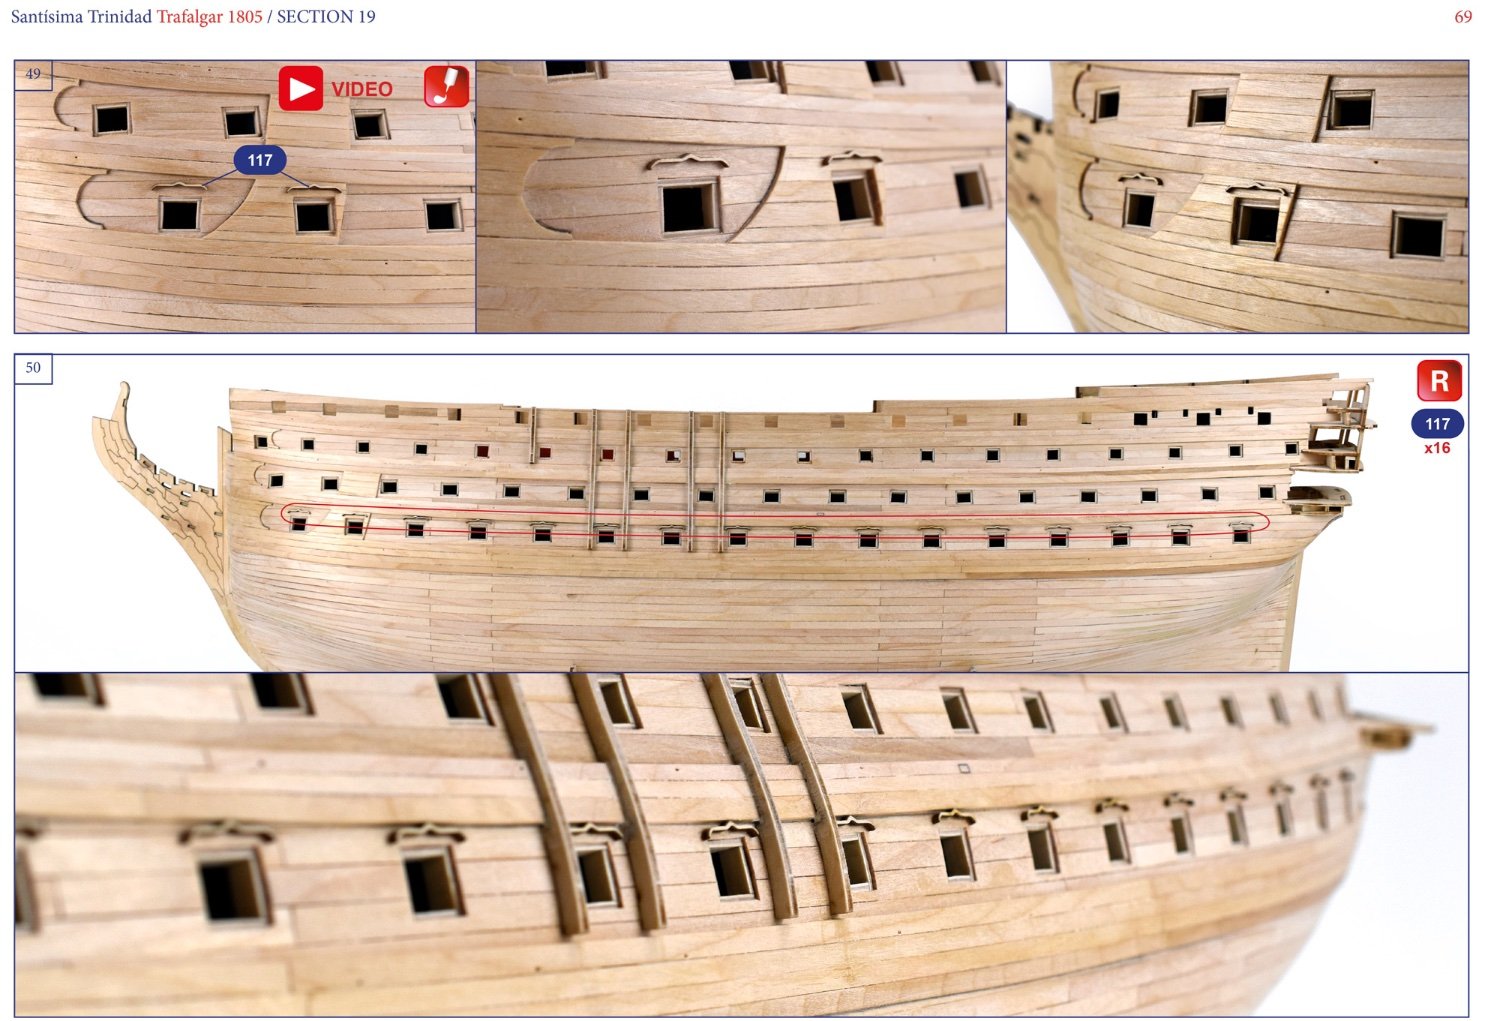
Another point that’s important to mention here is that the hull is single-planked. You will need to tread carefully here if you are used to double layer planking. You will need to ensure that your timber doesn’t sag anywhere as you won’t have the fallback of another layer. The good news is that the planking timber is superb quality and it’s 2mm x 5mm (300mm long). You also won’t see any bare timber in the finished build, so you have a little extra leeway too. The lower hull is coppered (5mm wide tape) and above the waterline, the colours are black, red, and white.
Multiple packs of high quality strip timber are supplied in cellophaned bundles, and clearly labelled for size. I very much do like the quality of the timber elements in this kit. They are a world away from my first build…ironically, an Artesania kit!
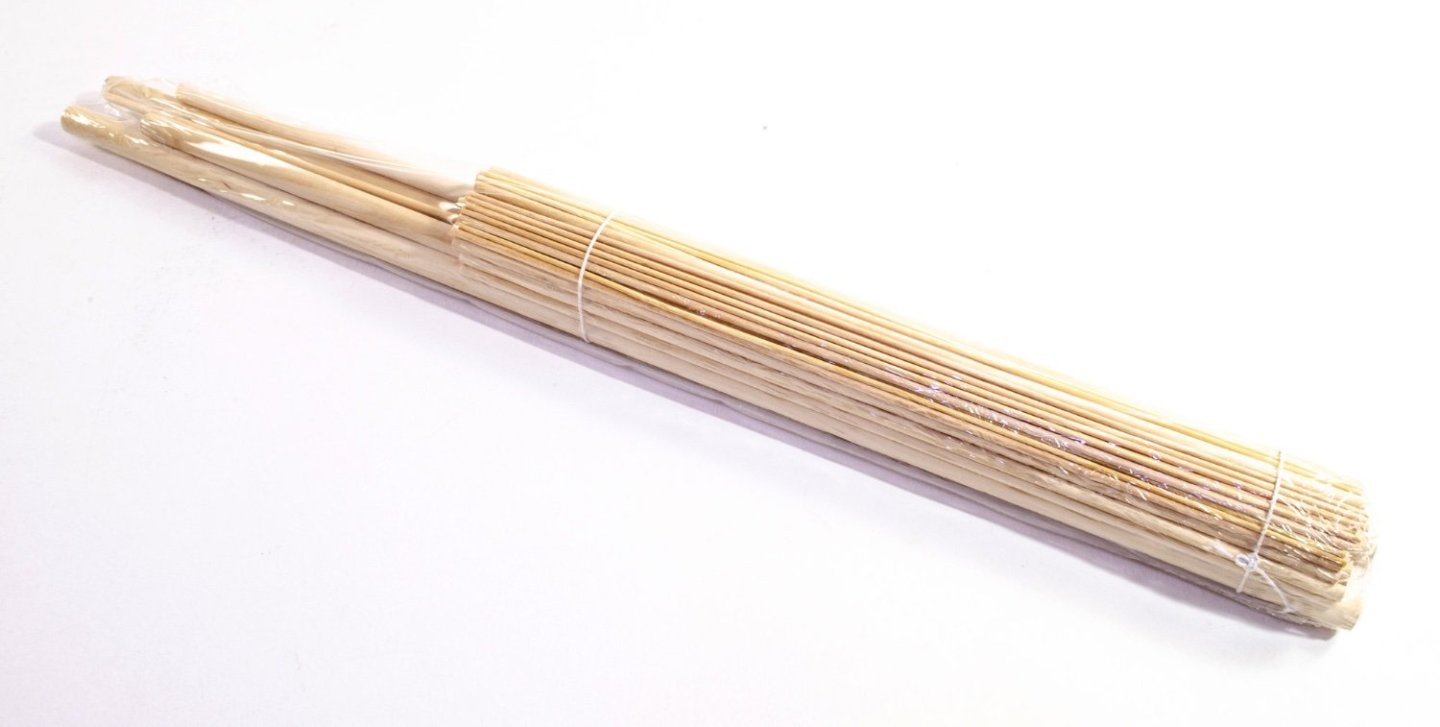

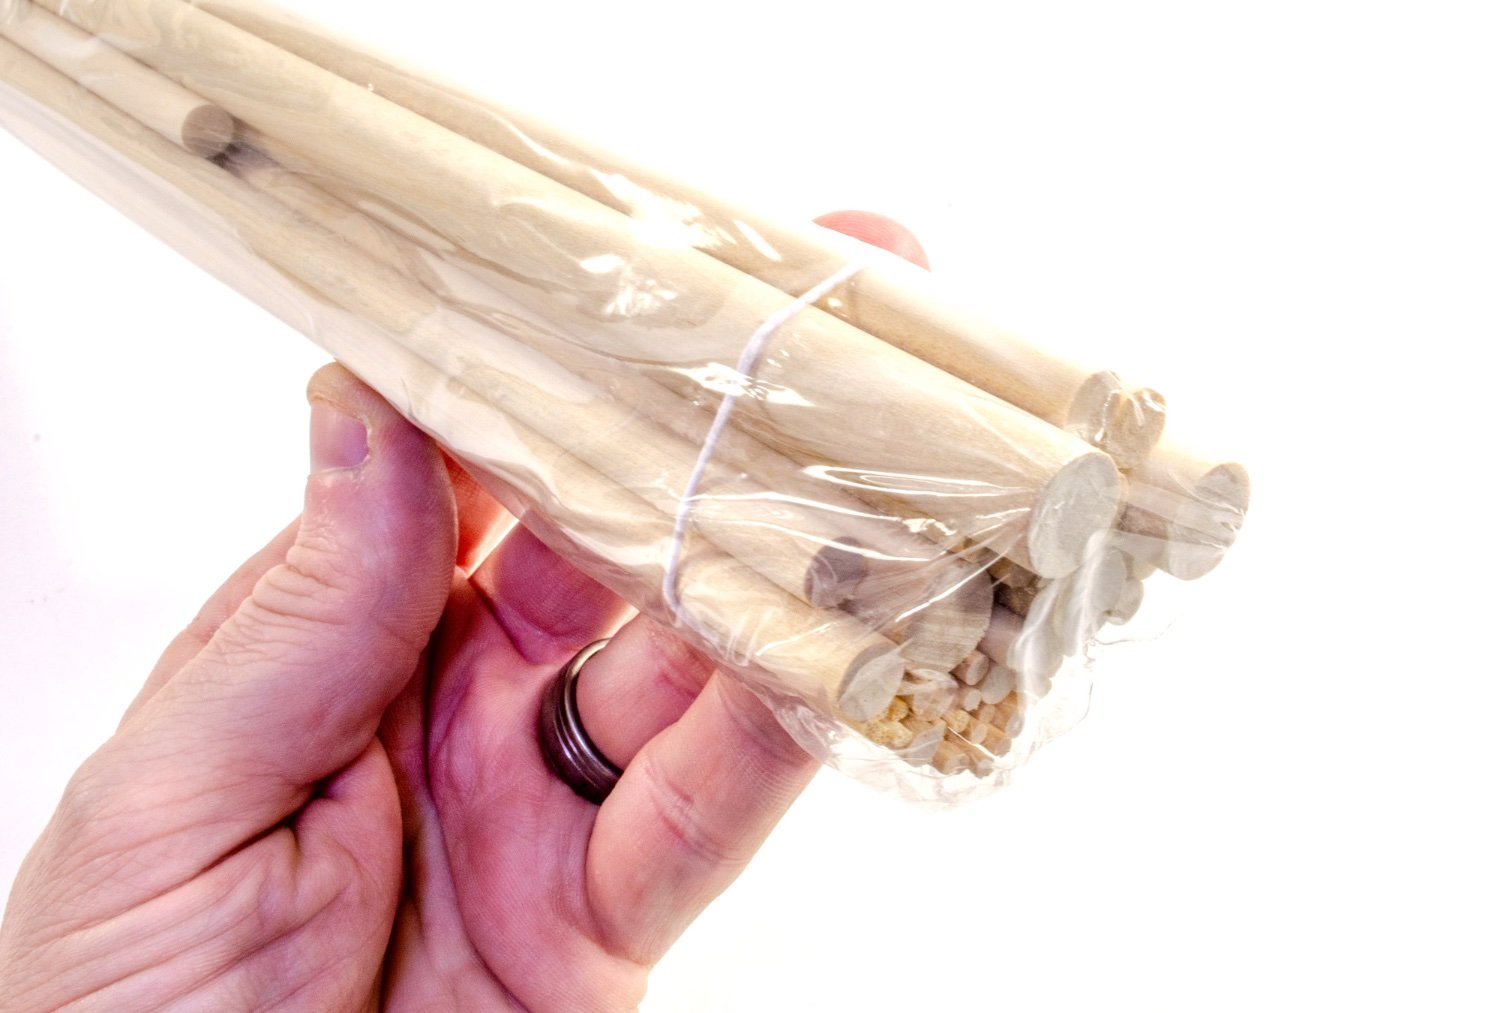
Another pack of timber is included. This time its dowel of various diameters. The material used is birch, with the small quantity of 2mm being bamboo. Thankfully, the latter does look fine, but I don’t go a bundle on bamboo for mast/yard material.

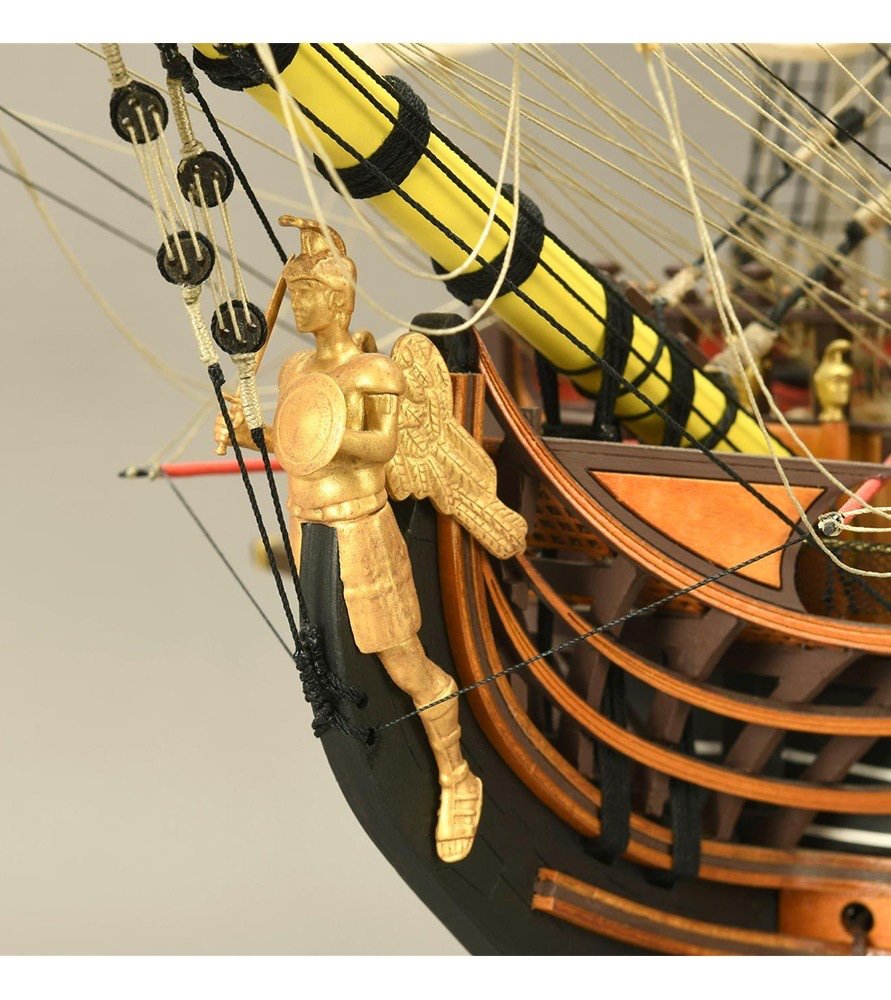
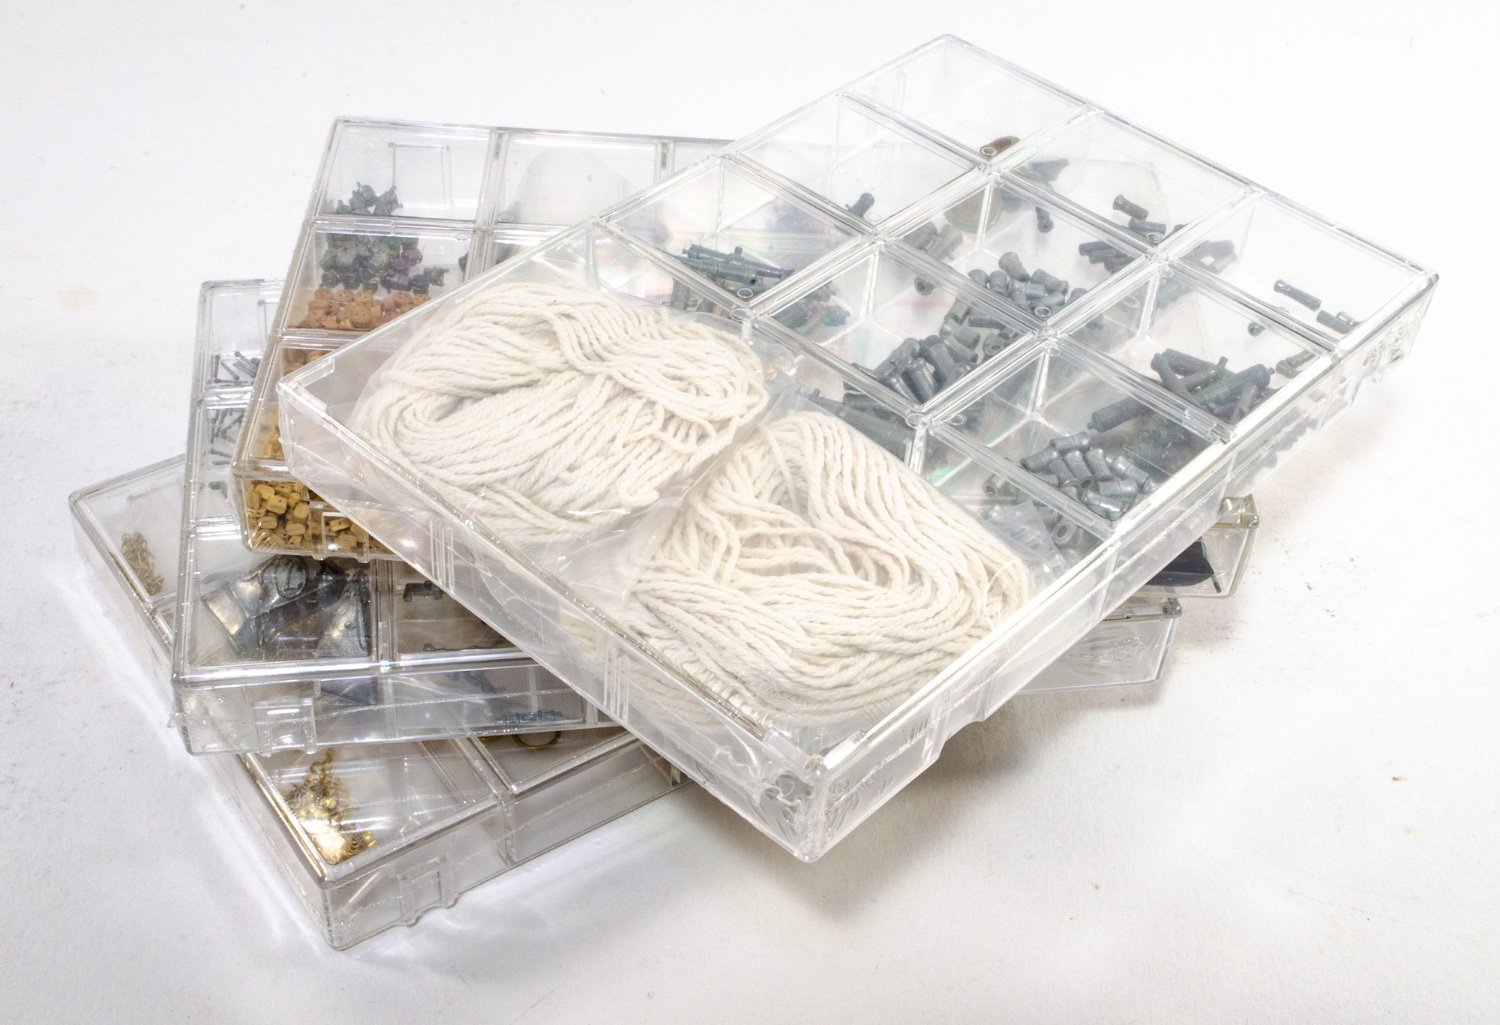
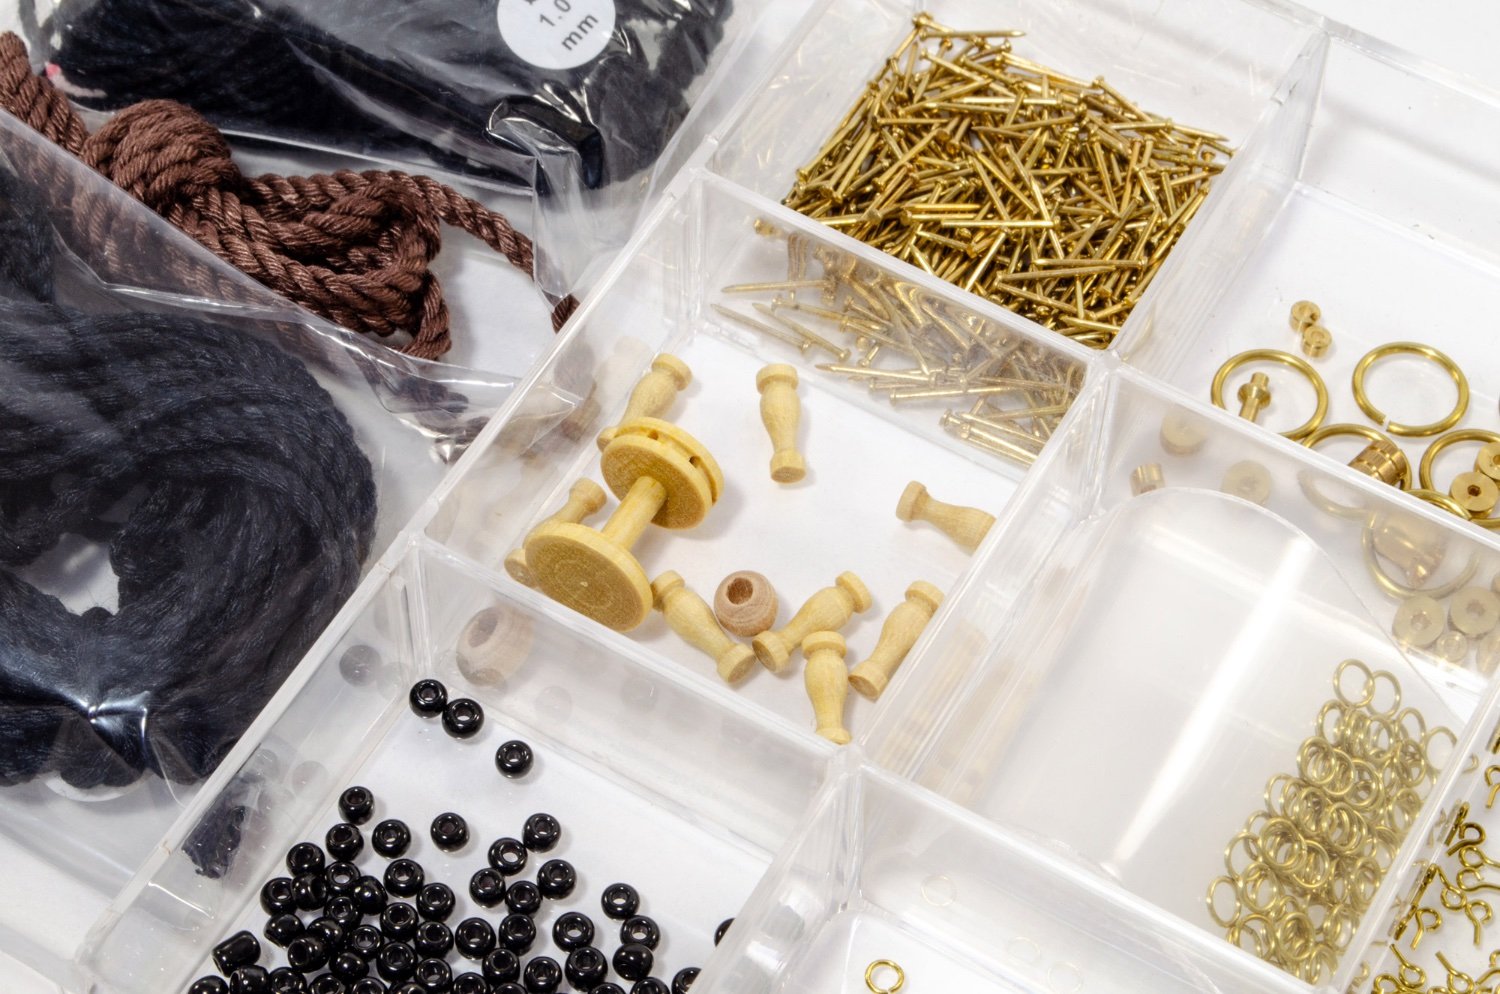
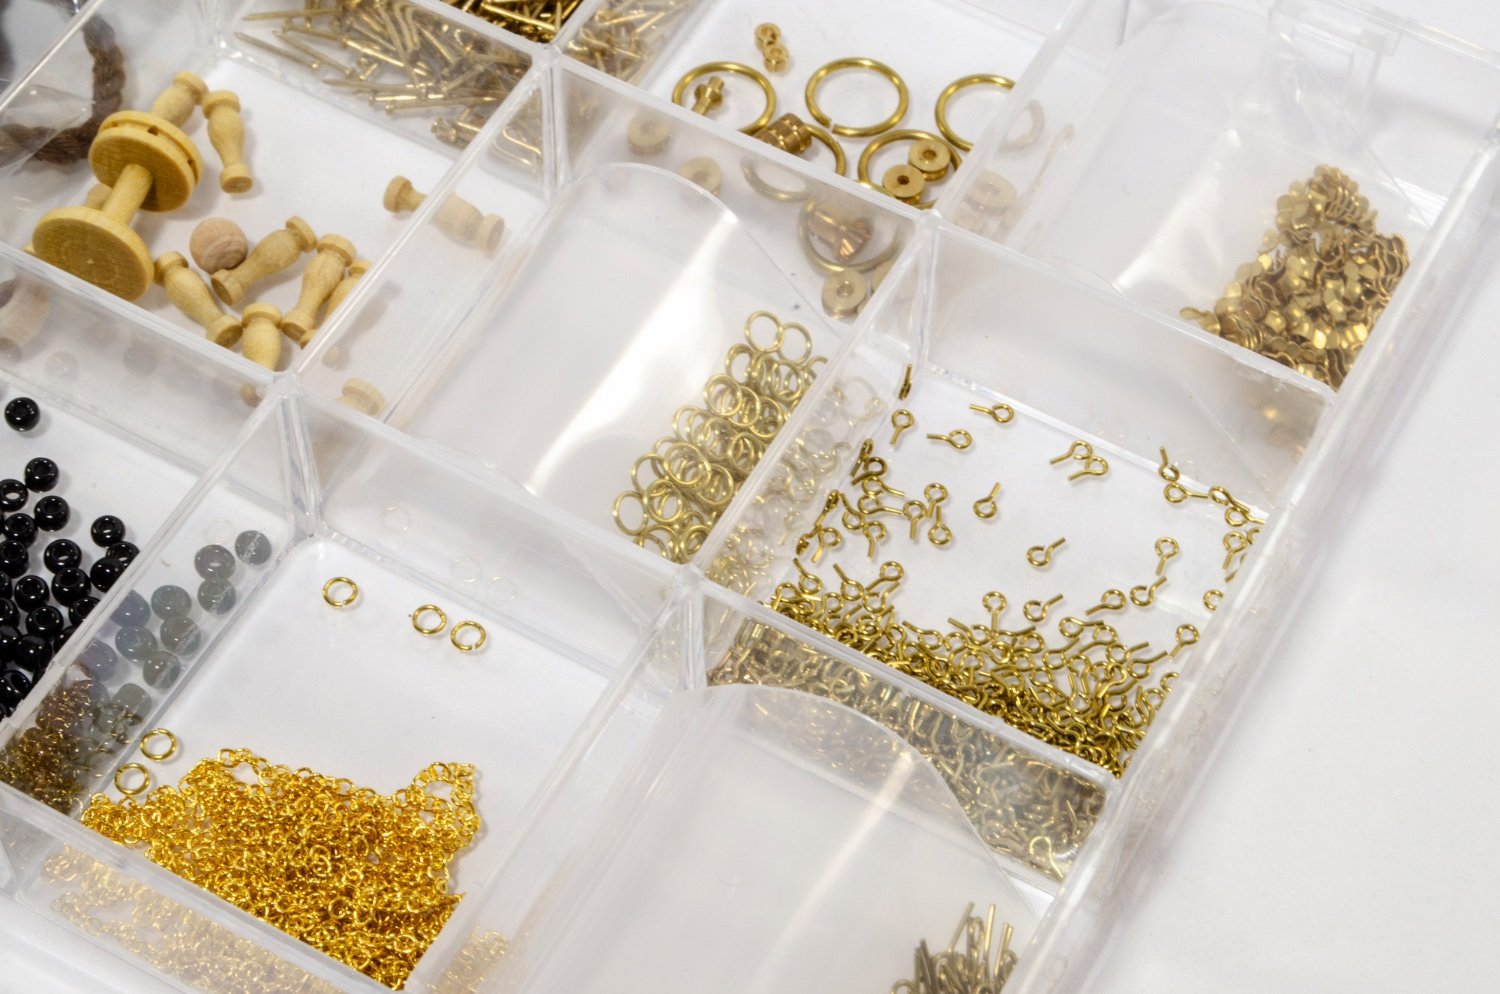
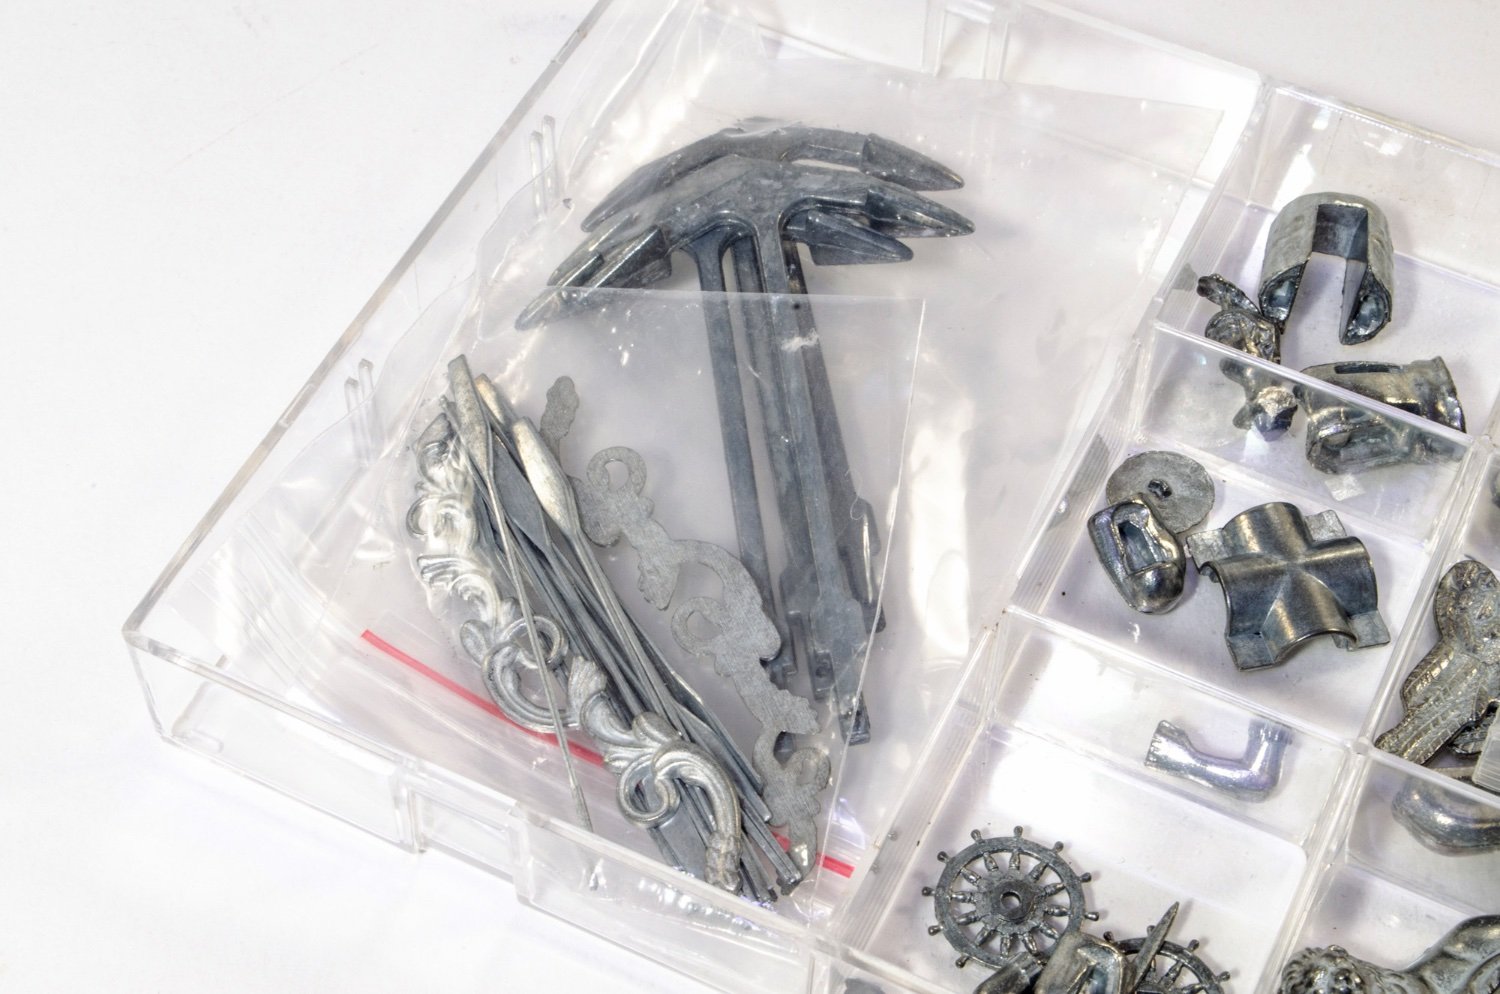
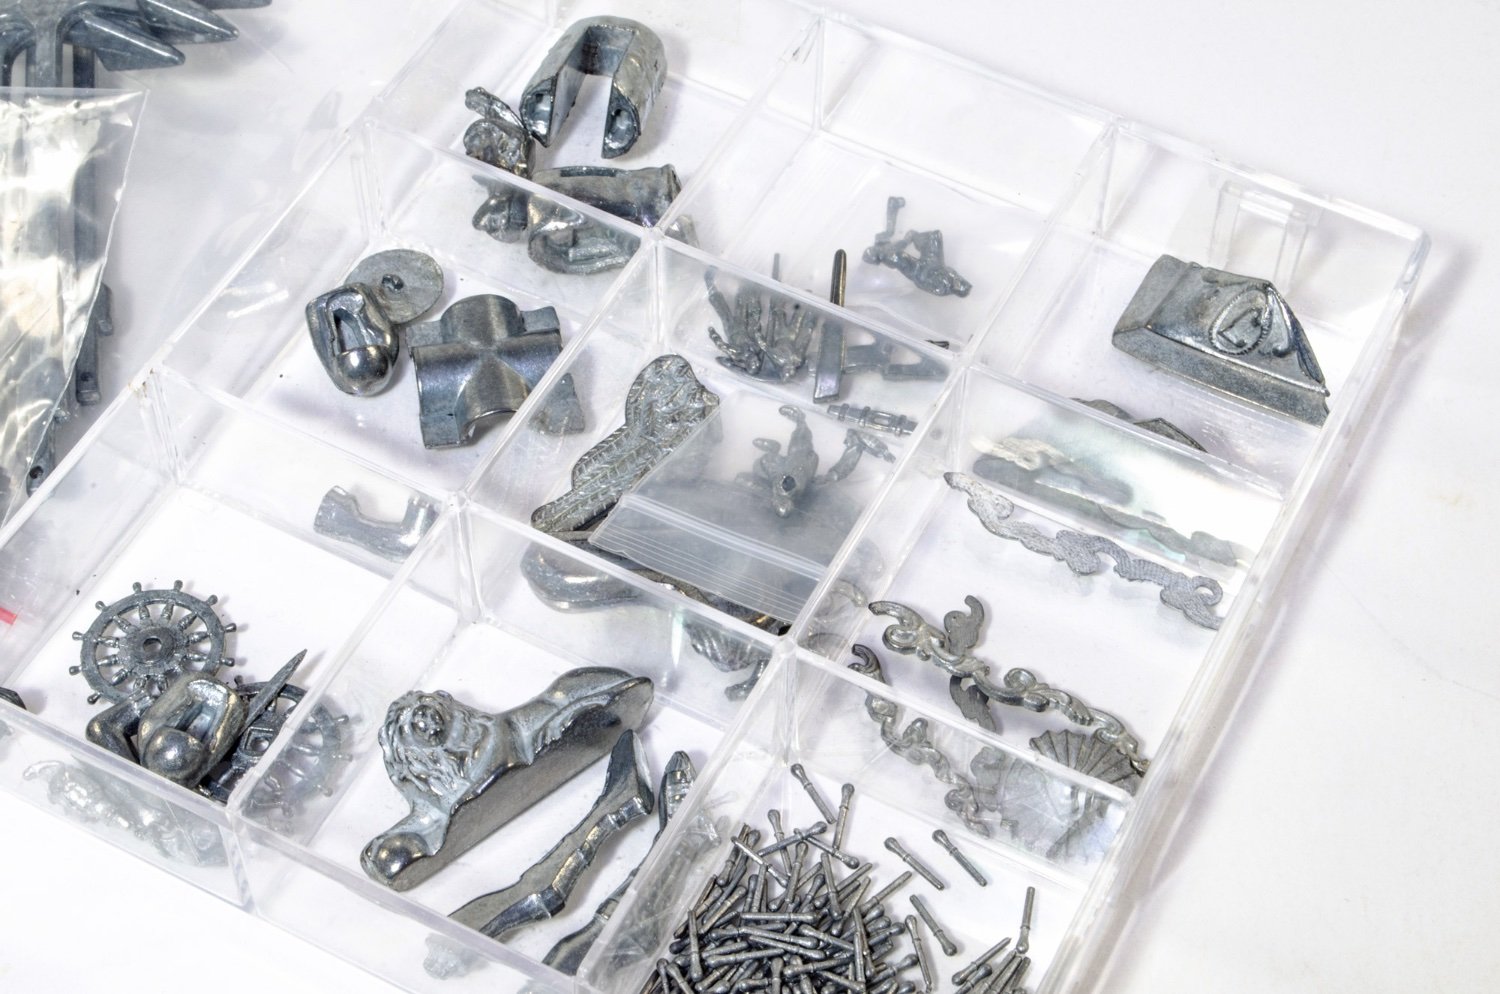
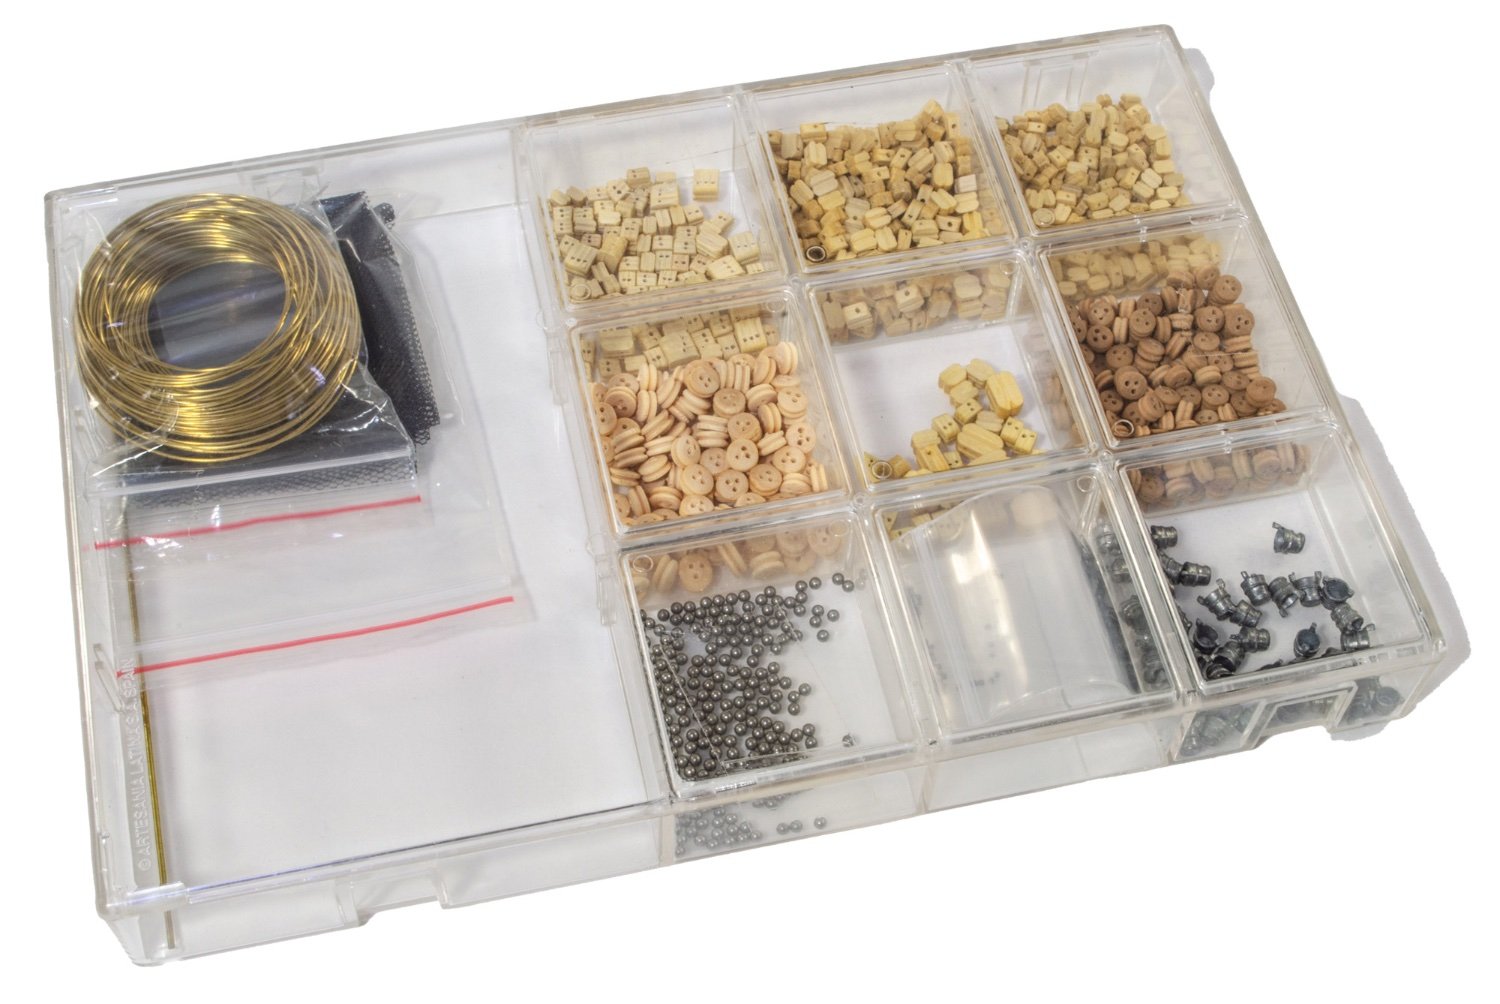
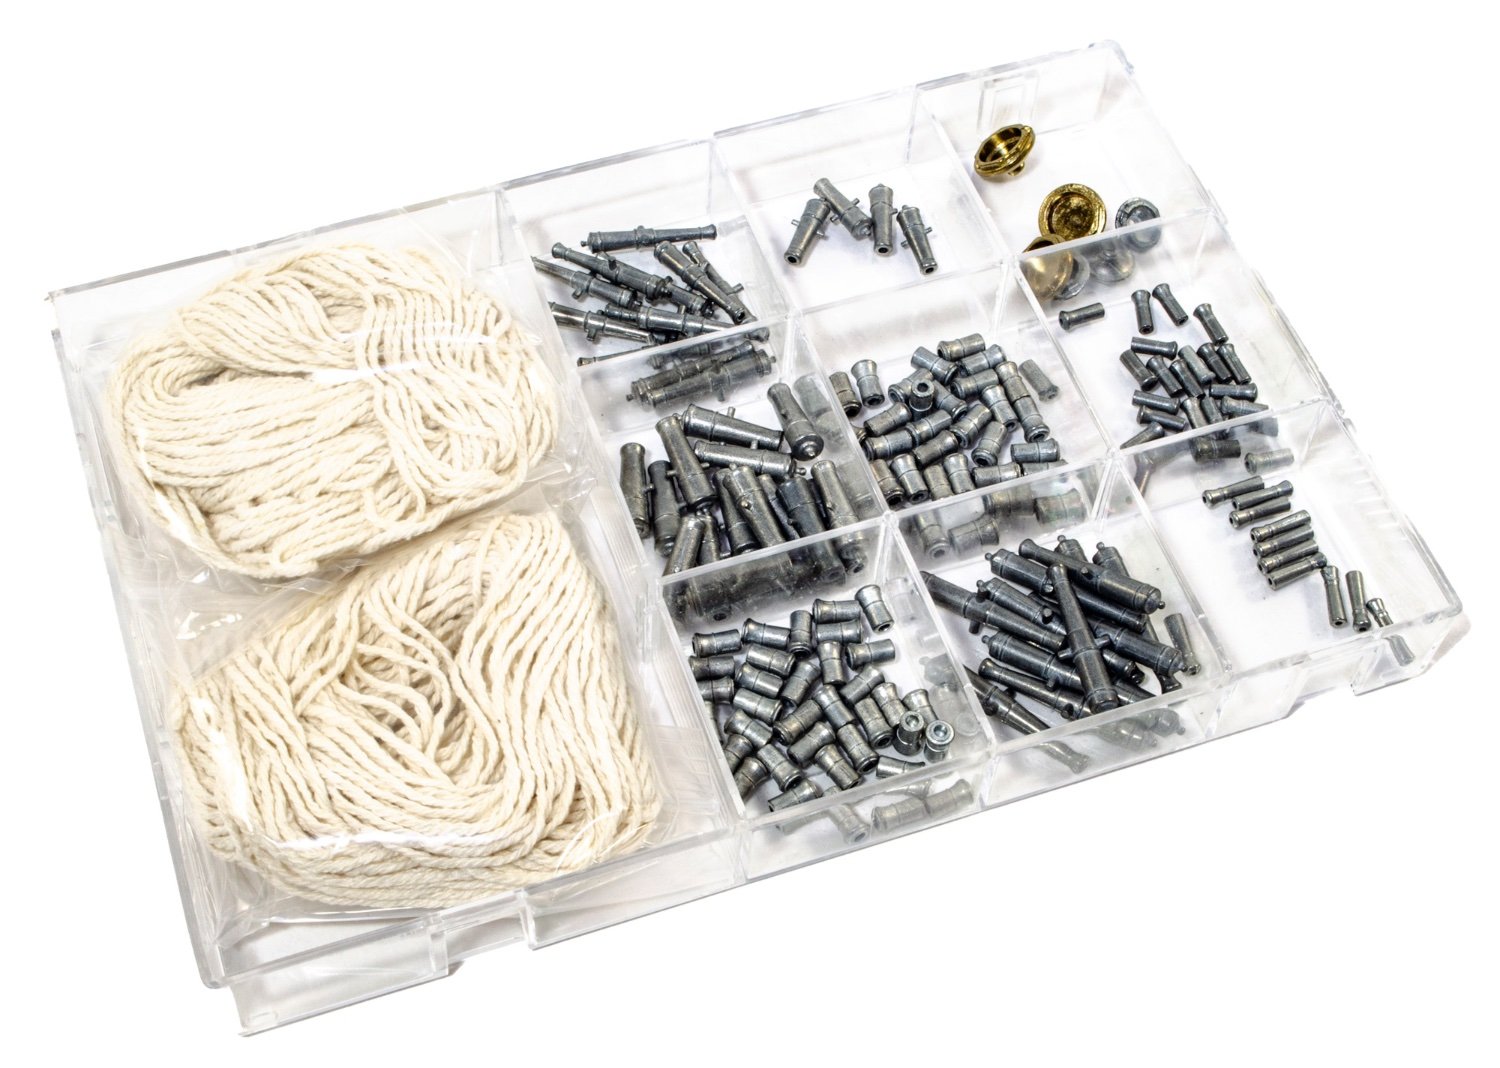
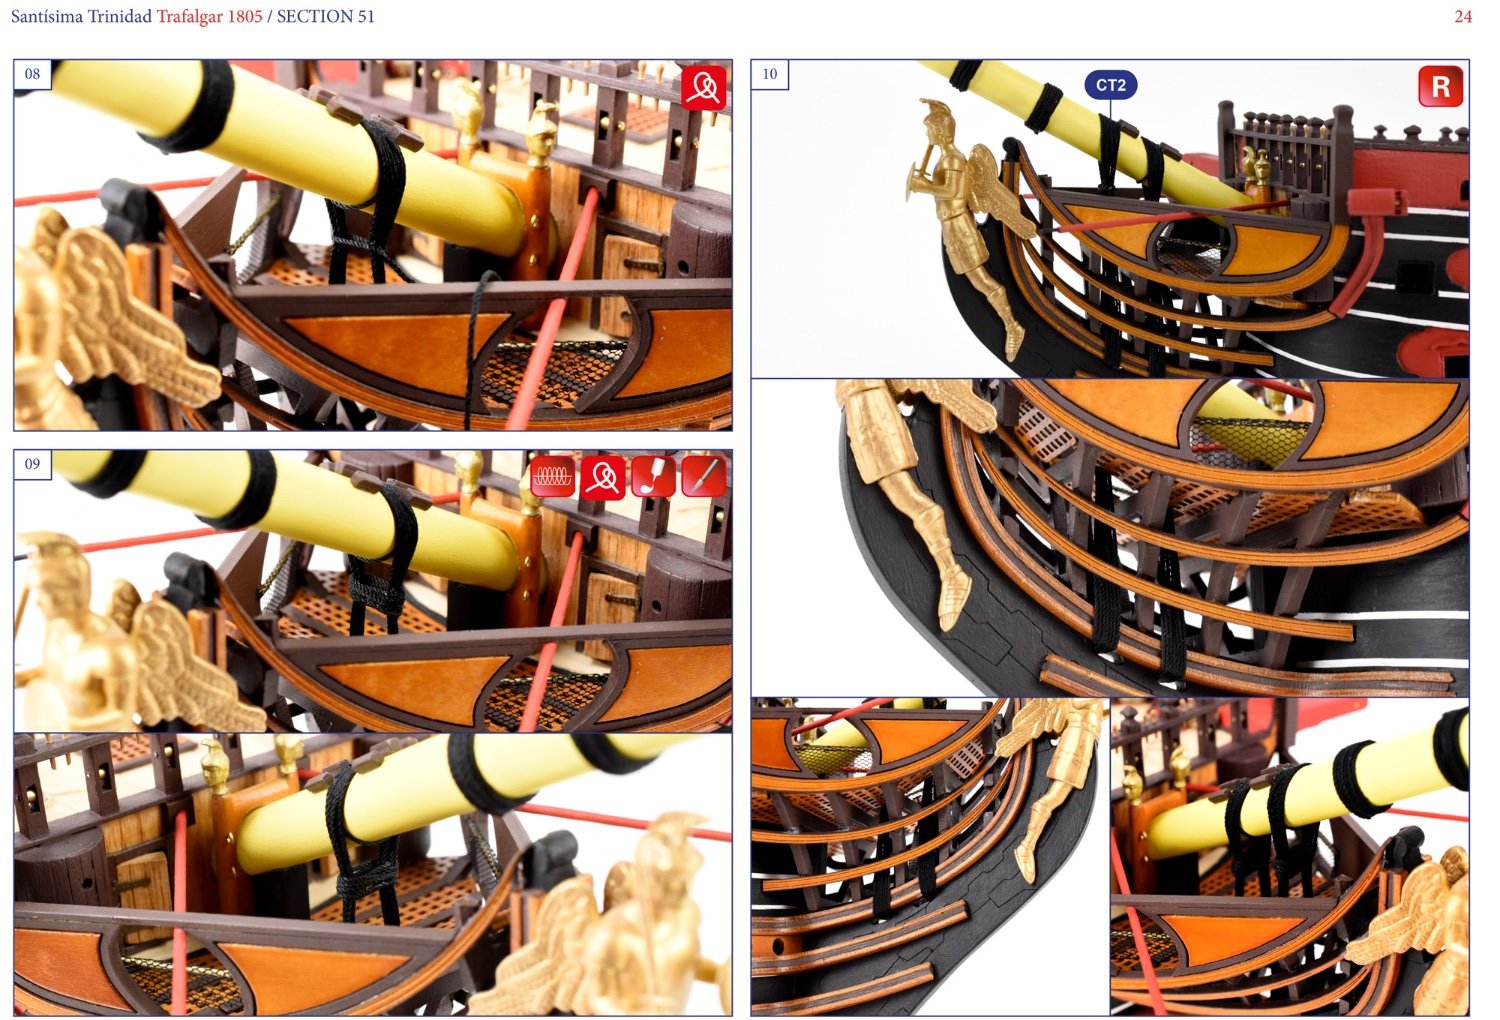
There are FOUR fittings boxes with this kit. Here are the photographs to see for yourself. The rigging blocks are deadeyes are perfectly good as far as quality goes, with the metal parts being cast in a zinc alloy. This includes the cannon. Some seams are present on some of these parts, and you’ll need a rotary tool to remove these. Other zinc alloy metal parts include buckets, anchors, stern décor, ship’s wheels, lower quarter gallery sections, belaying pins, belfry roof, etc. The figurehead is also far nicer than many of those supplied in other contemporary releases, with this one being cast in multiple pieces to eliminate the problems with single-part casting techniques. There are some brass parts too, such as the lantern tops, bell, anchor rings etc.
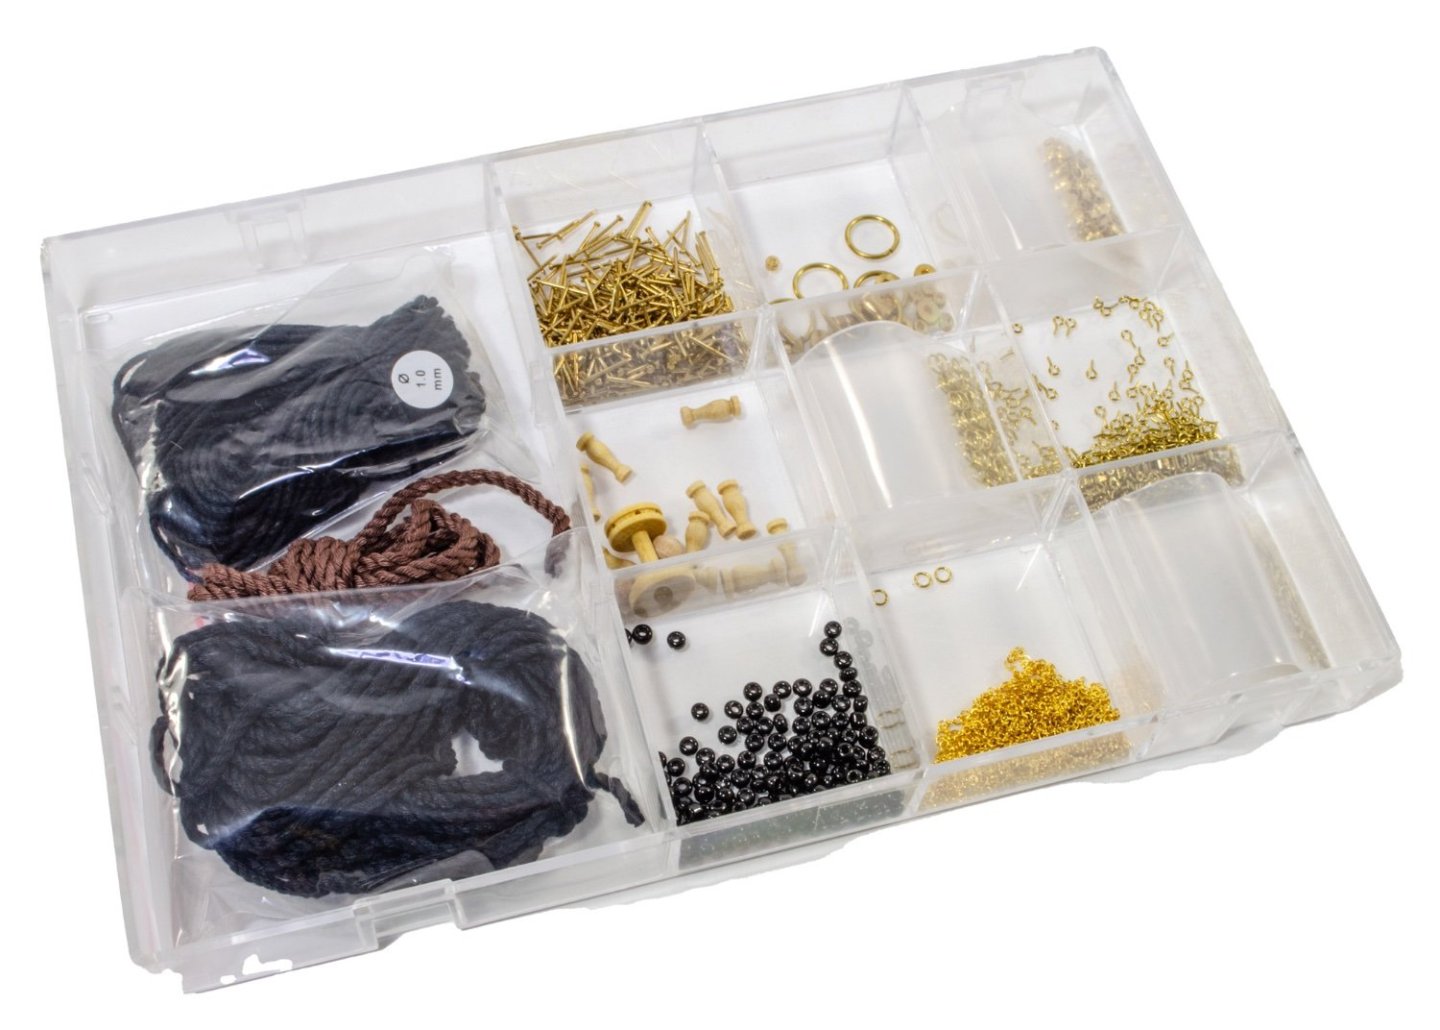


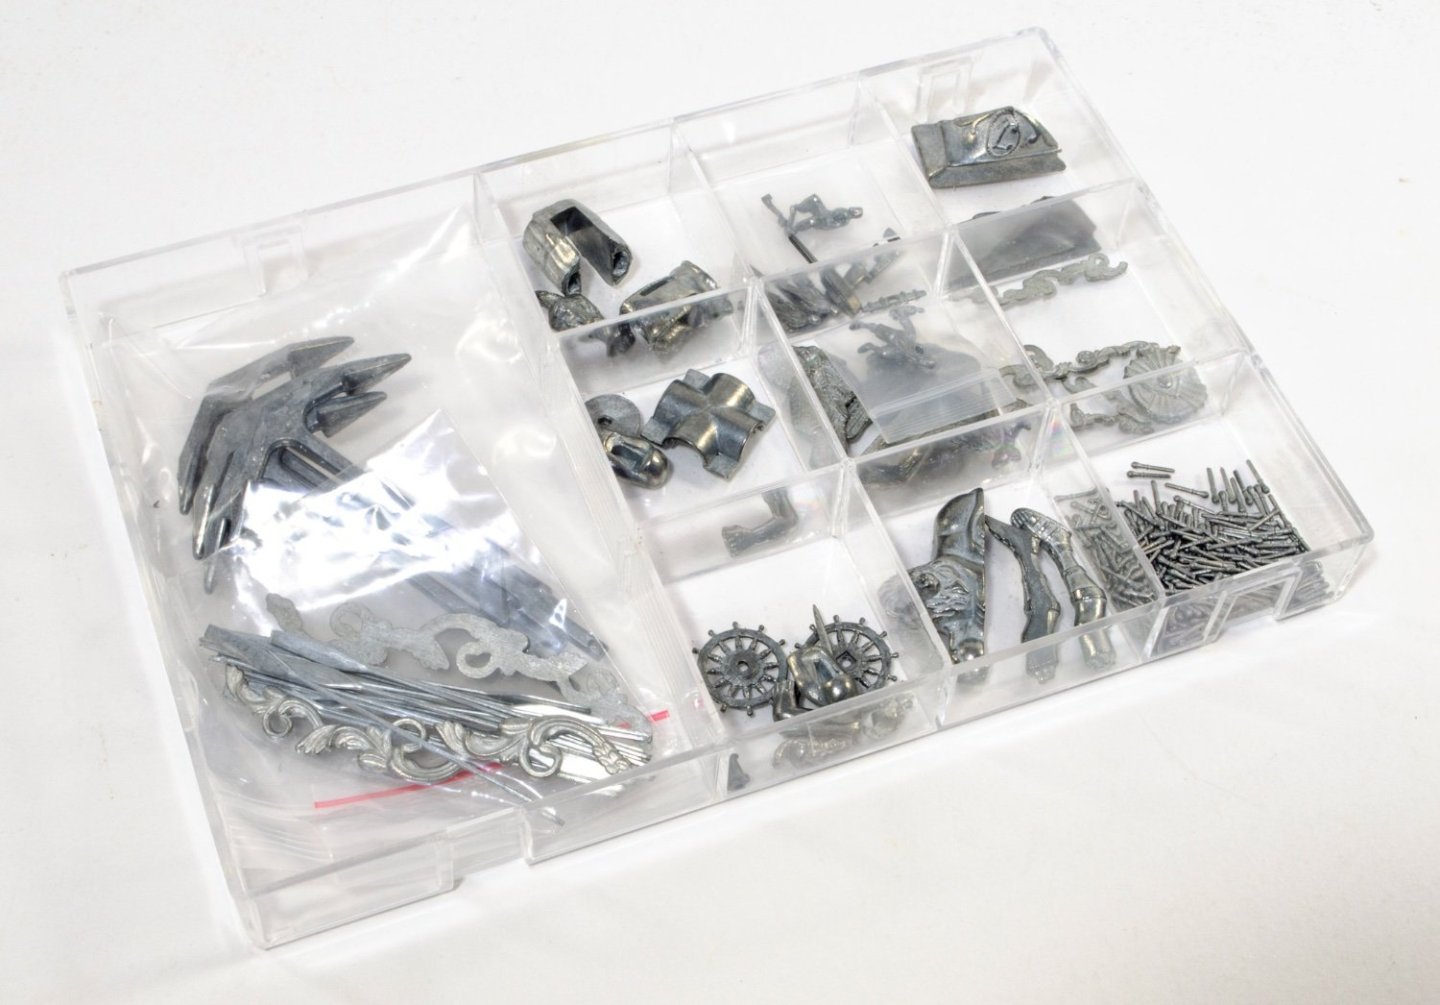
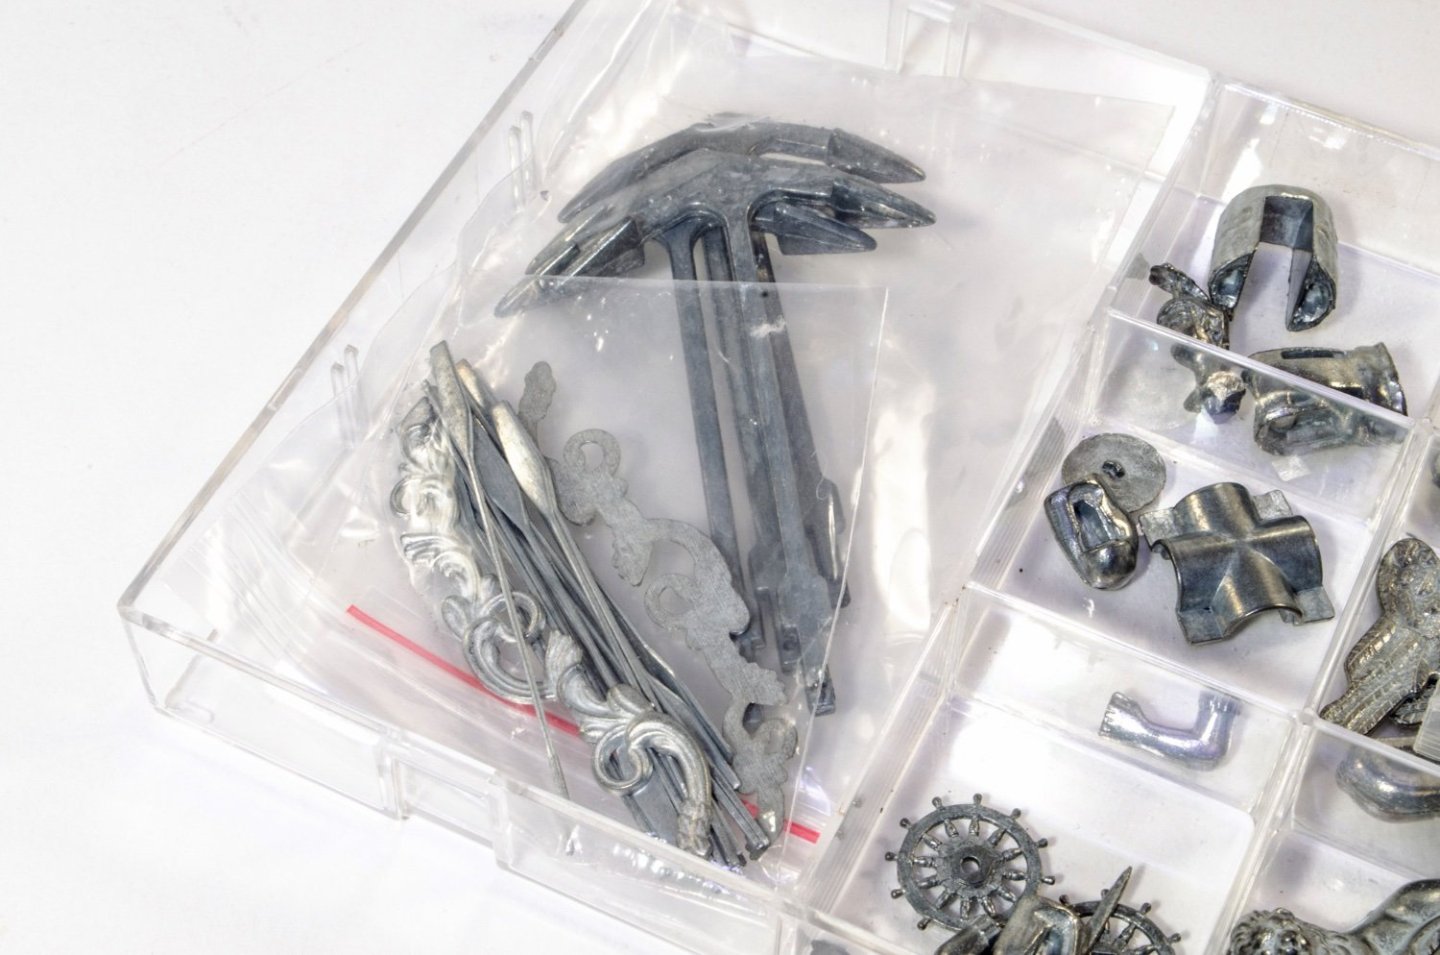

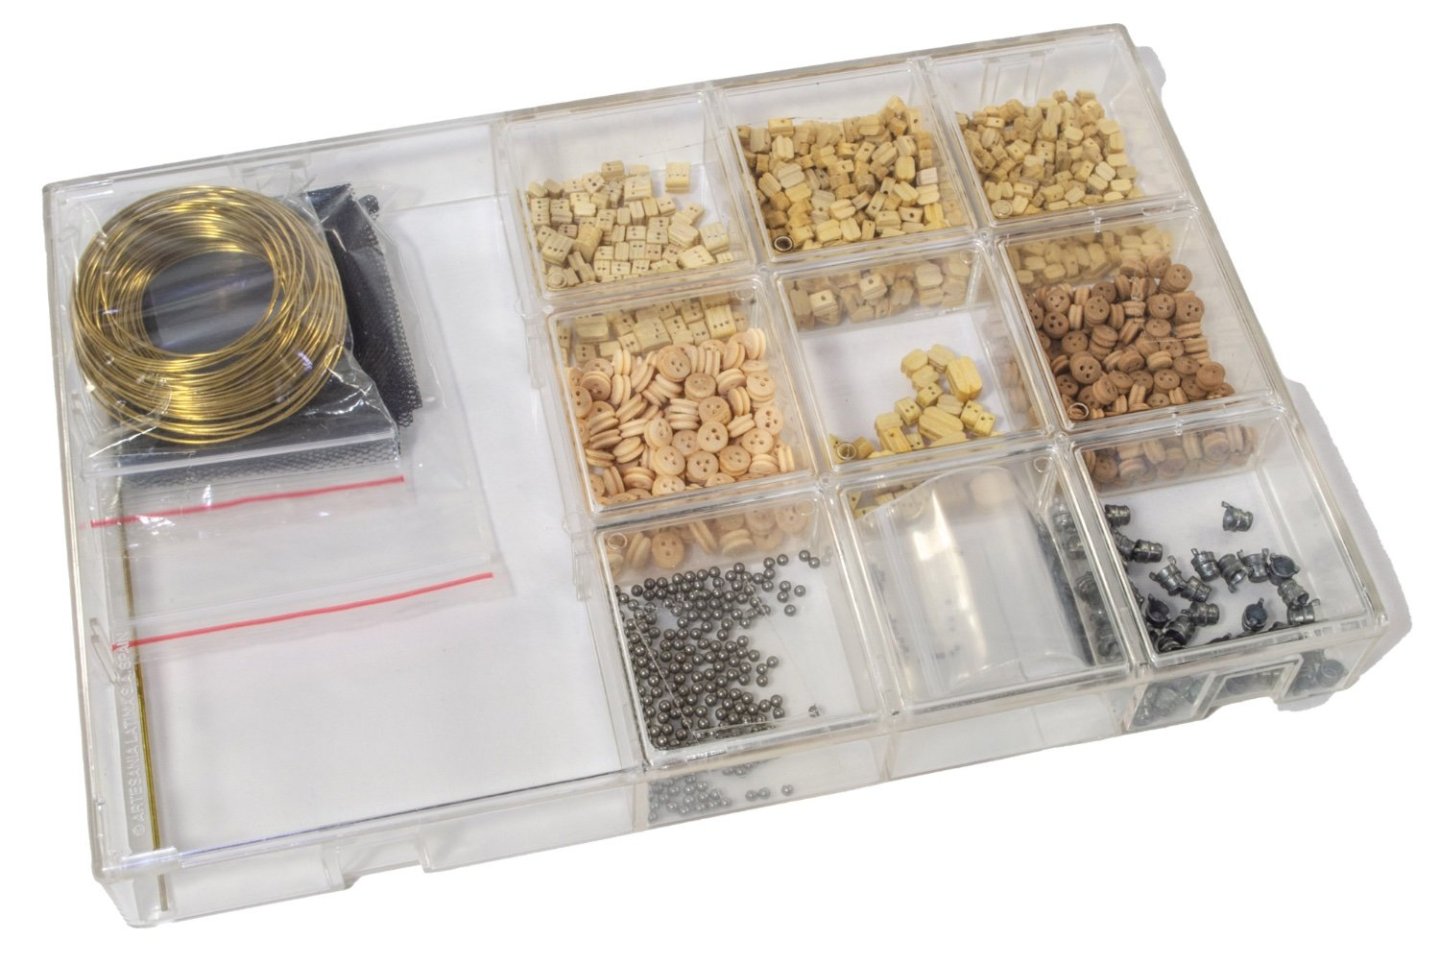
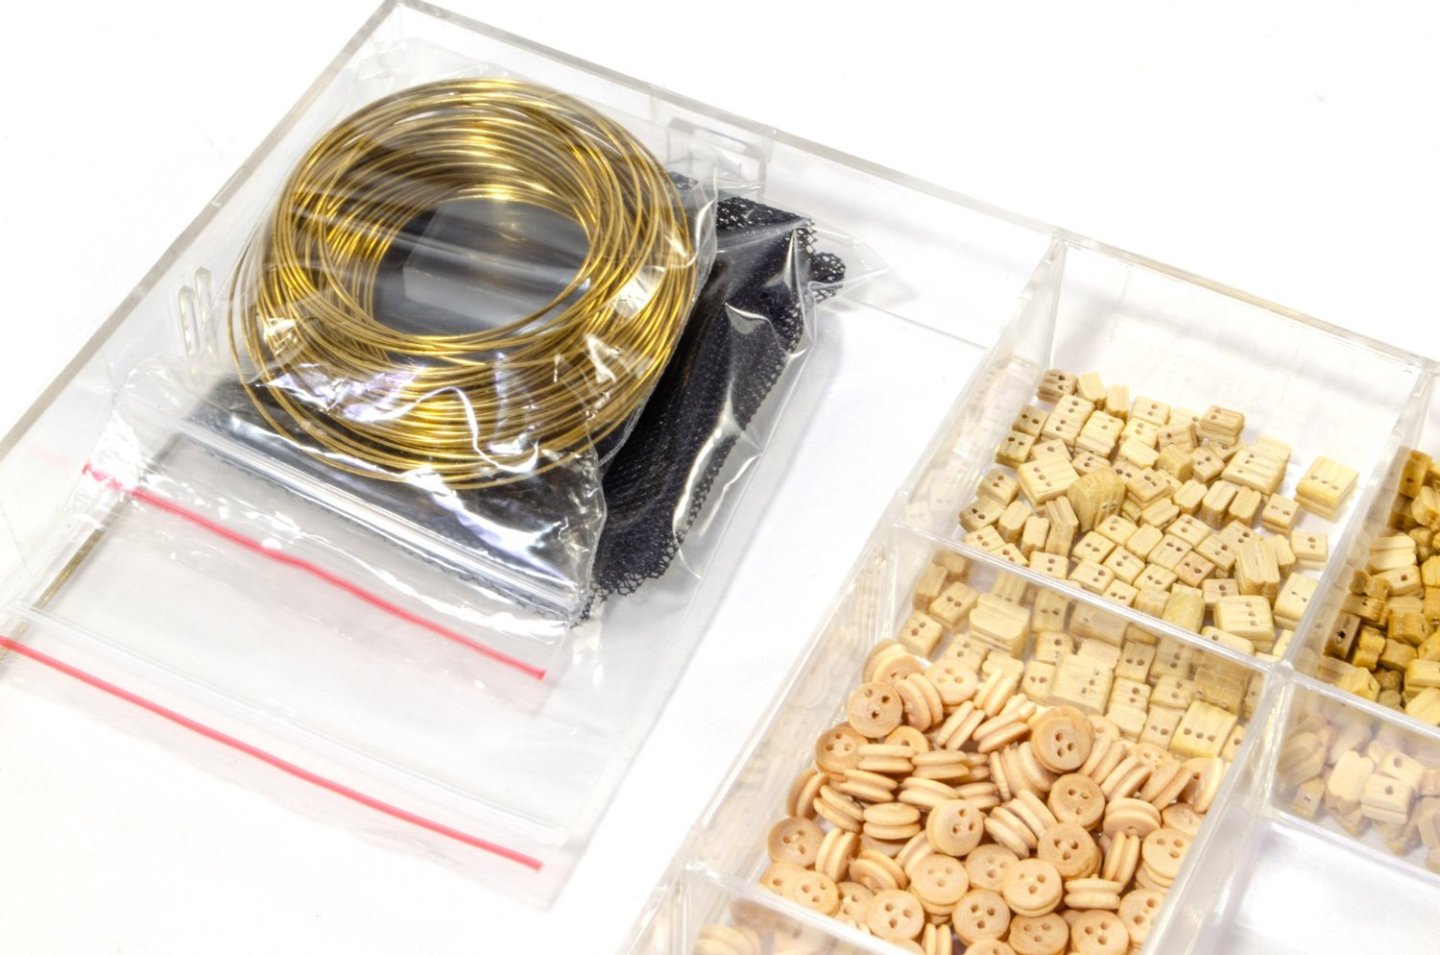
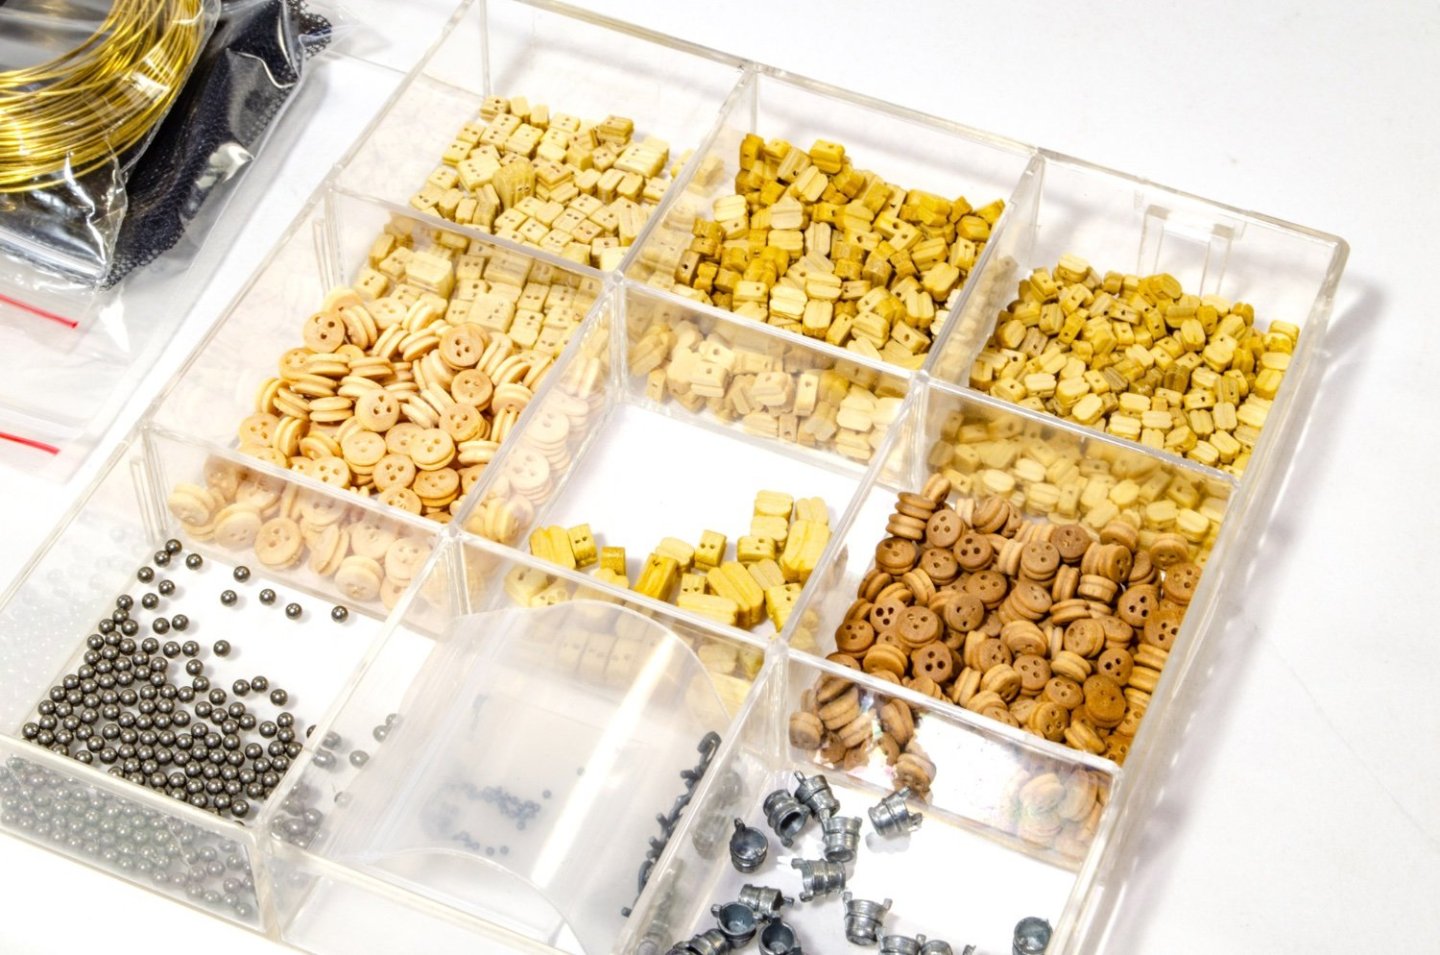


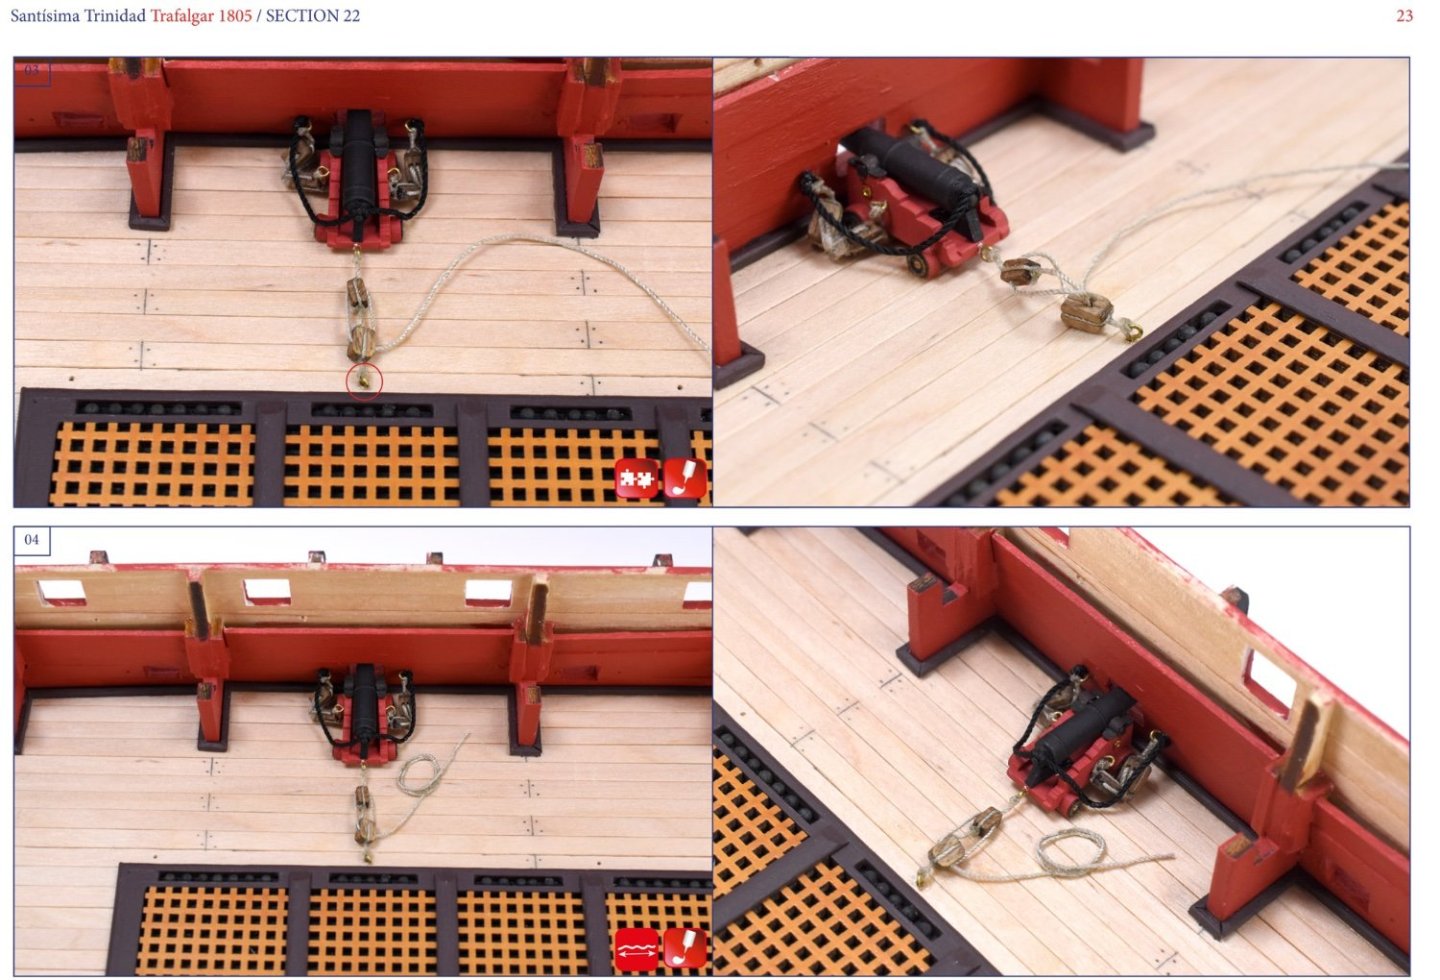
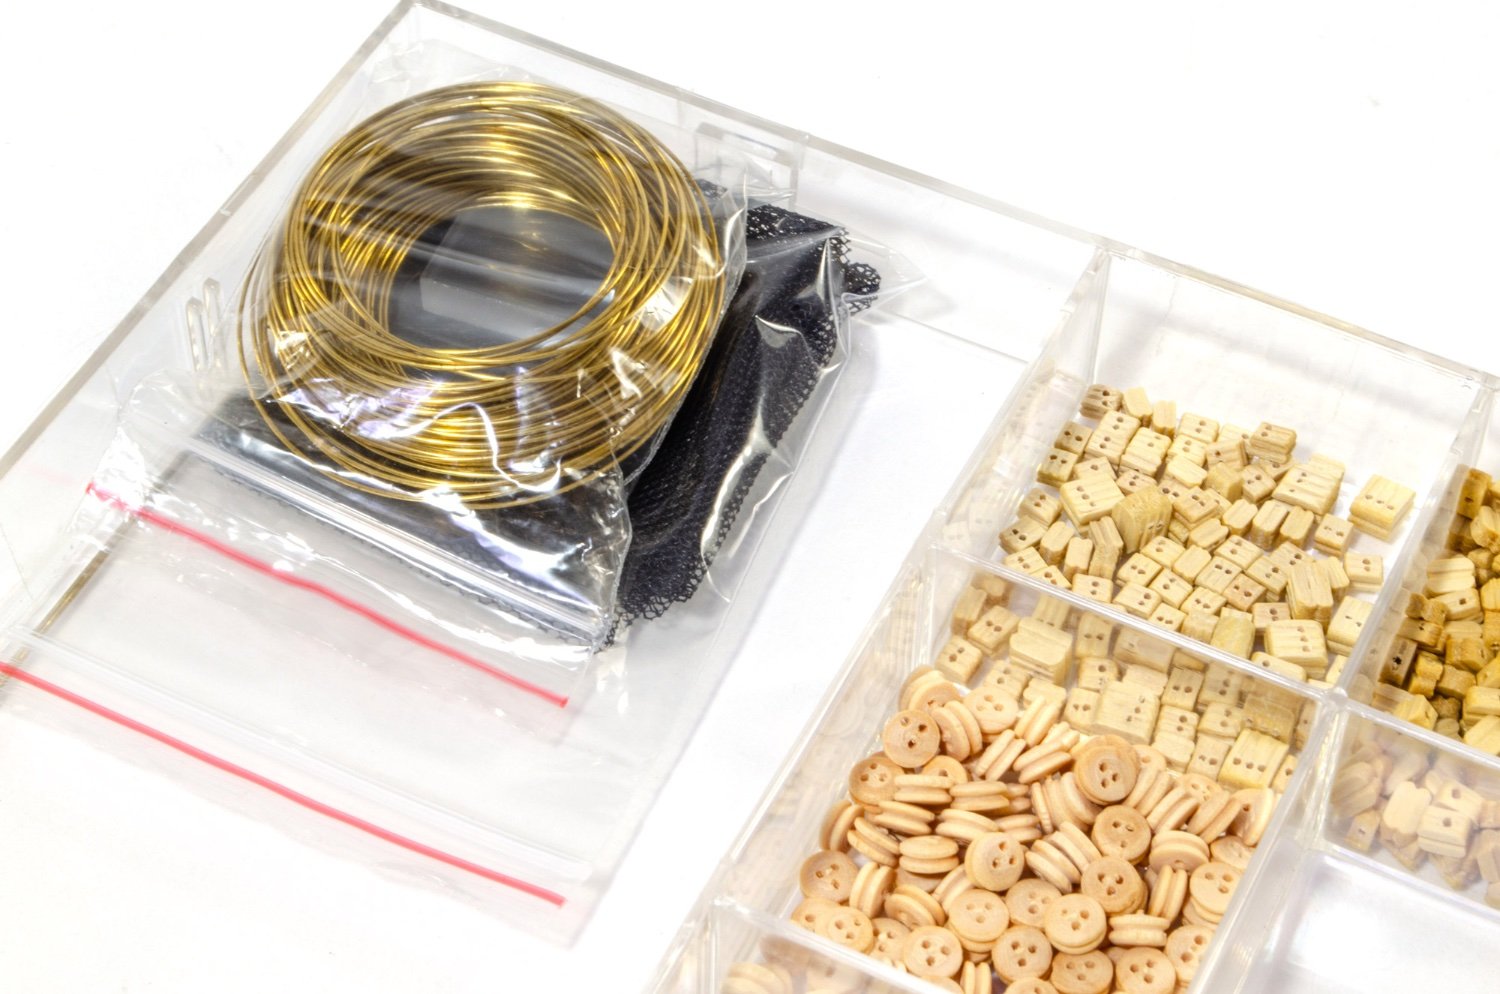
The fittings boxes also include brass wire, netting, eyelets, glass parral beads, brass nails, turned metal stanchion, capstan, brass chain, metal cannon balls etc. You will note that the lower decks have stub barrels and not whole guns. You won’t see them down there anyway, especially in 1:84.
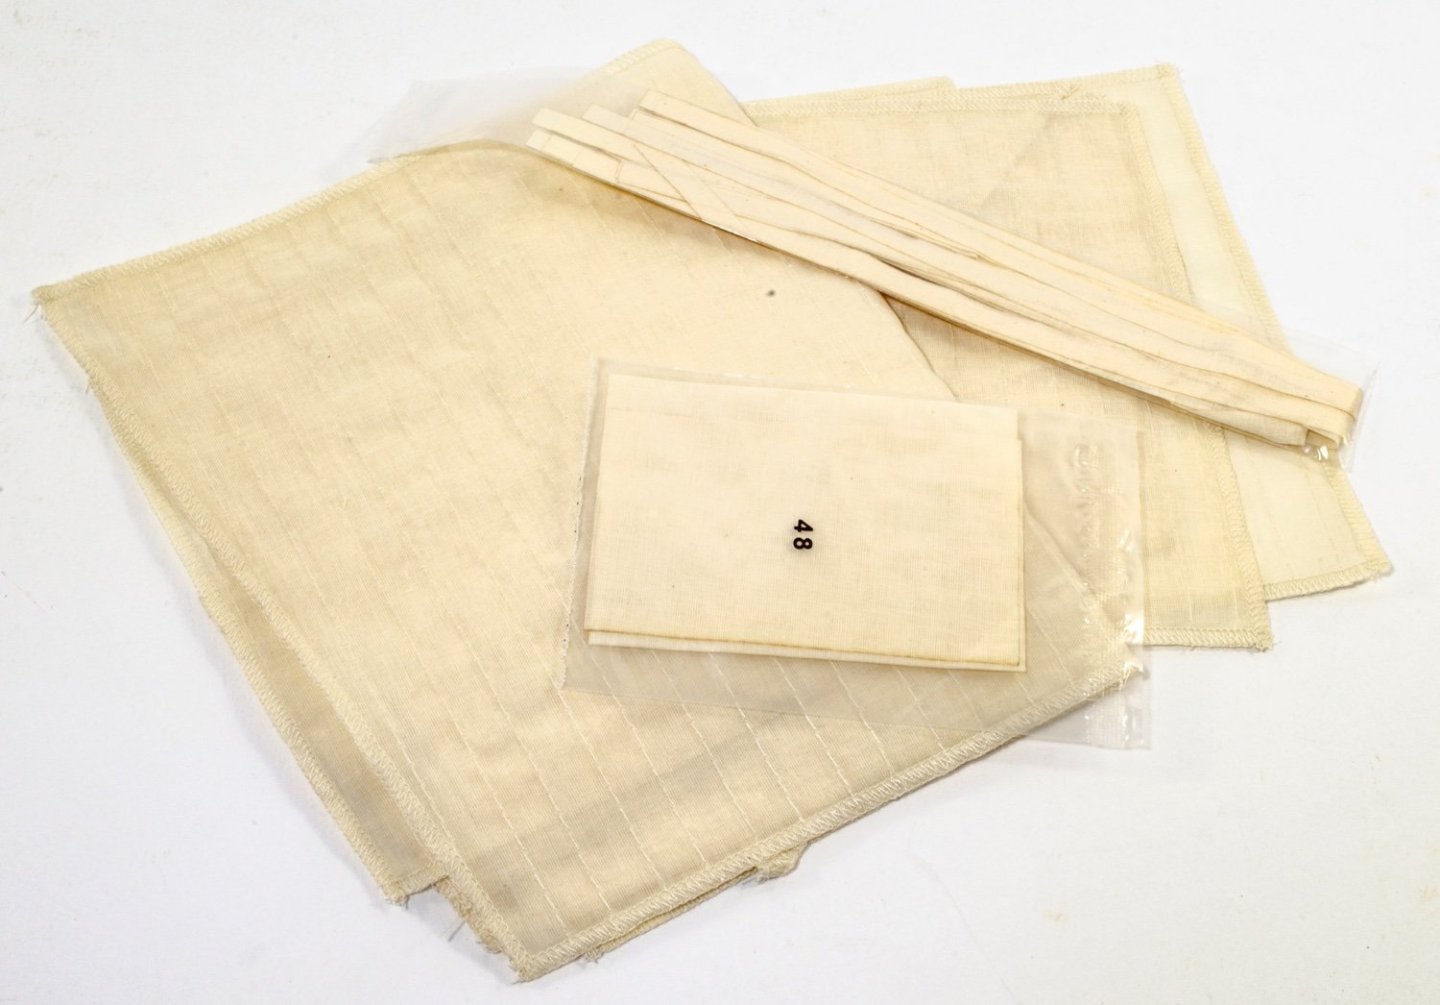
Love them or loathe them, Artesania has supplied a full set of sails. The material is quite thin, and the stitching is good, apart from that which edges the material. This is way too much and not nicely done. If you want to use these sails, I suggest picking out that stitching and redoing in yourself. However, I would simply leave the sails OFF a model of this type.
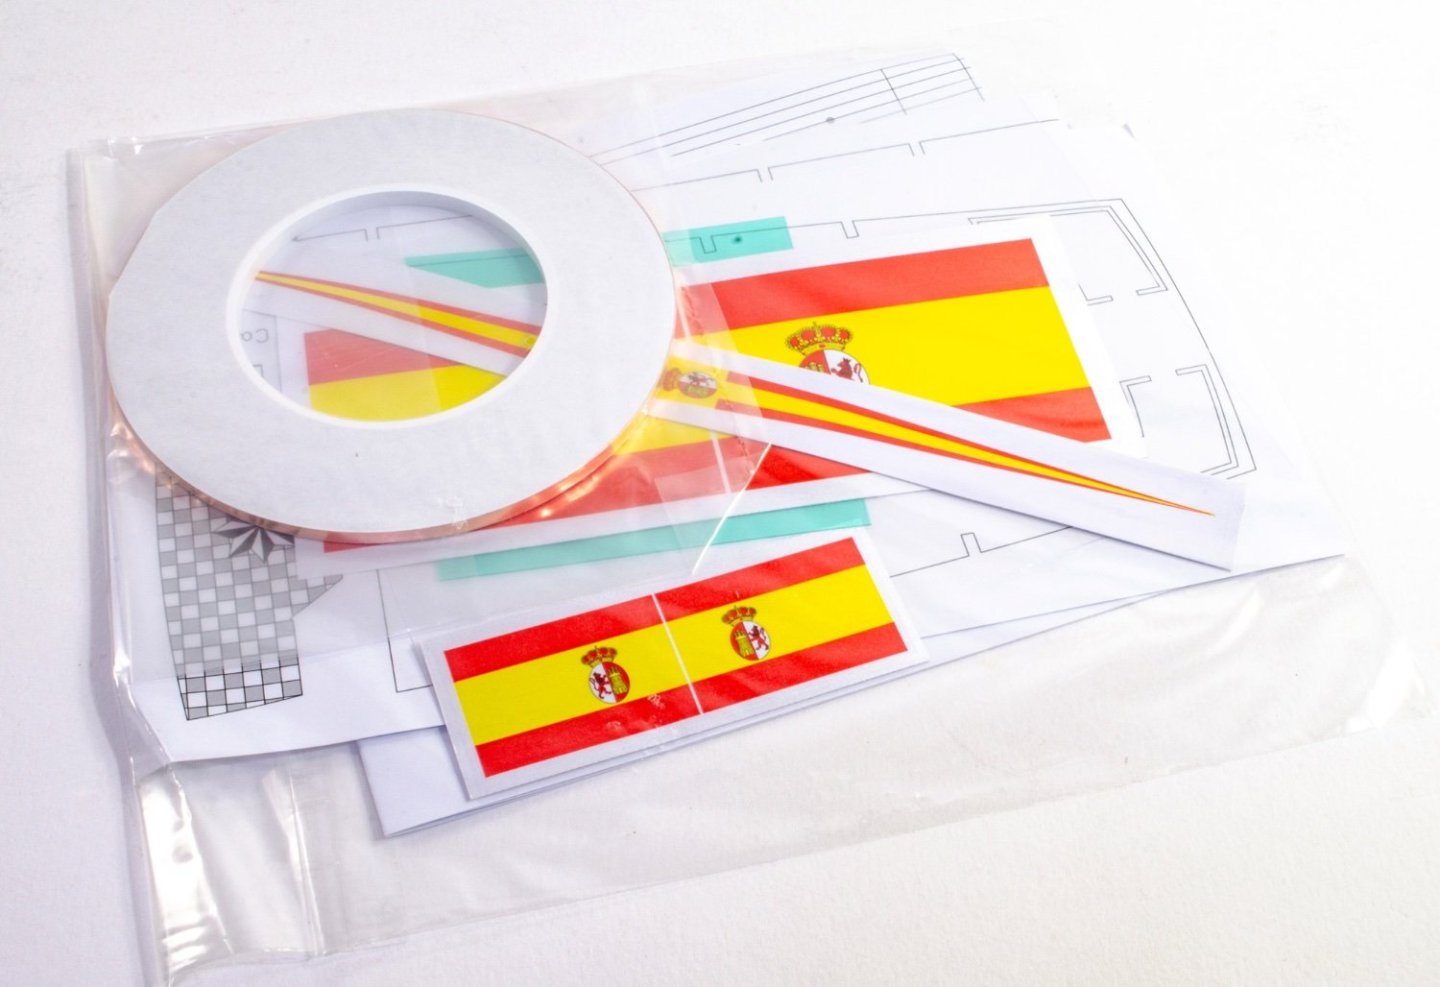
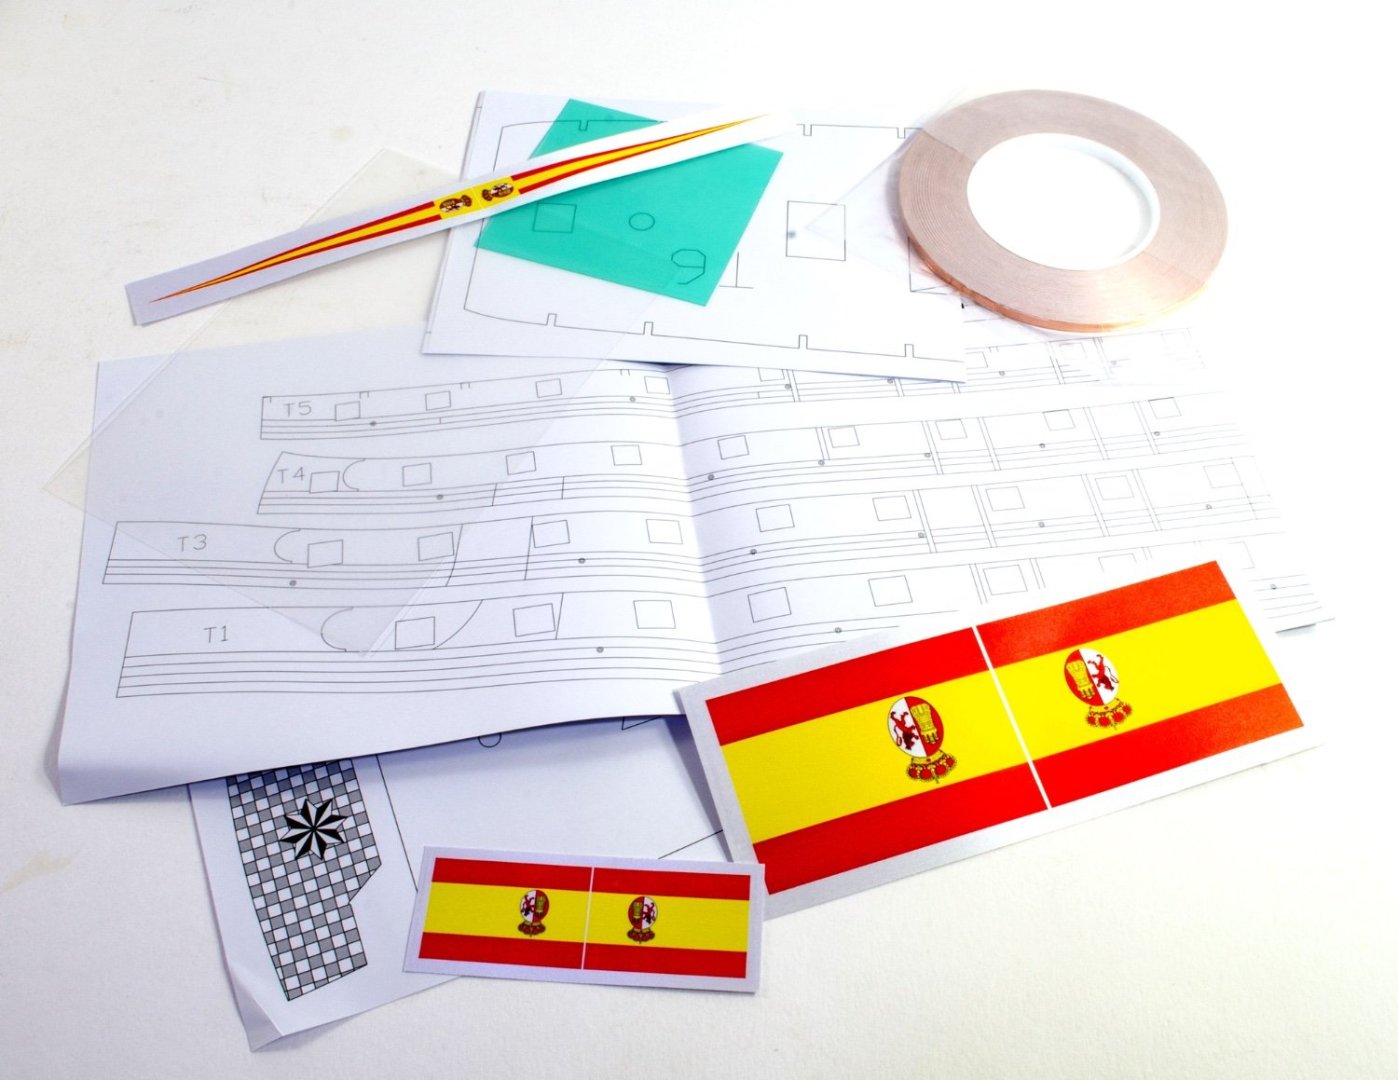
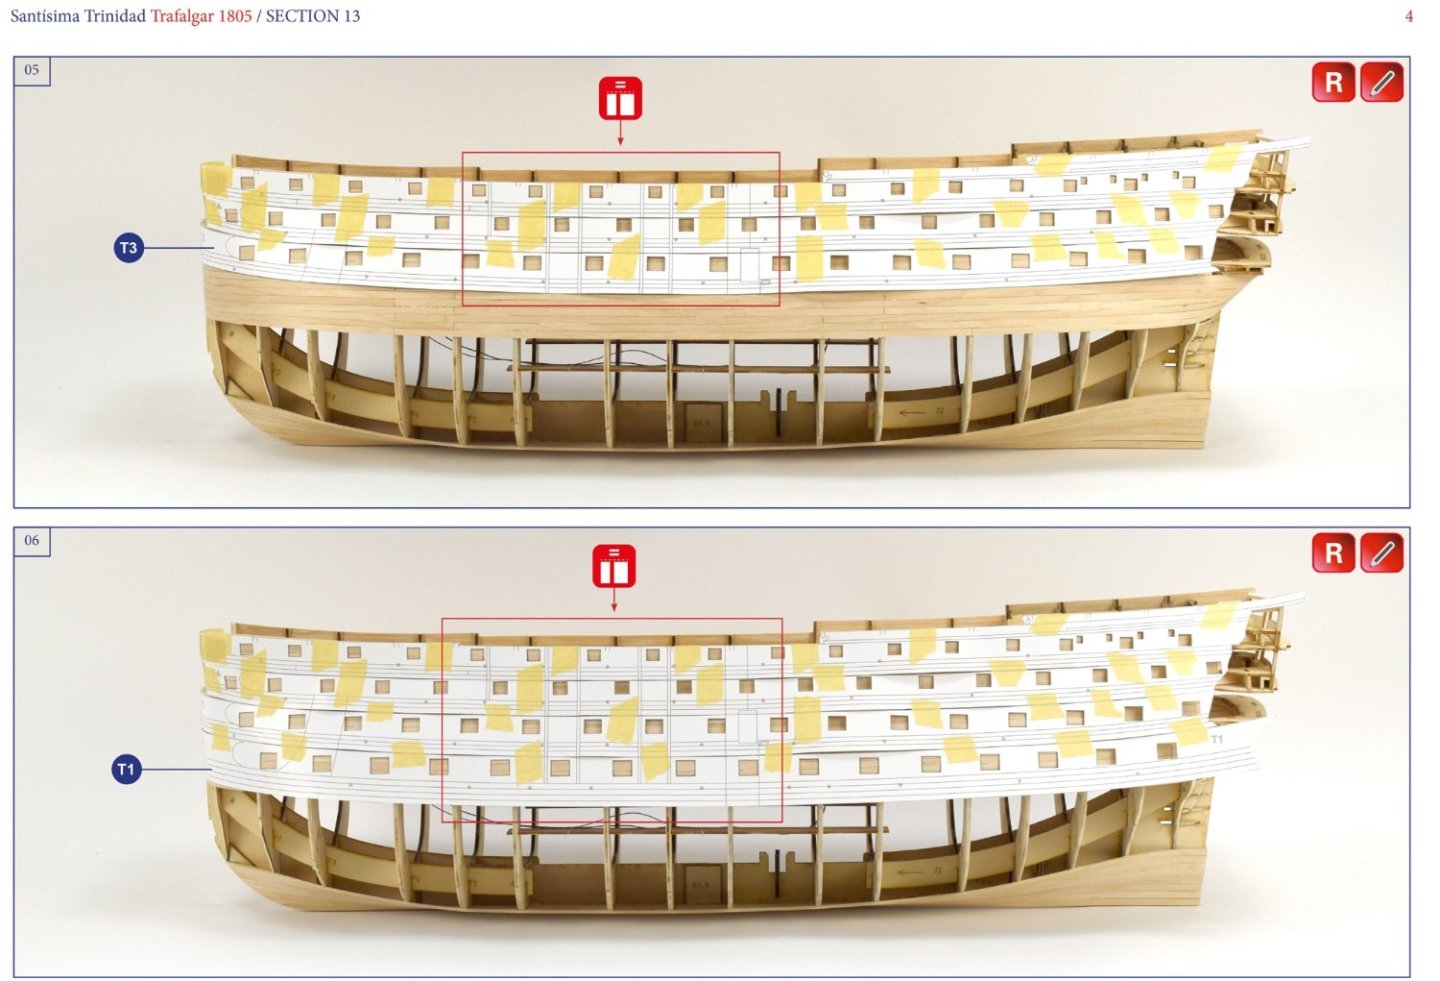
A number of other items are packed within another clear sleeve. These include some very nice silk screen printed flags, a roll of 5mm copper tape, acetate sheets for glazing, and various paper templates that you lay onto the planked hull, in order to position gun ports, fenders etc.
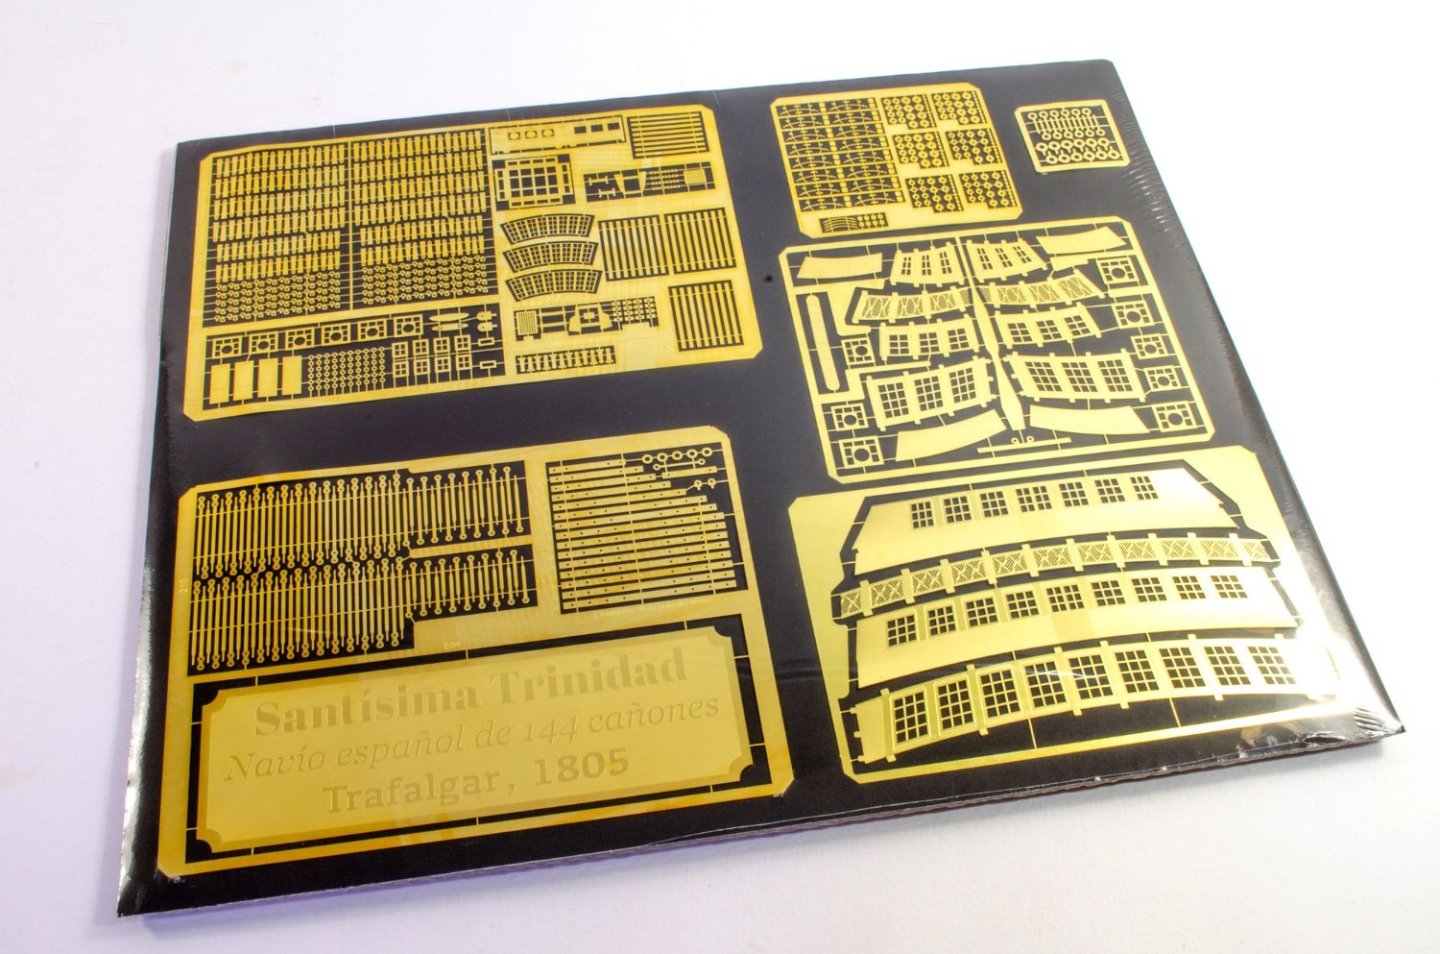
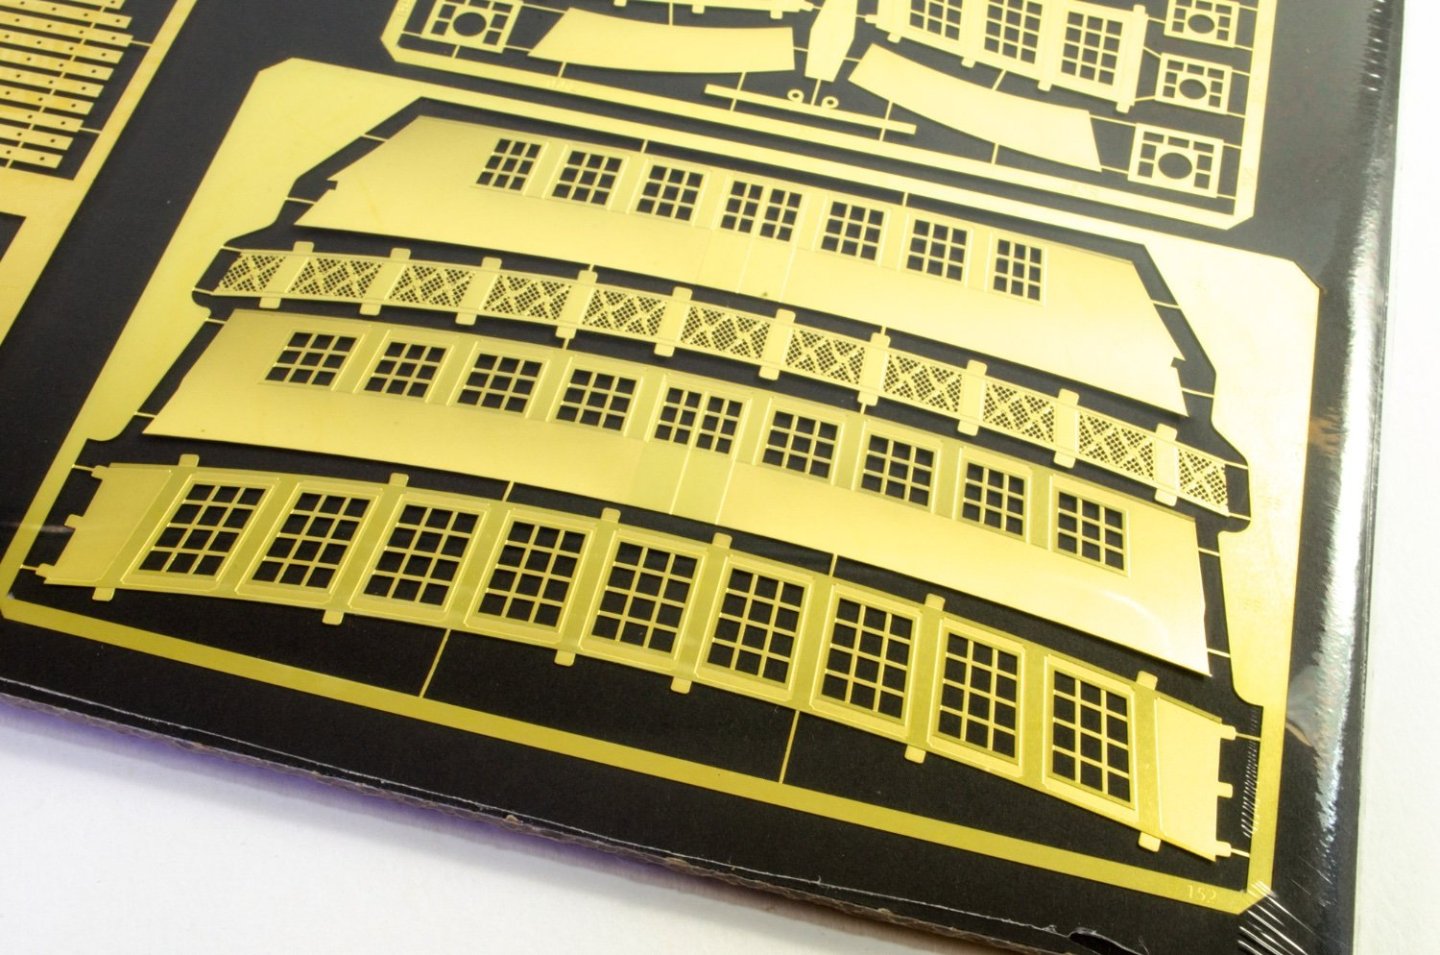
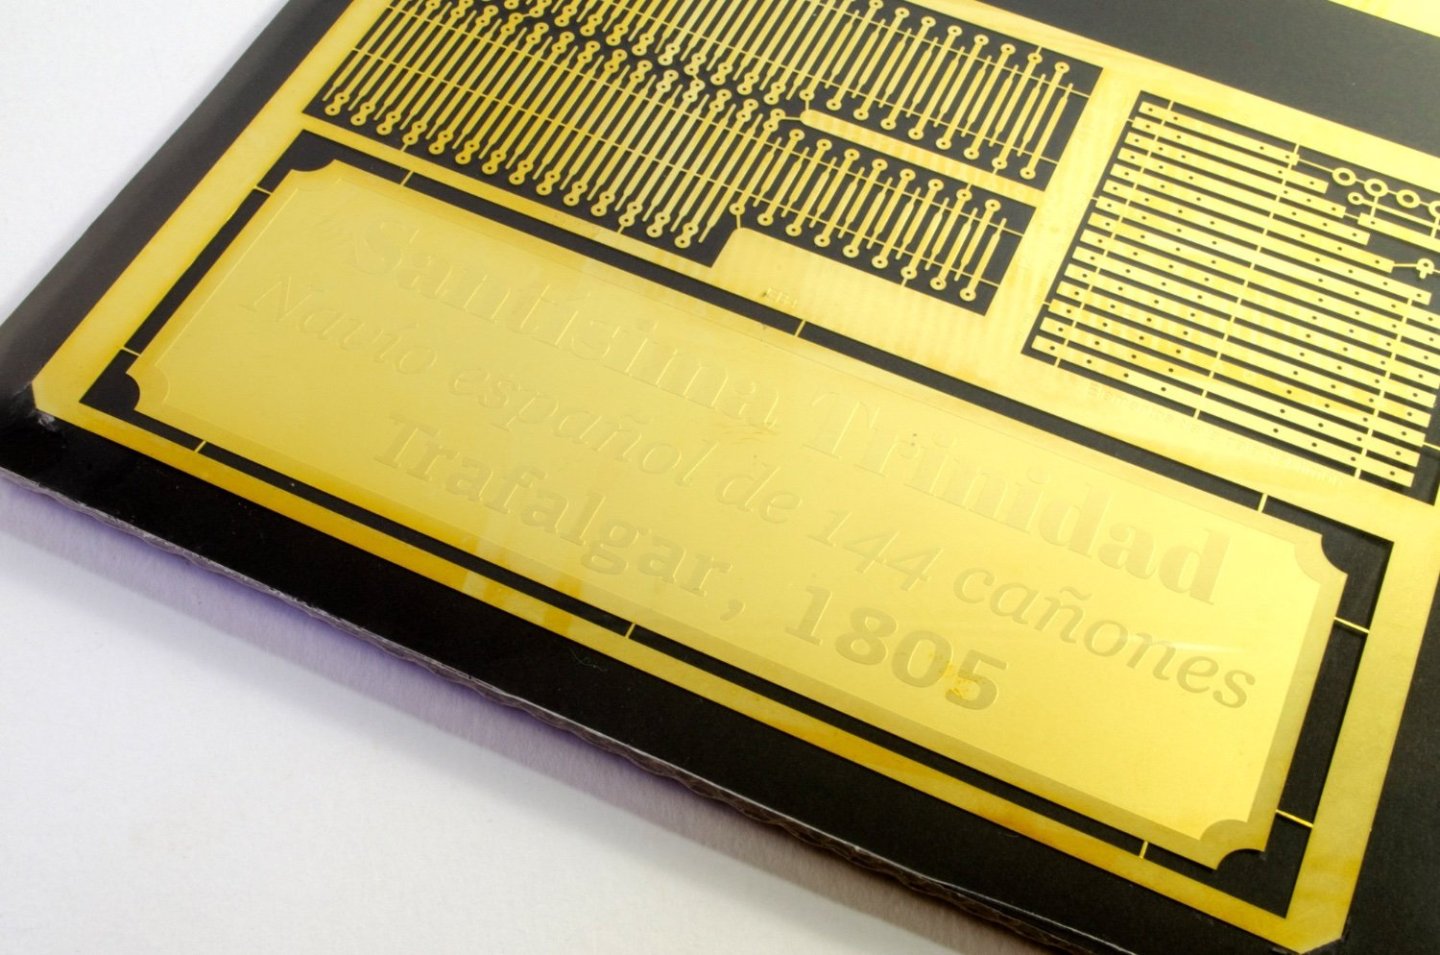
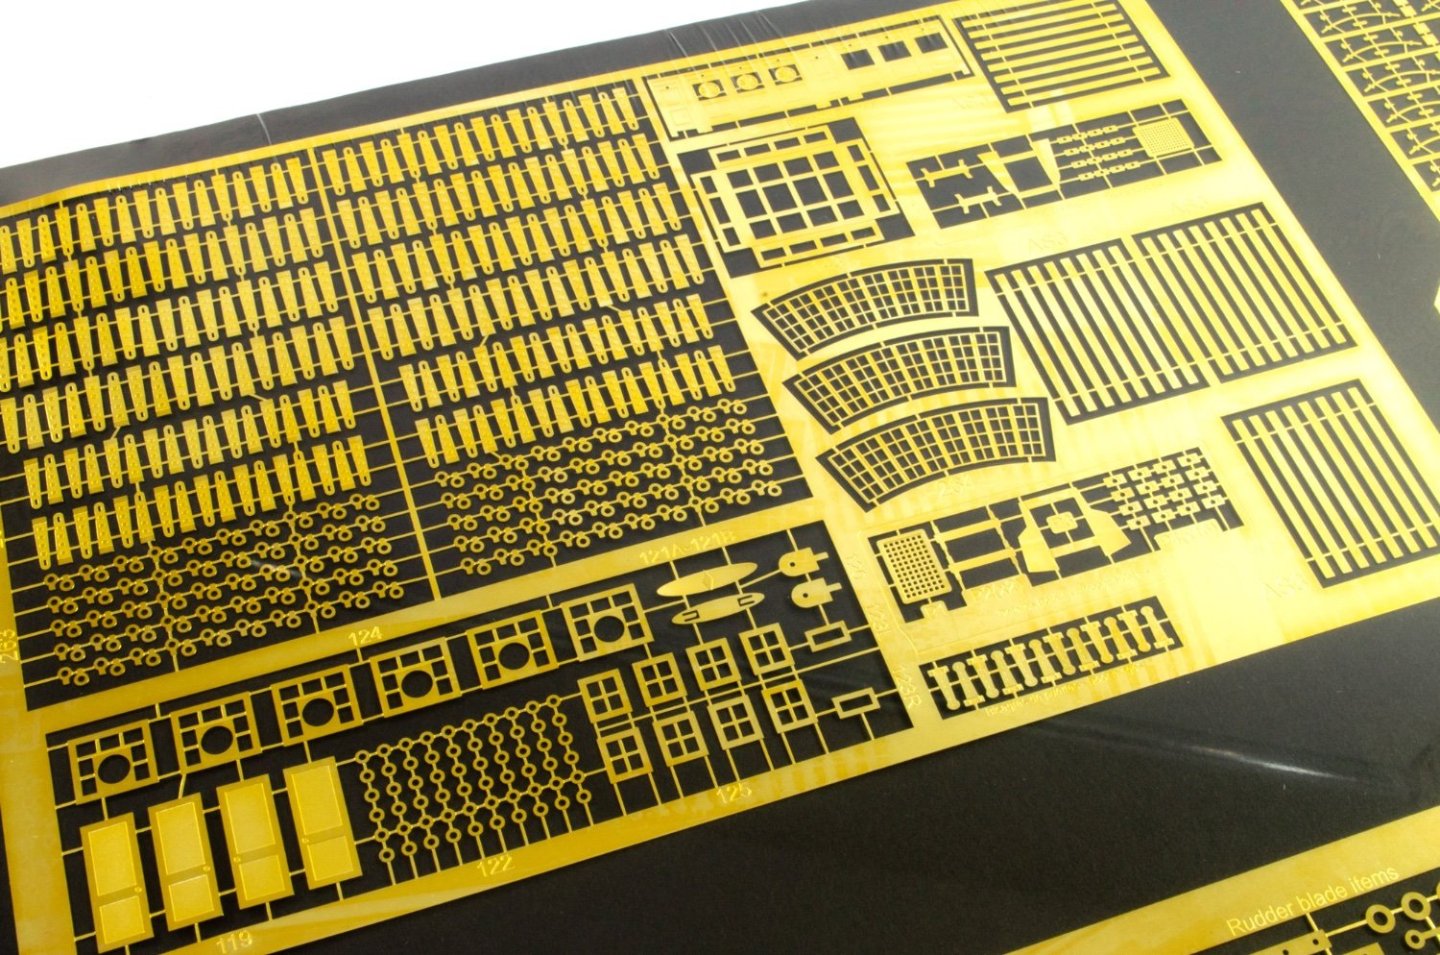
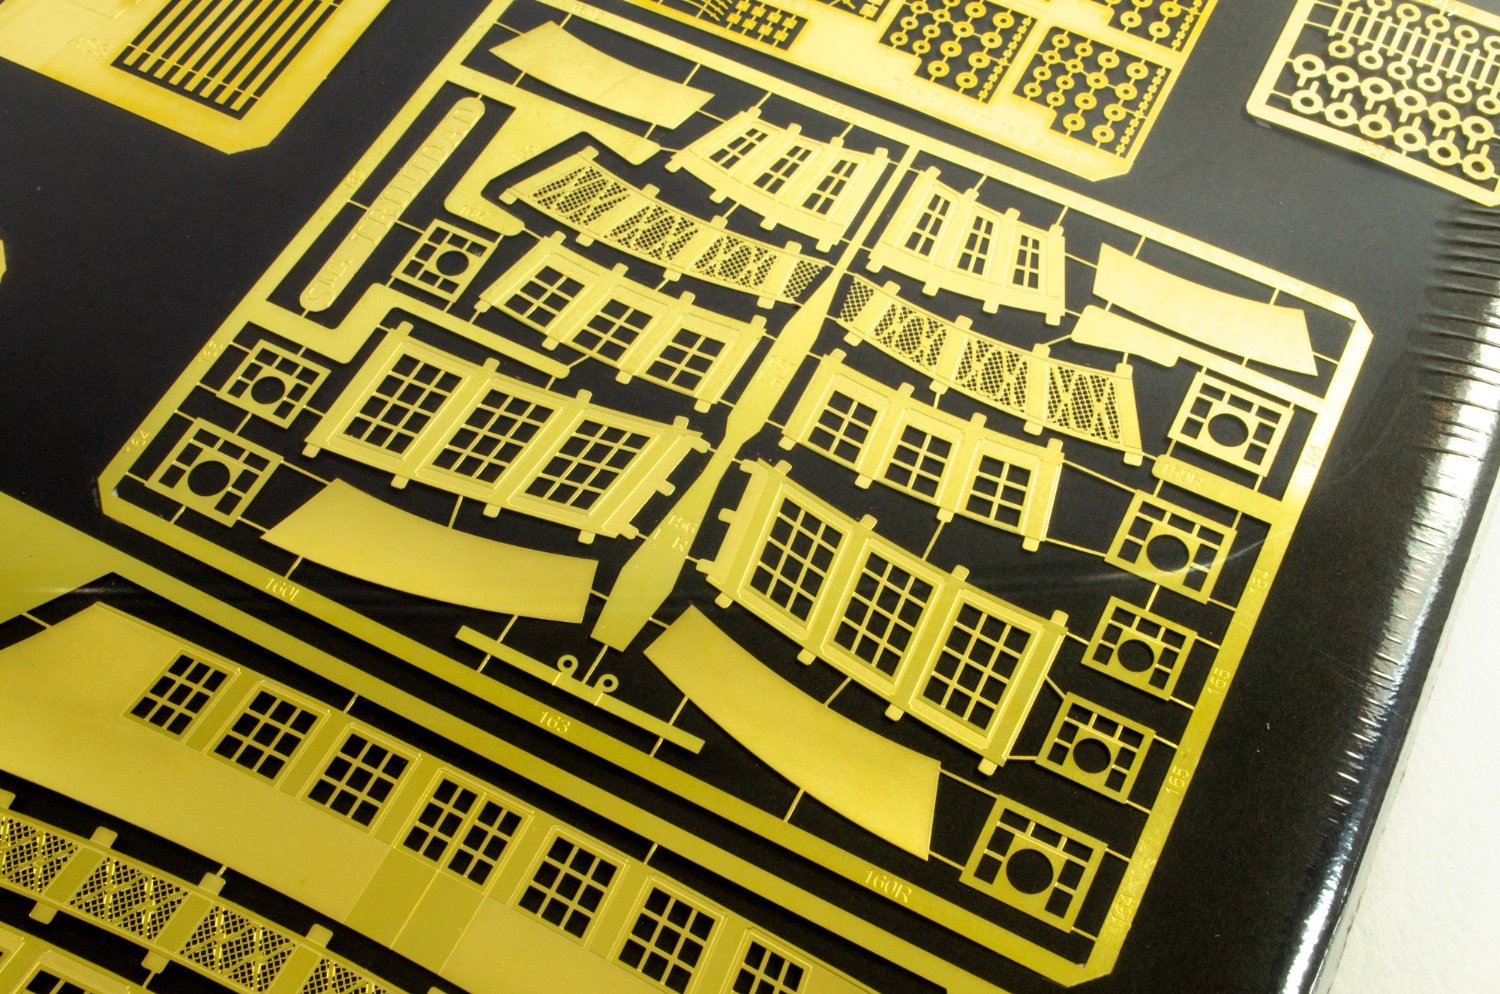
If you like photo-etch, then this kit has in in abundance. All of the SIX sheets of this is produced in brass, using multi-layer etching processes, and cellophaned to a thick card backing to protect it. You will see that a lot of the parts, certainly the larger ones, concern the stern fascias. While these are very nice, I would use them in conjunction with timber to enliven them further and produce something which looks more 3D. The same applies to the quarter galleries, but if you install the supplied materials properly, then you will still have a very nice result.

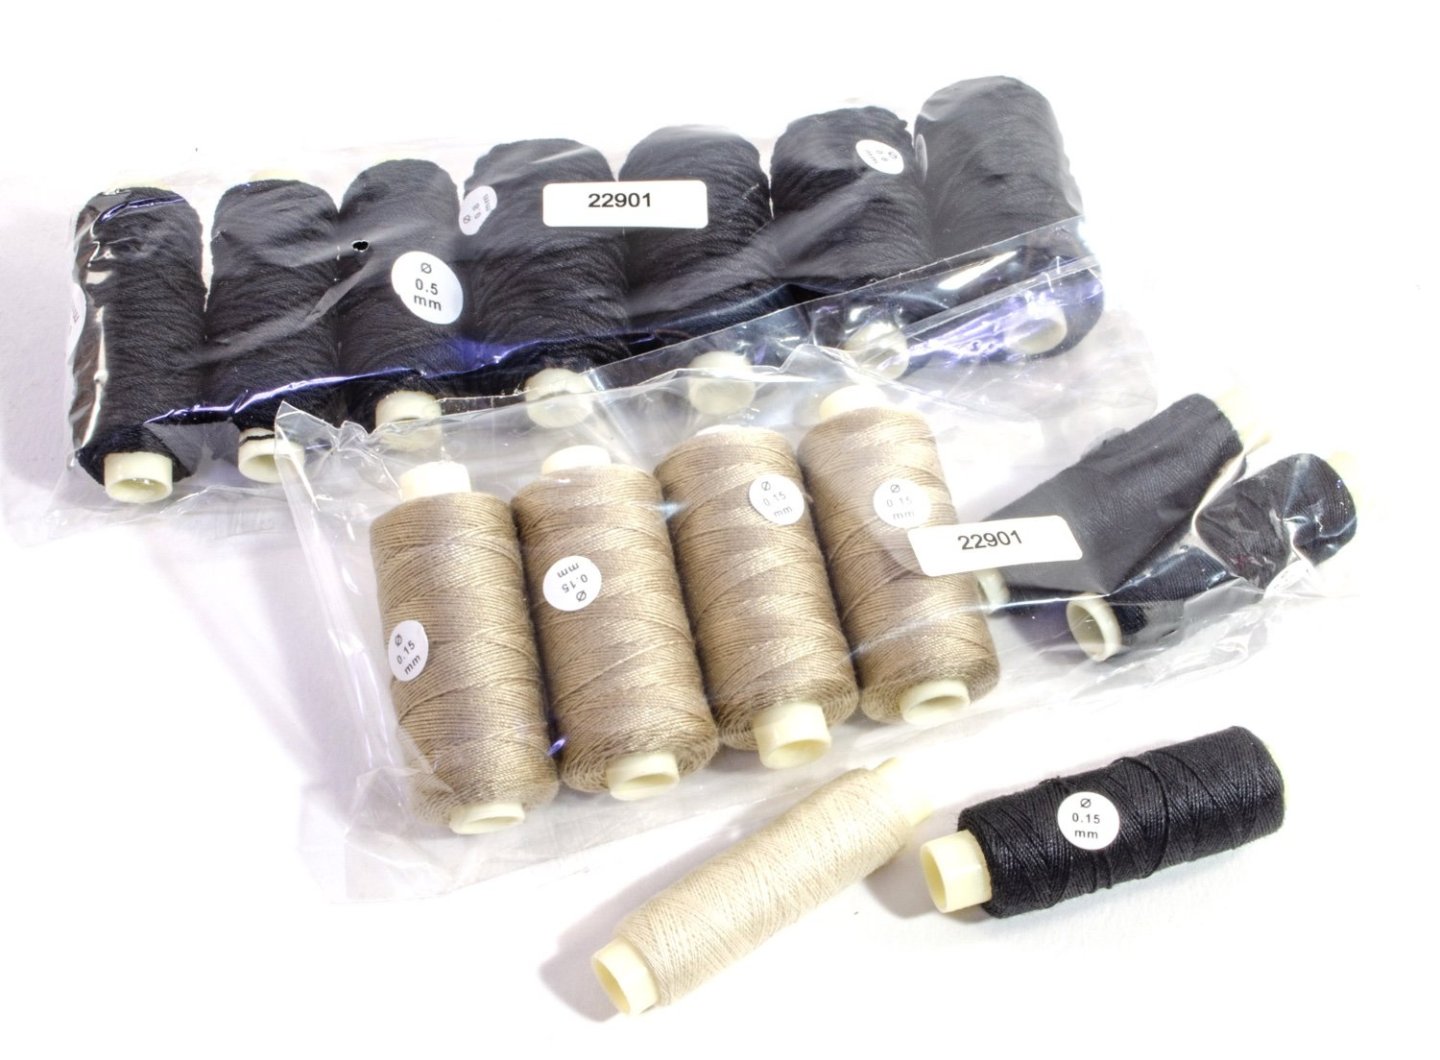
Now…rigging cord. There is quite a lot of this, as you would imagine, and generally the quality is ‘ok’. There is a small degree of fuzz on the spools I looked at, although not as bad as that of a number of other manufacturers. I would consider either replacing the rig or using one of a number of techniques to reduce the fuzz.
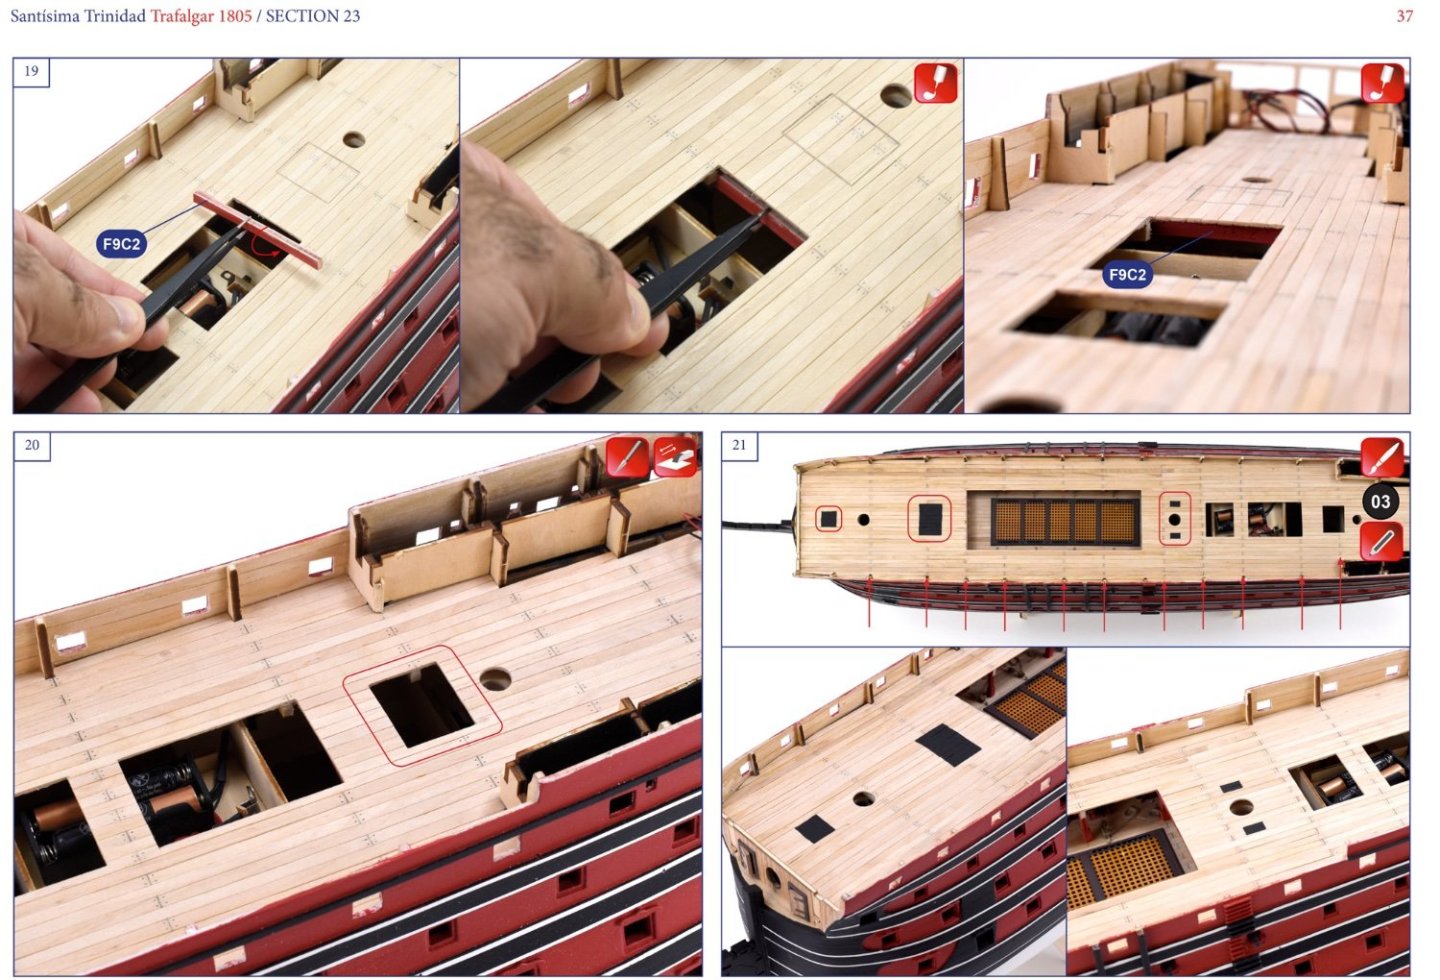
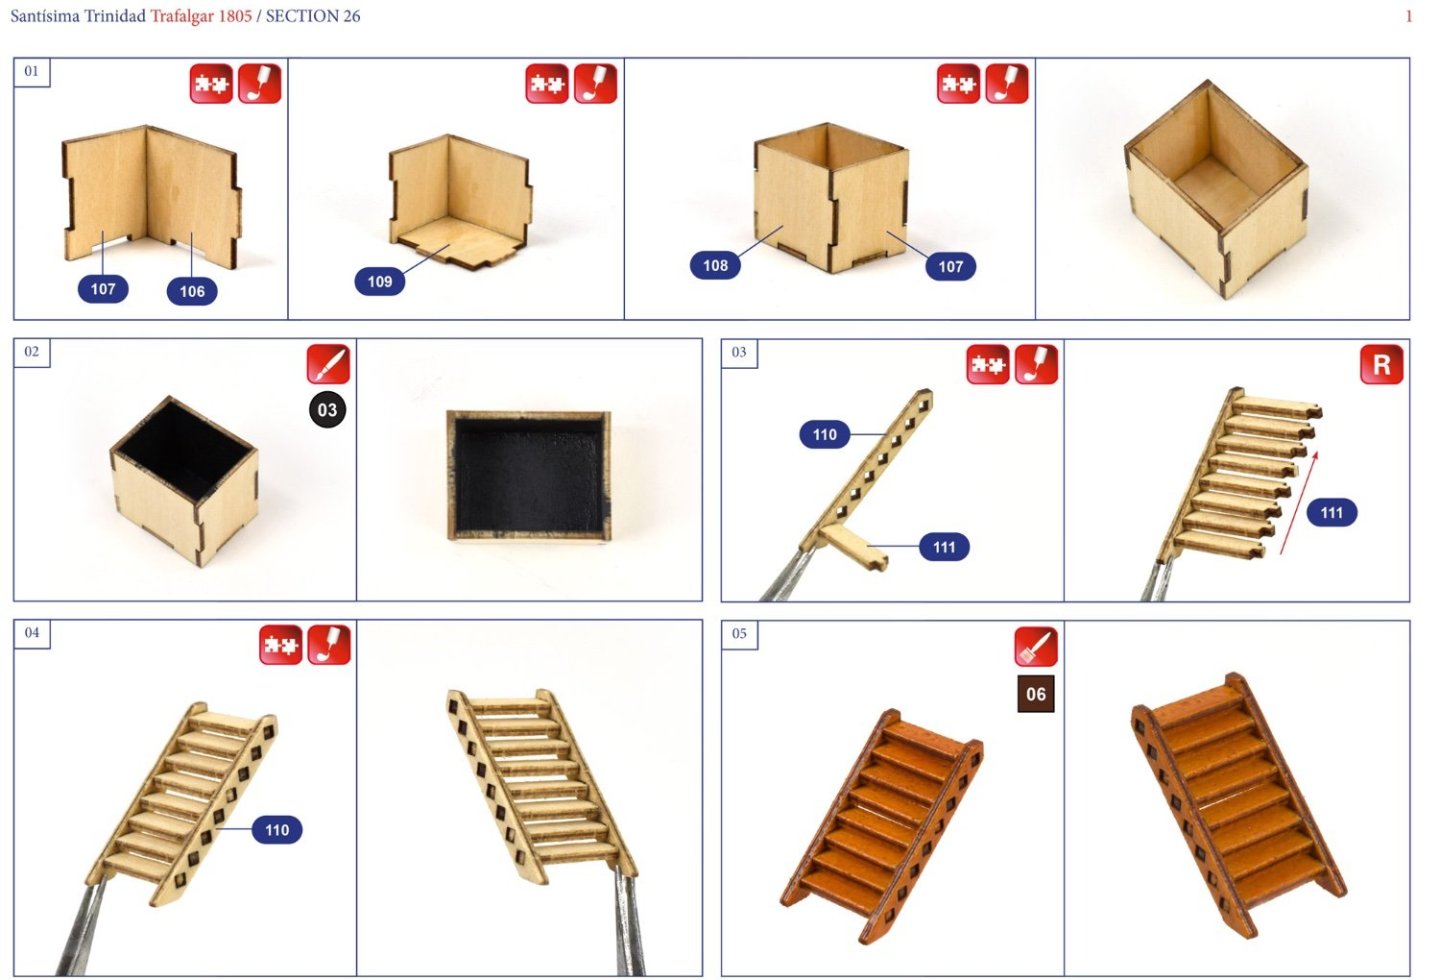
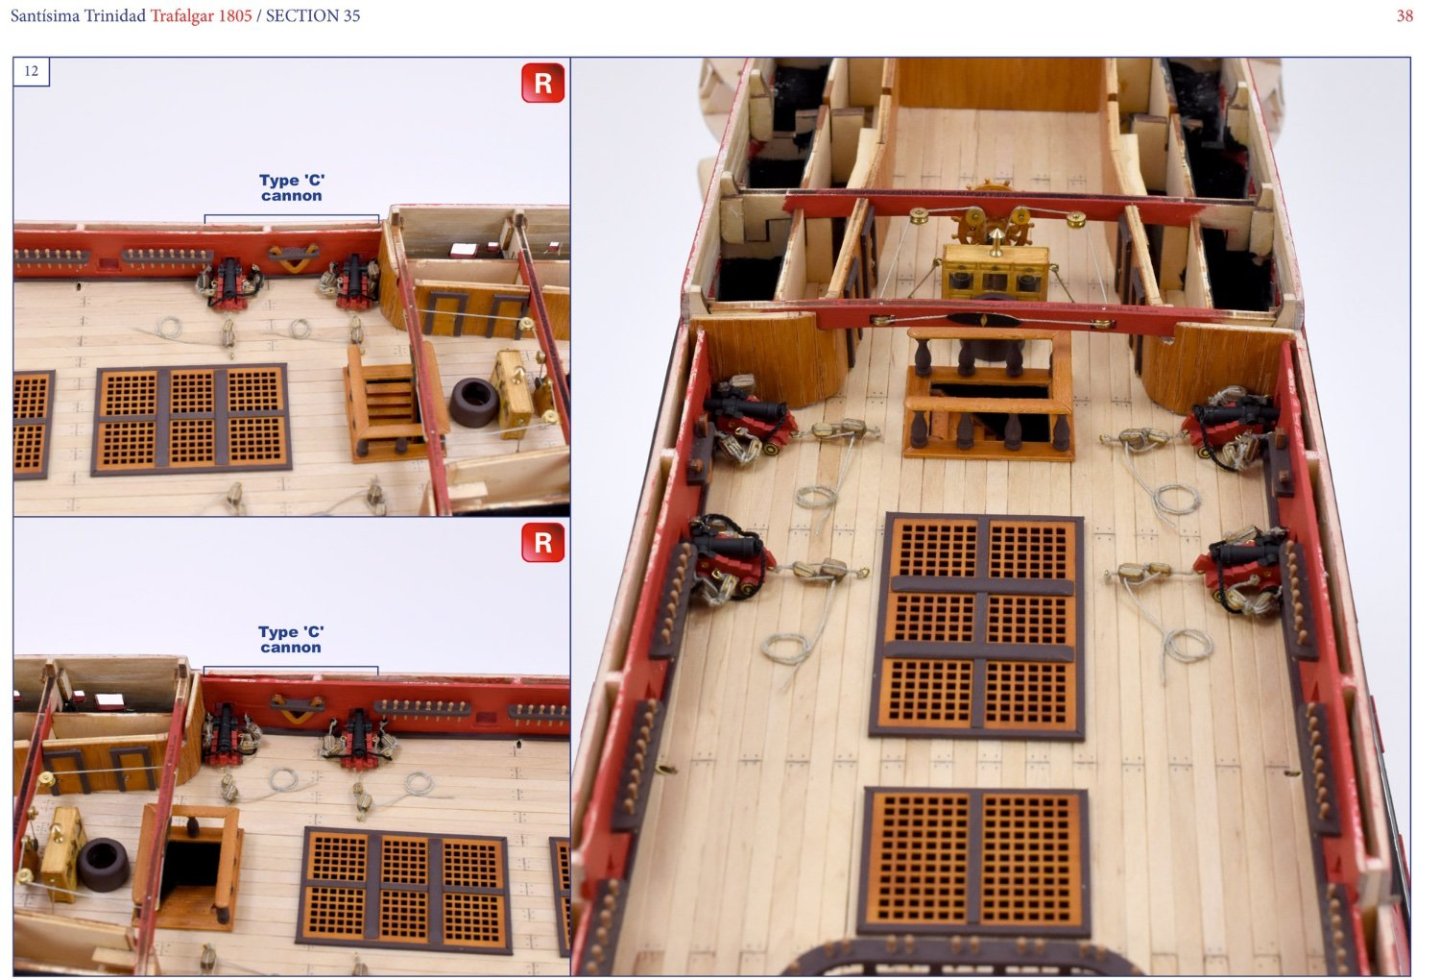
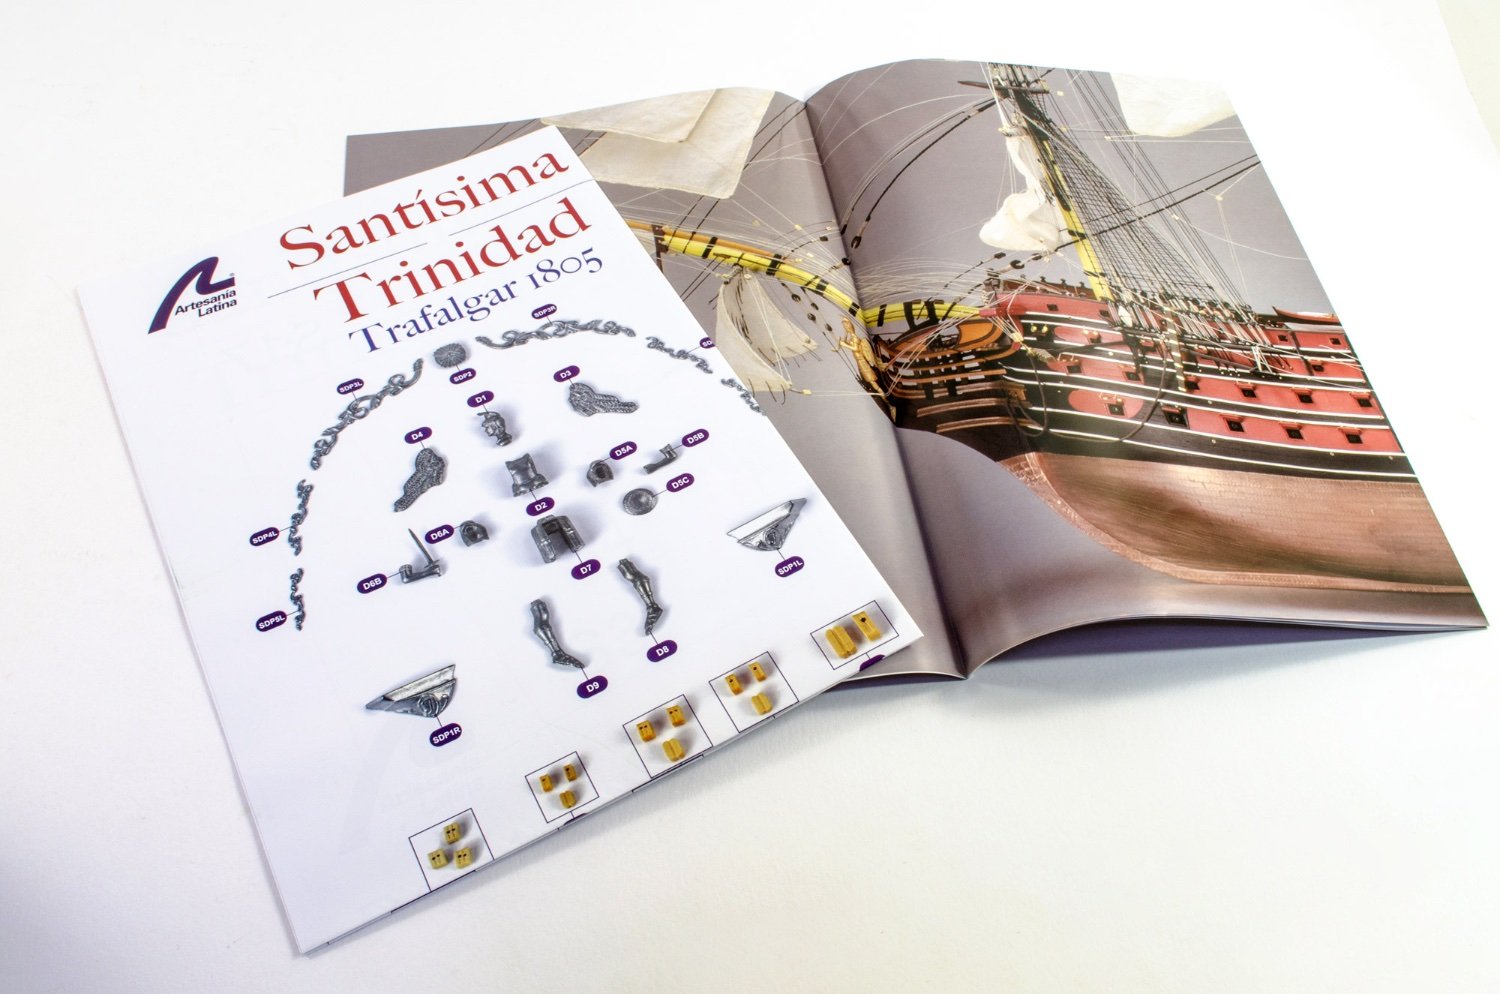
This kit supplies a few printed sheets, and what looks like a full-size colour side profile photo which will be very useful for reference. A full colour parts list and fittings sheet is also included. At this point, I have to tell you that there isn’t a printed manual. All of the instructions are available for download from the product page on Artesania’s website. There over FIFTEEN downloads too, so you’ll see why this isn’t included in print. Ideally, you could do with a laptop or tablet in the workshop and access the instructions from there. The instructions are graphically driven, and the sheer number of photos is astounding. Around 8000 photos are included, over 800 pages. I know Chris would kill me if I submitted that number for his kits! Everything looks extremely easy to understand with just about every angle of the build covered, multiple times. I’ve included a few photos from the various instruction downloads. If you head to Artesania’s YouTube page, you will also find a number of tutorial videos for this specific kit.


Conclusion
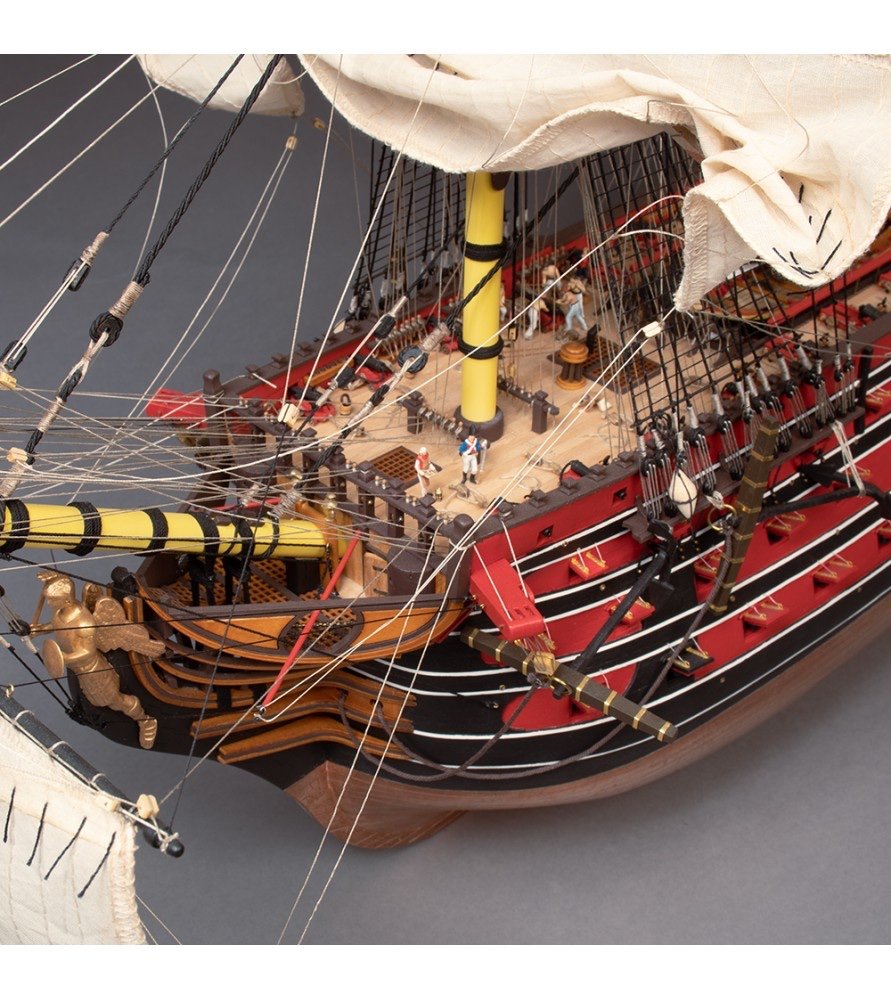
While I’ve seen numerous unboxings of some of Artesania’s recent large kit releases, this is the first time I’ve seen one for myself. Construction is generally quite different to what you’d expect with regards to bulkheads and hull skeleton construction. I’m not at all averse to this methodology at all. In some respects, it seems almost modular, and highly unconventional. It does appear to work well for the builder, having researched a number of online builds. I still have to get my head around a single-planked hull. It’s something I need to try and align with as I do intend to build this in the future. The hull is fully painted/coppered, so there is a lot of flexibility with the underlying timber if you need to fill and cut back…albeit carefully. You most certainly will need to be more careful than you perhaps would normally be on your lime planking. I know I’ve certainly improved in that area over the years, and you’re best employing a good method of tapering, such as the one that many use here…Chuck’s method.Another unusual element here is that ‘missing’ manual I mentioned. There is a QR code that you can scan which will take you to the product page on the AL website. Here you can download the manual directly. If you like a printed manual, you’re going to need some serious ink to print this. I know this aspect can be difficult for those that like a manual supplied, as is traditional.
In all, this is a kit I actually quite like, and I know Artesania are proud of their products. I’ve been discussing their products with them over the years, and this is one they are excited about. As far as price point is concerned, I think this is pitched correctly, considering the size of the overall model and the quality of materials supplied. Another contemporary manufacturer has released a limited-edition kit which is twice this price, and around the same scale, and slightly smaller. In comparison to that, minus the other kit’s gimmicks, this kit still stands head and shoulders above that with regards to quality and value for money. I’ve often said that I have a fondness for AL kits as that is how I started in the hobby, but I wouldn’t steer you wrong. This is a very nice kit; with the caveats and things I’ve mentioned. If you have the skills to build an intermediate to advanced kit, this is definitely one to consider.
My sincere thanks to Artesania Latina for the kit you see reviewed here on Model Ship World. To buy directly, click the link at the top of the article.

Related Products
Before I mention these, Artesania have also designed this model so that the grand cabin can be illuminated. Installation of the specific AL set is shown within the many photographs for this kit. The lighting set can be bought from AL for €24.99, here.Ok, I have been sent two additional sets that are designed to be used with this kit. These are a figure set (to add to the small number included within the kit) and a paint set.
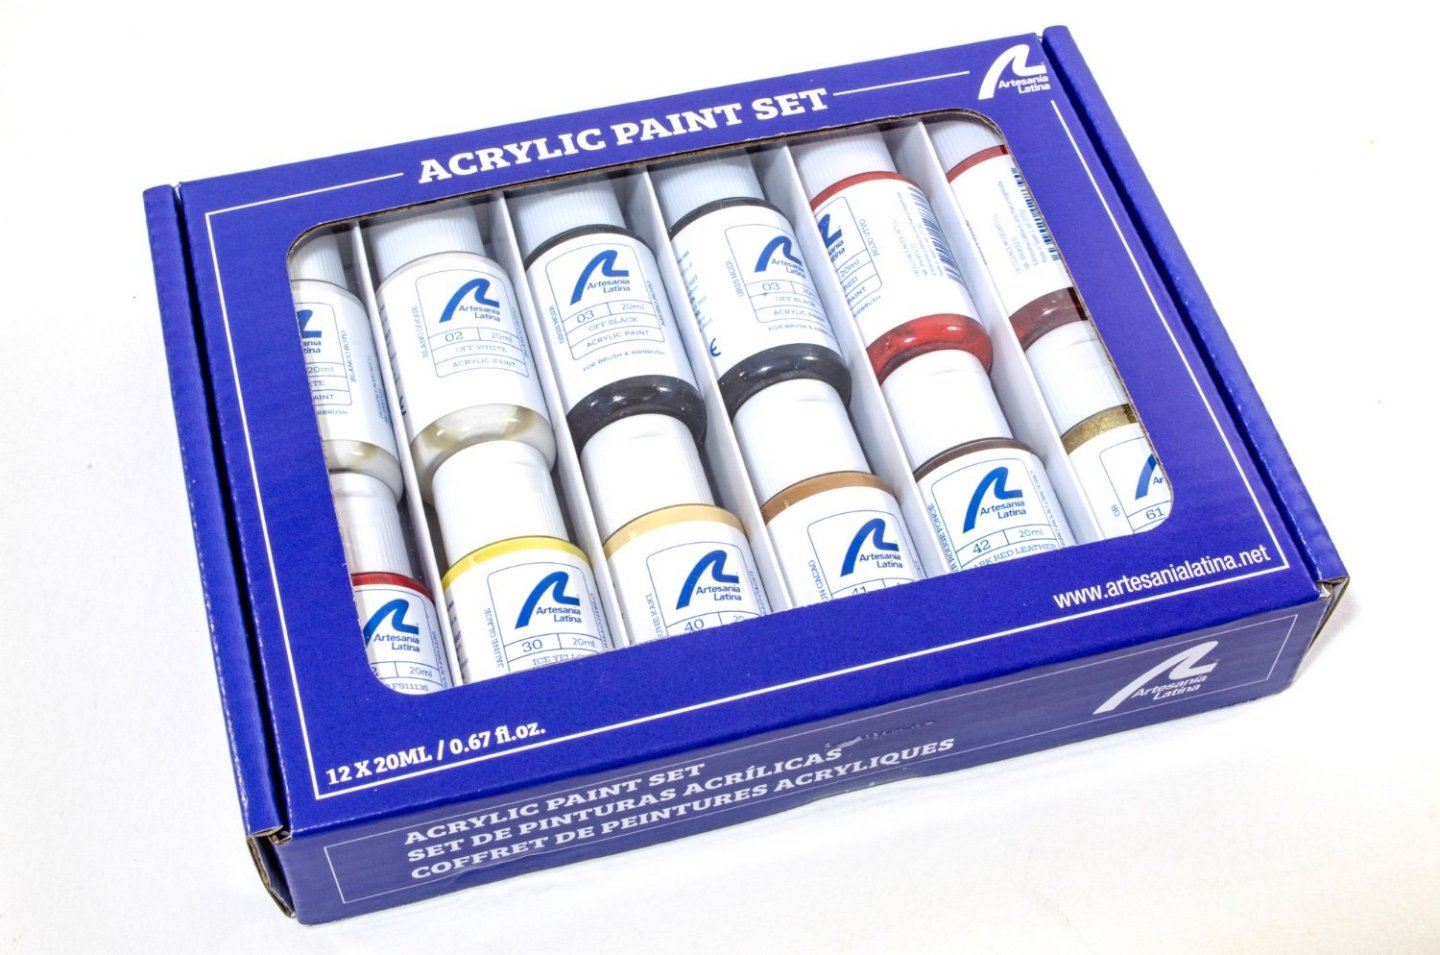
The paint set, which is available here for €31.99, includes TWELVE 20ml bottles of acrylic paint. These paints can be applied with a brush or thinned for use in an airbrush. The website says they can be thinned with alcohol or thinner. From this, I presume you can use either isopropyl (rubbing) alcohol, or possibly something like Tamiya X20A. For the latter, do a small test to make sure the paint doesn’t congeal. The paints in this set are:
· Off White x 2
· Off Black x 2
· Bright Red x 1
· Red x 2
· Ice Yellow x 1
· Buff x 1
· Cocoa Brown x 1
· Dark Red Leather x 1
· Gold x 1

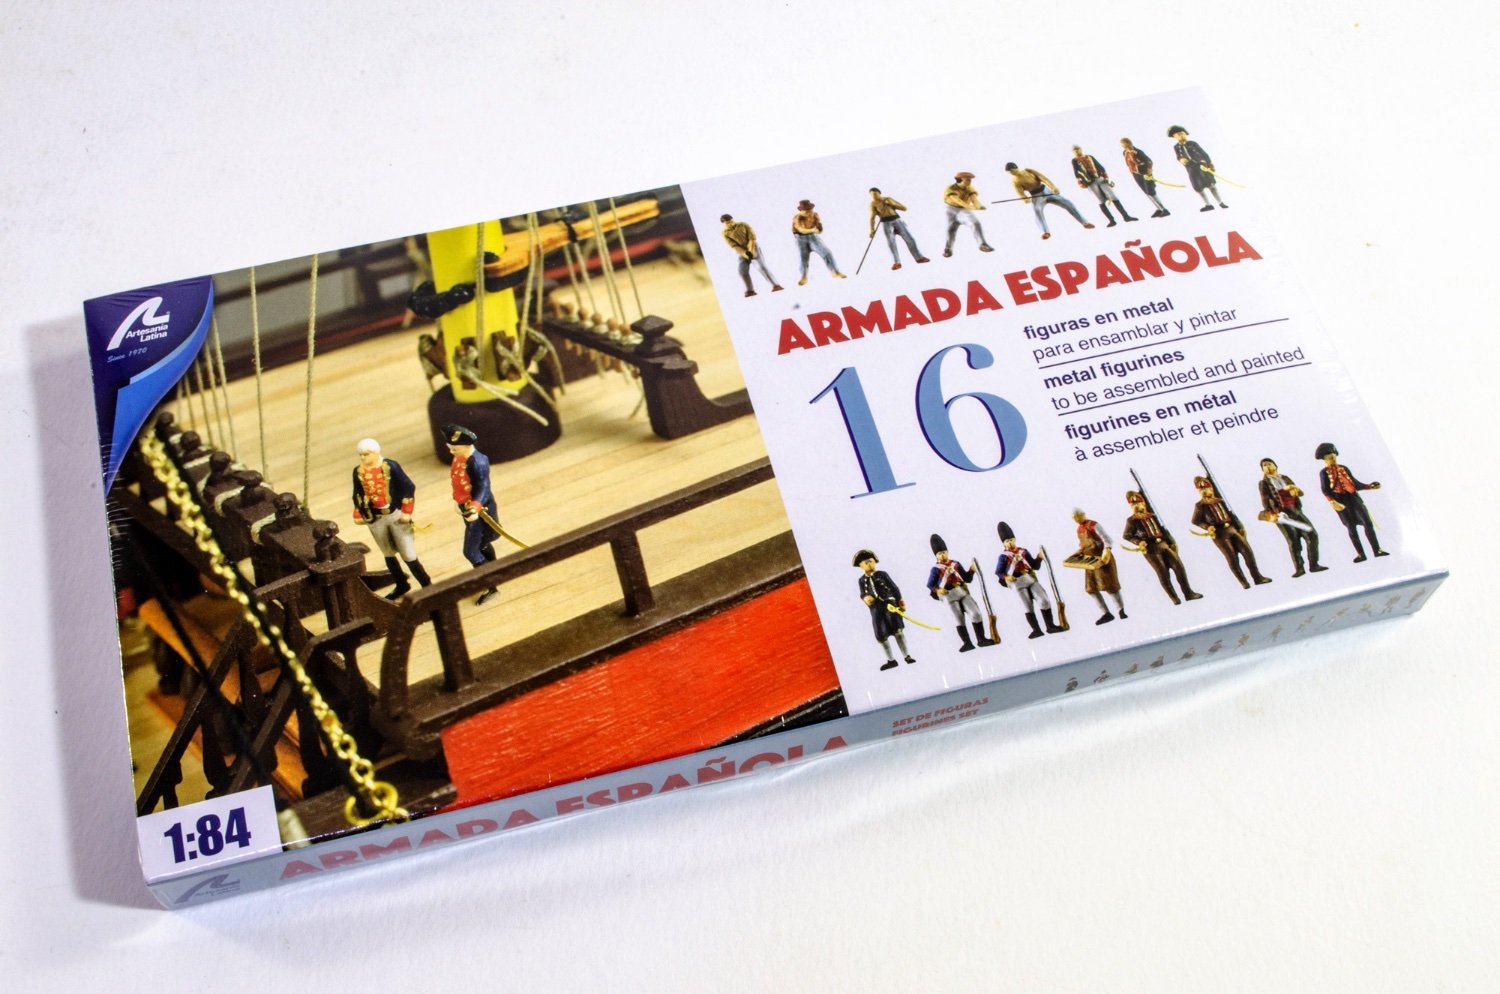
The Figure set I have for this release, can be bought here for €29.99. This set consists of SIXTEEN figures and accessories which are period-correct. The figures appear to be cast in zinc alloy and look quite nice for this scale. Included in this kit are:
· Captain x 1
· Officers x 4
· Surgeon x 1
· Marines x 2
· Grenadiers x 2
· Gun Crew x 5
· Sailor x 1
Also included are accessories, such as sabres, gun crew tools, ammunition etc.


-
Please read topics in this area about that issue, before starting yet another topic asking the same question.
- mtaylor and Ryland Craze
-
2
-
This morning I've awoken to a good number of members asking about accessing various Shore Leave topics.
All of those members used the Contact Us form at the bottom of the page...y'know, the one that says to use only if you have login problems.
Please DO NOT use that form for questions relating to the forum. Try checking in other areas of the site you may not have ventured into for eons, such as this area. Continued misuse of that form will see it being barred from the use of individuals.
-
8 minutes ago, allanyed said:
but why is there still a Non-Ship build forum
Simply because we understand that some modellers also want to post side projects, other than ships.
That area should have the same rules for posting within as the ship build logs. It's not a general chit chat place.
-
I think what we need to understand here is that the shortcomings of this kit are clear to see, but we will see it tackled 'as is', or with any improvements that the builder may choose to introduce. Ultimately, it's the satisfaction of the builder that counts. I'll certainly be following the build.
-
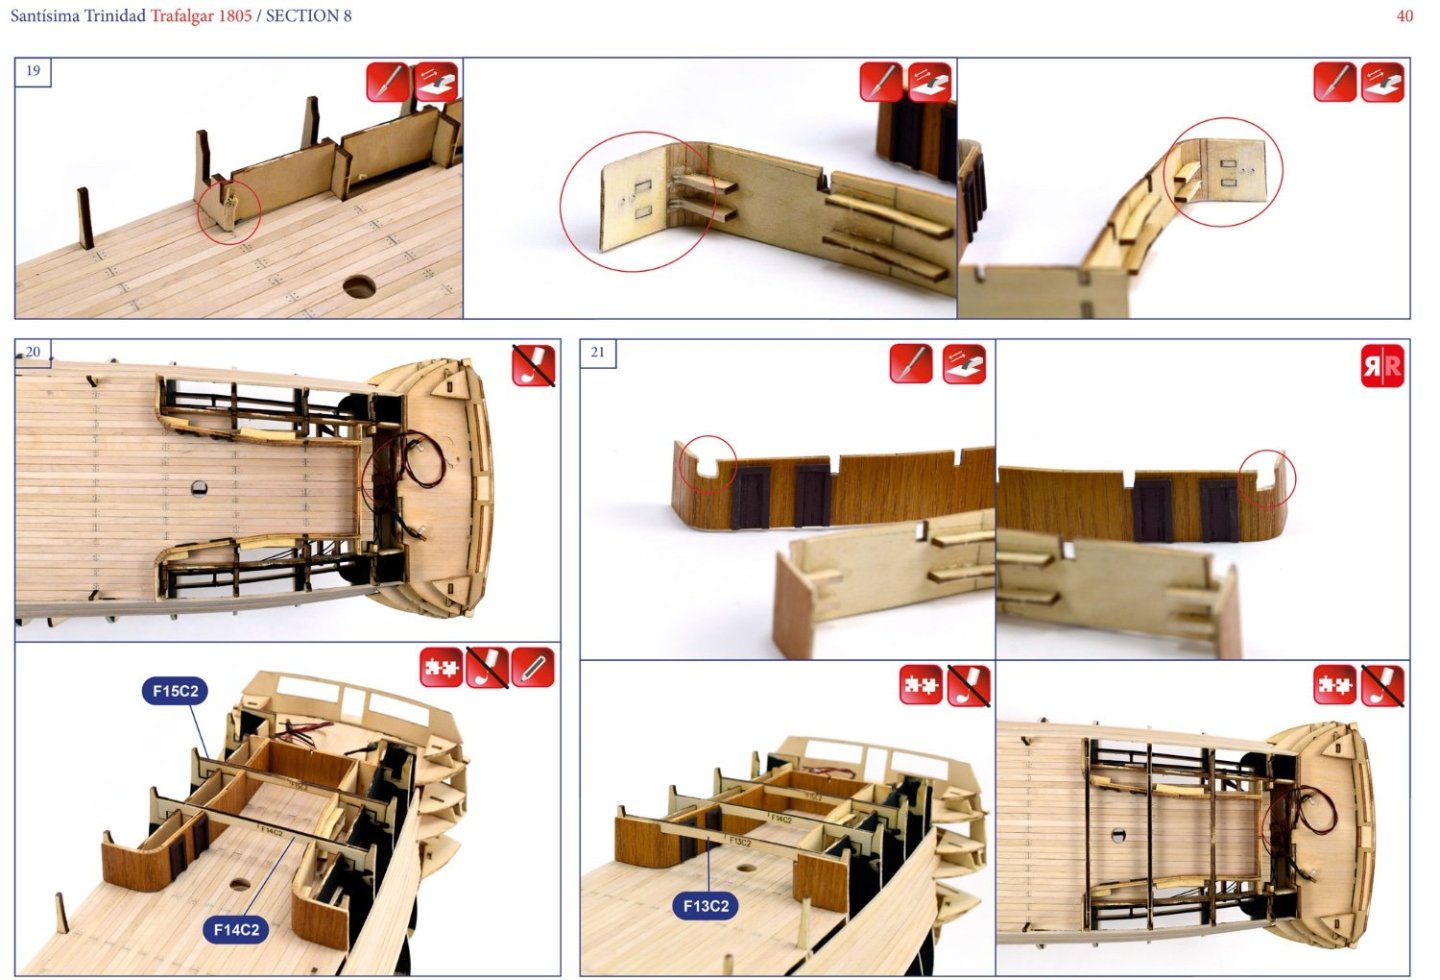
On the prototype, I totally removed the 'base' of that part, maintaining the depth of the part. I then fastened it to the model and used white, fine grain Milliput to fashion a new base to match the profile of the underside of quarter gallery.
- Blue Ensign, CiscoH, jpalmer1970 and 5 others
-
8
-
8 hours ago, hof00 said:
Hi All,
Still slow.... Esp. when subject post selected has photos.
Text content, no problem.
Other sites seem fine.
(Maybe something with comms from the Antipodes?)
Ping varies 124 - 137ms No packet loss.
Cheers....HOF.
Instances of slow speed seem to generate in the Antipodes, so likely a routing/traffic issue.
-
-
-
-
-
MSW is accessed through a proxy. When you ping MSW, you're actually pinging our proxy. All traffic here is routed through that.
It is very possible that our proxy could have been slow, or your route to MSW was slow. For me, I've not noticed any difference in access time, but I'm in the Uk and not Aus.
- Ryland Craze and mtaylor
-
2
-
That's not too shabby at all. And of course, you can just paint the hulls as you're doing.
- chris watton, mtaylor, Kevin and 3 others
-
6
-
On 9/15/2023 at 12:15 PM, Artesania Latina said:
Dear friends,
We're happy to announce we have some important news today!
We're releasing a 100% new Santisima Trinidad model, with the configuration and appearance it had at Trafalgar. You can discover this astonishing new model, faithfully reproduced, at last, here:
I'm very pleased to say that Artesania Latina have been kind enough to offer me a sample of this new release for review on MSW, and I look forward to taking a close look at it.
- Kusawa2000, Gord-Canada, mugje and 6 others
-
9
-
That's a beautiful transition at the stern planking.
- mtaylor, Thukydides, Theodosius and 2 others
-
4
-
 1
1
-
-
-
I built the Mantua kit about 20yrs ago and thought it was pretty good.
But that was a long time ago. I also installed a low voltage fluorescent tube inside to light up the portholes, windows and the glass ceiling for the Grand Staircase.
- Canute, chris watton and mtaylor
-
3
-
Looking sweet, and that's a lovely copper job, even if the rudder took an age!
- Ryland Craze, Kevin and mtaylor
-
3
-
That is so nice, and good to see it with different colours too.
- mtaylor and modeller_masa
-
1
-
1
-
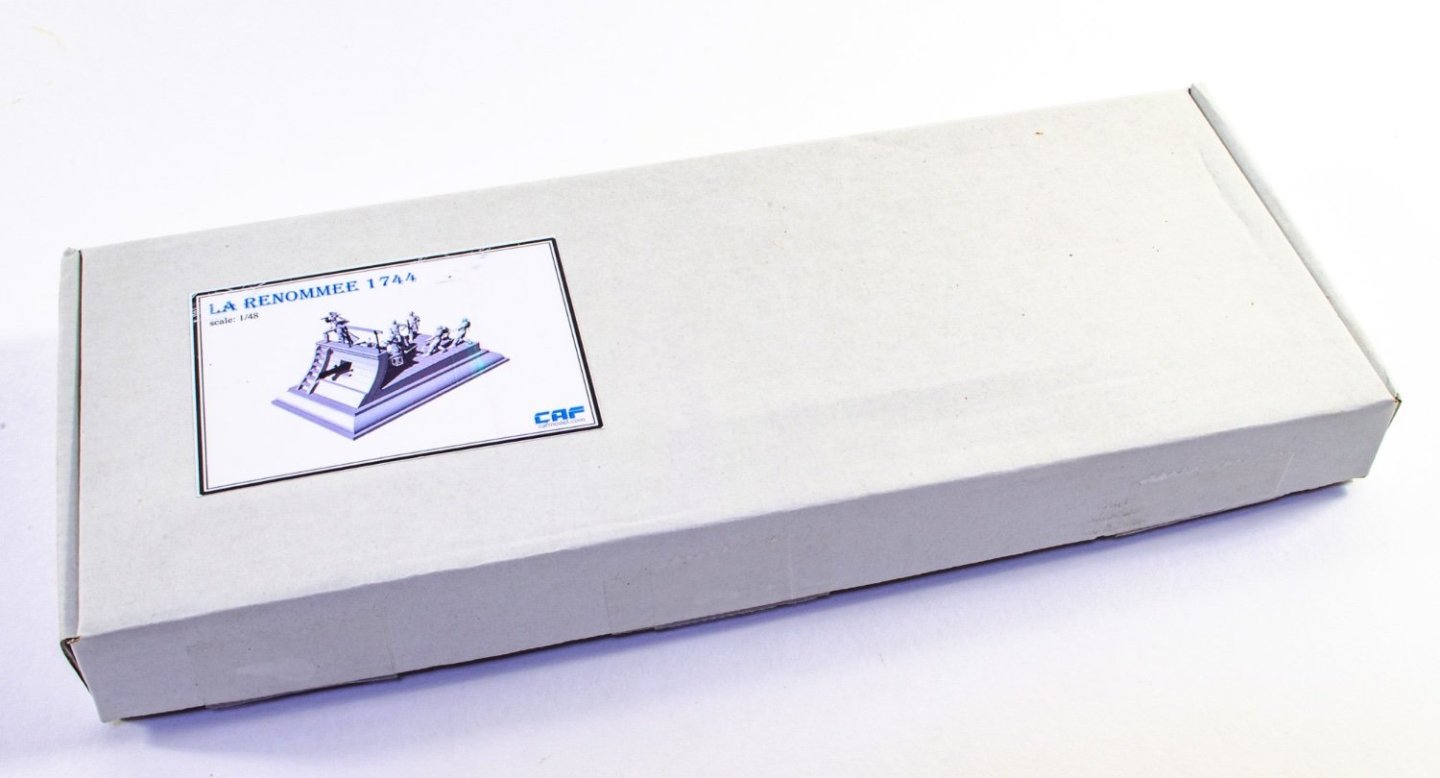
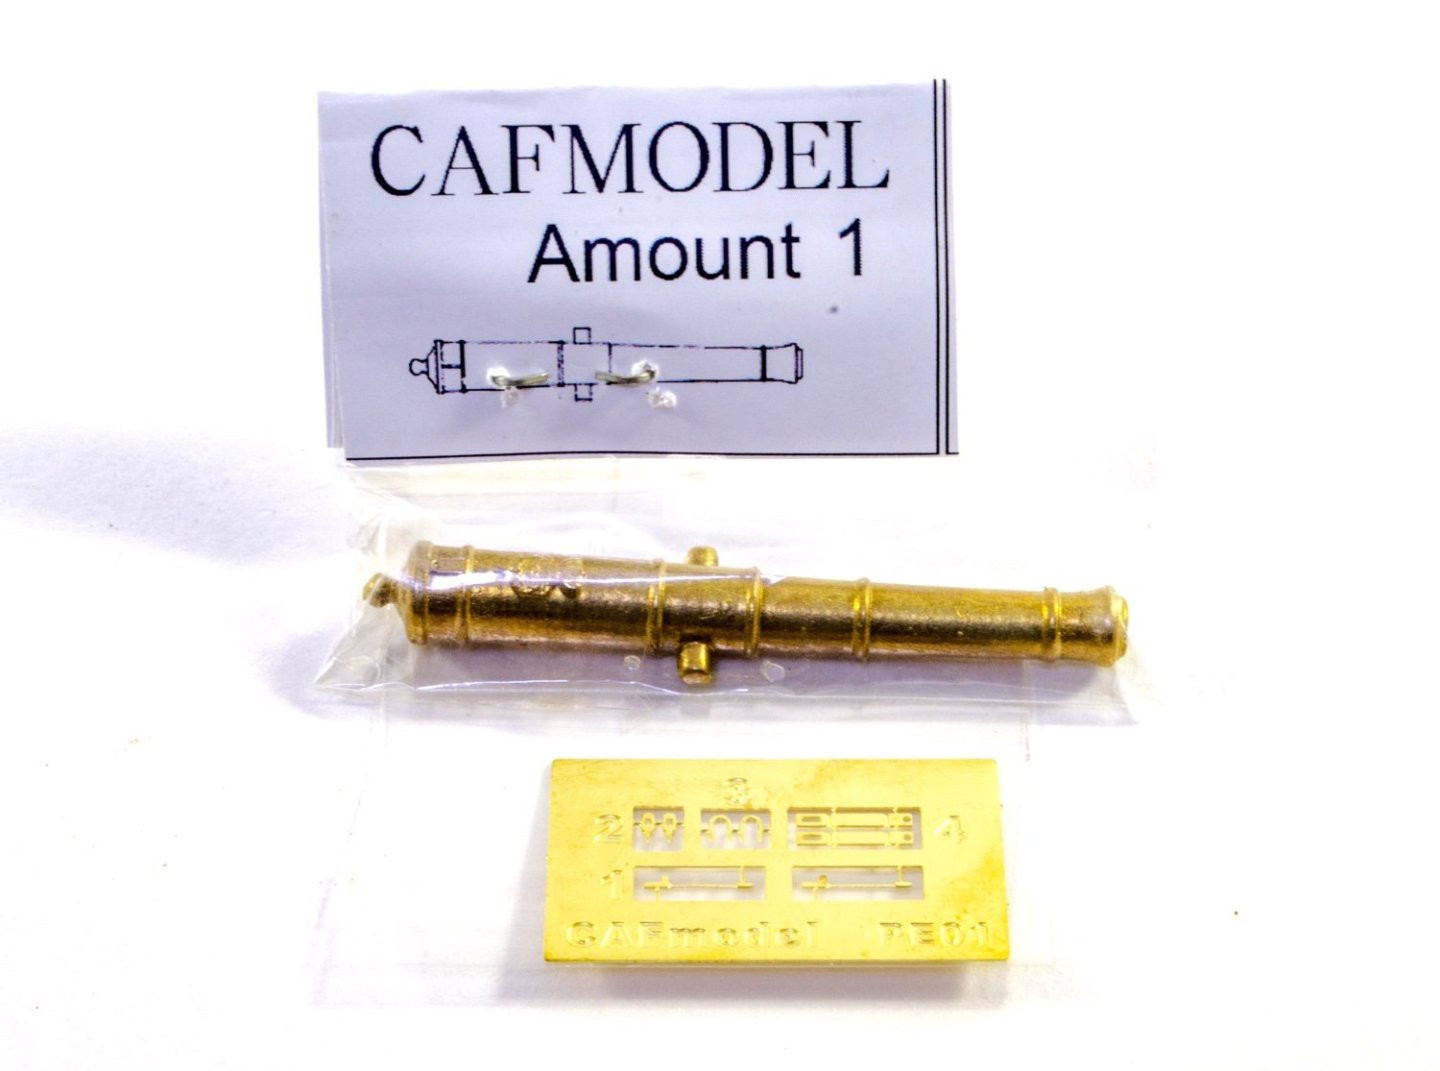
1:48 La Renommée section - CAF Model
Available for $79.00 from CAF Model
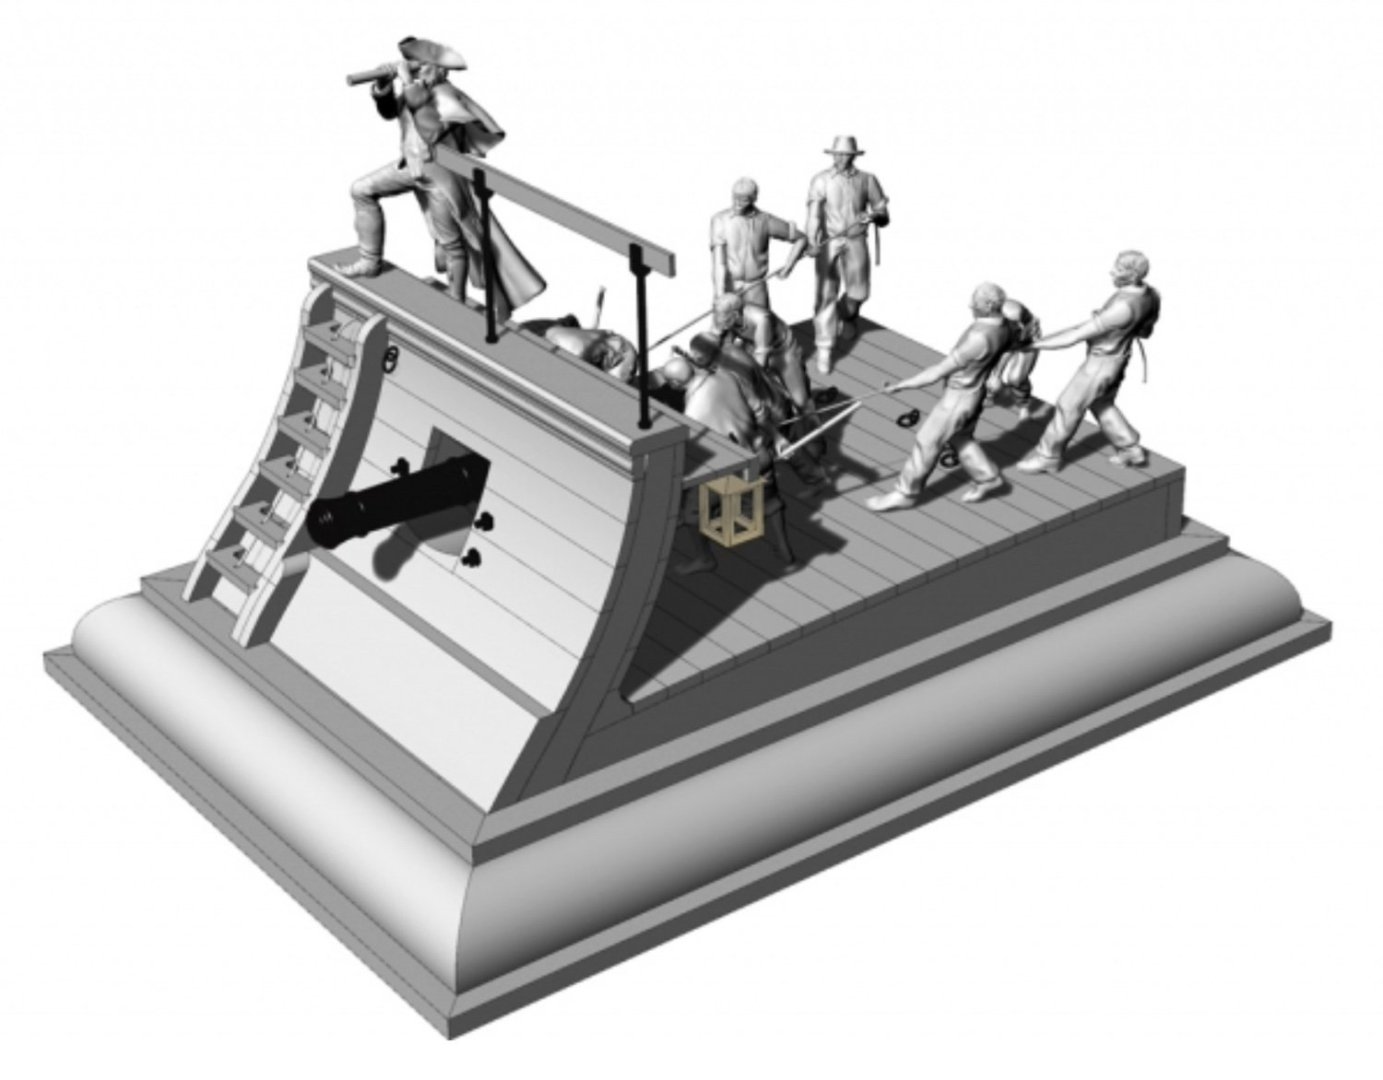
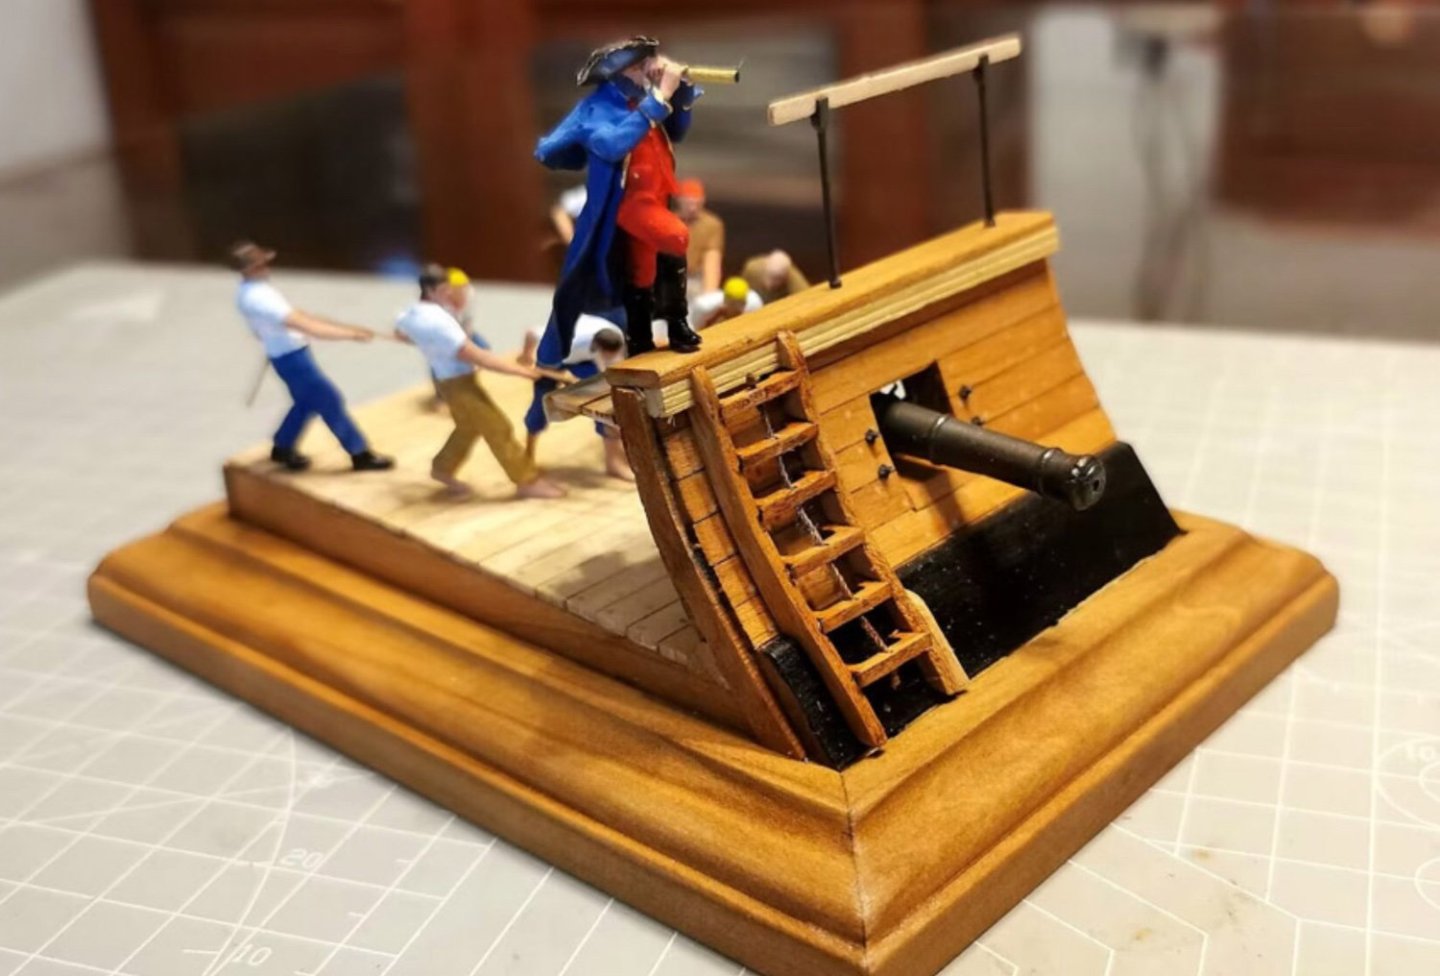
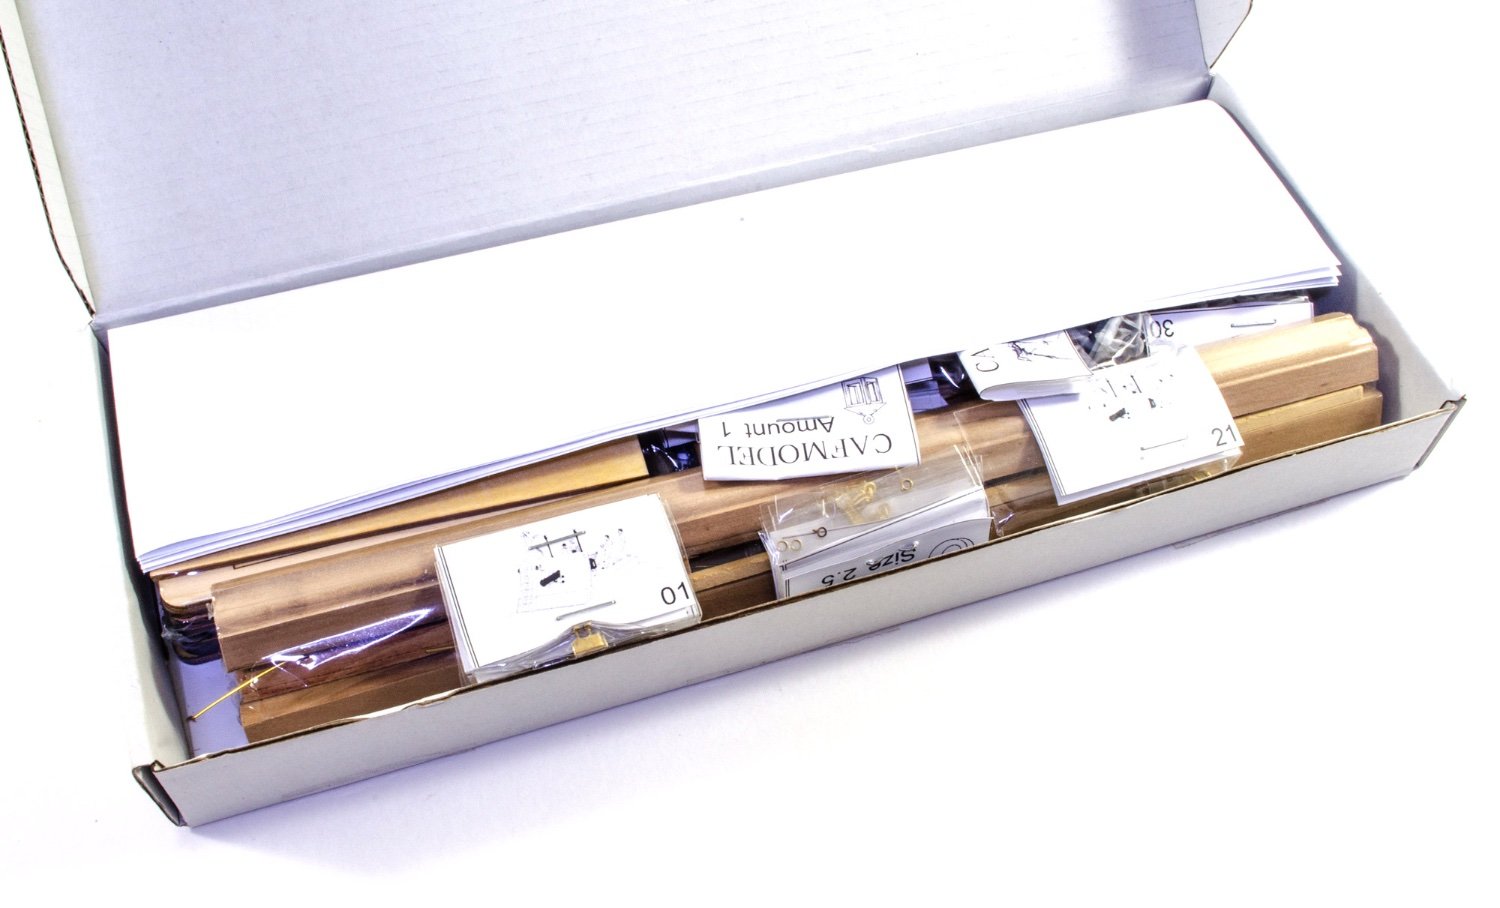
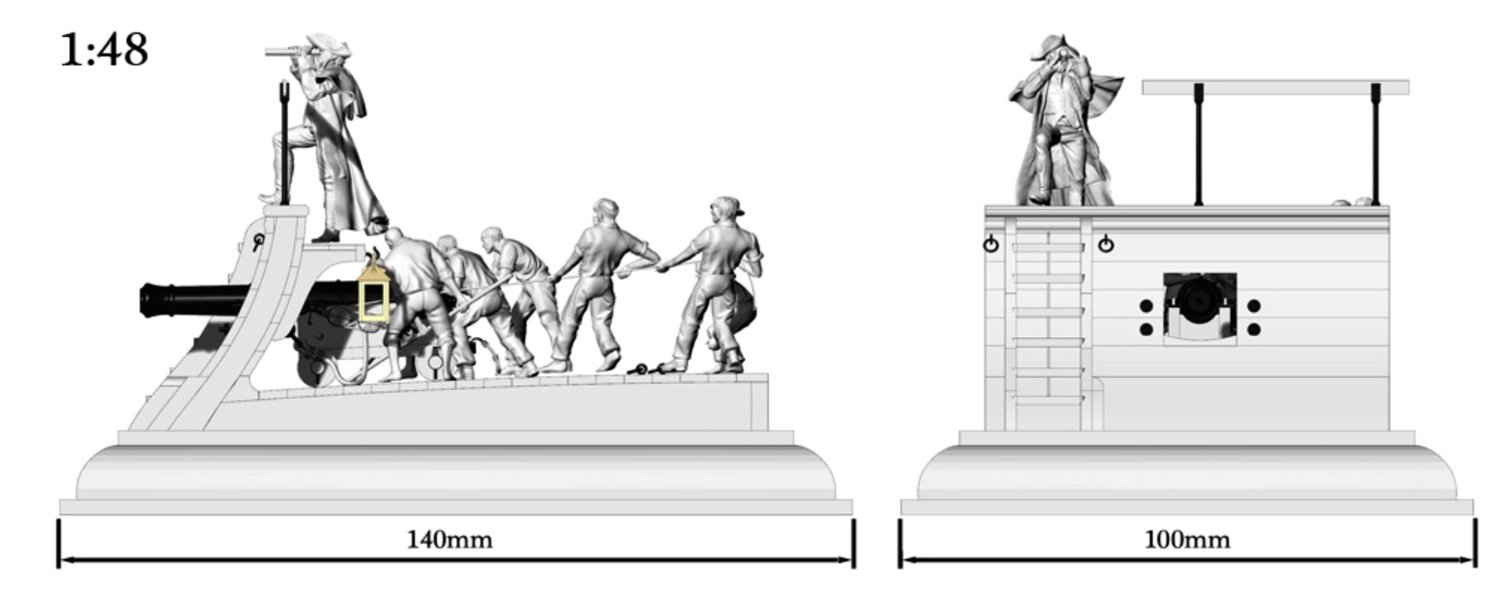
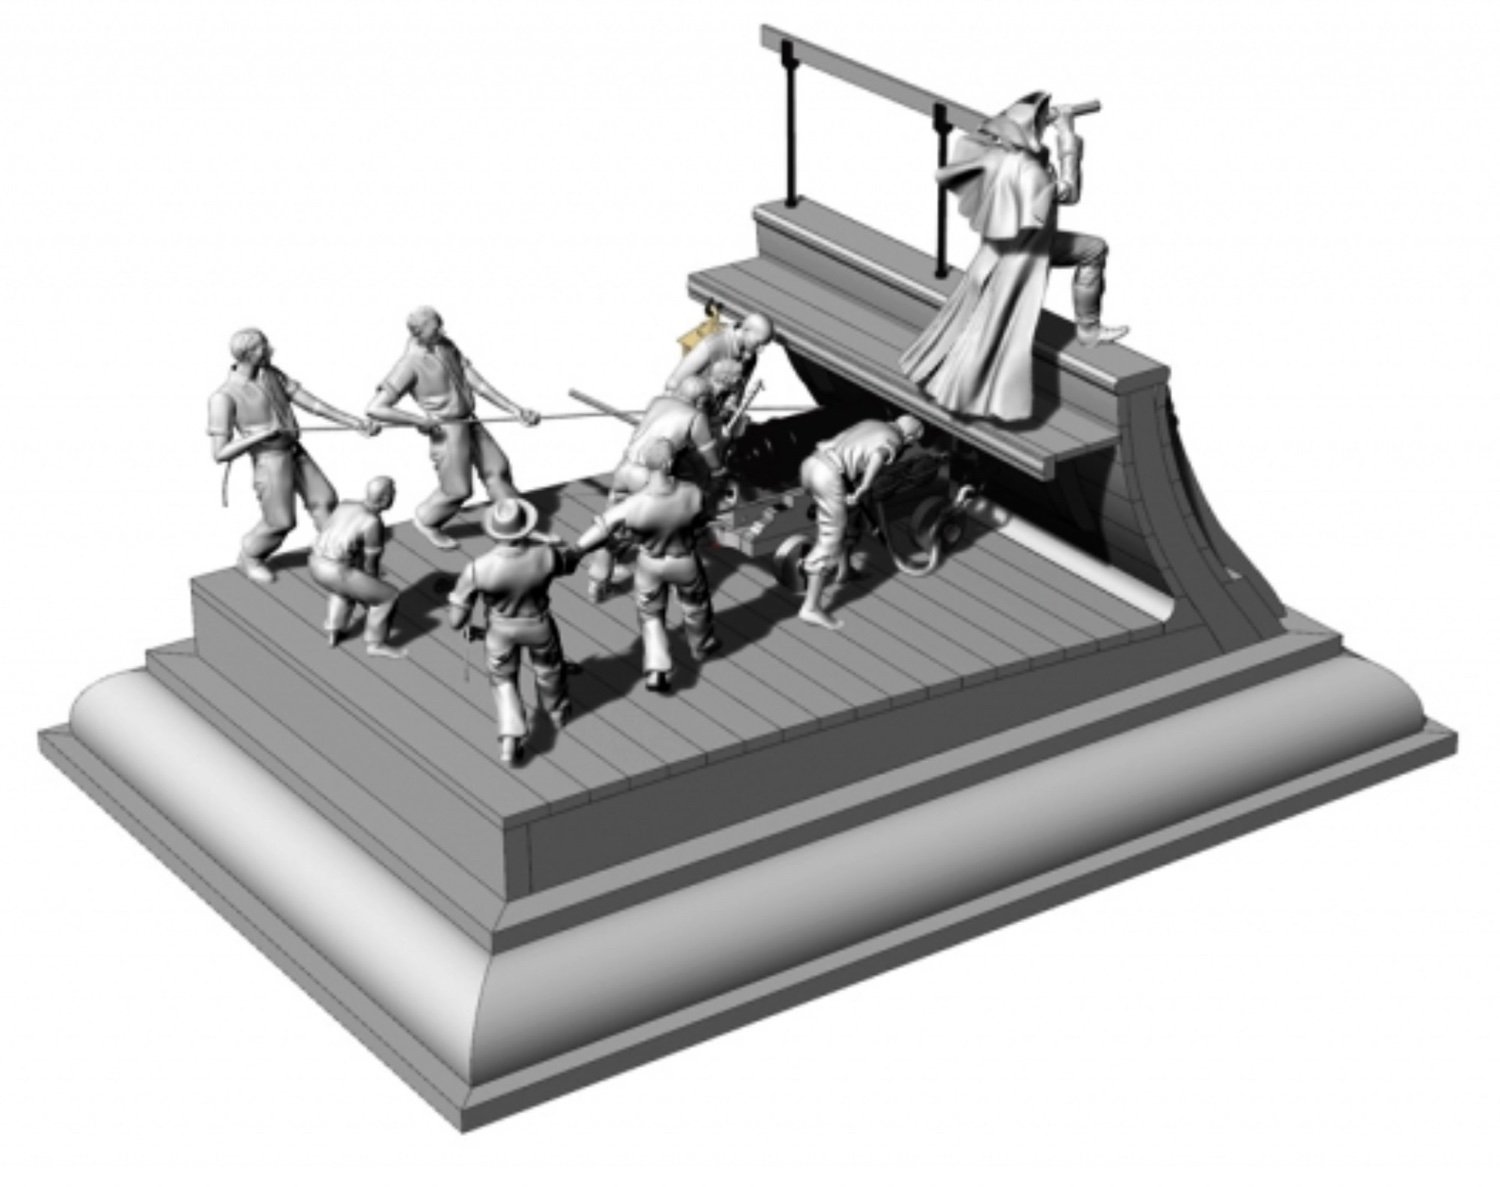
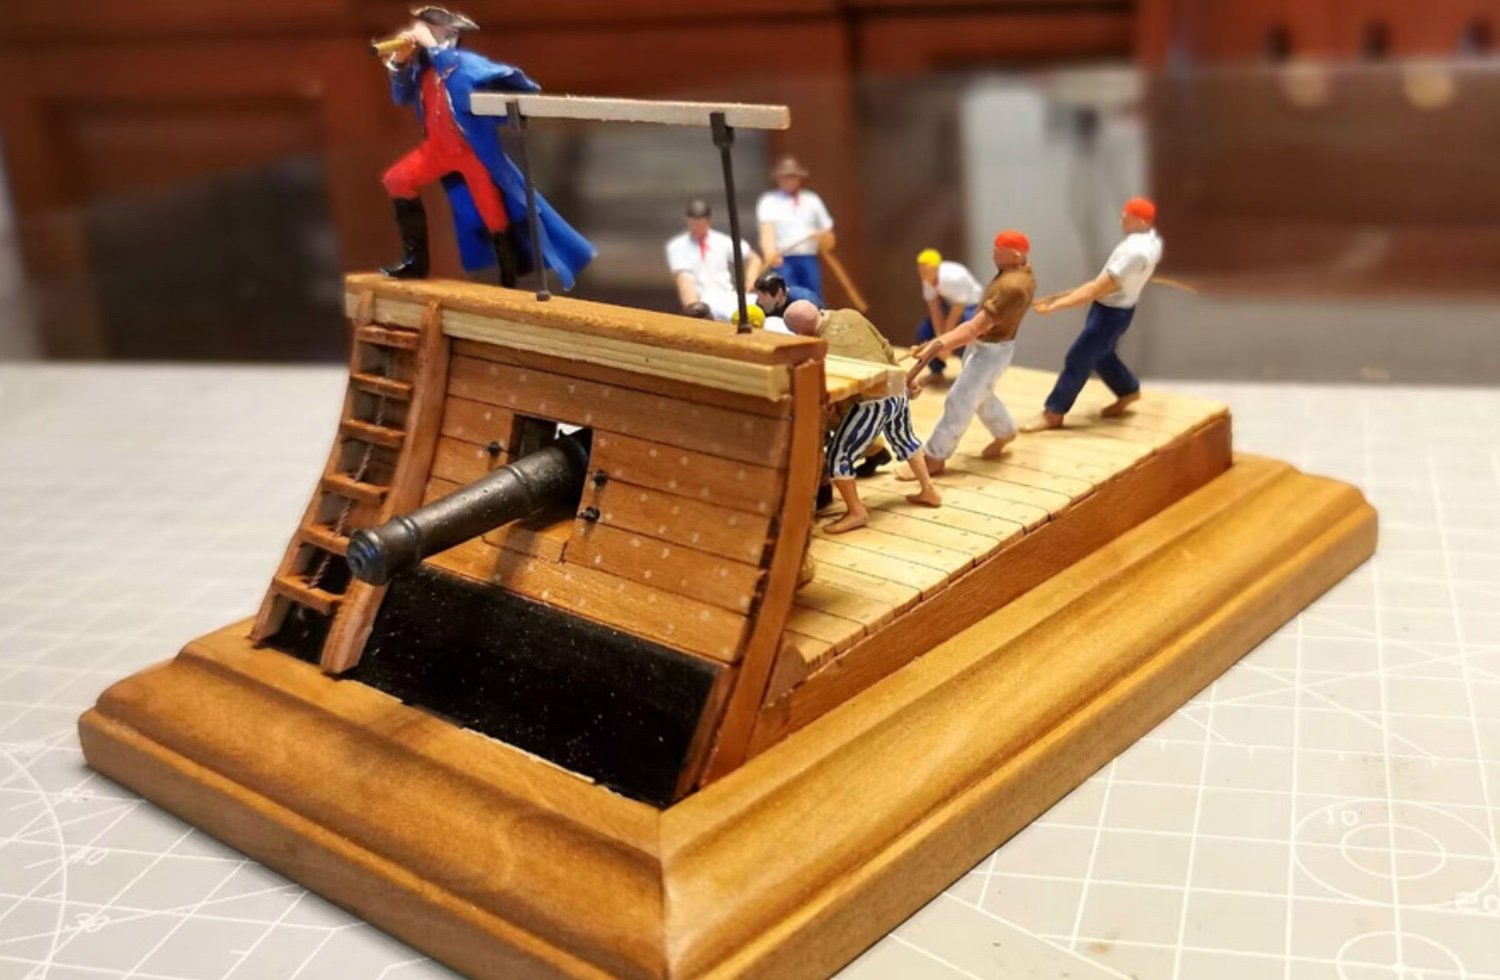
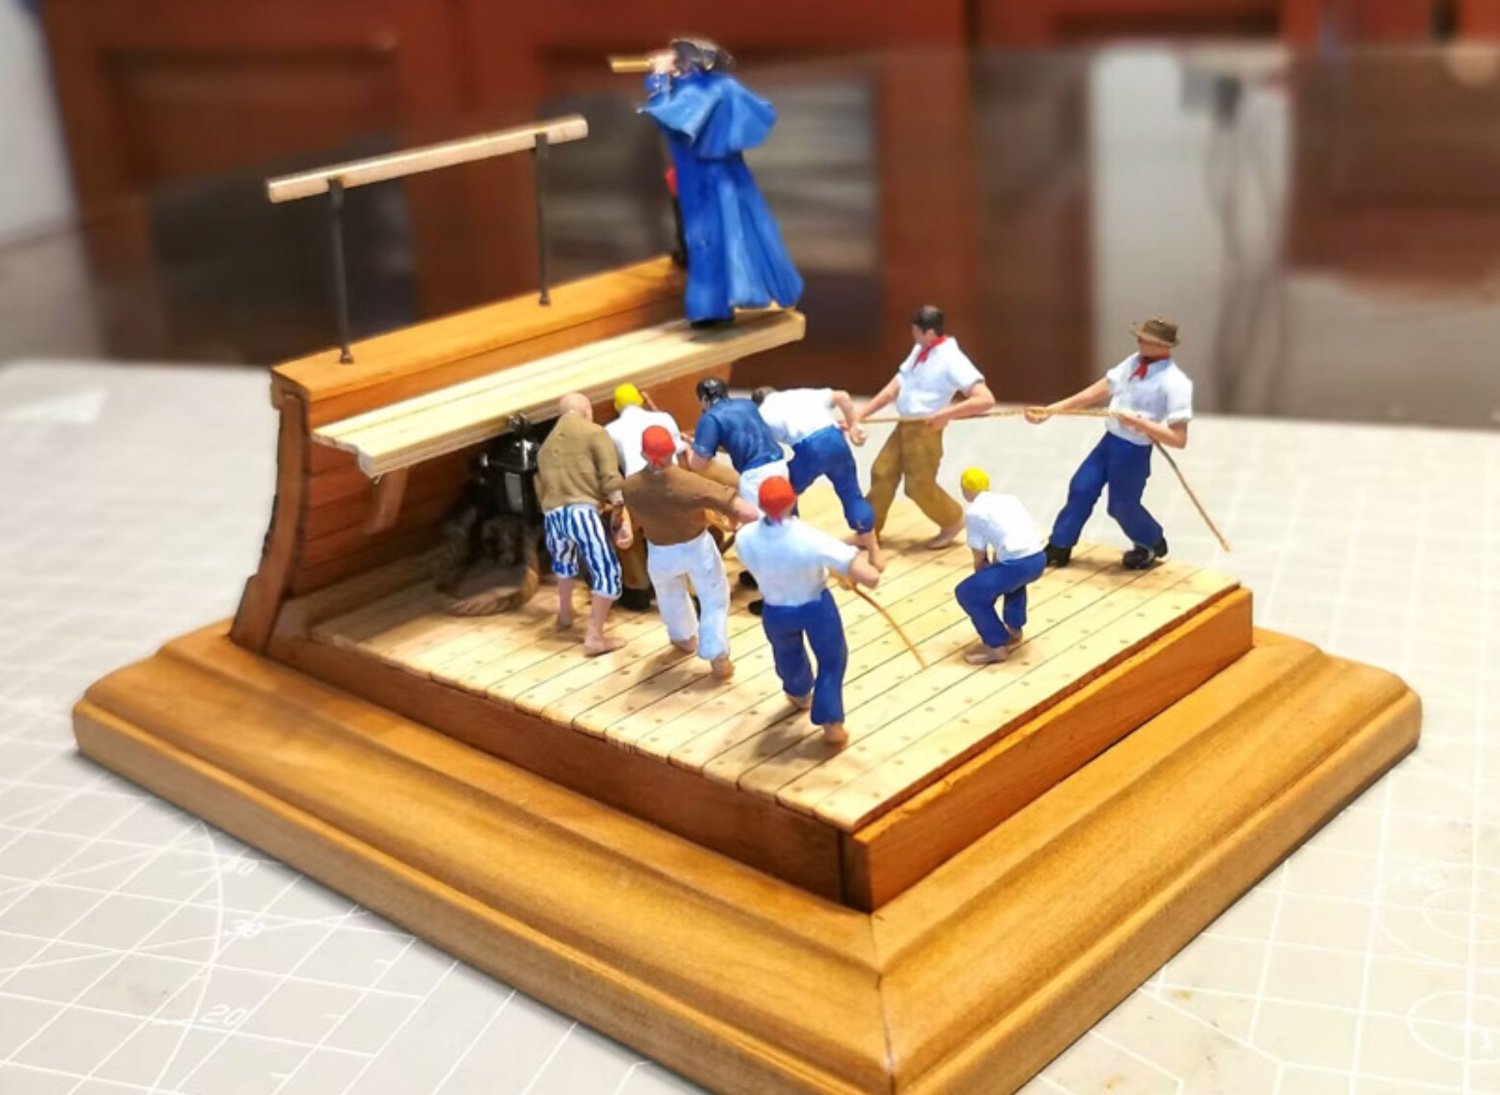
This one was quite a surprise when it came with the Postie on Monday. Not a full kit, but this time a small deck section in 1:48. The kit comes in a narrow, slender box with a product label on the lid. It's also another of those kits that when you take everything out, it's not very easy to get it all back in again...especially when you remove the stapes that are used to clip the many fittings bags together. Although in 1:48, the finished project is still quite small too, measuring 140mm x 100mm on the base, and less than 100mm tall, with figure stood aloft. The kit itself depicts a single gun section of La Renommée, complete with full gun crew and someone I can only presume is an officer. I'm sure those with better knowledge of French naval ranks.


There isn't too much strip wood in this kit with the majority of the timber here being the moulded wooden edges to the plinth you will make. You will need a mitre tool for this too. Two short lengths of brass wire are also included.

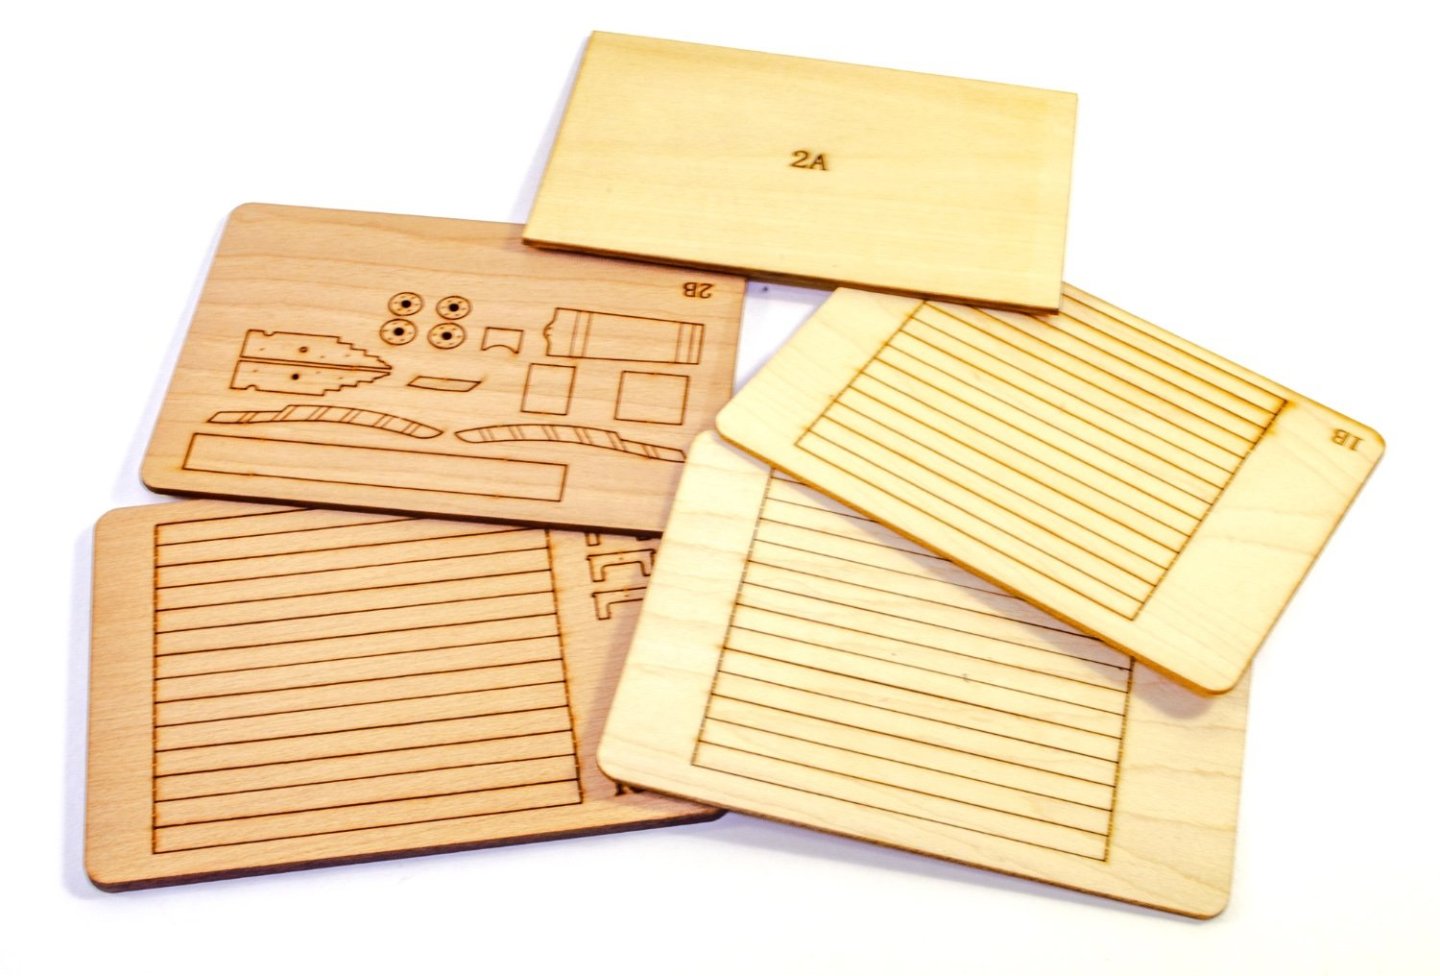
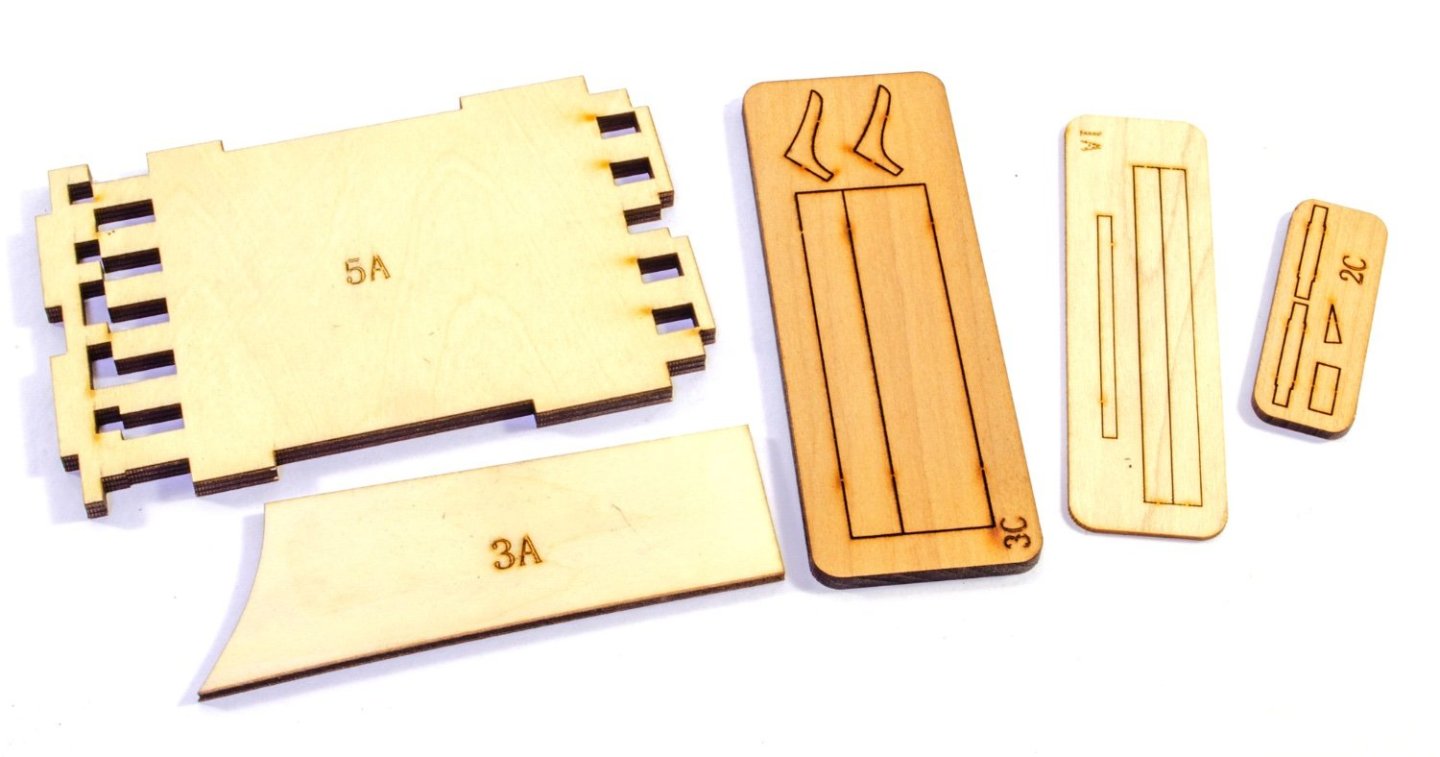
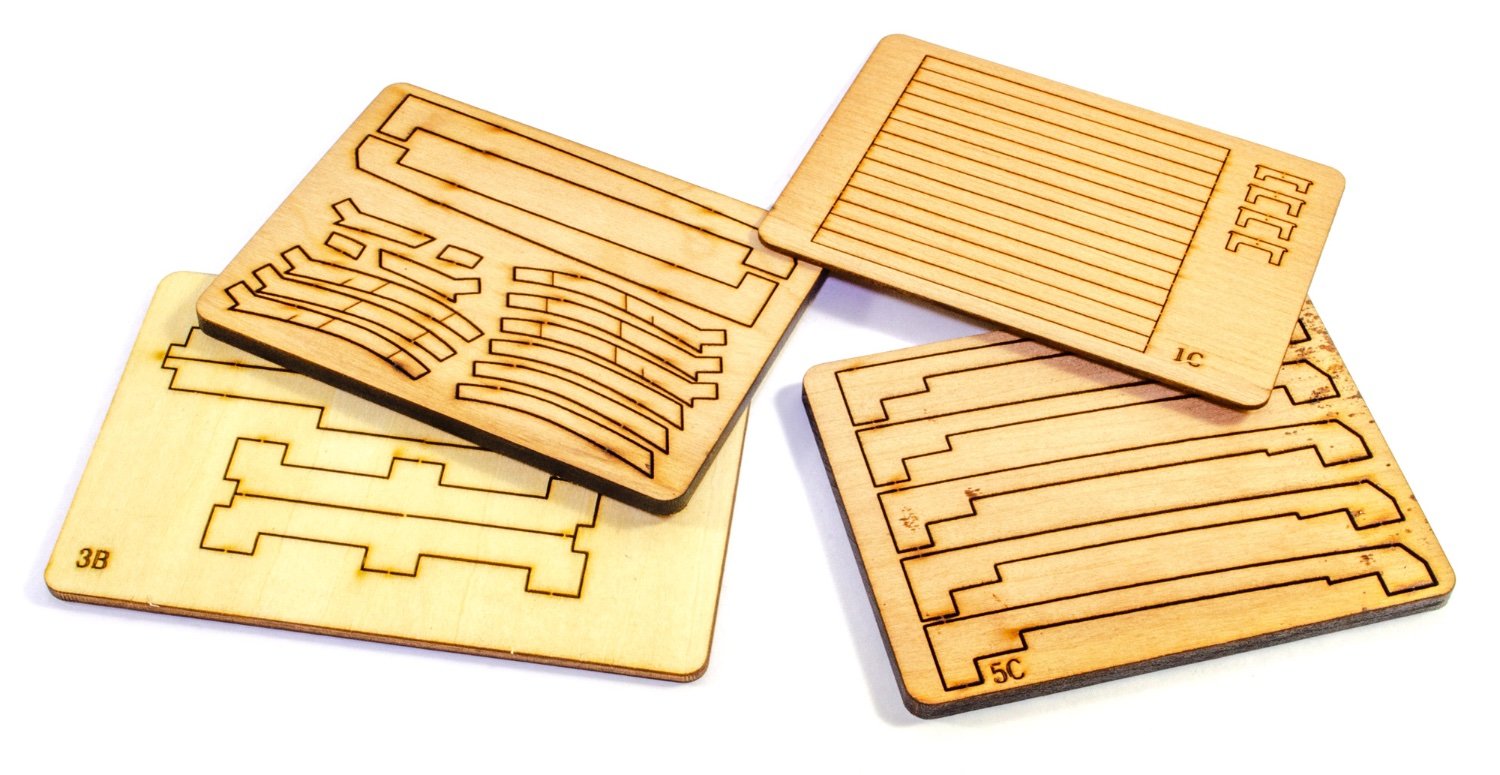
The timber sheets are quite small too with parts laser-cut in both pear and ply. The pear of course, is for making the exposed frames that you'll see on the open ends of the section as well as the regular hidden frames, the cannon carriage, and the ply for the core of the base. You will also see a part (3a) than is used as a template/gauge to ensure that the internal frames and angles of the bulwarks are set correctly. Note also the deck planks (pale strips) that you may well be able to use 'as is', with the laser cutting simulating the deck caulking.

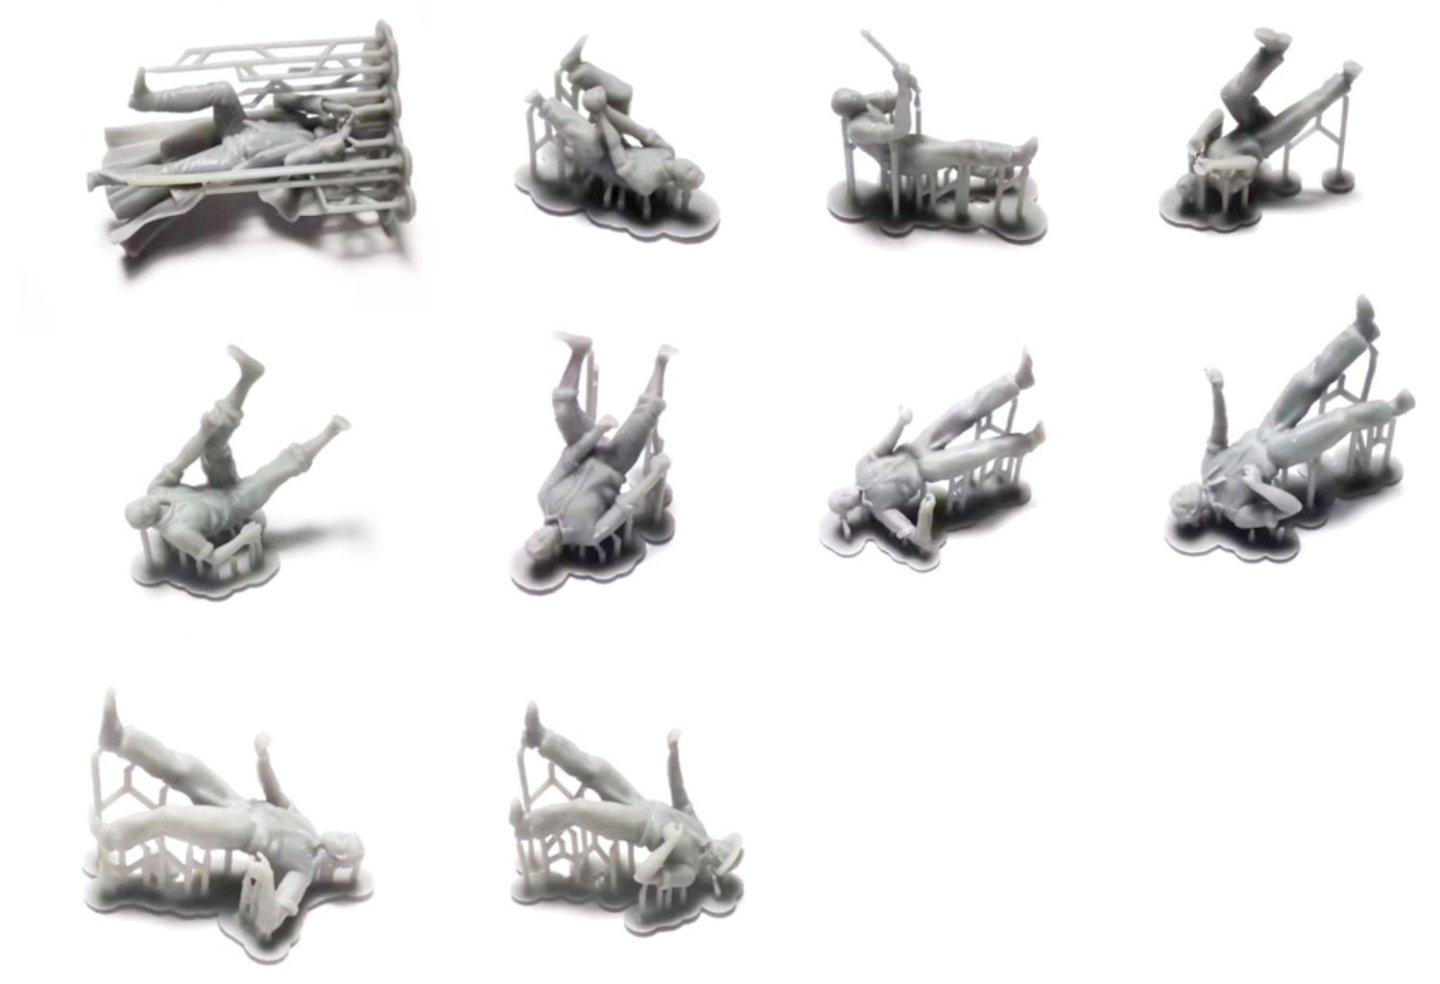
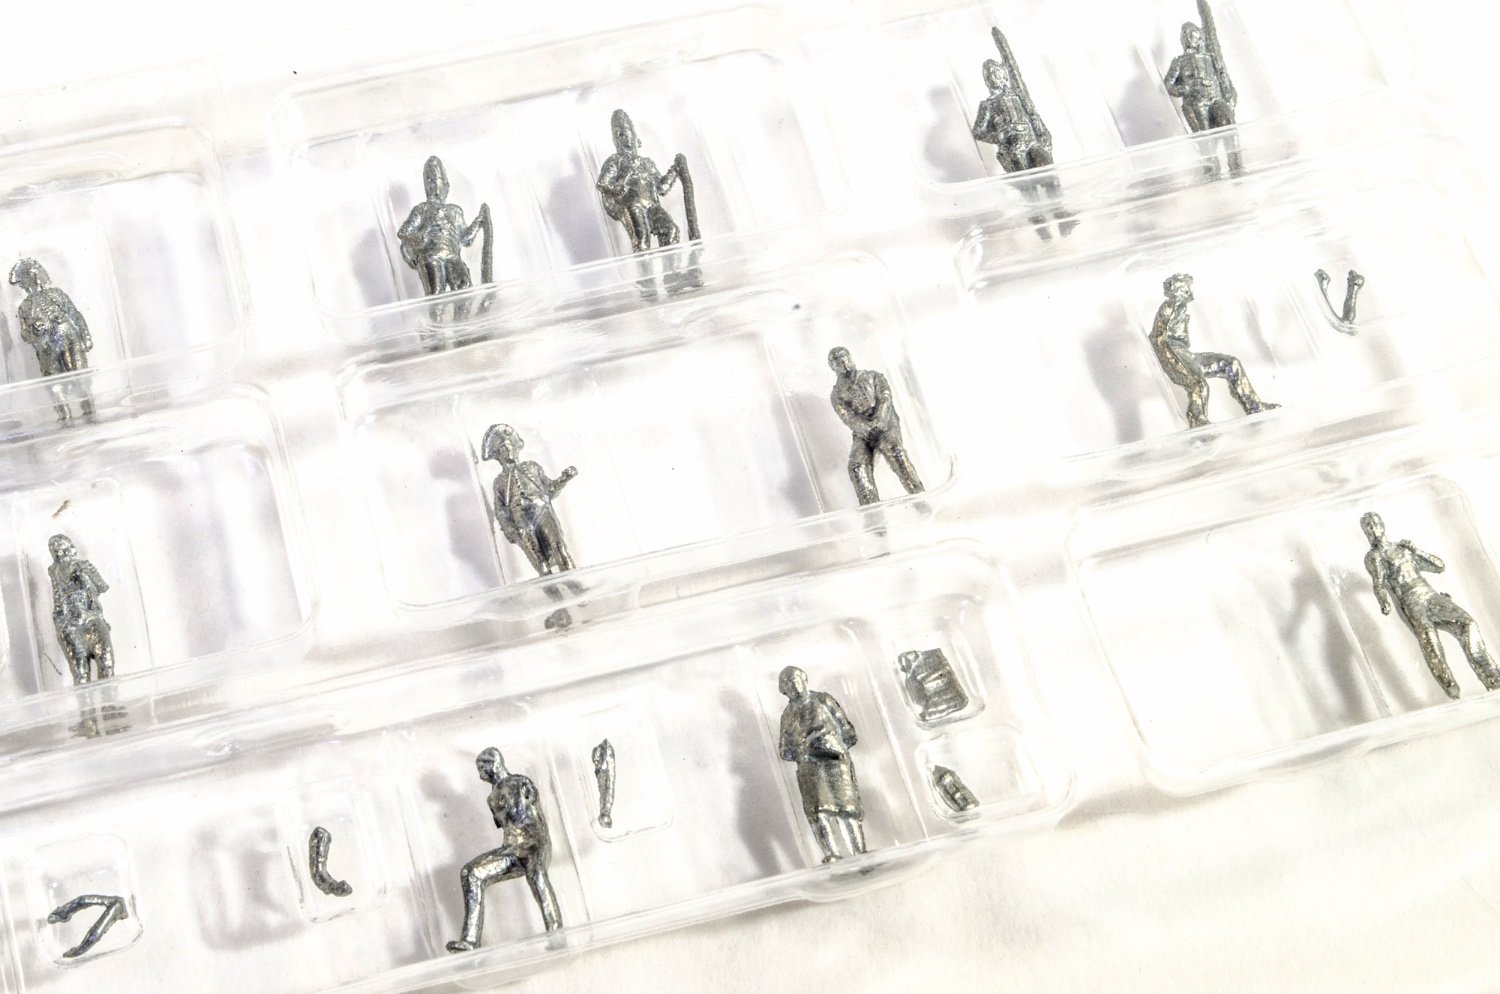
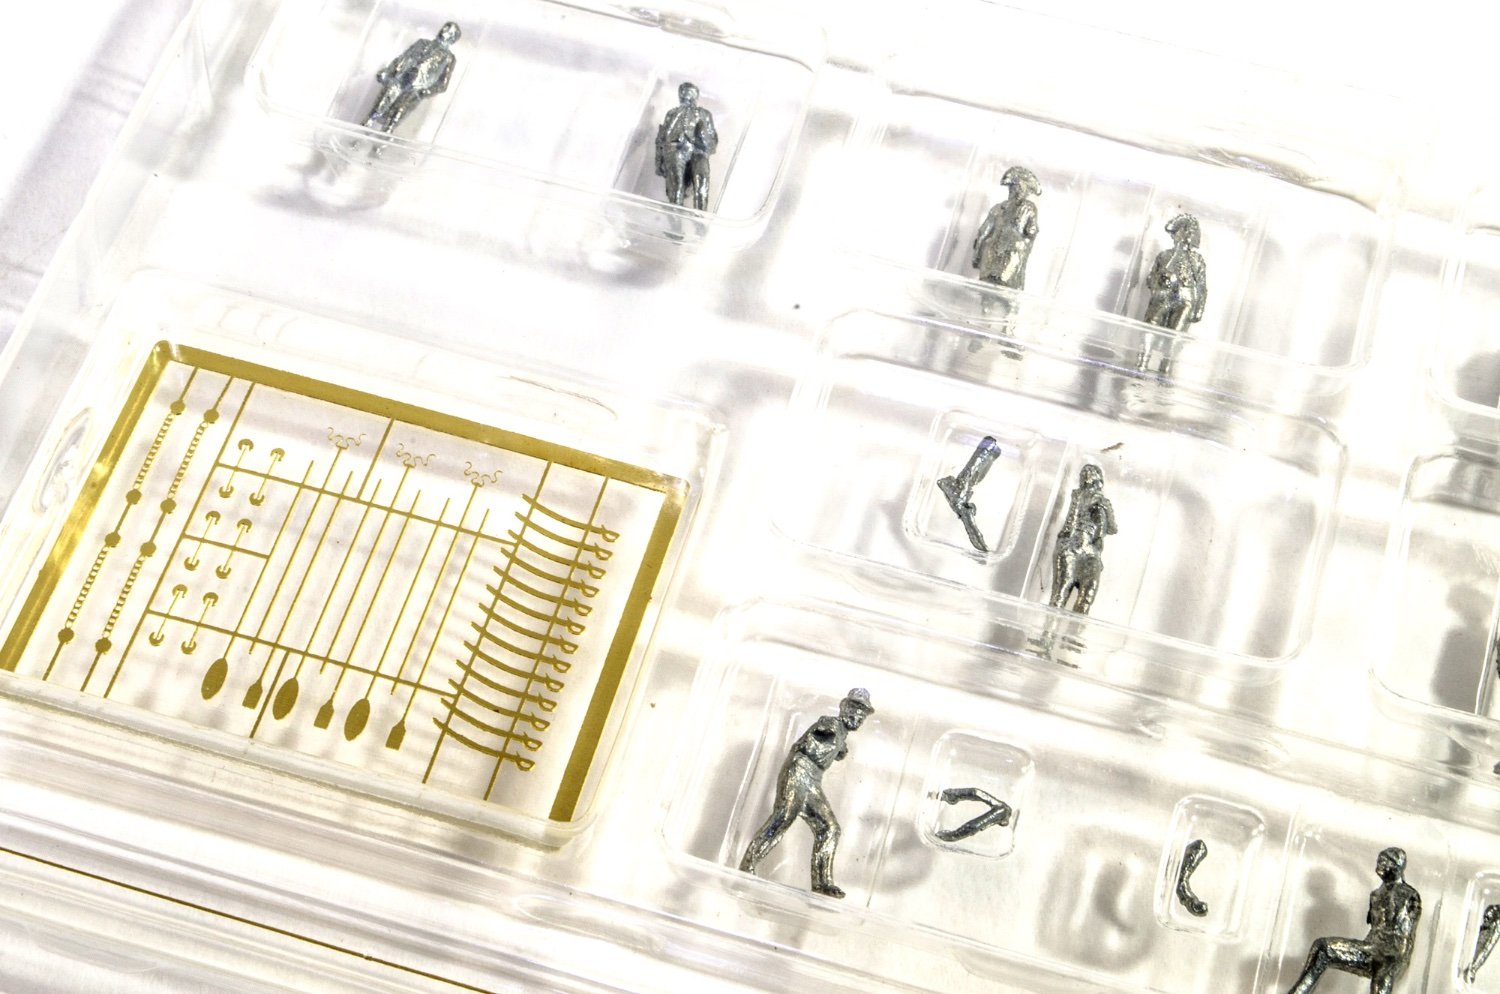
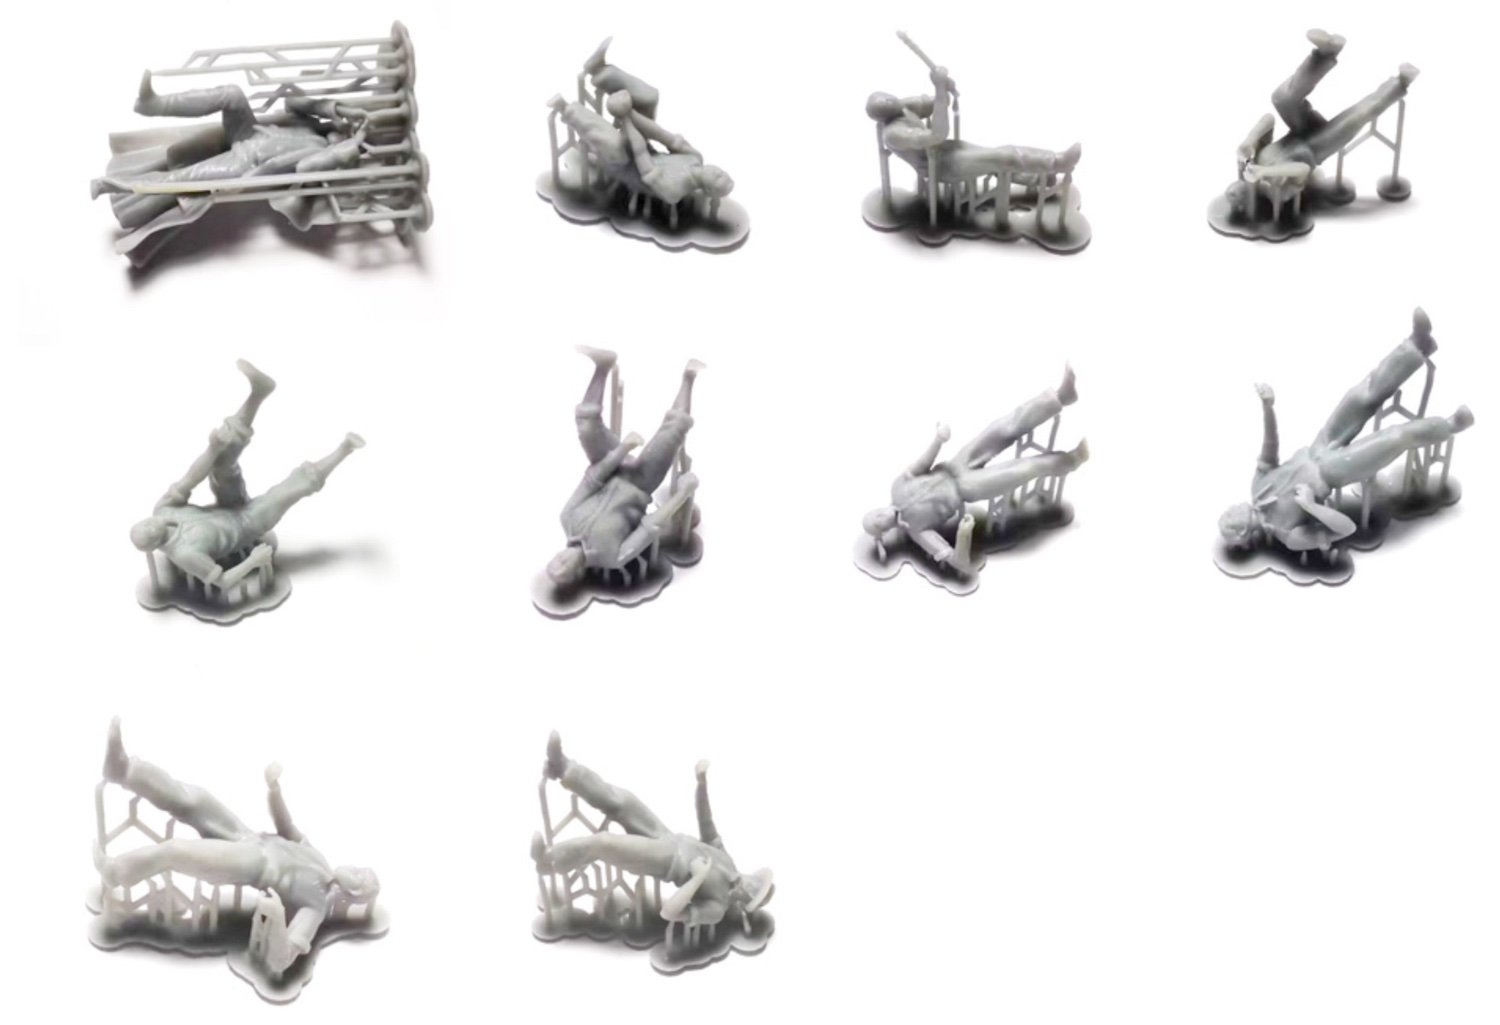
A big feature of this kit are the numerous gun crew figures that you will need to clean up and paint. These are provided as 3D-printed parts and you will need to carefully and cleanly remove the support structures from the printing process. These need to be cut back to just before the figure and then carefully trimmed/sanded flush to the part. With 3D-prints, never snap those supports off at the part as it can leave a small divot in the part. All figure types are individually packaged and numbered for reference.

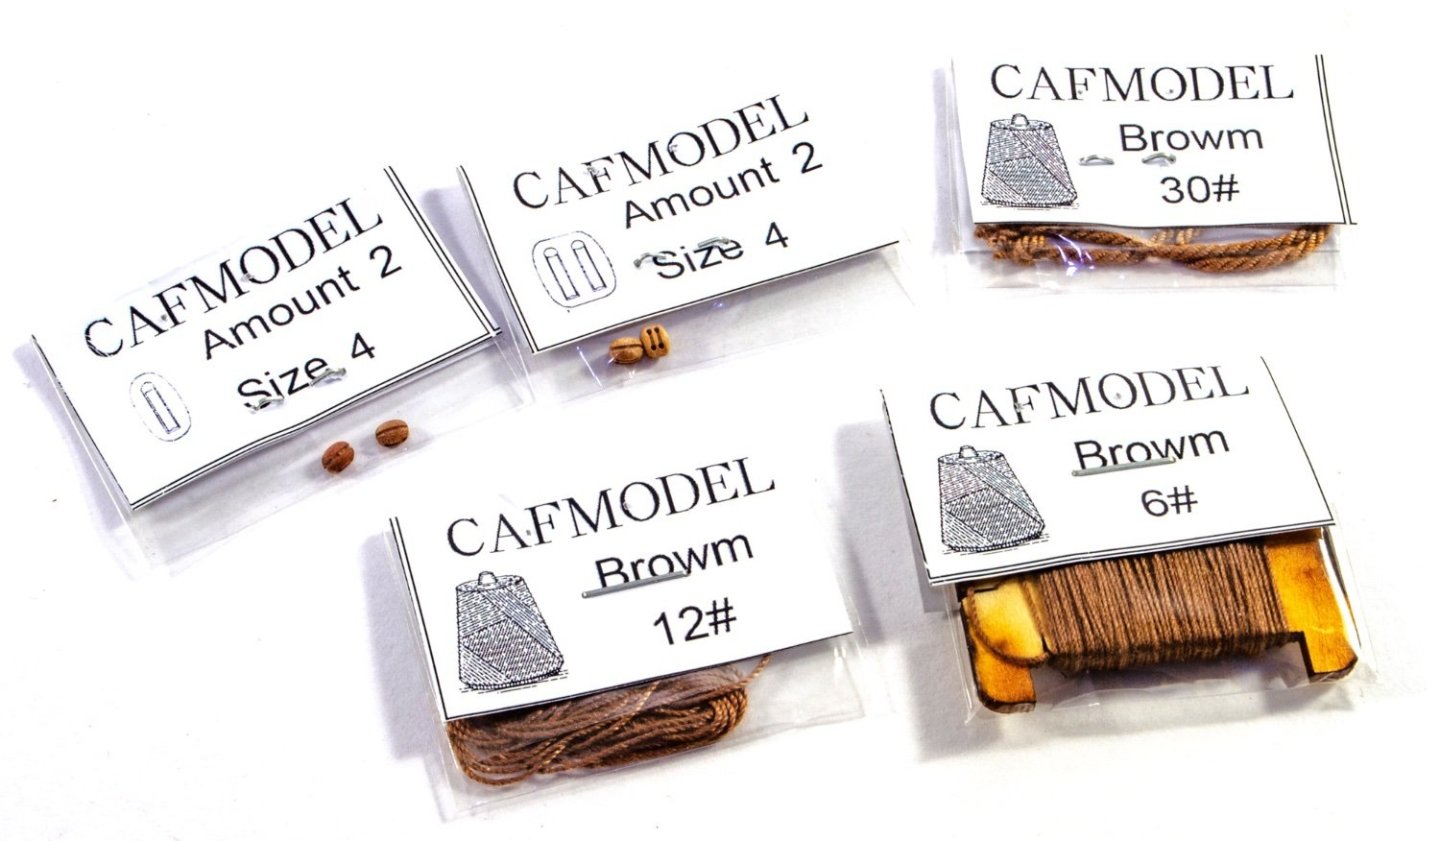
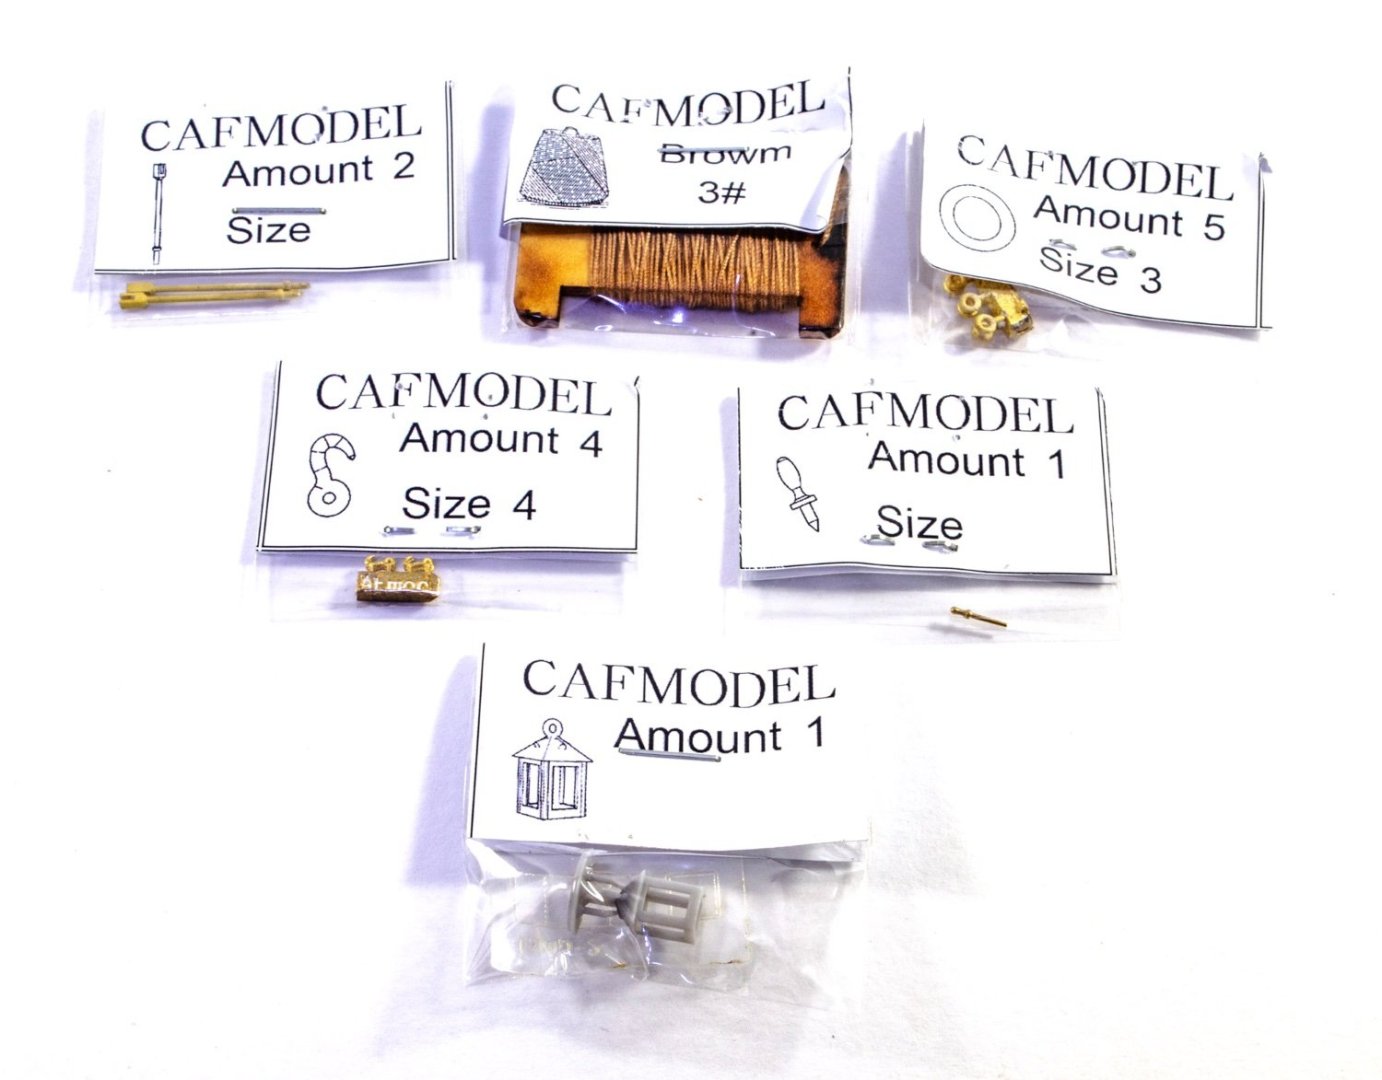
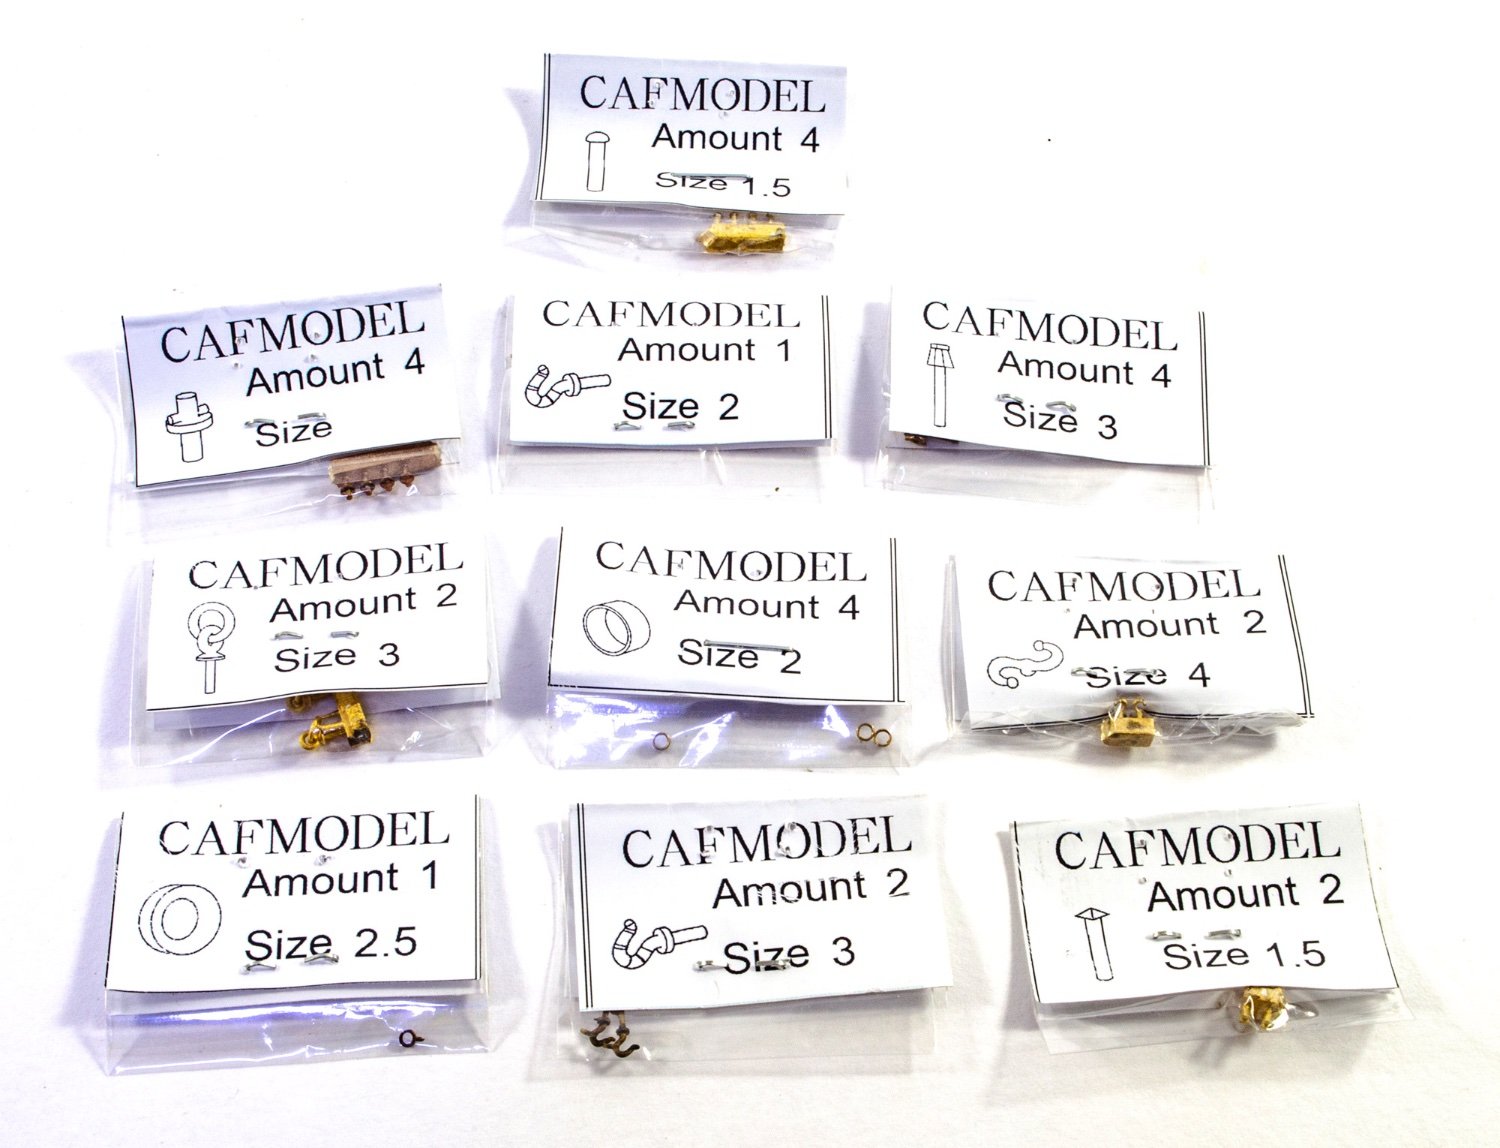
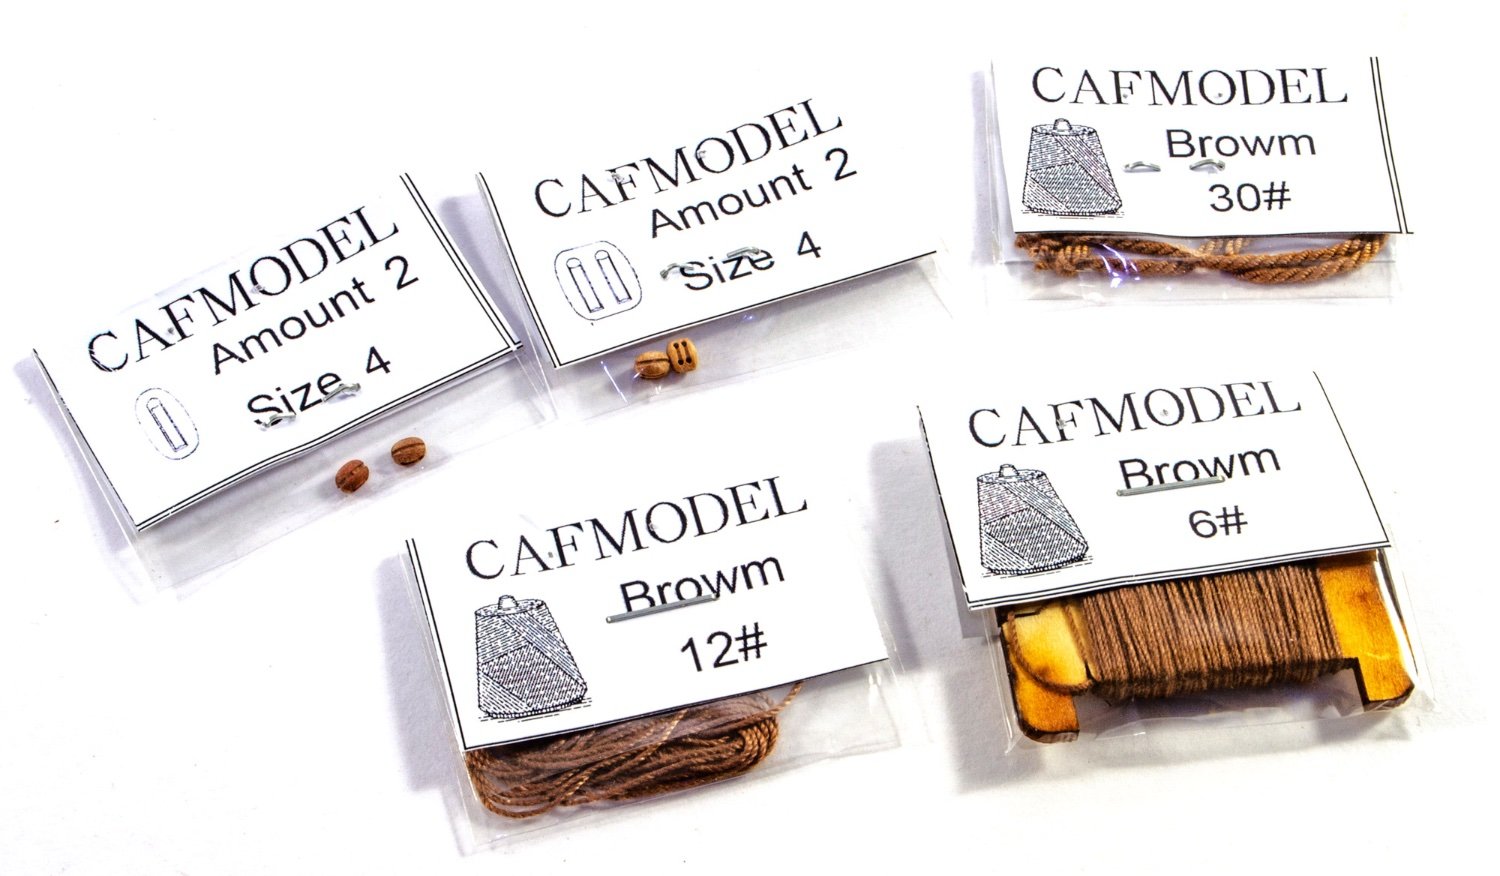
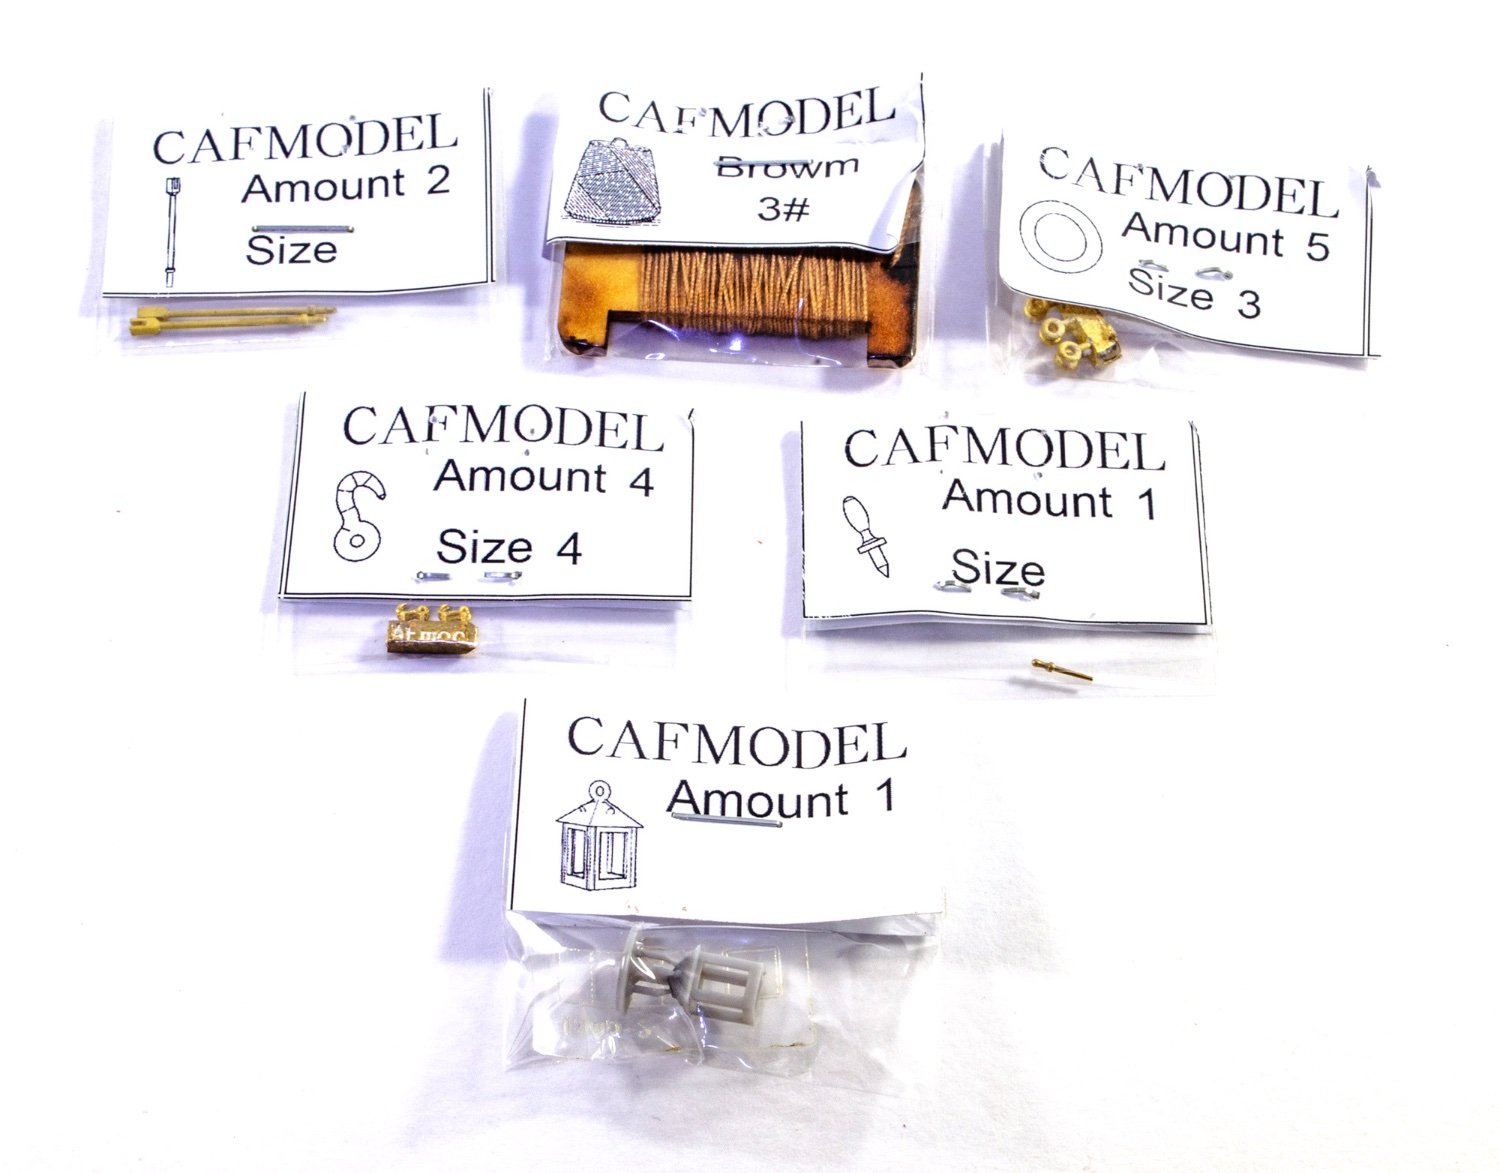
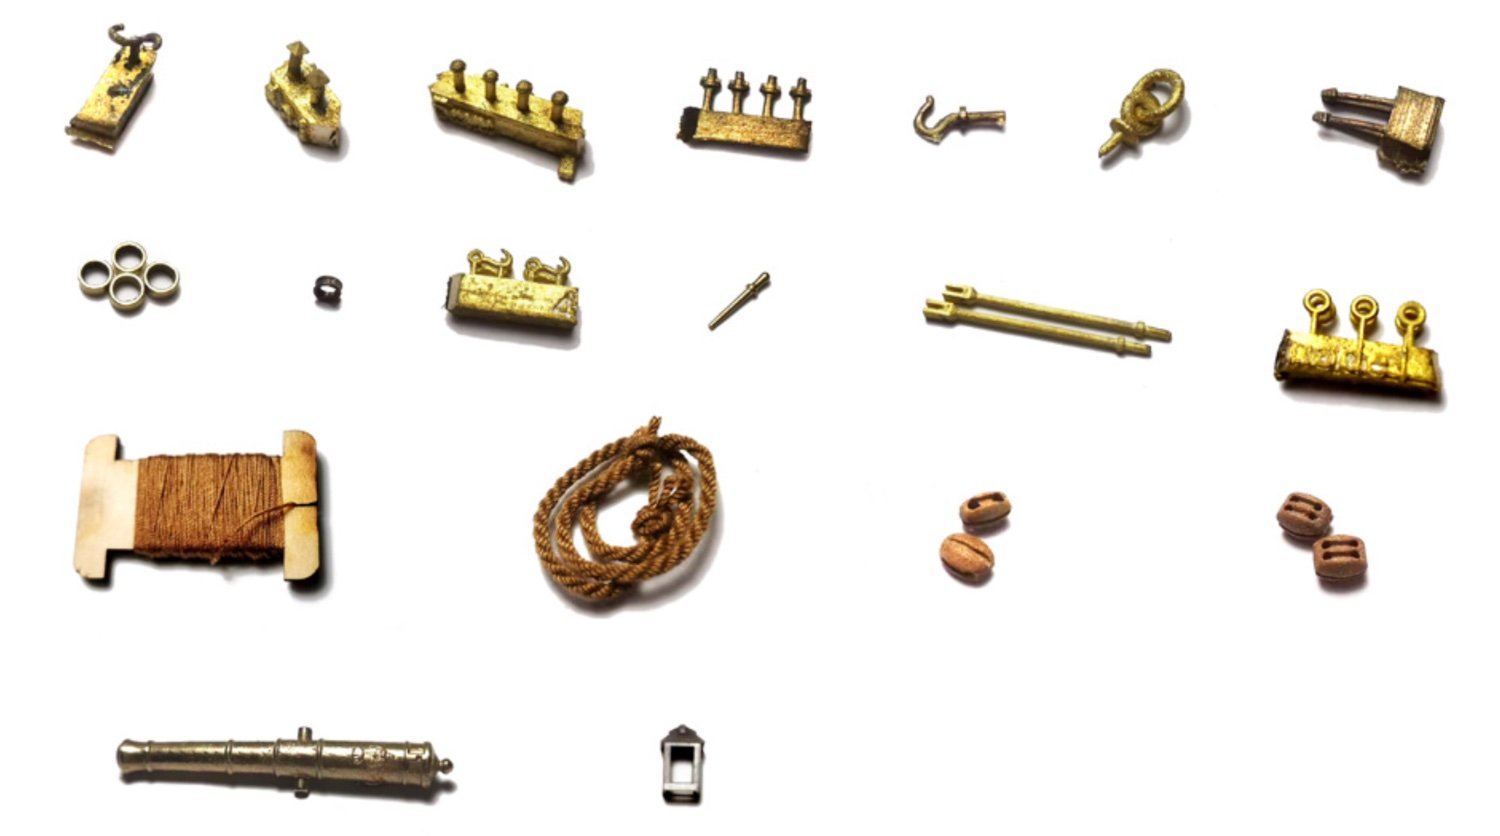
There are a LOT of small packs of fittings which include all the hardware for the gun, eyelets, stanchions etc. and again, these are all individually bagged and the part depicted on the seal, plus the part quantity. Some parts are cast onto brass blocks and you will need a small jeweller's saw or similar, to release the parts, and some fine files to clean them up. Also included is rigging cord in various sizes for the gun, rigging blocks, etc. The cannon is either cast in brass or bronze. I'm not too sure, but the detail definition is very good indeed and supplies quite a bit of weight to finished model. One thing of note here is the tiny lantern. CAF say this can be lit with an LED, but you will need to source those parts yourself.


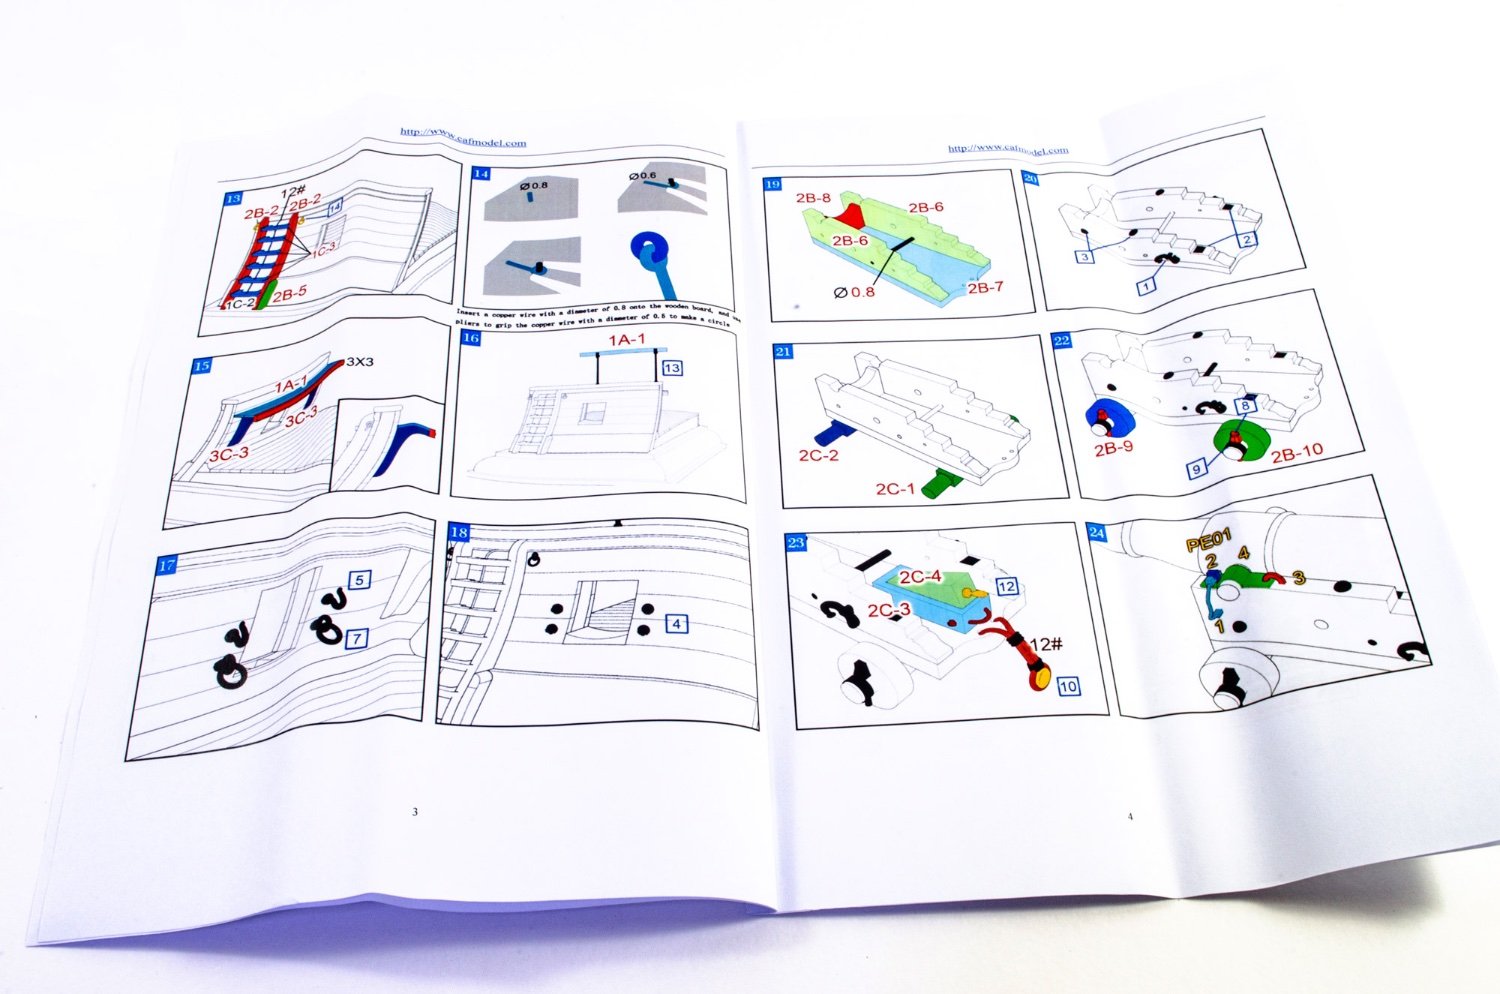
Instructions
These are a simple affair, spreading out over 6 pages, in full colour with parts annotation being clear and overall, the whole model looks simple to build up. Also included at the rear of the instructions are two pages showing the part sheets and corresponding part numbers.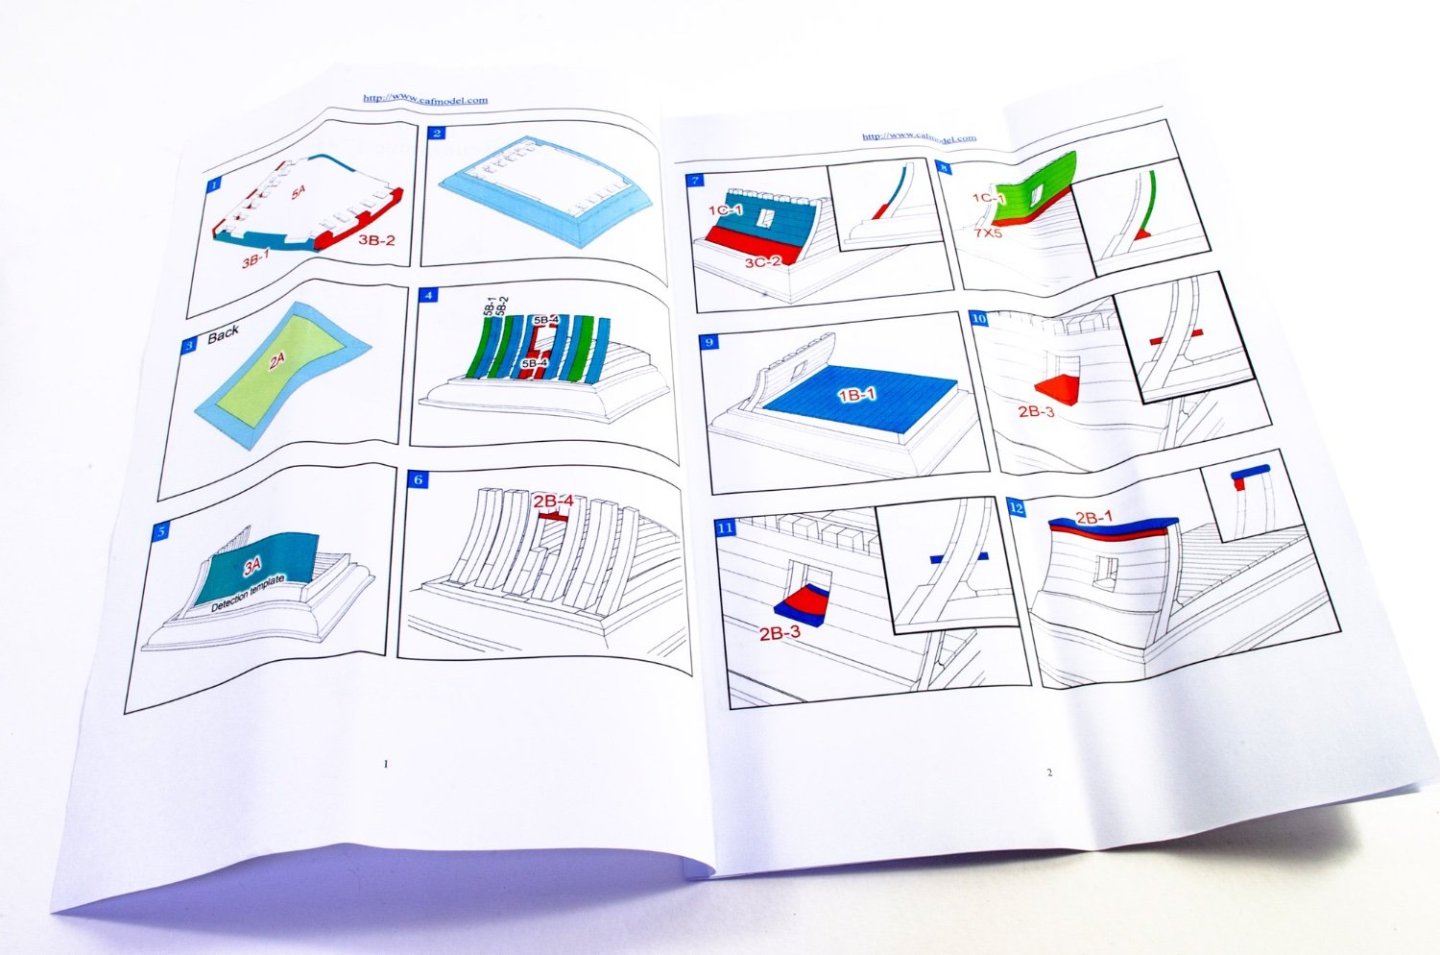


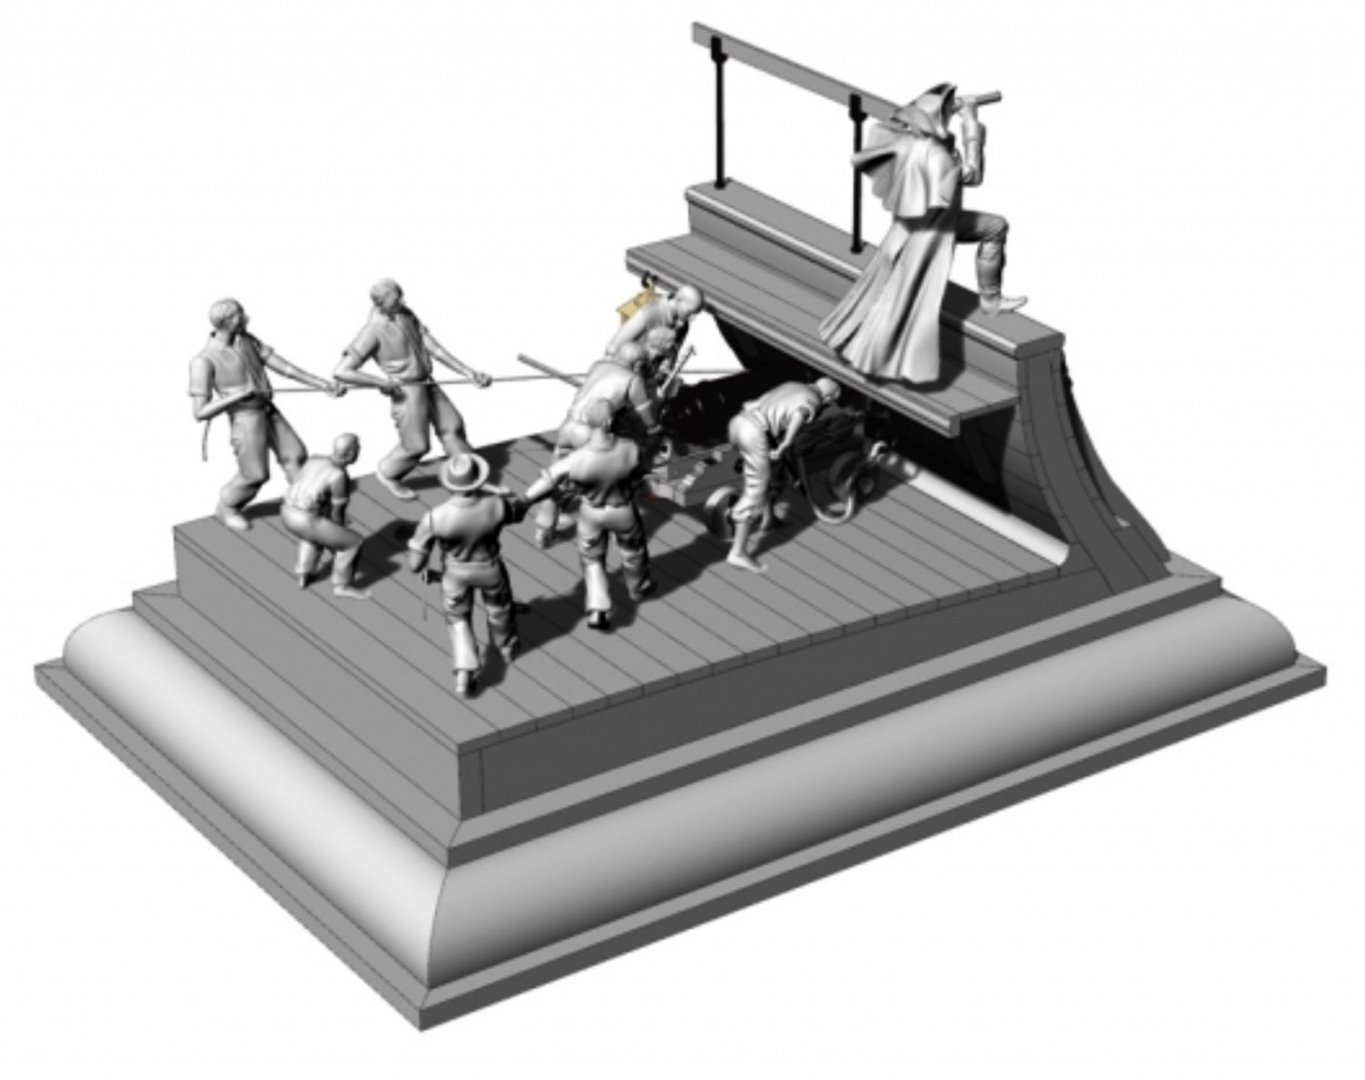
CAD and finished model images


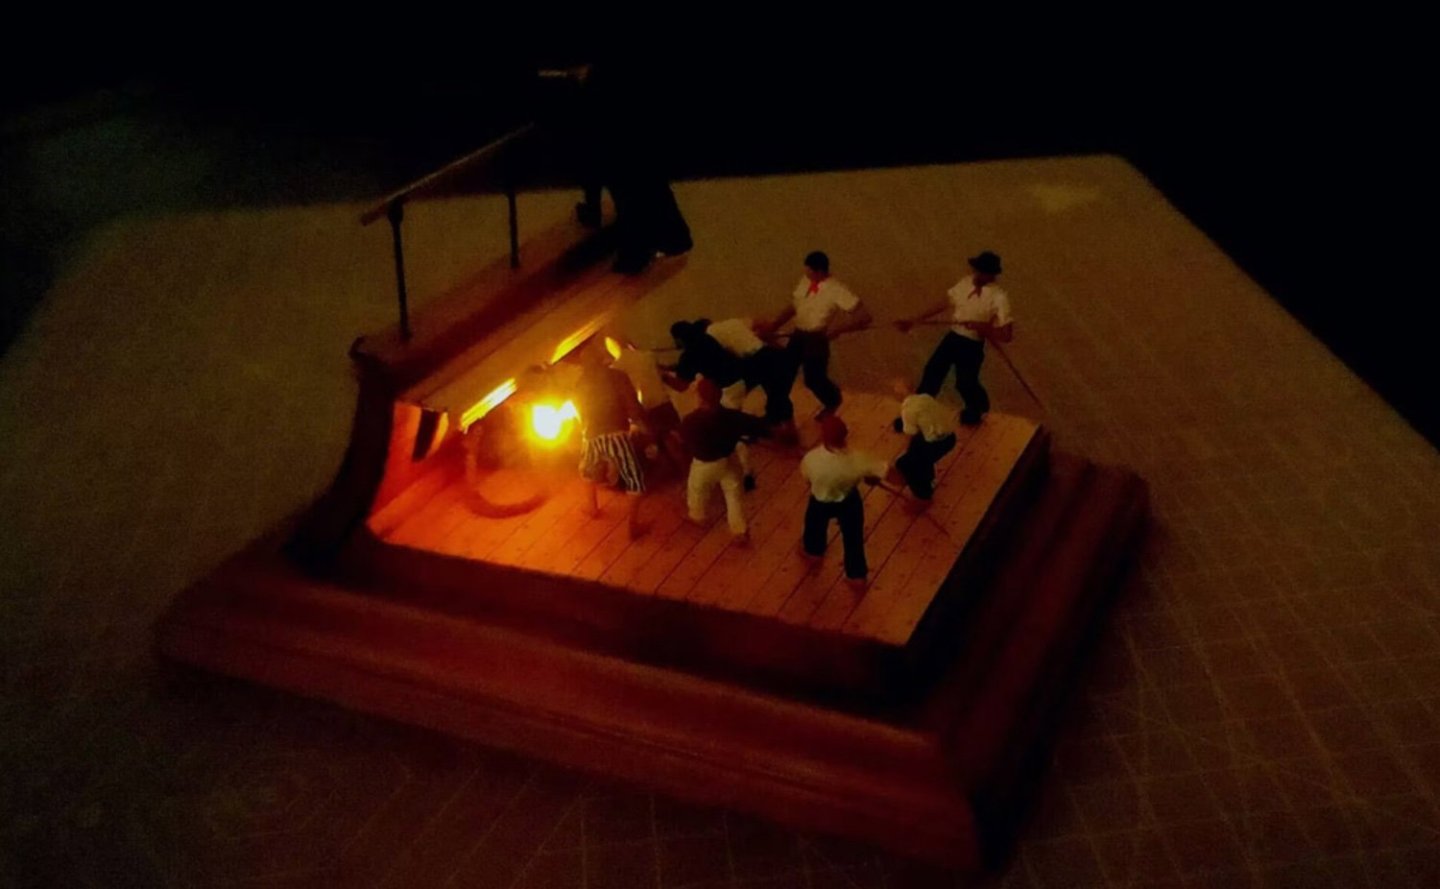
Conclusion
This has to be a nice little 'between projects' project! It's very simple to build, the materials are very nice, albeit some char will need to be removed from part faces in some areas, and there's plenty of parts to keep you occupied. One thing I'd like to have seen is the inclusion of a 'grain of rice' LED and some wire and battery clip for illuminating the model as shown, or even a requirements list and illustration as to how the prototype was tackled. That' not even a gripe though...more just me thinking it would've been a nice touch. This is quite an inexpensive model for what you get, when you look at all those 3D-print figures etc. I don't really see too many new kits like this these days, so this should perhaps be something to consider if you fancy a small diversion.
My sincere thanks to CAF Model for sending this kit over for review on MSW.

- thibaultron, bruce d, yvesvidal and 12 others
-
15
-
Welcome to MSW. Always nice to see another Scot here. I had family from both Highlands and Lowlands.
A beautiful place.
Looking forward to a build log.
- Swordfish073 and mtaylor
-
1
-
1


1:84 Santisima Trinidad – Trafalgar 1805 by Artesanía Latina
in REVIEWS: Model kits
Posted
It is.