


James H
-
Posts
5,517 -
Joined
-
Last visited
Content Type
Profiles
Forums
Gallery
Events
Posts posted by James H
-
-
You'll find things a LOT more solid from this point, especially when you get the inner bulwarks added.
- Haliburton, Mr Whippy, mugje and 2 others
-
 5
5
-
Hi all,
MSW will ALWAYS be free to use for all members, but this ship still needs a few £/$/€ etc. to keep afloat. We generally try to do this via our sponsor banners, but we also still rely on the generosity of our membership to help us with costs. We operate a dedicated server for this site, which isn't an insubstantial cost, plus the various other things we need, such as our domain names, anti spam and proxy firewall. It adds up to a pretty penny.
I know the old adage of 'if every member donated $1 etc' goes without saying, but we're realistic!
Times are harder for many folk at the moment with the way things are with global economics etc. but if you do want to, or have considered throwing a few $ our way, then I guarantee it will be very much appreciated. It all helps keep this wonderful and info-packed community afloat and preserves our valuable resource for years to come.
Should you wish to donate, then we have a tool on the forum home page sidebar.
Kind regards,
MSW/NRG staff
- allanyed, VitusBering, bridgman and 9 others
-
12
-
-
-
1 hour ago, allanyed said:
I like how you secured the waist rail in place for the full run first rather than trying to put individual pieces. For me this is the easier way to get a smooth line the entire length.
She is looking great!
Allan
And that's actually how we suggest to do it in the manual. The curve is so subtle in many areas as not to be noticeable.
-
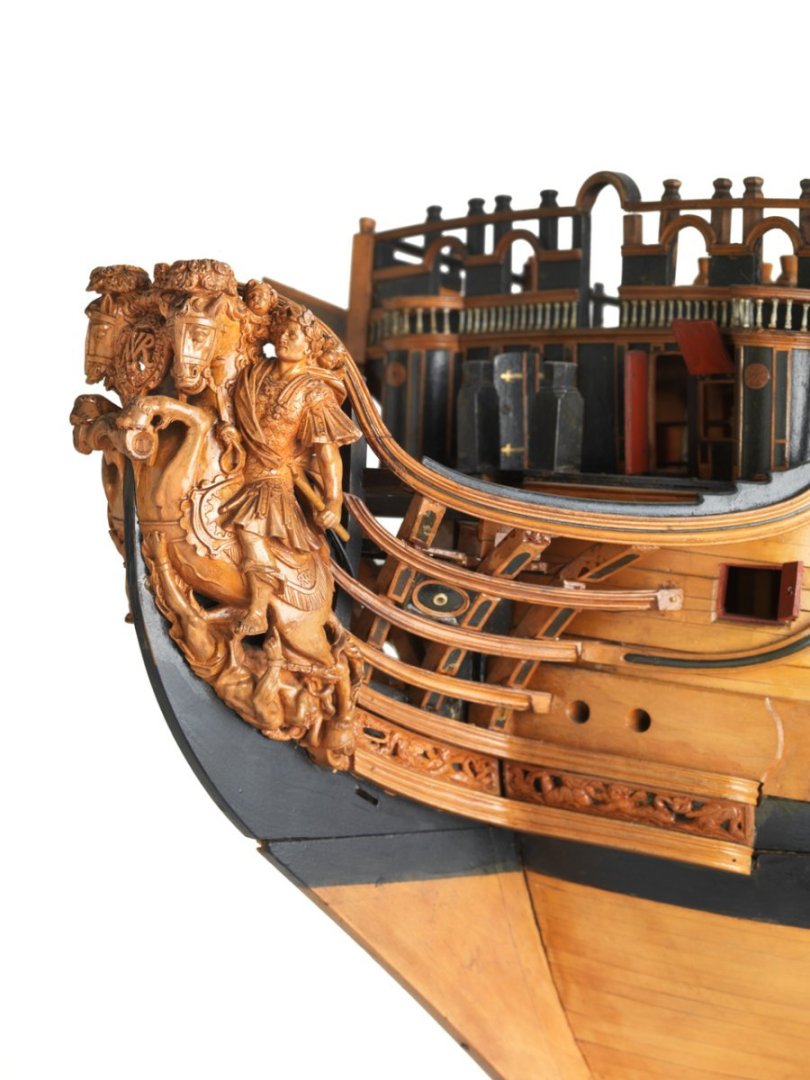
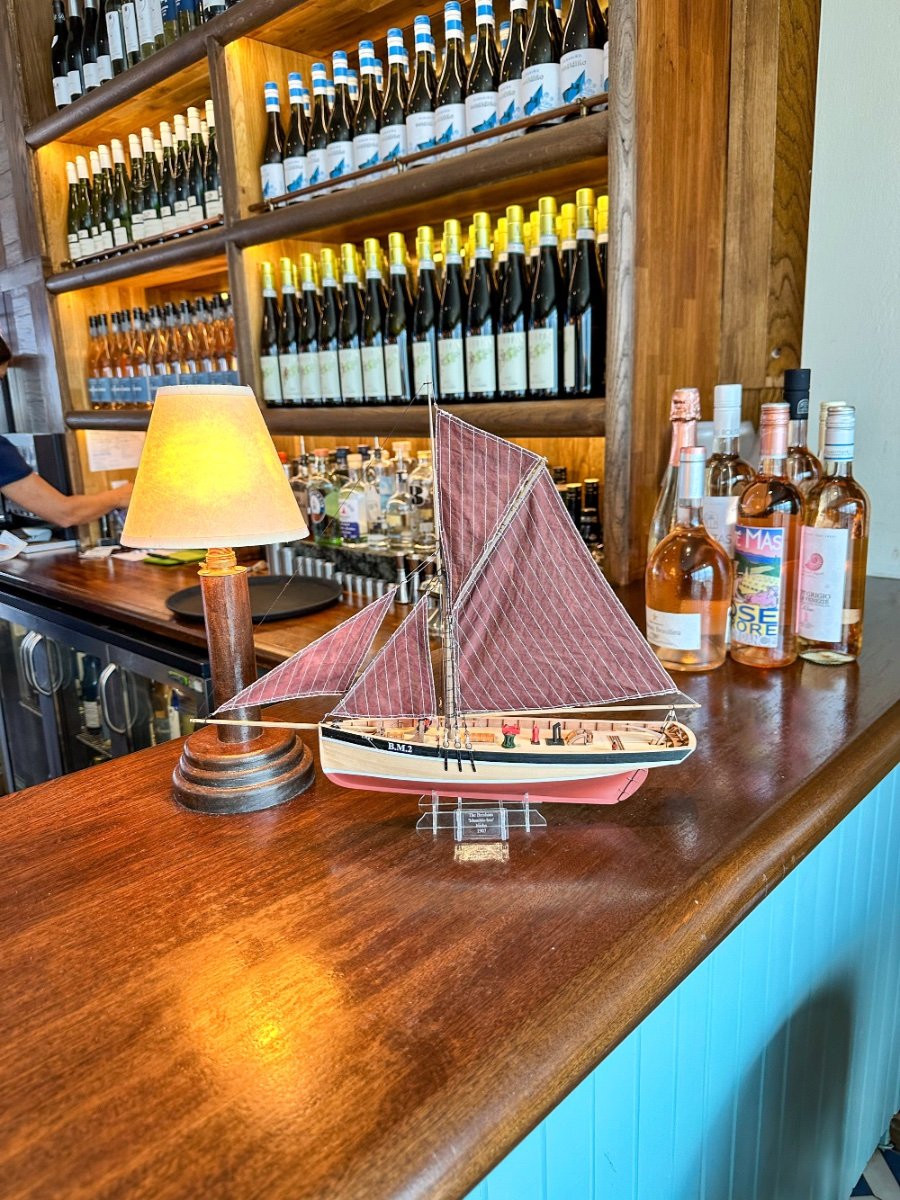
A quick footnote to Nisha's log.
I'm currently on holiday in Devon, UK, and had arranged to return Nisha to her real home....so to speak.
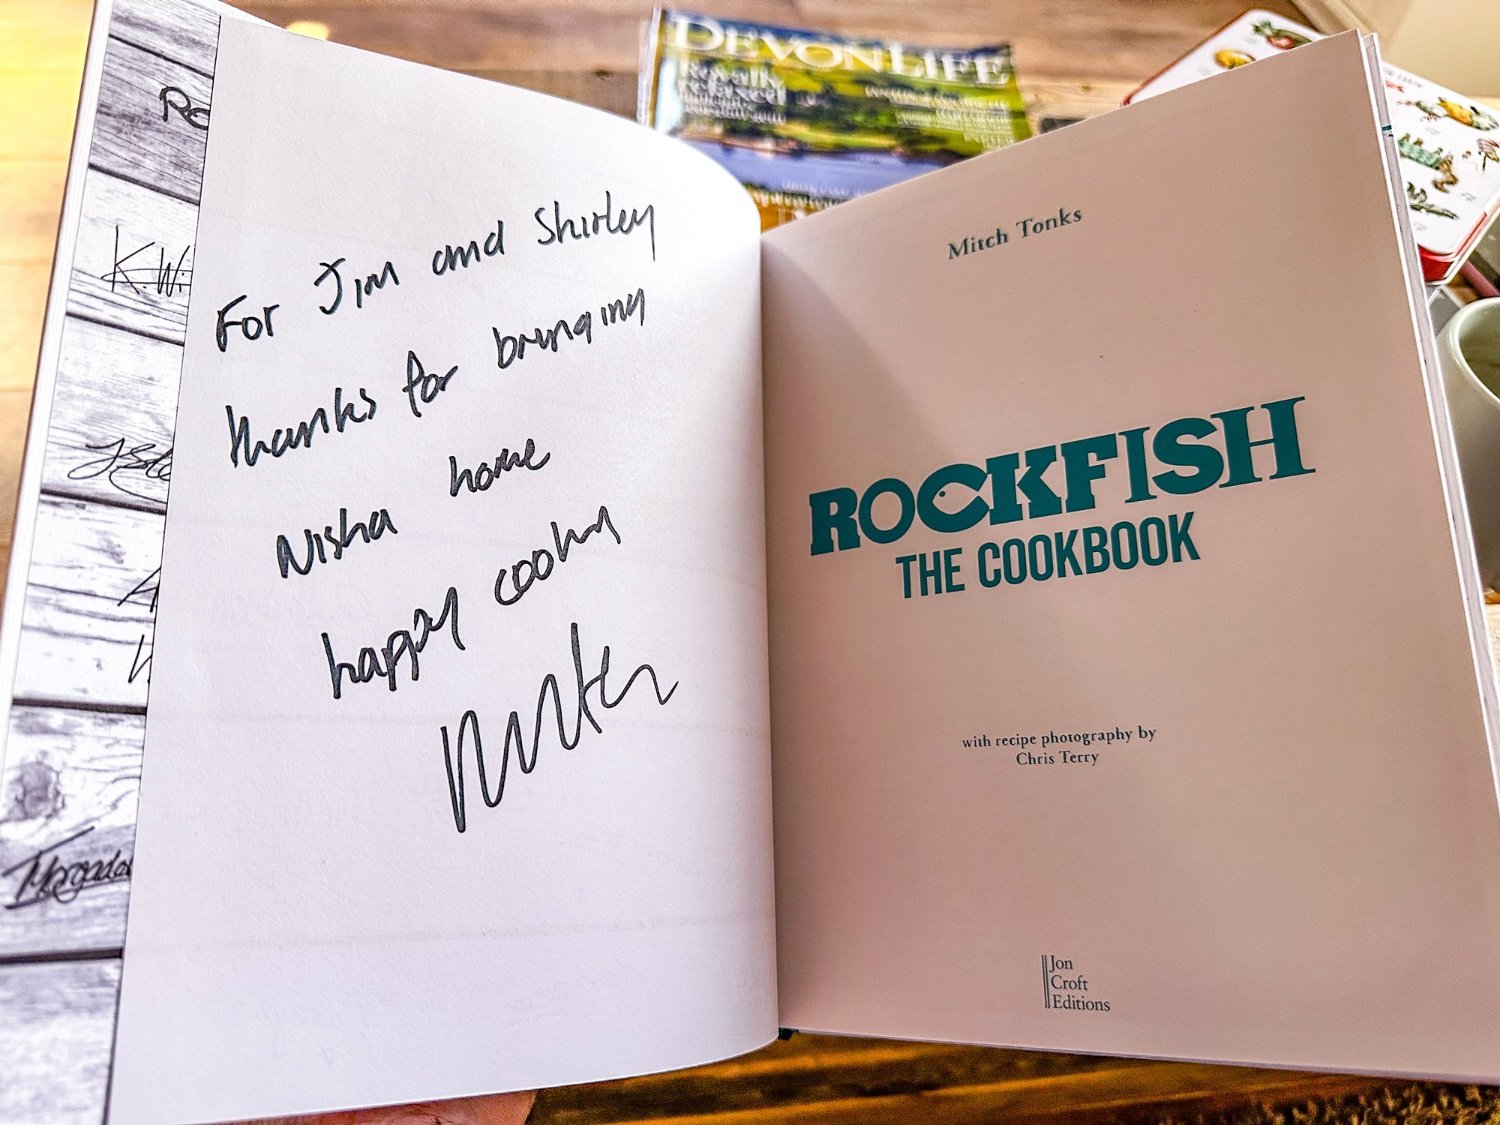
Whilst here, I've met with Mitch Tonks who is the CEO of the Rockfish chain of seafood restaurants. Our meet was in Brixham, so before lunch, I handed over Nisha to him and he was delighted with it. She's now on display in the restaurant, behind the bar area, for visitors to see. Mitch gave me a signed copy of his 6th cookbook and a rather nice pack of locally caught and tinned specialities.
What a lovely bloke!


-
-
I'm currently on holiday, about 3 miles from where HMS Terror was built.
- GrandpaPhil, clearway and Keith Black
-
3
-
-
1 hour ago, allanyed said:
Hi Aydingocer
This is great as you show a very clever way to do this with a simple tool such as your drill.
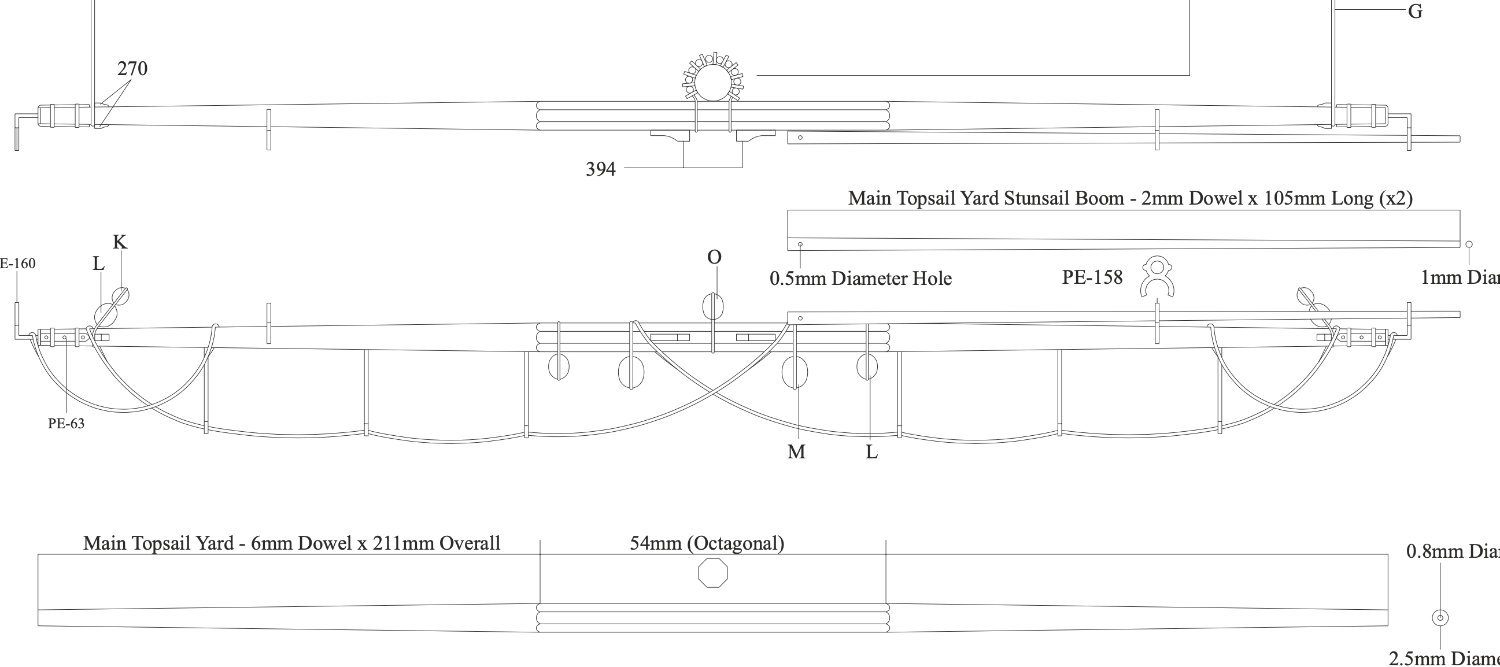
Do the yards on a sixth rate have an octagon center quarter? The octagon shape in the center quarter of the yards started about 1690 according The Masting and Rigging of English Ships of War, page 13 but Lees does not say if all yards on all rates had this design feature after 1690 so I am curious. Volume IV of TFFM by David Antscherl describes the octagon on the yards of a 14 gun sloop. If they do take this shape, it is probably easier to make the octagon at the maximum dimension needed, then sand as you have clearly shown leaving the center quarter as an octagon.
Allan
Yes, the plans have this detail, should the modeller wish to do it. It would be up to them.

- Ryland Craze, Mr Whippy, aydingocer and 1 other
-
4
-
It took me about 3 evening bench sessions (about 3hrs each) to make enough plates.
I don't think any lack of nail detail on the tape takes away from the appearance. They are so much easier to get a waterline with too as you just add the waterline mark to the tape and then score along the length before peeling away the excess. Any plates that are damaged are also a cinch to replace.
-
1 hour ago, allanyed said:
You have chosen a huge project and showing a great start. One of the nice things about this ship is that you can compare your modern day plans to the contemporary plans and models at the RMG Collections site.
https://www.rmg.co.uk/collections/objects/search/Royal William plans 1719 & https://www.rmg.co.uk/collections/objects/rmgc-object-66183
Regarding the lower wales, notice how it diminished in thickness at the bow so it rests in the rabbet as in the photo of the RMG model below.
Allan
Hi Allan,
I’ve seen you pass this info on it several kit build logs recently. This can and will eventually get lost in the pages. I think it’s a better idea to start a topic about this separately , so it’s easily referred to.
- GrandpaPhil, mtaylor and davyboy
-
3
-
-
You're still better giving it an initial polish with 0000 steel wool before allowing to age so that it ages evenly. If you leave greasy fingerprints, they will be seen in the final finish as the acidic residues leave actual fingerprints on the thin copper tape.
-
I know what Allan means here. There is no provision in the manual for this, but a modeller can do this if they see fit.
I admit I’ve also never tapered there either, so o can’t offer up a model to show this.
@allanyed maybe you can show where you’ve done this on your builds? It could be useful for reference in case anyone wants to add that feature.
-
-
-
-
18 minutes ago, DB789 said:
There’s still a small amount of bowing in the middle of the deck so it needs to be held down whilst the needs to be glue sets.
There really should be zero bowing. Before you glued, I'd have suggested every bulkhead was fully seated and the deck located exactly into each ear.
The deck is designed to lie absolutely flat onto the frames, with zero elevation anywhere.
- Mr Whippy and GrandpaPhil
-
2
-
Just a quick note about the orientation of your photos.
Check this out so you can post pictures so they are the right way around:
- Ryland Craze and AJohnson
-
2
-
I use a fine sanding sponge.
This is similar to the type I use.

- Thukydides, BobG, thibaultron and 2 others
-
5
-
11 minutes ago, glbarlow said:
I’m a fan of Chris and fully support what works for his business.
Hopefully all those that said they wanted Indy have their order in and if not in now order it soon. I’m sure Chris’s investment in such a detailed model is significant Revenue provides the capital for future models. His kits are such a level above all others.
I seriously would love to see you tackle her sometime. The hull is sat here in front of me, and it's monumental!
- mtaylor, Canute, thibaultron and 3 others
-
6
-
Lovely progress. That's a decent base for the second layer.
- mtaylor, Kevin and Knocklouder
-
3
-
Apart from the buckled MDF part, I also banged the back side bulwarks and split one as you did.
Annoying (especially in this heat!) but nothing major.
- Mr Whippy, Blue Ensign, hollowneck and 3 others
-
6


Grecian by DB789 - FINISHED - Vanguard Models - 1:64 - American Privateer Schooner
in - Kit build logs for subjects built from 1751 - 1800
Posted
With the prototype, I made sure all the plates were buffed down as much as possible to remove any wrinkle, and then I used some isopropyl alcohol to remove any grease from my fingers.
From there, I used 0000 steel wool to really shine it up before then applying acrylic matt varnish to it. That makes it look nice and uniform without the shine. If you want patina, don't varnish and let the copper tarnish itself, BUT don't go touching it again or you could see fingerprints in that patina, from the acid in your skin.