clearway
-
Posts
2,238 -
Joined
-
Last visited
Content Type
Profiles
Forums
Gallery
Events
Everything posted by clearway
-
 looks like an interesting little kit to build. I assume the frames are just a "plug" that is removed once the planks are glued to the keel? Keith
 -
Ty for the likes and comments so far everyone-there was more rigging added after that pic was taken Boyd! The Mantua victory is about two thirds the size of the billings model so it is still pretty impressive.
-
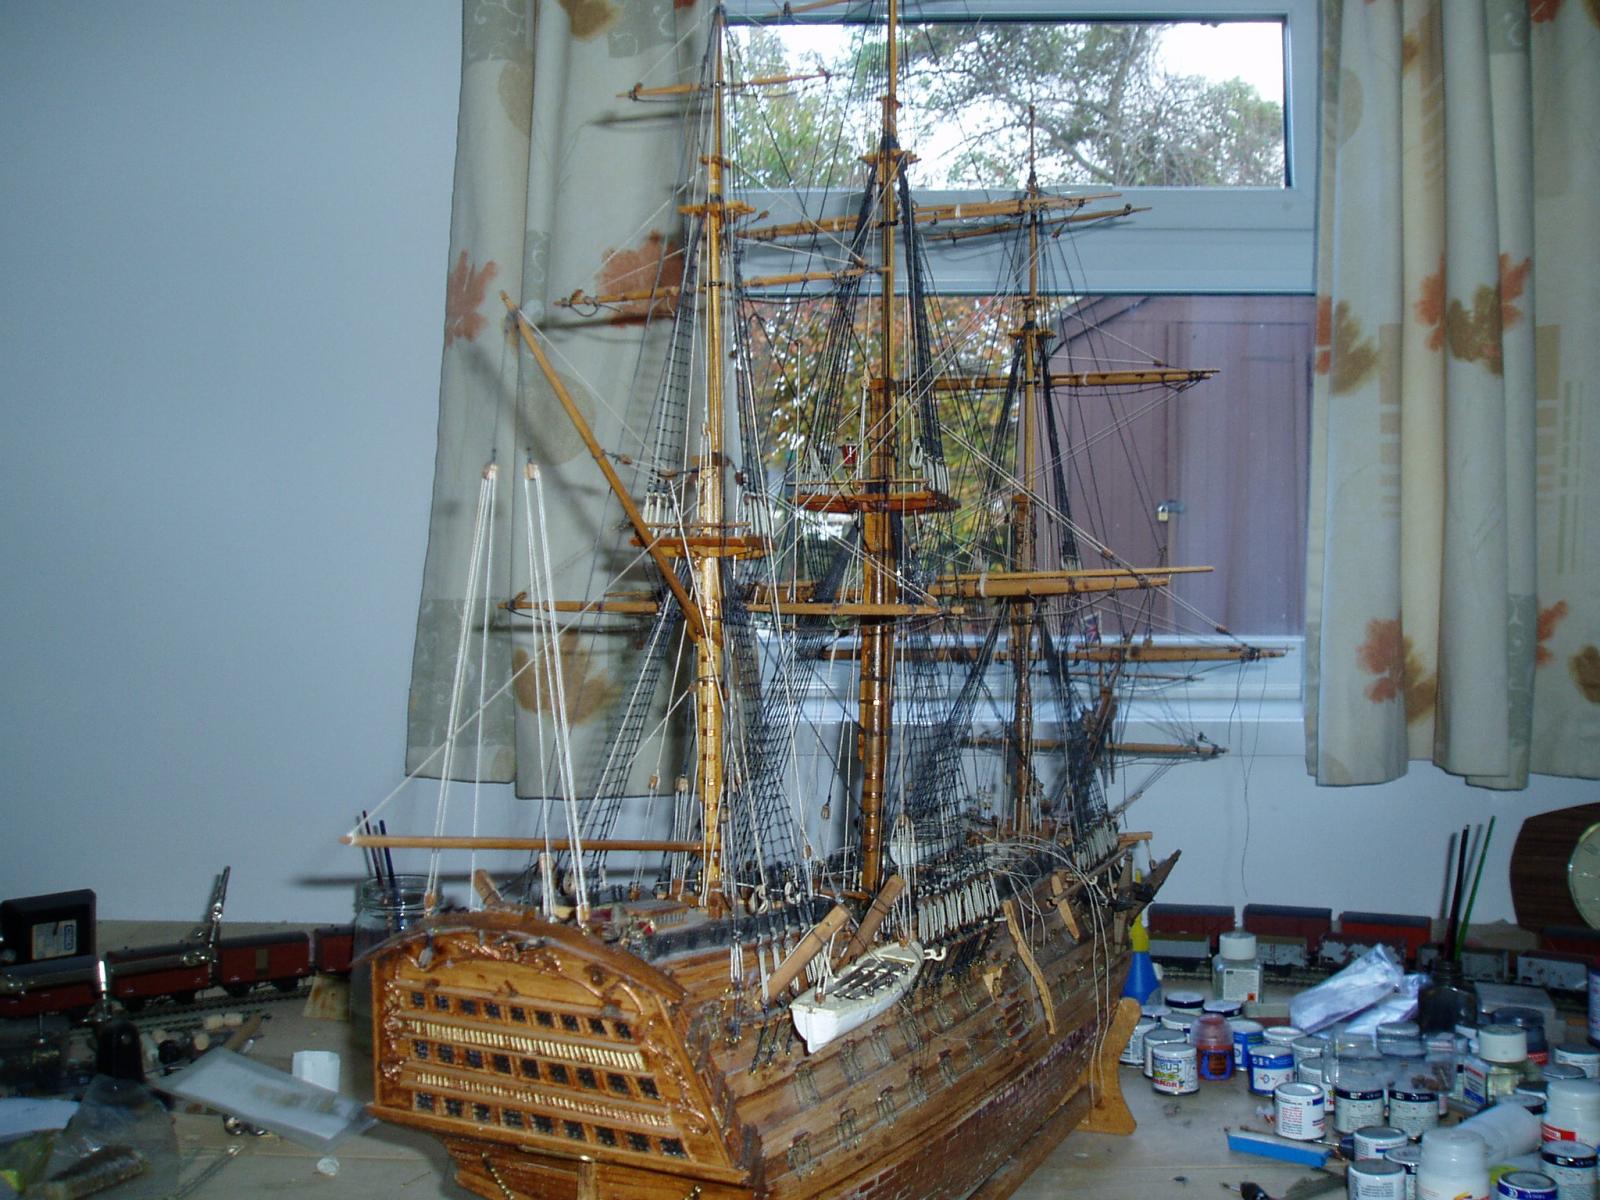
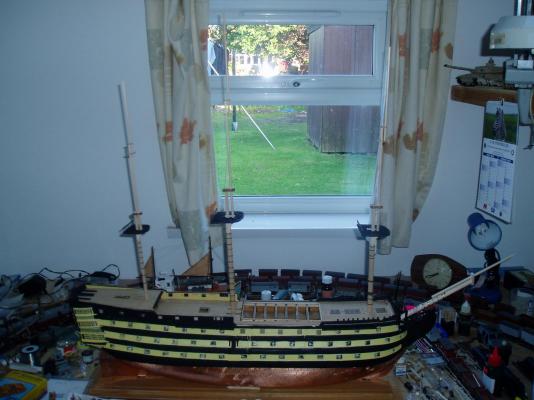
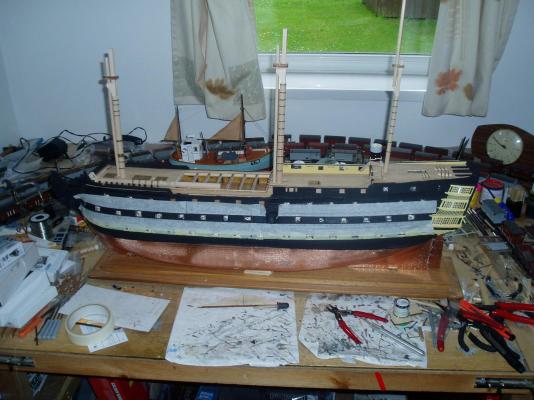
your right about the time flying Boyd- been doing this build since xmas 2013 but never really started in earnest till about february 2014 as i was remasting and rigging an old mantua 1/96 Victory for a friend- see below pic. Back to my Vic and carried out a bit more work to the masts as a break from painting yellow stripes. When on the workbench the mainmast stands at just under 5 feet 10 inches tall! Only the tops and the cheeks are actually glued all the rest is just held up with friction at the time being. Keith

-
you need to get some smoke in there too Dan - you can almost hear the shouting, swearing and gunfire- fantastic work.
-
Ty for the likes and comments everyone. think the copper will need re lacquered when i have finished though Dom. Keith.
-
looking great Boyd m8- you will find the walnut will most likely tone down to a more yellowy shade after it is exposed to light for a few weeks which i think looks nice. Know what you mean about the heights of the masts- i did the top masts and cross trees today and they are nearly as high as me with the vic on the bench, When i have the topgallant masts on i will have to stand and reach up to rig it!. Also when you start to rig her i advise starting with the mizzen mast first. Keep up the great work. Keith
-
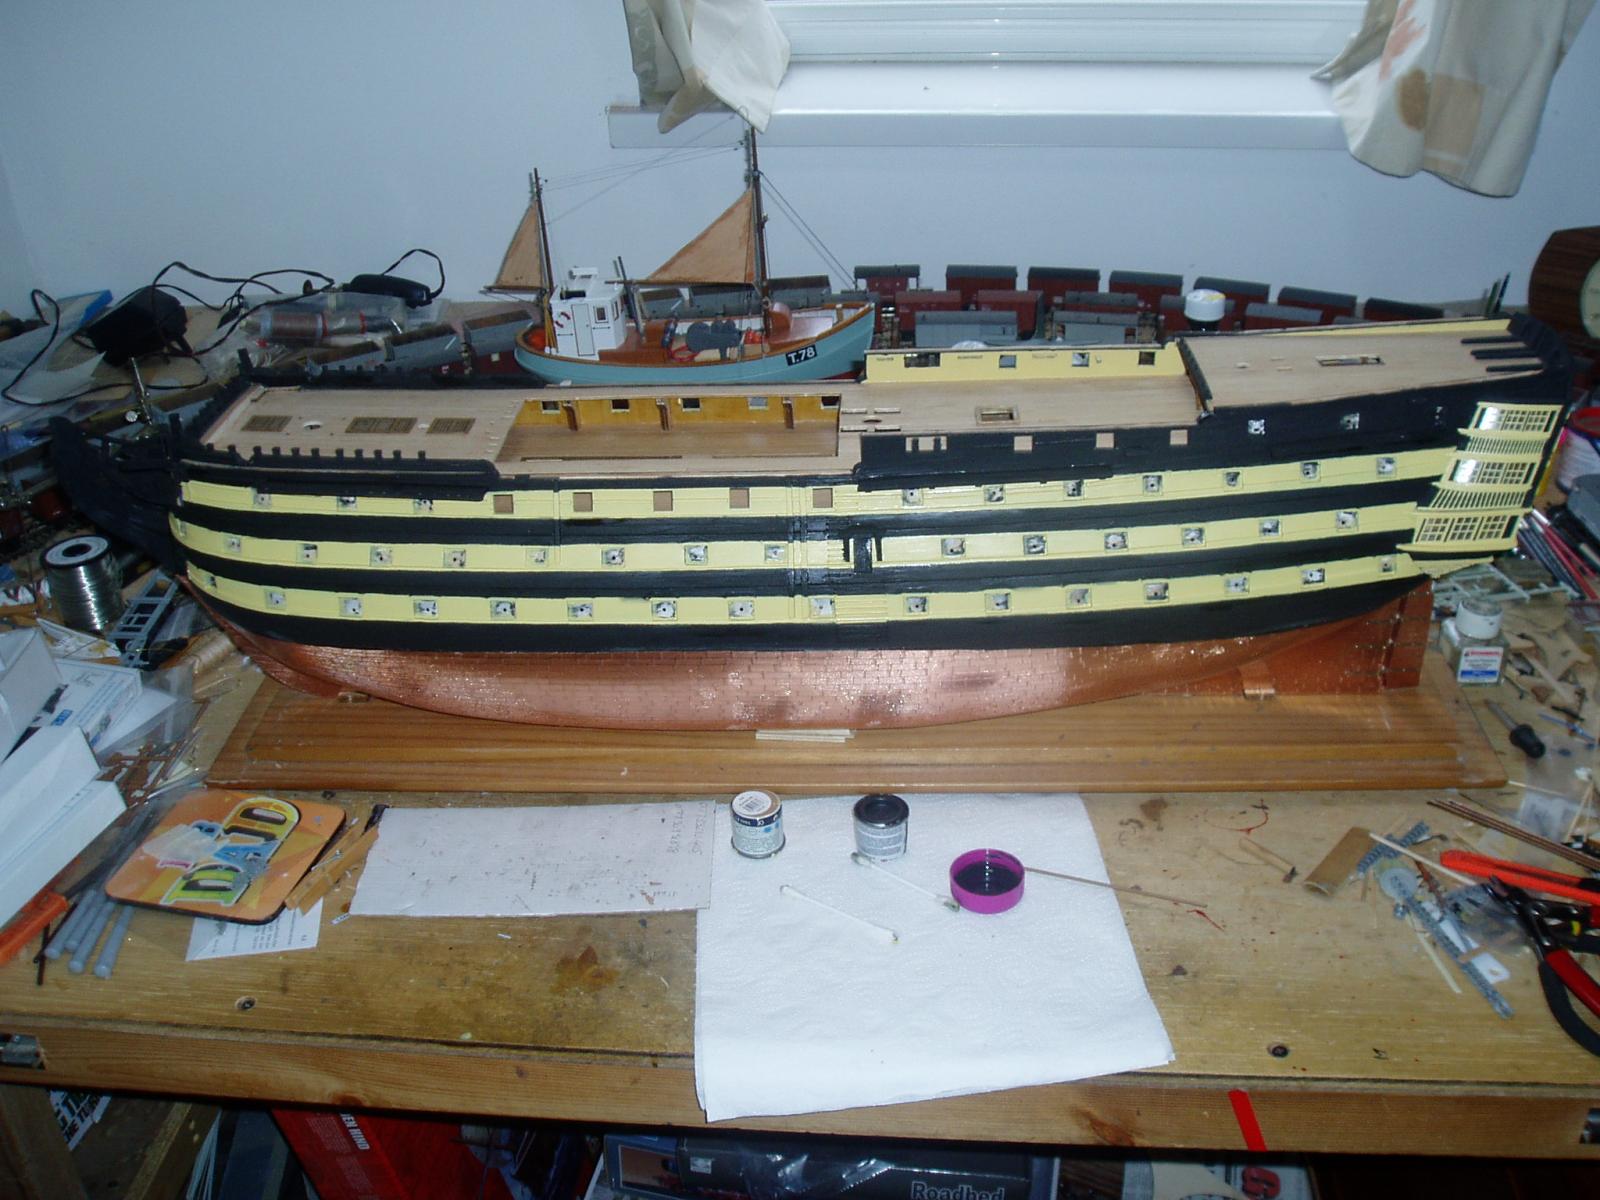
Just a quick update- couple of more coats on the yellow stripes- can't believe its a year since i was doing the stern gallery windows- woooosh goes time Keith

-
Ty Harry- your Vic is also looking very impressive. ementzingen these are the billing boats 1/75 kits. Keith
-
lol Dominic we all been there m8- you don't realise how big Vicky's bottom is till you plank it Keith
-
i painted the black on the hull first Phil so i didnt have to worry about getting any on the tiling, but yes i would recommend fitting the wales and finishing all the major parts of the outer hull before plating as the less the copper is handled the less it will tarnish, and when working on the bow and sttern you may catch the tiles if you use Boyd and mines clamping method while working on them. Keith
-
had the same problem with the ply formers on the billings version too- cad cam design is o.k. so long as you match the canting on the frames exactly as the computer! keith
-
way to go my man- dont know if i could face planking mine again though lol Keith
-
looking great as always Frank- enjoy the break m8 Keith
-
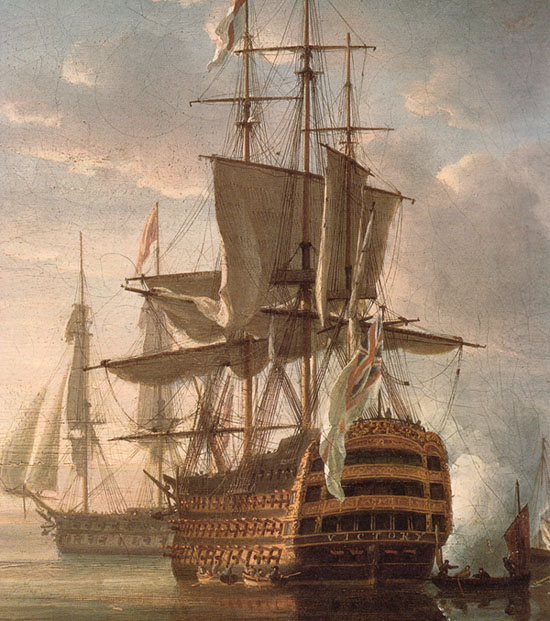
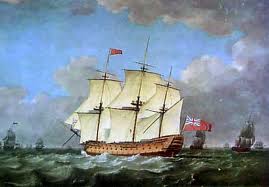
even more intriguing as the top most picture is a cameo from a larger painting which depicts all the ships Nelson served on and the other picture is in books describing her as hms Victory before her re-fit prior to being re-instated due to the napoleanic wars. painting with the stripes was i believed Nelsons idea to help british men o war identify each other in battle. (Sailing towards the french fleet he noticed also the french had painted their masts with black bands and ordered the british to repaint the masts white to help i.d. friend from foe. Keith
-
Certainly looking that way Dominic- these paintings are famous so amazed the kit manufacturers havn't used them as a reference for re-creating the retro look. Mind billings do say their kit represents the Vic as she looks today (they got the rigging wrong in places though)! Keith
-
interesting- there is an old painting of her in plain finish before the stern galleries were closed in and it looks like a gunport was there prior to the bumble bee look. Keith

-
i always start rigging with the mizzen mast first working upwards and forwards (easier for rigging the forestays )
- 1,319 replies
-
- 1
-

-
- caldercraft
- Victory
- (and 1 more)
-
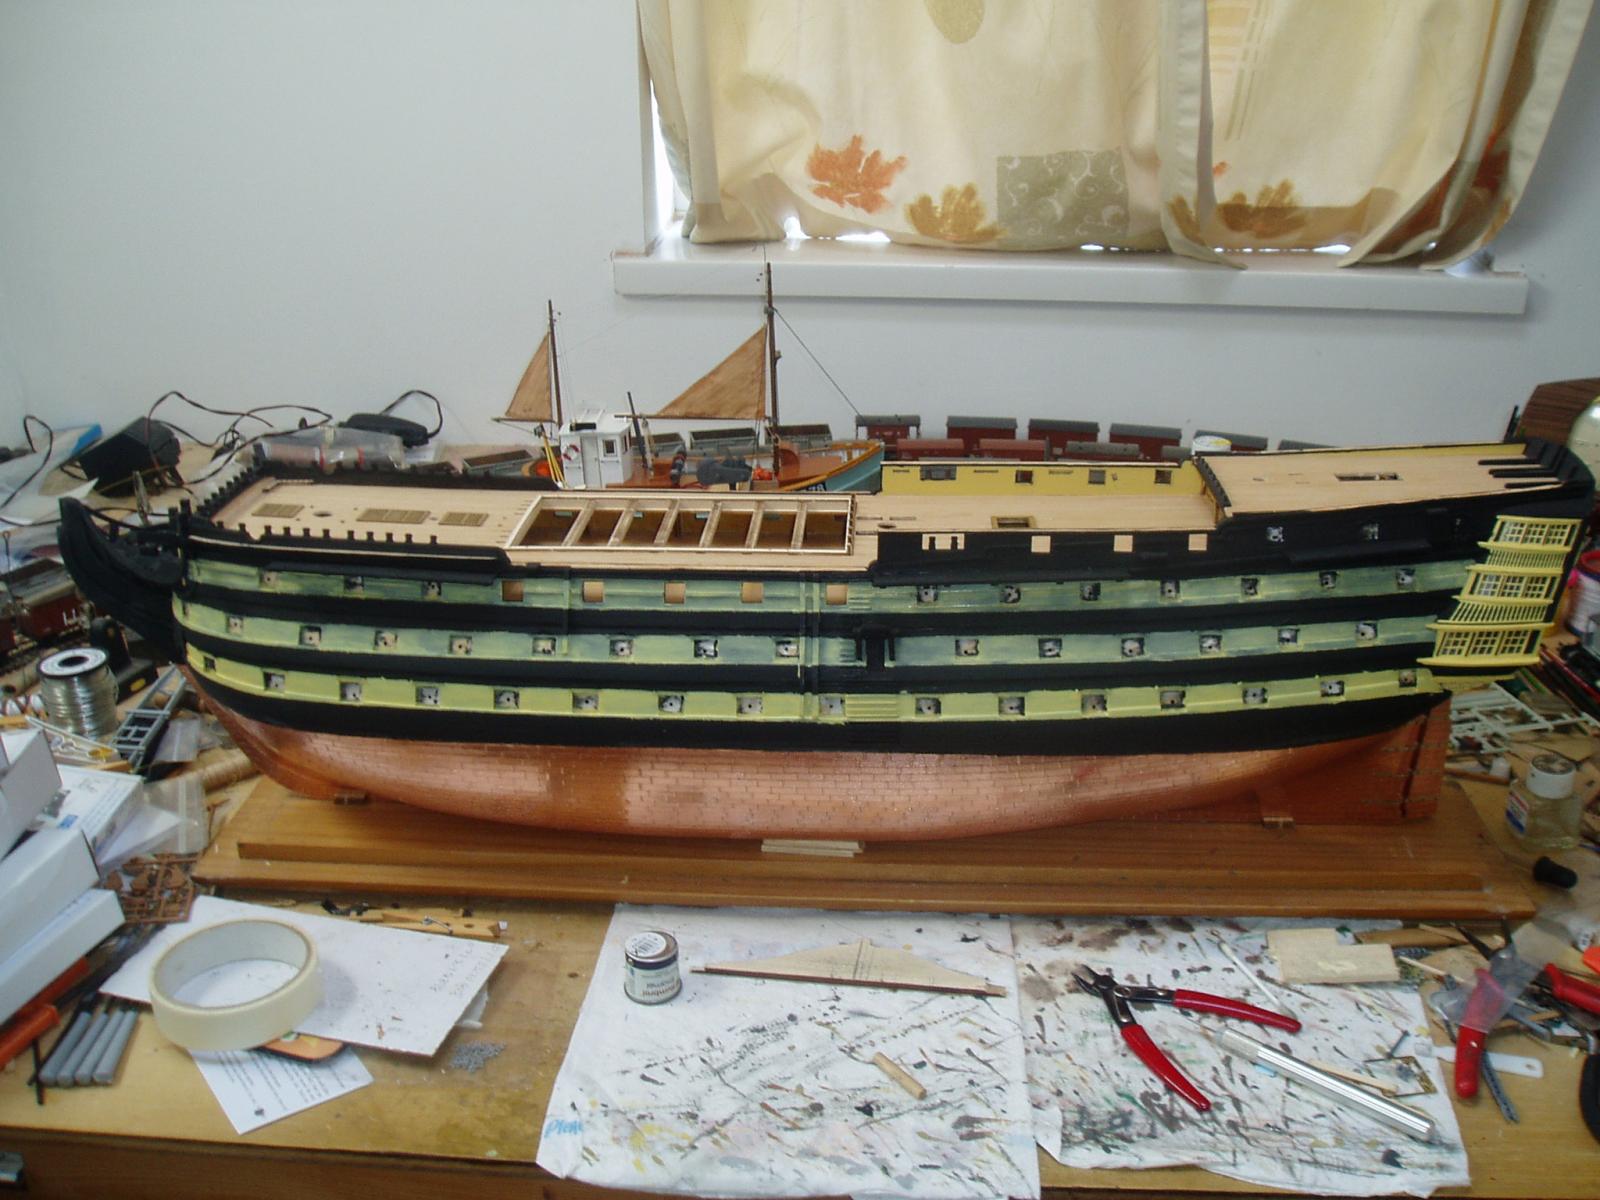
I suspect the doorway was a later addition and it was originally a gunport hence the iron ring bolts on the bulwark?
-
Lol Dominic- you tempting fate . You certainly get a lot more frames and internal bracing with the caldercraft kit as opposed to the Billings. Keep up the good work. Keith
-
Ty for the likes folks- Yep Boyd the stripes are inline with the gunports. You can make out the ridges for the wales on the yellow striping. Keith
-
bringing back memories of just over 12 months back Phil- keep going the end is in sight Keith
-
interesting- will bank this idea for later- wonder if it works on copper too
-
Ty for the likes everyone. Gardening taking priority at the moment- however it was raining again this morning so made a start on the yellow stripes. Decided to use run of the mill masking tape as a guide for the yellow striping- will have to tidy up the border with some black paint when i have finished with the yellow. While i like the humbrol matt 74 linen for the yellow it is a bit thick and needs thinning even when brush painting hence the "splodgy" lines. Another two to three coats should see it right- only one stripe painted on starboard side so far. Have fun all. Keith

-
Need to drill the holes for the gun rigging myself and must admit the dowel/pin vice idea looks ideal- Dan has some good ideas Keep up t' gud wuk as we say in Cumbria Keith
-
Hi mohamed, i didn't realise about the lack of Nina logs on the web. I soak the planks in warm water for a couple of hours then "tweak" them to the required shape between thumb and fingers. Must get back to Nina- since that pic was taken the poop and anchor decks have been trimmed to fit, but Victory has been taking prominence in the shipyard. Keith