
HOLIDAY DONATION DRIVE - SUPPORT MSW - DO YOUR PART TO KEEP THIS GREAT FORUM GOING! (Only 44 donations so far out of 49,000 members - C'mon guys!)
×


mtdoramike
-
Posts
2,094 -
Joined
-
Last visited
Content Type
Profiles
Forums
Gallery
Events
Everything posted by mtdoramike
-
Yeah that is my intent, but I have also read where if you run these Mahogany run about boats with too much power, you can actually swamp them. But at 36" long and 4" sides on the Rita, I don't think that would be an issue as long as the throttle was moderated properly when turning.
- 52 replies
-
- 1
-

-
- dumas
- Chris-Craft
- (and 1 more)
-
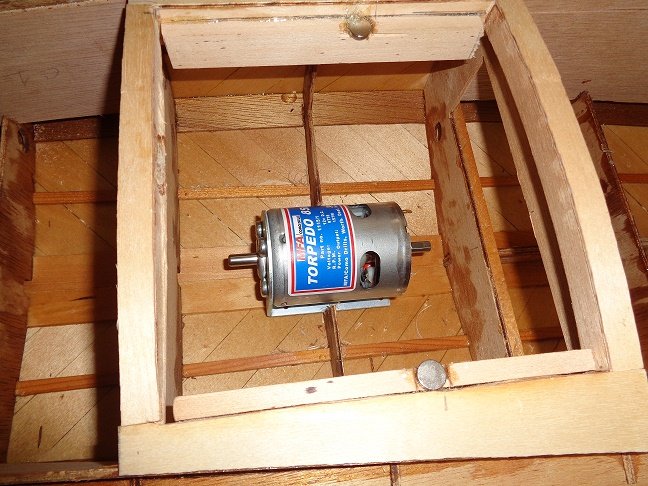
This is what that hog of a motor will look like mounted in the boat. I'm hoping with the weight of the motor will help balance out the boat and I will not have to use a bunch of dead weight.
- 52 replies
-
- 2
-
-
- dumas
- Chris-Craft
- (and 1 more)
-
Yes Pittman does, but I couldn't find a Pittman motor this large. I wished I could, I hate having to order and wait for these motors to come from England.
-
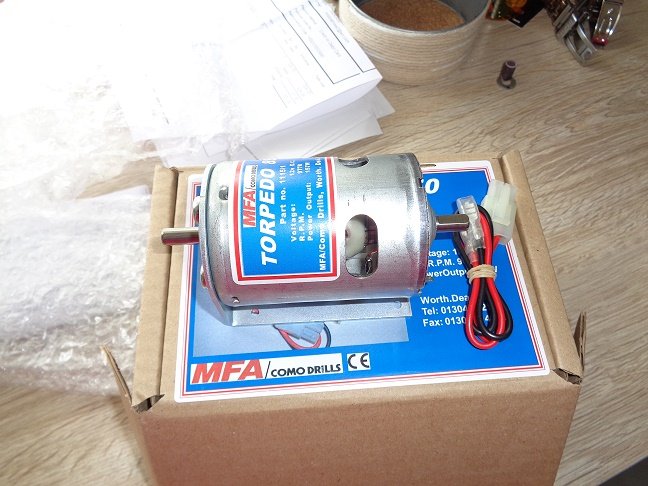
I finally got the beast of a motor in from Cornwall's in England. It took a bit over two weeks and cost about $38.00 US. Which isn't too bad considering you can't find a brushed motor in the US of this size or caliber. To give you an idea of the size of this motor, I put my fist up next to it. I also comes with the motor mount, which makes it a lot easier when it comes to mounting it.


- 52 replies
-
- 5
-
-
- dumas
- Chris-Craft
- (and 1 more)
-
The only rule I have when it comes to model building, is what ever makes the job easier, faster and safer is my moto or creed I thoroughly believe in artist license or builders choice hahahaha. I have taken a belt sander to a ships hull when I could find someone to hold it.
- 1,135 replies
-
- 1
-
-
- model shipways
- syren
- (and 2 more)
-
I've got the 350 scale Tirpitz still in the box, waiting on it's turn on the table. But I have a few more models before the Tirpitz. I think the Prince of Wales is basically or at least very close to the Tirpitz.
- 20 replies
-
- 4
-
-
- prince of wales
- tamiya
- (and 2 more)
-
OK enough talking, get to building I'm all in. Lets see what is in the box.
- 20 replies
-
- 4
-
-
- prince of wales
- tamiya
- (and 2 more)
-
If you go on Ebay, you can usually find the OLD Ben Latham kits in the square yellow boxes that are solid hulls, which would make an awesome build especially if you bought some thin wood strips and glued them to the hull, which would give it the planked on frame appearance.
-
The Ben Latham is made by Model Shipways and one of my favorites, although I have never built that particular model, I have always wanted to. If I had to choose between the two kits, I would always opt for the model shipways kit, some of the best plans on the planet as well as instructions and the fact that it's an American manufacture doesn't hurt either. I have never built the Scotish Maid, but I have heard that it's a bear of a kit to build as is most of the cheaper foreign kits are. I would like to add here that if you are into seller your models or might be in the future, picking American ship representations sells 10 times better than ship models represented from other countries with a few exceptions. Models of French ships are some of the worst to sell. I built a few and couldn't hardly give them away. So I steered clear of them after I realized this. English ships are second and Spanish ships are third on the list for most buyers. But there are exceptions to ever rule.
-
kit review 1:120 USS Susquehanna - WoodyJOE
mtdoramike replied to James H's topic in REVIEWS: Model kits
Very nice kit review, but the Woody Joe link doesn't work. This kit reminds me of the Billings kits in that it uses quite a bit of plastic molded parts, which I detest. But it looks like a great kit and I love the fact that they were future thinking enough to build the kit with Radio Control in mind if you so desire. -
Oooooo, the Agie, not many models get my blood pumping like the Agamemnon and what a beauty she is too.
-
DeAgostini Model Space Sovereign of the Seas 1:84
mtdoramike replied to RickyGene's topic in Wood ship model kits
Oh goody, popcorn ready. -
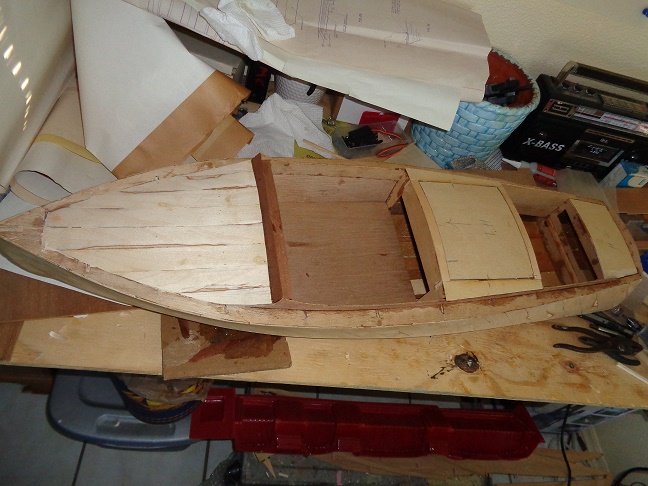
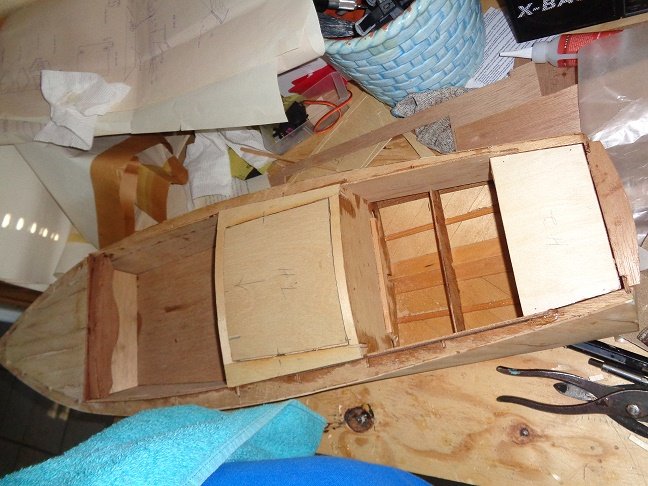
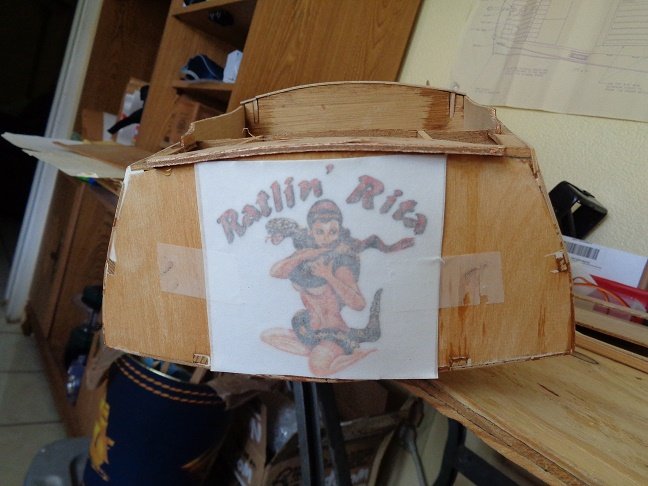
I've made a little more progress on the 1930. I cut out the engine and stern covers and got them mounted I covered the front deck with the bottom layer of planking. I ordered an FMA 850 brushed motor from Cornwall models in England for it. That motor should get this beast up on plane. I ordered the stern name of Ratlin ' Rita.
- 52 replies
-
- 6
-
-
- dumas
- Chris-Craft
- (and 1 more)
-
I'm so tempted on that Trinidad or the Louis, but I'm trying to stay away from any project that will take me two years or better to finish. I'm more leaning towards 6 month projects, although, I have people all the time wanting me to build them a tall ship model. I have a doctor who wants anything I'm w3anting to build for his collection. I told him then he needs to be the hi bidder on the Montanes that I'm donating to the hospital gala hahahaha. Beautiful kits Ron, I can't believe they are still here. Boy in my hey day, they would have been gone. mike
-
If someone doesn't snag this quick, I will and then my wife will want to finish what my blocked arteries started. I have three waiting there turn on the building board.
- 10 replies
-
- 4
-
-
- reale de france
- kit
- (and 2 more)
-
I would only give a right angle look to the sails if you have sails mounted as though the ship was in sail, moving. But in port they would never be at a right angle.
-
Oh no you didn't, I remember when you couldn't beg borrow or steal one of these kits. Rick, unless you are wanting a bunch of low ballers, you need to give at least a hint of what your wanting to get out of it. The shipping from Montreal to the US at $60.00 is not bad for that heavy of a beast. mike
- 10 replies
-
- 2
-
-
- reale de france
- kit
- (and 2 more)
-
I'm sorry to hear of your life issues Mark and wish there was something I could do to help out other than my prayers. If we lived closer, I would finish the build for you if nothing else, it my have given you a peace of mind and soul. I wish you all the best and hang in there and if you need anything never hesitate to ask. mike
-
Your planking job, looks great so far. When I plank solid hulls, I usually used contact cement. I measure out my planks, smear on the contact cement on both the plank and the hull and then lay on the plank. But I also color or stain the solid wood hull a dark color so if there is any minute gaps between the planks, it will not stick out like a sore thumb. I use a low shine varnish and usually rub the finish with steel wool to give it a waxed appearance.
- 13 replies
-
- 1
-
-
- constructo
- bounty
- (and 1 more)
-
First off, no matter what your next build is, it can be any model, but it's up to YOU to make it that show piece that would make you proud to pass down to future generations. A kit is a kit and only a starting point. But it's up to the builder on how much time, effort and research (oooops, there's a dirty word) that will either make an acceptable model or take that same acceptable model to the next level. I usually spend as much time researching a particular build as I do actually working on the model. I have built two out of the three you mention, the Model Shipways Bluenose, which went to a fellow in Canada. This is a great model for the beginner, easy to plank and it give detailed instructions on the proper way of deck planking. Model Shipways The Pride of Baltimore went to a fellow in Niagara Falls NY. It also was a fun model to build, but more of a second intermediate level model. It too has great plans and if memory serves, the plans on both were by Ben Lankford, who is one of the best at it. A piece of advice, never look towards your next build until you have a few models under your belt. I have finished several models where the owner had all the intentions in the world of finishing them, but life gets in the way and they just never got around to finishing them. Then someone like me steps in and finishes the model. Ebay is full of them. The last two models rear paddle wheeler river boat, Chris Craft mahogany runabout I finished where latch key kids abandoned and not to mention the next two, a 1930 Chris Craft Runabout and a Vietnam Gun Boat I will have to finish. Good luck on your current build and future builds, mike
-
Ok folks, the final journey of the Montanes will be coming to a happy conclusion soon. The Waterman Hospital located in my area and the same hospital where I had open heart surgery recently is going to accept the Montanes as a donation. They have a Gala event in February each year and auction off various items and then use the money to obtain equipment or fund special programs like caring for the homeless when they are in need of health care. The manager of the Cardio Rehab Facility is really excited about the donation and hopes to possibly get some new workout equipment with funds from the Gala. I'll post how the process goes as it progresses. mike
-
DeAgostini Model Space Sovereign of the Seas 1:84
mtdoramike replied to RickyGene's topic in Wood ship model kits
Hey RG, take some pics and show us what you got for your money. Model Space in my opinion is a great company, great support and what better way to spread out a build and the cost of the build over an extended period of time. The Sovereign is the only tall ship model that would make me want to build another. mike -
WOW CD, moving from a temperate climate like Florida and moving to New Hampshire, is a big move and require big adjustments I'm sure. Why don't you move over here near me and get out of that Tampa rat race. It's a bit more laid back here, although the lack of hobby shops is a downer. I wind up ordering just about everything I need on line. I'm just busting your chops, I'm sure you will get around to it one day. I know if I have an unfinished model laying around, it will nag me to no end, usually through my wife until I get back to it. mike
-
That is a bit shameful CD hahahahahahaha, like they say admitting it is always the first step.
-
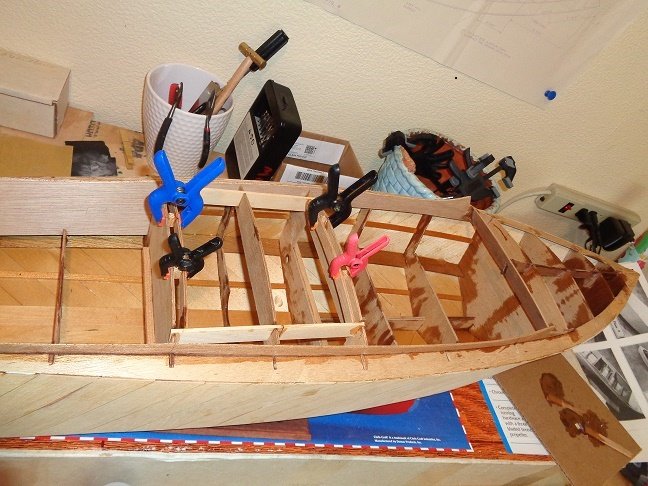
OK, I'm just getting started on the 1930 Chris Craft, I had to finish up a tug I was working on. I took some fiberglass resin, thinned it down a bit and thoroughly coated the inside of the hull with it to repel any water that might get in there. I'm going to be working on the front deck and at least get the false deck down before I start planking the hull with the finished mahogany strips. I'm not quite sure how old this kit is, but I'm thinking it's an 80's or early 90's kit. A lot of the wood is quite brittle. I may wind up having to cut new pieces depending on how it goes. I'm trying to moisten the wood a bit with a damp cloth that I place on the wood for an hour or so just to try and moisten the wood a bit until I can get it into place. I'm curious as to how the planking strips will be. I'm now on the hunt for a 800-850 sized brushed motor for this hog. It's a single prop, so I want to make sure it has enough power to get on plane. I hope I don't have to order the motor from Cornwall models in England, like I did the last time I needed two 850 brushed motors, but finding them stateside is like hunting for a Unicorn.
- 52 replies
-
- 2
-
-
- dumas
- Chris-Craft
- (and 1 more)