HOLIDAY DONATION DRIVE - SUPPORT MSW - DO YOUR PART TO KEEP THIS GREAT FORUM GOING! (89 donations so far out of 49,000 members - C'mon guys!)
×


michael mott
-
Posts
5,200 -
Joined
-
Last visited
Content Type
Profiles
Forums
Gallery
Events
Everything posted by michael mott
-

Cutty Sark by NenadM
michael mott replied to NenadM's topic in - Build logs for subjects built 1851 - 1900
Nenad, overall our time is what we make of it, it is good to see that you are progressing with the hull planking, this is like building the foundation of a house when the hull is finished then you can lavish over the small details of the rigging. Michael- 4,152 replies
-
- 1
-

-
- cutty sark
- tehnodidakta
- (and 1 more)
-
Coming together nicely Popeye. Michael
-
Microlux Tilt Arbor Saw Problems
michael mott replied to capnharv2's topic in Modeling tools and Workshop Equipment
Alex great to get your input on this issue. Experience counts! I have none with regards to the small machines, so your perspective is really enlightening. Michael -
Cool! The dress up look really sharp Sherry. Michael
-
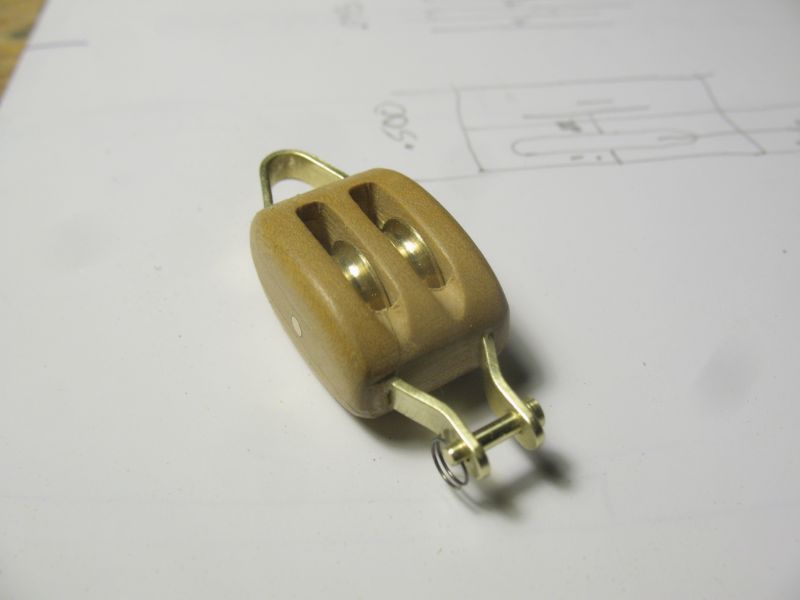
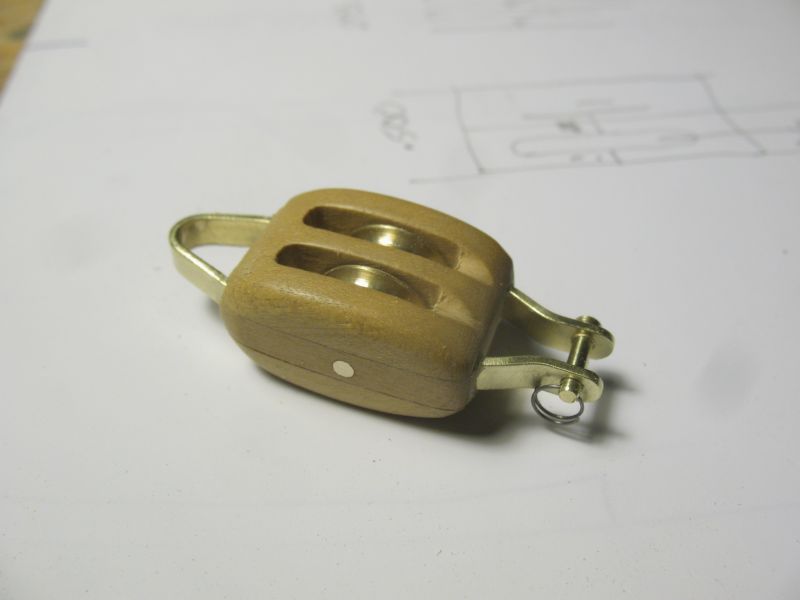
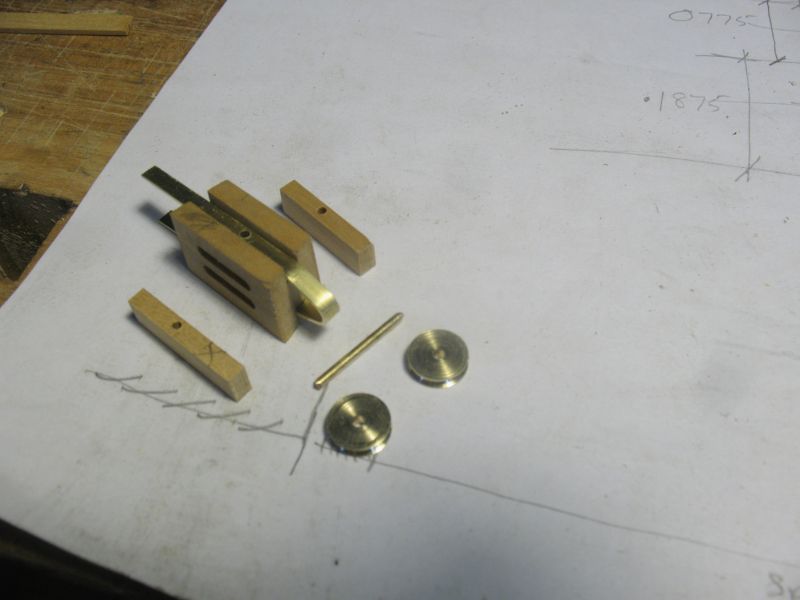
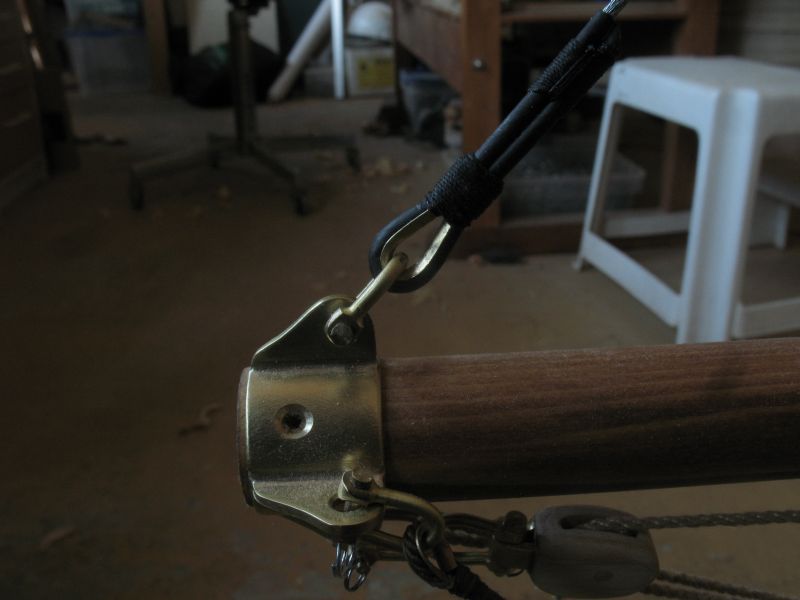
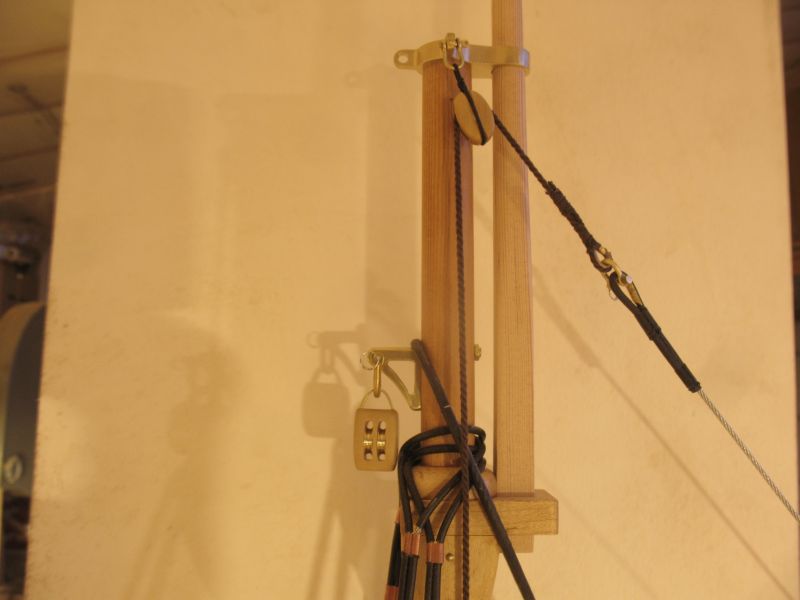
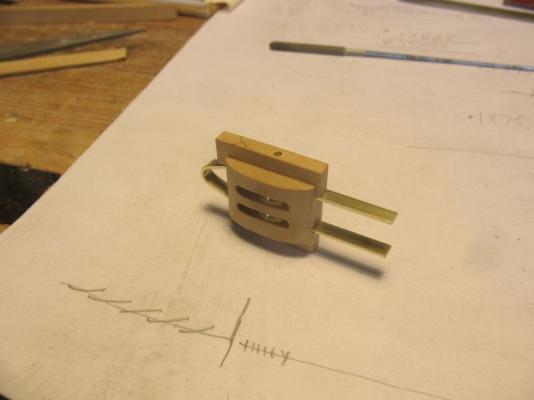
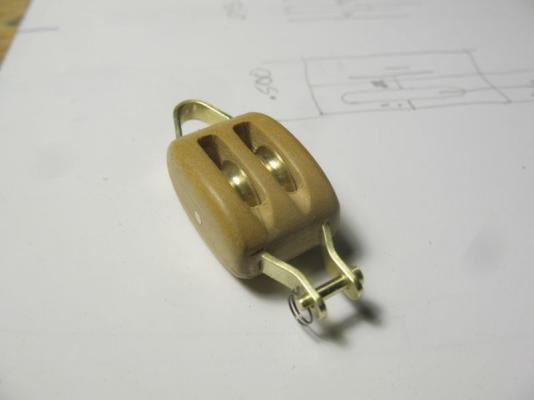
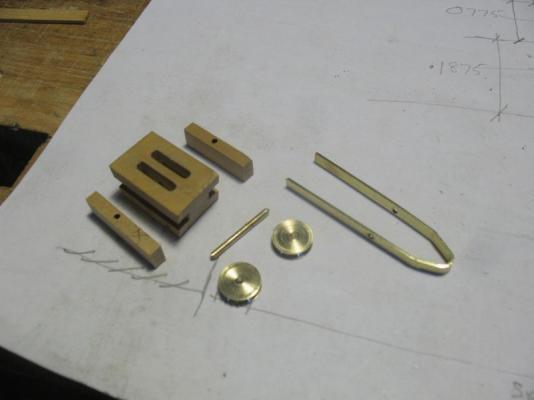
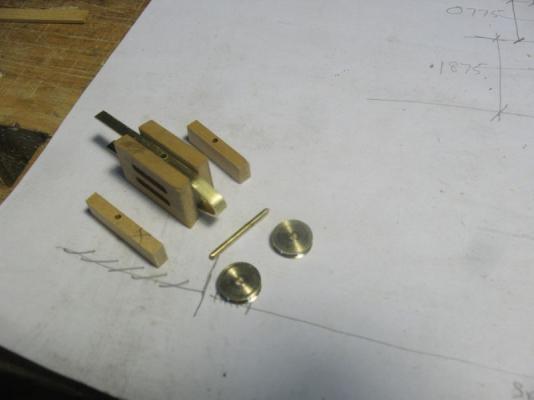
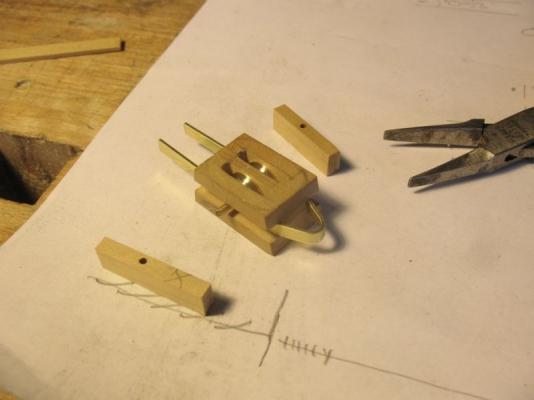
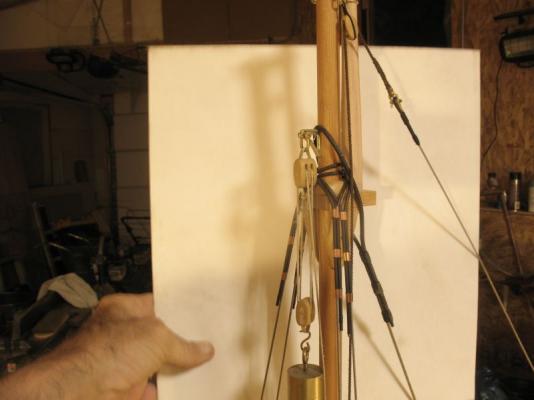
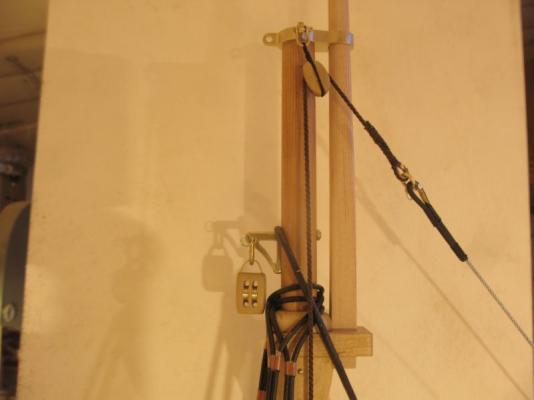
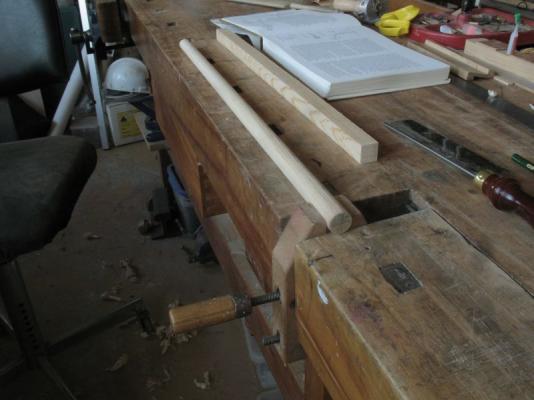
Matt missed you on the last post sorry about that. Daniel, John, Russ, and Druxey, thanks for all you kind words, at the rate I'm going I sometimes wonder when it will get to the lake. Today I managed to get enough time in to make a double block with a Becket. The sheaves are .375 diameter and the axle is .062, the brass is .125 x .031 I remembered a quote that one should treat every part as model in itself and this seems to work well for me. Machined up a block of Degame (lemon-wood) Did a lot of sanding and finishing with some fine steel wool. Made a pin for the Becket. the ring is .011 music wire. Set it up on the mast with the other double block to see how it looks for the Gaff up-haul, I just used the weight from the ropewalk to give some body to the rope. I must finish those seizings on the shrouds. The blocks work well together, this is a lot of fun, I need to get on and finish the gaff now, and of course there will be a few more blocks but the next few will be singles. Michael

-
Great work with the blocks and the cannon balls. Michael
-
Good to see you progressing Popeye, I like the poem too. Michael
-
Thanasis, What graceful line you model has. I look forward to the rest of your build. I hope the troubles in your country will not cause you any more problems. Michael
-
Nice fix Kats Trivial really when I think about the mess you inherited in the beginning of this remarkable salvage task you engaged in. Michael
-
Tim I like the positions that you have chosen they give a good sense of speed and balance to the boat. Michael
-
My Condolences Suzanne and Carla. Michael
-
Pavel, your work on the finishing of the hull planking looks very nice, I like the colours. Michael
-
Great start Mark, 9 inches is only 1/8th wow! I still have trouble getting my head around how small these models of huge ships are. I'm used to 1/8th equaling 1 inch. Michael
-
Ed, like others have said it is difficult to find words to describe my admiration for your workmanship. Your model is inspiring and sets a very high standard for me to work toward. Michael
-
Thanks for the link Sjors. Michael
-
Sjors Your model is coming along well! I noticed that you avatar is a Routmaster Bus, When I was growing up in London I used to collect Bus numbers ( a strange hobby only engaged in by British schoolboys I know) and I remember seeing the very first Routmaster bus out of the Park Royal plant where they were built. I lived not far from Park Royal One of my Brothers drove London Buses for 25 years, he quit when they stopped using Conductors. Incidentally I saw and cataloged every trolleybus on the London Transport system that were in service in 1963, I would ride my bicycle all over London finding the last few buses. A strange world we live in! Michael
-
Been there done that! my second son was colicky and a lot of long nights walking and soothing, thankfully he is 30 now and is a wonderful Father to two boys himself. The rail looks great Daniel. Michael
-
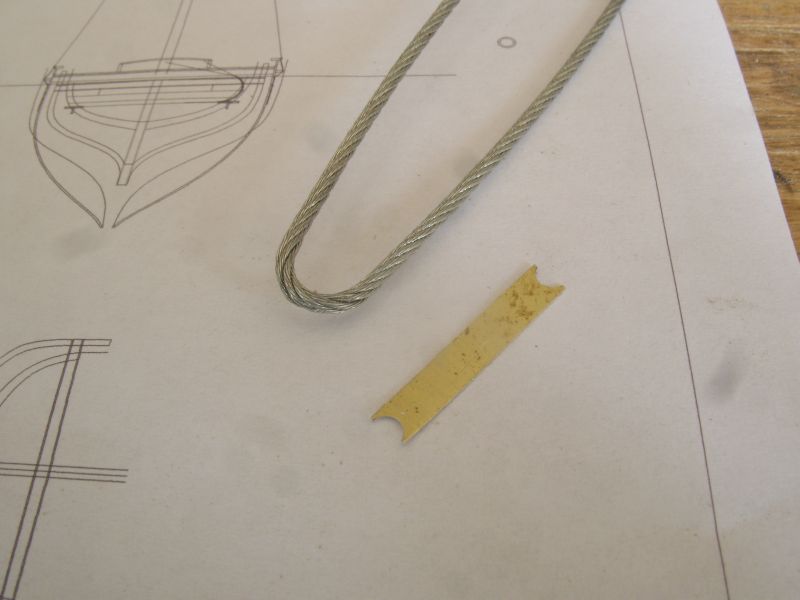
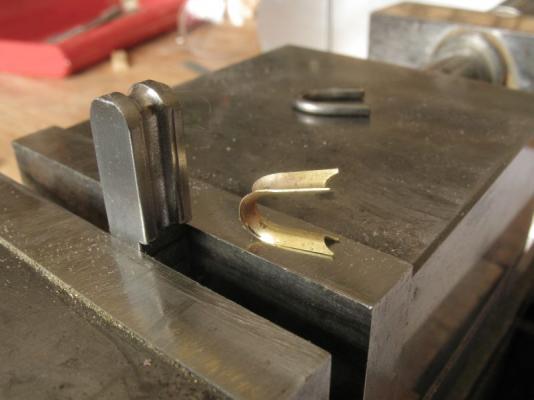
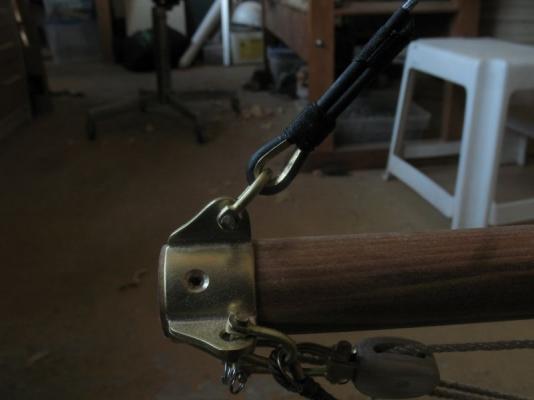
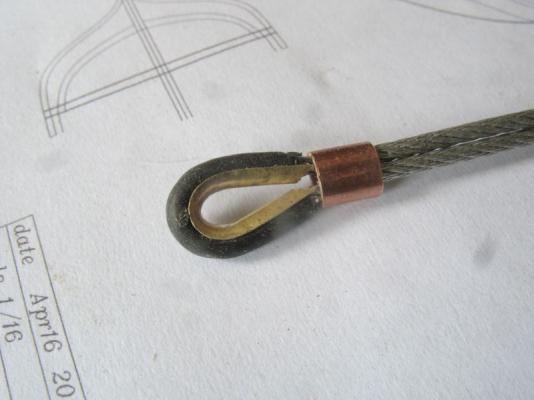
Bob, I am really looking forward to getting her wet. I did manage to do a little work yesterday and today, I worked on the Jib stay, I might just sew this into the sail and have it fly and not hank it to a stay I made a thimble for the 1/16th cable first I filed a couple of grooves at each end I annealed the centre part only and shaped the thimble using the same tools and methods as before At the moment it is attached to the bowsprit end cap but it will be attached to a traveler on the bowsprit, so that it can be hauled it to change sheets. Started working on the Gaff, by planing down a square of spruce to a tapered round section This evening I spent a couple of hours making one of the blocks for the gaff up-haul Michael


-
Russ, I know how you feel these last few days. Nice work on the cleats. Michael
-
Sherry the ship is looking very fine I would agree with Russ if I were going to cut holes for cannons then I would do it before the second planking it will allow you the added ability to ensure that the finished holes are clean and accurate and square, I say this not because I think that you are not capable of making them clean and square in the first place, it is just an insurance policy. And I like to have a fall back position. wood sometimes does not behave itself. Michael
-
Microlux Tilt Arbor Saw Problems
michael mott replied to capnharv2's topic in Modeling tools and Workshop Equipment
Mark Thanks for the link, Might I suggest that you make that one a sticky, at the beginning of tools. I use and do all of those suggestions and the author did a superb job of illustrating and explaining them. Michael -
Microlux Tilt Arbor Saw Problems
michael mott replied to capnharv2's topic in Modeling tools and Workshop Equipment
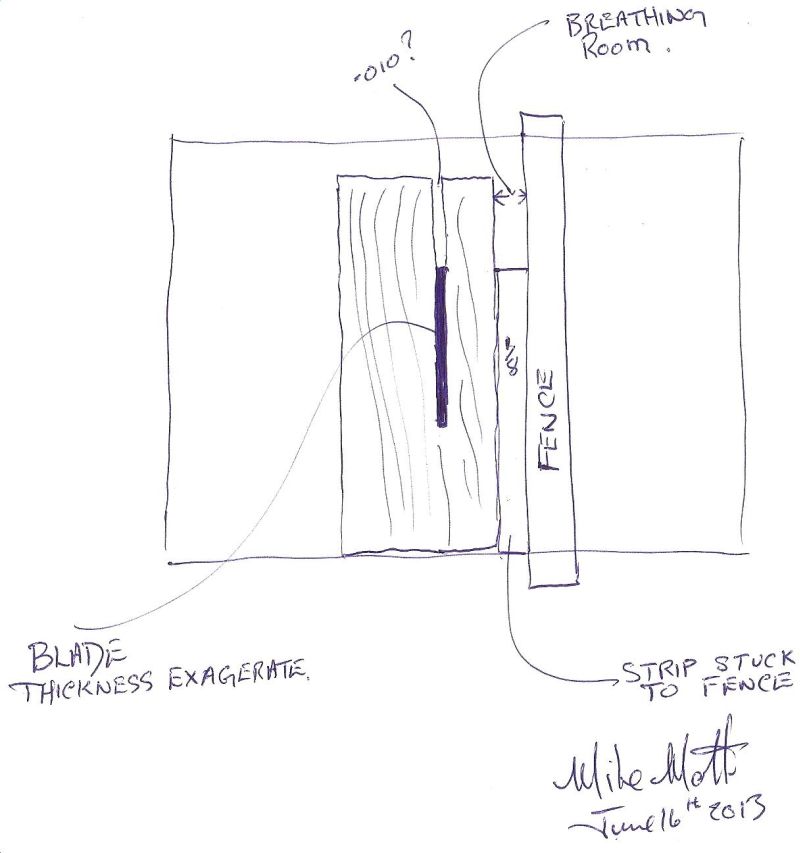
Hi Tony here is a sketch of what I was explaining. Michael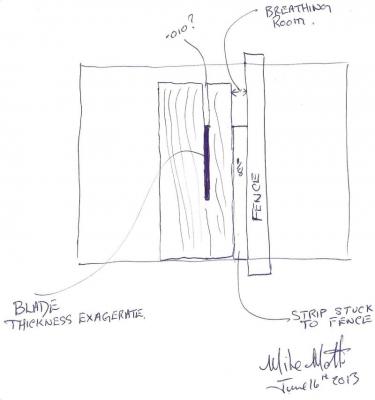
-
Gaetan, it is great that you have continued this build log after the crash, I also like to see the pictures where I can see the workshop tools and how you work, I learn something every time. Michael
-
Microlux Tilt Arbor Saw Problems
michael mott replied to capnharv2's topic in Modeling tools and Workshop Equipment
Harvey, Tony, Mark, yes this thread is interesting for all the reasons that you have all mentioned. Tony your comments about the fence and Harvey making the comment about having trouble with his fence on the full size saw brings to mind that I have had the same issues with fences. It seem to me that the issue happens after the wood being cut passes the blade. I believe this is because as we cut the wood we release some of the built in tensions that are inherent in the materials, after all they are organic and have grown in varying conditions. The nature of the blade is to cut a straight line, and if the wood begins to spring away from the blade on the open side there usually is not a problem, if however the wood springs toward the fence lets say even 50% of the time then we fin that two things occur at the same time. The wood is being moved away from the fence and simultaneously jamming at the side of the rotating blade, this can potentially cause some burning (certainly has on some of my wood) this is why I have spent some time looking at how I use my saw and how fences work in general. on another thread I spoke about keeping the larger portion of the wood next to the fence and so the piece being cut off has more of a tendency to curl should it be incline to do so. Something that has just occurred to me would be to set up the fence with a parallel strip say 1/8thand use some double sided tape and stick it to the fence so that one end is just past the trailing edge of the blade, so that as the wood passes the blade the wood has some "breathing "room as it passes the blade. I would only use this set up if I was using the fence as the limiting factor of setting the width. I still prefer to keep the wider part of the wood between the blade and the fence and increment it across with each pass, using the stop that was discussed here . Our experiences with all of our tools can give us new insights as to ways and ideas that can build the general body of knowledge, this is one of the things that I enjoy so much about this site. Michael