donrobinson
-
Posts
1,909 -
Joined
-
Last visited
Content Type
Profiles
Forums
Gallery
Events
Everything posted by donrobinson
-
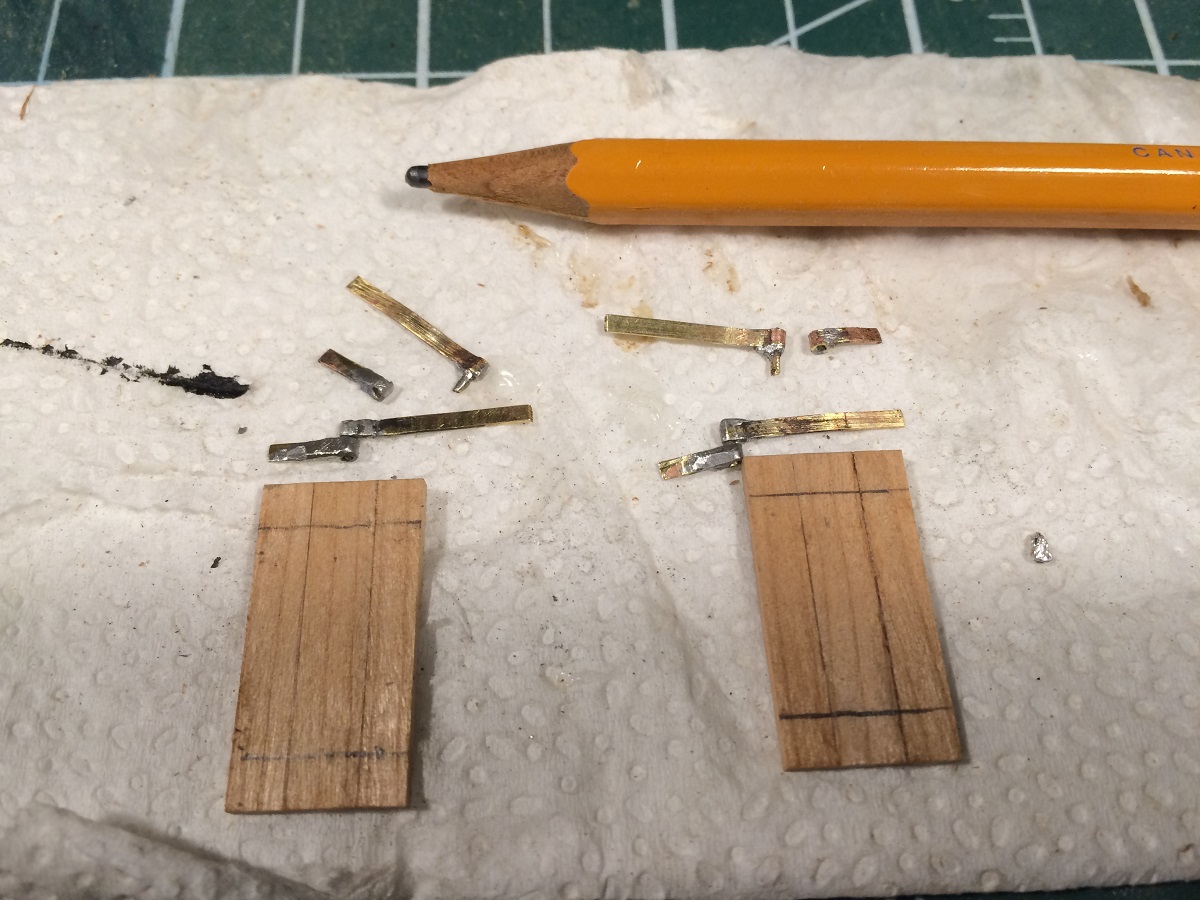
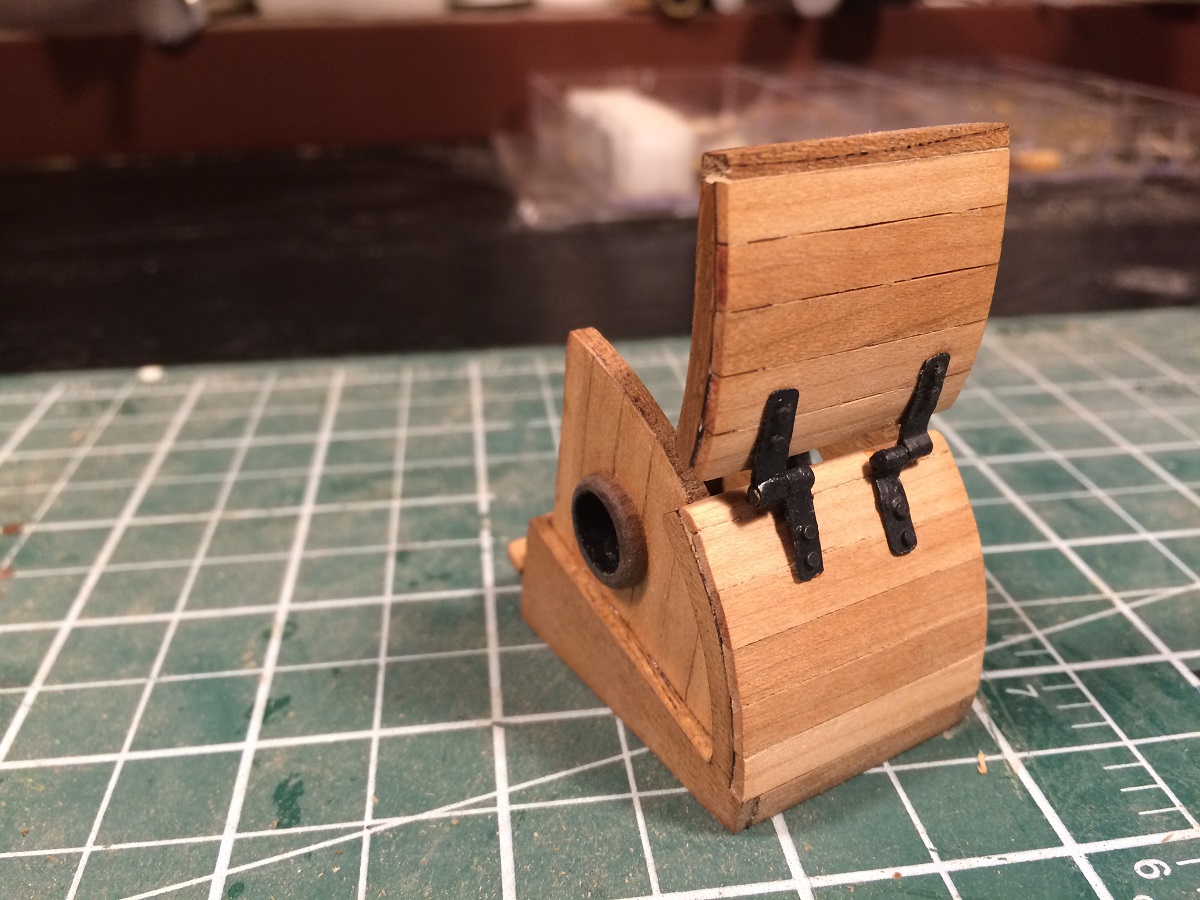
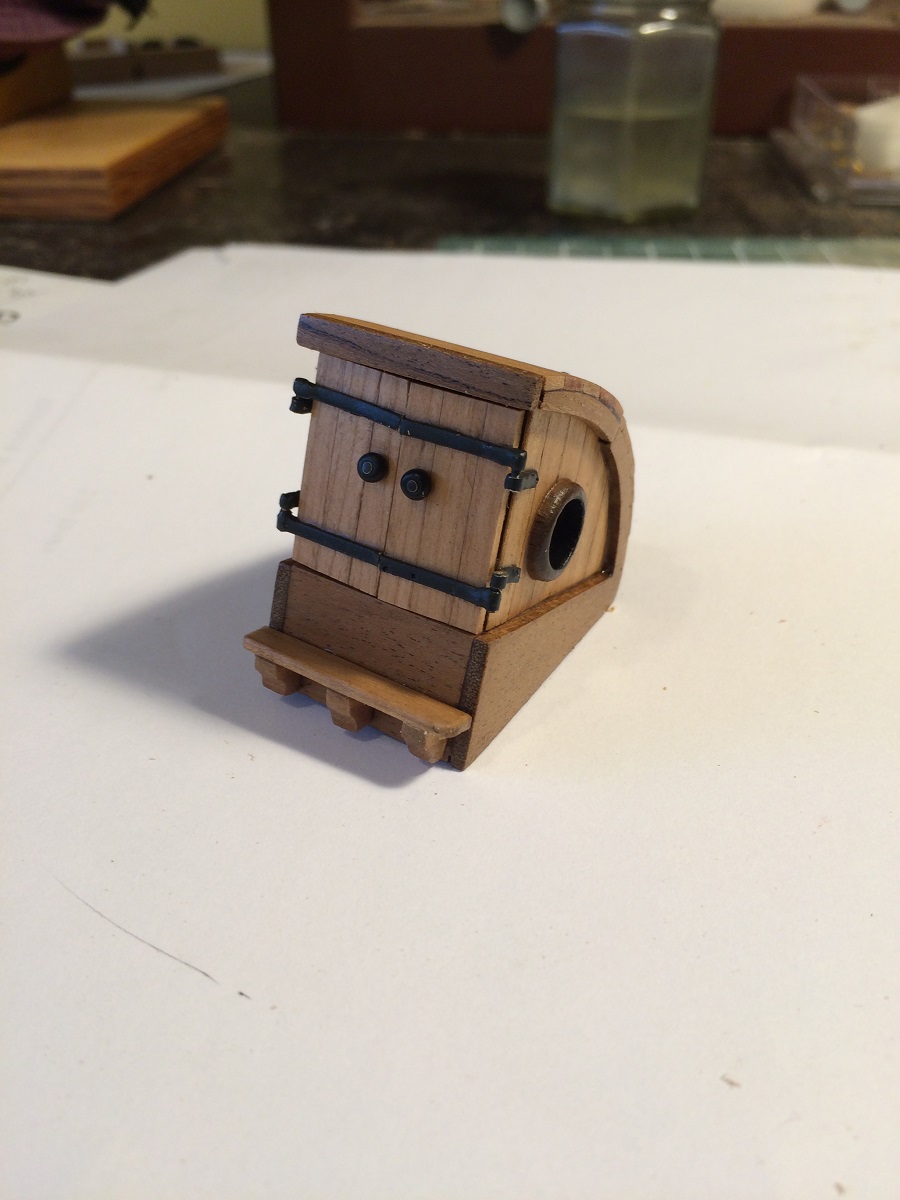
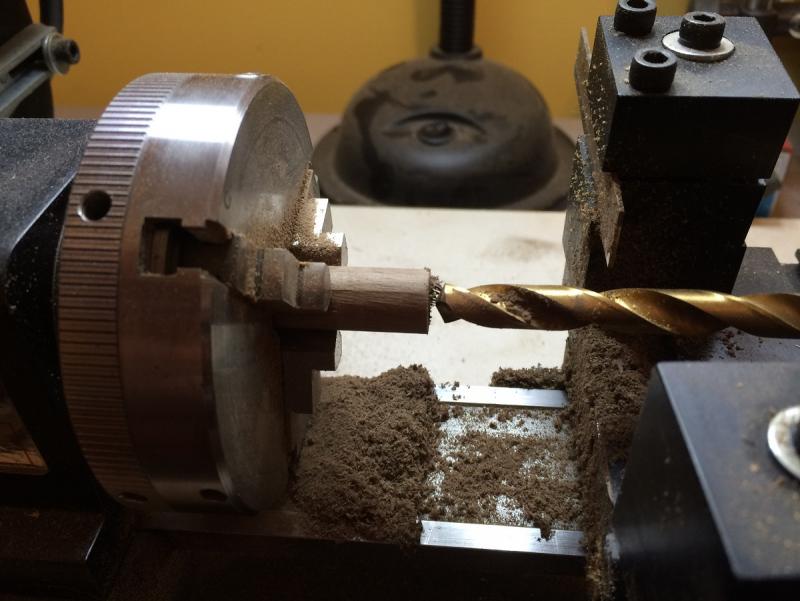
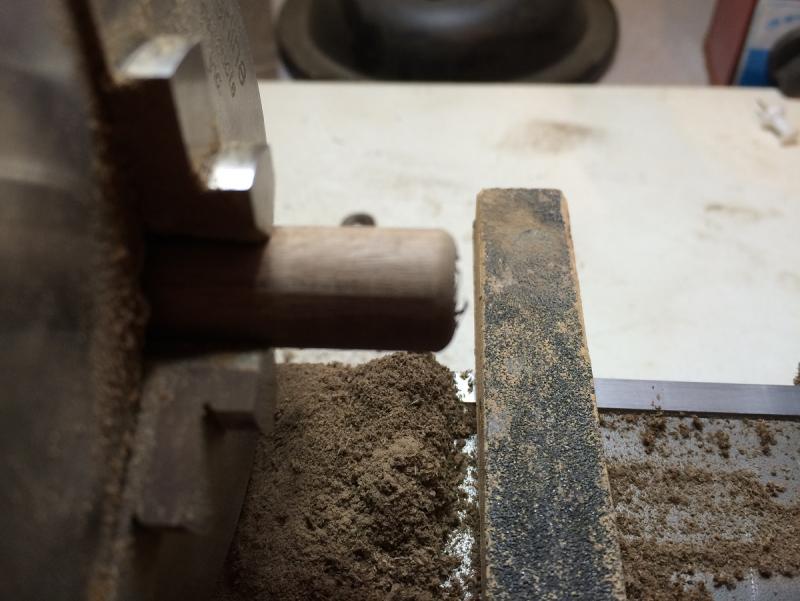
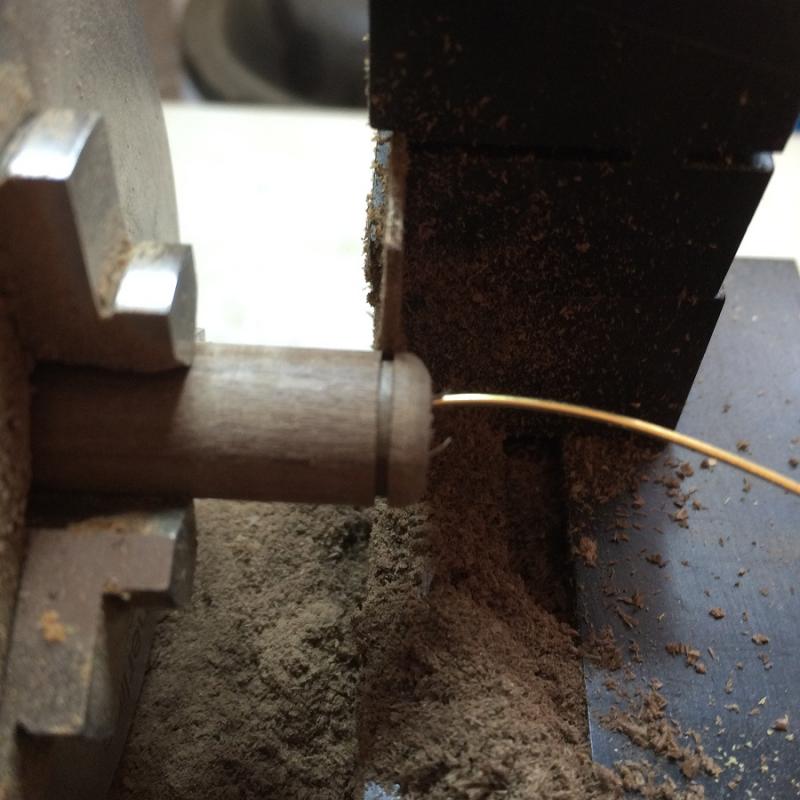
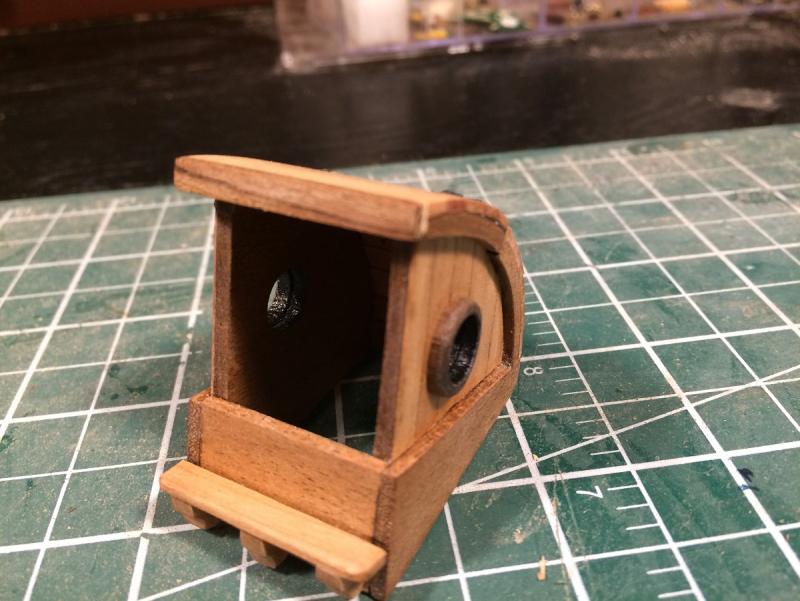
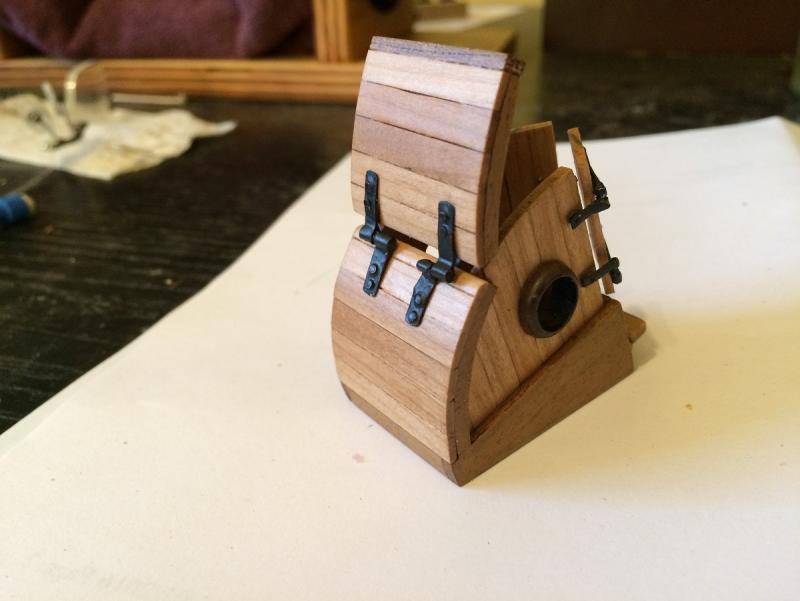
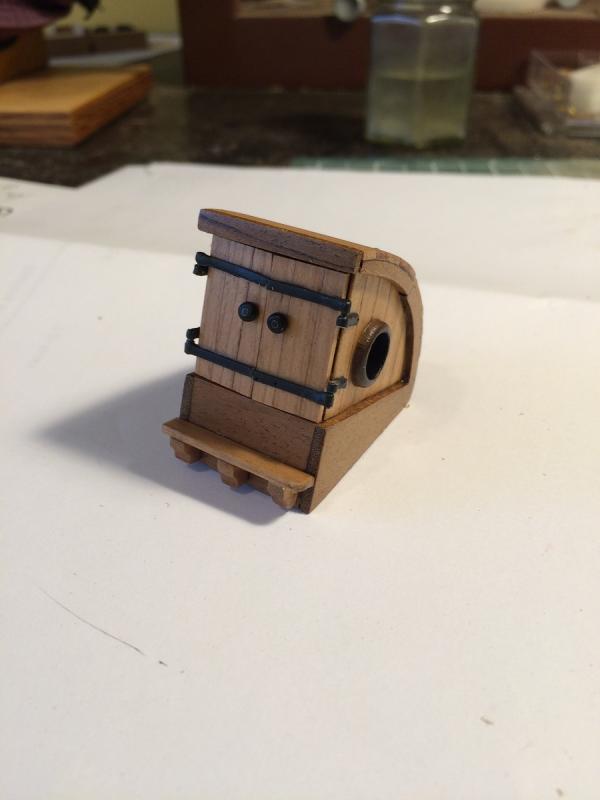
Hello All, Thanks to all those who have stopped in, given likes and for all the compliments. With this post you may have the idea I am stalling on cutting open and planking my deck..............you are right!! But it hasn't been a total waste I have accomplished a little. Here I am making the porthole covers for the forward hatch, Simply a walnut dowel drilled out, then shaped with a sanding stick then parted(the wire is held in place to stop the piece from flying away) I apologise for the lack of pictures but here it is almost complete with covers attached. The trim is walnut from the kit then finished with cherry. The front step was an addition I added as the height of the ledge would have been almost two feet, much too high when one's belly is full of grog or probably wine in the Adriatic Here I have laminated some 1.5 x 5 mm cherry then cut to size for the doors. Also I have made the hinges still needing some cleaning up and paint. Doors attached and working. I first tried brushing on wipe on poly but not paying attention I broke off a door. After repairing door I decided that spraying was a safer option, so it has four coats in this picture


- 653 replies
-
- 24
-

-
- trabakul
- marisstella
- (and 1 more)
-
Nice carving, the gold leaf is impressive very cool touch
-
Well that didn't take you long to install and shape . Looks real nice and true, good stuff.
-
Nice work on all the deck furniture, that green on the hull really looks good
-
Looks good Karl, I like the colours you have chosen
-
Geez, I forgot to say your new "preventer plates" look great , nice method. Now do something about those cob webs
- 843 replies
-
- 3
-
-
- niagara
- model shipways
- (and 2 more)
-
Hey Mike, looking at your pictures all of your deadeyes are not aligned properly. I'm not sure if you are finished with them in the pictures but you should always have one hole perpendicular to the seizing, just a heads up.
- 843 replies
-
- 2
-
-
- niagara
- model shipways
- (and 2 more)
-
Hello Jack, good to hear you have some new instructions and things are clearer for you. Your build is looking good. MarisStella kits really shine in the area of framing and how all the parts fit together so nice and tight and also square. One really has to be cautious of over sanding and creating a sloppy joint. Nice work and looking forward to seeing more.
- 174 replies
-
- 1
-
-
- gaeta falcata
- marisstella
- (and 1 more)
-
Wonderful looking ship
-
It may have been hard for you, but your ship looks great. Nice rigging
-
You can call anytime............and by the way Happy Birthday!!!!!!
- 107 replies
-
- 4
-
-
- brazzera
- marisstella
- (and 1 more)
-
8 microns shavings
donrobinson replied to Gaetan Bordeleau's topic in Modeling tools and Workshop Equipment
Very well said Gaetan, the thought of cutting down trees of that age is not a pleasure to me either. In saying that the colder the climate and the shorter the growing season does make for much smaller growth rings thus making the normal "softer" species harder Thanks for the educational lesson. -
Hi Jack, congratulations on your new build and I know you will enjoy it. Having watched your last build I have no reason to believe you will have any problem making this a beautiful boat. Having some experience, but far from an expert, with these kits my best piece of advice is to follow the plans very closely. Unlike many others these are very precise and by all means take your measurements from them. Look very close at them, a problem I keep having, and you will find all the information you will need. The instructions are a little vague at times and hard to understand( I am finding it is getting easier as I go along) but what they lack the plans make up for. If you do have problems give Zoran a email, he is a great guy and has always come through for me and most times the same day. It is my understanding that they are in the process of re-writing all of their instructions for their kits so they may very well appreciate your help in re-writing these. In the meantime enjoy your build and I will gladly follow along.
- 174 replies
-
- 5
-
-
- gaeta falcata
- marisstella
- (and 1 more)
-
Thanks Frank. So far I have cut the holes for the two masts and the two bits. The main hatch and the two smaller ones are not supposed to be cut out until the final planking is done. I am trying to think what the advantage is to wait until planking is done, if I do it now it would a lot easier to repair any mistakes I am liable to make. So now it has been a staring game, trying to figure out what to do next.
- 653 replies
-
- 9
-
-
- trabakul
- marisstella
- (and 1 more)
-
Thanks Lawrence, it has been slow here lately I think it is the lack of sunshine we have only had one day of sunshine since Oct 4. I may have to install a sunbed in order to pick up the pace around here
- 653 replies
-
- 9
-
-
- trabakul
- marisstella
- (and 1 more)
-
Looking good Ian, a real nice start to a great kit. You are right in saying they are not easy but a lot of fun. Take your time and enjoy, if I can be of any help just shout.
- 107 replies
-
- 5
-
-
- brazzera
- marisstella
- (and 1 more)
-
Hey Dave, for cutting your veneer I have done this before: Set fence to desired width, rip a piece of thin stock( all I had was 1/4" plywood), lower blade(do not move fence) double sided tape the piece you just cut onto the table saw surface tight against fence, raise blade and start your ripping. This blocks that tiny little gap at the bottom of the fence. Another method is to just clamp something to the face of the fence, but I'm not so sure if that can be done with the Byrnes saw. You could also use a full size piece of plywood on top of your table, set fence, lower blade attach plywood to table top with double sided tape then with saw on raise blade cutting through plywood. Hope this helps
-
Spiral staircase is great a nice addition to your fine ship
- 652 replies
-
- 2
-
-
- royal william
- euromodel
- (and 1 more)
-
Good to see a distributor of these great kits on this side of the pond.
-
Italian Boats of the Adriatic Sea
donrobinson replied to jack.aubrey's topic in Nautical/Naval History
Again nice pictures Jack, where are they taken? It does look like an interesting area to visit. -
Thanks Ian it's good to hear from you. It's funny that you are looking forward to starting planking and I'm sooooooooooo looking forward to finishing. The scary part now is to mark the hatches masts and etc. on the planking and hope that my measurements are correct. This where the accuracy of the MarisStella plans will really prove themselves. I still have not seen a build log for your Brazzera yet.
- 653 replies
-
- 9
-
-
- trabakul
- marisstella
- (and 1 more)
-
You can use a table saw with a taper jig, there are blades thin enough. I just use a knife a/o a sanding block. I usually always also sand a slight bevel to the tapered side of the planks
-
ancre La Salamandre by tadheus - 1:24
donrobinson replied to tadheus's topic in - Build logs for subjects built 1751 - 1800
it all fits so perfect, great stuff