HOLIDAY DONATION DRIVE - SUPPORT MSW - DO YOUR PART TO KEEP THIS GREAT FORUM GOING! (Only 24 donations so far out of 49,000 members - C'mon guys!)
×


donrobinson
-
Posts
1,909 -
Joined
-
Last visited
Content Type
Profiles
Forums
Gallery
Events
Everything posted by donrobinson
-
Welcome aboard Bob, come on in and enjoy the ride
-
Thanks so much Nils, I have some of your techniques in my mind that I hope to use on this build. Your Pegasus is completely amazing and I will be referring to it lots during this build.
-
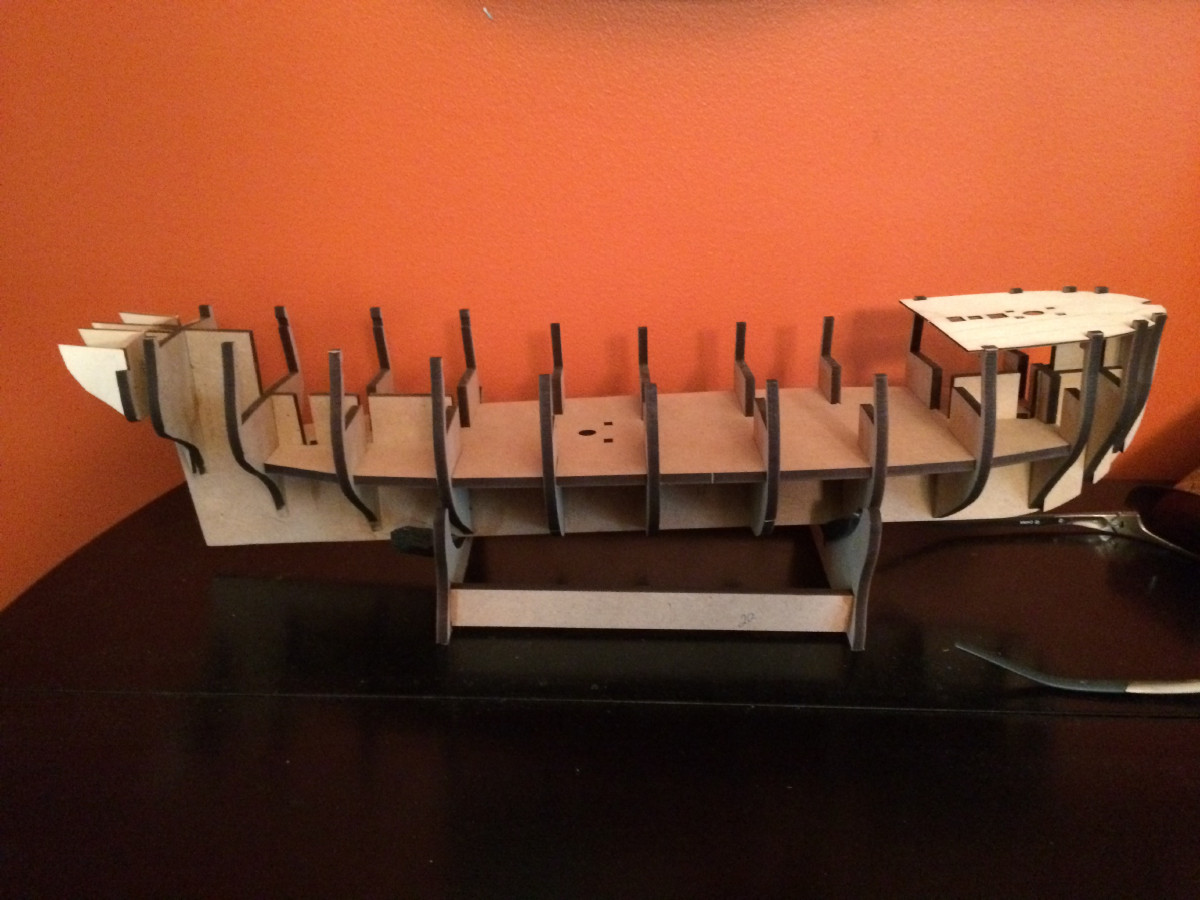
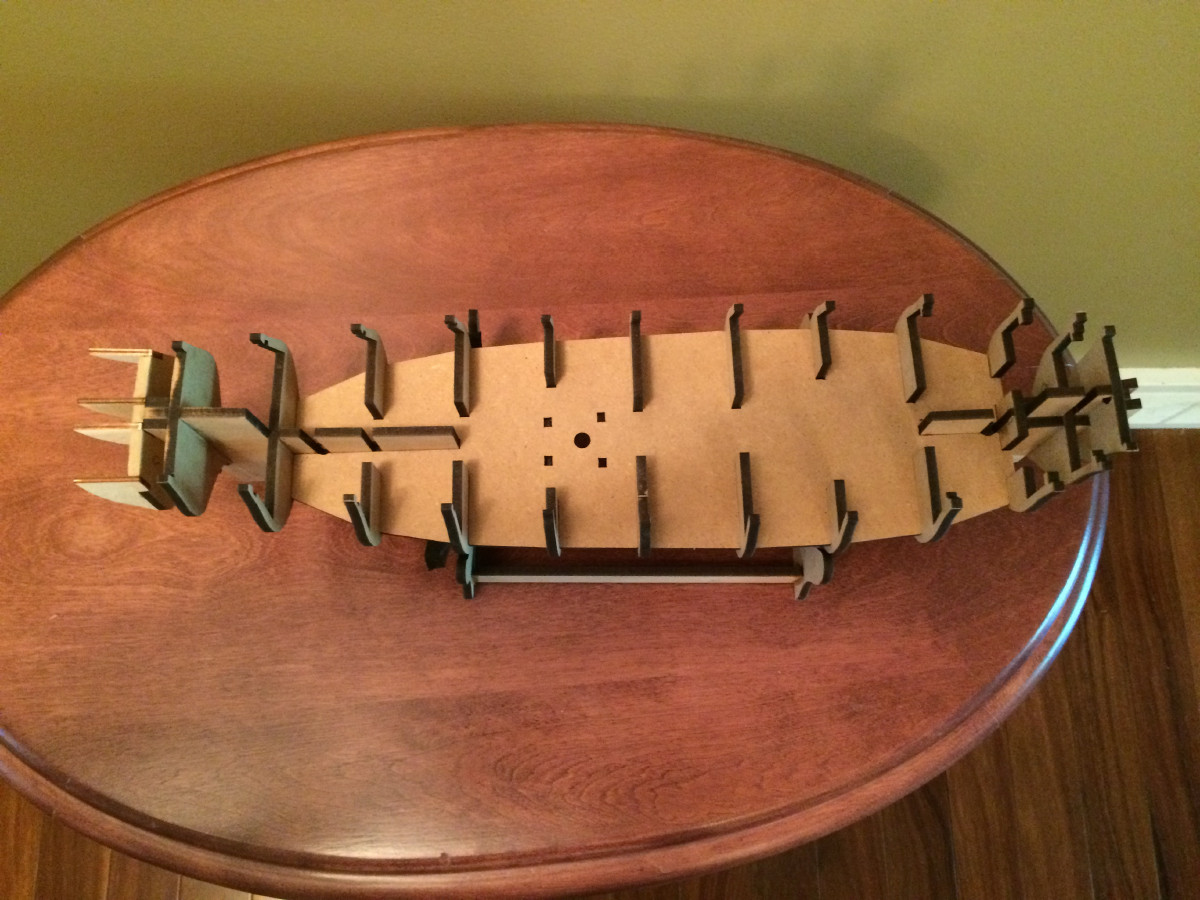
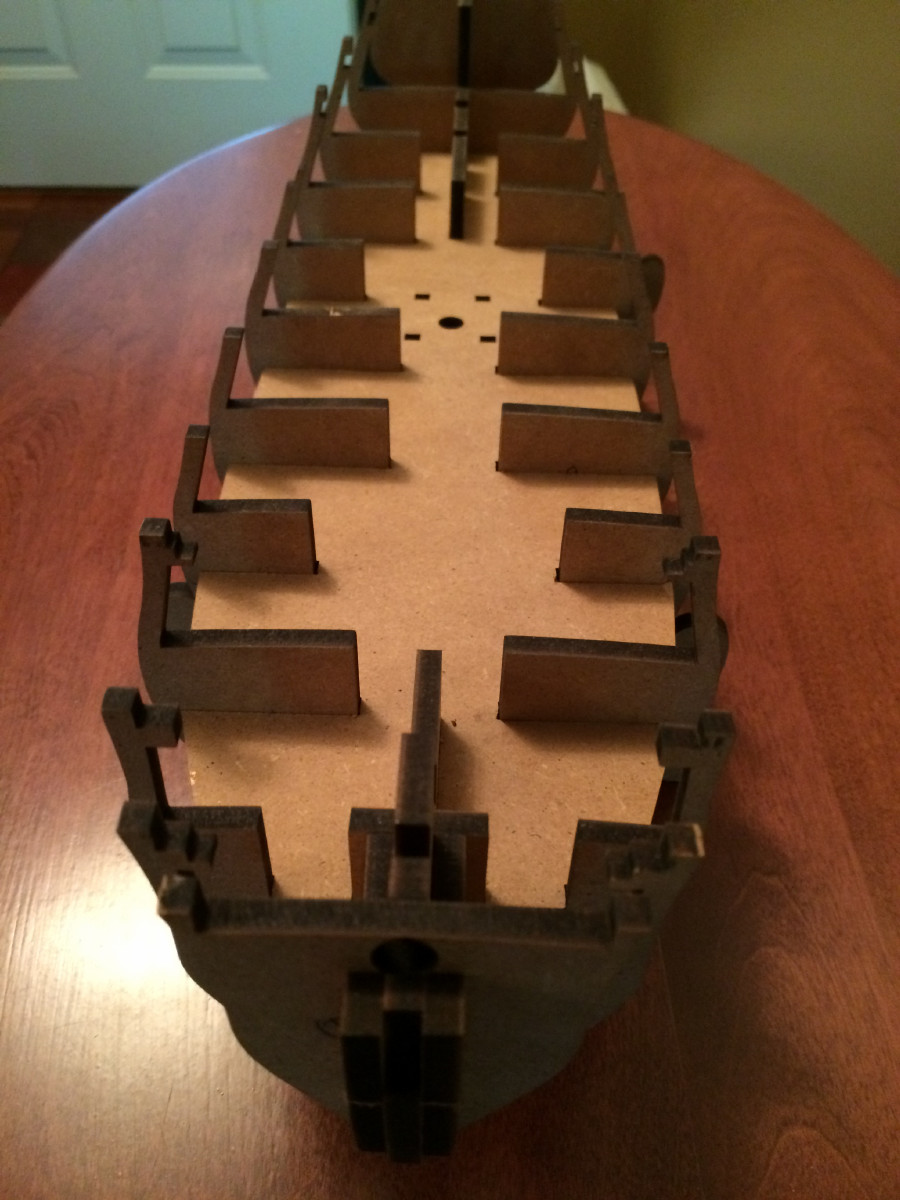
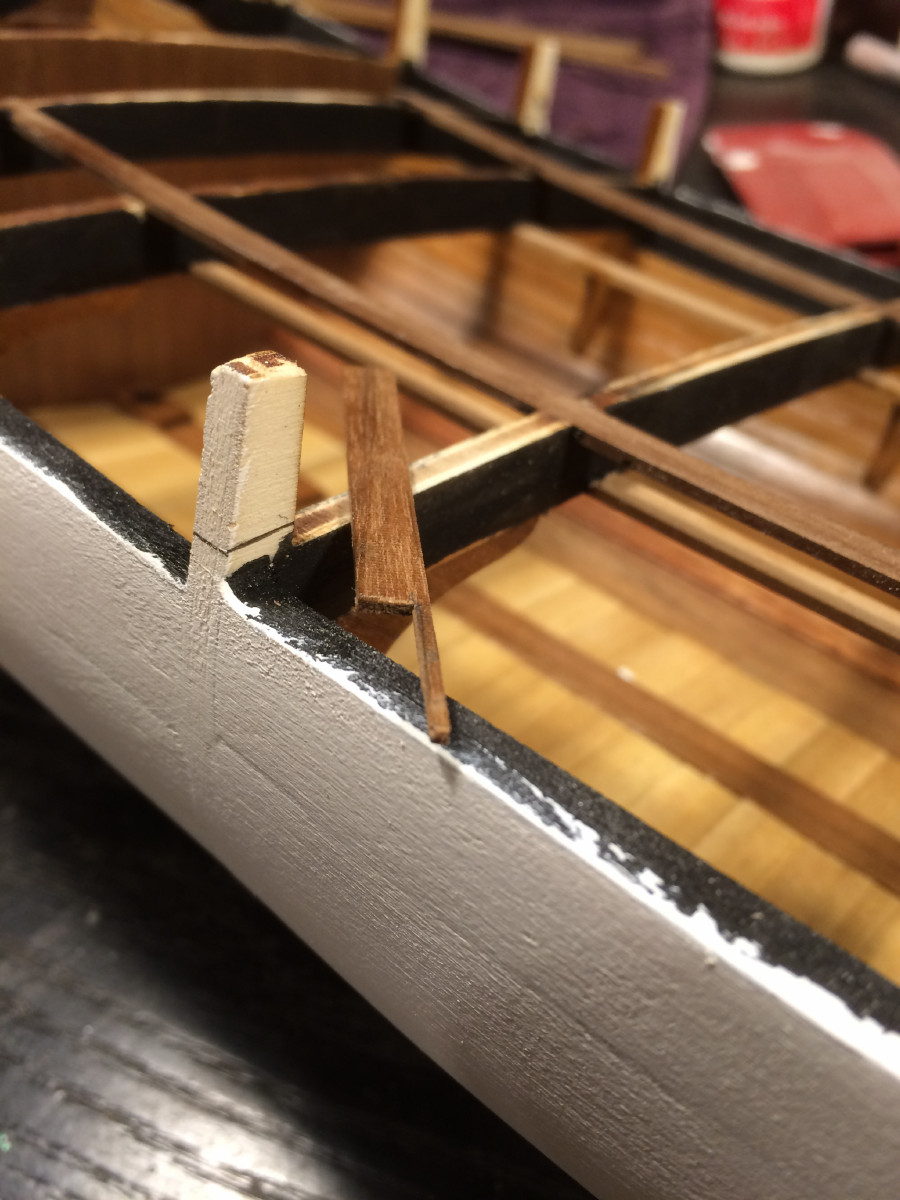
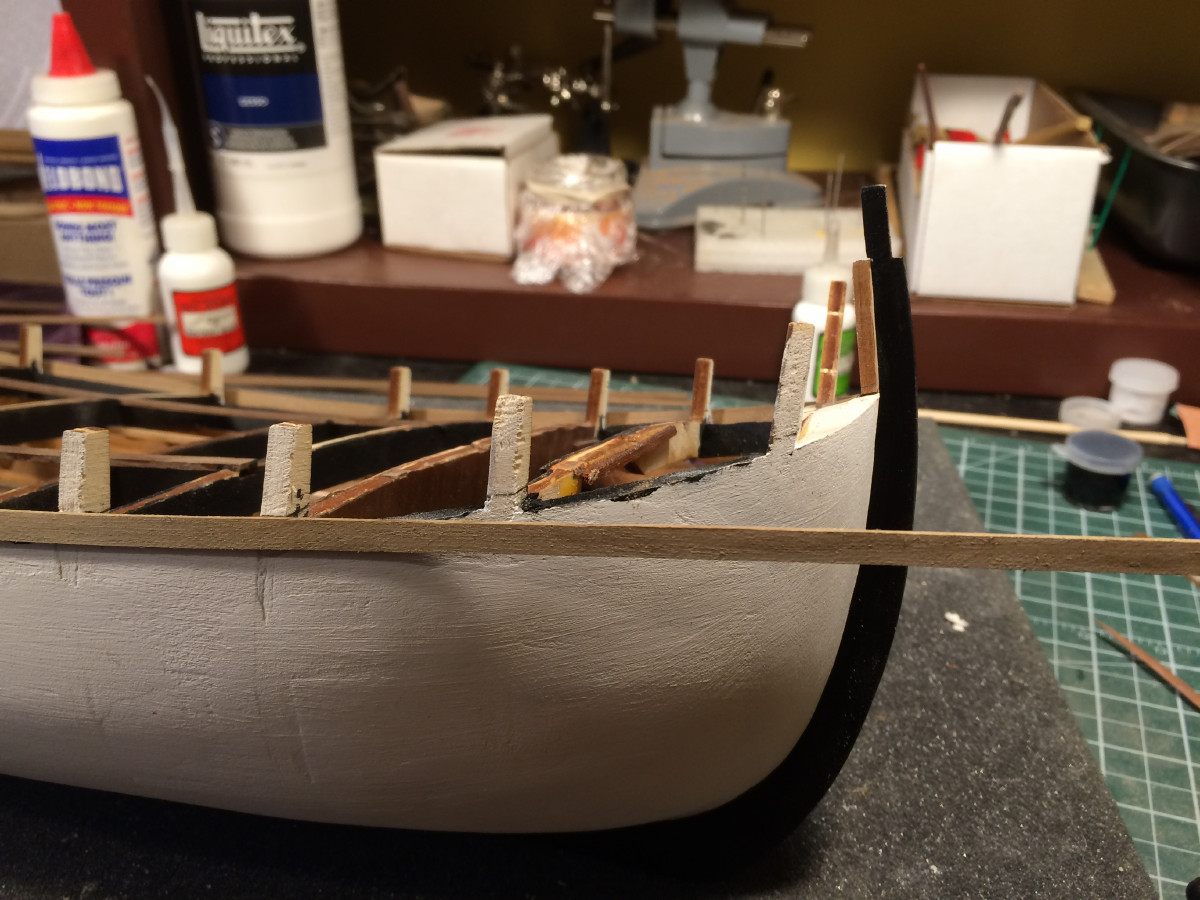
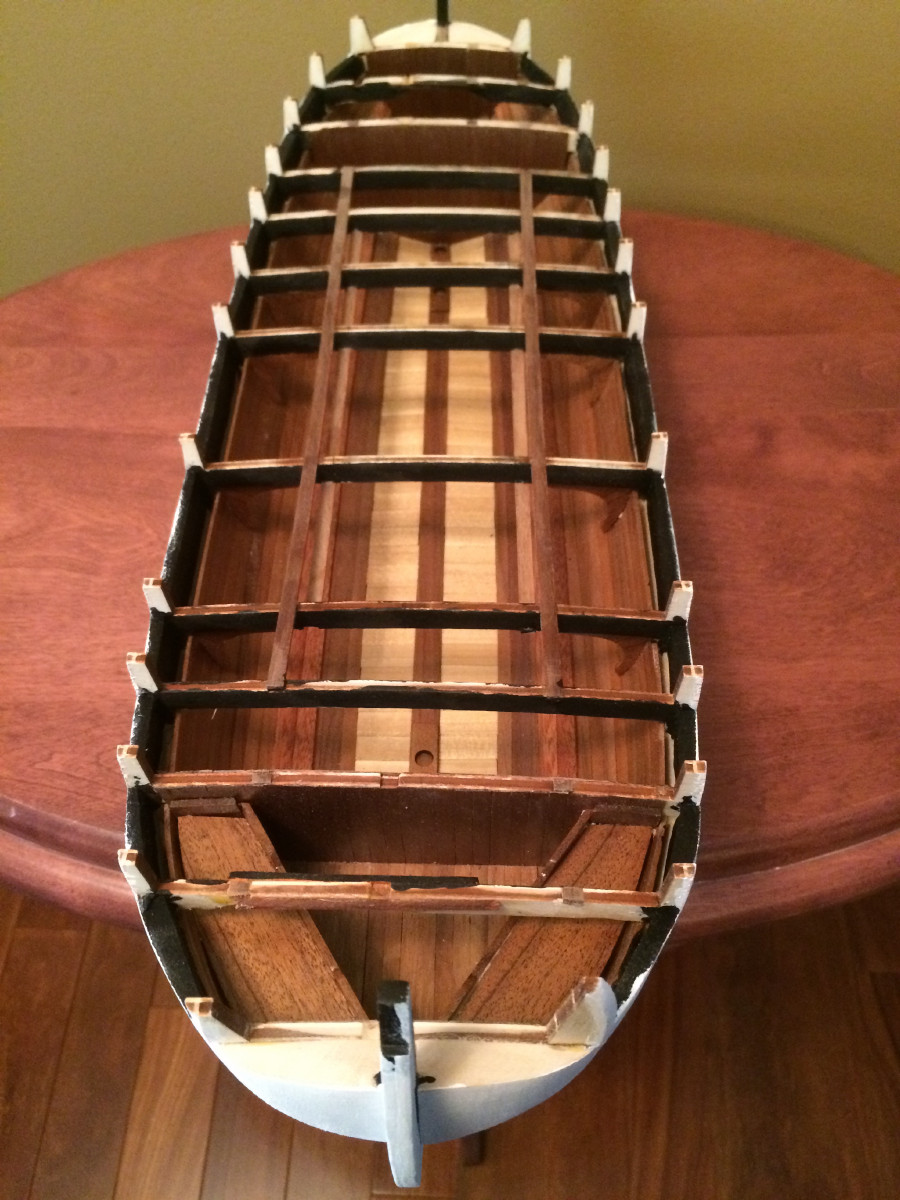
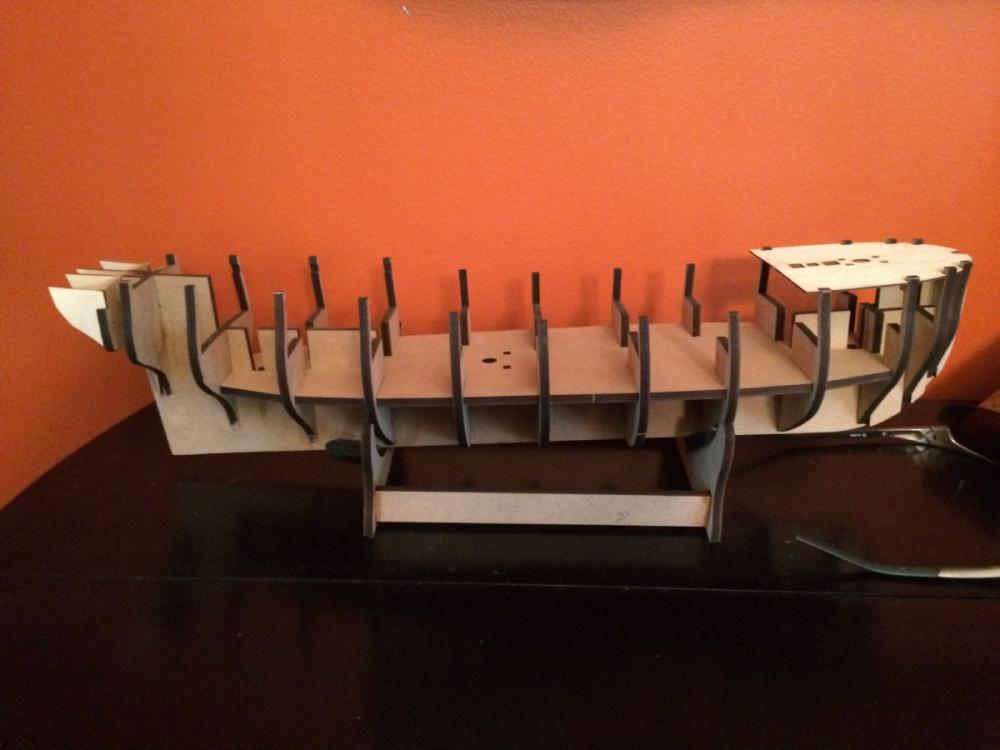
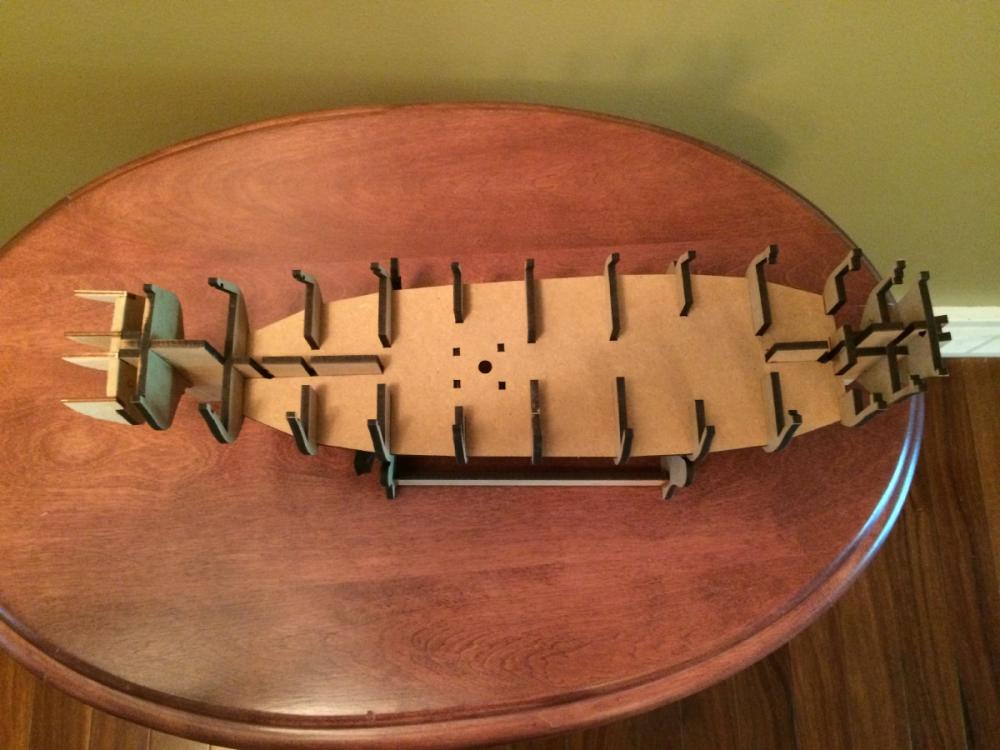
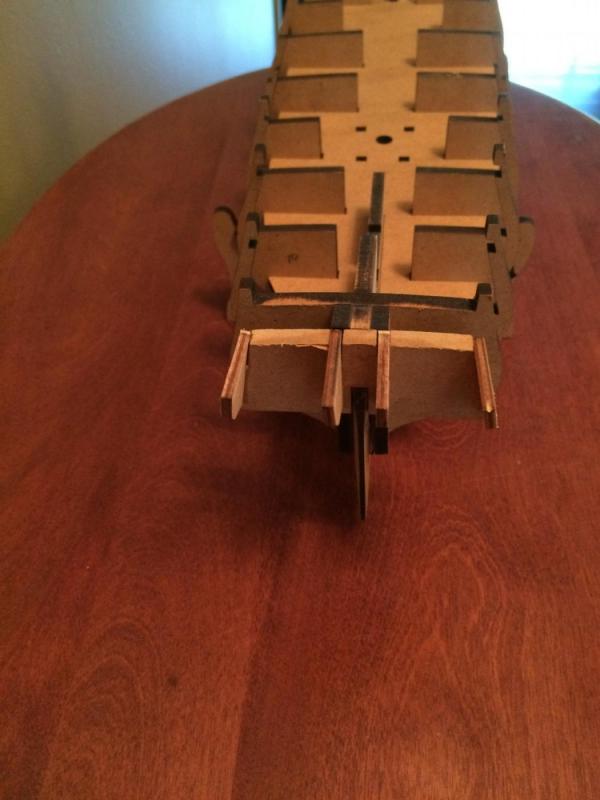
This is the start of my Pegasus log which I have been putting off for far too long and decided I would get it going. When I started this hobby a little over a year ago I seen a picture of the Amati Pegasus and instantly wanted her, however, for once in my life I held off starting her as I knew my skill level was not there yet. I feel now if I take my time and with the help available here at MSW I should be able to stumble through and do a fairly good job. I know this is a bold step starting this kit as there is some excellent ones on the go now, Blue Ensign and Landlubber Mike are just two examples of some of the skilled craftsmen here at MSW. Although I do not plan on following in their footsteps, I mean who could, I do plan on making some changes mostly to the kit wood and possibly a few other features(cannons, rigging line etc.). I did not include pictures of the contents but if anyone is interested in seeing the contents of this great kit just say so and I will be more than happy to add them. Enough of an introduction, it is my hope that I do this girl justice and maybe someday be allowed into that elite Pegasus/fly fraternity. To date I have fitted the bulkheads and transom supports. All went together good and there was very little adjustment required. I am impressed with the mdf so far and do not see any problems arising in the future from it, it is defiantly quite a bit denser than the stuff found in the local lumberyard and should out shine the normal plywood that is typically used. The one picture shows the plywood forecastle deck in place, it is not glued down that was just me playing around. In the past year I have had this kit the box has been opened and closed no less than 30-40 times and this piece keeps falling out. So I just put in in place for safe keeping .


-
It all looks so crisp and clean, great work. I'd be scared of putting holes for treenails in that beautiful decking.
-
I think your problem is that the glue "sealer" you put on was not thin enough. Glue does not rely on penetration for it's strength proof of this is on the side of the glue bottle (I use weldbond), if it is capable of gluing glass, ceramic, tile, marble etc. well none of these mediums allow penetration. Glue's strength comes from being glued to itself. That is why it says to coat both surfaces(which probably none of us do ) but is the correct way. Think of gluing two pieces of wood together on their end grains, lots of penetration no adhesion, if these were sealed first you would better luck with gluing. I am relatively new to this modelling also and I am currently on my fourth hull, my way is to always seal the first layer although I have never used the glue method you have I see no reason it shouldn't work if done properly(very thin). I'm sure there are many out there who don't seal their first planking and there is nothing wrong with that, this just the way I do it. These are just my opinions and by no way are they meant to insult anyone.
- 10 replies
-
- 3
-

-
- El Pilar power boat
- 1:27
- (and 1 more)
-
You've been busy, nice work
-
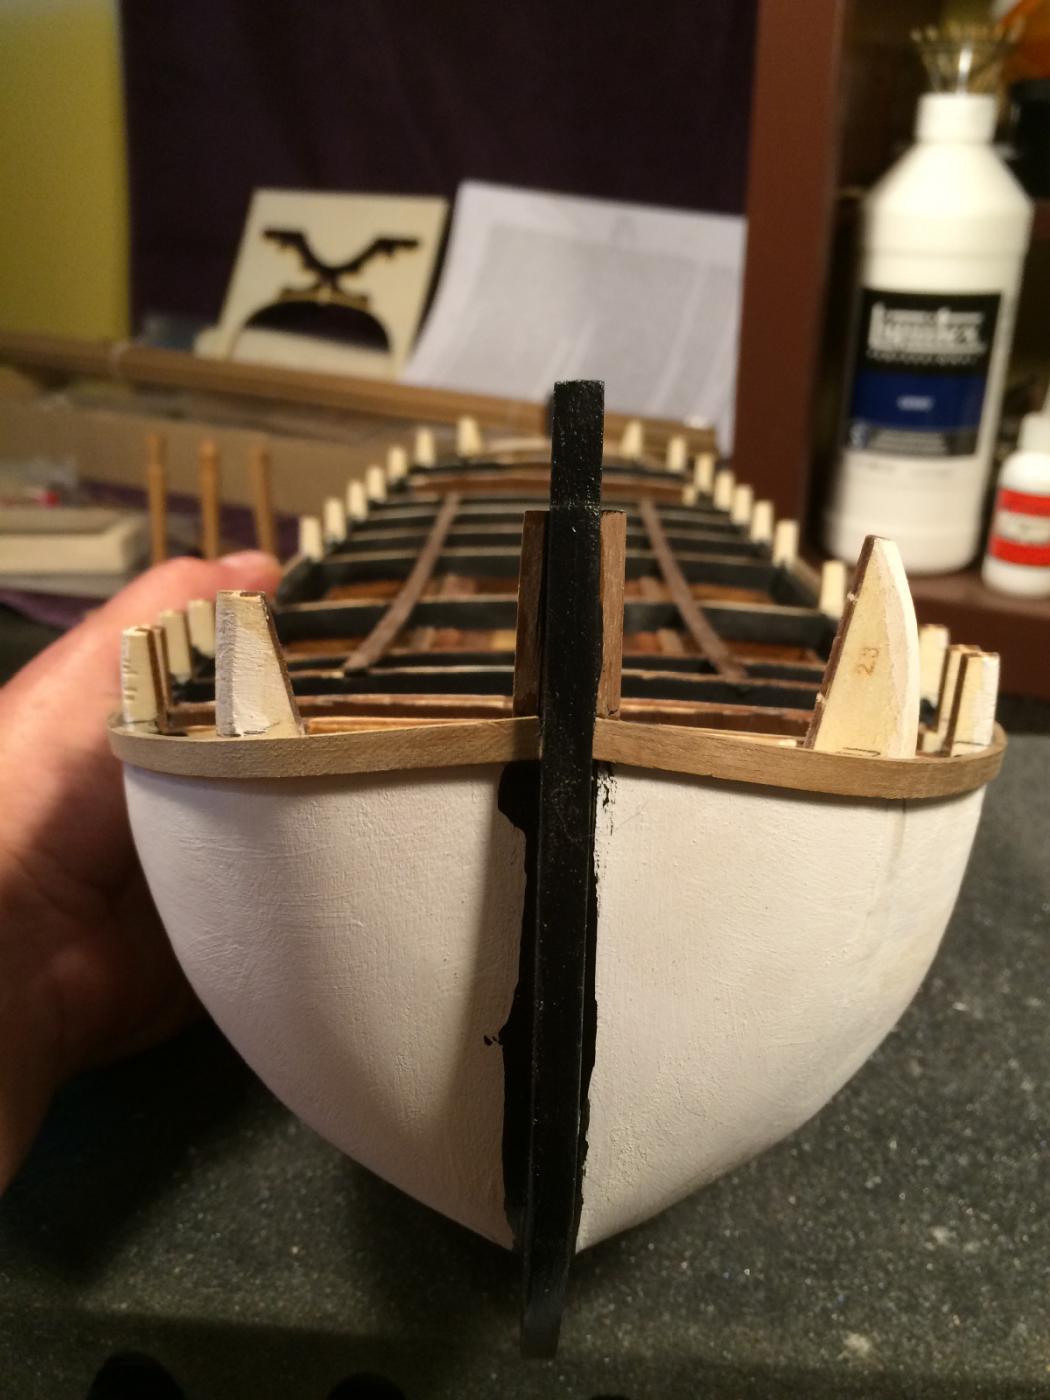
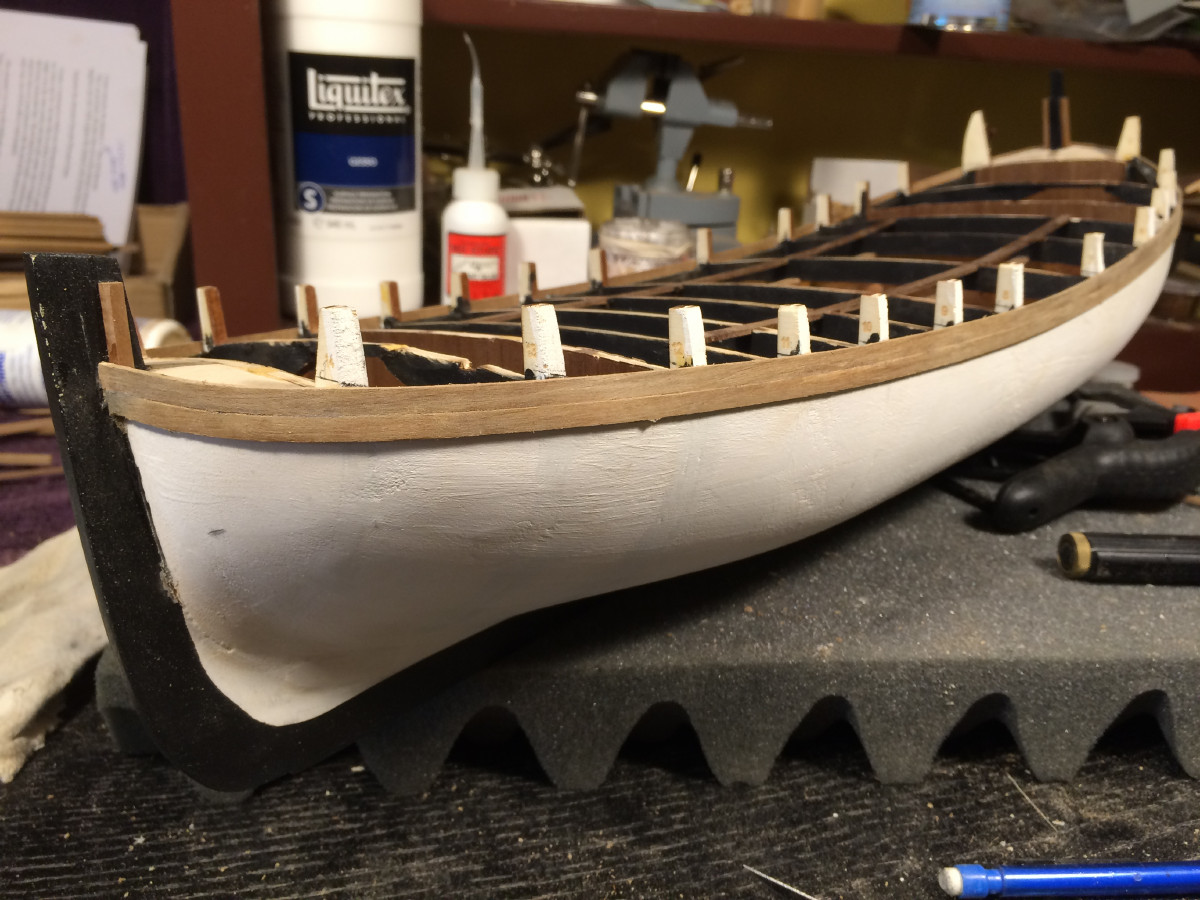
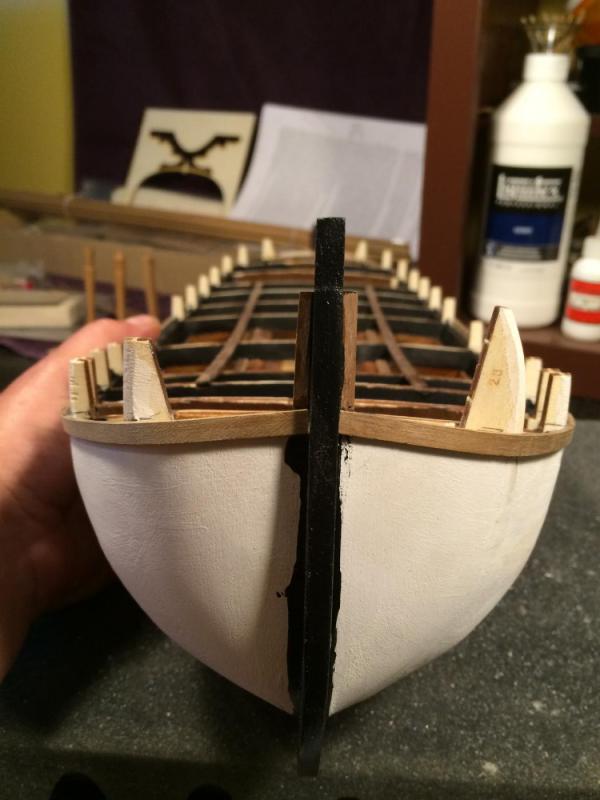
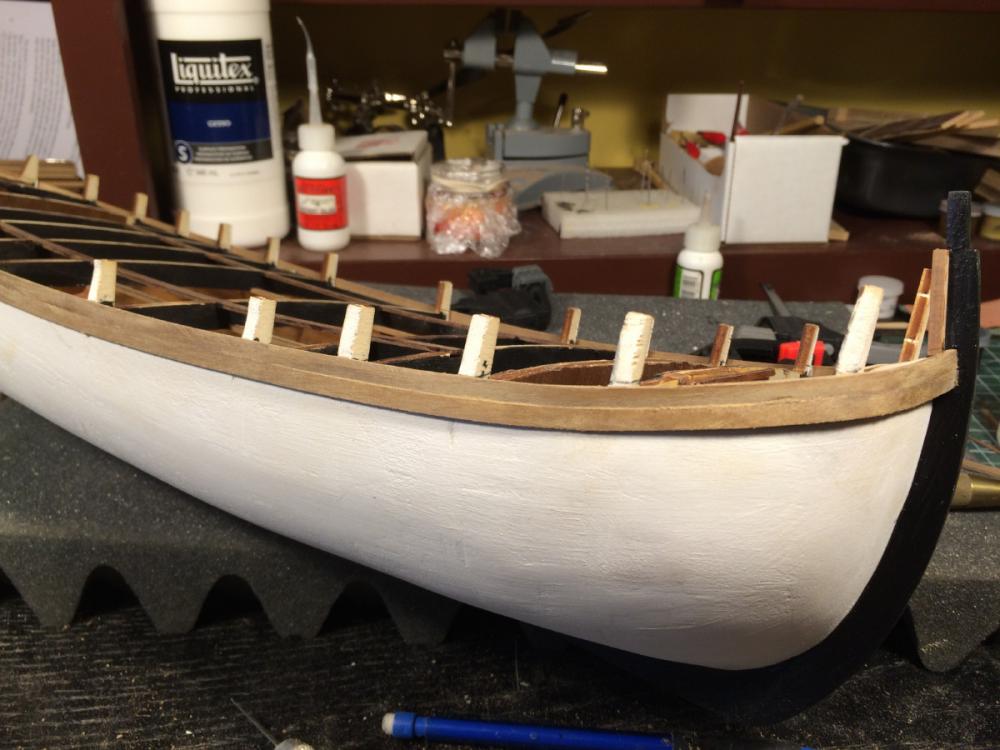
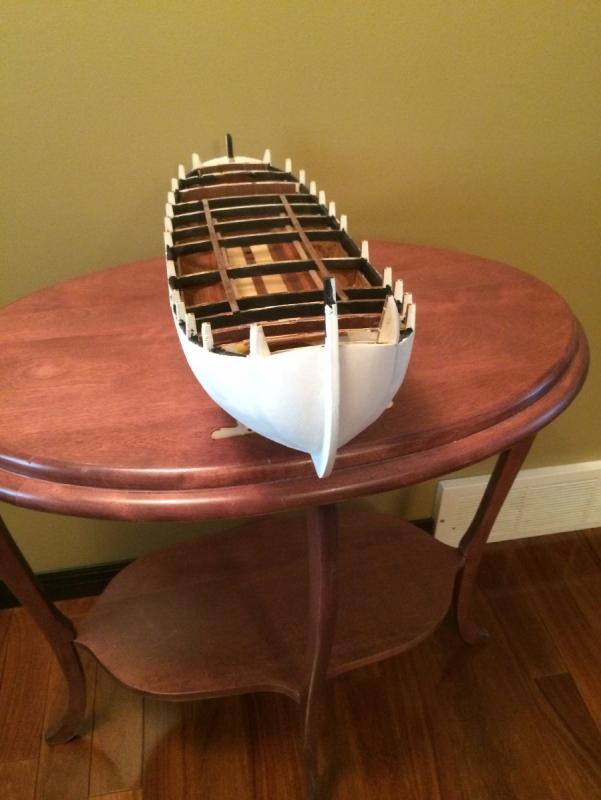
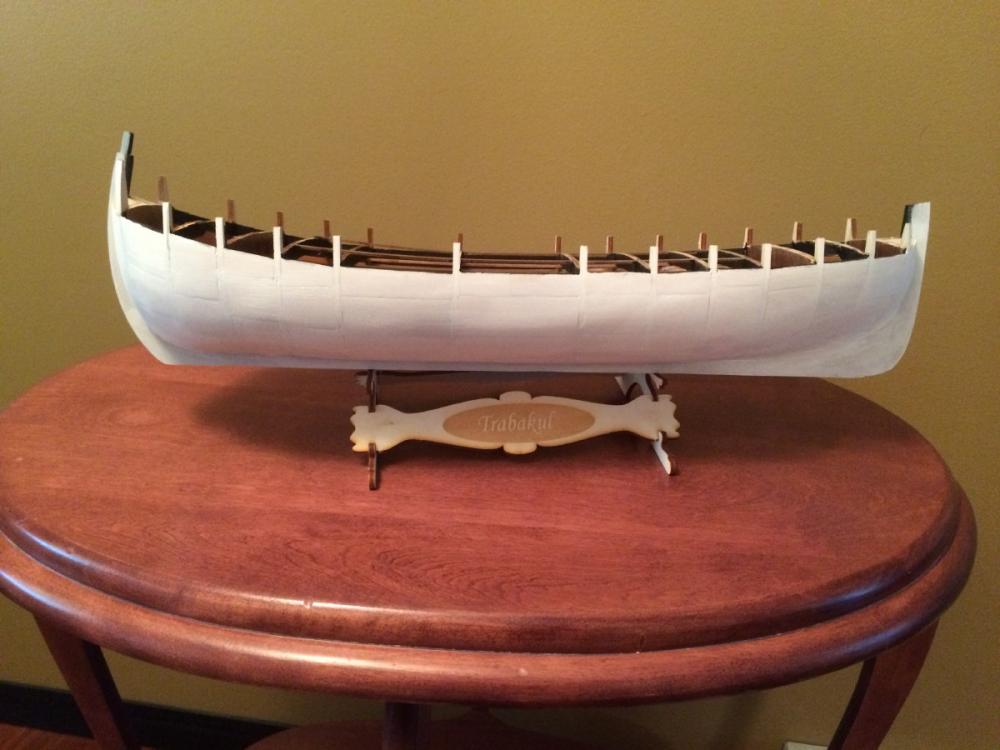
Thanks to everyone for stopping in and for your comments and likes. I finished fairing the hull to my satisfaction and have started the planking. This picture is showing the little jig I used to mark the placement of the first plank, 1.5 mm above the top edge of bulkhead The first two planks on either side need to be cut down from 5 mm to 4 mm, here I am doing that using my homemade jig and Proxon table saw. The first plank being attached. I use a combination of ca glue and white glue (weldbond). I started at the stern and moved forward, I trim the plank to length and shape when I get to the bow I find I get better results doing it this way rather than off ship. Here is the first plank completed. You will notice the port side front bulkhead is a little different, the original one broke off and joined the numerous other lost parts on my floor , so I made this one out of some scraps. The height isn't a big deal as these all get taken off later, it is just needed to get the proper shape of the bow with the planks And here is how she looks as of this afternoon. The next four planks will be the full width throughout their length then after these the rest will need to be shaped. Unlike most ships the Trabaccolo's bow is bigger than the stern so it is a bit of a reversal from other builds I have done. Well that's it for now, I'll see you all in about 8 or 10 planks. It's my now favourite time of day "nap time"


- 653 replies
-
- 22
-
-
- trabakul
- marisstella
- (and 1 more)
-
Very well said Mike.......Happy Father's Day
-
I'm really liking the looks of her Mike. You have some pretty fancy joinery going on there, I wonder what the purpose of some this actually was other than to drive future modellers nuts. Take a break have a nice cool drink and I'll be looking forward to more of your great work.
-
Wow, nice looking cannons
-
These pictures are really amazing, and your work is fantastic Bob. I was looking at the table thinking it looked rather empty.....any thoughts on maybe a couple mugs of grog, stout, beer.........
- 206 replies
-
- 3
-
-
- battle station
- panart
- (and 1 more)
-
Thanks Dave, I am hoping it all works out good, a little more filling and sanding then let the planking begin. By the way, your AVS is looking awesome
- 653 replies
-
- 6
-
-
- trabakul
- marisstella
- (and 1 more)
-
Hey Chris; Good to hear from you. I've been missing your updates. I missed "thirsty Thursday" .....well next week I'll be there for "wet Wednesday". Thanks for dropping by
- 653 replies
-
- 6
-
-
- trabakul
- marisstella
- (and 1 more)
-
Hello Everyone, how's things going? Thanks to all for your comments and likes. Well not a lot to report on, certainly not as much as I wanted to have done. I have the starboard side now complete with filler blocks, the initial filling has been done and one coat of primer (gesso). I am now waiting for things to dry then a little more filling and another coat of gesso then the planking can start. I probably would have started planking now but looking at the pictures I decided another round of filling is not going to hurt and it is easy sanding compared to what I have just been through. With another 2 - 3 hours yet to finish off the hull I will have about 45 hours into this part of the build. I would like to say I enjoyed every minute of it but then I would have a nose I could use for a main mast It's Thirsty Thursday.....be happy


- 653 replies
-
- 19
-
-
- trabakul
- marisstella
- (and 1 more)
-
Had to go back and look I never noticed. No matter she still looks hot!
- 517 replies
-
- 2
-
-
- Endeavour
- Artesania Latina
- (and 1 more)
-
Wow are you ever moving along, you'll be out on the high seas pillaging and plundering in no time . Looks good
-
I noticed him, I think he is harmless but defiantly keep Bart out of the shipyard
- 701 replies
-
- 6
-
-
- phantom
- model shipways
- (and 1 more)
-
She looks good, nice work
-
I agree with Greg, and I am impressed that you changed them. Great work!
-
Looking good Elijah, and that's a pretty fancy cradle
- 701 replies
-
- 4
-
-
- phantom
- model shipways
- (and 1 more)
-
Looks great Dave, every time I see yours progress I get a little urge to pull mine out of the closet
- 306 replies
-
- 4
-
-
- armed virginia sloop
- Patrick Henry
- (and 2 more)