HOLIDAY DONATION DRIVE - SUPPORT MSW - DO YOUR PART TO KEEP THIS GREAT FORUM GOING! (Only 20 donations so far - C'mon guys!)
×


AntonyUK
-
Posts
1,190 -
Joined
-
Last visited
Content Type
Profiles
Forums
Gallery
Events
Everything posted by AntonyUK
-
 Hi Joe. Yes there are a lot of CAD people on the forum.. But we all have our own builds and work to do. Well that's my excuse.... Have a go with Adobie Illustrator . I have version 10 that is ideal for cad if you have existing drawings. I import the scanned image onto another layer then trace with the pen for curves and line for the straight lines . Took me approx 1 Mounth to be able to draw most things. And the nice thing is its all vector drawings.( can be scaled to any size ) Lots of videos out there on how to do most tasks. Regards Antony.
 -
Hi Mike. Another interesting build I would say NO to the Oozing glue bit . Any excess glue soaked into the wood and will affect the varnish,stain and even Dope All the best. Regards Antony.
-
Hi Andy. You have made excellent progress since I last looked in on your build. The coppering looks very nice. I will never understand the black painting of the hull exterior. Just stands out as a silhouette. Miss the photos Regards Antony.
-
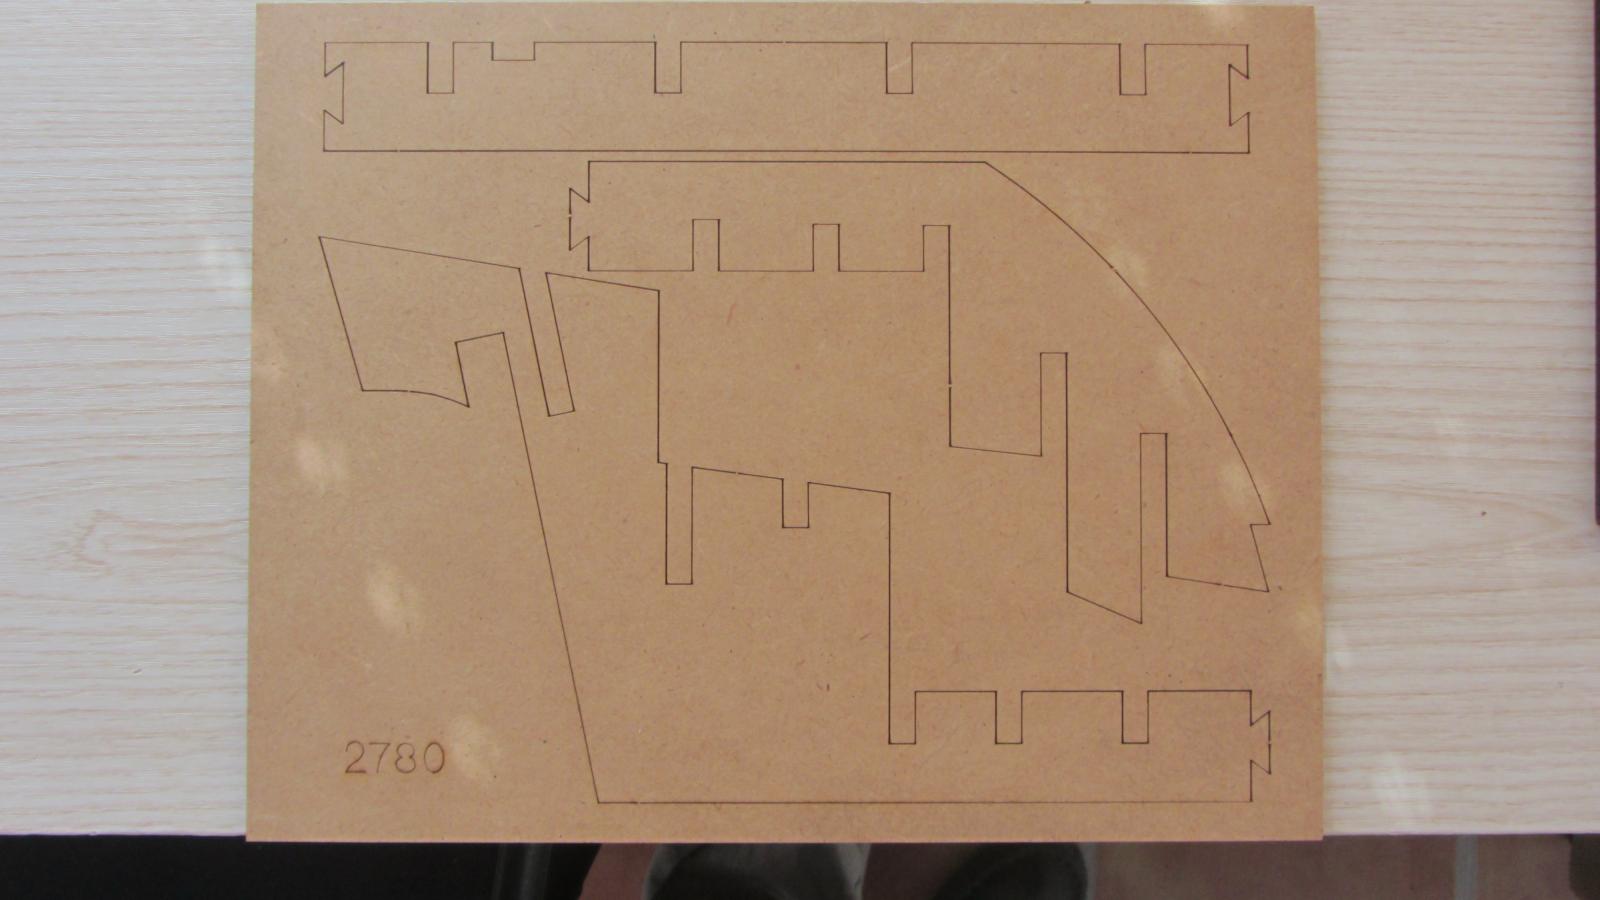
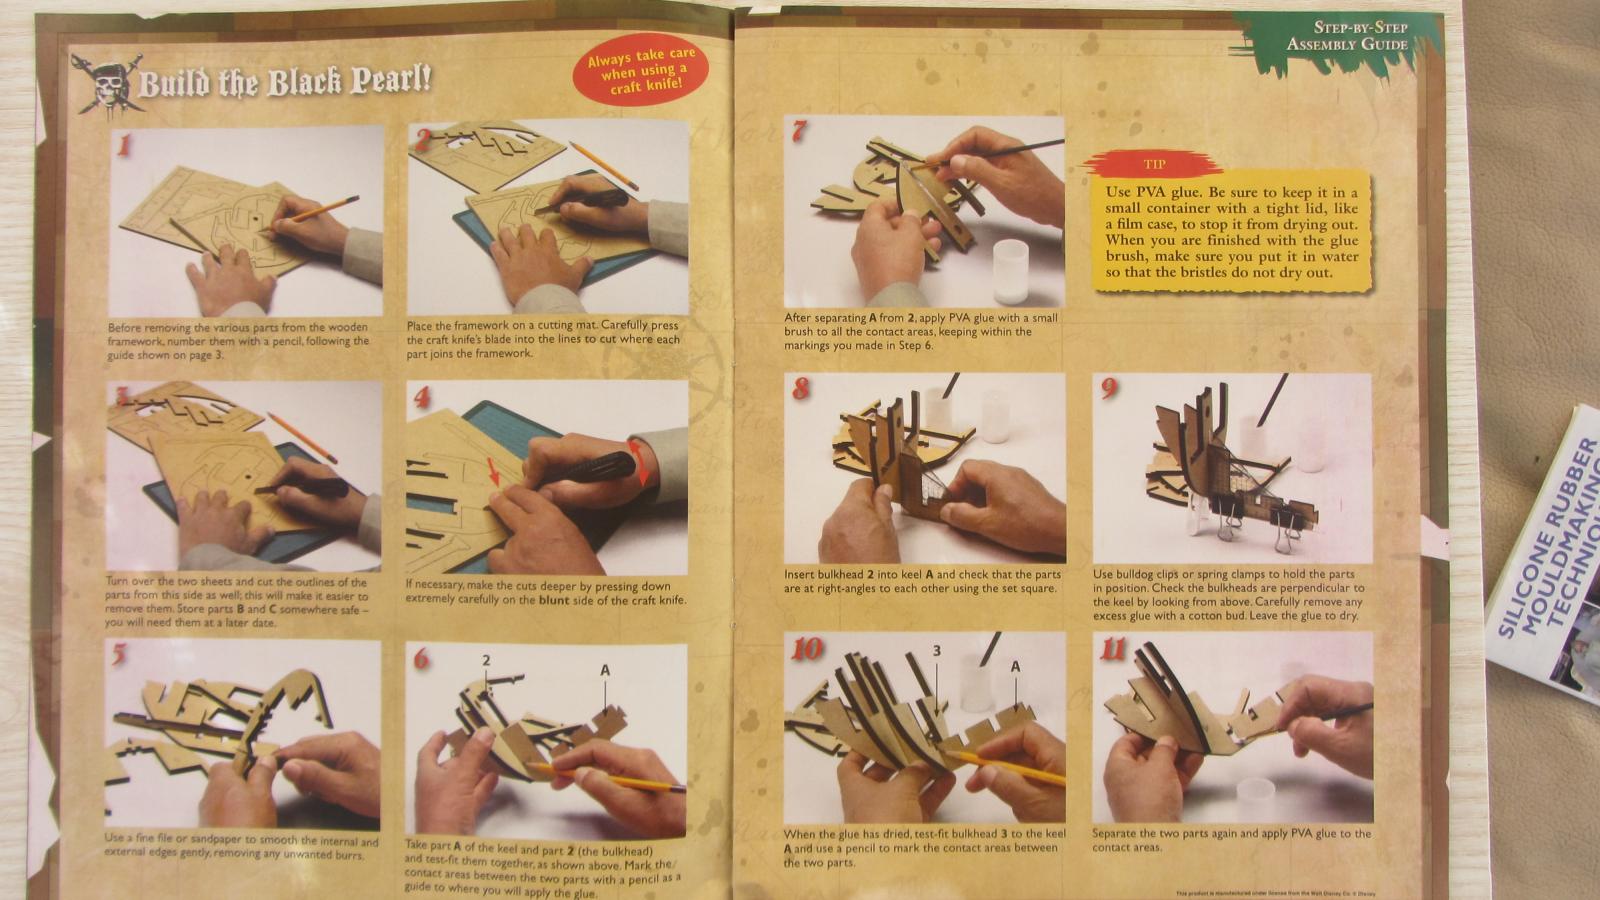
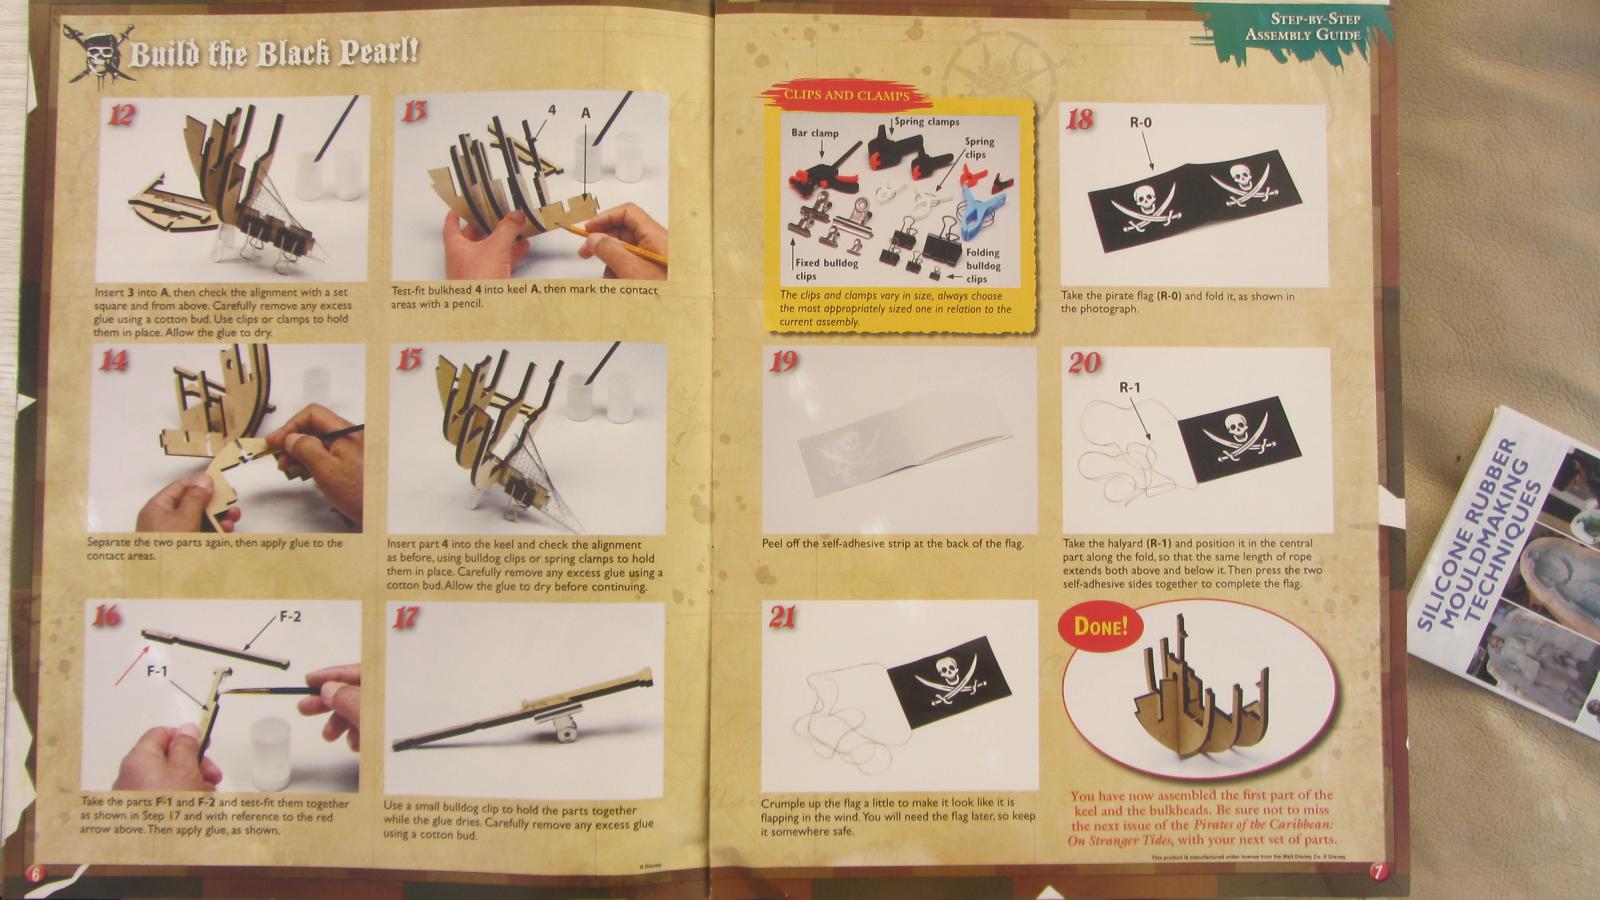
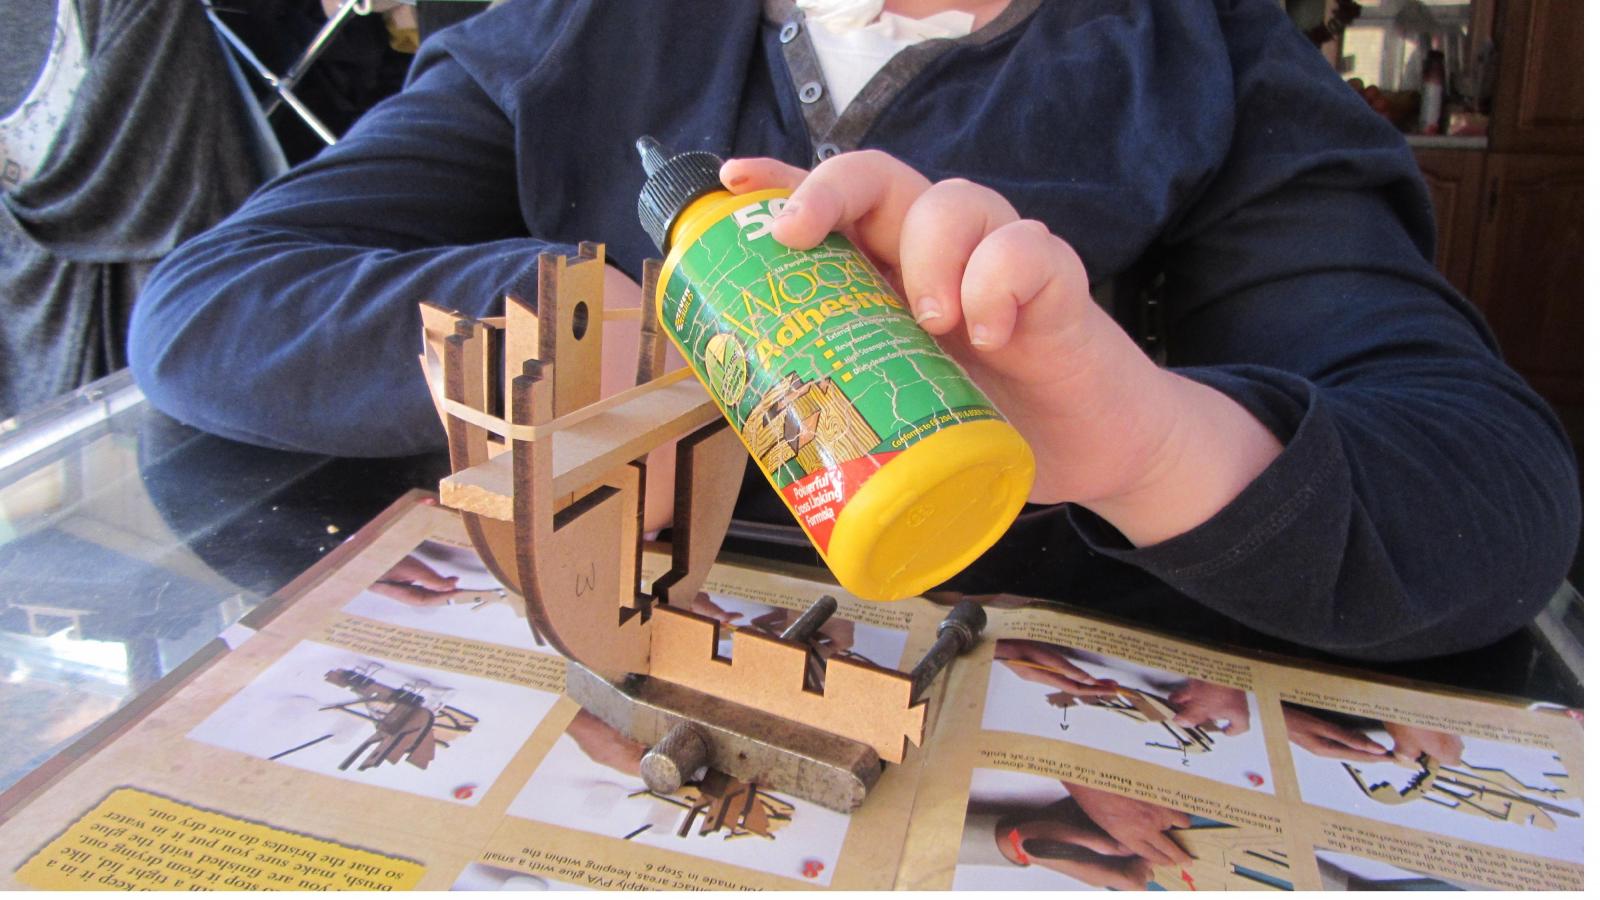
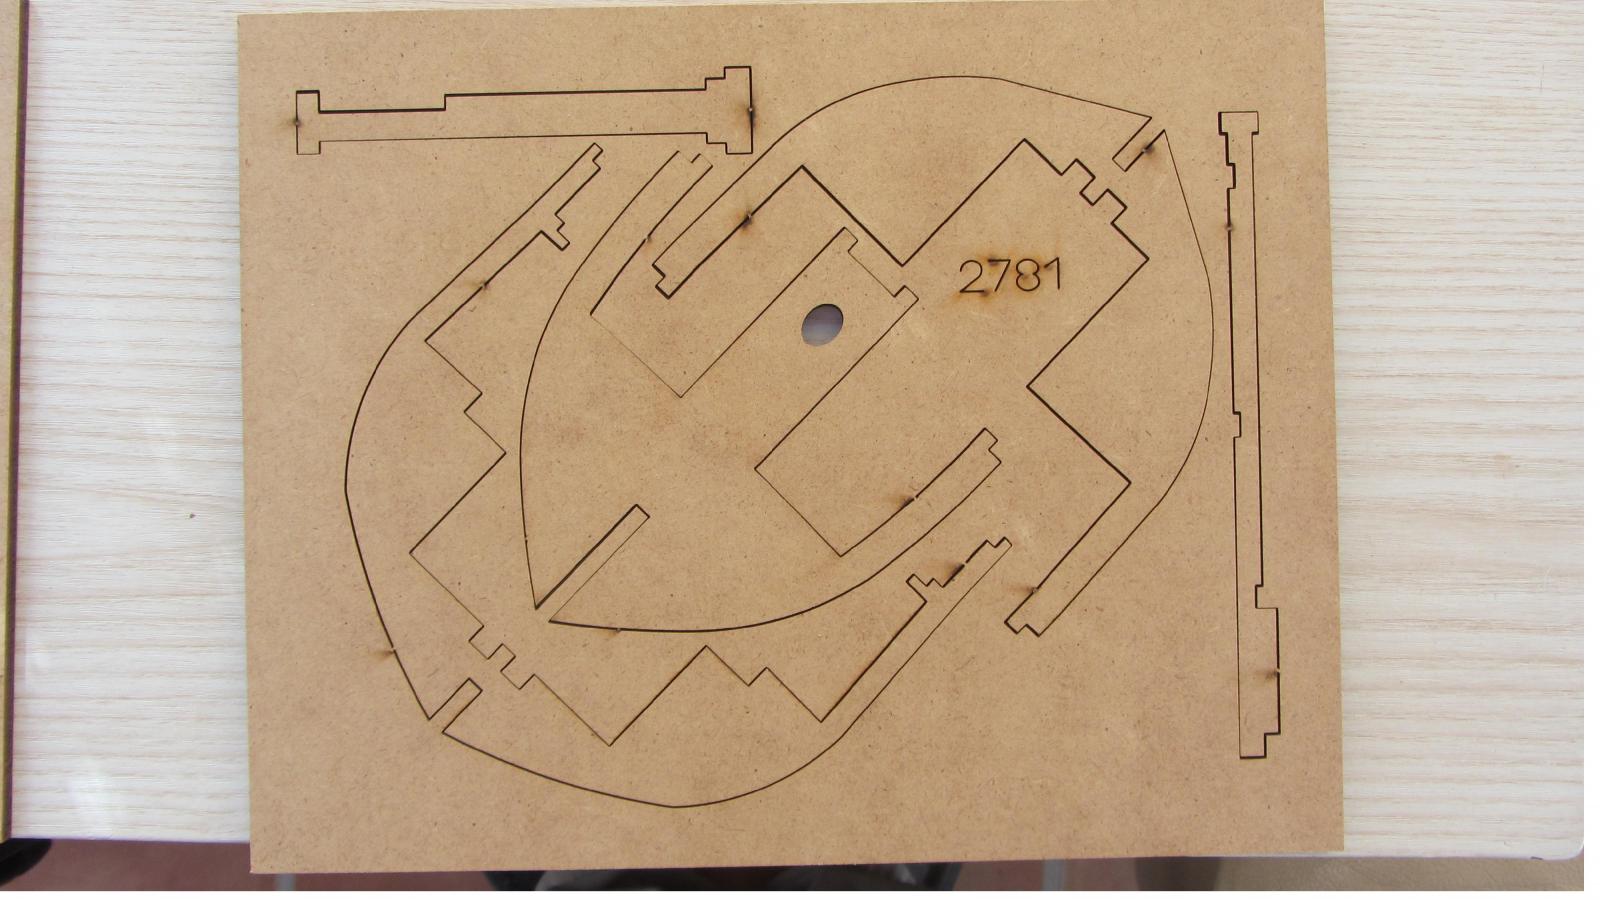
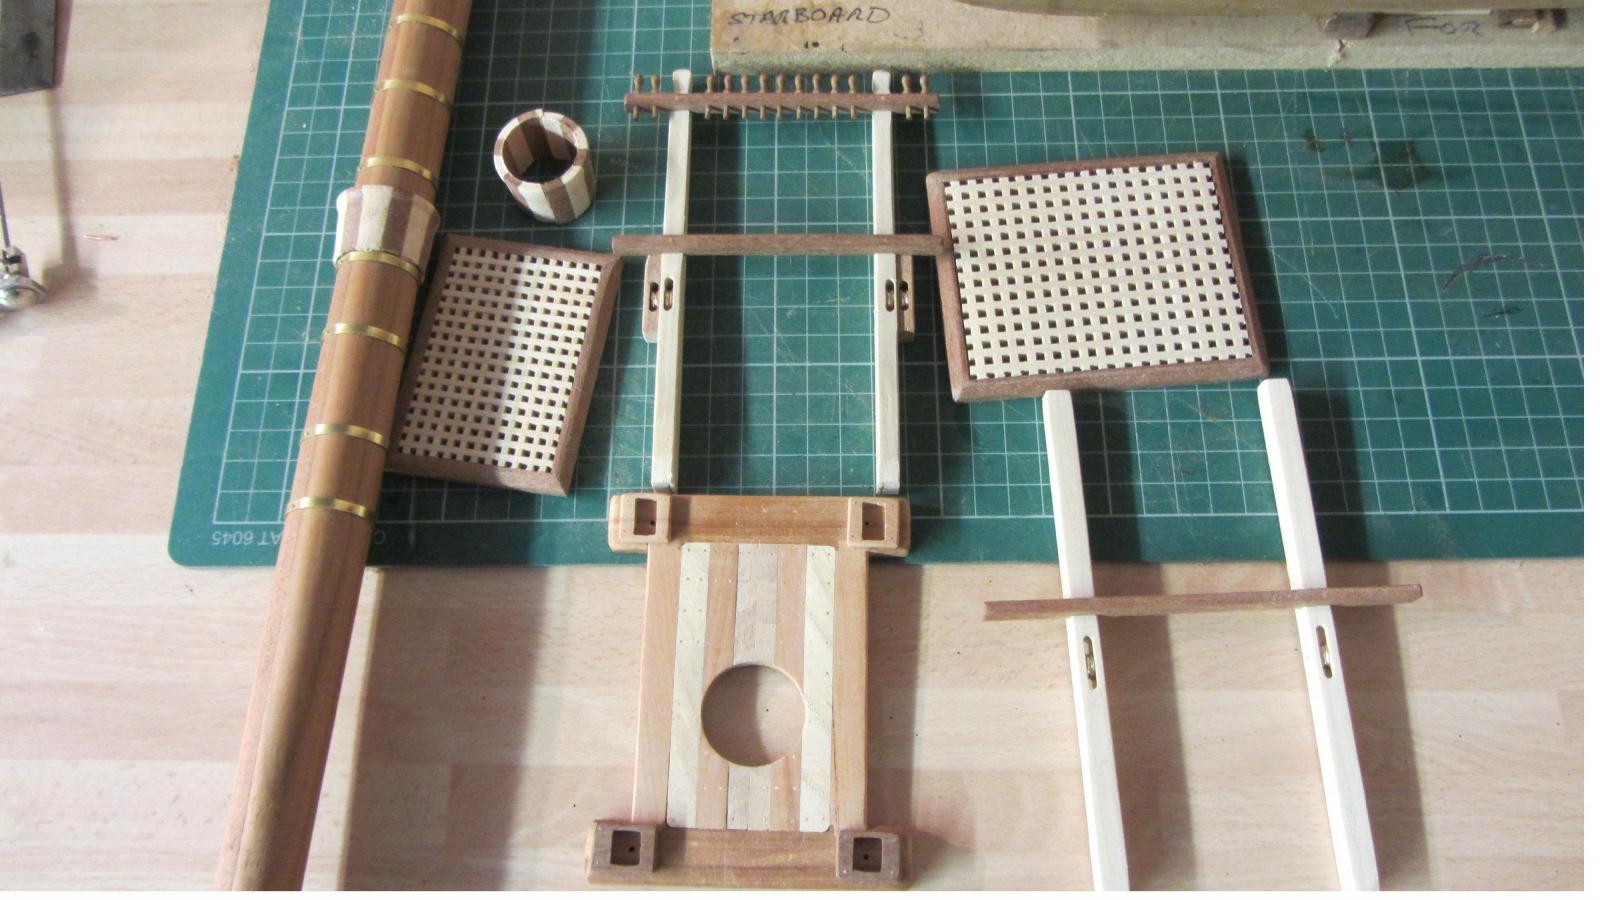
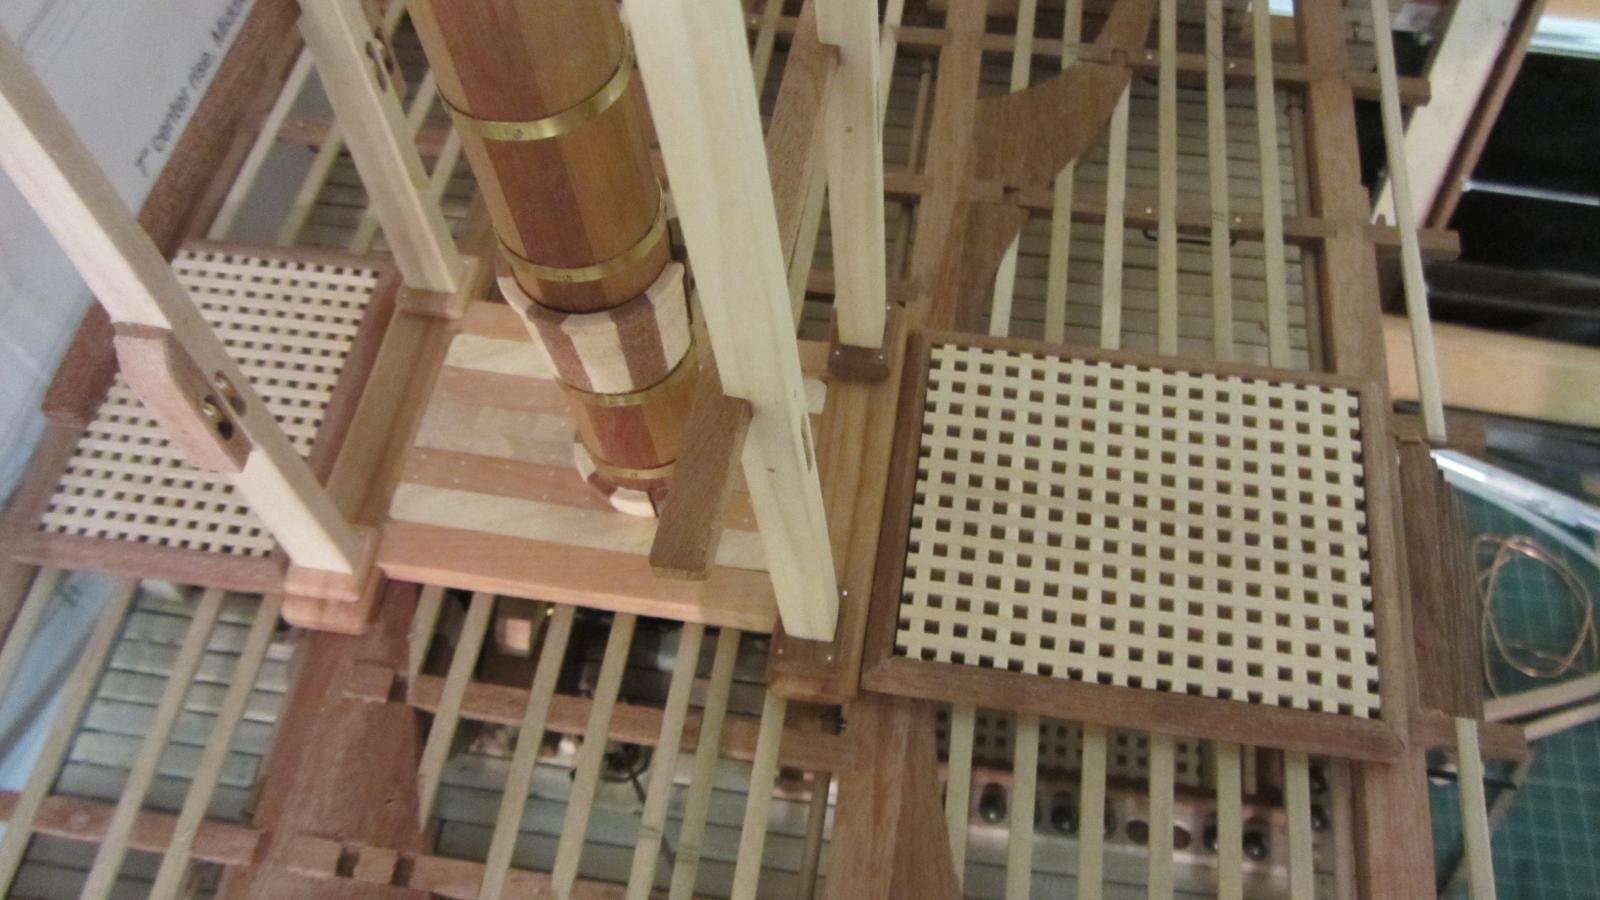
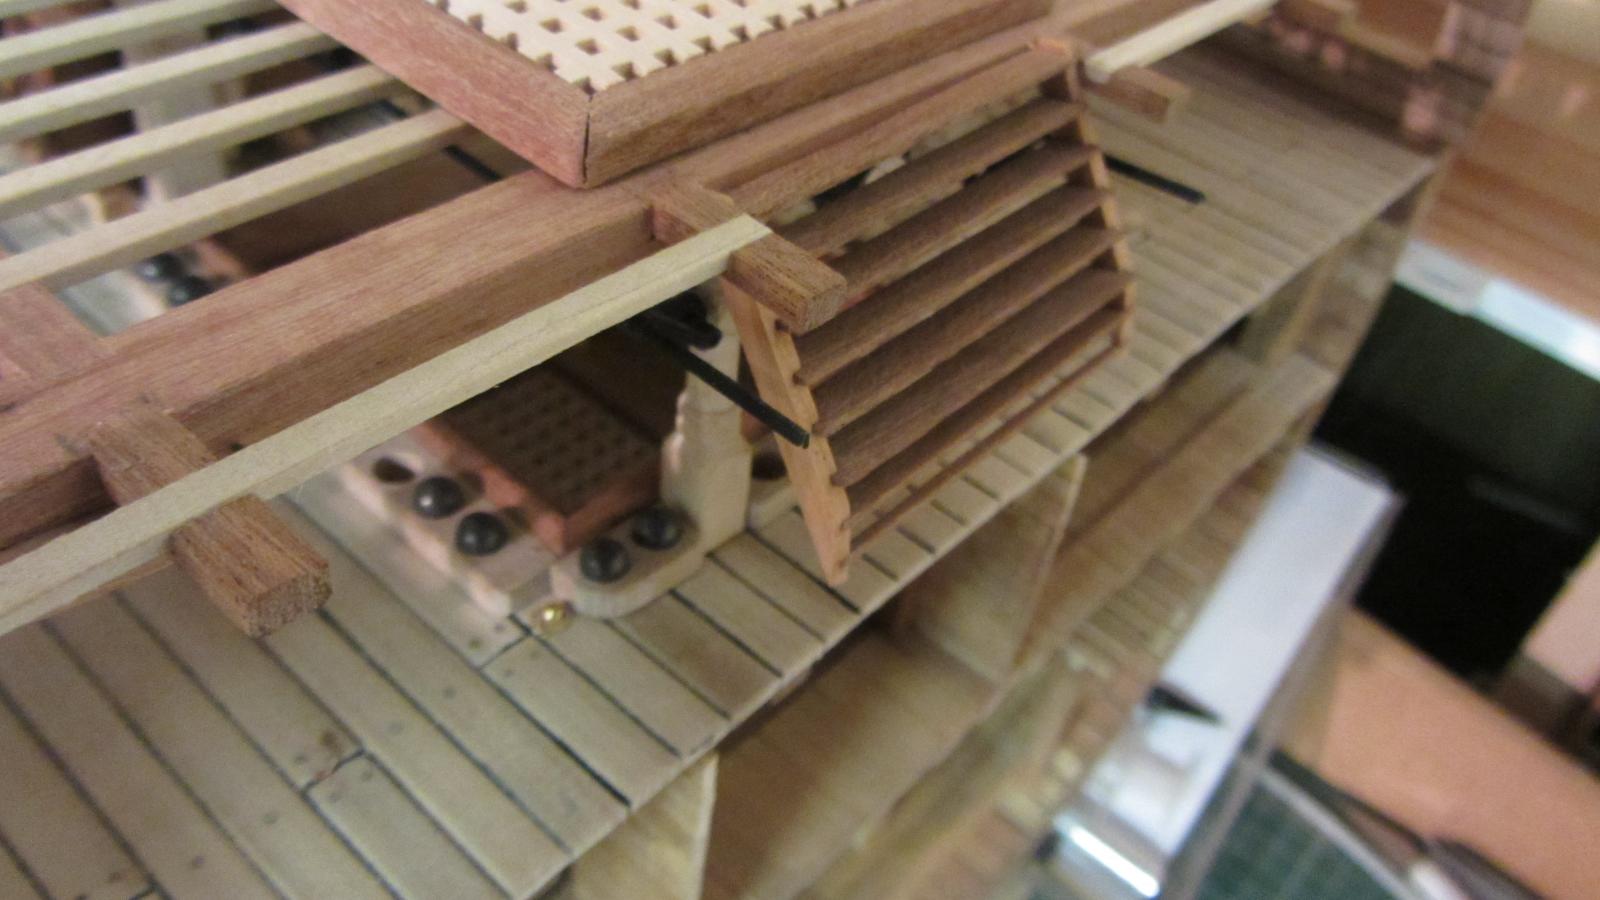
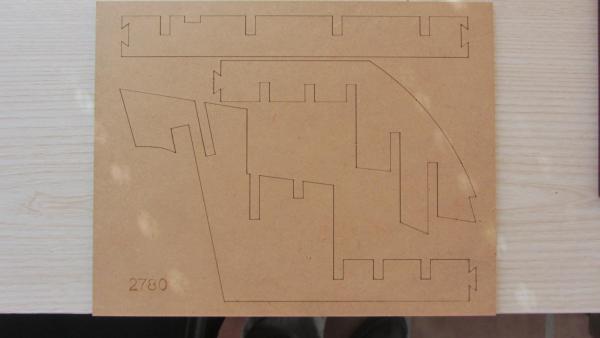
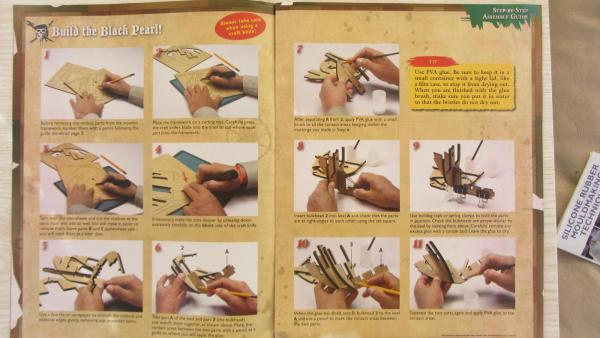
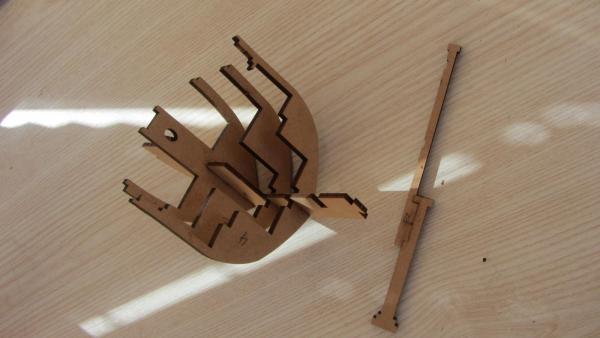
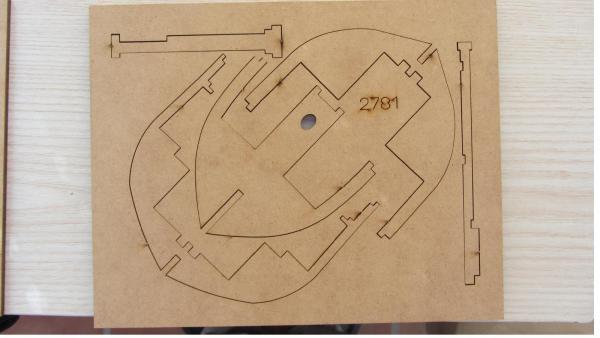
Hi. Well we made a start with the Black Pearl. The Board as supplied. And the other board. Instructions page 1. And Page 2. Assembly finished for this week. Alex doing the gluing. We managed to complete this with no issues. But I would of had a couple of spacers made out of the scrap MDF to jig the frames square. It’s only a very small detail but for anyone completely new to ship building it would help the build. Regards Alex and Antony.


- 21 replies
-
- 7
-

-
- pirate
- black pearl
- (and 1 more)
-
Using chisels for turning brass
AntonyUK replied to tkay11's topic in Modeling tools and Workshop Equipment
Hi Tony. Do NOT even try. It will snatch and take your head off. It can be used for putting in very fine details with a lock bar. Turn your cannons out of timber and gilding them with brass. Someone else is using this idea on the forum ... Not sure who . I will get back to you on who it is. Regards Antony Edited ... Found the idea on using gilding here. http://modelshipworld.com/index.php?/topic/300-le-bonhomme-richard-by-jeronimo/page-28 -
Hello shipmates. Thanks. I will pass on the messages to him. Steve. Have you a build log ? For the Peral . Regards Antony. Edited.. Found your build log Steve.. Don't know how I missed it
- 21 replies
-
- 1
-
-
- pirate
- black pearl
- (and 1 more)
-
Hi. This is a fun build to get my lad introduced into ship modeling. The model is info :- Length 80 cm , Height 69.5 cm , Width 31.5 cm. In the Model guide it states :- "This large model is easy to assemble by following the step by step instructions given with each issue, The instructions are suitable for younger model makers and they do not require any experience of model making. Simply follow the clear guide to complete this magnificent pirate ship." The parts in issue one are two sheets go fibre board (MDF) 6mm and 4mm thick.plus a flag and string. The packaging was very good. The laser cutting was also excellent and not over cooked More information can be found at www.hachettepartworks.com/blackpearl Will photograph the first parts to show the quality and ease of instructions later in the next post. My lad will be building this with a lot of help from me. Photos will show this as we progress with the build. He is very excited to build this model and we will continue the subscription as long as he has a interest in continuing the build. That's about it for now. Regards Antony.
- 21 replies
-
- 3
-
-
- pirate
- black pearl
- (and 1 more)
-
Hi Rusty. Wow off on another Exelent build. Look forward to watch this grow into another Masterpiece of yours Awaiting more photos. Regards Antony.
-
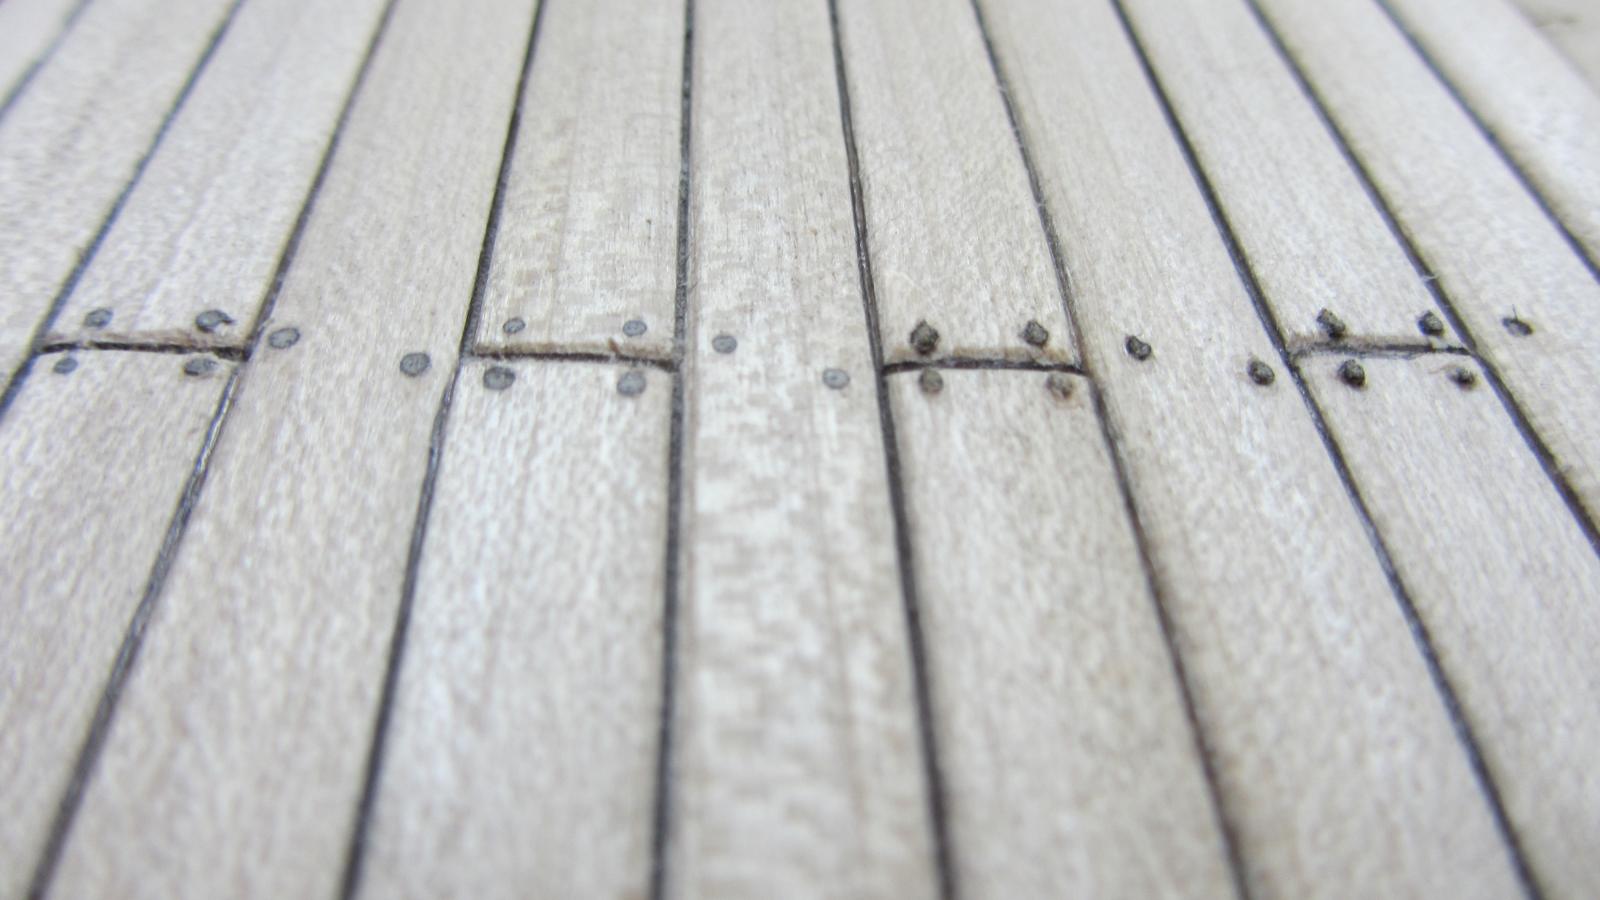
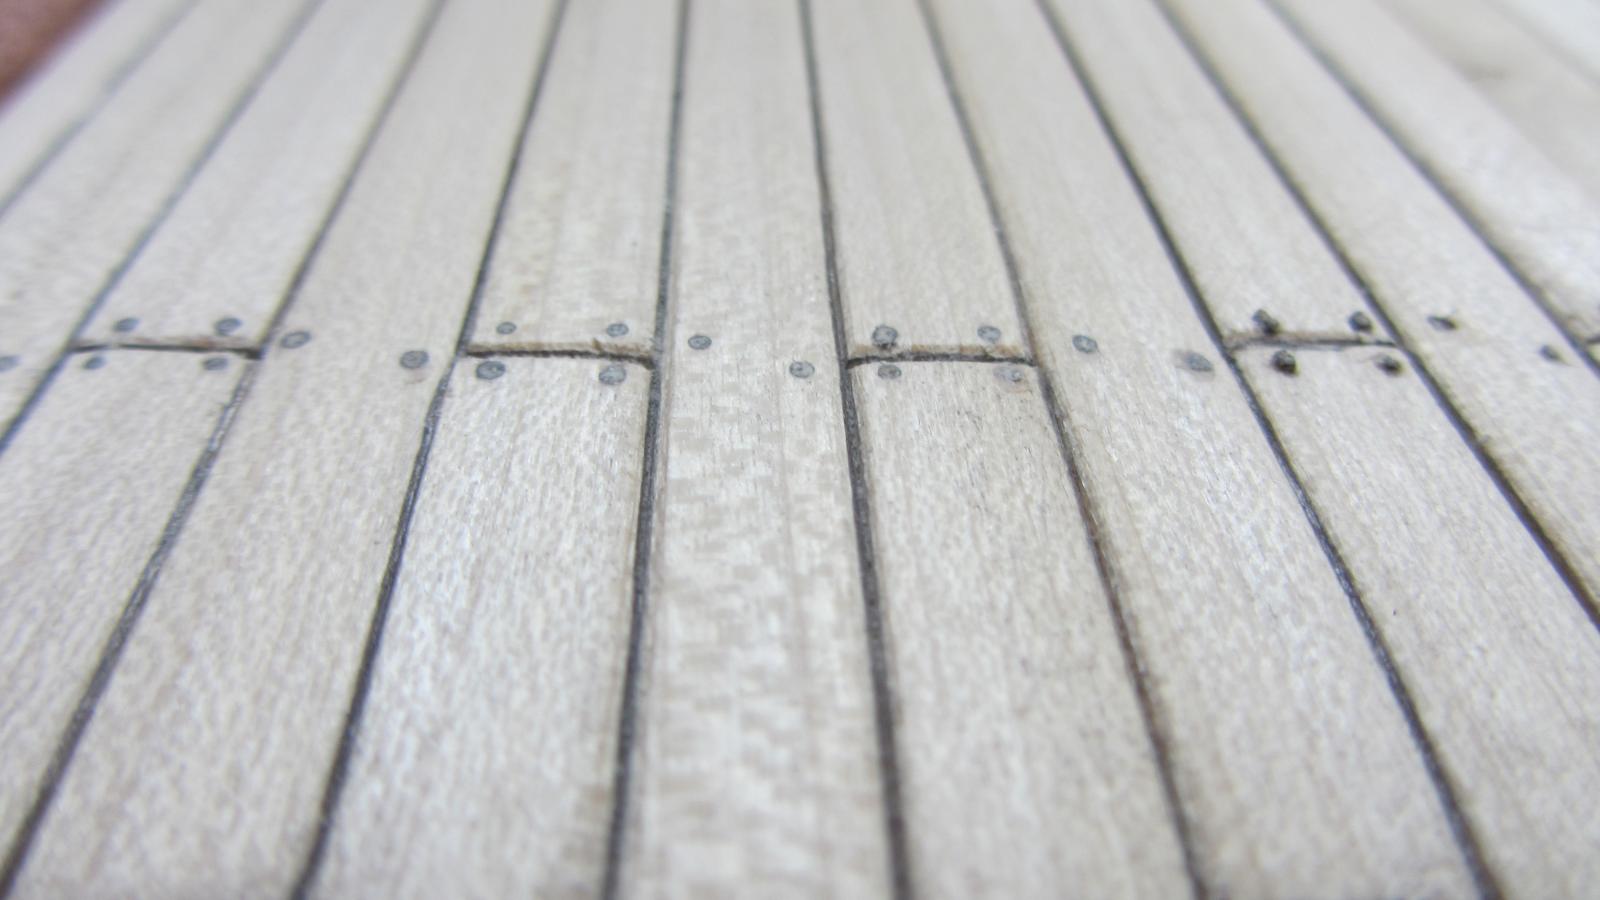
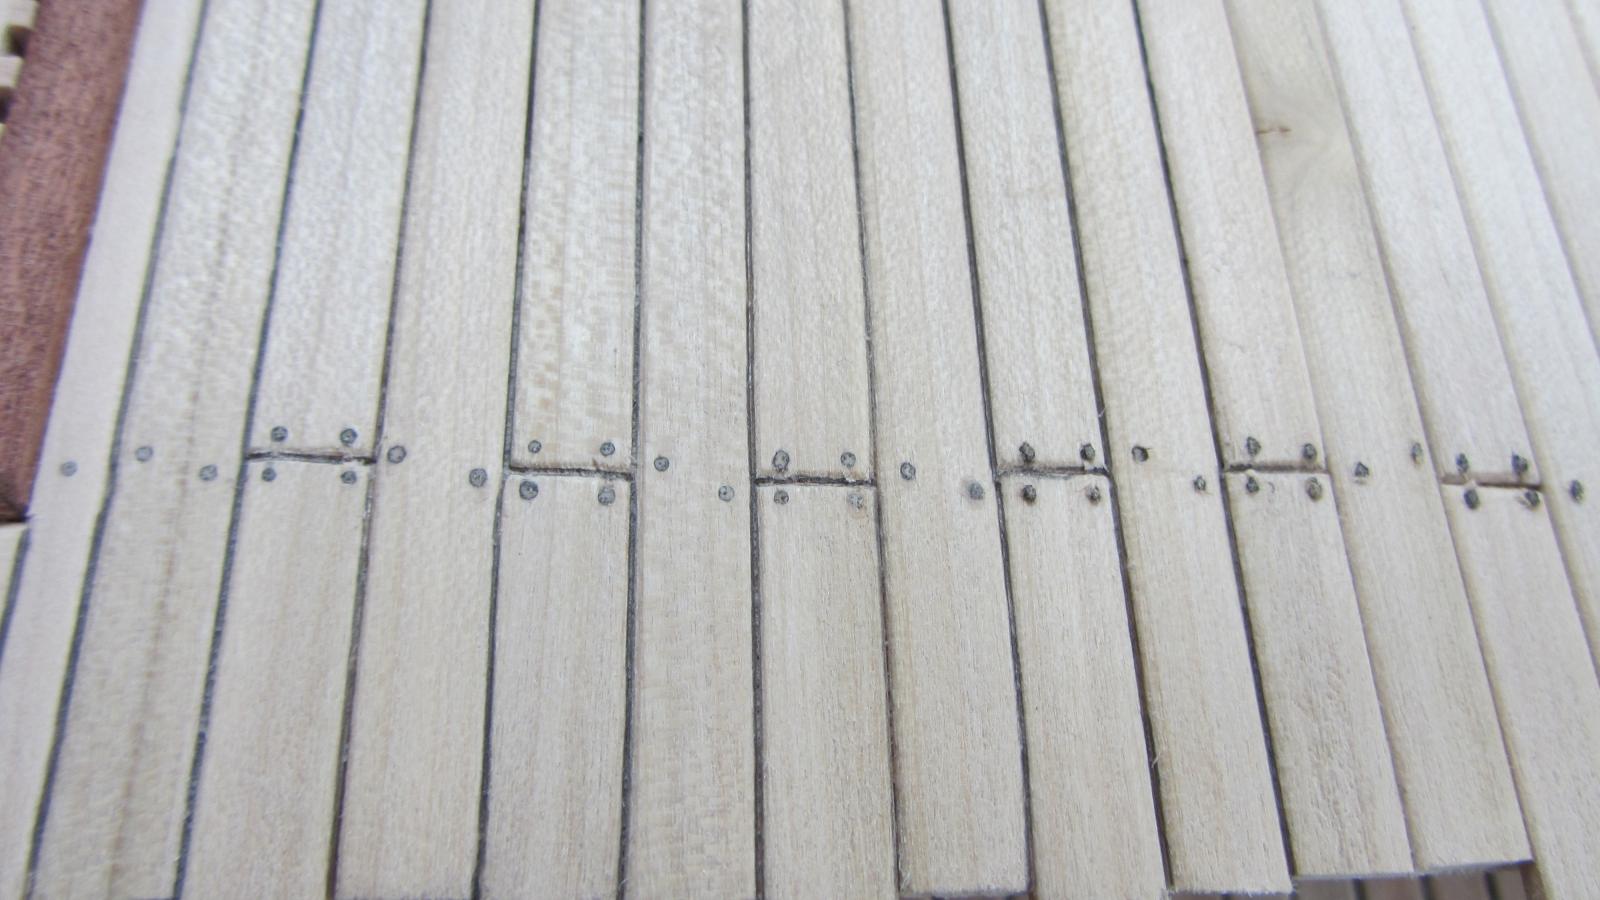
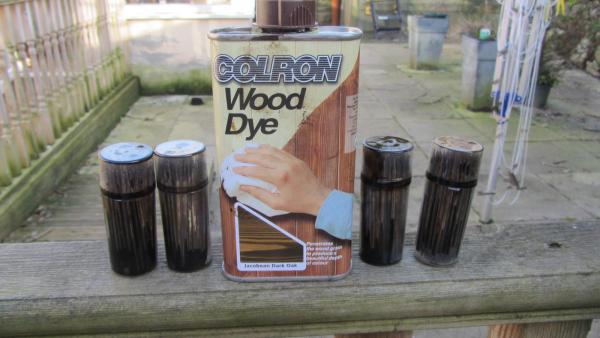
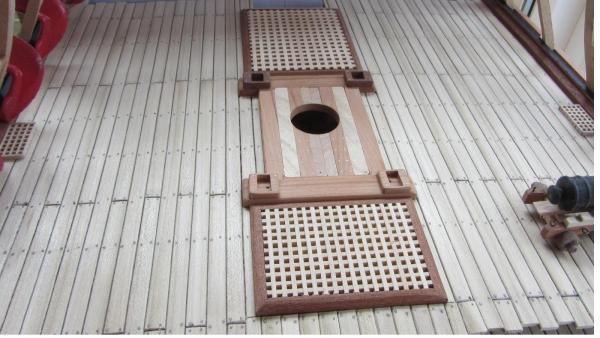
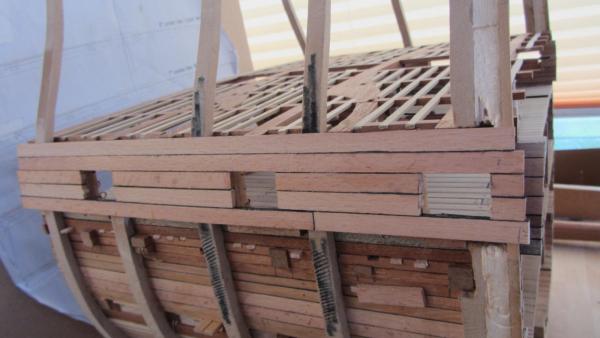
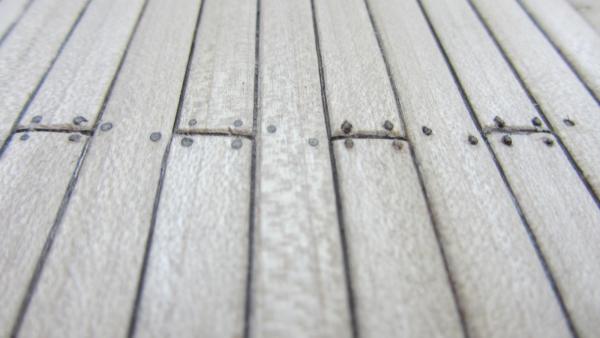
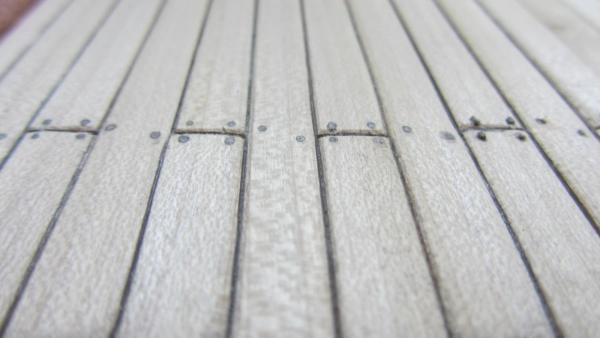
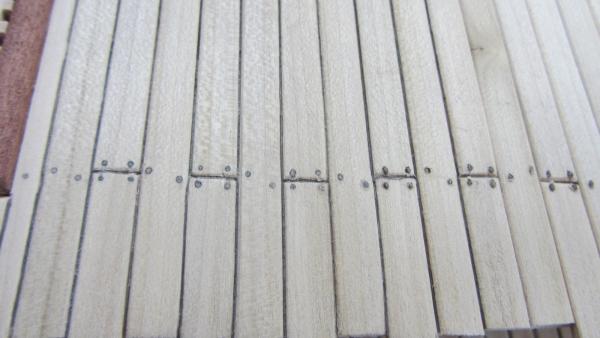
Hello Shipmates. Started the planking to the sides of the main deck. Completed deck without furniture on. The Stain used to soak the treenails prior to installing them. Thanks for looking in. Regards Antony.
-
Hi Shipmates. Thank you for the likes and comments. Drilling holes for the rest of the treenails today. Wow that's some 800 per deck The next deck is being milled and sorted into suitable timbers. Apart from the spelling in my last post... The treenails are soaked in Colron wood dye (Jacobean dark oak) Will add photo when I get back on the PC. And the planking spelling should read " stood on edge" Thanks for looking in. Regards Antony.
-
Hi. Just found this book and Vol 2 and 3 also on sale. The Seventy-Four Gun Ship vol.1 Hull Construction - Boudriot http://www.ebay.co.uk/itm/380856396027?_trksid=p2055119.m1438.l2649&ssPageName=STRK%3AMEBIDX%3AIT Seller will ship world wide. Hope this is of some use to someone. I have no links with this seller other than I have purchased books from him. Regards Antony. Edited sale end prices. Vol 1 £79.52 Vol 2 £65.00
-
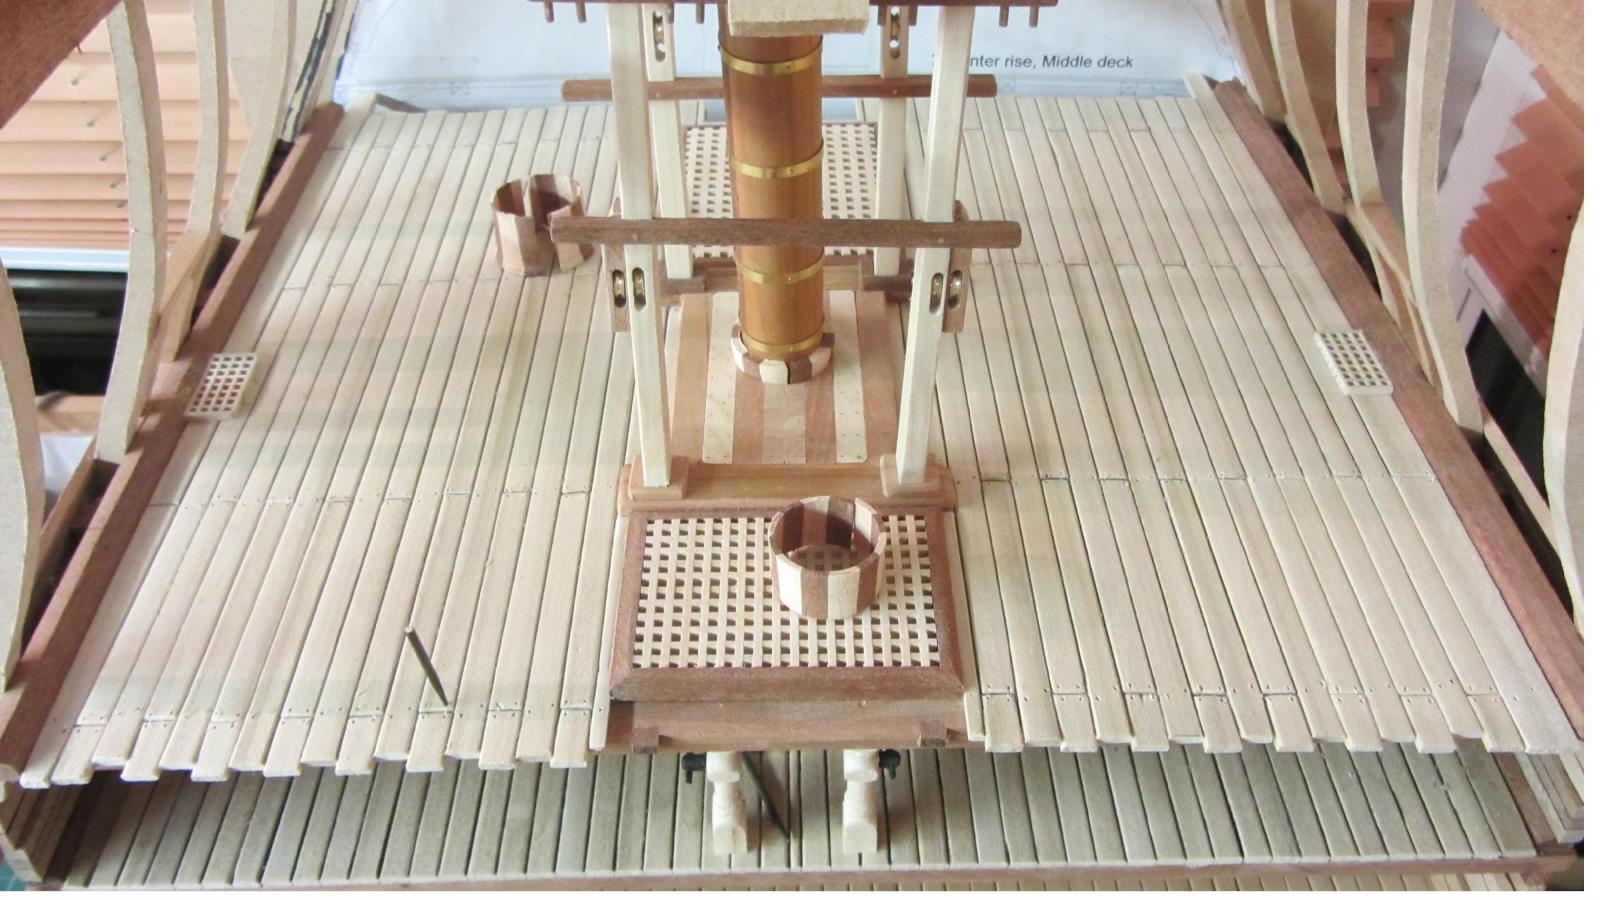
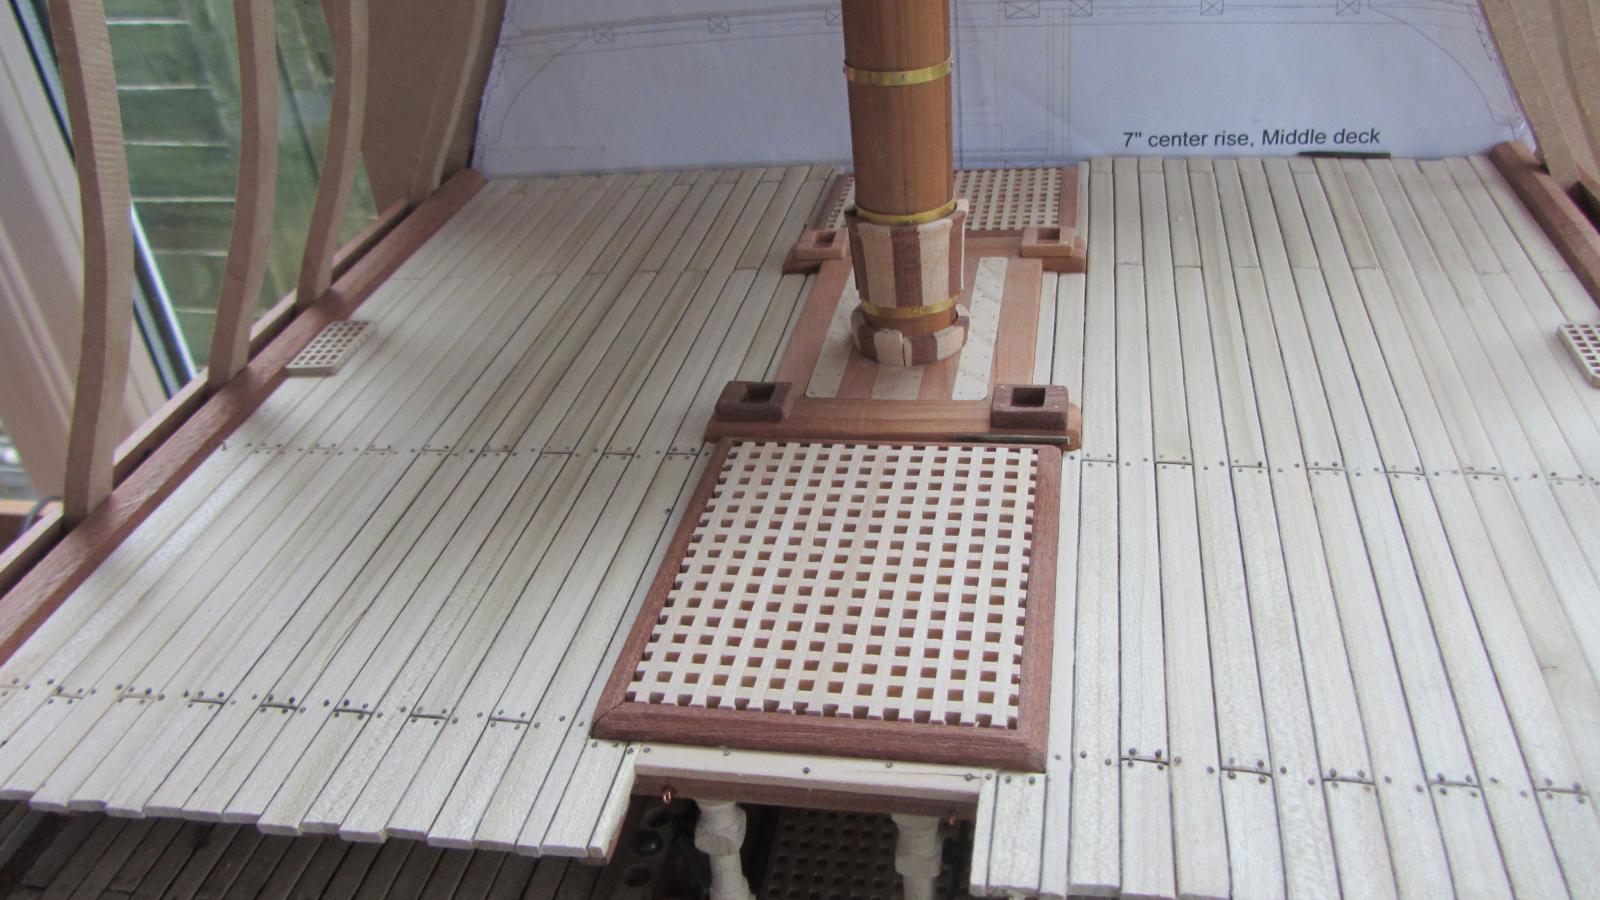
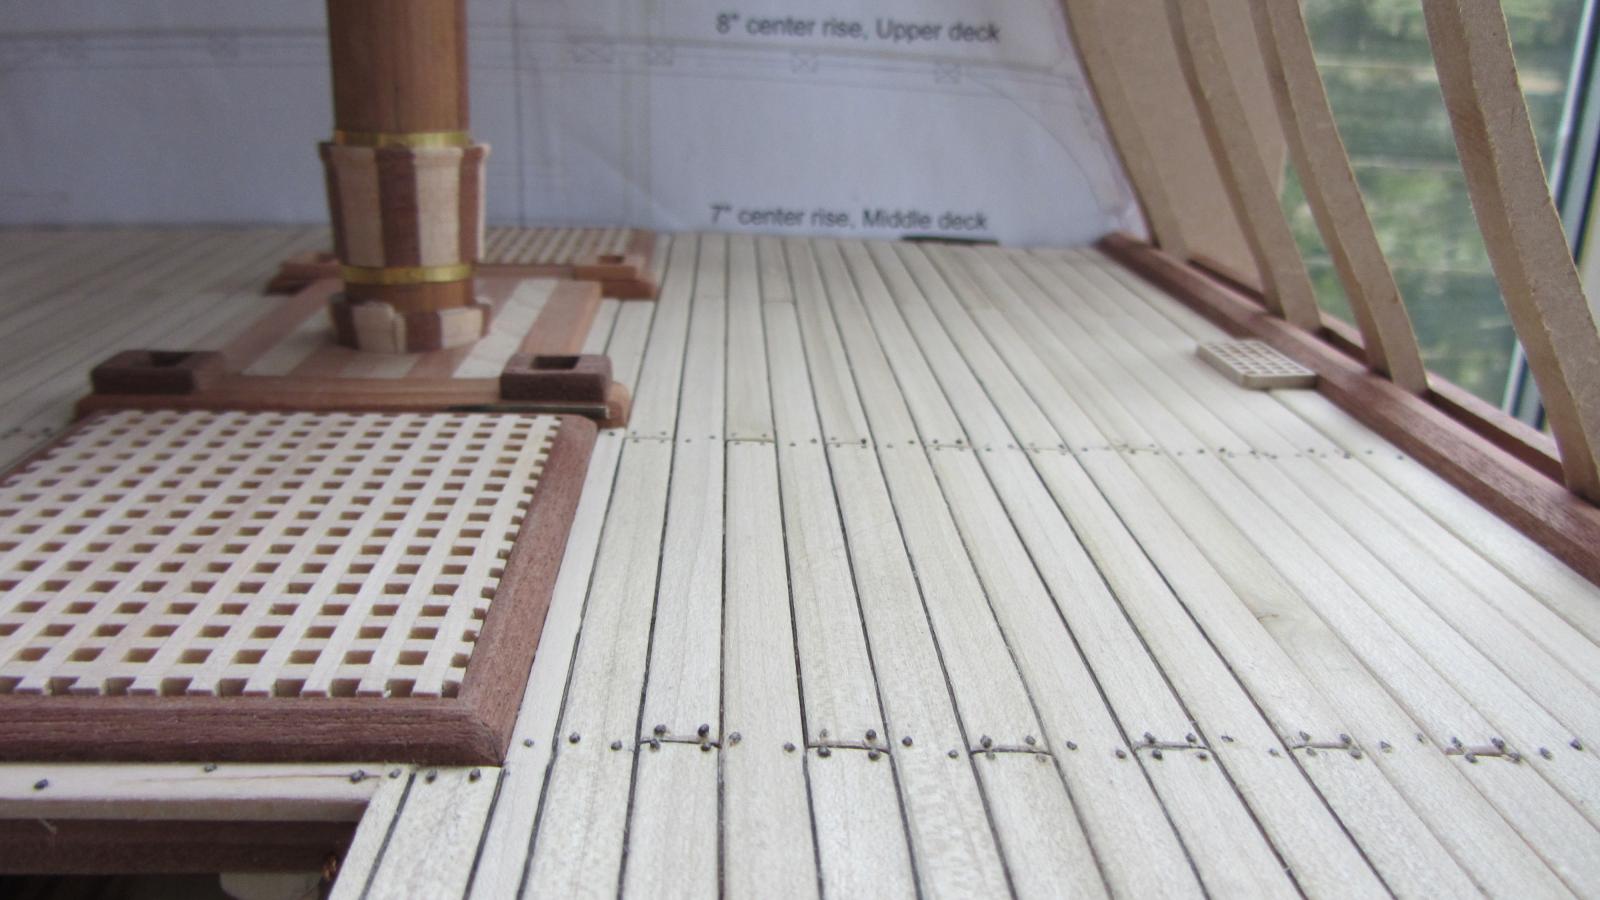
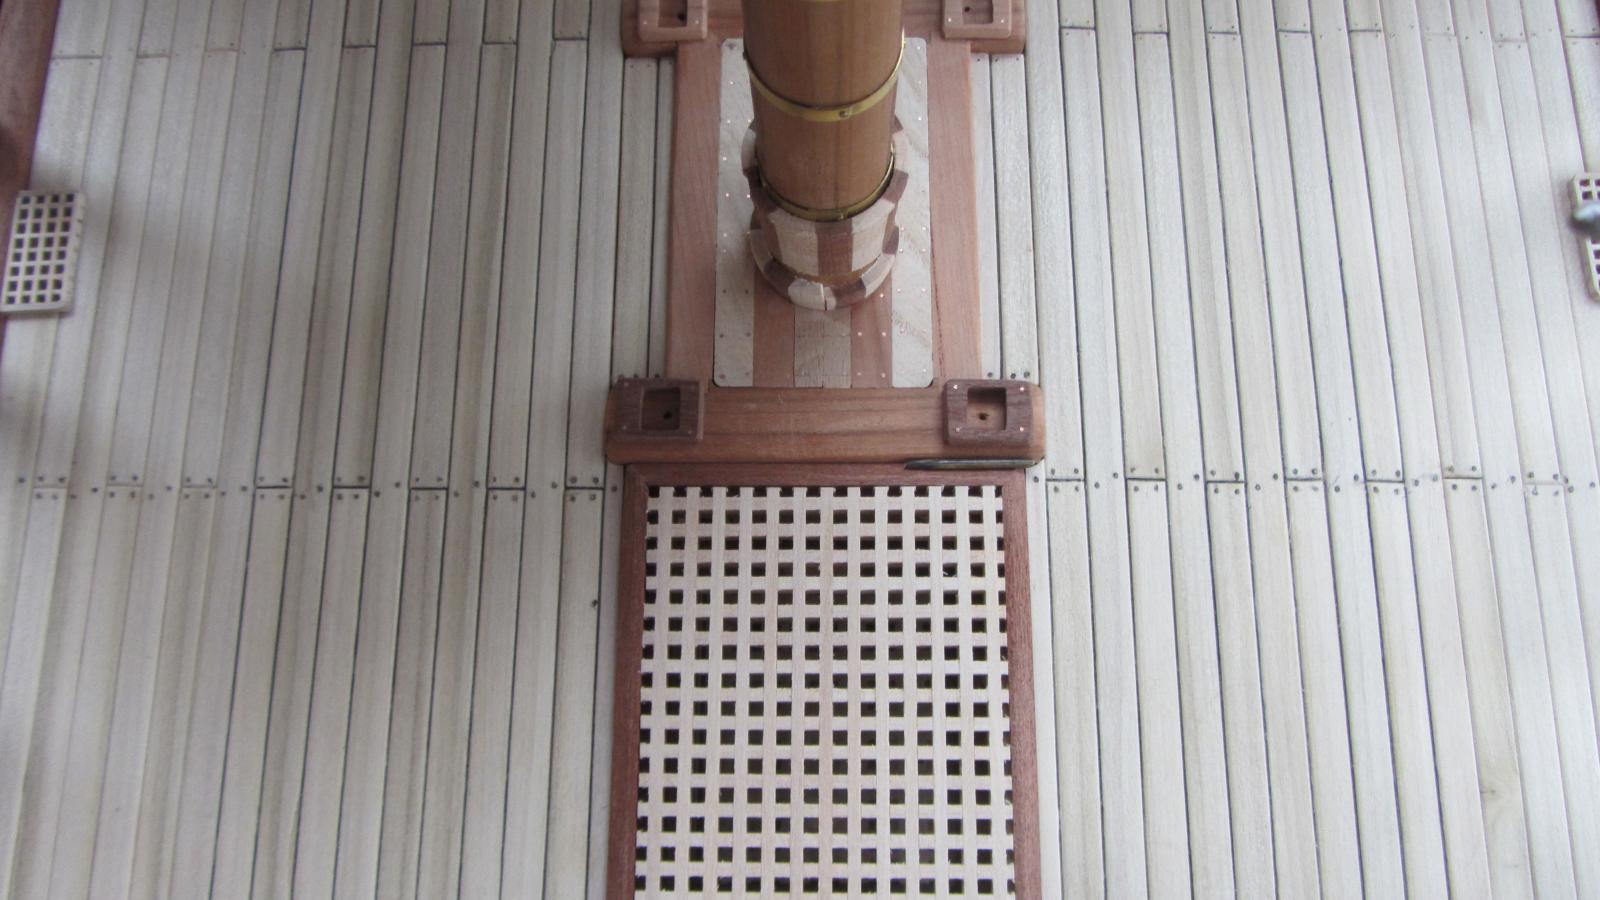
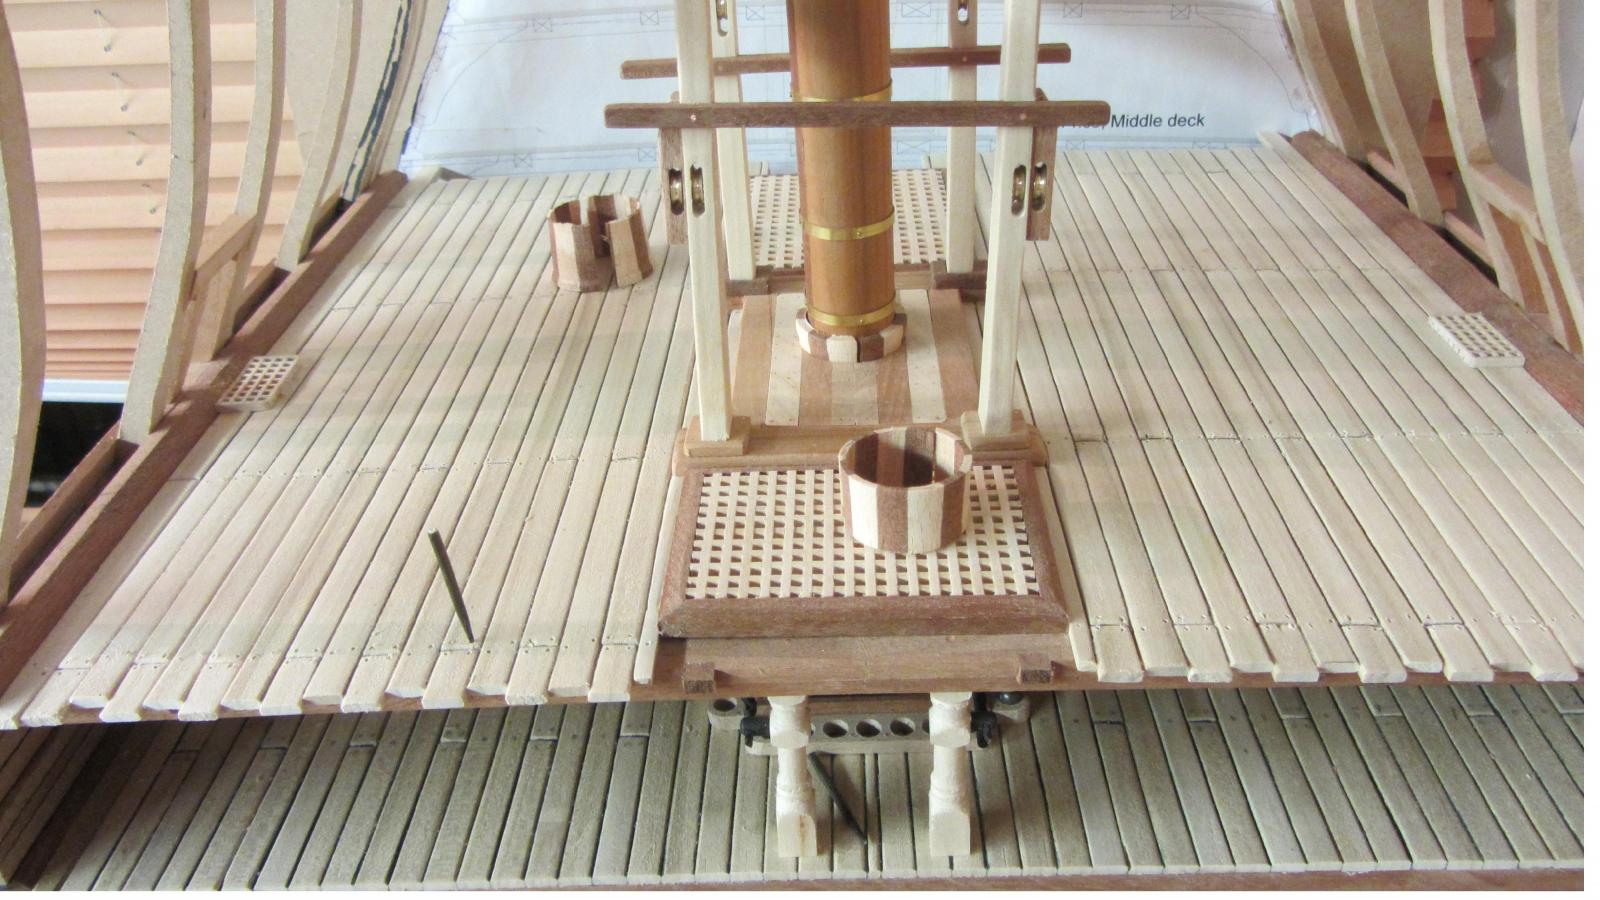
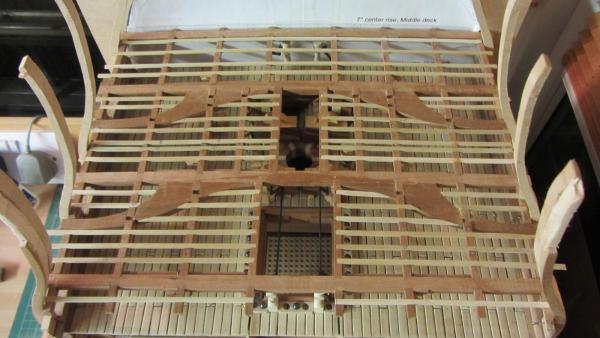
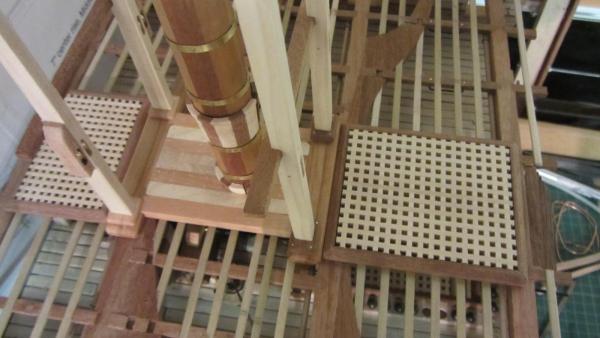
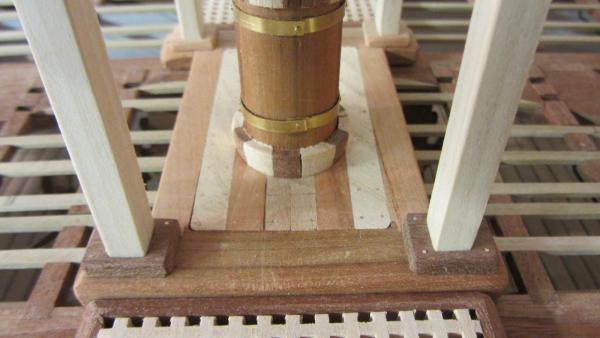
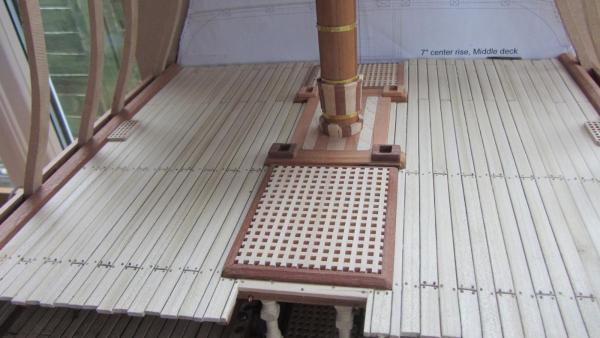
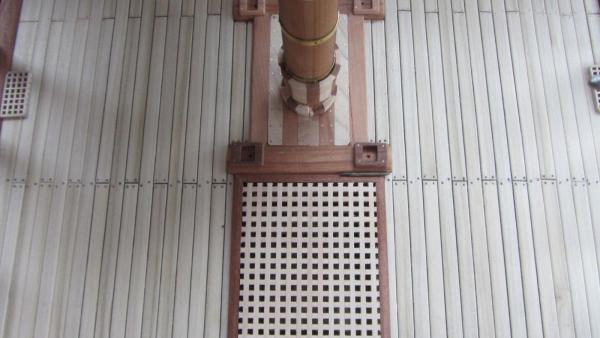
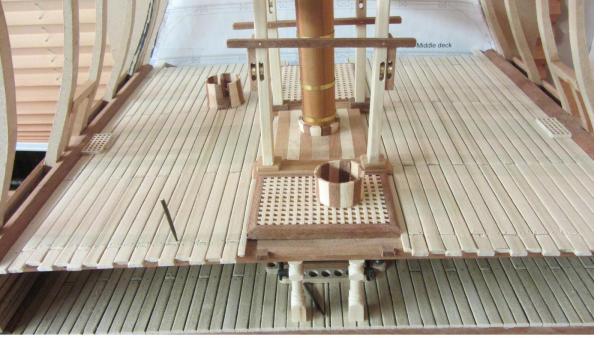
Hi Shipmates. A few more photos on my progress up to date. Tree nails are cocktail sticks sacked on dark stain then dryed and a .6 mm hole drilled into the Tulipwood. treenail then glued into place and when dry cut with side cutter and sandpapered. Chalking done with Black card. All the planks steed on edge and card glued to facing edge with PVA glue. Before sanding down and after. Tree nailing done on far side only this side to complete now. This middle Deck is now almost complete and now need to add the furniture. I will add the scuppers holes and the holes for the Gunport lids ropes as I do deck by deck. Thanks for looking in. Regards Antony.


- 209 replies
-
- 23
-
-
Hi Mark. One word...Excellent. Love this build log. Regards Antony.
-
Hi Remco. Just letting everyone else say what I am thinking. I will just look and drool over your skills. Regards Antony.
-
Hello Daryl. Nice progress since I last looked in. Must be putting in a few hours to get this far so quick. Regards Antony.
-
Hello Michael. Nice start to your build Nice to have your son helping Keep the photos coming as its going to be a nice build. Regards Antony.
-
Thimble help needed
AntonyUK replied to Senior ole salt's topic in Metal Work, Soldering and Metal Fittings
Hi. Use annealed copper tube of the correct size. Fill with casting sand(very fine sand). And block the ends. Bend around a bar of the required diameter. Can use heat if required. Bend as many turns as required. Remove the sand. Cut to make rings. Then grind outer part away. Regards Antony. Edit -: Turn it on a lathe. -
Hi Bob. Have a read through this article. http://hnsa.org/doc/luce/part4.htm This is page 4. And you can access all the pages. A lot of interesting reading. Regards Antony.
-
Hi. Another reference from The construction and fitting of the sailing man of war 1650-1850 "The bottom planking, This was generally wrought oak, to a width of between 9in and 12in." Regards Antony.
-
Hello Shihawk. On the full size ship according to The Anatony of The Ship. Page 50 "Planking was put on in as long lengths as possible-- or rather, obtainable. The Width was usually 12 in. And the thickness of the bottom plank in first -rate ships was 5 or 6 in." I will leave the calculations to u. Regards Antony
-
Hi Sygreen. Welcom to MSW. Have a read here on starting a build log. http://modelshipworld.com/index.php?/topic/53-before-you-post-your-build-log-please-read-this-starting-and-naming-your-build-log/ That's all the information you need to start your build log. As far as tools .. As others have said.. Keep it basic.. Quality is important. Knife. Razor saw . Mitre block to keep your cuts square. Cutting mat.(Large) Sand paper. Small files. A good light. Tweezers. Best of luck. Regards Antony.
-
ROYAL CAROLINE 1749 by Doris - 1:40 - CARD
AntonyUK replied to DORIS's topic in - Build logs for subjects built 1501 - 1750
Hello Doris. Like I said in my last post.. Top of the Masterclass. They are better than the ones I turned in a lathe You are so skilled. Is there anything you cannot make... I don't think so Regards Antony.- 883 replies
-
- 2
-
-
- royal caroline
- ship of the line
- (and 1 more)
-
Hi Remco. Just catching up on your build of the Kingfisher. Stunning workmanship and skill. Regards Antony.
- 1,215 replies
-
- 1
-
-
- sloop
- kingfisher
- (and 1 more)
-
Happy birthday m8 50 today .dont look a day over 25 Regards Antony.
-
Hello Alexandru. Skilled at wood... Skilled at metal.. And the list grows everytime I read your log. Excellent build with so much detail being as standard Regards Antony.