HOLIDAY DONATION DRIVE - SUPPORT MSW - DO YOUR PART TO KEEP THIS GREAT FORUM GOING! (Only 27 donations so far out of 49,000 members - C'mon guys!)
×


gjdale
-
Posts
4,891 -
Joined
-
Last visited
Content Type
Profiles
Forums
Gallery
Events
Everything posted by gjdale
-
 That is some really lovely work Janet! Please keep posting more progress pics.
 -
Hi Harvey, Just found your log and have to say you're doing a wonderful job on modifying this kit - truly first class work! I note that you live in Dorset -.my wife and I spent a most enjoyable week in Dorset about one year ago, staying in a thatched cottage owned by friends in the tiny village of Milton Abbas. The Dorset countryside really is lovely. I'll pull up a chair and follow along with your build now that I've found it. As I said, first class work and very interesting mods.
-
Thanks guys. Mark - you have a sharp eye. I think what you are seeing is camera angle distortion in this case, but there IS definitely a discrepancy at the forward end of one of the risers that will need to be adjusted. Thanks for checking - it can be easy to miss the obvious sometimes and I appreciate your pointing out what you see.
-
Looks great Kevin. If you want to put a coil in your breach rope, why not just replace it with a slightly longer one?
- 1,319 replies
-
- 2
-

-
- caldercraft
- Victory
- (and 1 more)
-
Looking great Vivian. Very neat trick with your light switch - one would never guess it was there.
-
Hi Brian, Warrior is still in the queue but I've got something else planned first. I'm keeping that under wraps for now though
-
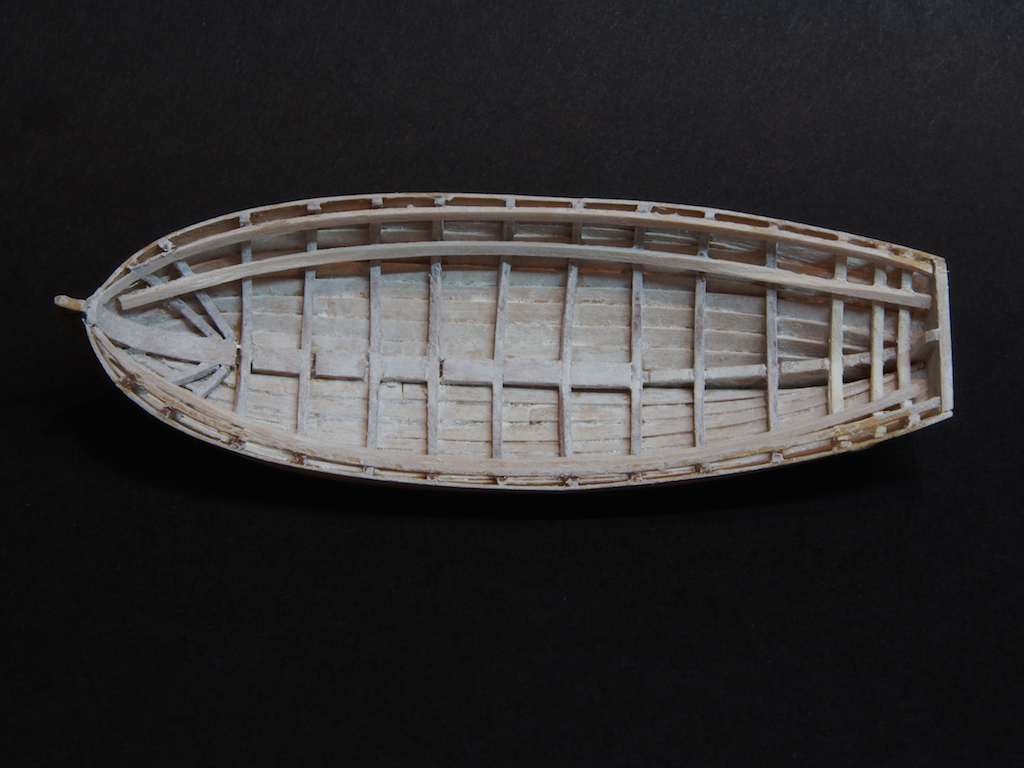
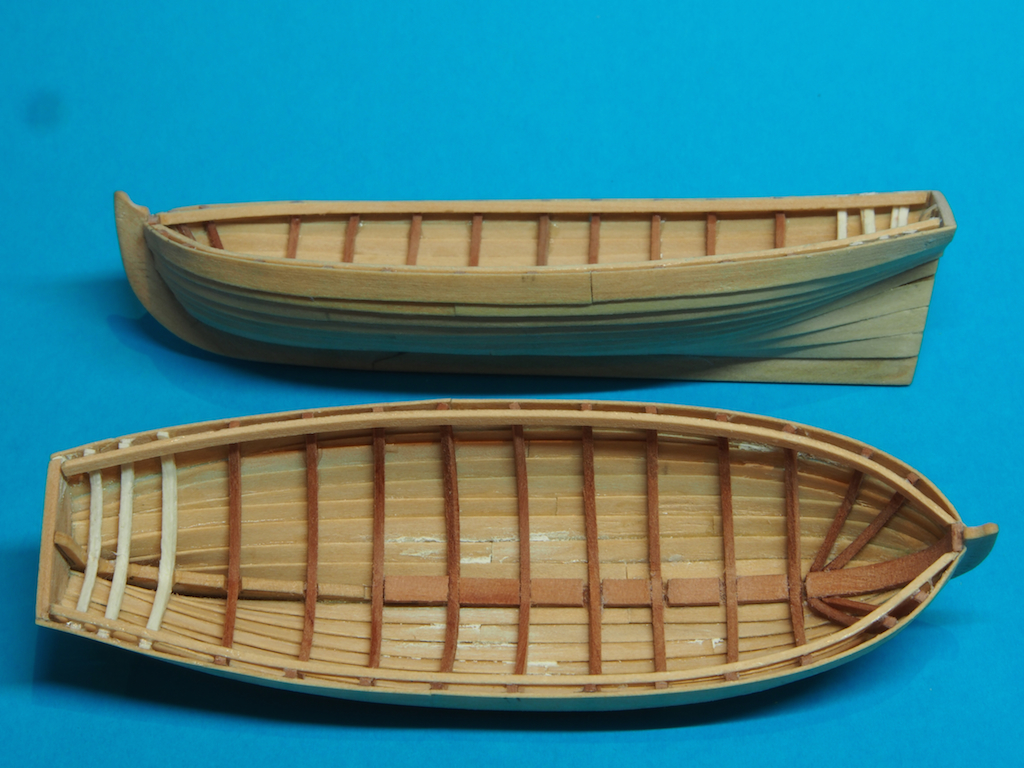
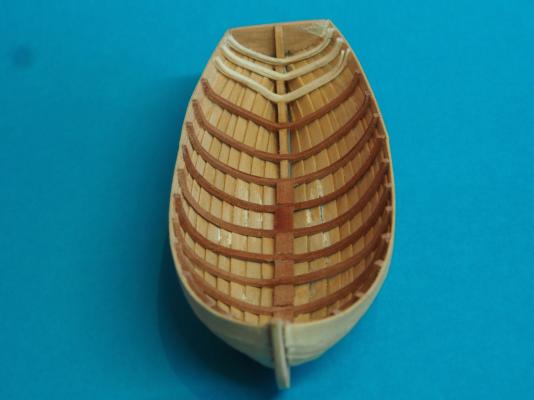
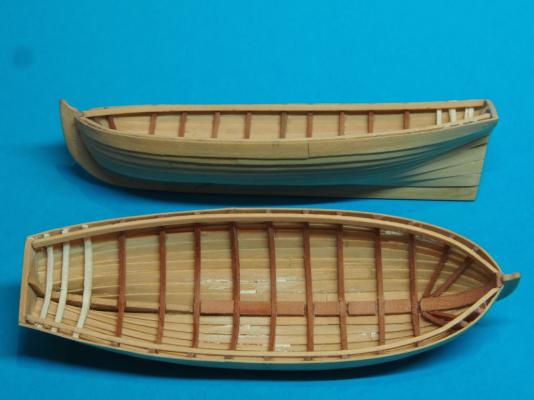
Cutters Ver 2.5 continued Not much time in the shipyard of late, though did spend the entire day in there today. Don't seem to have much to show for it though....... I have fitted the Risers for the Thwarts in both boats, made the Caprails, and given the interiors an undercoat of white Gesso in preparation for painting. The Risers were relatively simple to install, using a piece of 1/32" x 3/32" scrap Pear stock as a spacer to achieve a consistent distance below the gunwales on both sides. The Caprails were made in the same way as for the Pinnace, cutting them roughly to shape and then spot gluing them and sanding to final shape in situ. The only drawback here was that I've run out of 1/64" Boxwood sheet, so used Cherry instead. Quite a noticeable difference in how the two woods sand! By comparison, the Cherry tends to be stringy and fuzzy along the edge, and is prone to splintering. I forgot to take pictures of the Caprails before I unglued them with Isopropyl Alcohol. Painting with the Gesso gives a good base for the paint to grip. In this case, I thinned the Gesso slightly - I really only wanted to just cover/seal the wood with it. Here's a couple of progress shots - not very pretty in their "underwear" at the moment! I took these more to test some different camera settings than for any other reason, but thought I may as well post them anyway. Next task is painting the interior of the hulls in yellow ochre. Still debating whether I'll break out the airbrush for this task - will wait to see how the mood takes me next weekend.
-
Nicely done Dan. And a nice reminder to us all that even though it often takes longer to do the set-up than the actual job, it's well worth the extra effort in the long run and will usually end up saving time by avoiding unnecessary re-work.
-
Fantastic Mobbsie! I love the way you have made the yards themselves - they really do look first class. As for "lace-making", I think you've got it right when you say tie off as you go. It's hard enough trying to get one line at a time to go where it's supposed to - no need to add an extra degree of difficulty. Patience is key from here on - don't want you poking an eye out, or snapping off topgallant masts!
- 1,279 replies
-
- 1
-
-
- agamemnon
- caldercraft
- (and 1 more)
-
Happy Birthday for this weekend Bob. May you receive an appropriate number of ship modelling related goodies! Oh, and have an adult beverage or two of your choice to celebrate. I'll be raising a glass to you from Downunda.
- 1,477 replies
-
- 1
-
-
- essex
- model shipways
- (and 1 more)
-
Great work Vivian - looking really good.
-
Nice work so far on the coppering Sjors. She's going to look fabulous when you're done.
- 1,616 replies
-
- 1
-
-
- caldercraft
- agamemnon
- (and 1 more)
-
Just loving your attention to detail on this build Bob.
- 277 replies
-
- 3
-
-
- model shipways
- 18th century longboat
- (and 1 more)
-
Lovely Remco!
-
Great work Danny, and thanks for sharing your methods again. There is always so much to learn from reading your log !
-
Exquisite seems to be just the right word Johann.
-
Thanks guys. As for painting, while it appreciate your sentiments, and in some ways would like to leave them natural, to be in keeping with the rest of the build they really need to be painted. I will do the same as for the Launch and Pinnace, painting the hulls and leaving some of the fittings in a natural finish.
-
Happy Anniversary Augie - I can't believe it's already a year since you started this build! The pear decking looks great and the hooked scarphs........let's just say it's hard to believe this is your first go at them.
- 2,191 replies
-
- 1
-
-
- confederacy
- Model Shipways
- (and 1 more)
-
Great progress Ben - looking very sweet.
-
Nice to see the lovely Emma back in the shop Wayne. I look forward to some updates.
-
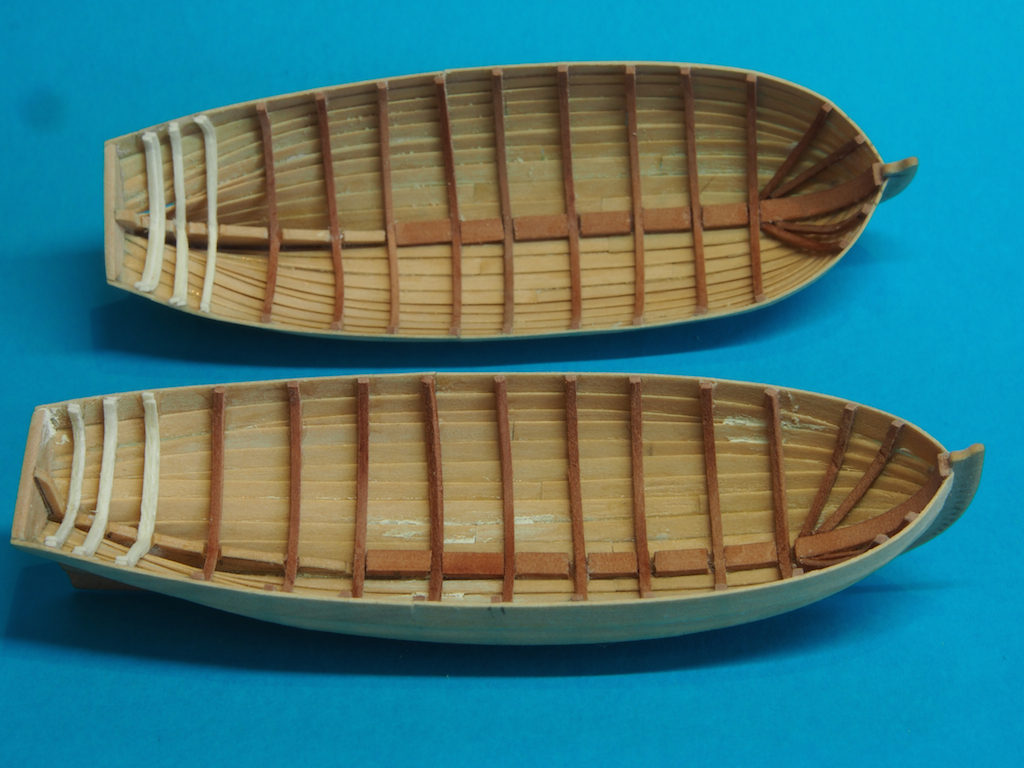
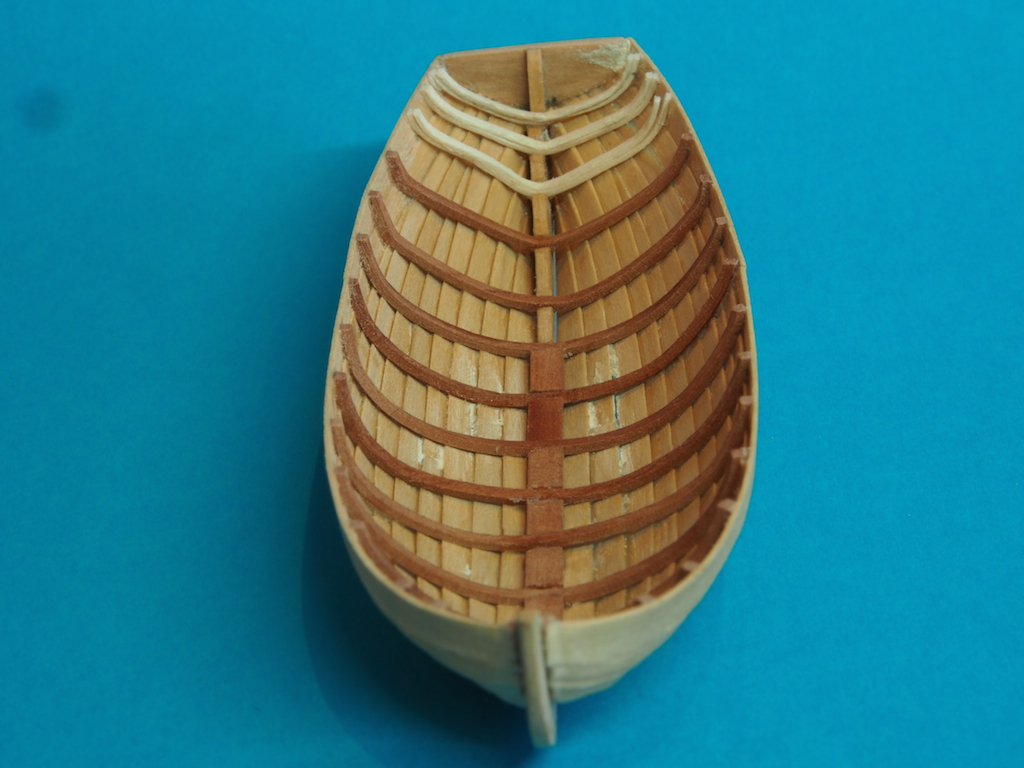
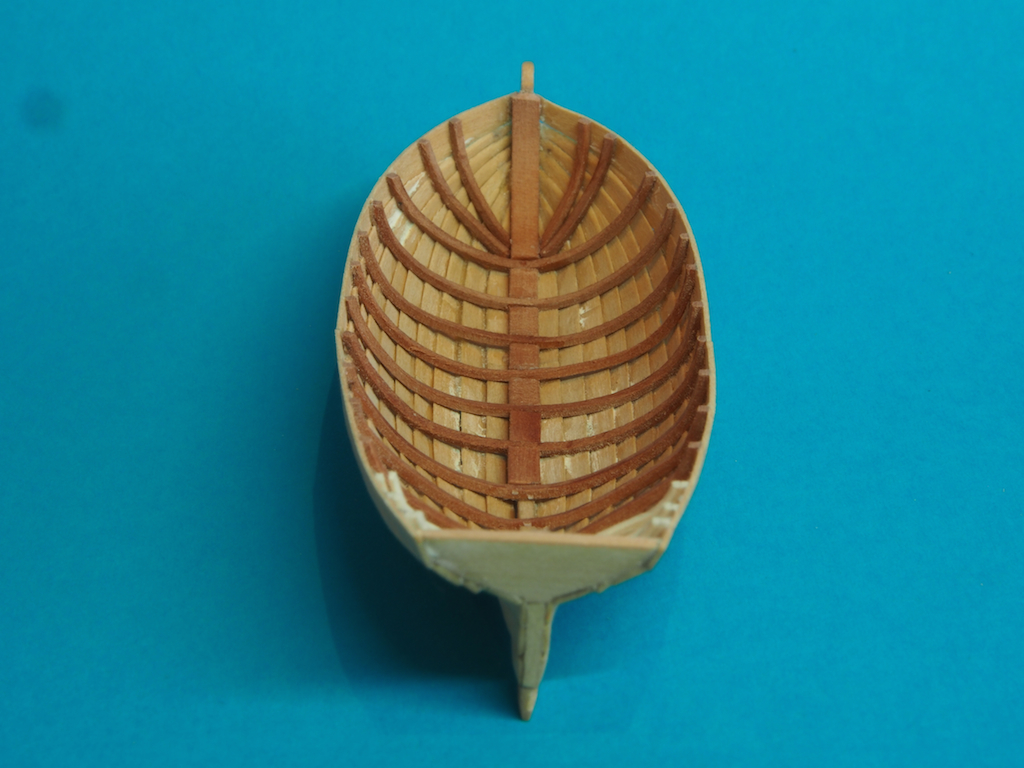
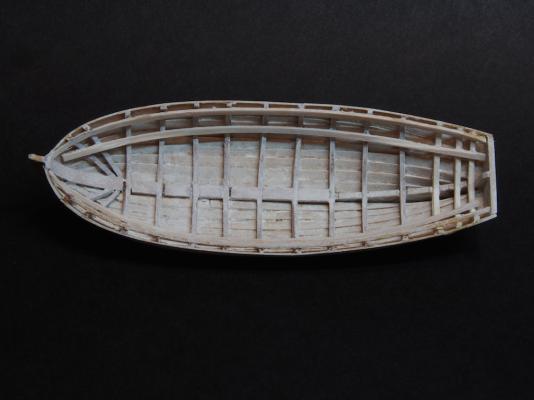
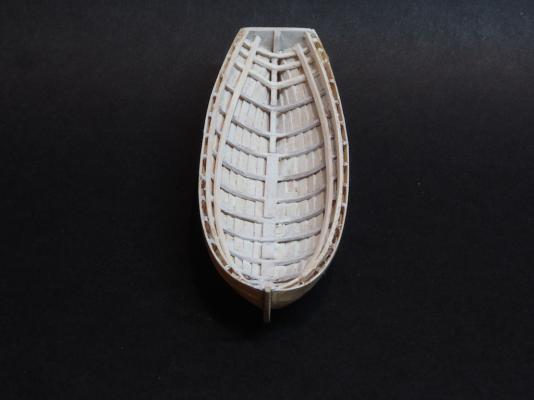
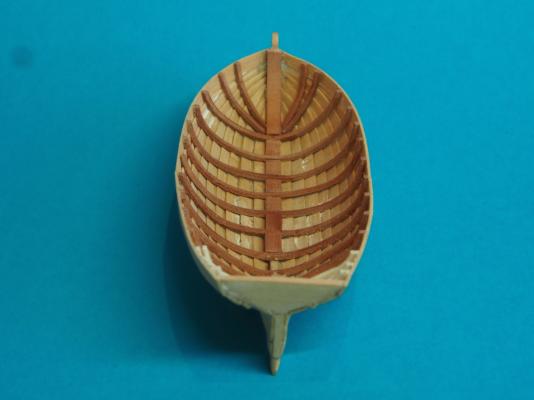
Thanks again for all the words of encouragement and support, and for all of the "likes". A brief update today. 25' Cutters Ver 2.5 continued This weekend I completed fitting all of the previously bent frames. This was a relatively straight forward job, although more time consuming than I had anticipated. I was pleased with the way the frames fitted into the hull shells, with only a modicum of persuasion required. The frames are all 1/32" sq Pear stock, with the exception of the last three frames in each boat. These are made of a double laminate of 1/32" x 1/64" Holly stock. I decided to fit a couple of extra hogging pieces so that these now run the complete length of the keel from apron to stern deadwood. This should make fitting the keelson/footwaling a little easier later on. I also trimmed the stems to shape and sanded back the transoms. In hindsight, I should have left the transoms a little higher and trimmed after fitting the cap rail. Oh well.......... A couple of pics of progress. You will notice some discoloured powdery substance in some of the shots. This is where I applied a small amount of filler where some of the glue joints were a bit bare. Once this is cleaned up, the hulls will be painted, so it won't be visible. I also fitted the gunwales: I will fit the risers for the thwarts next, and then paint the hulls before continuing with fitting out.

-
Andy - ROFLMAO!!!
-
Hi Ian, I decided to pay your log a "return visit" and it has taken me several days to catch up with your progress. Boy am I glad I did too! What you have achieved here is just tremendous. I particularly enjoyed working through your stove construction - what a great tutorial on metal work. Guess I know now where to come with questions on that subject! I'll look forward to following along from here.