MORE HANDBOOKS ARE ON THEIR WAY! We will let you know when they get here.
×


gjdale
-
Posts
4,880 -
Joined
-
Last visited
Content Type
Profiles
Forums
Gallery
Events
Everything posted by gjdale
-
 That's just stunning Bob!
 -
Welcome home Augie - hope the trip was an enjoyable one. We all look forward to the resumption of play in your shipyard now, er, I mean NOW!
- 2,191 replies
-
- 1
-

-
- confederacy
- Model Shipways
- (and 1 more)
-
Nice work on the bowsprit Bob. For the figurehead, just take a block of wood and remove all the bits that don't belong to the figure.
- 1,477 replies
-
- 4
-
-
- essex
- model shipways
- (and 1 more)
-
Coming along very nicely indeed John. Enjoy your holiday.
-
Can i live without a BYRNES TABLE SAW
gjdale replied to shihawk's topic in Modeling tools and Workshop Equipment
As my Dad has always said, "you'll remember the quality long after the price is forgotten". -
Well done Vivian, that's cool!
-
Can i live without a BYRNES TABLE SAW
gjdale replied to shihawk's topic in Modeling tools and Workshop Equipment
Larry - ROFLMAO!!! :) -
Can i live without a BYRNES TABLE SAW
gjdale replied to shihawk's topic in Modeling tools and Workshop Equipment
Curse you and your recipe Greg! Now I have to get a planer that I don't really need!!! ;) :) -
Can i live without a BYRNES TABLE SAW
gjdale replied to shihawk's topic in Modeling tools and Workshop Equipment
Okay Boyd, since you asked, you need one! And no, you can't live without one. There now, feel better? Yes there are others that would possibly do the job, but the difference is, the Byrnes saw is an absolute joy to use. It will bring a smile to your face every time you use it. And after all, don't we do this hobby for enjoyment? It will certainly come into its own when you start scratch building, but even kit bashing will give it a serious workout. If you're looking for it to "pay for itself", it will do that if you mill your own lumber to size - eg buy sheet stock from Hobbymill and rip it down to size. BUT, you don't buy one of these works of engineering art to pay for itself. You buy one because you can! And for the sheer enjoyment of using it. So, have you placed your order yet? Oh, and don't forget to order the Byrnes Disc Sander at the same time. That brings almost as big a smile to my face, and probably gets used even more frequently than the saw. Let us all know when you've pulled the trigger on this/these. :)- 367 replies
-
- 14
-
-
Hi Slog, Sounds like you're having an "interesting" time there! I'll bet the air is still a nice shade of blue I know absolutely nothing about card modelling, but if you're having issues with PVA, have you considered using something like UHU glue sticks? I was just thinking that they might be a bit easier to work with for those larger panels. You might also drop a PM to Chris Coyle seeking advice - he seems to be a bit of a "guru" on card modelling. Hope you overcome this temporary setback soon - your model is looking excellent so far.
-
Thanks very much Nick, Mobbsie, Slog, Mike, Keith and Nigel, and once again to all of the "likes". I feel somewhat humbled by the number of kind comments i have received since posting the completed pictures of the boats. All of the boats are now installed on the ship - the two Cutters from their respective davits (there was more involved in rigging those than I'd thought!), and the Launch and Pinnace on the skid beams. And yes Daniel, I did make and install the mast step in the Launch before mounting . I've also fitted the rudder chains - one of those things that's easy to forget (I almost did). I'm currently working on fitting the Anchors and hope to finish that this morning before I have to go away for work for the week. The last job will be to make and fit the rope coils, but it looks like that will have to wait until next weekend. No more pictures today - I'll save that until she is finally complete.
-
Lovely Danny, as always. I may have asked before, so please forgive the repetition, but what tool do you use on the lathe to creat the grooves in your sheaves. Some pics of the process would be great.
-
Very nice outdoor shots there Vivian. Your ship is looking terrific.
-
Nice catch Frank. As you say, better to fix it now than curse it later. Perhaps you should consider getting a cat.
-
Thanks very much Frank, Sjors, Daniel, Mark and Bob, and also all of the "likes". Daniel - sharp eyes, you may be right! I'll fix that before it goes back aboard the mother ship. Thanks for the catch.
-
Thanks Brian, Remco and Wayne. It is something of a relief to be finished this little side-trip.
-
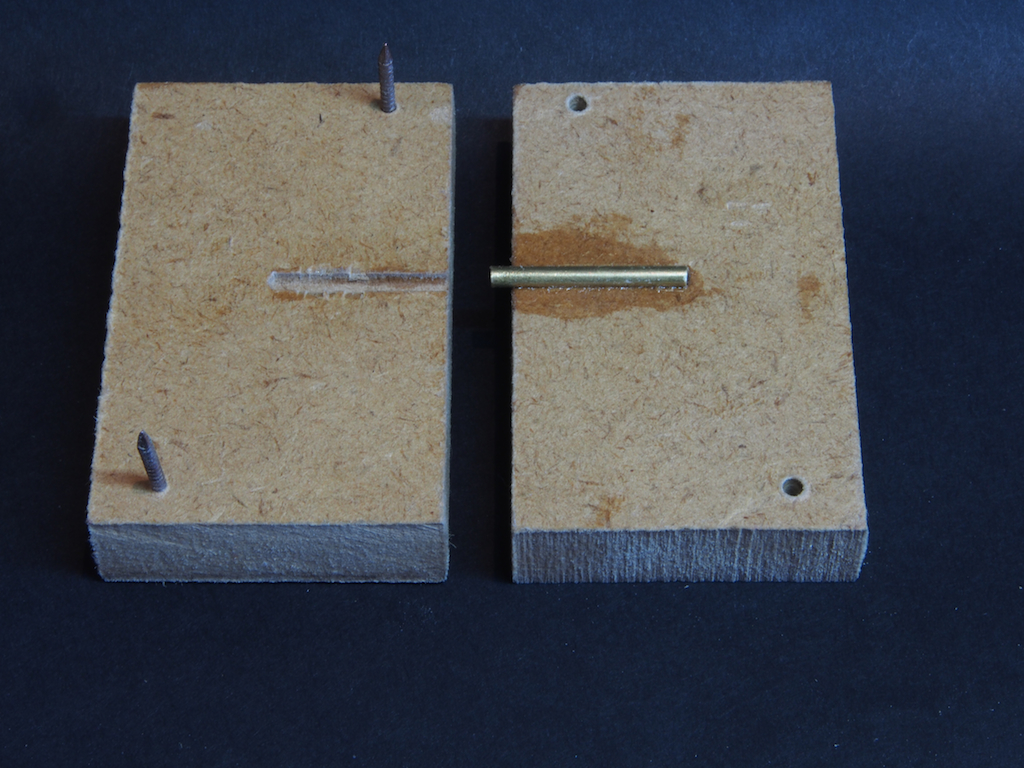
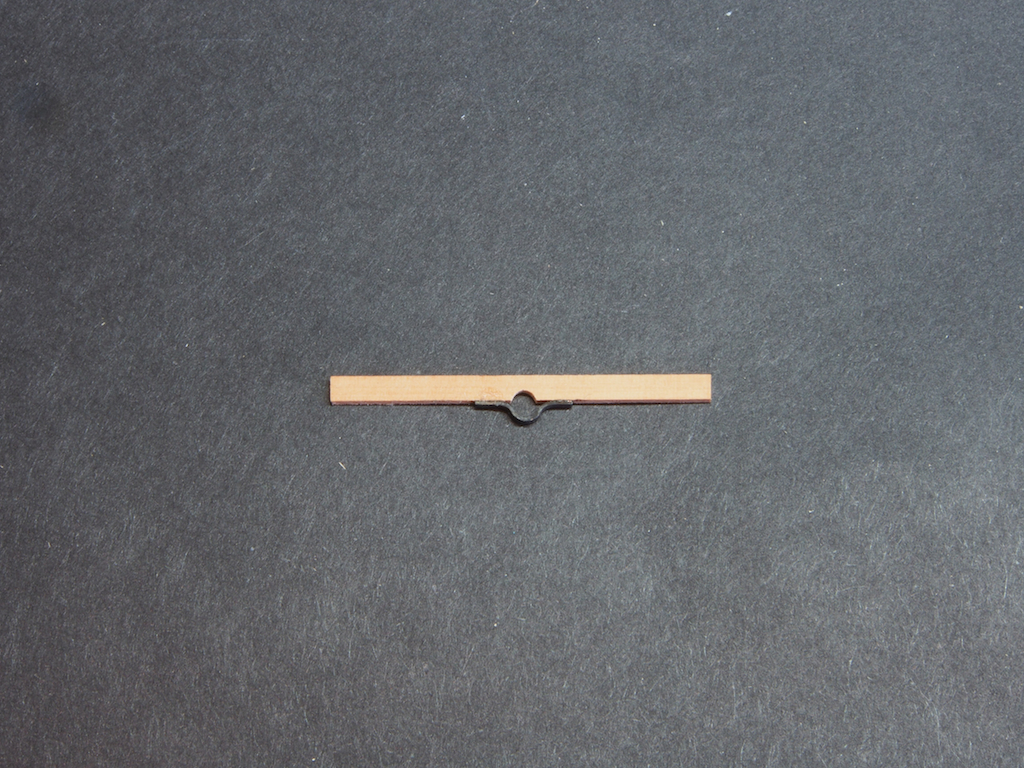
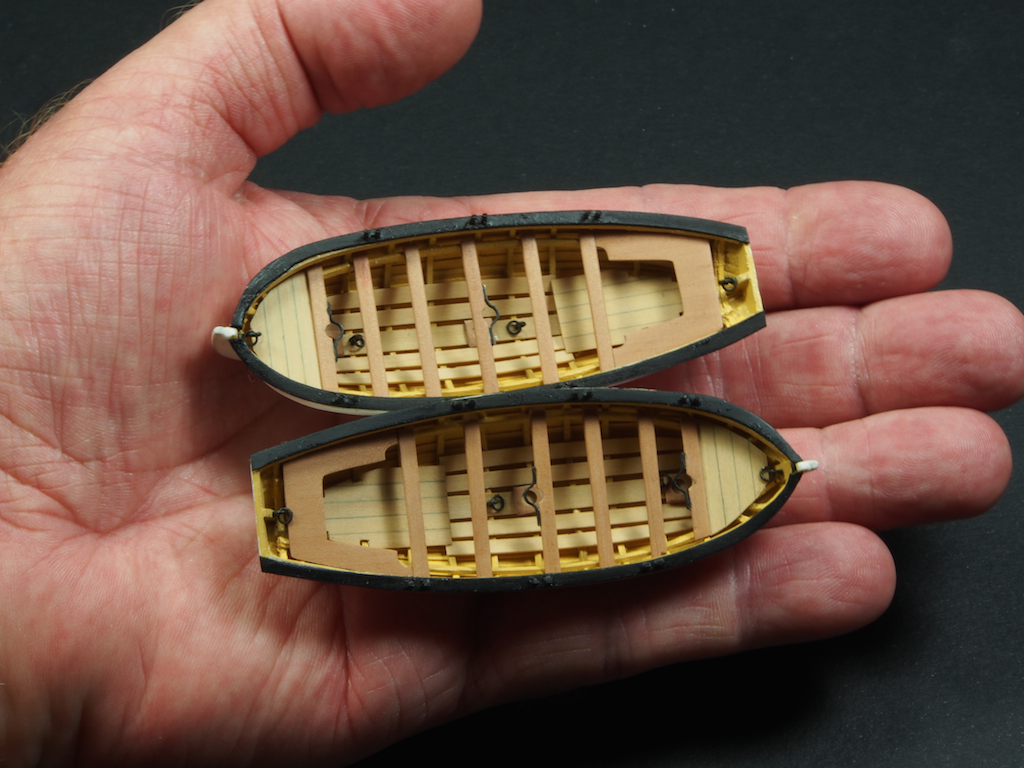
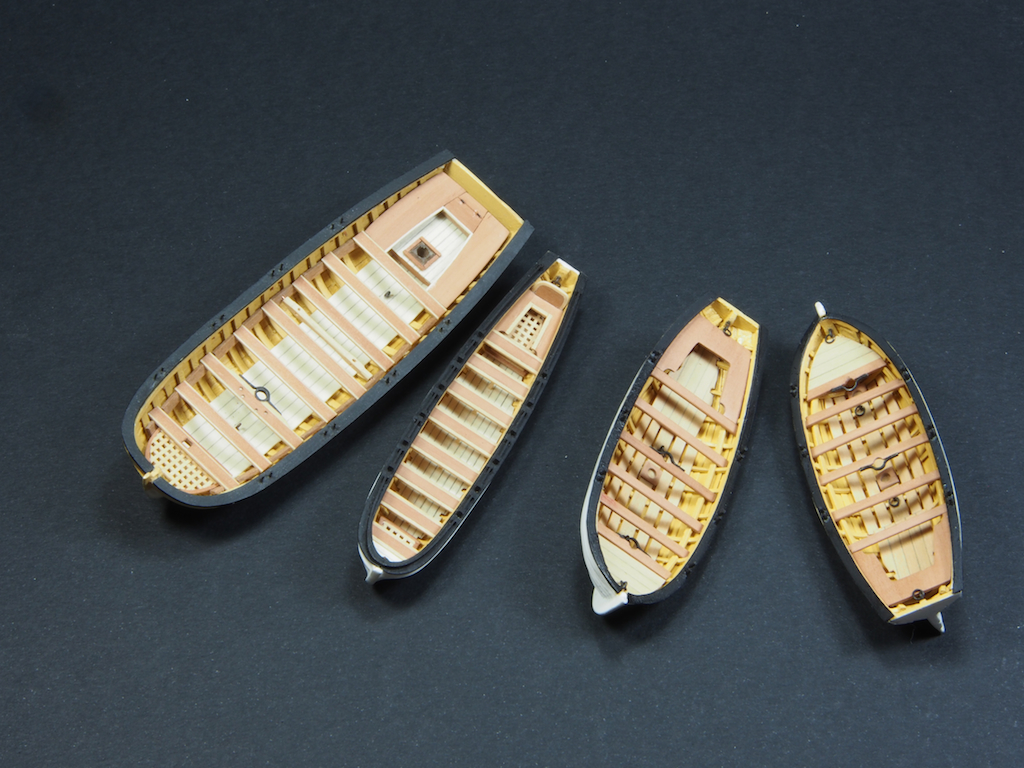
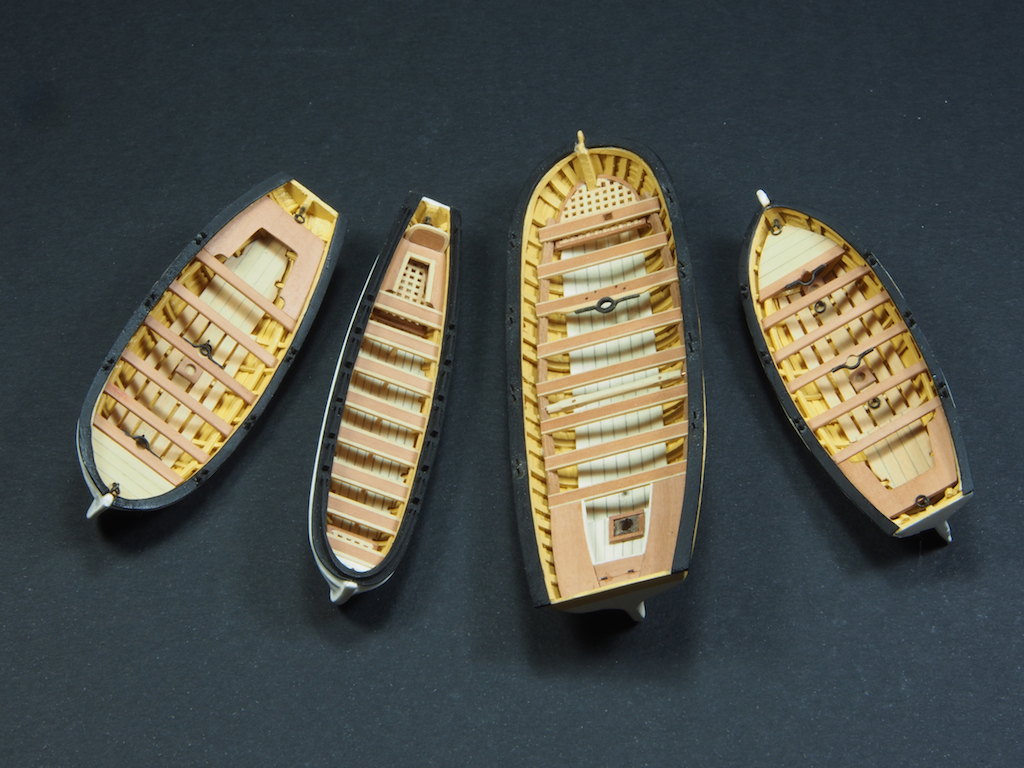
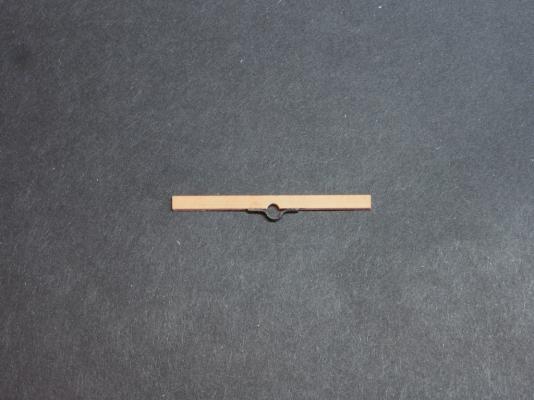
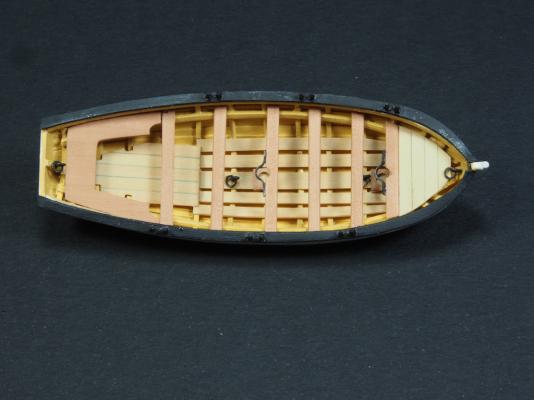
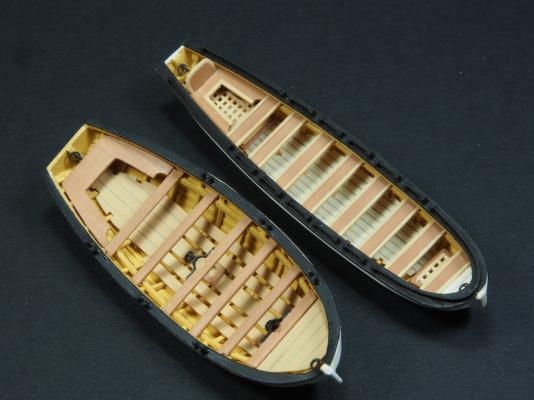
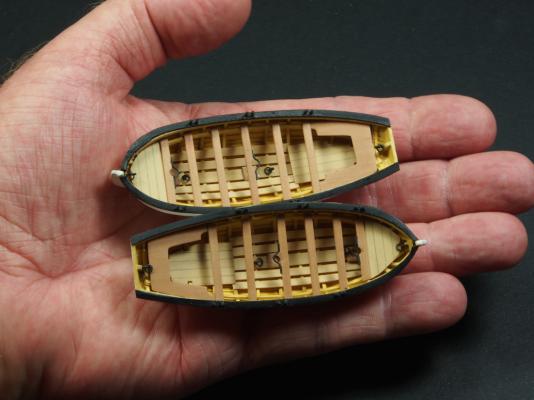
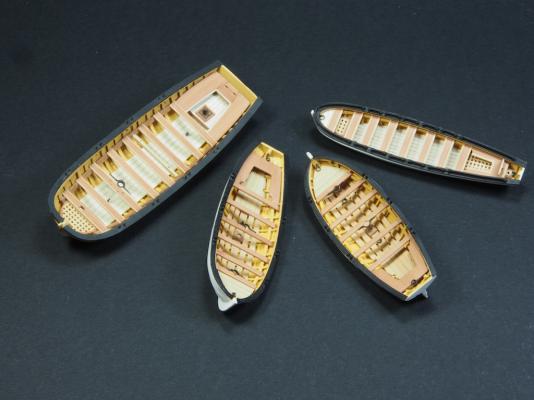
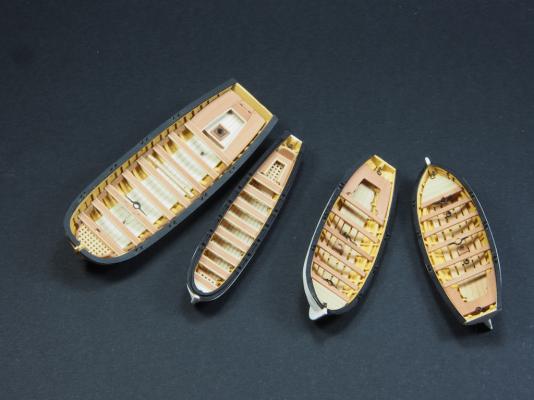
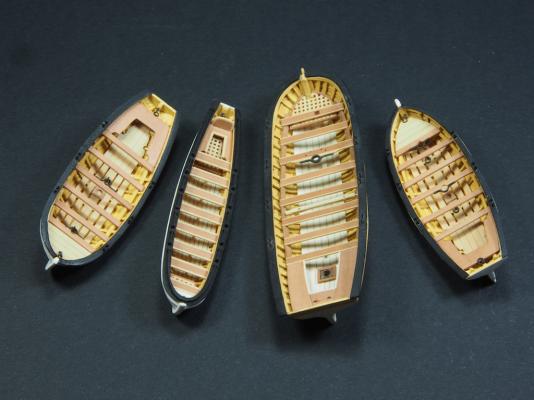
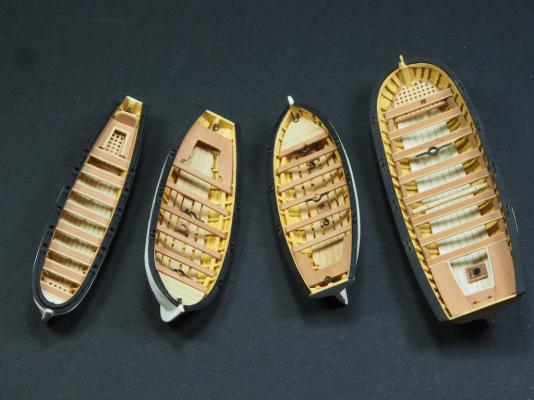
25' Cutters Ver 2_5 continued The next step for the cutters was to create some mast support bands to attach to the thwarts. Each cutter has two of these. I used some thin brass strap and bent them to shape by using a jig, the idea for which I "borrowed" from Ian Major's lovely Unicorn log. Ian machined his in metal, however I cheated and used MDF for the pressing surfaces, with a brass rod inserted as the former. After blackening, they were attached to the thwarts, which had been shaped for the other half of the "hole". In this pic, the thwart hasn't been finished sanded yet. After that, it was a simple matter of cutting the stern sheets, which I did using a paper template and cutting from a single piece of 1/32" pear stock, and then finessed to fit. The remaining thwarts were cut to size and finish sanded, putting a slight bevel/curve on the upper outside edges. The timber was left natural, only polished with successively finer grades of sandpaper. I also installed mast steps under the appropriate thwarts - you can just make these out in the photos. And here is a finished Cutter. The macro lens is not my friend today! I swear those blemishes on the cap rail aren't visible to the naked eye!!! Here's a picture alongside the 28' Pinnace for comparison. Note the very different hull shapes. And here's both Cutters, with my usual "scaling" shot: The Cutters (and all boats) are now FINISHED!!!!!! Doin' the Happy Dance! To celebrate, I thought I'd take a few shots of my Lilliputian Fleet. I had to remove the Launch from it's home on the "mother ship" for these shots, and was surprised by how large it looks in comparison to the others. And finally, one last "scaling shot" That's it for ship's boats. I do not intend to make either the Barge or the Jolly Boat. Next up, fitting the Quarter Davits, finish and fit the Anchors, and install rope coils throughout. Almost there..........


-
Echo by Maury S - FINISHED - Cross-Section
gjdale replied to Maury S's topic in - Build logs for subjects built 1751 - 1800
Great idea with your jig and "dado" blade arrangement. Are there any issues to be aware of when mounting two blades like that? Would love to see more pics of your jig arrangement if you have any. The finished gratings look excellent. -
Welcome home Gil. I look forward to the resumption of play.
-
Nicely thought through and executed Ian. Once you've got the process figured, the production part goes very quickly, despite the seemingly large numbers. Enjoy your trip away - hope you have nice weather for it.
-
Great tip thanks Janos!
-
Thanks Mike. You should dive in and have a go.
-
Wow. What a pleasure to see your updates Danny. You never fail to delight.