MORE HANDBOOKS ARE ON THEIR WAY! We will let you know when they get here.
×


gjdale
-
Posts
4,880 -
Joined
-
Last visited
Content Type
Profiles
Forums
Gallery
Events
Everything posted by gjdale
-
 Great save Jesse - and welcome to a very large club! The fore Topgallant mast on my Victory has TWO breaks in it. I would certainly recommend using epoxy if you have the misfortune to do something similar in the future. The epoxy will be stronger than the original wood! This is how I fixed the second break on mine.
- 607 replies
-
- 2
-

-
- scottish maid
- artesania latina
- (and 1 more)
-
Raising the bar yet again Danny! Great work.
-
Great tutorial Chris - thanks for sharing. For those as "chromatically challenged" as me, it's always helpful to read tutorials like this.
-
Byrnes Thickness Sander?
gjdale replied to Stefonroman's topic in Modeling tools and Workshop Equipment
Kevin, From memory, I needed to add about 50% to the purchase price to allow for shipping to Australia, and that was when the Aussie $ was trading at better than parity against the green back. Even with that extra cost, I don't regret one cent. All of the Byrnes machines are exquisite pieces of machinery that are a joy to use and should last a lifetime. To be honest, I cant even remember the total cost, but I sure as heck remember what a great machine it is! -
Nice progress Ben. Enjoy the conference.
-
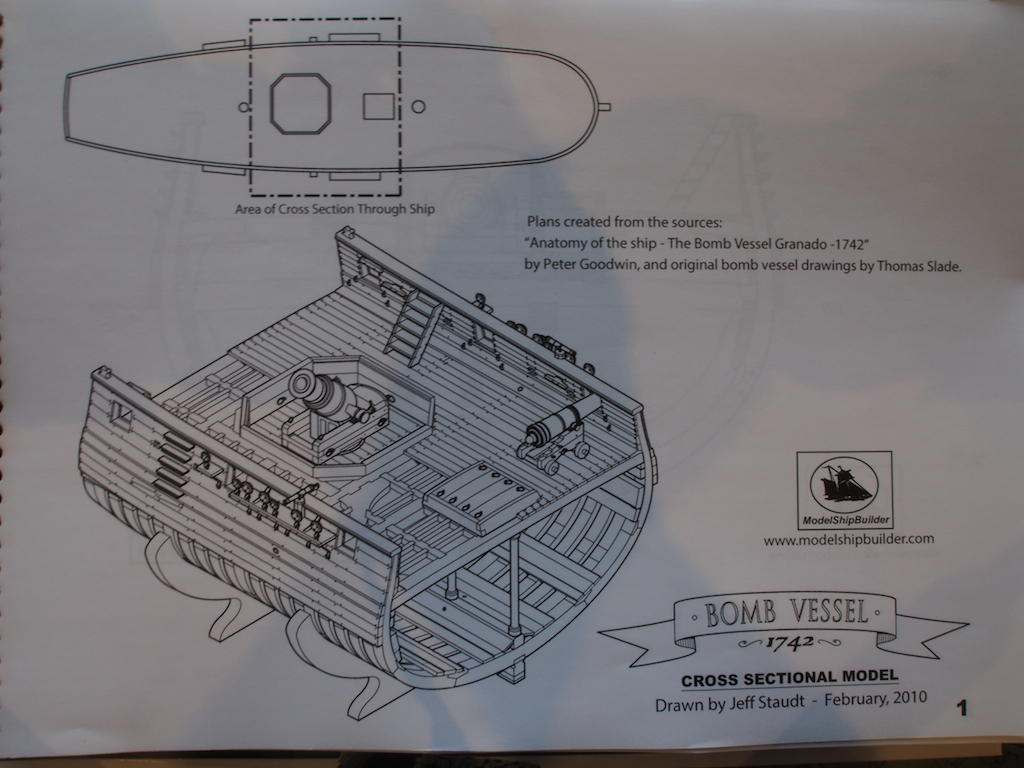
Kevin, You can get the BV cross section plans in 1:48. If you want them in 1:24, just have them enlarged. I'm with Mobbsie on this point - all you need is a little belief.
- 1,319 replies
-
- 5
-
-
- caldercraft
- Victory
- (and 1 more)
-
Great tutorial David. Thanks for sharing.
-
Nice addition to the details Jack, and your painting tests seem to have turned up a winner.
-
Flag lockers look good to me Kevin - sometimes, just the suggestion of a detail is sufficient to create the illusion. Take a step back and look from a viewer's perspective - it looks great.
- 1,319 replies
-
- 4
-
-
- caldercraft
- Victory
- (and 1 more)
-
Welcome home John. Glad to see a little update. If you're having problems with the PM system, check to see if your inbox storage is full - that is often the cause.
- 2,250 replies
-
- 1
-
-
- model shipways
- Charles W Morgan
- (and 1 more)
-
Nice start to the mast tops Bob. I know you said you had a lot of ME Deadeyes on hand, but you've done such a nice job so far, don't you think it deserves to be indulged with the complete Chuck/Syren treatment and use his Deadeyes too? Go on - you know you want to.
- 1,477 replies
-
- 1
-
-
- essex
- model shipways
- (and 1 more)
-
Are you sure it's not a Rigging spider come to offer its services? Sorry - I couldn't resist either. I'll get my hat and coat and leave now.........
-
The Byrnes Saw "inside and around"
gjdale replied to nobotch's topic in Modeling tools and Workshop Equipment
Just to add to what Mark wrote in post #19 above, the mod I made has been working beautifully for me (see link from Mark's pist). I also ran this past both Jeff Hayes at HobbyMill, and Jim Byrnes himself. They both thought it a good idea. Jim would consider offering this as an option if there were sufficient demand for it - so all you Byrnes saw owners out there, start asking! -
Thanks again folks, I really appreciate all the kind words. The "group" build of the Bomb Vessel cross-section is going to be fun. Jack Panzeca has decided to join in with Mobbsie and me, so we are now a truly multi-national group. If you're not familiar with Jack's work, you should check out his Viking ship Oseberg build log - some really first class work as well as superb photography! If anyone else is considering a move to the dark side, please feel free to join us in this little adventure.
-
Nice start to your new project Vivian.
-
Thank you one and all for your very kind words of congratulations, and for all of the "likes". It does feel good to have completed this one at last. Sjors - I'll change the signature block shortly - as soon as I start a new log. Danny - thanks for those photos. That's a real beauty. Brian - Warrior is still in the queue, but I wanted a couple of smaller projects to catch my breath before taking on another huge undertaking. I have the plans and timber all ready to go for that one, but it will have to wait a little while yet.
-
Superb Danny. And thanks for the extra info on your method for cutting the grooves in the sheaves.
-
As long as it's only an eye patch you're needing.....................
- 1,279 replies
-
- 1
-
-
- agamemnon
- caldercraft
- (and 1 more)
-
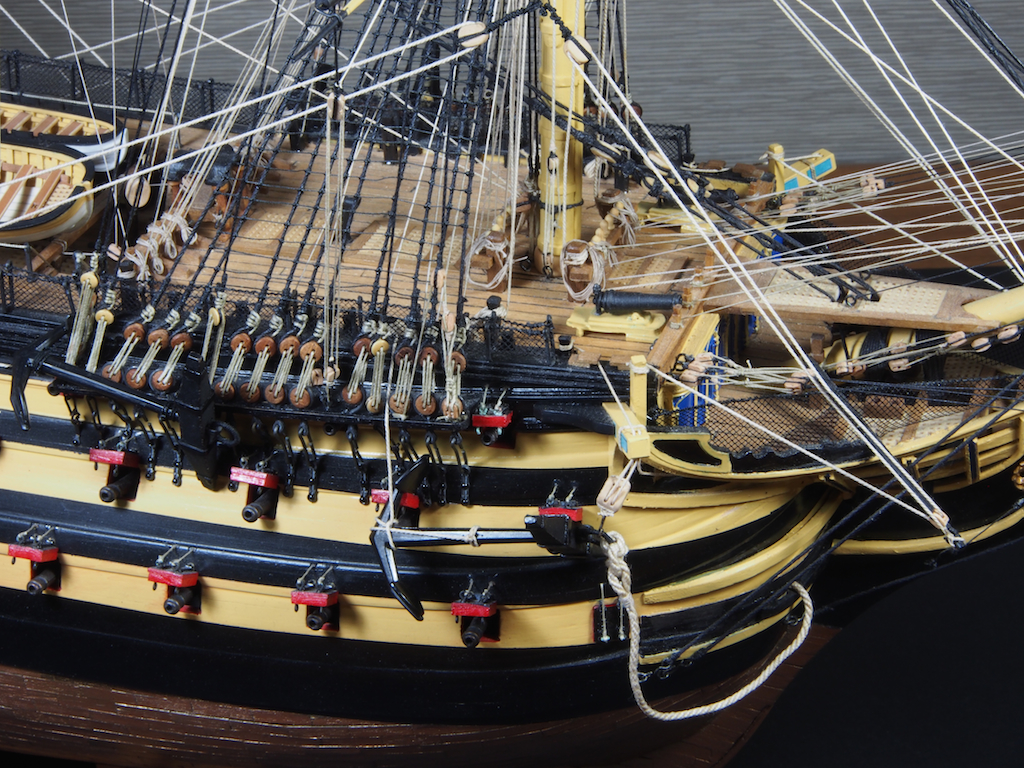
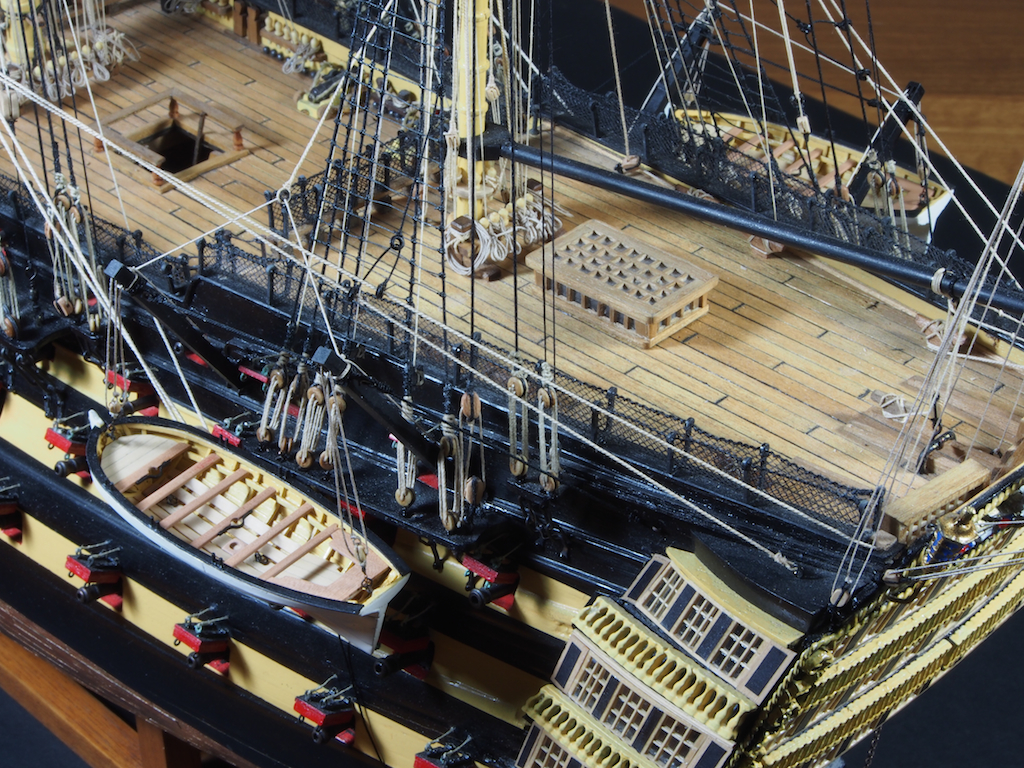
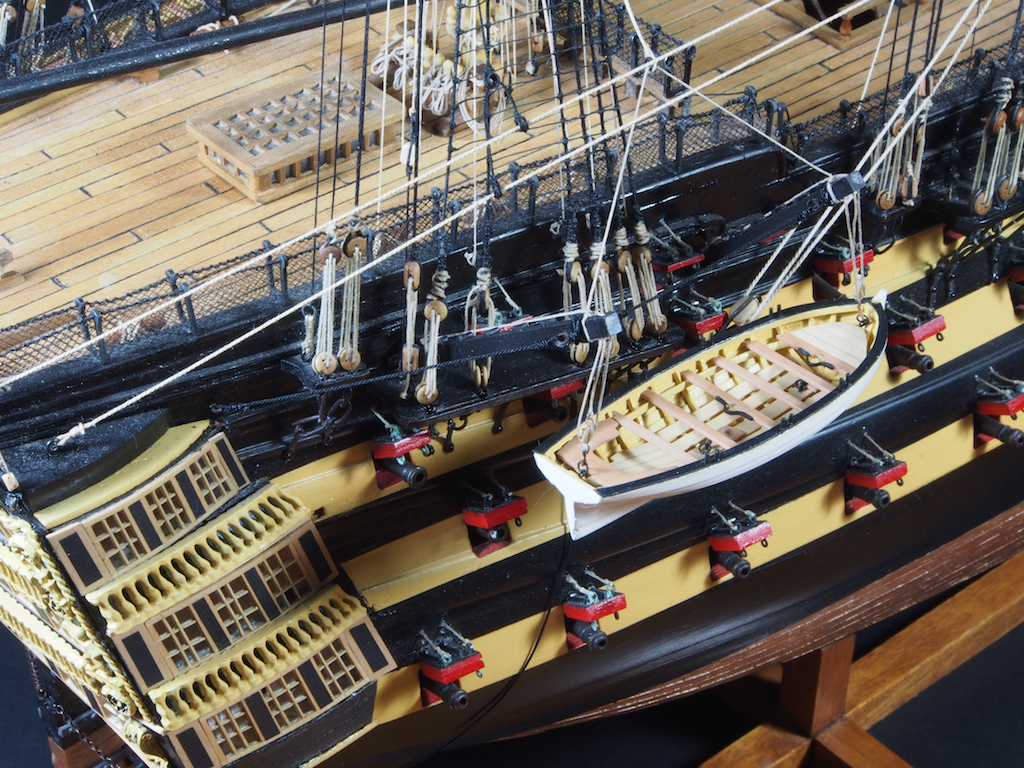
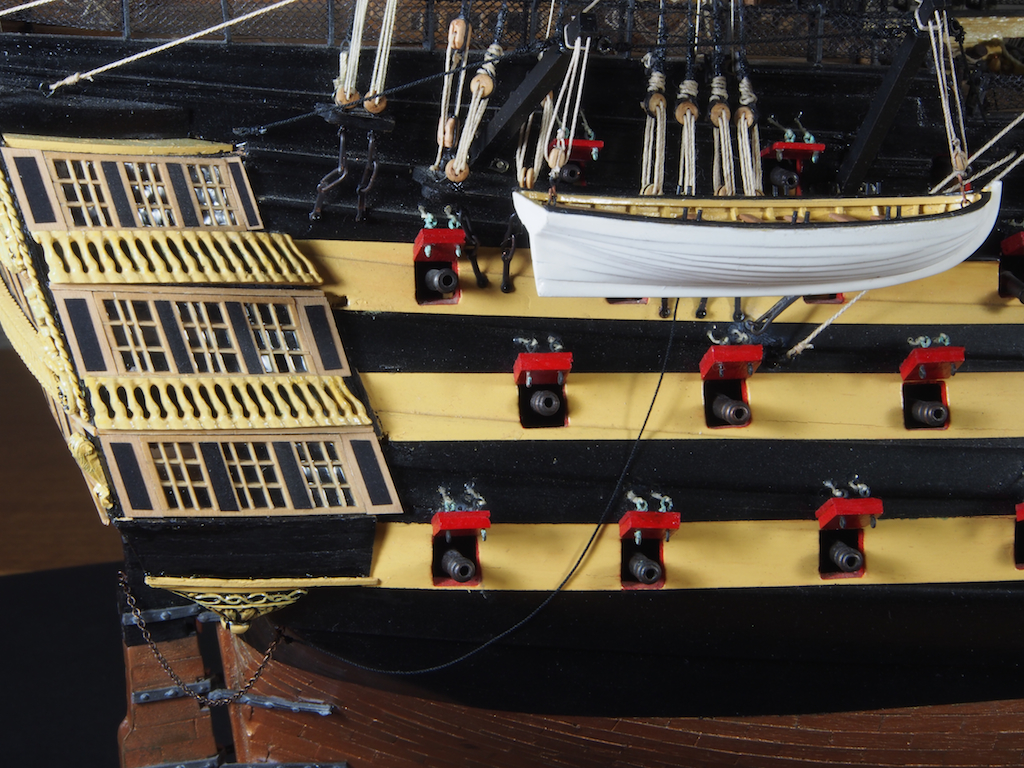
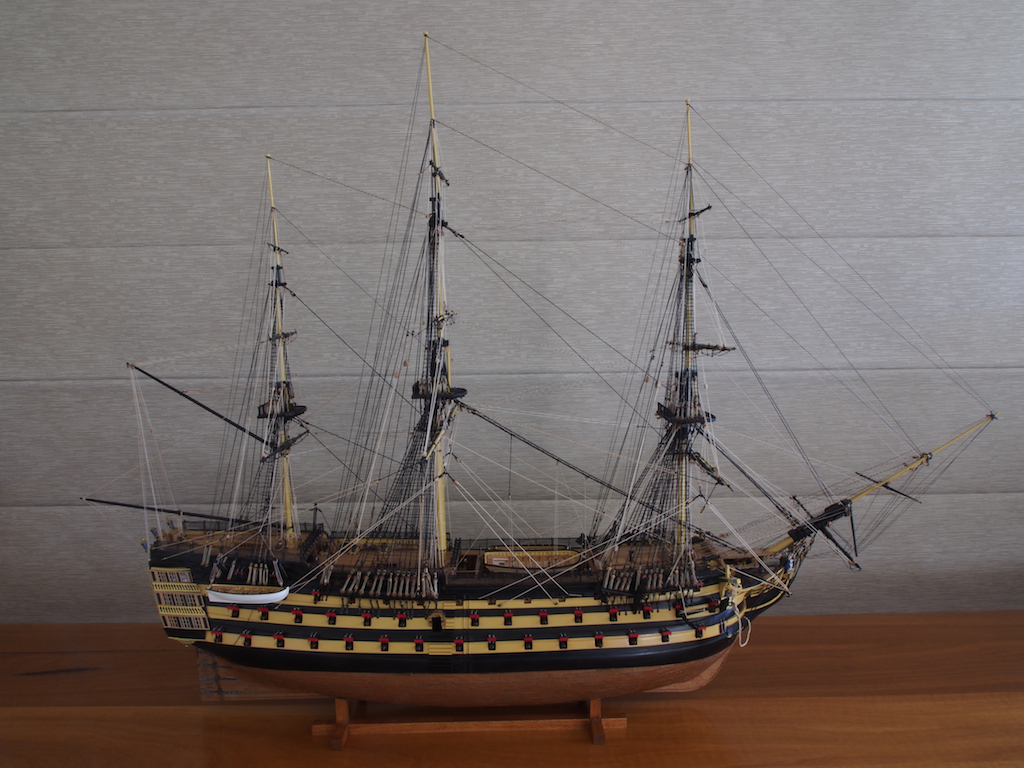
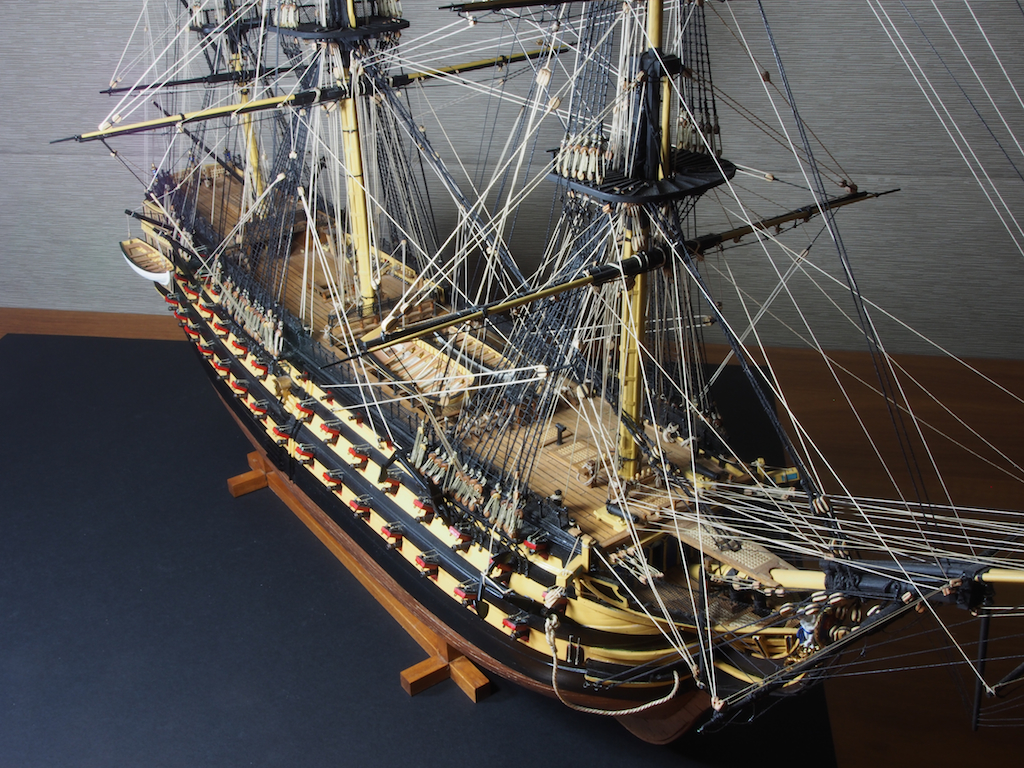
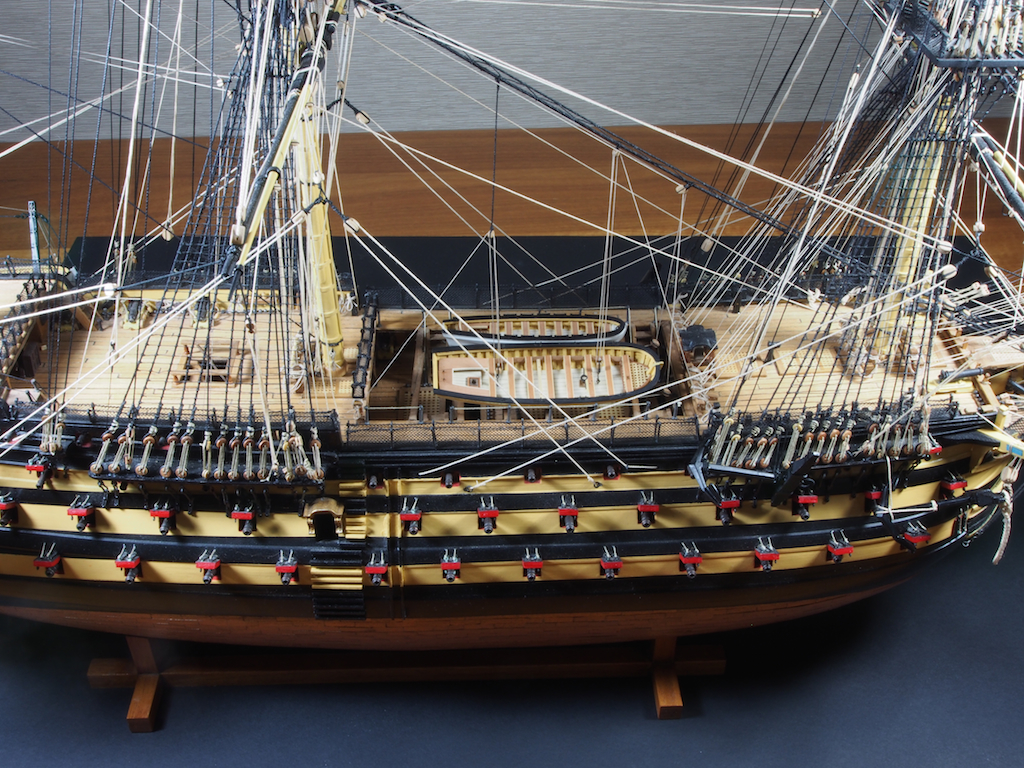
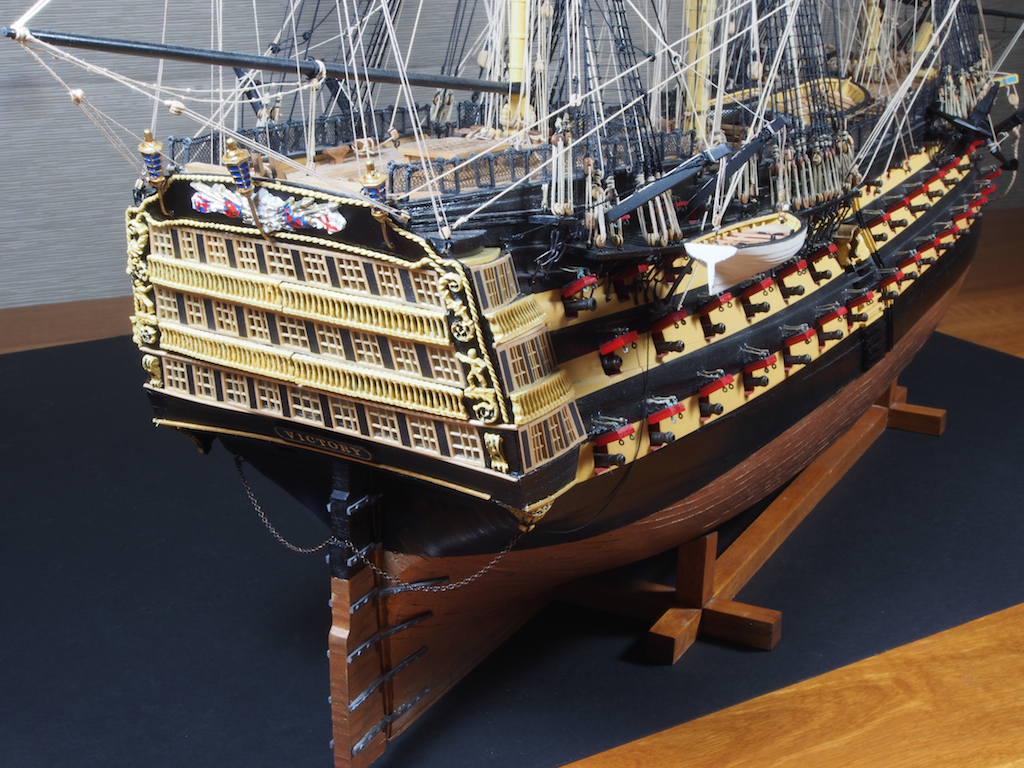
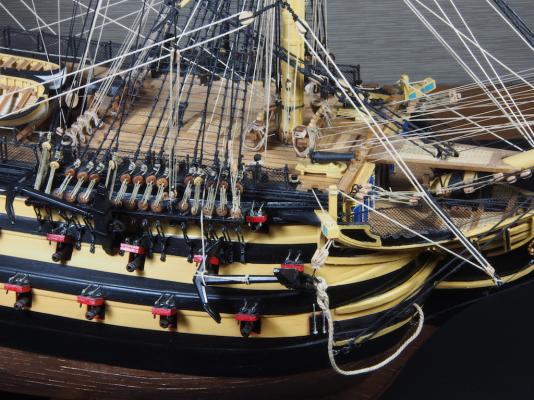
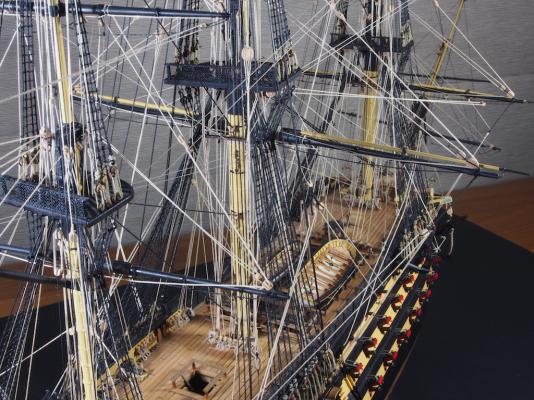
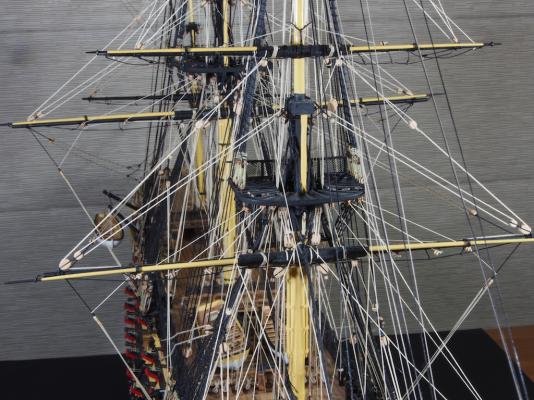
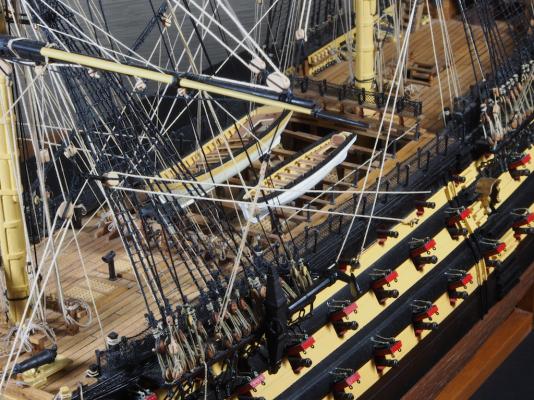
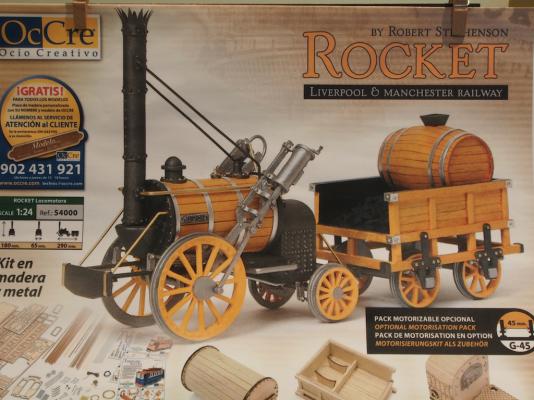
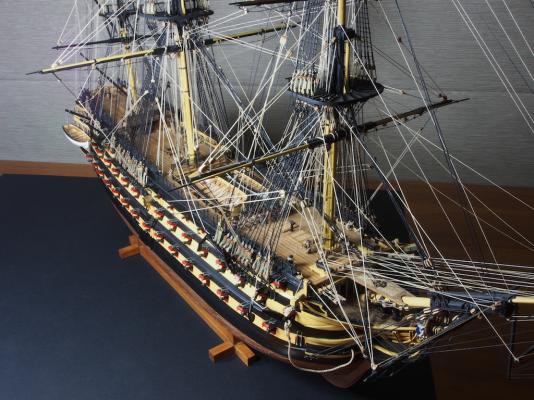
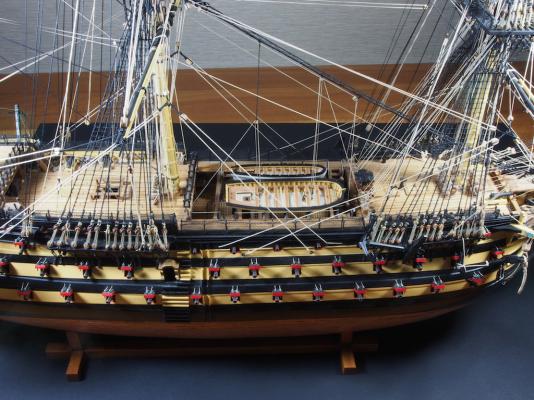
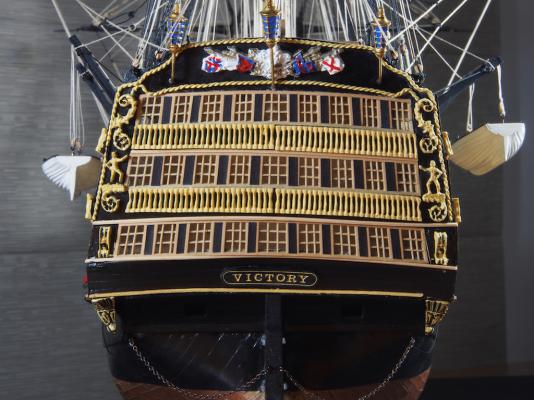
Just continuing from the previous post, a few more shots of the finished ship: Now, a number of you have been wondering what’s next. As you know, I’ve been leaning more and more to the “dark side”, but I also want to take on a slightly smaller project - hopefully one that won’t take 19 years to complete! I’ve also been encouraging my very good mate Mobbsie to come with me to the dark side. So one evening while we were chatting on Skype, we decided that it might be fun to do a “group build” together and that is what we shall do. The subject will be a cross-section model of the Bomb Vessel Granado in 1:48 scale. We will be using plans drawn by Jeff Staudt (available through our neighbour site Model Ship Builder), and we are using timber from Jeff Hayes at HobbyMill. I’ve promised Mobbsie that I won’t start until he’s finished his Aggy, which he reckons is another couple of weeks away (yeah, right - so far, he’s achieved in 19 months what it’s taken me 19 years to do!). So for a group build with a difference (since we're in opposite hemispheres), keep an eye out for our respective logs - coming to MSW in just a few short weeks. I have also had a hankering to do a non-ship related build, so I will be doing this in tandem. It is a (relatively) small kit from OcCre of Stephenson’s Rocket. Of course, I won’t be able to run a log of that here, but will provide a link for anyone interested. And don’t be surprised if you see something “rocket-like” in the background of the Cross-Section updates! Catch you all on the other side. Thanks for following.


-
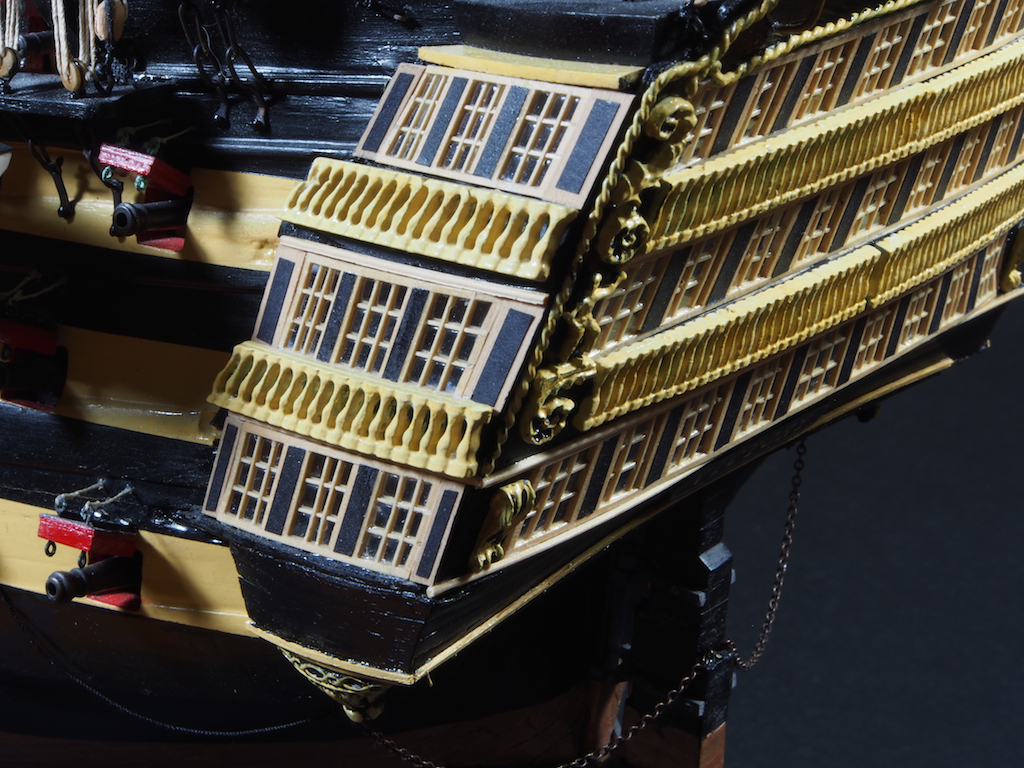
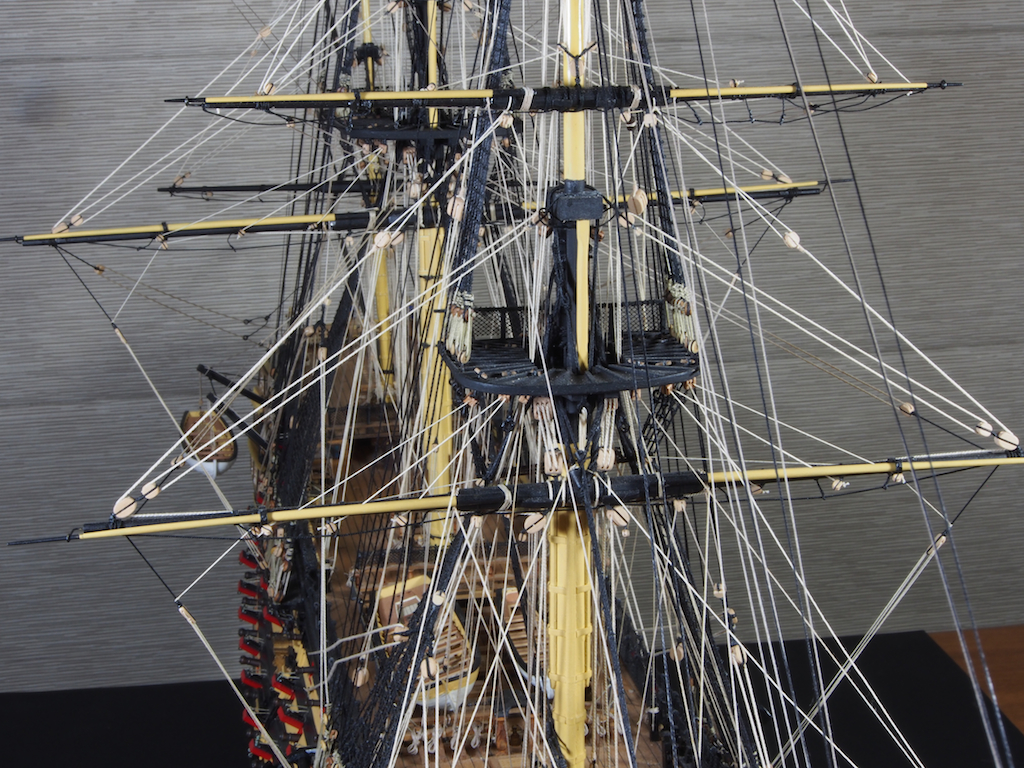
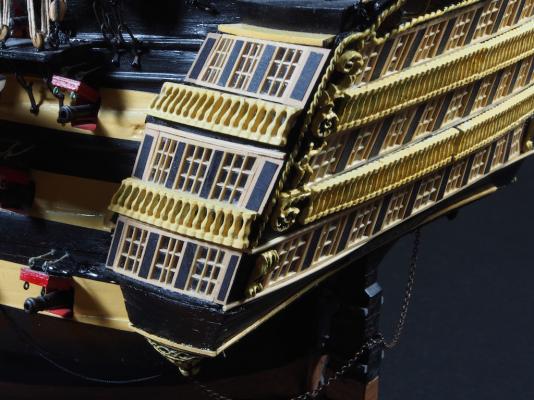
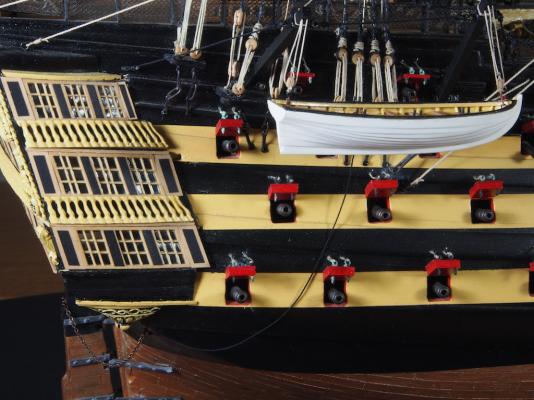
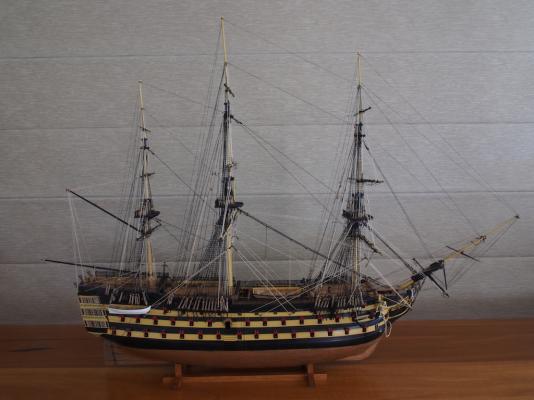
Well, it’s done! After almost 19 years in the making, I’ve finally finished my Victory. The end wasn’t without incident though……… After taking a series of photos before placing her back in the display case, my son came over to give me a hand lifting the case cover back on. He was at the bow end, and as we were lowering it, he managed to catch the end of the case on the tip of the bowsprit. Fortunately the damage was minor - a couple of sprung rigging lines that were easily repaired is about all - although it came very close to snapping the Fore Topgallant Mast in one of the places where it had been broken and repaired before. Close call, but all is well now. I took a range of photos and have cut that back down to a dozen or so, so with your indulgence, I’ll split these across two posts. Before I do though, as this will be my last progress update, I think it timely to make a couple of observations and offer a few votes of thanks. When I joined MSW almost exactly three years ago, I had anticipated that I would be finally finished this model in about six months from then. I was, like everyone else who joins this forum, given a very warm welcome and almost immediately the advice and encouragement started to flow in. Although it took me three years and not six months, the end result I have achieved is light years from what would have been without MSW. So a couple of thankyous. Firstly to Chuck, for making this site possible and for giving so freely of his time and expertise to help all who venture this way. Chuck was also kind enough to share with me his techniques for mass production of rigging blocks - a technique that I was eventually able to replicate, thanks to his tutelage. Thank you Chuck for teaching me to fish. Secondly, to all of the Admins and Moderators, who also give freely of their time to keep this site running in the way and with the spirit it has been intended. A more friendly and supportive site could not be imagined. Thank you ladies and gentlemen. I’d like to make a special vote of thanks to Danny Vadas. From a very early point in my MSW existence, Danny became something of an informal mentor to me. But it was when I was contemplating re-doing my stern and quarter galleries that Danny really stepped up to the plate. Danny did the design work and drawings, including the design of some special jigs, that enabled me to re-make these tricky parts. Perhaps more importantly though, he gave me the courage to even attempt this in the first place, by offering to guide me through the process via remote control and email exchange. The results speak for themselves, but while I may have provided the labour, the kudos belongs to Danny. Thank you Danny - I look forward to sharing a nice single malt with you again someday soon. It was through this learning experience that I started to gain the confidence to try a few other things for myself as well. The fleet of four scratch built boats are a direct consequence of this, so again Danny’s mentoring has pushed me to much greater heights in my modelling, and I continue to learn every day. And of course, I’d like to thank all of you who have followed my journey and offered words of encouragement, or have simply hit the “like” button from time to time. Knowing that you all are watching has kept me going at times, and has also helped to keep me “honest” - there were a number of times when I’ve thought, “no, that’s not good enough - the guys will never let me get away with that”. And some of you weren't backward in coming forward with constructive criticism - thank you all for that (you know who you are! ) Enough already. Here are some pics. A few general shots to start with, and then some more details and close-ups in the next post. This last view shows both the rebuilt stern galleries and the clinker planking on the two 25' Cutters:

-
Nice set of new toys there Mobbsie! And I just love that stand you've made - real classy! Can't wait to see the final finished ship in its case.
- 1,279 replies
-
- 1
-
-
- agamemnon
- caldercraft
- (and 1 more)