gjdale
-
Posts
4,894 -
Joined
-
Last visited
Content Type
Profiles
Forums
Gallery
Events
Everything posted by gjdale
-
 Very nicely done Mike. She looks fabulous.
 -
Thanks John, Keith, Mark and Daniel. Keith the scroll saw blade in the pics is a 28 TPI skip tooth blade and it seems to work okay for this. I've got some 46 TPI spiral blades (that cut in any direction) but have found these very difficult to control in the past. I may give them another go for this as some of the smaller frames have REALLY tight curves. I also had a look at Ron's work in his Oneida log, having spotted the reference in your own log earlier today - some might fine work there, but oh to be working at 1:48 instead of 1:90! Next time........ Mark - yes, rest assured the new tools have more to do with future builds than ships boats. Daniel - nice to see you back. Always a pleasure to see you here - you were one of the first to encourage me to do better. So, in a way, it's all your fault!
-
Sorry John, Our posts must have crossed in the ether. Don't have a final tally time on Victory yet - she's not actually finished yet - but we're now at 18 years and counting) thank goodness I haven't been counting hours! As for what's next, you'll just have to wait and see, but the dark side is definitely involved........
-
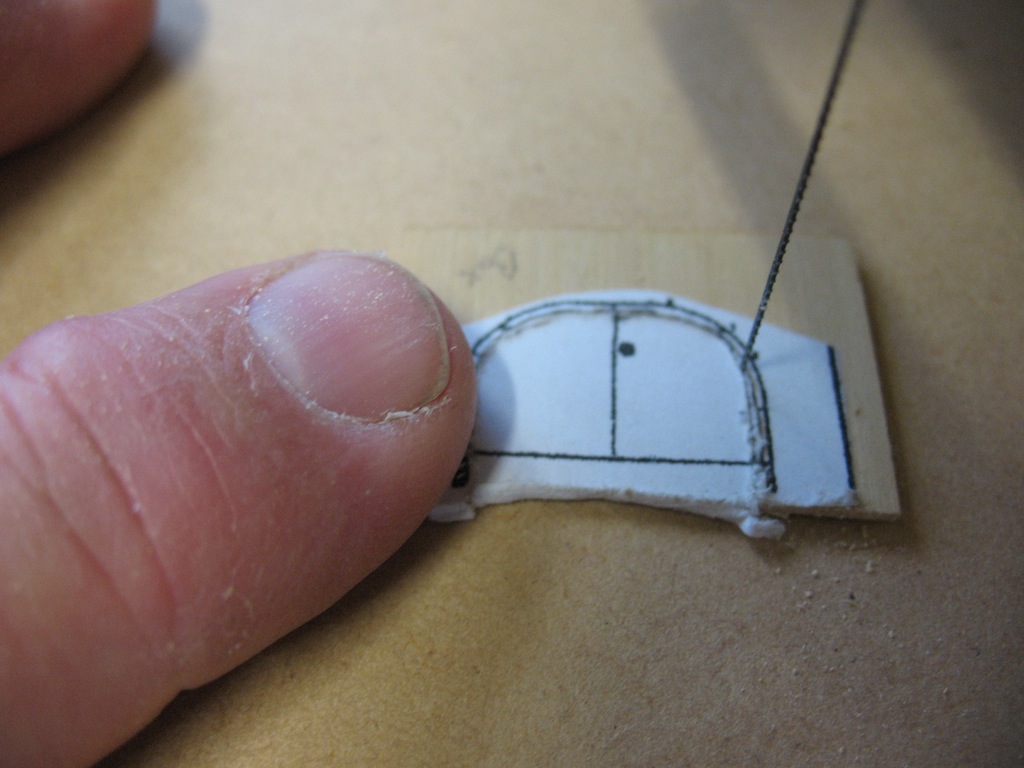
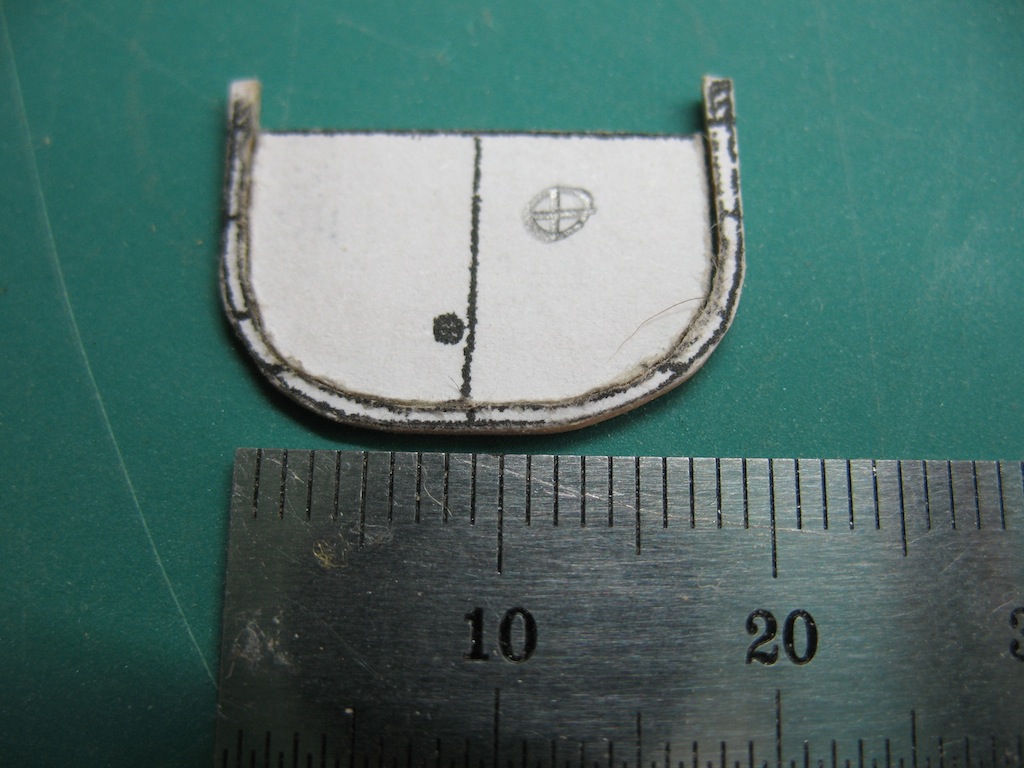
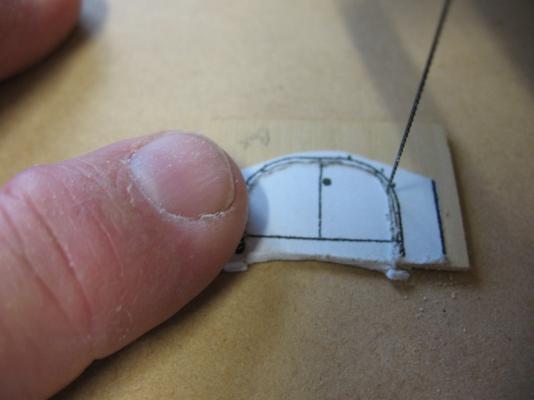
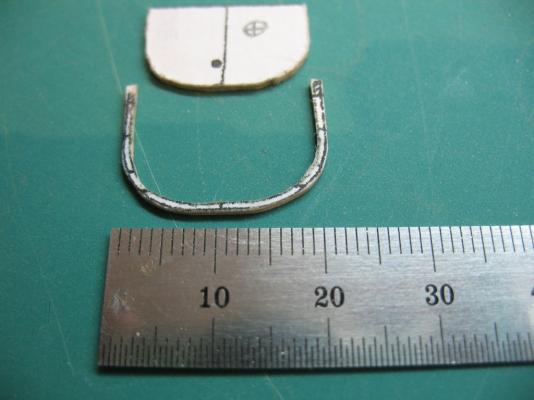
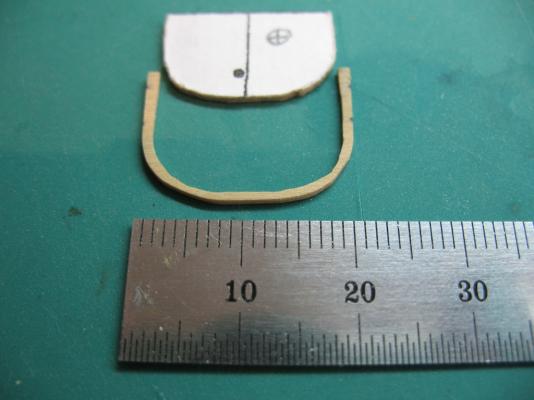
Okay, so I've been mulling over methods for constructing the remaining ships boats. My launch came out pretty well, but there were some aspects to that method that weren't the greatest (in my opinion). I thought about using the method that Chuck does for his Longboat and Pinnace kits, and as copied very successfully at 1:64 scale by Blue Ensign in his Pegasus build log. I was concerned that scaling down to 1:90 would make this method a little too risky. So, I went back to my Warrior Practicum (Romero) and reviewed the alternative methods described there. I have decided to test one of these, and if successful, will use it for both Pinnace and Cutter builds. At 1:90 scale, the 28' Pinnace will be 95mm long, while the 25' Cutters will be 85mm long. Romero provides plans at both 1:64 and 1:96 scale, so I adjusted the 1:96 scale to suit my needs. As he focuses on the 1:64 scale, he provides only occasional reference to dimensions for the 1:96 scale and in fact suggests using the same thickness frames in both scales. Unfortunately, the drawings don't agree with that approach, so further thinking about stock size was required. In the end, this is what I have come up with. The keel/deadwood will be a total of 1/16" thick, but will be made by laminating two pieces of 1/32" stock at 90 degrees to provide greater structural stability/strength. This will allow me to cut the keel and stem in one piece. Frames will be a total of 1/32" thick, again made by laminating two pieces of 1/64" stock. I ran a test on the frames today, using some boxwood. The inside of the frame pattern was cut CAREFULLY and SLOWLY on the scroll saw (hence the need for the zero clearance top). It was then cleaned up by hand with a couple of files. The inner piece was then re-inserted and temporarily glued in place. Once dry, the outside of the frame was shaped using the Brynes disc sander. The inner piece was then re-separated using a dab of isopropyl alcohol: And here is the finished test frame - about 1/32" thick in all dimensions (that's less than 1mm for the metric only folks ): The inner piece is important as it will be glued to a construction board to provide backing support while planking the boat. Conclusion: It works! The frame appears to be relatively strong. Onwards to production - only 20 frames per boat and three boats to do....................

-
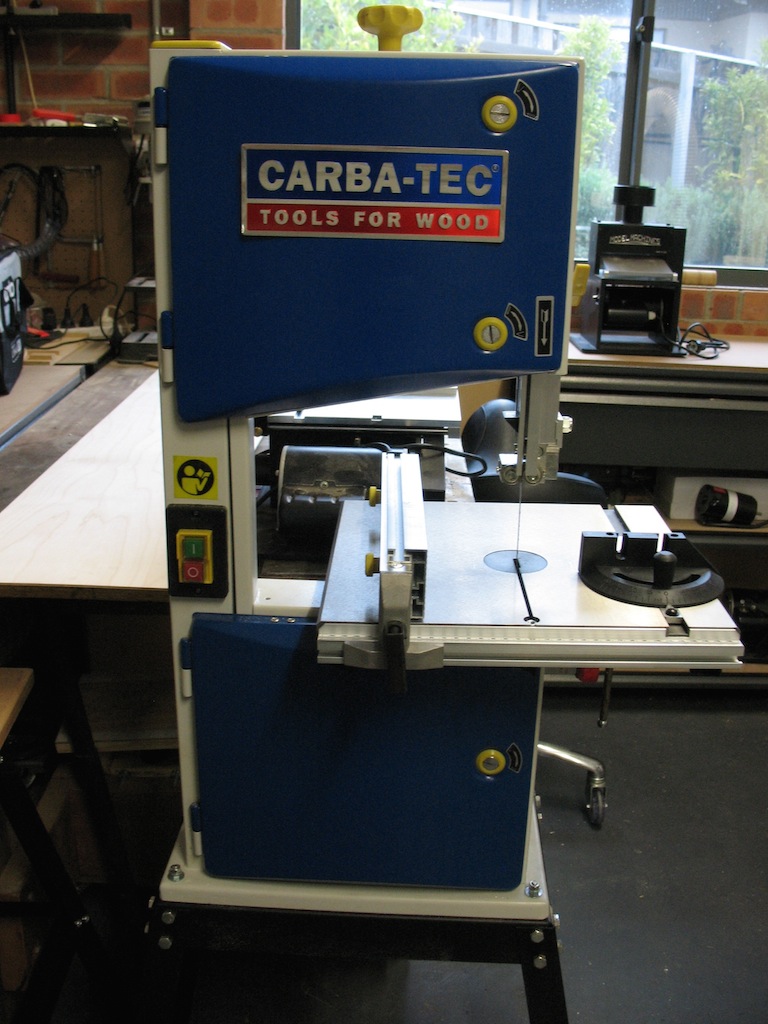
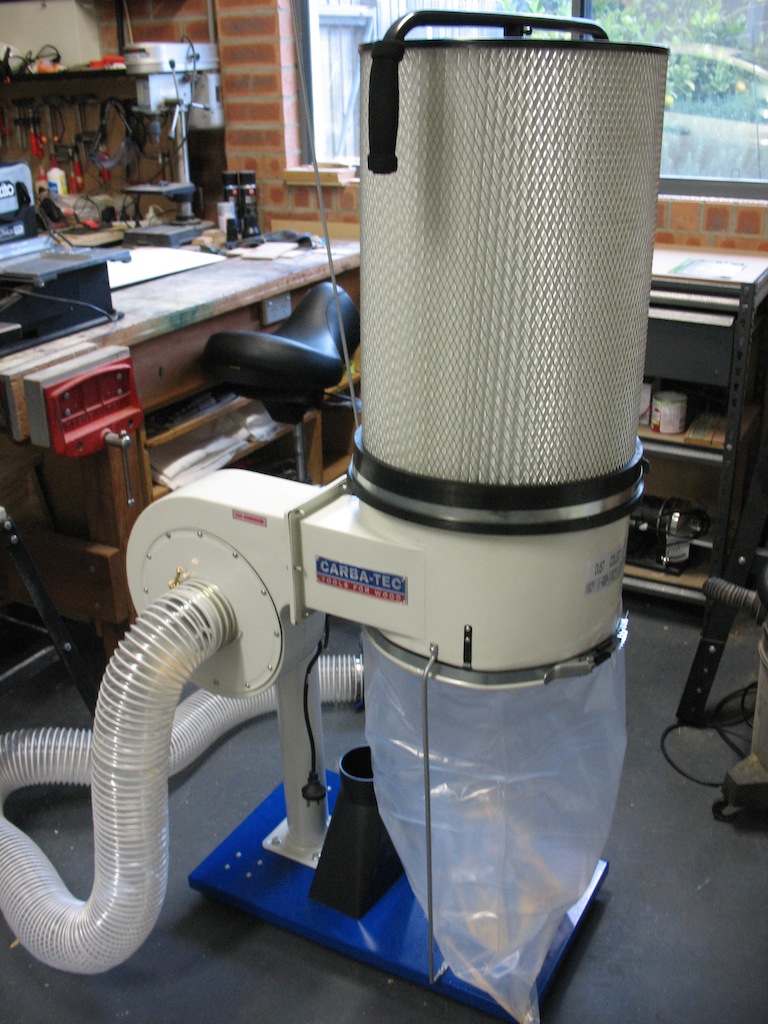
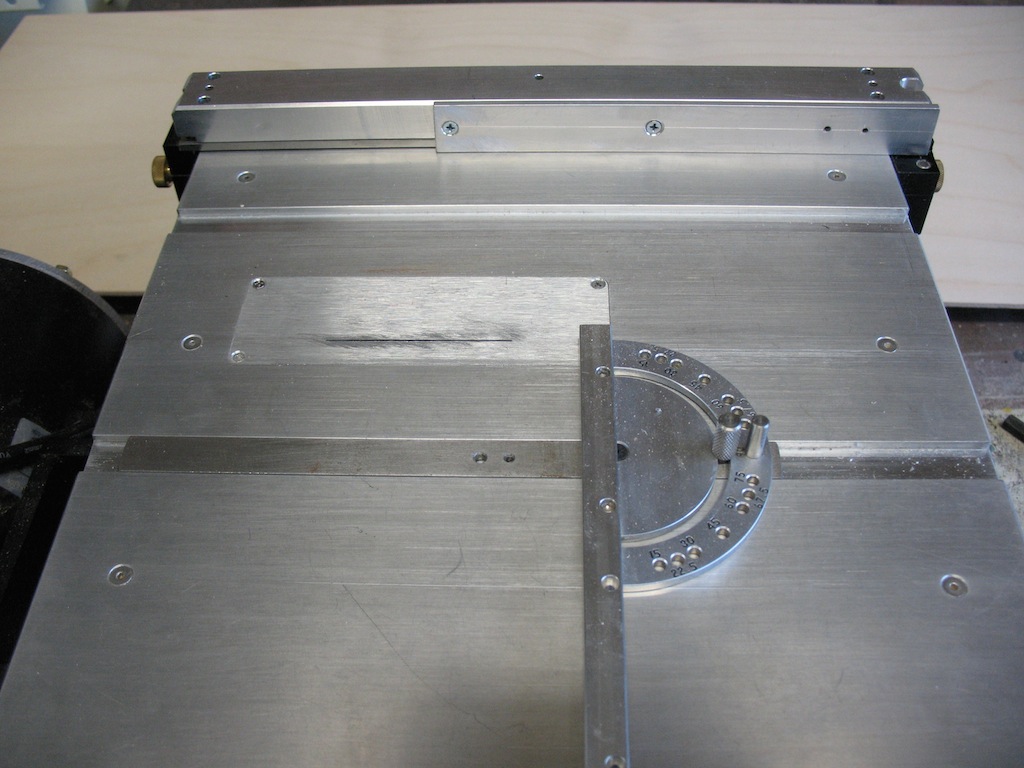
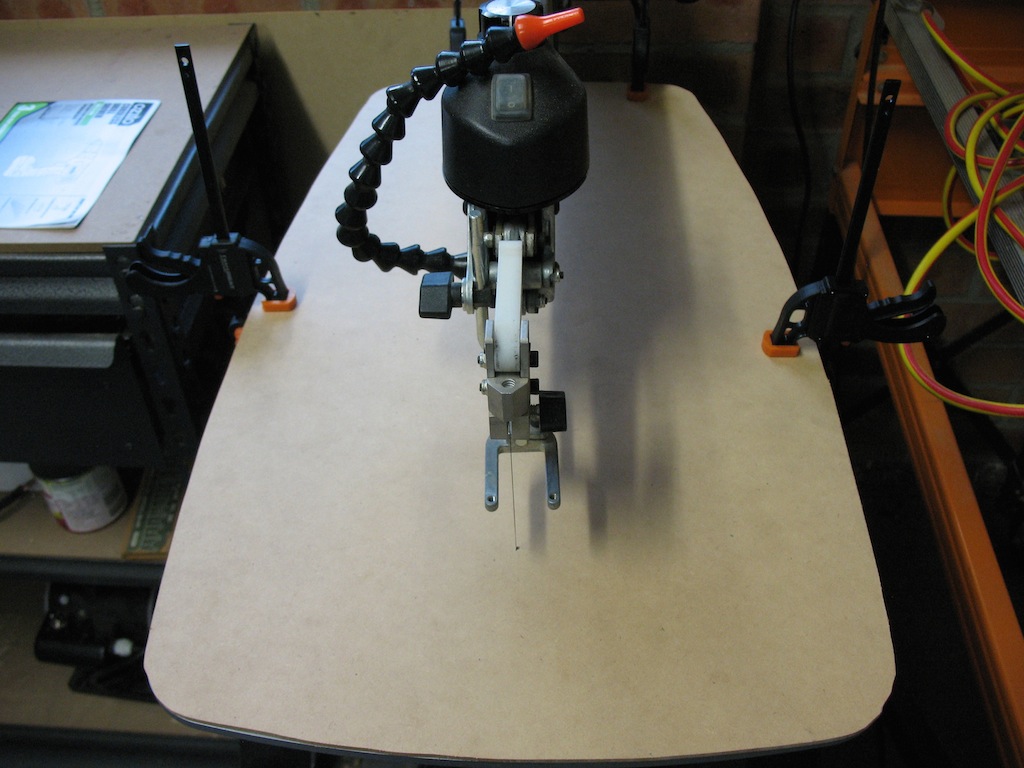
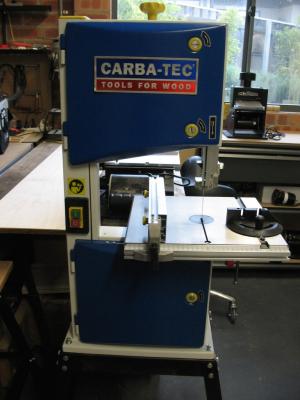
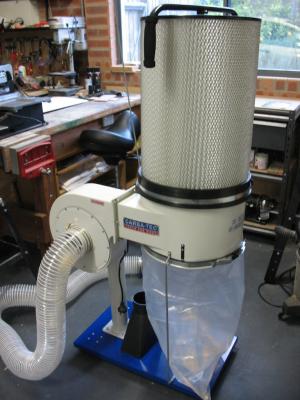
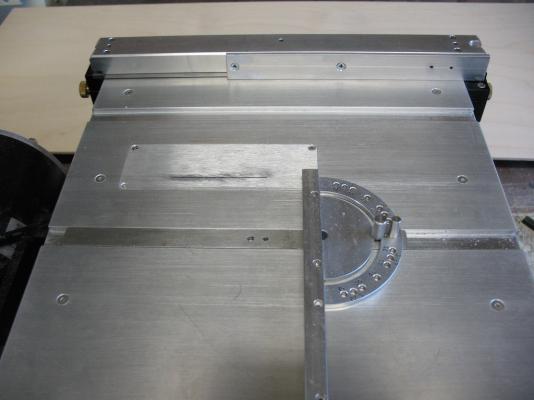
Hi folks, Thanks again for all the additional kind words and "likes". I've spent the last couple of days thinking about and preparing for some ship's boat builds, and in doing some preparation/mods to some tools. First up - the tools. I finally got around to setting up the new toys properly. Here is the Bandsaw (it's a 10" model from Carbatec): Having never owned (or used) a Bandsaw before, the instructions for setting it up were.........let's just say they make some European ship model kit instructions look good! However, through another woodworking forum, I came across a video of a guy named Alex Snodgrass demonstrating at a woodworking show how to set up a bandsaw correctly. Having watched the video a couple of times and taken notes during the second viewing, I applied his instructions step by step and in no time I had the saw setup and running perfectly. If you want to see this video, just search for Alex Snodgrass in YouTube - it really is worth watching. Next up was the Dust Collection system. Similar deal with the instructions, but managed to work it out by myself. I opted for the 2 micron pleated filter upgrade (standard is 5 micron), which was a real bear to fit, but we got there in the end. It comes with a standard 4-inch fitting, and I also bought a range of adaptors which enables me to connect virtually all of my dust-making machines, including all the Byrnes machines. Next up - a mod to the Byrnes saw. I've been thinking about the issue of ripping thin stock and the rear of the blade binding against the cut strip and either stopping the saw, or throwing the strip back - neither of which is good news! The most common fix for this appears to be to offset the rear of the fence to allow some clearance, and in fact this was the advice from Jeff Hayes at Hobbymill. I know that Jeff uses this method very successfully, but I have found it to be both fiddly and somewhat unreliable (could be just me). Anyway, I got to thinking and came up with the thought that if I were to add another guide to the inside of the tall fence, but that stopped around the mid point of the blade, then that should provide the necessary clearance at the rear of the blade to prevent binding. I ran this idea past Jeff and he said he thought it should work. I bought some 3mm thick aluminium bar stock (25mm wide to match the height of the tall fence), drilled and tapped the high fence and secured my fence mod. Sounds easy, but I managed to break three drill taps in the process - don't know if that was just my ineptitude in using the taps, or what......... In the photo you can see some empty holes at the end of the fence mod. That is because behind these lie the broken off drill taps - I decided that two screws would have to do in the end. I haven't tested it yet, but I'm confident that it will work. (Famous last words!). Final tool mod was to create a "zero clearance" table top for my scroll saw. This was very simply done using a piece of 3mm MDF, cutting to shape around the existing table top, and drilling a small hole for the blade. It is simply clamped in place on the table top. This one I have tested, and it works fine. In the next post, I'll talk about my tests for small boat frames..........

-
HMS Druid by Krug - FINISHED - 1:48 - Hahn
gjdale replied to kruginmi's topic in - Build logs for subjects built 1751 - 1800
Thanks for posting the extra info on your sled Mark. I'll be making one of these up for myself very soon now. Your photos and comments will be invaluable. -
HMS Druid by Krug - FINISHED - 1:48 - Hahn
gjdale replied to kruginmi's topic in - Build logs for subjects built 1751 - 1800
Very nicely done Mark. -
Thanks Patrick - now that you mention it, I do recall seeing that discussion. Hopefully this will answer Sailor's question.
-
Wow folks! Thank you all so very much for all your lovely comments (and all the "likes"). I feel quite humbled seeing so many congratulations. To be honest, it's the support and encouragement from all the folks here that has enabled to get to this point - a point that I am very pleased to be at, and feeling kinda proud too. I actually moved the ship out of the shipyard today, to a temporary home elsewhere in the house - where she is less likely to get damaged while I'm working on the ship's boats. I won't fill up the log with individual thank you's - please take them as read as I really do appreciate your support. To answer a couple of specific queries though: Keith (TMC) - yes, the Cutters are clinker built. I have a cunning plan............ John (Texxn5) and Ben - you both asked what's next? Well, there is just a small matter of the ship's boats to finish... "Next" is a closely guarded secret for now. You'll just have to wait and see. Sailor - a good question about keeping the seas out around the Entry Port. I will admit to having absolutely no idea of the answer to that one. Perhaps someone more knowledgeable than I would like to answer. I'll wager Blue Ensign will be able to steer you right on this one. A little bit of preparation and research today, and the afternoon spent in the "big" workshop assembling some of my recent acquisitions (new toys, er, I mean tools). A little more prep and setting to work tomorrow and then it's on with the ship's boats. Thanks again everyone for all the support.
-
Nice looking rear end there Rusty!
-
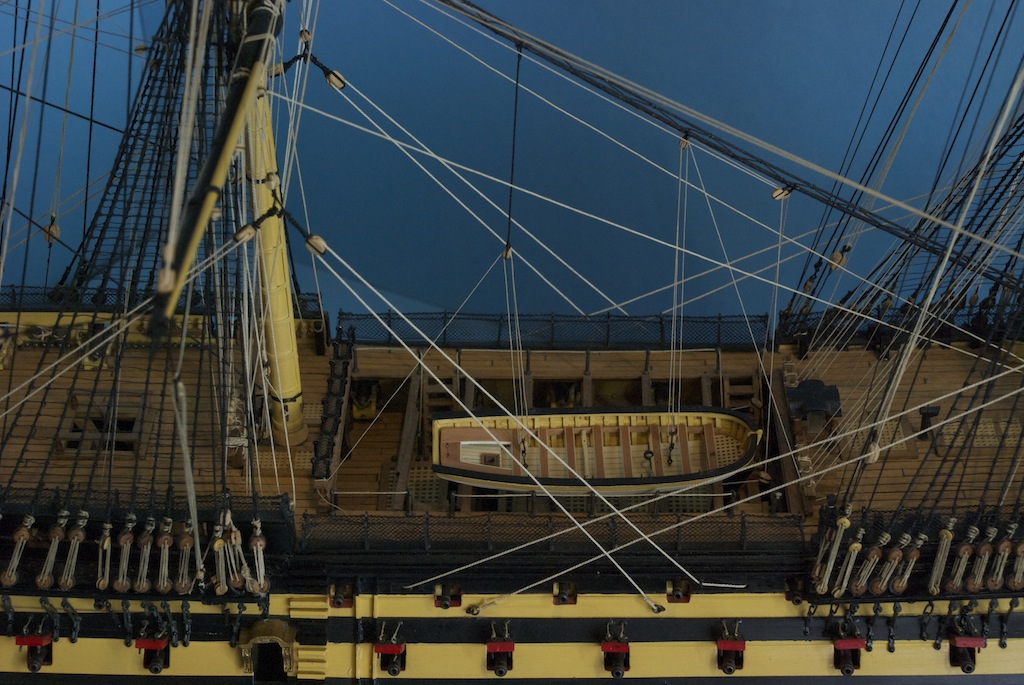
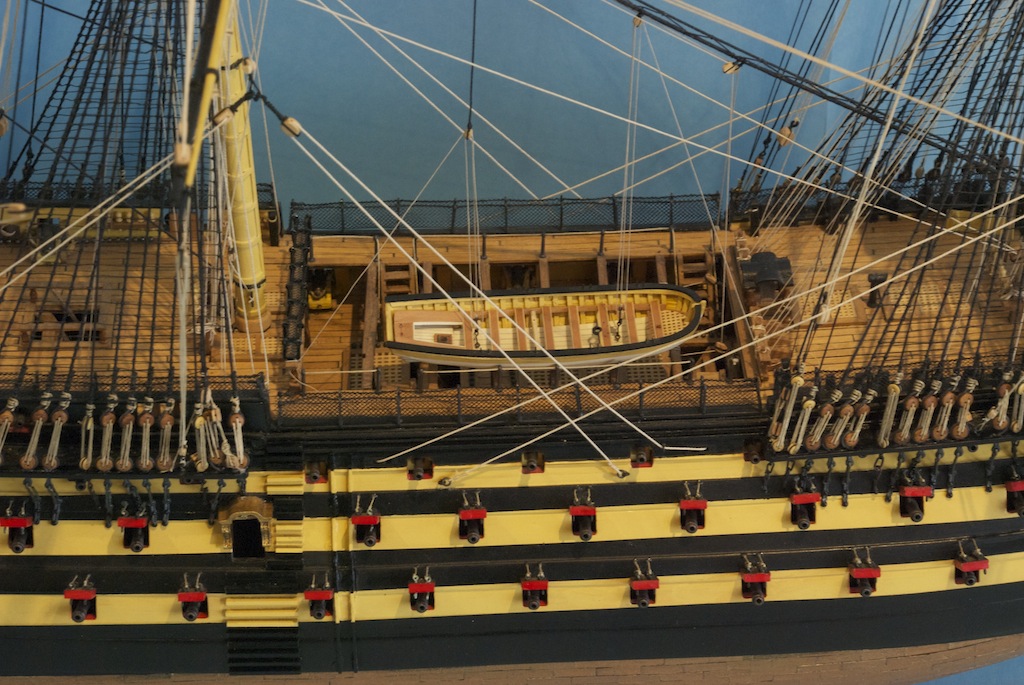
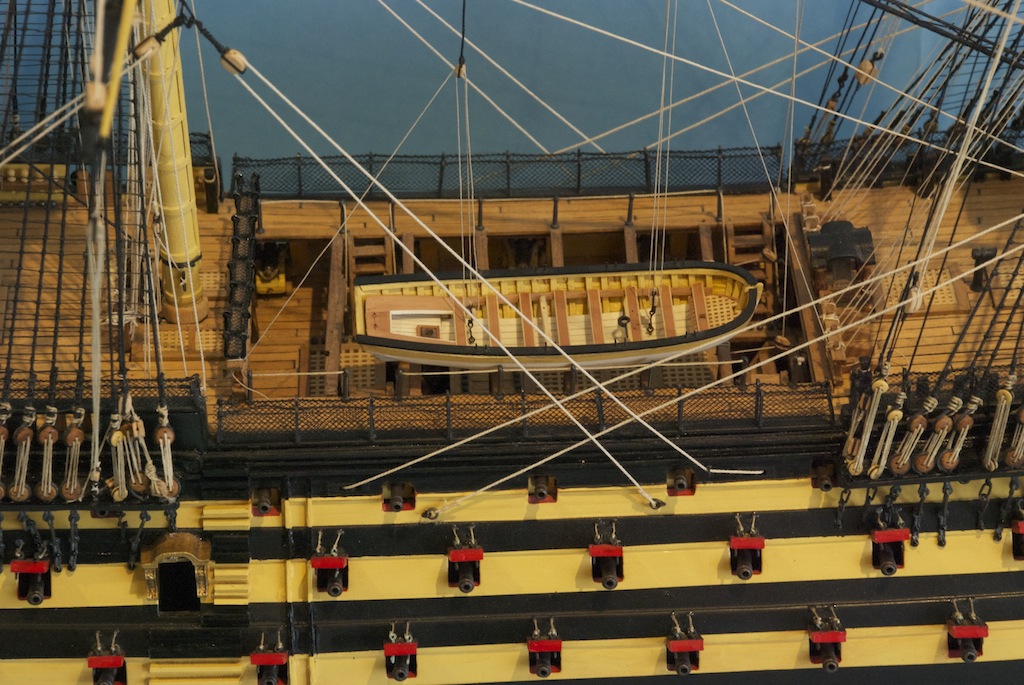
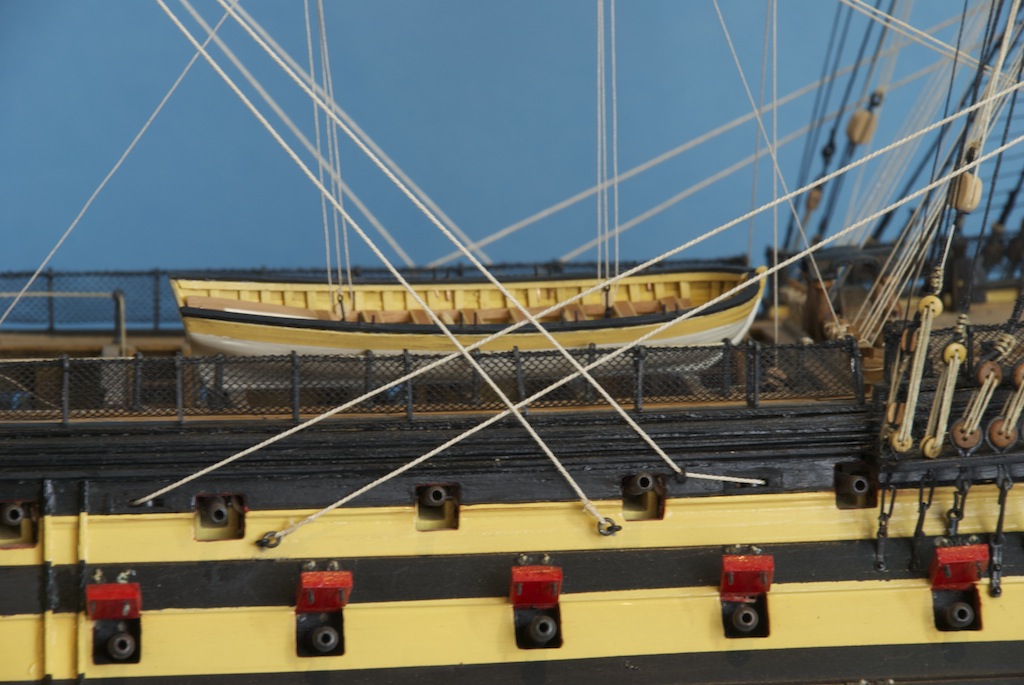
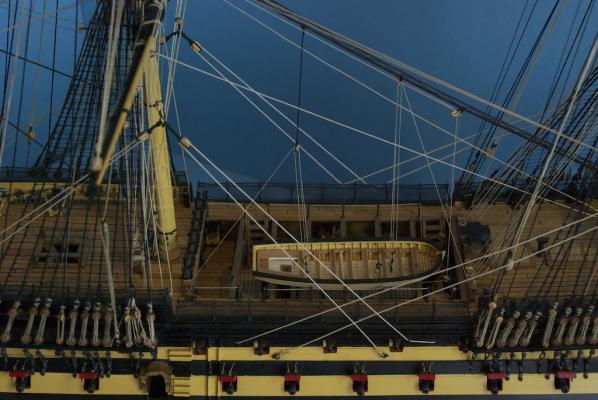
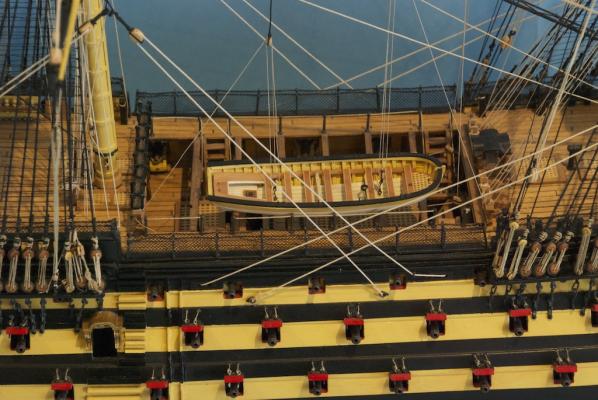
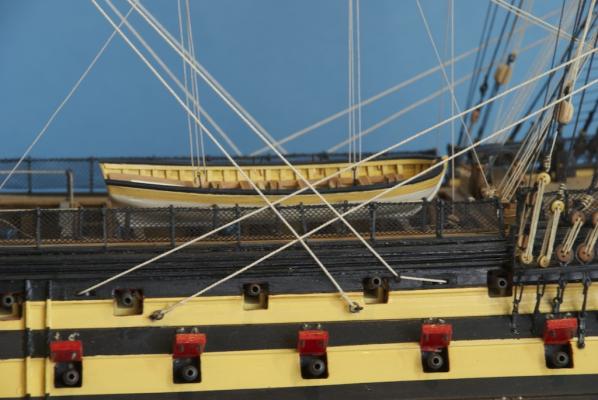
In this final series of shots, I wanted to show some views of the Launch on the skid beams. I fitted a couple of eye-bolts to the keelson of the boat and attached the lifting gear, to show the boat in the process of being readied for launching. I haven't yet tied off the tackle falls, in case I change my mind about this, or some of you have better ideas for this aspect. This last shot shows quite clearly the Fore course sheet and the Main course tack passing through their respective hull sheave blocks. And that's your lot for now. Hopefully it won't be too long before I start posting progress on the remaining boats.

-
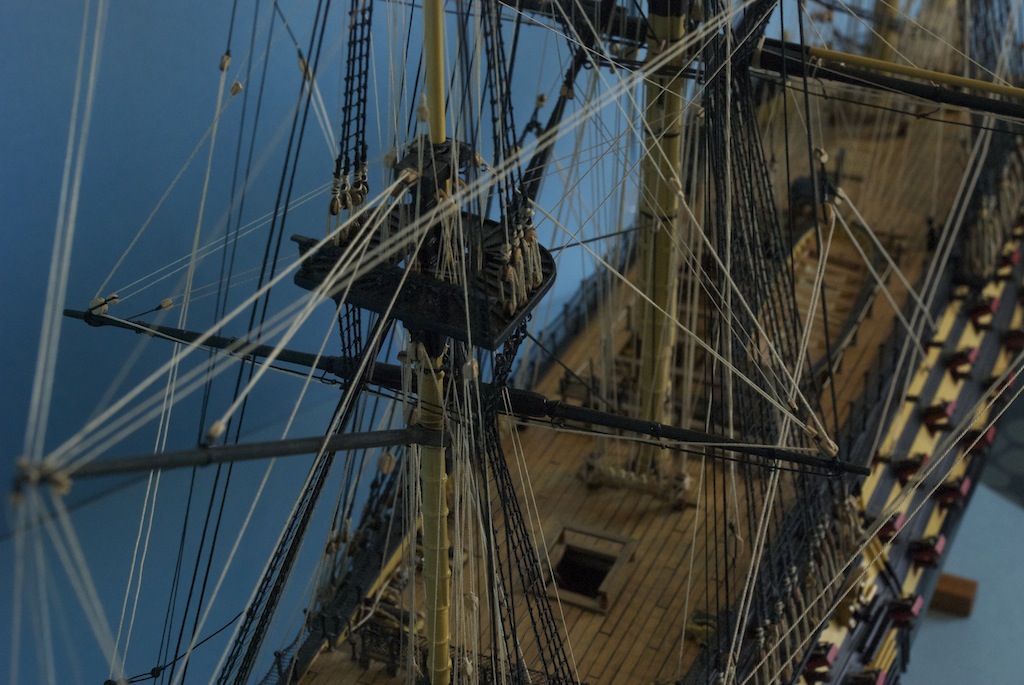
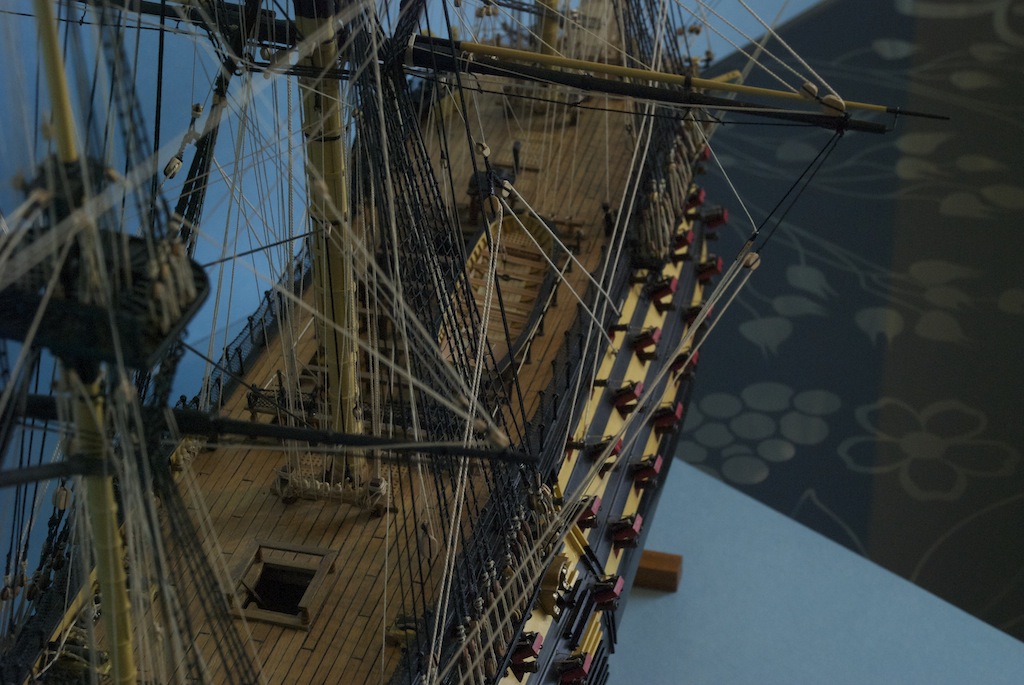
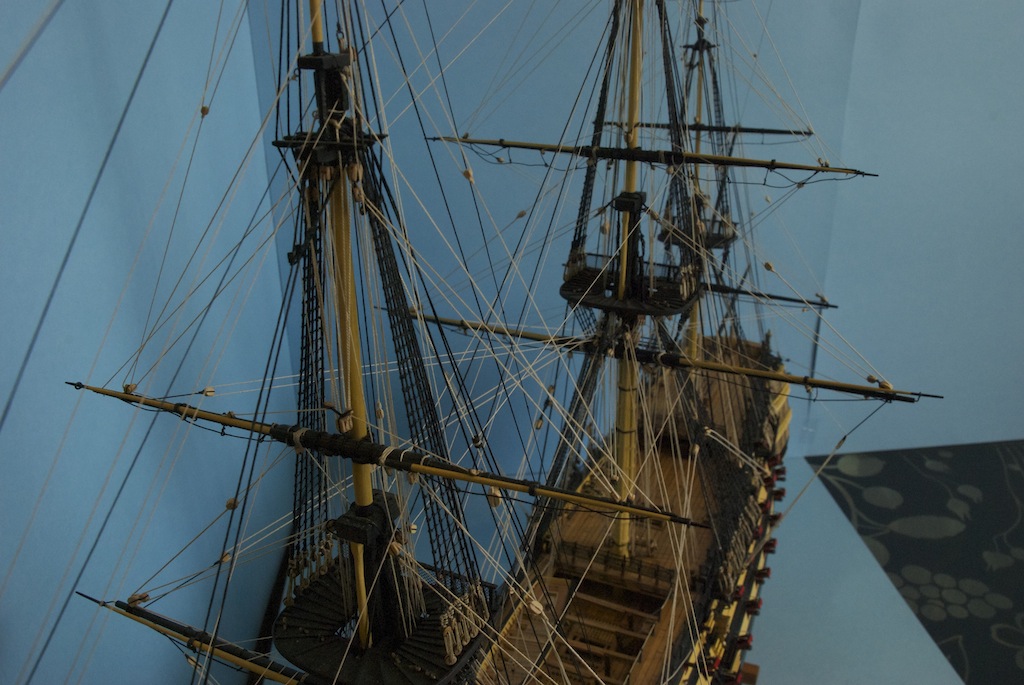
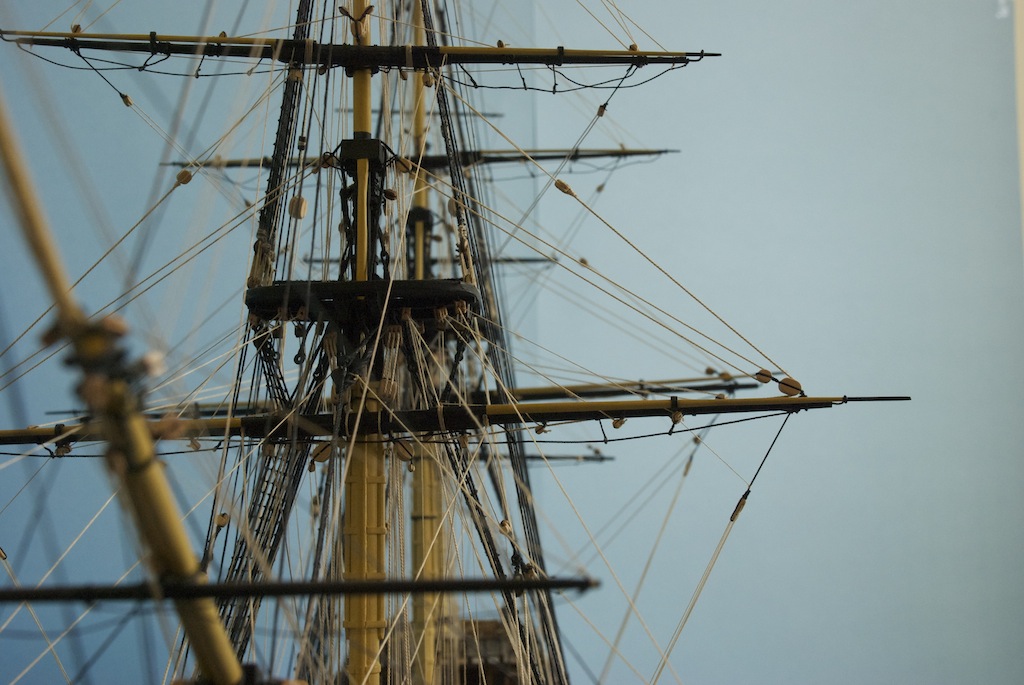
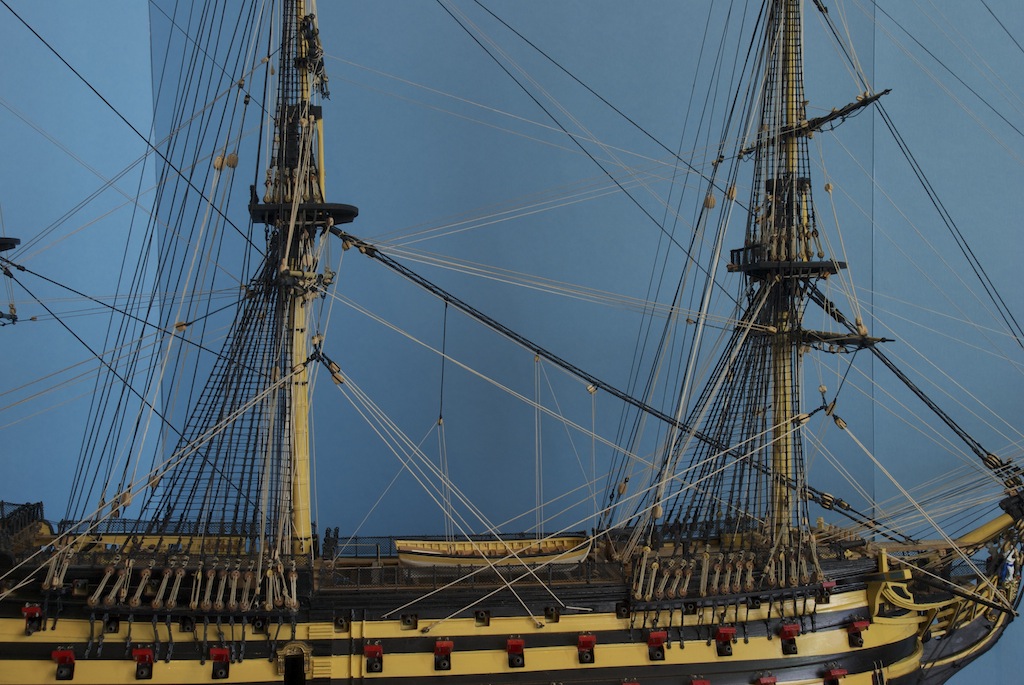
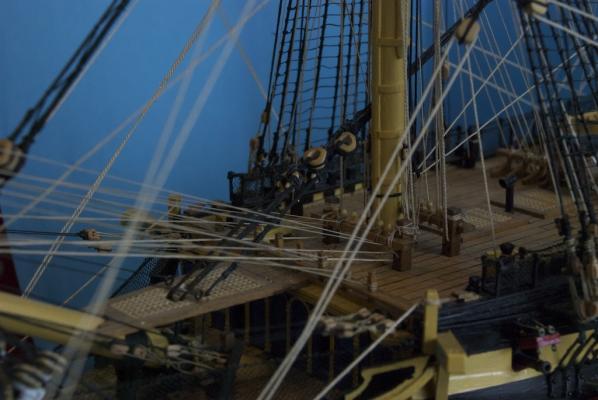
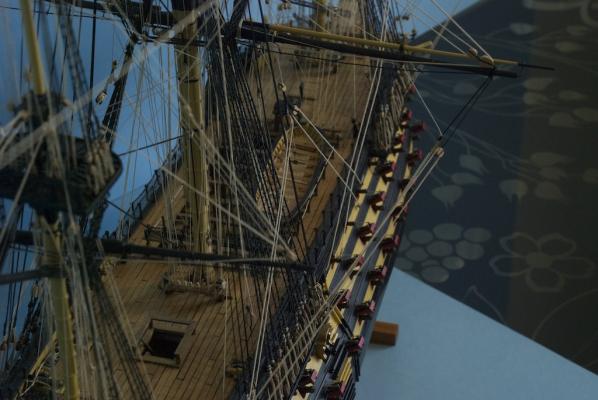
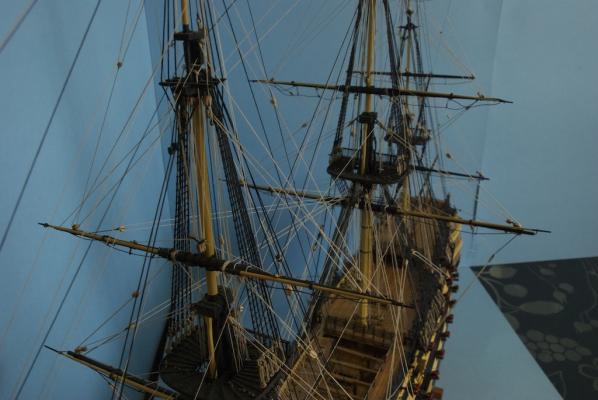
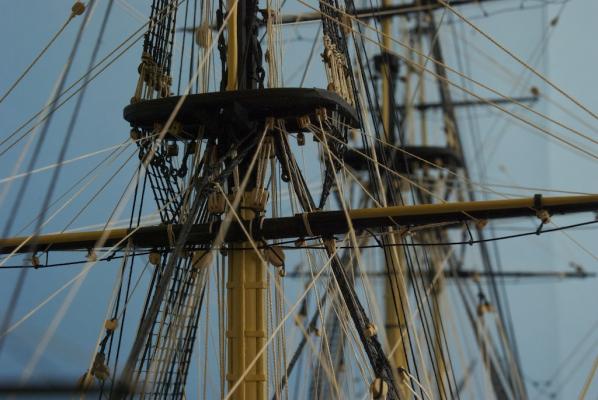
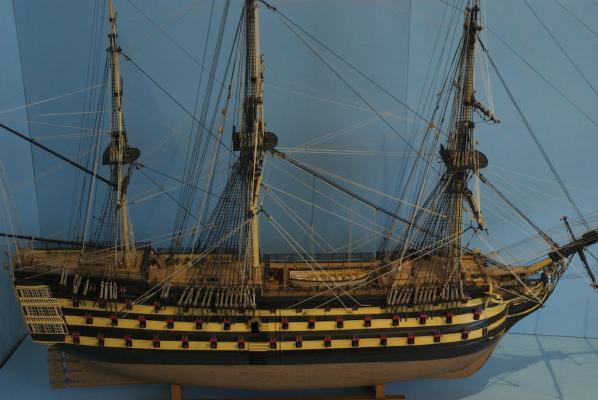
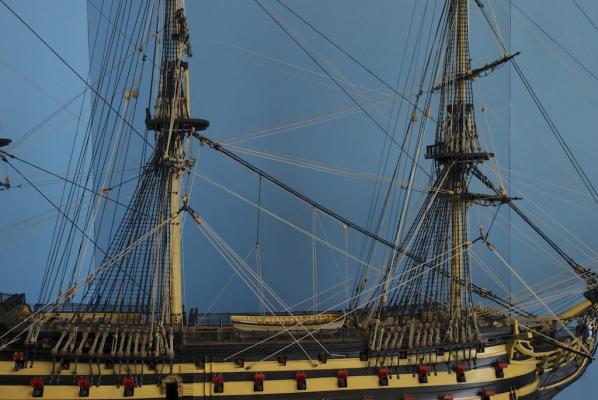
This series of photos shows some close-ups of the rigging. I wanted to try to capture some of the "busy-ness" of it all, especially under the tops and around the forecastle.


-
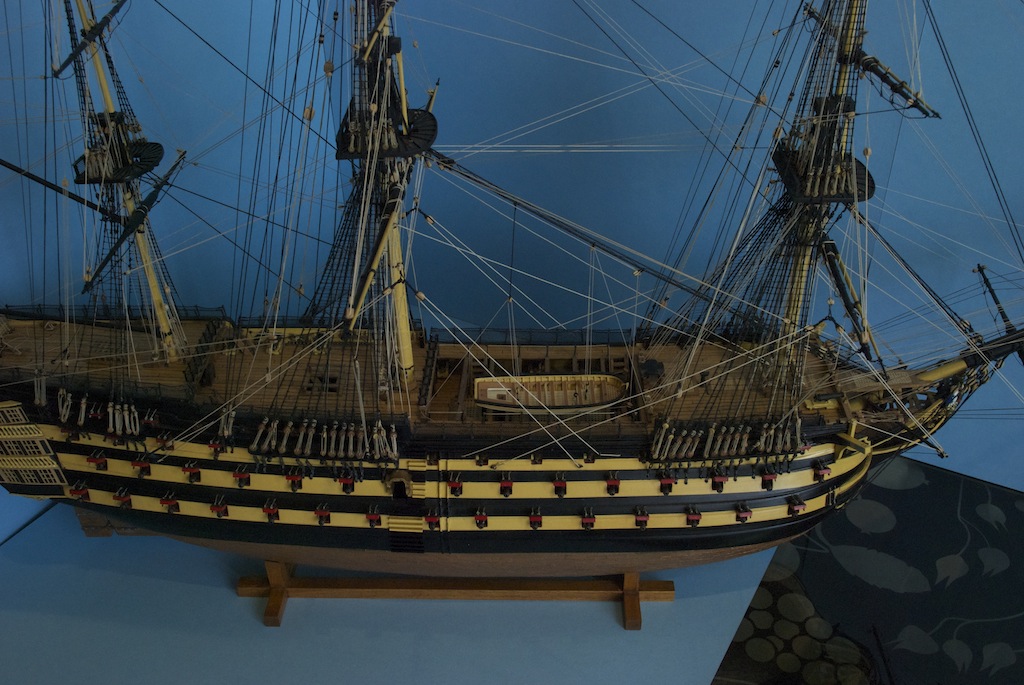
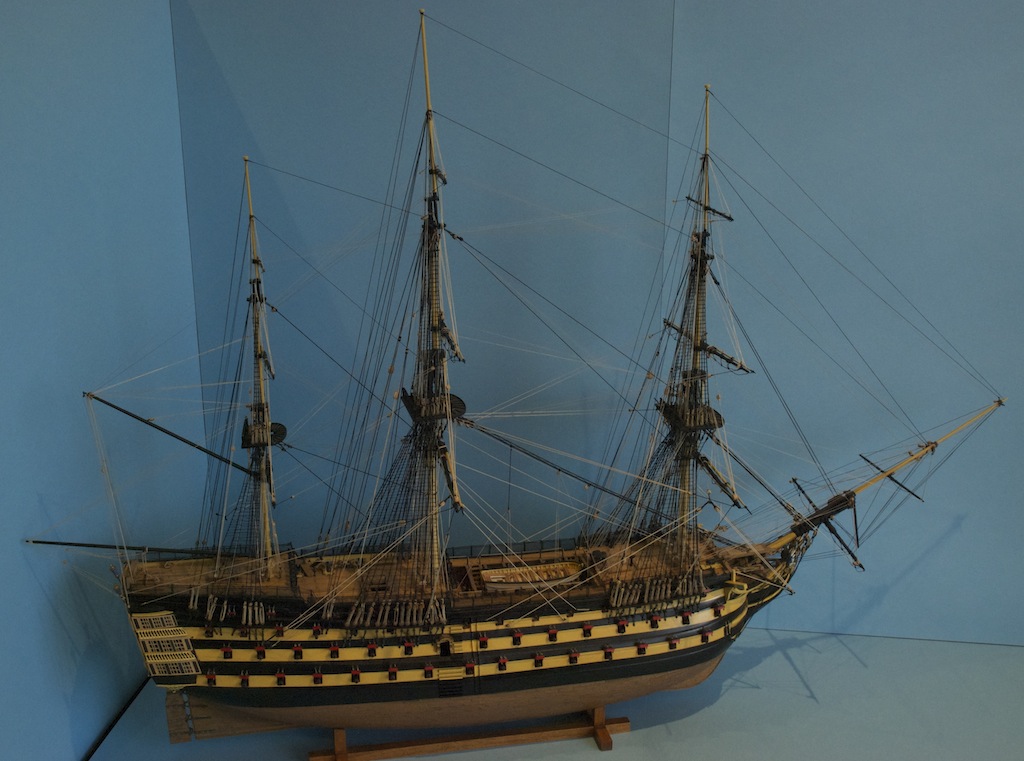
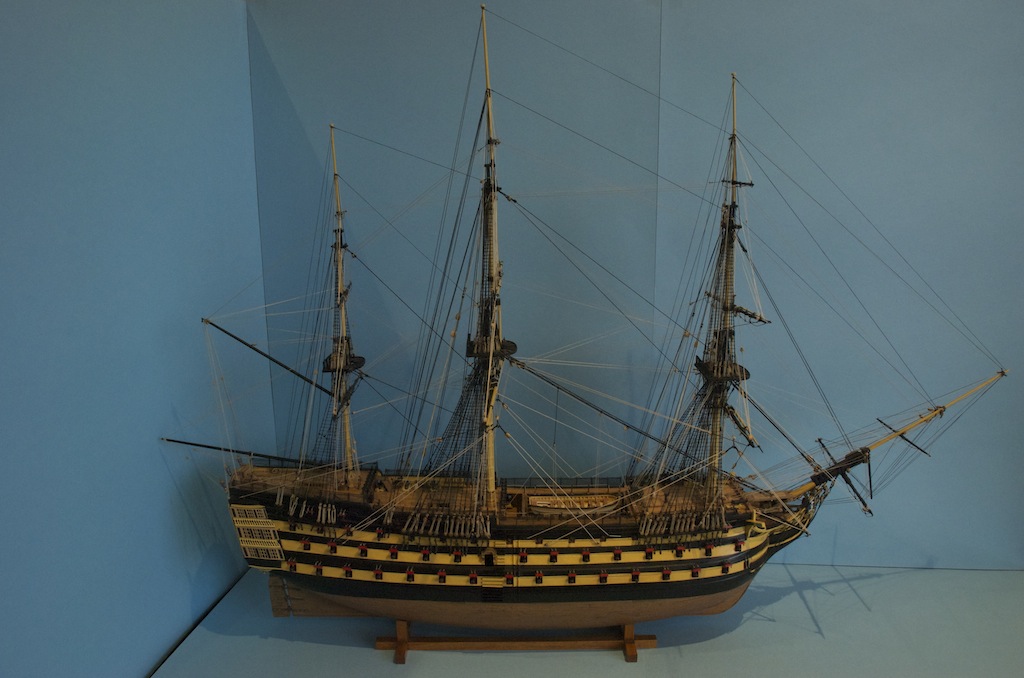
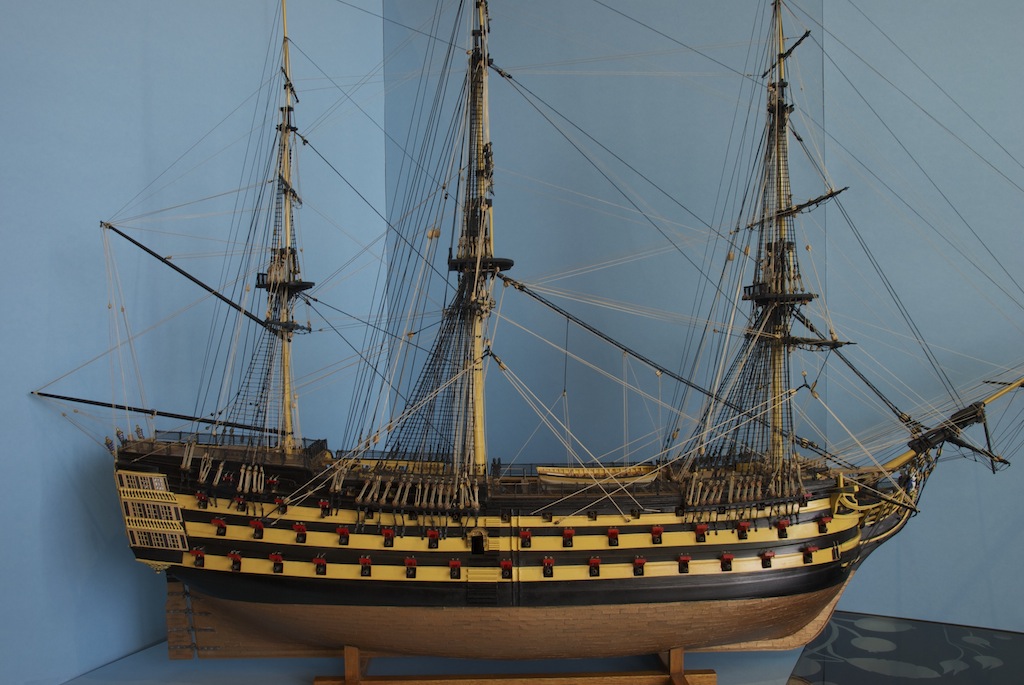
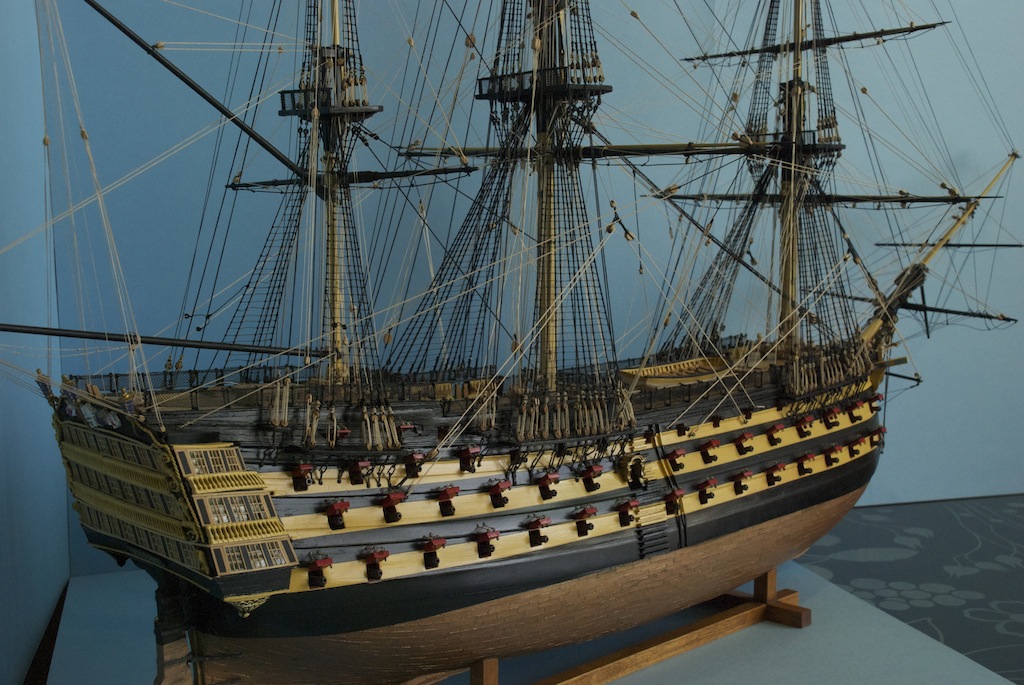
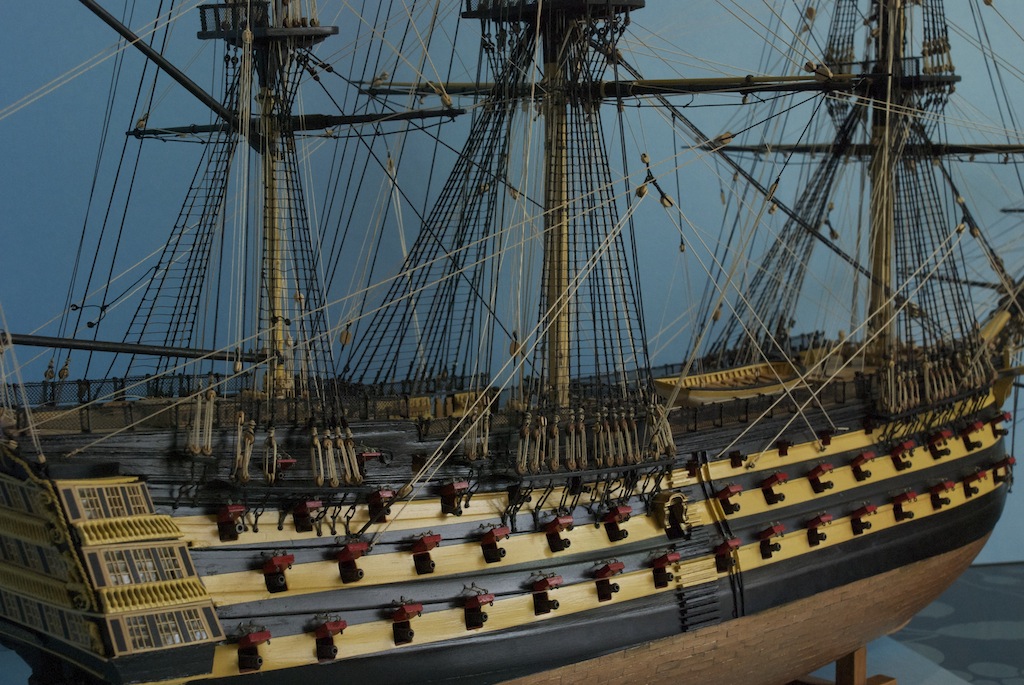
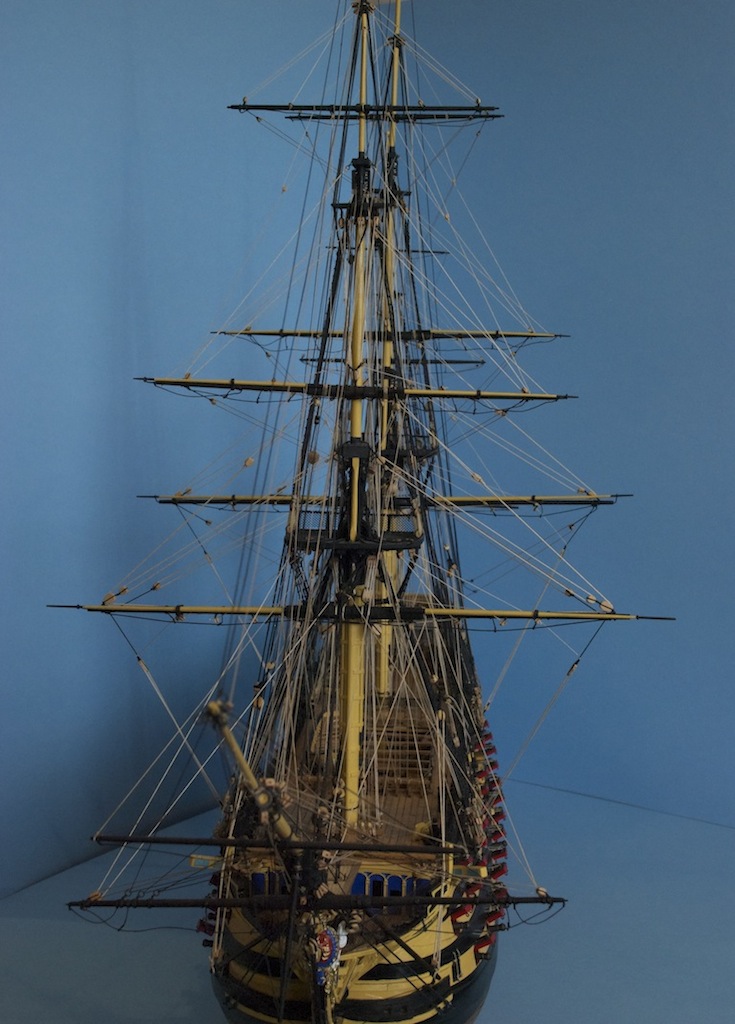
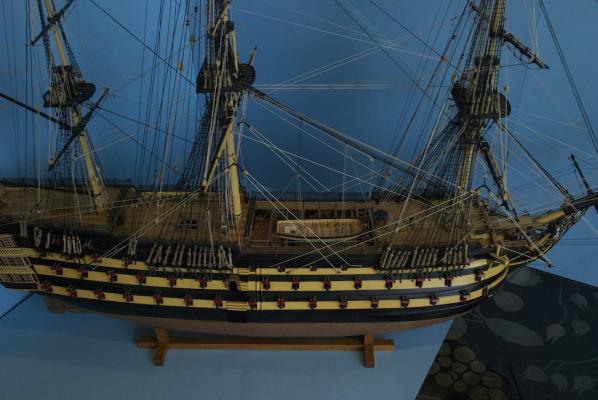
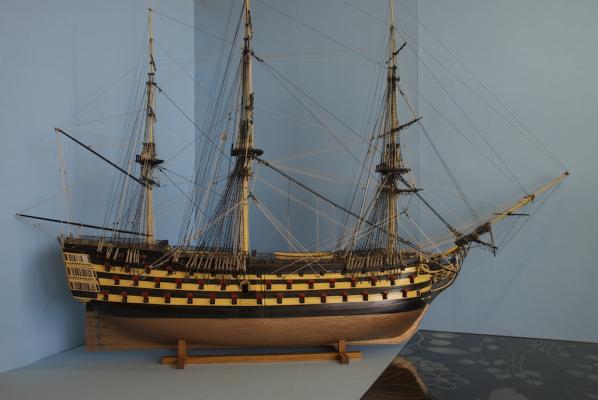
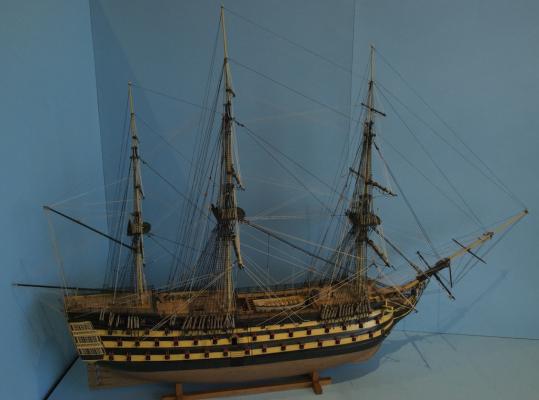
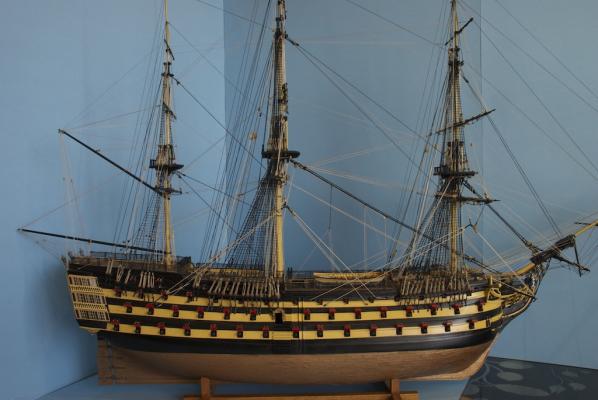
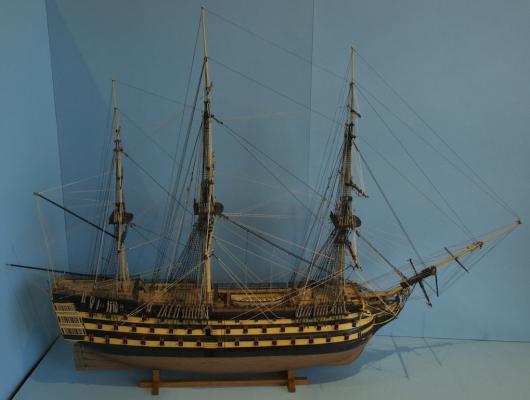
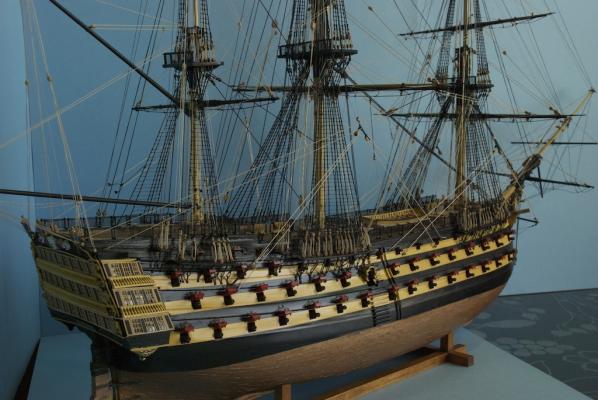
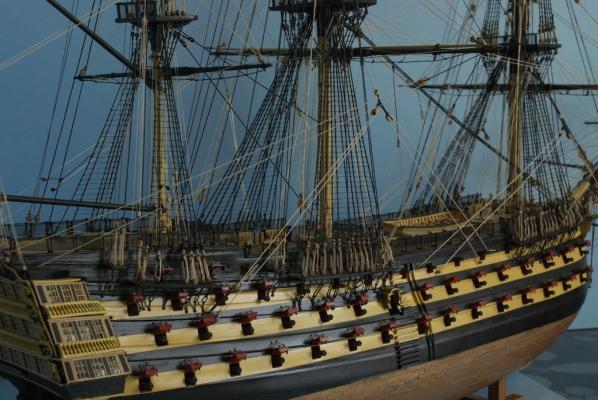
In this, and the next two posts, I'll show some overall progress shots. I decided that to celebrate the occasion of completing the rigging, it was time to try and take some decent photos. So I bought some sheets of light blue cardboard from the local art supply shop (having read somewhere here that light blue provides the best background for ship photos), and made up a temporary photo booth. Of course before I could do that, I had to completely clear off and clean the shipyard table too (an added bonus)! I experimented a bit with camera settings, so the quality varies a bit, but here goes;


-
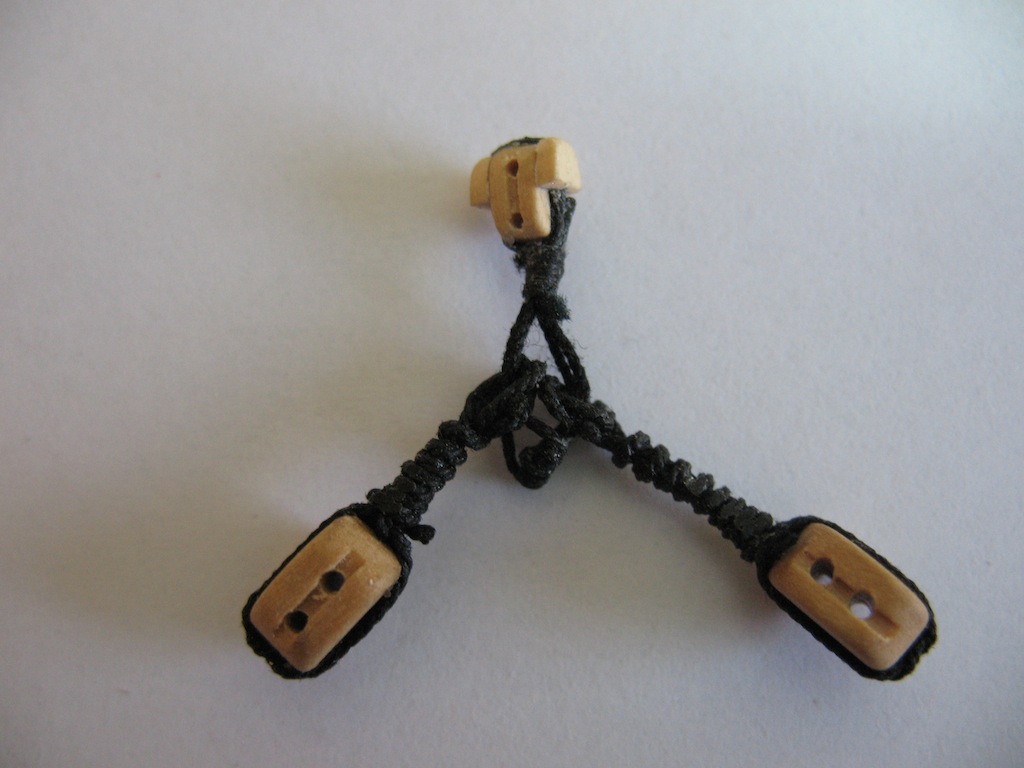
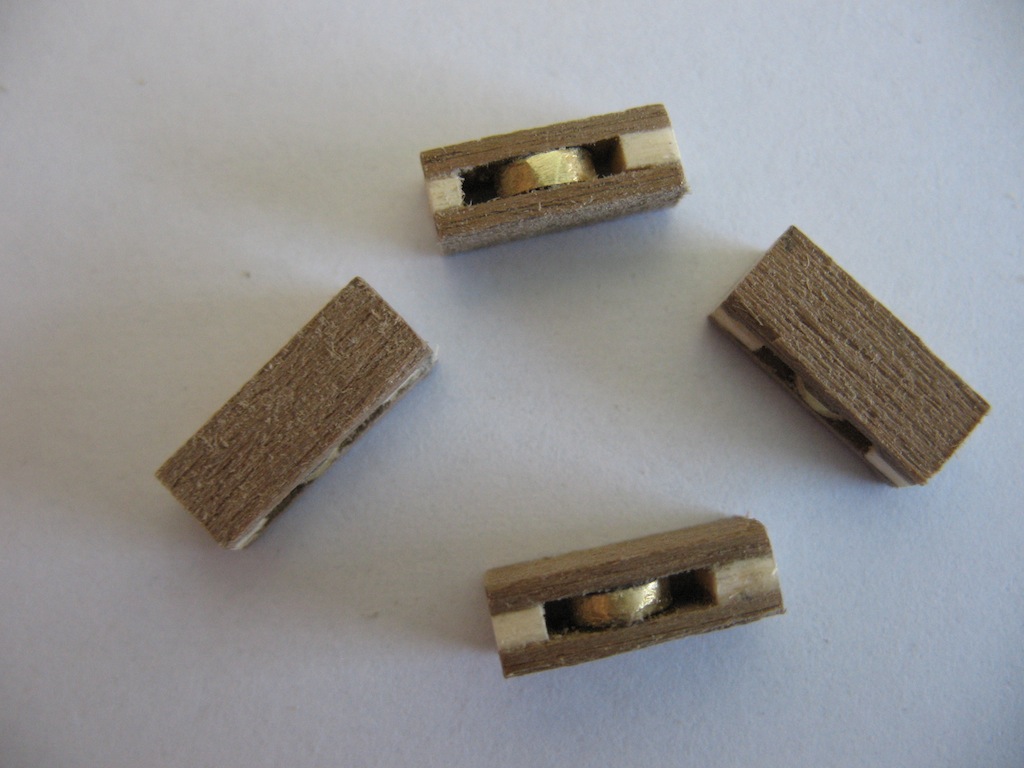
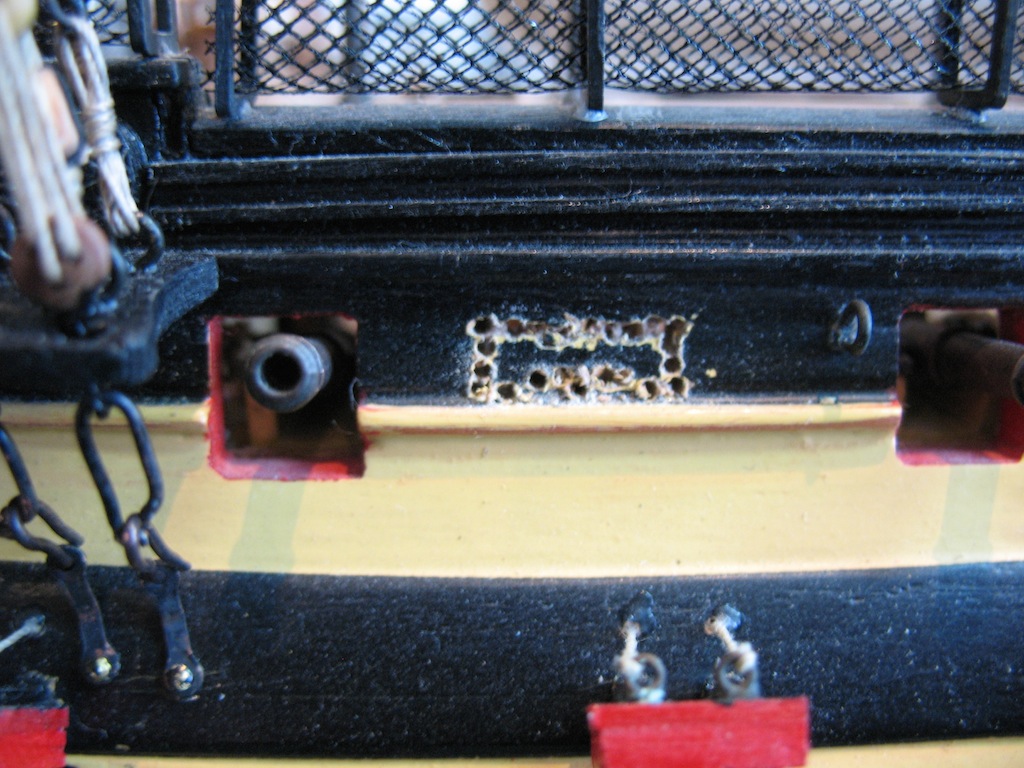
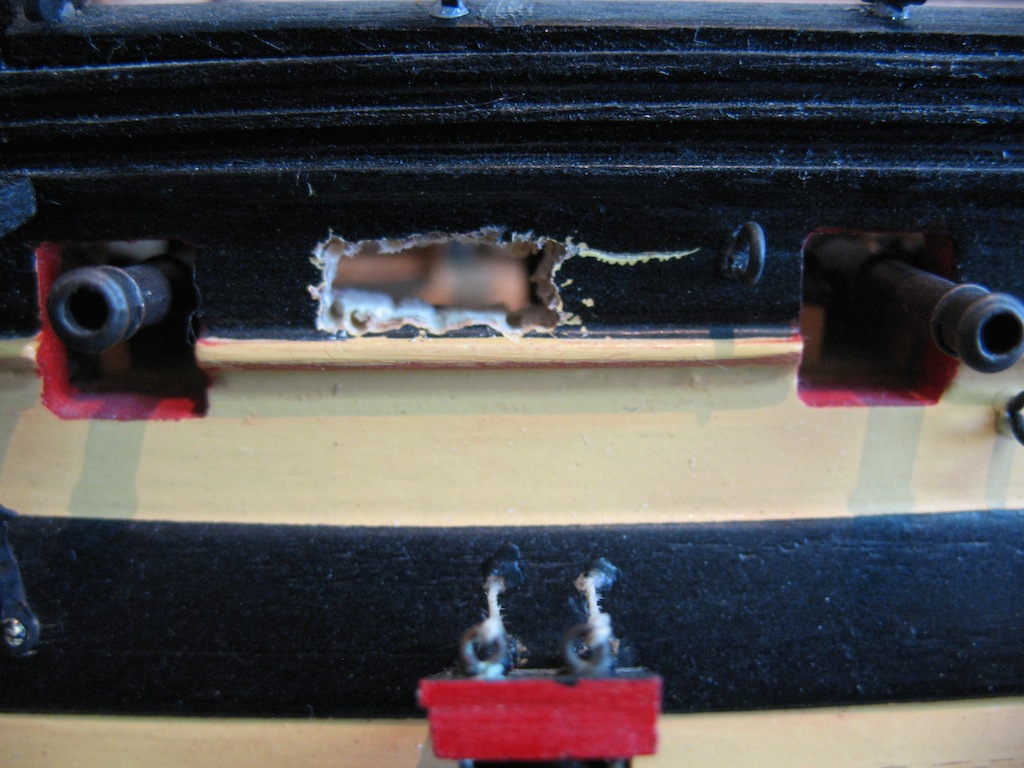
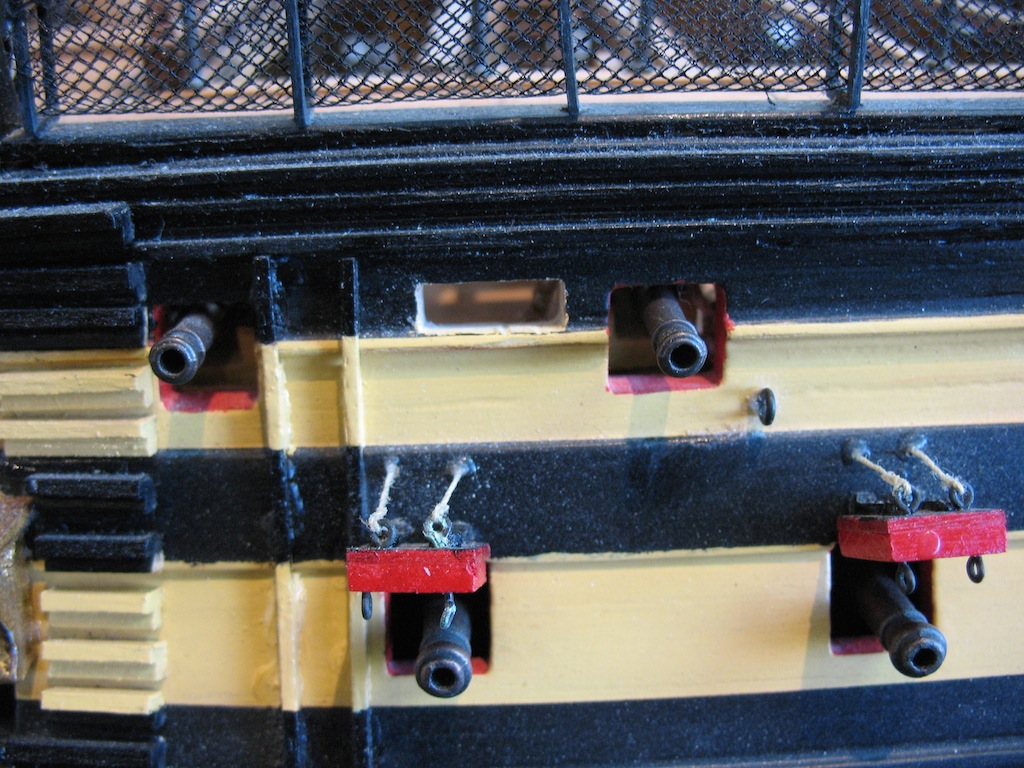
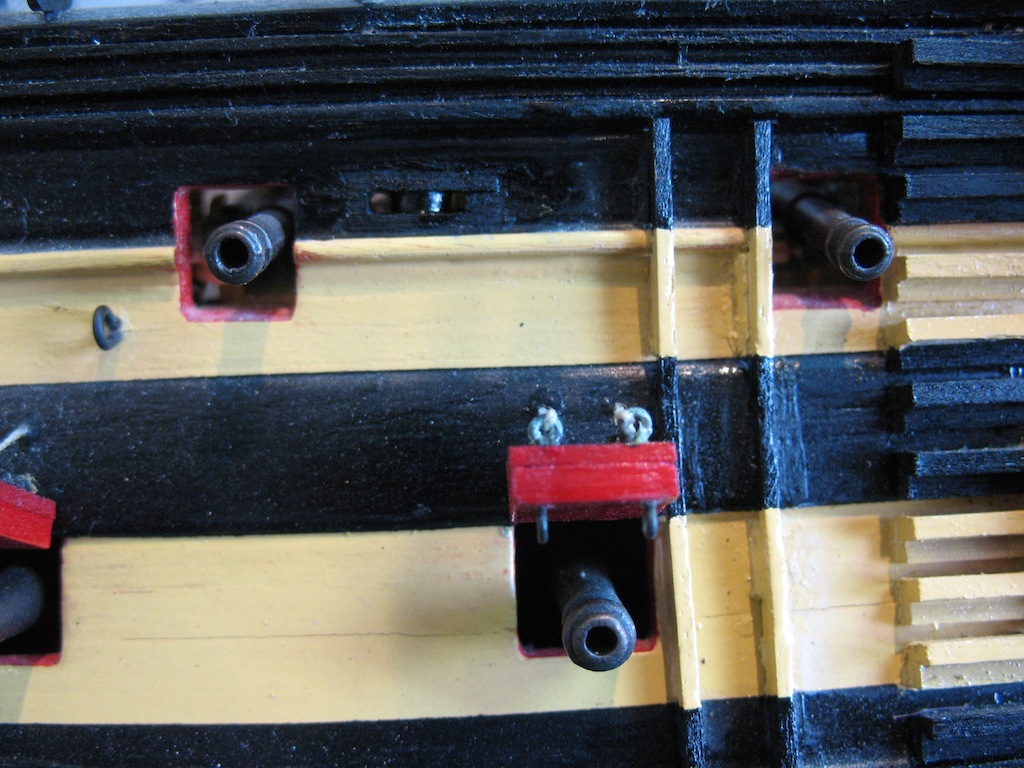
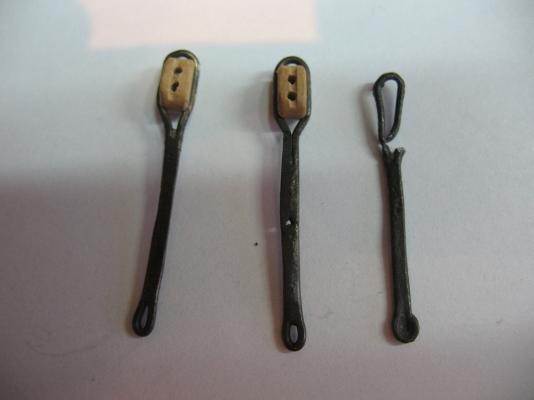
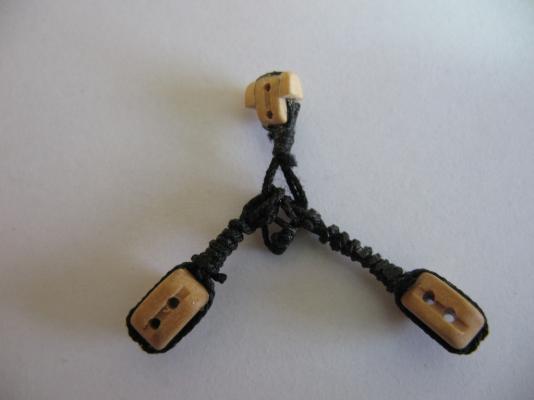
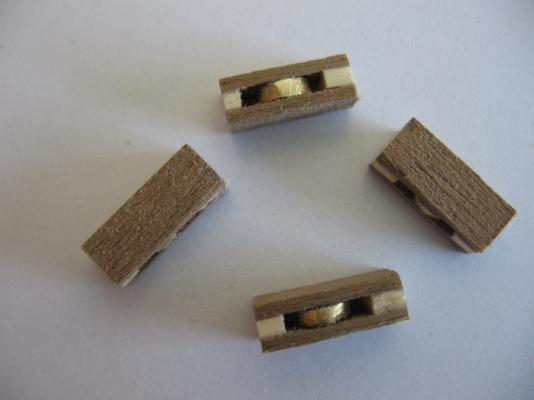
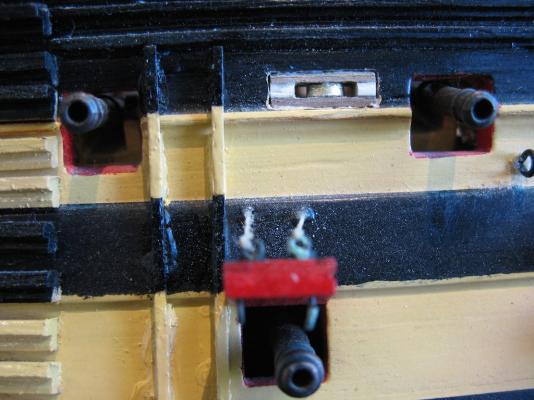
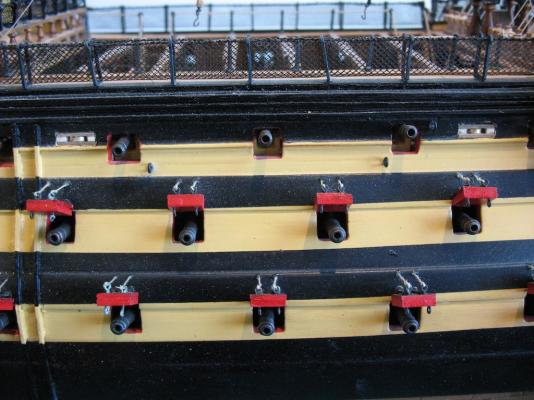
Hi all, Thanks again for all the kind words and also for all the "likes". It's been a while since I've updated the log, partly because I haven't been home much, and partly because progress shots of rigging gets pretty monotonous after a while. Anyway, the big news is, that having had the Easter weekend plus a few extra days of purely "me time", the rigging is at last complete! Doin' the Happy Dance! But of course it wasn't all plain sailing to get there. As we know, there have been a few modifications to the kit instructions, plans and parts required along the way. So this post will show a couple of these, and then I've got a ton of photos of the completed rigging that I'll post in separate posts shortly. That should keep you know who happy for at least a week! First up, the Spiders. These are metal straps that hold the block for the aft end of the Main course sheets. The kit supplied parts were made of a soft and brittle metal that basically crumbled as soon as I tried to insert a block in the looped end. No real drama here. After some earlier experience in making deadeye straps, the process was basically the same. Form the shape with some brass wire, silver solder, blacken and there you go. Here's a pic showing my two home made versions on the left versus what remains of one of the kit ones (the other was in several pieces): Next up, the Clue/Sheet/Tack block arrangement for both Main and Fore courses. A relatively simple arrangement, though I decided to add shoulders to the Clue blocks. You can see these in the photo. The more observant of you will note that the shoulders are at the wrong end of the block! Doh! No problem, I fixed this before final fitting. As I was studying the plans and reading the equivalent section in Longridge, I realised that the kit had taken a major shortcut, that had I realised, I could have fixed easily during the hull construction stage. Fixing it at three-quarters of the way through the rigging stage proved a little more challenging. I am referring to the through-hull sheave blocks for the Main course tack and the Fore course sheet. The kit directions would have you simply drill a hole in the ships side and poke a line through. Not good enough! says I. Making up the sheave blocks was fairly simple - I made these up in a gang, using some scrap timber and some brass rod for the sheaves themselves: So how do you insert these into a completed hull, with lots of rigging already in place? Well, you just start hacking away don't you? What could possibly go wrong? To be honest, I thought long and hard before I started this round of surgery. Even after I made up the sheave blocks, I almost chickened out. But then I remembered the stern re-build and how well that turned out. So on I went. First step was drilling a series of holes around the outline of where the sheave block would fit: Then it was time to hack into it with a small key-hole type saw in the Exacto: About now, you're probably thinking "he's nuts!" - yep, so was I........ But a little further work with a file, and it's not looking so bad: Then it's fit the sheave blocks into their new home: A touch of filler around the outside, and a lick of paint and it's done! The lead for the Main course Sheet through the Quaterdeck bulwark is supposed to be through a lead lined hole, but the kit again just indicates the hole... This was a simple fix by cutting a piece of brass tube and blackening, then inserting in the hole. No photos of this in progress, but you might be able to pick it out in the following posts. The next three posts will show in order: some overall shots of progress to date, some close ups of the rigging, and some close ups of the launch in place on the skid beams. I'm well satisfied with my "long" weekend's work. I still have to make up eleventy gazillion rope coils (and yes, that's the right number - I counted them ), make up some anchors, fit the quarter davits, and make some more boats. I've decided that I'll make a Pinnace to join the Launch on the skid beams, and two Sea Cutters to hang from the quarter davits. I think that boat making will be the next task - it will be nice to be making sawdust again instead of macrame!


-
Great work with the airbrush Kevin. Hey, it's Easter - aren't you supposed to be going back to your Vicky now?
-
Those molding panels look superb Mike - well done! Your tiller is also very nicely done.
- 137 replies
-
- 1
-

-
- finished
- model shipways
- (and 1 more)
-
Those last two shots from head on are pretty impressive Slog. Beautiful lines to this beast. Nice job so far.
-
Well done Sjors. You see, when Mobbsie sends you "around the buoy", it usually means you end up with a better outcome.
- 1,873 replies
-
- 1
-
-
- occre
- san ildefonso
- (and 1 more)
-
Sean, I'm not an expert, but I went with yellow ochre. I honestly can't remember what the actual ship has (and I was on board her just last Sep!). If you post this question separately (outside of your build log) you may get more answers from the other more knowledgeable folk here.
-
Well, the practice ones looked pretty darn good Sjors! Can't wait to see the real ones.
- 1,873 replies
-
- 1
-
-
- occre
- san ildefonso
- (and 1 more)
-
Thanks Ed for the extra info on the wax/turps "formula" - I had a feeling it was going to be somewhat imprecise. You obviously know when it "looks" about right - another sign of the master craftsman at work!
-
Looks like a really interesting kit Michael. Think I'll pull up a chair and follow along. You seem to be off to a great start.
-
David, LoS is easily found online. Here is one such link. https://www.etsy.com/au/listing/63353887/liver-of-sulphur-gel-2-oz-great-for?utm_source=google&utm_medium=product_listing_promoted_en_au&utm_campaign=supplies_low