gjdale
-
Posts
4,894 -
Joined
-
Last visited
Content Type
Profiles
Forums
Gallery
Events
Everything posted by gjdale
-
 Great work on the "fix" Mobbsie - I'll hope to be done with that myself next weekend. Sounds like you may have solved the Floor Rider problem too. You'll be leaving the rest of sucking up your sawdust at this rate!
- 255 replies
-
- 1
-

-
- granado
- bomb ketch
- (and 2 more)
-
Congratulations on reaching another milestone John. She's looking superb.
- 2,250 replies
-
- 1
-
-
- model shipways
- Charles W Morgan
- (and 1 more)
-
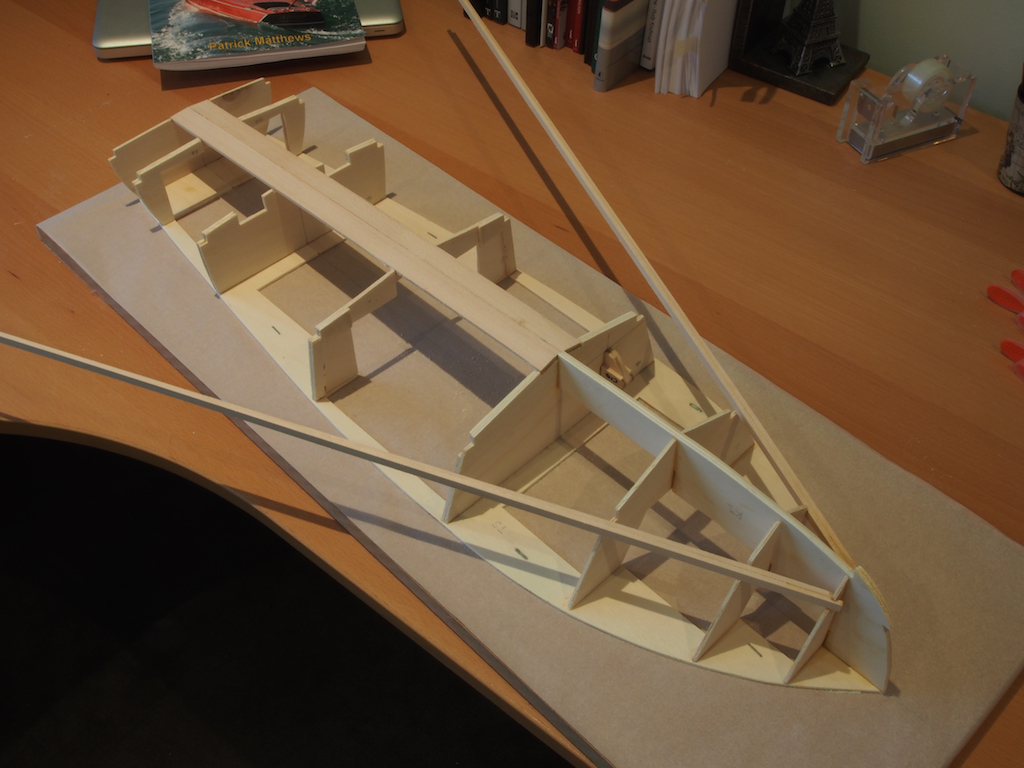
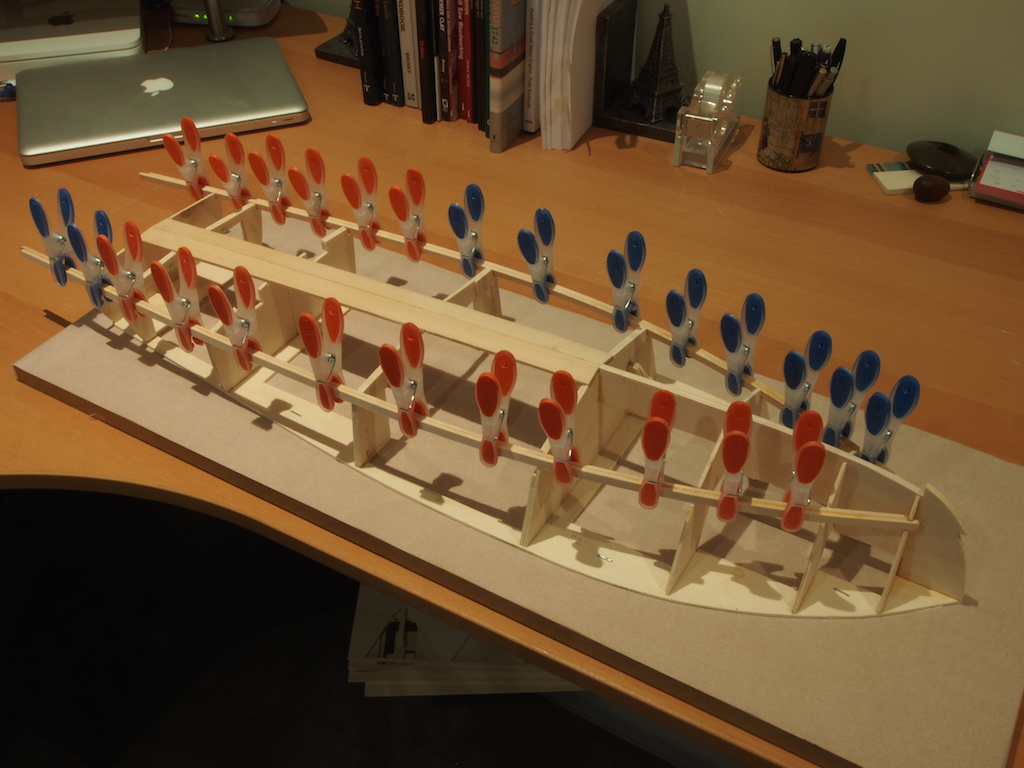
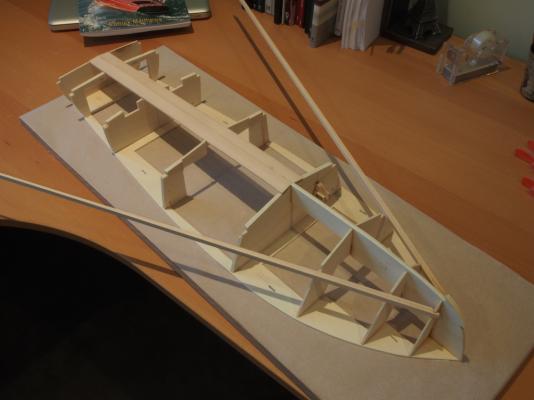
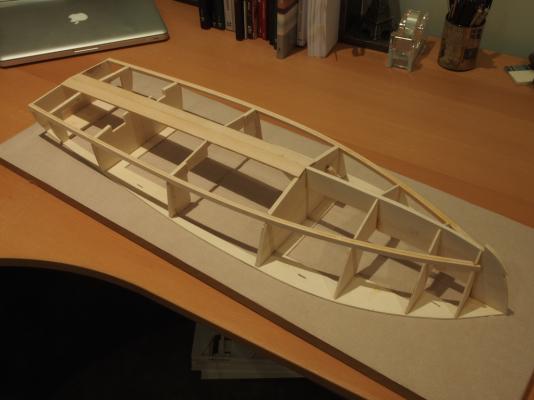
Construction: Frame, Keel and Chine Installation The frames are then installed, with the aid of a special template jig as they are not perpendicular to the sub-deck. When installed correctly, they have a slight lean aft. Epoxy is the recommended glue for this job. I used the 5-min type and it was quite good to work with, having a reasonable working time to get things aligned correctly, and then setting reasonably quickly after that. Once all the frames are installed, the Fwd keel is inserted. I used Epoxy to glue the forward part to the sub-deck, and then wicked super thin aliphatic resin into the frame joints. The next job is to insert the Butterfly Keel, which is a two piece keel (one either side of the centreline) extending from Frame Four aft to Frame Eight. Once that is installed, the next job is to install the Chine. This is an interesting construction method. The Chine is made of two 1/8” thick strips of balsa on each side To start, the ends of the two strips are glued together for the first inch, with about 1/4" overlap. Once dry, this section is then glued into the notch in frame one, using a liberal amount of Epoxy and left to cure for at least one hour. Once the epoxy has cured, a bead of wood glue (I used the aliphatic resin again) is run between the two strips, and these are progressively bent to shape, clamped and glued to each frame notch in turn with thick CA and the assistance of some CA kicker. Sounds complicated but is remarkably easy and all done in about 5 minutes. Once all the glues had dried, the overhang was trimmed flush with the transom. This completes the lower hull framing. The next job will be to install the “underplanking”. Edit: I may have been mistaken about some of the materials used. See post #19 below for further thoughts.


- 339 replies
-
- 21
-
-
- dumas
- Chris-Craft
- (and 3 more)
-
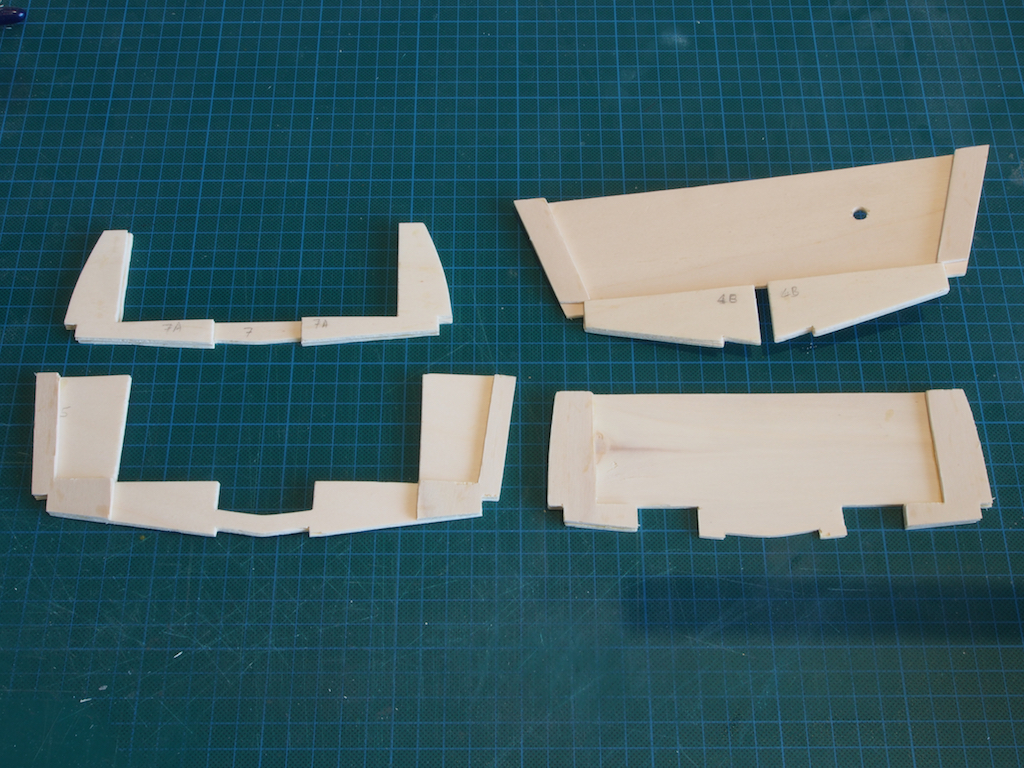
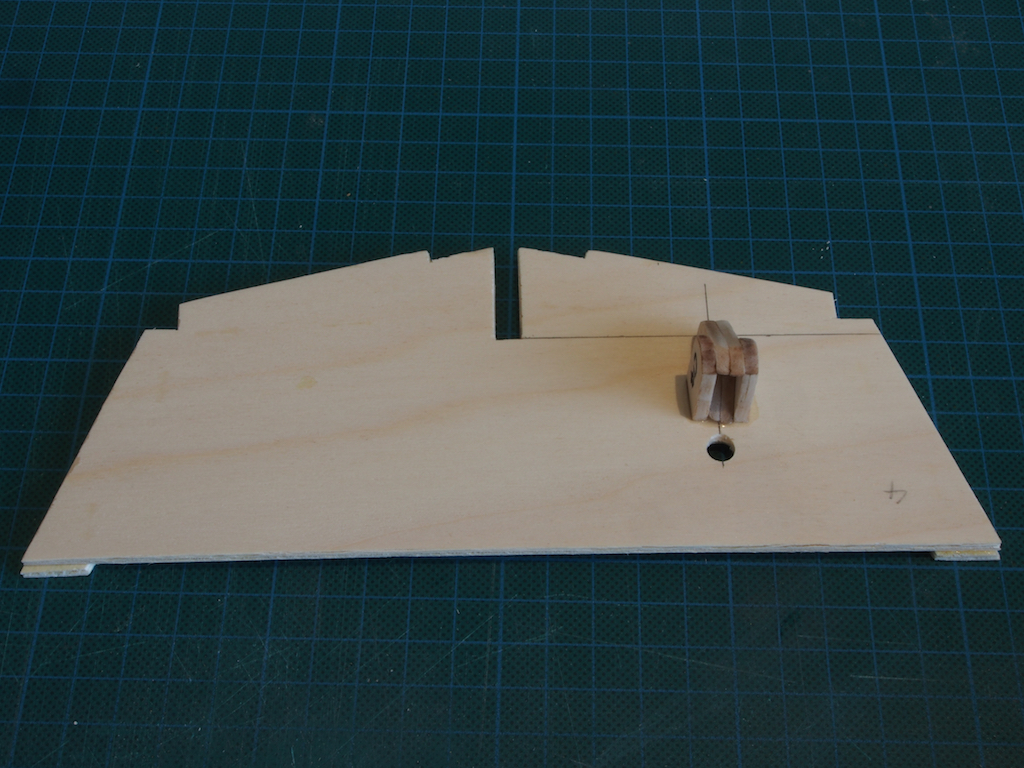
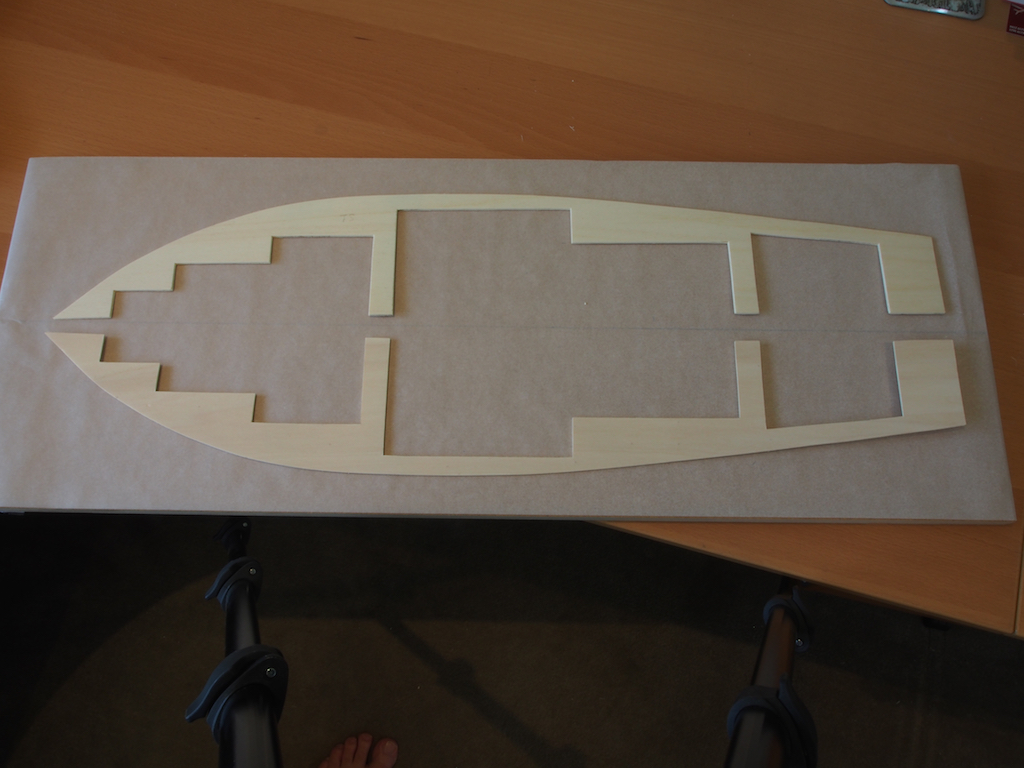
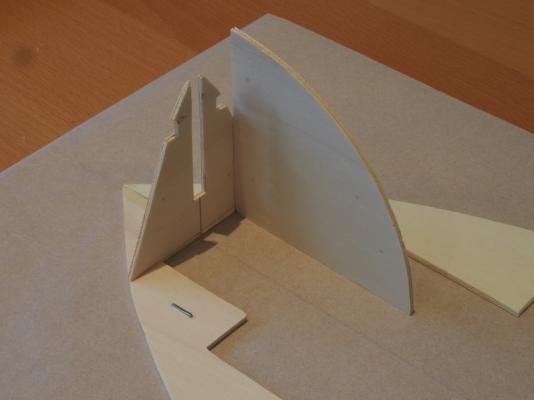
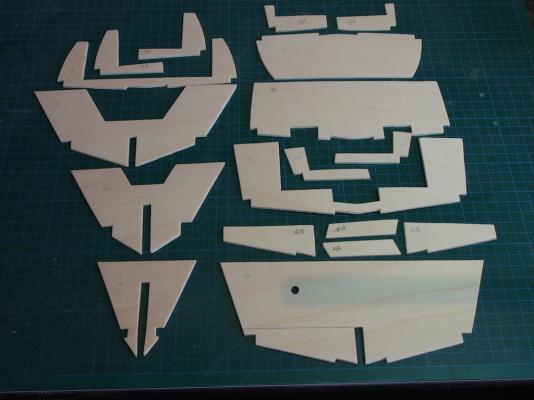
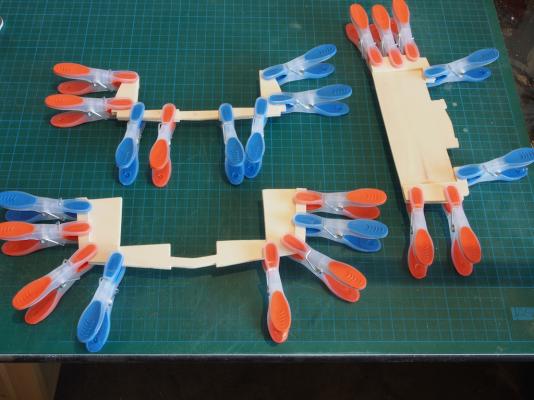
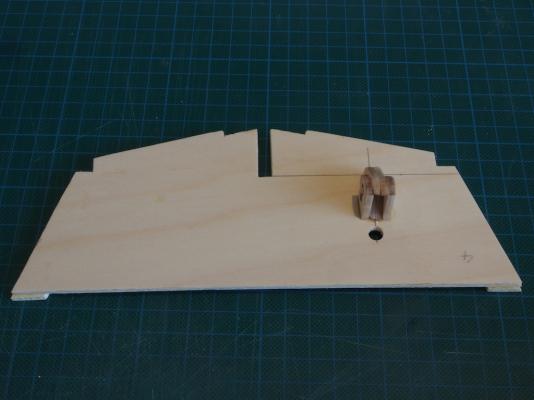
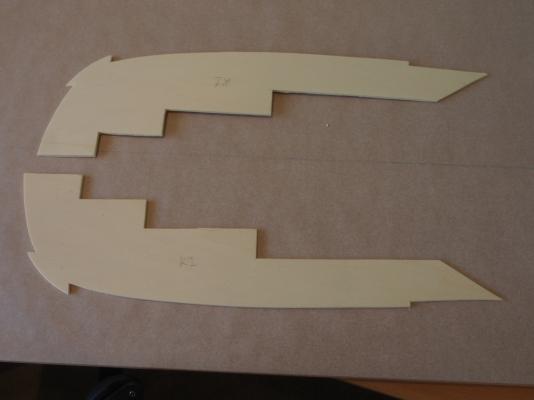
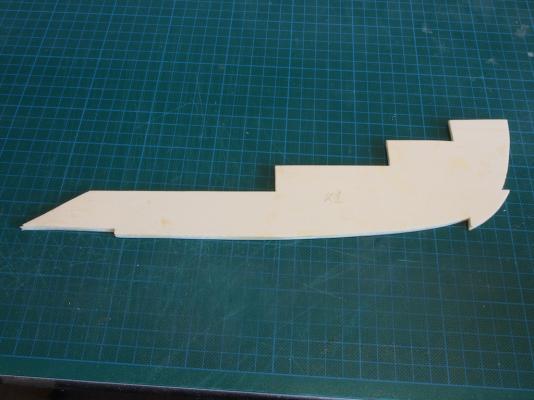
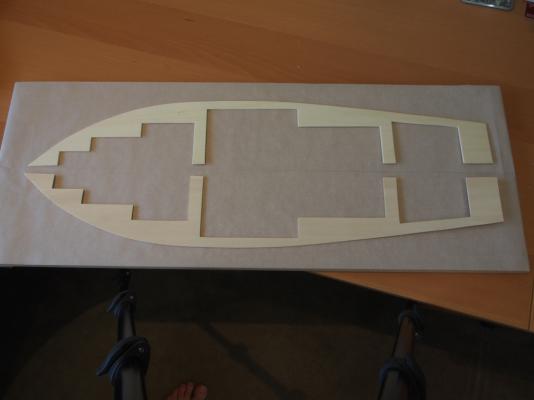
The gauges have now been set aside for the time being. The final version will be dependent on some lighting I plan to add, so will wait for some of that to arrive before going any further with these. In the meantime, it was time to start construction proper. Construction: Frames and Keel The frames are all die cut balsa ply. The die cutting requires a little more effort to release from the layout boards than does laser cutting, and the edges are nowhere near as neat. However, after a couple of hours of cutting out and cleaning up, we were ready to begin. Four of the frames have reinforcing strips around the edges, so the first job was to glue these up: Frame Four is also drilled to accept the steering column, and has a support installed on front (bow) side of the frame: The Forward keel extends from the bow to Frame Four, and is comprised of two identical parts epoxied together: The sub-Deck provides a flat surface on which to assemble the frames. It comes in two parts which are joined together over a sheet of grease proof paper on top of the building board. (The grease-proof paper is to ensure that the sub-deck doesn’t accidentally get glued to the building board!) Continued next post.........

- 339 replies
-
- 14
-
-
- dumas
- Chris-Craft
- (and 3 more)
-
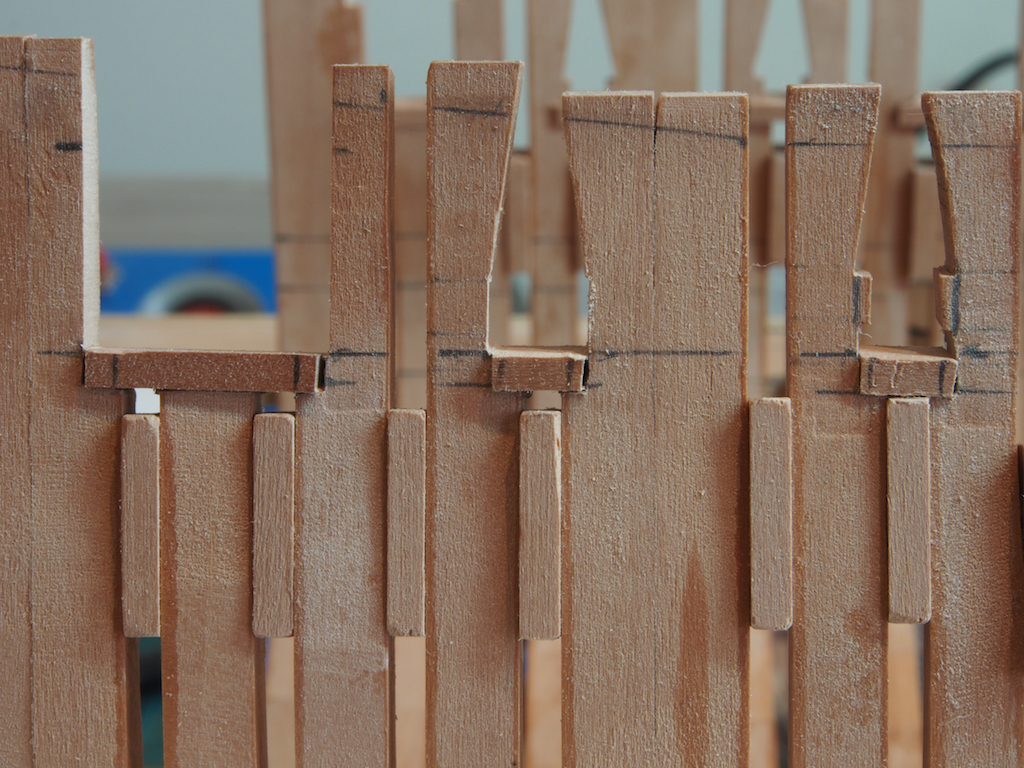
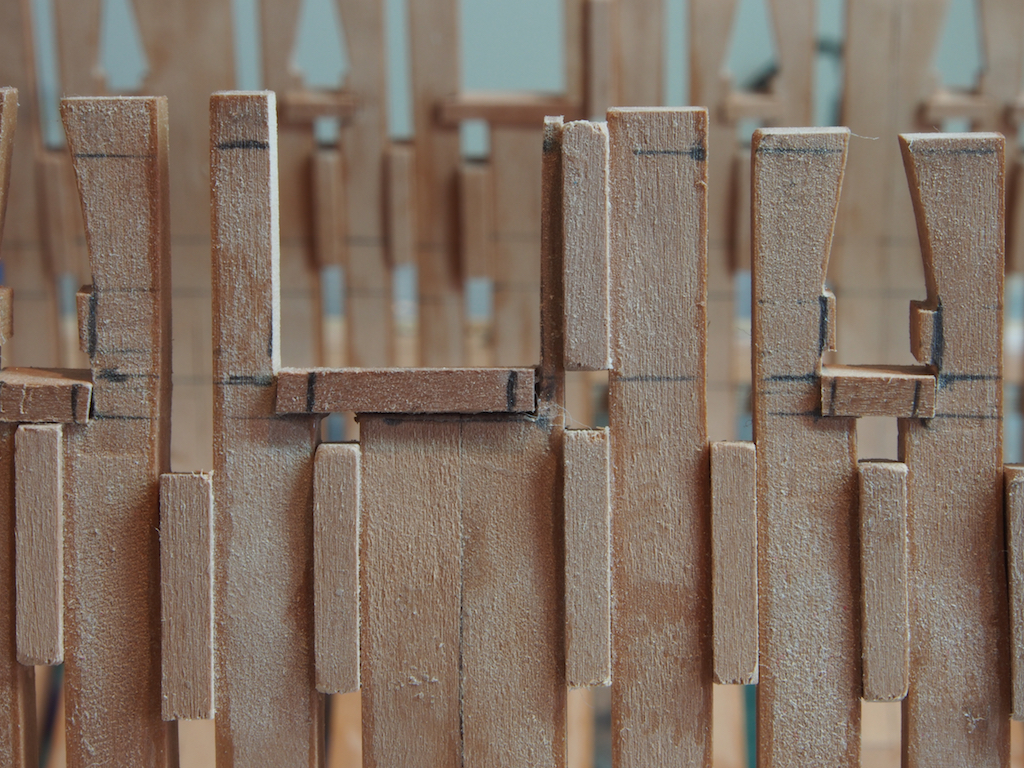
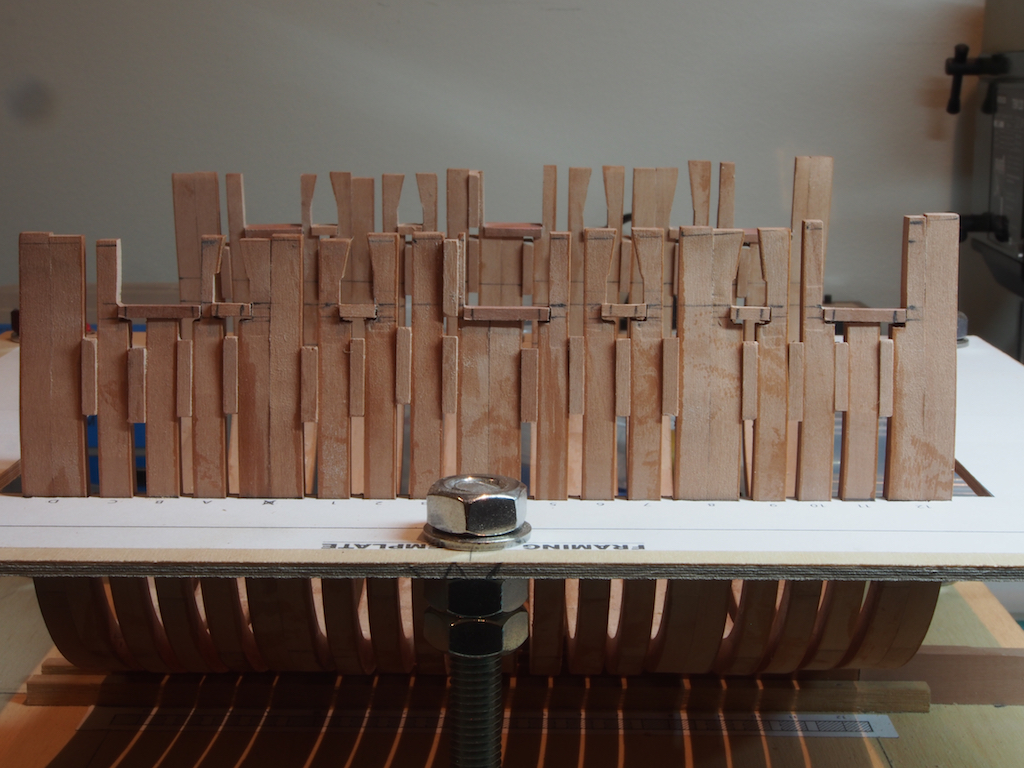
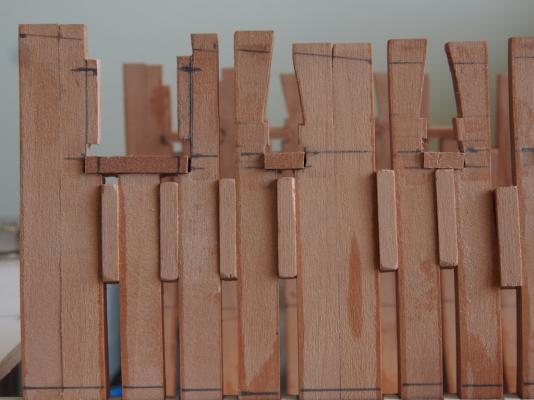
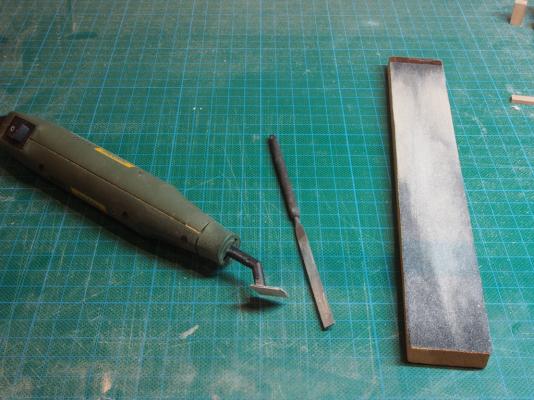
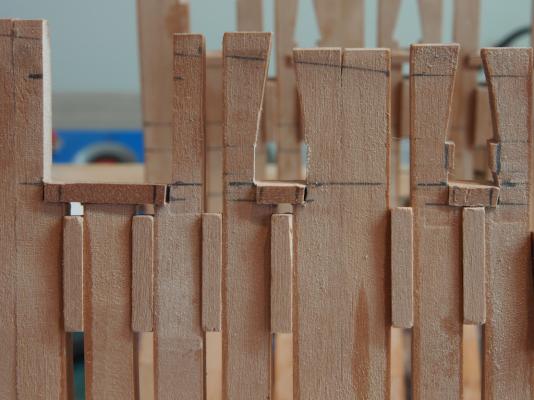
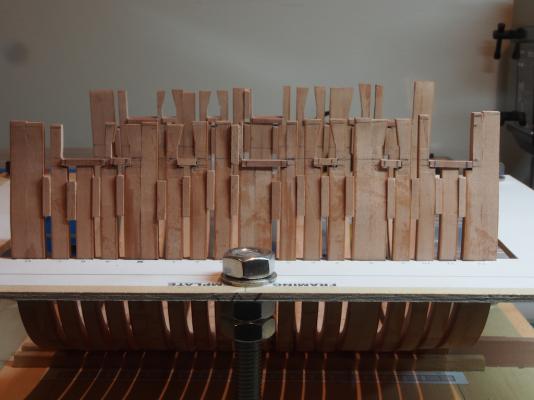
As I mentioned a couple of posts back, when fitting the lower sills, it became apparent that there was a problem with the pre-cut gun ports and sweep ports. On one side the lower sill had to be lowered a couple of mm, while on the other side it had to be raised. Here is a close up of the lowered sills, illustrating the resultant problem (ie gap in the inside face of the port). Having thought about this for a couple of days, decided that the solution was to file out the ports to the edge of the lower sill, and then install fillers/shims on each side. Tools used for this job included the Proxxon Pen Sander, a file, and the good old sanding stick. The latter proved to be the most useful for the larger gunport, while the file was the "weapon of choice" for the sweep ports. Here is how it looked after the first two frames were adjusted: Frame Four was problematic in that the fix was going to leave a particularly narrow piece of the original frame - just asking to be snapped off. So before filing this frame out, I added a separate filler piece between the frames to give more “meat” to support the vulnerable area. The filler is on the right hand side of the frame in the centre of this picture. All frames have now been opened up. Next task will be to add the fillets to the sides of the ports, and then install the top sills / filling lintels. It looks like this fix will work.

- 456 replies
-
- 18
-
-
- finished
- bomb ketch
- (and 2 more)
-
Seriously good looking frames there Jack! Did you use Mobbsie's filing method for the keel notch as well? I found doing this gave me a much neater joint here as well.
- 60 replies
-
- 1
-
-
- granado
- bomb ketch
- (and 1 more)
-
Thanks Ken - rest assured I'm off the pain meds now! I make it a rule not to try anything at all on modelling while "under the influence" - aside from the obvious safety issues, it invariably ends up in re-work...... Rusty - it's reassuring to know that you also had to make adjustments to the sills!
- 456 replies
-
- 3
-
-
- finished
- bomb ketch
- (and 2 more)
-
Thanks Mark - was back in the shop today, but worked on the Runabout instead. I'm finding it useful to have the two, totally different, builds underway. When I need a break, or some thinking time, I just switch over and let things settle for a while. I don't think the problem is a plans error. Probably one of those accumulated micro errors things. It would have been fine had I not pre-cut the gun ports/sweep ports. I'll start the "fix" tomorrow.
- 456 replies
-
- 1
-
-
- finished
- bomb ketch
- (and 2 more)
-
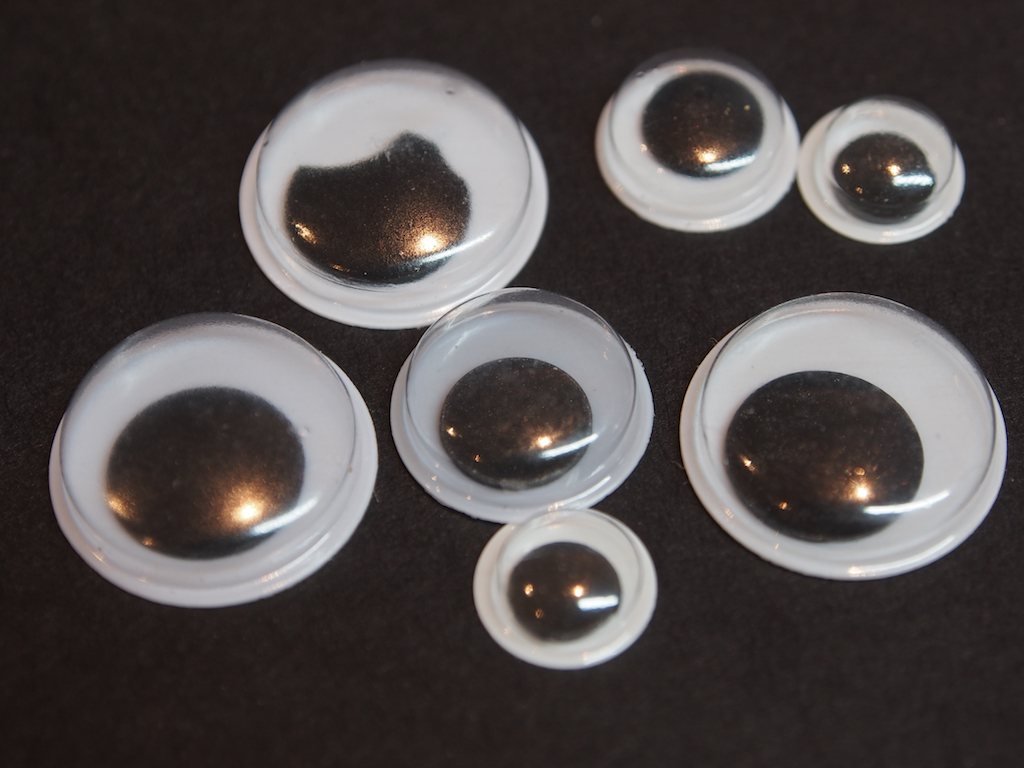
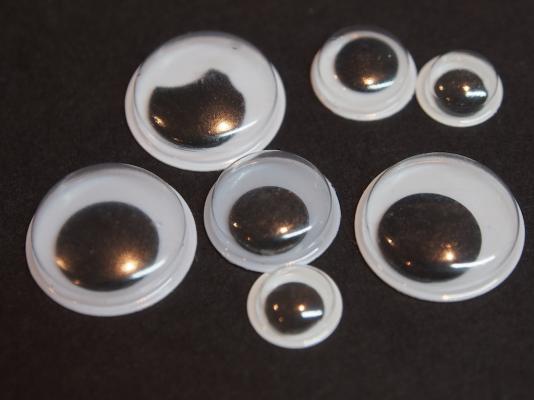
Thanks Mobbise, Mark and Ben. A minor update tonight...... Construction: Gauges continued Continuing development of the gauges, I came across another idea from the RC Forum – instant domed gauge glasses! Yes, they’re “googly eyes”. A few minutes on the sanding block to remove the backing and reduce the diameter to just fit the gauges and you have: The plastic is not quite as clear as I would like, so not sure yet whether I’ll go with this in the end. I have another alternate method to try yet……..
- 339 replies
-
- 18
-
-
- dumas
- Chris-Craft
- (and 3 more)
-
Sean, This is one of those cases where you've got to look at the instructions, read them carefully, study the ship, read the instructions again, look at the plans, read the instructions again, and then throw them away!!!! Then go ahead and plank the quarterdeck. The fitting of the poop deck is the biggest "paint you into a corner" in these instructions for this kit. See also my note in post (#8) on page 1 of your log re fitting of cannons to the quarterdeck BEFORE you fit the poop deck.
-
Thanks very much Richard, Jack (P), Aldo (great to see you back my friend), Ben, Marc, and Jack12477 (welcome aboard Jack). Well, the first really serious hurdle has hit. Despite the care taken with cutting the gunport / sweep port cutouts, when I went to install the lower sills it became evident that a certain amount of adjustment was required. I decided to re-mark all of the heights based on the waterline (set by the height of the top of the jig - and yes, that was checked all round first). On one side of the ship all of the ports need to move up a little, and the other side they need to move down a little. That in itself is no big deal - I just adjusted for each port as I installed all of the lower sills. The problem is that where sills have been lowered, there is then some of the cutout in the side of the frame that would still show, even after planking. And of course, for the side where the lower sills were raised, although this is not a problem here, it will be for the upper sills on that side. After consulting with my chief co-conspirator (Mobbsie) via Skype, I discovered that he had found the same problem. We chewed it over for a while and have decided that the "fix" for this is either (1) start over completely; or (2) remove some of the vertical part of the frame and insert a filling piece that will not be noticeable once the planking is in place later on. While I have to confess to seriously considering Option 1, I decided to go with Option 2 (as has Mobbsie). I haven't started that process as yet as I've just had to have some minor surgery and discovered long ago that serious pain meds and ship modelling do not mix well. I'll probably start on that process this weekend. No pics until the theory is proved! Oh, and in the spirit of good sportsmanship, we decided that we would indeed warn Jack P of this particular pitfall BEFORE he got to that stage. It was tempting though Jack...............................
- 456 replies
-
- 5
-
-
- finished
- bomb ketch
- (and 2 more)
-
Gotta agree with the others Augie - very nice work!
- 2,191 replies
-
- 2
-
-
- confederacy
- Model Shipways
- (and 1 more)
-
Great work on the sails again Jesse - they look fabulous!
- 607 replies
-
- 1
-
-
- scottish maid
- artesania latina
- (and 1 more)
-
Nice work Sean. You'll be pleased to be moving on to something a bit different now.
-
Just stunning, as usual, Remco.
-
Nice to hear from you Robbyn and glad that things are okay with you. We'll be here, waiting patiently, when you you're ready to resume building.
-
Welcome to the forum Brian. That's a really excellent looking little lantern. Lucky you had such high tech equipment to make it with too!
-
Up to your usual high standard I see Bob.
-
Great work Mobbsie - you're really powering ahead now. It's all looking "shipshape".
- 255 replies
-
- 1
-
-
- granado
- bomb ketch
- (and 2 more)
-
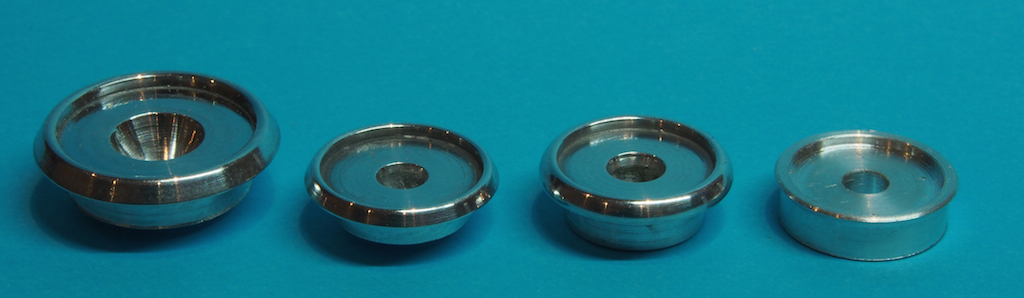
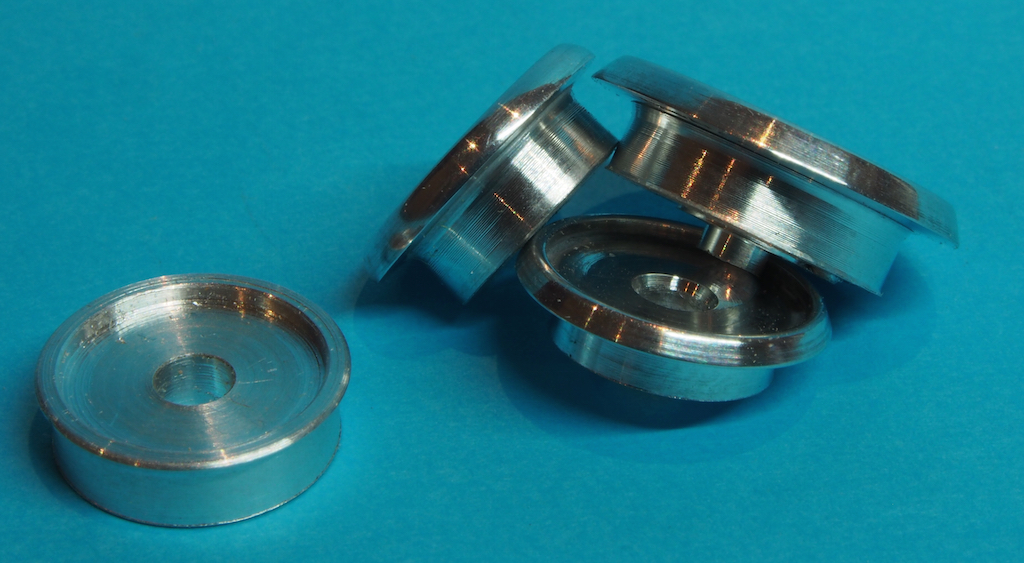
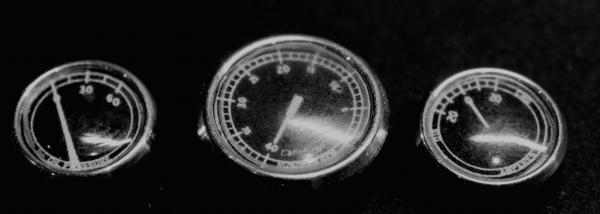
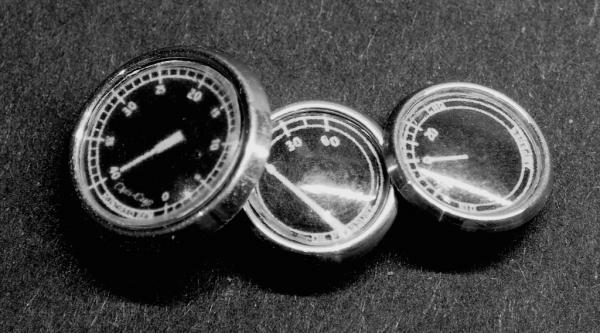
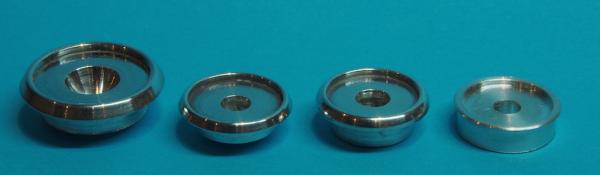
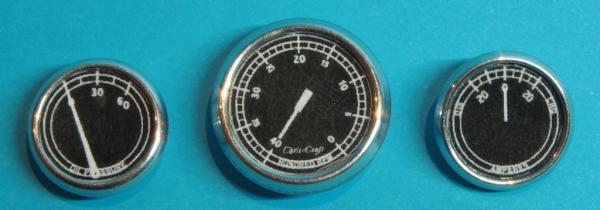
Thank you very much Brian, Mobbsie, Bob, Rusty, Jerry and Sy, and of course, all of the likes. I am constantly in awe of the generosity of spirit of the modelling community and would like to pay tribute to two special gentlemen. Firstly, our very own Rusty, who PM'd me recently to offer to send me his copy of the Dumas DVD on finishing techniques. An offer that I might add, I accepted with grateful alacrity - it might just get me through the fibreglassing stage! Thanks ever so much Rusty! The second acknowledgement I'd like to make is to someone who, to my knowledge, is not even a member of this Forum. That gentleman's name is Mr Ken Foran. Ken is an expert modeller and is the designer of the Model Expo Allerton Steam Pumper kit. A little while ago, I bought this kit when ME had one of their 40% off sales (I know, I'm weak, I couldn't help myself). When I sent a query to ME Customer Service regarding something in the instructions, they kindly put me in touch with the kit designer, Ken. I have since had an ongoing email dialogue with Ken, who it turns out has also written a book "Model Building with Brass". This book is an absolute beauty! Not only does it provide lots of tips and techniques that are applicable to model ship building, but it is packed with beautiful colour photographs of Ken's work - a great coffee table book as well as a must-have reference book. Anyway, it was reading his book that prompted me to have a go at the instrument gauges for this build and Ken has patiently answered my (several) email questions about how to go about this, including tips on cutting techniques and achieving a highly polished effect. Thanks Ken! Right - on with the show..... Construction: Gauges Having successfully competed the “proof of concept” for the gauges, I went back and turned up the final versions, adding a few improvements as I went. In particular, I made the “undercut” behind the gauge more substantial to help with mounting, and I put a bevel on both the inside and outside of the outer ring. Before parting off from the lathe, I used a succession of finer grit sanding pads, and finally some metal polish to achieve an almost “chrome” finish. In the pics below, I've included the original "proof of concept" test to show the difference in finish achievable: Browsing the RC Forum, I came across a set of gauge faces that someone had drawn up and posted, so I “borrowed” these rather than re-inventing the wheel. After a little trial and error to get the sizing right, I printed them up and have just temporarily placed them in the gauge faces for a “test fit”. At the moment they are just printed on plain paper. In the final version I may print them on photographic paper. Further testing to be done yet. Given that the larger of the dials is just 10mm in diameter, I think these look acceptable. I have a plan for the gauge "glass" - coming to a forum near you soon........................

- 339 replies
-
- 21
-
-
- dumas
- Chris-Craft
- (and 3 more)
-
Yep, well done on the bulkhead Sjors. Looking forward to seeing the rest of the fit out now.
- 1,616 replies
-
- 2
-
-
- caldercraft
- agamemnon
- (and 1 more)
-
Flying Dutchman brand are also very good.