MORE HANDBOOKS ARE ON THEIR WAY! We will let you know when they get here.
×


gjdale
-
Posts
4,880 -
Joined
-
Last visited
Content Type
Profiles
Forums
Gallery
Events
Everything posted by gjdale
-
 Sjors, The chocks go with each join of the futtocks that make up the frame. There are five components to each frame, and hence four chocks required per frame, two large and two small. With a total of 22 frames (counting the double frames), that makes a total of 88 chocks required. Then there is the allowance for the occasional loss to the space-time-continuum between the modelling desk and the floor, and of course, the odd re-do of a frame here and there. So I just made lots.
- 456 replies
-
- 5
-

-
- finished
- bomb ketch
- (and 2 more)
-
Looking fabulous Danny, despite the challenges of taking pictures in the caravan!
-
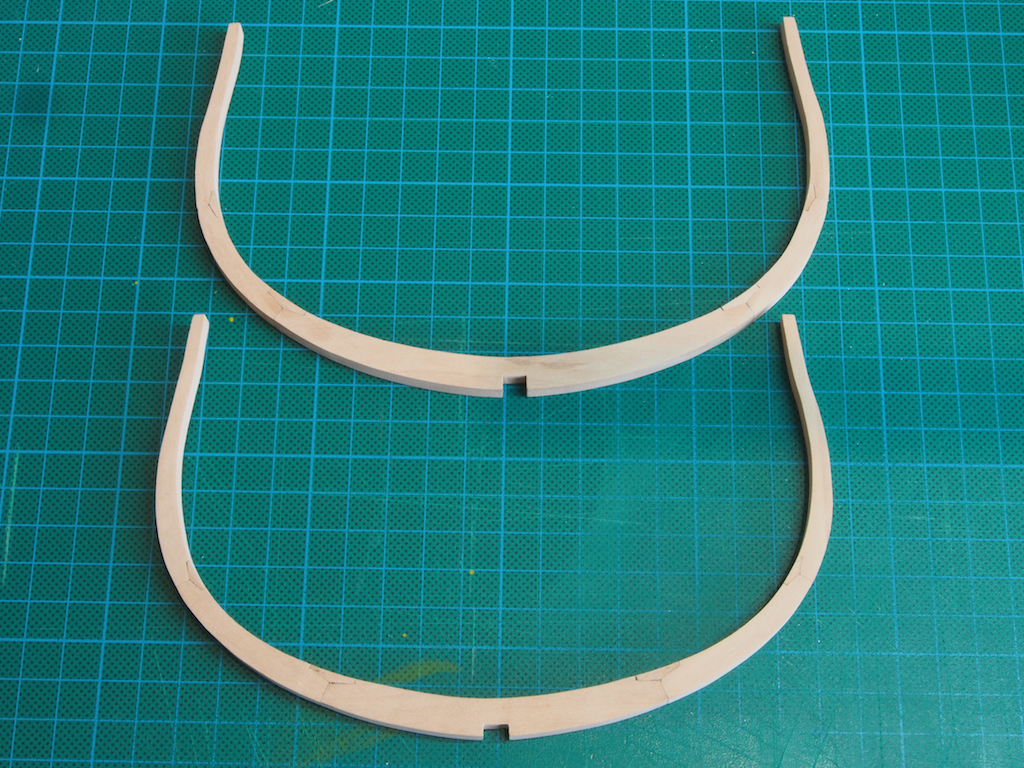
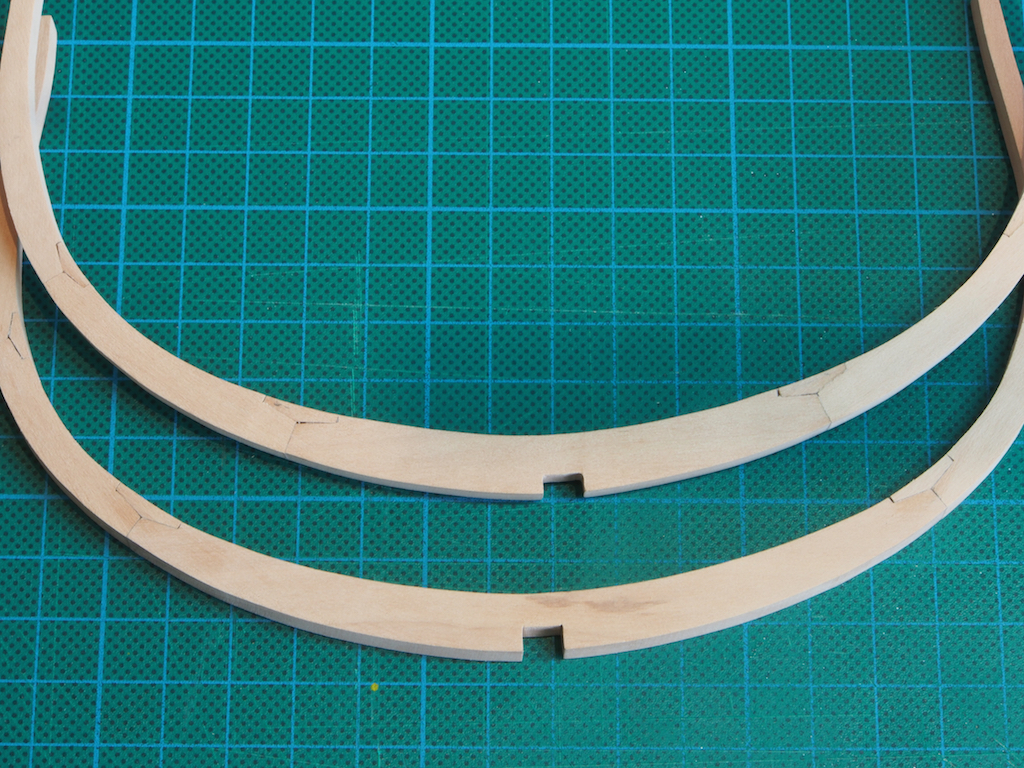
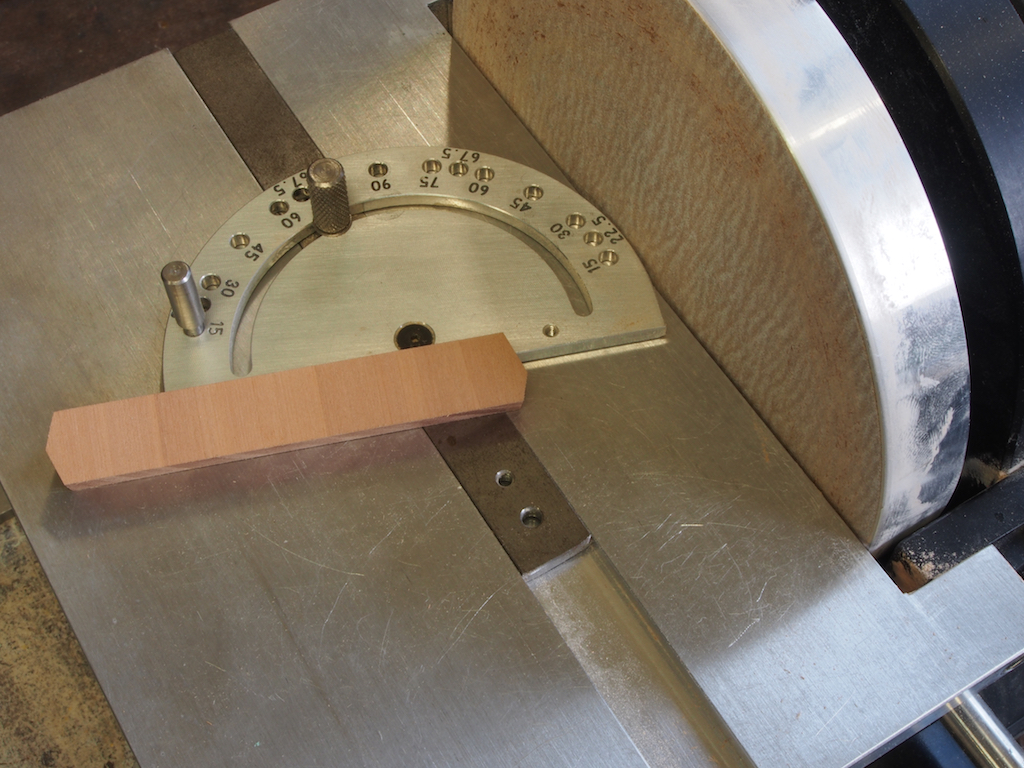
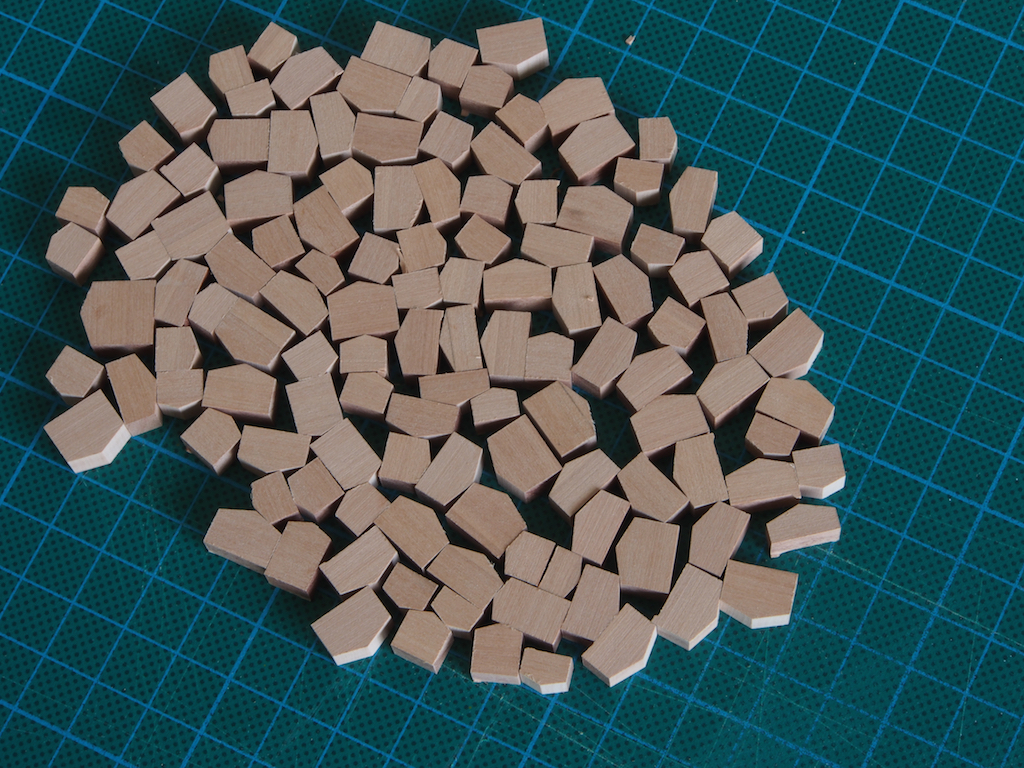
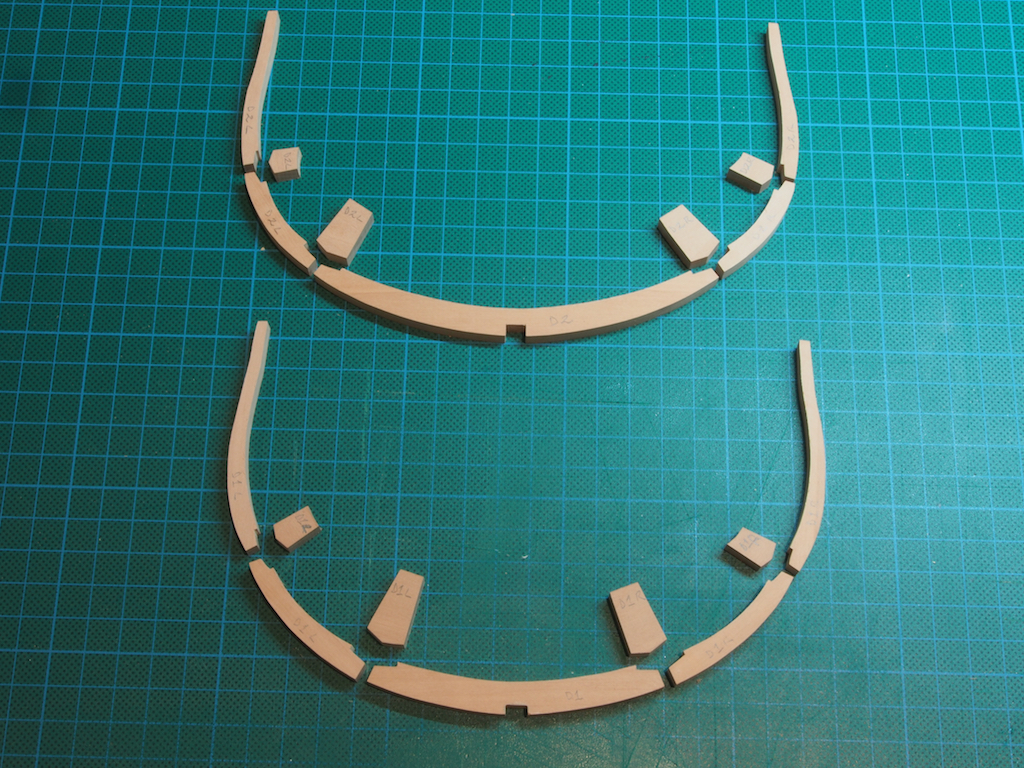
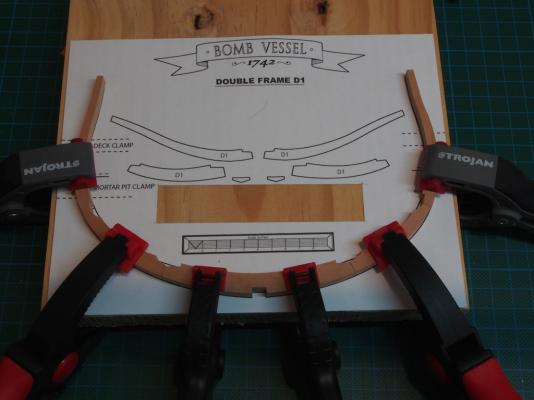
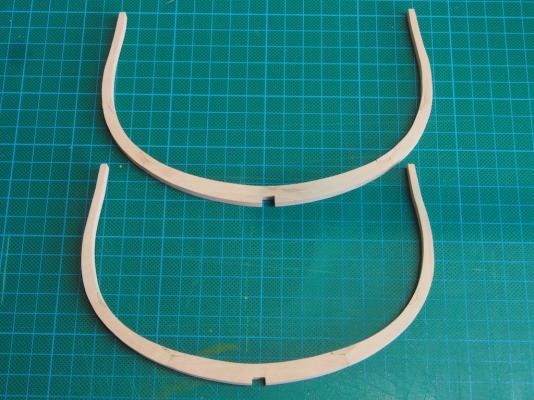
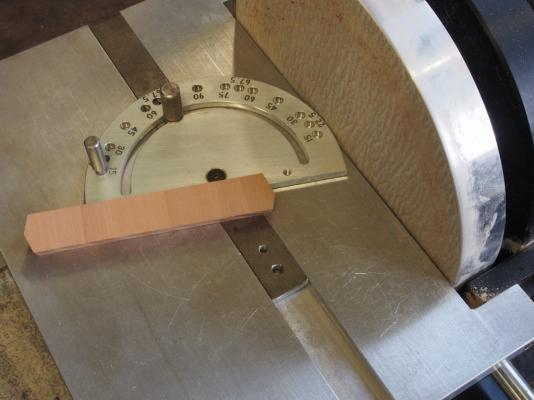
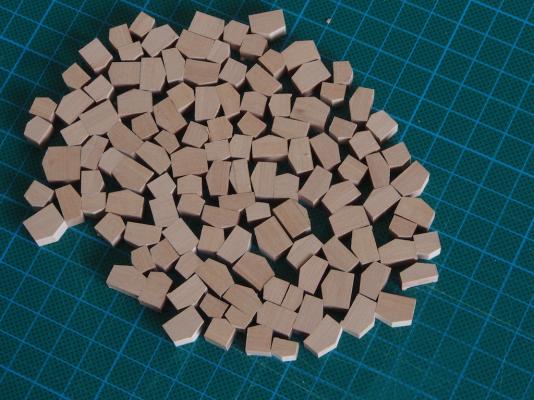
Thanks Mobbsie, Mark and Marc, and all of the "likes". Continuing on: First Frames - continued The frames pieces were placed over the pattern pieces and clamped in place to a scrap piece of pine board while the pieces were glued on the butt joins. Once these had dried, the chocks were fitted into place and after the glue had dried the chocks were first trimmed close using the scroll saw, and then finished on the oscillating spindle sander. The final step was to put the whole frame through the thickness sander for a couple of light passes to clean them up and bring them down to the finished size of 1//4” thick. On first glance these look okay, but on closer inspection you can see that the joints around the chocks are not very good. As is my way, I pondered on this for a day or two, and then went back to my references (yeah, the ones I should have consulted in the first place! ). In reading both Antscherl (The Fully Framed Model - Vol 1) and Tosti (Naiad Frigate - Vol 1), I discovered that while both used slightly different methods for making and installing the chocks, the one thing they had in common was that the chocks were fitted to one side of the futtock scarph first, and then the second side (from the other futtock) was fitted. It seems pretty obvious in hindsight, but I guess that’s why it’s called hindsight……. Yep, nothing for it but to re-do the frames (again)! Chocks A little more pondering, and I believe I have come up with a mix of methods that should work for me. The first step was to “standardise” the chocks. A quick check through the drawings/patterns revealed that all frames have two sizes of chocks, and these sizes are consistent through all of the frames. The larger chocks have a base of 12mm and the smaller 8mm. I measured the angle at the apex of the chocks and it too is consistent at 18 degrees either side of the centreline. As I now had the necessary details for mass production, it was time to well, mass produce………….. I first cut a series of ‘stock’ pieces (12mm and 8mm wide) from a 3” wide sheet of 1/4” pear, cutting across the grain so that in the finished chocks, the grain would run along the length of the chock. I then set the angle on the mitre gauge of the Byrnes disc sander to 18 degrees. As this angle is not one of the pre-set angles available, I used a digital protractor to set the angle and locked it in. Each side of the end of the stock piece was sanded on this angle, forming an apex along the centreline. I tried to be very precise by marking lines various, but in the end discovered that the Mk 1 eyeball, calibrated with the aid of the Optivisor, gave just as accurate results. The chock was then sliced off on the Byrnes table saw, and the process repeated until I had a pile of lotsa chocks. Here’s what 136 chocks in two sizes looks like: I then went on to re-cut the frame pieces, and that is when a major set-back occurred. Just as I was cutting the last two pieces on the scroll saw, what appeared at first to be a simple blade breakage was subsequently discovered to be the sheering of a 6mm bolt in the Drive Link Assembly. After a half hour on the phone with a very helpful service guy from Carbatec, I’m still not sure of the way ahead. He is going to call me back on Monday to let me know if they can get me the replacement parts to repair the machine. It’s not going to be an easy job either, but the Carbatec guy told me I was going to need to “man up” and strip the machine down to do the job myself! (my wife laughed uproariously at this suggestion - go figure………… ). It looks like progress will be halted indefinitely while I get this sorted , although I may use my original frames for some further ‘test-bed’ work. Currently thinking through the issue of whether or not to show additional fastenings (bolts) in the double frames (as per AOTS) or stick with the simplified representation shown in the plans. Currently leaning towards adding the extras - some nice examples of this on MSB by both Spanien and Migue. The questions is, what size would be appropriate for these bolts? (grateful for any input here) I'm thinking of using copper wire as it has the advantage of being able to be blackened in situ using Liver of Sulphur, as has been demonstrated many times by EdT. I have some wire that is 1/32" thick (about 0.8mm), which at 1:48 scale equates to an actual diameter of 1 1/2", so I may give this a go on the "test bed" to see how it looks.

- 456 replies
-
- 17
-
-
- finished
- bomb ketch
- (and 2 more)
-
Nice to see an update Wayne - she's looking great!
-
Great to see you back in the shipyard Gary. Your posts are always such an education!
-
Lovely addition of detail Gil. It's these subtle additions that make your build really stand out.
-
Looking good David.
-
Congrats on the arrival of your new wood Mike. Looking forward to seeing your new frames.
- 967 replies
-
- 1
-
-
- hahn
- oliver cromwell
- (and 1 more)
-
HMS Naiad 1797 by albert - FINISHED - 1/48
gjdale replied to albert's topic in - Build logs for subjects built 1751 - 1800
Beautiful carving Albert! -
Hang in there my friend - we're all pulling for you!
-
Lovely work Alex!
-
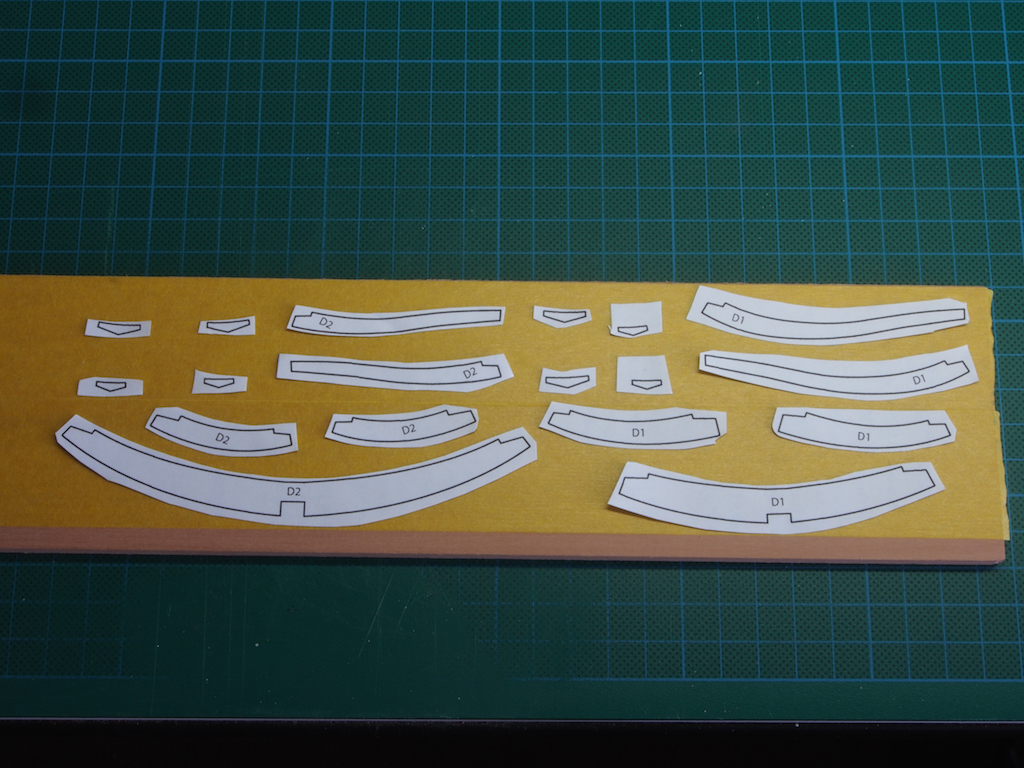
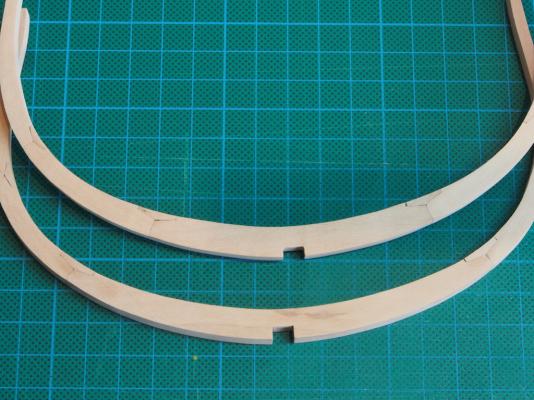
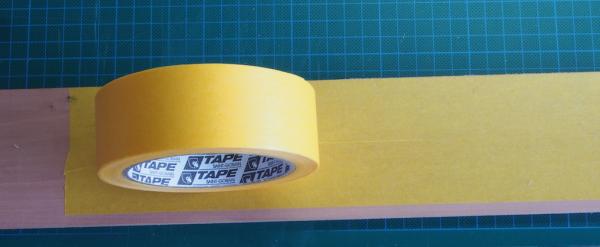
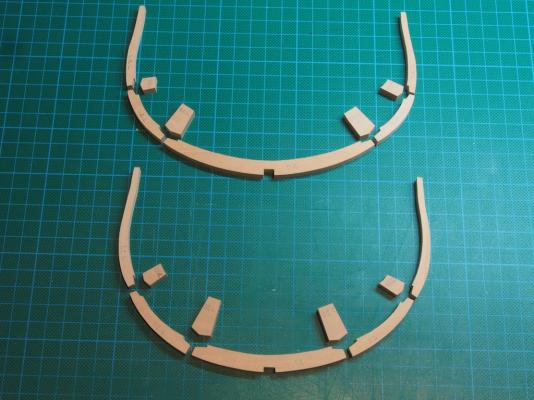
Thanks for the good words and all the likes folks. First Frames There are 5 double frames and 12 single frames in this cross section. I decided to start with the foremost frame, which is the double frame D1/D2. Figured this would be a good place to get techniques/methodology sorted out. All frames will be made from 1/4" thick Swiss Pear. The stock is very slightly over-size for thickness. In making the first frames, I chose to leave the stock thickness "as-is" until the frame assembly is complete, and then reduce by passing the completed frames through the thickness sander. I may live to regret that decision, but we'll see how it goes! Prior to cutting these out on the scroll saw, the timber stock was covered with low-tack painters’ tape, and the templates printed on sticky label paper and stuck on top of the tape. This is a tip I picked up from a scroll saw forum - it makes removal of the pattern very easy and there is no sticky residue to clean up afterwards. I have to say, having now tried this method, that it works a treat! In laying out the pattern pieces, care was taken to ensure that the grain ran along the length of each piece (as far as possible). The pieces were cut roughly to shape on the scroll saw, leaving about 3mm all round, and then the final shape was achieved using the Byrnes disc sander for the outside curves, and the oscillating spindle sander for the inside curves. When it came to cutting the scarf joints and keel notches, I experimented with a couple of different methods, including hand saw and chisel, band saw, and using the mill with an end cutter. In the end, I decided that I was over-thinking it, and simply cut these as accurately as I could with the scroll saw, and then cleaned up with a (very sharp) chisel and file where necessary (which to be honest, wasn’t much). The chocks were deliberately left over-size to provide a “handle” for cutting and shaping the “business” end. The bulk of the handle will be cut off prior to assembly and the remainder cleaned up on the spindle sander after assembly. Here are the completed frame pieces cut out and ready for assembly: Glue-up awaits, but if I've missed something important here, now's the time to tell me!

- 456 replies
-
- 22
-
-
- finished
- bomb ketch
- (and 2 more)
-
Another excellent tutorial Chris. Thanks so much for taking the time and effort to develop this and share it with us all - especially those of us who are "chromatically challenged".
-
Just stunning Remco!
-
Excellent work there Marc. Bet you're glad you chose to go down this path now!
-
Looking good Mobbsie, Let me know how you go with the drum sander - my offer stands I'm going to have another crack at frame D tonight - I'll post pics on completion.
- 255 replies
-
- 1
-
-
- granado
- bomb ketch
- (and 2 more)
-
Hi Lou, That's some seriously nice work you've done so far! I look forward to following the rest of this build. What a great complementary build to the cross section (or vice versa).
-
Very nice planking job Frank, and as others have said, fantastic work with the weathering.
-
The chains look great Bob - well done.
-
Thanks Mobbsie and Lou. The change in angle was achieved by angling the milling vice on the milling table. This was done by eye, with a bit of trial and error to ensure the cutting bit would track down the line. After I had finished it, I had one of those Blinding Glimpses of the Obvious (BGO), that so often occur with the 20/20 vision of hindsight - I could have used the rotating table that I have for the mill to achieve the same result more accurately and more easily! Oh well.......... Lou - the "gray shims" are a set of parallel bars that I used to ensure the top surface was level and just clear of the top of the vice.