bruce d
-
Posts
3,046 -
Joined
-
Last visited
Content Type
Profiles
Forums
Gallery
Events
Everything posted by bruce d
-
 Hello Clark, before buying from CAF I contacted Tom via messages on this forum and he is extremely helpful. Even though I only ordered some of his smaller kits( like the longboat) he offered to help in any way once I start. I believe the website is 'work in progress' and he concentrates on kits. Looking forward to all these CAF builds! Bruce
 -
Gerco, welcome to MSW
-
Thanks for the kind words. I try not to think of how immaculate your cutter looked at this stage compared to my build. I started with a plan and the issues I have had so far all stem from my choices of materials. I will tread carefully from now on. There is still a quarterdeck and cabin roof to do for Mediator and I have been playing around with some materials, dummy-ing up the parts in card to see if I can predict any issues with different thicknesses of materials. Heaven forbid I actually have to buy something.
- 43 replies
-
- 4
-

-
- mediator
- first build
- (and 1 more)
-
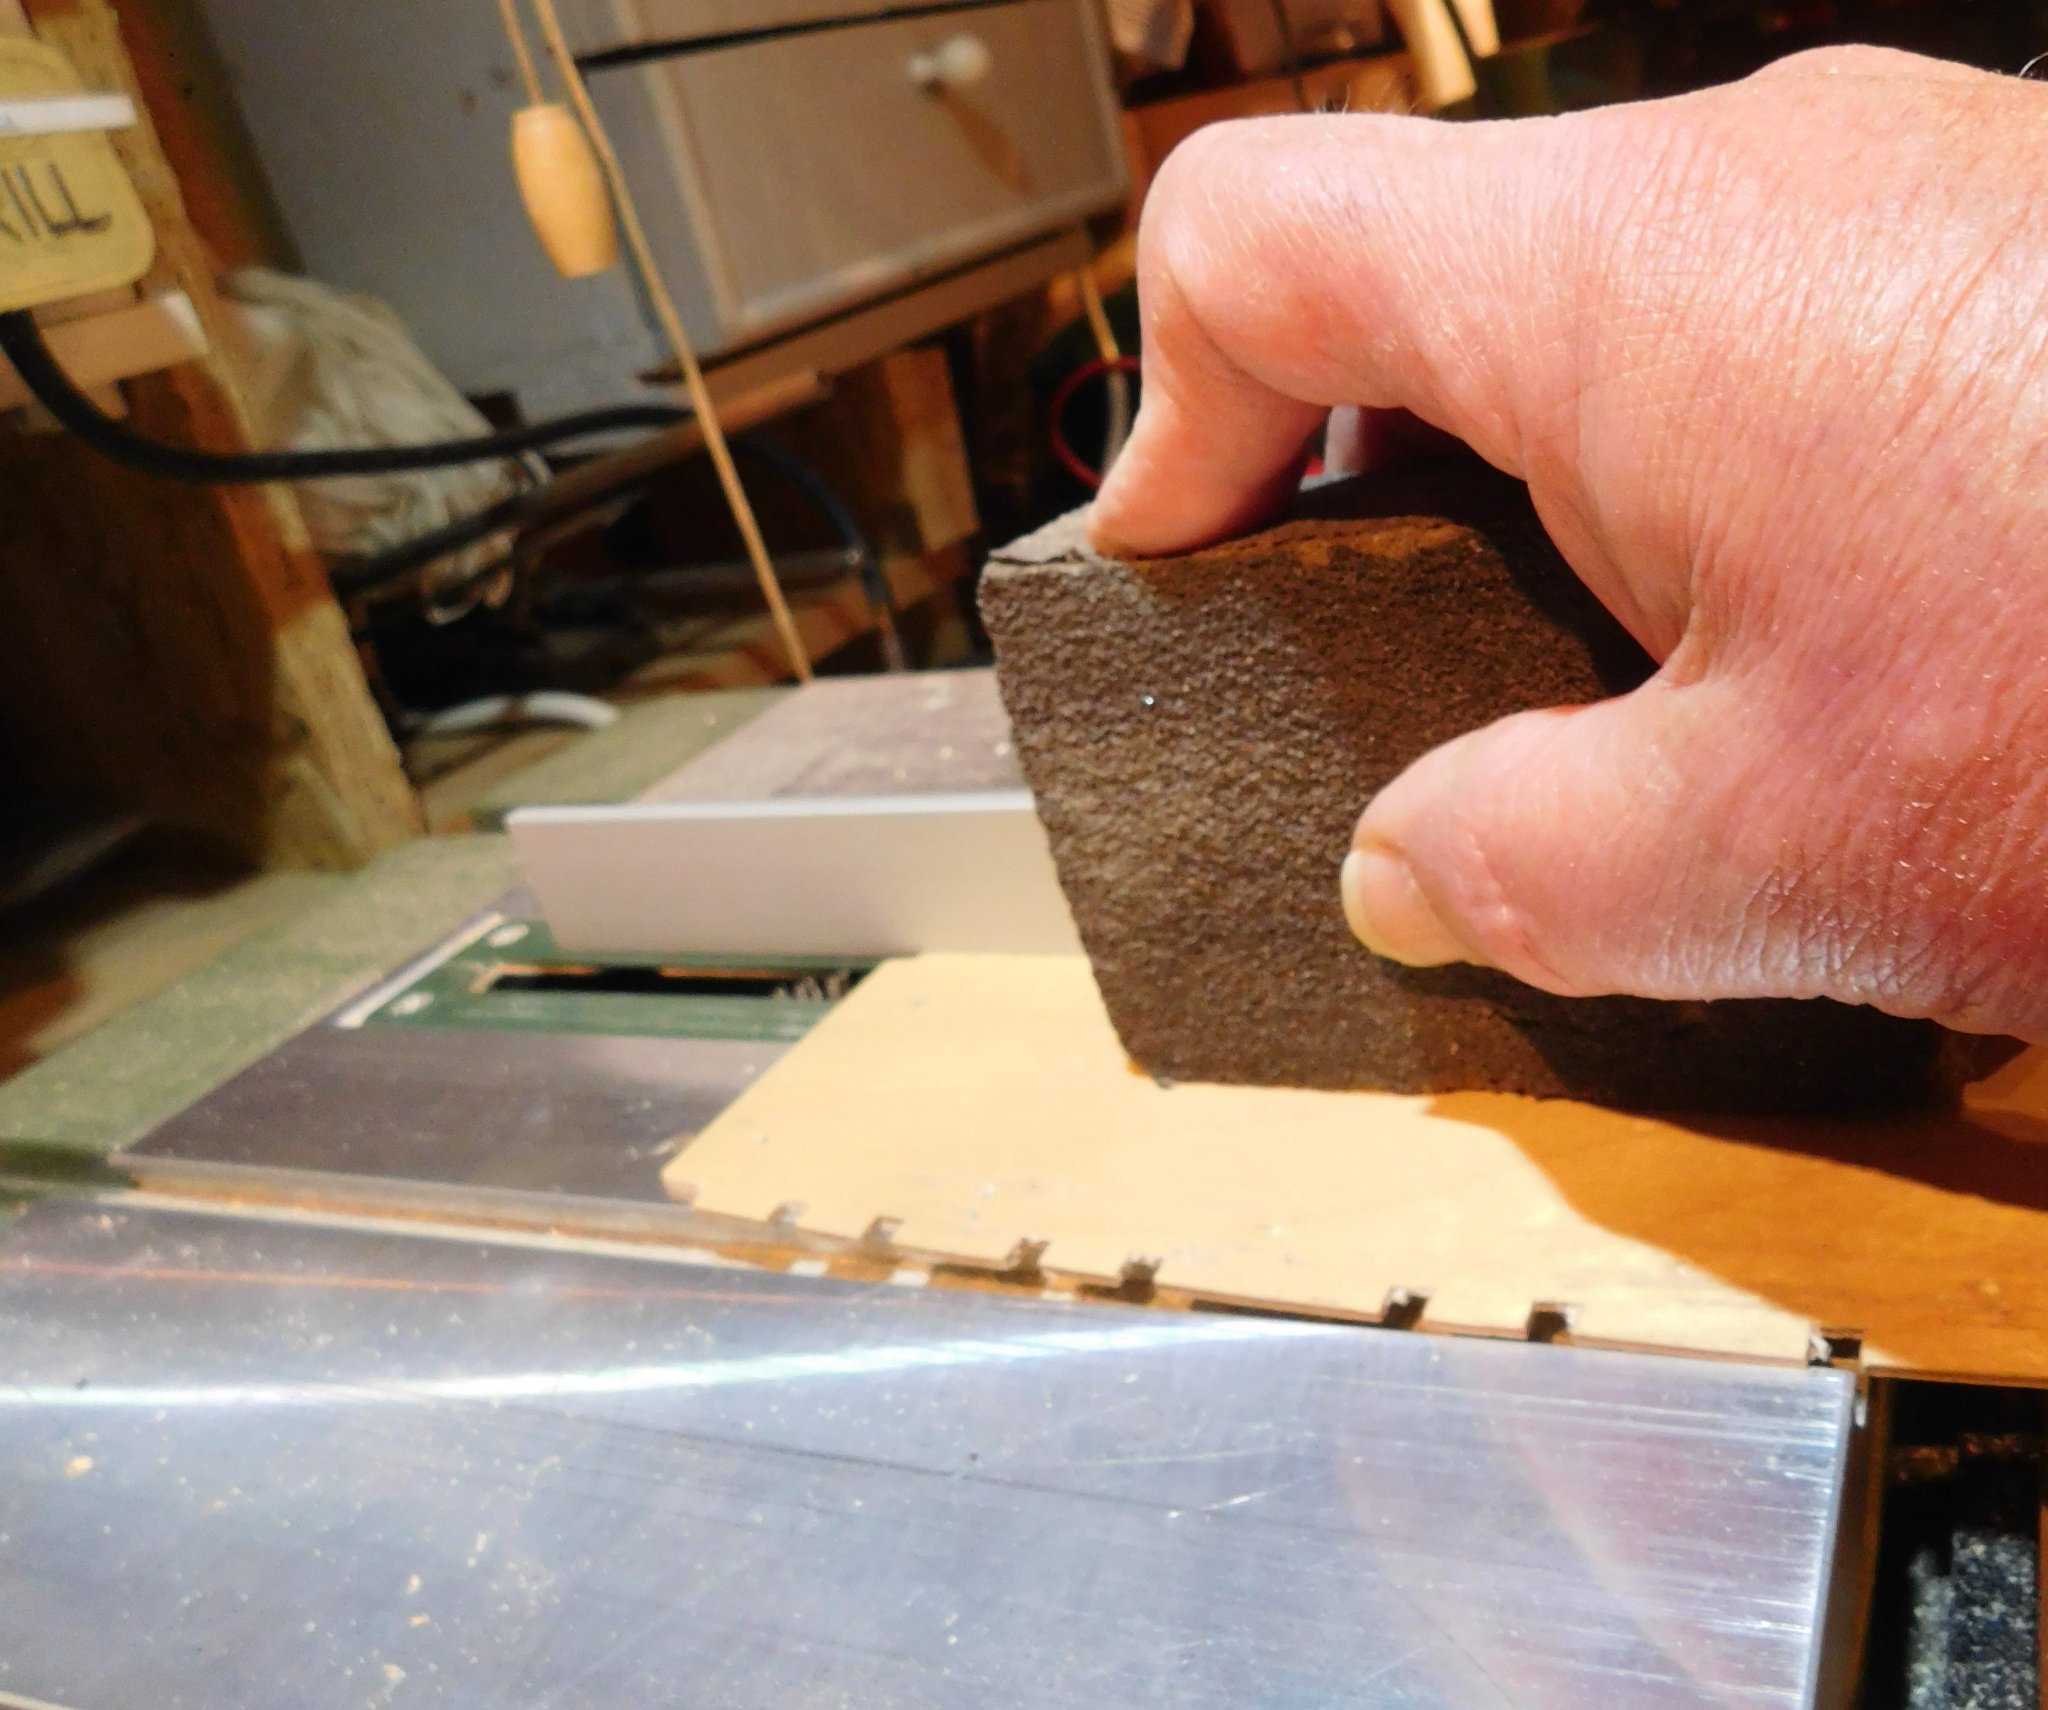
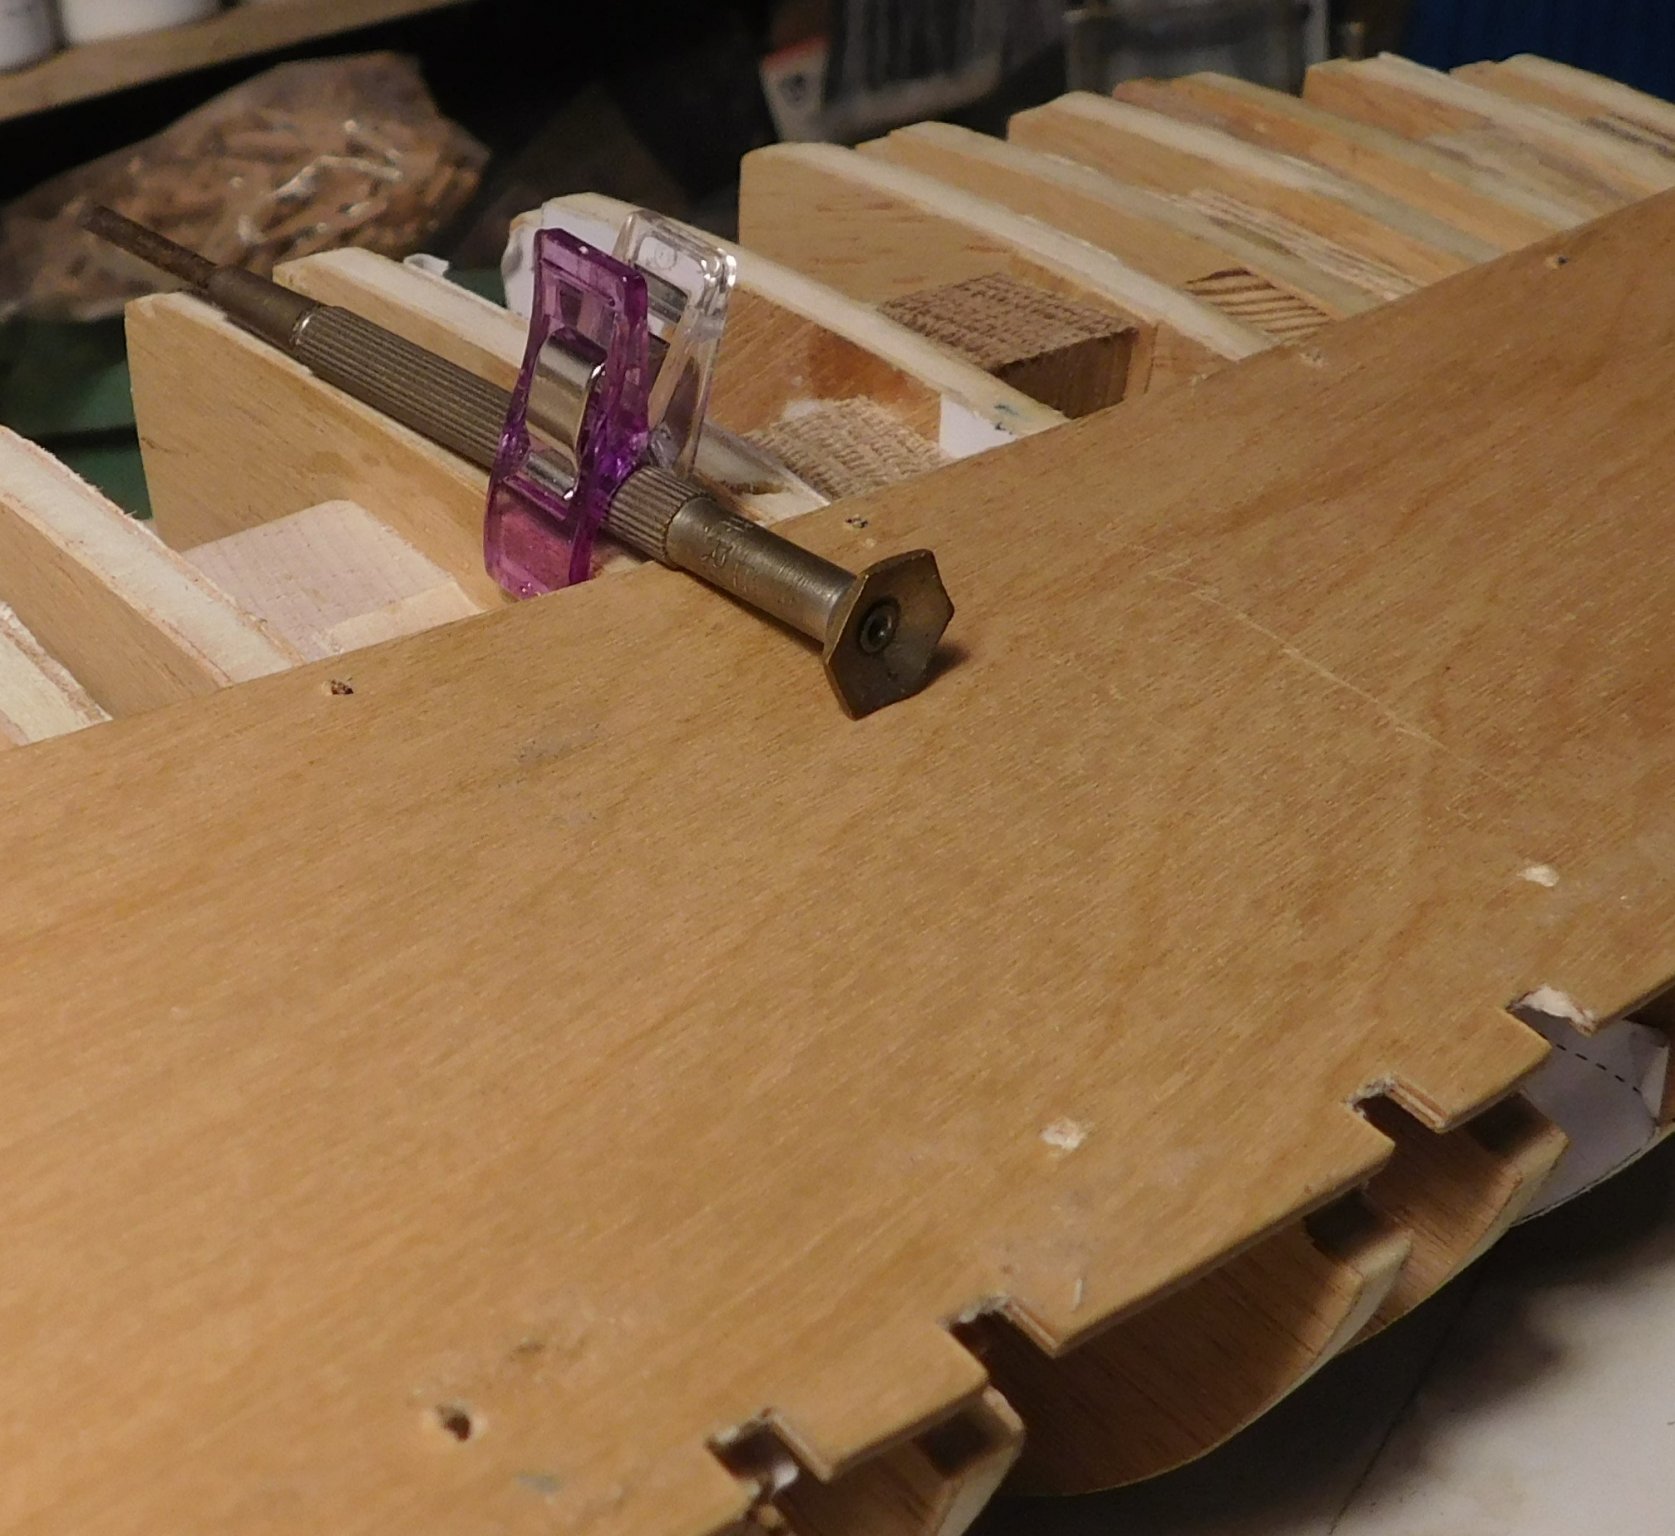
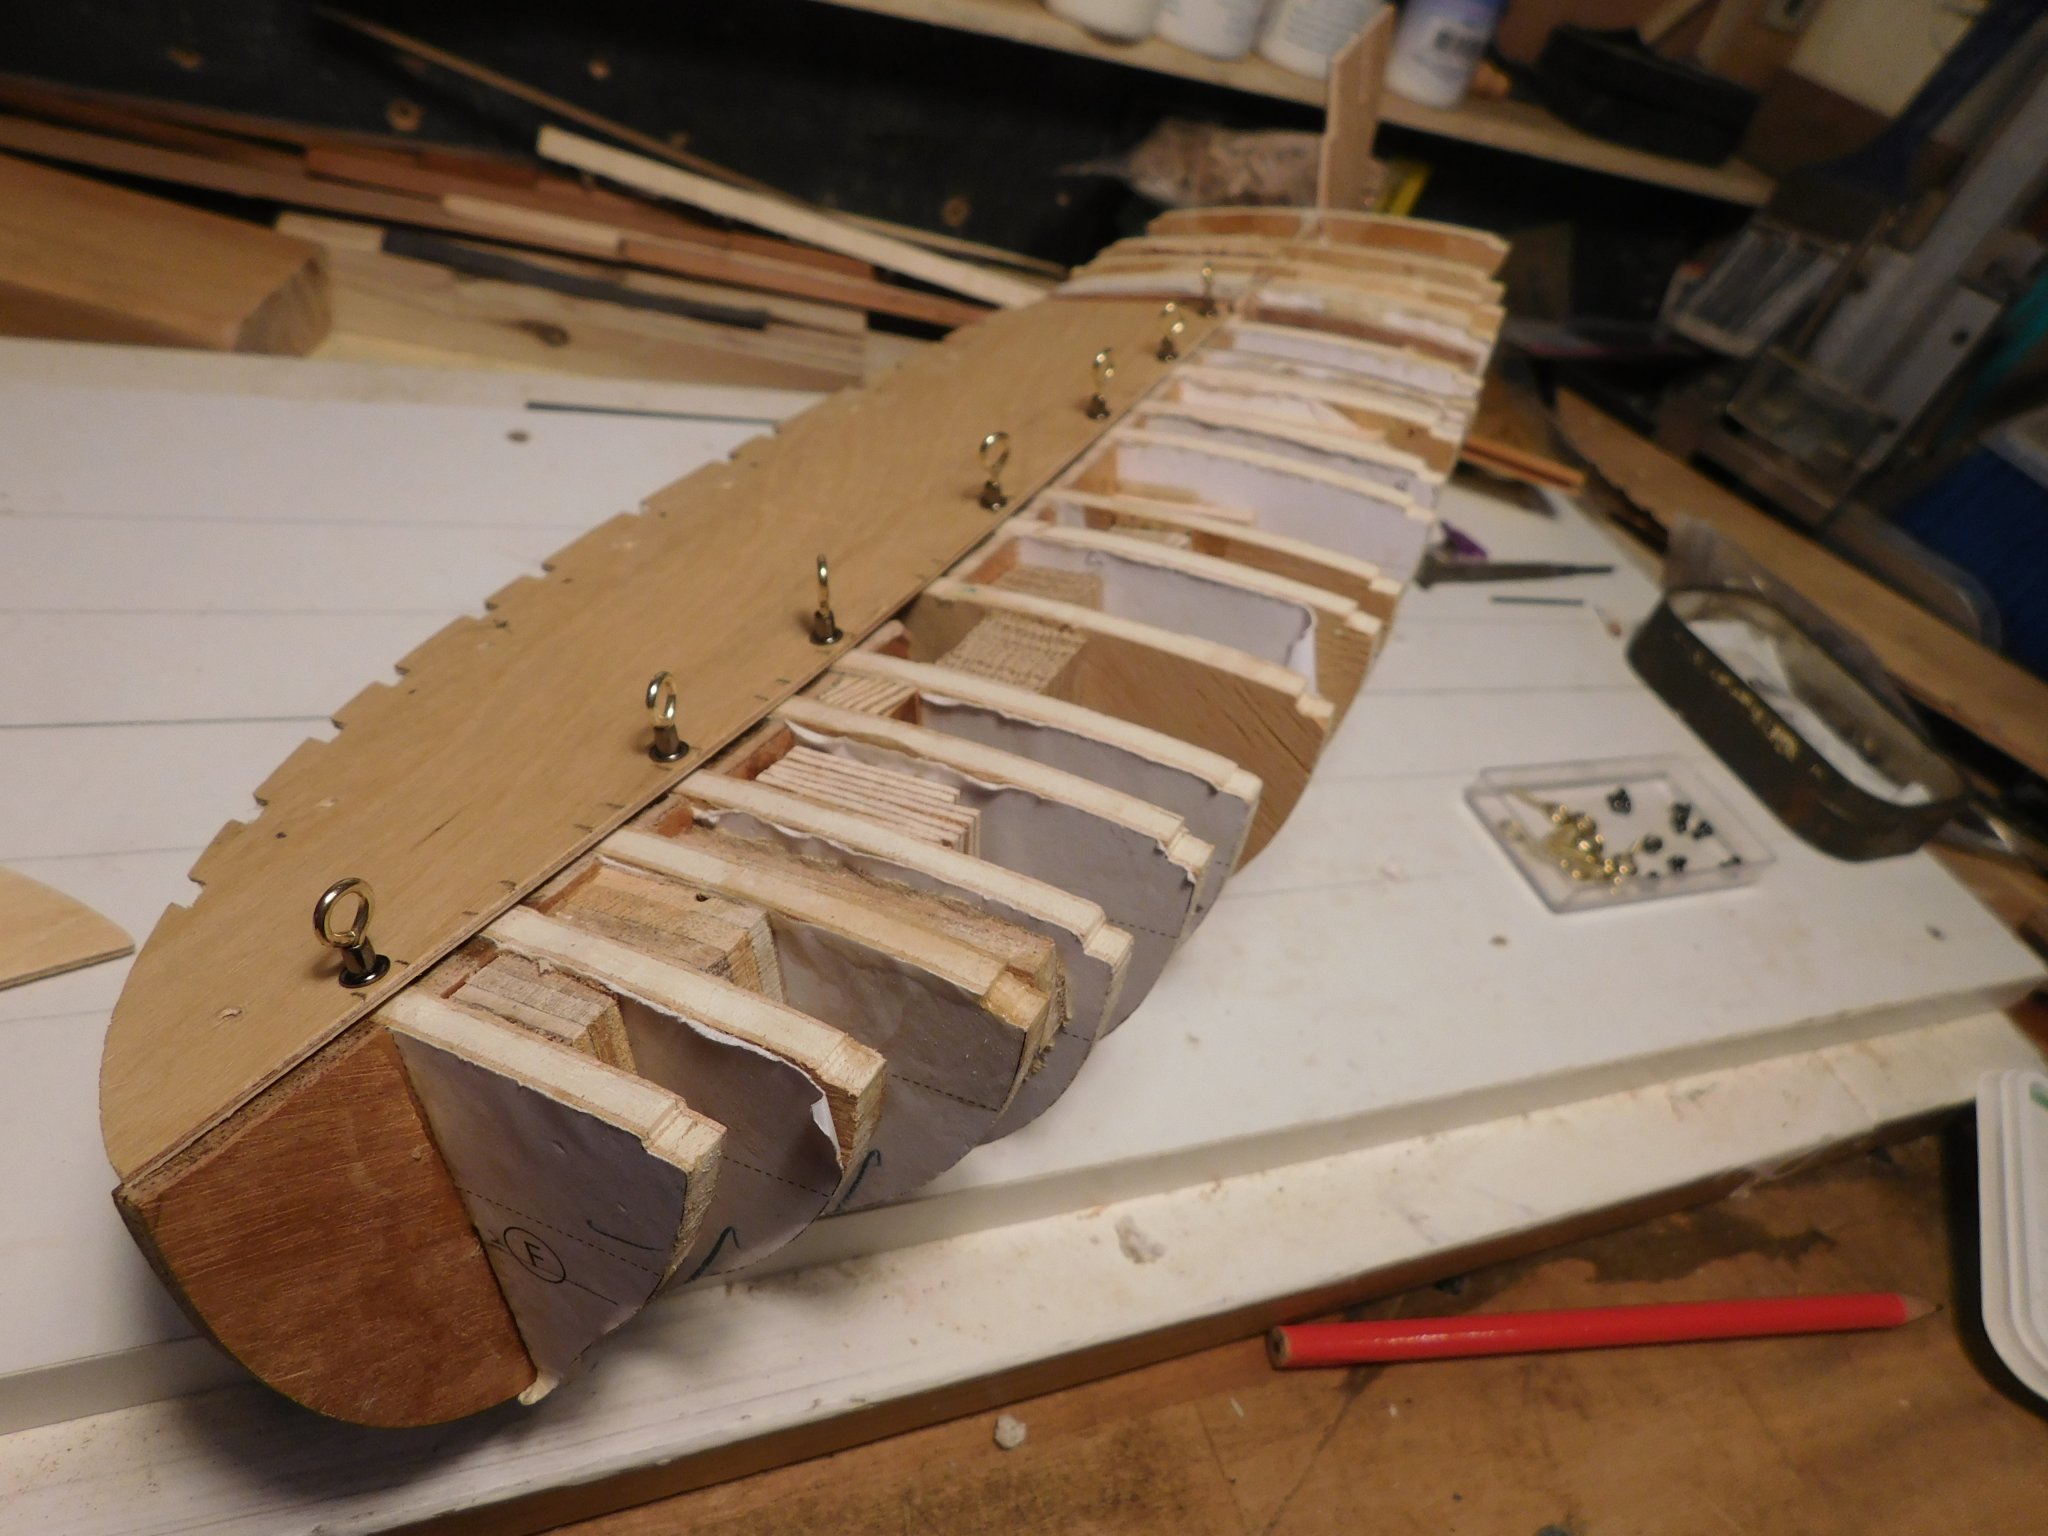
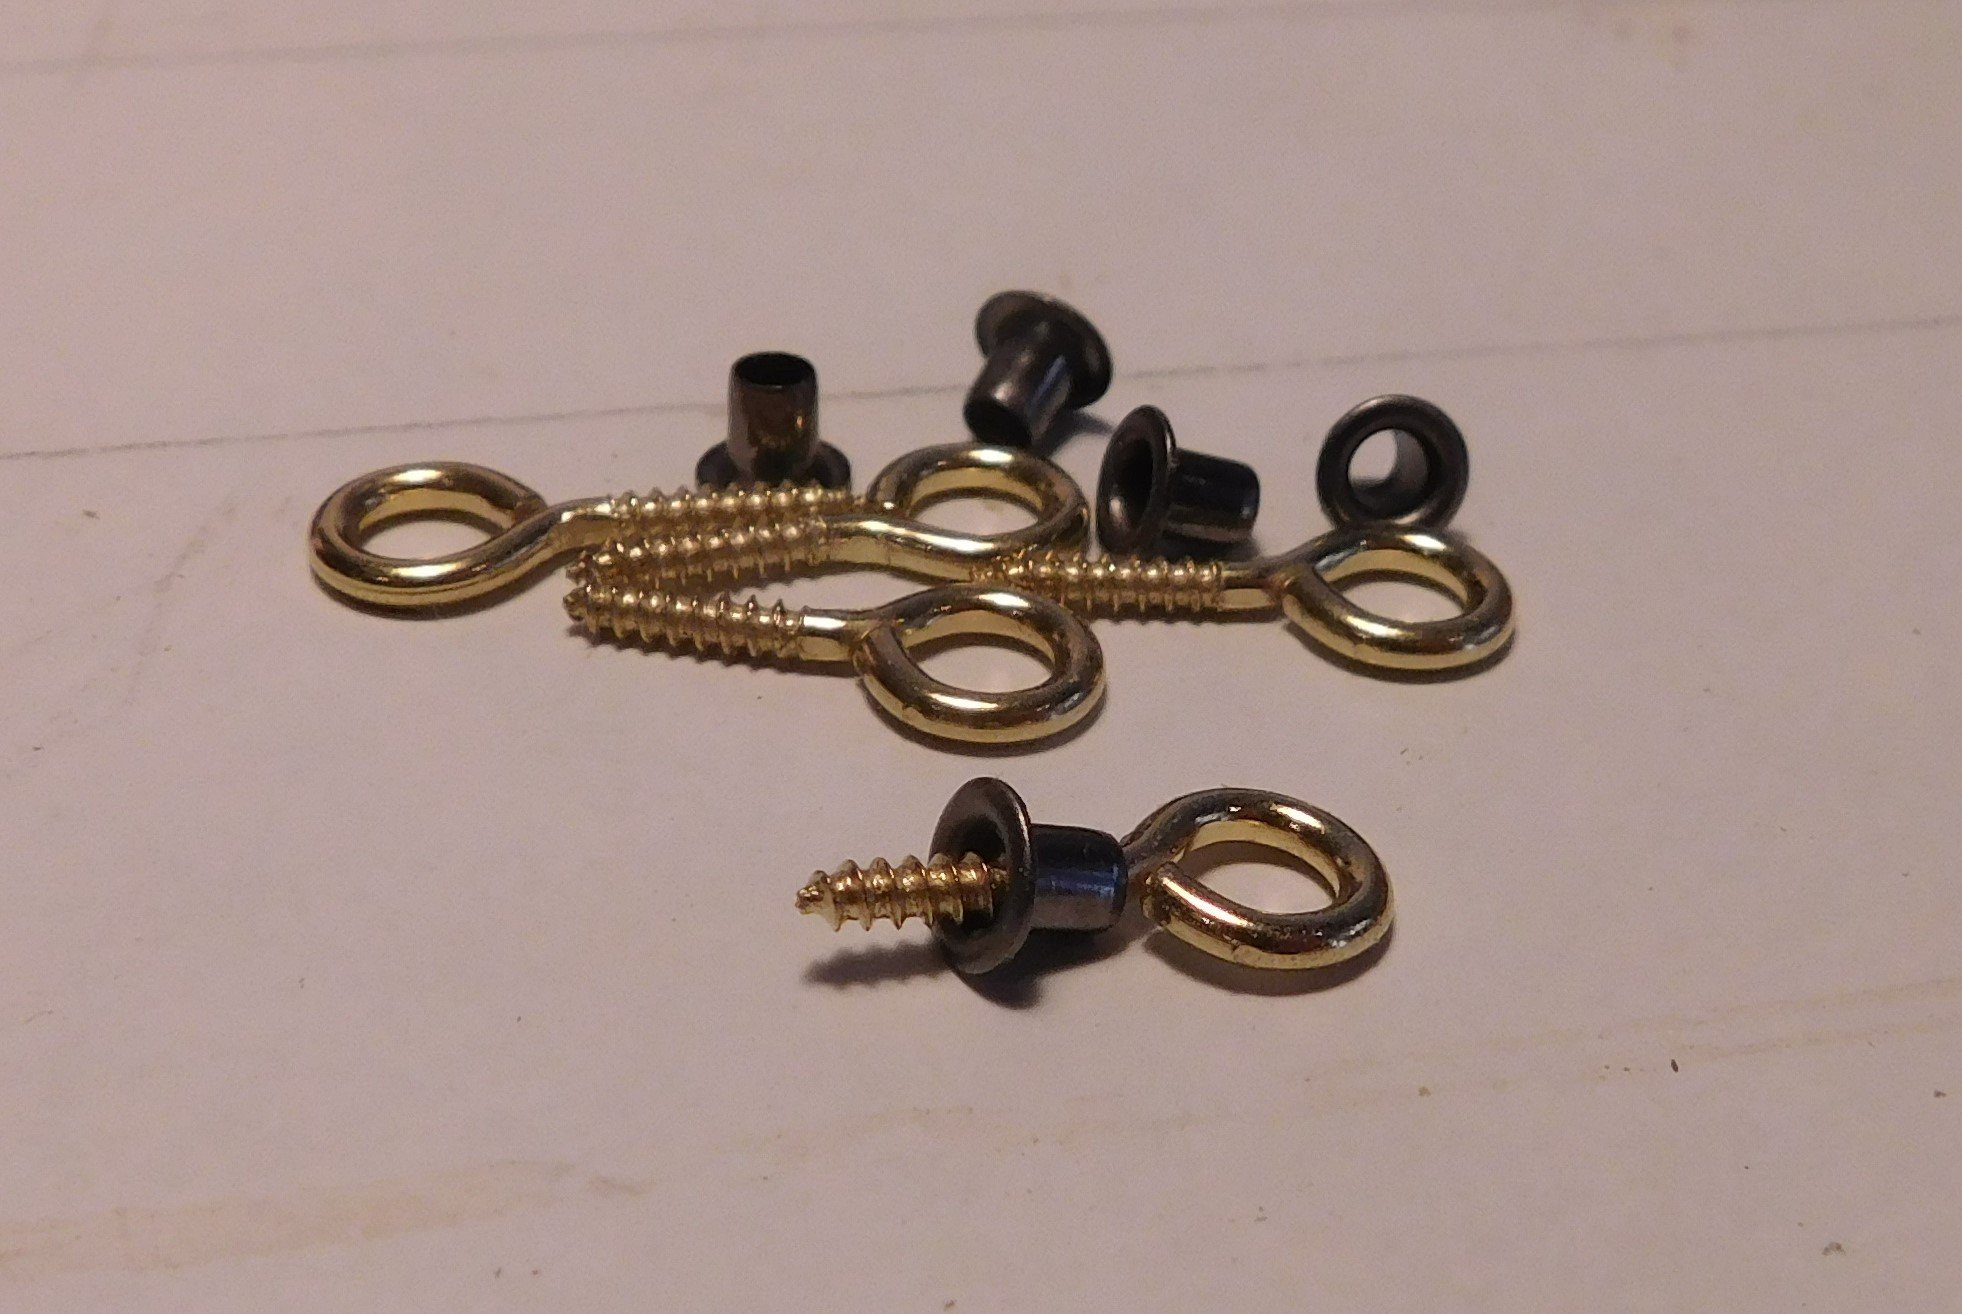
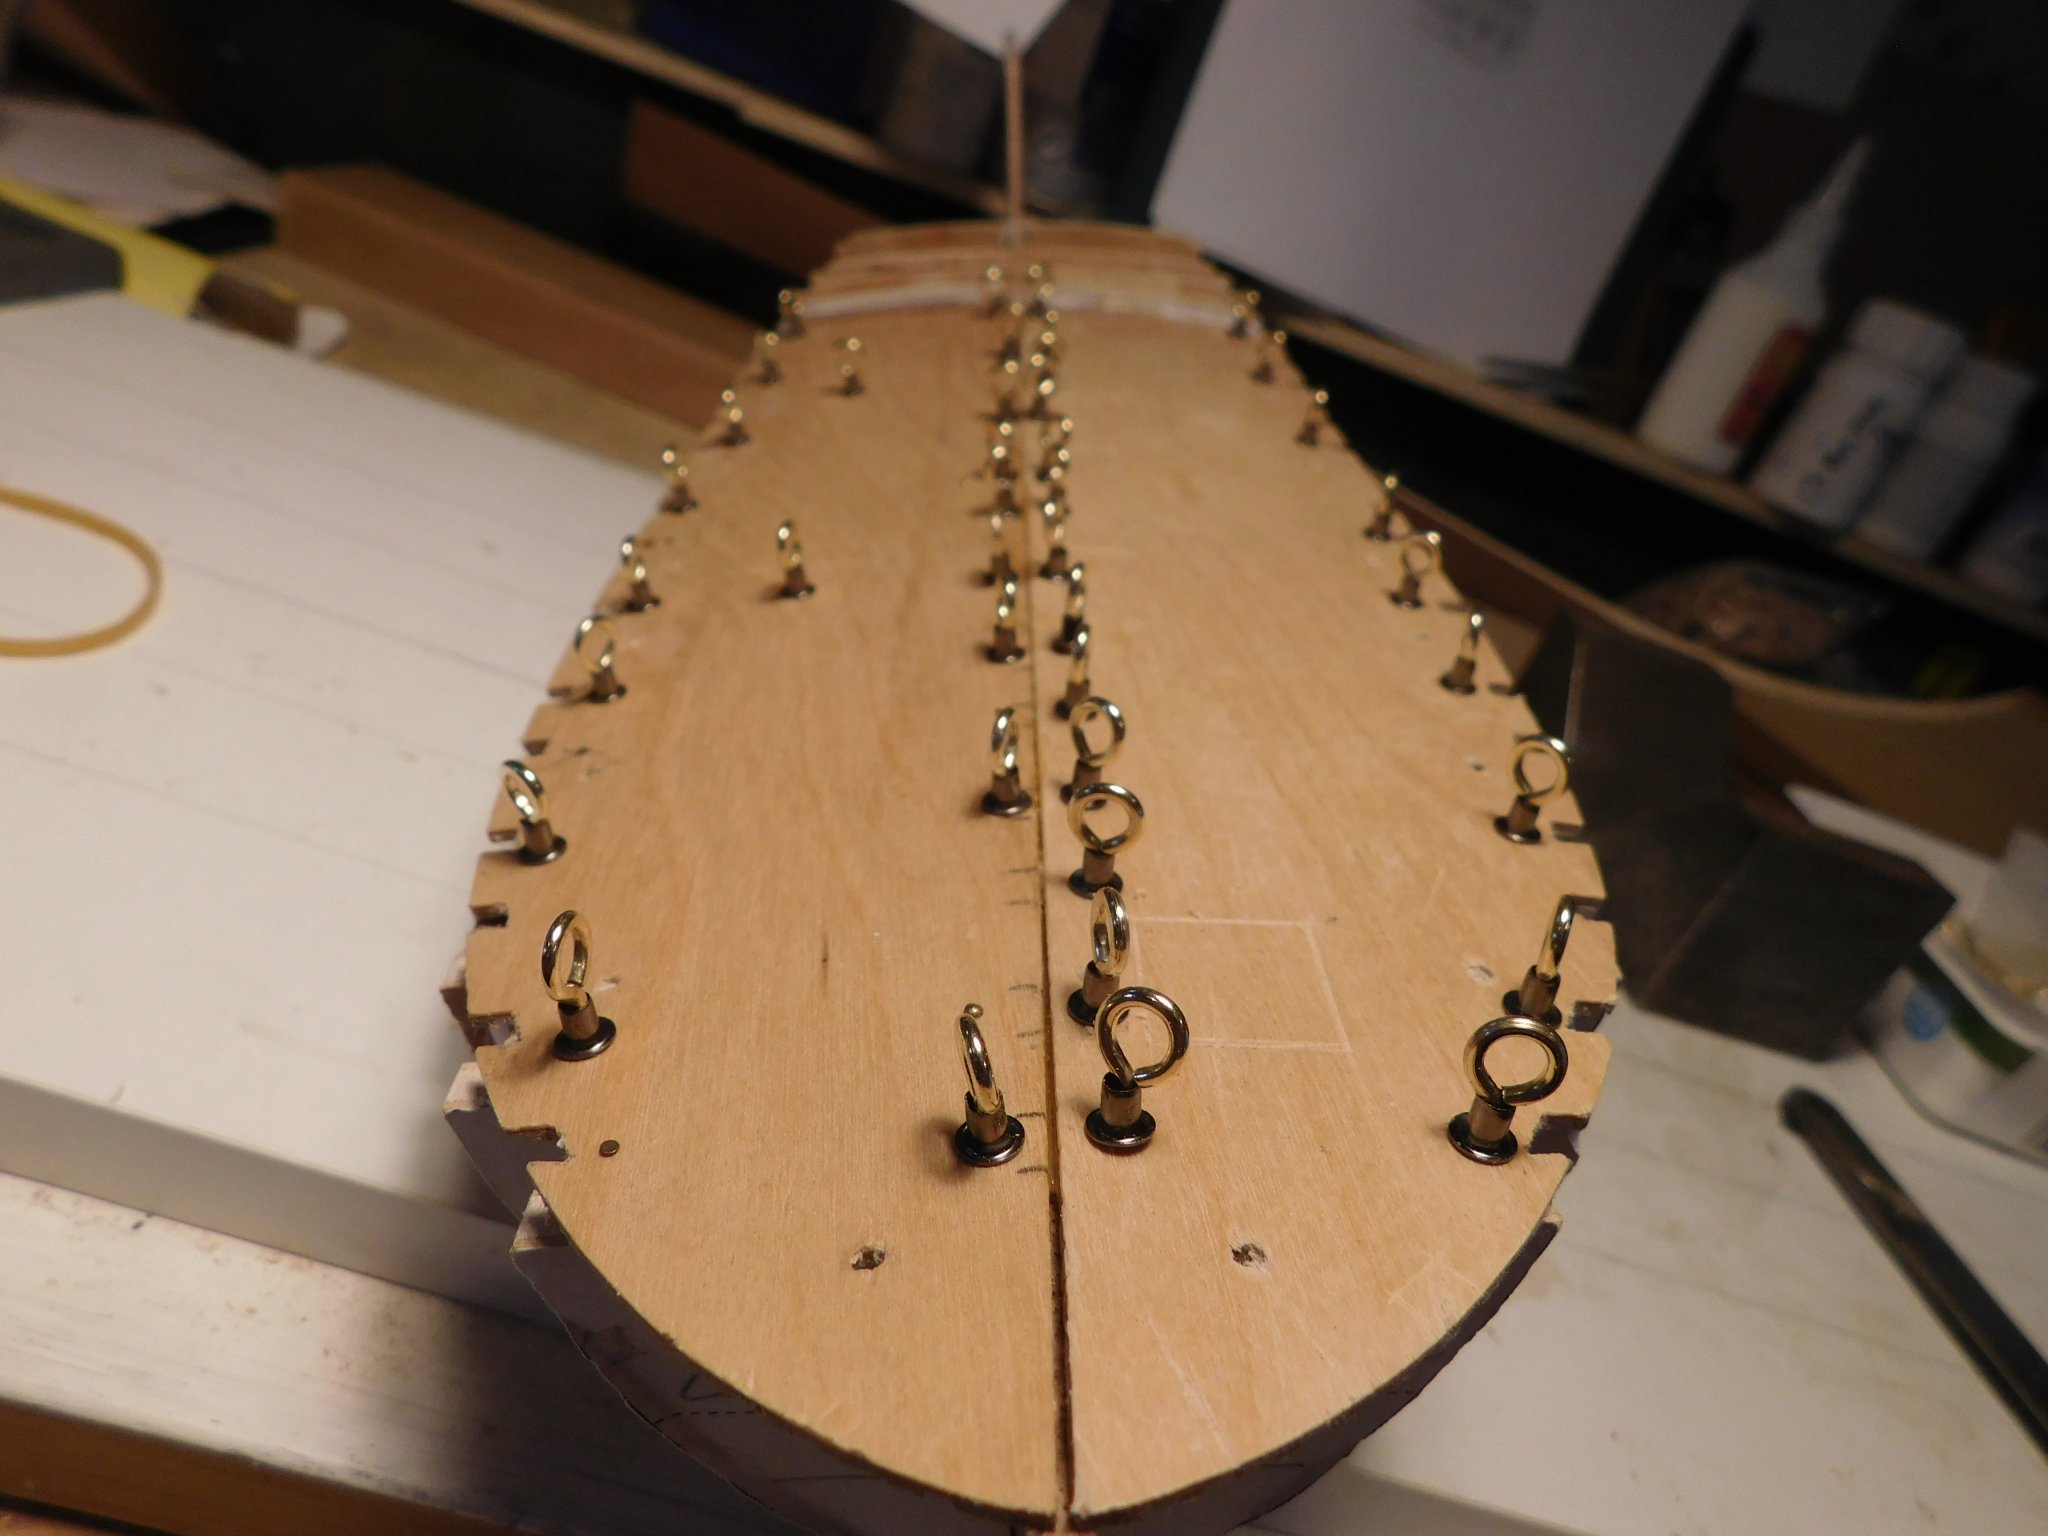
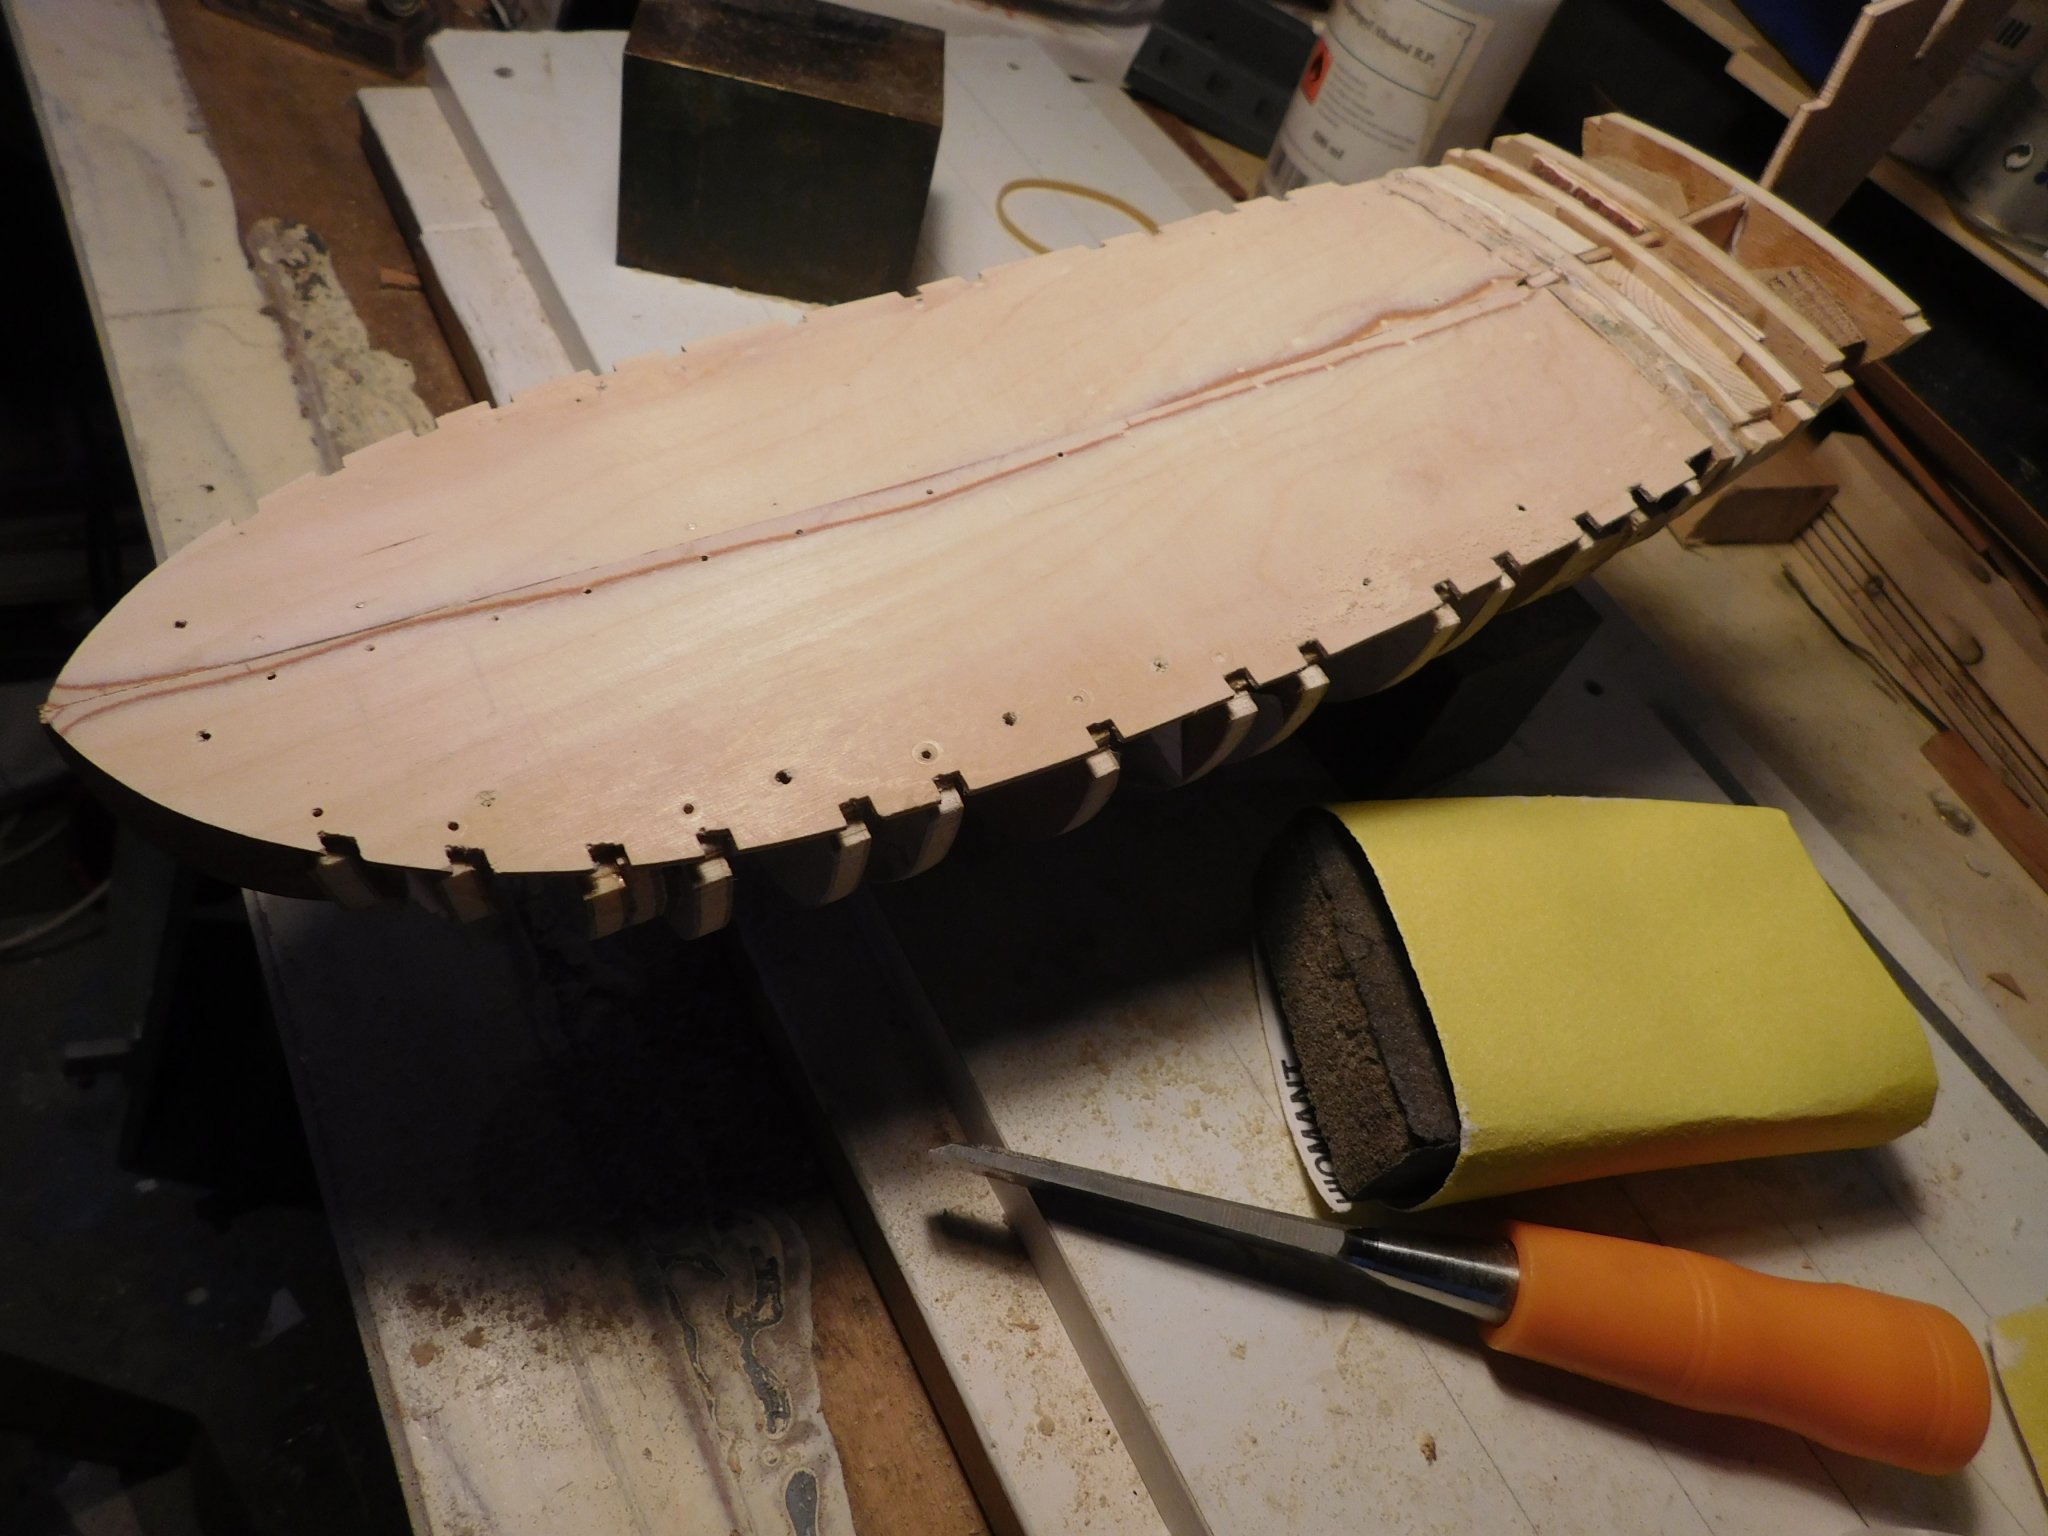
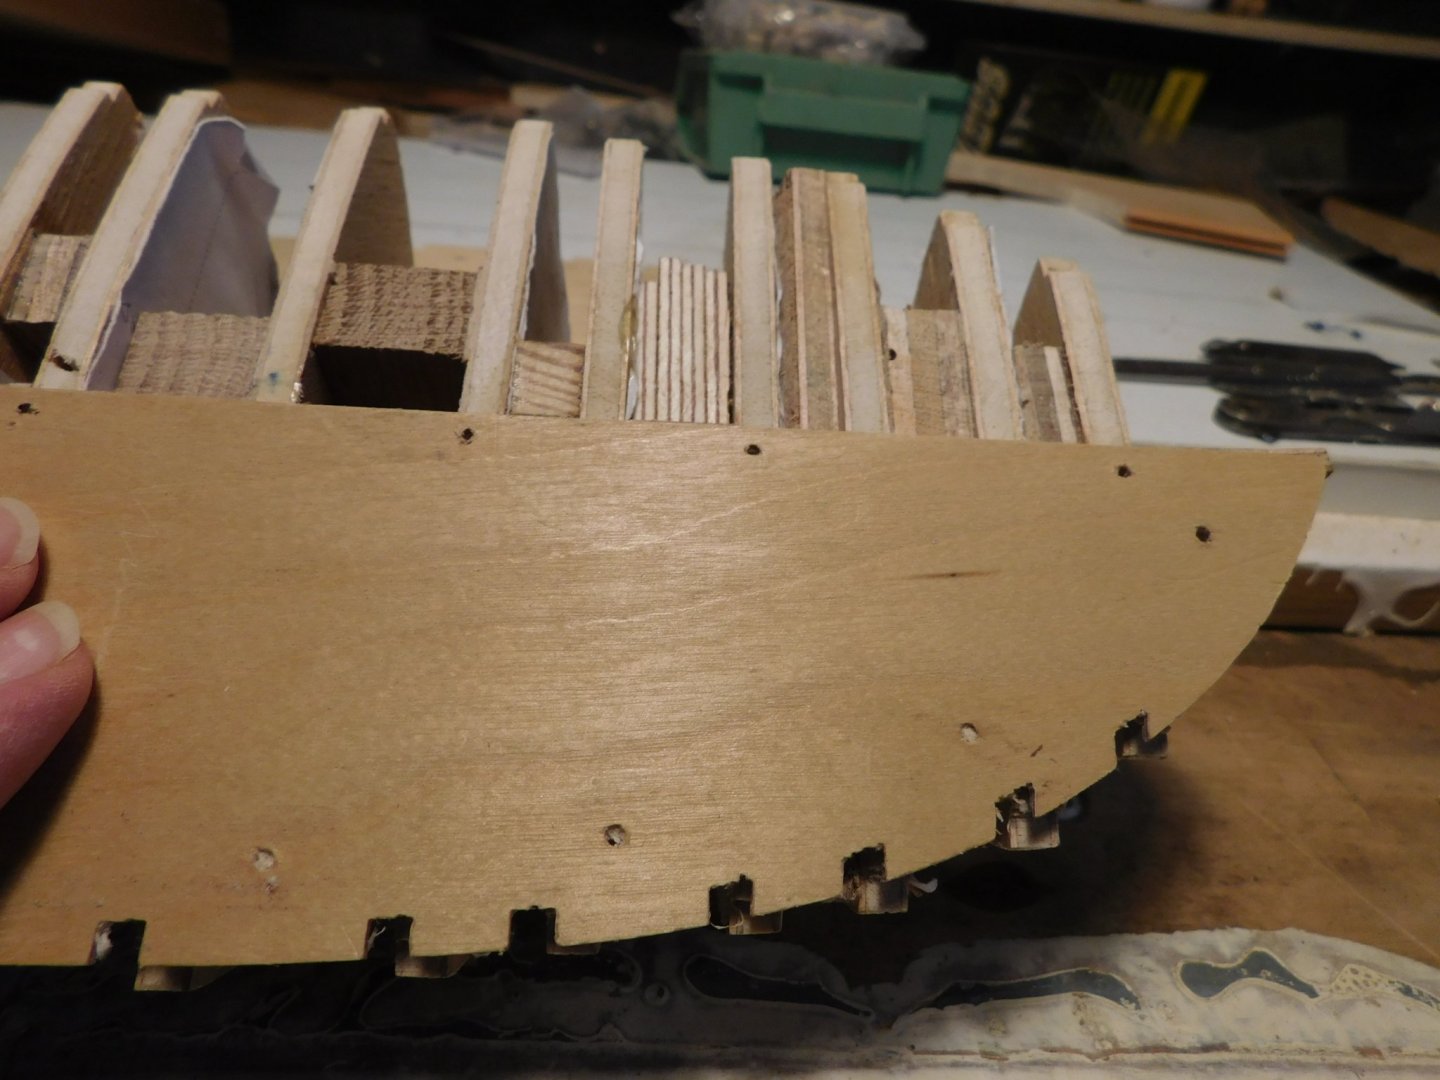
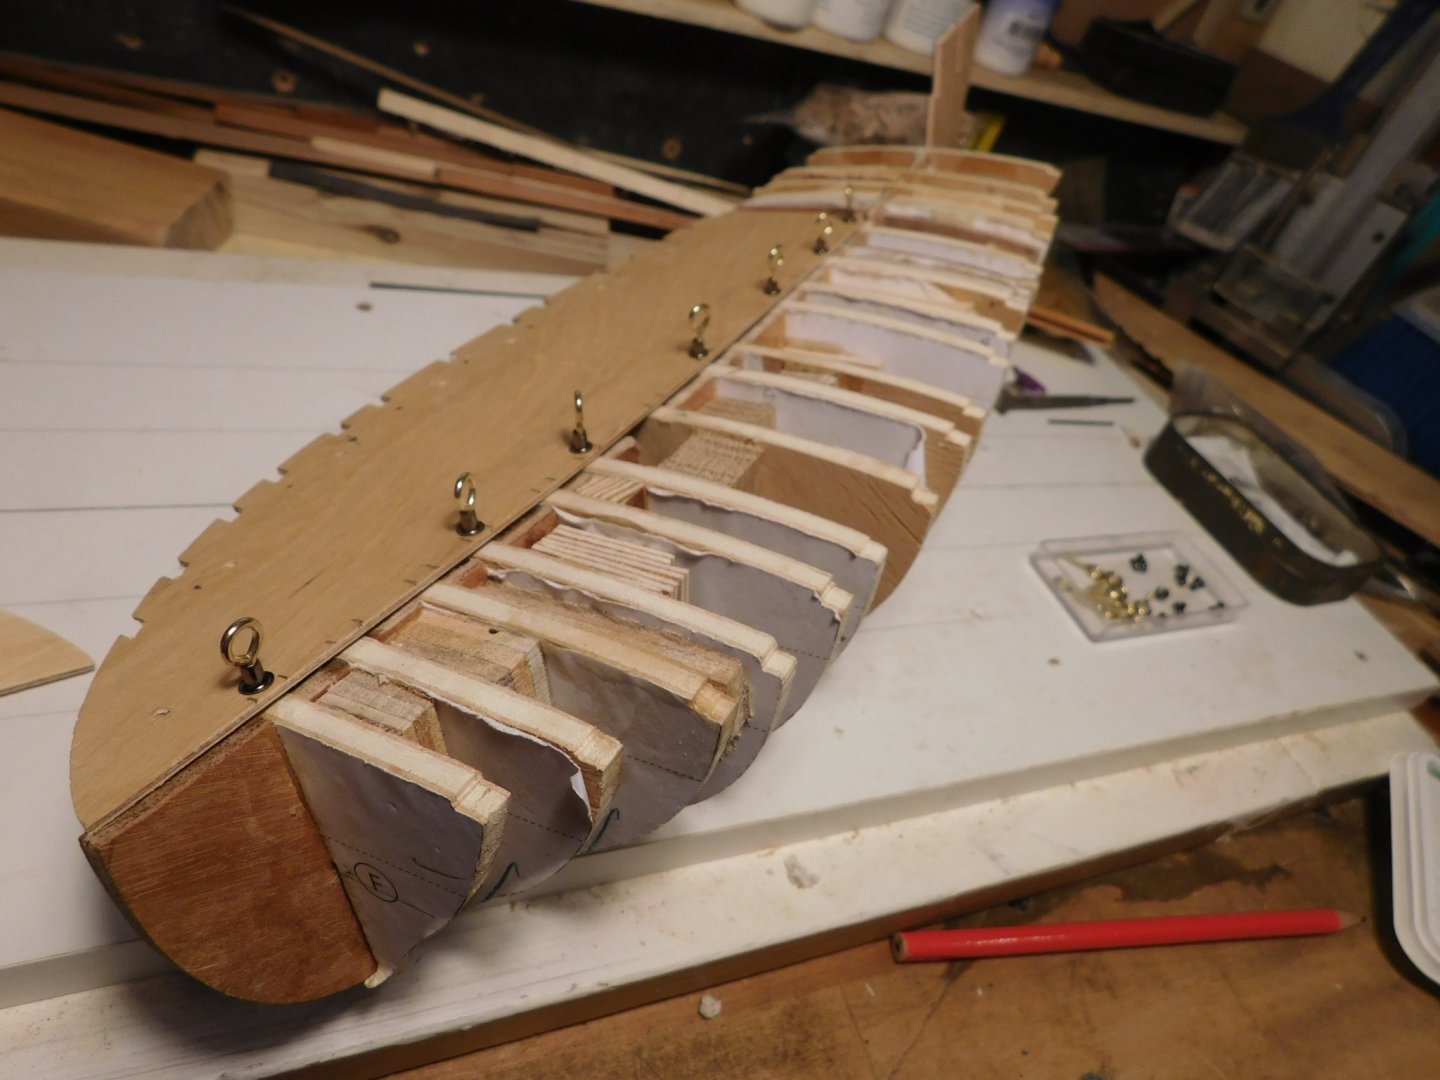
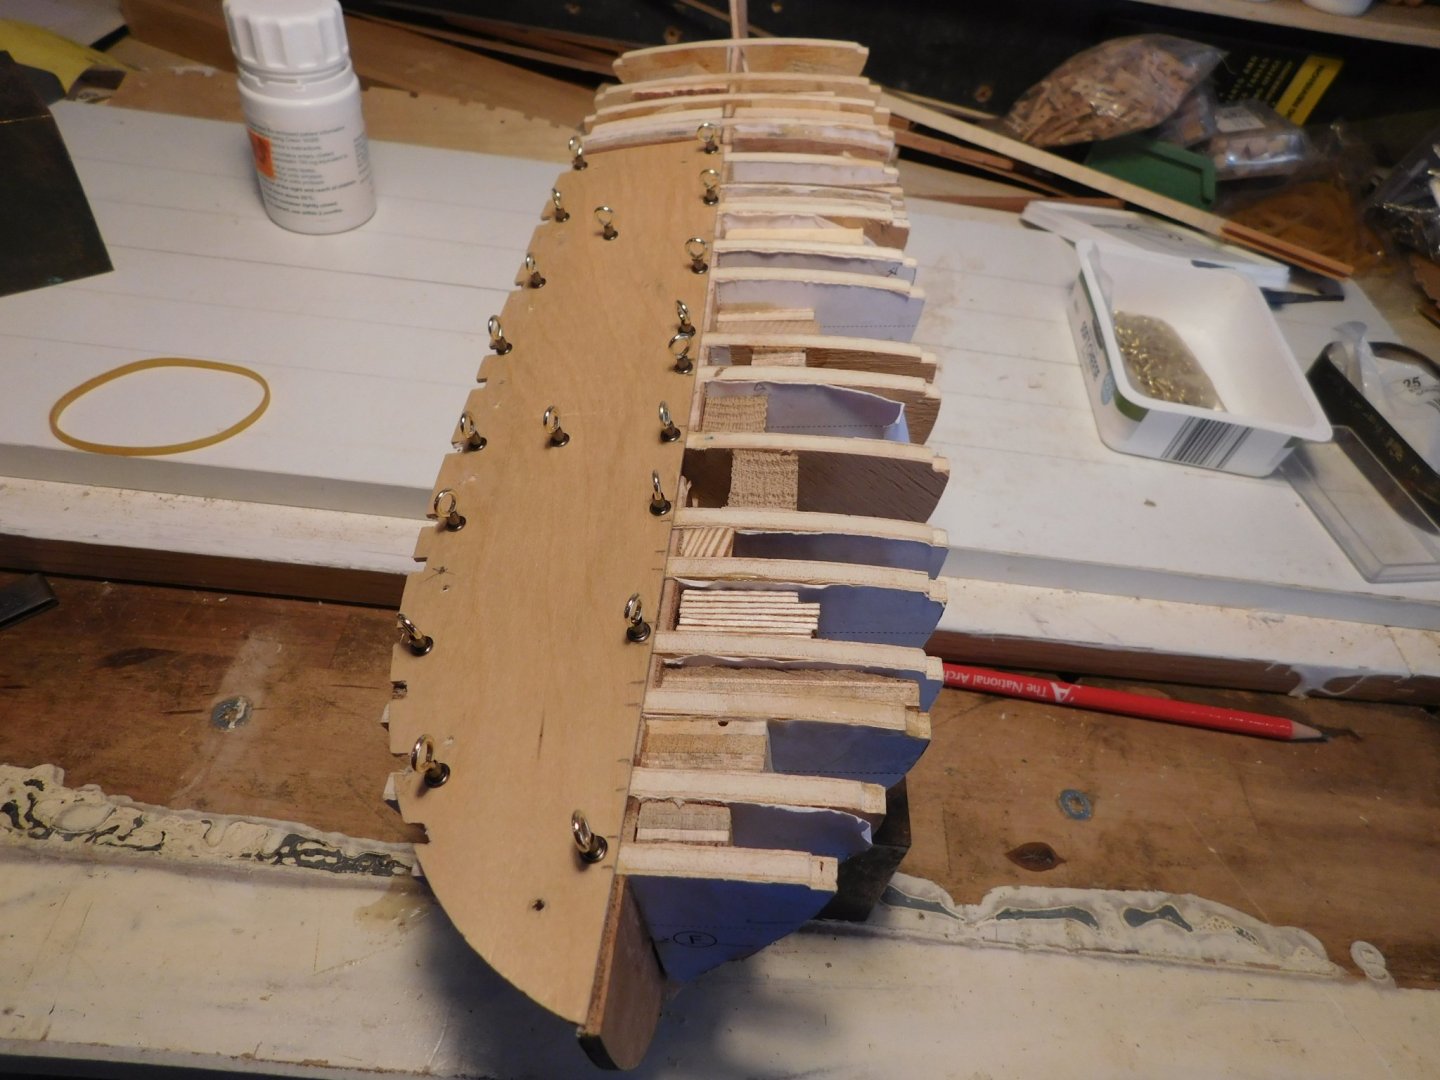
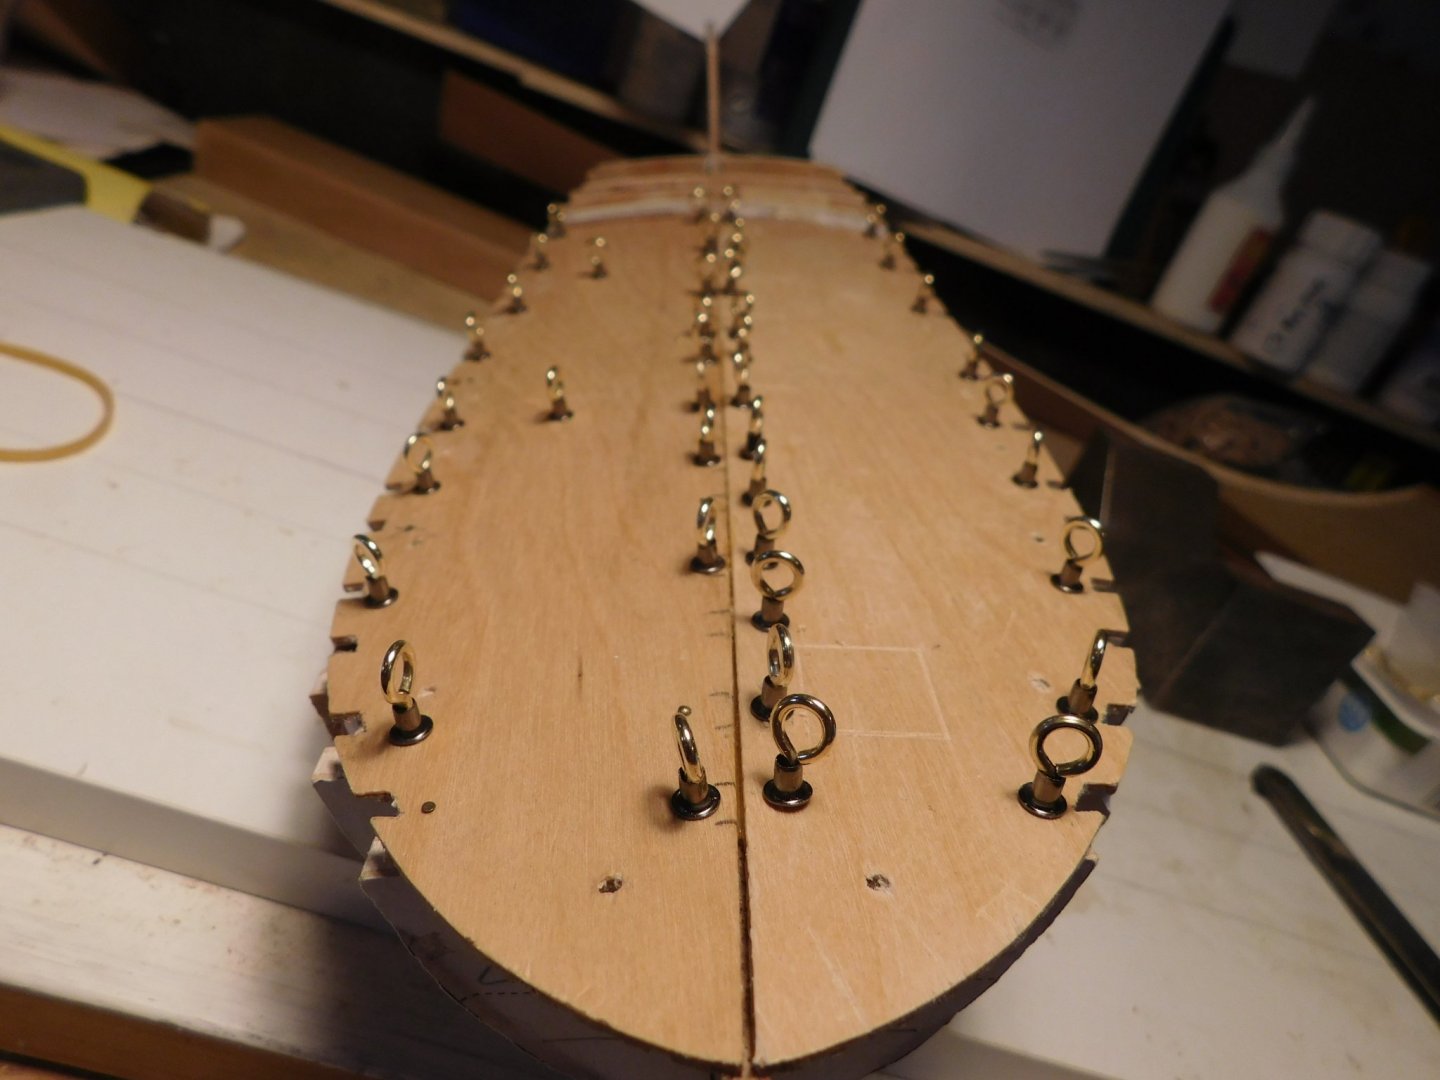
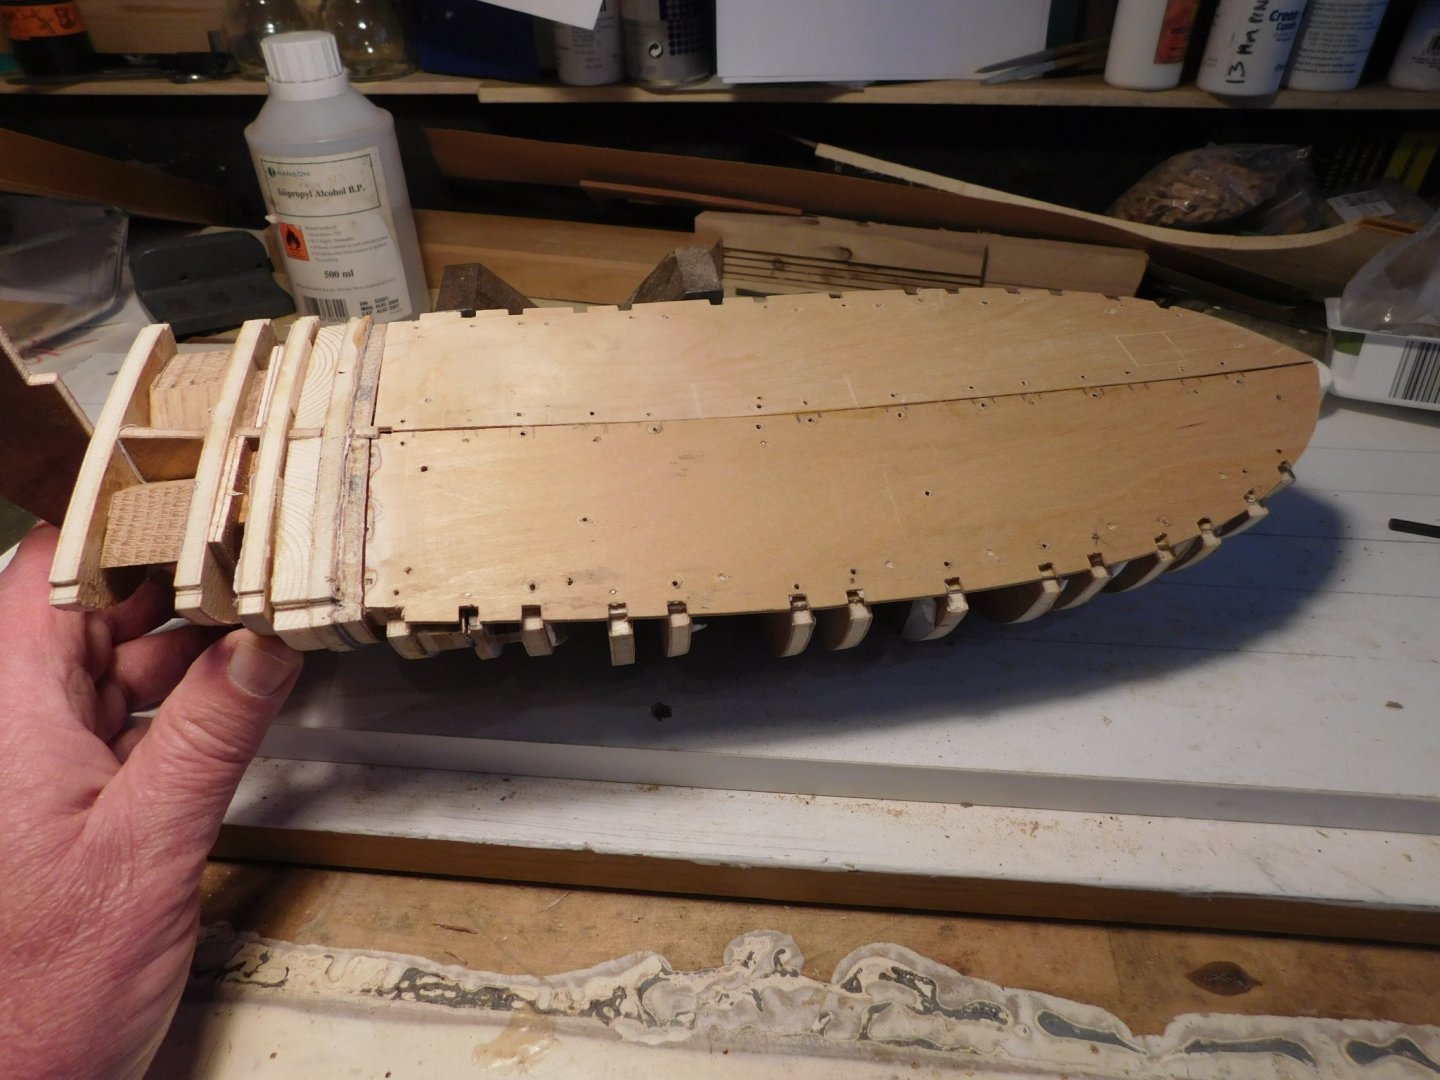
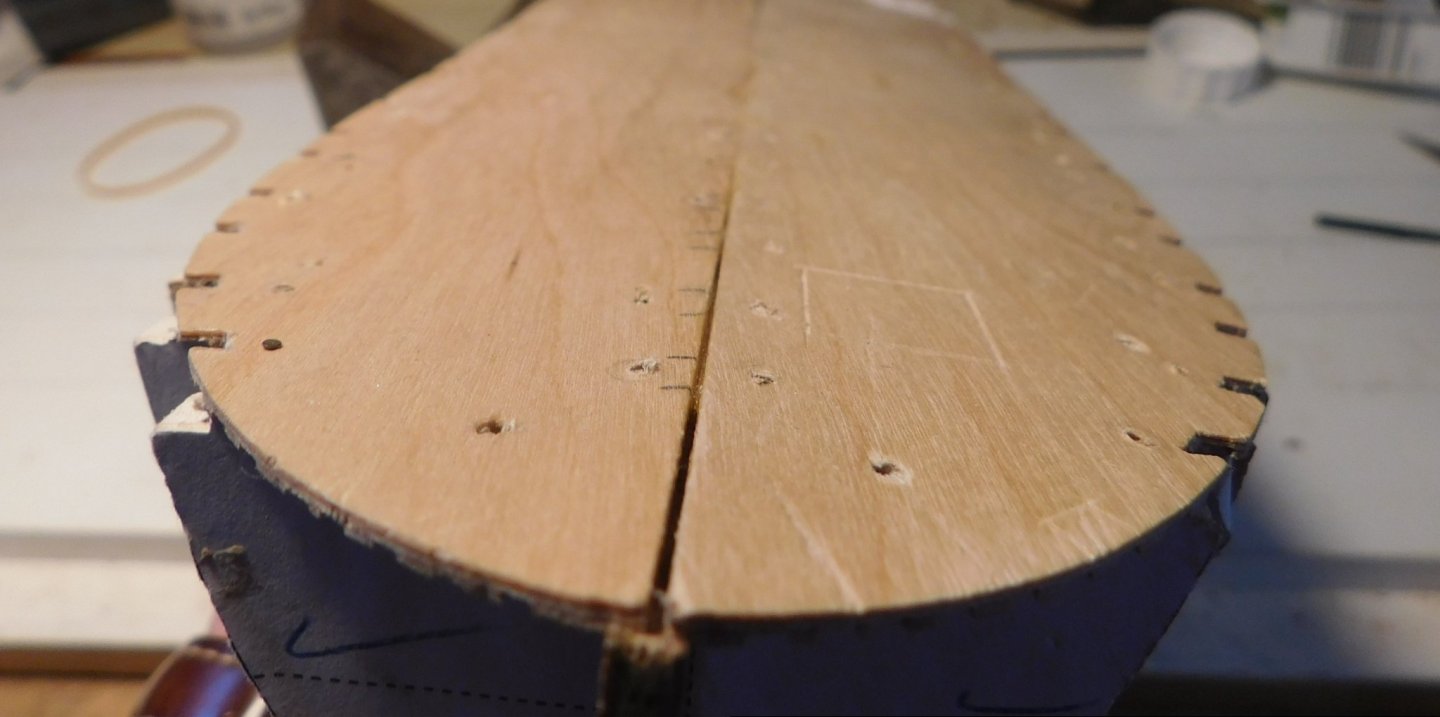
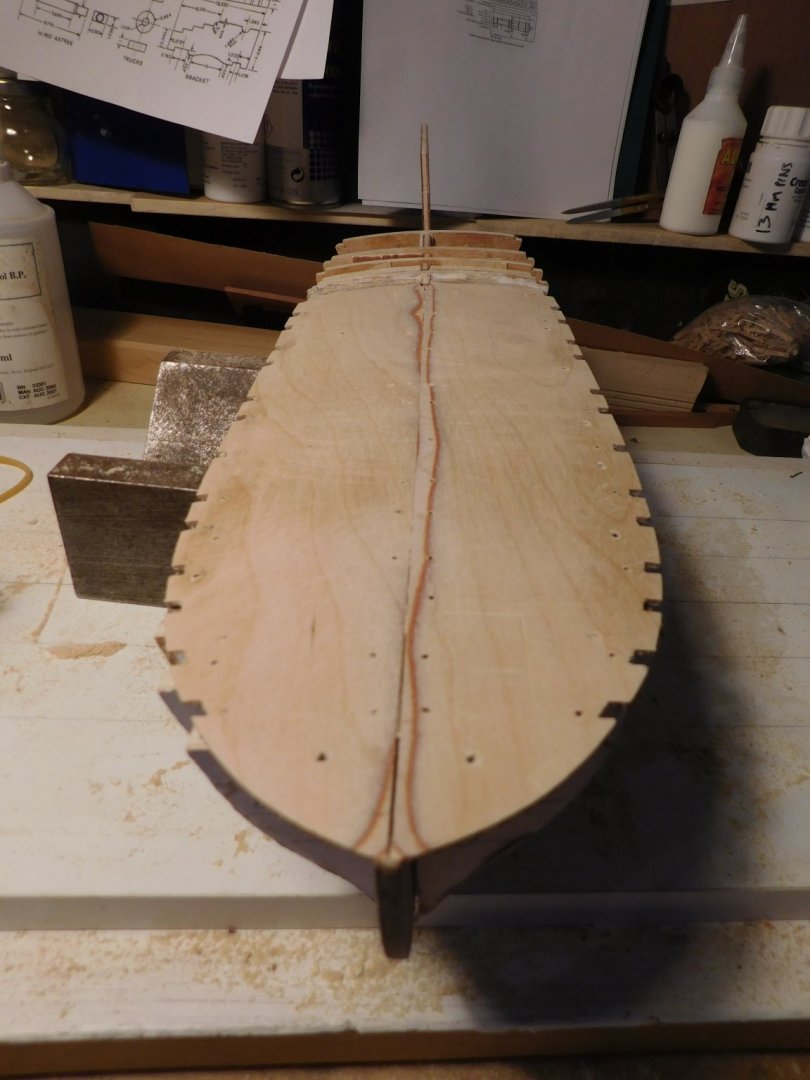
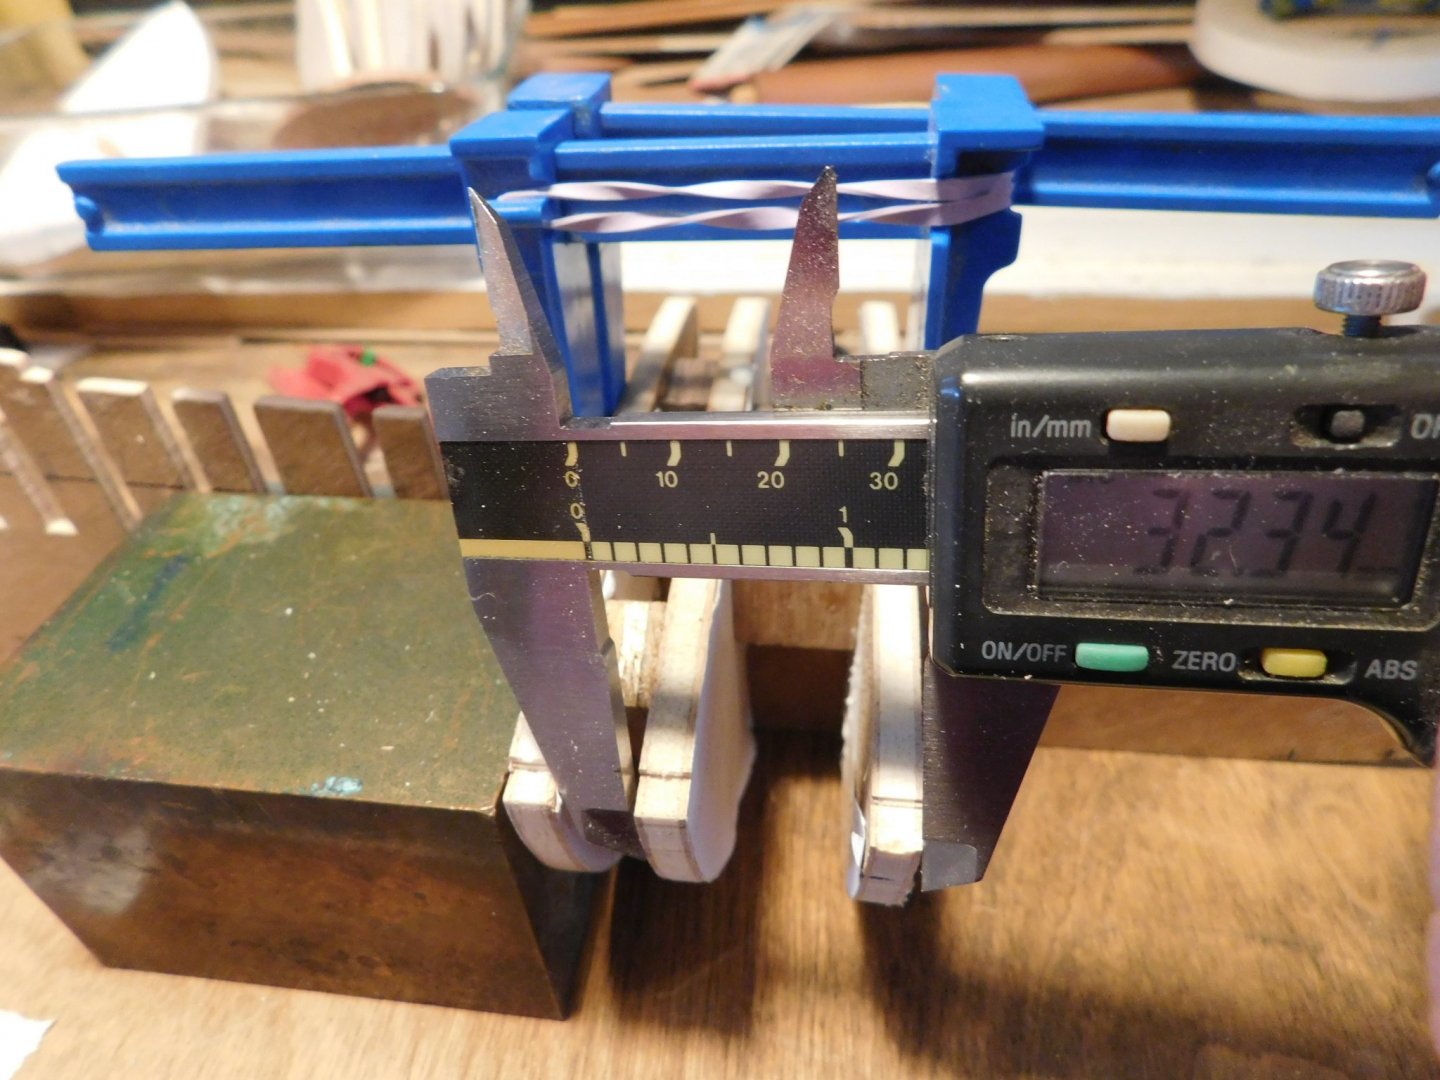
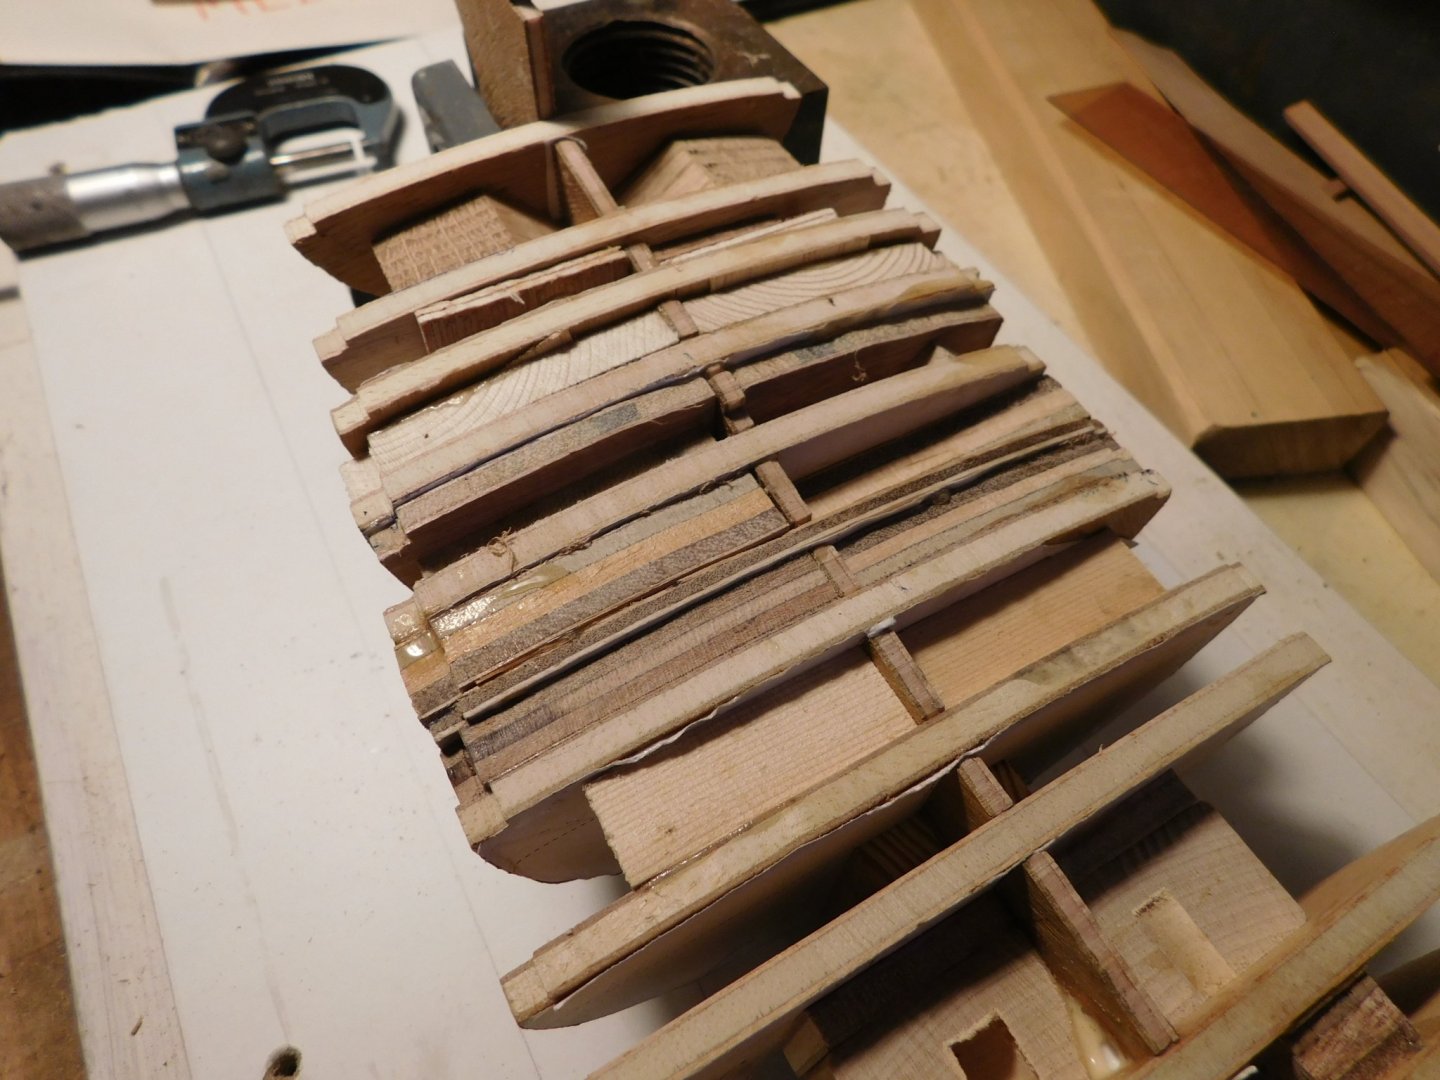
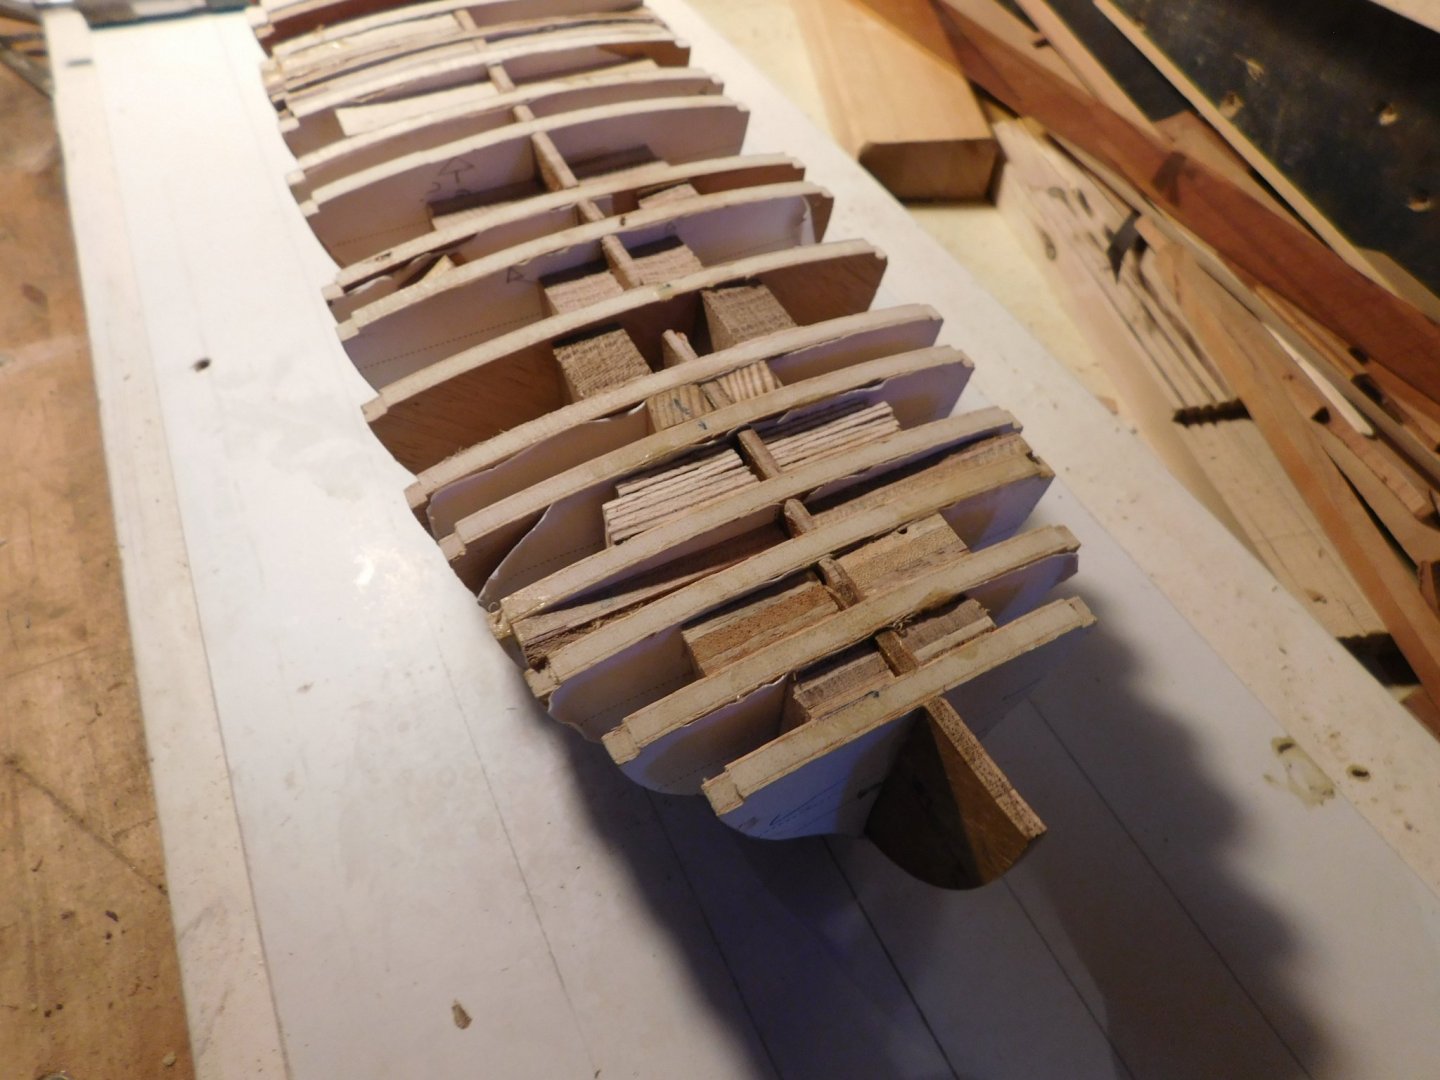
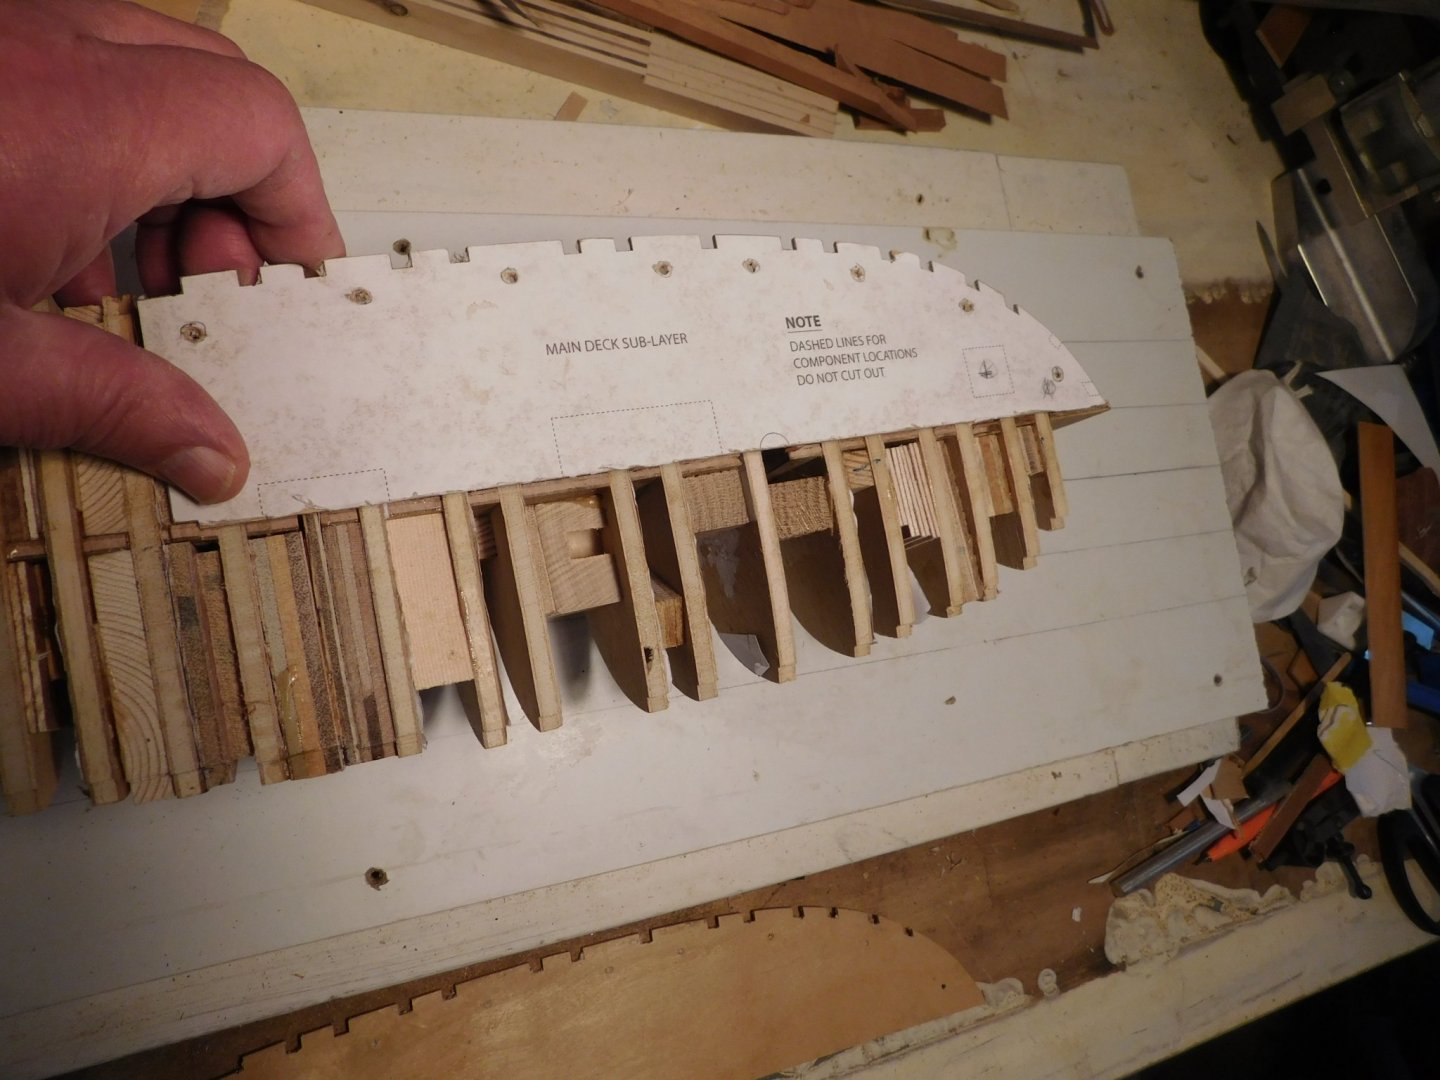
Mediator is fighting me. I am winning, but it is important that I do not underestimate the ability of Mediator to lay an ambush. The new sub-deck pieces (see last post) have to bend in two planes to sit properly. They were made of an inferior plywood that appeared easily bent. A test run revealed splits in the surface and de-lamination after being bent and left overnight, so it was the end of the line for these bits. Fortunately I still had the original sub-deck pieces made of superior plywood. To get them to bend over the bulkheads (which was the reason I had rejected them) I cut a series of grooves in the underside to allow the stiff ply to bend. For some reason I imagined that the grooves were not needed right up to the edge where the two halves would meet. Stay tuned… To hold the two halves in their new shape while the Titebond worked required clamping. Due to the compound curves I needed to improvise something that would hold the centre edges straight, pull the width onto the curve of the deck across the tops of the bulkheads and keep whole kaboodle true to the sheer. These are the clamps I made from the type of small screw-in eyes used in picture hanging and 2.5mm eyelets: Pilot holes were pre-drilled in the deck pieces but not into the bulkheads in order to get the most out of the gripping power of the self-tapping threads. They were screwed in with fingertips. Started in the centre on the hull centre line and worked towards each end. Once that was done I improvised a hold-down clamp like this … … on the centre line until the whole line was tightened down. Then, a bit of force to pull the outer edge down. Lots of glue, worked quickly … … and let it sit for a day before unscrewing. The whole thing worked and was as solid as I could have hoped for, but the centre join line was proud where the ply had resisted bending. This was due to my bright idea of not cutting the grooves near that join. To be safe drove a few pins in before about half an hour with 80 grit sandpaper wrapped around a sanding sponge to fair the join. That's all for now.


- 43 replies
-
- 10
-
-
- mediator
- first build
- (and 1 more)
-
Large clinker built cargo vessels from the late medieval period in Northern and Western Europe - The Mönchgut 92 wreck in context Master thesis Klara Fiedler Maritime Archaeology Programme University of Southern Denmark Large_clinker_built_cargo_vessels_from_t.pdf
-
Welcome to MSW Greg,
-
Accurate Triangle metal square
bruce d replied to michael101's topic in Modeling tools and Workshop Equipment
Hello Bob. I have had a ground steel 200mm engineers square that was out by a whole degree: it happens. Fortunately, that amount of 'slop' doesn't happen very often but it is wise to check carefully especially if buying budget tools. -
Allan, I have seen the results of Alcad products on plastic and they can be verrrrrry convincing. Not used them myself, but a friend swears by them. https://www.alclad2-online.co.uk/product-category/finishes/
-
Shipbuilding Practice and Ship Design Methods From the Renaissance to the 18th Century MAX-PLANCK-INSTITUT FÜR WISSENSCHAFTSGESCHICHTE Max Planck Institute for the History of Science Multi language, covers a lot of subjects: design, construction, launching, models (!), national styles etc. P245.pdf
- 3 replies
-
- 10
-
-
Hello Daniele and welcome to MSW. I look forward to seeing your chosen subject and a build log.
-
Pretty sure it was Mariners Mirror 64 (1978), pp 349 - 60. HTH, Bruce
-
Lettering options (easy)?
bruce d replied to Brewerpaul's topic in Painting, finishing and weathering products and techniques
I will try to describe a method I used a long time ago. The idea is simple, it is just a case of whether you like the effect. I couldn’t produce raised lettering but it was easy to produce lightly embossed print and images. So I turned 'embossed' into 'raised' like this: (1) print what you want; (2) place it face down on a firm but slightly compressible surface such as a cutting matt; (3) trace the image/text from behind with a ball point pen or a stylus, pressing as hard as the paper will allow; (4) turn it over and admire your work. I got the best results by producing the text as a negative (white text on black field) and then printing this onto gold coloured paper. When embossed from behind the slightly raised effect of the text was quite convincing. The black background was then cut to shape and a coat of pale varnish sprayed on and the work of art was then CAREFULLY put in place with tweezers. It took a few attempts to learn how to handle the printed piece without the photocopied solid black area developing small cracks but this was using a toner printer, inkjet is probably more forgiving. Also, since my project was only needed for a particular occasion and it didn’t matter if the materials had a short life, I used gift wrapping paper. I suggest something more light-fast for a ‘keeper’ model. I see no reason why it would not work on paper with a woodgrain print as the background. Hope this helps. Bruce -
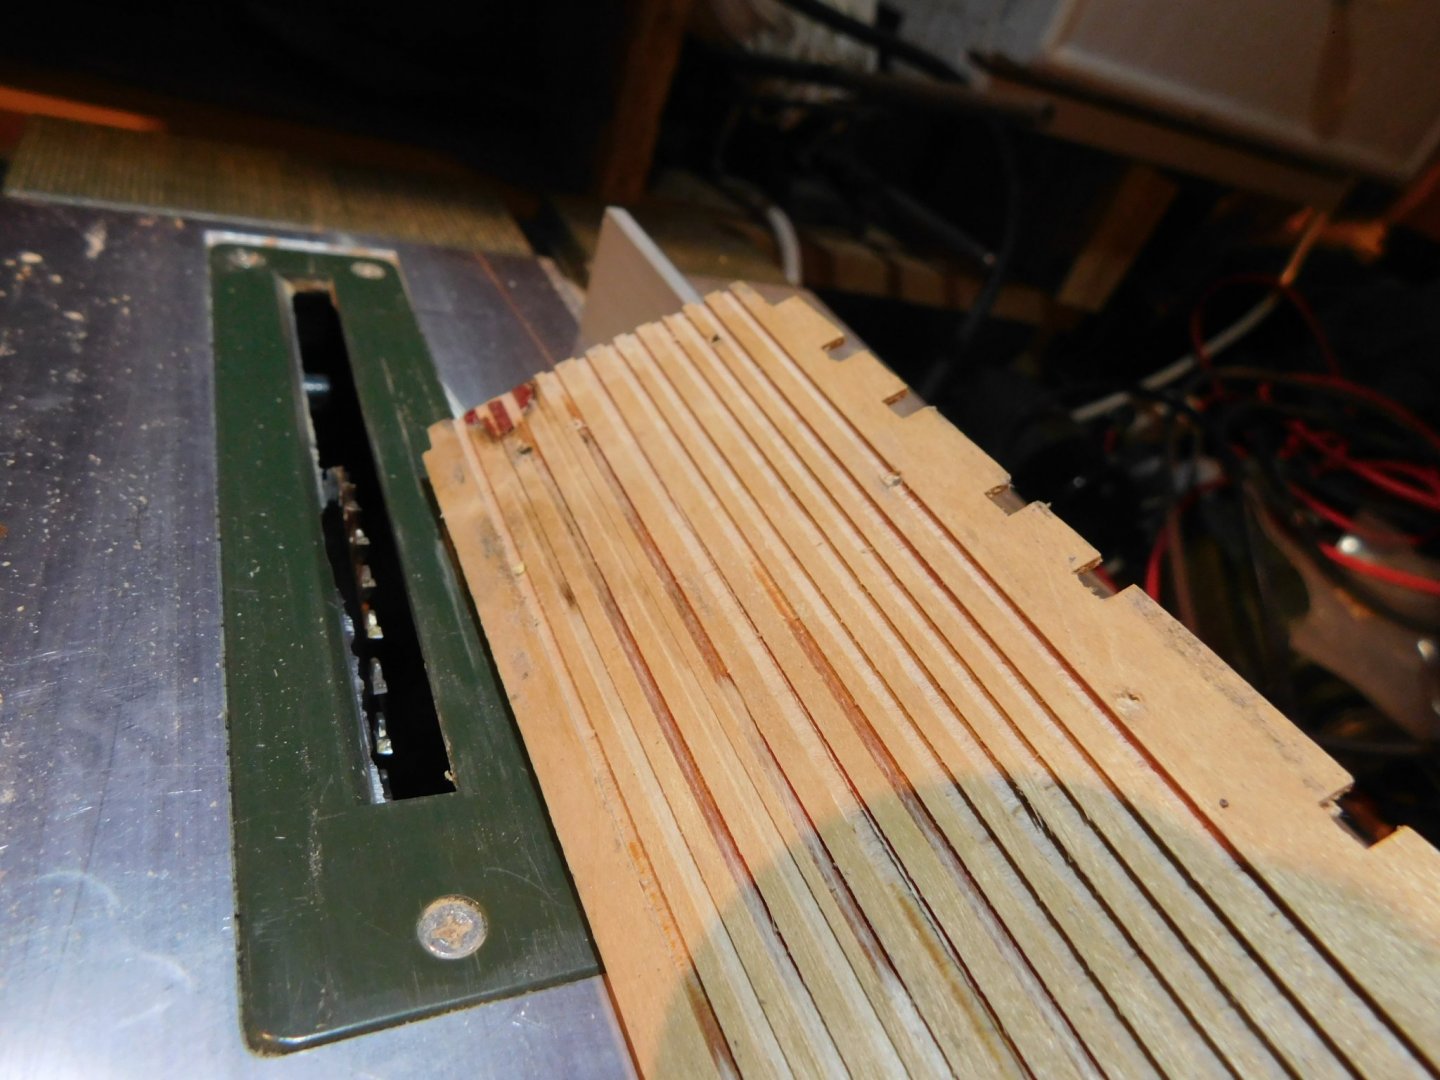
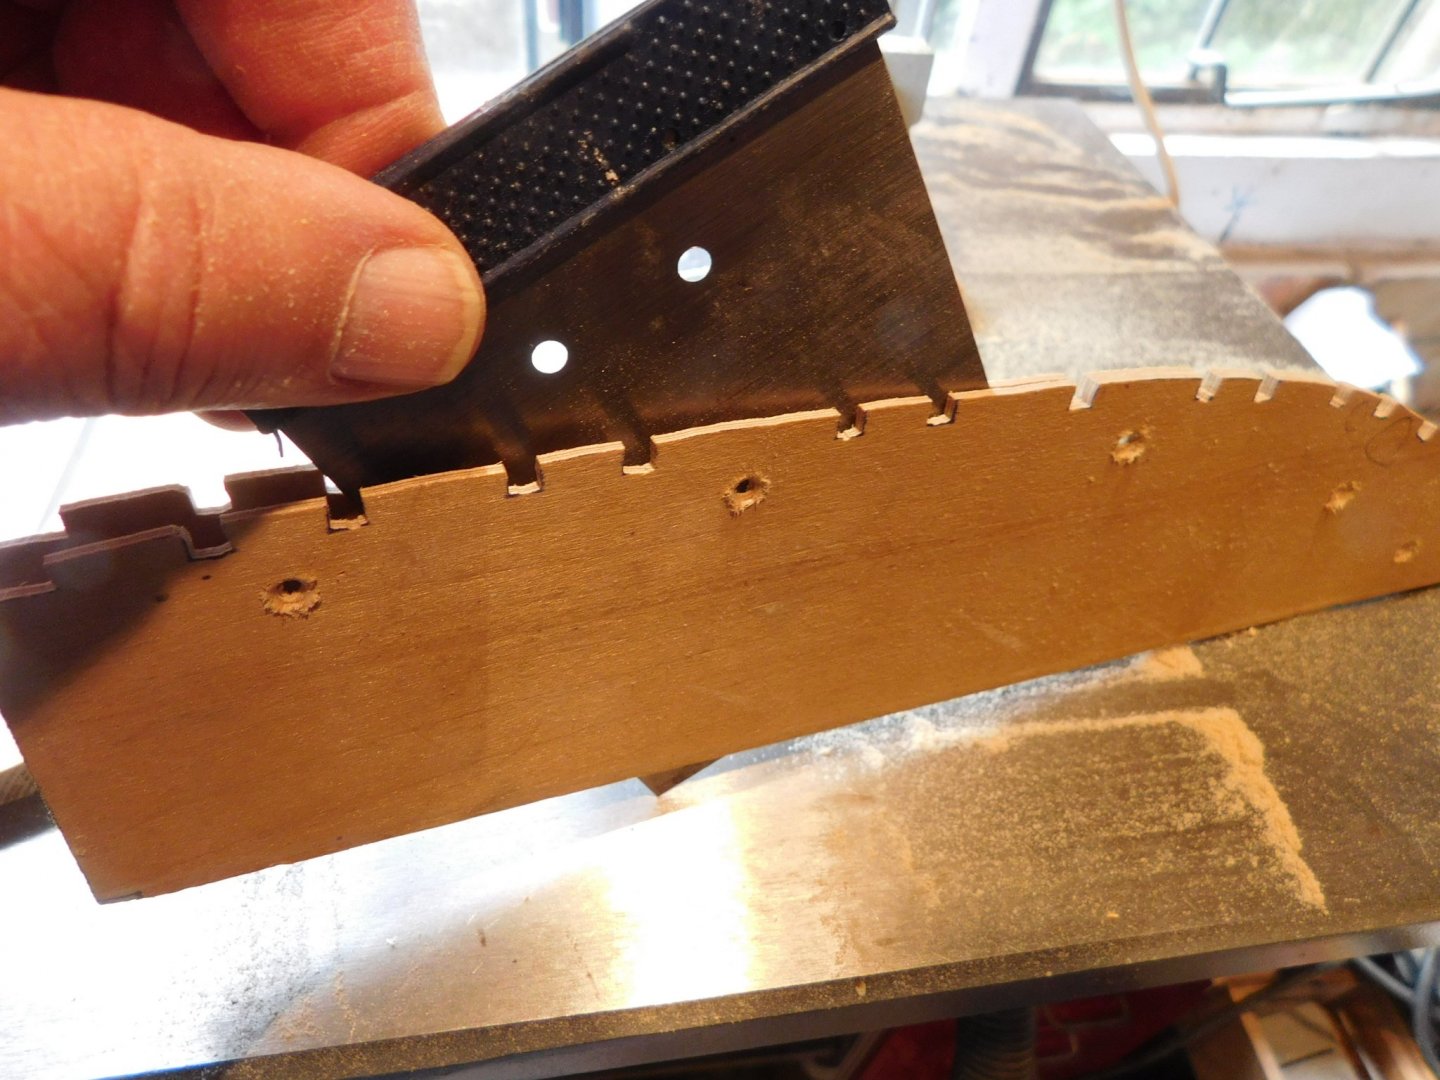
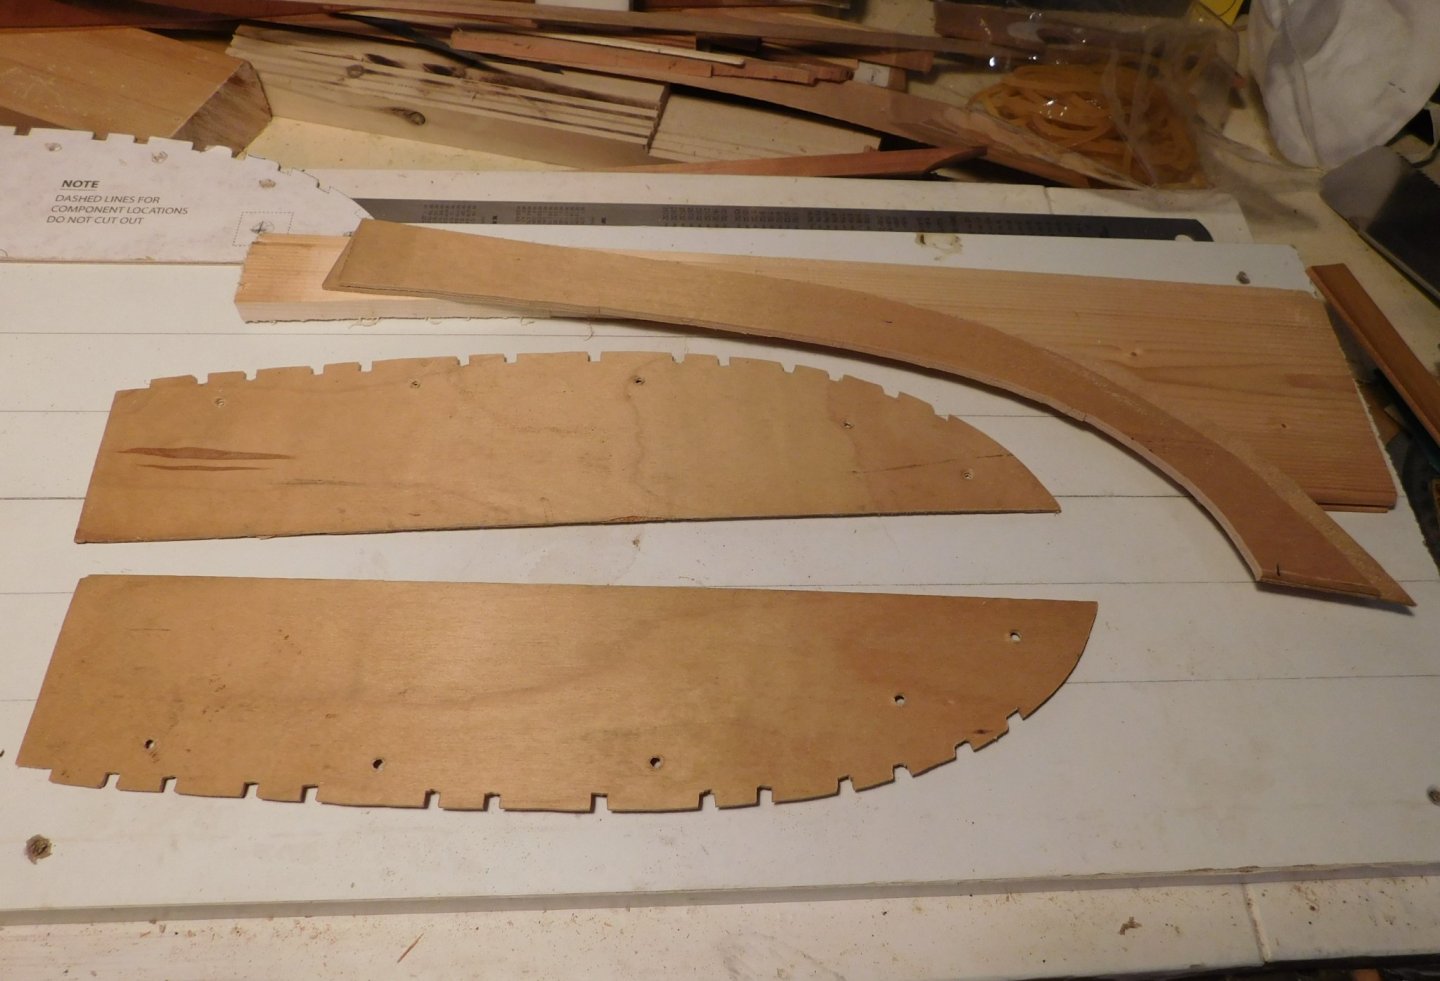
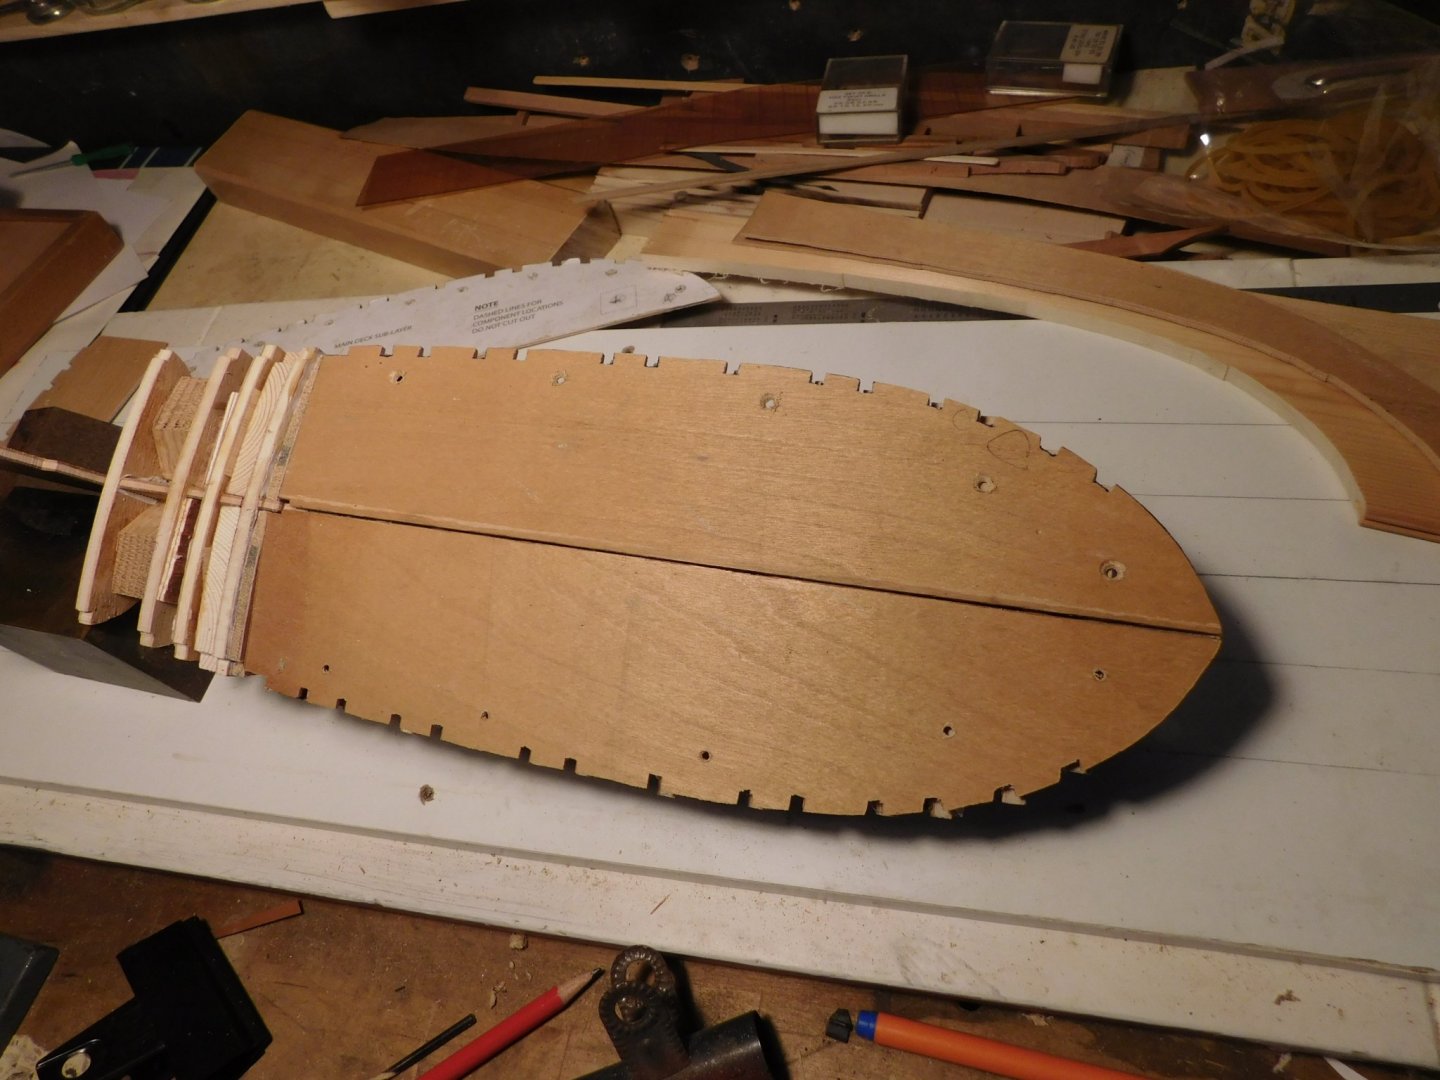
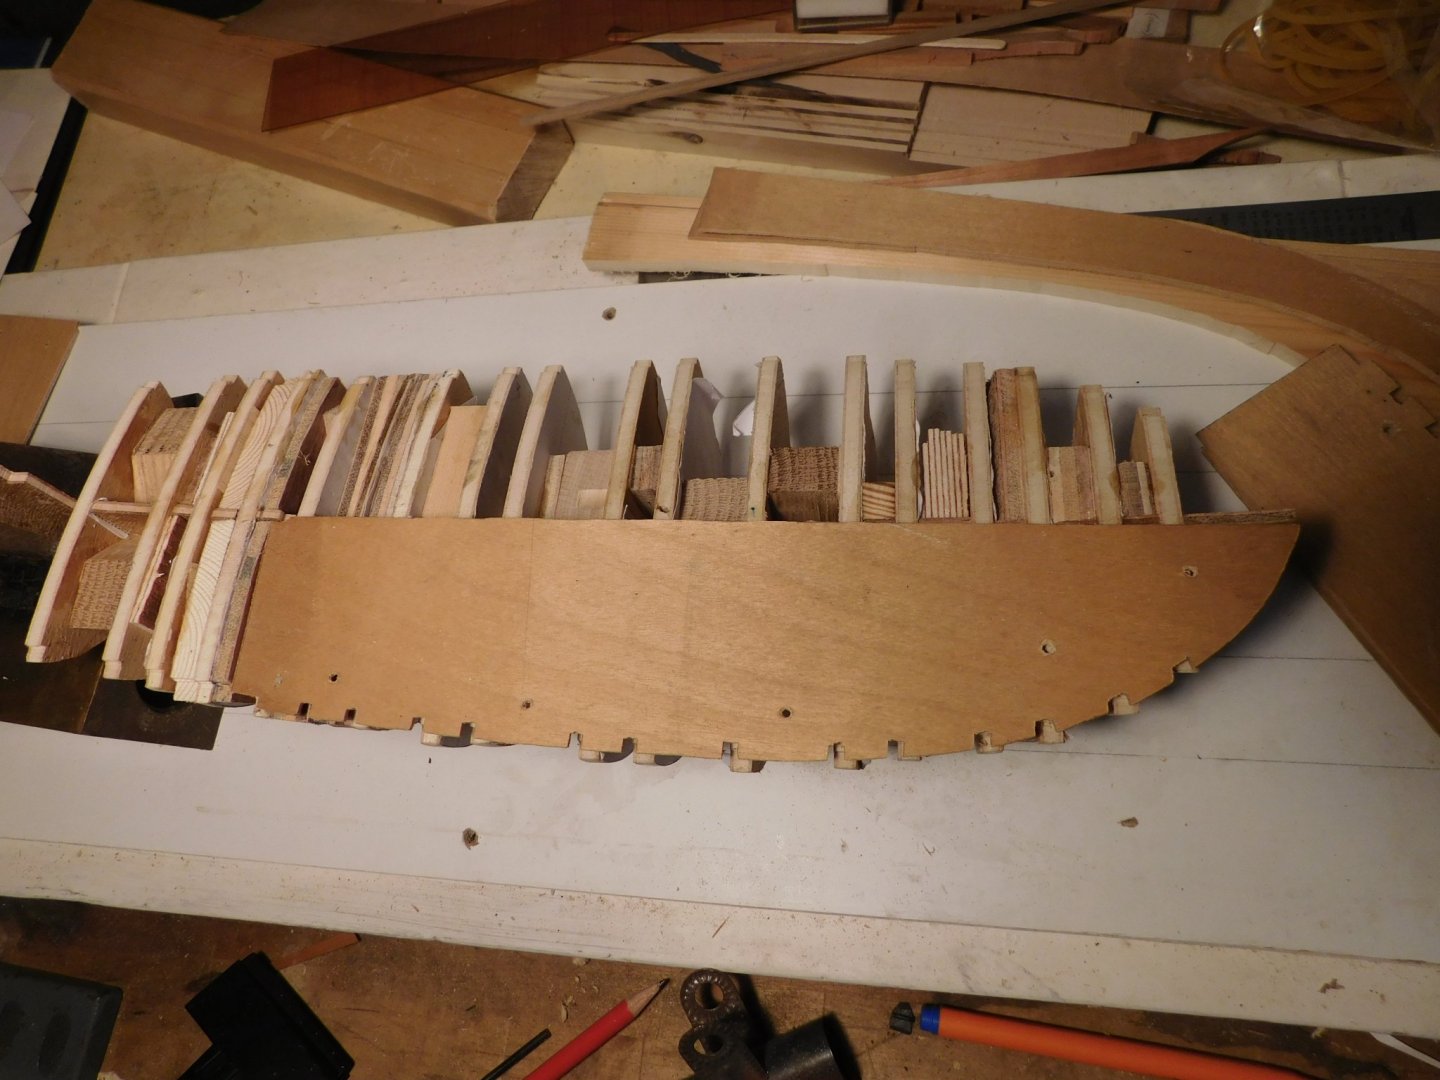
In post #6 above I made the subdeck pieces out of some really nice modelling plywood. This turns out to have been a mistake. The subdeck pieces must bend to conform to the curve across the tops of the bulkheads and the plywood I used was just too stiff. Experiments with the offcuts proved that it would not work without excessive force and, rather than start trial and error bending with heat, it was just easier to remake them. A piece of inferior plywood was chosen as best for the job (didn’t think that would be part of the story) and the same process as before was used. I was able to simply use one of the existing subdeck pieces as a template for tracing the profile. Prising the two pieces apart. I love that 3M spray adhesive. Just sitting in place to get a feel for the next steps. This plywood will bend easily, should have used it to begin. I am still getting used to the look of the hull/bulkhead assembly with the spacers. It looks like something out of Barnwood Builders. However, I will have plenty of places to get a fixing for the subdeck pieces . Bruce


- 43 replies
-
- 6
-
-
- mediator
- first build
- (and 1 more)
-
Hello CTYankee, It is a good brush and there is a good reason there are so many modellers using them. A word of caution during your 'getting to know' phase: it is very easy to damage the tip (the small part at the front that the needle goes through) by innocently putting a bit of pressure on the needle when re-assembling or adjusting. Ask me how I know ....
- 40 replies
-
- 4
-
-
- best airbrush
- compressor
- (and 1 more)
-
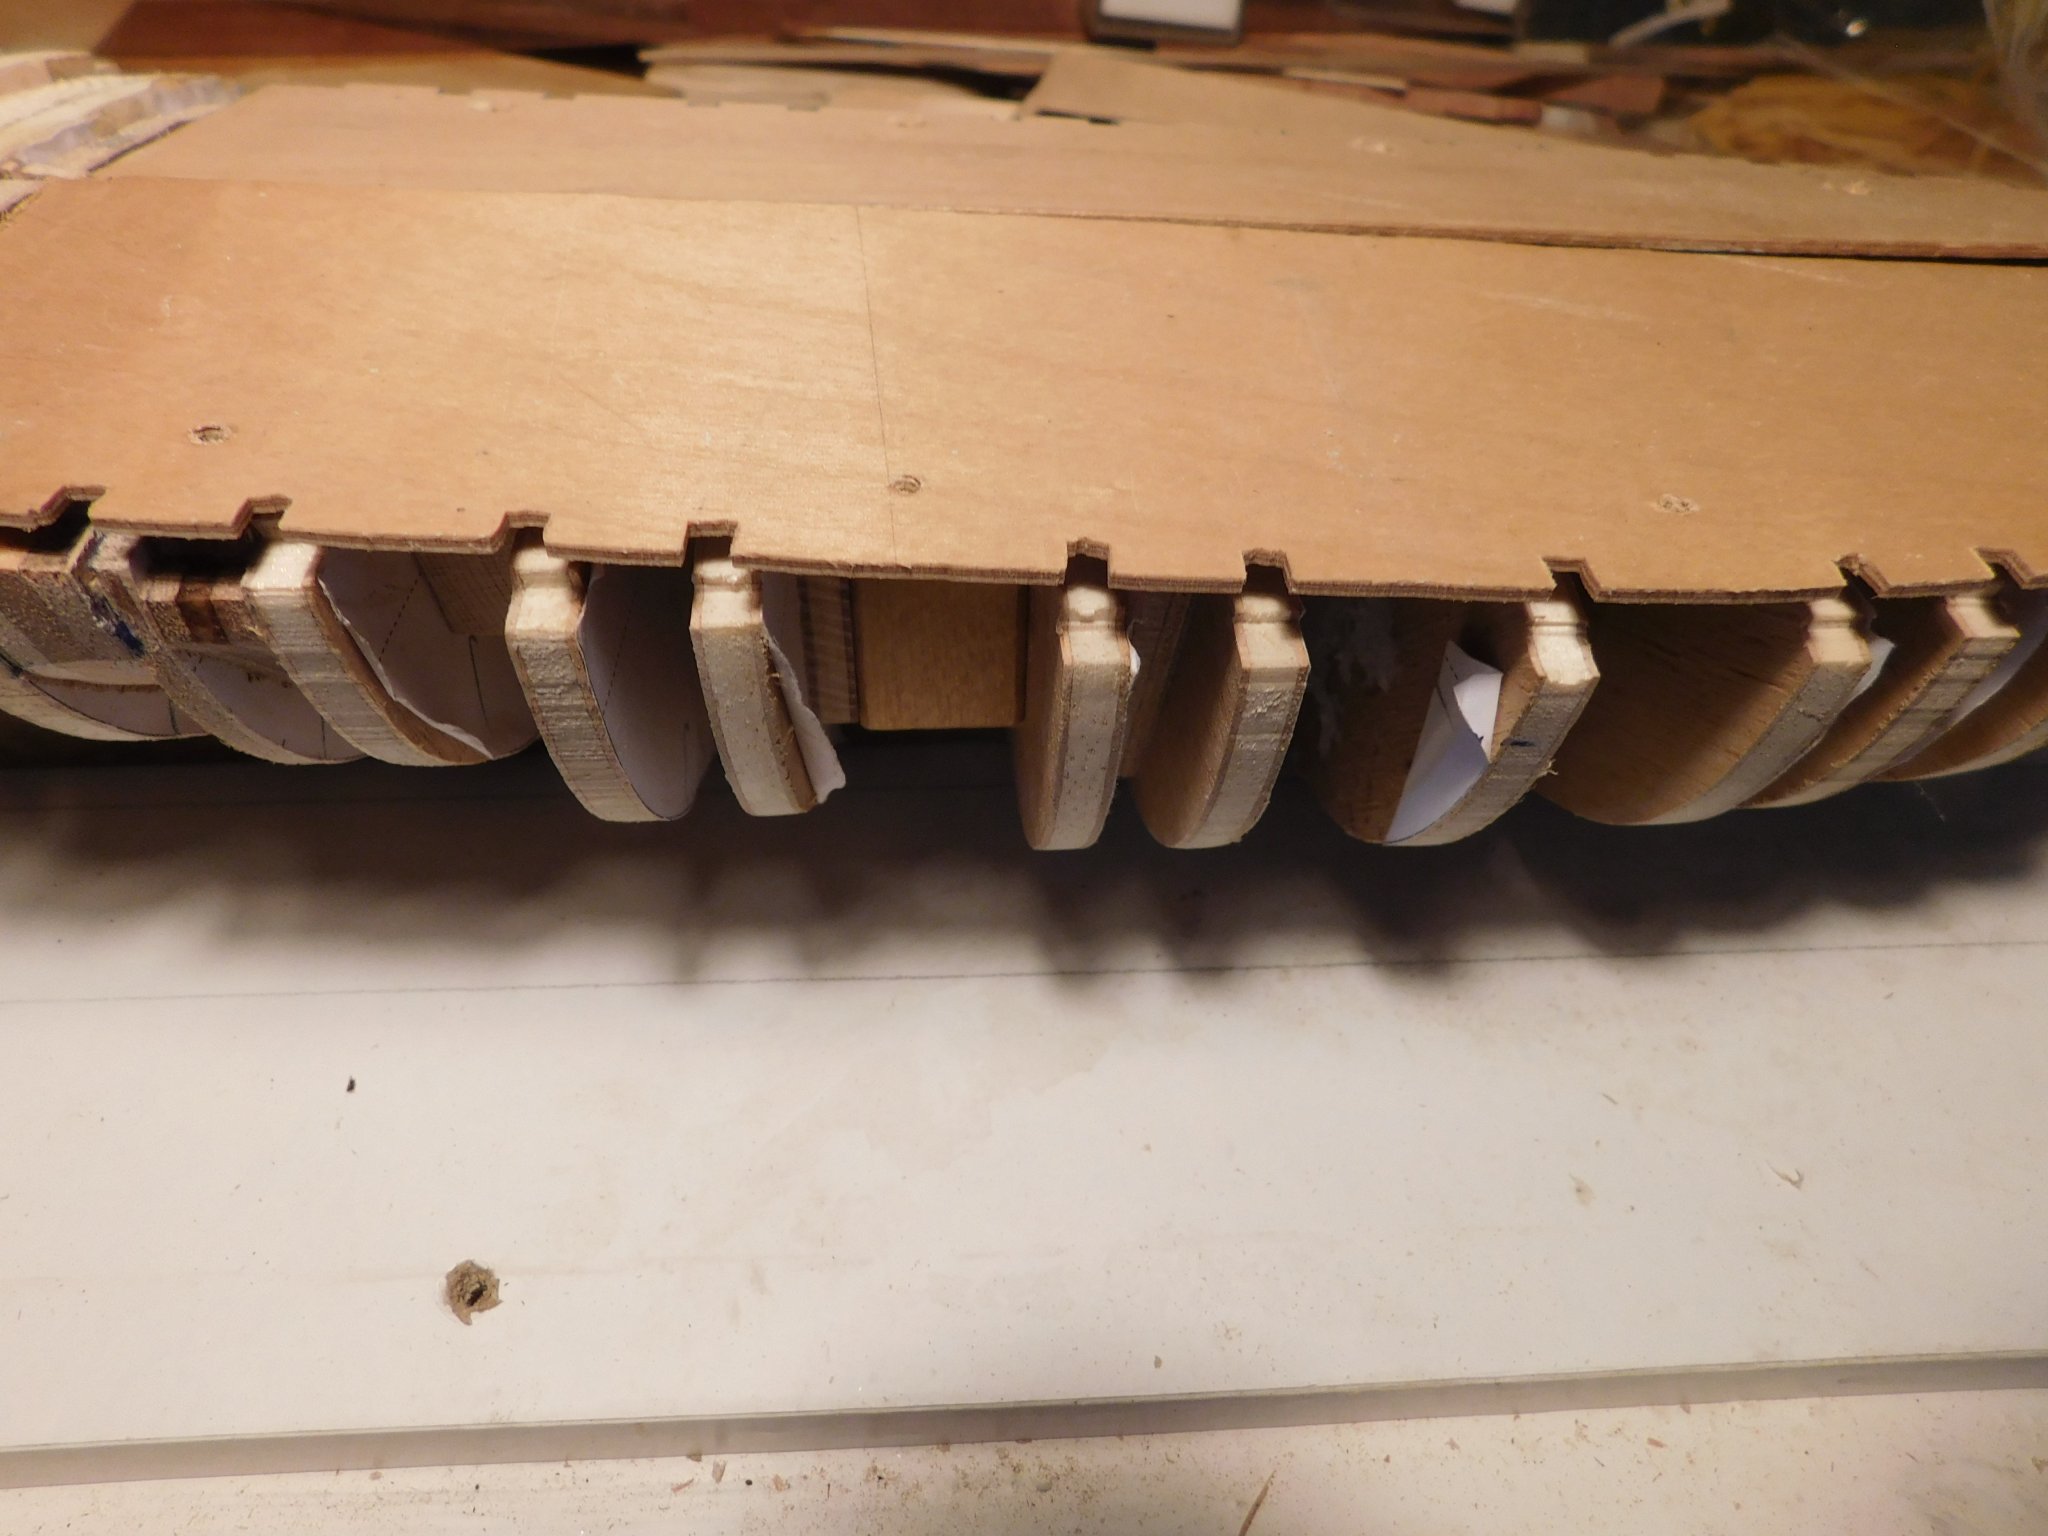
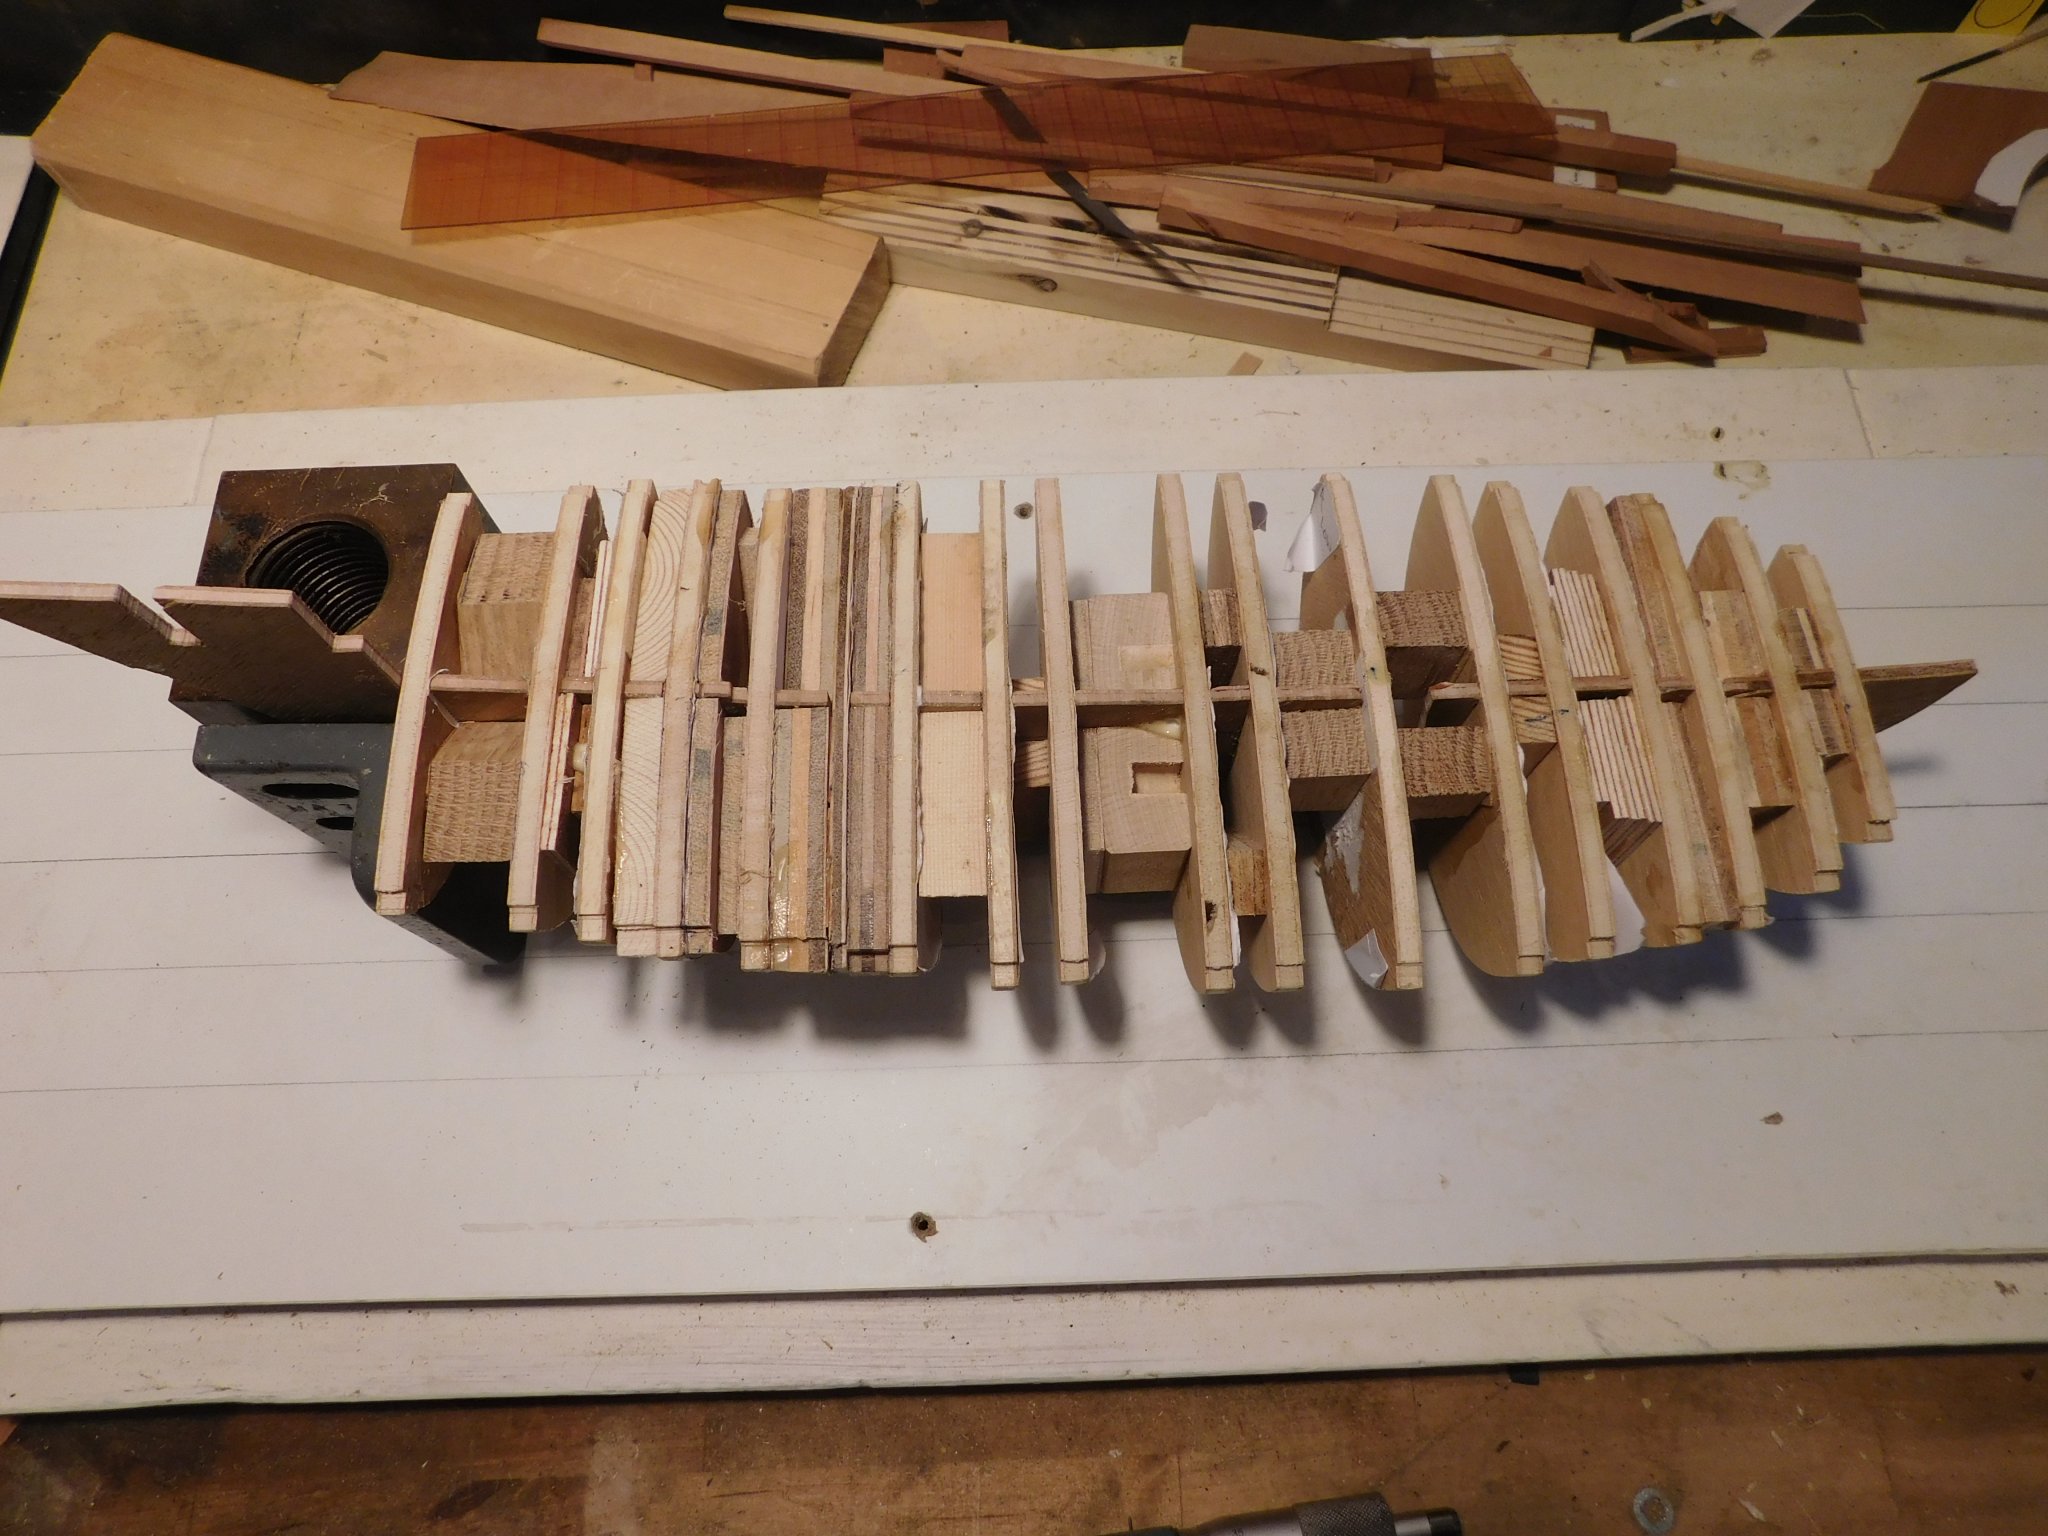
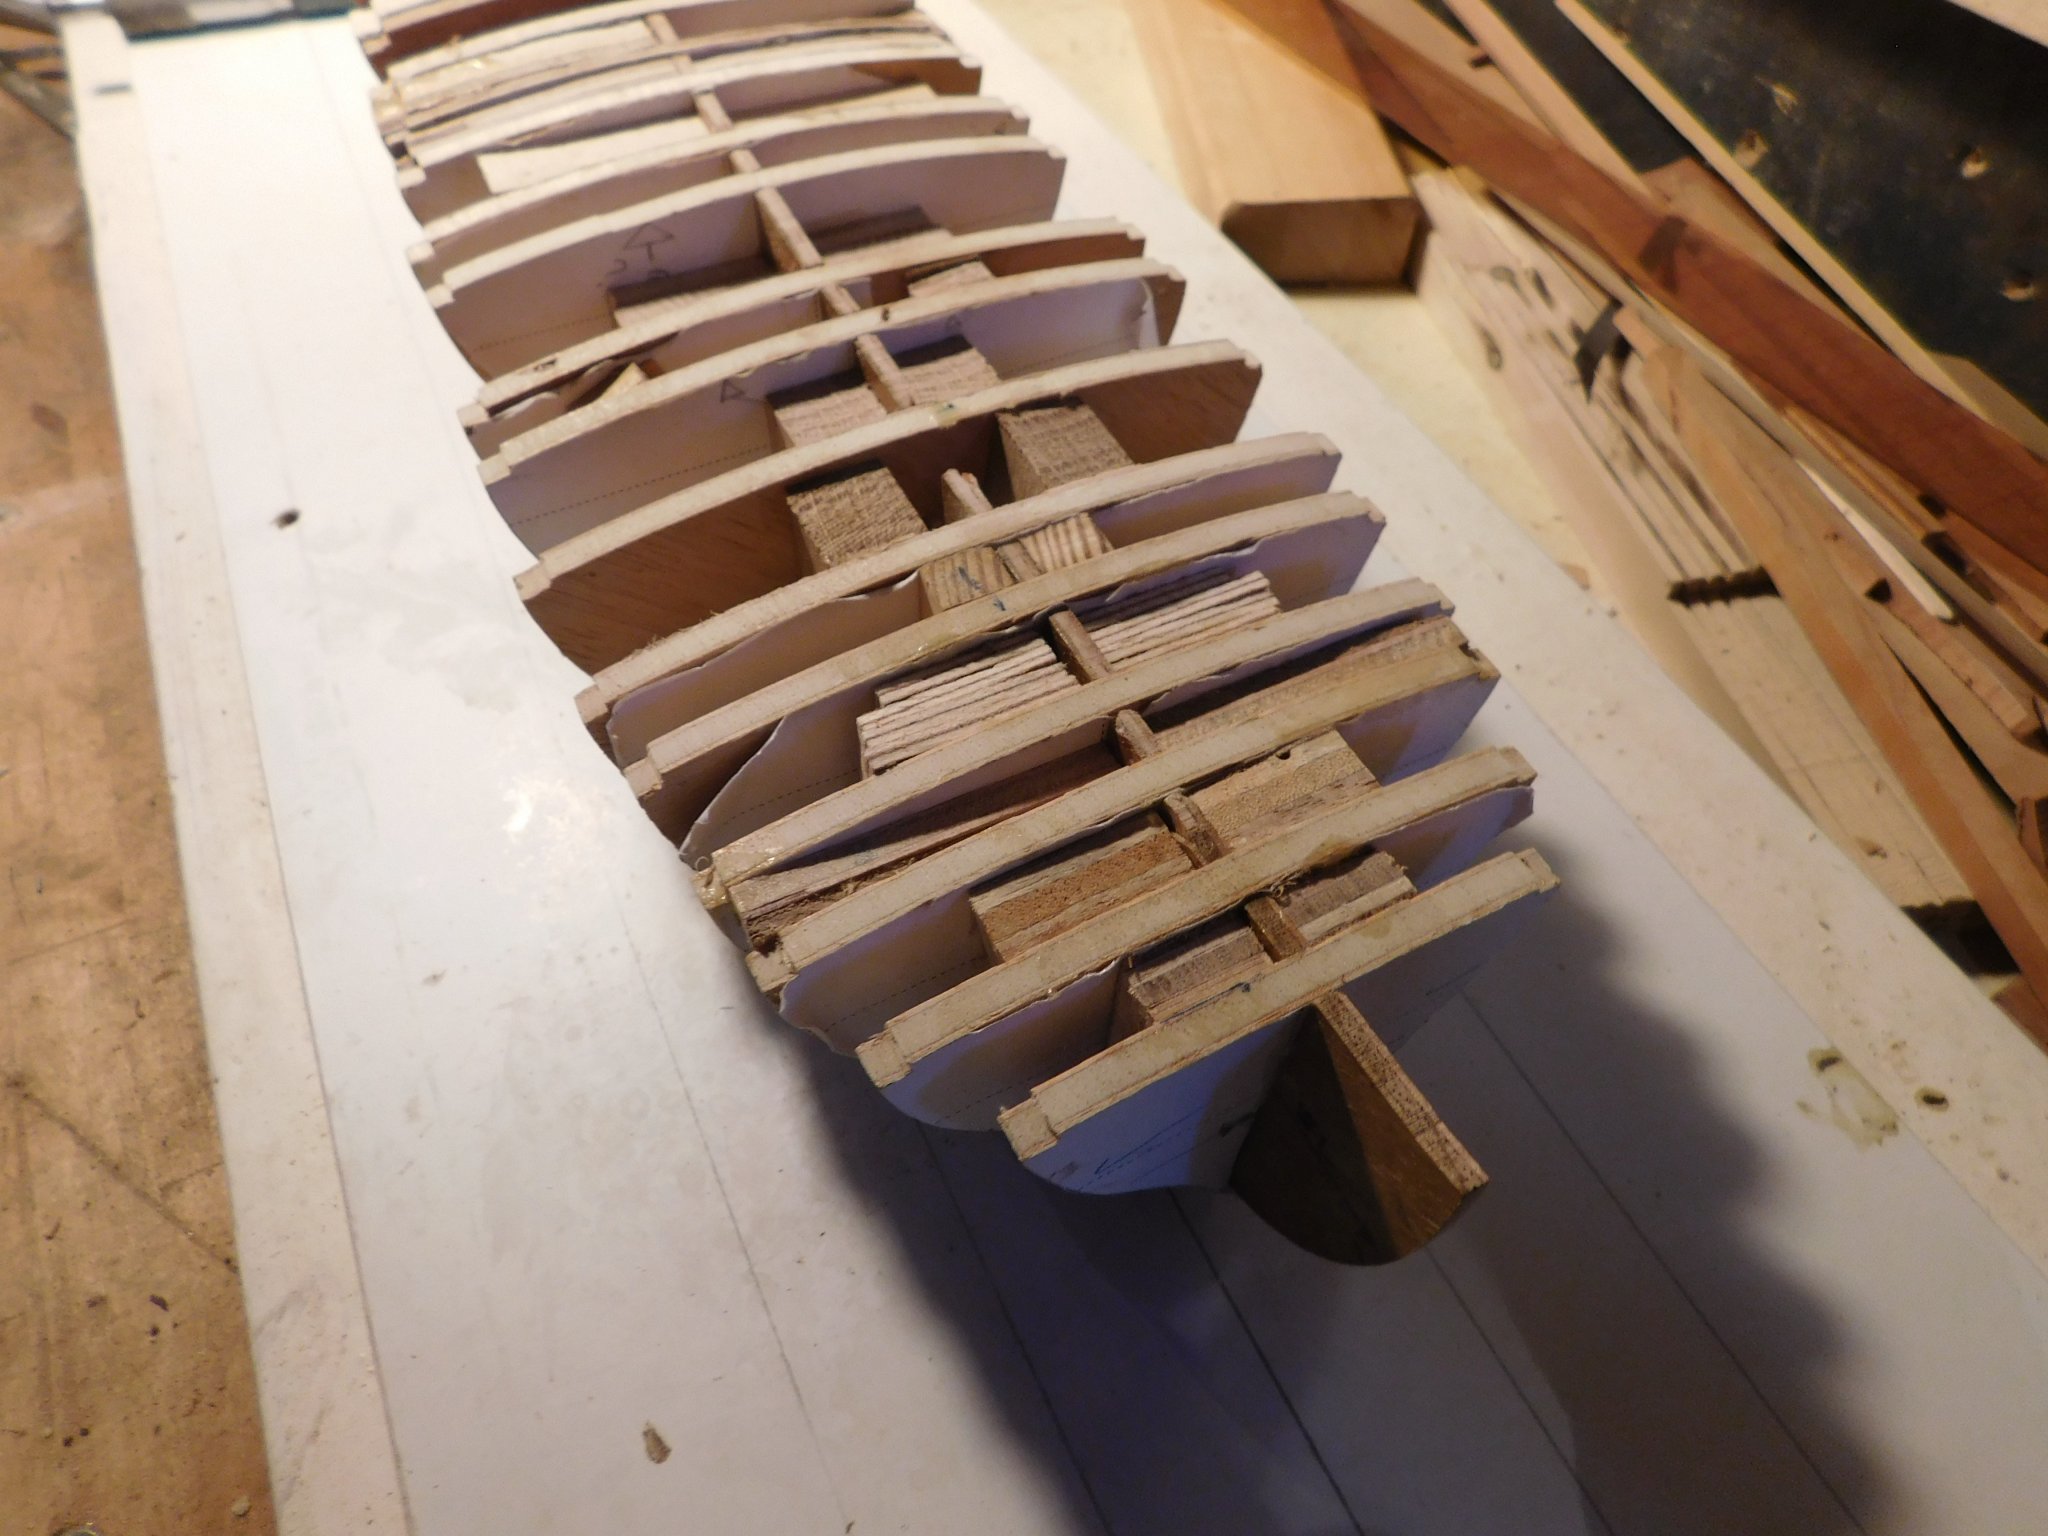
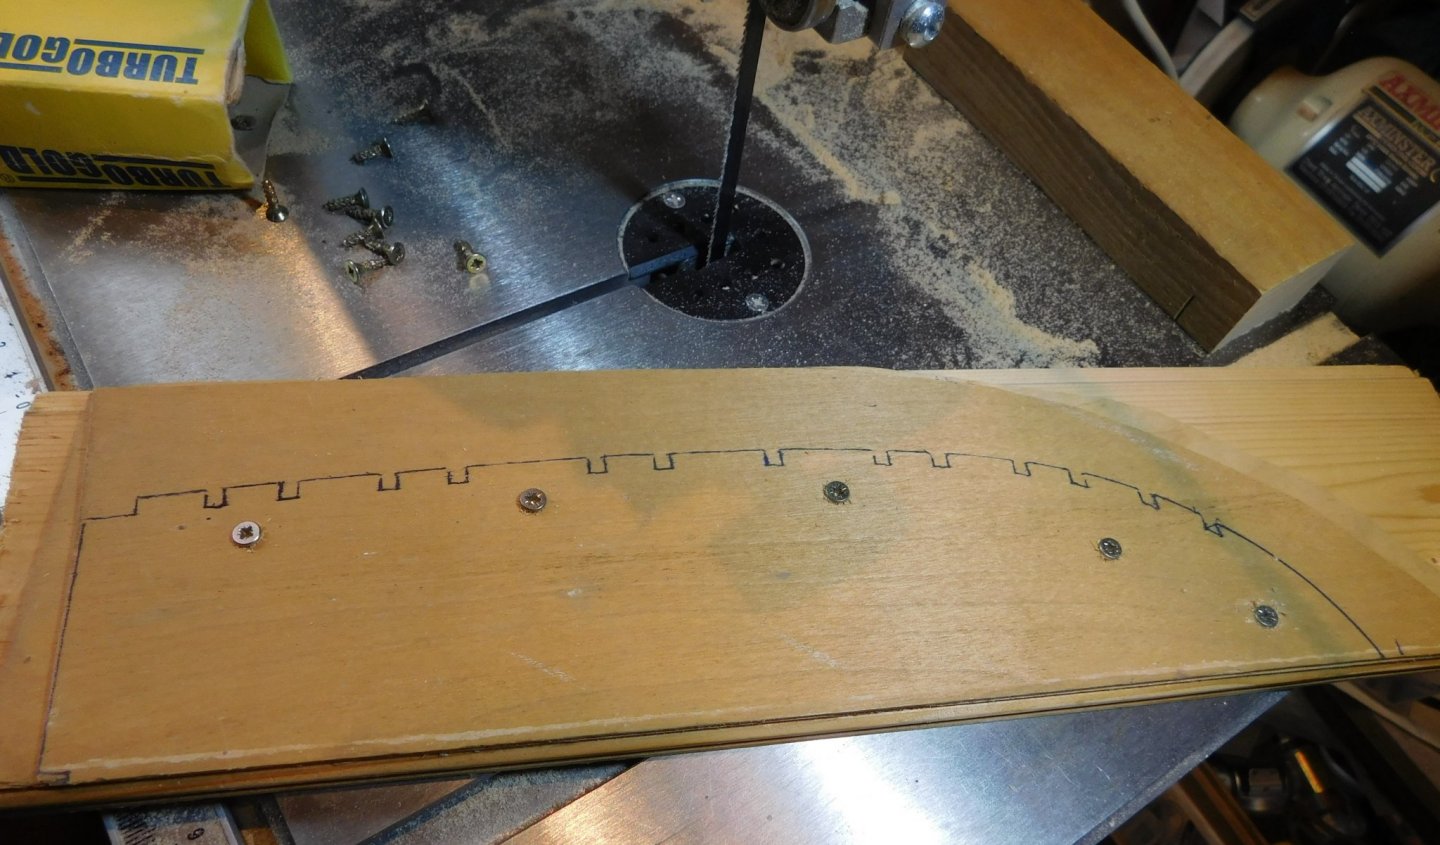
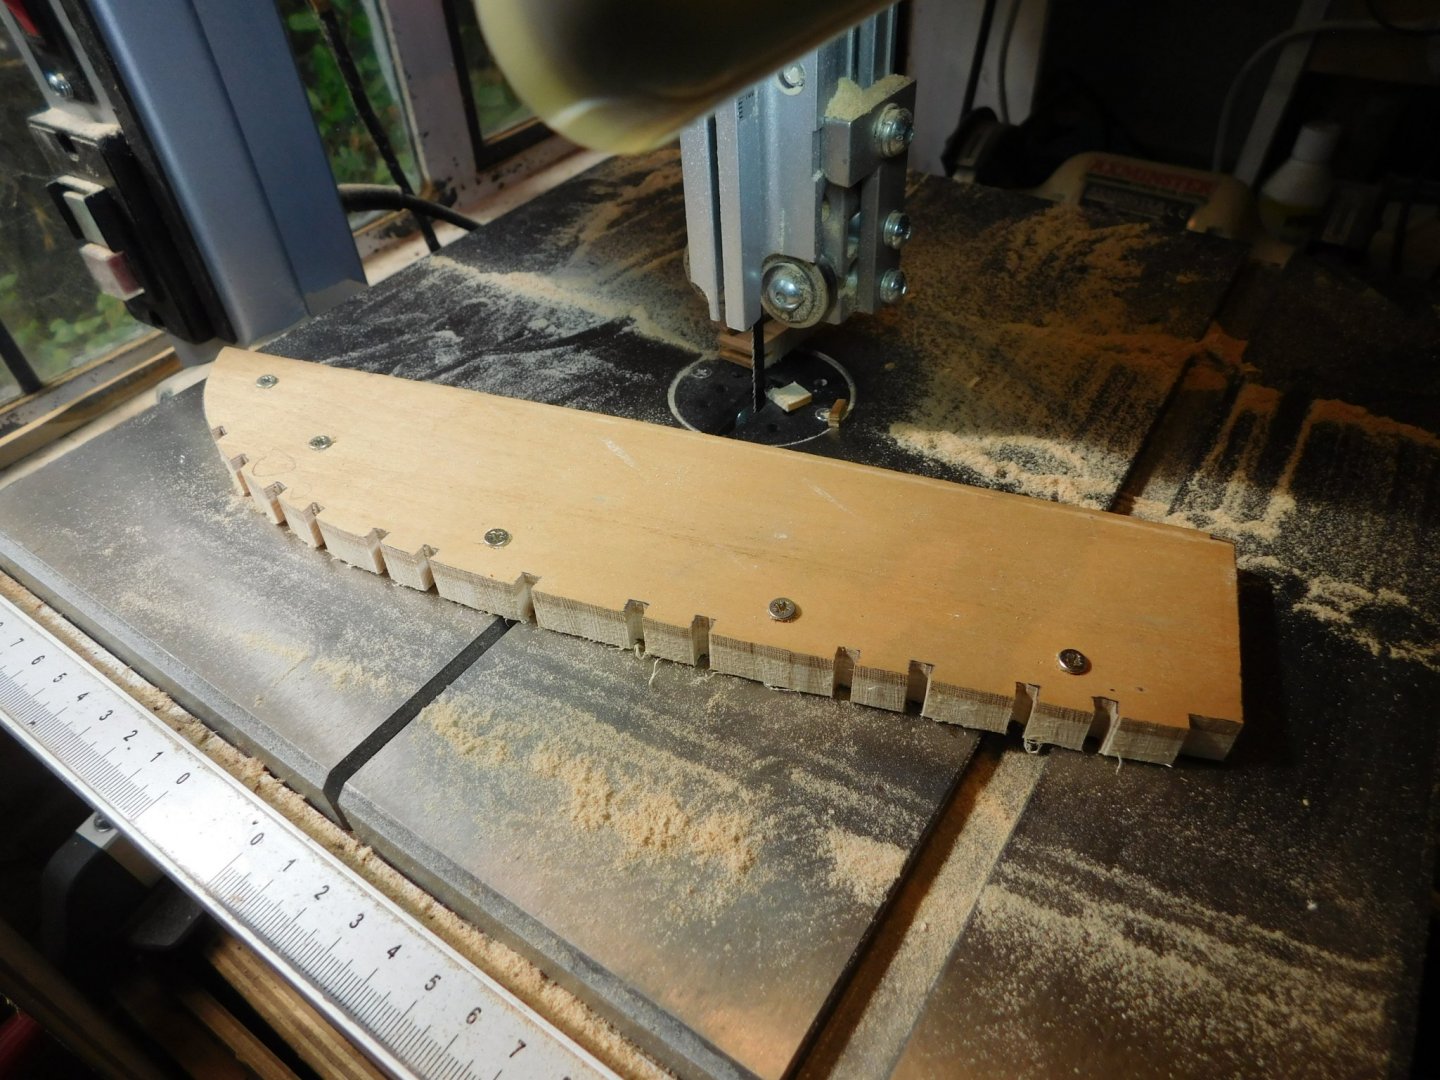
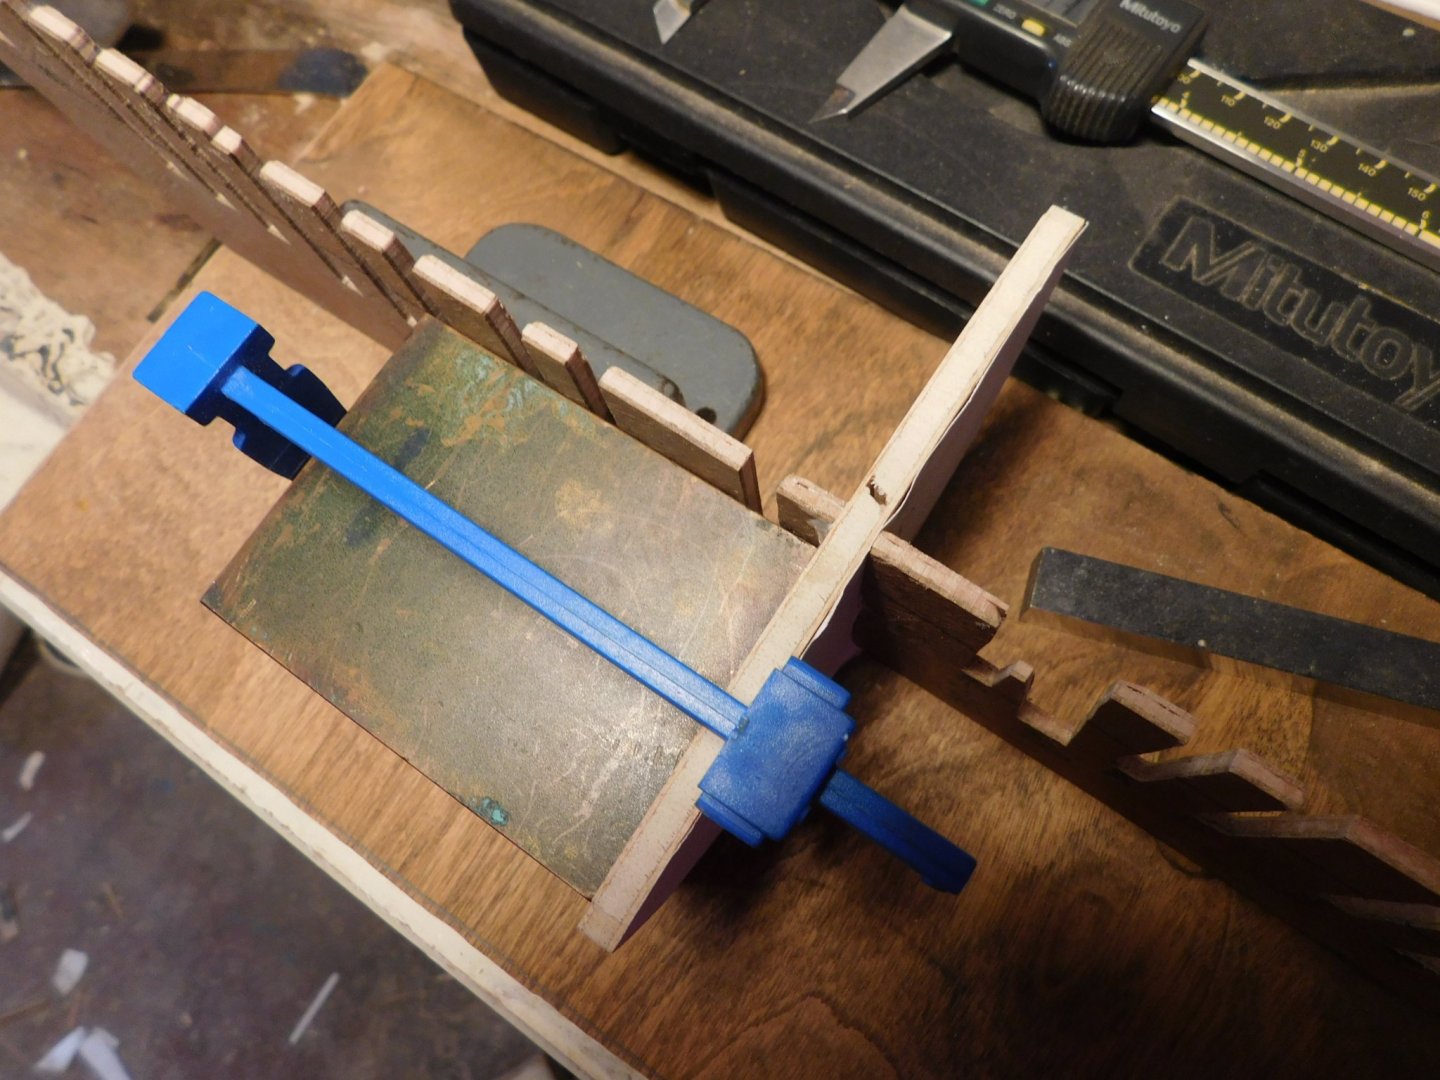
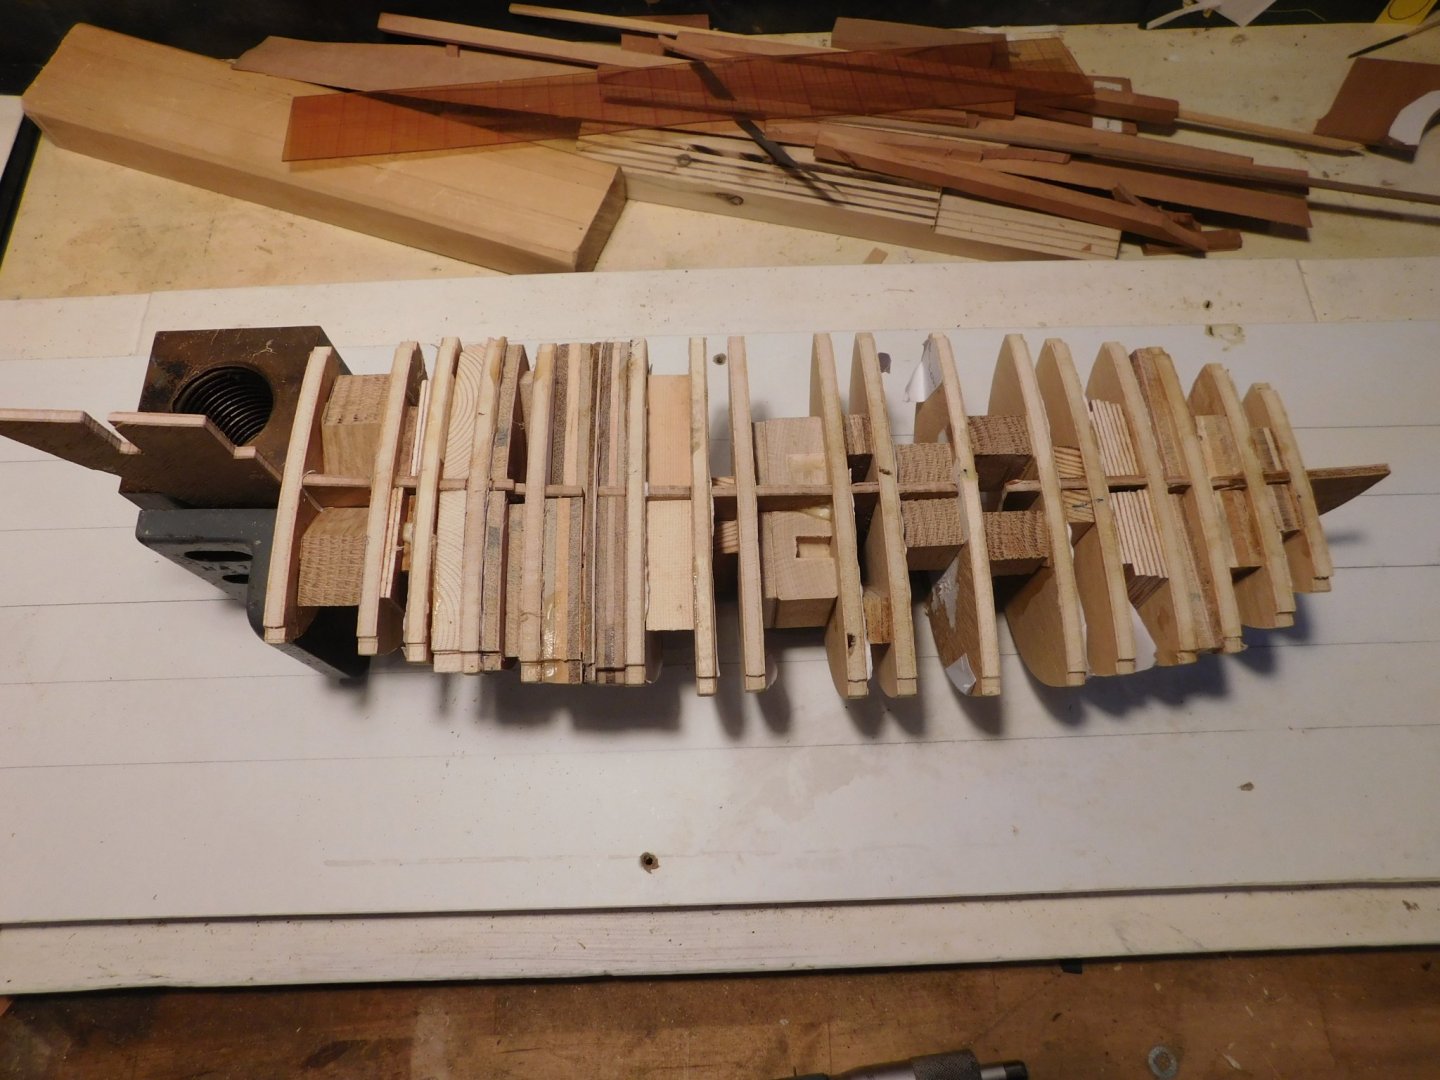
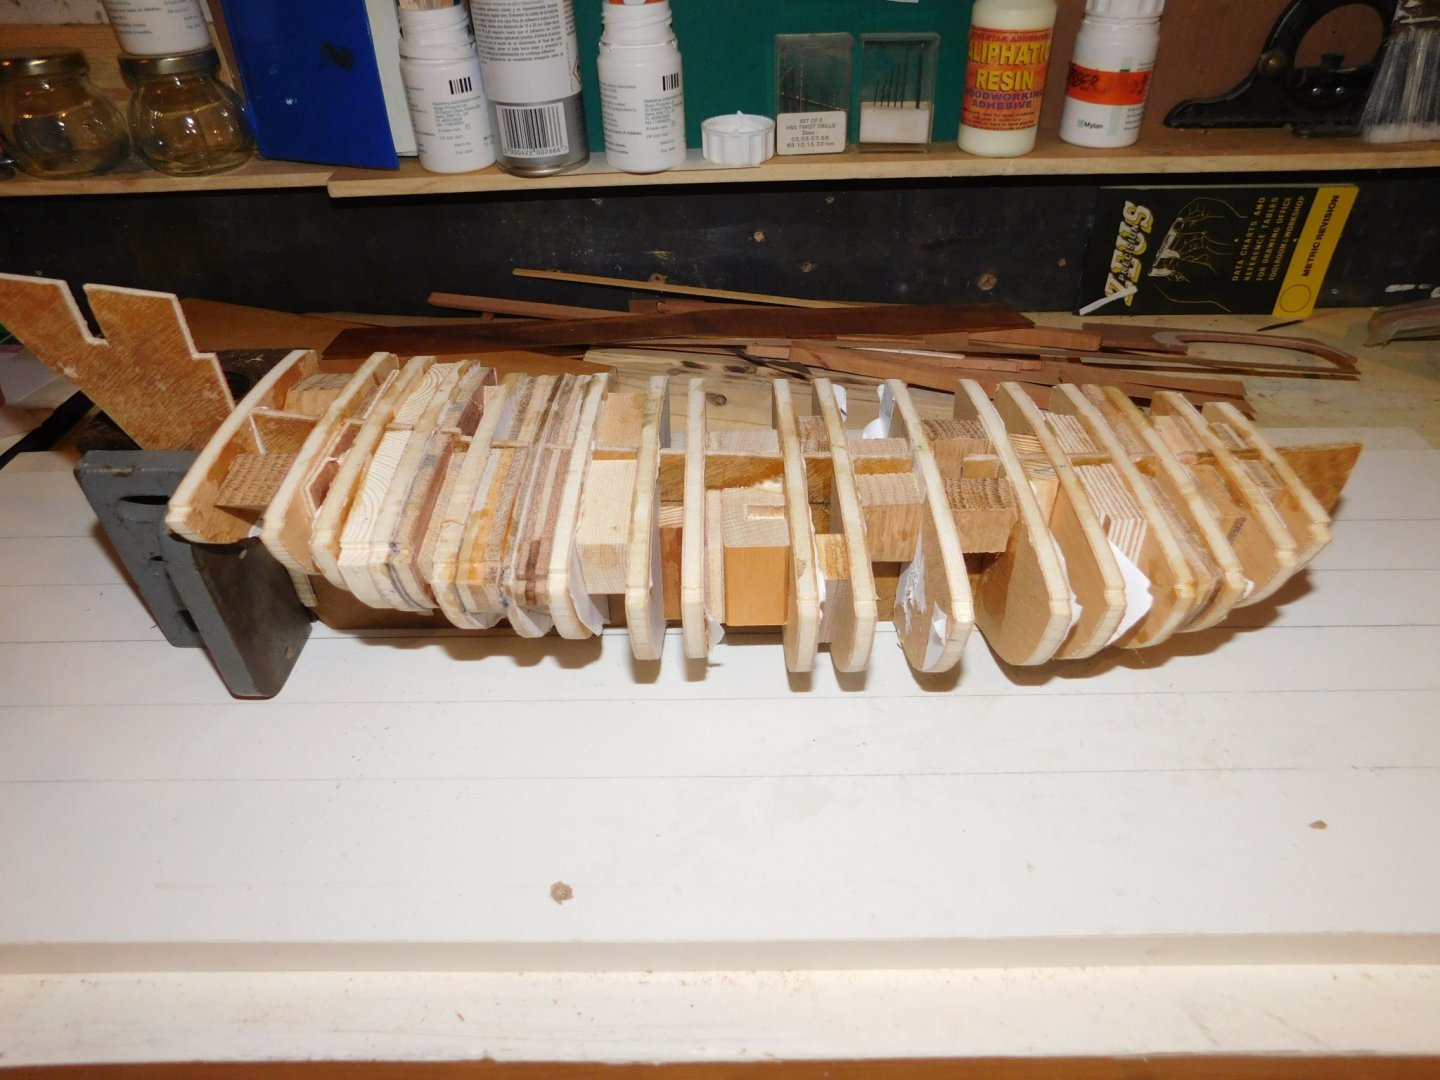
It has taken a while for me to get the bulkheads fitted. During the assembly of the bulkheads a twist appeared in the hull former. It was about 6mm out of true and several bulkheads were already in place. I had ensured the initial assembly was square and true in all directions: However, the twist was there and it was too big to ignore. I looked at the scraps of the plywood I used to make the former and, sure enough, the remainder had also developed a bow. Since I chose the blasted piece because it was perfectly flat when I checked and now both the workpiece and the off-cut were warped it cannot be a co-incidence. I was satisfied that the material was the problem and not something I had done. The bulkheads already fitted were in the middle as I had started with these wide stations and had planned on then doing two bulkheads at a time, one at each end. If I could correct the problem without removing these pieces then I would carry on, otherwise I would chalk it up to experience and start again. It was time to get creative: I resorted to force. The idea was this: if the bulkheads were parallel and also at right angles to the hull former, then the hull former must be straight. First step was to go back to the beginning. I measured the gap at the junction of the former and the bulkhead: the gap should be the same all the way across but it wasn’t (it was when I installed them, the twist happened afterwards. @/$*&!!). Spacers with good square faces were made for each gap matching the measurement taken at the junction. I used a variety of materials: cherry offcuts, plywood, birch etc. Each gap was different so it was a slow process. I paid a lot of attention to getting the spacers the exact width of the gaps, sometimes making the spacer by laminating pieces together for a good fit, sometimes running pieces through a thicknesser for tuning. Typically the same spacer that was a loose fit on the port side was tight on the starboard so I used whatever force was necessary to get matching spacers ‘home’. Once the fit was as near to perfect as I could manage I glued and clamped. It was heartening to see an improvement (small but in the right direction) after the first couple were done. Most of the twist appeared to be in the rear half so that end got the heavy handed treatment. The result is not pretty but it is straight and I was glad to pull it off. It definitely does not look like I envisaged but … so what? Mediator has a cabin at her stern: the last of the bulkheads form the structure of this space and I will come back to these after a while. I have some unresolved thoughts about how I will detail the cabin entrance and want to ‘dummy-up’ a couple of trial pieces before gluing anything. Maybe after fairing, maybe after planking, we will see what seems right when I make some more progress. An unexpected advantage of posting a build log is that I was shamed into clearing away the clutter from the workbench before taking pictures. Bruce


- 43 replies
-
- 6
-
-
- mediator
- first build
- (and 1 more)
-
This document is in the public domain. Royal_Navy_Wooden_Shipwrecks_Database(1).pdf
-
- 7
-
-
Per Rise, welcome to MSW from the UK. Good looking models, hope to see more. Regards, Bruce
-
Hello Jackie and a warm welcome to MSW. Looking forward to seeing a build log of ... whatever it turns out to be! Bruce
-
How niave of me. Next time I will make some type of building jig to align things.
- 43 replies
-
- 3
-
-
- mediator
- first build
- (and 1 more)
-
John, I am so sorry to hear of your loss.
-
Very nice, thanks.
-
Hello Aaron, and a belated welcome. I agree with Allan, you never know when another interest (maybe promoted to 'hobby') will enter your sphere. Scrimshaw must be very rewarding. I have had the pleasure of seeing in person some of the work of Grinling Gibbons and it stirred an interest. Sadly, it turns out I have absolutely no apptitude for carving but am especially happy to see someone who does have the talent. Hope to see more of your work. Bruce
-
Hello Genny, and welcome to MSW from Sussex. Thanks for pointing us towards a book which may otherwise have slipped past un-noticed.