Tigersteve
-
Posts
1,323 -
Joined
-
Last visited
Content Type
Profiles
Forums
Gallery
Events
Everything posted by Tigersteve
-
 I thought I'd post an "intermission" photo of my workshop. It's a small operation. Steve
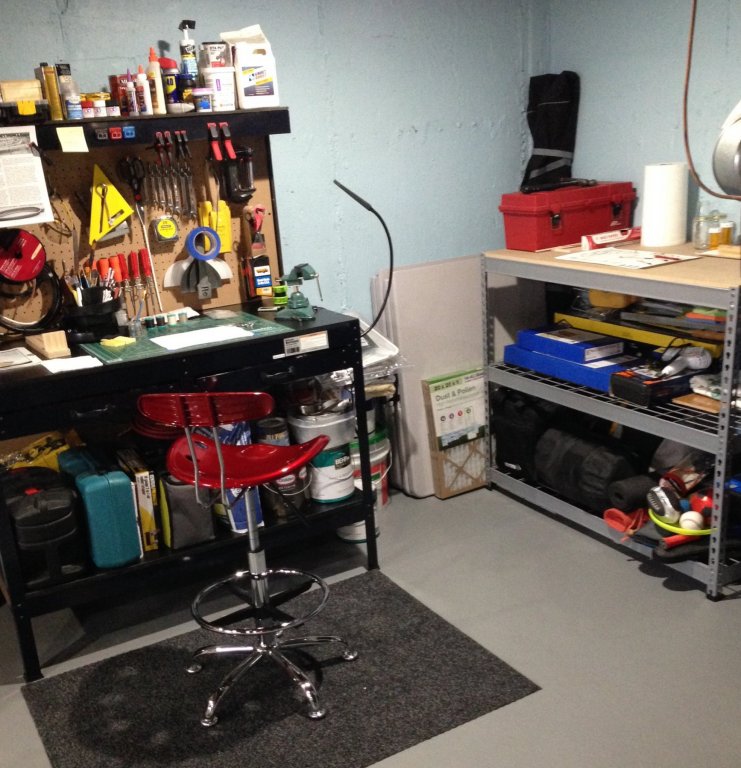
- 165 replies
-
- 2
-

-
- finished
- model shipways
- (and 1 more)
-
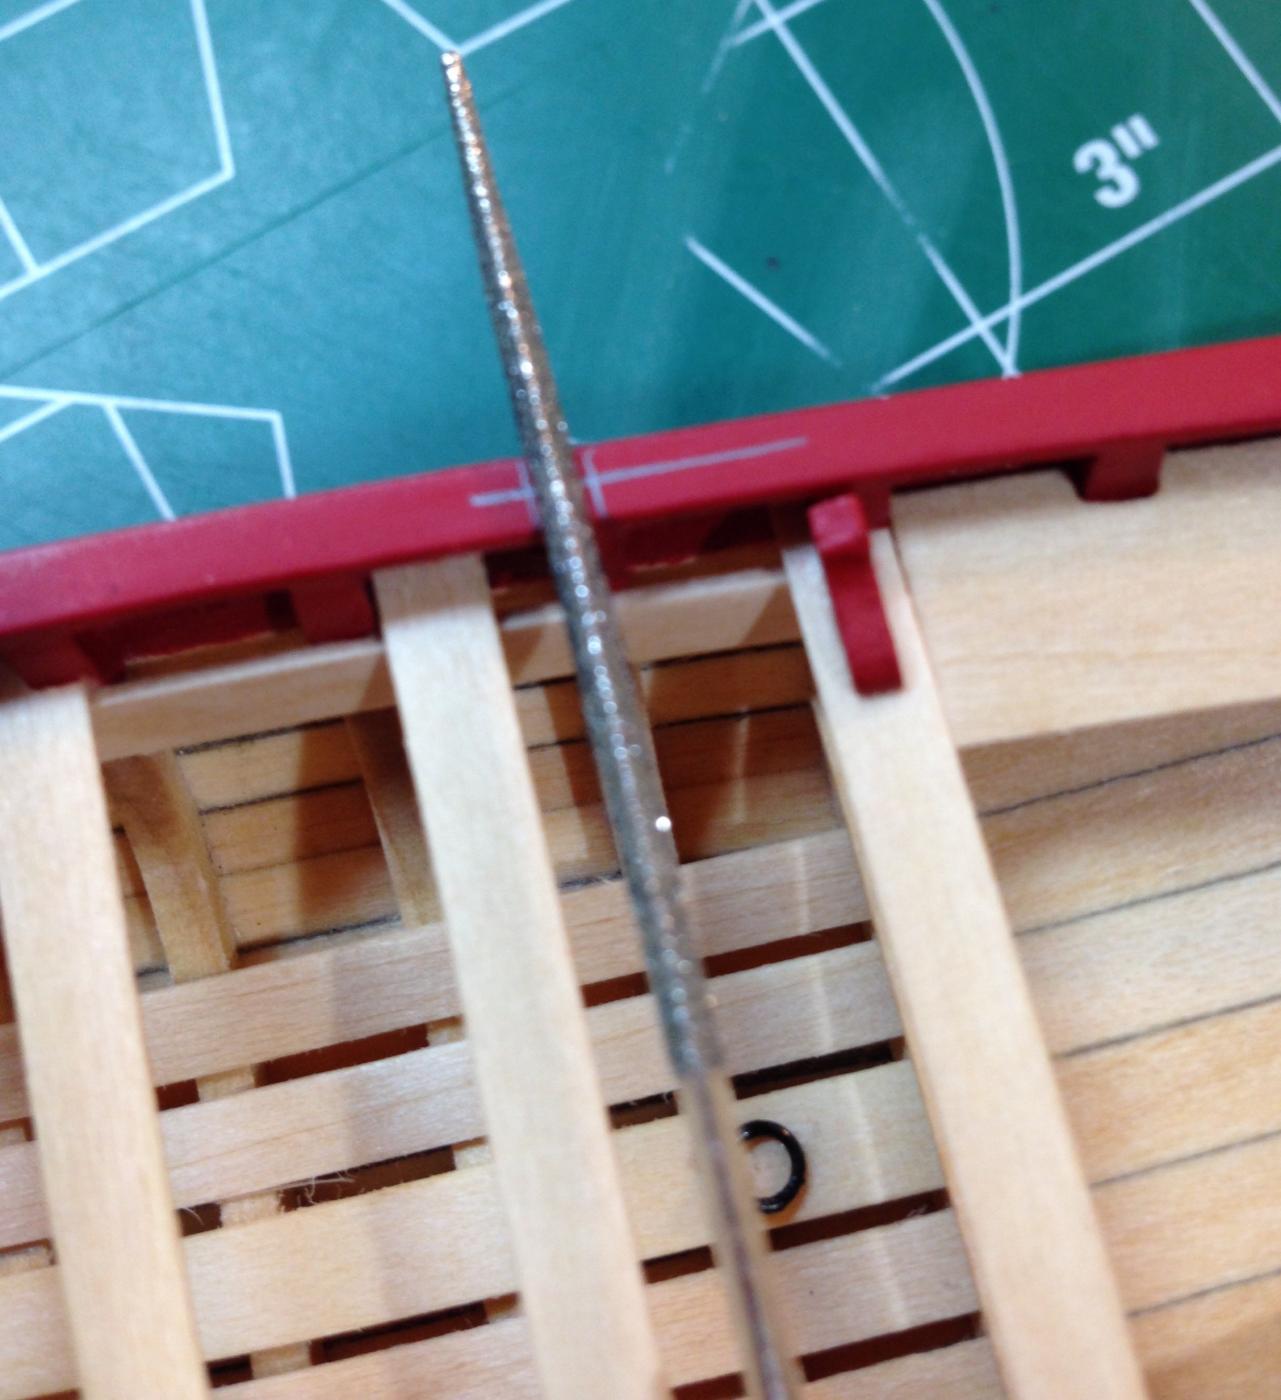
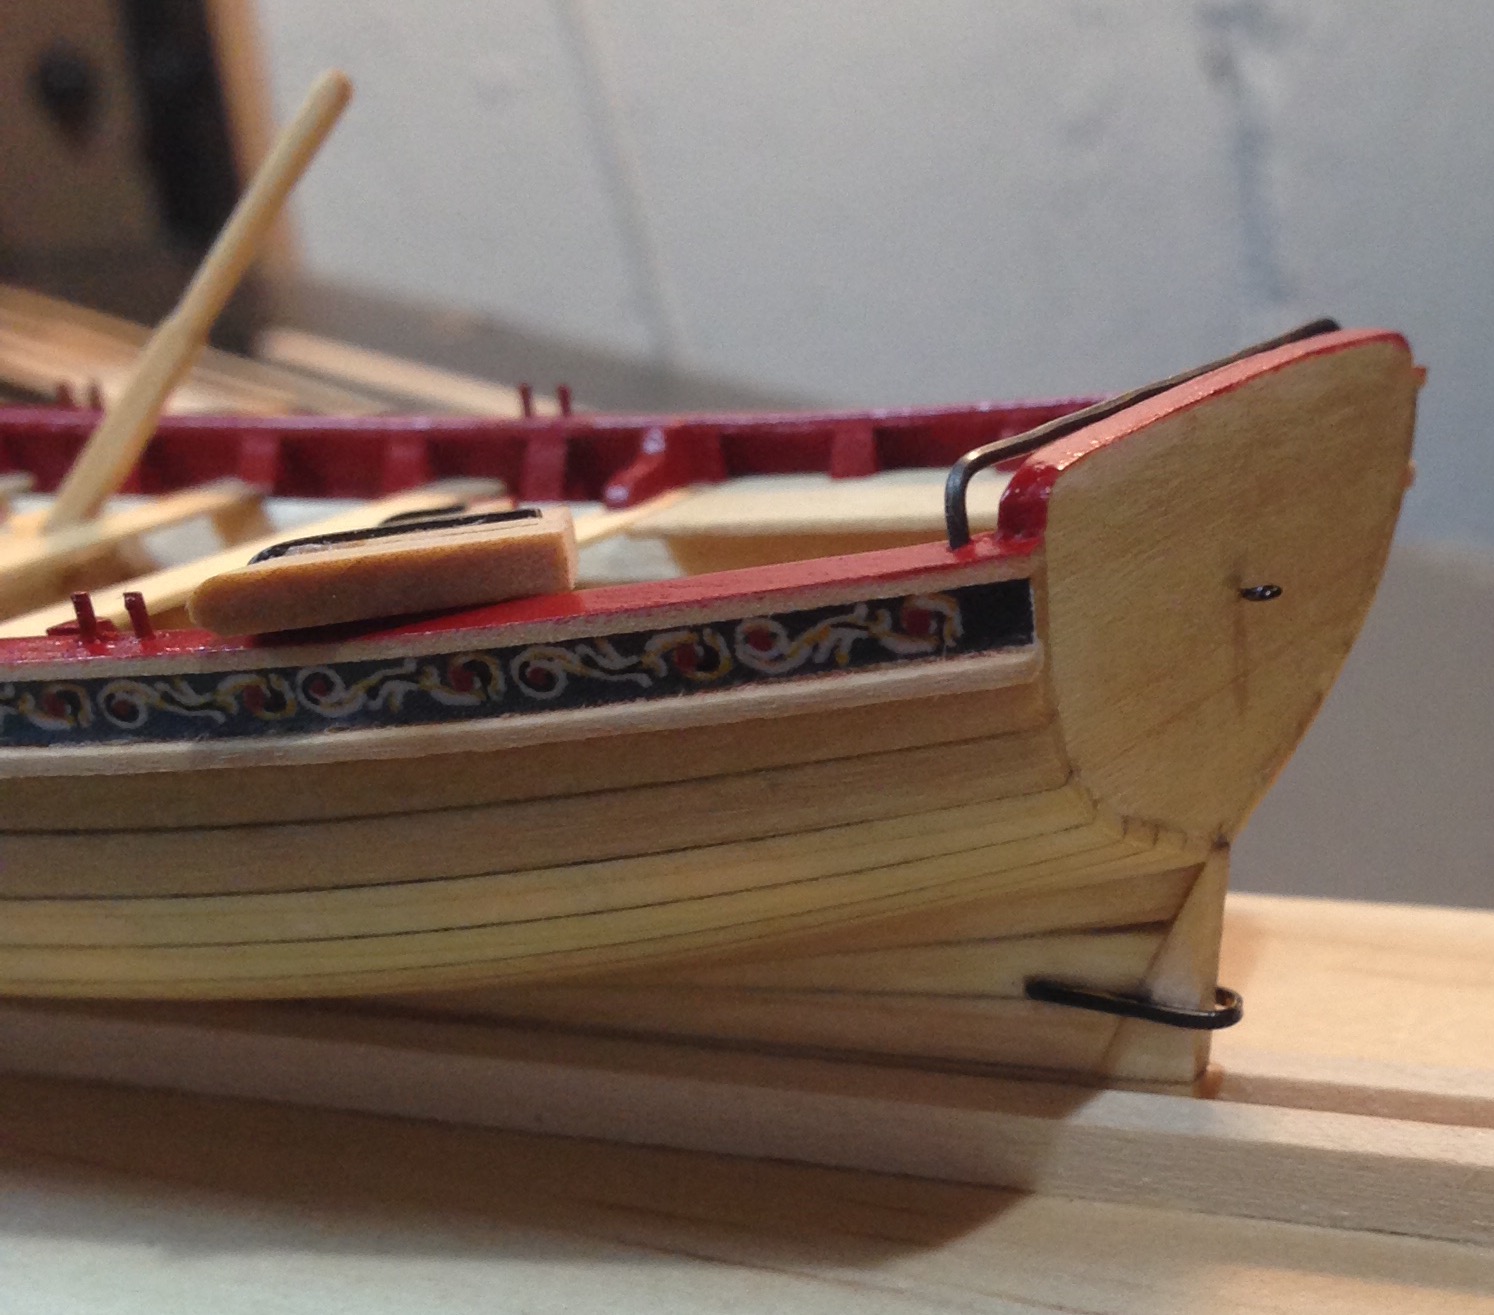
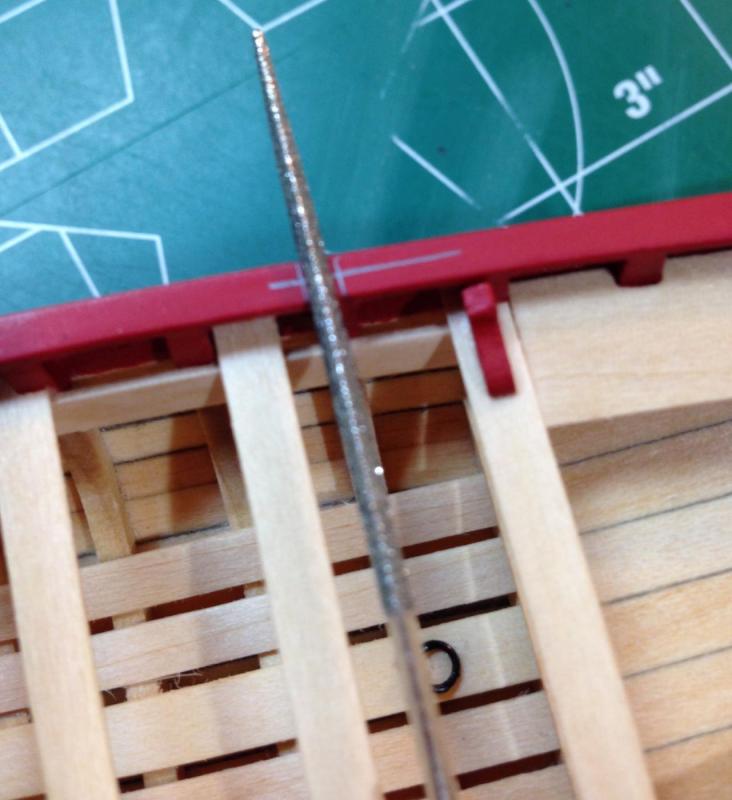
In the second round of installing the oarlocks, I used a straight edge to draw a line roughly in the center of the caprail in the locations where the oarlocks would be placed. I then used a small file to draw two equally spaced perpendicular lines. This method worked much better for me. Not perfect but I'm getting used to drilling these tiny holes! Repainting the caprail was not fun. I wanted to see how Minwax Polycrylic(water based) satin would look over the paint job. I think it provided a little more sheen than the Minwax WOP. It certainly dries quicker and no time to buff to dull the shine. It's a little more shine than I want, but I think I may accept it, as the idea of painting it again is exhausting. The rudder setup is just about done. The tiller has been shaped and stained. I will install on the next updates. I think I'll work on the oars next. Steve

- 165 replies
-
- 10
-
-
- finished
- model shipways
- (and 1 more)
-
It's getting there. Eventually it will just come together. Keep working on it until you're happy. Steve
-
Bob- thank you. It looks great. I have to stop fiddling with the oarlocks on mine so I can move forward!! Steve
- 277 replies
-
- 1
-
-
- model shipways
- 18th century longboat
- (and 1 more)
-
Nice work. I'll follow along. Steve
-
Wow- painting already! Seems like you just started on this project. Awesome! Steve
- 162 replies
-
- 7
-
-
- dirty dozen
- fishing
- (and 2 more)
-
Samueljr added sails to his: http://modelshipworld.com/index.php/topic/4559-18th-century-longboat-by-samueljr-finished/?fromsearch=1 Steve
- 162 replies
-
- 1
-
-
- 18th century longboat
- model shipways
- (and 1 more)
-
I can't wait to see what you decide. I think if you wanted to you could finely sand the layers of WOP off and still stain. So don't rule that out if you had it in mind. Test it on scrap first, of course. Not an expert, but I'm learning about these minwax products as I go. Really enjoying your build. Steve
-
It's looking really good. She'll look nice with the Mayflower. I will have to get a curling iron now. Lol Steve
-
No rush. Just wanted to see what the other part of your rigging looked like. I'm in the midst of repainting my caprail and touchup as well. Not close to rigging yet. Thank you for your reply. Steve
- 277 replies
-
- 2
-
-
- model shipways
- 18th century longboat
- (and 1 more)
-
Bob- it looks great! Very excited about this:) Can you take a photo of the top of the mast for us? Steve
- 277 replies
-
- 1
-
-
- model shipways
- 18th century longboat
- (and 1 more)
-
Just found your log and skimmed through it. Nice work on this kit! Steve
- 164 replies
-
- 1
-
-
- model shipways
- armed virginia sloop
- (and 2 more)
-
It looks good. I didn't understand the purpose of the hole at first. I'm also curious how you're going the finish the hull. Stain, poly? Sorry if this has been answered already. Your planking is very clean if I remember. Steve
-
Looks good as always. What's the purpose of the hole at the top of that thing? Any idea? I'm curious. I think you should drill it. Steve
-
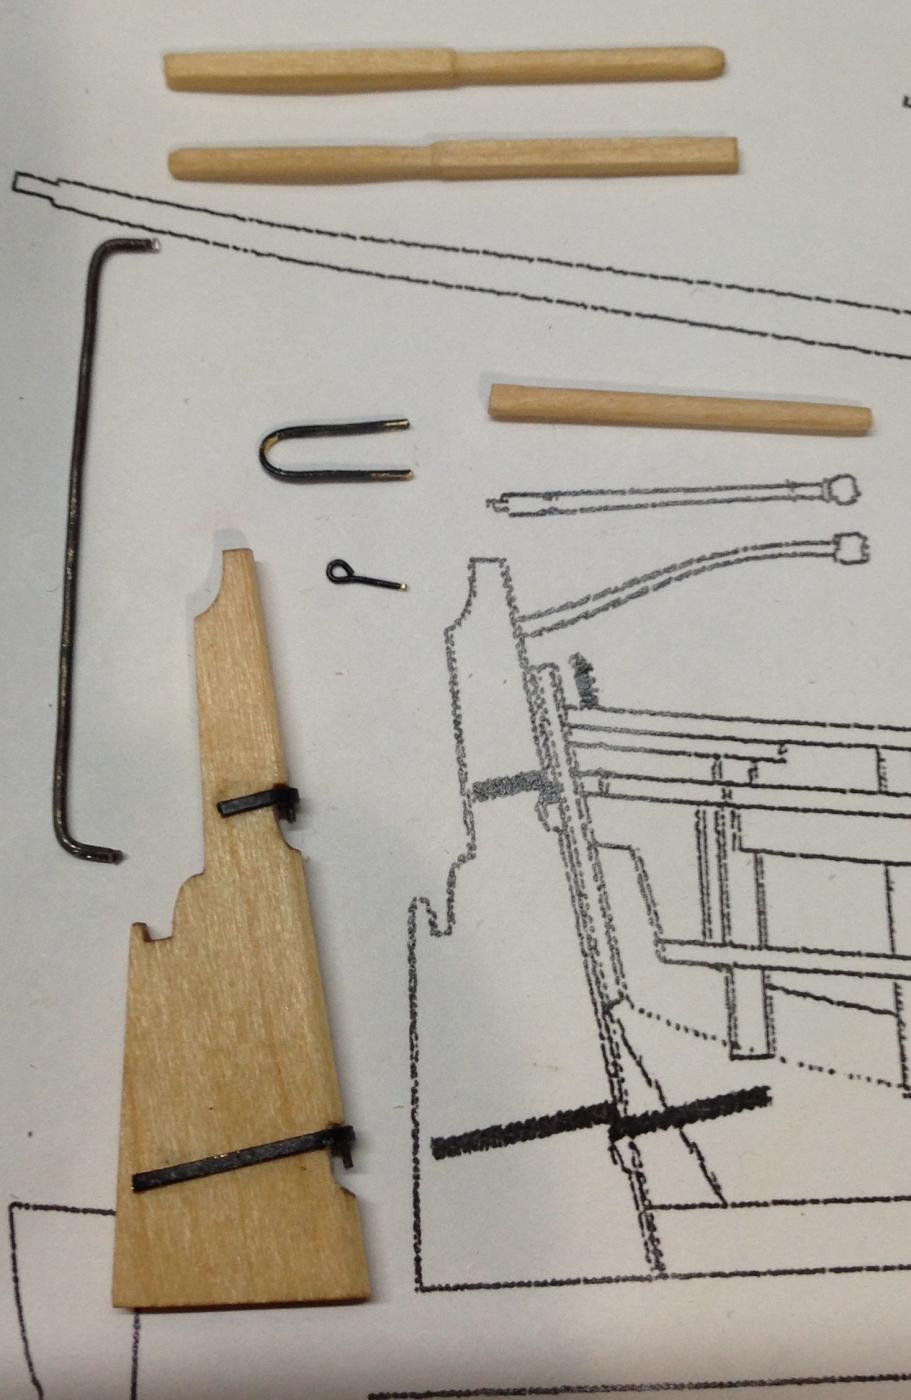
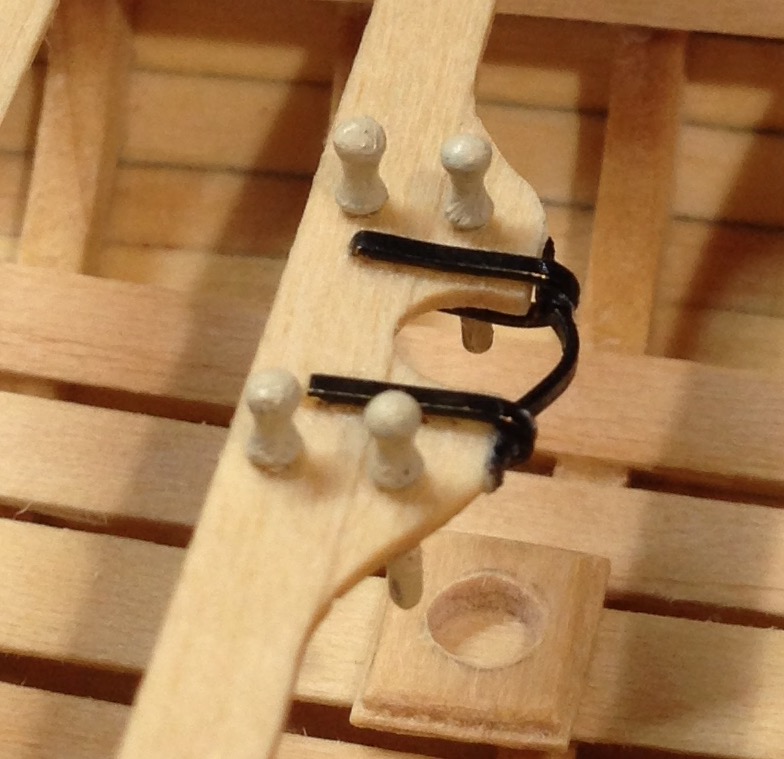
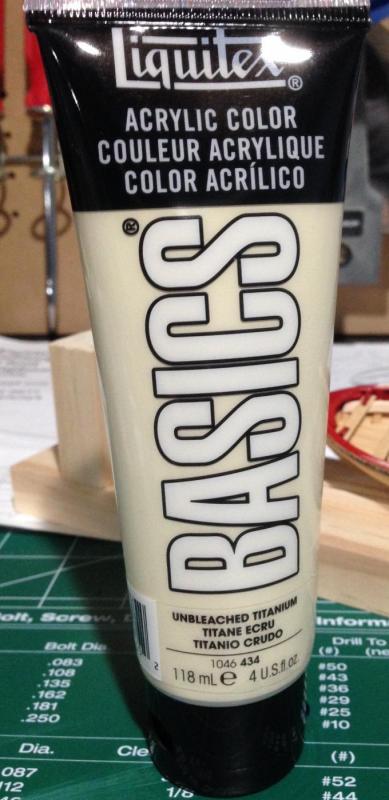
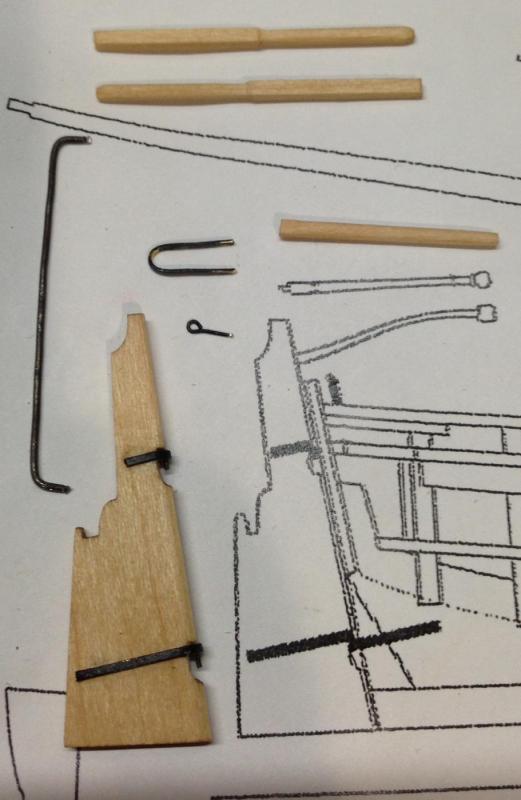
Thanks Chuck and everyone for all the likes! In the middle of another redo with the oarlocks. I had them installed but I rushed it a bit so naturally it has to be redone. Probably a week to correct this with the filling of holes, sanding, painting, etc. Here's some photos of other progress: belay pins painted (photo of the paint used). Pleasantly surprised by the quality of this paint. Metal work for the rudder and such is shown along with the horse and windlass handles on the side for now while the caprail gets repainted and oarlocks installed. Steve
- 165 replies
-
- 9
-
-
- finished
- model shipways
- (and 1 more)
-
Glad you decided on the wood for the deck. What are you using for the hull planking? Sorry if you've answered this already. Steve
- 362 replies
-
- 3
-
-
- active
- revenue cutter
- (and 1 more)
-
Check out Chuck's planking videos too http://modelshipworld.com/index.php/topic/13850-chucks-planking-videos/ The curve of the sheer is up to you but you need to leave a little room at the bow for the caprail and also some room at the transom. You'll see that on the plans. I spent the most time on this build on planning and marking off the hull before I started bending planks. Steve
-
I agree the gradual soaking, bending, drying then repeating worked for me. I had a couple planks with kinks and they showed after the stain so if that happens don't use them and redo unless you are painting below waterline. It really is a learning process and you will figure out what works for you. Bob F shows the method for marking off the sheer from the plans. He also explains the tick strip method which many of us used. Steve
-
It was tricky to install the windlass. I ended up sanding until it fit into position. Originally, I wanted to add that detail but I was afraid to cut into the risers. Also I wanted to keep moving forward. The drill bit that I had for drilling the hole for the wire broke so I could not add the wire. I ended up gluing it in place. Also knew adding the wire would be very difficult. Steve
-
The nailing looks good. "Time to move on". I totally get that. You will be obsessing about the next detail anyway. Oh just a tip I learned after. Install the lift rings before you install the thwarts. I know the risers are next for you but keep it in mind. Steve
-
Congrats on the planking. Steve
-
I think this one is going to be a good one. Lol What makes this kit so expensive? Is it because of the amount of walnut wood included? Anyone know? Steve