HOLIDAY DONATION DRIVE - SUPPORT MSW - DO YOUR PART TO KEEP THIS GREAT FORUM GOING!
×


JpR62
-
Posts
699 -
Joined
-
Last visited
Content Type
Profiles
Forums
Gallery
Events
Everything posted by JpR62
-
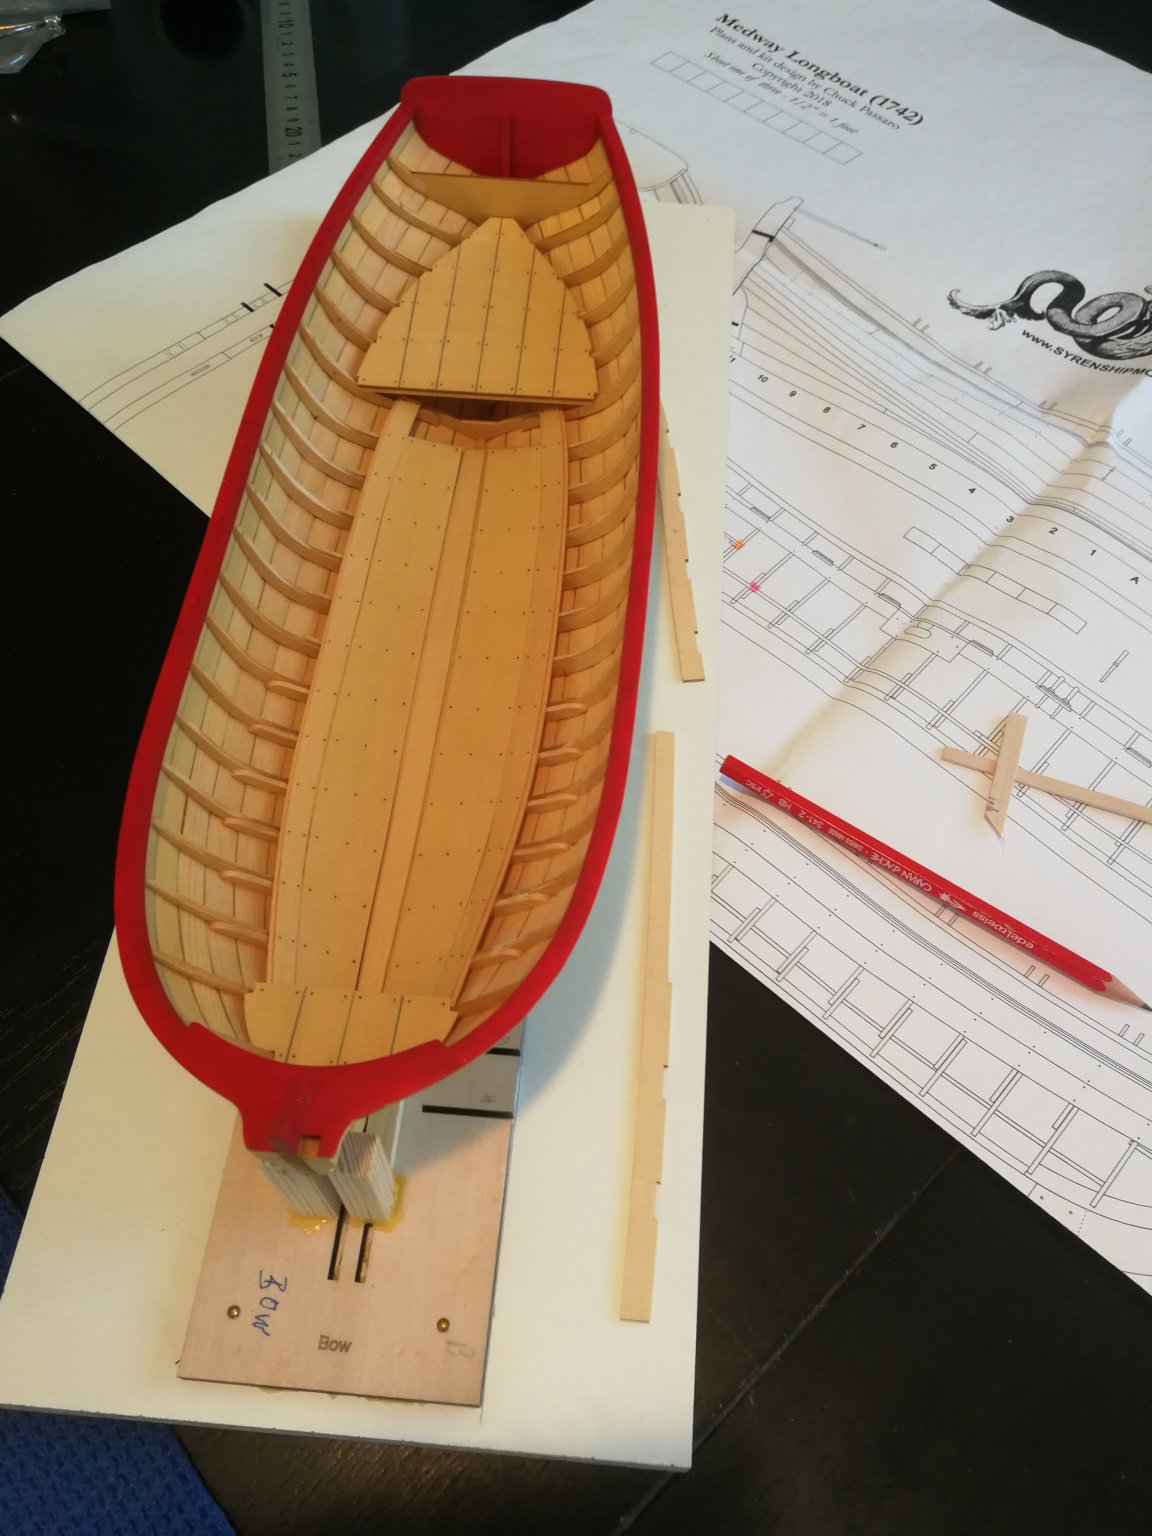
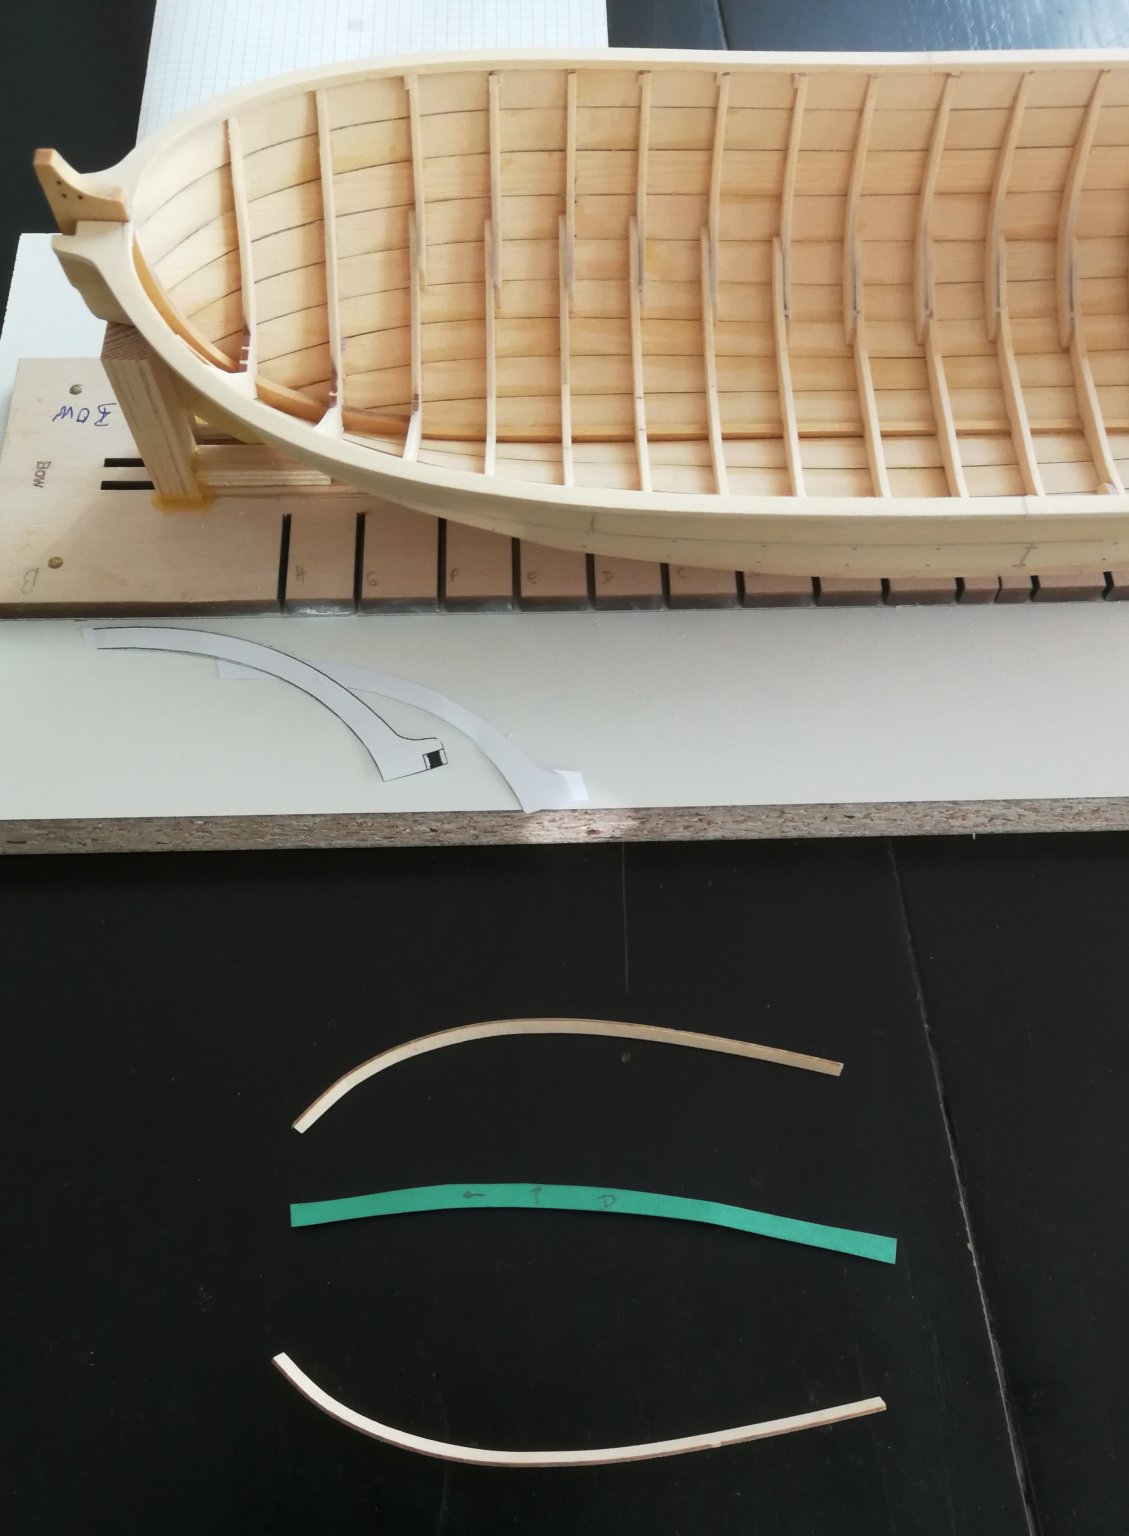
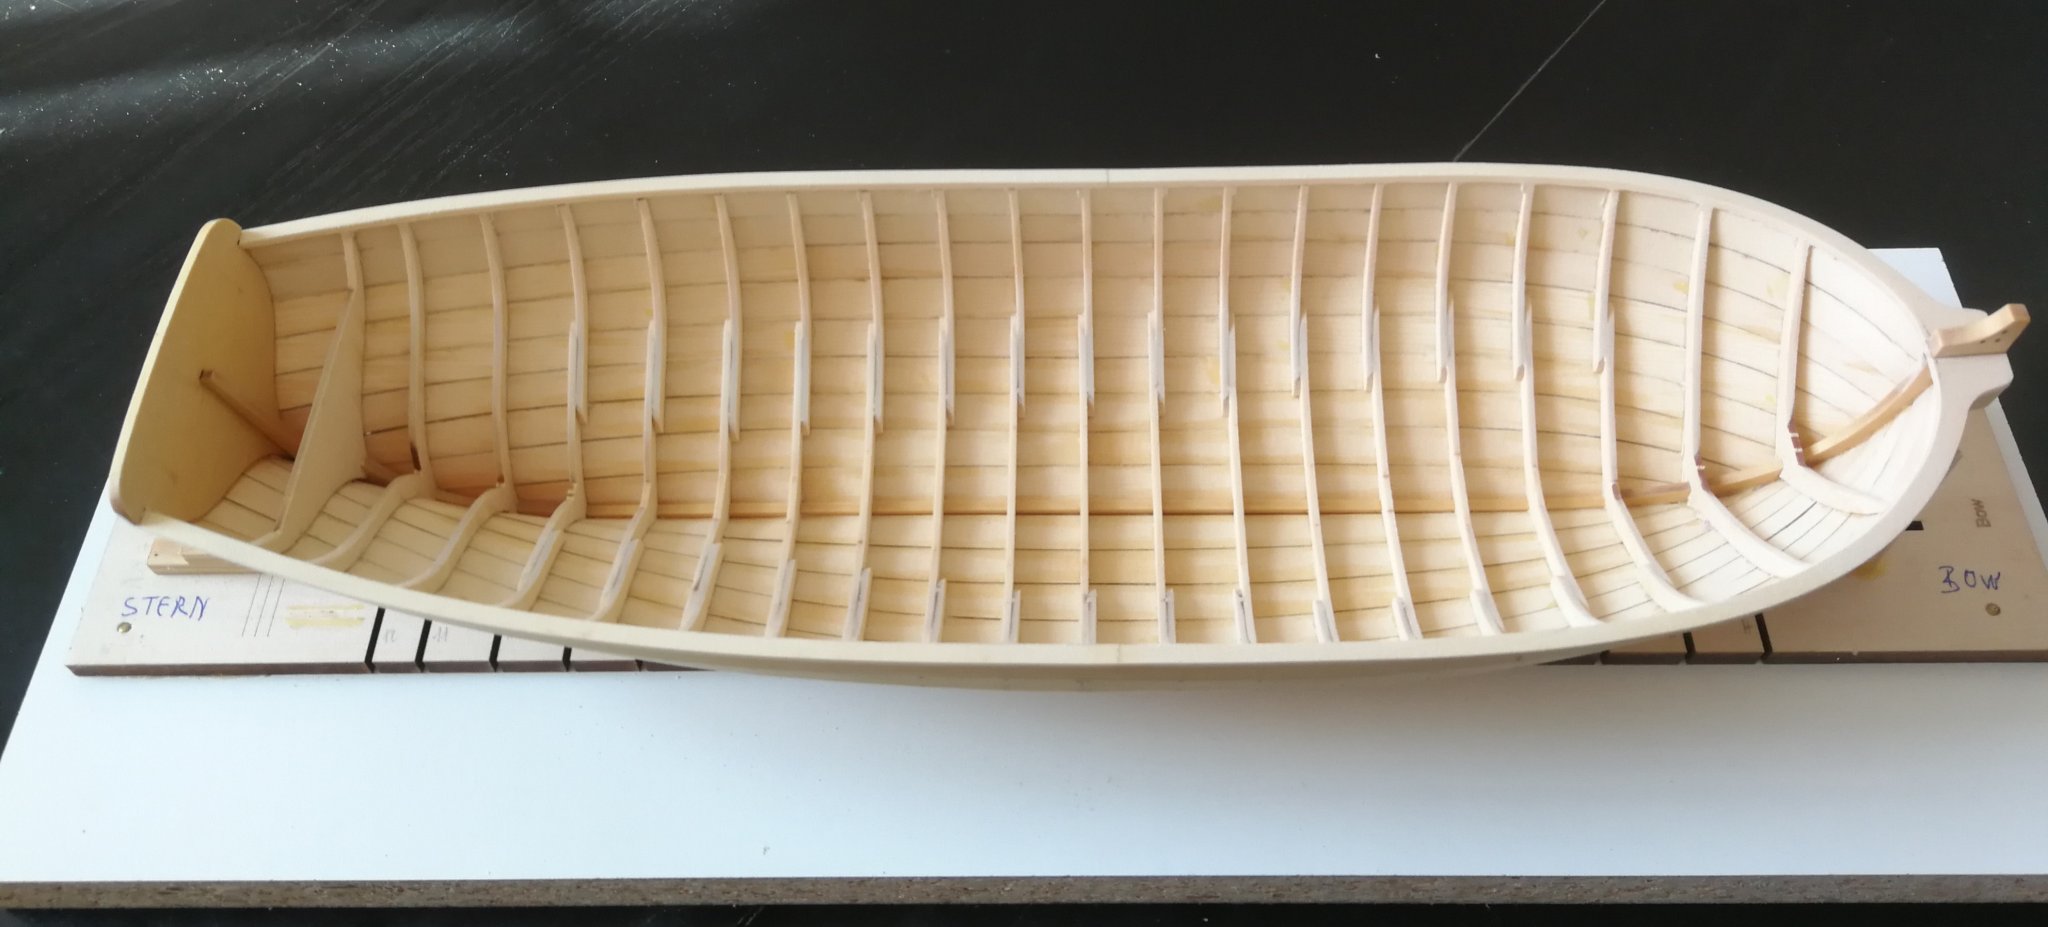
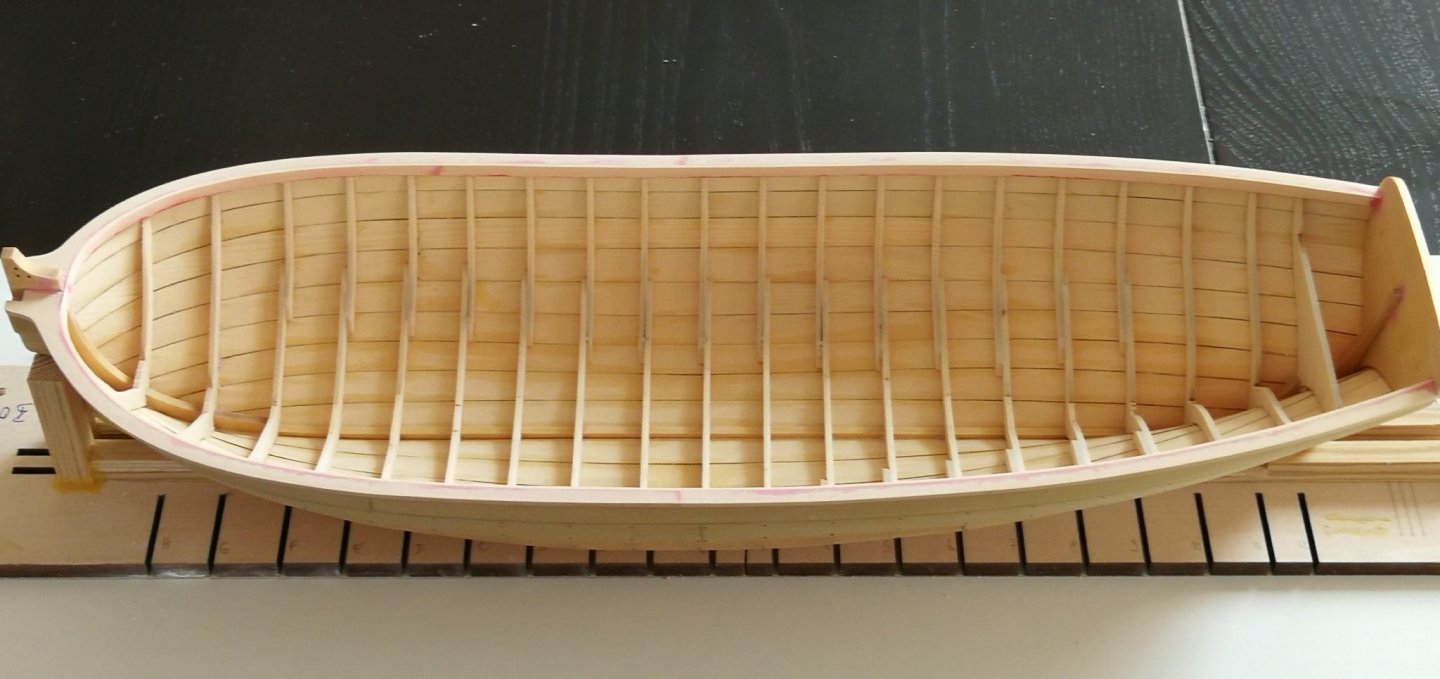
 Bob and Gary, thank you for your kind words and thank you to all the 'Likes'. The risers are in place. They were previously pre-bended. I used a little jig (on the model of the depth gauge 'T' square used for the Queen Anne Barge) to determinate the good position at each frame. I simulate the nails only once the board in place. I wanted to be sure I positioned them correctly. I started working on the thwarts.
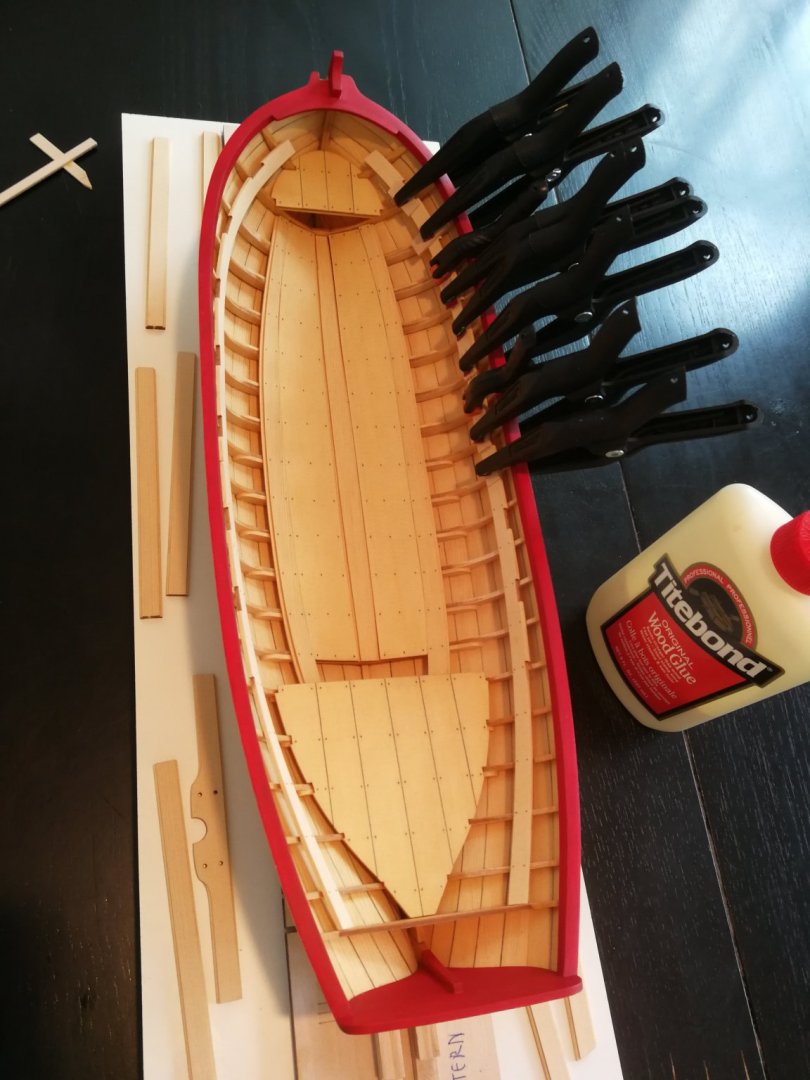
-
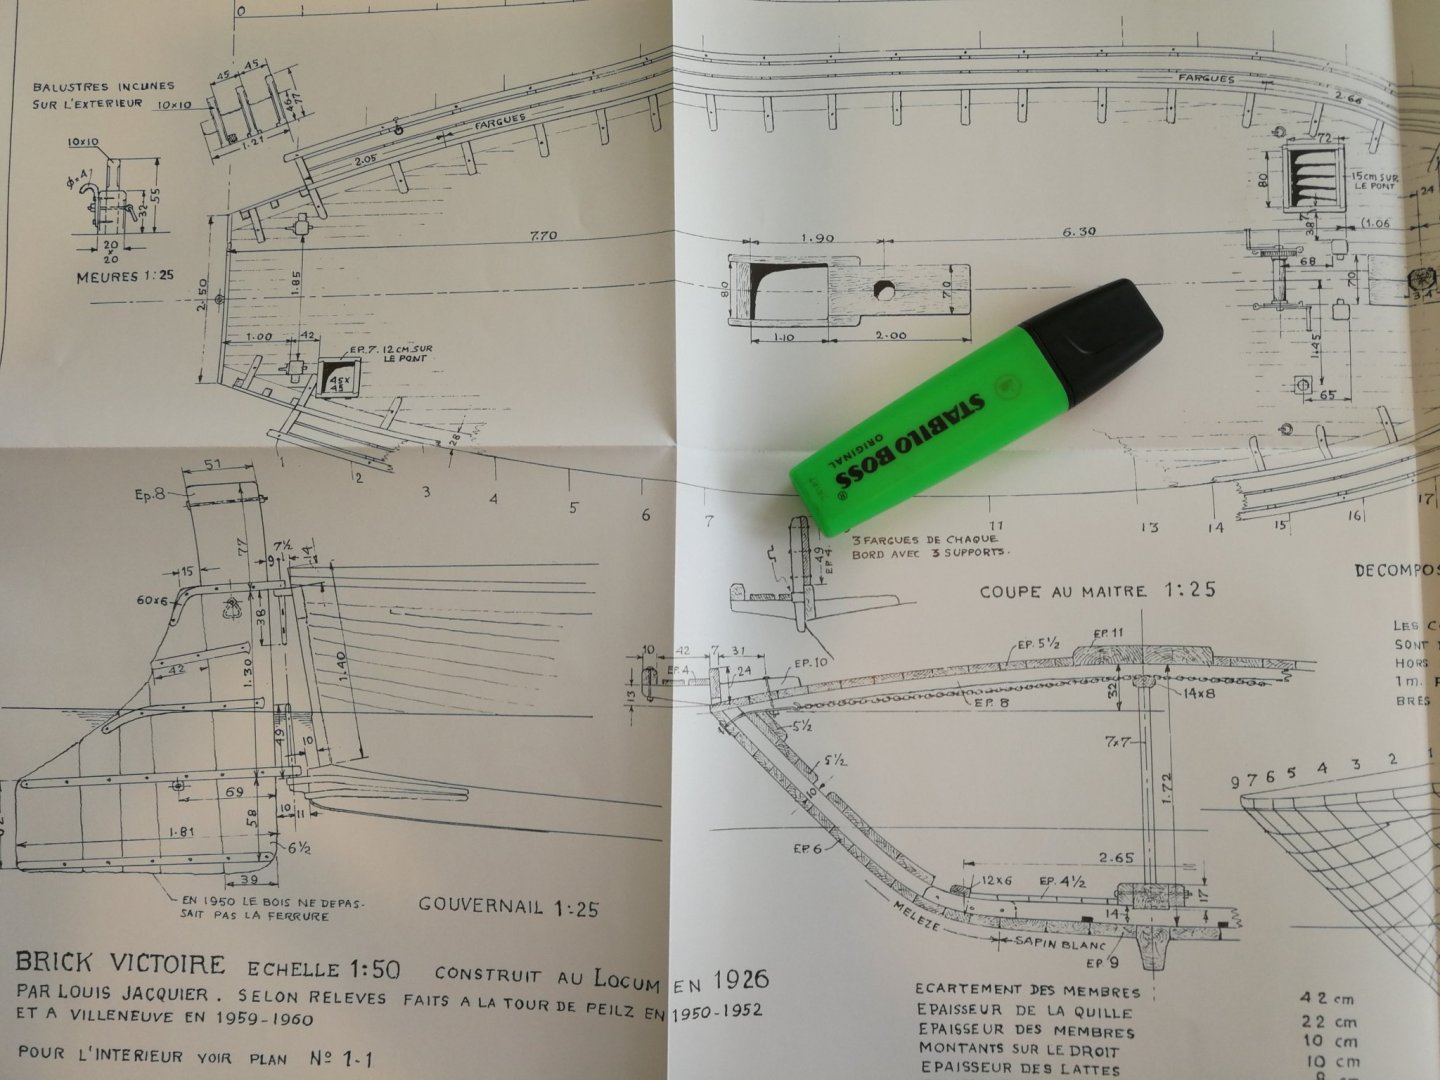
A little additional information. This summer, the Ancre editions will publish a new monograph written by Hubert Mallet on 'La Victoire', a barge from Lake Geneva. The talented French model maker used the book and plans produced by Gérard Cormaz to write this new monograph. The new plans of 'La Victoire' will contain the entire structure of the framework and will thus make it possible to produce a POF type model. Indeed, Hubert Mallet produced a magnificent 3D modeling work to restore the entire frame and thus publish the timbering plans. Knowing the policy of Editions Ancre, an English translation of this new monograph should follow. I will report on this future monograph as soon as it is available.
- 1 reply
-
- 2
-

-
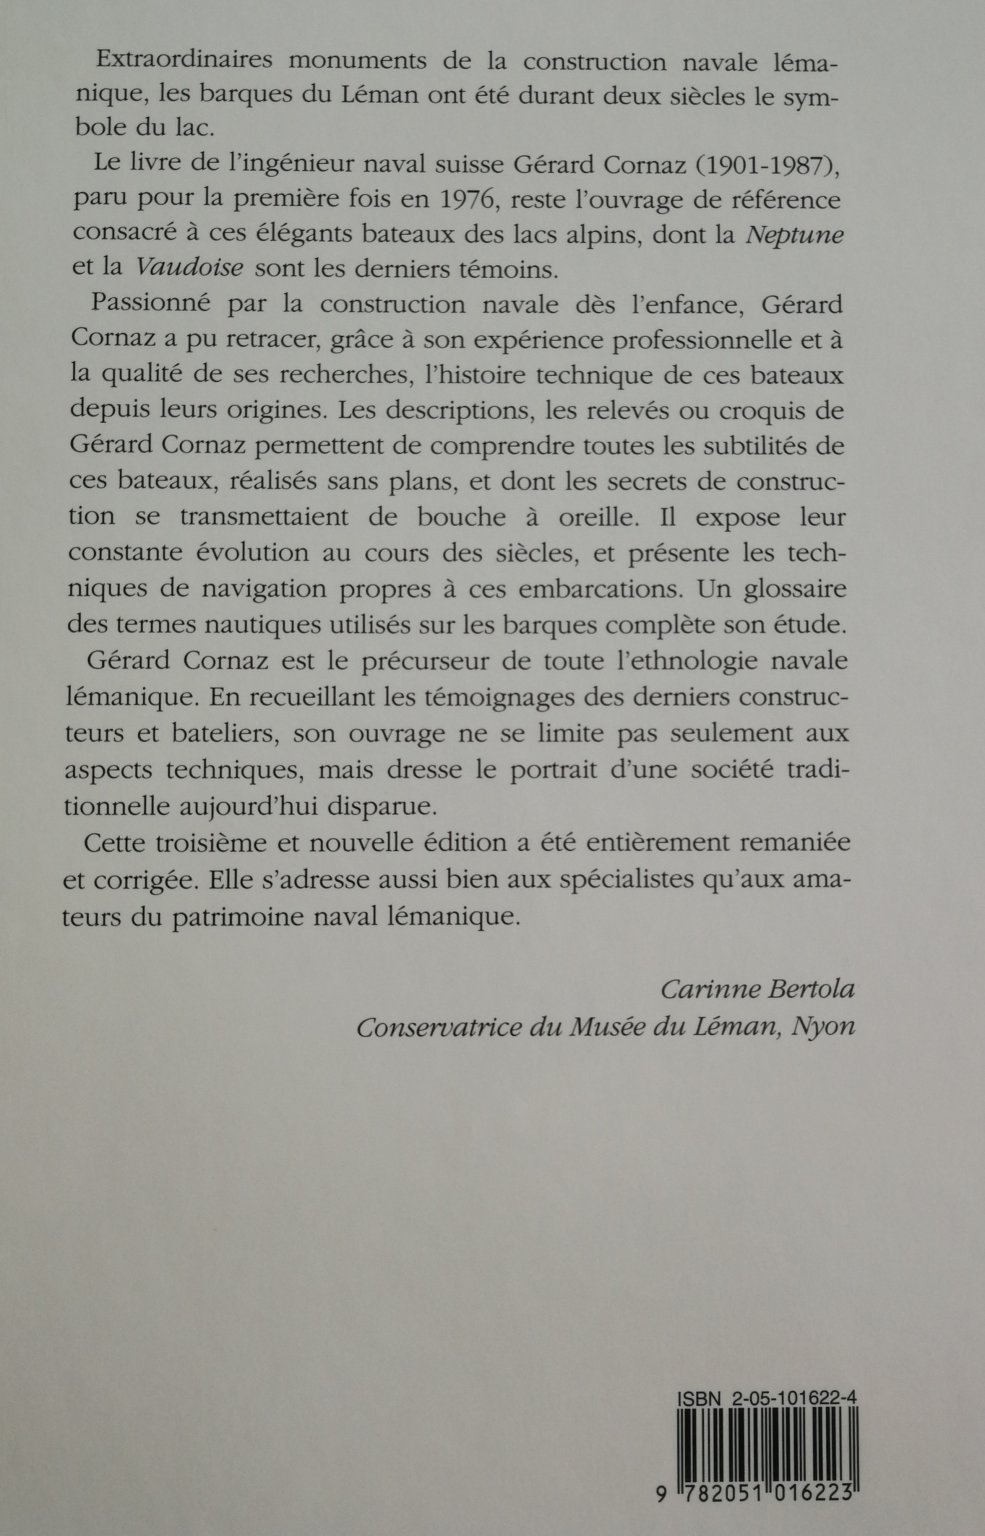
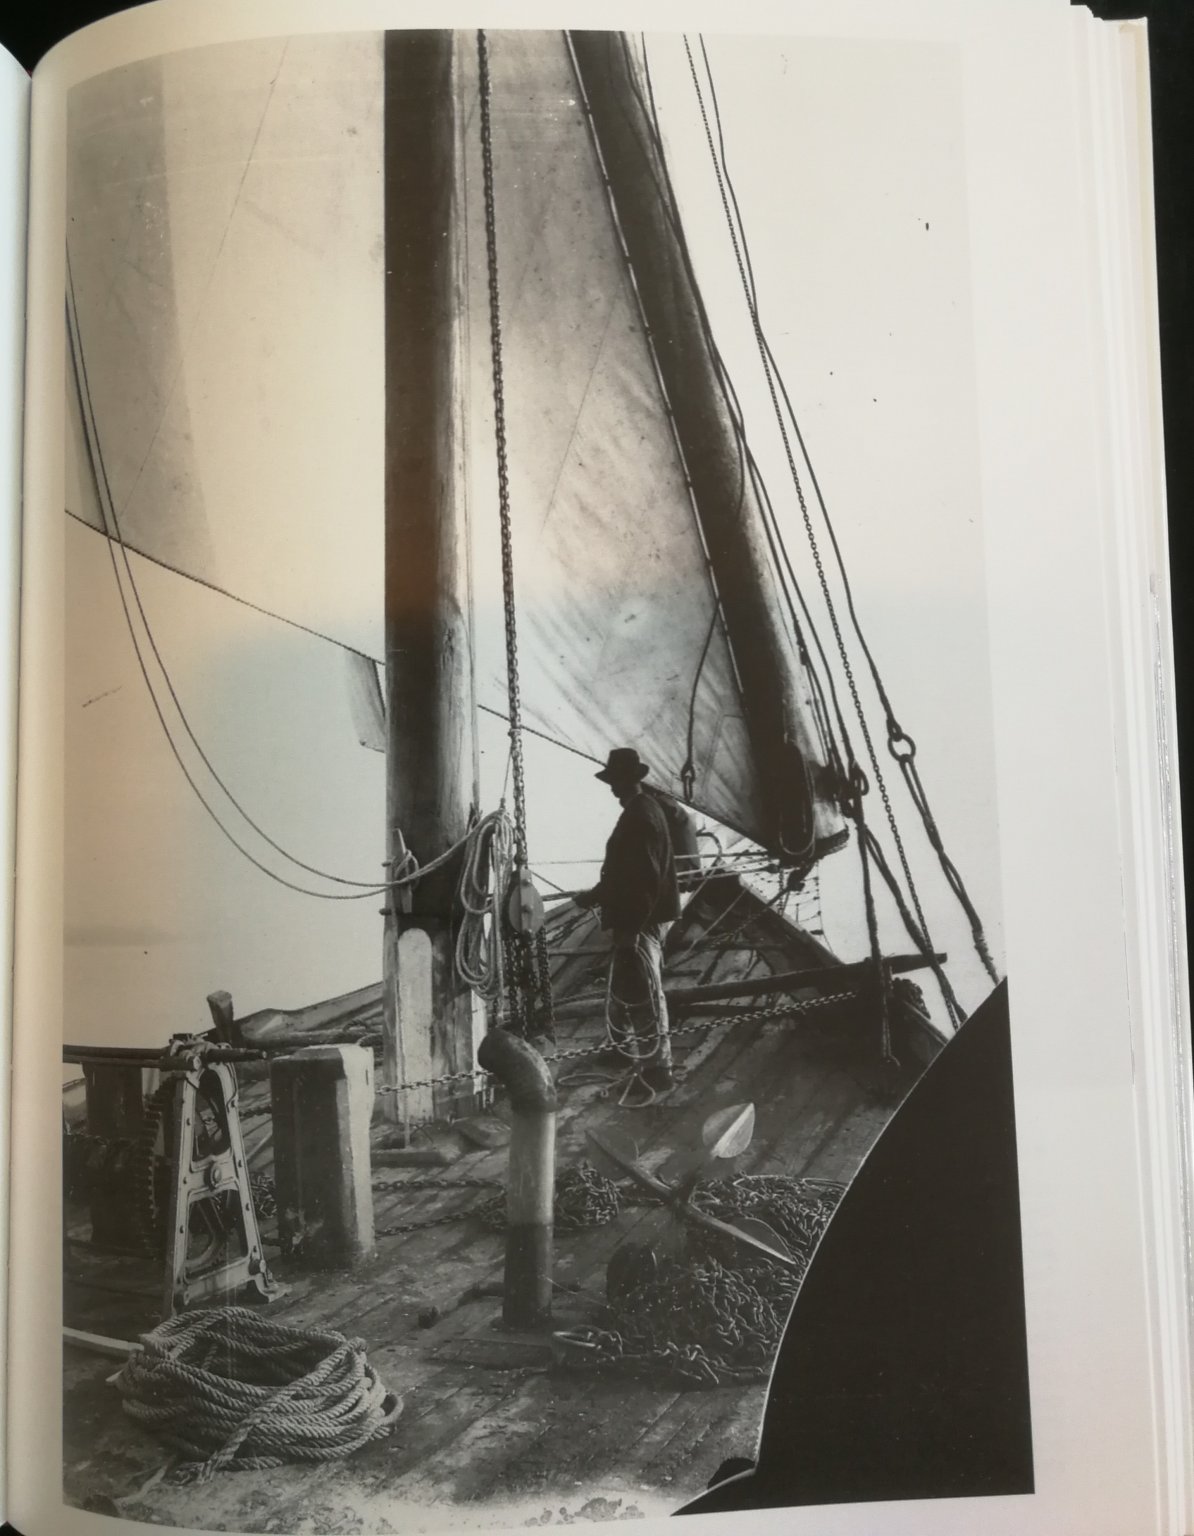
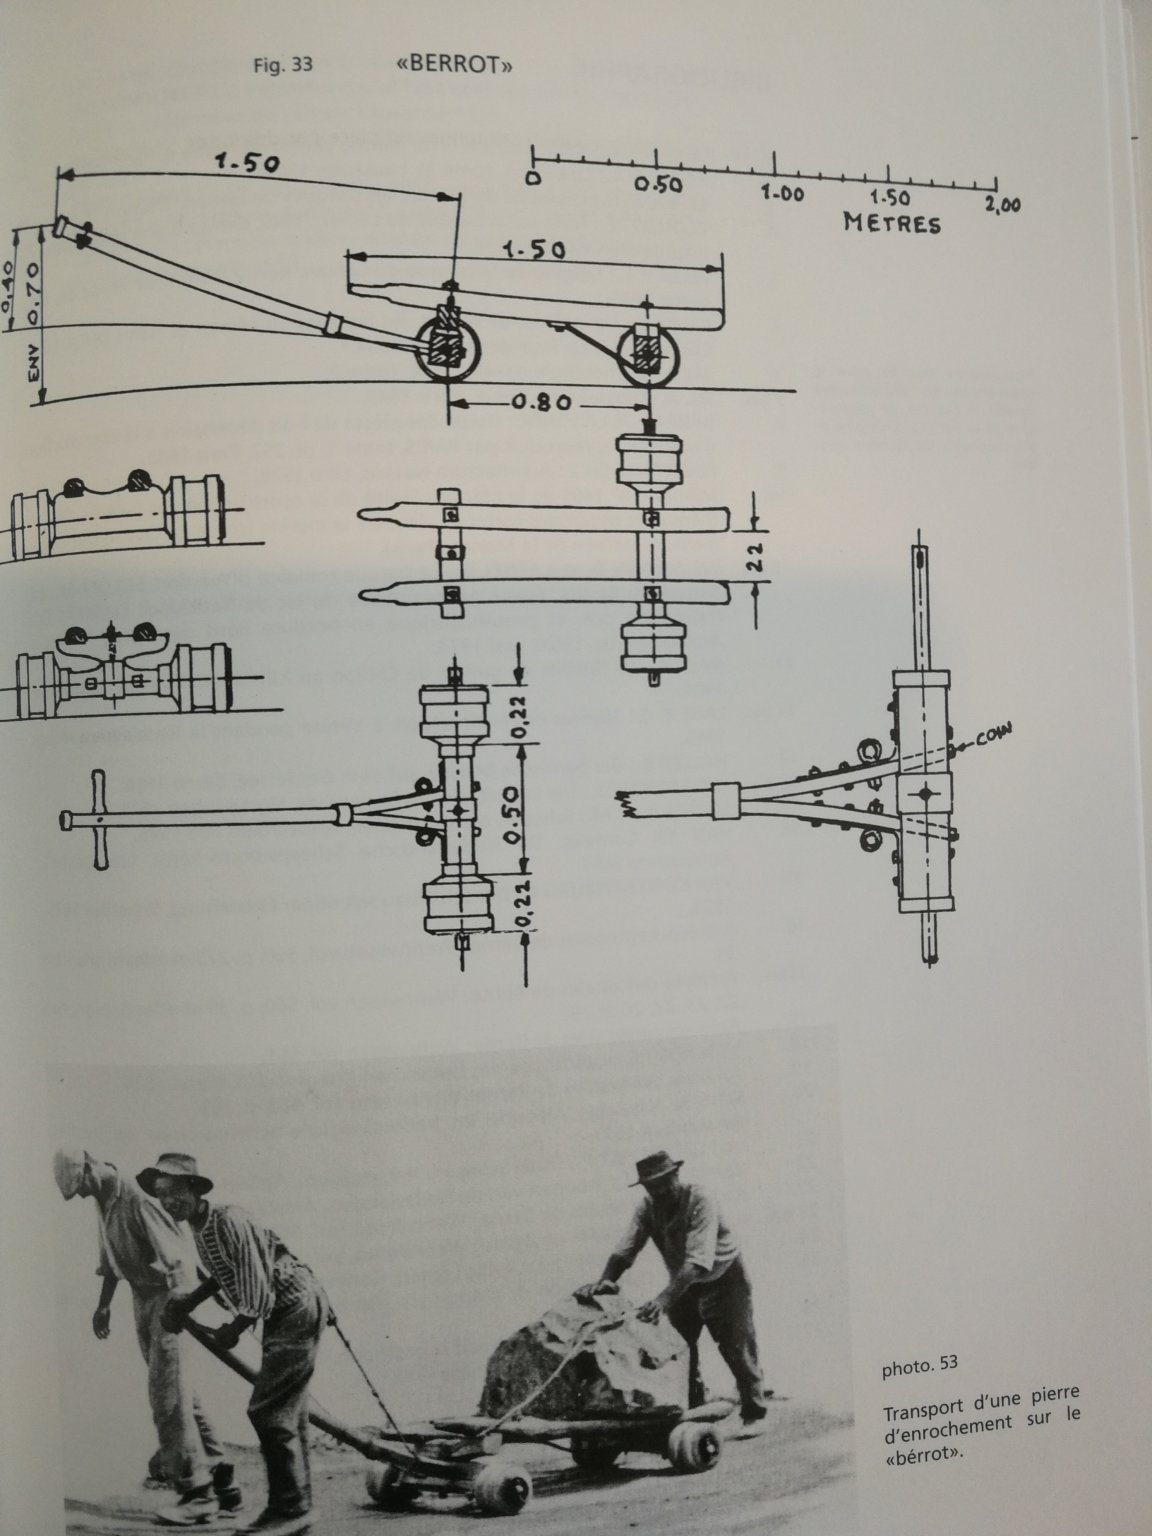
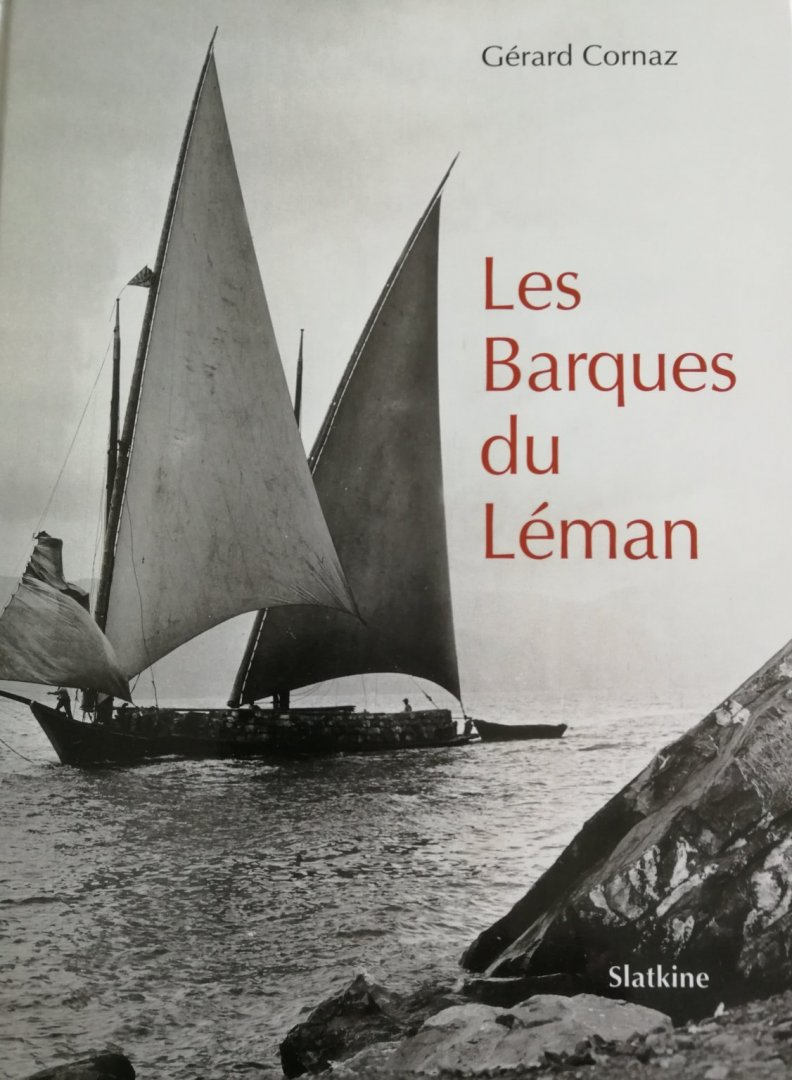
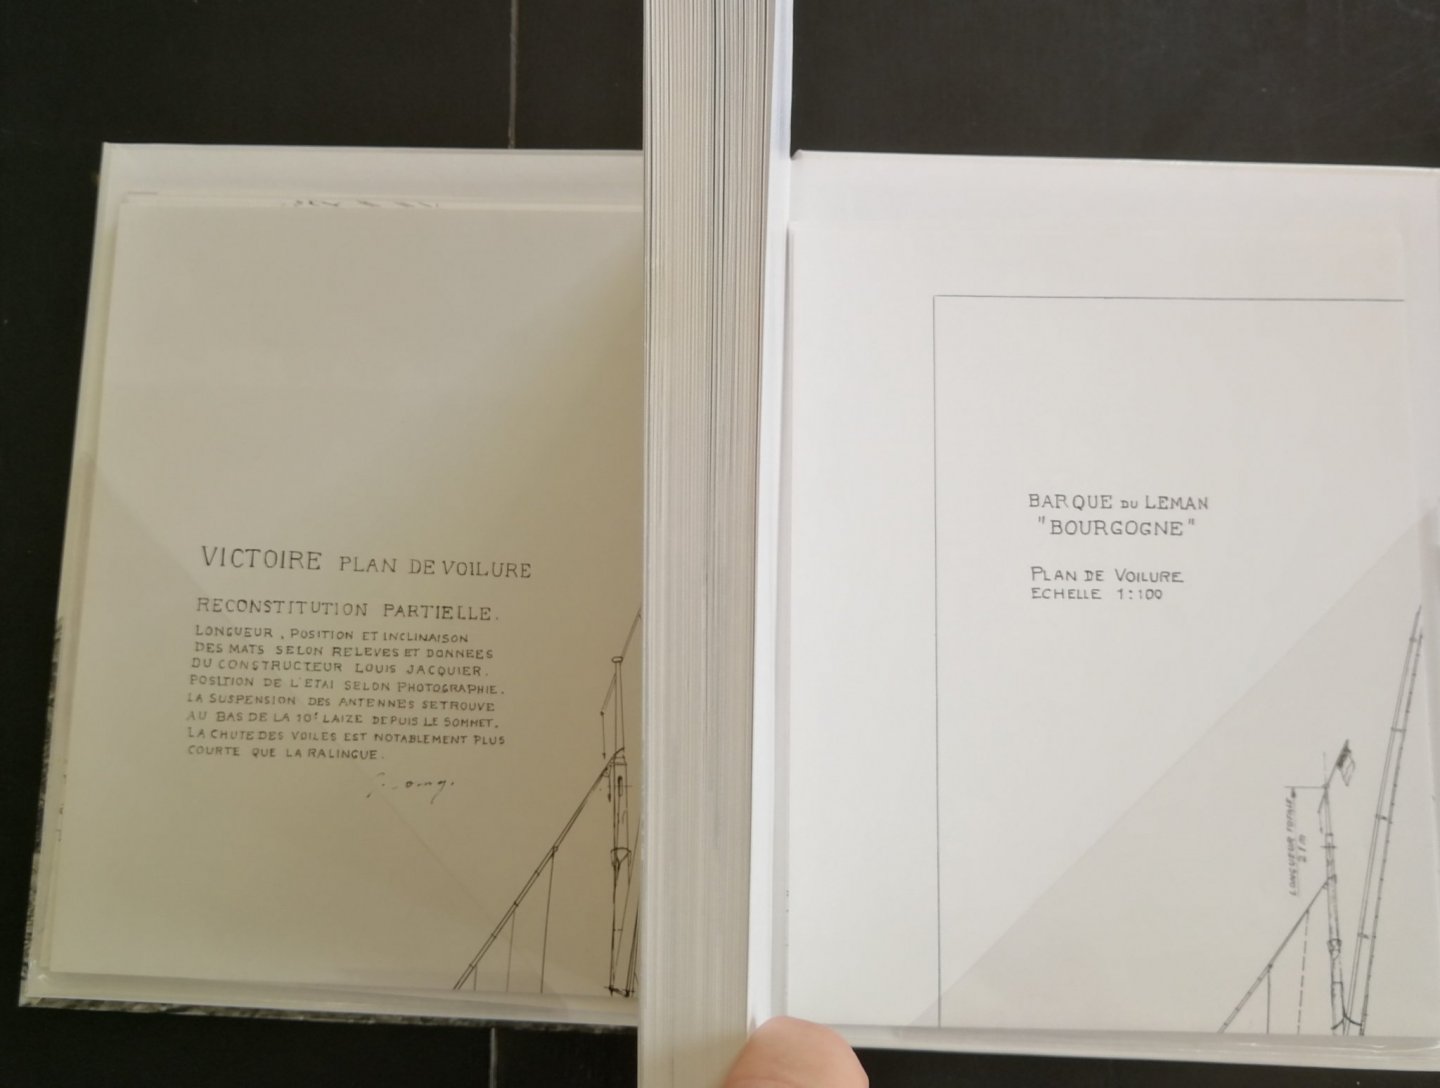
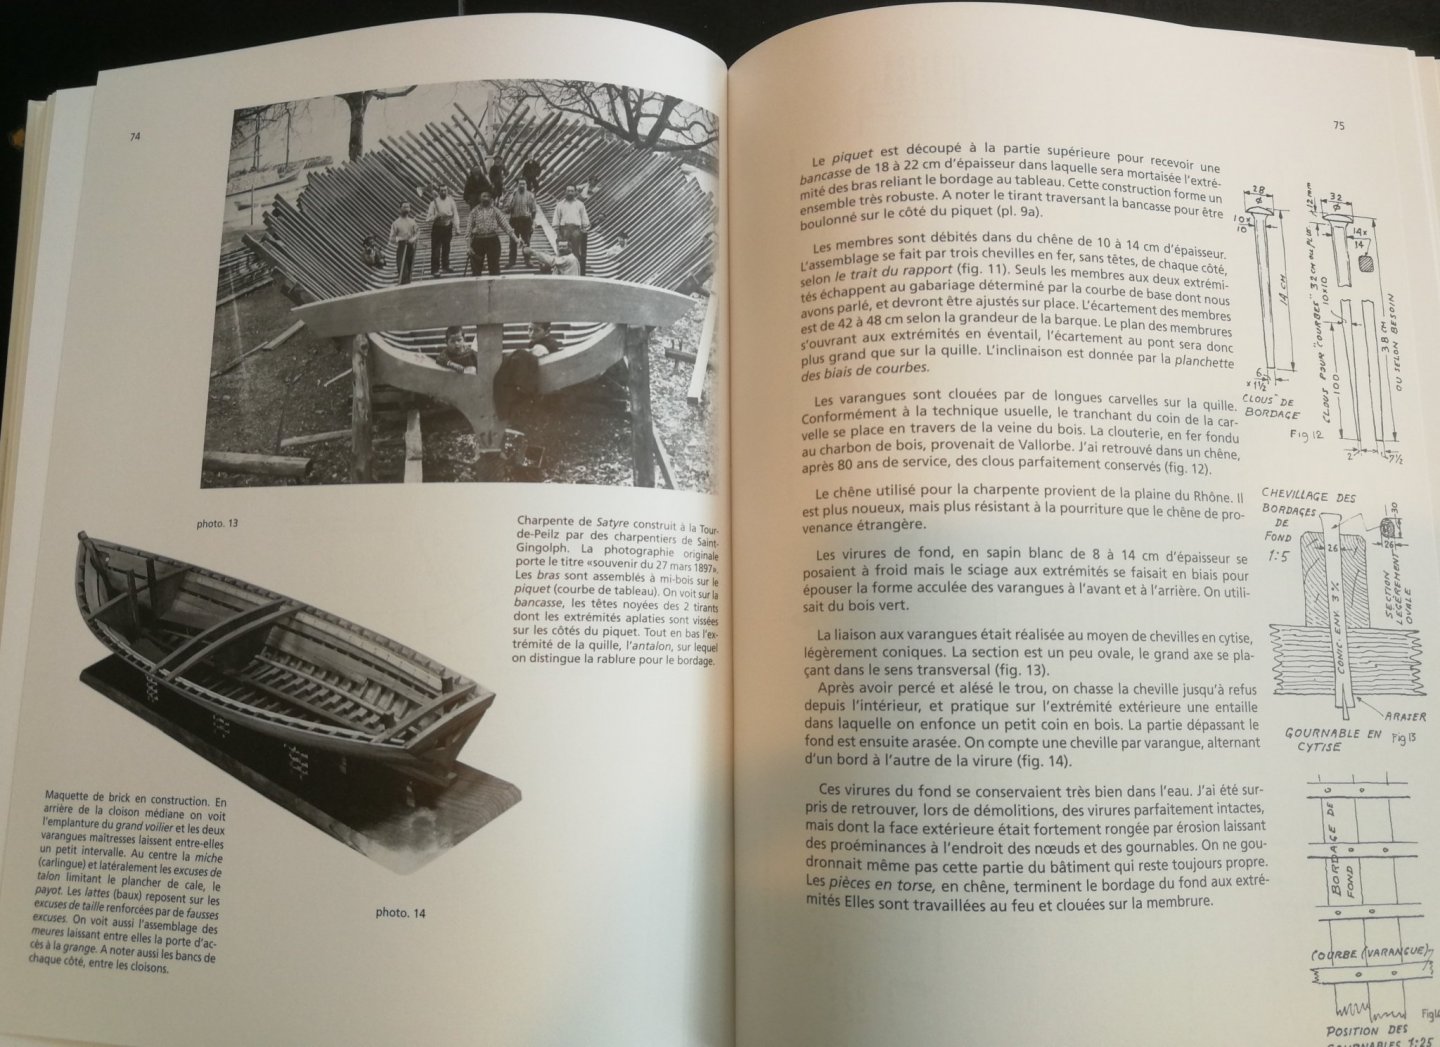
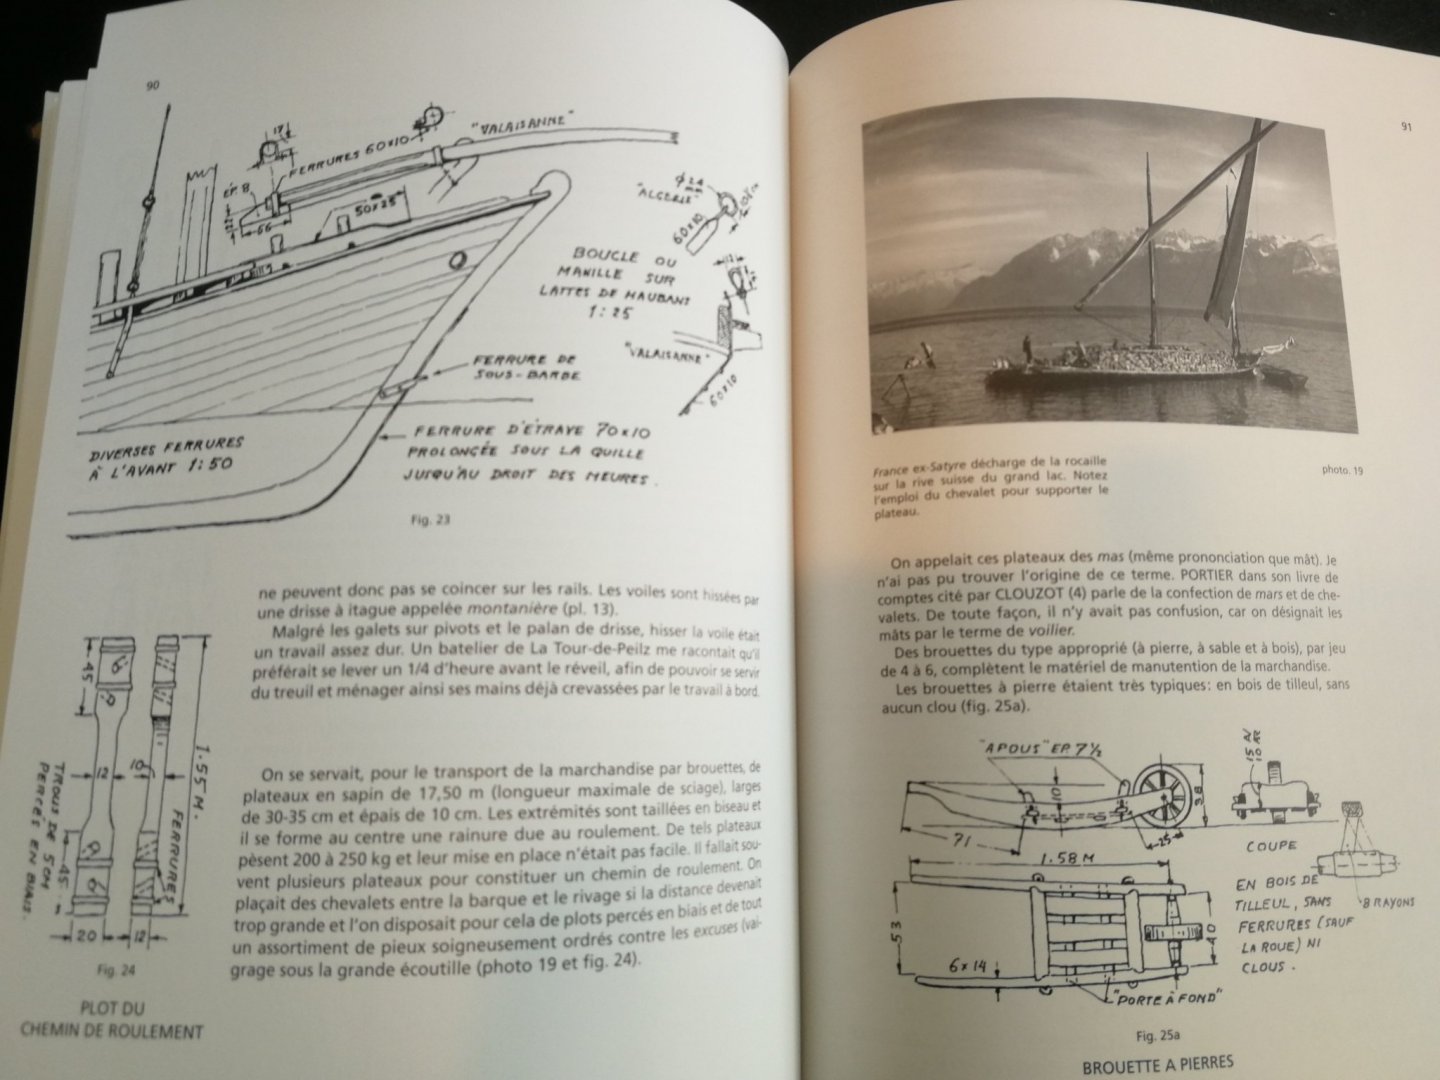
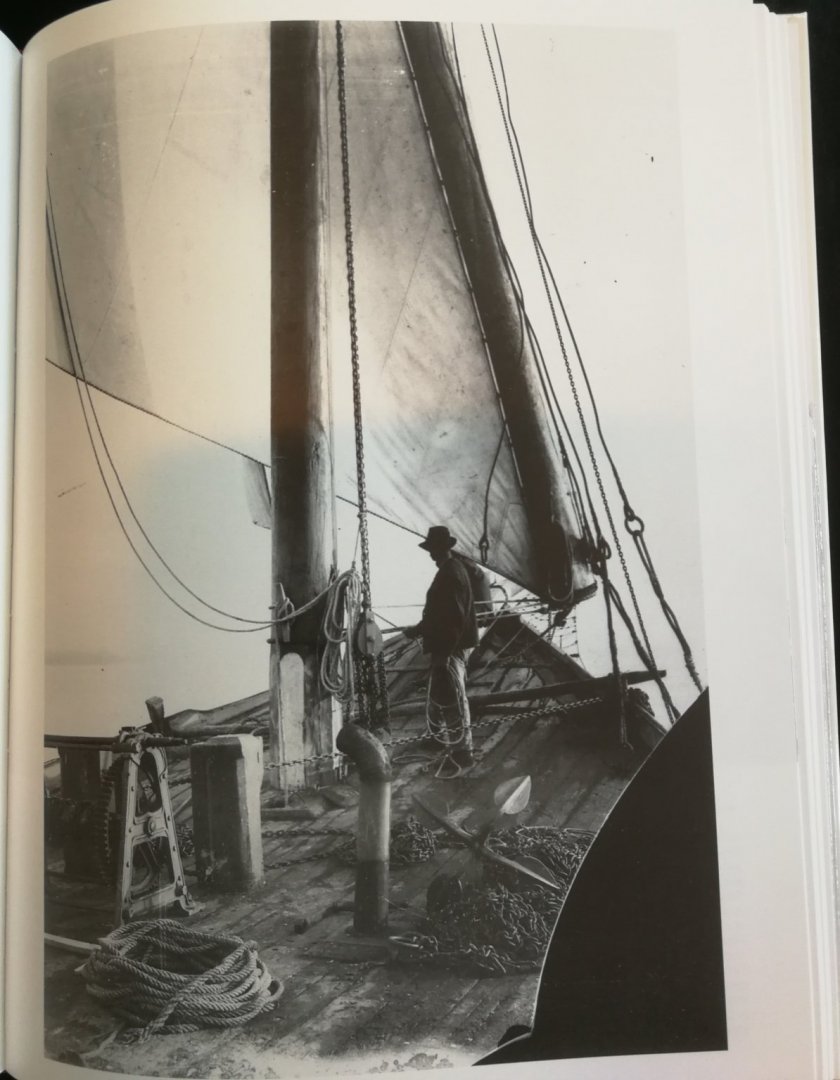
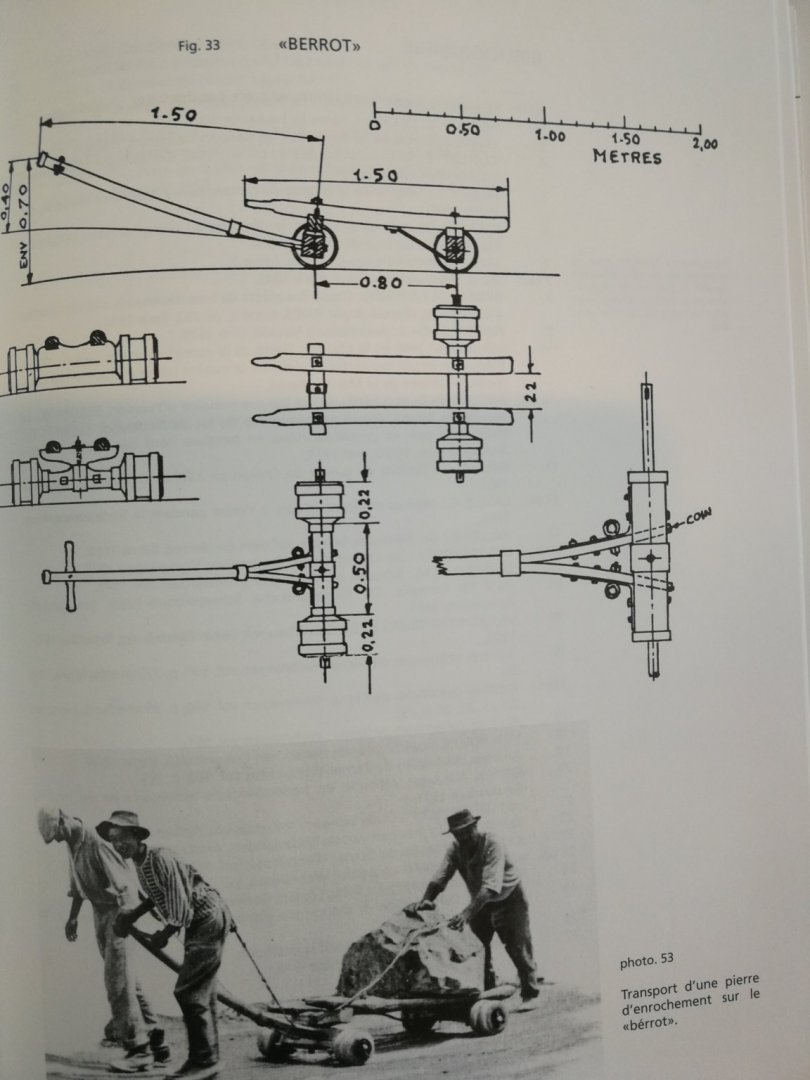
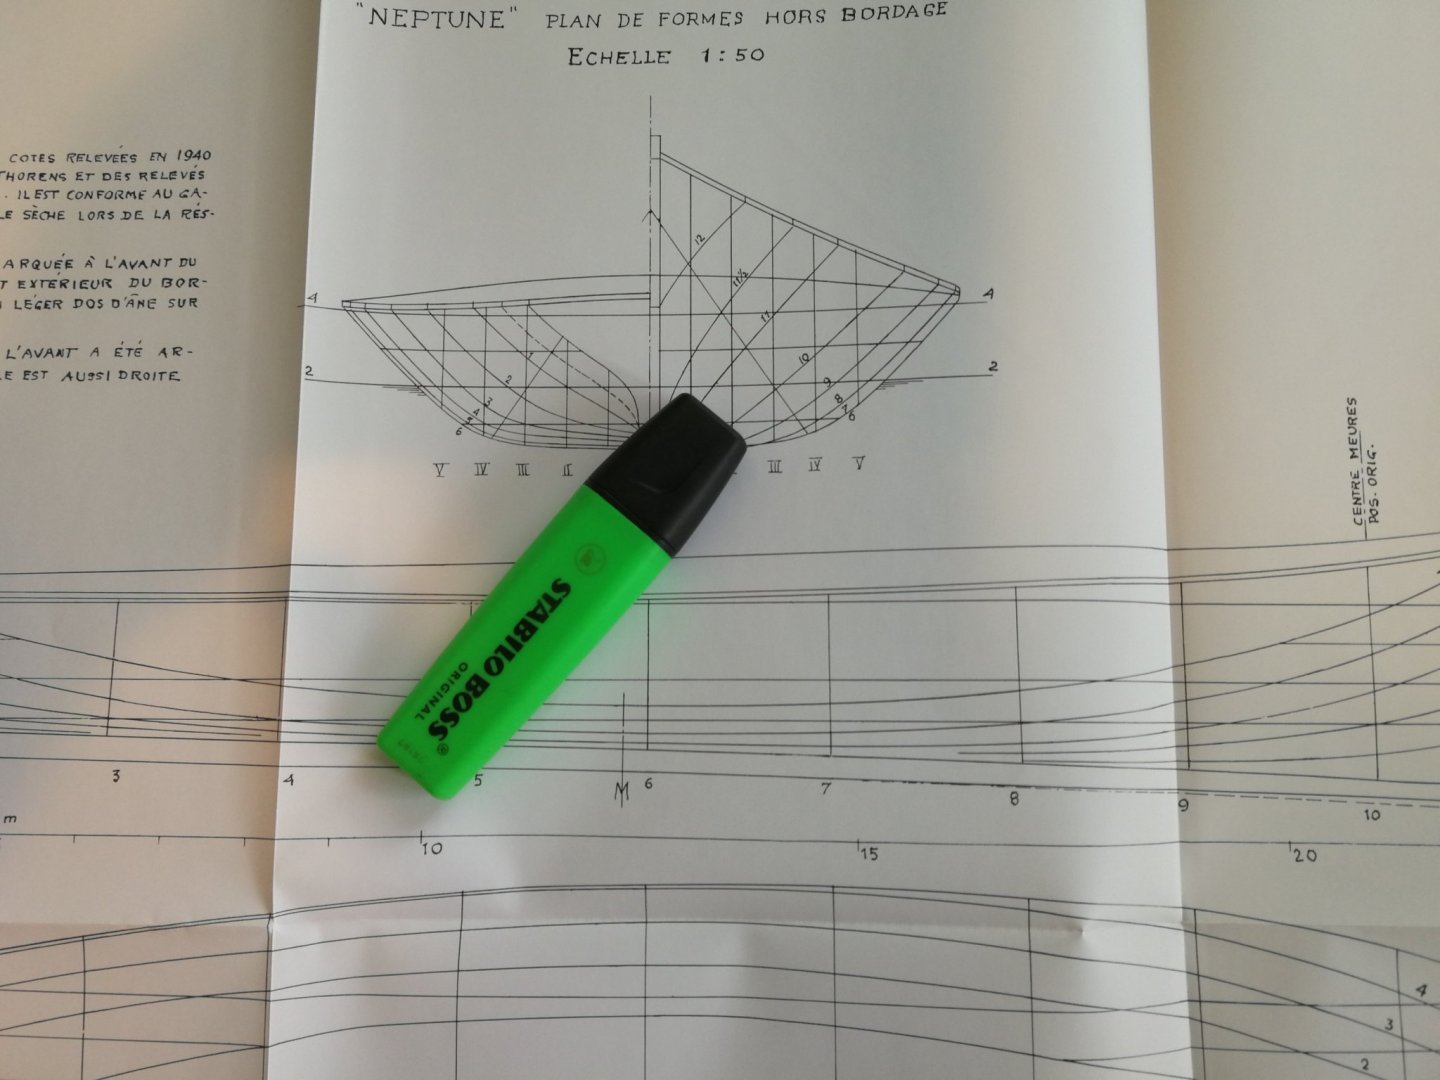
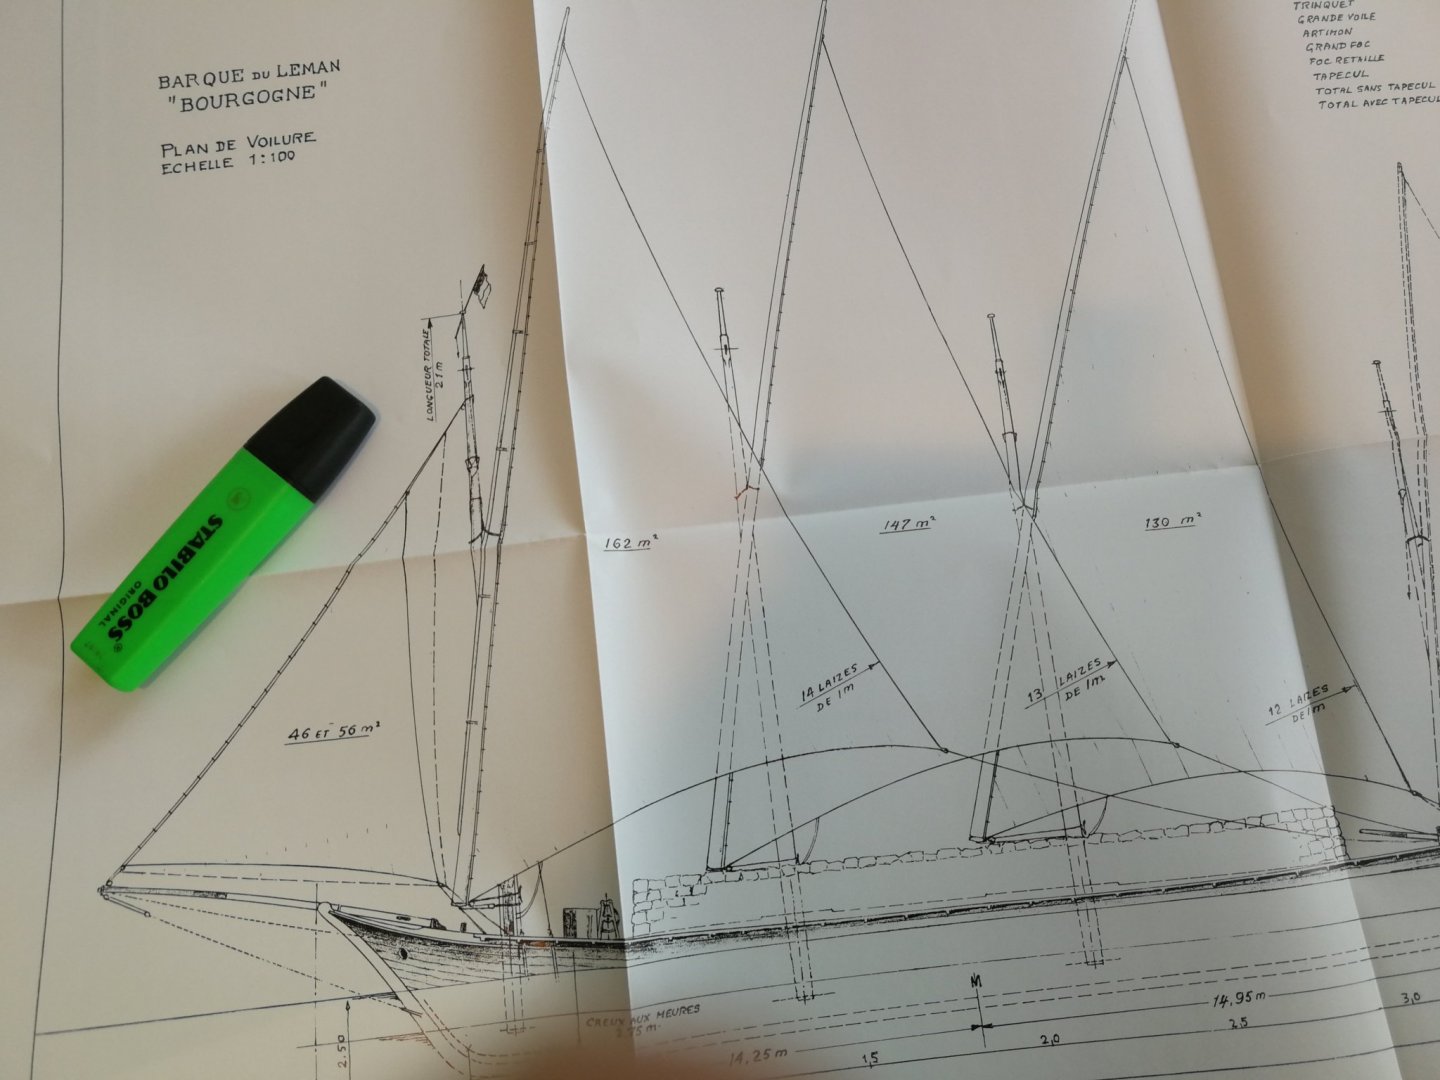
A wonderful book on the subject : The barges of lake Leman (lake Geneva). Book published in French at Slatkine Editions, Geneva, 1998 ISBN number of the French edition : 2-05-101622-4 This is a new revisited edition from a book published under the same title in 1976 www.slatkine.com Author of texts : Gérard Cornaz Book cover : 'Fenalec' barge bringing its jib 207 pages Ten plan sheets (Scale 1:50) Format : 23 cm x 30 cm Price: 76.-- CHF The 10 sheet plans are inserted at the beginning and at the end of the book : The book is richly illustrated with drawings, diagrams and black-white photos Some extracts from the plans describing 3 different models of barges : 'La Victoire', 'La Neptune' and 'Le Bourgogne' Unfortunately only in French but as the book really contains many drawings and photos (there are almost on each page), this book is really a must. He is considered the reference on the subject.
- 1 reply
-
- 3
-
-
Wonderful job ! The red color is superb and magnifies the model. A beauty !
- 263 replies
-
- 3
-
-
- Medway Longboat
- Syren Ship Model Company
- (and 1 more)
-
Perfection ! Just a big thumbs up for this high level work ! Very great art.
-
ancre La Jacinthe 1823 by guraus - Scale 1:48
JpR62 replied to guraus's topic in - Build logs for subjects built 1801 - 1850
Wonderful job ! A very beautiful model. -
Brig Eagle 1814 by ChadB
JpR62 replied to ChadB's topic in - Build logs for subjects built 1801 - 1850
I just discovered this build log. Wonderful job ! Thank you for sharing ! -
Glad to be able to follow your build. And it starts perfectly.
-
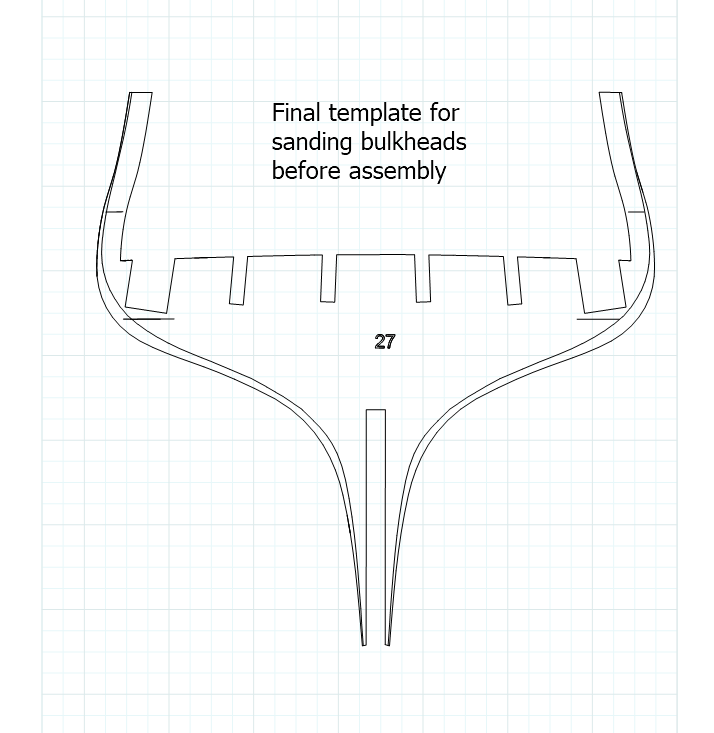
Interesting because I ask myself the exact same questions. It is intimidating not to have lines of reference on the bulkheads at the bow and at the stern in order to be sure of having sanded enough or on the contrary too sanded... and to be sure of the symmetry of the sanding carried out of the port side with the one made to starboard... On a log of the Winchelsea frigate (MIdixon - Post #15 - see link below ), I saw someone who had modeled the hull in 3D to determine the limits of the sanding on the bulkhead. I found the idea interesting but unfortunately I have no skills in 3D software... And I must also get myself a table saw... Build Log - Winchelsea Frigate
- 170 replies
-
- 1
-
-
- medway longboat
- Syren Ship Model Company
- (and 1 more)
-
Superb work as usual ! Always so precise and clean. I am delighted to see it finished.
- 170 replies
-
- 1
-
-
- medway longboat
- Syren Ship Model Company
- (and 1 more)
-
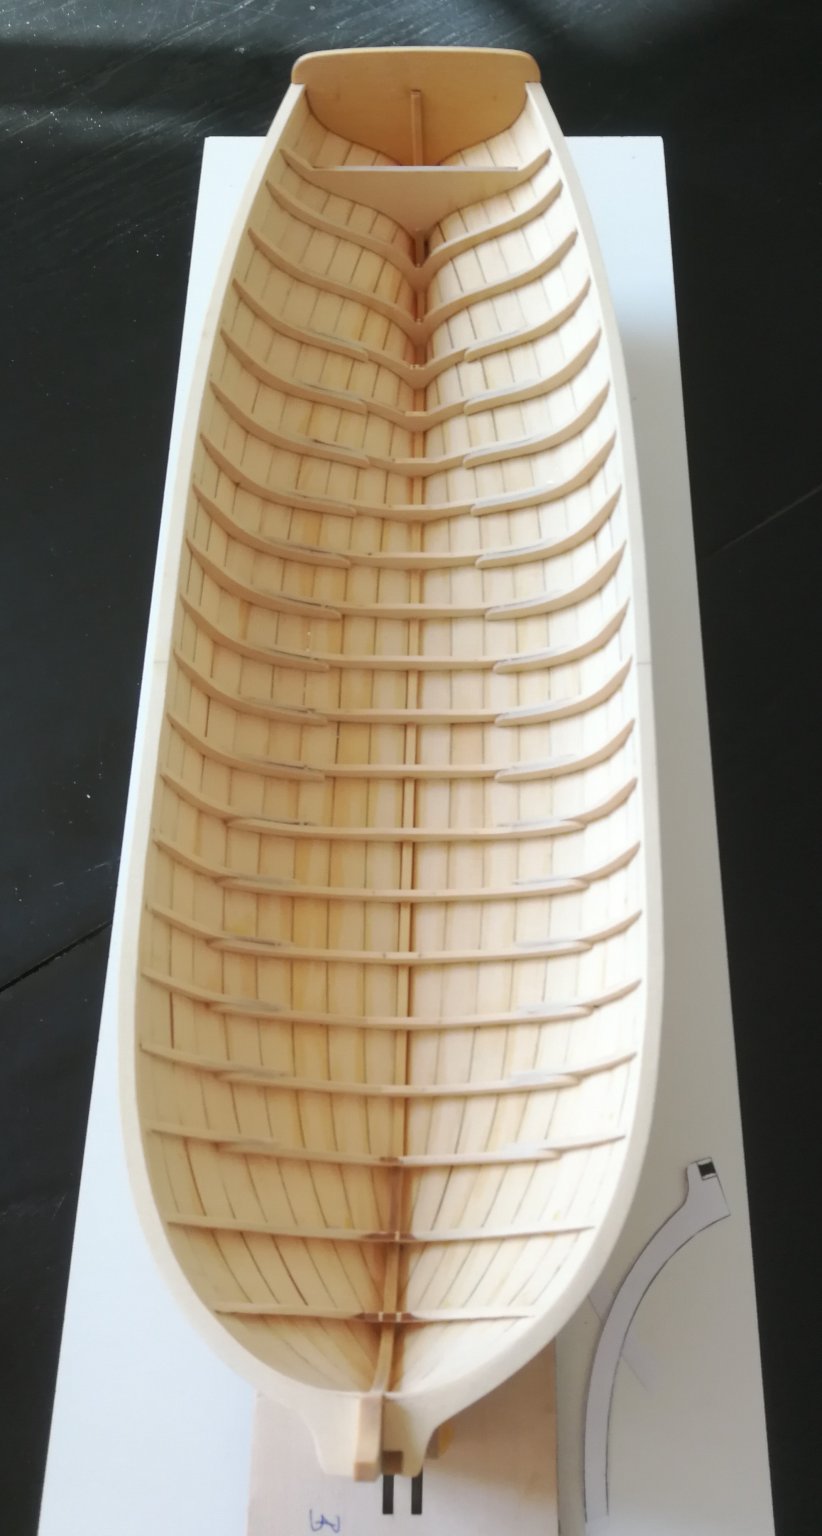
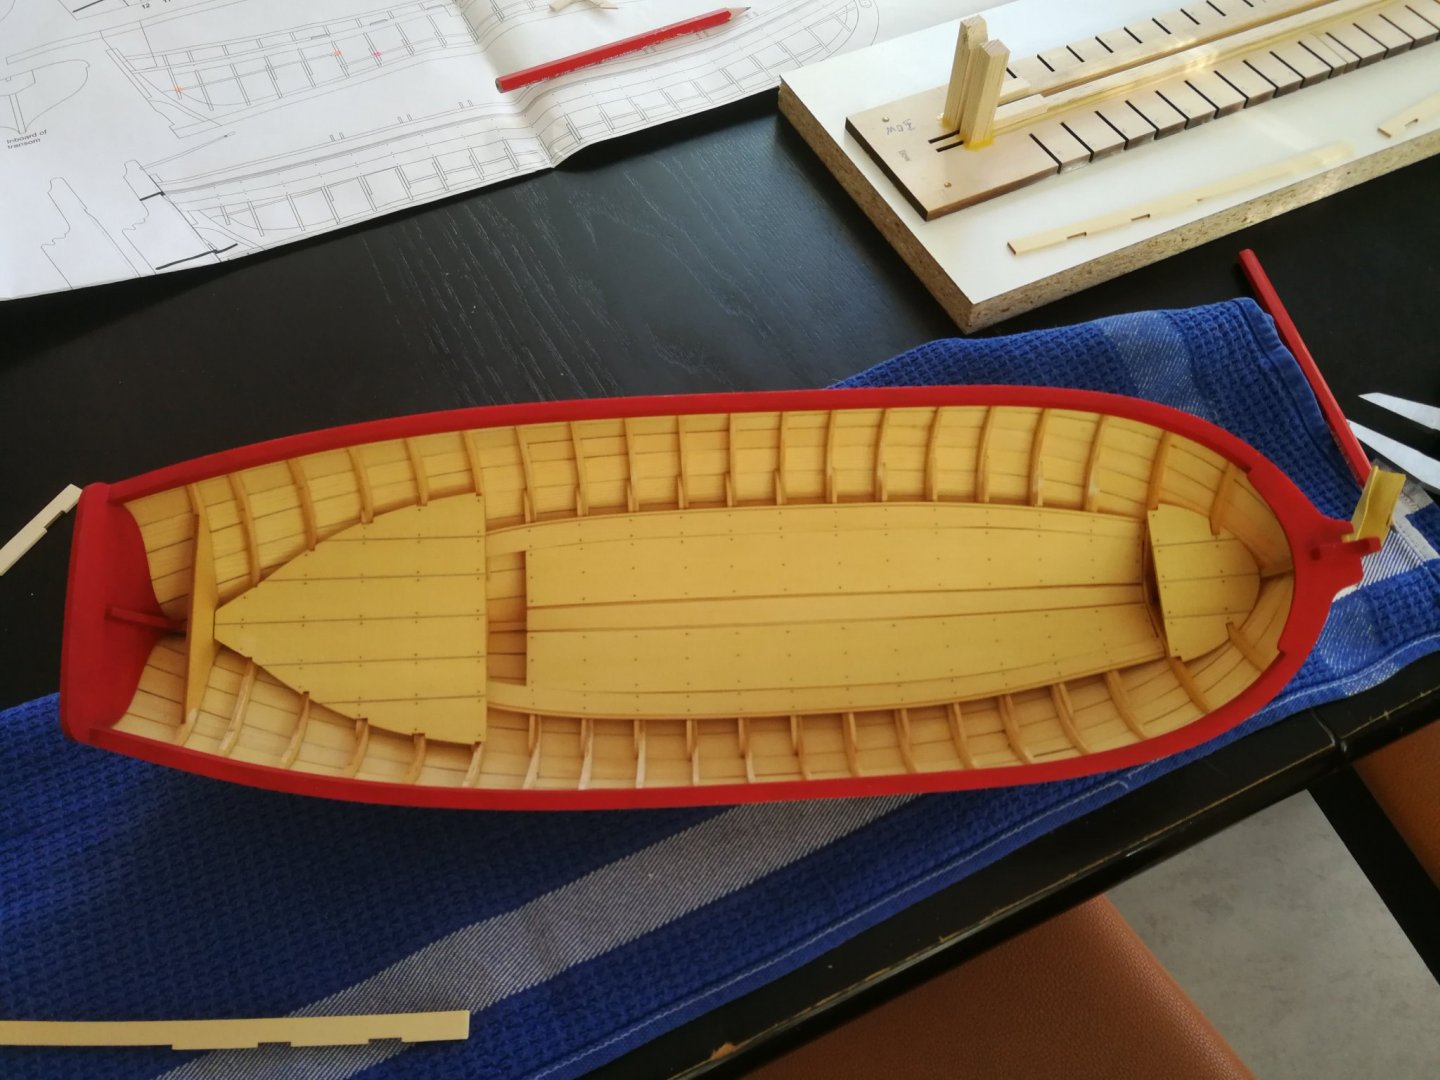
As I apply many diluted layers with a brush ( I am in my tenth coat and I have as much to apply in order to have a good result...), I decided to install the floor boards and the bow and stern platforms. It changes me from the repetitive painting job... I tried to follow the instructions as well as possible. On the advice found on Ryland Craze's log, for the two outer floorboards that are made of two pieces each, I installed each piece separately. I actually found it easier to bend them separately. I will continue in parallel the painting work and the laying of the thwarts.


-
What a wonderful build log ! Always a great pleasure to read these posts ! Thank You 😄
- 607 replies
-
- 2
-
-
- winchelsea
- Syren Ship Model Company
- (and 1 more)
-
Nice job ! You do remarkable work on this diorama. I'm really enjoying your log !
-
FREE JOURNAL OFFER - COVID 19 COPING
JpR62 replied to kurtvd19's topic in NAUTICAL RESEARCH GUILD - News & Information
Thank you for this great idea. I will read it with great interest 😀 -
Great admirer of your work ! It's always so beautiful !
- 589 replies
-
- 2
-
-
- le gros ventre
- cargo
- (and 1 more)
-
Superb work. You really made a great job on this particular model. So clean and so precise. Thanks for sharing.
- 77 replies
-
- 5
-
-
- morel
- master korabel
- (and 1 more)
-
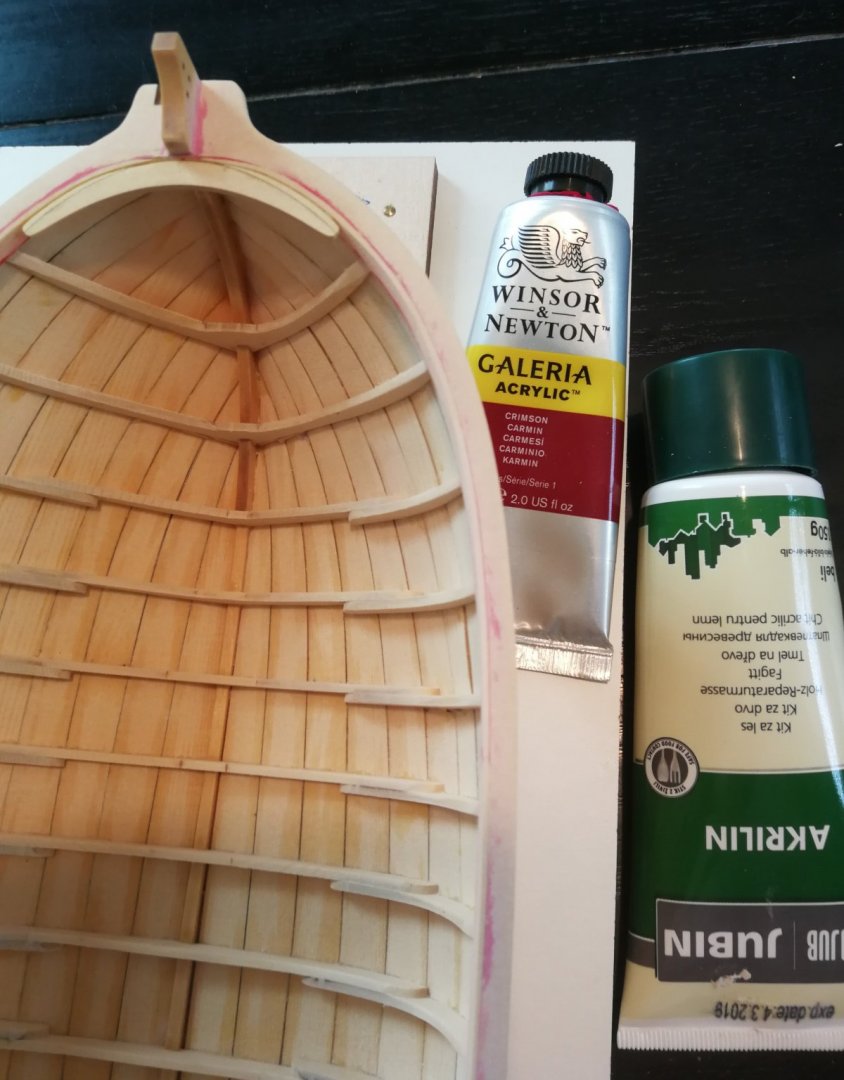
Thank you for your kind words. Ron, it is probably not necessary to tint it. I dye it in the final color to make sure that we will not see the joint once the final color is applied. It is also easier for me to control the finish of the sanding.
-
This version of the Armed Virginia Sloop is absolutely fantastic. What a wonderful job. A gem ! Thank you for these detailed photos.
- 231 replies
-
- 1
-
-
- model shipways
- armed virginia sloop
- (and 1 more)
-
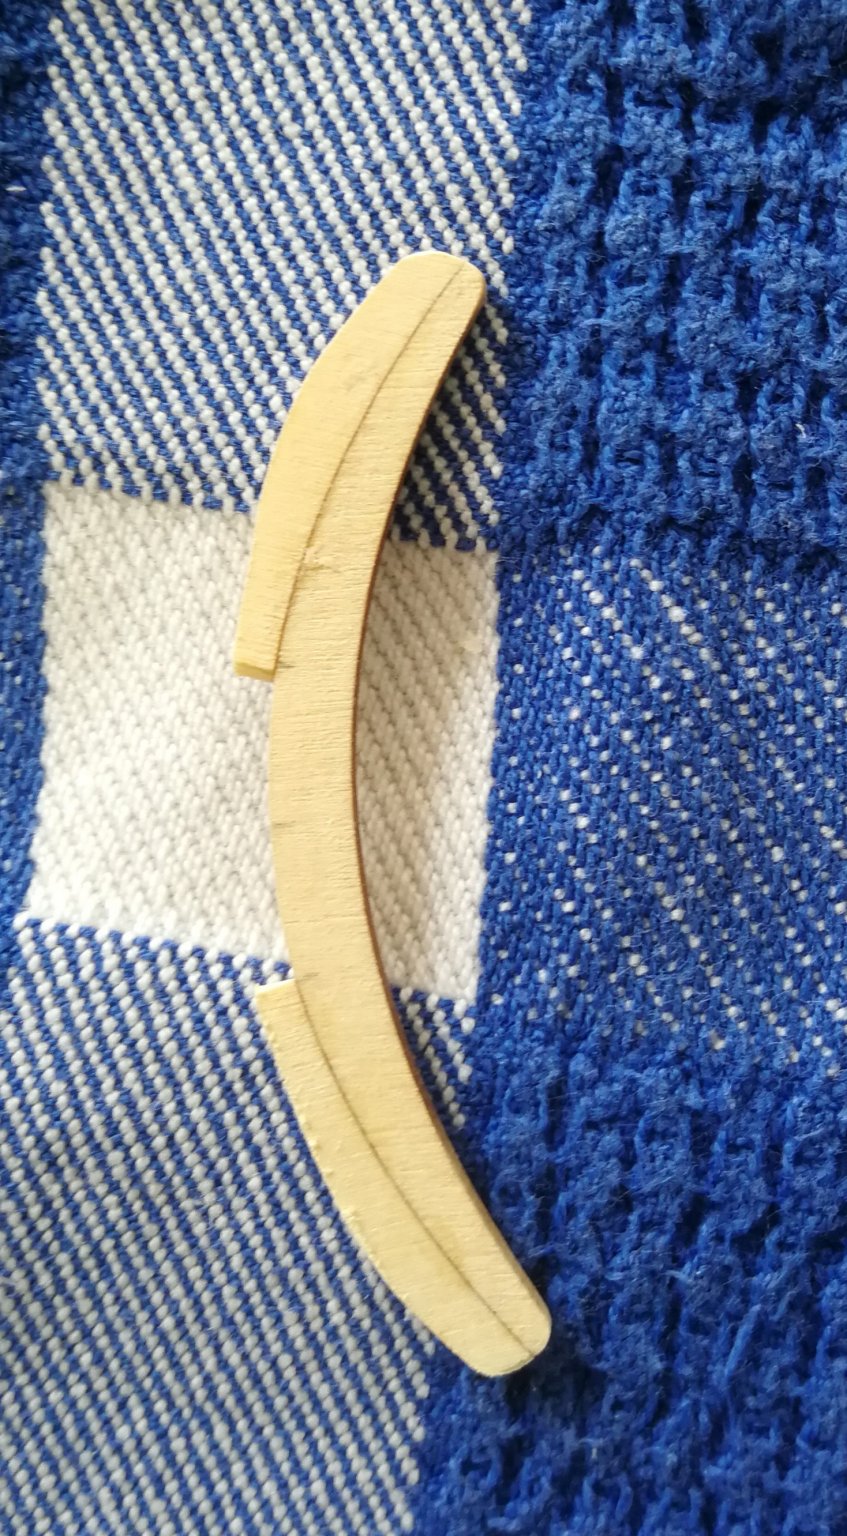
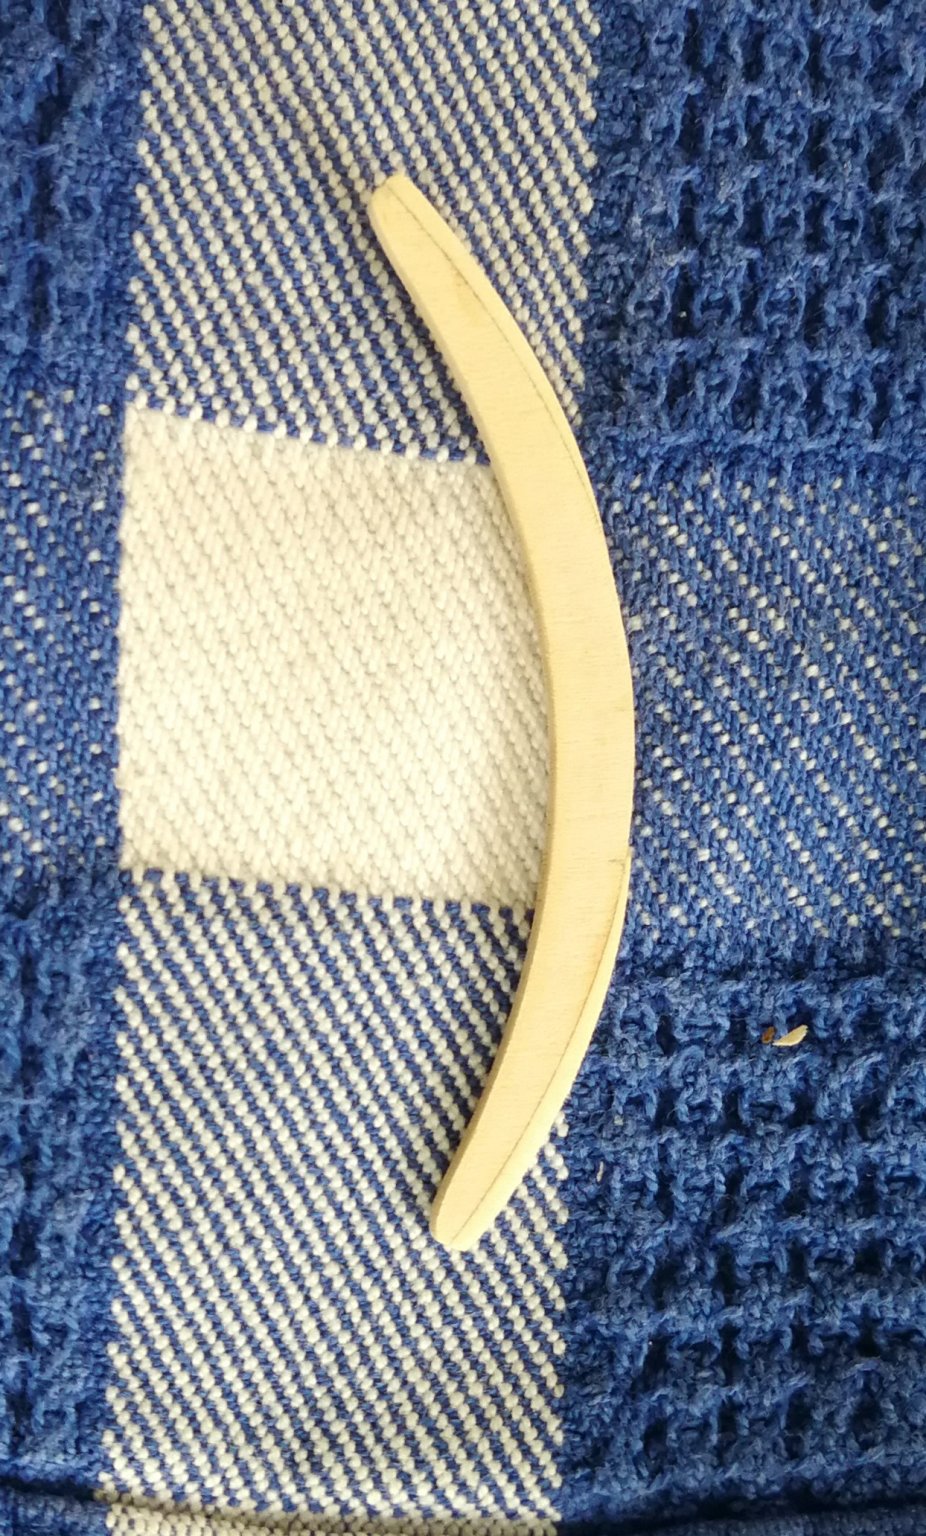
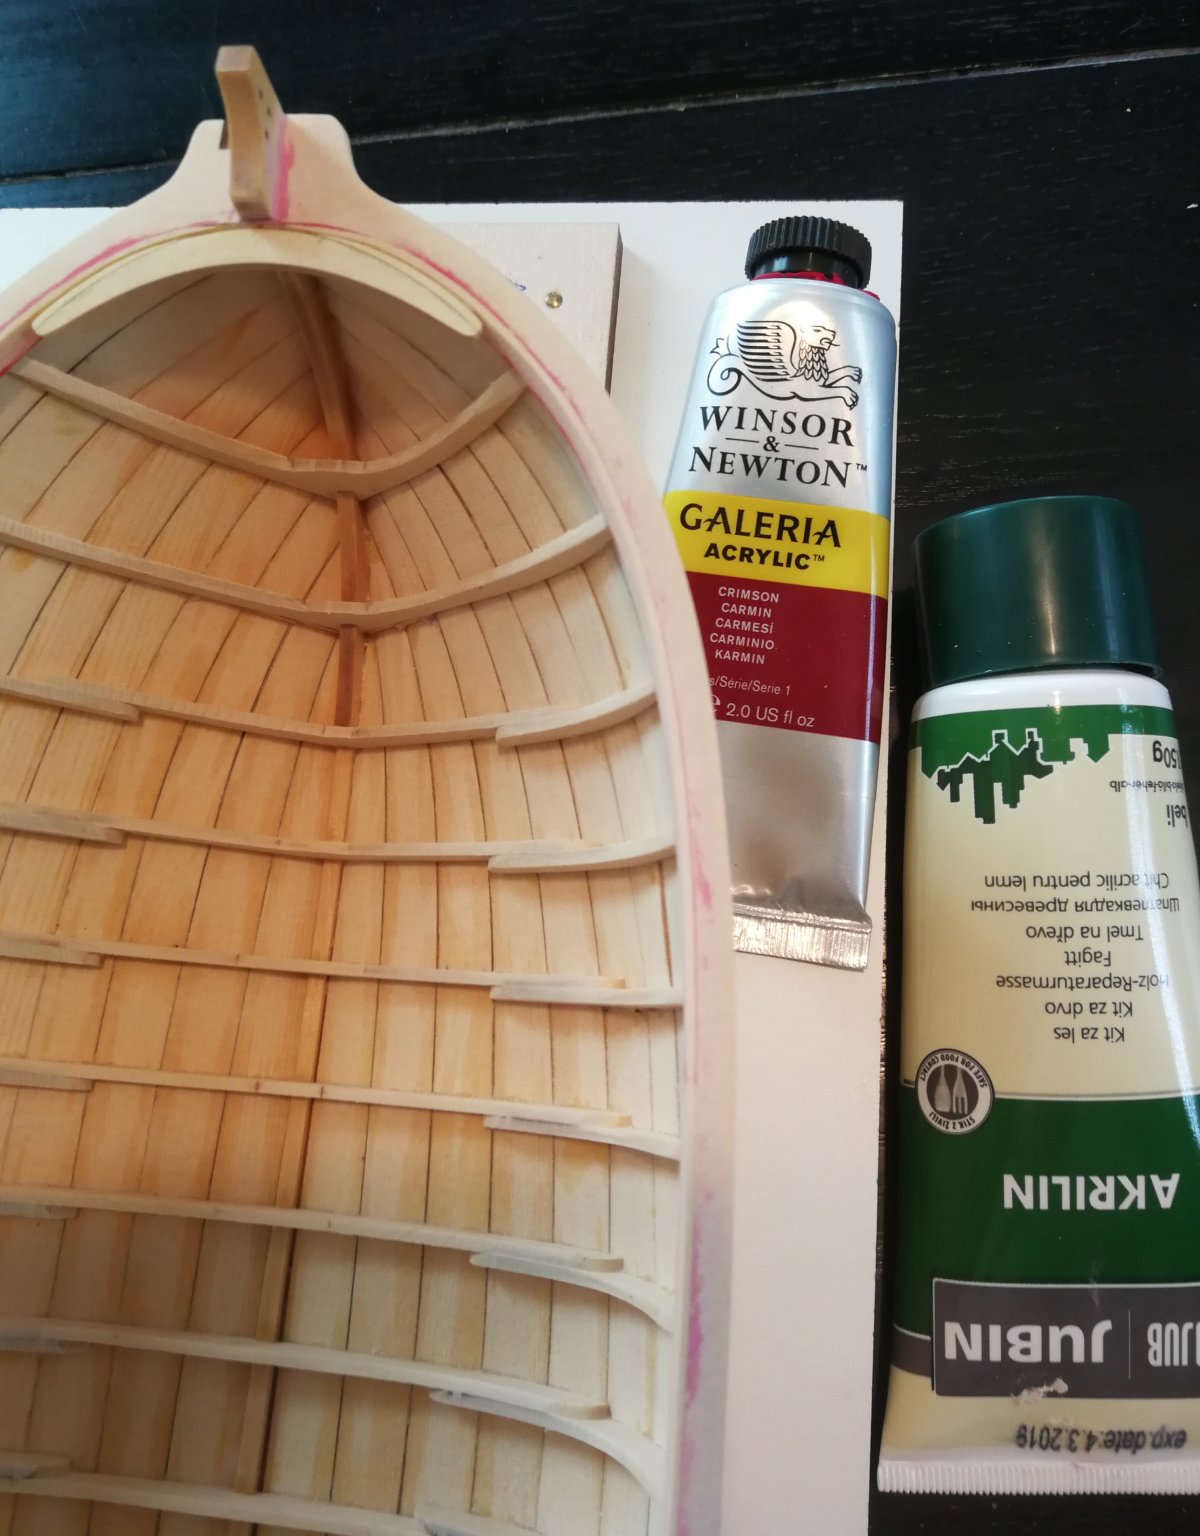
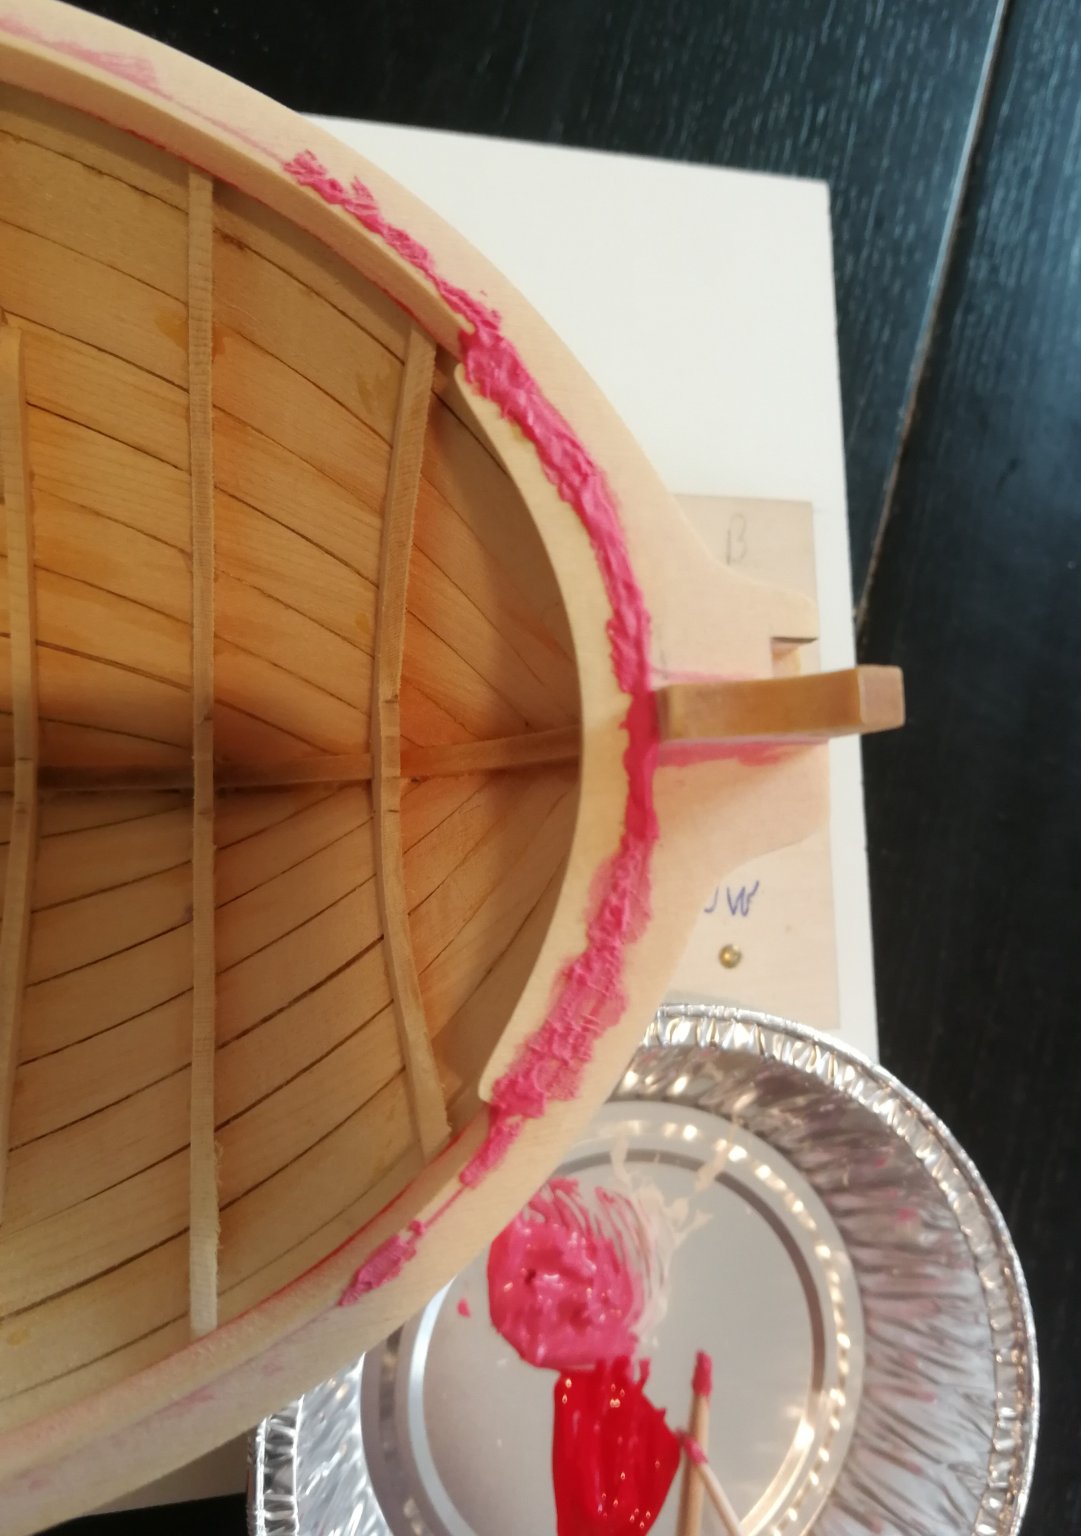
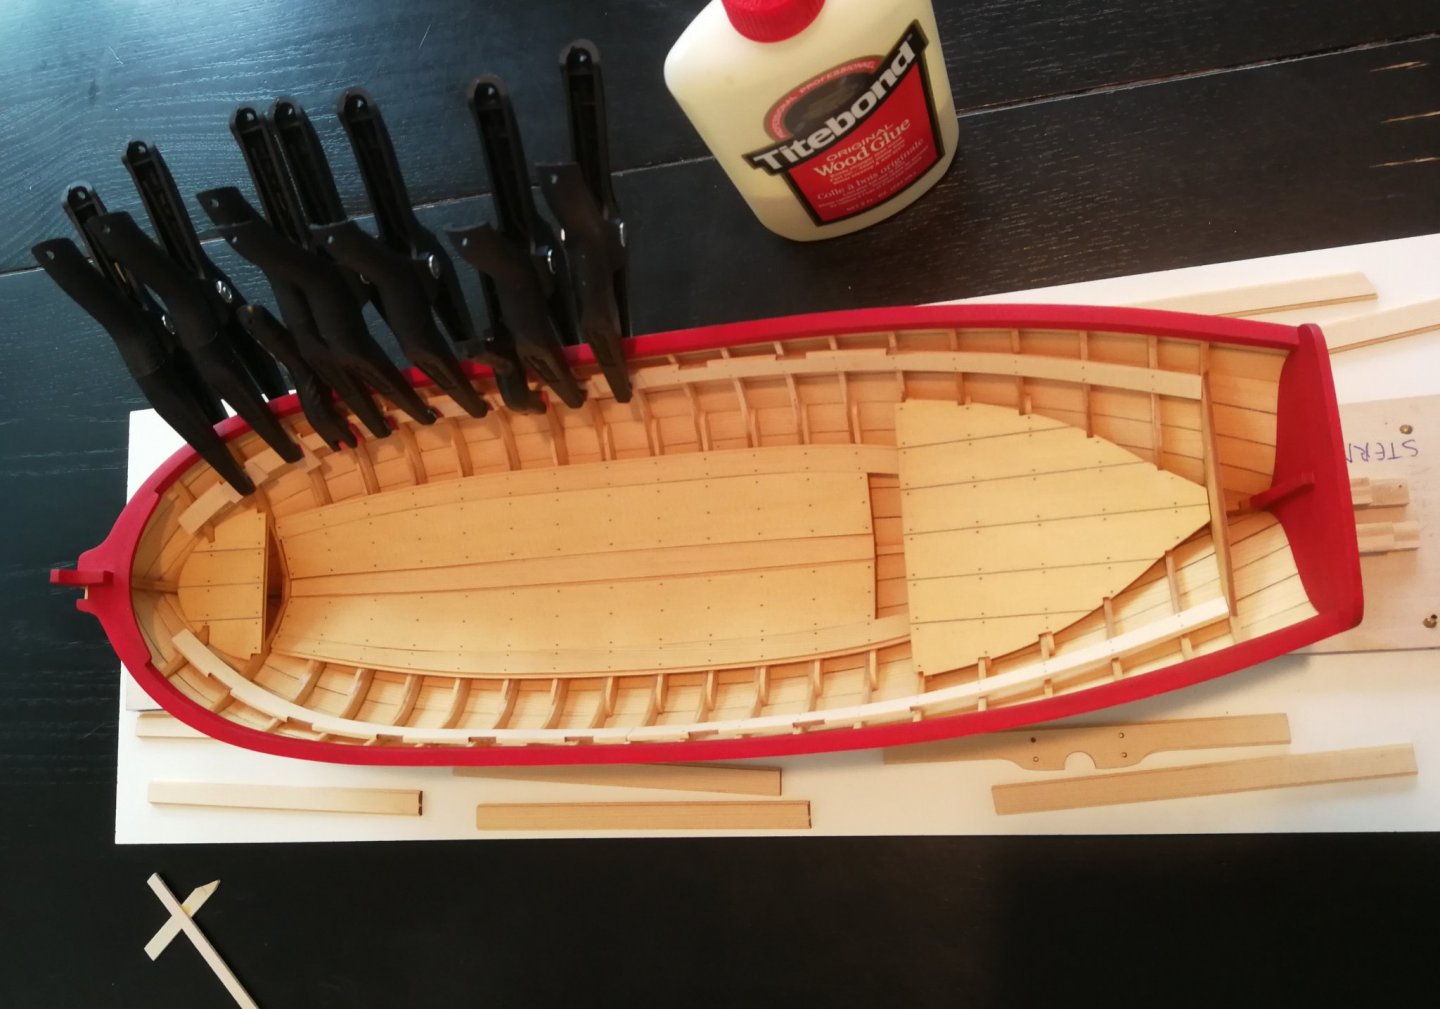
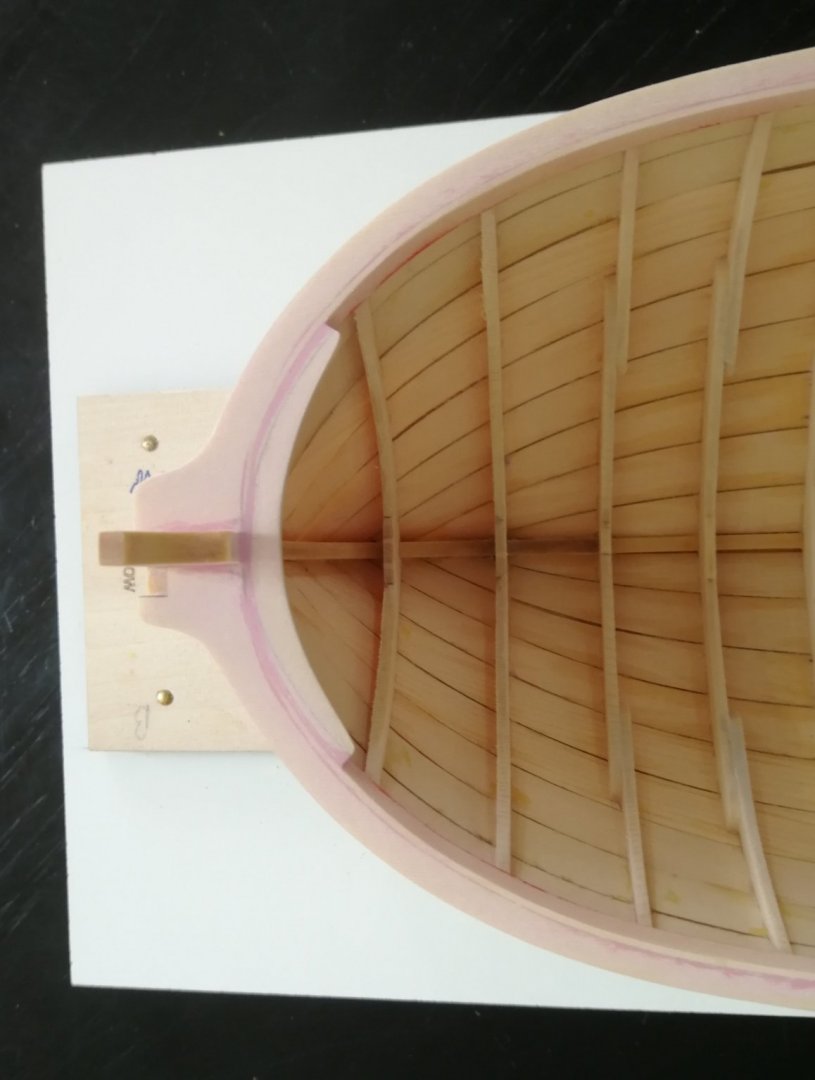
Thank you to all the 'Likes'. The knee is now in place at the bow. As the laser cut knee did not perfectly match the bow of my longboat, it may be interesting that I detail how I mounted the knee. A first possibility would have been to completely recreate a new knee. But I was not sure if I could reproduce the curve as perfectly as that the part supplied in the kit. Luckily, as the piece is very fragile, Chuck provided a few pieces just in case one broke. So I glue at each end, a piece of the second copy provided. I then sand the ends until I get the shape that perfectly matches the bow of my longboat. I glue the knee and prepare a mixture of wood filler and red acrylic paint. It only remains to sand perfectly. With this method, I was able to use the original part and be assured that the curve is perfect. It's time to take out my brushes.


-
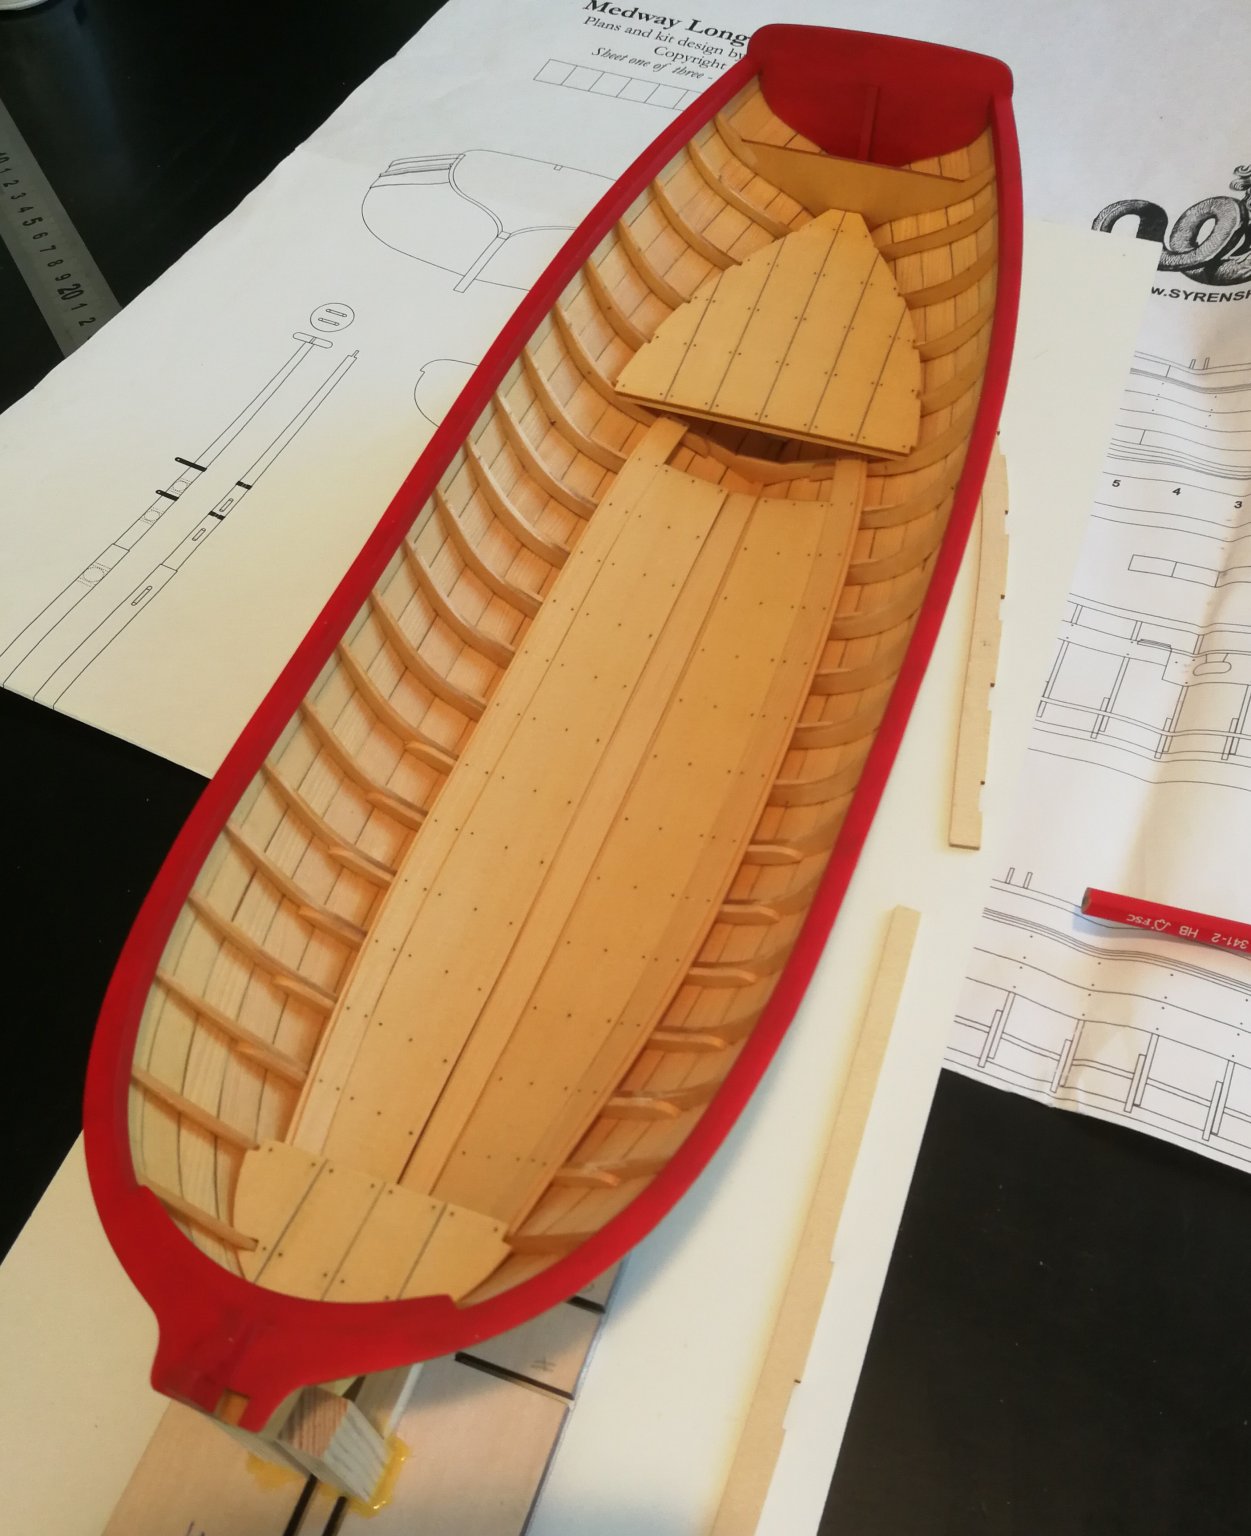
Thanks to all for your kind words. I really appreciate. The inboard sheer strake has been added. These are 4 pre-cut planks 1/32" thick and 5/32" wide. I made a cardboard copy of the bow section to be sure not to bend the wrong end or the wrong way 😁 The 2 bow sections were then preformed by briefly dipping them in hot water and then shaped on the model with clamps. I waited until the parts were dry. Be careful to use small scraps of wood between the clamps and the sheer strake so that the wood is not marked. You will notice that I already painted in red the lower edge of the inboard sheer strake before gluing it in order to avoid to paint this part later and in order to have a clean finish. Once glued, I carefully filled the small gaps with red tinted filler. Finally I sanded the top of the cap rail and inboard sheer strake smooth.

-
You do remarkable work on this model, so clean and precise. I really like the finish applied to the wood. Can't wait to find out more.
- 77 replies
-
- 5
-
-
- morel
- master korabel
- (and 1 more)
-
Thanks to all the 'Likes'. The cap rail has been reduced to a width of 5/32". I started with the outer edge. Then using a compass open at 5/32" I drew a line following the outer edge. I finally sanded the inside edge to this line. I still have to finalize the fairing inboard and the interior needs to be cleaned a little.


-
Superb model and a very detailed and informative build log. This cutter Alert is really awesome ! Glad you shared this lovely work.
- 335 replies
-
- 1
-
-
- alert
- vanguard models
- (and 1 more)