BANYAN
-
Posts
5,851 -
Joined
-
Last visited
Content Type
Profiles
Forums
Gallery
Events
Everything posted by BANYAN
-

HMCSS Victoria 1855 by BANYAN - 1:72
BANYAN replied to BANYAN's topic in - Build logs for subjects built 1851 - 1900
Hi Dave, thanks for that info - if I can eliminate the rippled effect , this would be perfect. cheers Pat- 993 replies
-
- 2
-

-
- gun dispatch vessel
- victoria
- (and 2 more)
-
Very nice Greg. With all the PE, where it joins the resin/plastic parts do you fill the joint, or file down the PE edge so that it does not stand proud - for example the vertical join aft of the ladder in your port side amidships photo earlier? I may be jumping the gun but am interested as I may have to do something similar when I finally get around to my Vampire resin build. The PE certainly holds a lot more detail. cheers Pat
-
Hi Alan, first nice progress with your drawings - should turn into a nice figurehead. As to Javelin Vs Spear - Druxey is quite right to point out the difference as a javelin is a light throwing spear differentiated mainly with a javelin not having a head; whereas a spear generally does. cheers pat
-
HMCSS Victoria 1855 by BANYAN - 1:72
BANYAN replied to BANYAN's topic in - Build logs for subjects built 1851 - 1900
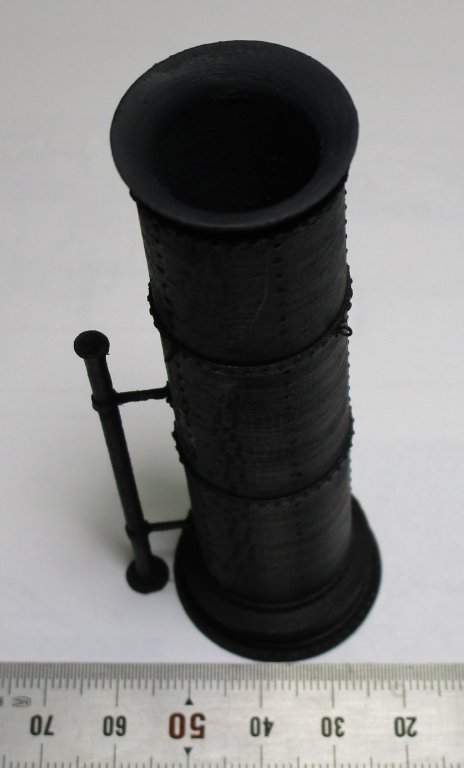
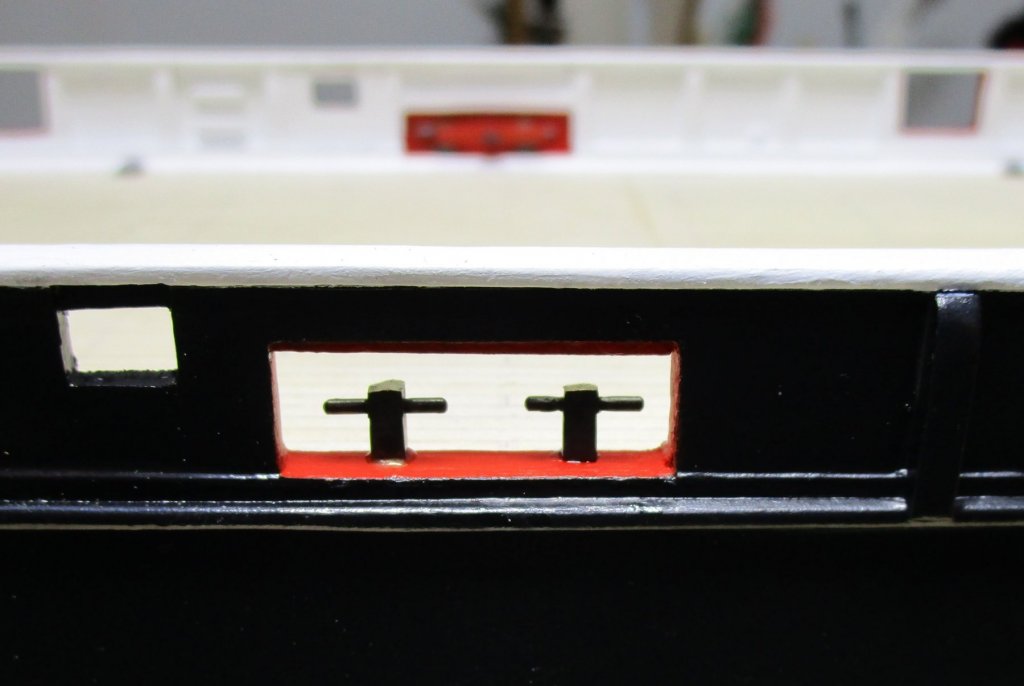
Hi all, many thanks for the remarks, questions and likes. General Comments: The camera really points/brings out the errors especially at this scale. In hind-sight the pipes for the pissdales are too large in relation to the dales themselves, and the battens for bolstar securing are a little too thick, but they looked OK before adding them to the model and to the naked eye - I think I will leave these as are. However, I am not as sure that I can live with the poorly filed tops of a couple of the towing timber. The problem is that these are two-part epoxied into the waterways and it would be too difficult and risky to file them flat in-situ - I am still thinking on this issue I need to find a way to better inspect these parts before fitting them. Russ: Thanks for your kind comment. There is much more detail to be added yet :). Carl: Thanks for the suggestions; I will try to sand but may be a tad fiddly. I think the real issue comes down to the brand of paint I used and I have decided not to use it again - committed to it for this build though. Ed: Many thanks for looking in and being 'gentle' on my workmanship (especially compared to yours). I am learning a lot and one of the biggest lessons is not to file freehand (put it in a vice dummy! - I have learned the hard way and you show this in all your work so I should have known better). I am using acrylic paints, but as I explained to Carl, it is either the paint brand (peculiarities with their composition) or the thinner/reducer I have used as it seems to take weeks to fully cure. I am leaving the red to settle for a few more days while I clean up some of the other work and then try to recoat it. As to the funnel, yep a great way to show the details but please see next comments. Bernie: I did not print this myself - the build is a club effort even though I am doing 80% of the work or should it be - A friend of mine recently purchased a 3D printer from ALDI (German owned grocery shopping chain here in Australia that uses 'special deals' on other merchandise as a marketing ploy and inducement to go to their shops) - he got it for A$200ish - very cheap but seems to work very well. He uses it with AutoCAD 3D (or some name like that - from the AutoCAD family I believe); it is not much good for 2D but seems great for 3D. He really knows how to make it 'sing' and experiments with different print mediums and placement of 'holders' etc to get the best results. I can put you in touch for a private discussion with him about it if you like? Give me a bell or PM. There is a downside though, every little detail shows through if you airbrush and I am finding the printing pattern, even though smooth to the touch, comes through and you have to use many layers of paint. That said I think it is a great way to do details such as this and even though not 'scratch' in the purest sense, I still had to do all the research, he had to create the drawing and print it off. It is similar to buying a resin or PE after-market part I suppose. We have plans to try and do the capstan also. cheers Pat- 993 replies
-
- 4
-
-
- gun dispatch vessel
- victoria
- (and 2 more)
-
HMCSS Victoria 1855 by BANYAN - 1:72
BANYAN replied to BANYAN's topic in - Build logs for subjects built 1851 - 1900
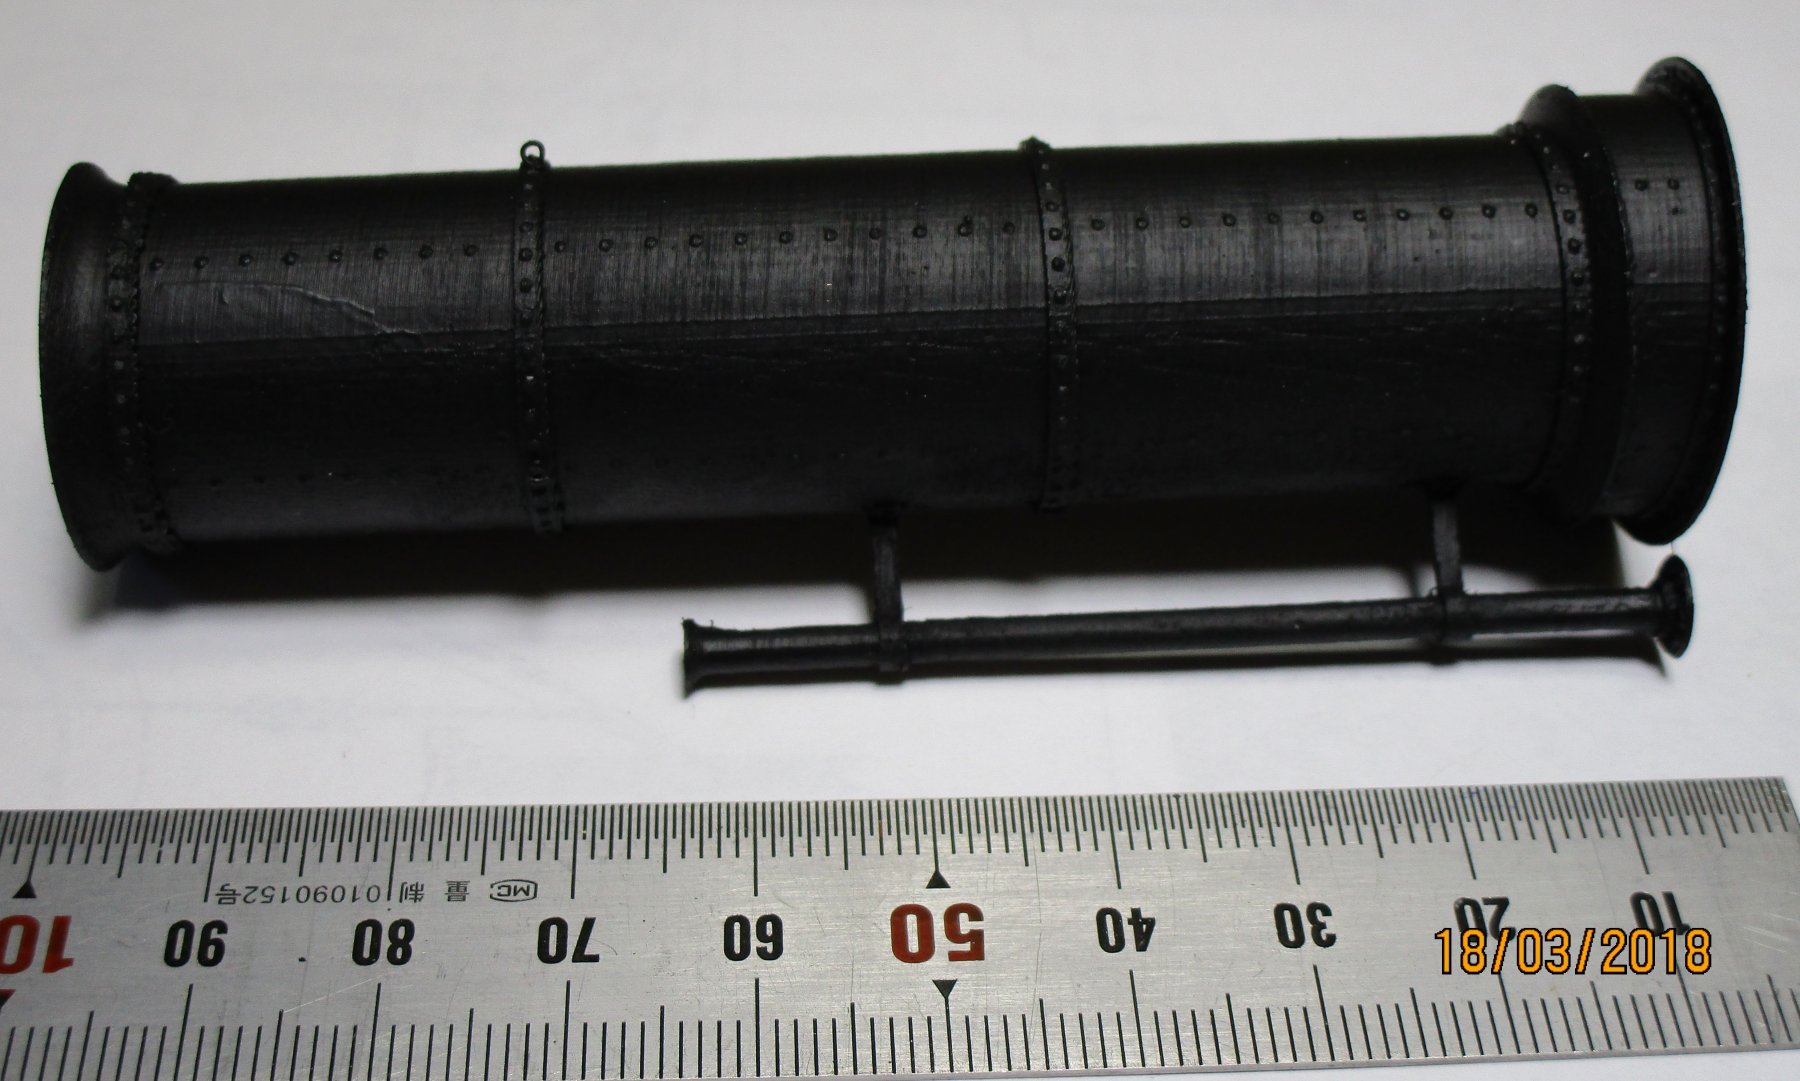
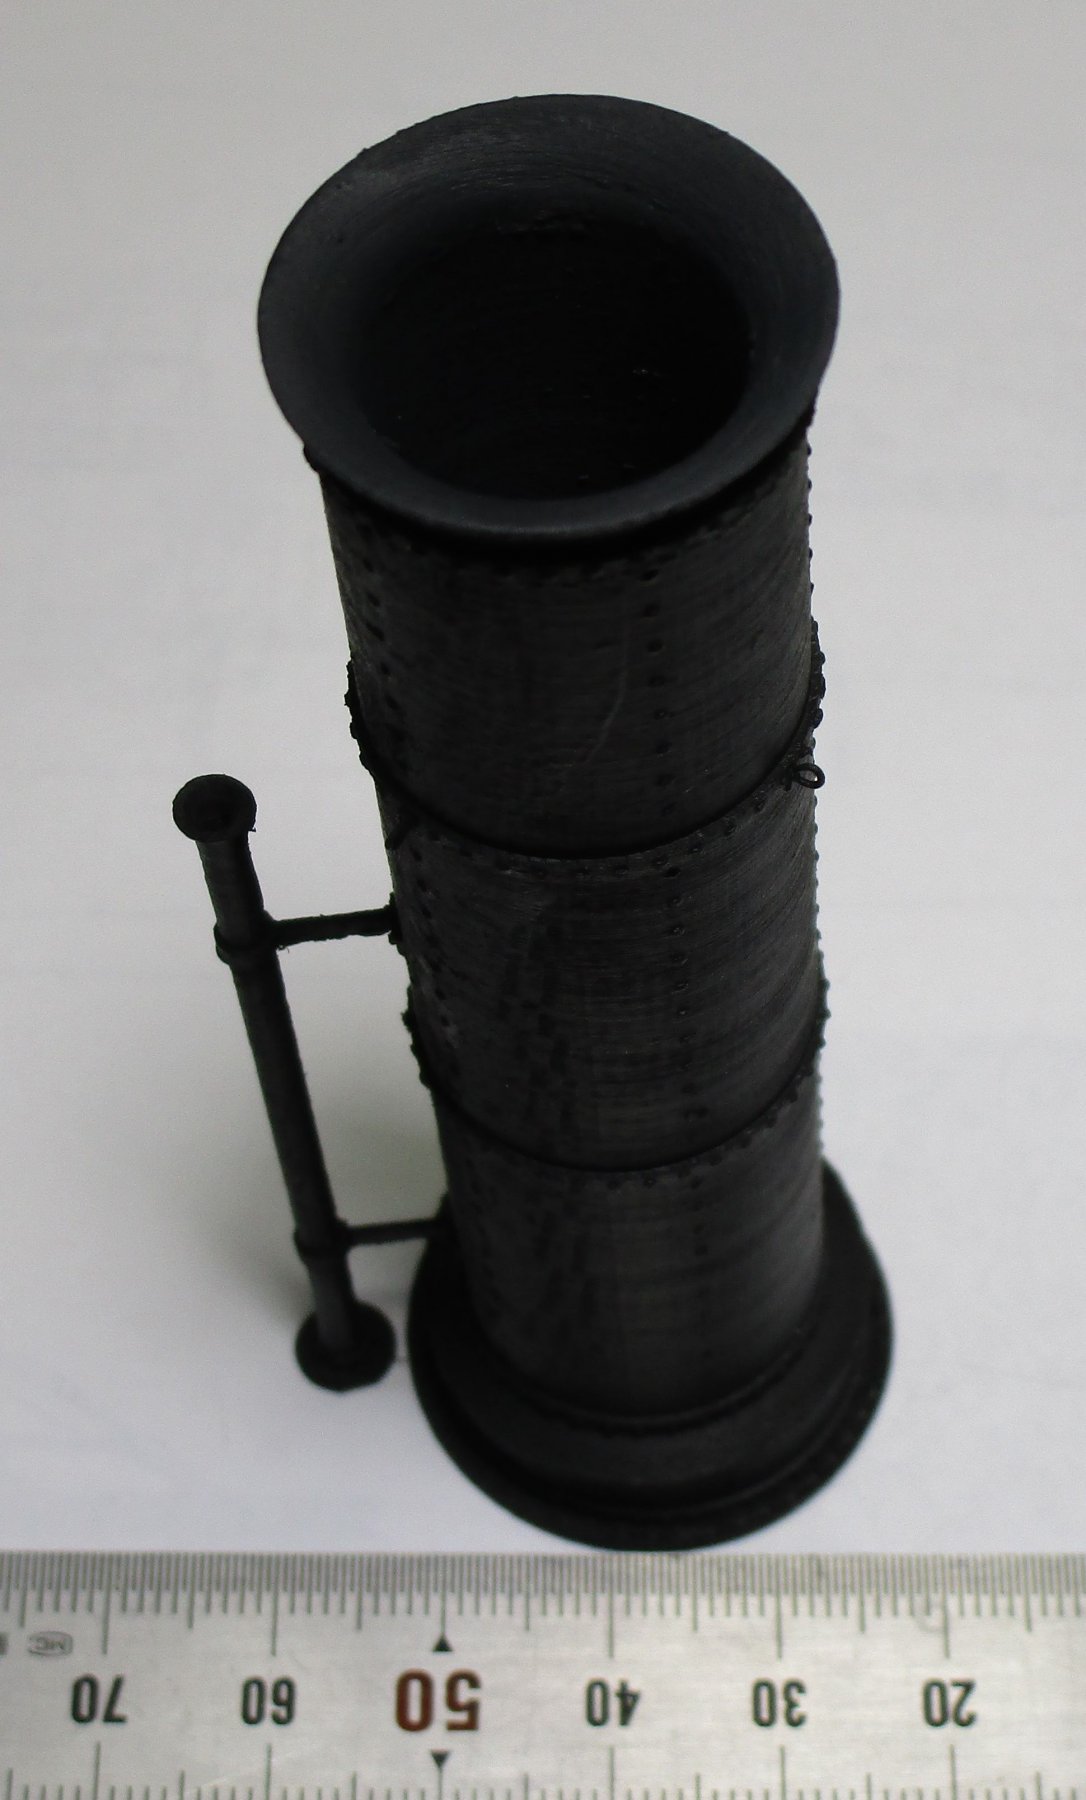
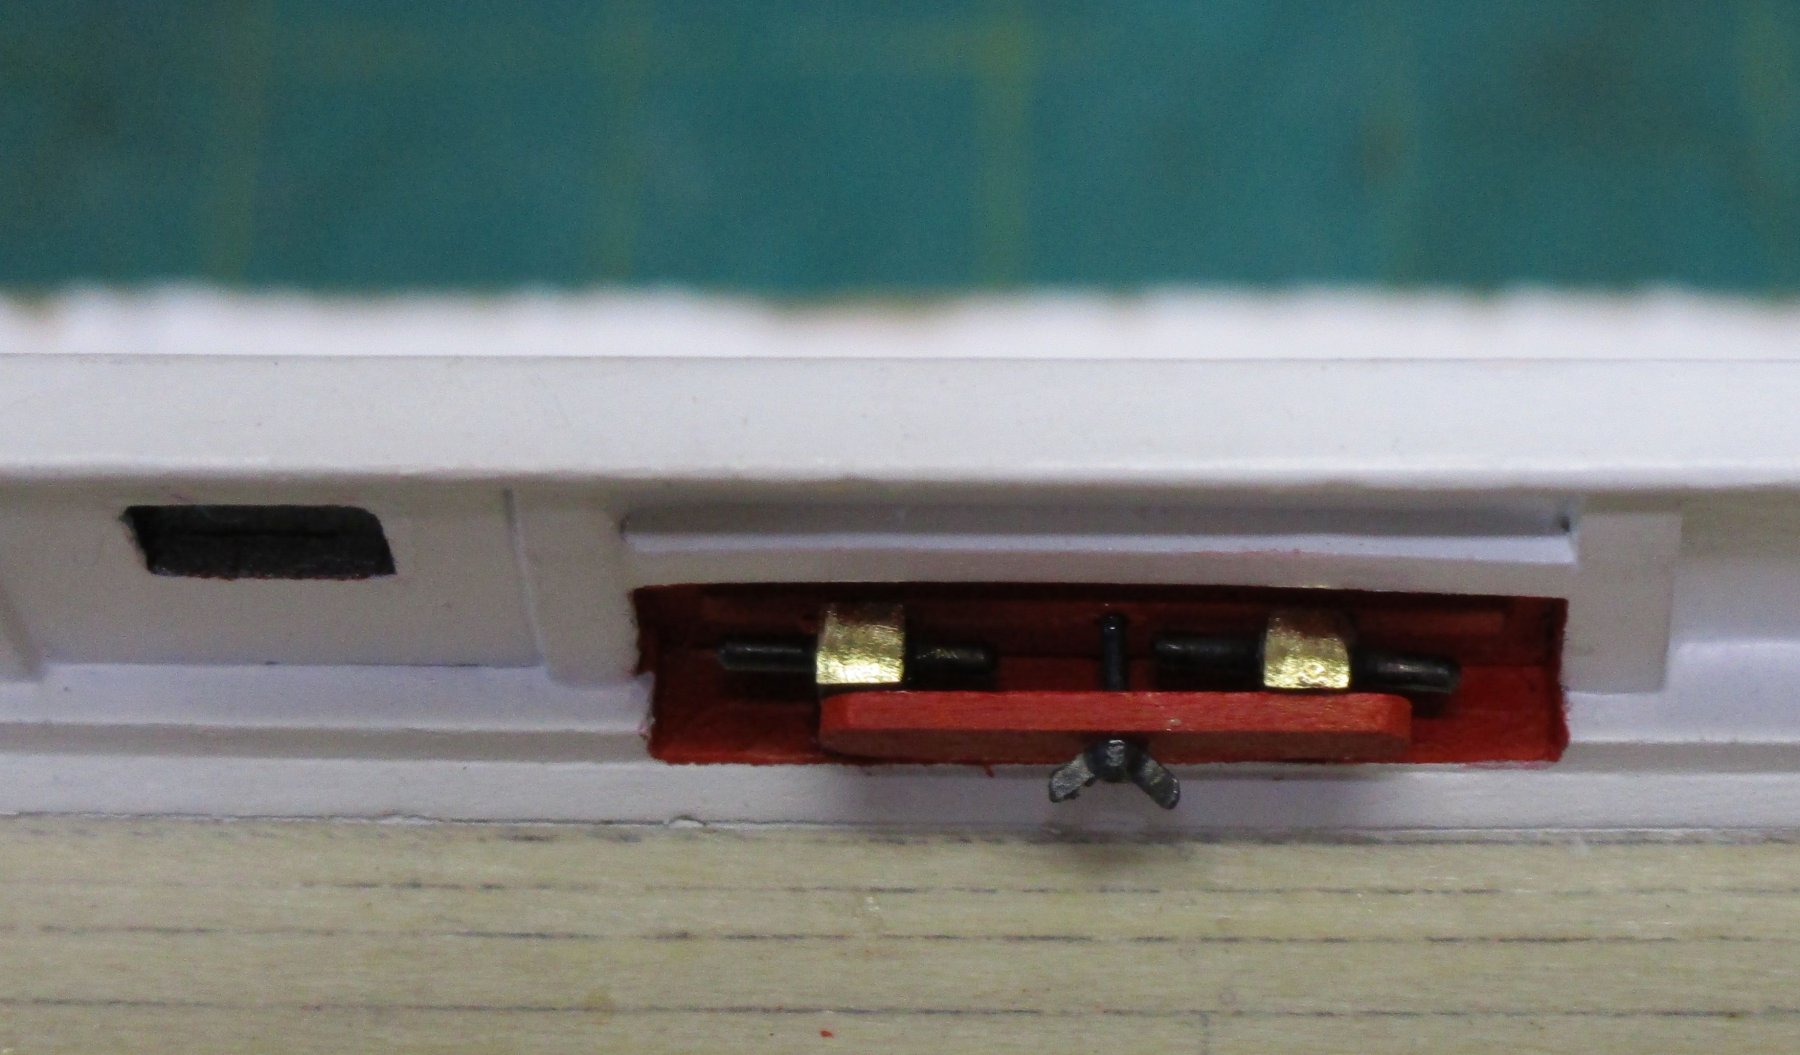
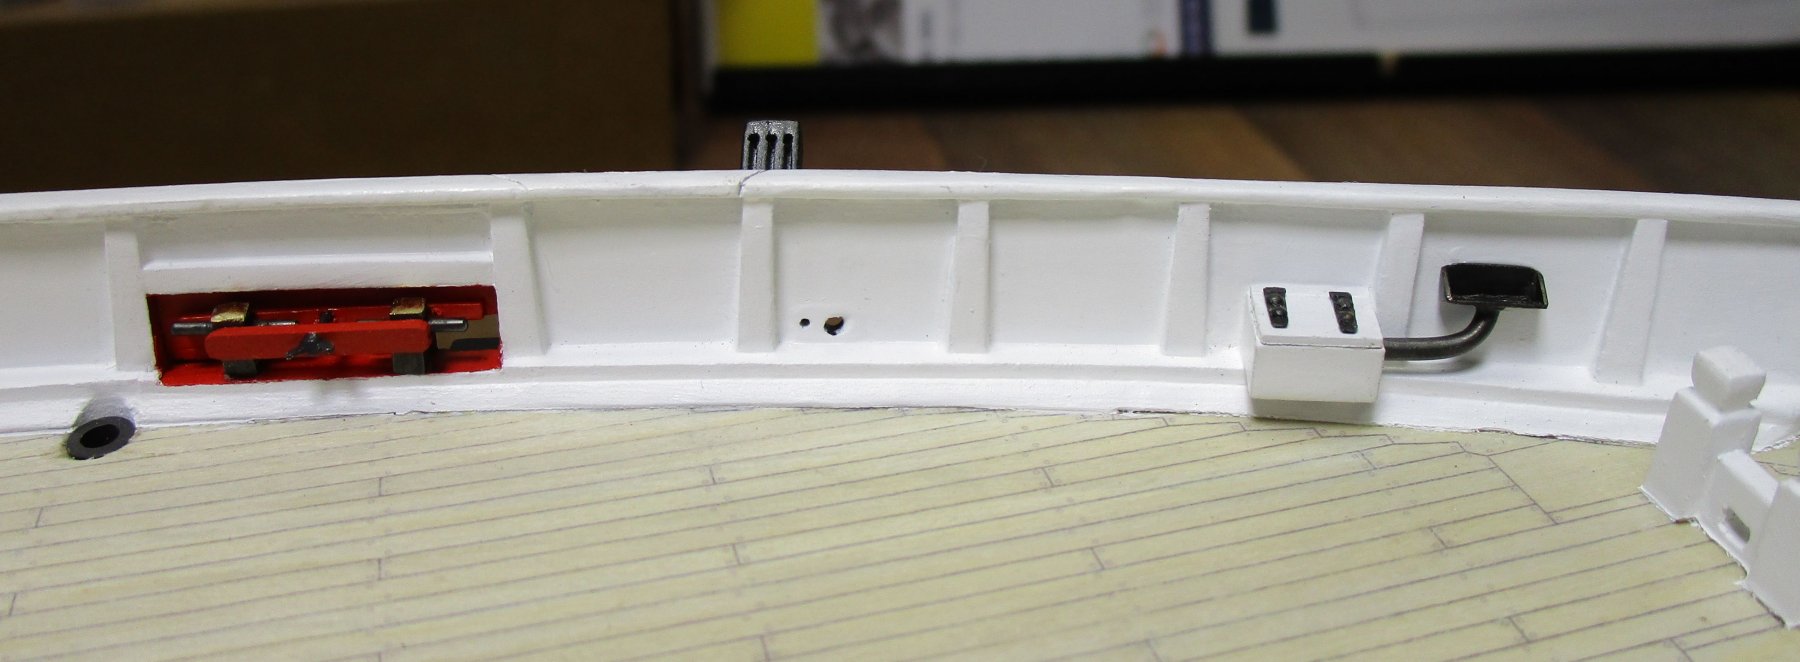
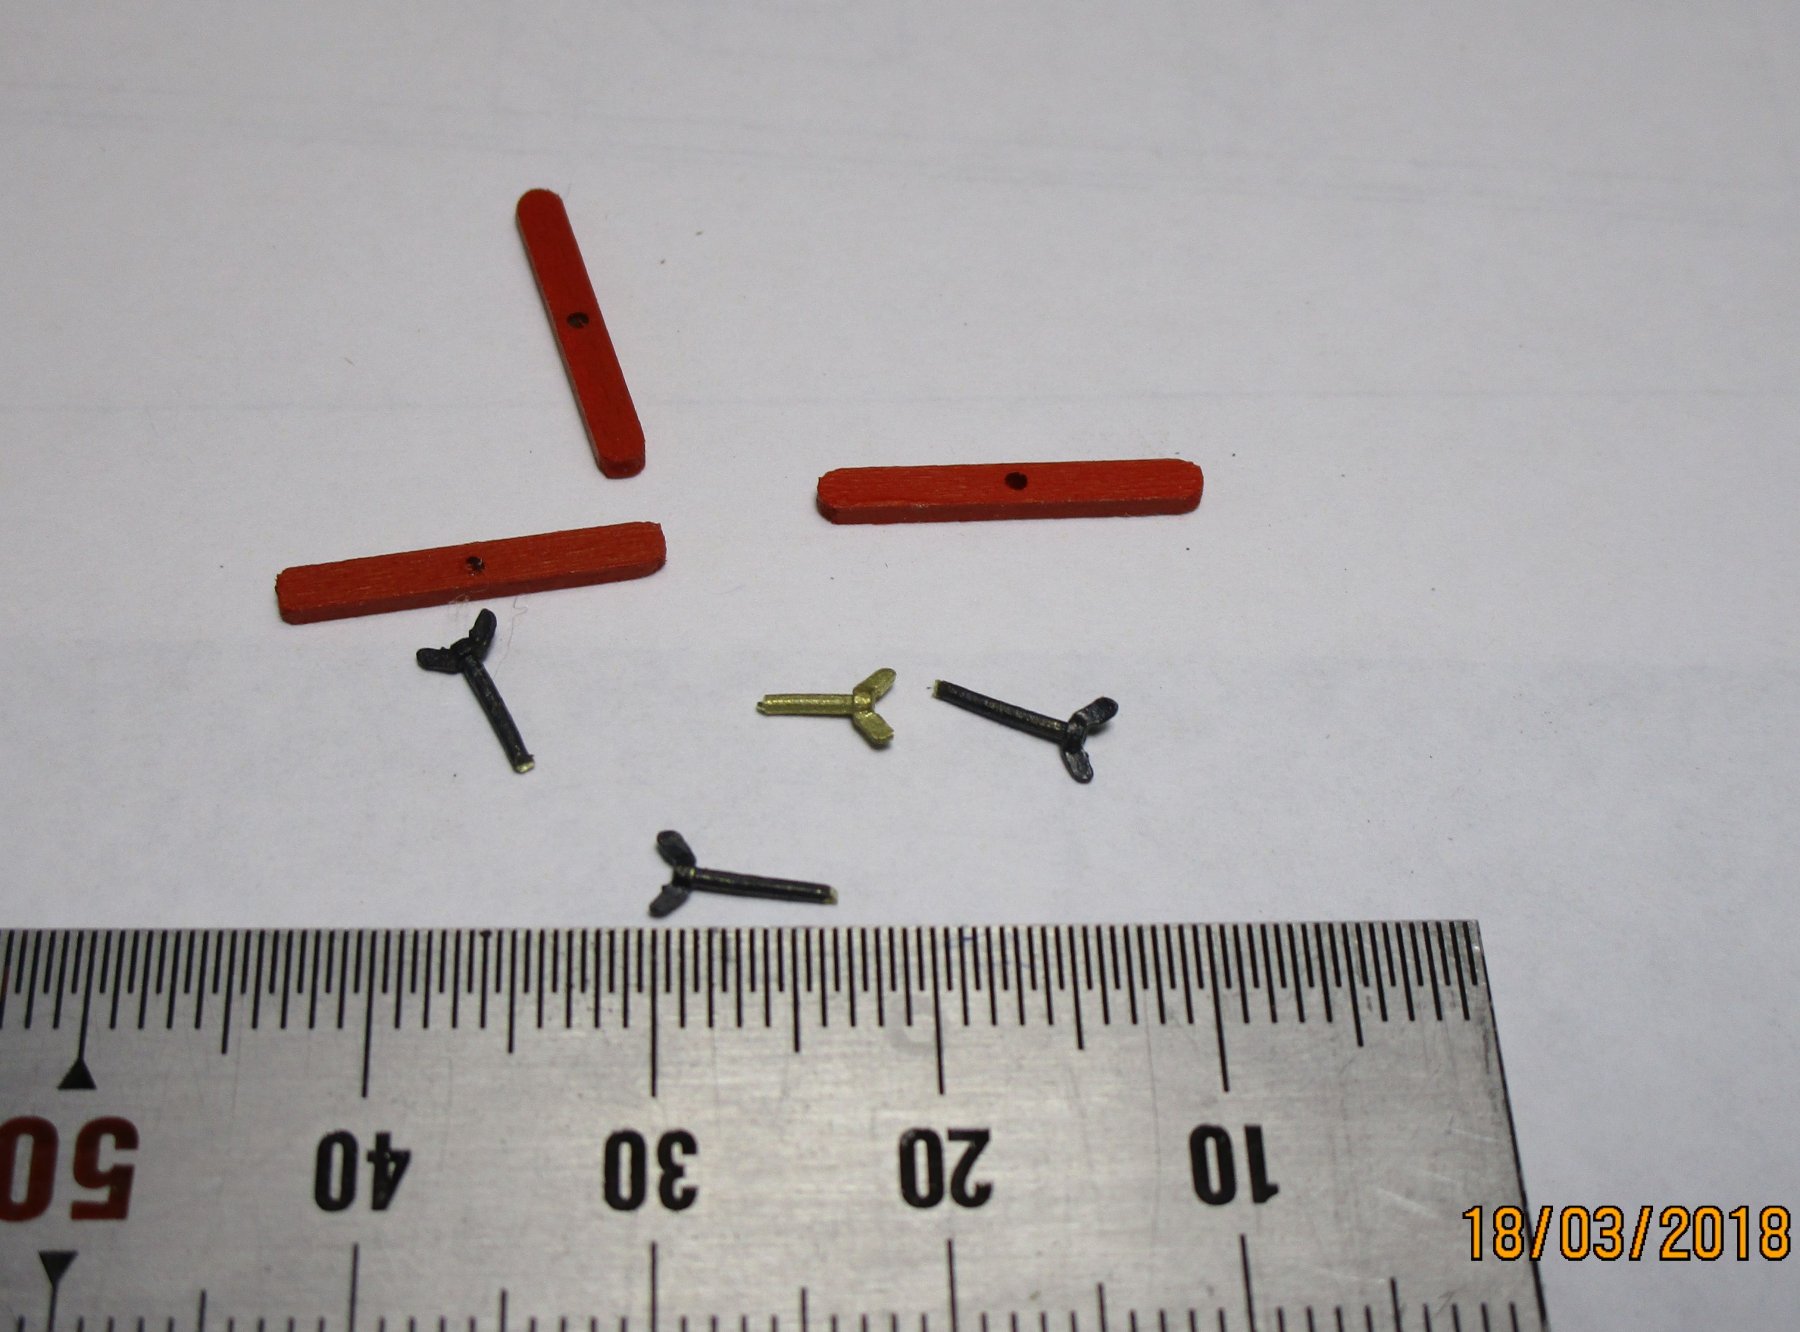
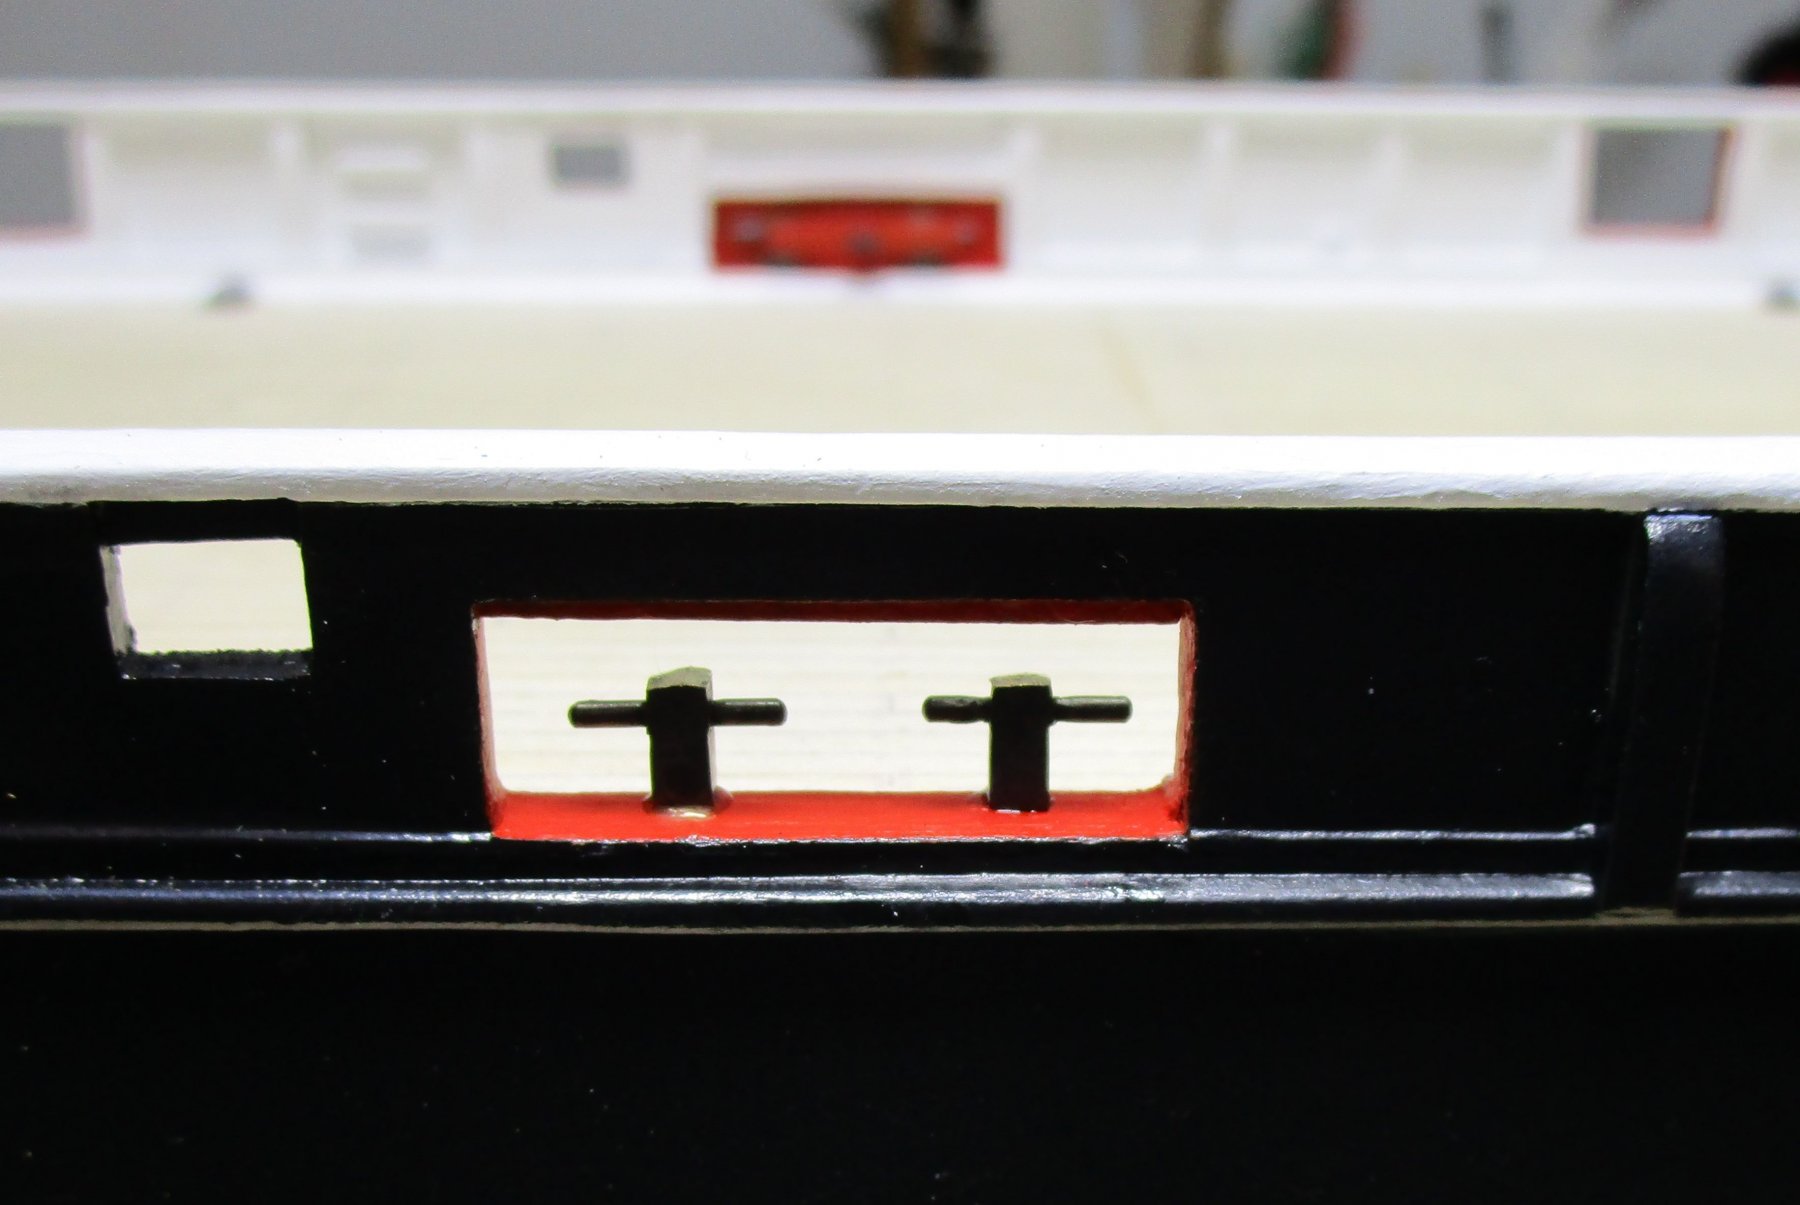
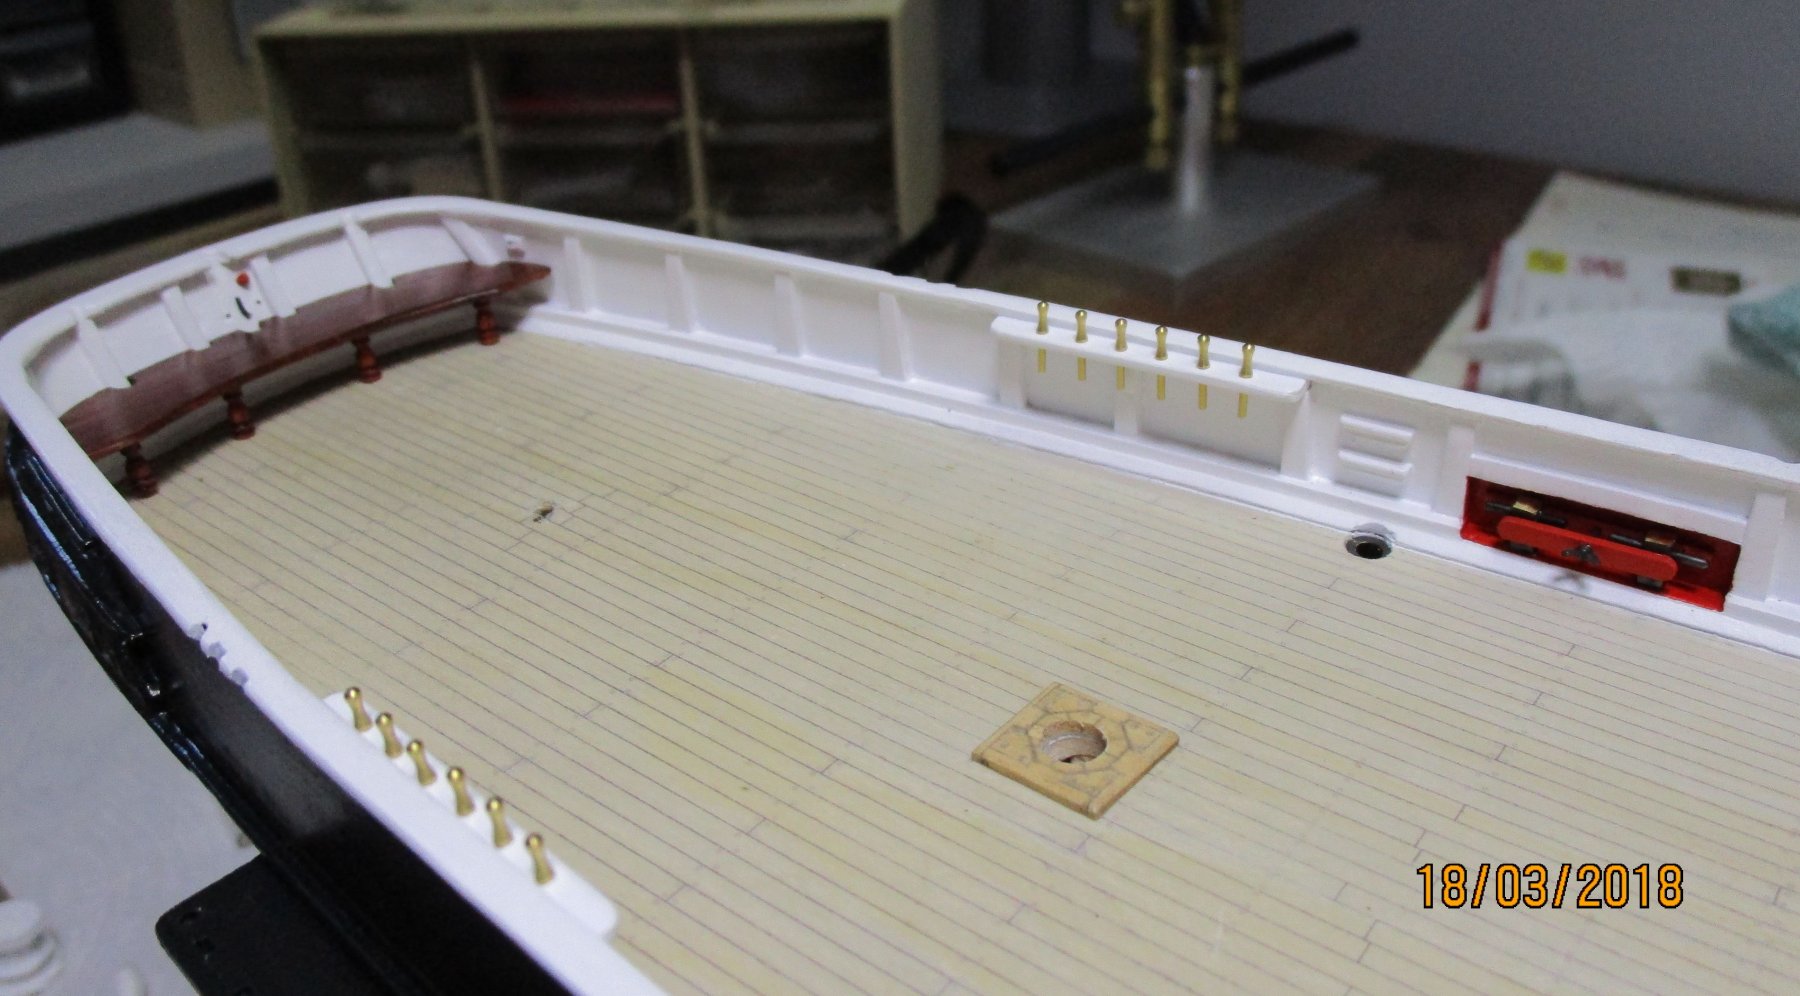
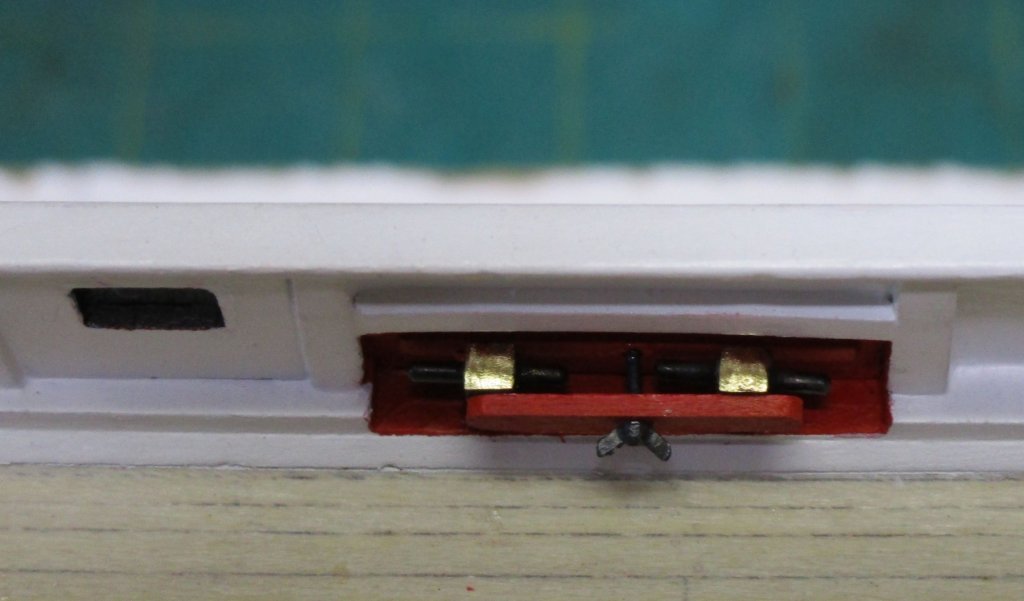
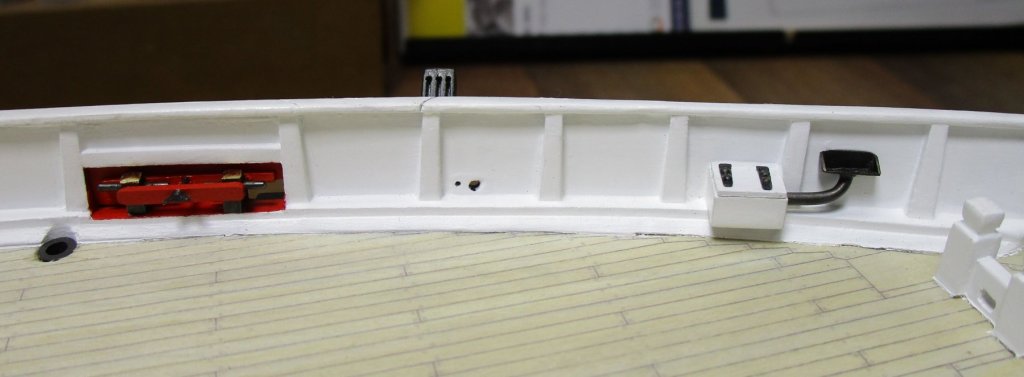
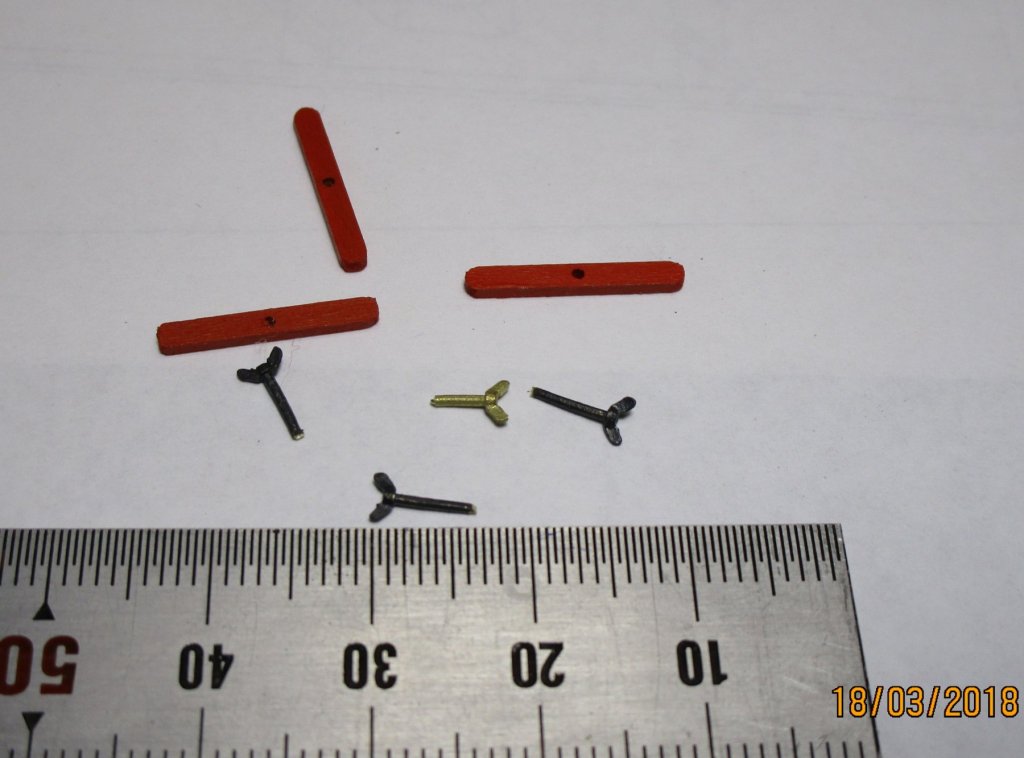
Hi again folks, some further small updates. i have decided I HATE this camera - it shows far too much detail too clearly These photos are extreme close-ups as the port openings (with bucklars fitted) are less than 20mm across. They show that I have a lot (did I say a LOT) of cleaning up to do yet. All those bumps (dust) are not visible to the naked eye. The one advantage is that it clearly shows where I need to sand, touch-up or square off etc. so that will be the next major undertaking. The first photos show a 3D printed funnel; primed black. We had started one in metal but getting the panel rivet details etc to show proved too difficult. The 3D printed one looks OK but has a bit of cleaning up (sanding mainly) to be done yet. The tie-down rings are small brass eyes I made; chains will be fitted to these and secured at the deck with bottle screws. The towing timbers (bollards) are made from brass (shown previously) and blackened. I then sanded the top to simulate the copper cap (as per the contract). The small wingnuts (first photo) simulate one method by which these bucklers may have been secured in place for sea (battens across the towing timbers and pulled taut with the threaded rod and wingnut. I have also fitted the heads (less than 10mm across) and pissdales - this one is shown closed, the opposite has the lid up. I still have to add a small rope handle to the lids. I have also dry fitted the rear bench to the transom. Now back to the sanding and scraping, then touch ups to cover the 'vermillion' that just keeps showing/bleeding through. cheers Pat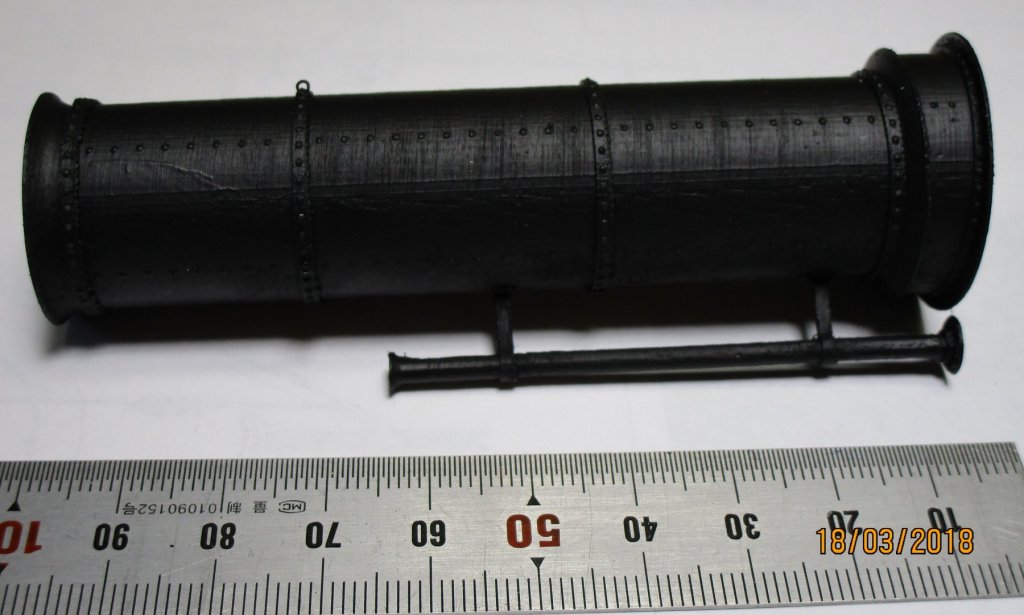

- 993 replies
-
- 14
-
-
- gun dispatch vessel
- victoria
- (and 2 more)
-
Very nice work Tecko; that is some serious alteration. cheers Pat
-
Very nice display piece Rob, you have done an excellent job on those half-hulls and chosen a very good way display them. cheers Pat
-
Congrats on your retirement Alan. You may be swimming in circles at the moment but I am sure the eddies are taking you in the right direction. cheers Pat
-
Great progress Greg. Those decks are very nicely detailed. Are they an after-market purchase or part of the kit? cheers Pat
-
OK, OK you're making me hungry - where's the fresh fish already? Very nice and lifelike build of a working trawler build Denis; love the detail. regards Pat
- 378 replies
-
- 4
-
-
- t78 norden
- billing boats
- (and 1 more)
-
Another hello from Newcastle, Australia.
BANYAN replied to Jobbie's topic in New member Introductions
Another warm welcome to MSW Jobbie. you have a great collection of nicely built models; look forward to your build of Supply. cheers Pat -
Very nice work indeed Ed; I am looking forward to your next volume. cheers Pat

- 3,612 replies
-
- 2
-
-
- young america
- clipper
- (and 1 more)
-
Looking good Mike. You will get there despite the challenges life throws yourway - it took me 14+ years to do my Endeavour cheers Pat
- 943 replies
-
- 4
-
-
- hahn
- oliver cromwell
- (and 1 more)
-
Small but good progress John; life takes priority. I hope your immediate health issues get sorted and my best wishes for your forthcoming 'leave of absence' from the museum. cheers Pat
-
Beautiful job Danny, very nicely presented and plenty of details. Are you going to add a 'topping lift' to the accommodation ladder? cheers Pat
-
HMCSS Victoria 1855 by BANYAN - 1:72
BANYAN replied to BANYAN's topic in - Build logs for subjects built 1851 - 1900
Thanks mate; yeah plenty of adjustments and trials needed. He is on version 4 as we speak, but thinks that should crack it cheers Pat- 993 replies
-
- 3
-
-
- gun dispatch vessel
- victoria
- (and 2 more)
-
Looking good Dave; you must be flogging those dockies (or enticing them with an extra rum ration or two) cheers Pat
-
HMCSS Victoria 1855 by BANYAN - 1:72
BANYAN replied to BANYAN's topic in - Build logs for subjects built 1851 - 1900
i Dave, thanks for looking in. The printer is one of 2 a mate of mine purchased; he is a wiz at 3D and G code and rather than learn even more skills before I have mastered the few I have,I have taken up his kind offer to produce these for me cheers Pat- 993 replies
-
- 4
-
-
- gun dispatch vessel
- victoria
- (and 2 more)
-
Let me the be the first to welcome you to the dark side Tecko Nice work on the boat. cheers Pat
-
HMCSS Victoria 1855 by BANYAN - 1:72
BANYAN replied to BANYAN's topic in - Build logs for subjects built 1851 - 1900
Many thanks for looking in and your kind comments Jason, I'll keep you posted on the capstan. Latest attempt allows most of the detail to be presented such as the capstan bar holes etc, but the bar locking pins are proving too much for the printer at 1:72. The hardest part will be trying to paint this as I have developed the 'old fella' shakes The doctor suggested I have a few drams the night before (but was careful to mention that he was not encouraging me to drink :)) cheers Pat- 993 replies
-
- 2
-
-
- gun dispatch vessel
- victoria
- (and 2 more)
-
ancre Chebece 1750 by Jeronimo - FINISHED
BANYAN replied to Jeronimo's topic in - Build logs for subjects built 1501 - 1750
Stunning work on that detail Karl; this is a very nicely presented model. cheers Pat