BANYAN
-
Posts
5,964 -
Joined
-
Last visited
Content Type
Profiles
Forums
Gallery
Events
Everything posted by BANYAN
-
Love these two! cheers Pat
-

HMCSS Victoria 1855 by BANYAN - 1:72
BANYAN replied to BANYAN's topic in - Build logs for subjects built 1851 - 1900
Thanks again Eberhard; I am looking forward to this trip. i have deliberately given the NMM a liss as from what I can see, simply not worth a visit anymore Nice photos BTW. cheers Pat- 1,021 replies
-
- 3
-

-
- gun dispatch vessel
- victoria
- (and 2 more)
-
A Lorch Micro-Mill that never was ...
BANYAN replied to wefalck's topic in Modeling tools and Workshop Equipment
Very nice work Eberhard; you have a very nice, practical and efficient tooling setup there now. cheers Pat -
HMCSS Victoria 1855 by BANYAN - 1:72
BANYAN replied to BANYAN's topic in - Build logs for subjects built 1851 - 1900
Hi Steven, sorry I did not respond against your second comment/feedback earlier - somehow I missed it, a senior's moment - much appreciate the info about Bristol and in particular about the GB. It's been a while since I was there; I served in HMS Bristol back in 1986 doing my Bridge Watchkeeping and Ocean Navigation Certificates - had a great time during a port visit there, but I was not fully aware of some of her maritime heritage collections. cheers Pat- 1,021 replies
-
- 2
-
-
- gun dispatch vessel
- victoria
- (and 2 more)
-
HMCSS Victoria 1855 by BANYAN - 1:72
BANYAN replied to BANYAN's topic in - Build logs for subjects built 1851 - 1900
Thanks for the feedback and info Eberhard, great to hear that access to Chatham has improved but a little disappointing to hear Bucklers Hard is a tourist trap now - I think like you it was a much better option without the 'trappings' when I last visited there in the mid-80s. Thanks Mark, Ill be sure to do that cheers Pat- 1,021 replies
-
- 2
-
-
- gun dispatch vessel
- victoria
- (and 2 more)
-
Outstanding detail at 1;72 - I have to keep reminding myself of that. cheers Pat
- 3,618 replies
-
- 2
-
-
- young america
- clipper
- (and 1 more)
-
HMCSS Victoria 1855 by BANYAN - 1:72
BANYAN replied to BANYAN's topic in - Build logs for subjects built 1851 - 1900
Thanks Dave. The plan is to 3D print the capstan and see what it looks like rather than manufacture one The plan is to do Portsmouth and Chatham Dockyards, and the SS Great Britain in Bristol, as well as revisit Bucklars Hard. I was based in Portsmouth for 2 years while on an exchange deployment with the RN, so I have a few mates there I hope to catch up with. I think I might be pushing my luck if I try for any more (in trouble with the Admiral that is). cheers Pat- 1,021 replies
-
- 4
-
-
- gun dispatch vessel
- victoria
- (and 2 more)
-
HMCSS Victoria 1855 by BANYAN - 1:72
BANYAN replied to BANYAN's topic in - Build logs for subjects built 1851 - 1900
Thanks for looking in and the kind comments guys. I am off to the UK next year Steven and a visit to the GB is included (along with a few other maritime museums :)) As with your Dromon, the research is slowing me up quite a bit Great to see you back Bernie; hope to see more of your lovely 'James Caird' soon? cheers Pat- 1,021 replies
-
- 2
-
-
- gun dispatch vessel
- victoria
- (and 2 more)
-
Some production line you got going The buoys and staffs look great! cheers Pat
- 378 replies
-
- 5
-
-
- t78 norden
- billing boats
- (and 1 more)
-
HMCSS Victoria 1855 by BANYAN - 1:72
BANYAN replied to BANYAN's topic in - Build logs for subjects built 1851 - 1900
Thanks Denis; appreciate the complement. Victoria is the same era and was built on the same principles as the Union/Confederate ships, and for a similar purpose, although she never engaged in any ship-to-ship battles - purely shore bombardments. cheers Pat- 1,021 replies
-
- 2
-
-
- gun dispatch vessel
- victoria
- (and 2 more)
-
Nope but yours look so much better I thought I might cajole you into it No probs re ref to resistance soldering. cheers Pat
-
HMCSS Victoria 1855 by BANYAN - 1:72
BANYAN replied to BANYAN's topic in - Build logs for subjects built 1851 - 1900
Thanks for looking in and the positive reinforcement guys; much appreciated. cheers Pat- 1,021 replies
-
- 2
-
-
- gun dispatch vessel
- victoria
- (and 2 more)
-
What a beautifully crafted model Antony; you can be justifiably proud of this one. cheers Pat
- 99 replies
-
- 3
-
-
- turtle ship
- korean
- (and 1 more)
-
Slow but steady progress John; an excellent foundation for your future planking. cheers Pat
-
Hi Dave; a very good process with excellent results - that yard furniture looks really good. i hope you are going to add those tiny bolts/pins cheers Pat
-
HMCSS Victoria 1855 by BANYAN - 1:72
BANYAN replied to BANYAN's topic in - Build logs for subjects built 1851 - 1900
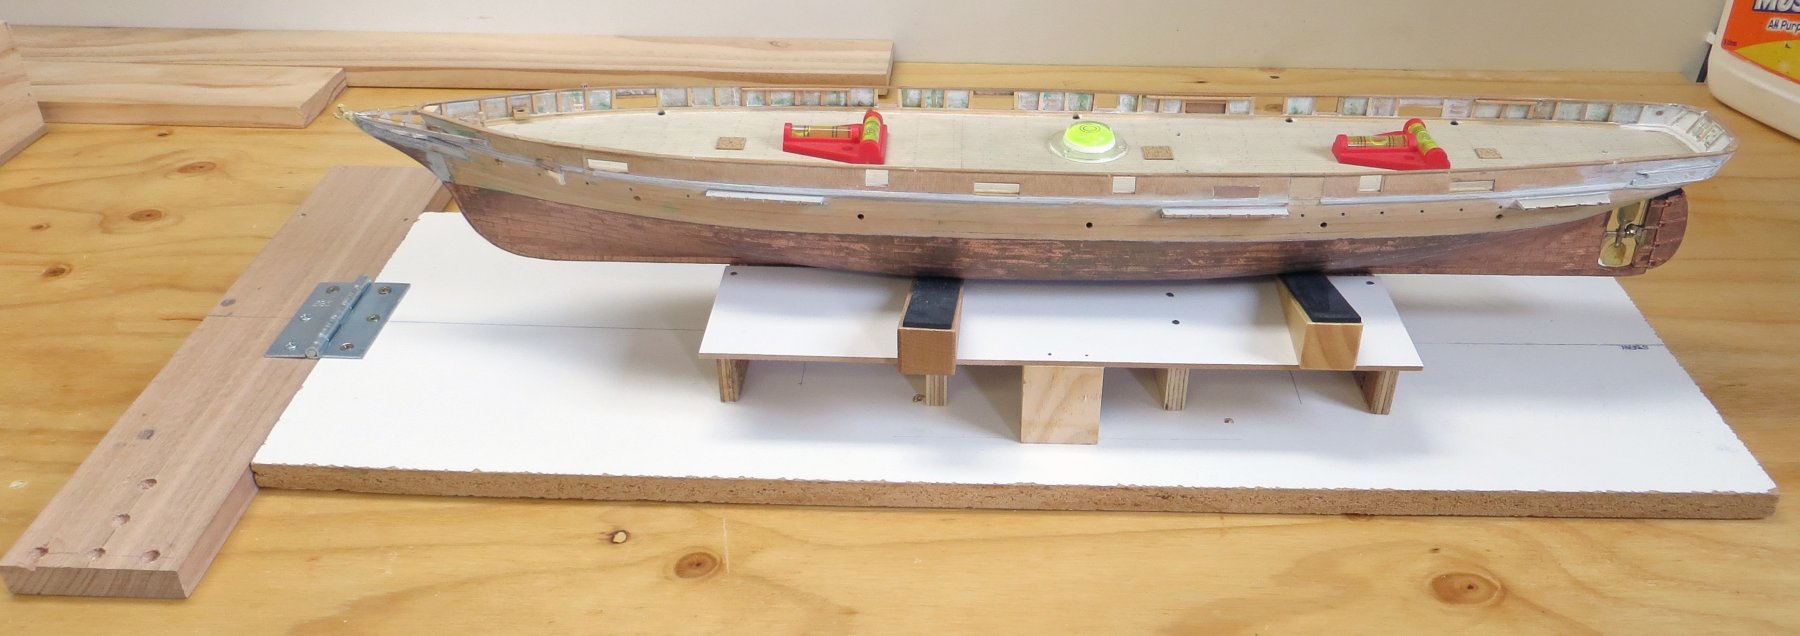
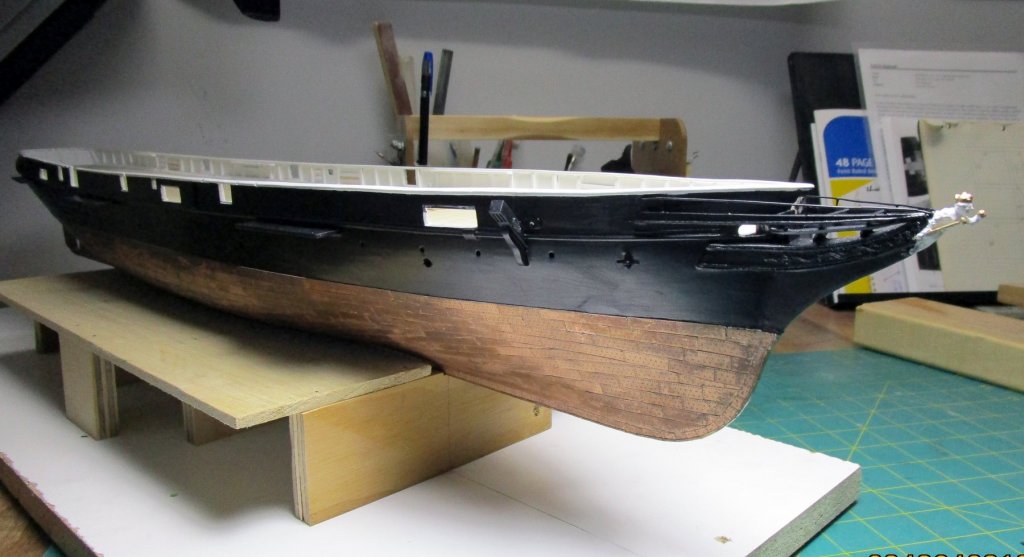
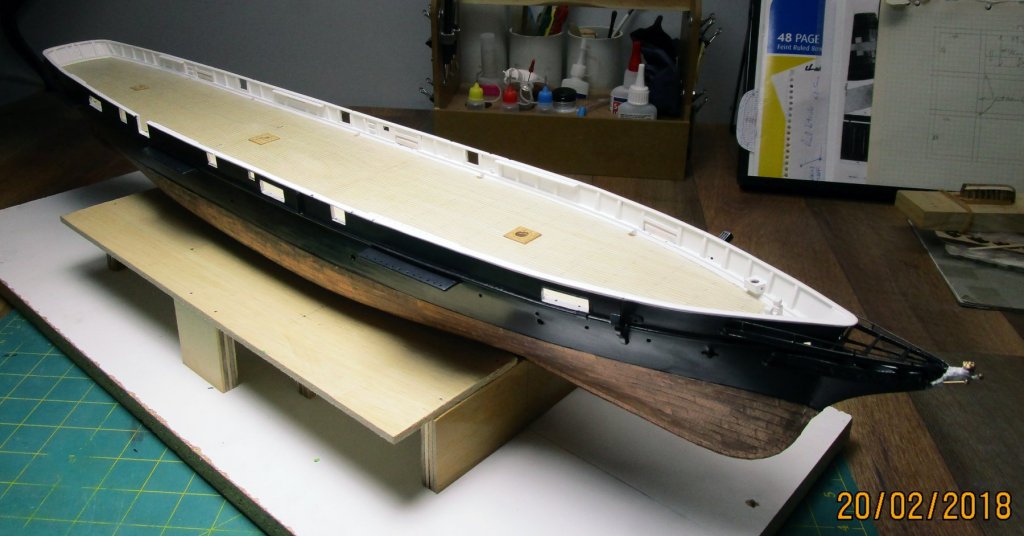
Hi folks some more progress on this build. I have now done a fair mount of the painting. The bulwarks and cap rails are finished but the hull still needs its final coat of black - you can see where I have started final sanding etc. The figurehead requires some touching up of the white to complete it also. The following show progressively how I have been proceeding. First I built a build cradle which is hinged at the front so that I can angle the deck appropriately under a large mill to drill the mast holes. This cradle keeps the ship nice and steady - there are two bicycle spoked from the keel (epoxied in) that pass through the assembly and secured with nuts under the board; the door wedges are for leveling the deck laterally. The next photo shows her masked and the priming coat applied. the last two photos are of her in her current state. the larger holes are for the scupper outlets; the final size is much smaller - a 9" scupper at 1:1. The smaller holes are for the Lang Scuttles mentioned earlier in this log. I have also attached a 3D render of what the capstan will look like. cheers Pat


- 1,021 replies
-
- 16
-
-
- gun dispatch vessel
- victoria
- (and 2 more)
-
Further on those 150mm guns, the independent fire control is the most likely reason, but rather than selective, I note the turrets ere the two central ones. Perhaps they could 'slave' the other 150mm guns on that side to the central one also? cheers Pat
-
Hi Ensign, I have built a model of Endeavour (AL kit heavily bashed) and depending on your locale may be able to provide some help. Your profile does not indicate where you live etc. cheers Pat
-
Nice! That looks great Russ. I can empathise with the research Russ, it seems the smaller the item the harder to 'nail it' cheers Pat
- 420 replies
-
- 4
-
-
- captain roy
- lugger
- (and 2 more)
-
Great story Alan, there are far to few of these 'sharing' guys around. I am happy to say that I have had a similar experience with a very experienced modeller in my club; his willingness to mentor and his patience are much appreciated - and as in your case he wanted nothing but to share his experience. Look forward to your redos; they will be worth it. cheers Pat
-
Hi Lou, I have been having similar problems with posts - I thought it was just me. Almost ready for her maiden voyage Denis cheers Pat
- 378 replies
-
- 5
-
-
- t78 norden
- billing boats
- (and 1 more)
-
Some very fine detail and great craftsmanship in this build guys. cheers Pat