BANYAN
-
Posts
5,964 -
Joined
-
Last visited
Content Type
Profiles
Forums
Gallery
Events
Everything posted by BANYAN
-
 Glad to see your team are making some headway with your research John; wish I could say the same for our build The model is looking really good. cheers Pat
 -
Great results from some meticulous planning and execution Dan. As always, your explanations make easy reading and are very informative. cheers Pat
- 287 replies
-
- 3
-

-
- michelangelo
- ocean liner
- (and 1 more)
-
Great progress Mark, looks like you have those dockyard workers busy again. cheers Pat
-
Another example of your fine craftsmanship Ed; that yard looks very realistic. Love the jig! cheers Pat
- 3,618 replies
-
- 6
-
-
- young america
- clipper
- (and 1 more)
-
You were right Russ, the paint really does accentuate her lovely lines. This will make into a superb example of your Biloxi luggers :). cheers Pat
- 420 replies
-
- 3
-
-
- captain roy
- lugger
- (and 2 more)
-
Now that's the future of modelling Very nice job Dave, shows what can be done with some modern technology. Some purists may have difficulty with this, but there would have been the same issue with the introduction of PE way back, and look at it now - a staple of many kits. cheers Pat
-
I am assuming all this PE is aftermarket Dan? Some very fine detail in those guns and very well assembled. cheers Pat
-
Thanks John, that is the other one. Many thanks folks, appreciate this. Now to get busy in the shed cheers Pat
-
HMCSS Victoria 1855 by BANYAN - 1:72
BANYAN replied to BANYAN's topic in - Build logs for subjects built 1851 - 1900
Thanks for looking in John, Denis Ed and Eberhard; appreciate the comments. Thanks for confirming the solution Eberhard; I will get some in soon. Your explanation of the loops makes some sense Eberhard, like faking out a tow rope etc to pay out under control and not 'snap'. However, I cannot see these loops in any other image I have so, as ED has suggested, I think I will terminate at an eye under the counter until I can get better supporting information. I need to relocate some text I read recently about a better way of connecting preventer chains as the thrust of the argument to support the new method was that the 'old' way resulted in the rudder, when unshipped, being drawn into a broad aspect relative to the sea by the towing action resulting in damage most of the time. The new method kept it on 'axis' thus streamlining the tow. I will post it here when I find it again as it is out of copyright. Many thanks for the continued support. Pat- 1,021 replies
-
- 5
-
-
- gun dispatch vessel
- victoria
- (and 2 more)
-
Nice work Denis. You're not mucking around with this build are you; rapid progress. Another fine vessel to add to your fishing fleet. cheers Pat
- 378 replies
-
- 4
-
-
- t78 norden
- billing boats
- (and 1 more)
-
HMCSS Victoria 1855 by BANYAN - 1:72
BANYAN replied to BANYAN's topic in - Build logs for subjects built 1851 - 1900
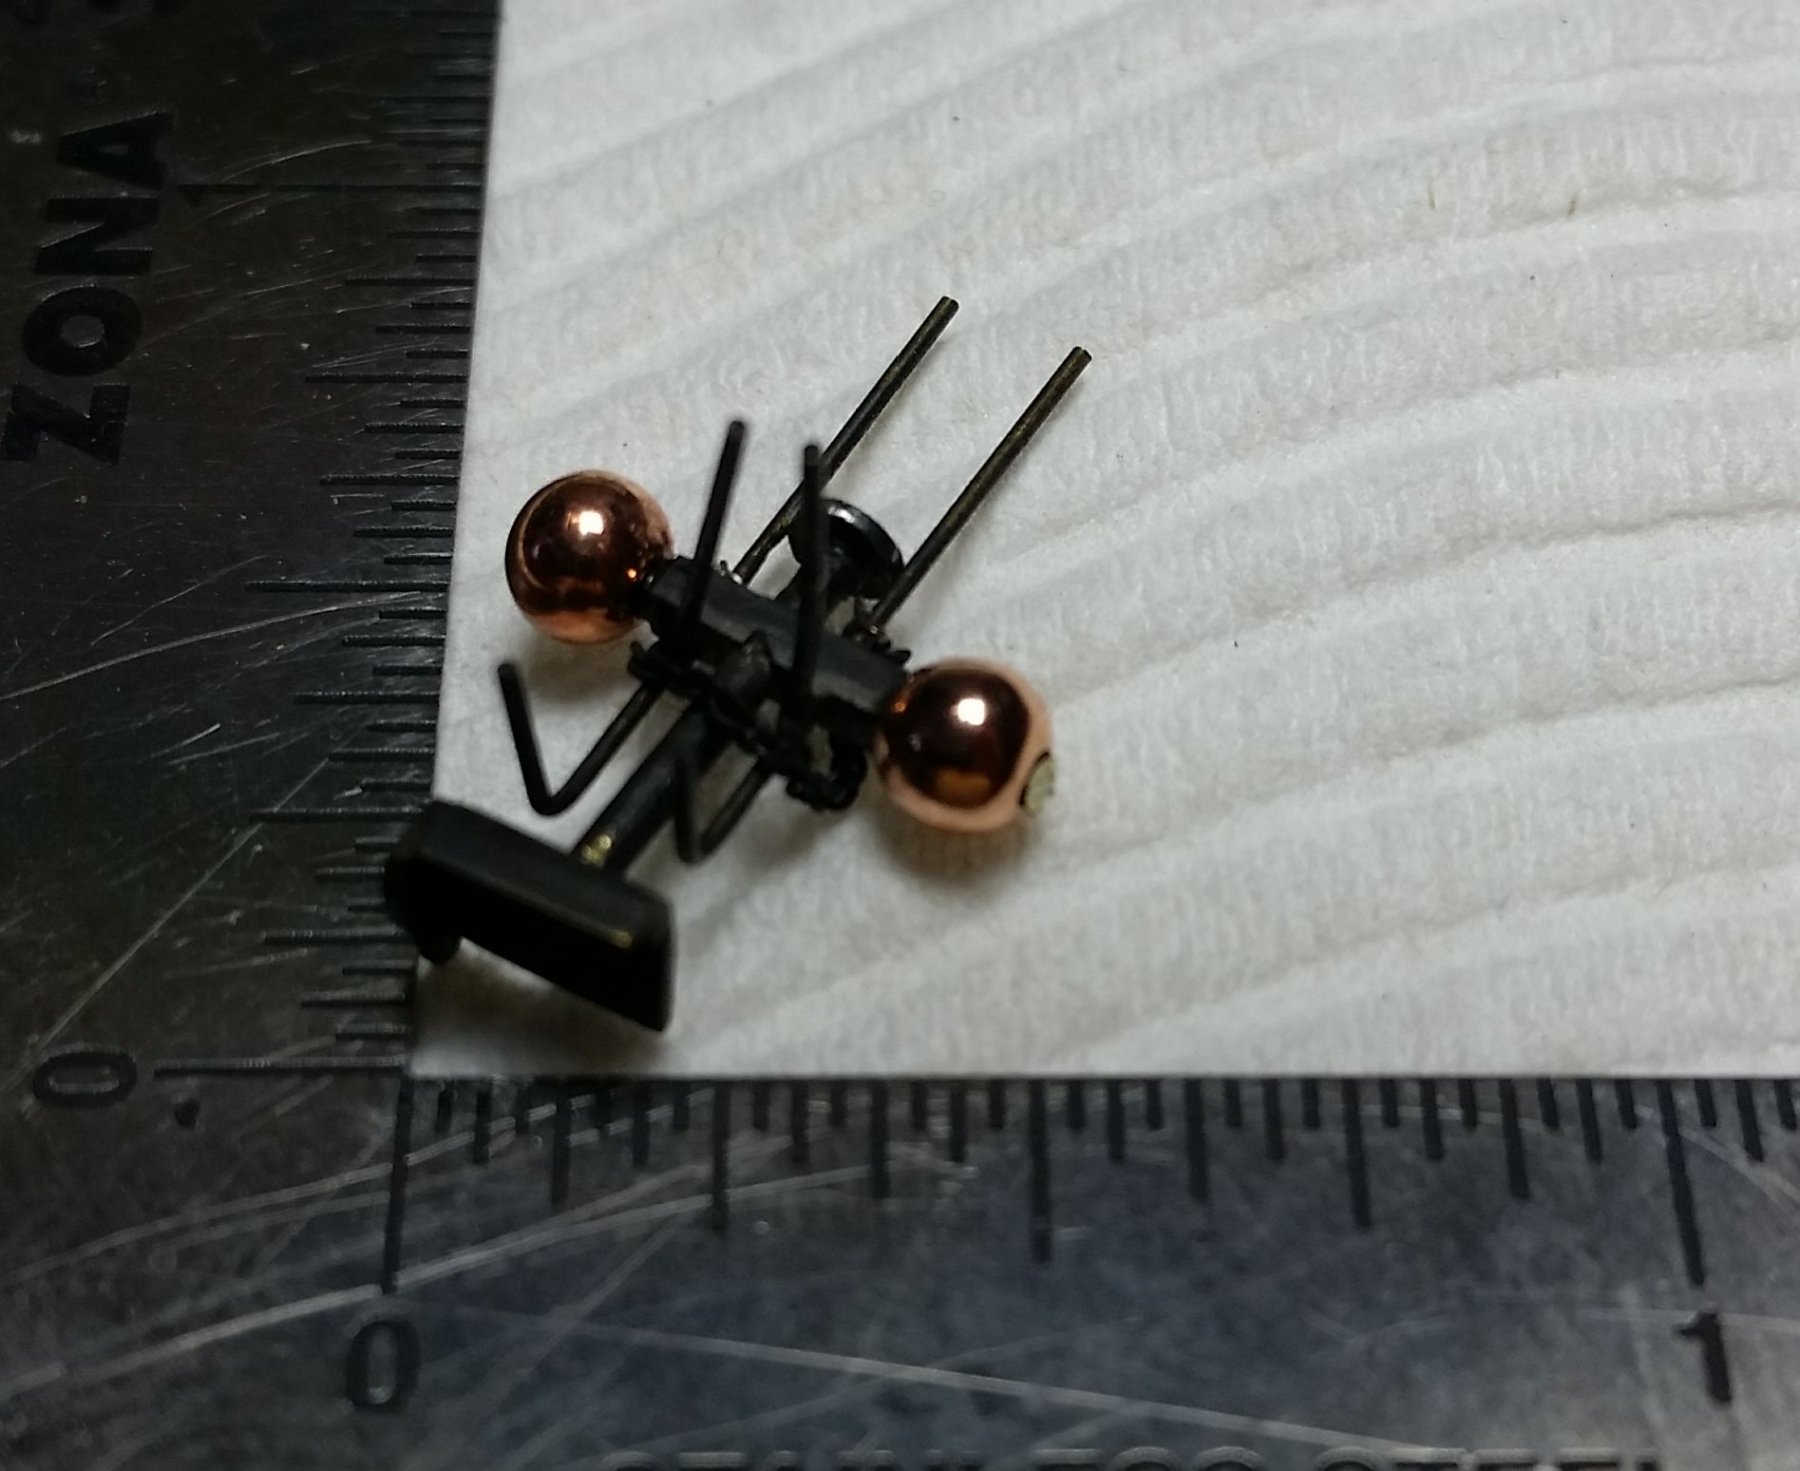
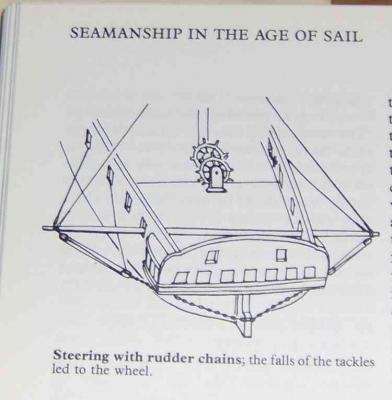
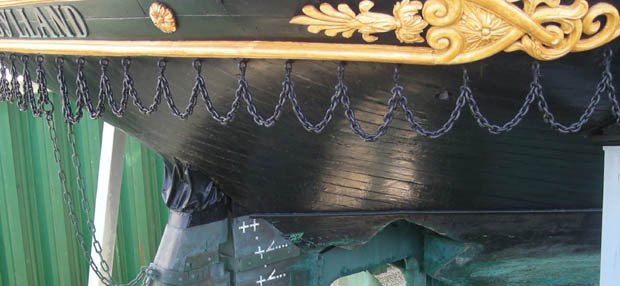
As part of the final push for finishing, I need to drill for the ends of the rudder chains. These were used only as preventers and not for emergency steering; an emergency tiller was provided for this. This raises two questions I hope someone may be able to steer <pun intended> me in the right direction. Q1. The Contract specified: "Rudder to be fitted with Rapson's patent slide tiller, pintles, and Lang's tiller abaft the rudder, in case of the rudder head being carried away,also to have one spare tiller." This implies an iron tiller arm that is fitted above the waterline but outside the hull when required. My initial thoughts are this might be a iron T bar fitted into a mortice, or yolked around the rudder upper parts, with steering pendants then shackled to eyes on the ends of the T? Please note c1855. I have not been able to unearth any info so any info or suggestions most welcomed. Q2. The photo of the ship (not clear) and the lithographs show the rudder chains terminating at, or passing through the hull just under the counter/transom timber junction. The enhanced photo suggests some sort of collar BUT, I think this may only be some background 'clutter' which the person enhancing the photo has assumed to be the ship. i base this on all lithographs not showing this. See images below. As these were only to prevent losing the rudder I believe these would have terminated on the hull as shown in all images. Another contemporary frigate, the Danish 'Jylland' shows the chains extending forward in loops but in this instance I believe it may be to provide sufficient length to use them for emergency steering also as shown by Harland in his book "Seamanship in the the of Sail". In the absence of better information, I am going to terminate the chains under the counter on eyebolts. The alternate solution was that the chains went into the hull, hence the perception of collars, and would then be fitted as required to the Lang's Emergency Tiller which was fitted inside rather than outside the ship? Supporting images - enhanced photo of Victoria counter, Danish frigate Jylland rudder chains (from Jylland Museum website) and illustration from Harland "Seamanship in the the of Sail". See earlier posts for lithographs etc. Any comments, suggestions or corrections most welcomed. cheers Pat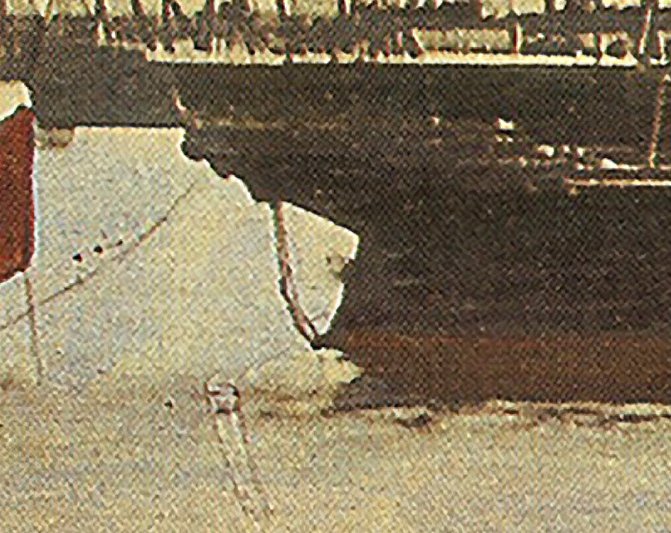
- 1,021 replies
-
- 6
-
-
- gun dispatch vessel
- victoria
- (and 2 more)
-
HMCSS Victoria 1855 by BANYAN - 1:72
BANYAN replied to BANYAN's topic in - Build logs for subjects built 1851 - 1900
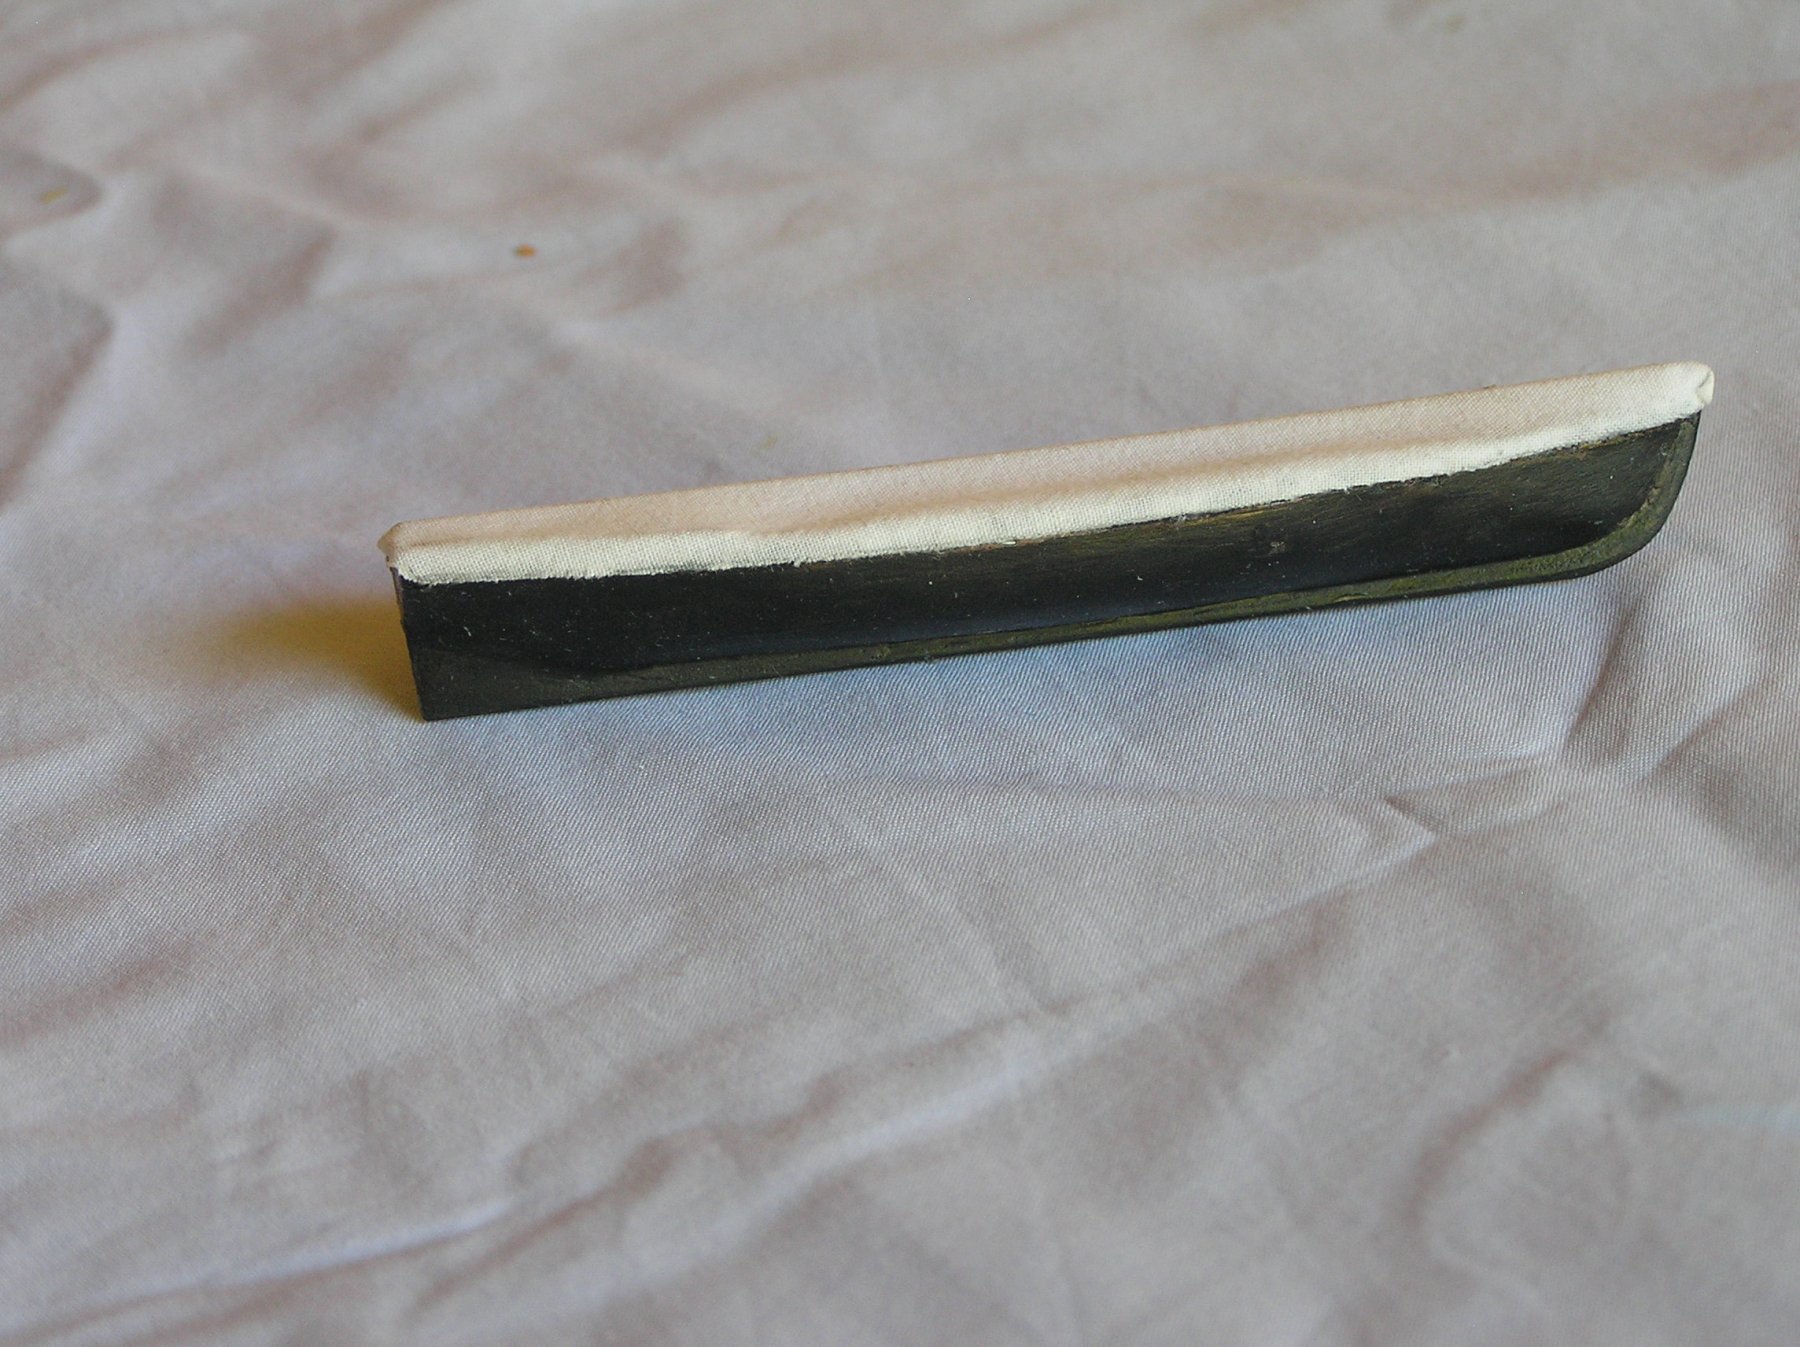
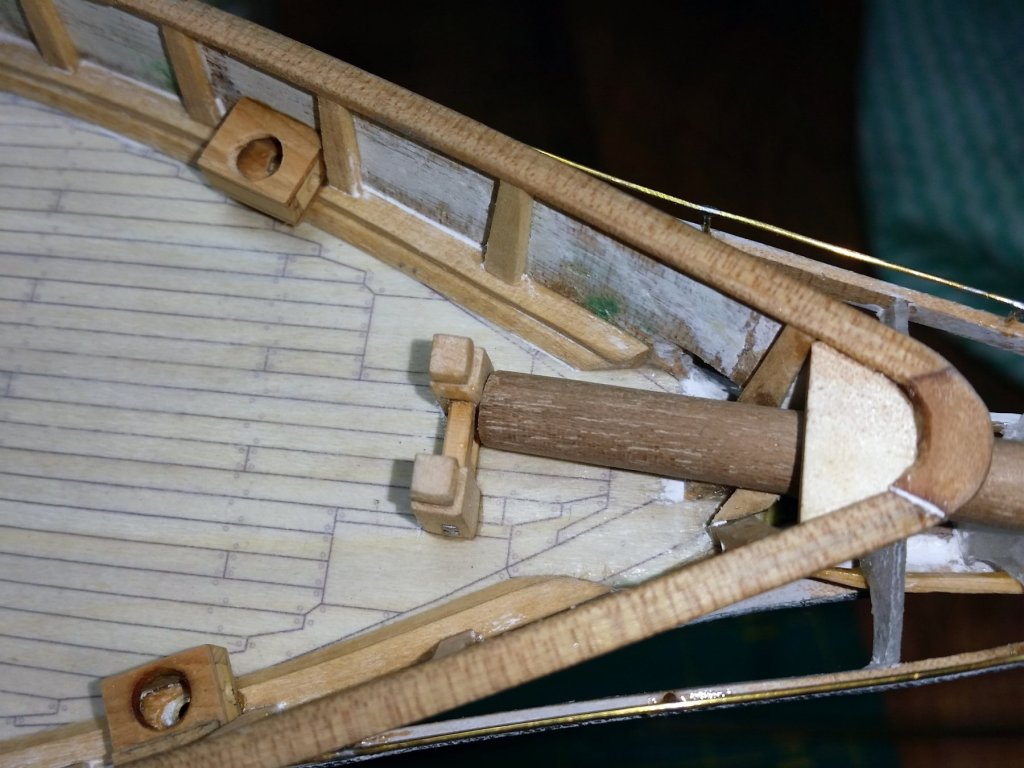
Hi folks, a lot of small details being prepared and the associated notches, drill holes etc being made to the model in preparation for her coat of paint. This is almosr complete now and I start the finishing sanding and masking tomorrow. Hopefully, I will have her primed by the end of this month. Some of the smaller details now finished include the Common Service Lifebuoy (Cook design), the cutter (still needs some tidy up and final paint), and the forecastle (heads still need lids and jibboom needs a tenon to fit into the bitts) ): cheers Pat

- 1,021 replies
-
- 9
-
-
- gun dispatch vessel
- victoria
- (and 2 more)
-
One of my first purchases Ed; thanks again for the feedback. cheers Pat
- 3,618 replies
-
- 1
-
-
- young america
- clipper
- (and 1 more)
-
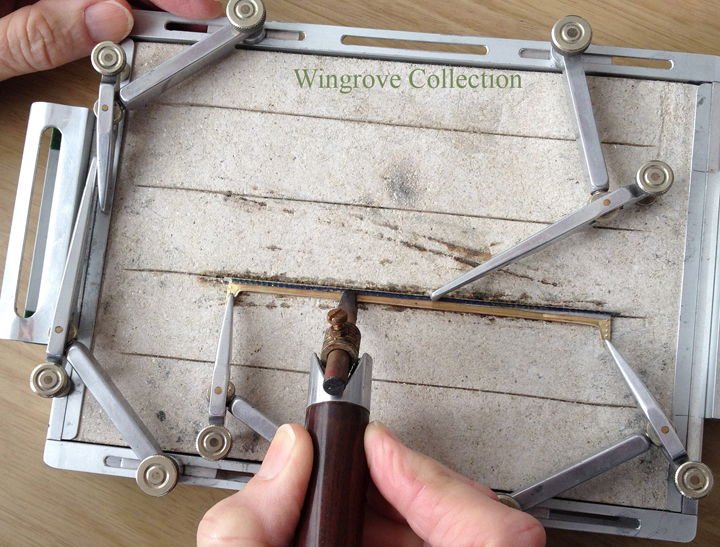
Thanks jhearl; that is the one - much appreciated. What a magnificent build of Falls of Clyde by GAW, which is a masterclass in metalsmithing a ship model. I hope GAW does not mind if I repost a picture from his build (Wingrove Collection) showing the jig I was thinking of? Now, I have to work out how to make a version of this. Thanks again for the pointer Eberhard, I will have a search to try and find it. cheers Pat
-
Hi Ed, thanks for the feedback, especially that statement by Underhill as I had missed that. I will need to pay more attention in future. I am still contemplating making allowance for, but not fitting, slings as Victoria was intended as a warship also and slings may have been a necessary 'battle' precaution. Many thanks. I have Luce, and Fincham also and concur your comments - they are very useful references also. I find "Seamanship" by Commander G.S. Nares (1868) very useful also. You are right though - it is a never ending activity researching this stuff and very detrimental to the building time. i am sure that your next volume will become a very useful reference as well as a building guide (techniques) for ships of this era. cheers Pat
- 3,618 replies
-
- 3
-
-
- young america
- clipper
- (and 1 more)
-
Shame, shame - hinges don't work <shock horror> That colour combination with the natural wood looks absolutely great Denis cheers Pat

- 378 replies
-
- 5
-
-
- t78 norden
- billing boats
- (and 1 more)
-
Hi Eberhard, many thanks for the info and feedback. That is a nice jig you made for the mill; I will have to look at something like that also. I am assuming you made it yourself? Thanks for those links, very interesting discussions. I'll do another search online but as yet have been unable to relocate the jig I am interested in. What I am looking for however is for soldering more than mill work. The device/jig I saw was basically a square steel frame that enclosed a soldering pad; whether hollowed out or void I am not sure. Along each side of the square there was a slot milled out to allow fitting of either an articulated arm, or articulated fingers. The fingers were two part with the outer part sliding in the slots and the inner part working like an elbow joint. The inner part looked a lot like the one from clickspring (had already found that but thanks for the reminder), and also had a slot so that you could adjust it in and out as well as swivel it - there was an additional thumbscrew at the tail for this. There were two of these arms, but a lot thinner than the clickspring one (almost flat) so that you could position flat bars/pieces and hold them stable while soldering them. cheers Pat
-
Hi Ed, that's an interesting comment about no additional support for the yards. I had been contemplating using chain sling preventers which were shackled to an eye in the topmast? I will need to look a little more closely at this; thanks for the heads up. cheers Pat
- 3,618 replies
-
- 3
-
-
- young america
- clipper
- (and 1 more)
-
I can live with this one Greg Very nice effects and not overdone; your technique is really developing well. As to those missiles - Carrier Killers - more rubble for your ruble cheers Pat
-
Thanks Rob, that is a really great finish; a very believable 'mothballed' look to her. Thanks for sharing. cheers Pat
-
In support of Wefalck's comments; I have also read somewhere that new ratlines were natural cordage (not treated with tar). The blackish appearance was the result of tar transfer from the hands and feet of the sailors as they 'picked up' the tar from grasping the shrouds and standing in the tops. cheers Pat
-
Hi Ferit, wasn't the purpose of the lanyards (apart from providing an elastic/flexible interface) to enable a purchase to pull the catenary/sag out of the shrouds and then use the lanyards to hold that tension? cheers Pat
-
That's an interesting technique Rob, have you any pictures of a finished deck you have done? From your description, I think that would look pretty realistic. cheers Pat
-
She is looking really good Russ; great work! cheers Pat
- 420 replies
-
- 3
-
-
- captain roy
- lugger
- (and 2 more)