

Gregory
-
Posts
2,735 -
Joined
-
Last visited
Content Type
Profiles
Forums
Gallery
Events
Posts posted by Gregory
-
-
I agree with David. A very nice build so far..
- Keith Black and bruce d
-
 2
2
-
-
-
-
I think you will find most of the CNC work in the scratch build topics.
I think the biggest challenge for kit builders, for me anyway, regarding CNC, is getting the design of the part from the kit plans to a cutting file to drive the machine.
This has been true for me with my laser cutter. I have spent more hours than I want, learning to use the software to get the kind of precision and results I want.
I have one of those little CNC machines that I haven't got out of the box yet. Instead I went ahead and focused on my laser work, and it has kept me busy enough, that I haven't
been in the mood to tackle a new learning project.
While most members here are always happy to help, they also want to spend their time building, and not teaching CNC or laser cutting techniques.
They may not get past the point where they talk about their $2,000 machine and software that is $100 monthly subscription.
A great example of the high end of CNC work is from a member here, HJX, is doing the CNC work for the Winchelsea kit, group project.
Your best resources may be another online group that is focused on CNC work. Just because they may not be building model ships, the technique would be the same.
Welcome to MSW!
-
-
-
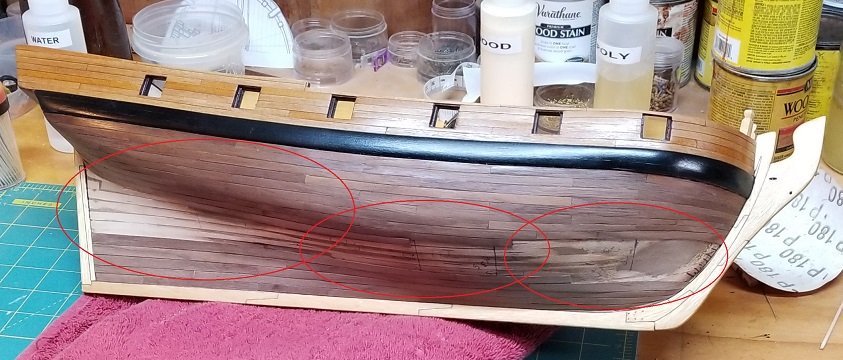
Hard to believe it's been over two weeks since an update, because I have been doing some work almost every day, if it has only been to lay a plank or two. As I mentioned,
I'm spiling the planks that are curved and it takes some tweaking to get a good fit. The scrap bin has grown considerably.
.jpg.1c4142e0a5b750eb86b36fdc7bd8efd2.jpg)
Here is the last plank for the port side ready for gluing. The finish on the bow, while not perfect, is not as lumpy as it appears in the photo. The grain of the wood and lighting create a look
that is somewhat unflattering.. But I know you all know how that goes.
.jpg.daec367999725ec083e7174997556727.jpg)
I'm Satisfied with the fit.
I decided to go with one drop plank on the bow. While they usually show up higher on the bow, I said " what the heck " . Being close to finishing the side at this point, my laziness got the better of me and I decided to make one plank instead of three.
.jpg.3d08aac2f9fa64c07166f2ed69f30235.jpg)
.jpg.900d090a570f20dab1346e480b21c88a.jpg)
Port side done.
Not a lot left to do on the starboard:
... and I'm looking forward to working on the other aspects of this build, that aren't as repetitious as the planking.
- etubino, PeterB010, Edwardkenway and 7 others
-
10
-
Not an easy challenge for the first time, and YT's method is certainly an option..
Take a look at the Knight heads for Chuck's Winchelsea build.
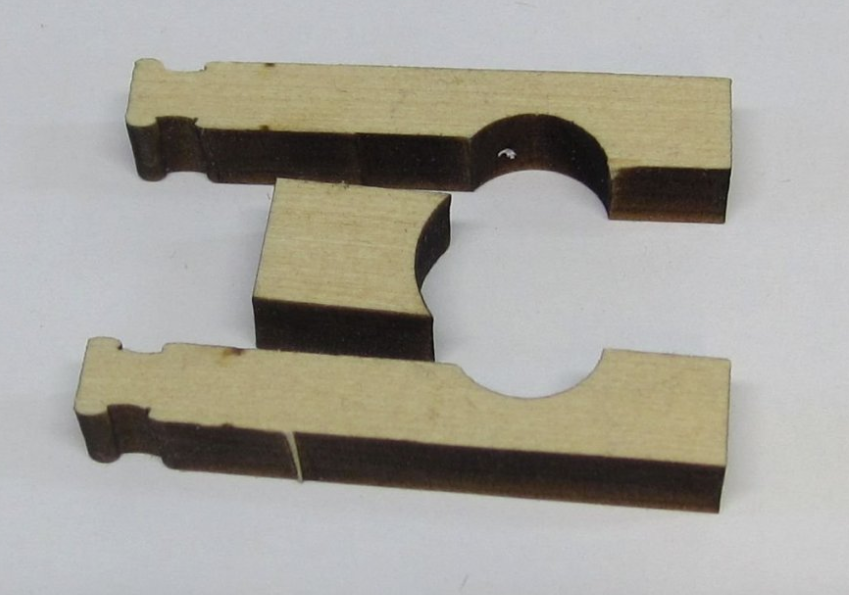
While the project comes with some laser cut starter pieces, imagine cutting out those shapes with small files and chisels.
A rotary tool might be useful, but requires a lot of caution because they tend to run away and cause damage.
Then it is a matter of fine tuning them.
-
-
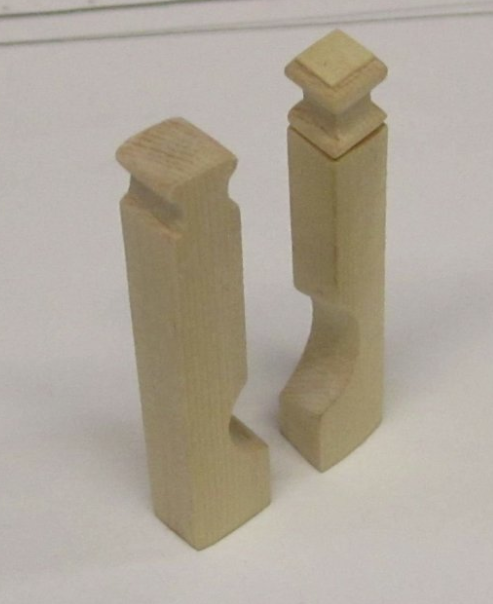
Great start..
Do you have some square stock that you could shape on the long axis, then slice off pieces?
Might go a little faster..
Here is an Image from Anatomy of the Ship - The Ships of Christoper Columbus
If you need more info from the book, I will try to find it for you.
- mtaylor and Jorge Hedges
-
2
-
Do you have a link for that saw? I would like to see the features.
I can't seem to find anything but the blades, which appear to be very competitively priced.
- mtaylor and Edwardkenway
-
2
-
5 hours ago, VTHokiEE said:
I think unfortunately that the lower rail makes it look slightly off level.
I'm hard pressed to see what the problem is. It looks really good to me.
-
2 hours ago, Chuck Seiler said:
Not so obvious. Cardboard, when painted properly, can look like wood.
Hard to imagine since cardboard is made out of..... No, wait!
Nevermind... 😁
- mtaylor and Chuck Seiler
-
2
-
-
-
-
I refer you to this recent discussion.
There are others. I will try to put together some more references for you.
-
What does your rope walk look like? There are different styles out there..
Mine is somewhat traditional but limited by the length of my workbench.. I can only make about 40 inches of rope at a time.
The size of the rope is determined by the number of threads I use on each of the whorls.
I have made rope with up to 8 threads on each of the 4 whorls, for a total of 24 threads.
-
How are you using the pencil?
If you run it along the edge after it is in place, there is less mess.

Just one edge of adjacent planks gets the effect done.
Also, how soft a pencil? I think you will find a No. 2 works fine.
( Disclaimer: While I have used pencil to good effect, the above image is of some laser cut planks, so the char provides the lines you see. )
- mtaylor and thibaultron
-
2
-
1 hour ago, Justin P. said:
This is more or less how I had imagined it myself, but without a mill I was anticipating separating out the blocks and then having to cut grooves one by one...
Did I see you have you have the Byrnes saw in your shop? How small a kerf do you have? With an .02 kerf, you can make all the grooves on a long strip before you separate the blocks
and fine finish them.
-
19 hours ago, Justin P. said:
I looked over your build log, thanks for detailing you method (based on Chucks). I can't find Chucks tutorial though... any help would be appreciated.
Here is a basic illustration from Mondfeld.
I recall seeing this method in more than one model ship building book, so you may already have this..
Another option is to laminate some thin strips together, where the strip in the middle is more narrow than the outer strips, creating the
sheeve portion without sawing or milling.
-
-
Chuck, just curious about your source for some of the fine images of contemporary models. Are they publicly available, or is it private stuff you have access to?
Posting kit instructions?
in How to use the MSW forum - **NO MODELING CONTENT**
Posted
How much material are you talking about?
It depends on the kit, and the extent of the sharing.
Excerpts and even small snips of the plans are OK for instructional purposes.
A lot of Model Expo kit instructions are available on line at their web site.