

Gregory
-
Posts
2,735 -
Joined
-
Last visited
Content Type
Profiles
Forums
Gallery
Events
Posts posted by Gregory
-
-
Thanks. I think it's great that you can point out these shortcomings. It's how we improve our skill and effort.
I know I could have gone a lot further to match the actual NMM plans, but basically I was being lazy, and wanted to use one thickness of wood.
To give them credit. Master Korabel did use two thicknesses, but not to the extent that is shown in the plans.
I think I have been challenged though, and I may have to re-visit this later.
- Edwardkenway and lmagna
-
 2
2
-
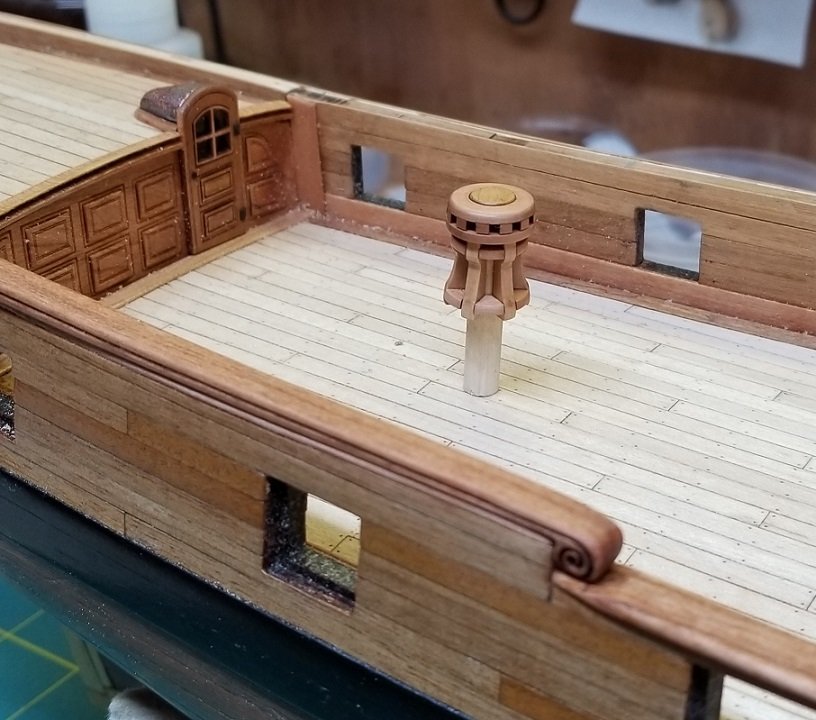
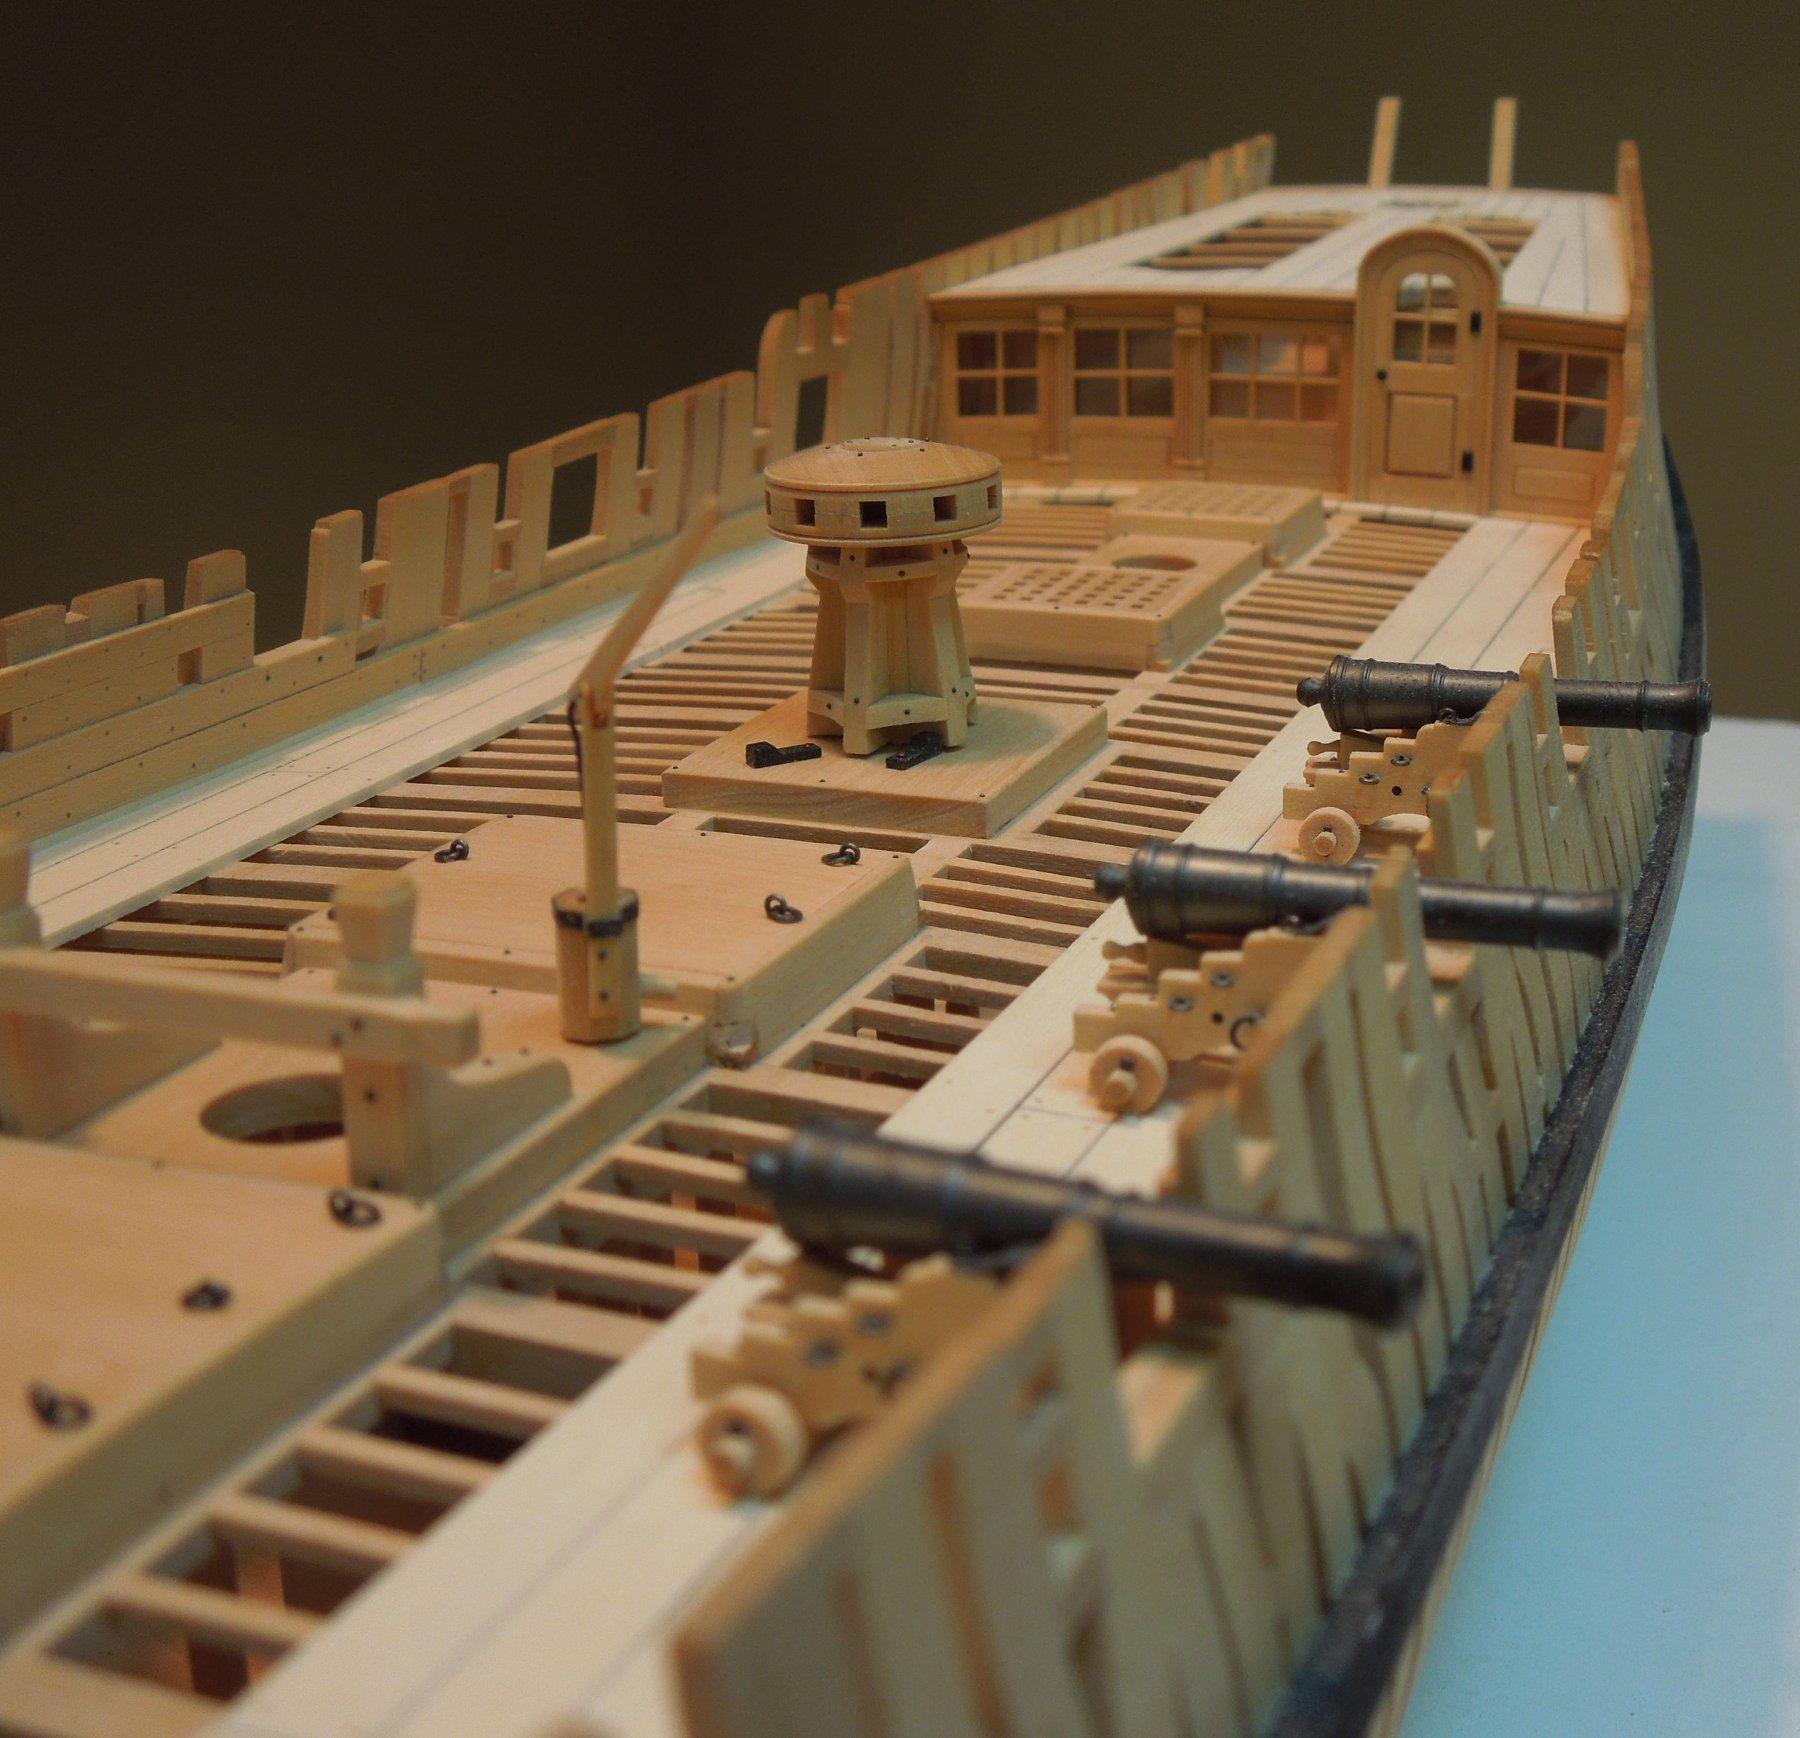
A small update that involved more hours of work ( fun ) than you might imagine.
I built a capstan.
There are many capstans available out there from the various ship modeling sources, with different levels of detail.
There are also some great articles regarding capstans in the NRG data base, Ship Model Furniture, Deck Fittings and other Details
I also acquired a set of the Winchelsea plans, after discussing the dimensions of Chuck's capstan for the Winnie project.
The basic design was around for over 100 years, and there are some nice drawings at the NMM, which pretty much match what I discovered in my
research.
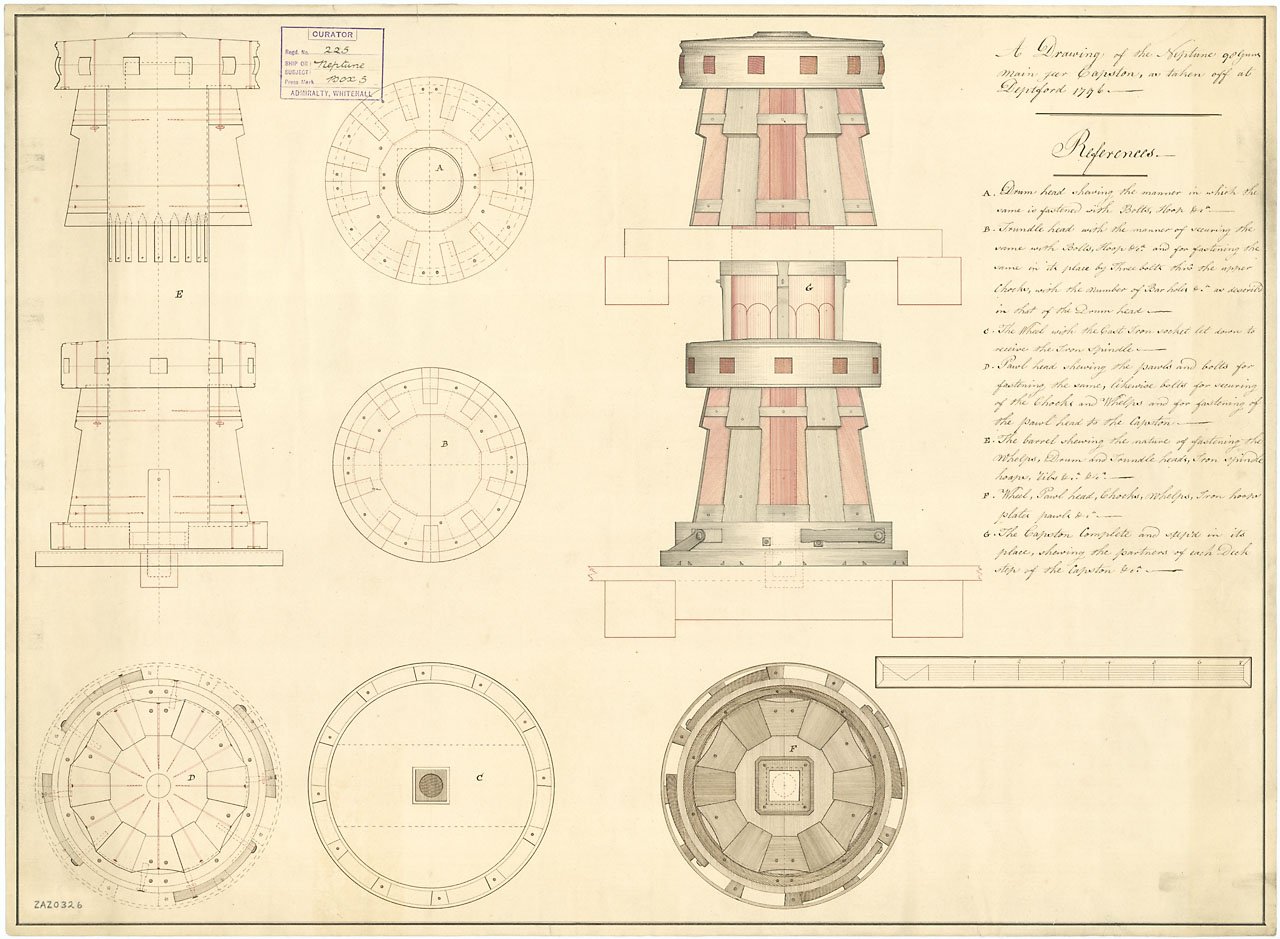
This one from Neptune' (1797)..
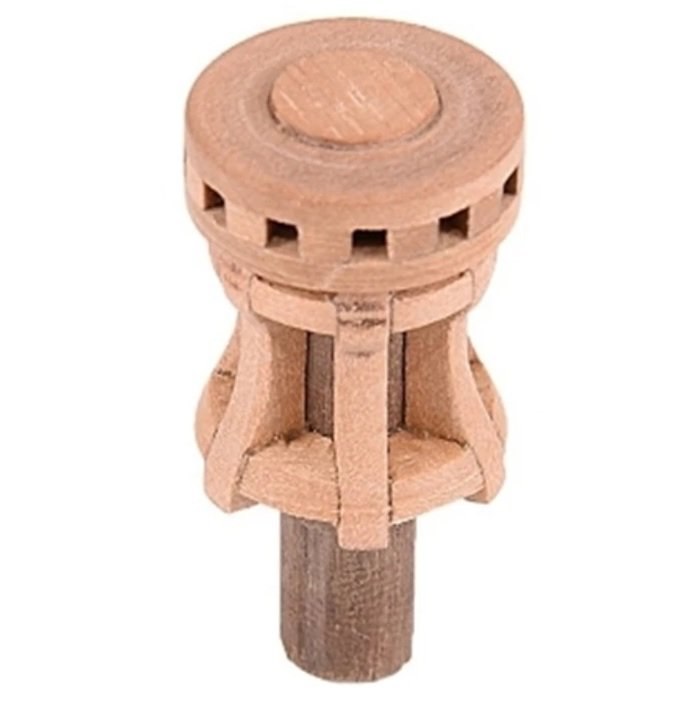
I recently reviewed the mini-kit from Master Korabel of their 1:72 capstan.
It has the level of detail I am looking for, but at 1:72 it is too small for the scale of my ship at 1:50.
I scanned the parts of the Master Korabel kit and resized them to better fit my model.. ( No, I will not be offering these for sale.. 😄 )
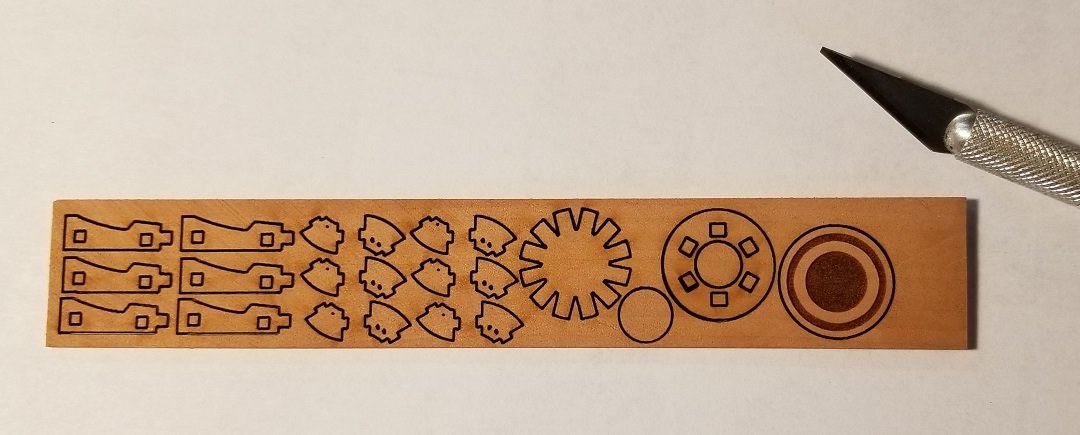
For what it's worth, just scanning, re-sizing then cutting, doesn't result in parts that go together well. The interlocking tabs and slots, have to account for the thickness of the stock used. Also, the kerf of my laser is not as fine as the high end machines, and I had to do a lot of tweaking to get an acceptable fit.
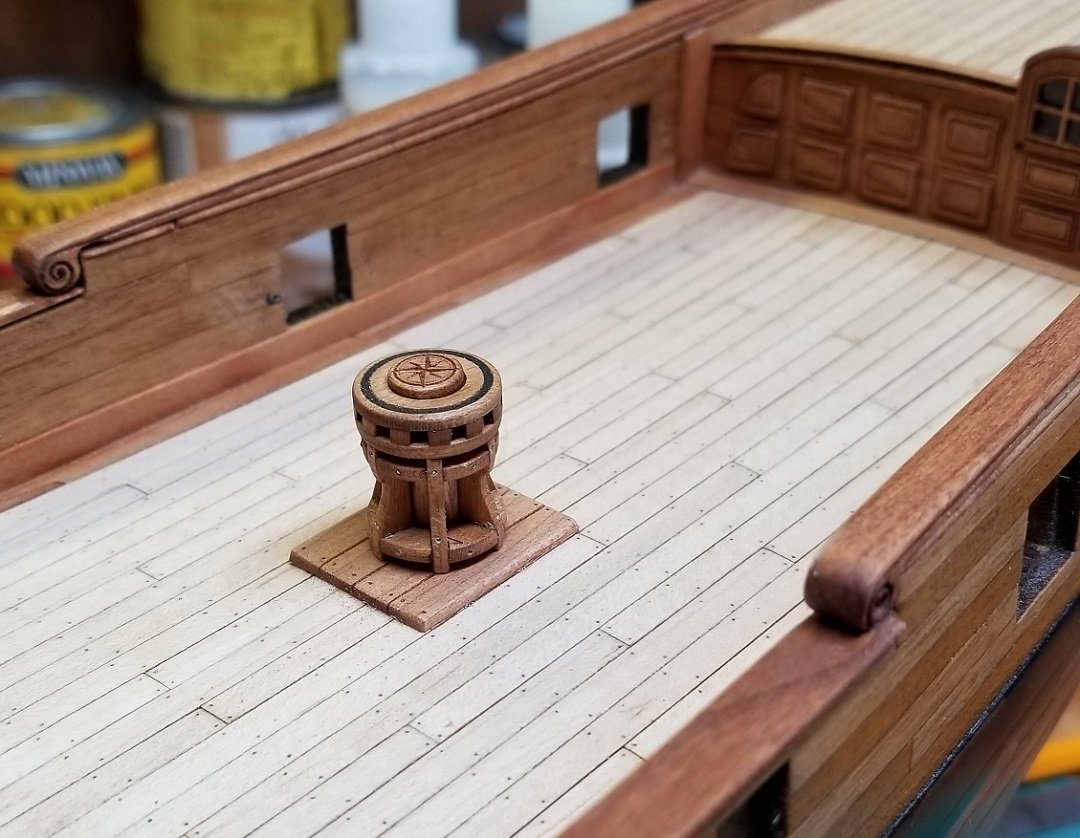
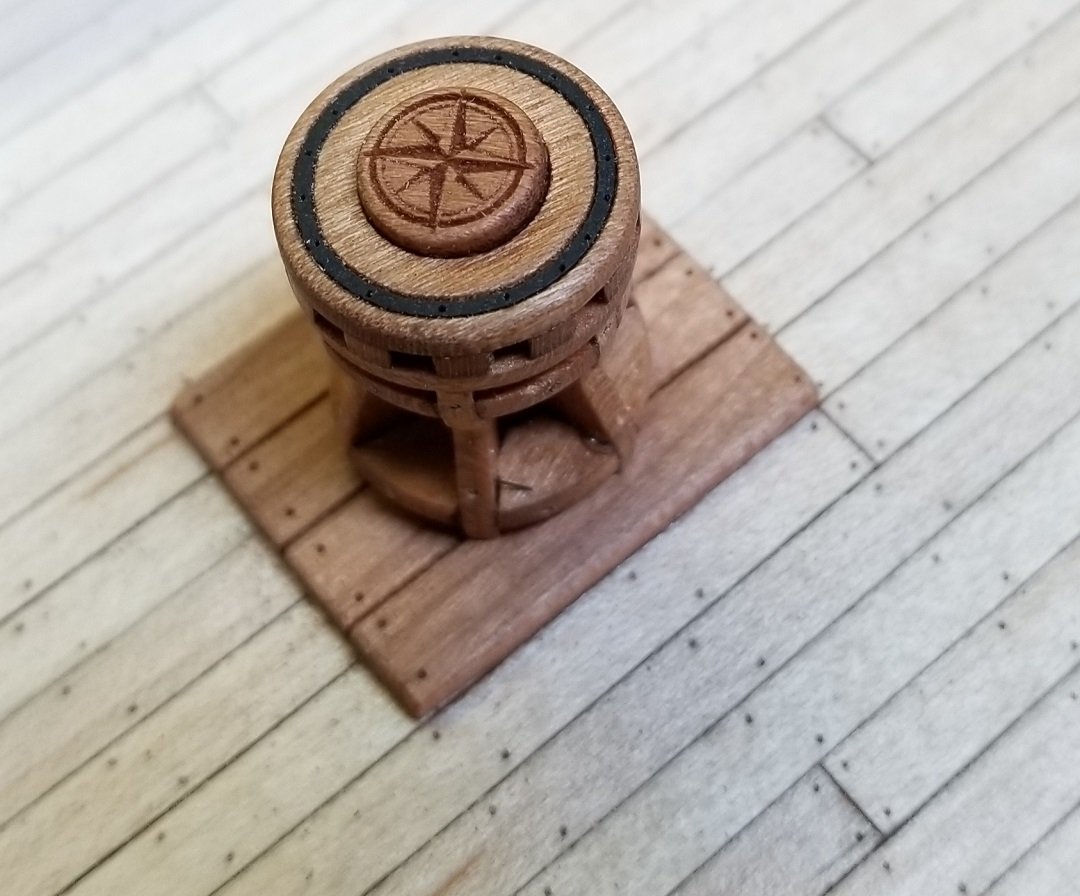
Realistic or not, I couldn't resist adding a little bling.. I hope I didn't go too far overboard..
I mentioned up-thread that the deck layout in the plans did not appeal to me, so the capstan is a replacement for a windlass shown on the plans.
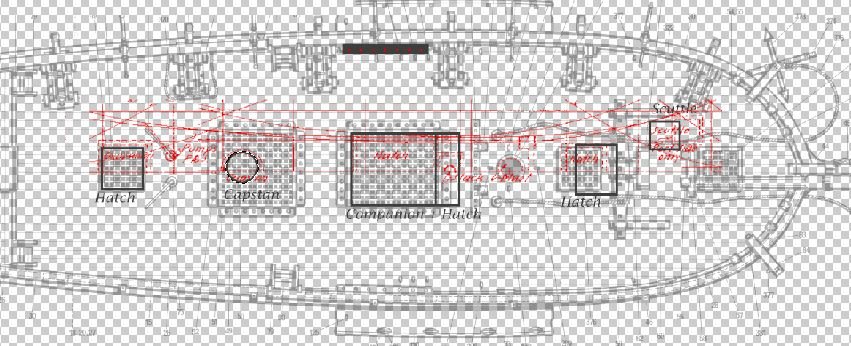
The Chapelle drawings, based on the NMM plans of Ferret,will be my basis for a deck arrangement. I won't try to match it feature for feature,
but it gives me what I feel is a little more appealing than the kit plans.
- mtbediz, lmagna, Edwardkenway and 5 others
-
8
-
-
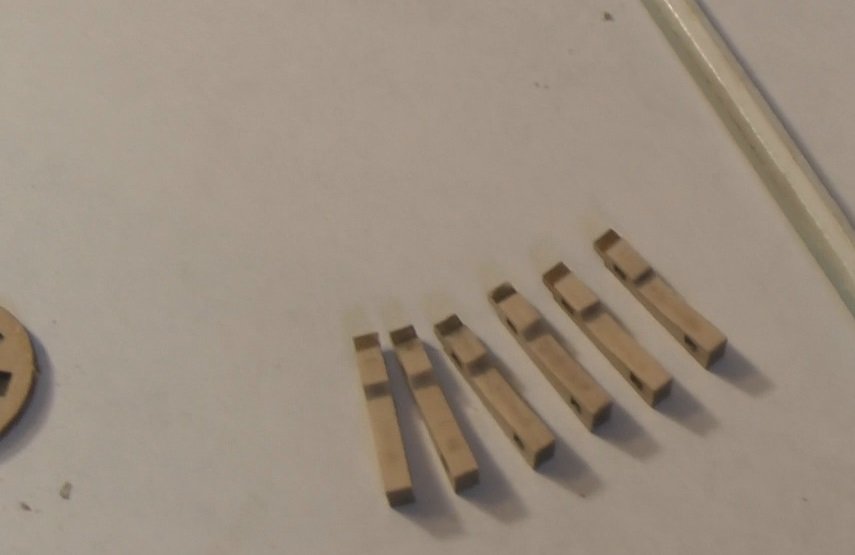
This is the 1:72 capstan kit from Master Korabel
It measures 18mm x 14mm actual size.
I picked it up from one of our sponsors, Crafty Sailor, and I feel it is a great value at $4.99 US.
Looking at the web site illustration, you might have your doubts about using this.
But we all know, kits are what you make of them..
Stay tuned..
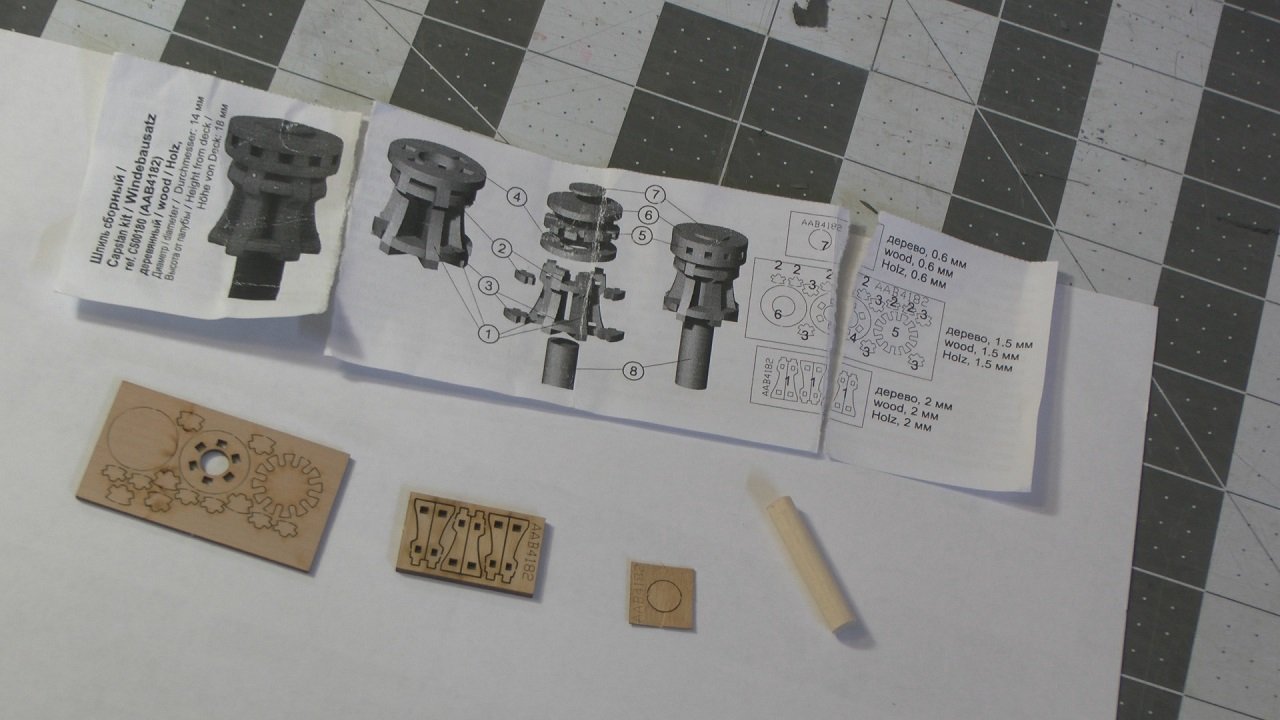
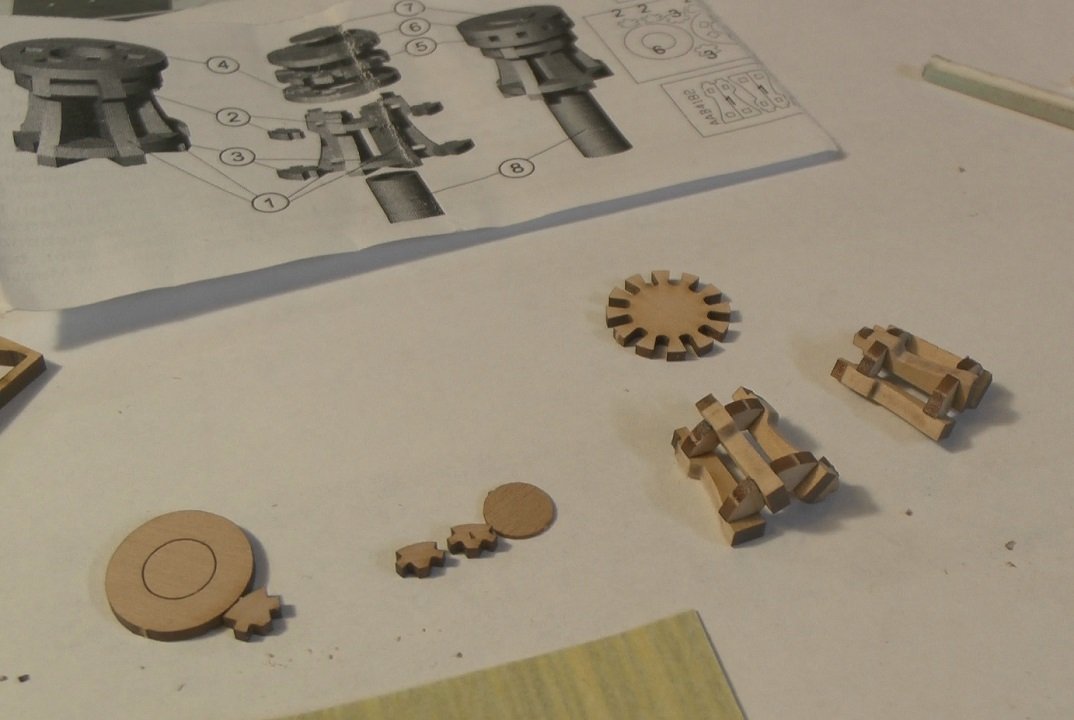
As you might imagine, the contents are pretty sparse, but it is all you need. I tore the plans taking them out of the little plastic bag everything came in.
I forgot to include in the picture, a small length of brass wire, that is intended for making rivets on the completed part.
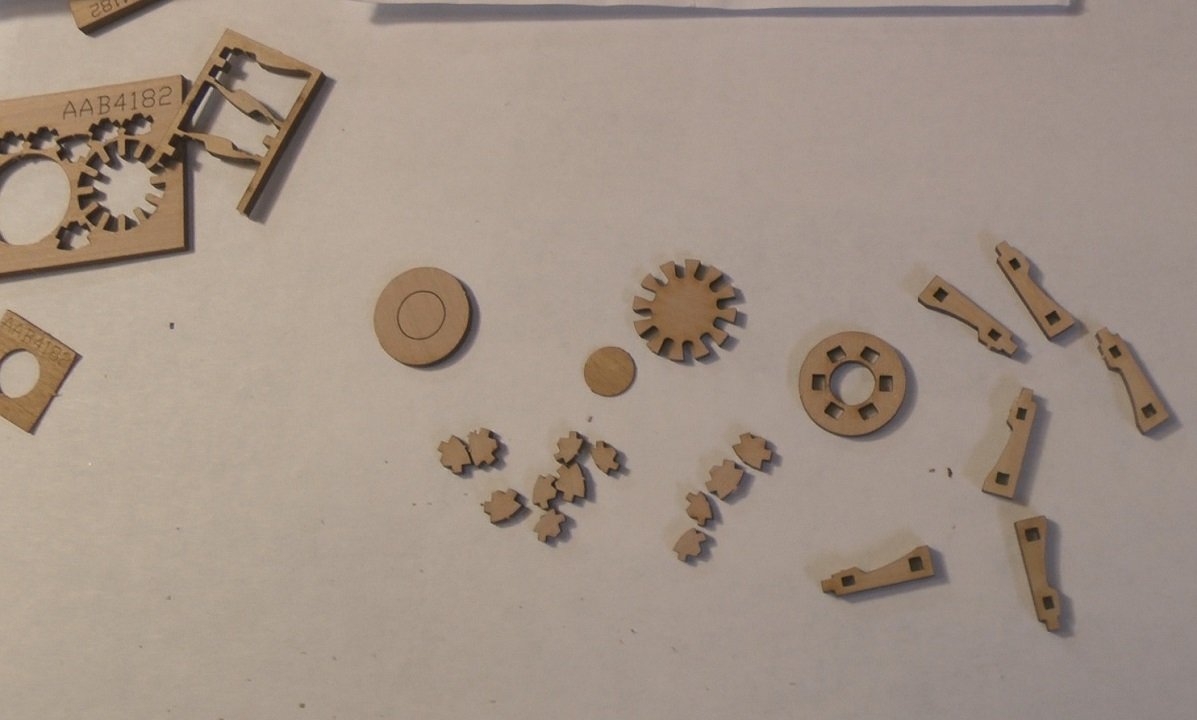
The quality of the wood is very good. I believe it is pear. The parts came out of the sheets very easily, with no risk of damage. The holding tabs were very small and easy to cut and release the parts.
I thought I should remove some of the visible char before assembly, but I later realized it was really not necessary .. I spent ( wasted ) about 20 minutes on the parts
seen above..
I assembled the main body in two halves, using very small amounts of white glue. The fit of the parts is incredibly tight. I don't really think glue is even necessary
at this point.
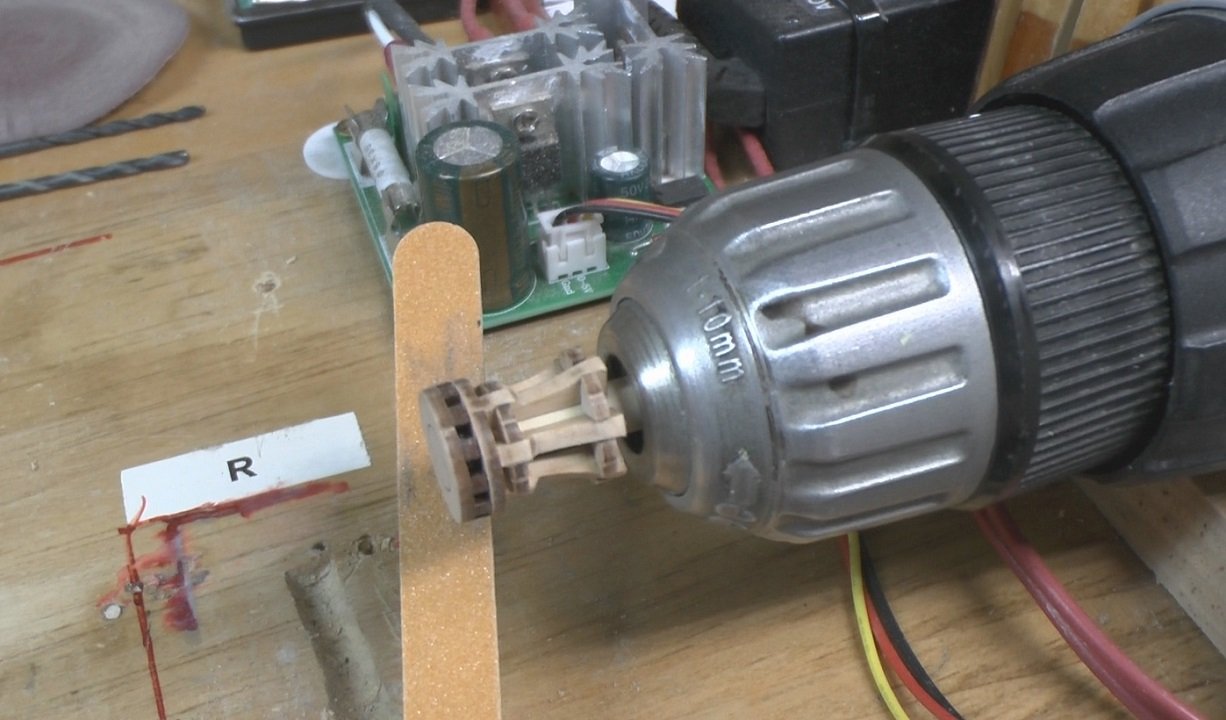
With all the parts together, I mounted it on my unimat for some finishing. This is where I realized all the visible char could be removed by spinning it like this.
It didn't take much work to have a nice looking piece.
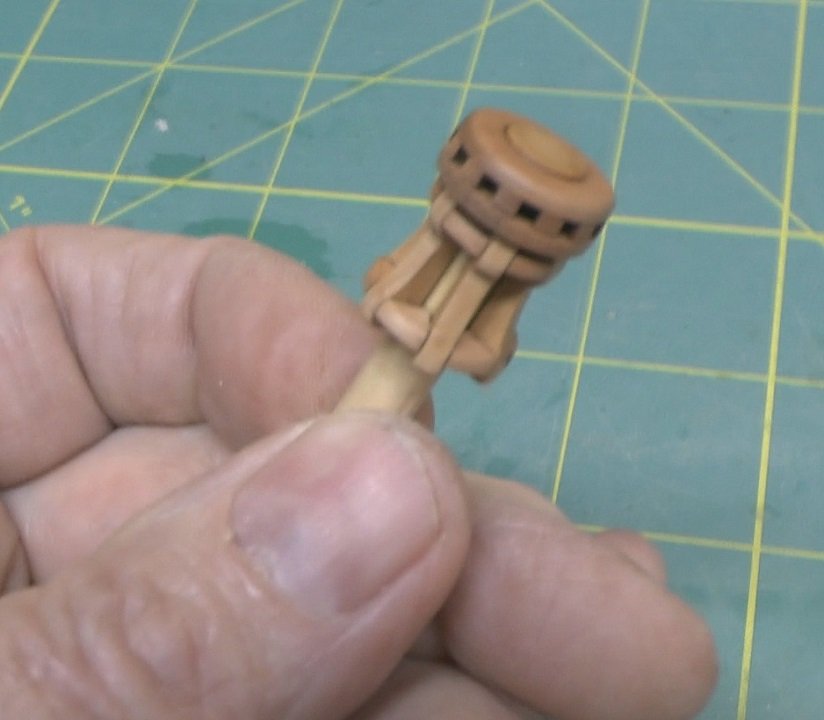
As I mentioned earlier, there was some brass wire included to add the look of rivets, but not knowing when I am going to use this, I decided not to add the rivets at this time.
I completed this in less than an hour, and I'm sure any of our members could do as well if not less.
I'm going to be needing a capstan for my Resolution, but this is a bit too small. I hope Master Korabel issues some other sizes in the future..
It is listed at 1:72, but I put it on the 1:64 plans I have for Rattlesnake, and it looked pretty good.
I highly recommend this kit.
- Canute, BLACK VIKING, bruce d and 8 others
-
11
-
-
That shot with the supervisor also presents an interesting perspective. It looks like the model is at least 1:10 scale..
- FrankWouts and Rustyj
-
2
-
-
I would experiment with some scrap to see what looks best. Black, or maybe dark blue. Flat, rather than gloss.
-
For a simple approach I would try to build it pretty much like the instructions show.
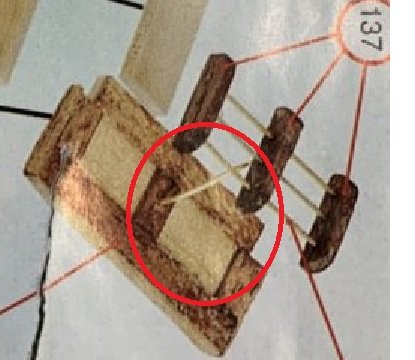
Then, in the areas I circled, you could fill it in with something like this:
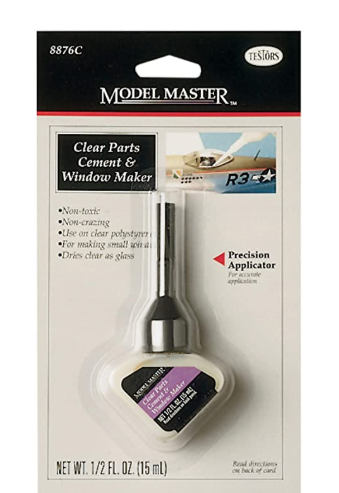
It will look just like glass..
- Keith Black and mtaylor
-
2
-
1 hour ago, thegrindre said:
Sheesh, those look so complex.
Any wood ship model kit is going to be complex..
But the way to keep it as simple as possible, is to reduce the armament, and reduce the rigging..
Just to get a feel for the wood kit building process, you might start with something like one of these kits from Model Expo:
LOWELL GRAND BANKS DORY WITH TOOLS 1:24 SCALE It's currently bundled with a nice little tool set. Only $49
MODEL SHIPWAYS MS1457 18TH CENTURY LONGBOAT
You would get a feel for how fast the building process is, then come back for ideas about a bigger, more complex project.
There should be a build log or two for the kits mentioned, and you can see how others did.
- mtaylor, VTHokiEE and Louie da fly
-
3
-
You're off to a great start..
How much experience do you have with wood ship models?
- Elijah and Bill Morrison
-
2
-
Just another little nit pick:
It would be nice if modelers would consider renaming their pics before uploading them.
Seeing a lot of " 20200504_152930.jpg " & etc. is distracting.
In Windows, you can rename a batch of pictures by highlighting all of them, right-click to rename- and give them something short and sweet like " Schooner ",
And they will all be named " Schooner(1) , Schooner(2) etc..
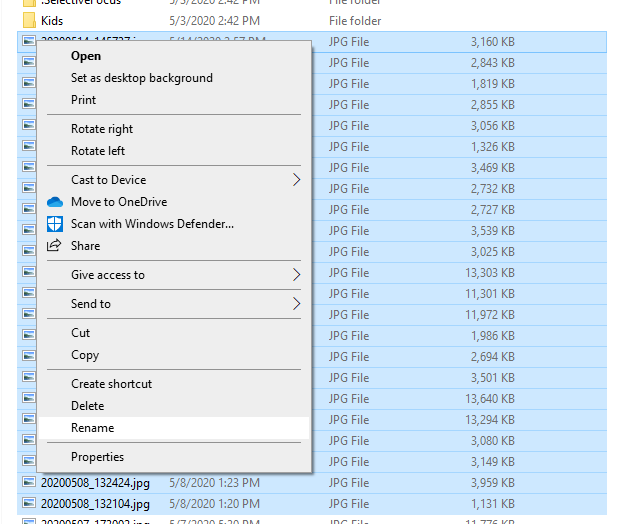

Just a thought..
-
-
As promised..
Card stock and Mod Podge.
One little project at a time..
- Jeff T, Edwardkenway, PeterB010 and 6 others
-
9
-
Ooops! I just realized I didn't add the hinges, and a door knob/latch handle..
I'll be back...
-
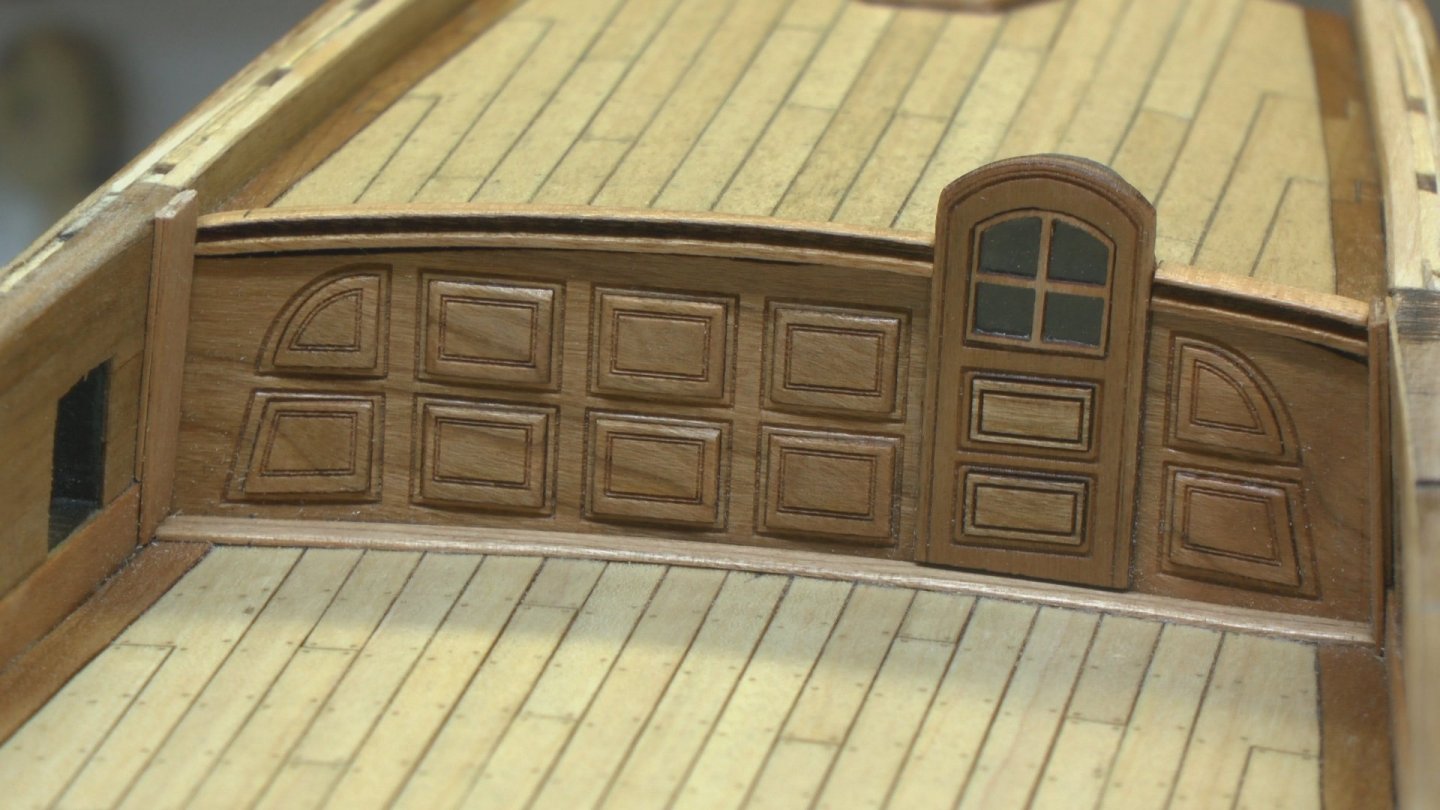
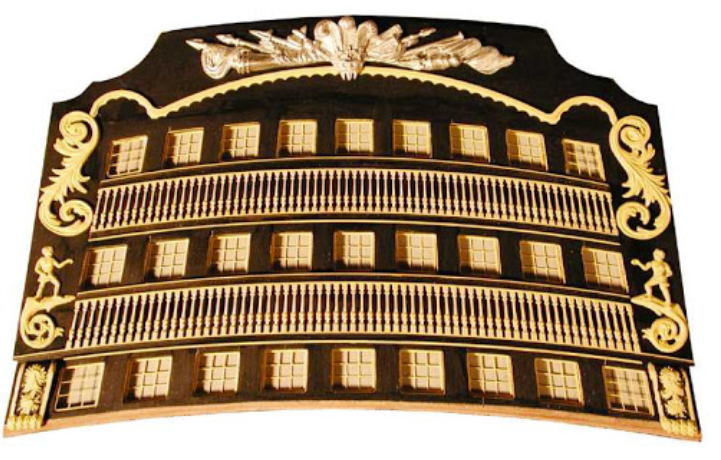
Finished up my quarterdeck bulkhead project. The scrap pile grew considerably while refining this..
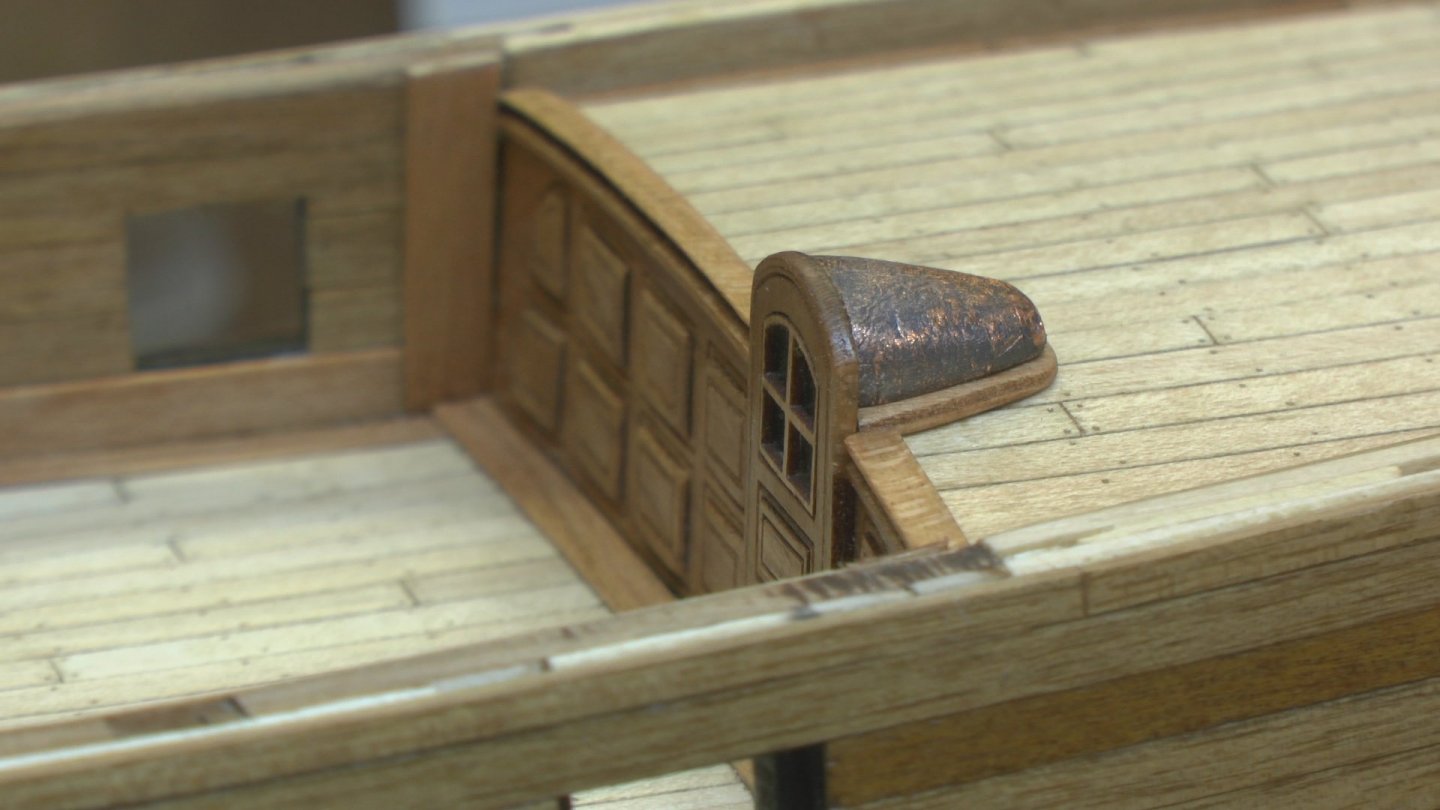
The cupola, also inspired by Greg Herbert and David Antscherl's Speedwell, was more challenging for me than I expected.
Still trying to avoid paint, I settled on a wood mold that I covered with copper leaf.. The patina was created by enclosing the part in a sandwich bag with a chopped boiled egg..
Go figure...
What to do next.. Capping rail? Tiller ? Cannon? I have already fiddled a bit with all of those.. Now to get it done...
-
Without some kind of computer controlled tool; laser, CNC, your only option is by hand, or you could print a decal.
Make a pattern on a piece of tracing paper, then use a fine pointtool to etch it onto the work piece.
- mtaylor, mugje and Bob Fraser
-
3
-
-
20 hours ago, Jim Rogers said:
I do not like the brass Trenails. Look out of scale and stick way to far out IMO. Shouldn’t they be flush?
I think if you buy the kit, you have to sign an agreement to do the treenails just like that.. 😀
- VTHokiEE, vaddoc and Duanelaker
-
3
-
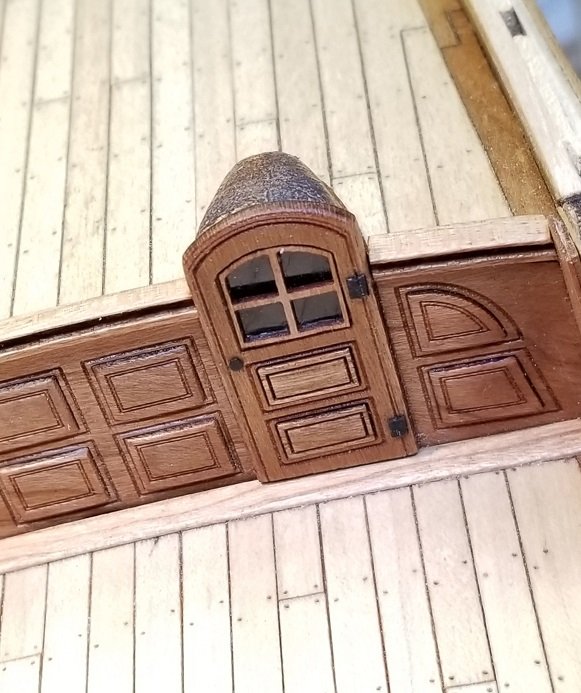
One of the detail projects..
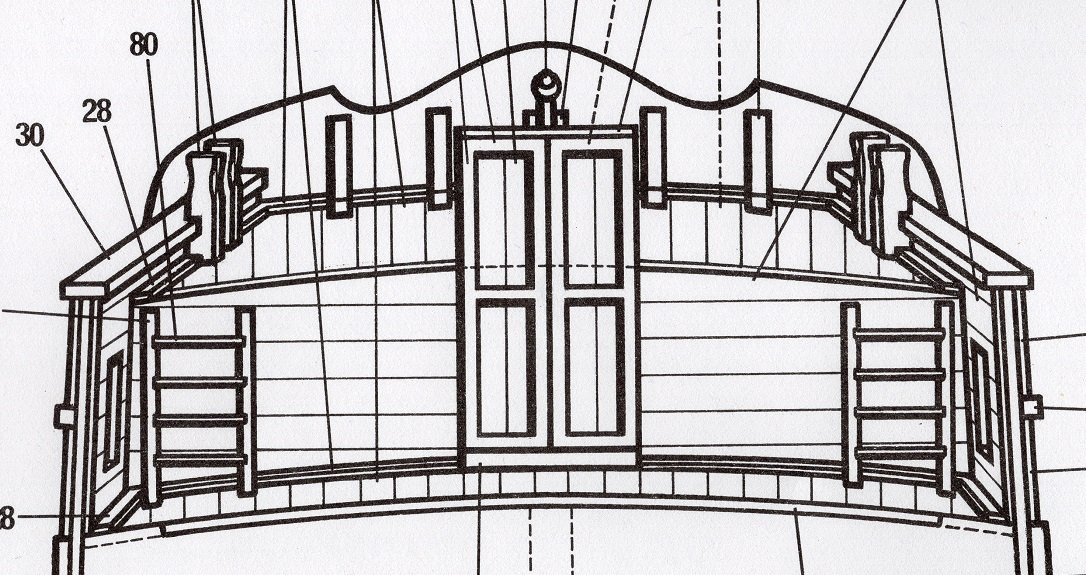
The kit plans show an unlikely door to the great cabin. Scaled from over 7 feet, it seems there was some misunderstanding about the average height back then, or even now.
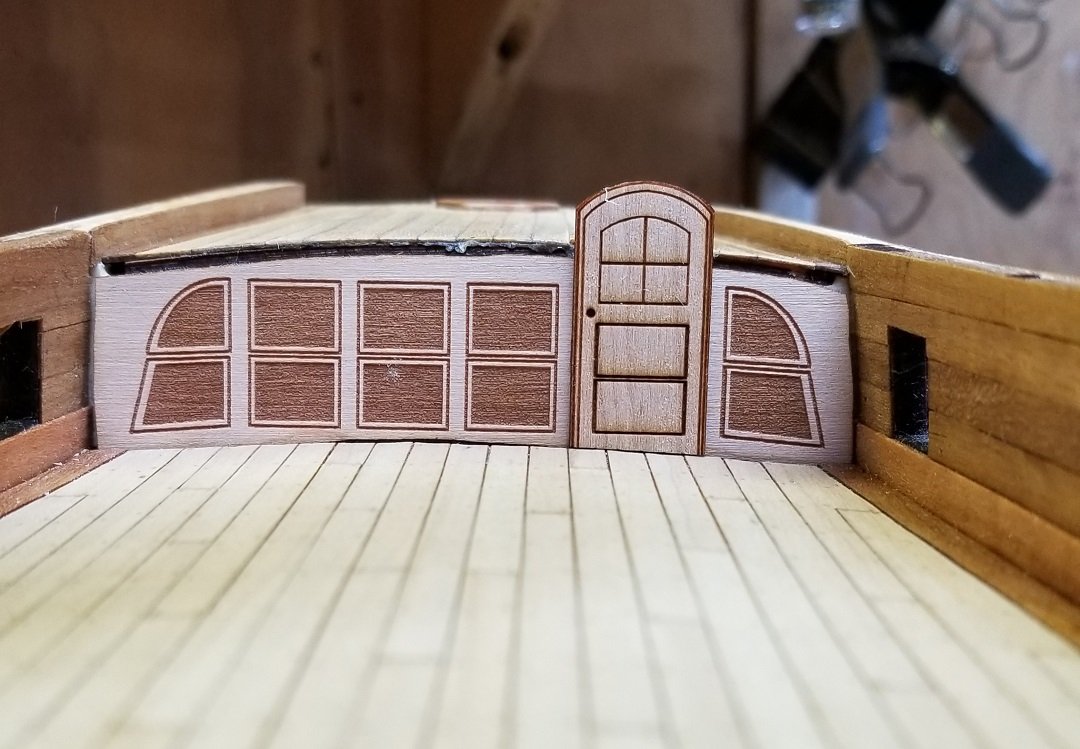
Here is my prototype for the bulkhead and door. I borrowed some dimension ideas from Greg Herbert and David Antscherl's Speedwell , where I calculated the
door height to be about 4'7". Stooping a bit as you step down, would seem to be the order of the day.
I plan on refining this a bit more and will present the final design later.
- egkb, Edwardkenway, PeterB010 and 1 other
-
4
-
Thanks.. I will have to check out the " Blue Stuff " ...
-
.jpg.d4295e1ab1b18f537e3435a34ce1151e.jpg)
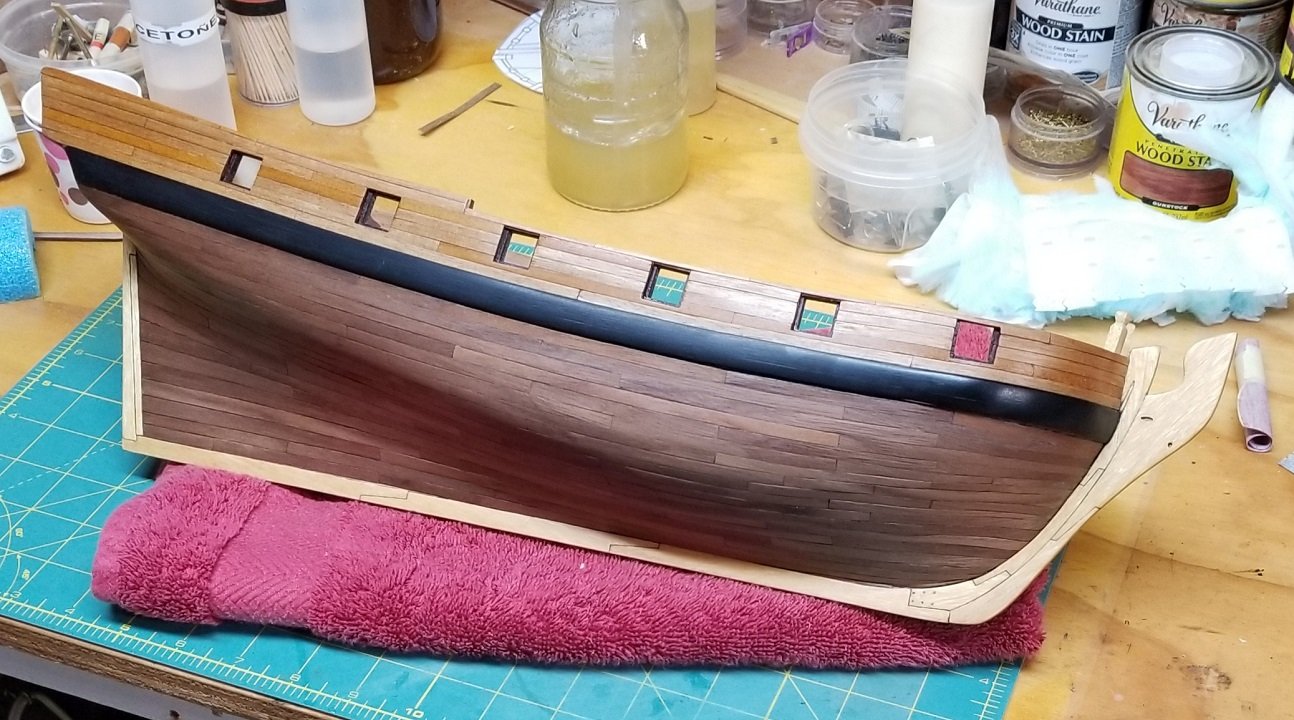
Finished the main deck planking off the boat.
.jpg.54bd85dbe9945a405707180fc596a2dd.jpg)
Installed in place. Lot of detail to be done.
.jpg.c3e74fbaf77f77d9324b889fa8910239.jpg)
Here is a little jig I made for placing the eyebolts for the gun tackle.
-
- mtaylor and modeller_masa
-
2
-


HMS Resolution ( AKA Ferrett ) by Gregory - Corel - Scale 1:50
in - Kit build logs for subjects built from 1501 - 1750
Posted
Now I know I'm challenged..
I like the molding-like embellishment on the upper structure..
What do you make of the eyebolts on top? What purpose ?
Thanks for that image.. It didn't come up in my search..