


Thukydides
-
Posts
776 -
Joined
-
Last visited
Content Type
Profiles
Forums
Gallery
Events
Posts posted by Thukydides
-
-
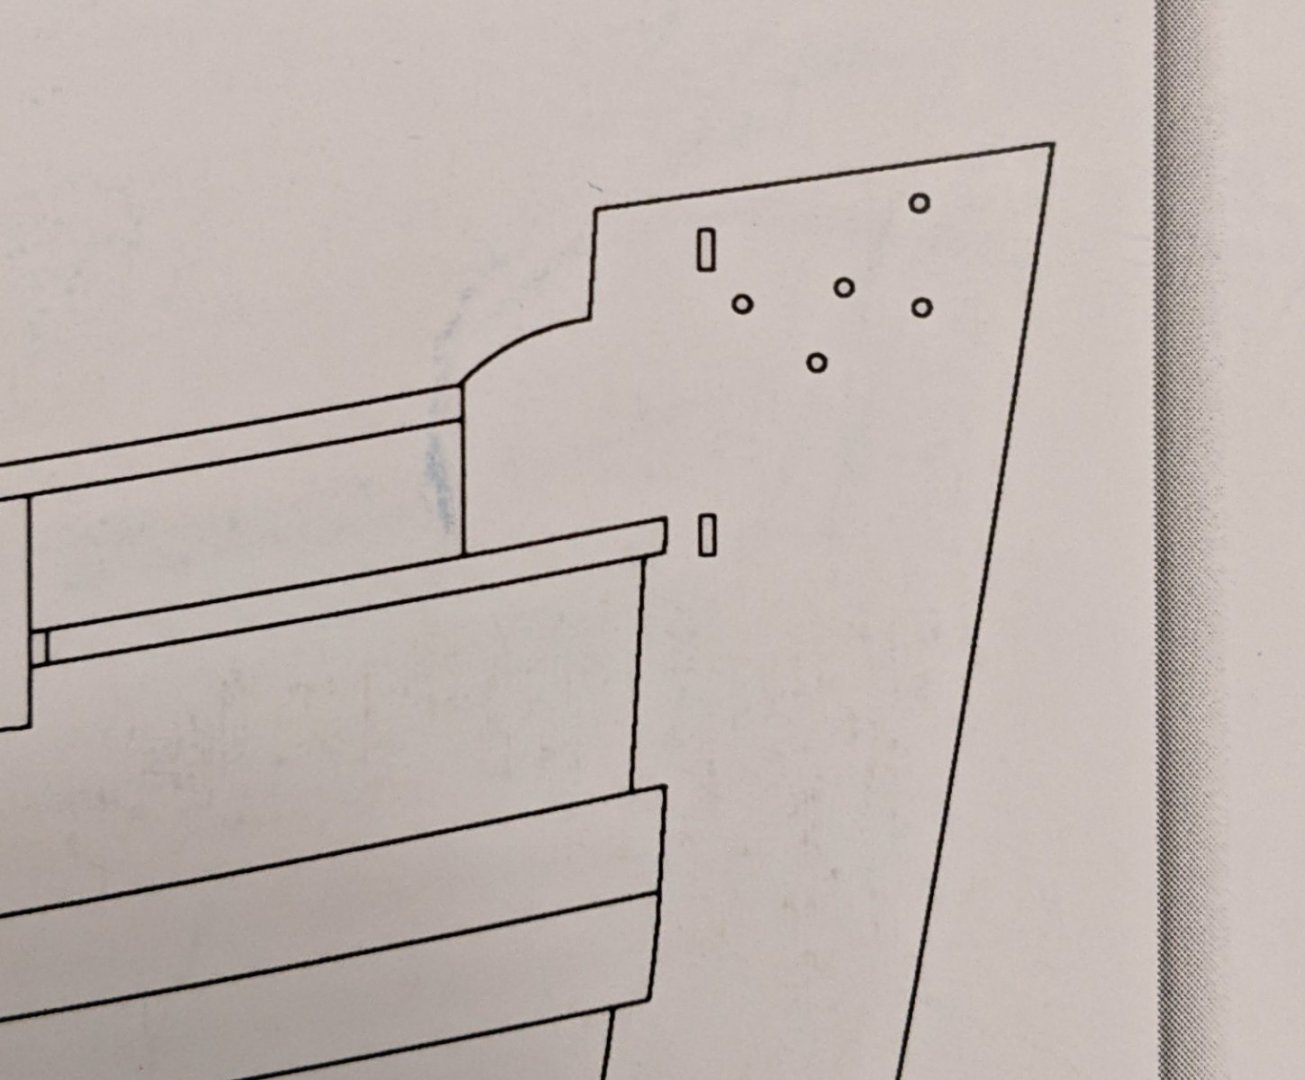
See Gregory's post, that was what I meant by edge bending. For the drop plank, traditionally they were put right under the wales by British shipwrights so if you are going to add one, that would be where you should put it.
The garboard does look a little bit far forward to me, so I think that is part of your issue, but you should mark out your planks using tick strips and check. You may be fine with the addition of a drop plank.
-
If I had to guess from the picture you havn't been tapering enough yet or maybe the garboard was brought to far forward (hard to tell given I can't see the whole model).
Look up Chuck's edge bending tutorial after tapering (you bend the plank on its edge to get the necessary curve using heat and a little moisture) and use tick marks to determine how much tapering you need. If the necessary taper is too extreme you may need to add in a drop plank below the wales. See the picture below for an example of what it should look like. You can see I added a drop plank right below the wales where one plank becomes two.

-
Log #22: Painting the White and Blue
I used an airbrush to spray white below the waterline. As I was worried about how well acrylic would stick to the WOP base I used primer for the first layer. I also sprayed red on the inner bulwarks and started the process of darkening the upper bulwarks by mixing in some blue with the red.
This was the point where I remembered how much I hate painting white. I also was struck again by how my planking failures came back to bite me. Getting a smooth even finish took many layers of white paint and sanding. Even after all that work there are still some imperfections that were impossible to correct.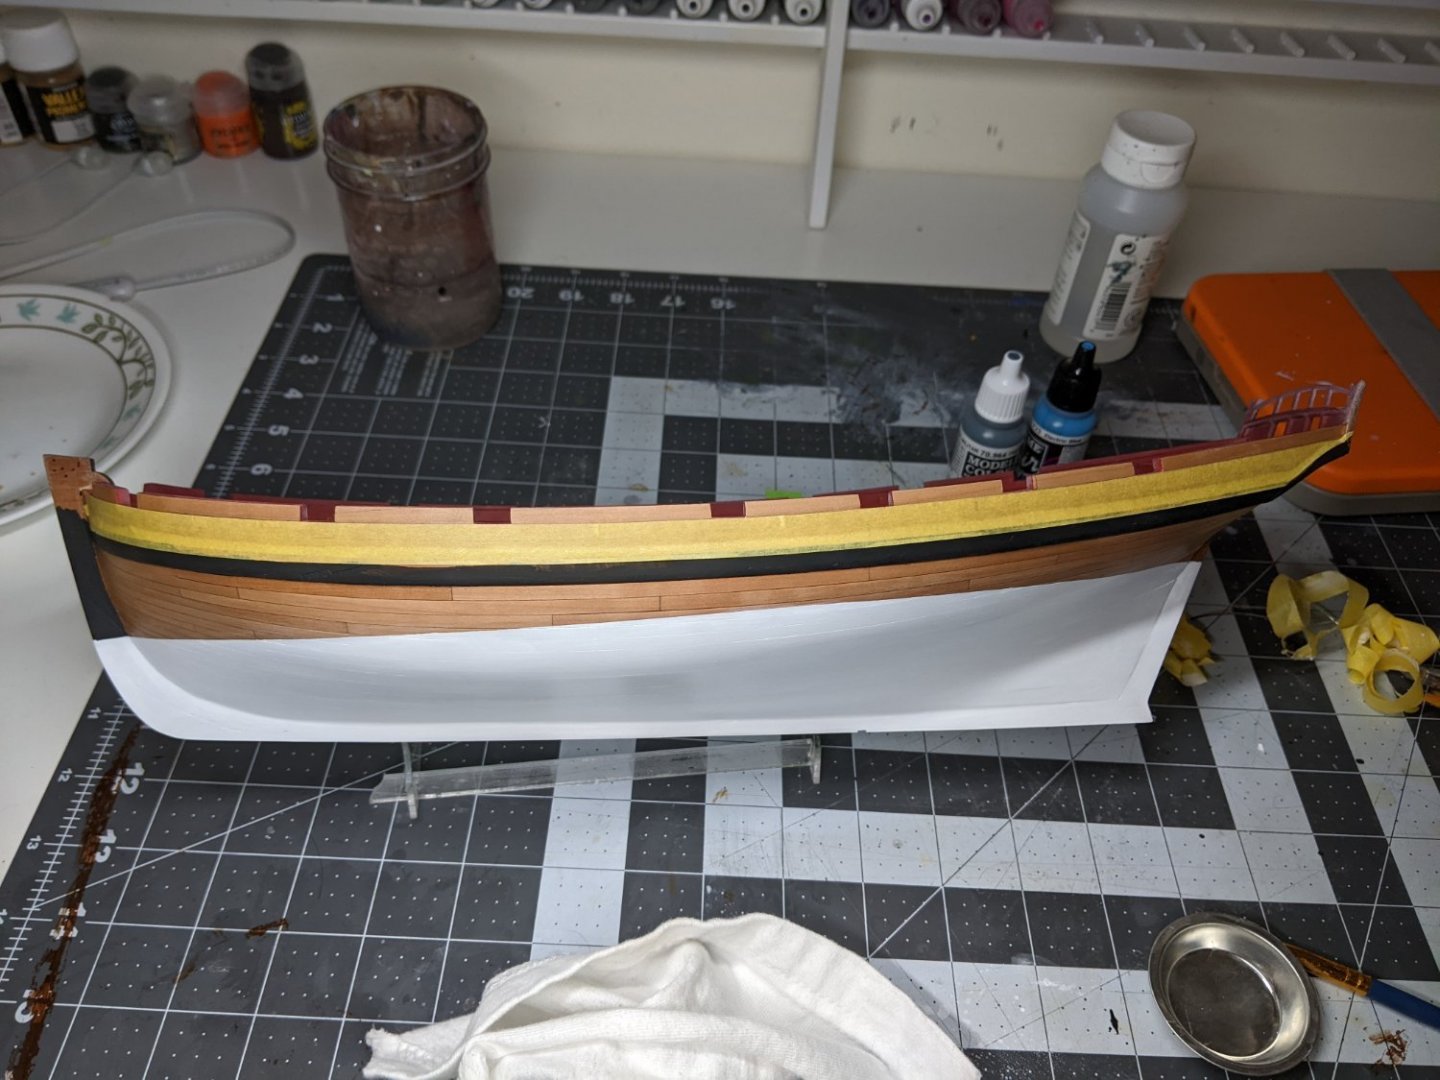
My goal is to depict Alert as it would have appeared at sea and so for painting above the waterline, I made use of a number of techniques used for miniature painting. The goal of these is to reinforce the highlights and shadows that would naturally be visible if we were looking at Alert in its full size. To illustrate what I am doing I am going to use the example of a single light source shining on a cube.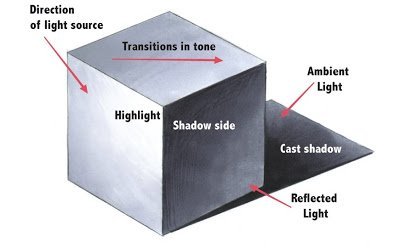
https://drawingtechniquesfundamentals.wordpress.com/2015/09/11/week-1-line-work-cube-shading/
The key thing to notice here is that light hitting the side of the bulwarks will behave a bit like the shadowed side (or potentially the upper face depending on where exactly above the ship we assume the light source is, but the principle remains the same). The railing that will go on top will have the effect of putting part of the blue into shadow and so the main highlight will come from light reflecting back off of the water. The same is also true of the transom where it is angled down towards the water.
The goal here is not to perfectly paint on how the light would impact the blue, but to give a rough approximation that works from most angles. That way we get the illusion of strengthened shadows and highlights.
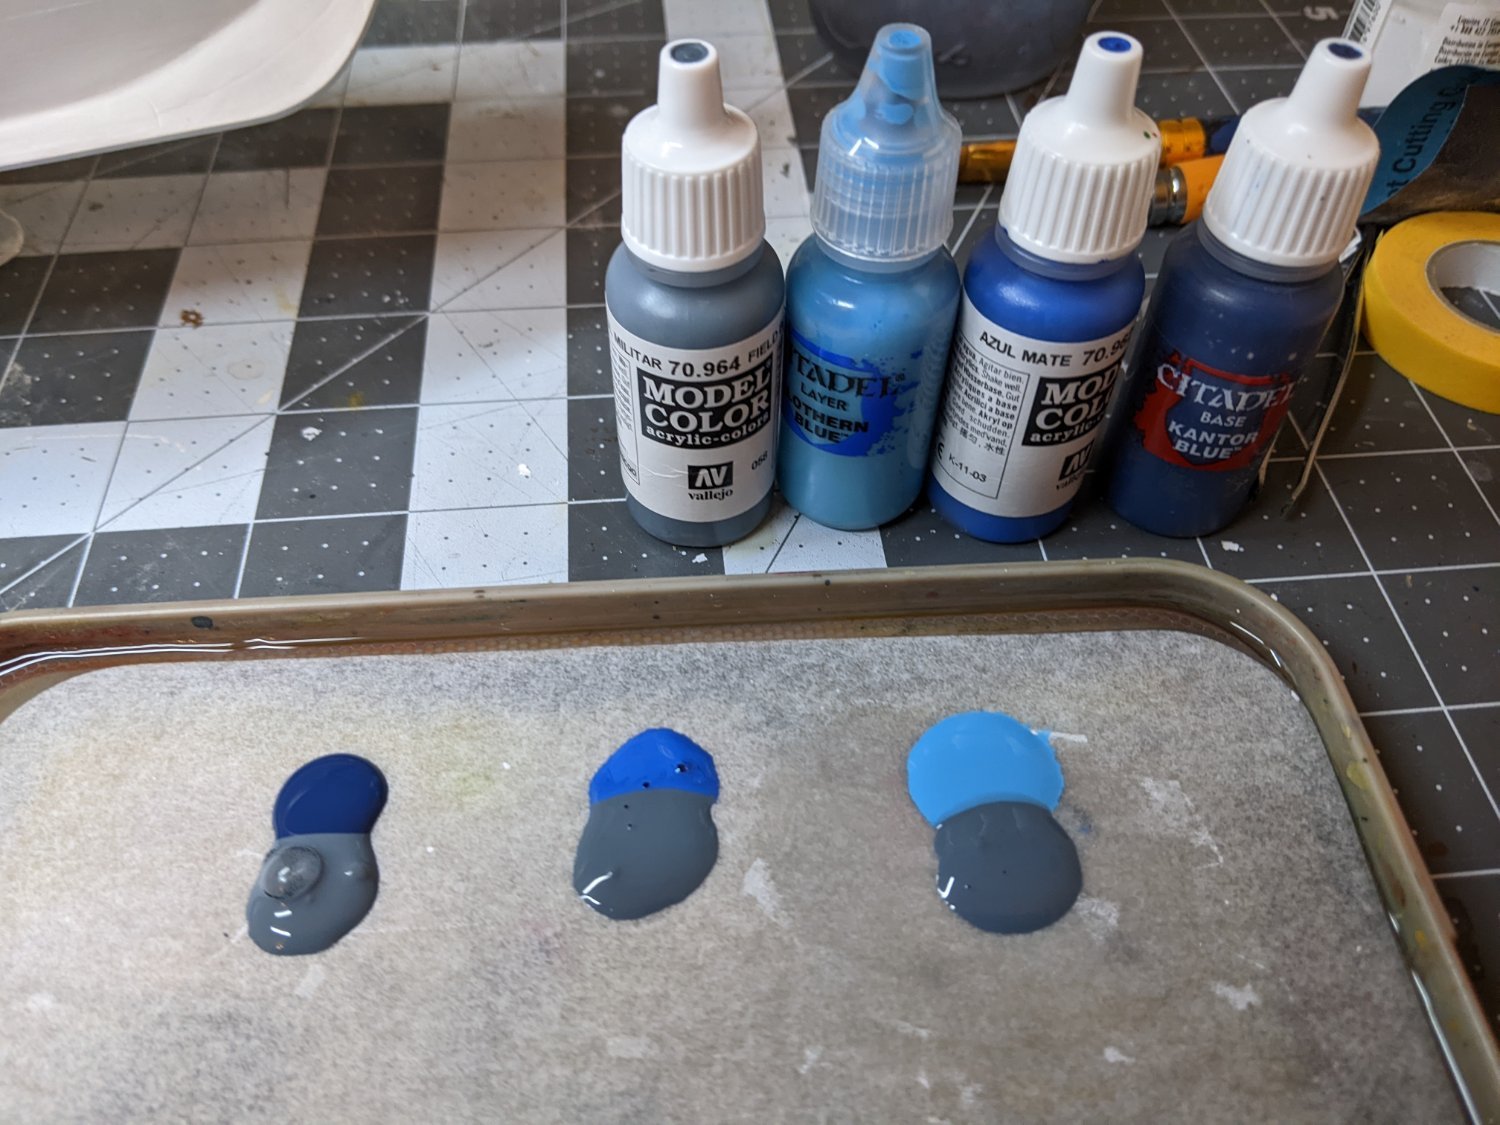
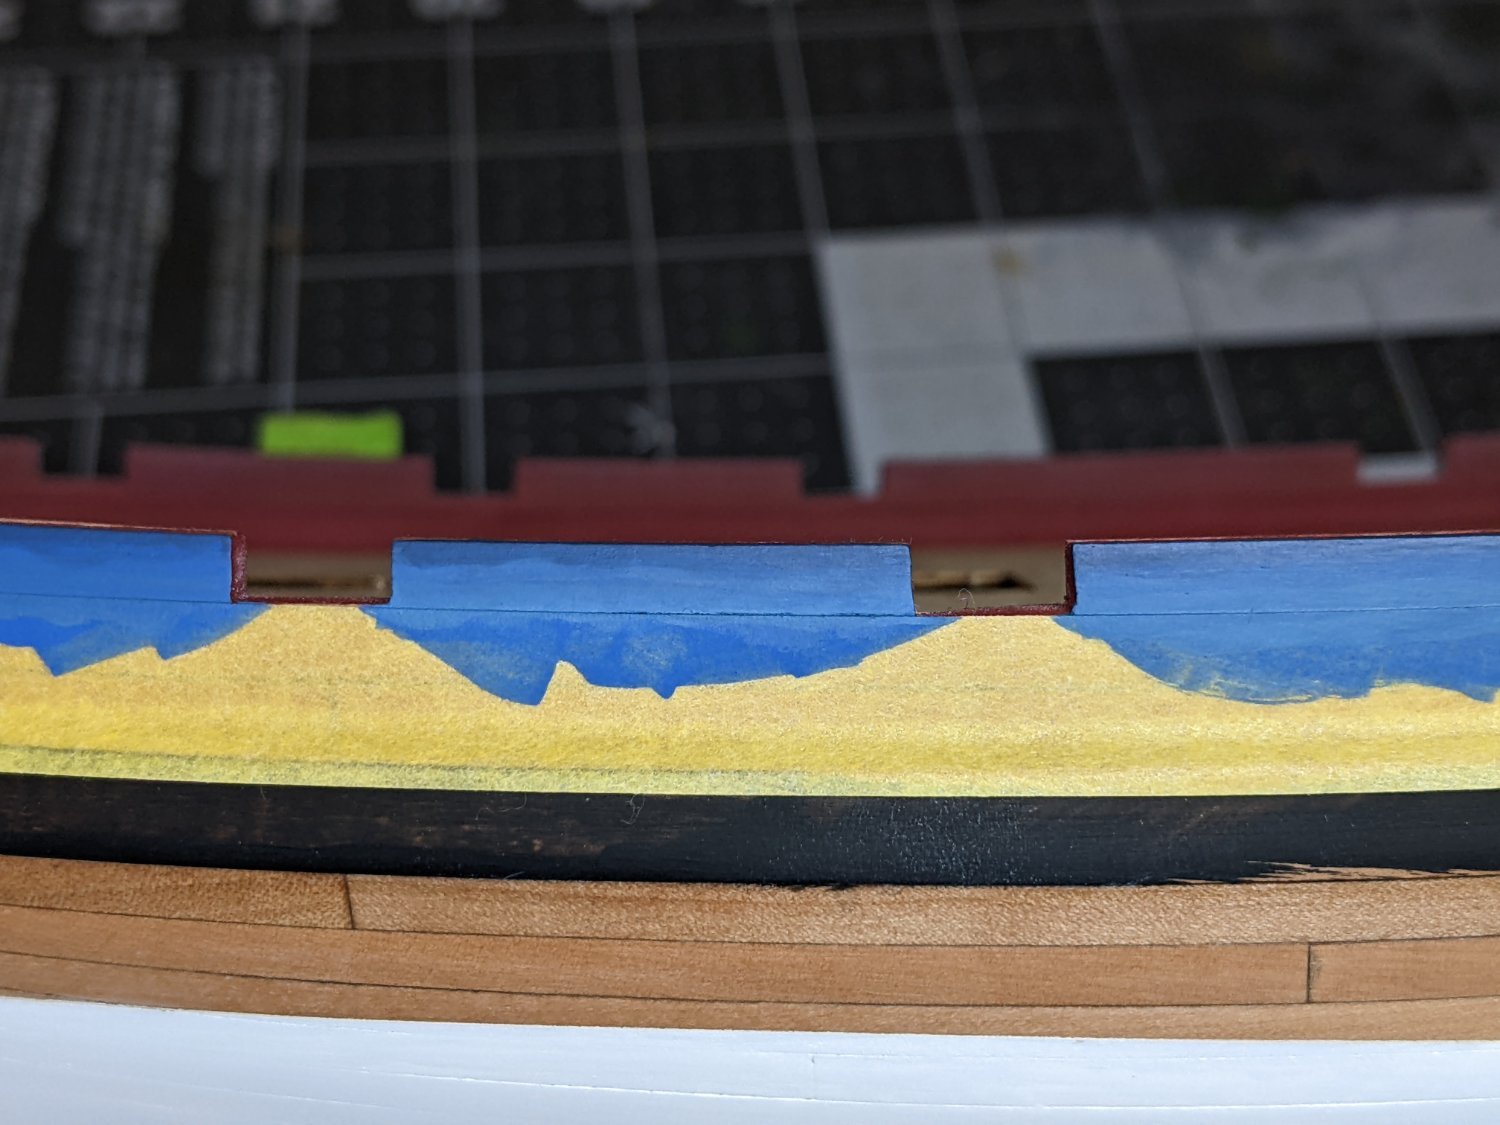
To start with I painted on two thin coats of my mid-tone (a 50-50 mix of field blue and flat blue). I mixed in the field blue to dull down the blue and give it a bit of a greyish look similar to the colour used by @Blue Ensign in his fantastic alert build log.
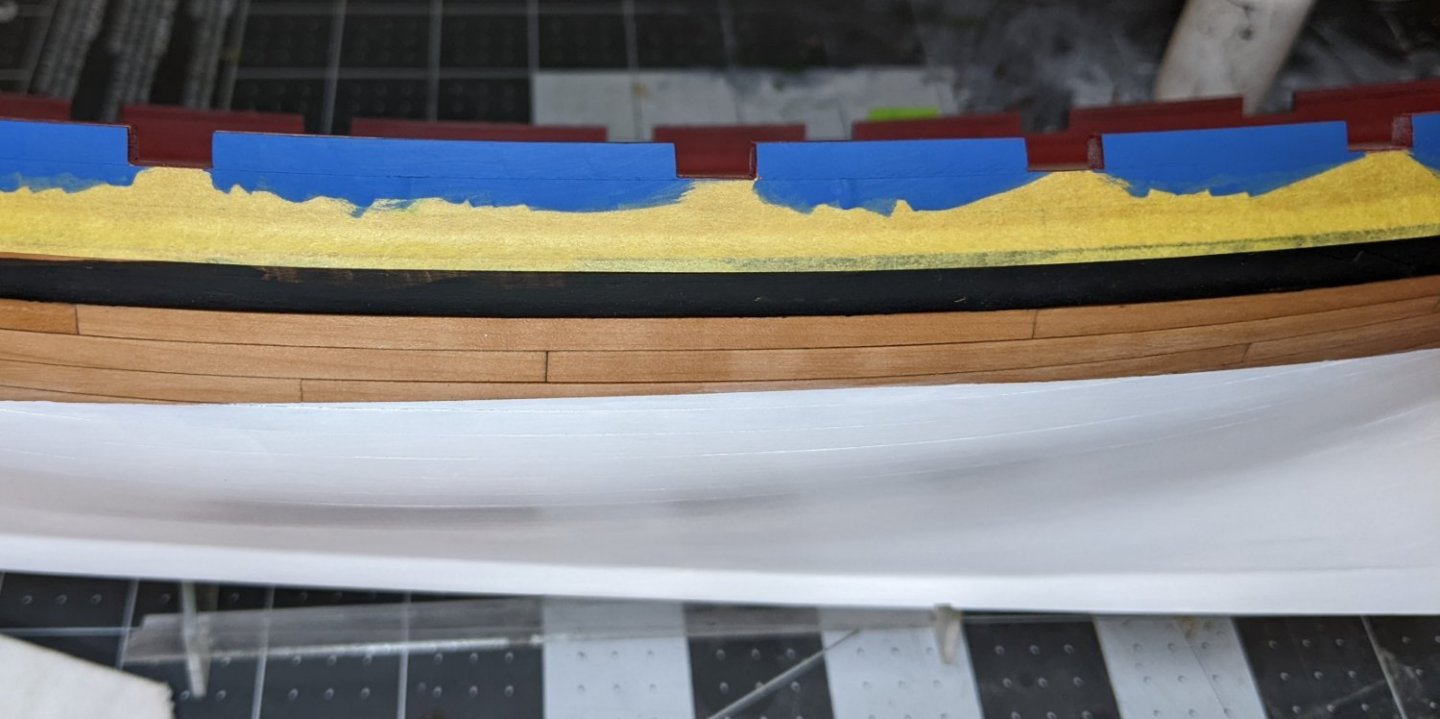
Then on my wet pallet I created a gradient from my highlight (a 50-50 mix of lothern blue and field blue) to the mid-tone to my shadow (a 50-50 mix of kantor blue and field blue).
Then on each section of the bulwark I painted three stripes of paint with the shadow at the top and the highlight at the bottom. Quickly wiping off my brush I then blended the three colours together to get a gradient from dark to light.
After this dried I went back in glazes (very watery paint) of the mid-tone to blend the transitions. At times I also went in with the highlight tone and the shadow tone to reinforce the contrast. For the transom I also allowed the highlights to rise higher in the middle and the shadows to come down lower on the sides.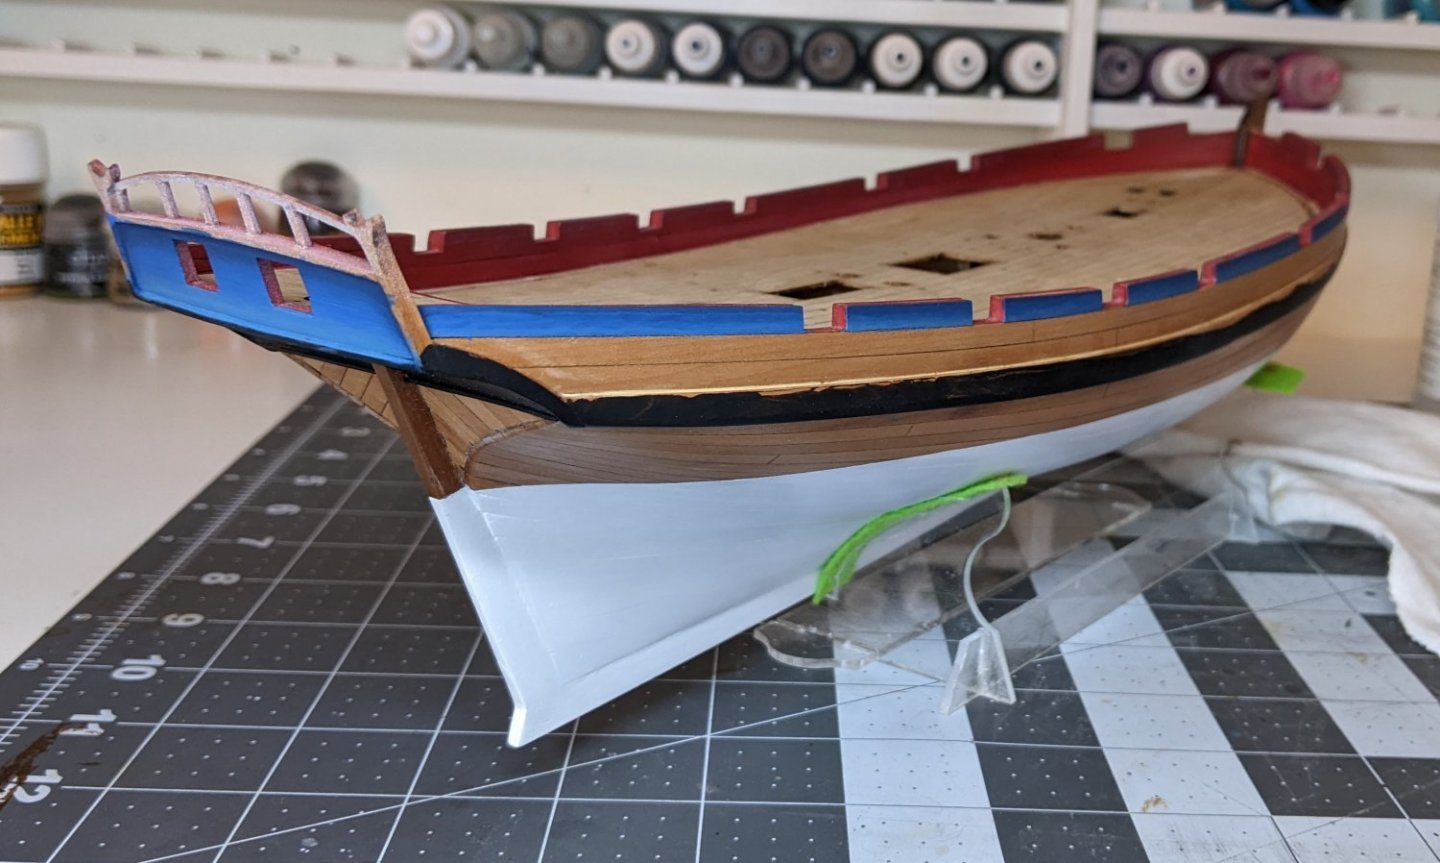
And you can see with the end result that the effect is quite subtle, but it produces a much more visually interesting image. Reinforcing how the light would have fallen helps to sell the illusion that this is not a model, but a real ship.Next up is the inner bulwarks where I will employ a similar technique, but this time with red.
- jpalmer1970, Obormotov, Theodosius and 11 others
-
 13
13
-
 1
1
-
Thanks for all the help everyone, yes @VTHokiEE it seems you are correct. Where in the instructions all the diagrams are from the other side I didn't notice as I looked ahead. So it seems I need to keep the hole clear. And moving it will throw off the alignment. So I guess I will just have to make the moulding thin at the bow.
- VTHokiEE and jpalmer1970
-
2
-
19 minutes ago, Gregory said:
I skimmed through the instructions and see no purpose for that hole.. Perhaps Chris will chime in..
It doesn't show up in the AOTS book as a hole...
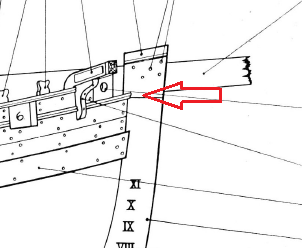
It seems to coincide with some molding, but I can't tell to what extent the molding is modeled in the Vanguard kit.
Ya that is basically the issue I can't figure out. The moulding (what I called a railing in my post) is going to end up covering the hole on my model and I am trying to figure out if it matters.
-
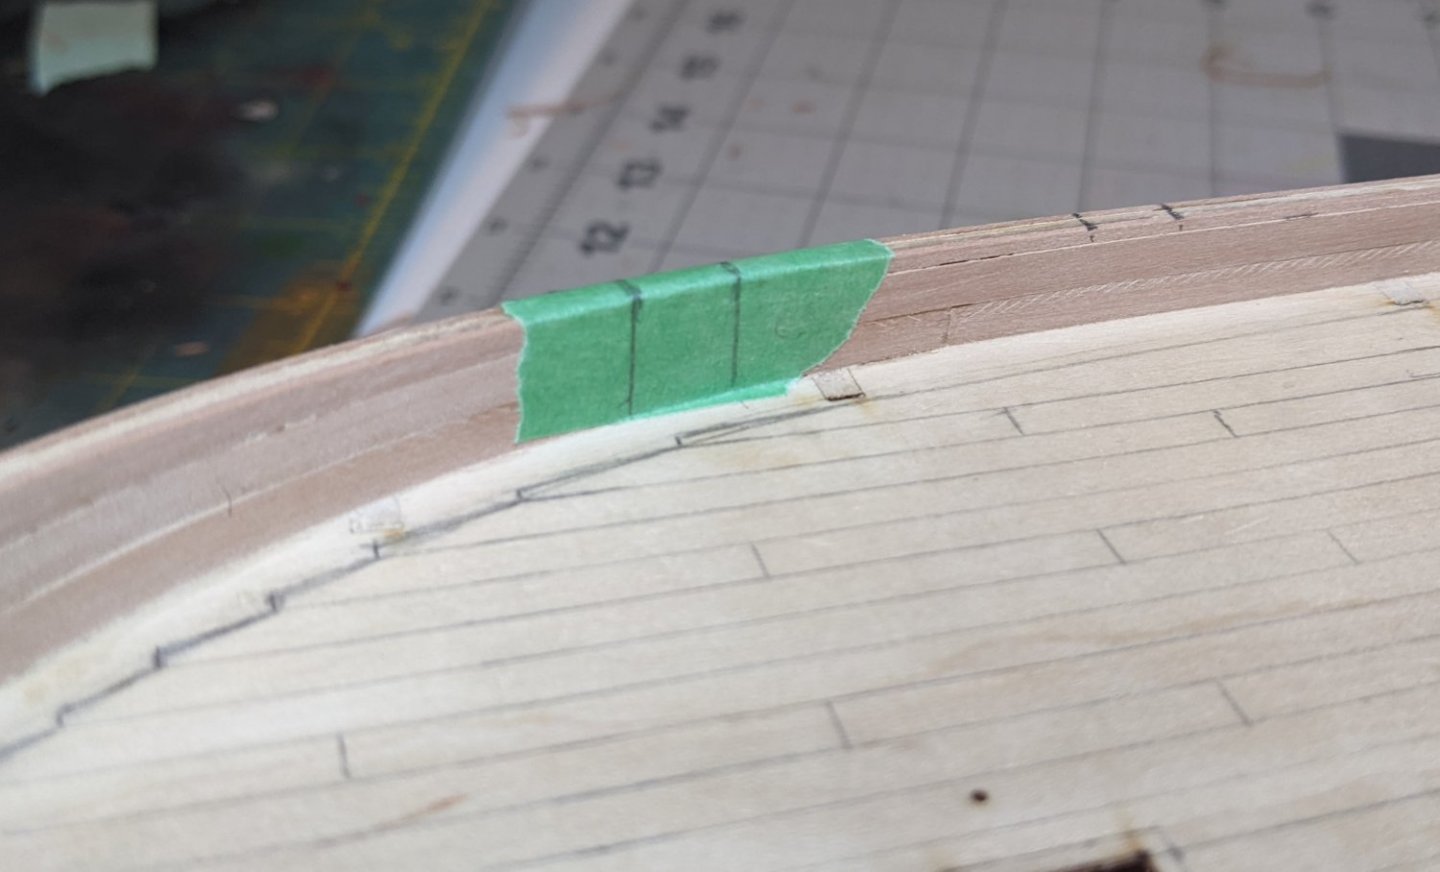
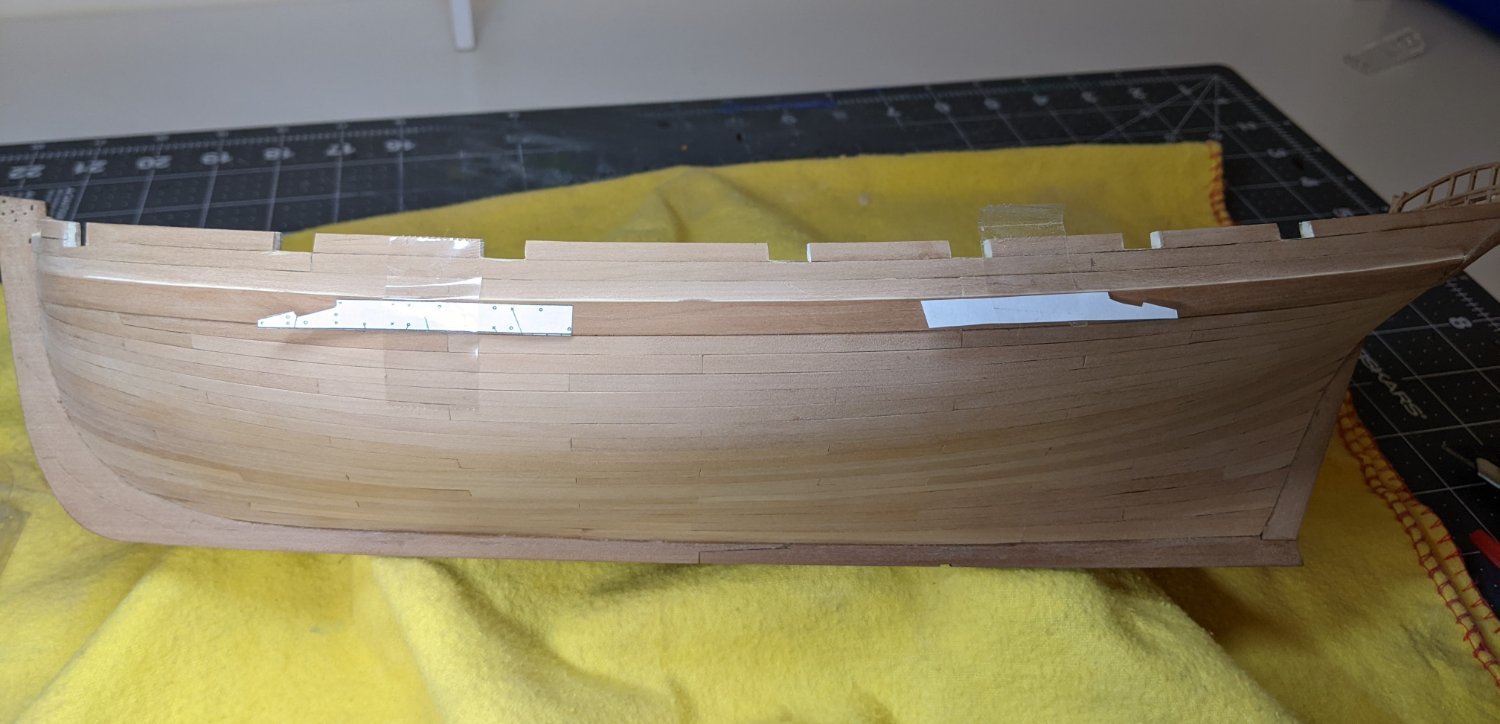
I am working away on the painting and hopefully will have somthing to show you all soon. But reading ahead I am planning for the 1x1 mm strip railing just below the first plank and I noticed a minor problem. Right where the railing meets the bow there is a hole which will end up partially covered.

I cannot figure out from the instructions what this hole is for. Any suggestions on how I can correct for this issue? See below for how the instructions say it should look:
-
Log #21: Painting Styles
As I mentioned in my mini update I applied WOP to the hull and so now am turning my attention to painting. Since I am planning on laying down my base layer with an airbrush I will have to do this in stages. I masked off all the areas not being painted white or red (I can do them both at the same time since they don’t cover the same area).
However, before we dive into the actual painting, I wanted to talk a little bit about what we are trying to accomplish when we paint a model.
We are attempting to accurately represent real ships, but what does this mean? Are we trying to achieve accuracy in the materials used, accuracy the colours, accuracy in how it would have actually looked if we could go back in time and see it sitting there by the dock? Should I use wood (a material similar to what the object would have been made of) or plastic (a 3d printed model might incorporate more detail than I could possibly impress in the wood)?
As I think we all can see, there are no clear answers to some of these questions and so the making of a model becomes somewhat of a compromise. If we apply this logic to the painting process we have similar issues. Should I paint using the most accurate colour I can research, or should I try to represent how the ship would have looked in real life? How much should I consider what makes the model look aesthetically pleasing? Take a look at the picture I took of the corner of my office:
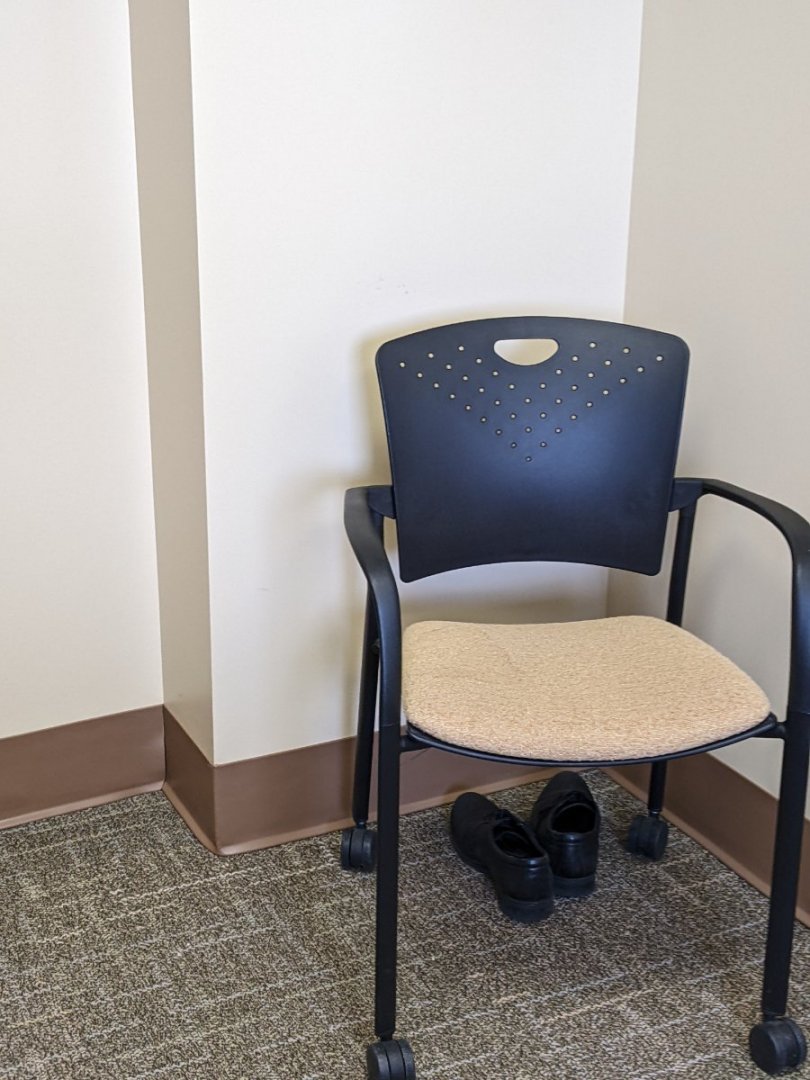
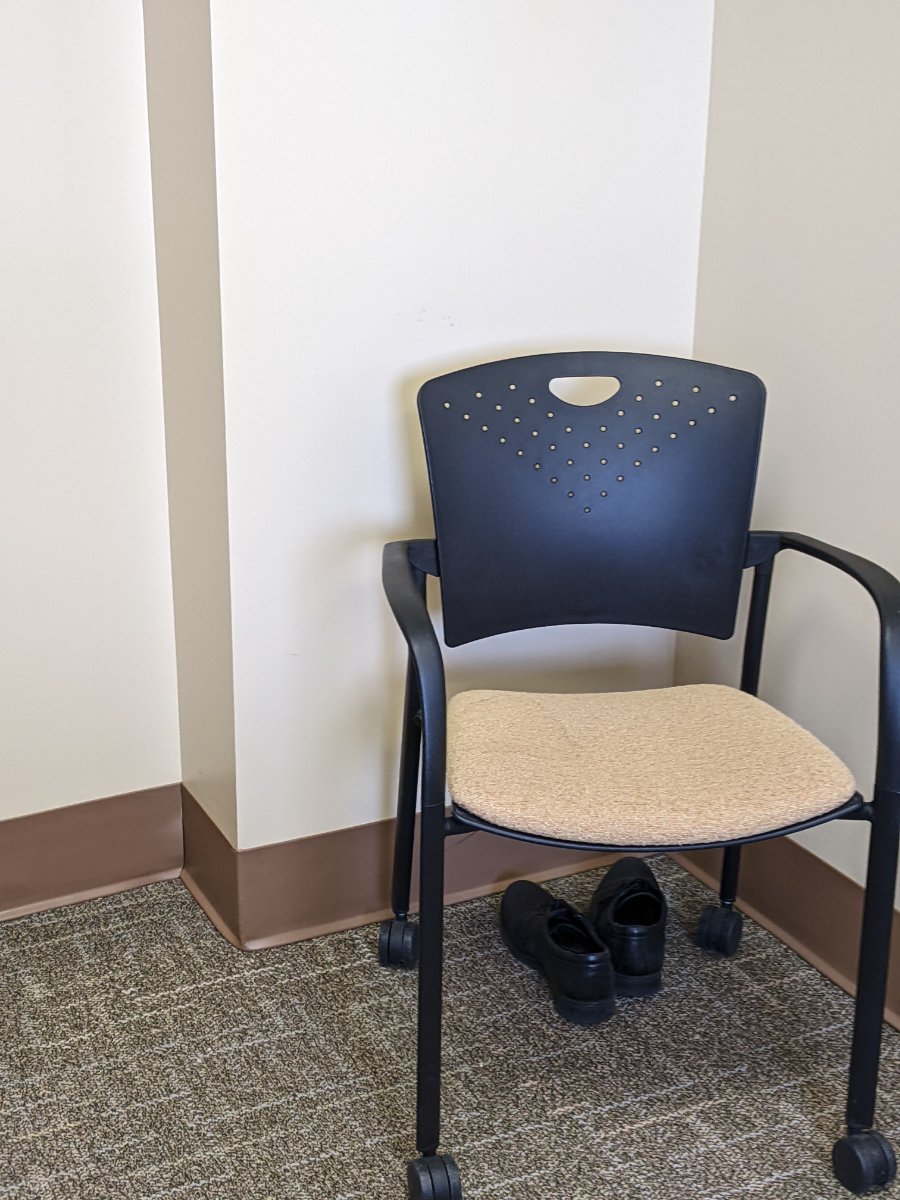
Notice how colours are not uniform. Despite the wall being painted one colour (cream), it looks different depending on what part you are looking at. The same is true of the chair, the black appears at times grey, and on the edges even almost white. Light does not fall on small objects the same what it does on large and so we have a choice. Do we paint our model using the uniform colour it would have been painted with, or do we attempt to simulate some of the way light would have fallen on the full sized ship in real life.To explain this I will use the example of miniature painting. Take a look at the models in the link below:
https://i.redd.it/or4e7cu8hpn21.jpg
Now compare them to this model:

Which one looks more interesting? Which one looks more like a man in an armoured suit? The difference between these two sets of models is primarily the treatment of light on the armour. The first set is simply painted in the colour of choice (with black in the recesses). The second adjusts the colour to capture how the light would fall on a large object (such as a man in a mechanized suit). This is achieved through two primary methods:1) Varying the colour to simulate reflection points and the way a surface perpendicular to another may appear much darker.
2) Edge highlights to simulate how light collects on edges making them appear much brighter.I do want to articulate that I don’t think it is wrong to paint a model with a uniform colour. It is a choice, just like the choice to use 3d printing for a barrel as opposed to making a wooden one. Much of where you fall on that choice will depend on what you are trying to achieve with your model. Are you making a diorama or an admiralty style model or something in between? I hope however, that this log has made you consider that the question of accuracy is not as simple as picking the right colour.
In my next log, I will start the painting process and discuss how we can apply these principles to the painting of Alert.
-
9 hours ago, jpalmer1970 said:
Hi Thukydides,
Looking forward to hearing more about the painting process. I have seen that some people on the forum don't apply WOP to hulls before painting and others do..... what are the pros and cons of either way? I guess the WOP seals the wood to an extent??
Thanks
Unfortunately I can't really help you much with this question. I don't have a lot of experience painting wood so I am just going by what I read on this forum with regard to the order. In the the post I linked above (when I was doing my tests) I asked @glbarlow which order I should do it and he suggested doing the WOP first to stop paint seeping through the wood. I guess it does seal it to an extent.
I suspect that apart from the potential seeping it doesn't matter much as if acrylic can stick to plastic then it should be fine on the surface that the WOP provides, particularly since I am planning on using a white acrylic primer for my first layer below the waterline. From what I have read, most of the historical advice that you do water based before oil relates to pre-acrylic era where you didn't have the acrylic binders.
- jpalmer1970 and Obormotov
-
2
-
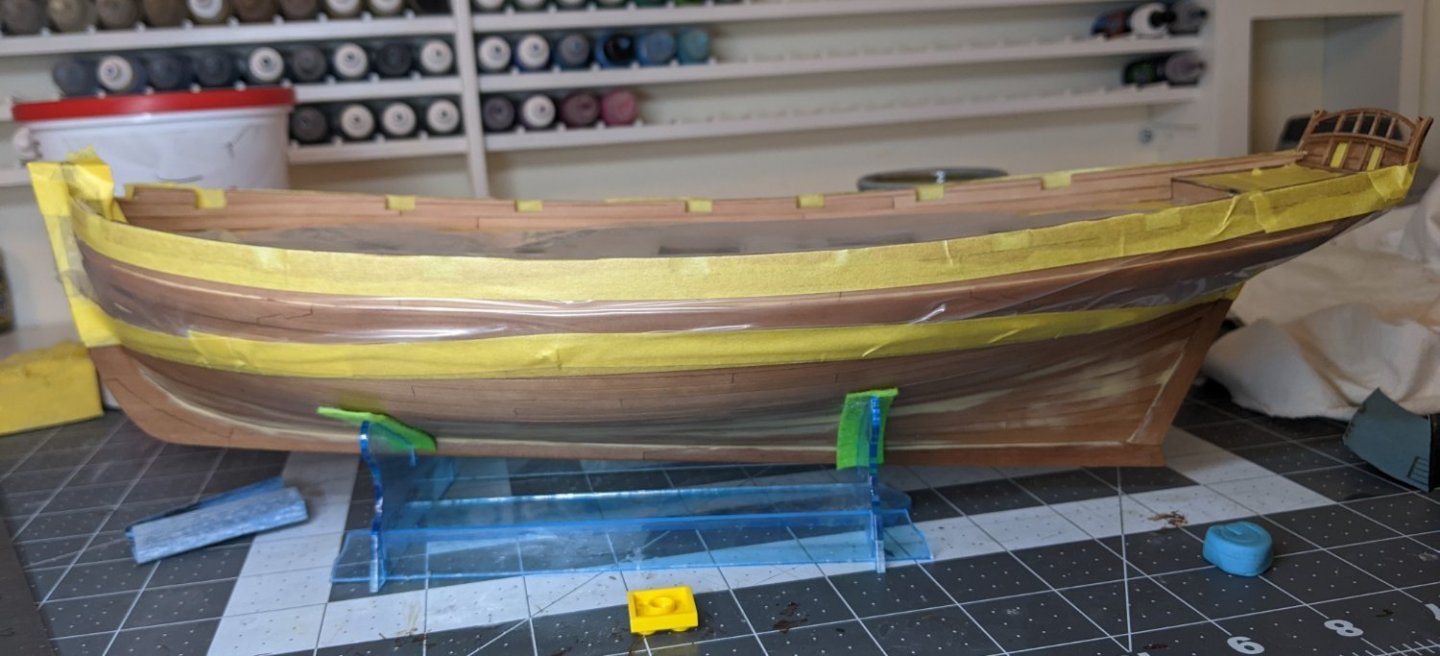
Minor update. I have applied several coats of WOP and the hull is starting to look pretty good at this point.

I am now prepping to start painting by marking the waterline and in my next post I am going to go into the painting process in detail. This is one area that I feel I have something to add to the vast array of experience and knowledge on this site.
-
10 hours ago, Grey said:
Definitely making way…
I am struggling a bit on the 2nd layer of planking. I just haven’t found a method that works real well for me yet. Little too much guess work for my tastes-and I fumble around with the CA a bit. Need to find a better way to apply.
Still enjoying the process, even if I need to remind myself that frustration is part of learning. 🥲Thanks for stopping in!
Cheers,Grey
I put a small amount of CA at a time on a yogurt container lid and then dip a toothpick in it and use it to apply the glue to the planks. @James H's solution (using a fine tip) will also work well. There is a bit of a learning curve as to the exact amount to apply. Too much and it spills over the edges and too little and you don't get it to stick. I found it just took me a while to get the feel for it. This is all part of the learning process. As long as you take your time and treat each plank as its own project you will do great.
- chris watton, Grey and AJohnson
-
2
-
1
-
-
-
Thanks for all the likes and encouragement. The next instalment of my log should come quicker than the last few. I am busy applying the WOP (2 layers on already). Will probably post some pictures when that is done.
@Diver It may very well have been a shoe polish cloth. I have had it for about 20 years. For many years it was in my guitar case for wiping the guitar down.
-
Log #20: Preparing the Hull
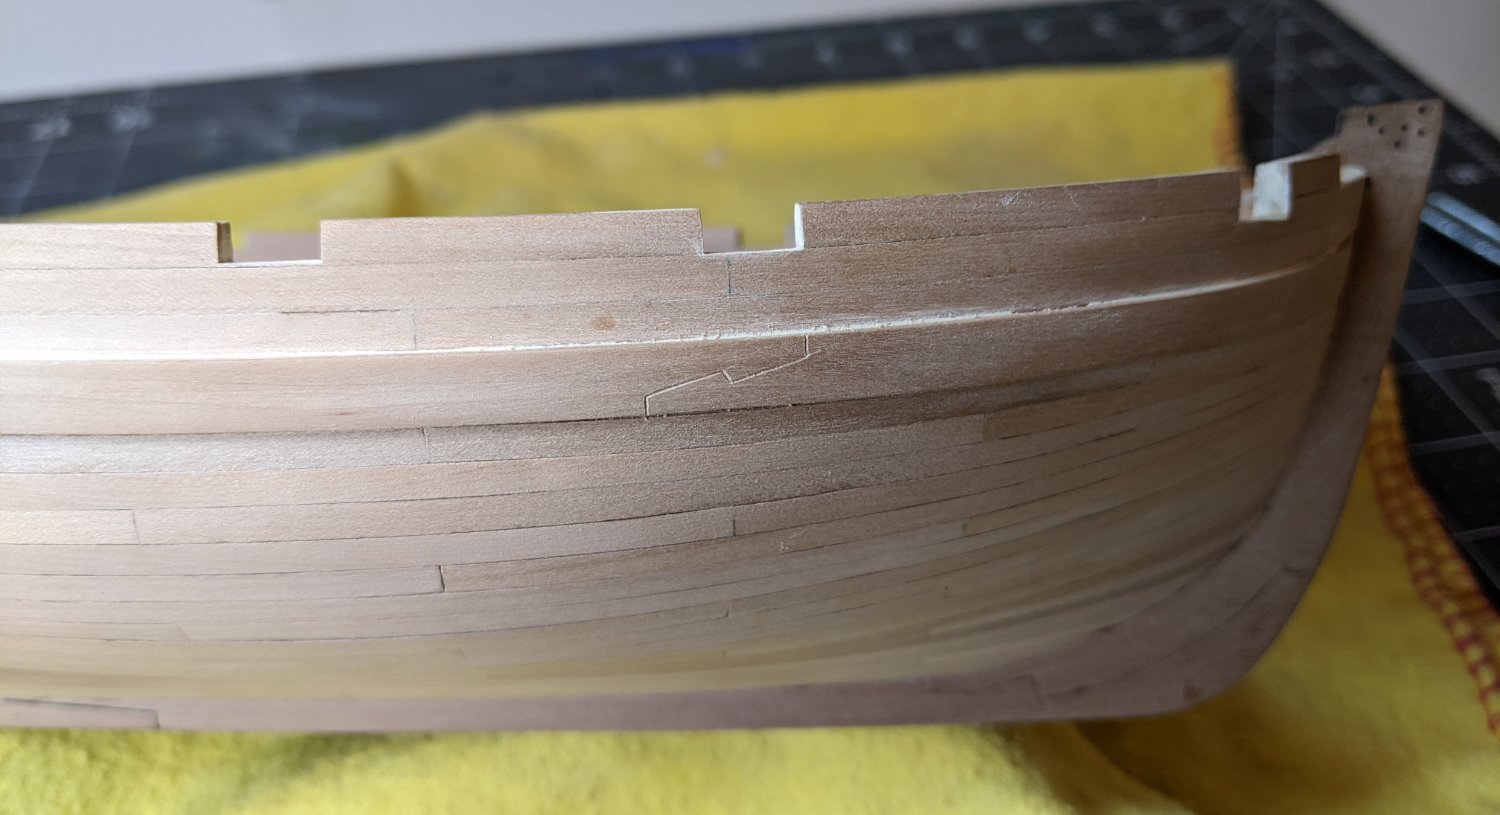
Though build log entries have been slow in coming I have been working away at Alert. Before I could begin varnishing I needed to make some final adjustments to the hull. The first of these was to scribe the scarf joints on the wales.
Using a printed scan of the joint in Goodwin, I cut out templates and used them to mark where I cut with a craft knife. Some of them turned out better than others, but all in all I am pleased with the outcome.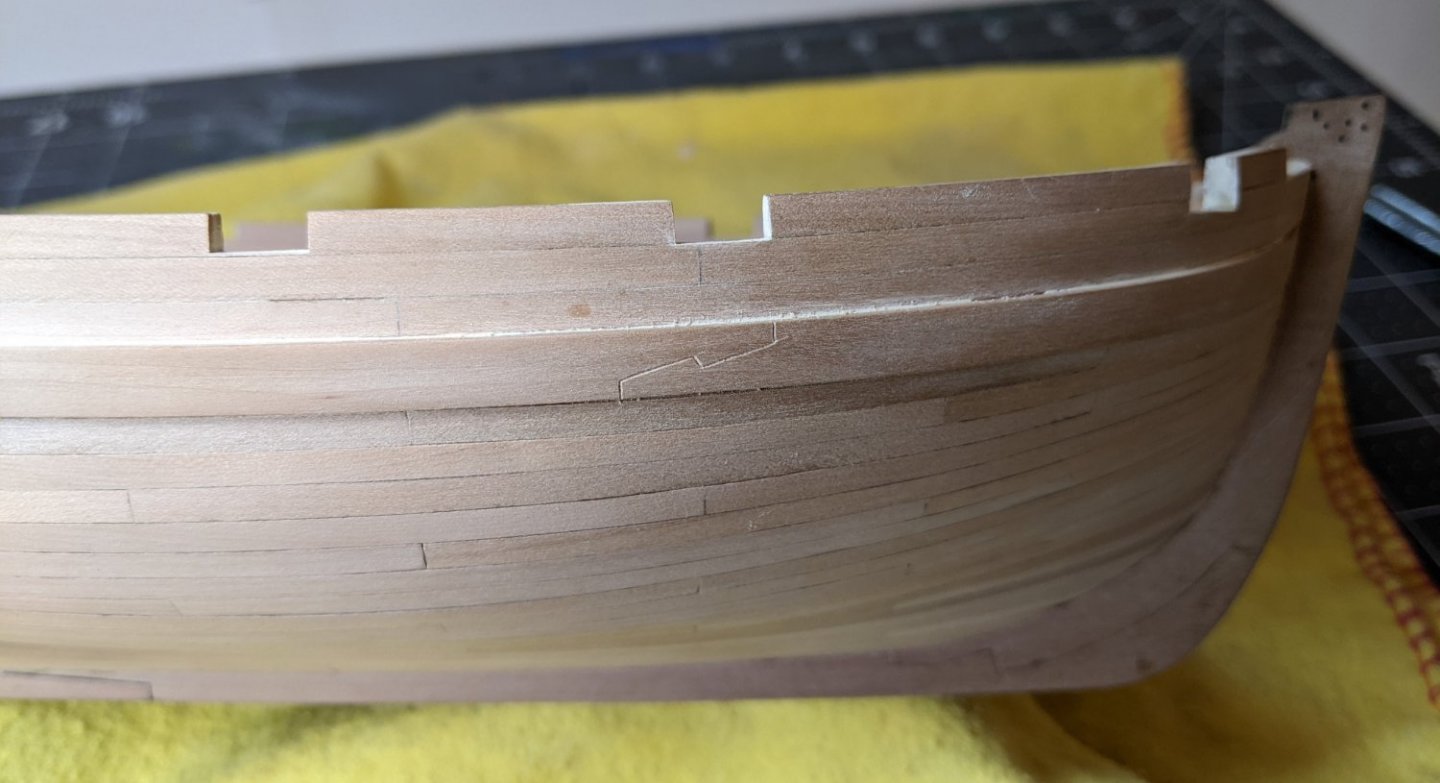
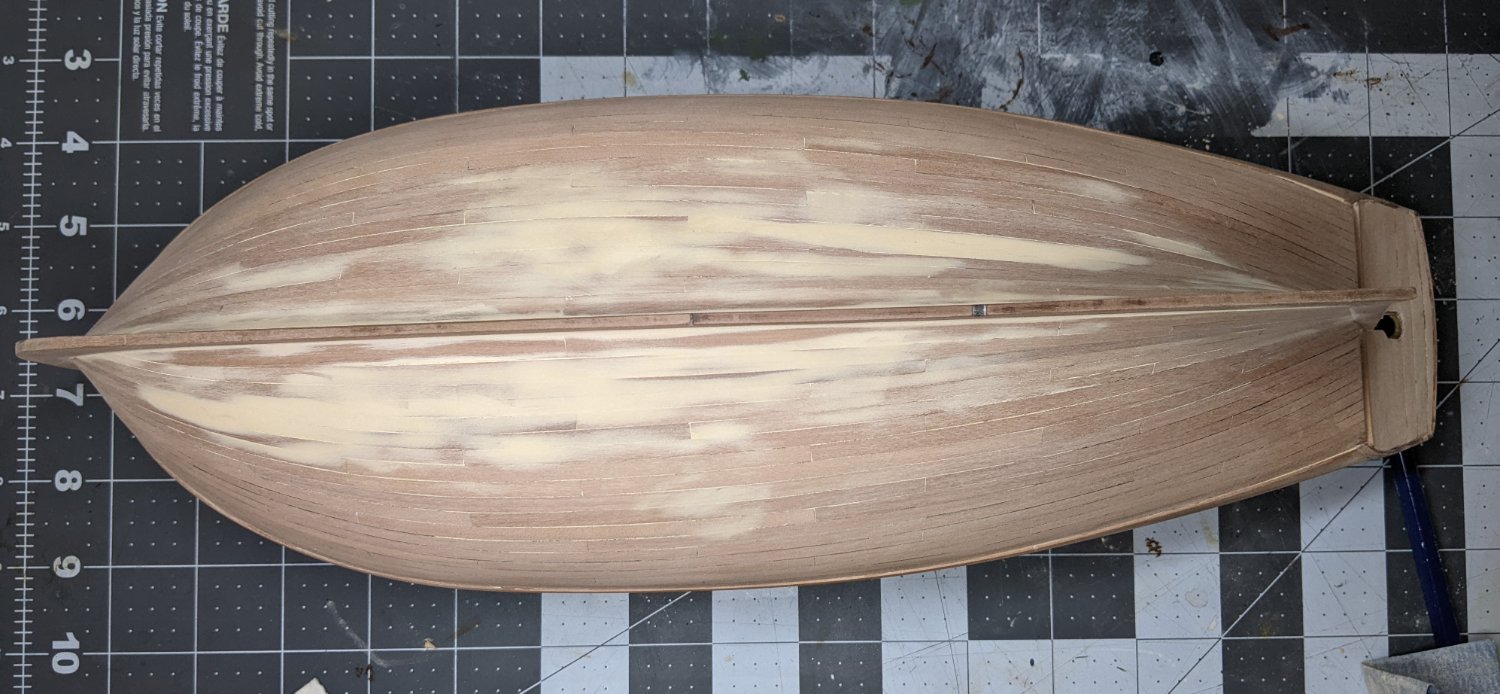
Then in preparation for the eventual painting below the waterline, I sanded and added some more wood filler to the lower part of the hull. This required several layers and using my fingers to feel for bumps and divots. Very small gaps may get filled by the varnish layer, but I figure getting it as close to perfect before adding the varnish will make my finishing job easier.

I have been doing a lot of reading on various options for a varnish layer, but in the end I decided to attempt the method described in @DelF's Duchess build log (link). I figured that I should probably do some tests before applying it to the hull and so glued a few planks to a piece of wood to simulate the hull.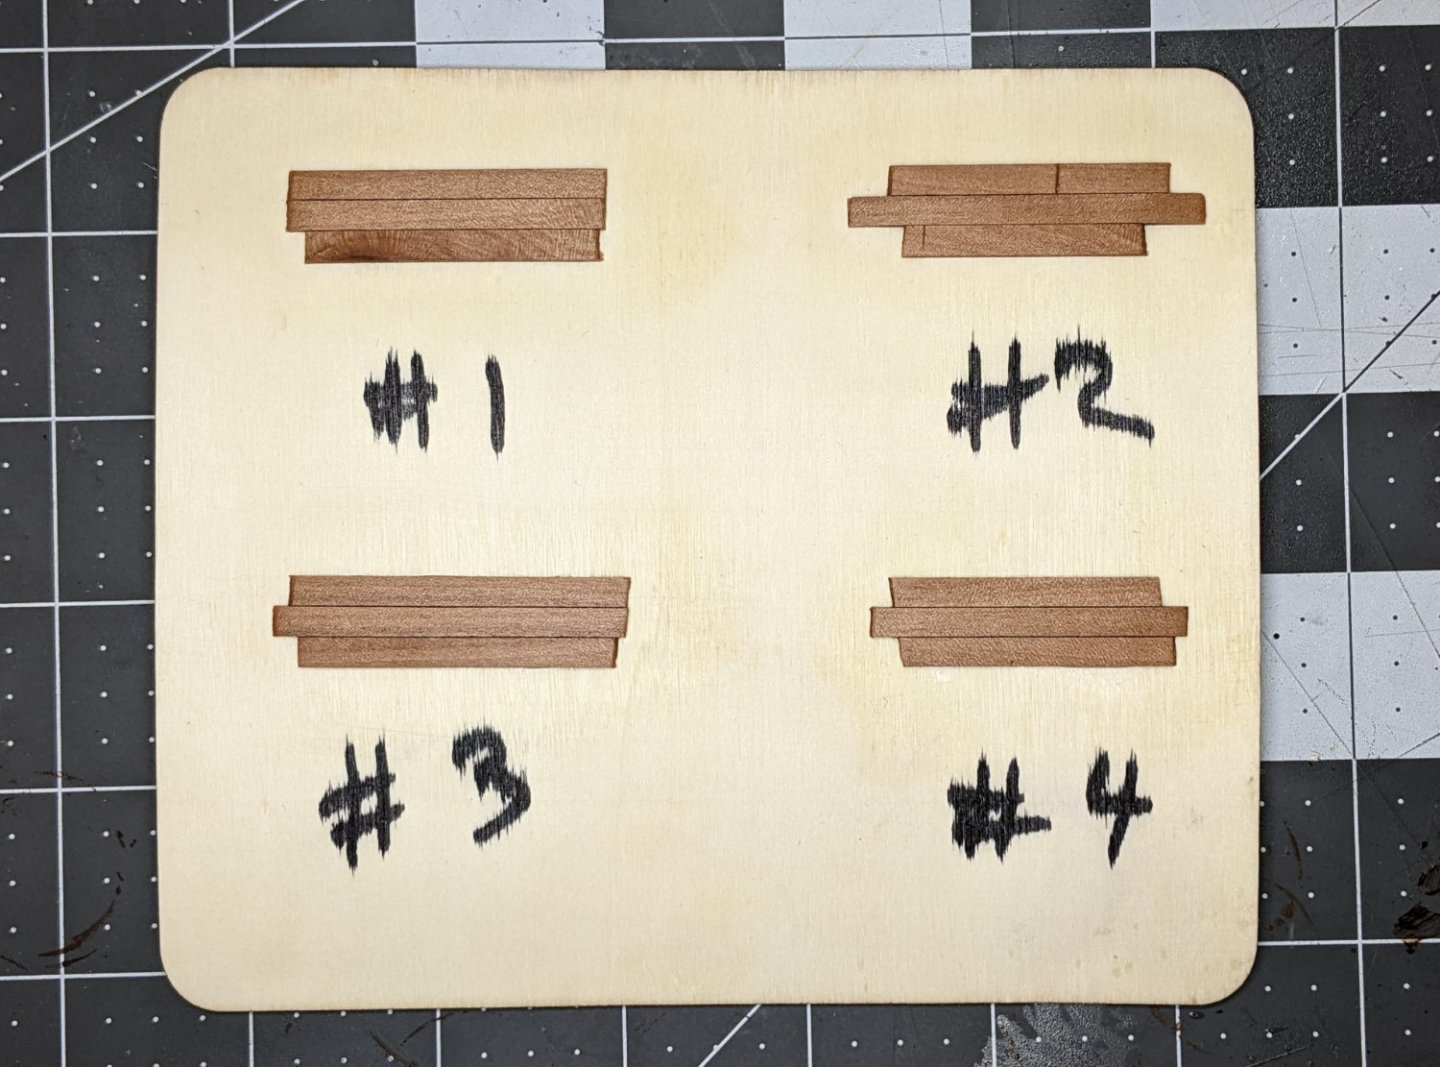
Following @glbarlow's method as described in @DelF's build log, I practiced applying the WOP in varying amounts, layers and degree of sanding. I did not find that more layers resulted in a significant difference in tone (the numbers correspond to the number of layers). However, the resulting finish is silky smooth (particularly #4) and so I am planning to apply either 3 or 4 layers of the WOP to the hull.
-
Looking really good. I am also also humming and hawing about colours and finishes. From my tests with wop it seems to give more of the deeper brown on pear that you are looking for.
-
-
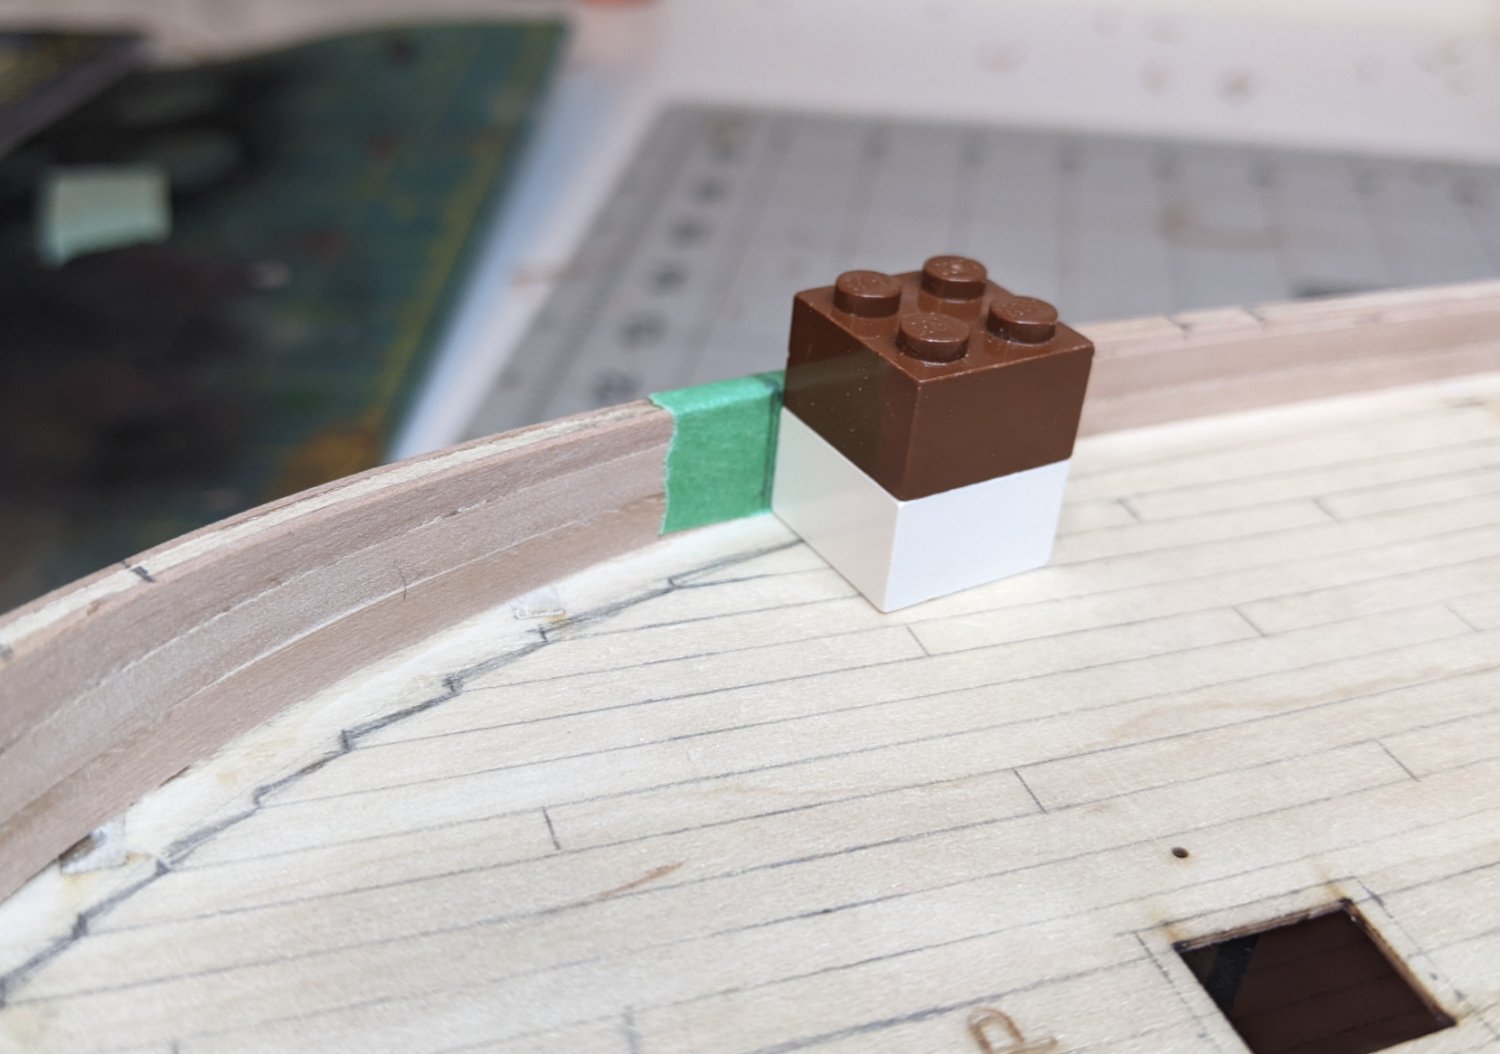
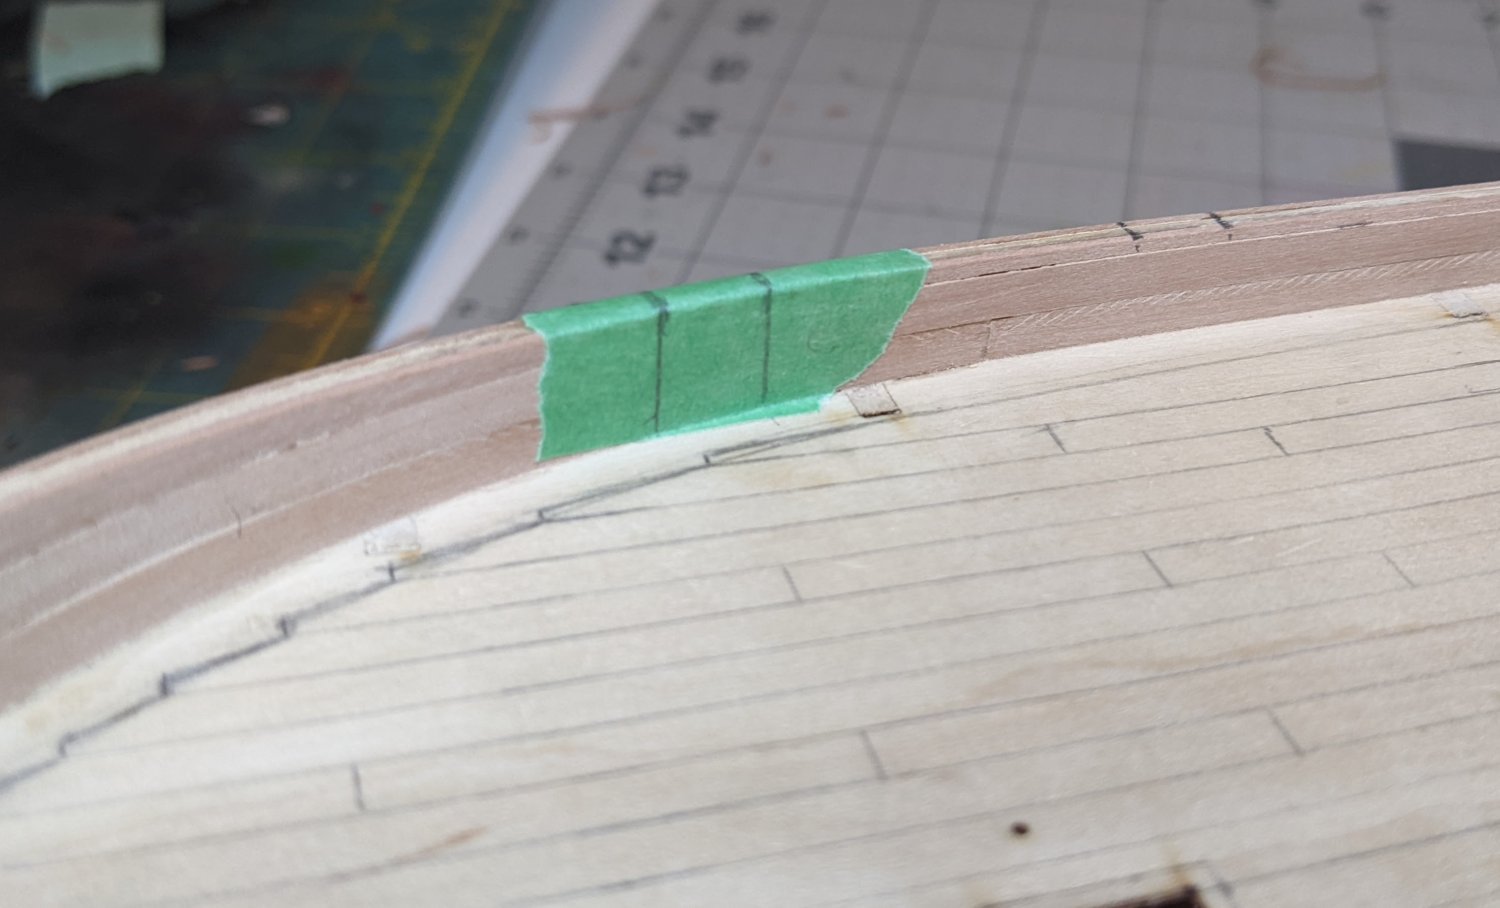
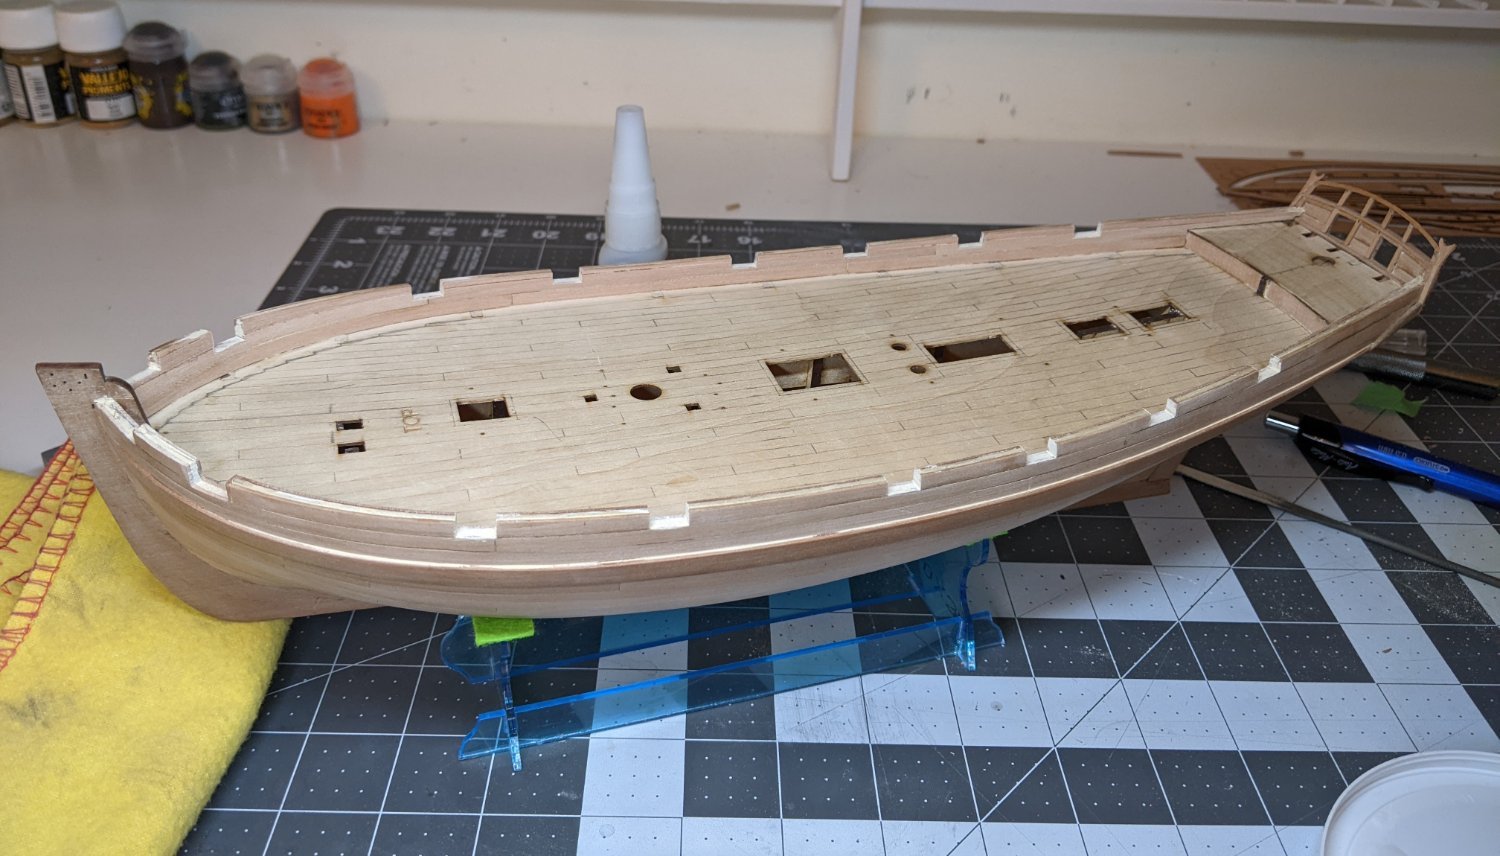
Log #19: Cutting the Gun Ports
Things have continued to progress slowly. With the inner bulwarks done, it was time to cut the gun ports. Like most things I have embarked on over the course of this project, it was much harder in practice than I expected. To avoid splintering I taped the bulwark with masking tape before marking the gun ports. To ensure that the ports were cut perpendicular to the deck and in a consistent manner I used lego blocks.
After marking out the location using the railing as indicated in the instructions, I used the lego to draw the two parallel cuts.
Then using a razor saw and the lego clamped against the bulwark as a guide I made the cuts down to the required height. I found that making the cuts was easy to get wrong. On a few of the ports I made the cuts at a slight wrong angle or slightly two far apart. On two of these the additional width was noticeable and I had to add back some additional material.
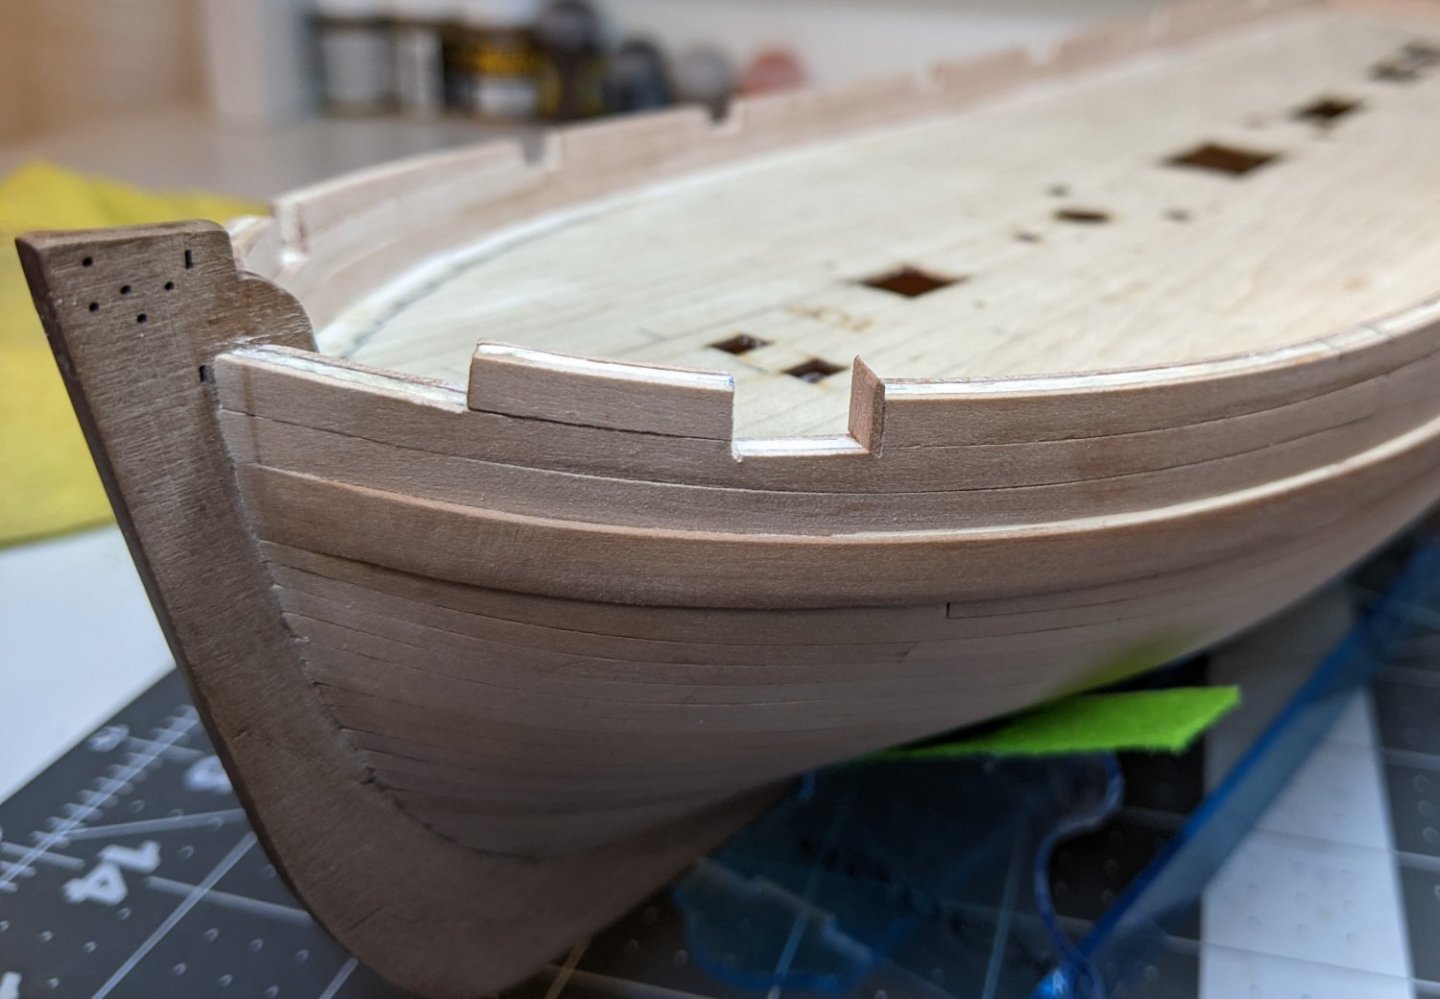
I then filed the edges to conform to the bulwark. In the end where this will be painted it shouldn’t be too visible. Finally I filled in any gaps with some wood filler.

-
-
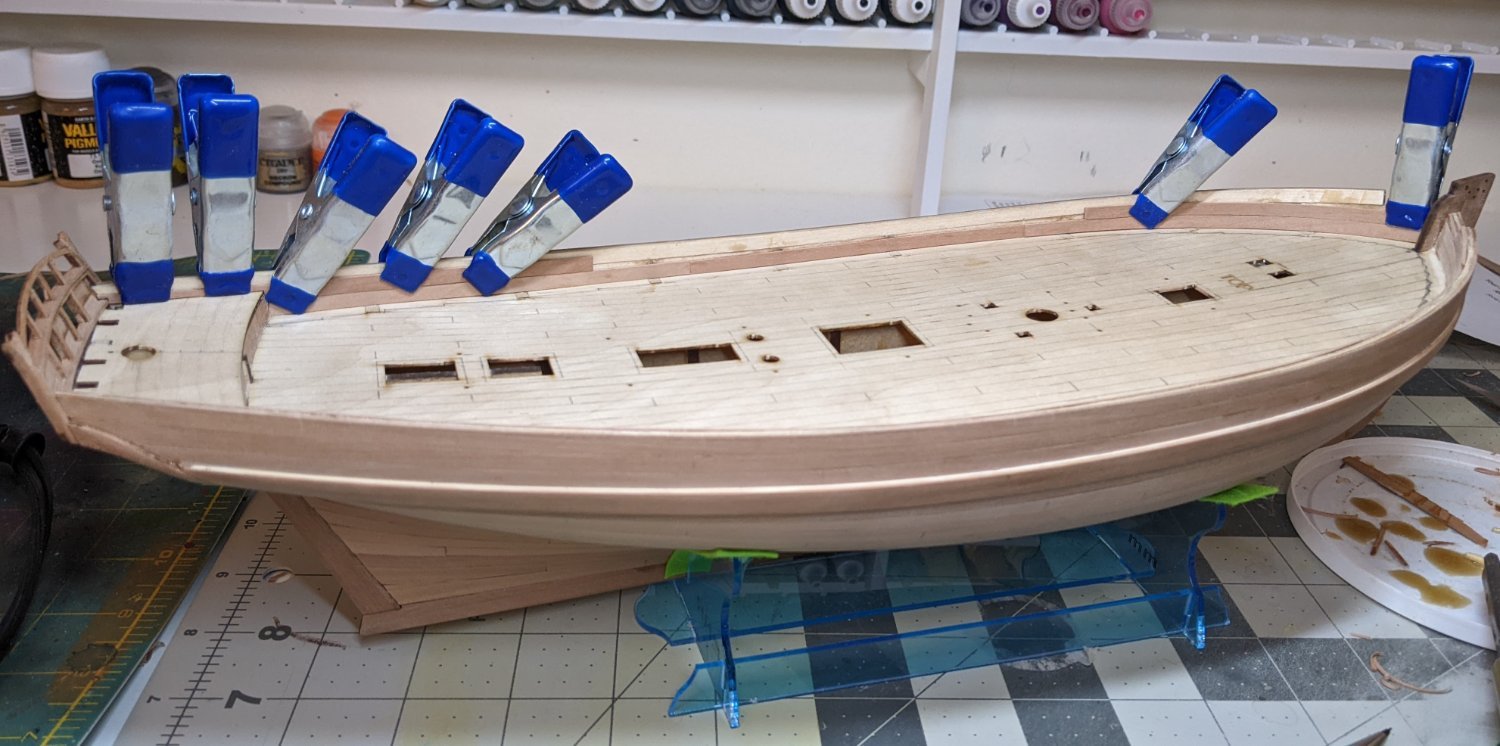
Log #18: The Inner Bulwarks and Fixing the Boom Crutches
As @Blue Ensign managed to catch, the boom crutches were turned a little outward following the run of the hull instead of inward. This is a great example to me of what a valuable resource this forum is. I had always just assumed these were purely ornamental, but now that it has been pointed out to me, the use for the crutches seems obvious.
Fortunately I had made them pretty thick and so with some careful filing I was able to remove some material to make them turn slightly inwards. You can see how much I had to adjust the angle in the picture below. Since I made them by gluing two pieces of pear together, the original line between the two pieces is still visible. They are still not perfect, but much closer to what they should be.
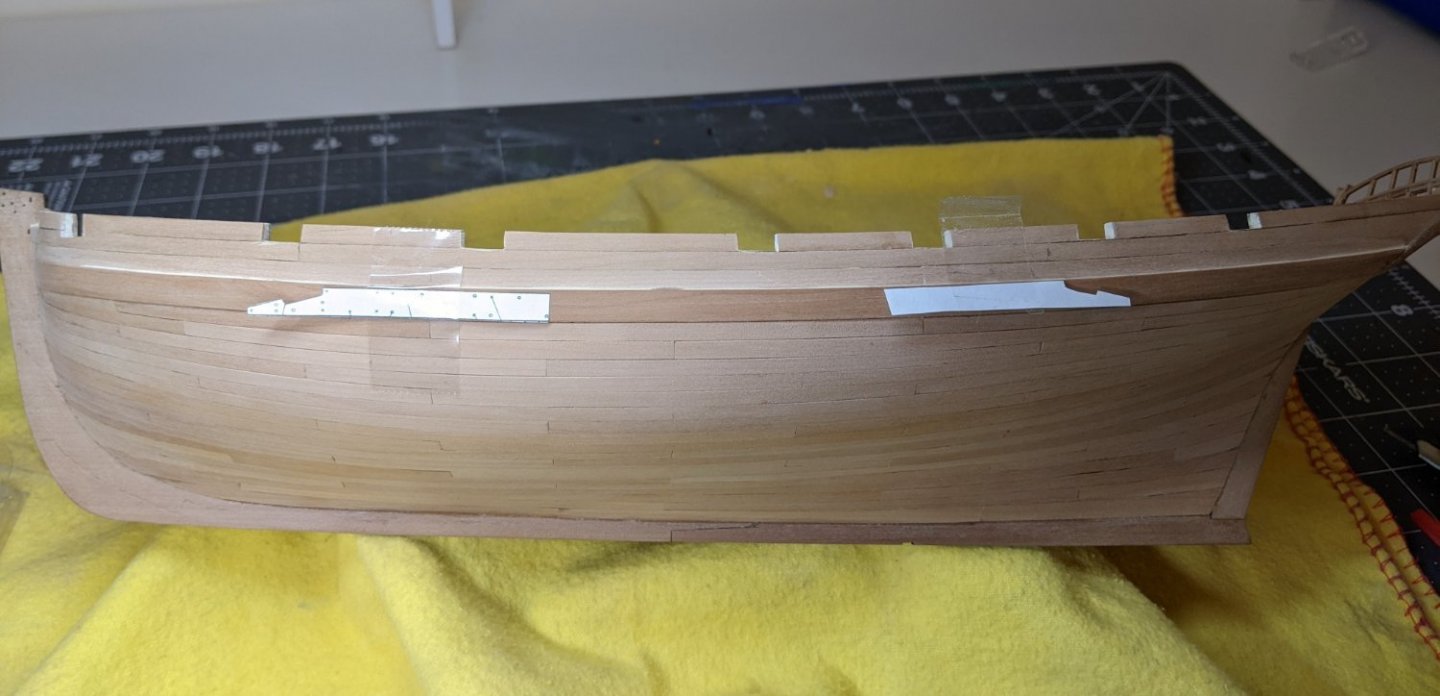
Next I turned my attention to the inner bulwarks. After much consideration I decided to adopt the approach of @jpalmer1970 and do the bulwarks before attaching the margin planks. That way I can much more easily get in there with my airbrush to paint and avoid the need for a bunch of precise masking.
The process of planking the inner bulwarks was much the same as the outside. I planked the two ends and then fitted the middle plank. The only complicated part was the shaping of the plank that ran up to the transom. Some precise cutting was required to make it fit on top of the beam I placed at the base of the transom.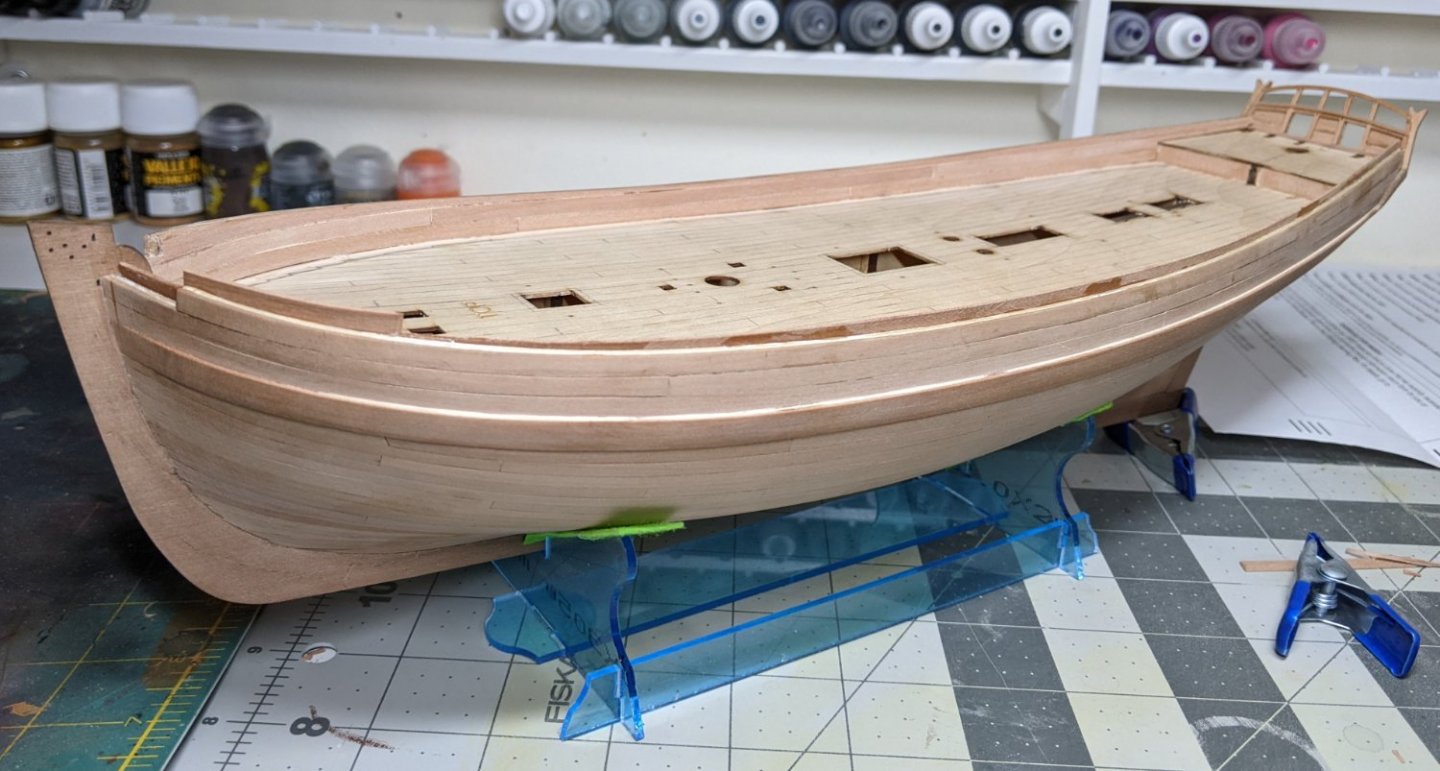
I planked without any tapering (though some slight edge ending was required). The uppermost planks then stuck up over the top of the Bulwarks (as seen in the near bulwark in the above picture). Since gun ports will be cut all the way through the upper plank, I just planked it as one big plank from bow to stern. Once the glue had fully dried I simply came back with my knife to cut off the excess material. You can see the final effect on the far bulwark.Next up, more sanding and cutting the gun ports.
-
5 hours ago, desalgu said:
I got the small dome painted and it took all of 2-3 seconds to spray. I'm sure I could have done that even when cold.
I find the biggest problem with my airbrush is the set up and cleanup time. I would use it more if I didn’t have to clean it after I was done.
-
On 1/7/2022 at 6:41 PM, desalgu said:
It's been cold here, like 10 deg-F or lower, which is too cold for me to airbrush in garage, so I tried brushing metallic paint. I've never had much luck doing that, and this was no exception. I've done 3-4 coats and brush marks still show. It's supposed to warm up tomorrow enough to try airbrushing, so hoping that will solve the problem.
If you are using a small hobby/makeup airbrush you can do it inside provided you have a big open space. When I airbrush I set up in the kitchen/dining room. I just do it at night after all the kids are in bed and cover the whole dinning tale with a cheap dollar store table cloth. It doesn't produce much paint so as long as you are wearing a respirator while painting, the room is large and you house has an air exchanger vent in the room you should be good.
-
53 minutes ago, Blue Ensign said:
Sorry to confuse,
The cut of the recess of the crutches should be angled slightly inboard so that the boom rests in them when moved across from the central line of the mast.
B.E
Ah now I understand. No I did not check this and when I went back to look, infact I have them angled slightly outwards due to the run of the hull.
I think I can somewhat correct this through some careful filing so that at the very least it is not noticable. Thanks for the tip. This is exactly the sort of thing that would never have occured to me, but now that you say it, it seems obvious 😃.
- jpalmer1970 and Obormotov
-
2
-
It looks fantastic, great job!
- Saburo, FriedClams and JpR62
-
3
-
1 hour ago, jpalmer1970 said:
Hi,
I planked the whole bulwarks and then butted the margin plank up against them. I was able to bend a couple of the boxwood strips to use as the margin planks.
That looks fantastic @jpalmer1970. Maybe my problem with the bending was I was using a wider stock because I was thinking I needed it to go under the inner bulworks.


HMS Sphinx 1775 by Blue Ensign - FINISHED - Vanguard Models - 1:64 scale
in - Kit build logs for subjects built from 1751 - 1800
Posted
Looking good BE. You may have address this previously, but why are you using the false deck at all? Couldn't you just plank over the beams (as would have been done on the real ship)?