


Thukydides
-
Posts
787 -
Joined
-
Last visited
Content Type
Profiles
Forums
Gallery
Events
Posts posted by Thukydides
-
-
41 minutes ago, AON said:
I was lucky enough to attend the Admiralty Models Frieze painting and Flag Workshop held in Niagara-on-the-Lake, Ontario, Canada (30 minutes from my home) in 2015.
The images attached are what I did at the workshop.
This is a really helpful post. I really appreciate you taking the time to detail all this.
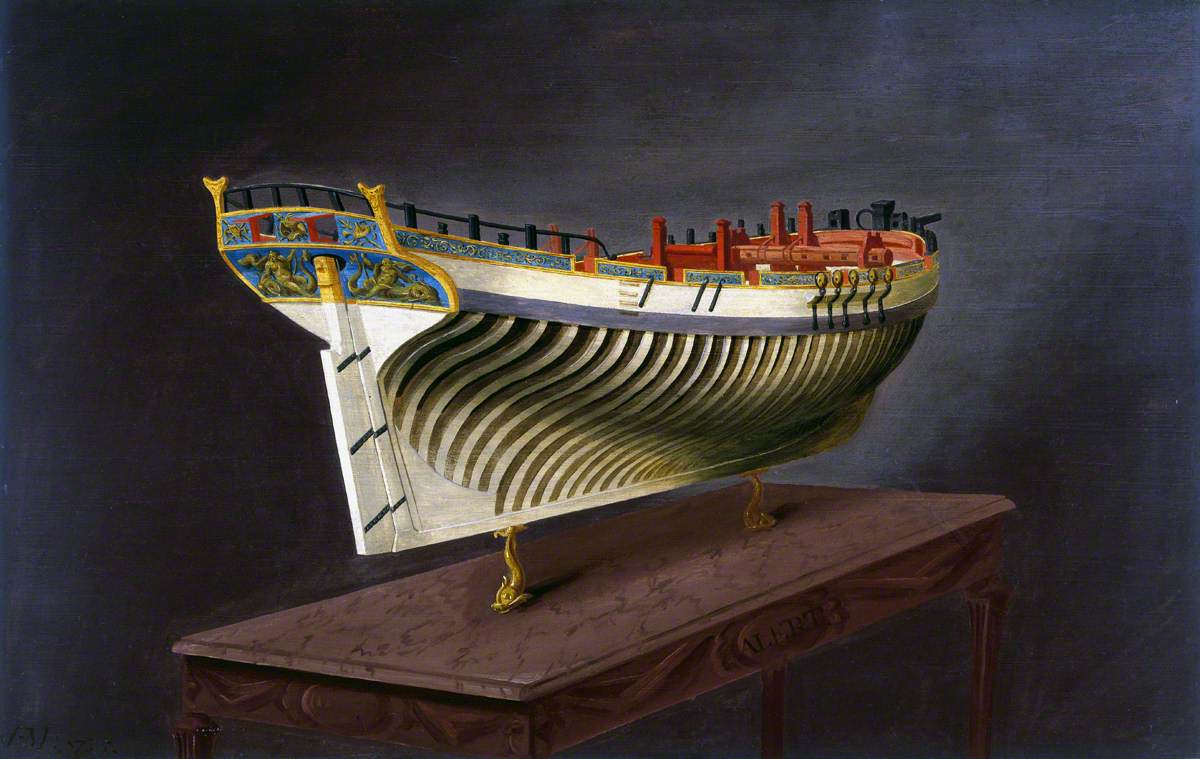
27 minutes ago, Gregory said:I trust you have seen these images from the science museum. It is the best I have been able to find.
I had seen that picture, but the one you have linked is a higher resolution than the ones I had been looking at. This one is detailed enough I may be able to use it to copy. Thanks
- Marcus.K., Gregory, jpalmer1970 and 1 other
-
 4
4
-
11 minutes ago, AON said:
Has anyone responded to your painting question?
I thought I read some people painted on paper and then glued the paper onto the model.
This seems more comfortable in many ways.
No I haven't gotten much, but it is a pretty specialized topic and so I wasn't expecting too much :). I was mostly looking for any contemporary examples of the painting style (with high resolution photos) people could point me towards to try and emulate (most of the models I find by googling either don't have this or they are taken too far back to see the details properly). Though if anyone who has experience painting frieze wants to chime in I am more than ready to take advice.
I vaguely remember reading somewhere about doing it first on paper, the issue for me is the time to do that would have been much earlier in the process to try and avoid it looking like a piece of paper glued to the model. The idea of painting the frieze is more of a sudden thought of mine. Also I suspect it won't look as good as if you directly paint onto the model, there is a subtle different texture you get painting on paper.
There is also the printing option (as Chuck did with the Winchelsea kit). My problem with this is though it looks very nice (better than just sticking on the PE that comes with the kit), I can always tell it was printed.
I am still of two minds whether to attempt this. I may try a few more practice versions and if I am happy enough I will proceed. If not I can always leave things as they are. Part of this is being driven by my thoughts about what I might try after I get the alert done and I want to practice the techniques (and make as many of the mistakes as possible) on the current model.
-
I have been considering whether or not to paint the frieze on the Alert. To this end I have been looking at the pictures of the contemporary model of the Winchelsea that Chuck uploaded to the site (link) as well as pictures of the Marshall alert painting (link) (though it is hard to find anything high enough resolution to really copy) and practicing on pieces of paper. I think I have managed to get the colour and depth down, but am struggling to get the patterns looking right.
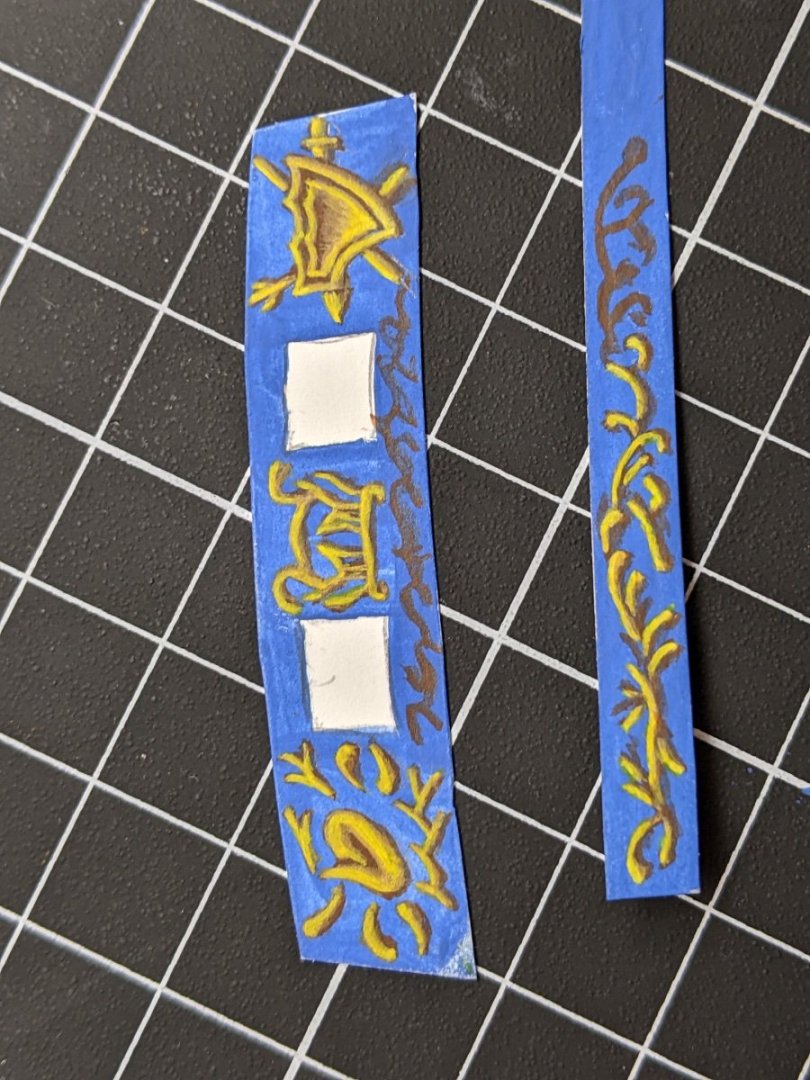
Does anyone who has experience painting frieze have any suggestions for examples I could look at / tips for getting the look right?
- Ryland Craze, GrandpaPhil, aliluke and 7 others
-
10
-
Log #35: Cannons and Other Fittings
Thank you everyone for stopping by and all the encouragement.
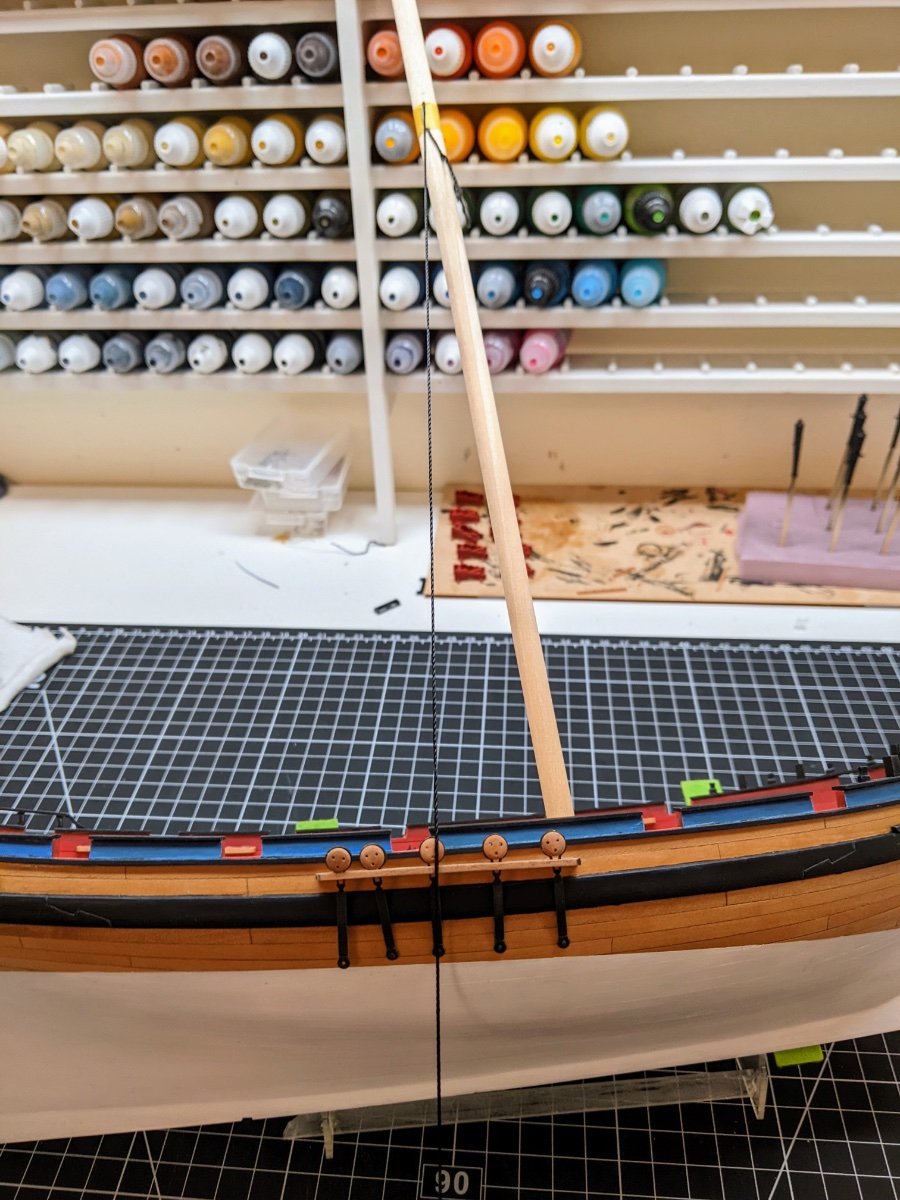
I attached the deadeyes to the hull. I can’t remember which build log I saw this in, but in it they temporarily attached a piece of string to the mast at the correct height to get the right angle. Since that seemed a good method I copied it.
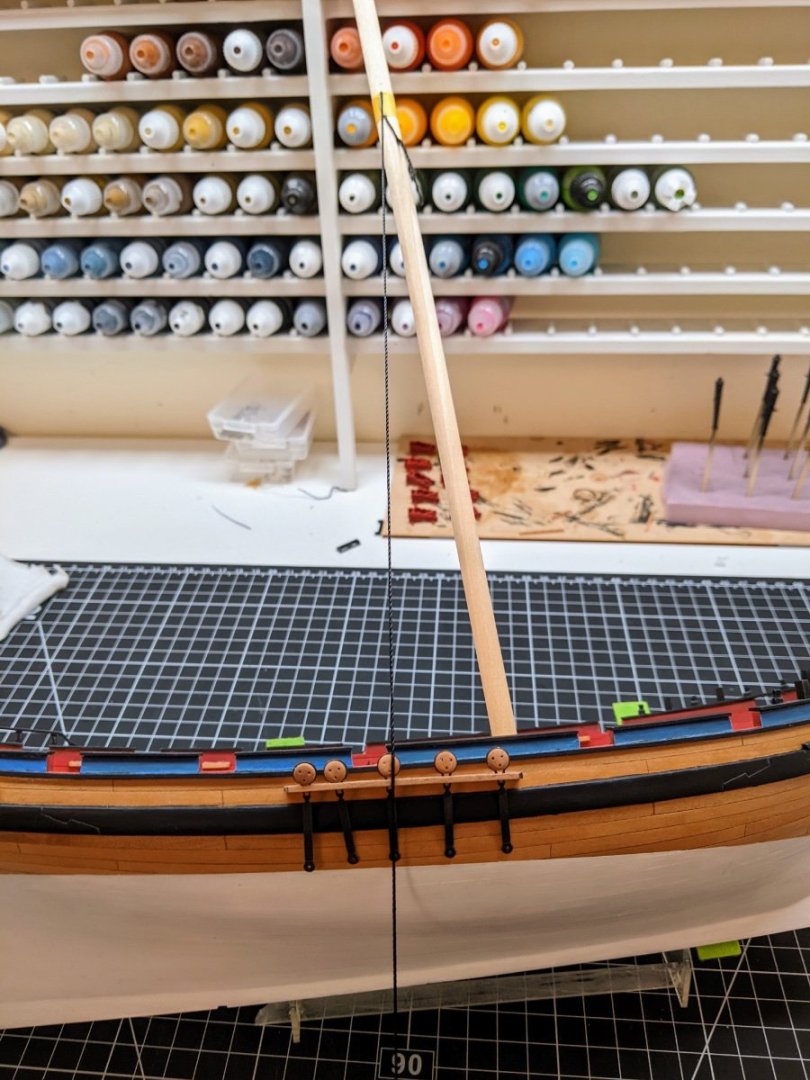
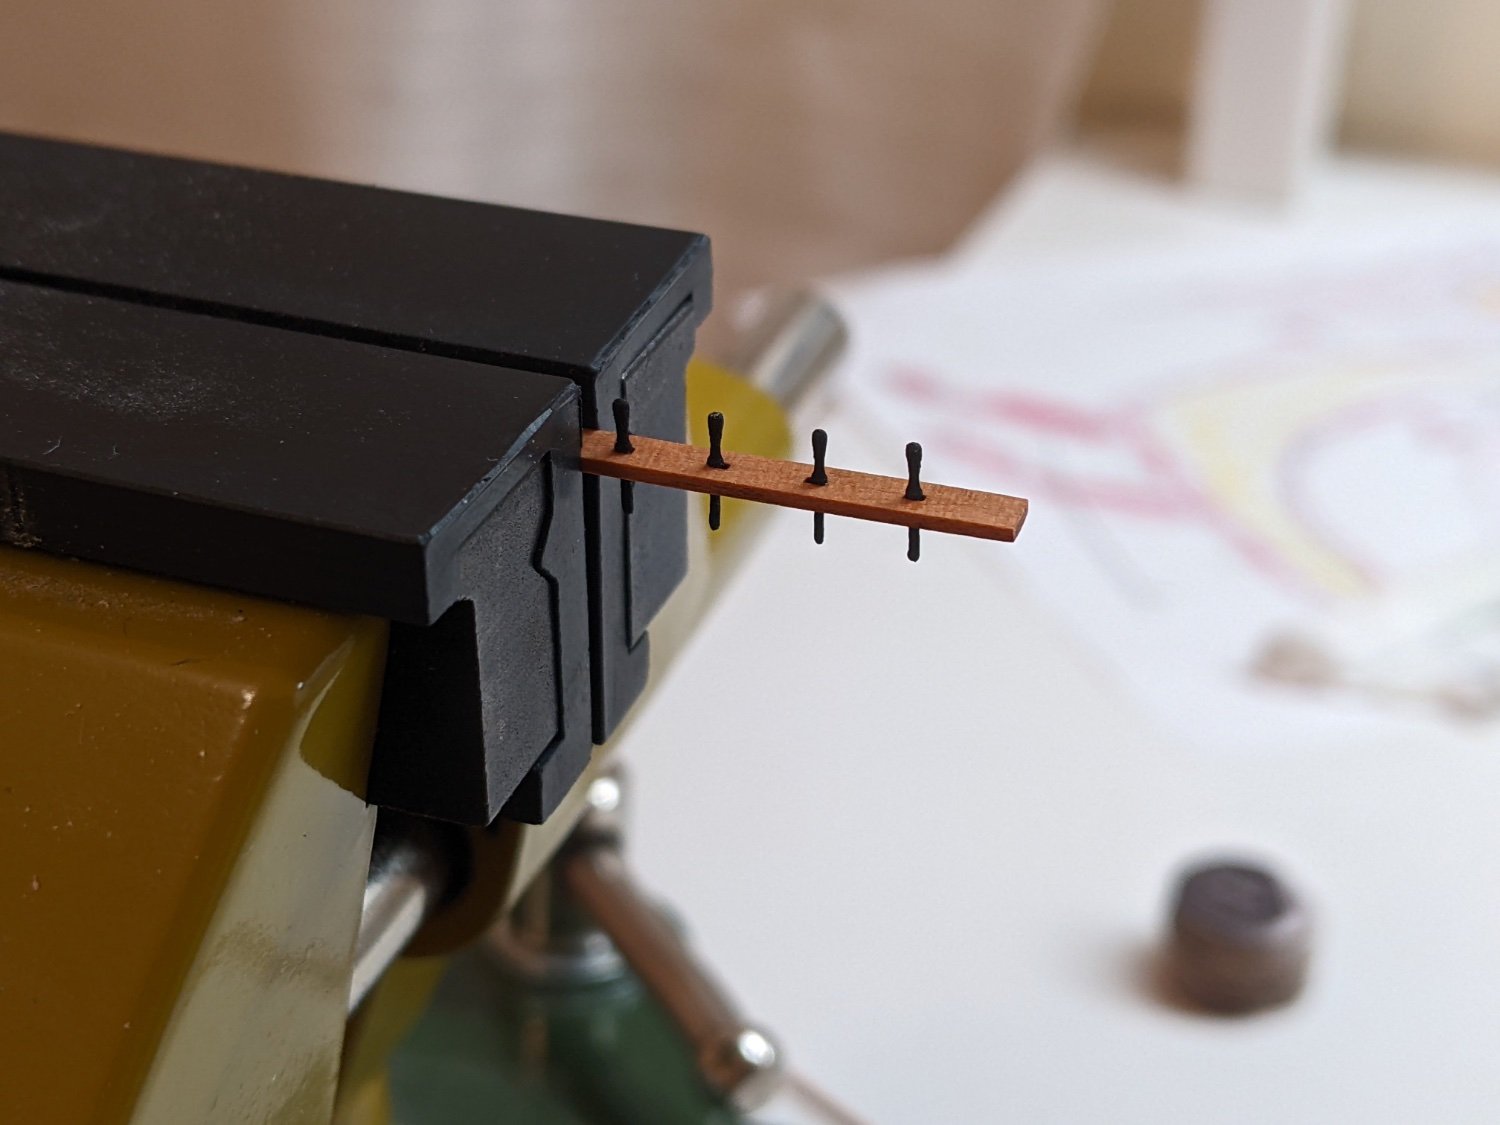
I also received some wooden belaying pins from crafty sailor which are a bit more to scale than the PE ones in the kit. I painted them black as I felt that produced the best contrast.

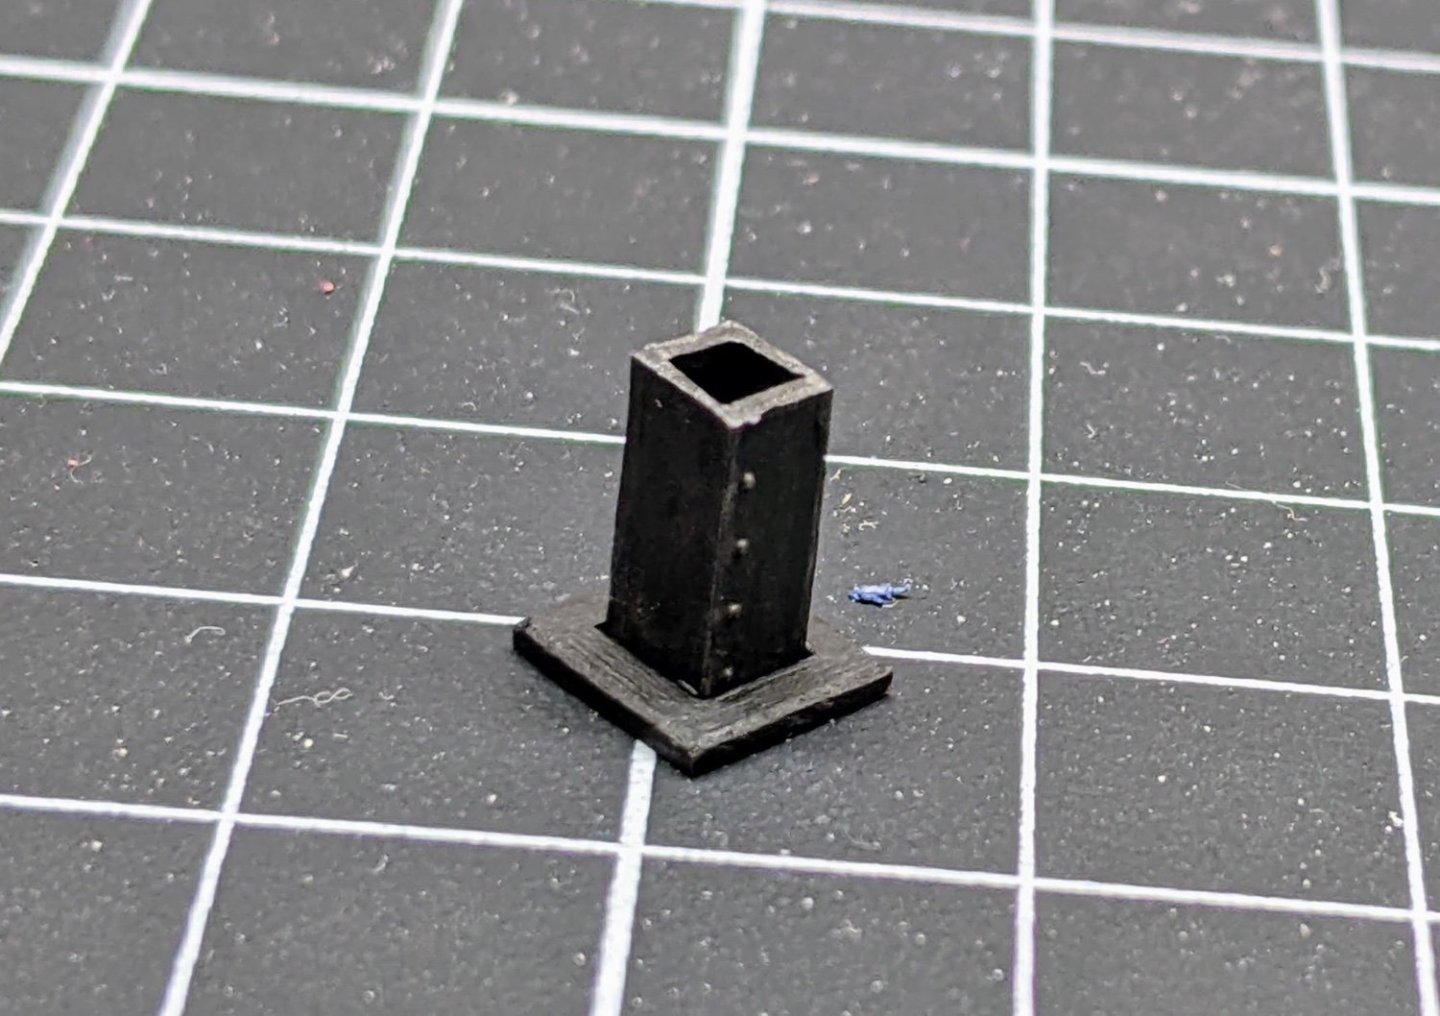
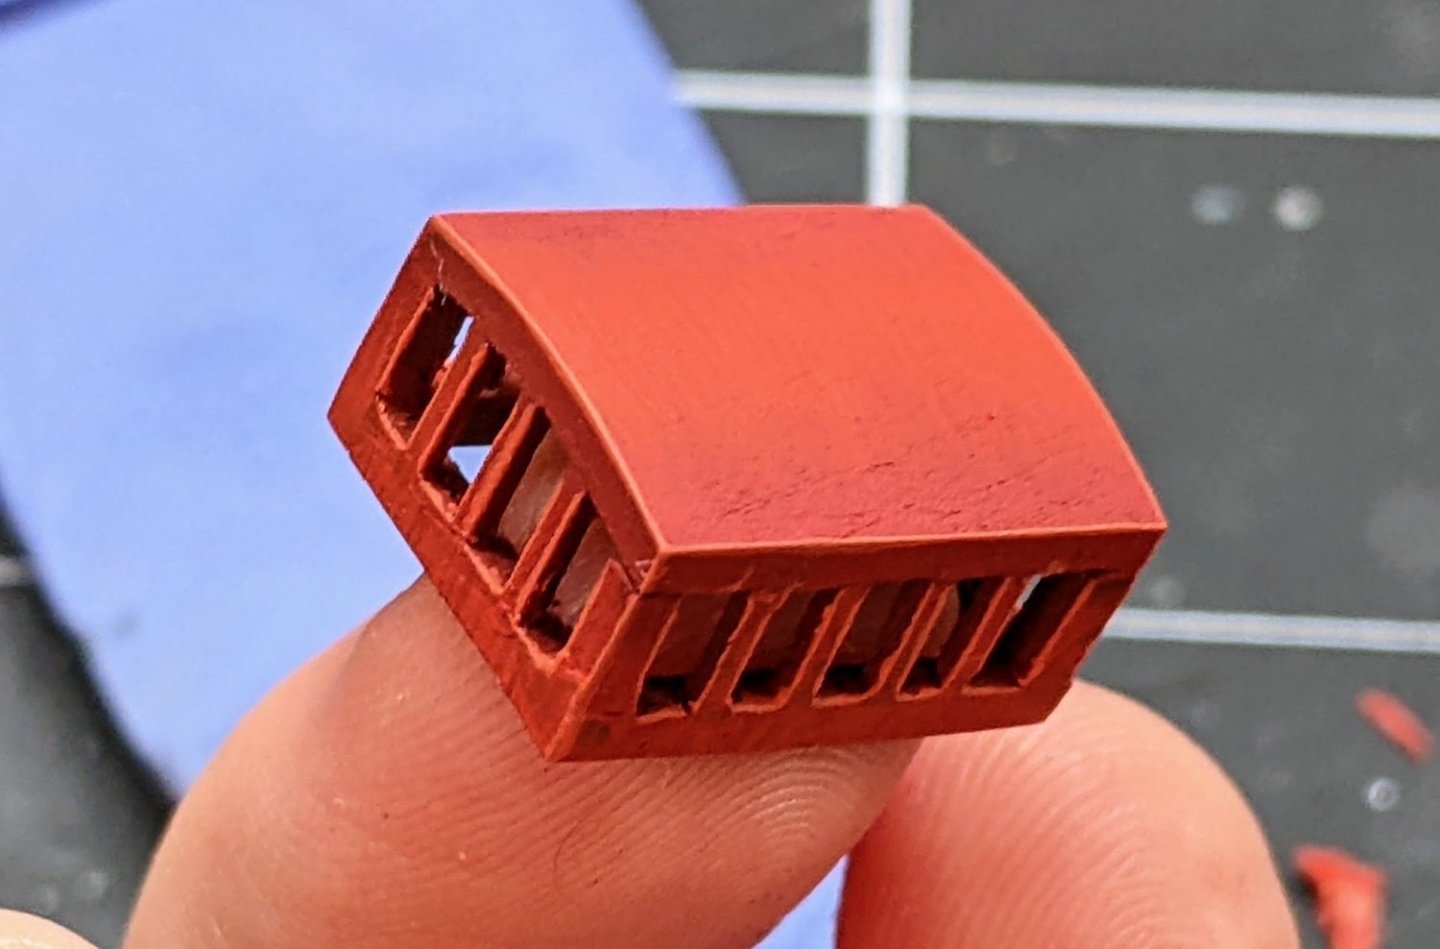
I also decided I would depart from the kit arrangement for the stove pipe. Using some random pieces of plastic from my bits box I was able to construct something roughly the scale depicted in Goodwin. Conveniently I found some pieces that had rivets on them (I think from a tank armour plate or something like that) and was able to use them to match up with the drawings in Goodwin.
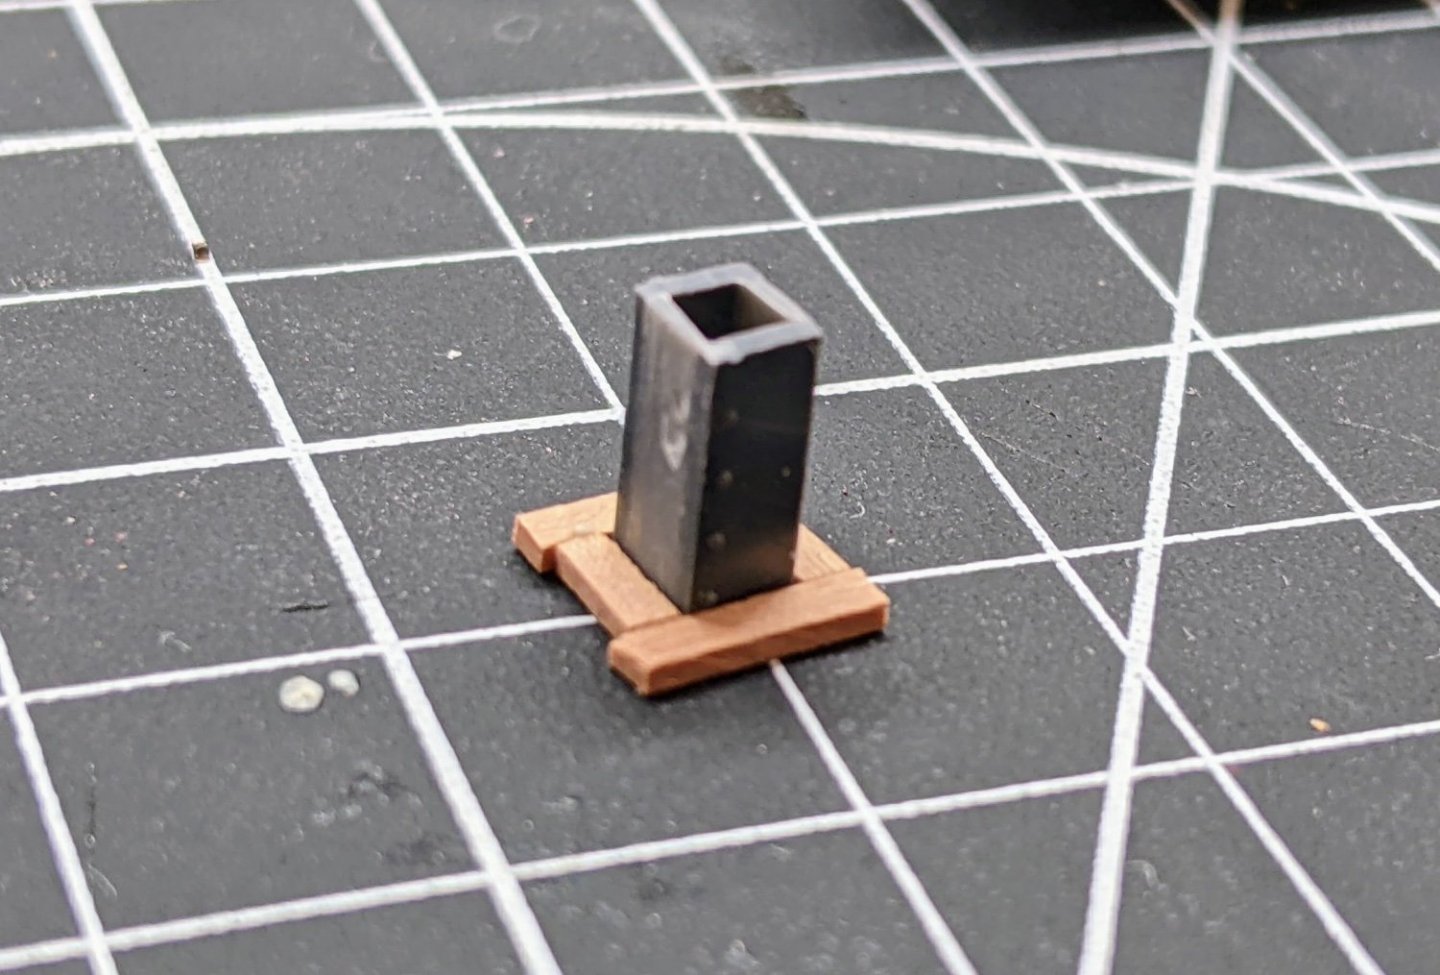
I also took some scrap pear to make a moulding around it. Once completed I painted it black and then for the stove pipe I edge highlighted with a dark metallic paint to give the illusion of metal. I also picked out the rivets with this colour.
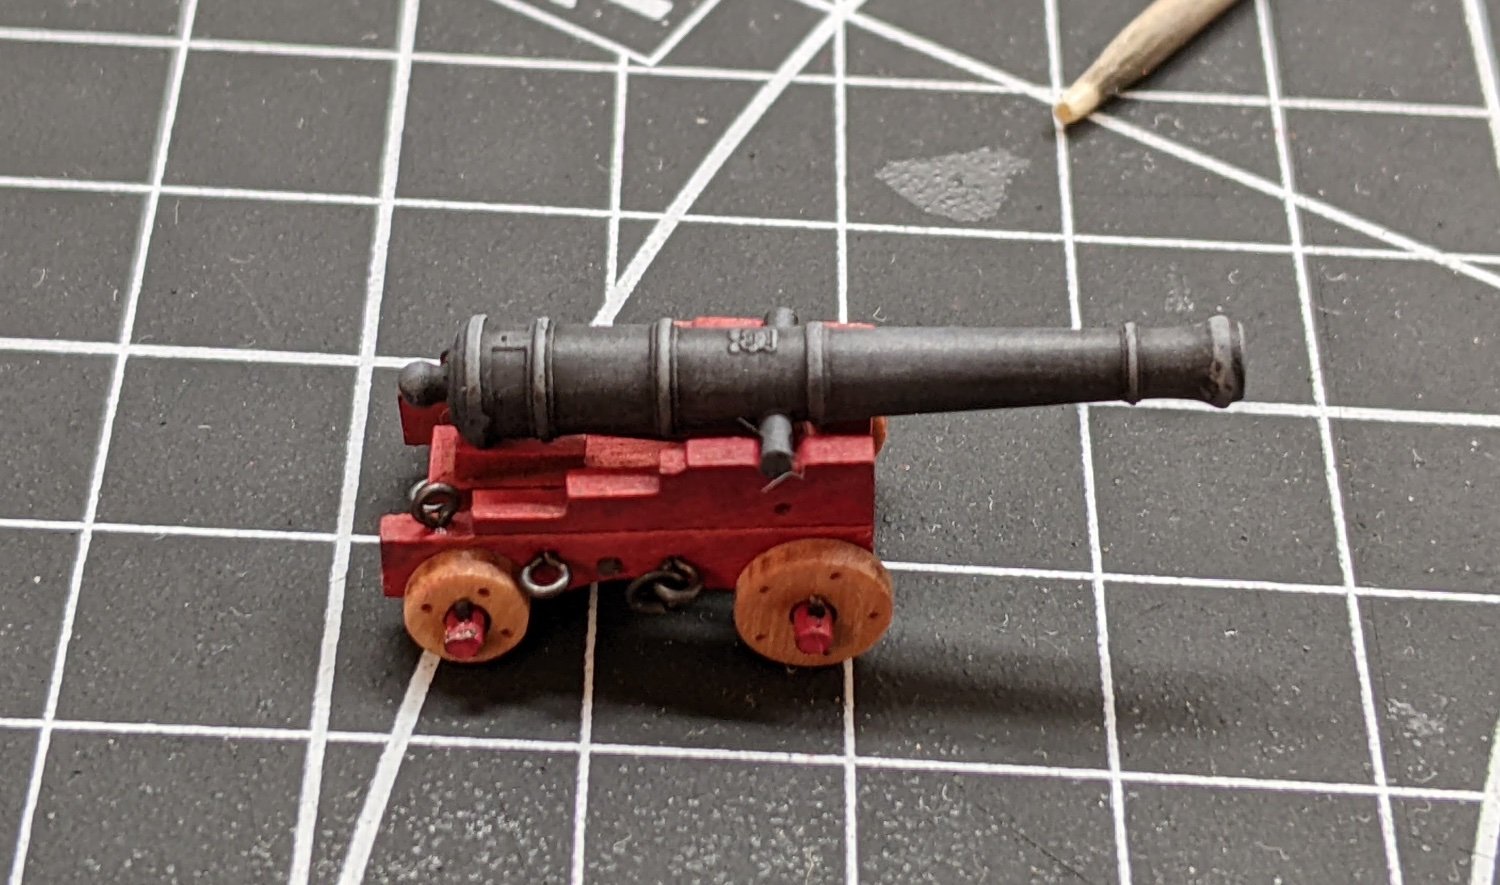
For the cannons I began by priming them black (I did this a few weeks ago in the massive painting session). I then did a heavy dry brush of vallejo german grey (a dark grey) from the top and the sides. Dry brushing is a great technique for cannons as it produces a rough finish which allows us to somewhat simulate the uneven surface of a cast iron cannon. If you are interested in the technique I would recommend looking it up on youtube (there are many videos on the subject). However I will describe the process briefly.

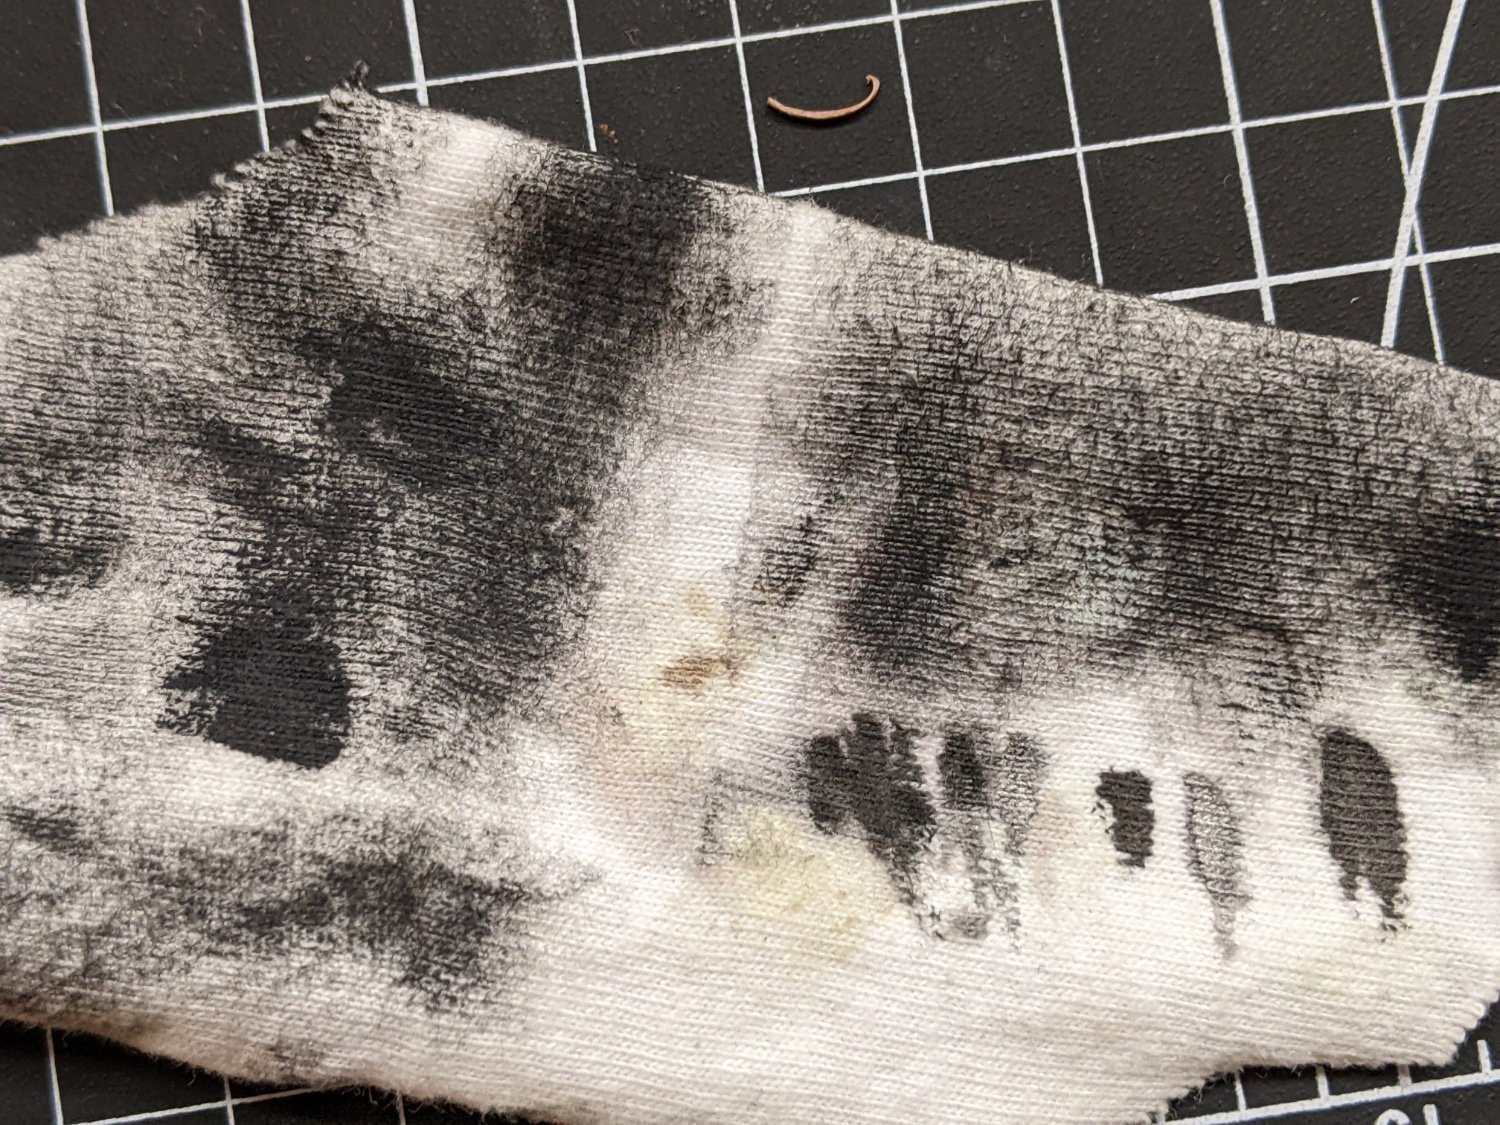
First I take a small makeup brush (I just get them at the dollar store) and stick it in the paint filling up the brush. It is important that you do not wet the brush first. Then take an old tshirt and brush until very little comes off the brush. We then with a light quick motion brush on the cannon. You can see the effect of this below:
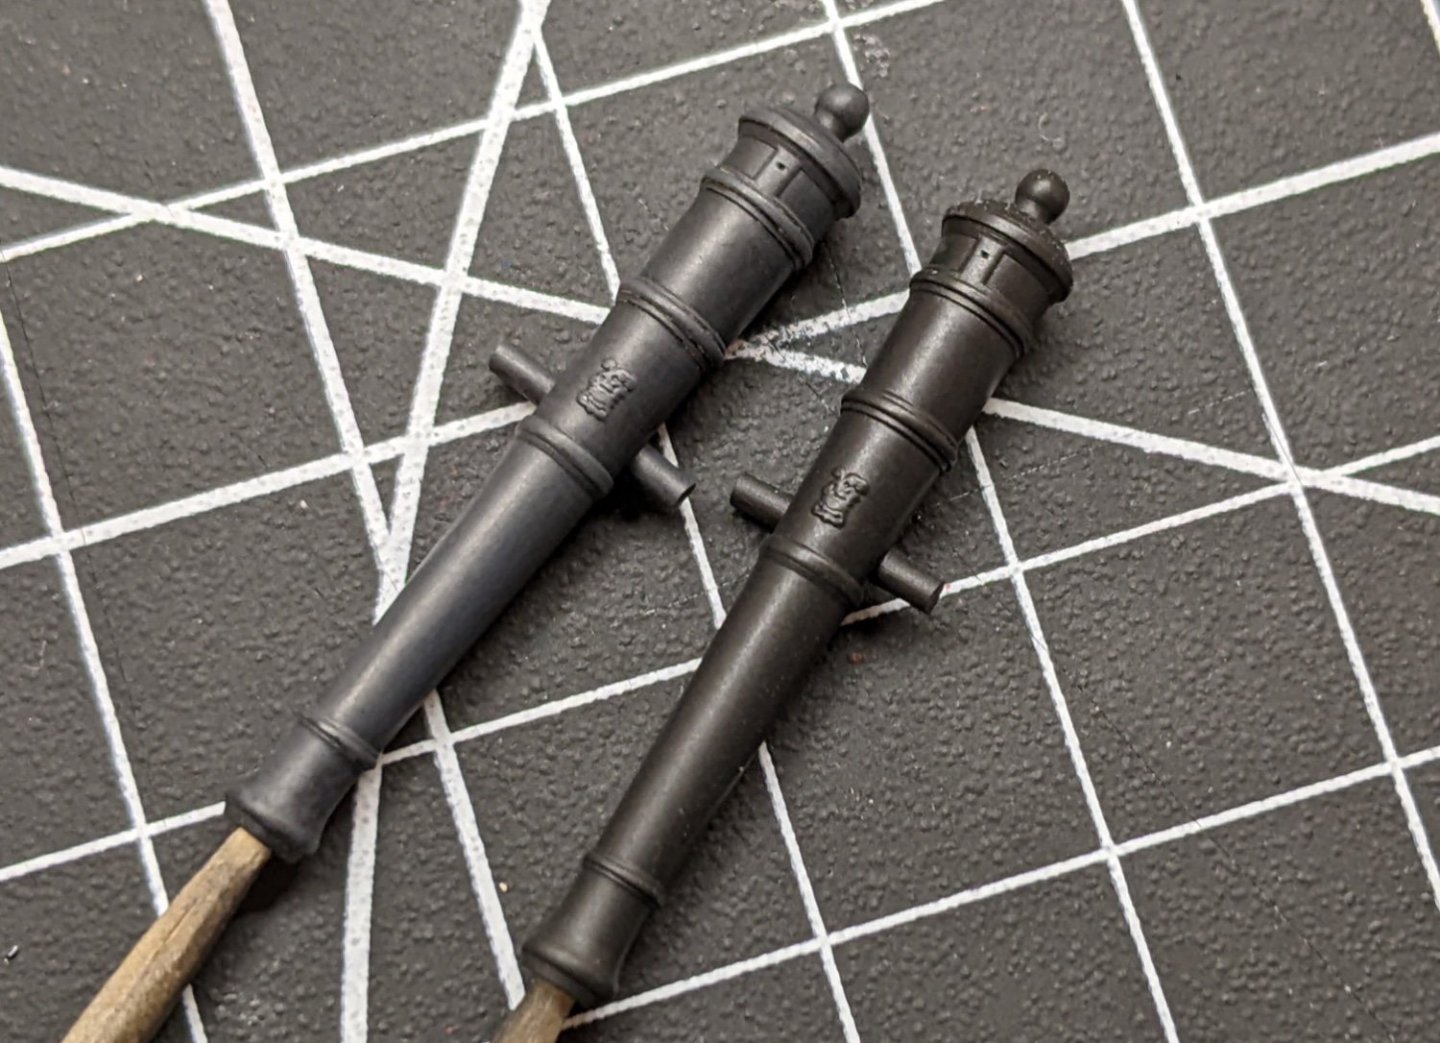
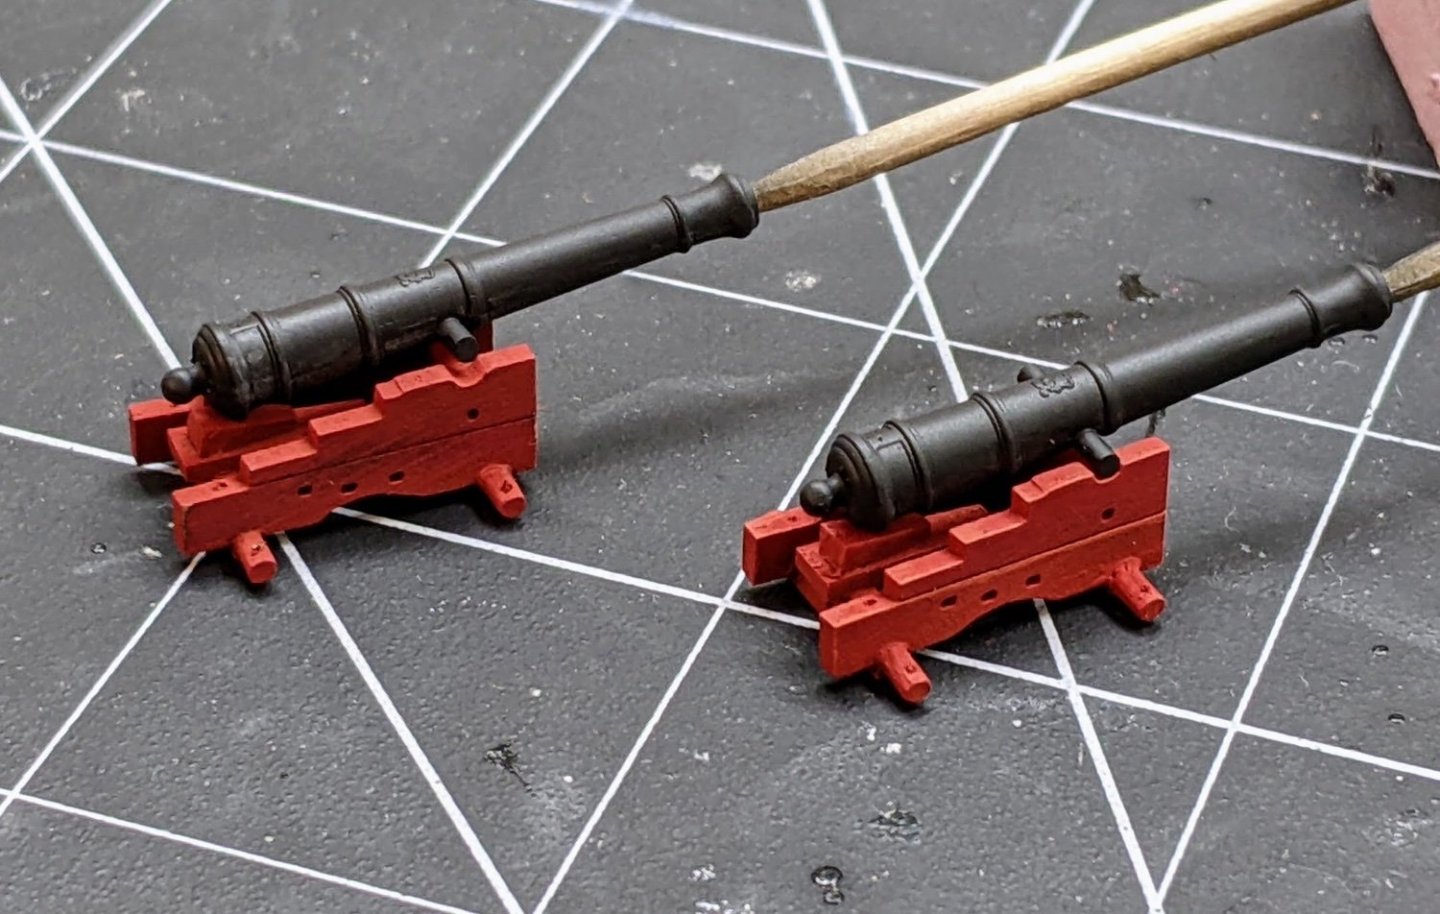
Notice how the recesses stay black while the exposed surfaces pick up the colour. I then proceeded to do two more dry brush layers. The first with a medium grey and then a final with a light grey covering less and less of the cannon each time. You have to be very careful as you use the lighter colours and really work to get the paint off the brush. Otherwise you will end up with too much paint on the cannon. The lightest colour should mostly be picking up the sharp upper edges.
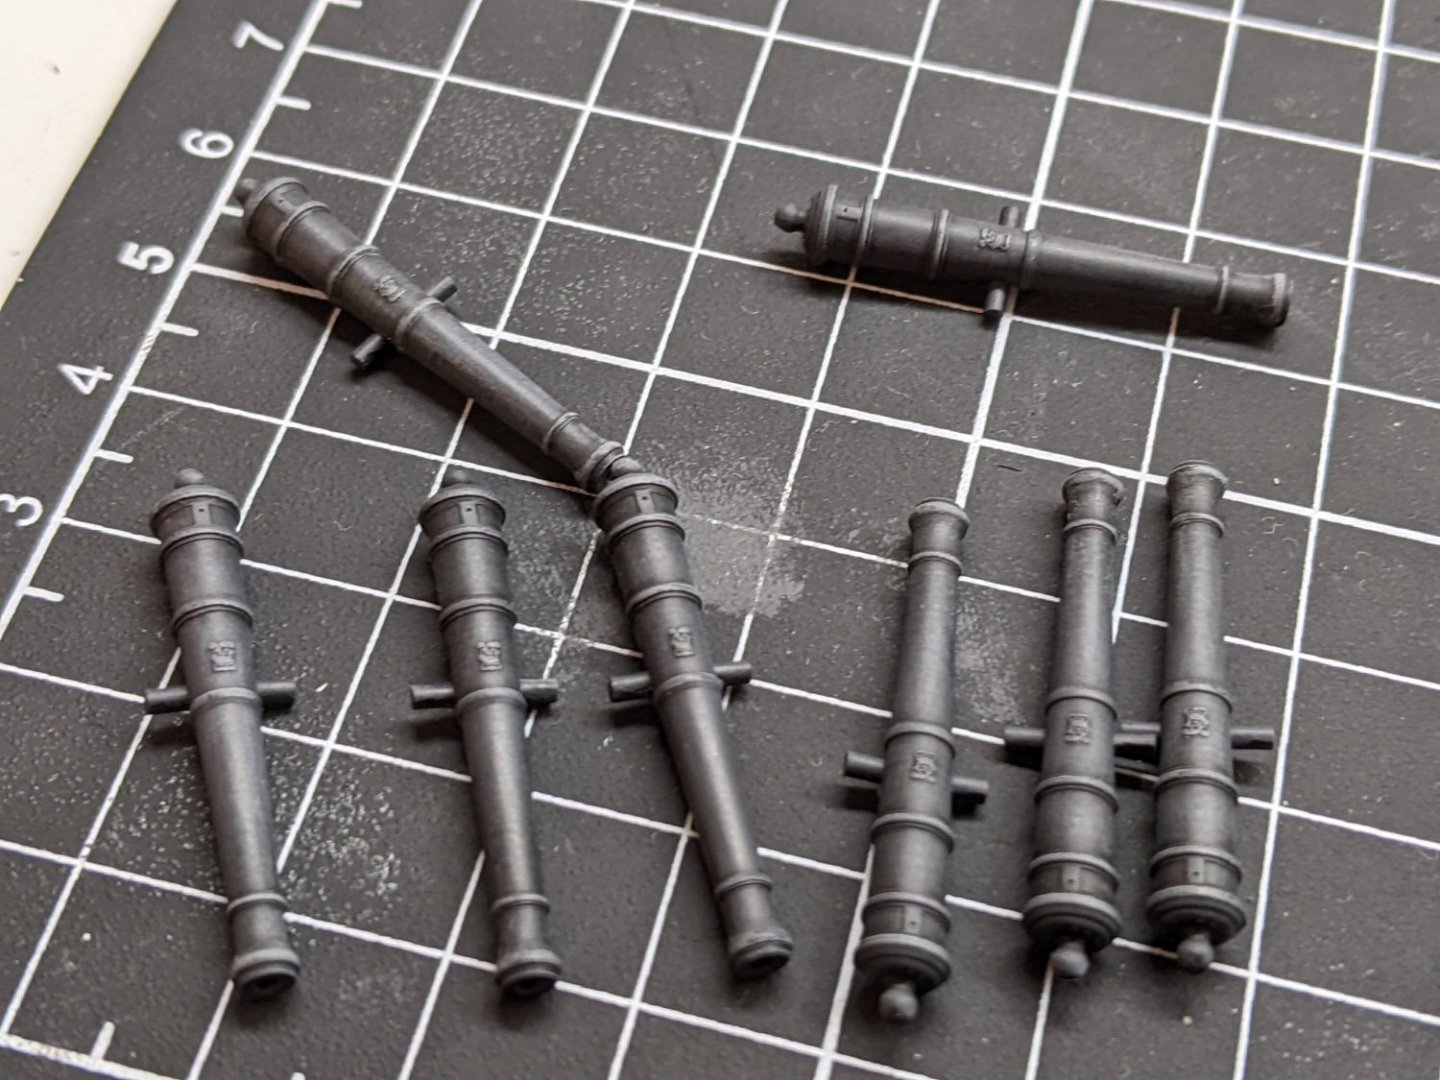
This is what they looked like once they were done and below you can see one of the cannons on a carriage.

-
1 hour ago, jpalmer1970 said:
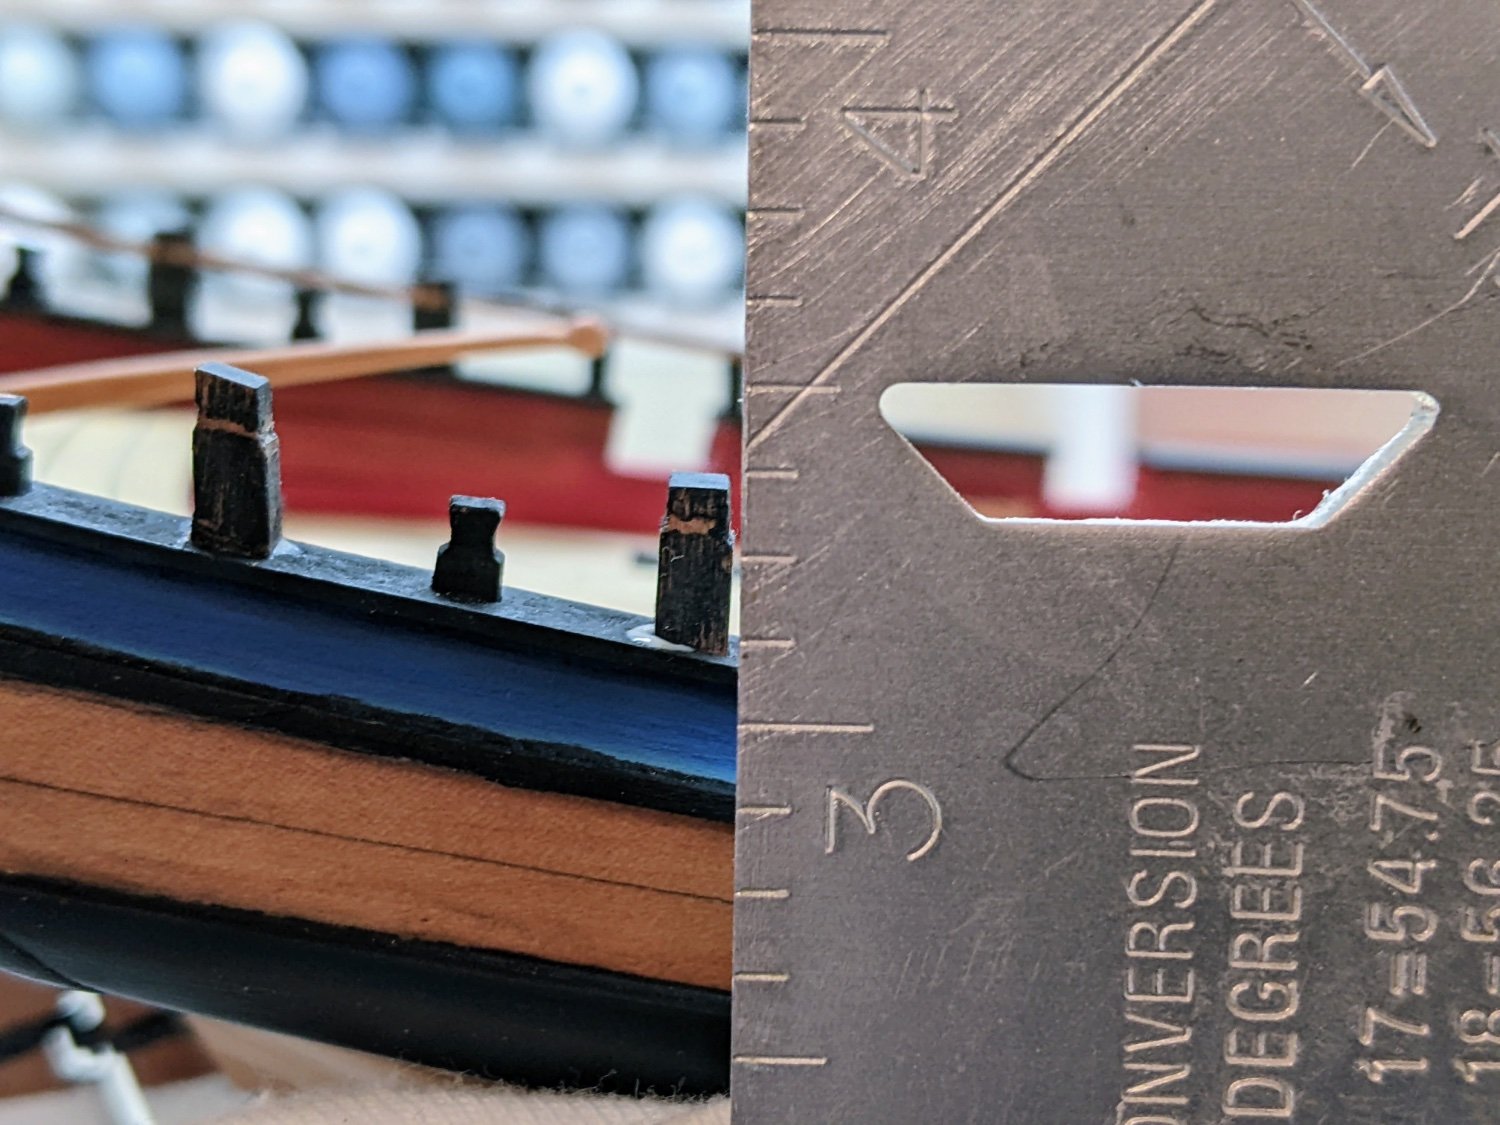
I wanted to see how different methods of doing this compared so I put together a little trial of four different caulking alternatives.
You might want to also add whatever finish you are doing before you commit to one method or another. The calling lines were much more visible for me after i added WOP than before.
Personally I like the slightly more subtle look of the pencil lines.
-
congrats, she looks lovely.
- Ryland Craze and Dfell
-
1
-
 1
1
-
1 hour ago, Gregory said:
There were 11 when I got mine.. Who got the first one?
I took #s 10 and 9 :).
- mtaylor, thibaultron and Canute
-
3
-
I am definitely interested in these.
- mtaylor, Canute and thibaultron
-
3
-
Looking good. You are doing great with the log.
2 hours ago, jpalmer1970 said:It may be a short while before I get the fairing completed as I can really only do this outside, which means I am limited to whatever spare time I can find at the weekends to work on it,
I feel you on this. I also don't really have a dedicated space I can do messy things. There are certain tasks I have to do outside because of the mess they create or in the case of airbrushing I need to wait till everyone is in bed so I can use the kitchen so they don't go running around breathing in the paint dust.
-
On 5/15/2023 at 10:29 PM, jpalmer1970 said:
The pumps look great - that is a neat little enhancement !
Thanks, I had considered doing what BE did and making the proper hexagonal shape, but I decided these would look good enough. Like much of this build it is a bit of a compromise between the kit instructions and my research. I am mostly just trying to push myself and build the skills for the next kit I do when I will likely pursue more of a "no compromises" approach. I still have lots of future mistakes to learn from :).
- jpalmer1970, AJohnson, Peanut6 and 2 others
-
5
-
Welcome, I also came from a plastic modeling background. Some of the skills will translate and others will not but as everyone else has suggested look around, pick something small to start with and you will do great.
- Keith Black, mtaylor, Ryland Craze and 1 other
-
3
-
1
-
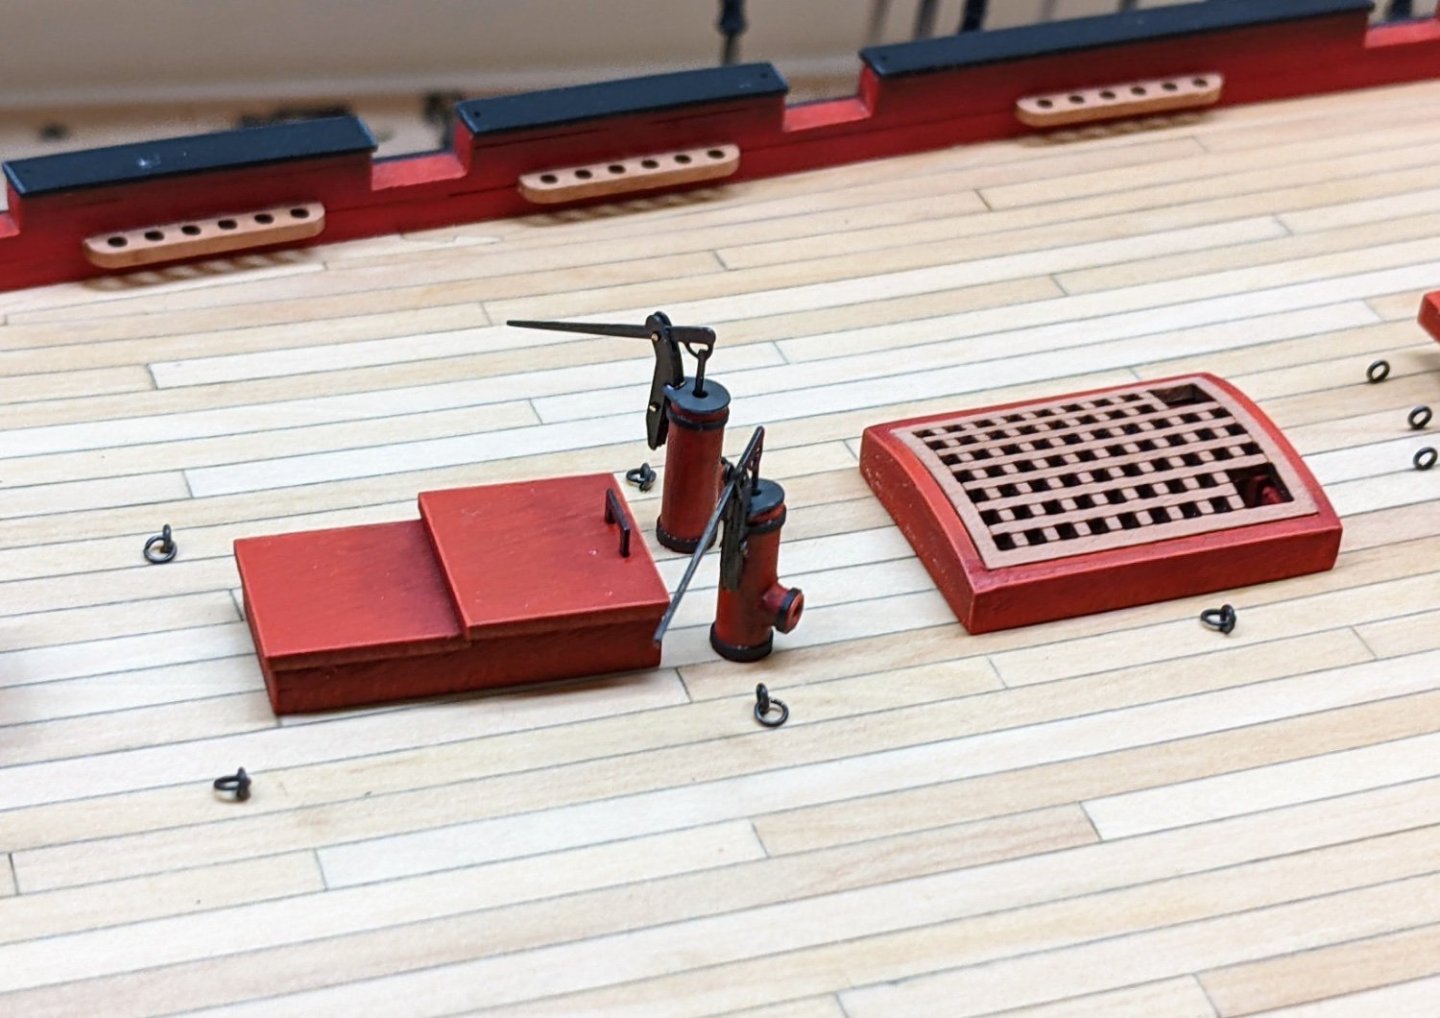
Log #34: The Pumps
I know I promised my next log would discuss the cannons, but I got distracted with a bit of a side project. In preparation for work on the cannons I had done a large blackening session.
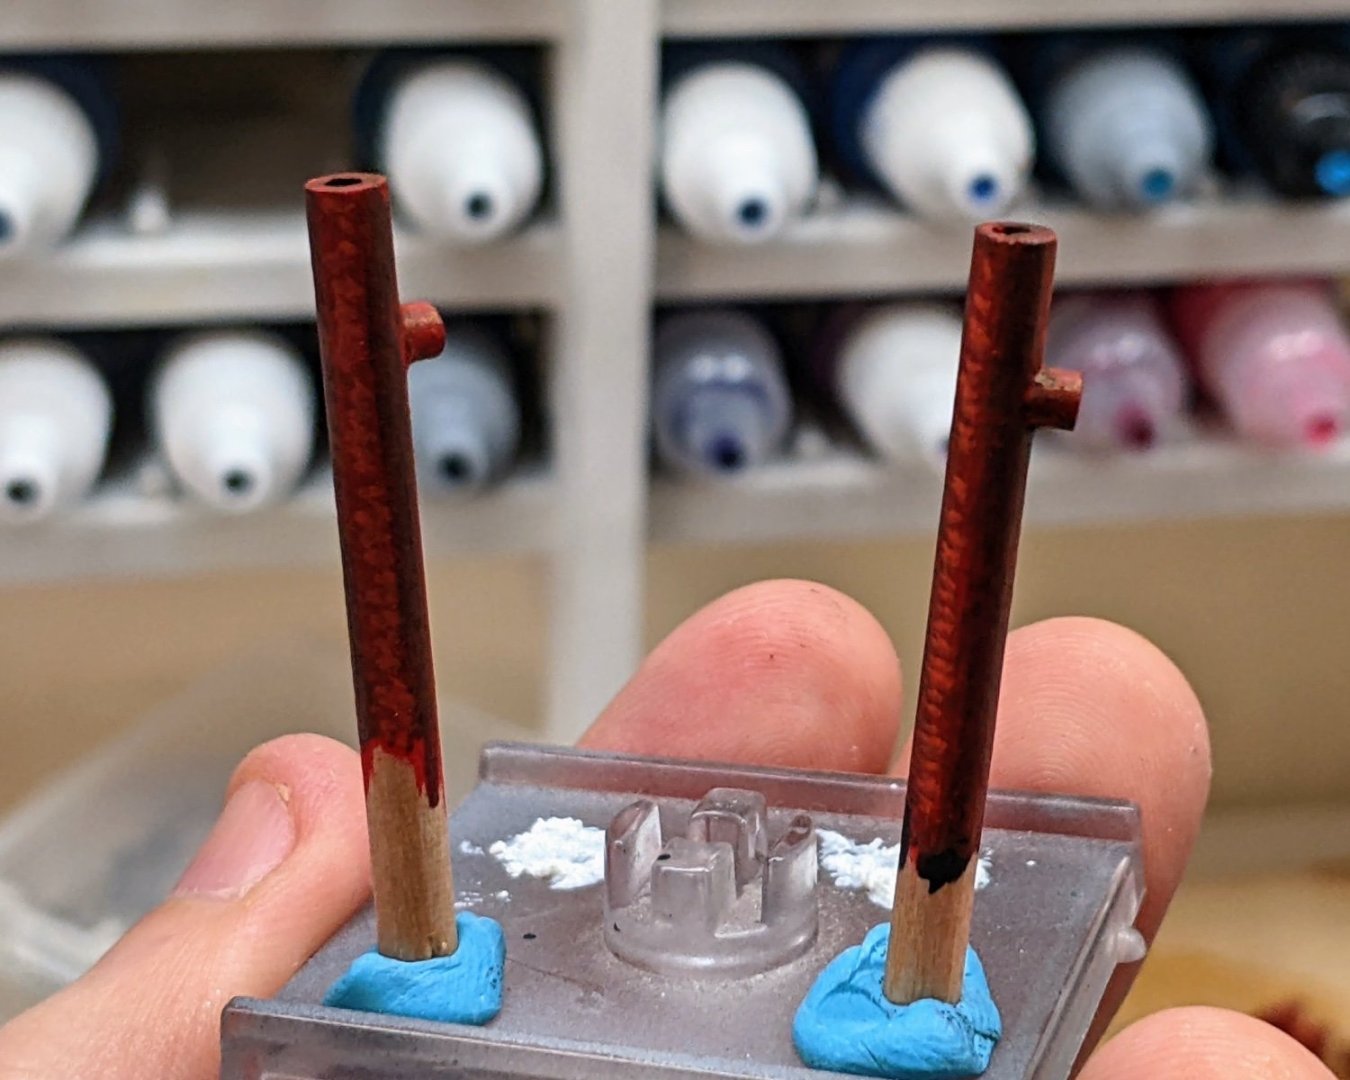
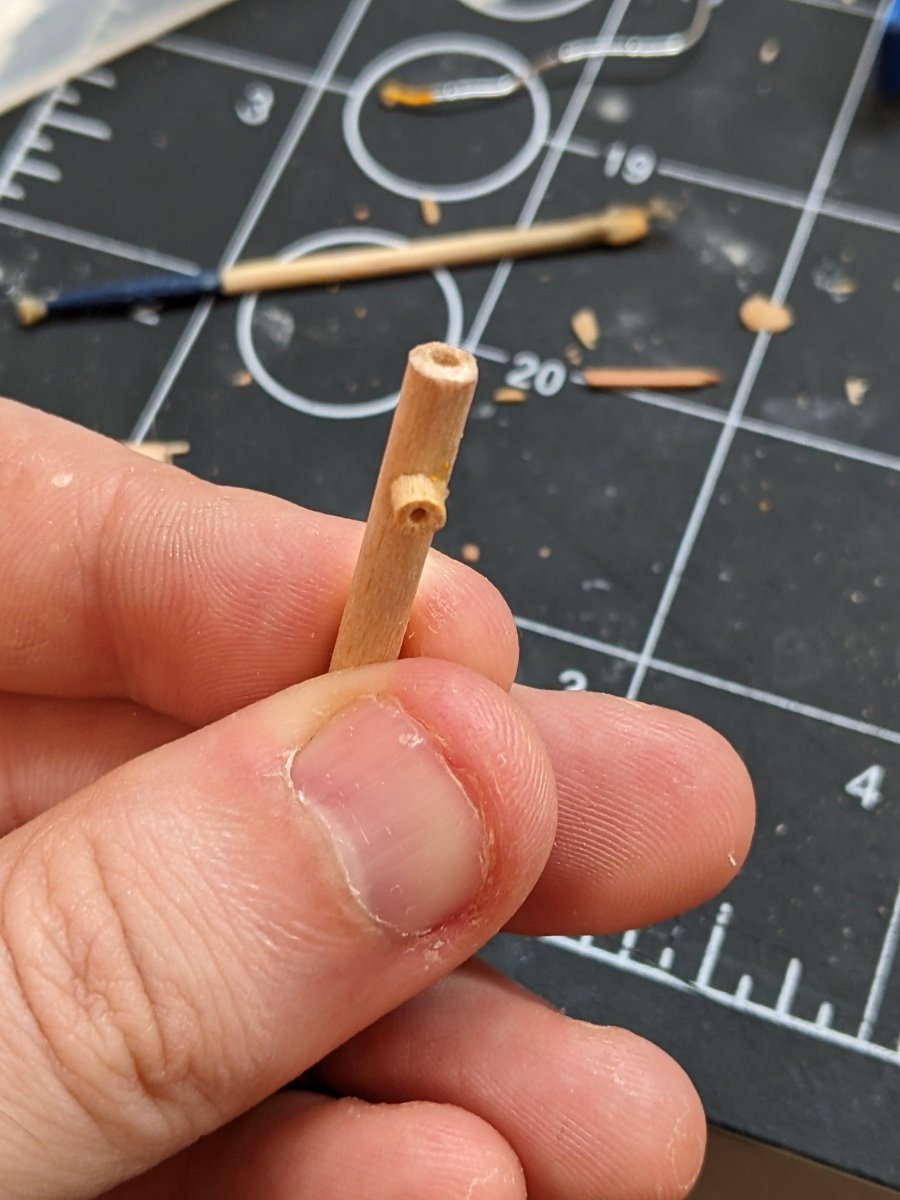
I decided to play around with the pumps as I figured I could add a little more detail. First I cut a small piece of one of the smaller dowels and glued it to the side of the main dowel. I then drilled holes to simulate the spouts. To avoid the dowel splitting I drilled small holes and then slowly increased the size by drilling with progressively larger bits.

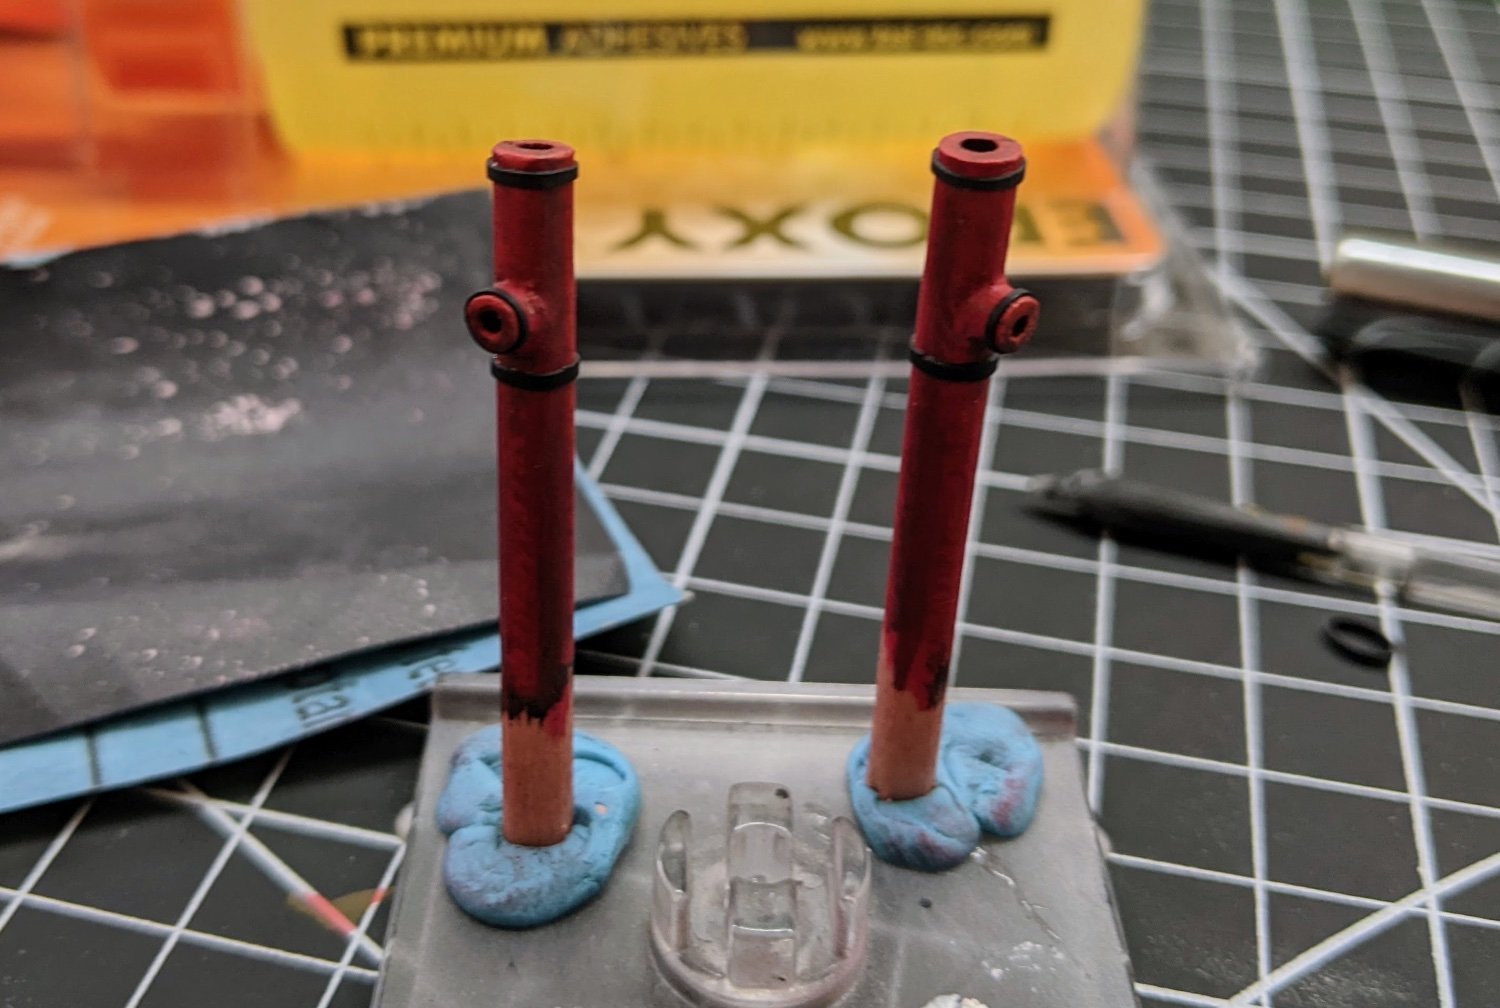
The painting process then proceeded as I have detailed in previous logs. You can see below what they looked like after I had blocked in the main highlights.
Once the painting was finished I used shrink tube to simulate the iron bands that Goodwin depicts in his book on Alert.

Finally I attached the PE and you can see below what they look like on the deck.
-
Good job on the garboard.
- usedtosail and Mr Whippy
-
2
-
-
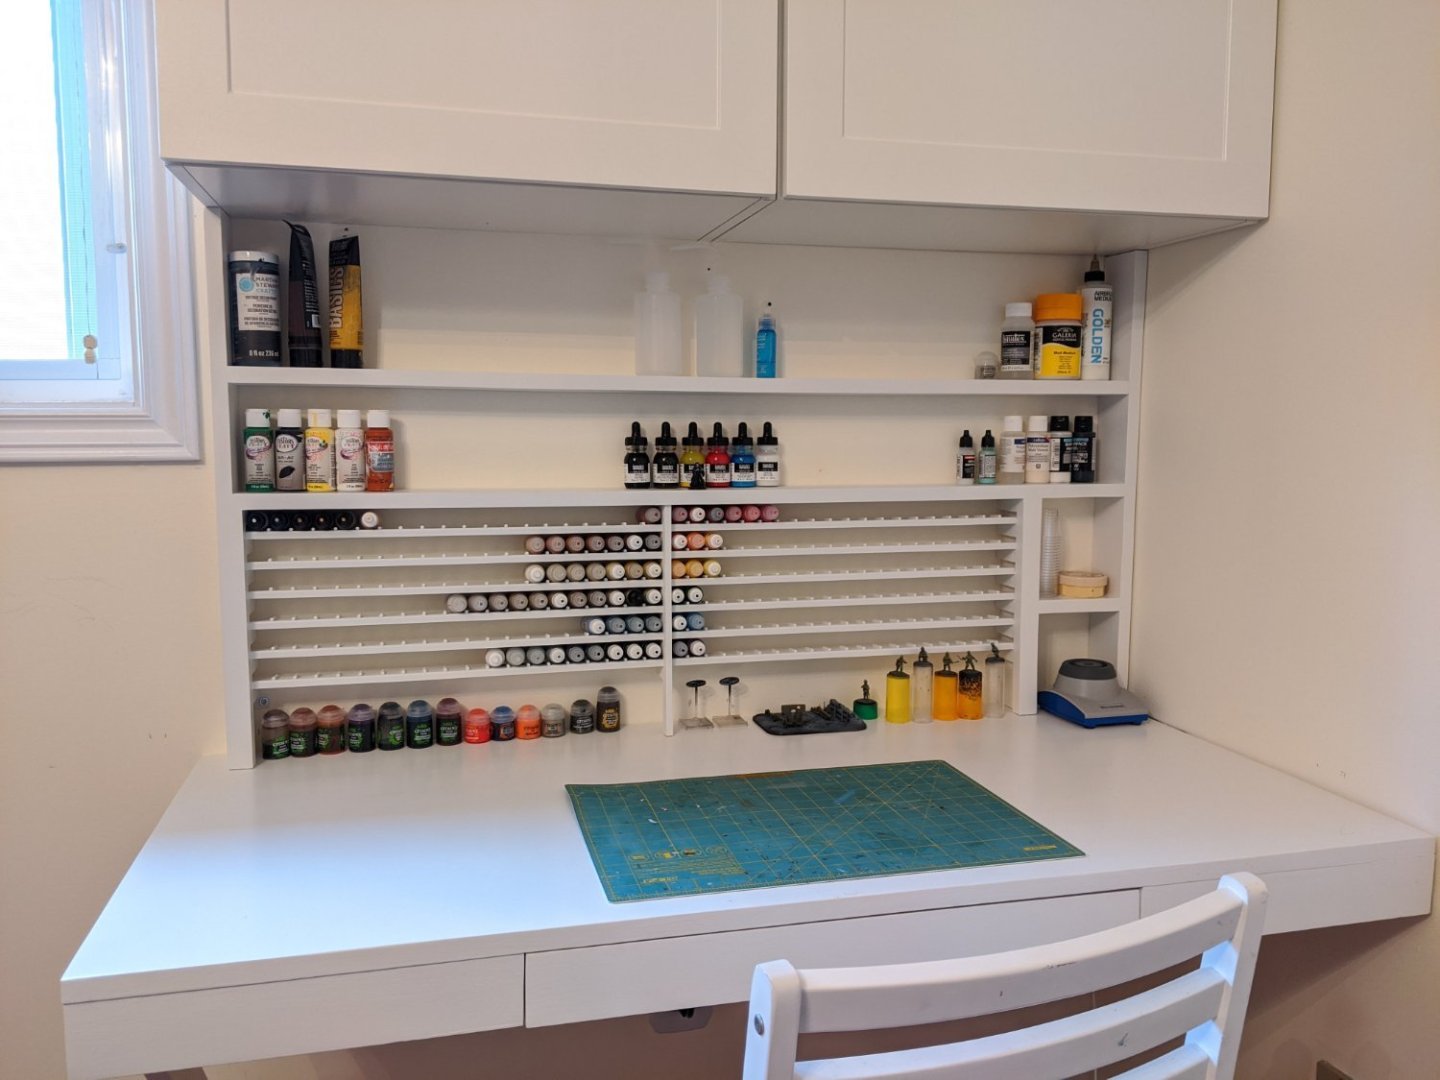
Great to see you starting a log. I will be following along.
2 hours ago, jpalmer1970 said:do many other modellers on this site work in a cupboard?
I don't work in a closet, but my space looks very similar as it is in a corner of our bedroom. This is the issue when there is no spare space in the house. I have to keep my desk clean though or my wife gets mad because it makes the bedroom look untidy. This is a bit of an older picture, but it hasn't changed much apart from the shelves getting filled up and me getting a bigger cutting mat.
- Bryan Woods, yvesvidal, jpalmer1970 and 1 other
-
4
-
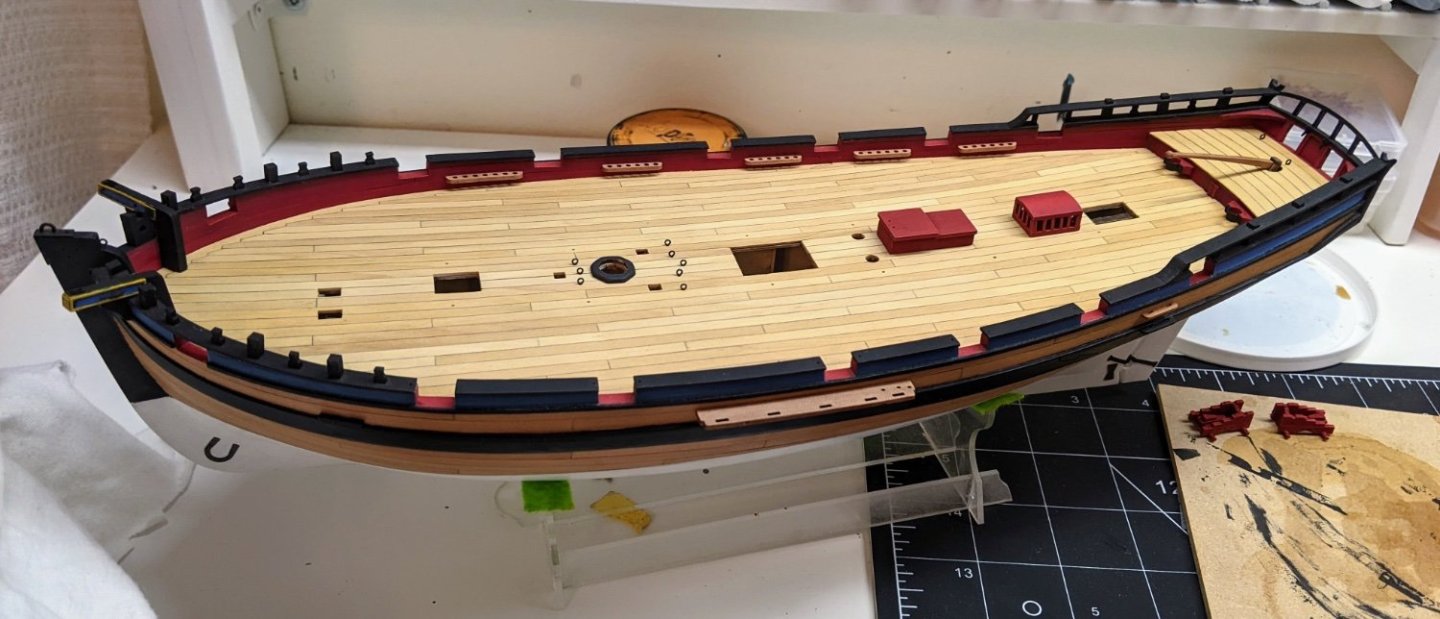
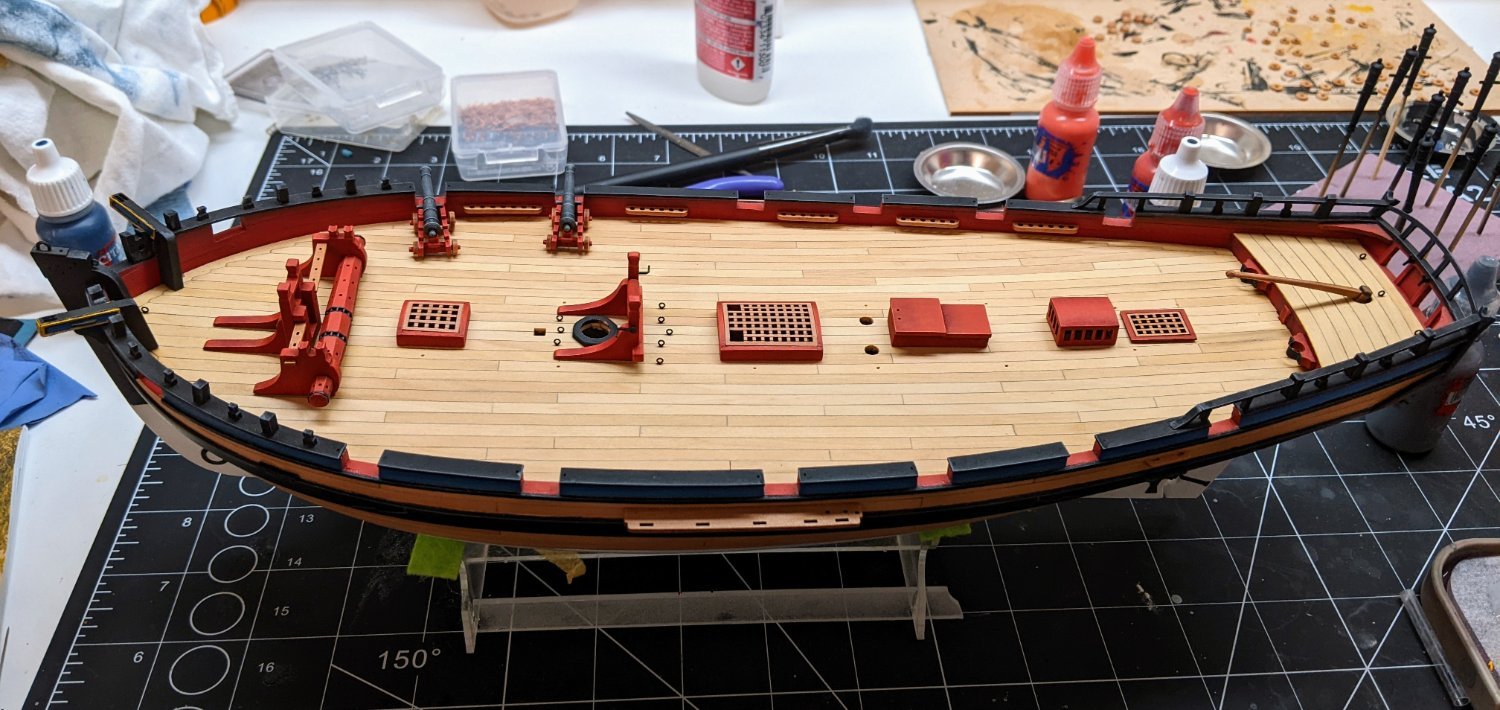
Time for a minor update. I have finished painting most of the deck fixtures and edge highlighted all the railings, timberheads, wales etc... This mostly just involves taking a medium grey and running the side of the brush along the edges.
I also figured out what I am going to do with the cannon barrels but more on that in the next post. You can see the current state of affairs below.

-
-
Looking good. Dry brushing is a great technique for cannons, because the downsides of it (a kind of rough chalky look) actually sort of simulates the rough surface you get from casting.
If you would like a small suggestion, I would recommend going in with a very fine brush and accentuate the upper sharp edges and how they would catch the light. I am thinking of a colour sort of like citadels talaren sand, but any ochre type colour would do (the exact colour is hard to recommend because things sometimes look different in pictures). Then in an even smaller space on the upper edges go in with an ice yellow or even pure white (almost just a dot). This will give it a bit of a simulated metallic reflection.
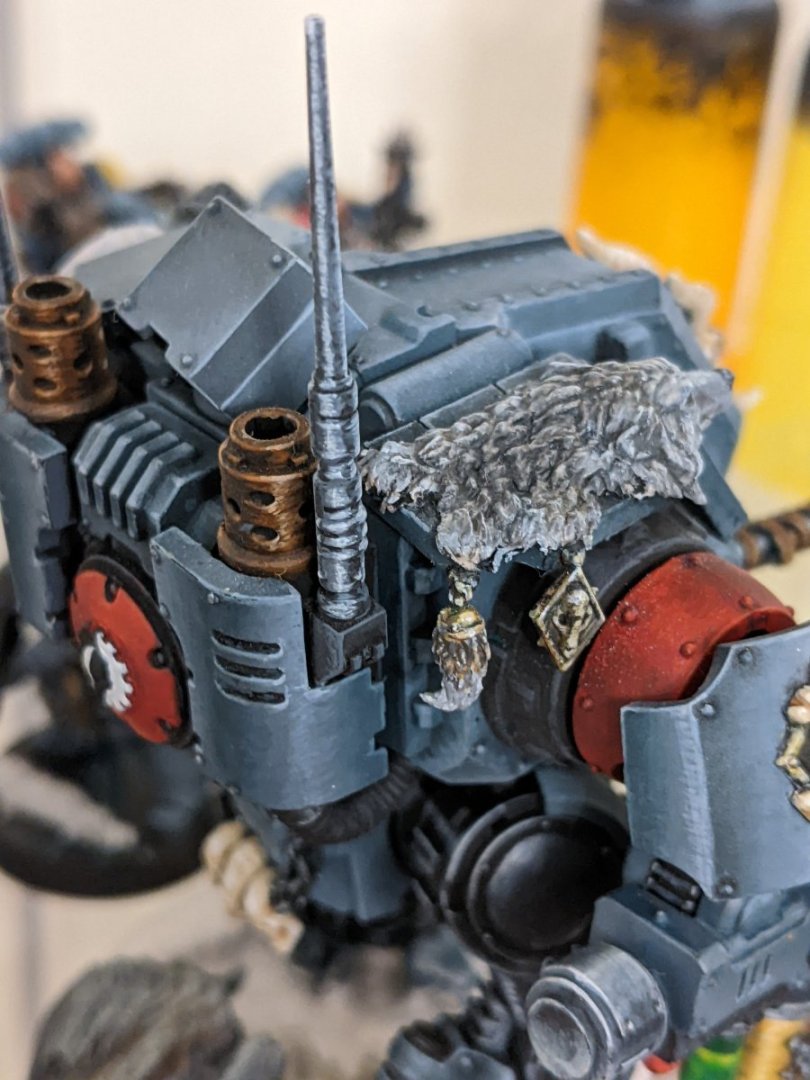
See the above picture for an example. The bronze exhaust pipe things are about the size of a cannon at 1/64. You don't need to do as much of a gradient as I did or do the reflection all down the barrel, just accentuate the upper edges and add a small bright reflections on the sharp edges, just make sure they line up.
-
As everyone else has said there is no "best" beginner model. As someone who is in the middle of their first model, I would suggest paying particular attention to items 1 and 2 on Chris' list. You will make a lot of mistakes and so this means that:
- You don't want to have problems with the kit itself adding to your already steep learning curve
- You are unlikely to produce the model of your dreams with your first attempt
You may aspire to build a three decker some day, but I would recommend picking something smaller to make all the inevitable mistakes on. Then once you have the experience of completing a model you can move on to the subject you have always dreamed of doing and maybe actually do it justice.
I can recommend the one I am working on (Alert by Vanguard Models), but there are many other suitable alternatives.
- mtaylor, Ryland Craze and Chuck Seiler
-
3
-
1 hour ago, glbarlow said:
Nice work. Your skill with the air brush is outstanding. I always appreciate a builder willing to go backwards to rebuild or replace something to improve the model. It’s a bold, but seldom regretted decision.
Thanks Glenn, you and BE have been much of my inspiration for taking the time to go back and redo things as I read through your logs and saw how taking your time and doing it right is always more rewarding than doing it quick :).
-
This looks fantastic. Your kits are getting better and better.
- chris watton, AJohnson, hollowneck and 1 other
-
4
-
Log #33: Fixing the Railing
Thanks everyone for stopping by and for all the likes.
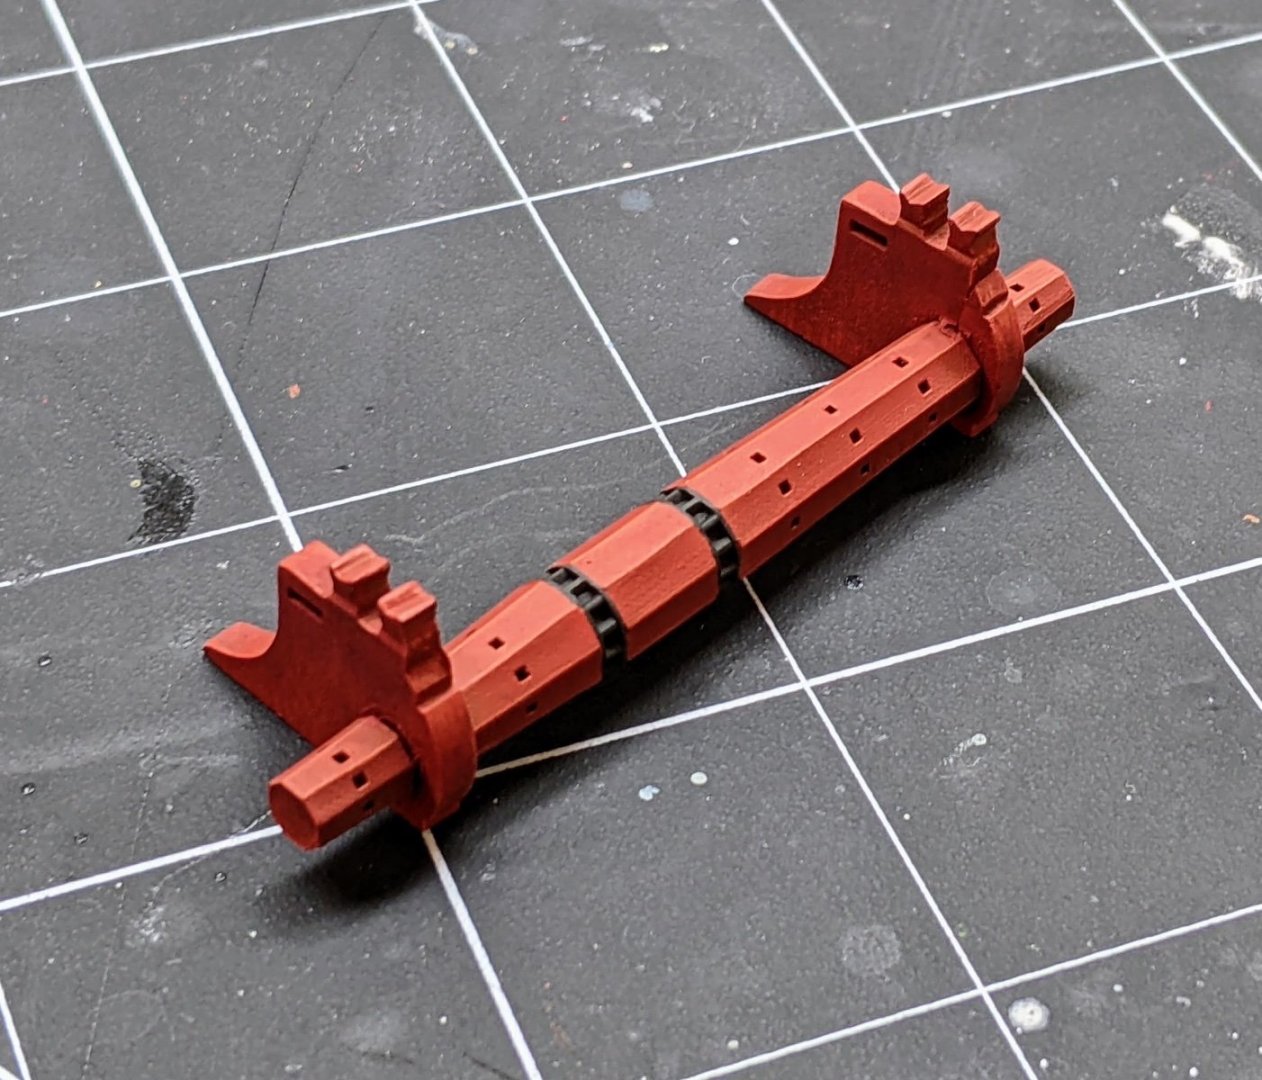
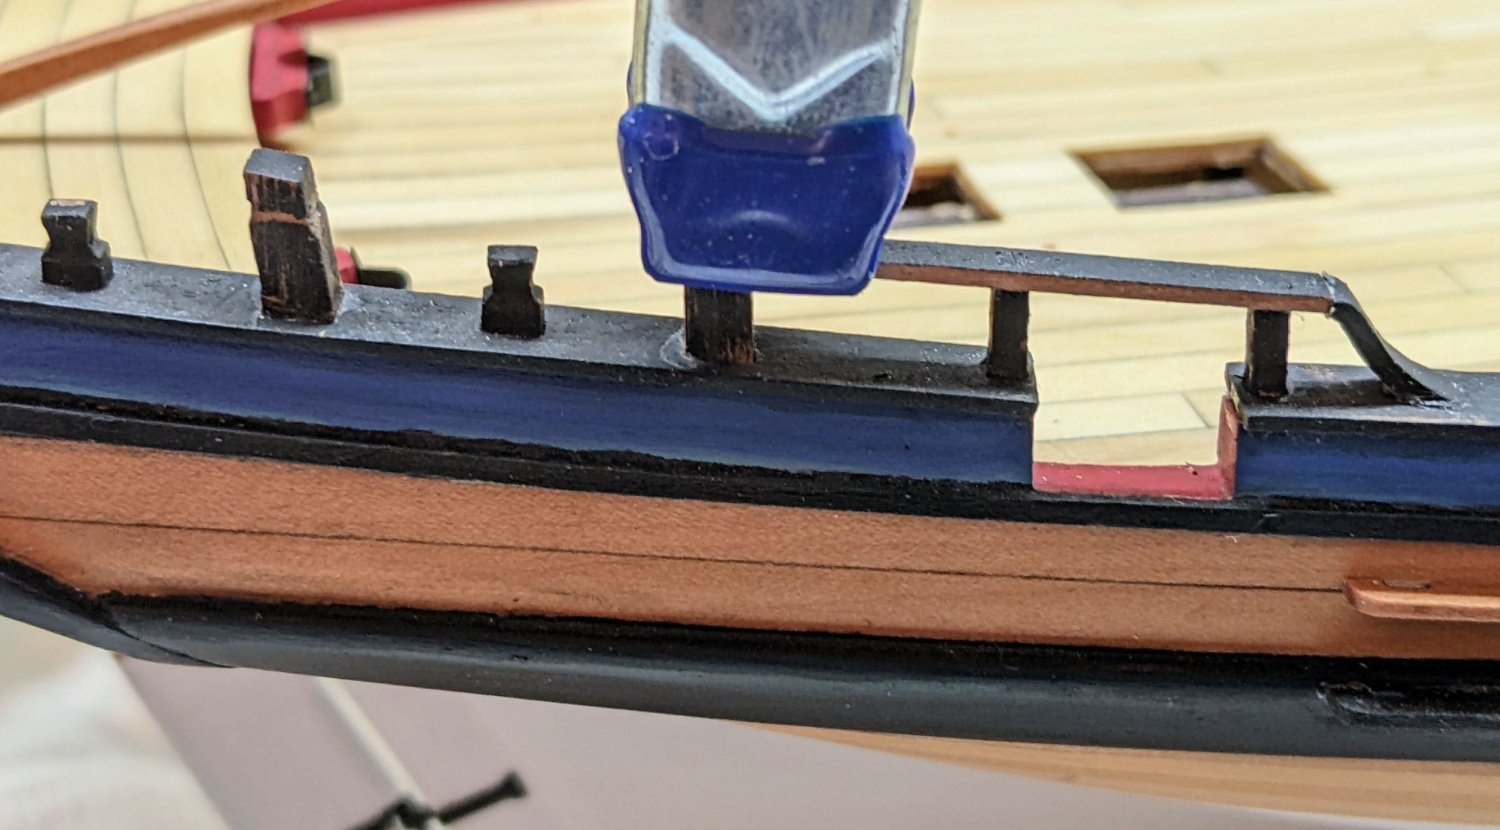
I continue to work on painting up deck fixtures. The windlass is the latest piece complete. I still need to catch the edges of the metal bands with a bit of dark metalic paint to simulate the scratches and wear from metal rubbing against metal, but it is mostly done.
I recently presented my work to date at a Model Shipwrights of Niagara meeting and one of the questions I received was regarding if I had had made sure the stantions at the stern were perpendicular to the keel. And once I had looked I could not unsee the fact that a few of them were at the wrong angle. In addition I noticed that in Goodwin, the railing at the stern is much thinner that what I had. This was particularly problematic to my eyes where I had made a fairly thin railing at the top of the transom. So once again I broke out the isopropyl and my exacto knife to disassemble parts of the stern.
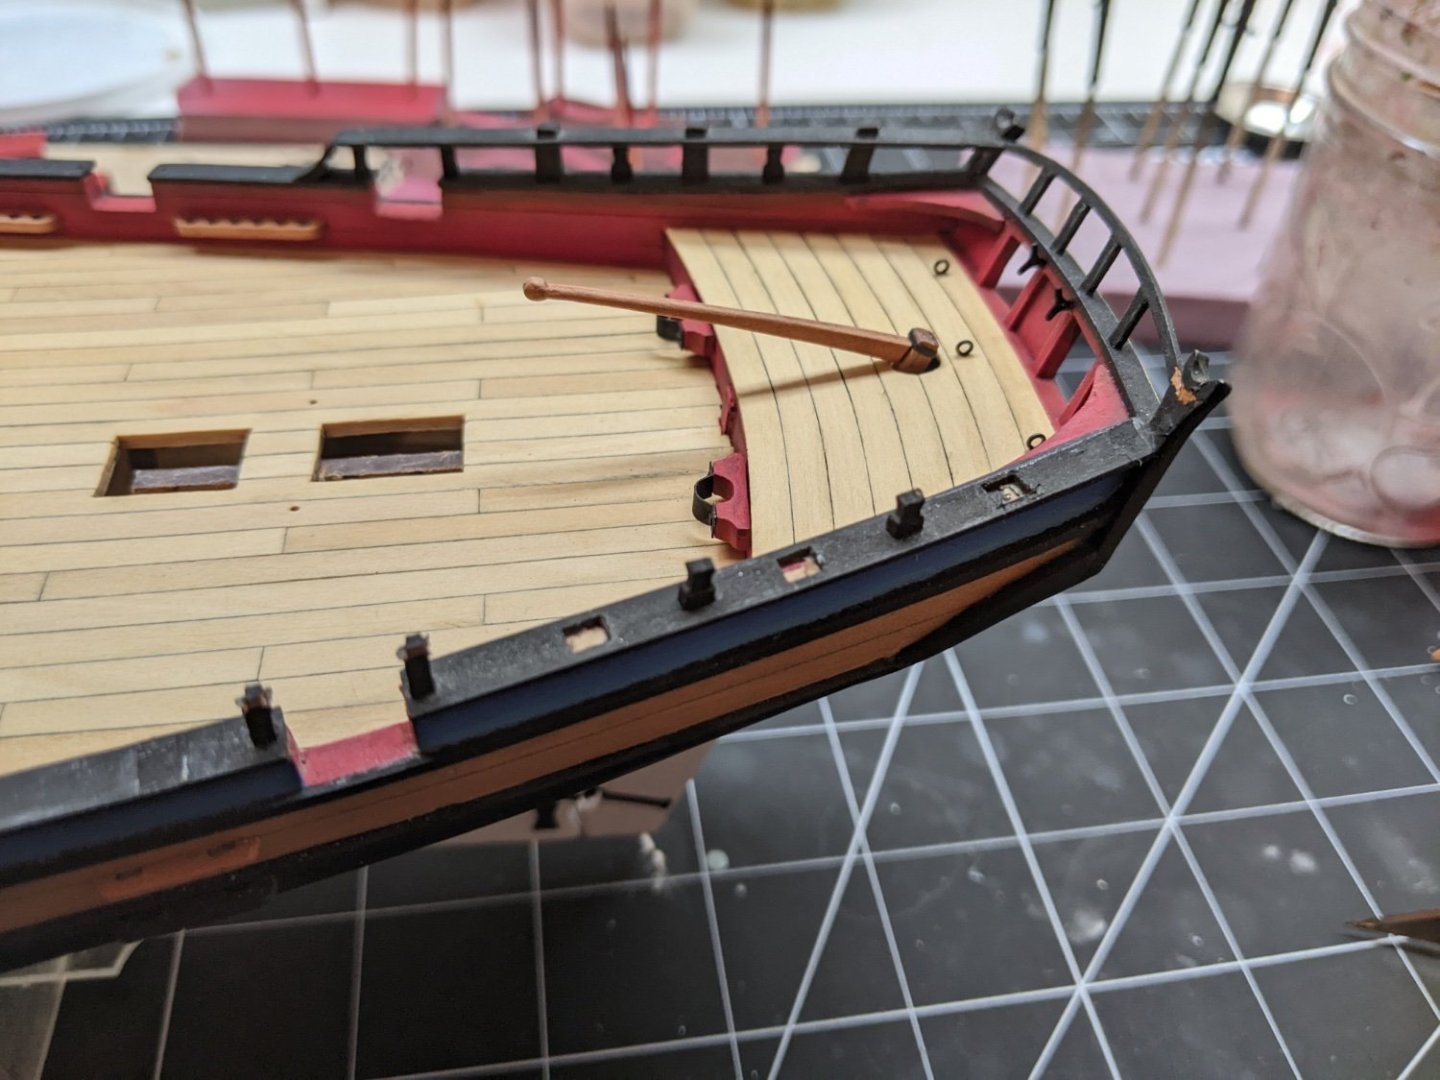
I then reattached the stantions using a square to ensure they were at the correct angle.
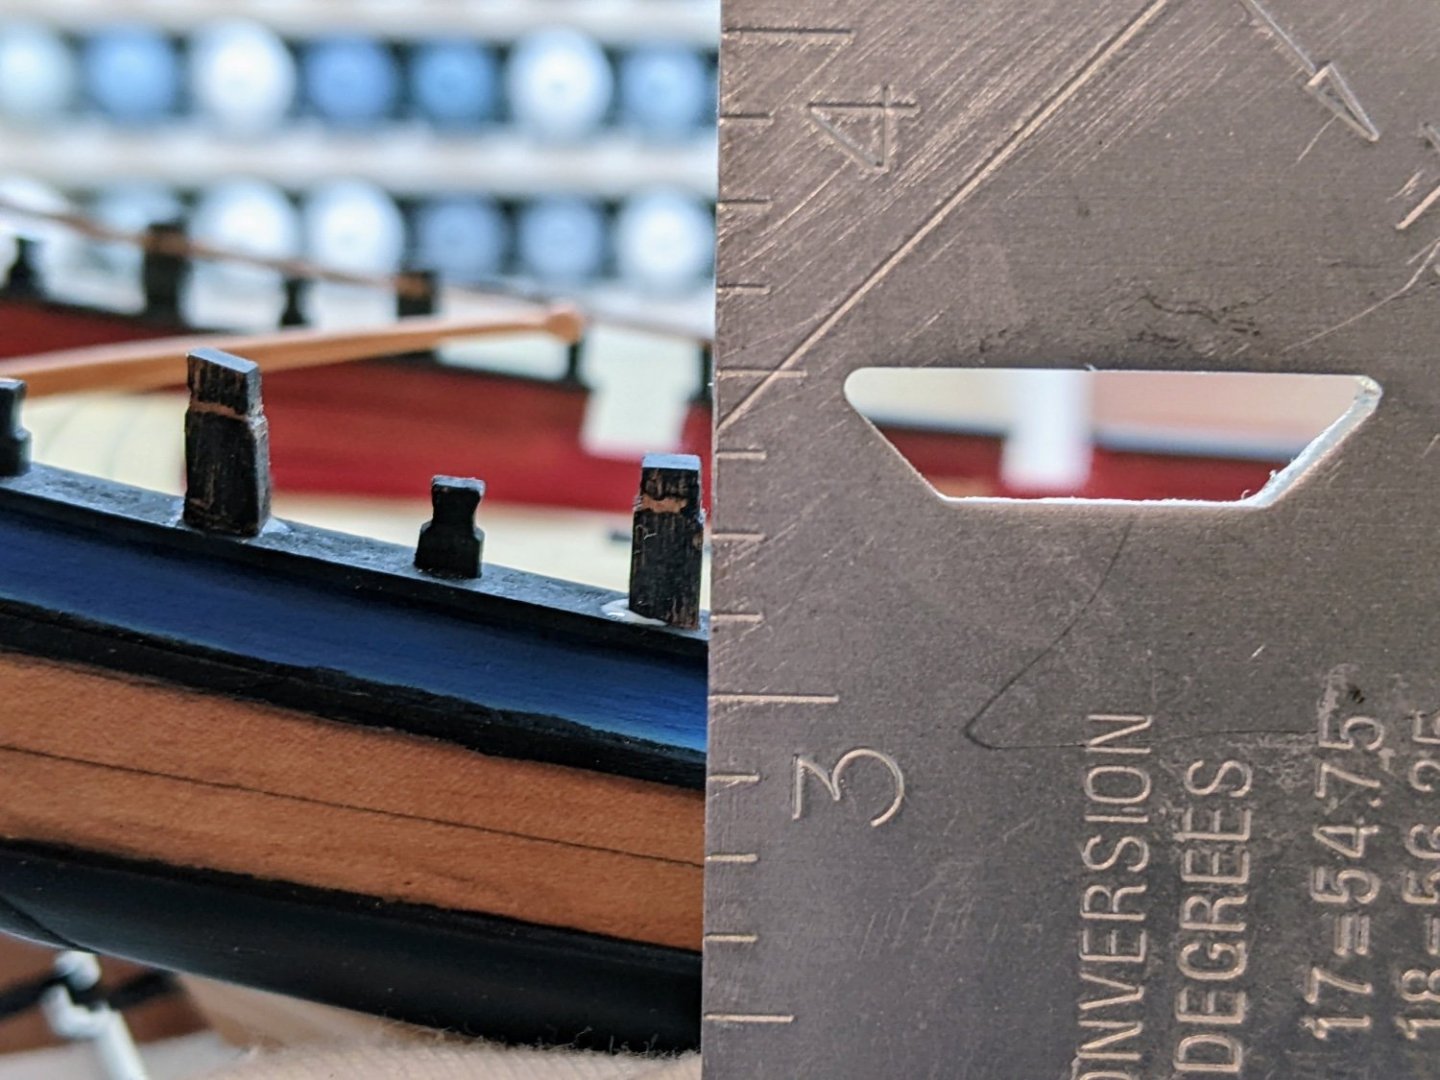
I then thinned the railing down to around 3/32” and attached it to the stantions.

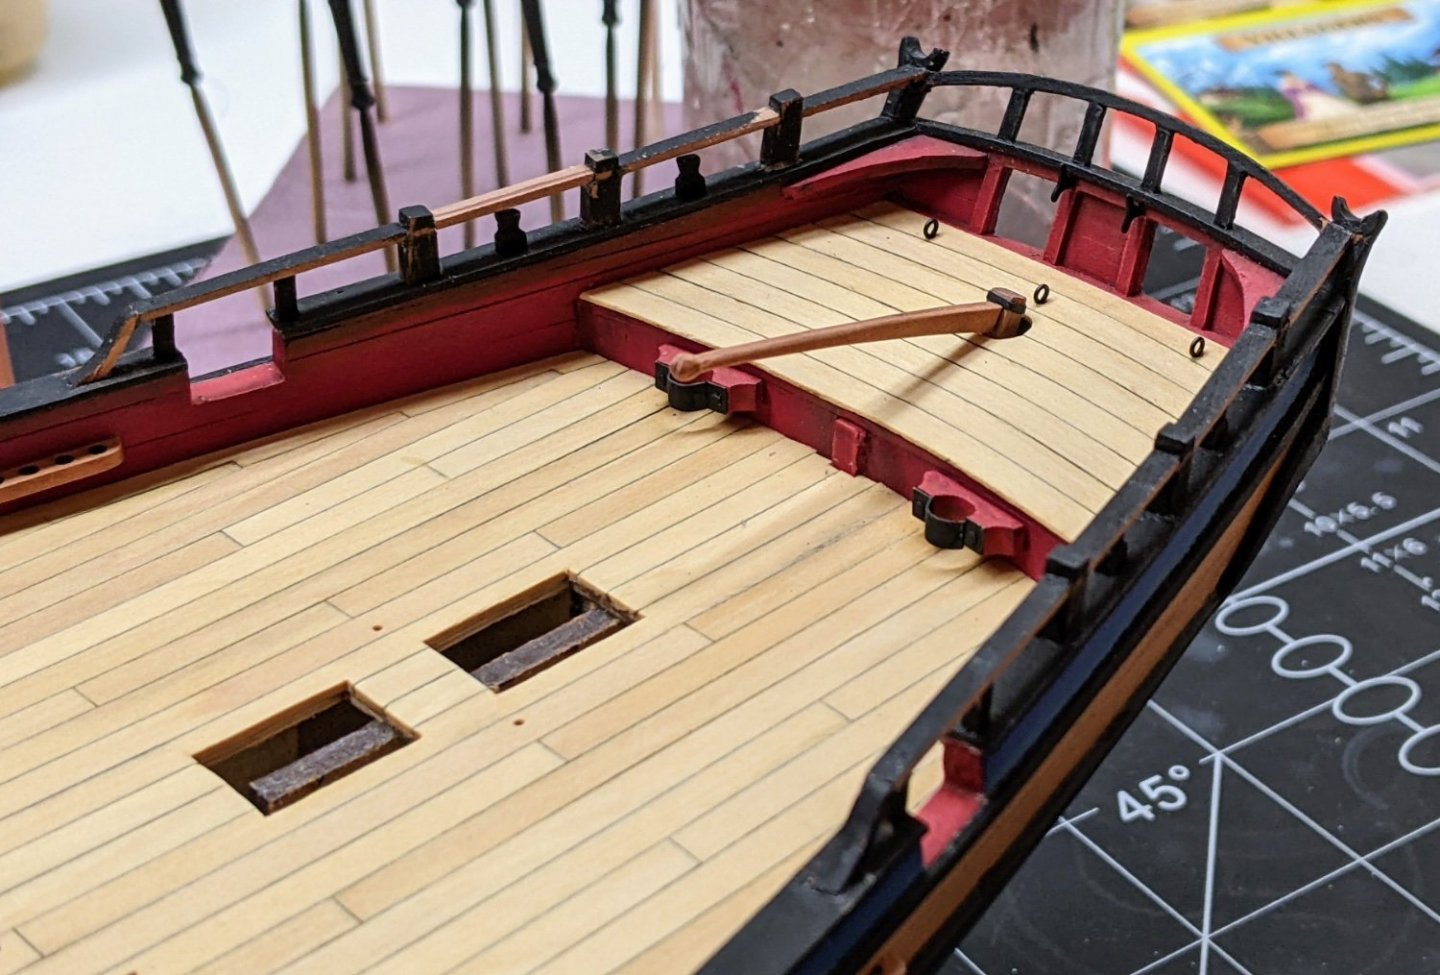
And here is the final result. In the end I am once again pleased I went back and fixed what I had done. Something had always looked off to me with how the railing met the transom, but I hadn’t been able to put my finger on it. I will have to repaint it, but that shouldn’t take too long.
-
Looking good, what do you mean by how the mizzen works? Alert doesn't have a mizzen to my knowledge unless you are referring to where they could temporarily rig one using those rings attached to the quarter deck?
-
Log #32: Painting the Deck Fittings
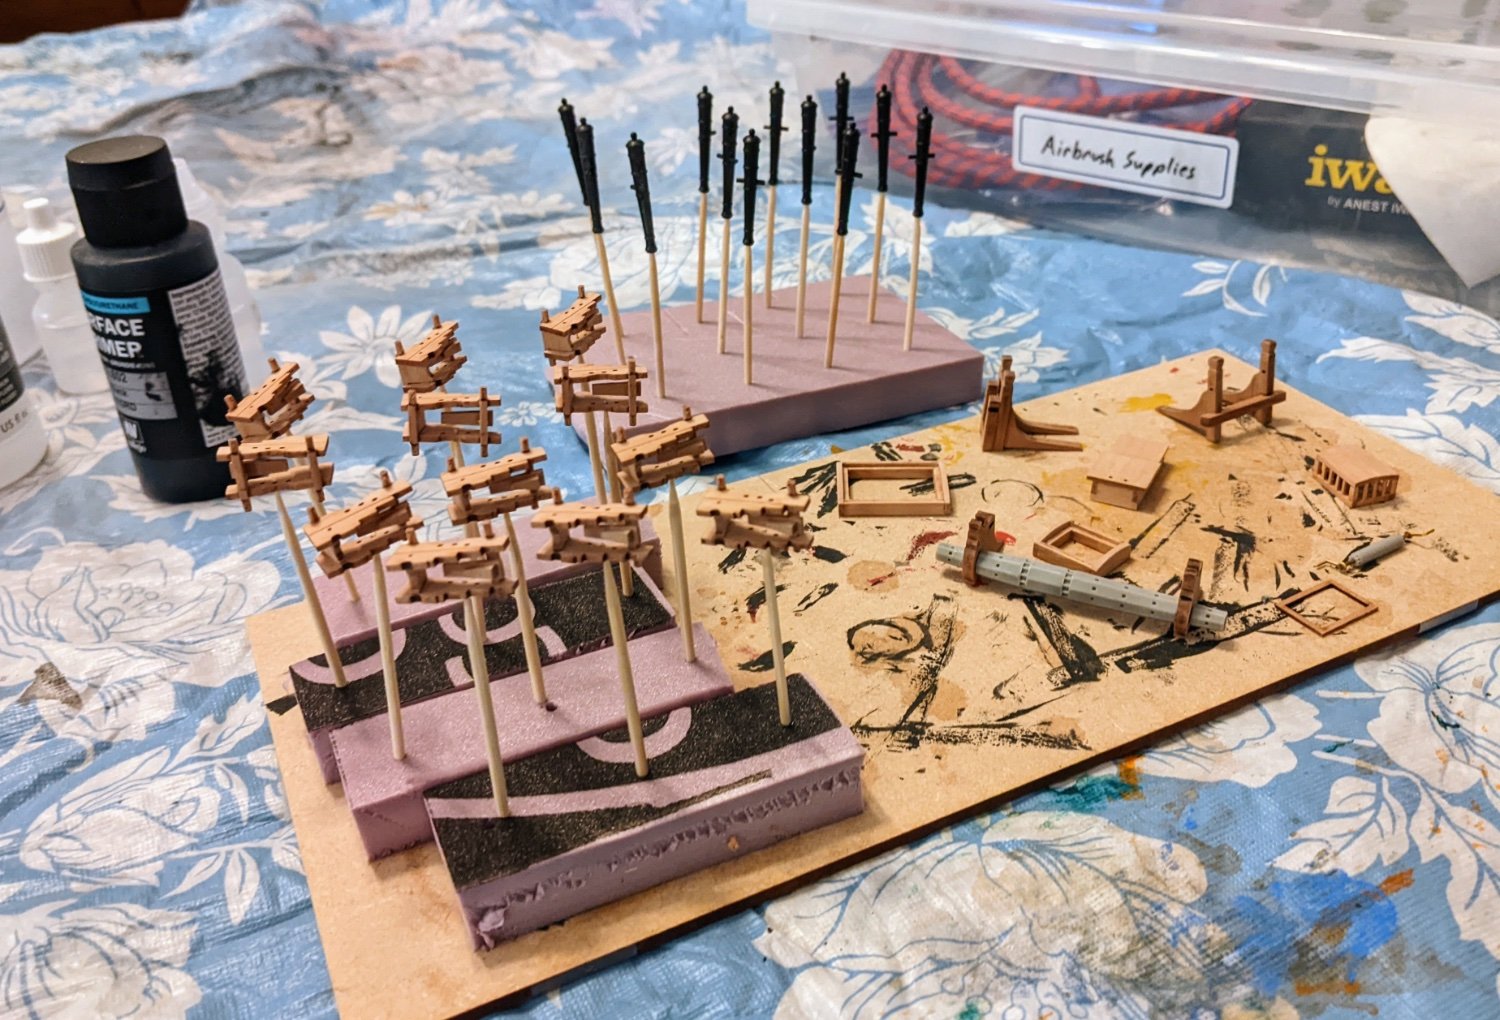
With the carriages assembles it is time to start the painting. Though not strictly necessary for most of the fittings (only the plastic ones), I decided to prime everything black with my airbrush.

I then mixed Vallejo flat red with a little bit of Citadel incubi darkness to make a dark crimson which I sprayed over all the parts. I then sprayed pure plat red from above to leave the undersides in simulated shadow.
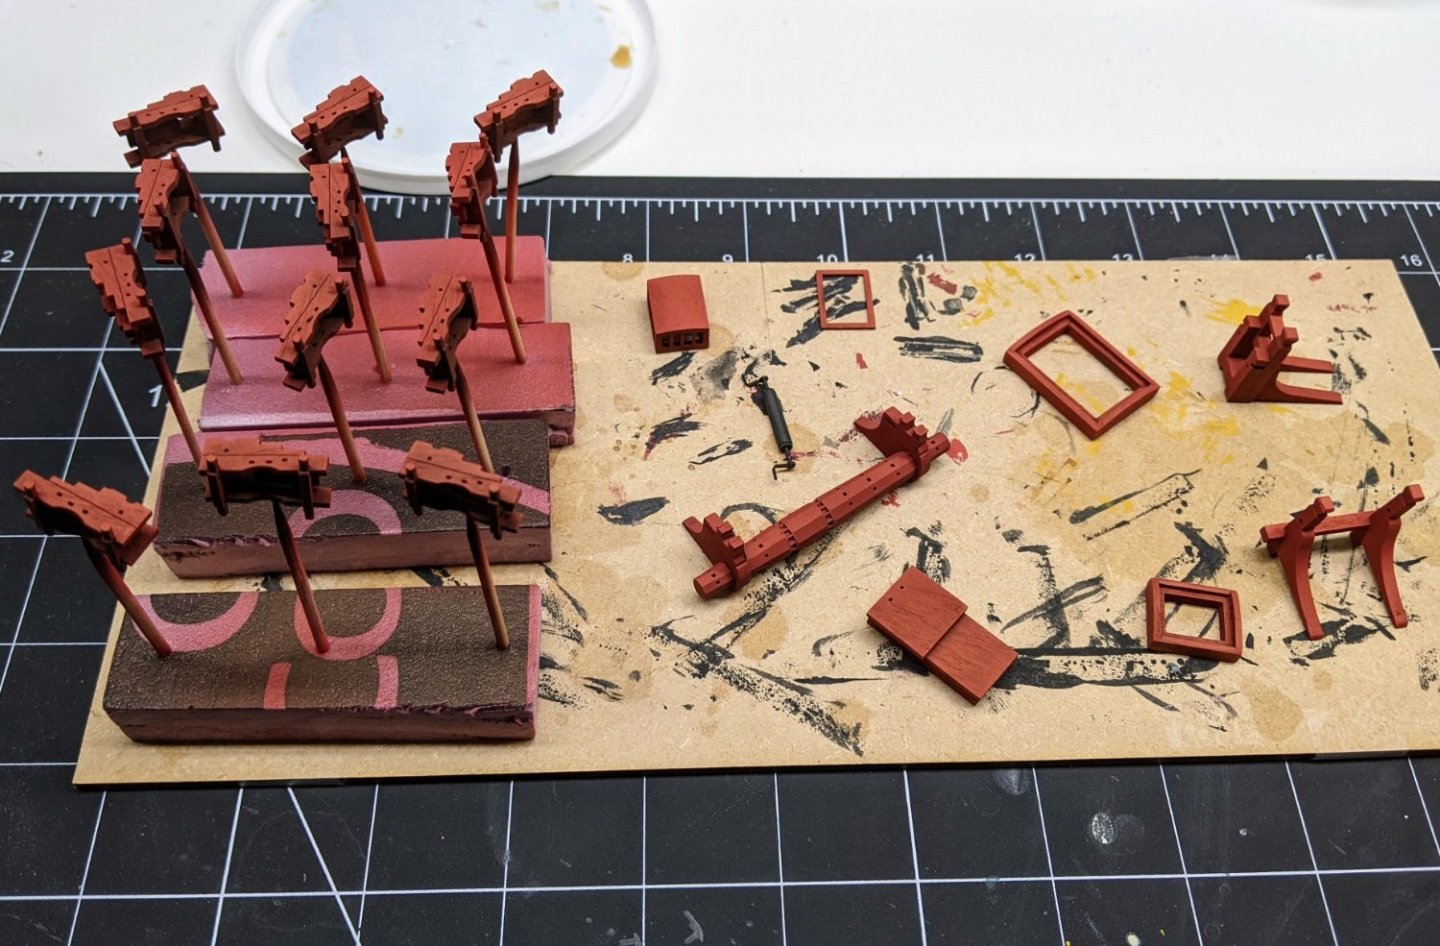
After letting it all dry for a day I broke out a very fine sanding paper to smooth some of the flat surfaces that had swelled up due to the paint. This obviously removed some of the paint, but as these were large exposed surfaces it didn’t matter since I painted over them again.
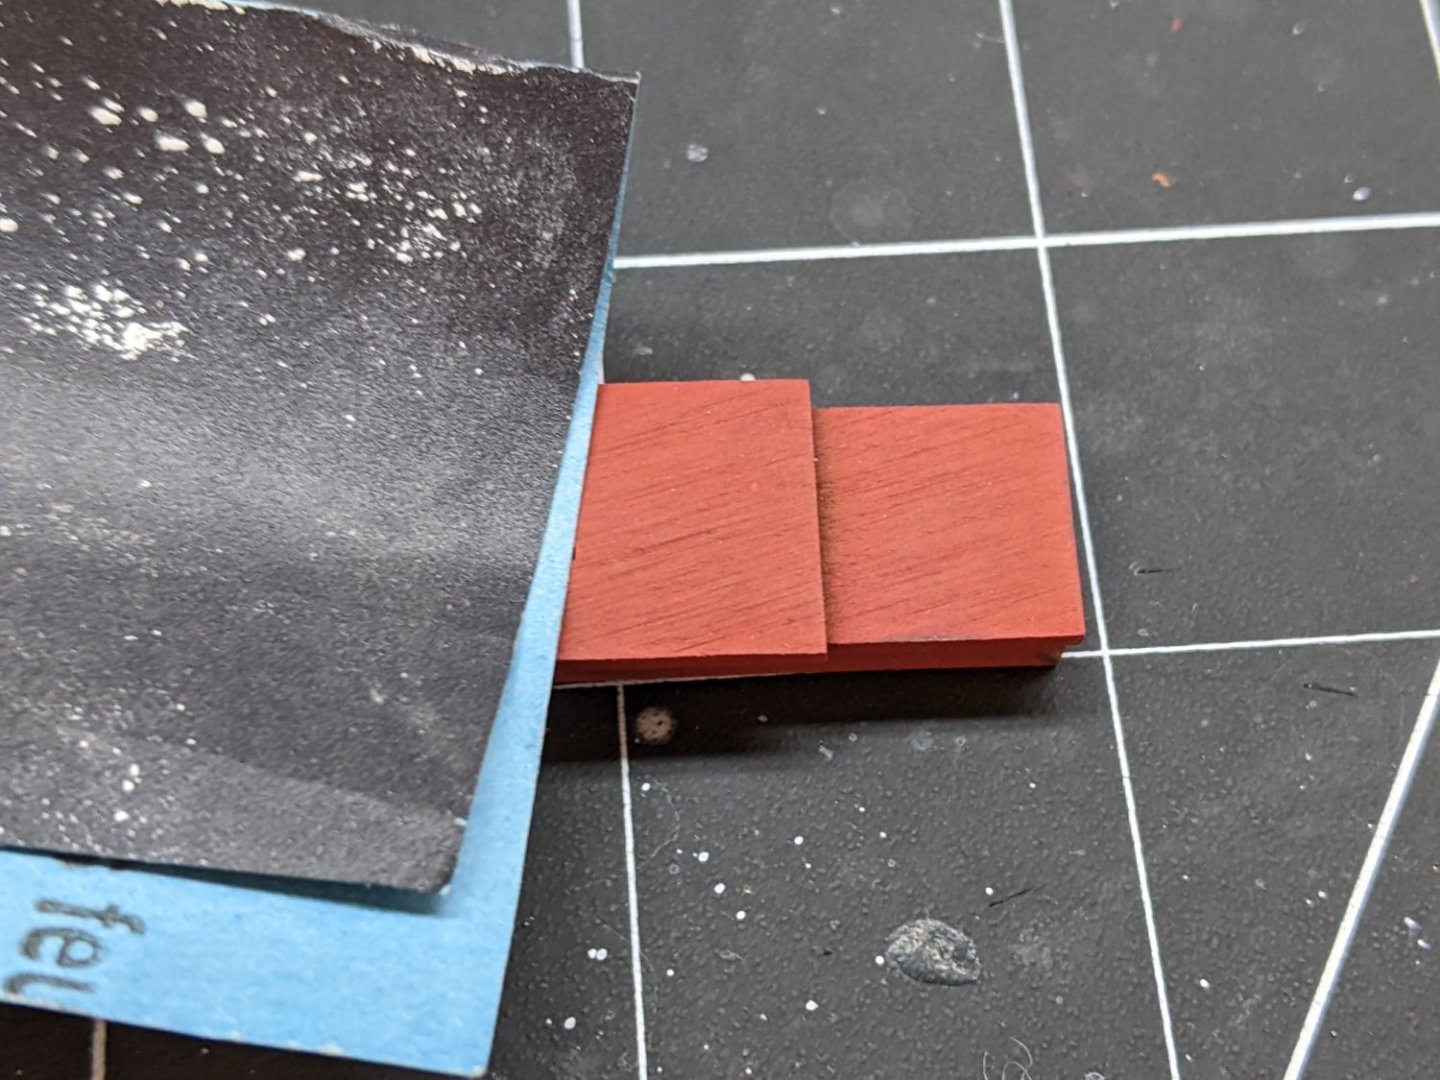
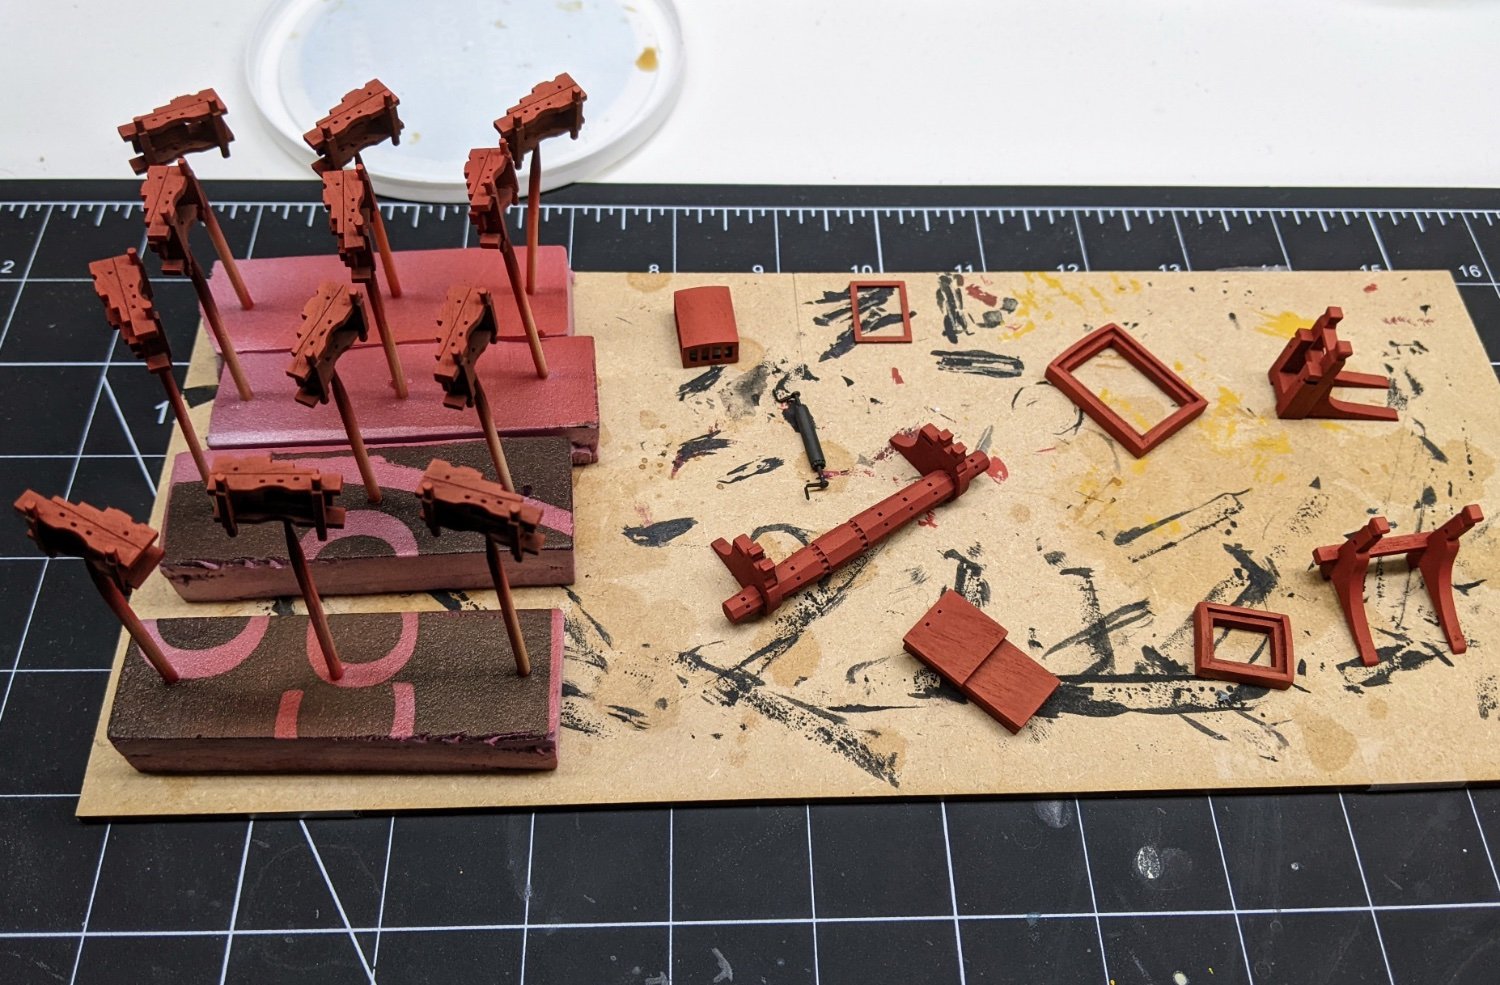
Then I began a process of glazing highlighting the various parts. To do this I begin by blocking in the main highlights with my brightest colour (an orangish red from citadel called wild rider red). In general vertical surfaces I wanted to be brighter towards the bottom and upward facing flat surfaces would be the brightest. This also allows a greater contrast between the two faces where they meet. I should also note that since the example pictured is a curved surface, I highlighted towards the middle to simulate the light reflecting off the surface.

I glazed towards the highlights with citadel evil sun scarlet (a blood red colour) and down towards the shadows with the vallejo flat red. Then finally all the edges were highlighted with pure wild rider red (the orangish colour).
You can see how much of a difference this makes in the below comparison between two cannon carriages. One has been highlighted using the above method and the other has only has the base coats form the airbrush.
And here is what a couple of the finished fixtures look like on the ship at scale.


HM Cutter Alert by Thukydides - Vanguard Models - 1:64 - first build
in - Kit build logs for subjects built from 1751 - 1800
Posted
Log #36: Rope
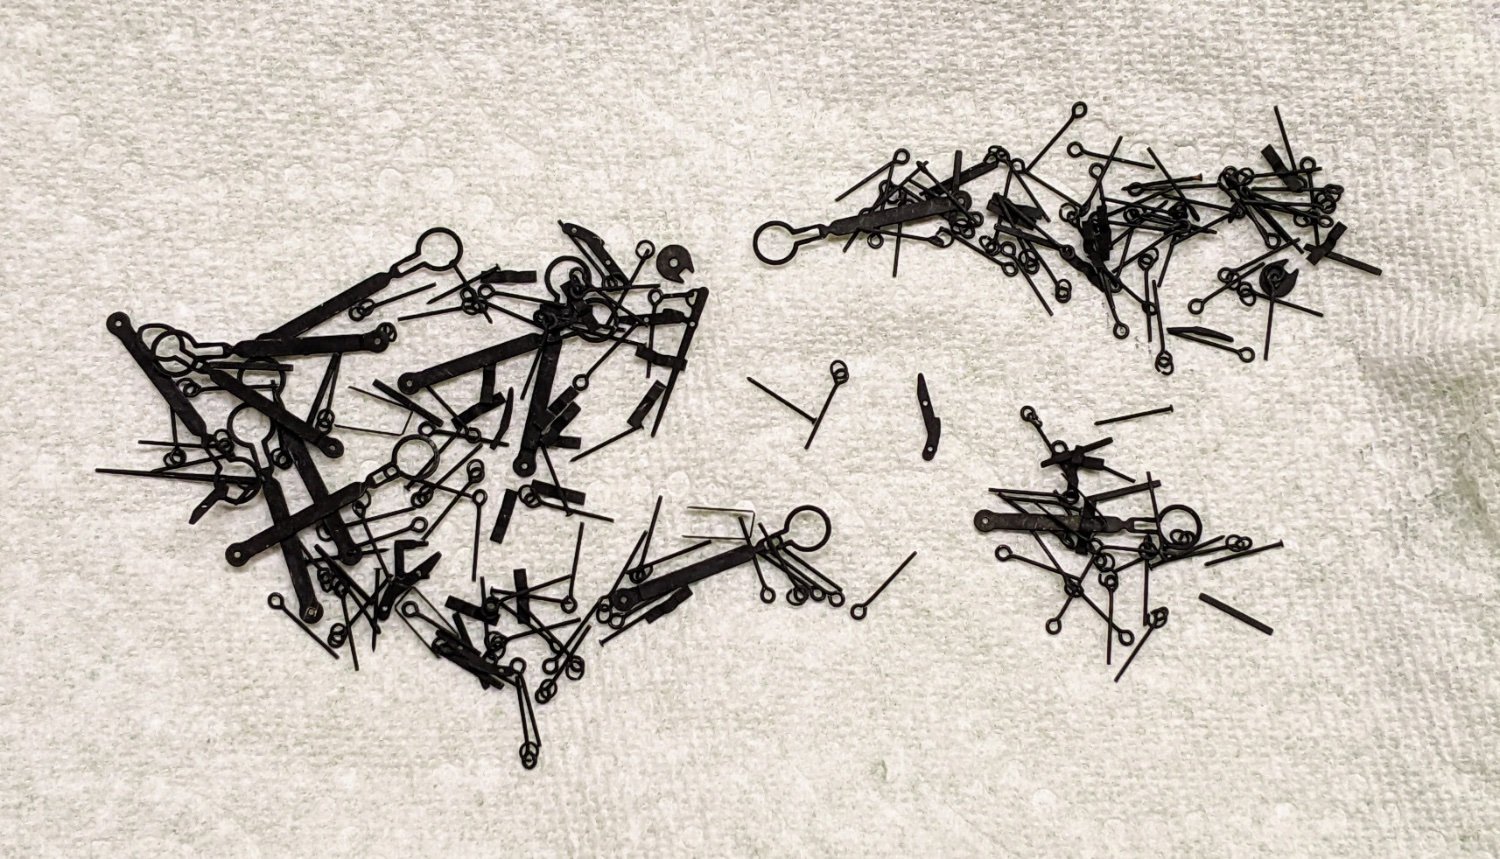
While I was pondering painting a package arrived in the mail.
I ordered a bunch of rope from @BenD and it looks even better in person than in the pictures. The cable laid rope is particularly nice looking and I think it is really going to enhance the model. I would highly recommend the rope to anyone who is interested in adding just that little bit of extra realism to their model. I had reached out to Ben to ask if he could do some additional sizes of cable (I had been looking for some smaller diameters than he offered on his website) and he was super helpful and made me cable in the requested sizes. He also threw in a few extras for free :).
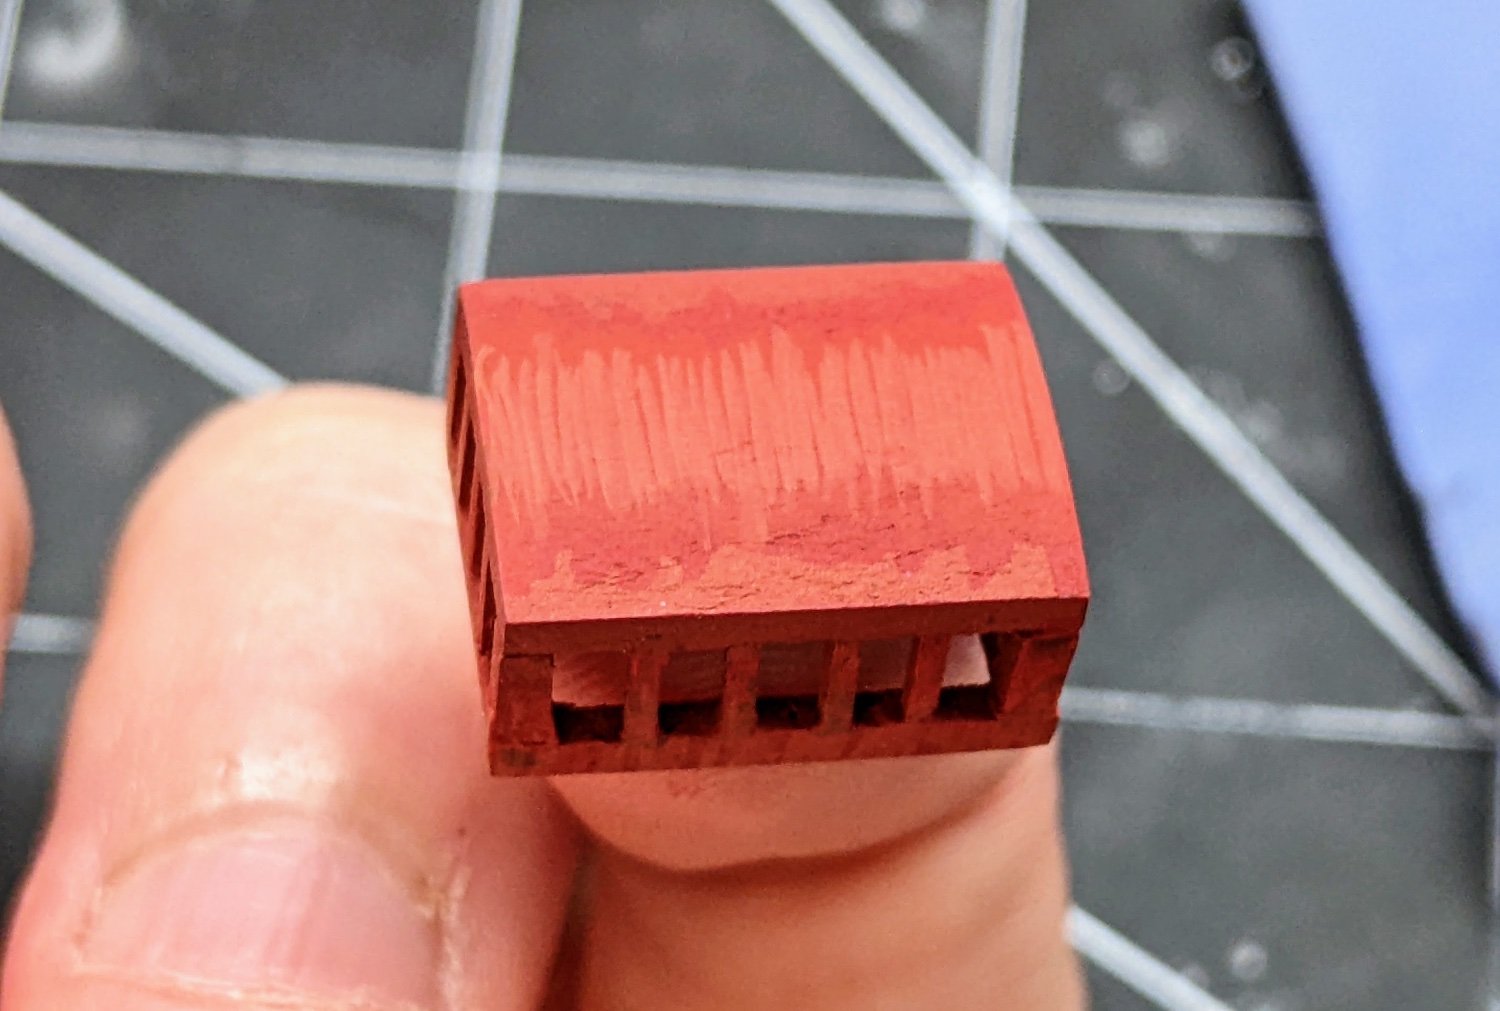
See below for some examples with my finger for scale:
1.6mm cable for the anchor
0.25mm for rigging the cannons and many other tasks
1mm cable for the shrouds