


Thukydides
-
Posts
759 -
Joined
-
Last visited
Content Type
Profiles
Forums
Gallery
Events
Posts posted by Thukydides
-
-
12 hours ago, EKE said:
I bought the standard version of the kit, because I just love the color and the quality of the pear wood. I know lots of folks love the boxwood material, but I just think the color and character of pear is preferable, at least to my eye. Personal taste, I suppose. But the Zulu had such beautiful details rendered in pear, and I really love it.
I also like the pear. Maybe it is because it looks a bit more aged.
- Ryland Craze and EKE
-
 2
2
-
1 hour ago, ccoyle said:
Hello, Ian. You have made a very good start on this kit. You might not know that this kit is an early design effort by Chris Watton, who is a member here and now runs his own company, Vanguard Models. Many design compromises were made for Sherbourne with the intention of making the kit easier for beginners to complete, so yes, there is plenty of room for improvement in the level of detail. A big help for me when I built mine 20 years ago was a volume from the Anatomy of the Ship series on the cutter Alert; the two ships are not exactly alike, but the book can help you with detailing the model. One thing that you might wish to consider is making the rig more period-appropriate. You can see what this looks like on my example in the gallery here. Again, this modification was done using the Alert book as a source. But, do as much or as little extra detailing as you like. The main thing is to enjoy the build.
Cheers!
Are there any other books on cutters you would recommend? The Goodwin one is almost impossible to get now unless you want to pay a small fortune for it.
-
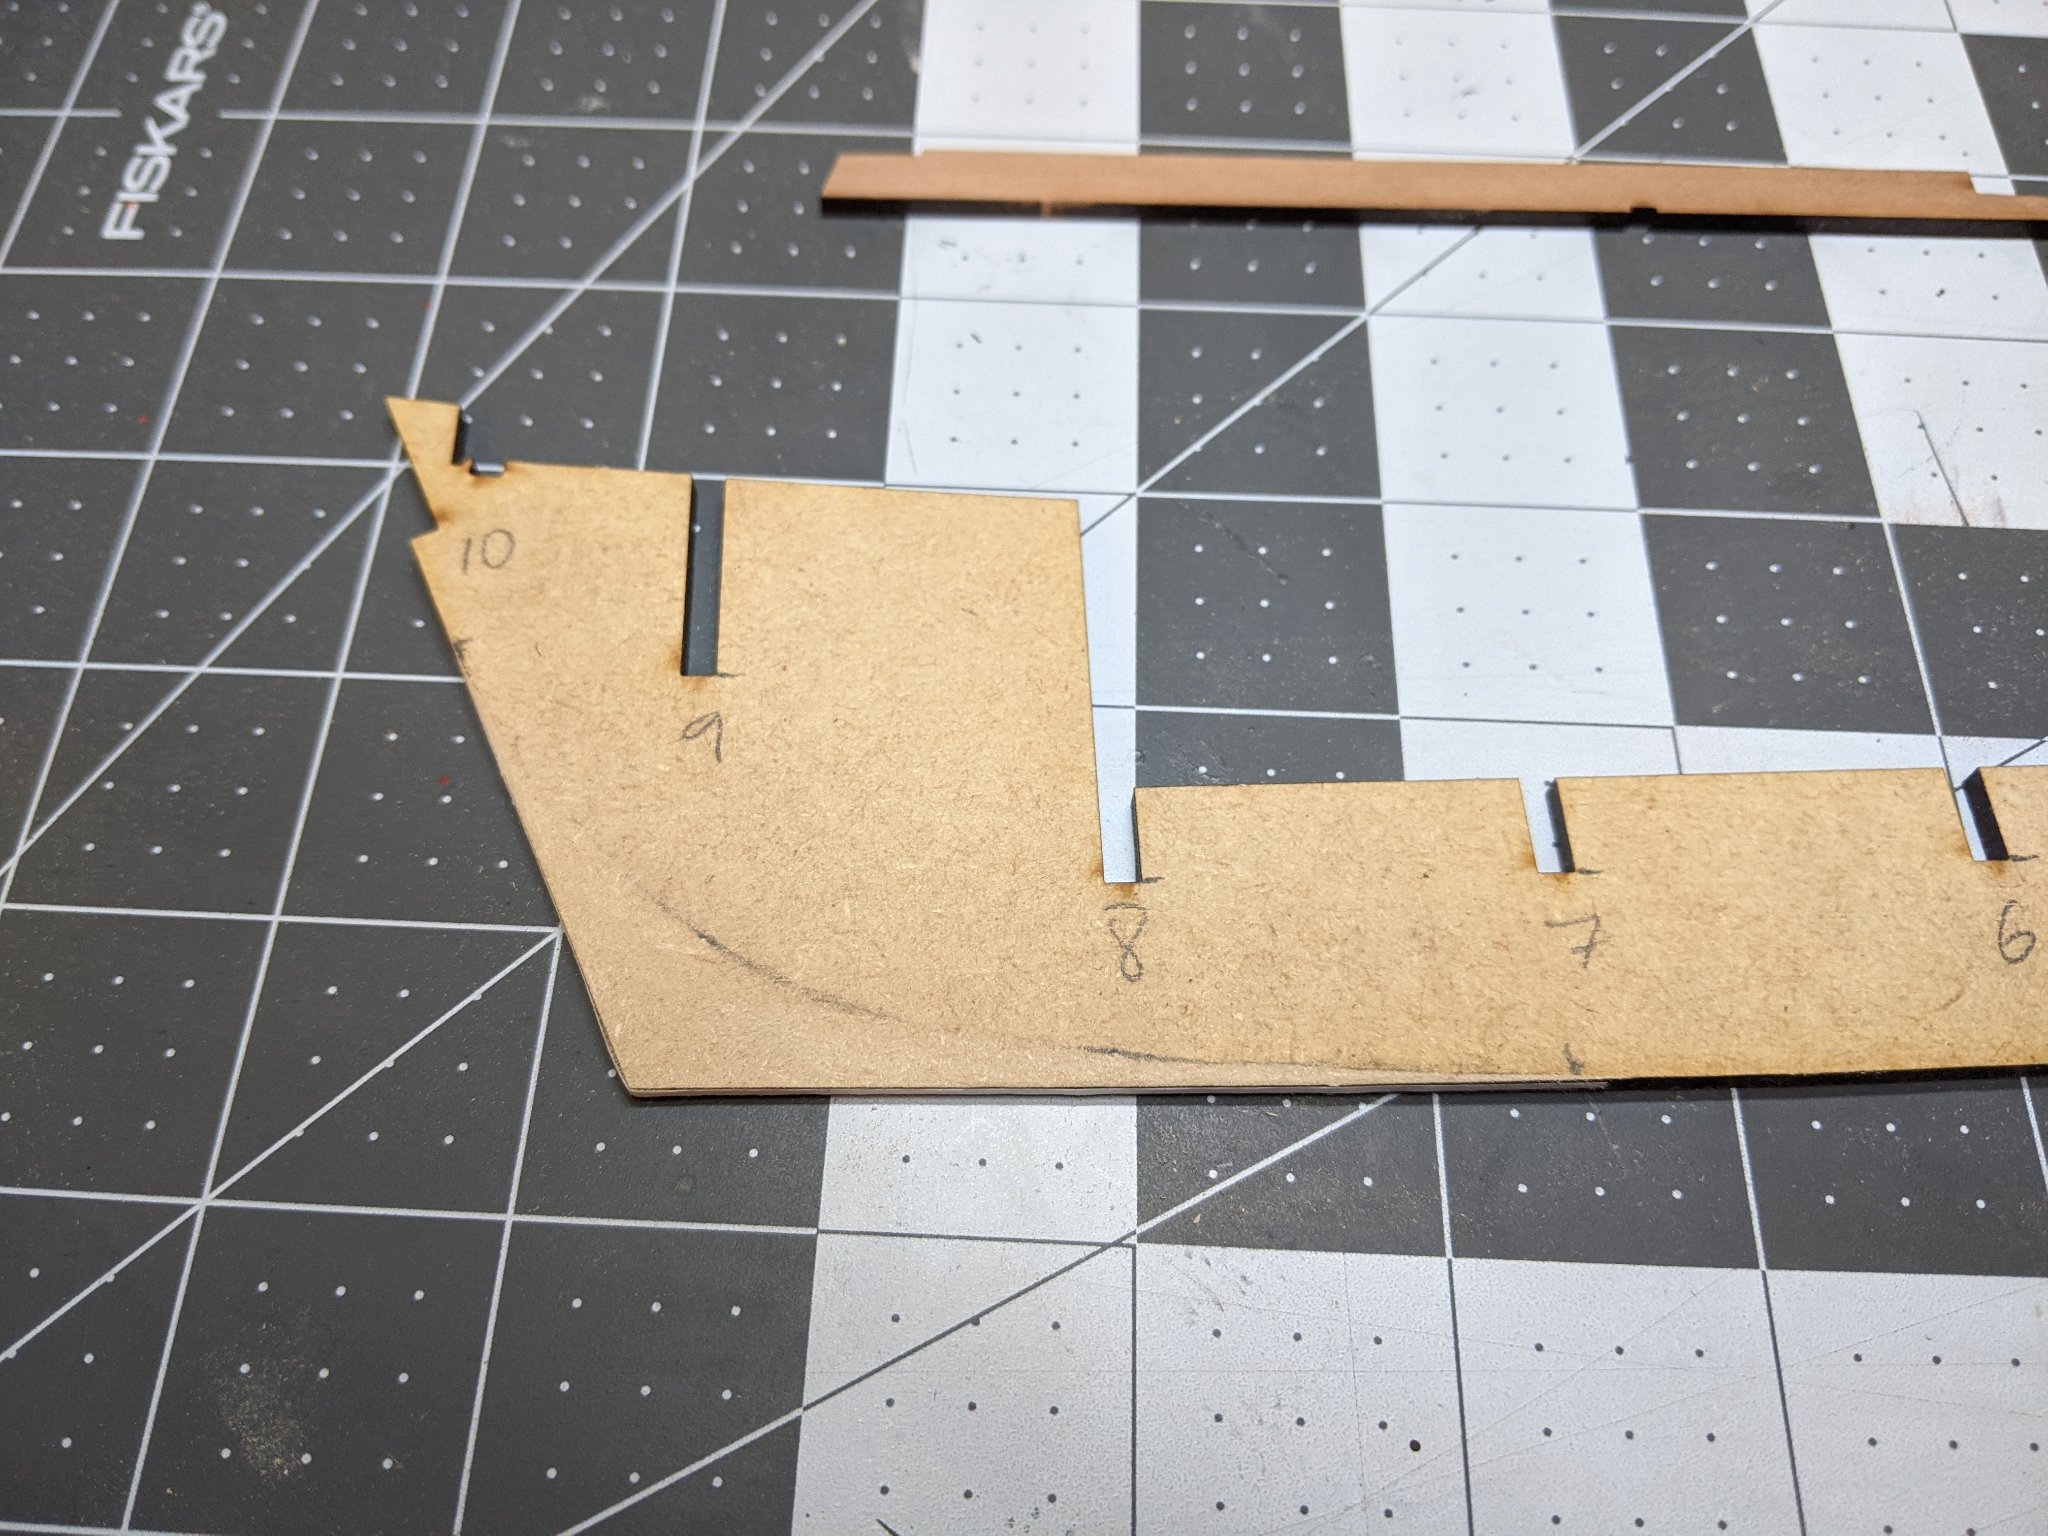
The stove would have been below the deck. If you look at pictures of the finished model you can see the stove pipe just ahead of the mast. I am not sure there is an easy way to actually model the stove on this kit as there is no lower deck. For example see below for my work in progress alert model. The kit has a lower deck which is where you would put the stove if you wanted to add it in. Especially for a first build, I wouldn't worry about this as very little of it would be seen through the hatch anyways.

- GrandpaPhil, Ian Barefoot and tkay11
-
3
-
Log #5: Planking and then Re-Planking
I must admit that the planking was one of that parts of the build I was most apprehensive about. I planned to treat the first planking as if it was the only one in order to practice the techniques for the second planking. This might result in a slower build, but hopefully will allow me to work out all the kinks before I get to the part that everyone will see.
I used Chuck's edge bending method on the planks. You can learn more about it here. However, what appears simple in theory was much harder in practice.
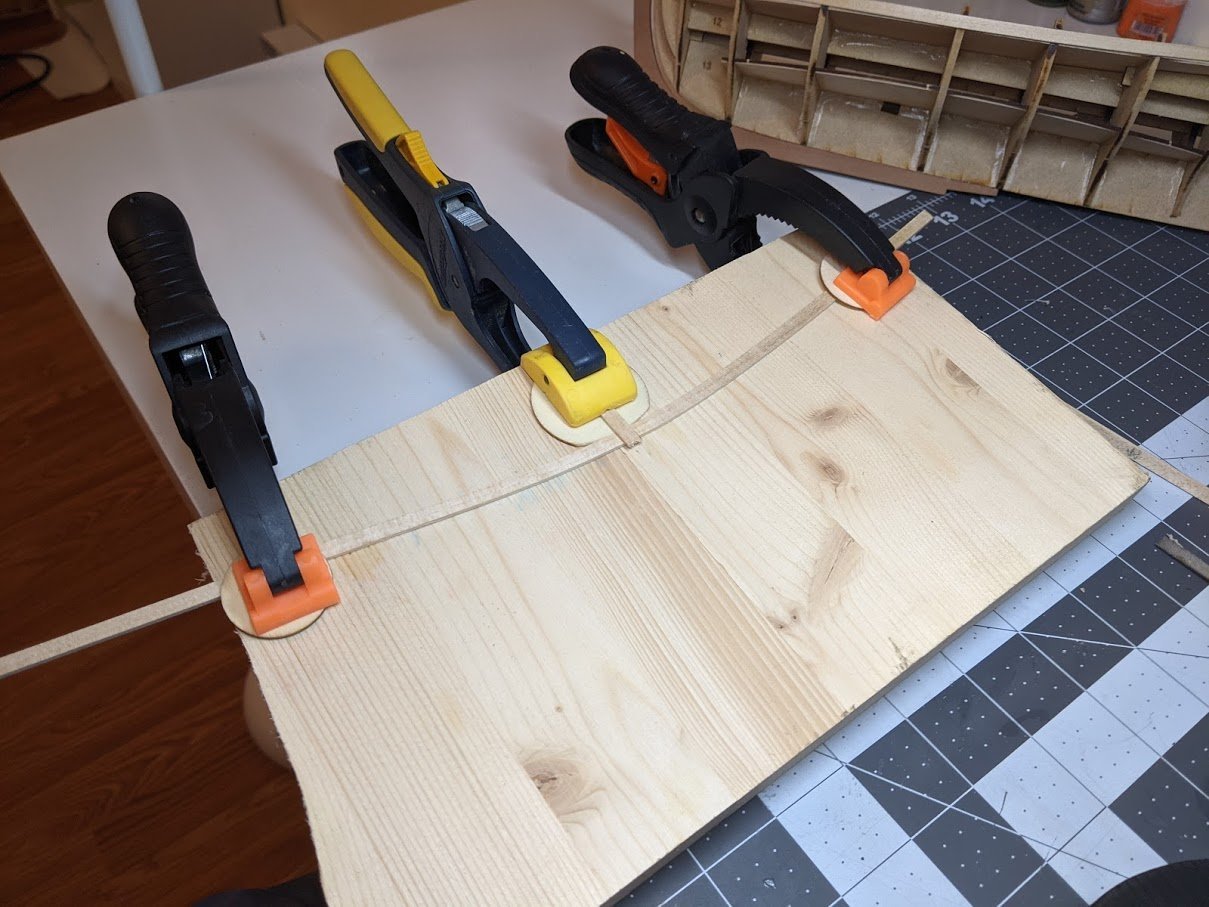
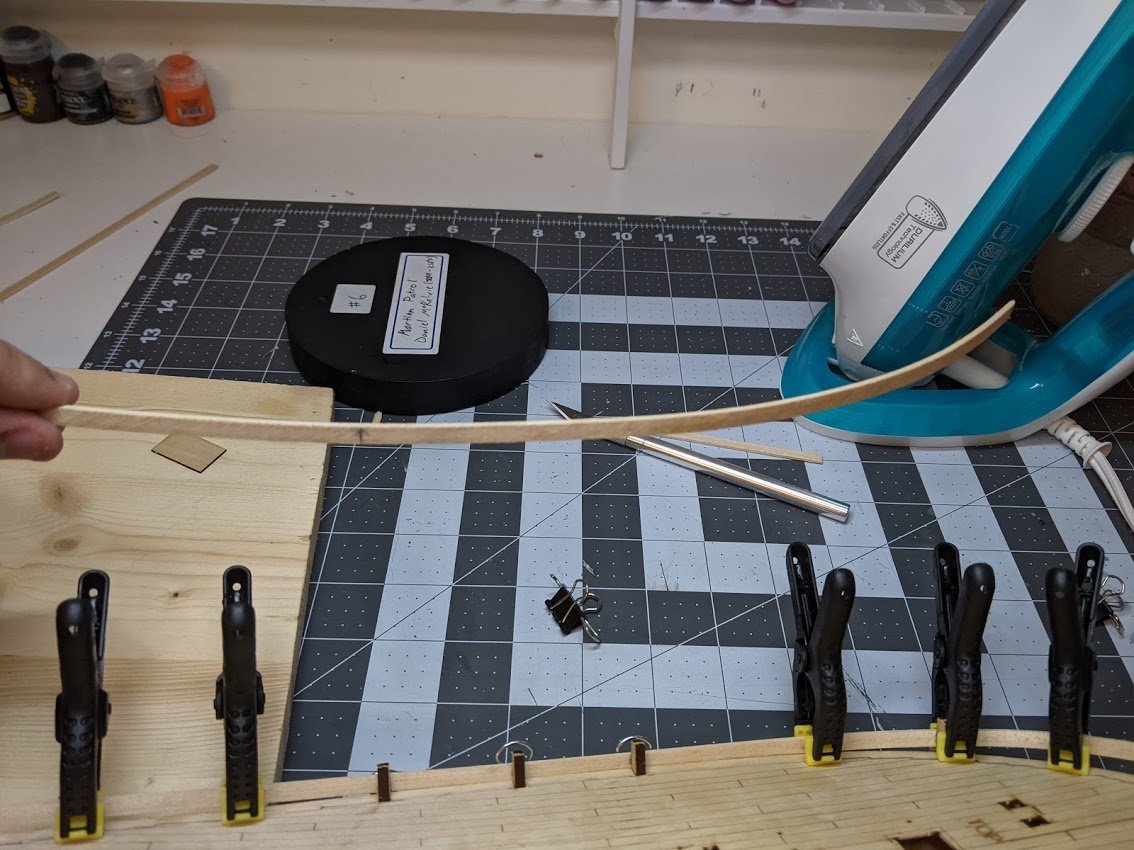
First I struggled with how much and where to make the center of my bend. Then I discovered that sometimes I needed more than one bend. However, by the time I got to the 4th strake I was feeling much more comfortable with the process. I then bent the strakes round a curved wooden block again using the iron and a tiny bit of water to get them to hold their shape.
I attached the strakes to the model using pva. After much humming and hawing I decided to go in this direction as I felt it would be easier to remove strakes after the fact if I messed up. This thought turned out to be rather prophetic.
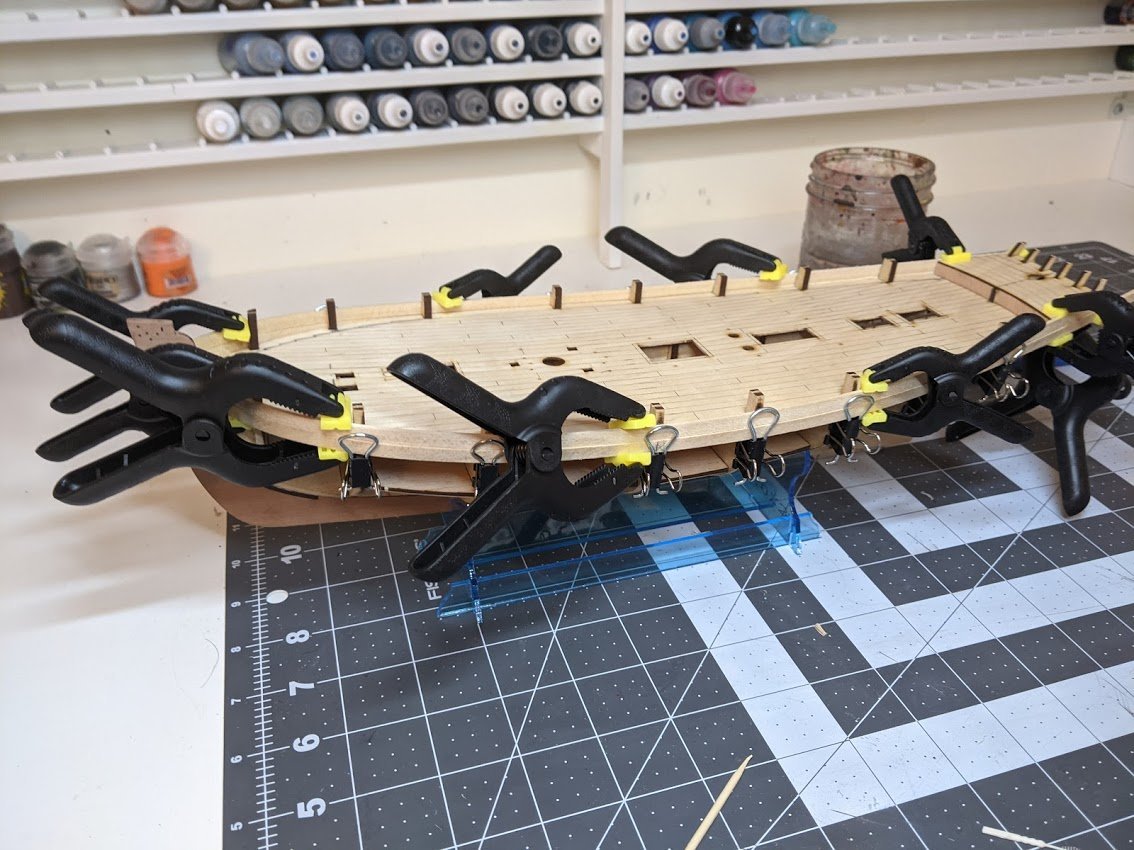
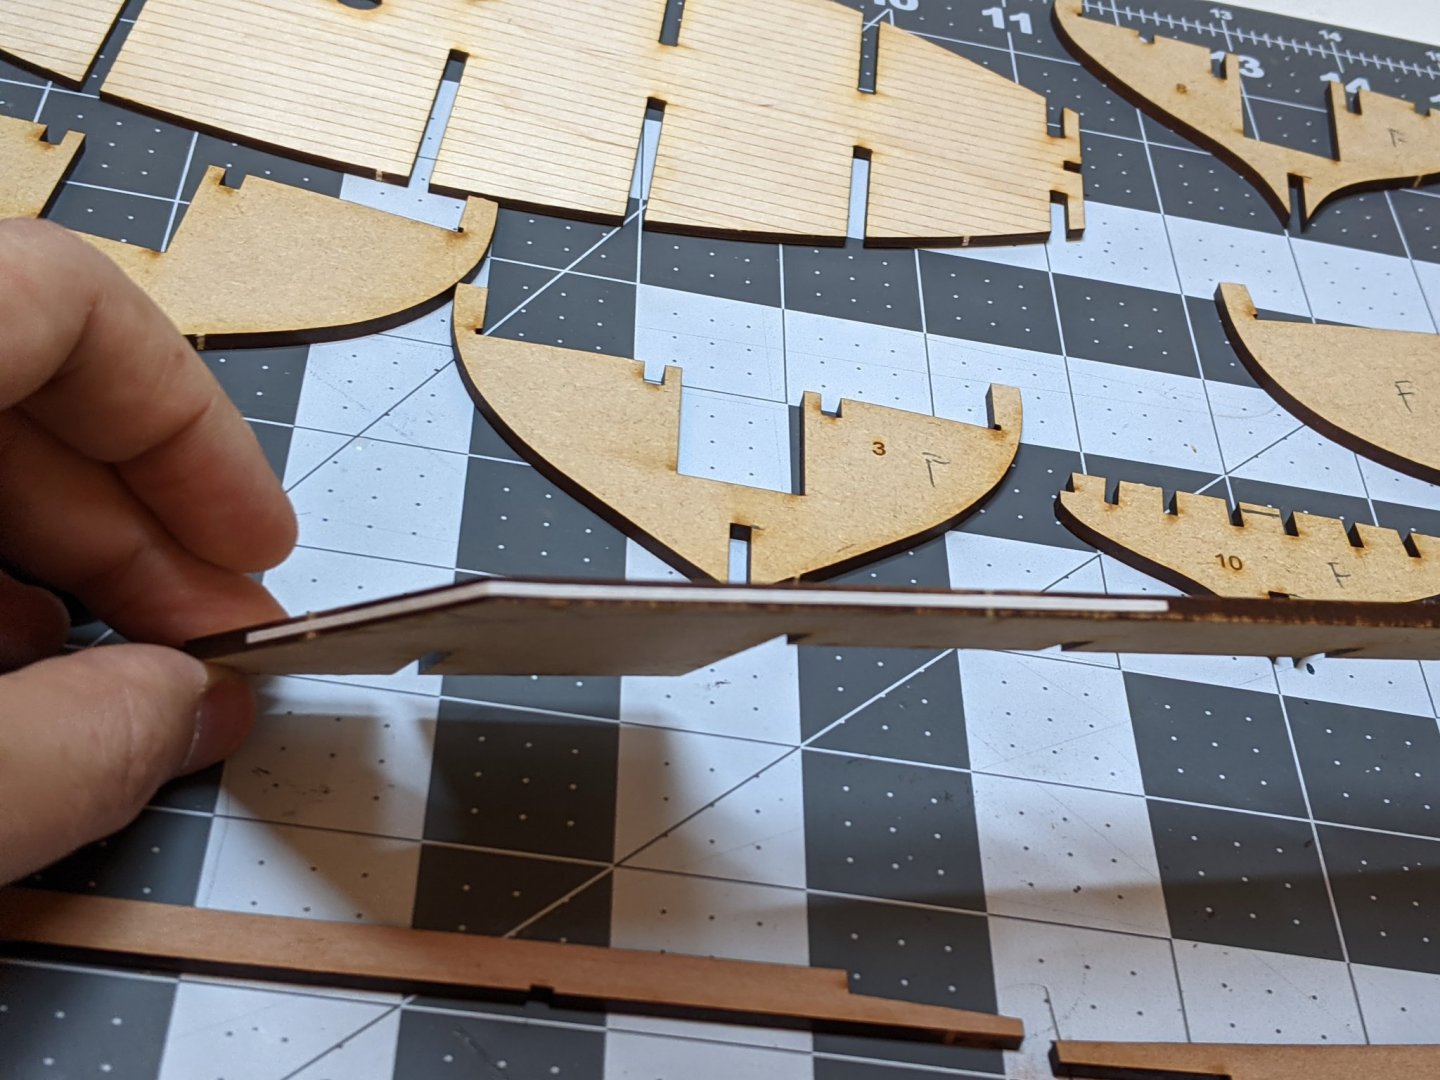
Feeling pretty pleased with myself, I set the model aside to dry. A few hours later when I went back to examine it I noticed this.
The problem had not really been visible when I attached the first strake, but now that the second was on I could clearly see a gap between the false deck and the planks. The problem was that I had not adequately fared bulkheads 2 and 3 causing the plank to bulge out between them.
I was of two minds what to do about this. I considered posting about it to see how much of a problem you all thought it might be, but in the end I decided to go ahead and correct the problem. This was the moment I became very glad I had decided to use pva for the first planking.
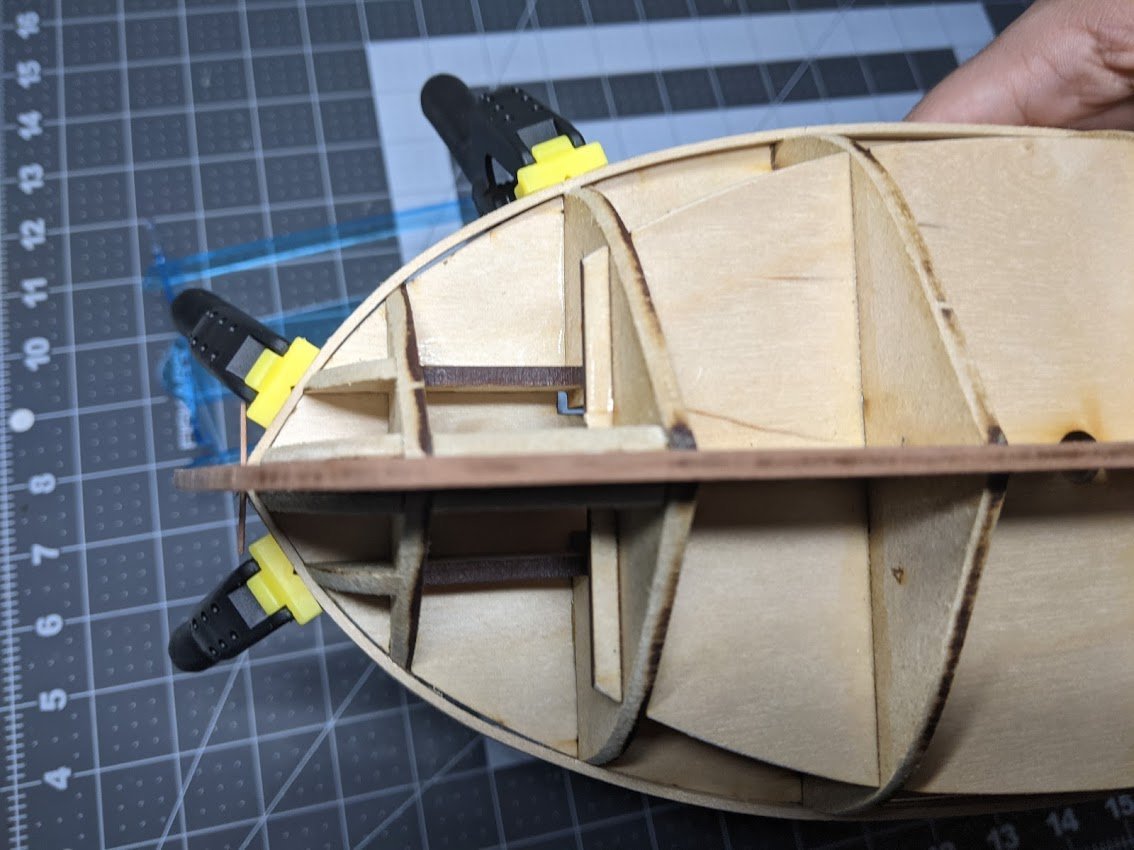
I dabbed a little bit of isopropyl onto the joints on the first few bulkheads and then gently used my hobby knife to pry the planks off.
Then after sanding down the bulkheads (this was an awkward task where I had only partially removed the planks), I reattached the planks to the hull.
In the end I was glad I took the time to go back and correct the issue even if it might not have been a big deal. It would have messed with the fit of the margin planks on the deck and I would have been forever bothered by it if it had resulted in any visible distortion, no matter how minor.
Lesson Learned:
Be much more careful about checking the faring before attaching any strakes. This will ultimately save a lot of time and headaches.
On to lining off the hull...
-
Log #4: Final Assembly and Faring
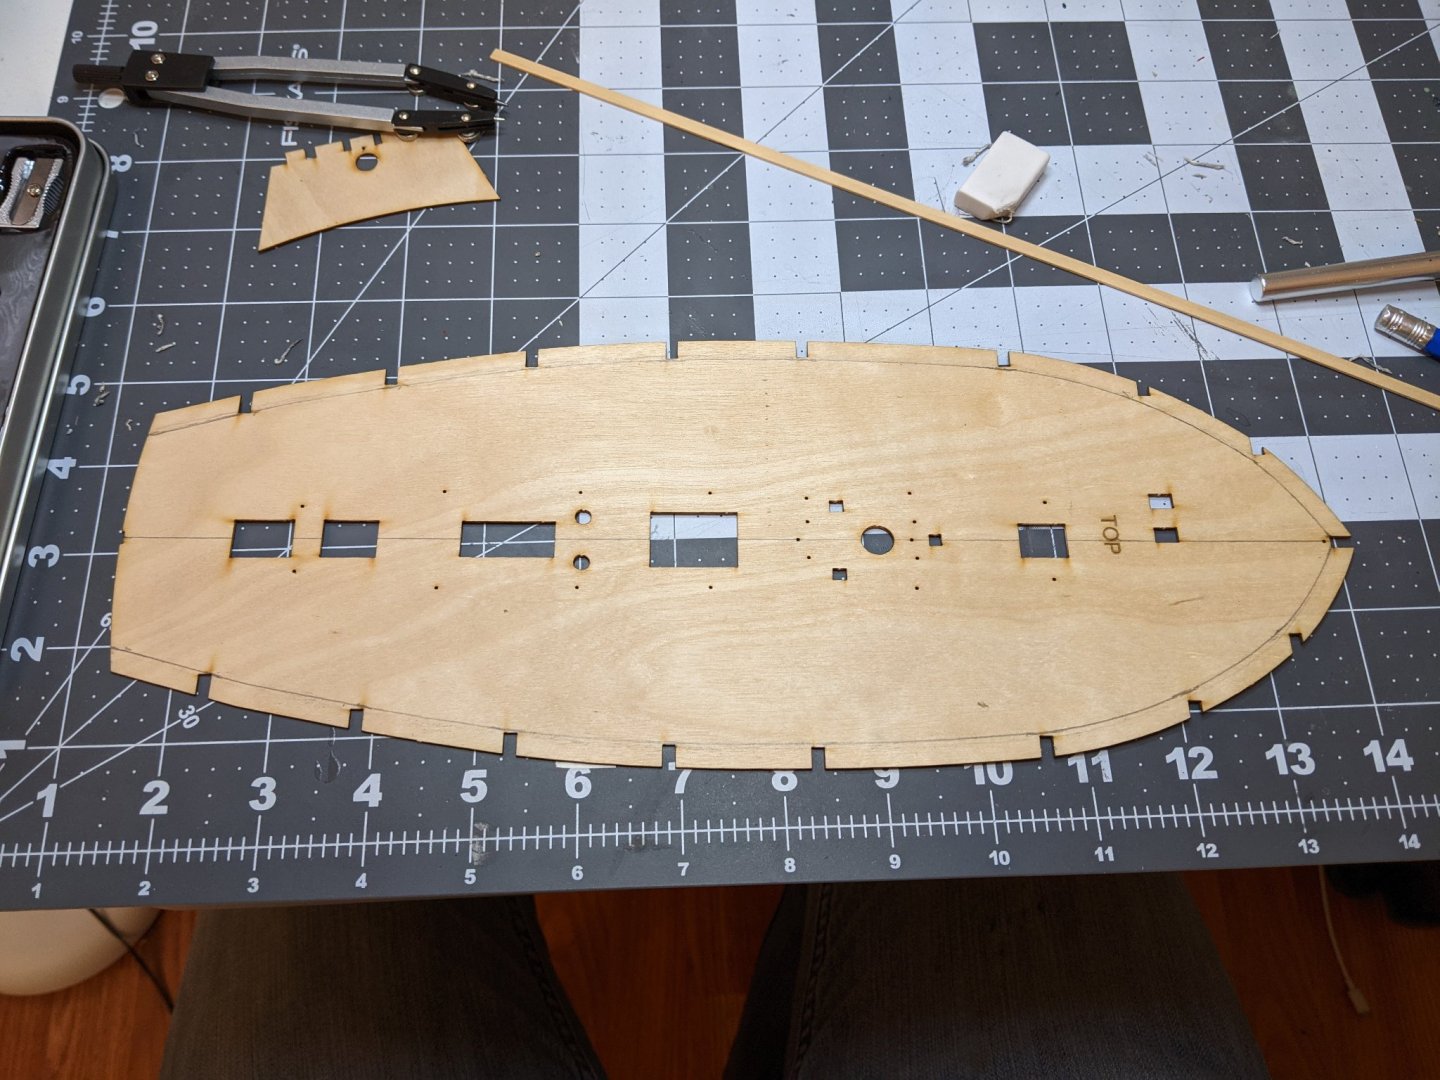
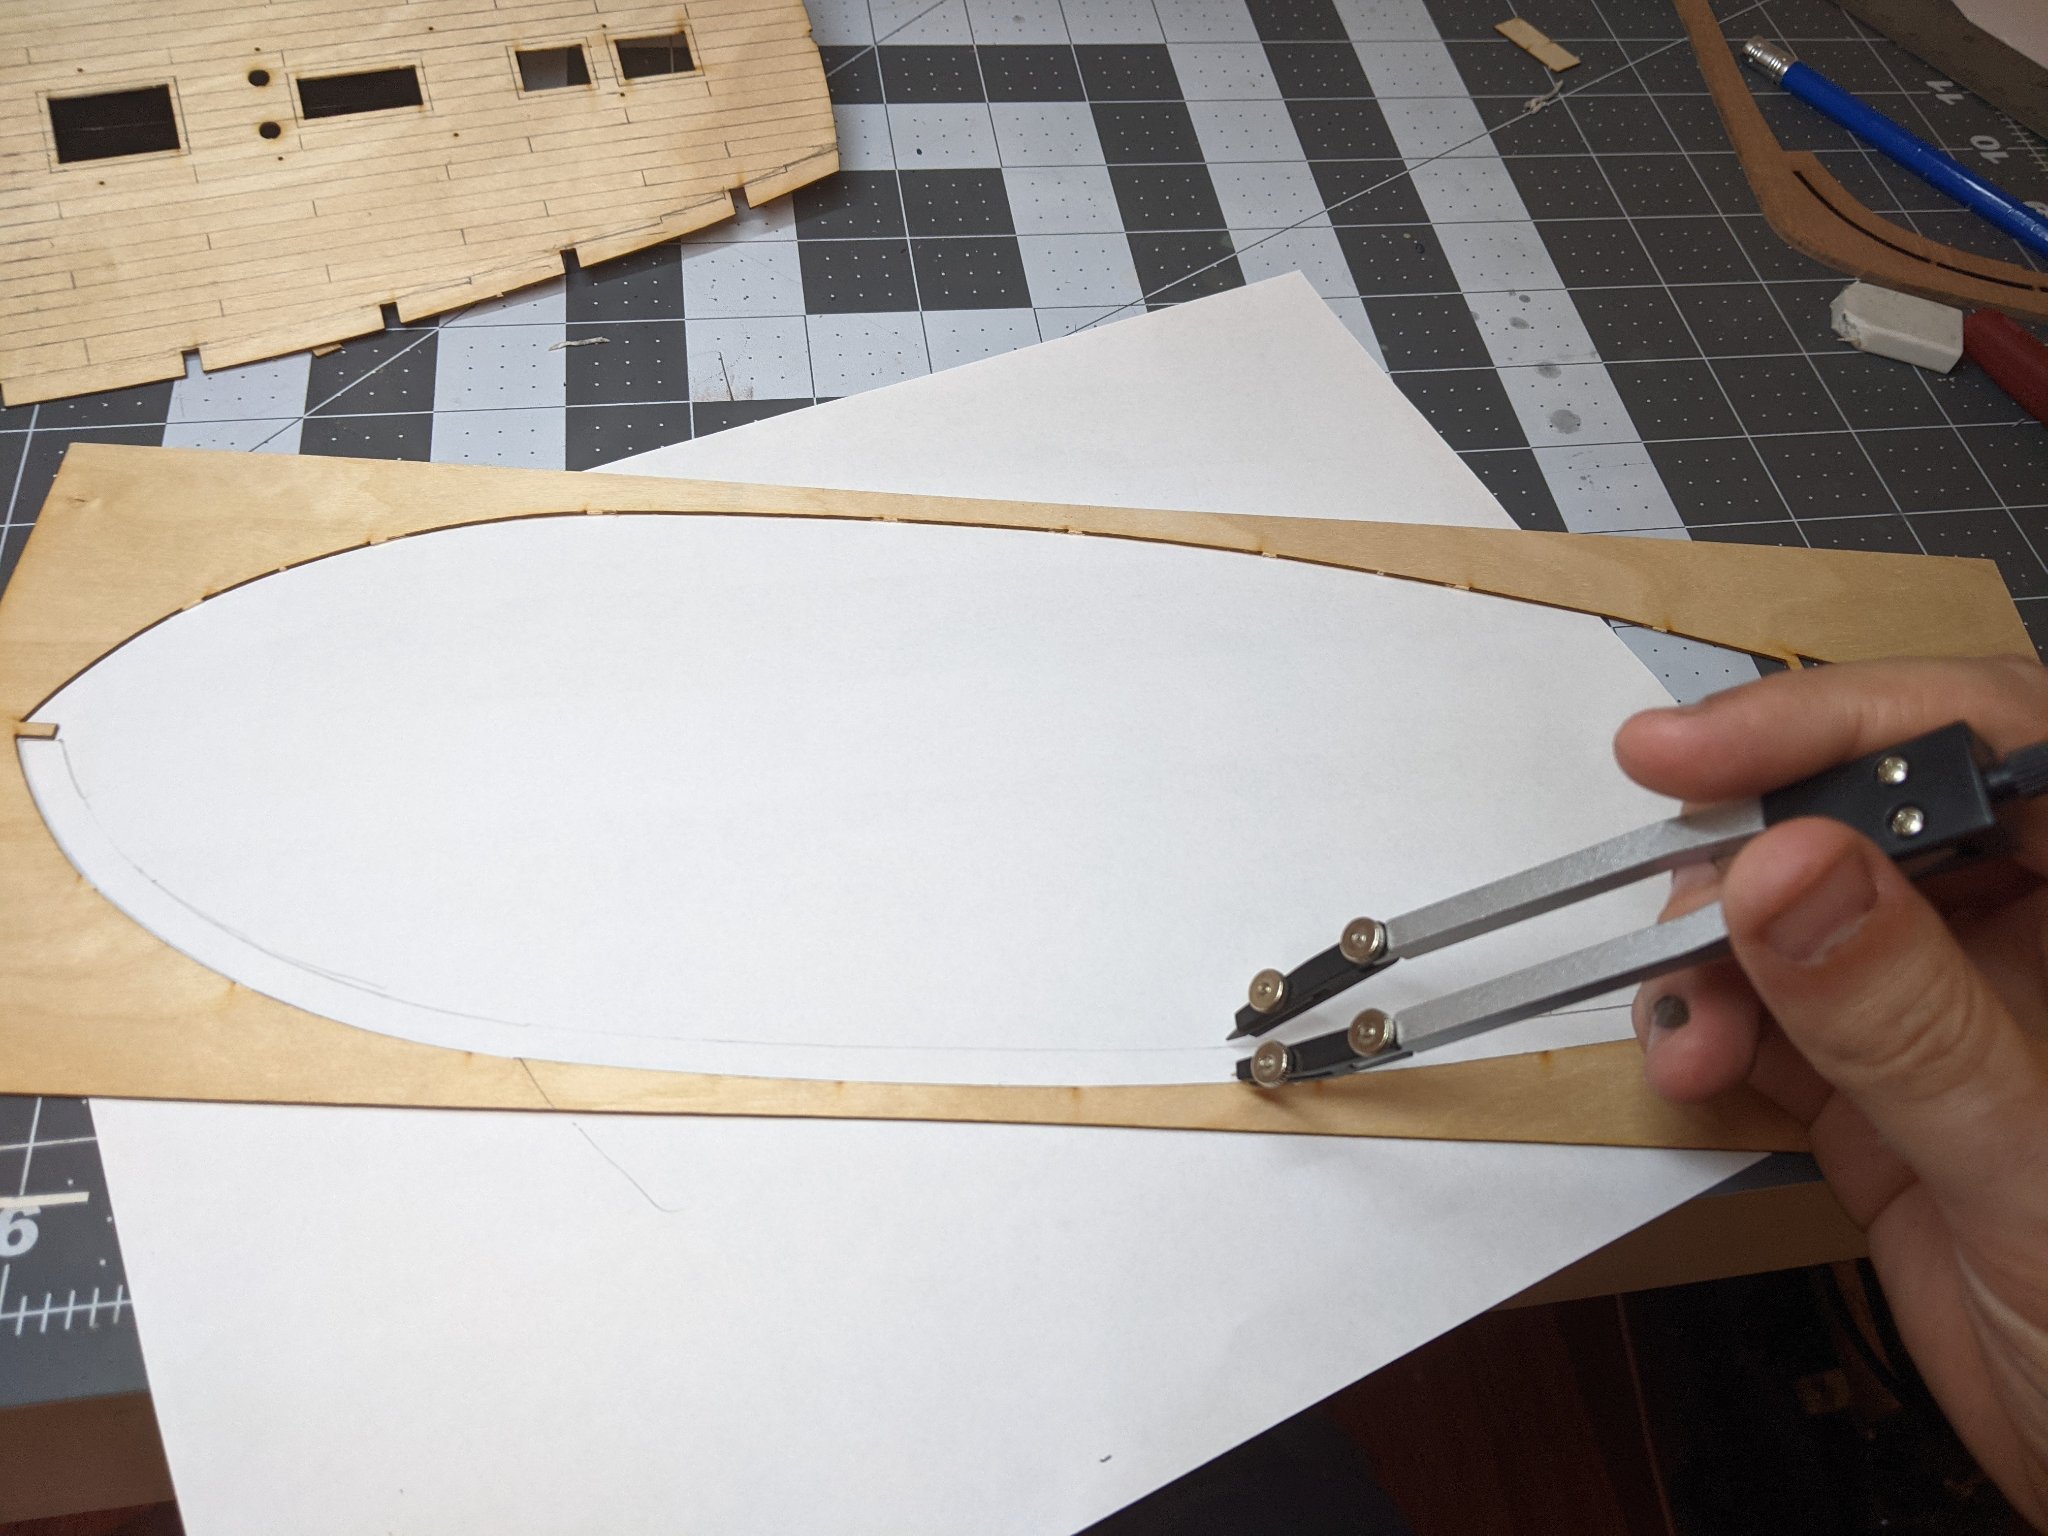
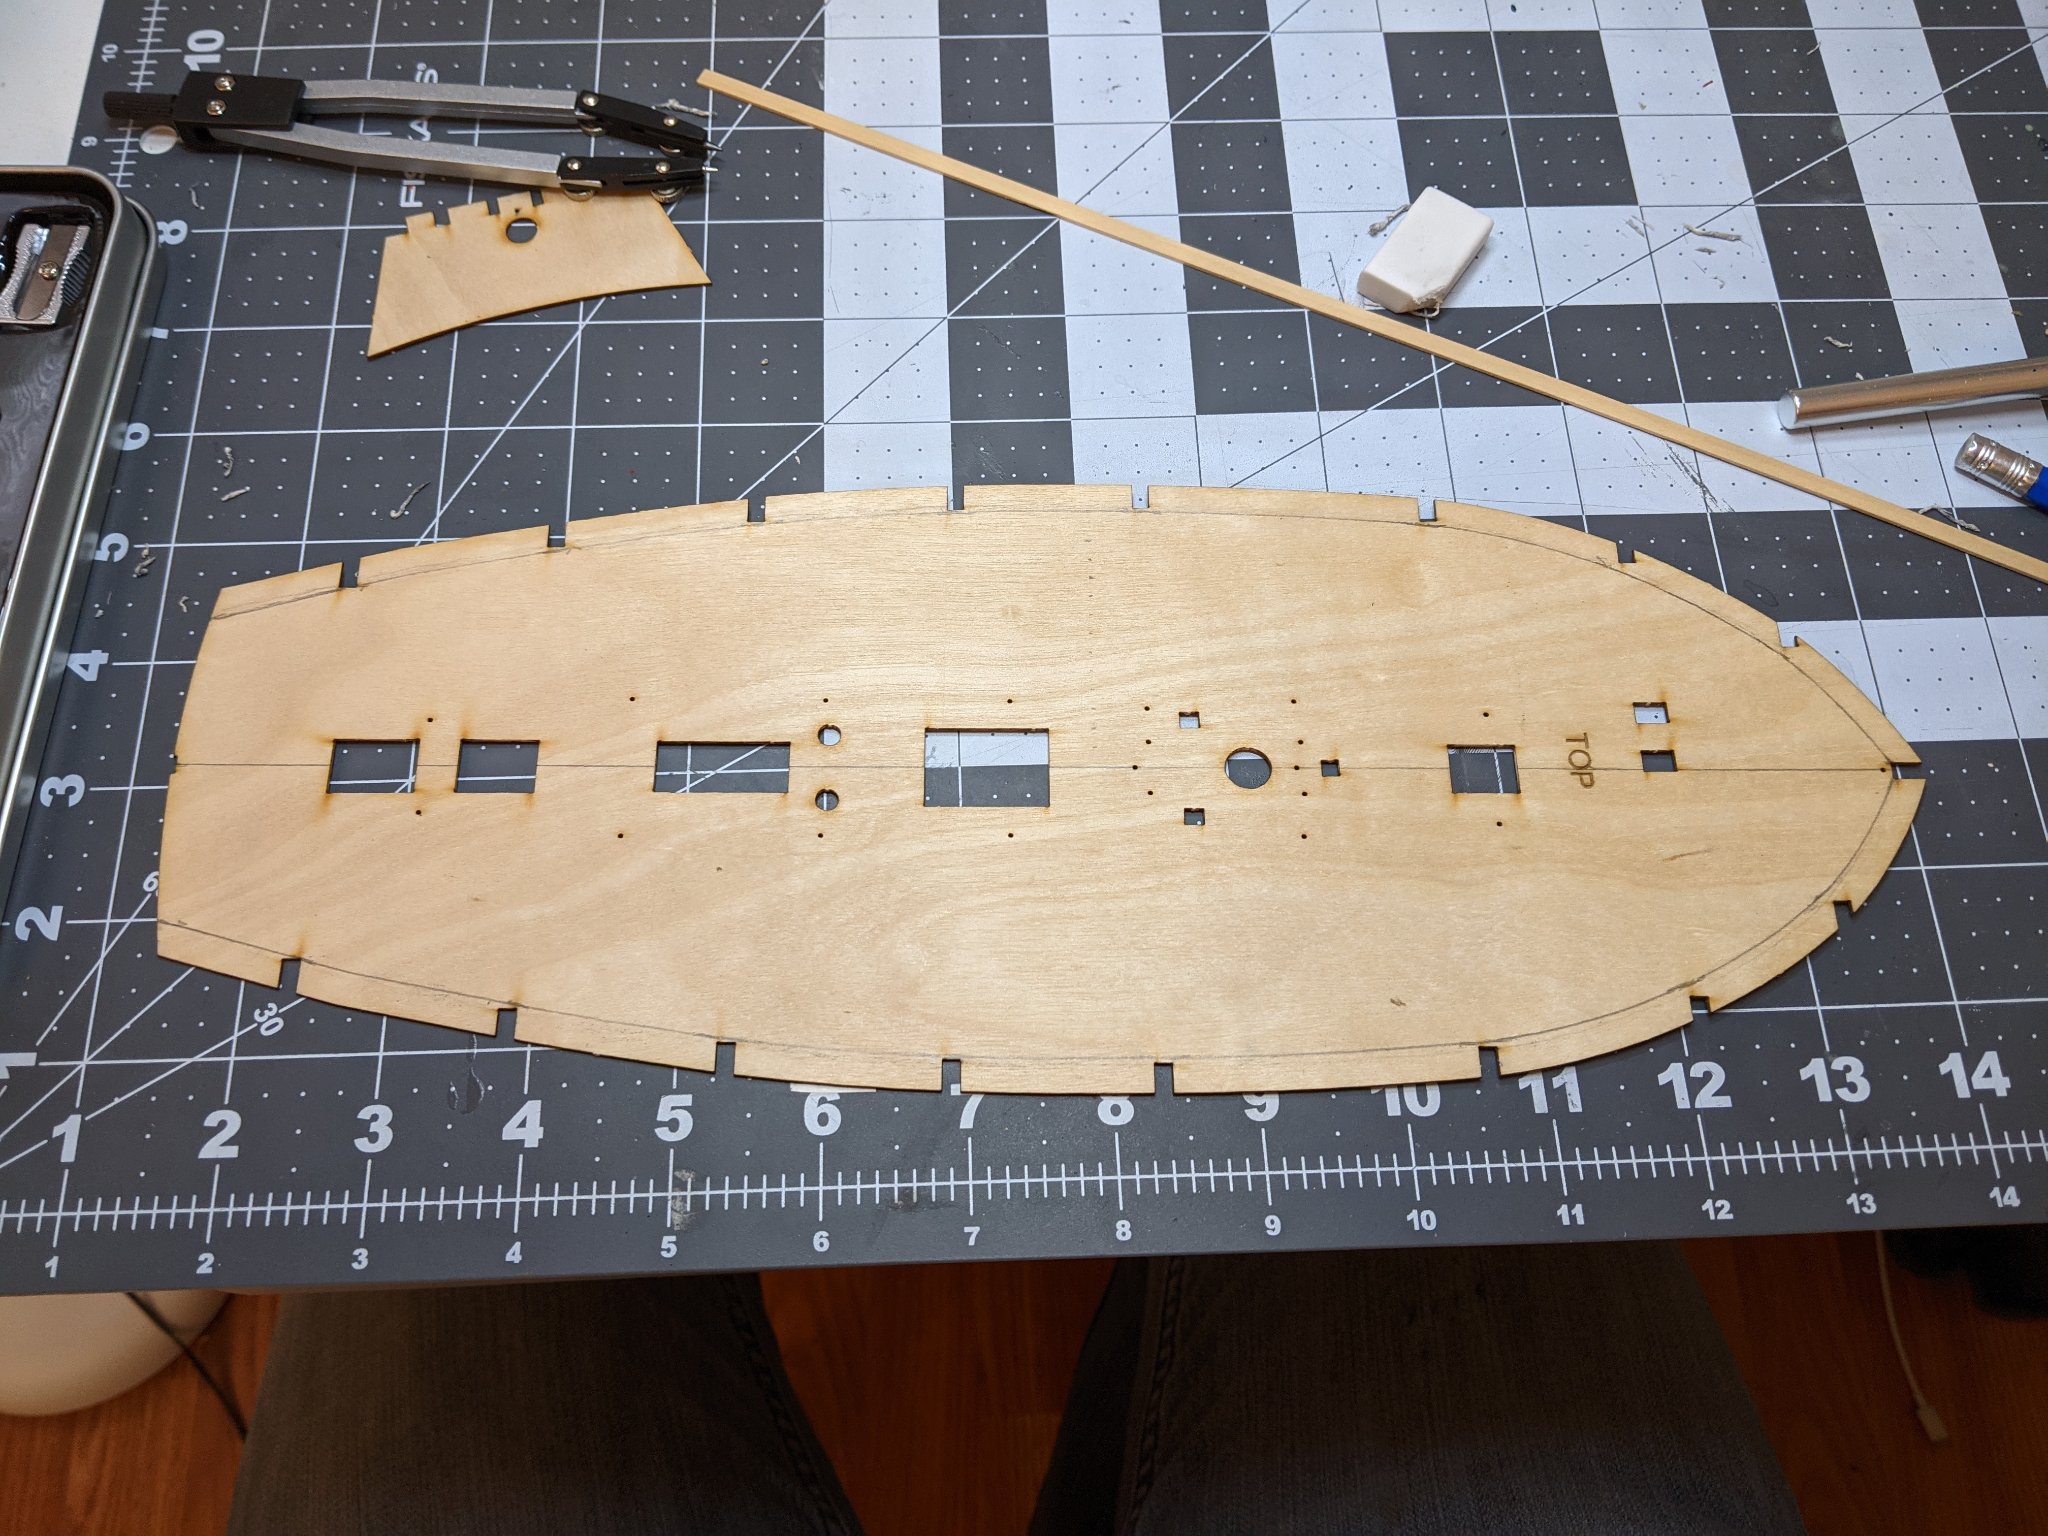
Having laid out the planking pattern it was time to install the false deck and begin the faring process. However, before I could begin this I needed to make sure I had a way of making templates for theargin planks. The boxwood sheet I ordered won't get here for another week or two and once the deck is installed, the tabs would get in the way of me double checking the template.
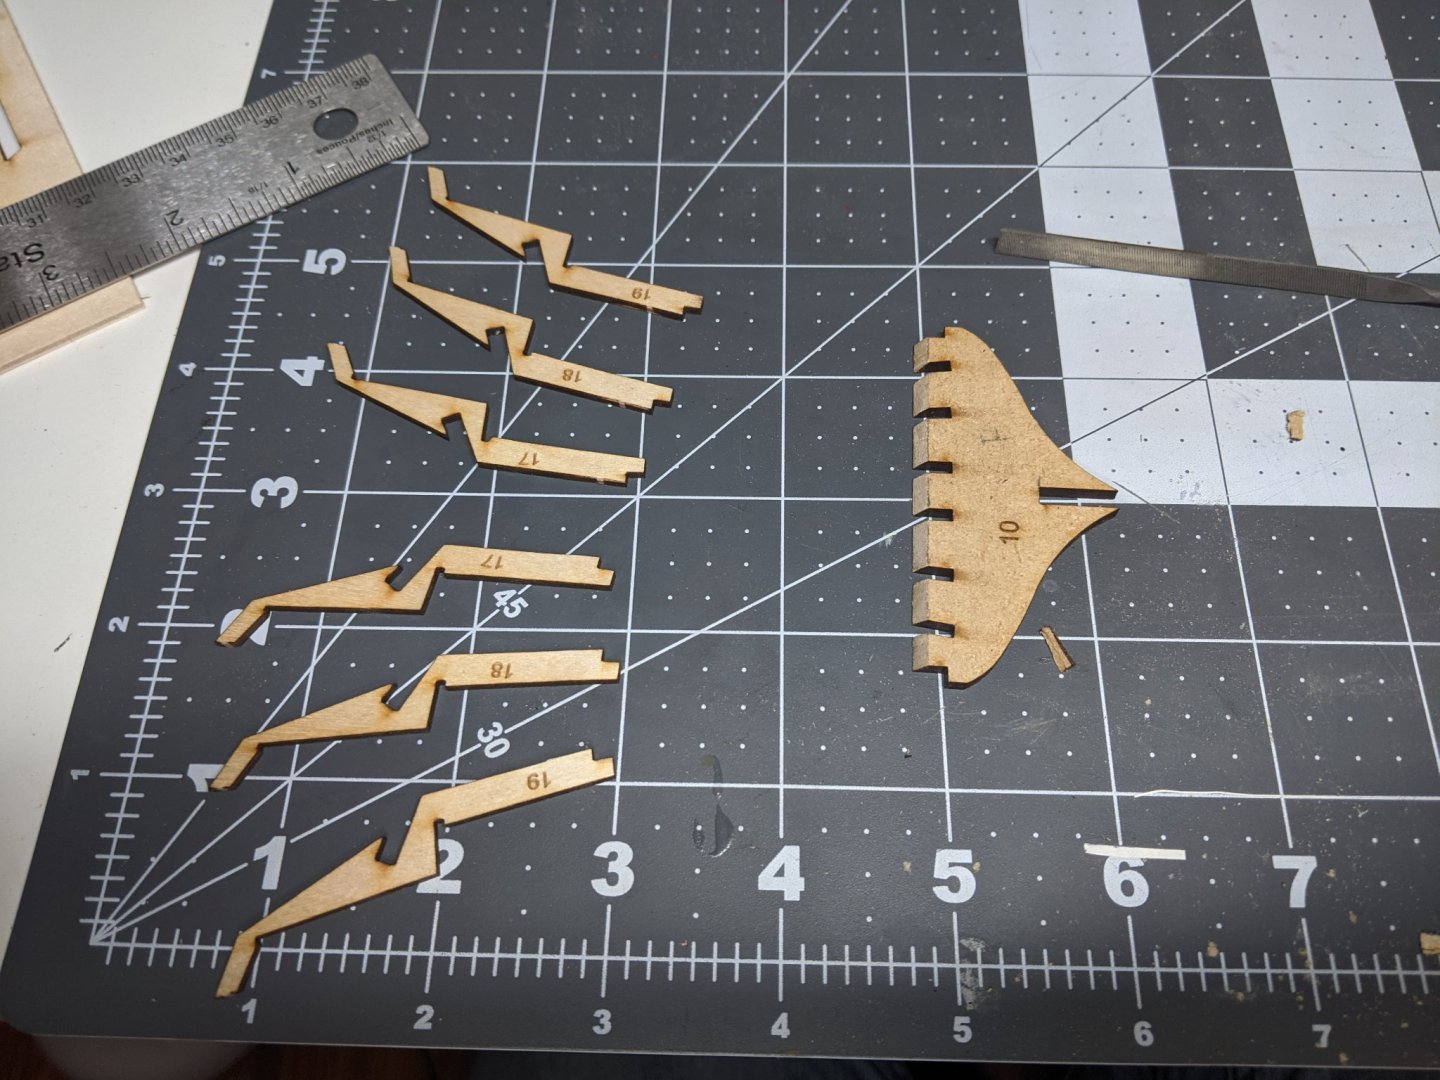
To create the template I used the sheet the deck came in. I cut off the tabs used it to draw the outside edge of the template. I then used the compass to draw the inside edge of the template.
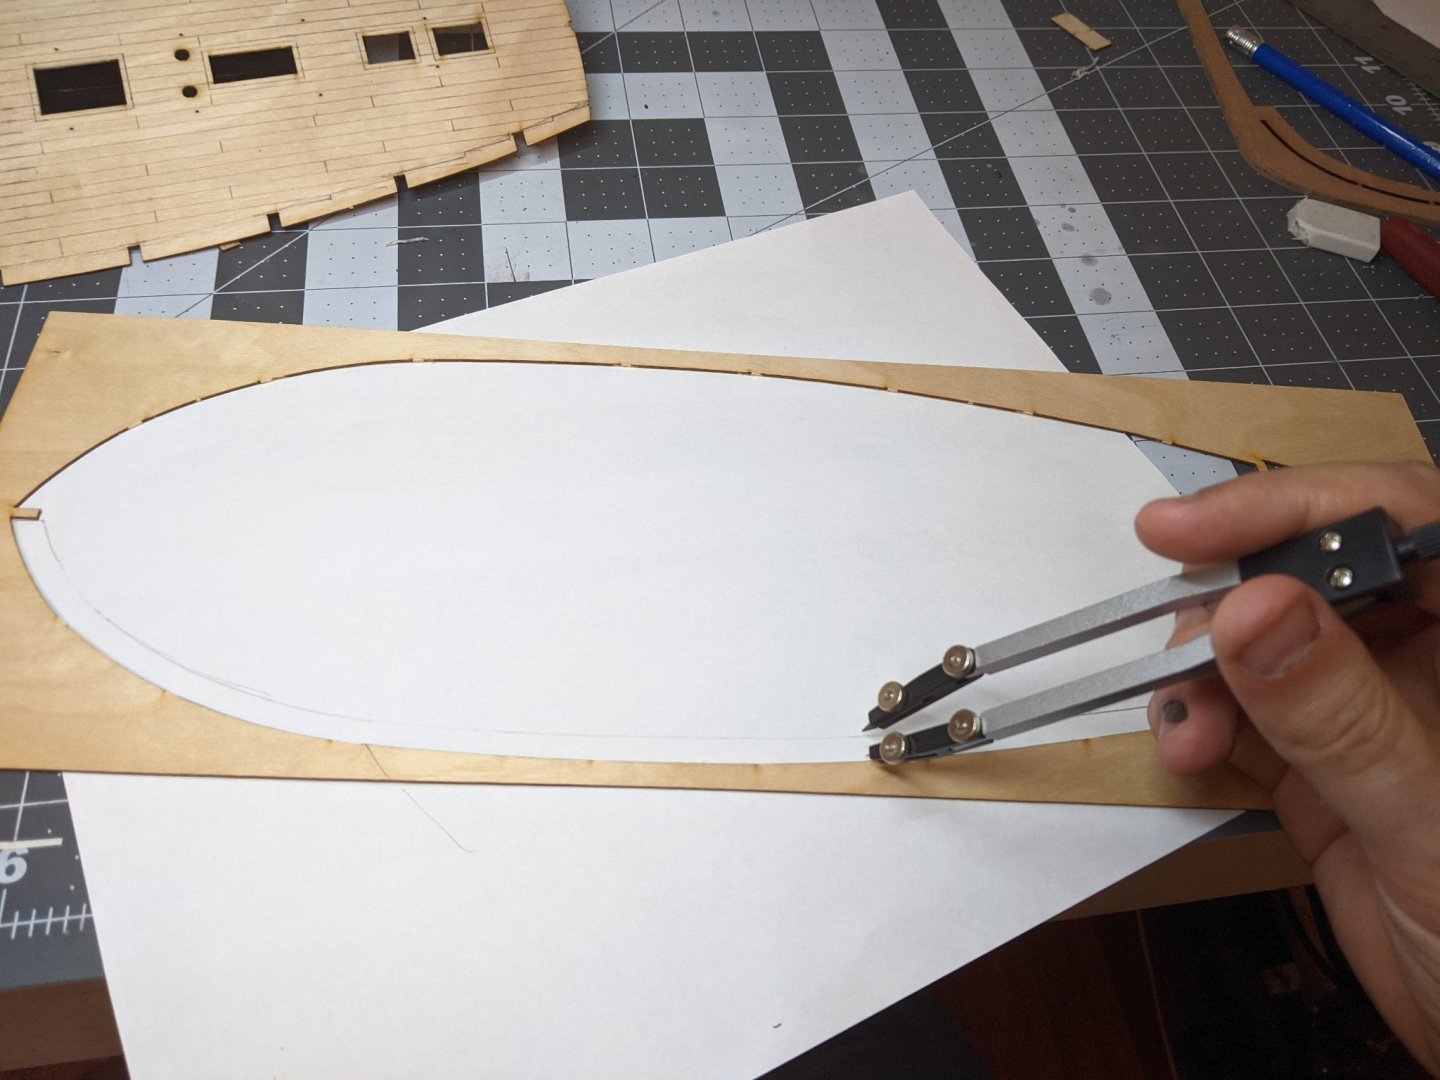
Everything appeared to match so on to the final assembly.

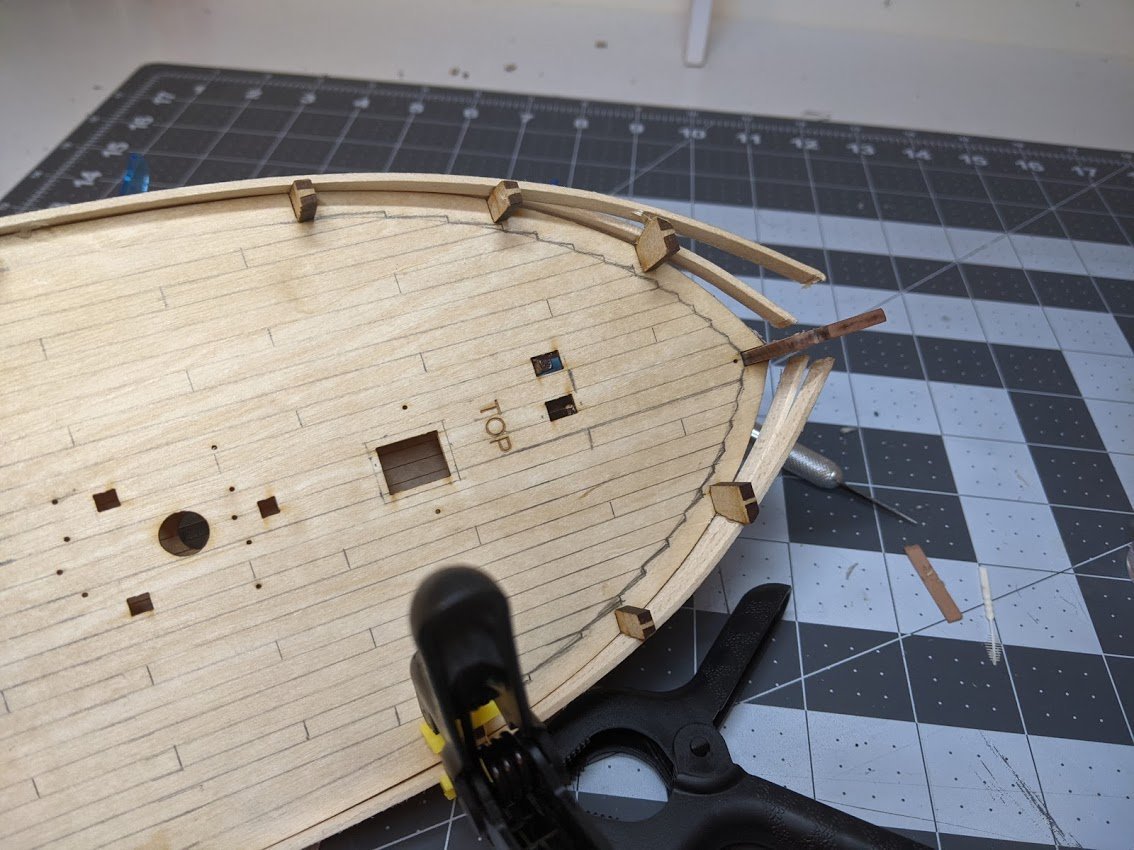
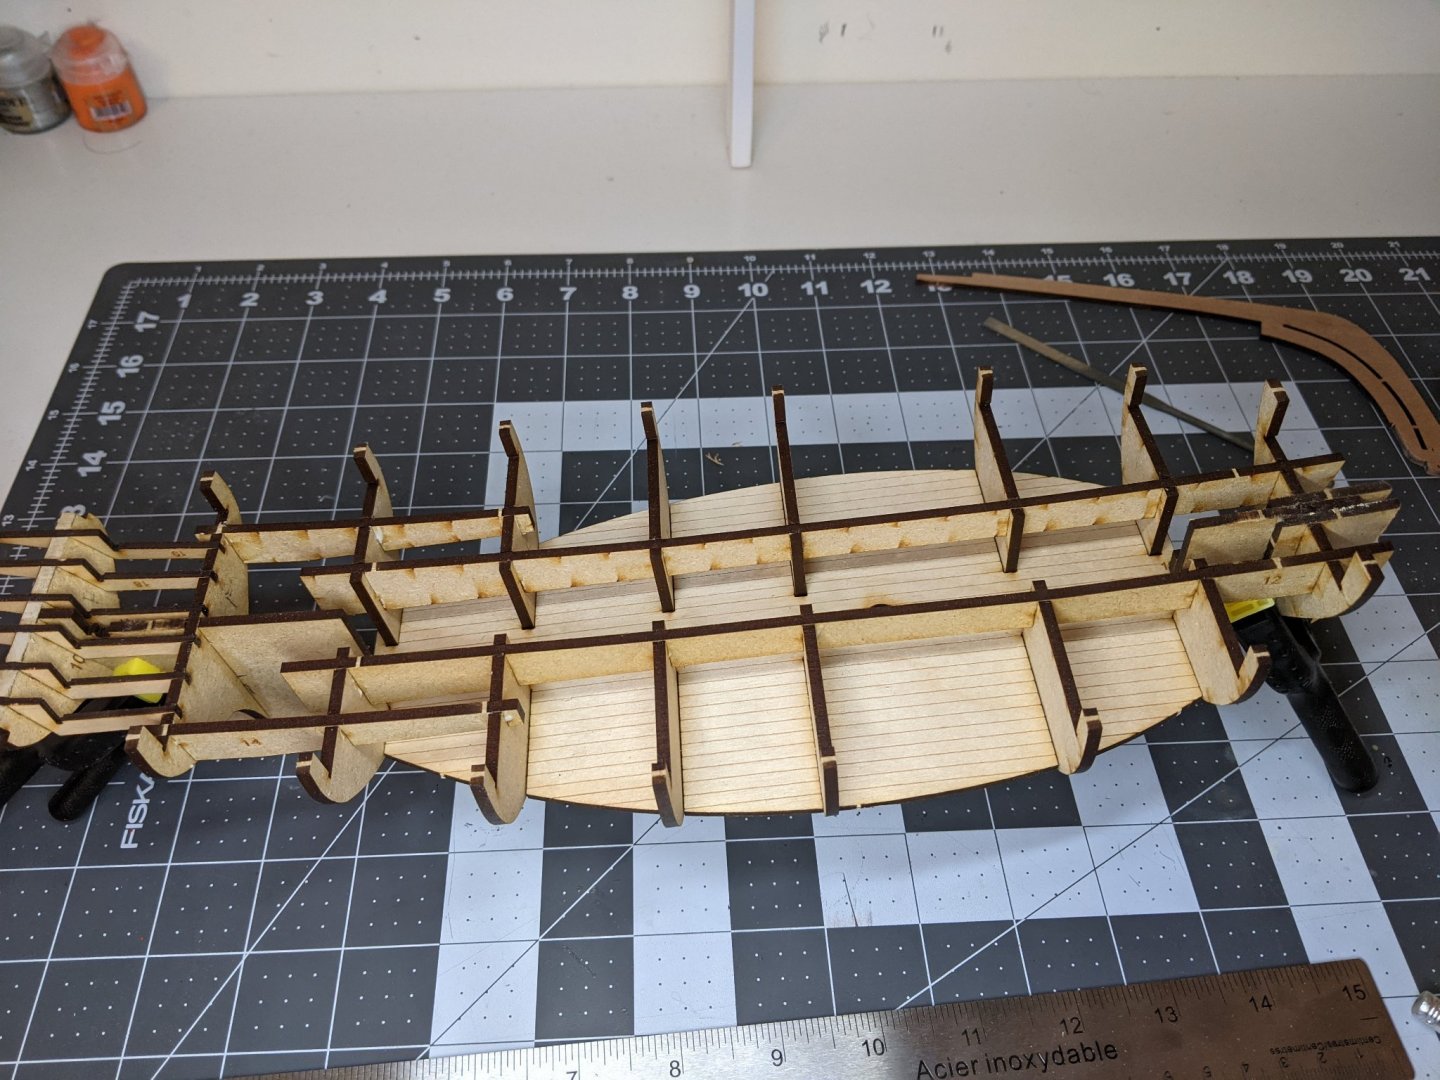
After gluing on the deck and adding the final pieces of the frame I fared the hull using sandpaper. This wasn't as hard or as time consuming as I had expected. Just letting the sandpaper run down the natural lines of the hull took off the parts it should without me having to think to hard about it.
Finally I attached the front end of the keel. The instructions indicated that I should attach the whole keel at this point, but I decided to leave off the back end of it to make the sanding stage after the first planking easier. I can always dry fit it when attaching the garboard plank.

Next up, I get to see if all the reading I have done on planking taught me anything...
- jpalmer1970, CiscoH, Eurus and 1 other
-
4
-
-
Just now, Blue Ensign said:
Looks good to my eye, 👍and as the build progresses and deck fittings are added the butt shift becomes less apparent.
I used 4.5mm wide Boxwood strips for the deck planking which is what I had to hand at the time. (Post15)
I would otherwise have gone with 3.4mm strips equating to planks of 8.5 inch widths.
Regards,
B.E.
That makes sense why I ended up with more planks as the kit ones are just shy of 4mm.
One question I had for you was the process for cutting the steps in the margin planks when you actually do the planking. You glued down the margin planks long before you actually laid the rest of the planks. Did you just cut the notches out with a hobby knife? Is there anything I need to be careful of when glueing down the margin planks?
-
I don't think I really appreciate the detailed work on rigging I have seen on these forums until I opened up the fittings box for my alert and saw how small all the bits really were.
It looks good.
-
They look amazing. I would never have guessed they were made out of card.
-
Log #3: Designing the Deck
Though I largely intend to follow the instructions as written, there are a few places where I want to make some minor adjustments based on some ideas from other build logs. The first of these adjustments was the deck planking pattern.
The pattern is largely a replication of the excellent work that blue ensign did on his alert kit. I would highly recommend you check out his post on the subject here.
It was not clear to me from the pictures what width of planks blue ensign was using and since I was planning on using the planks that came with the kit, I needed to rebuild the pattern from scratch using the picture of his finished pattern as a guide.
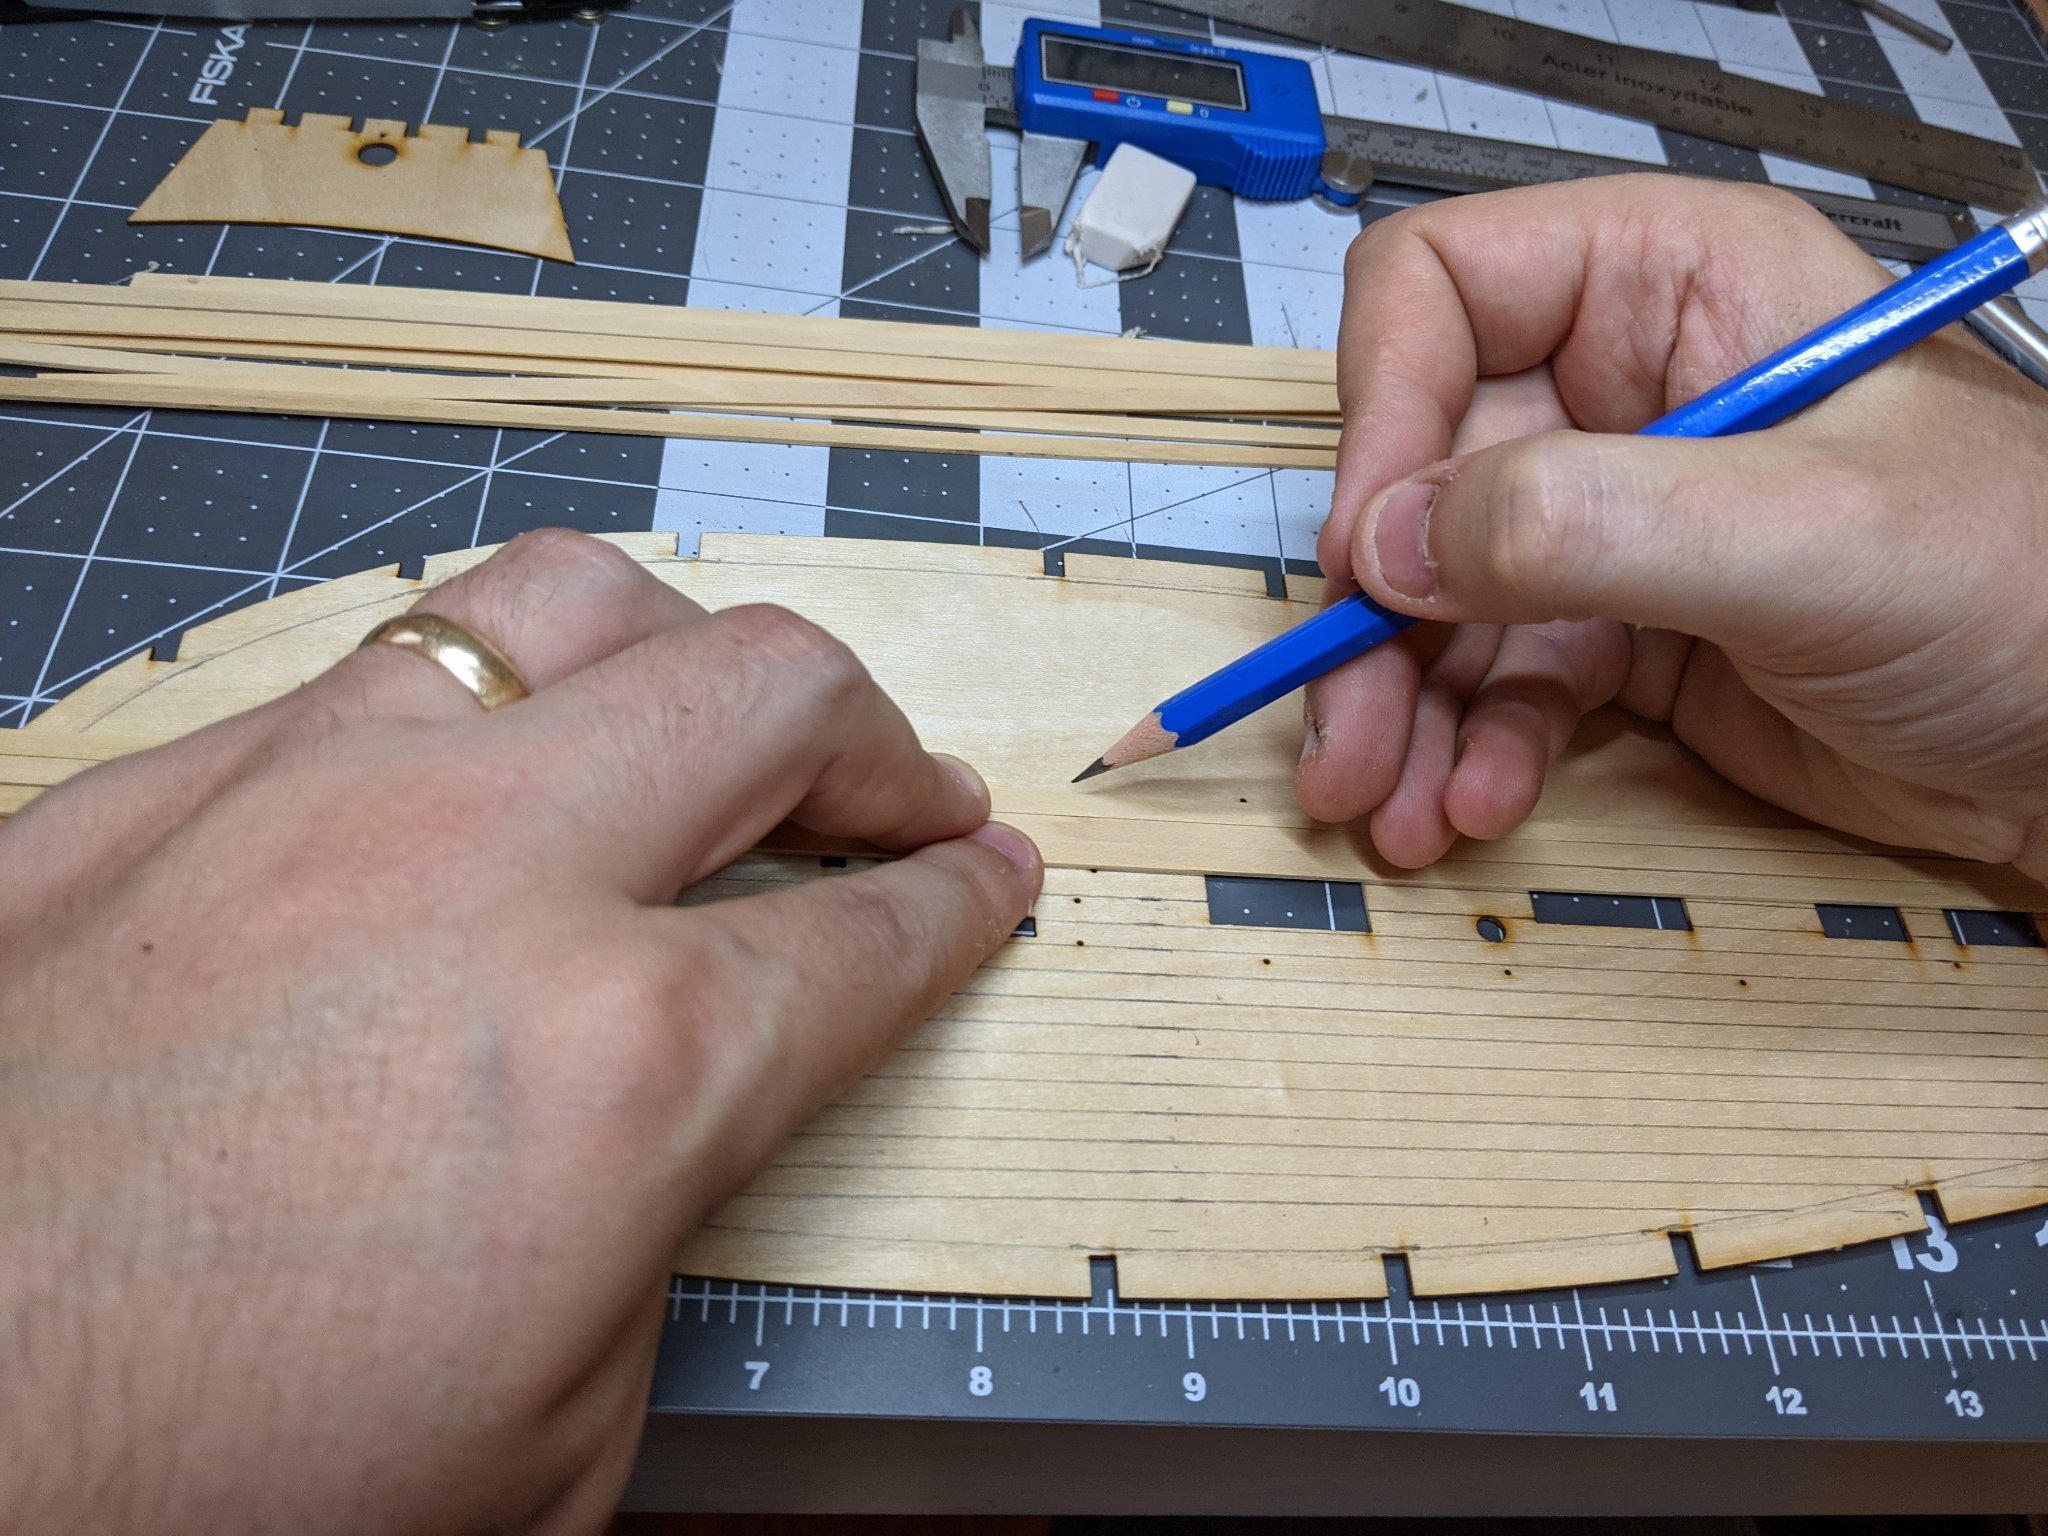
The first step was to mark out where the margine planks would go. These will be cut out of a boxwood sheet I have ordered. I used a compass, setting the width to match the distance the bow cuts into the deck, keeping this width constant all the way round the outside of the deck.
Next, I measured and drew the plank lines down the length of the deck. I had a lot of trouble figuring out how to do this precisely until I realized I could just lay the boxwood strips next to each other to make my tick marks.

Then, I marked where the planks would but into the margine planks.

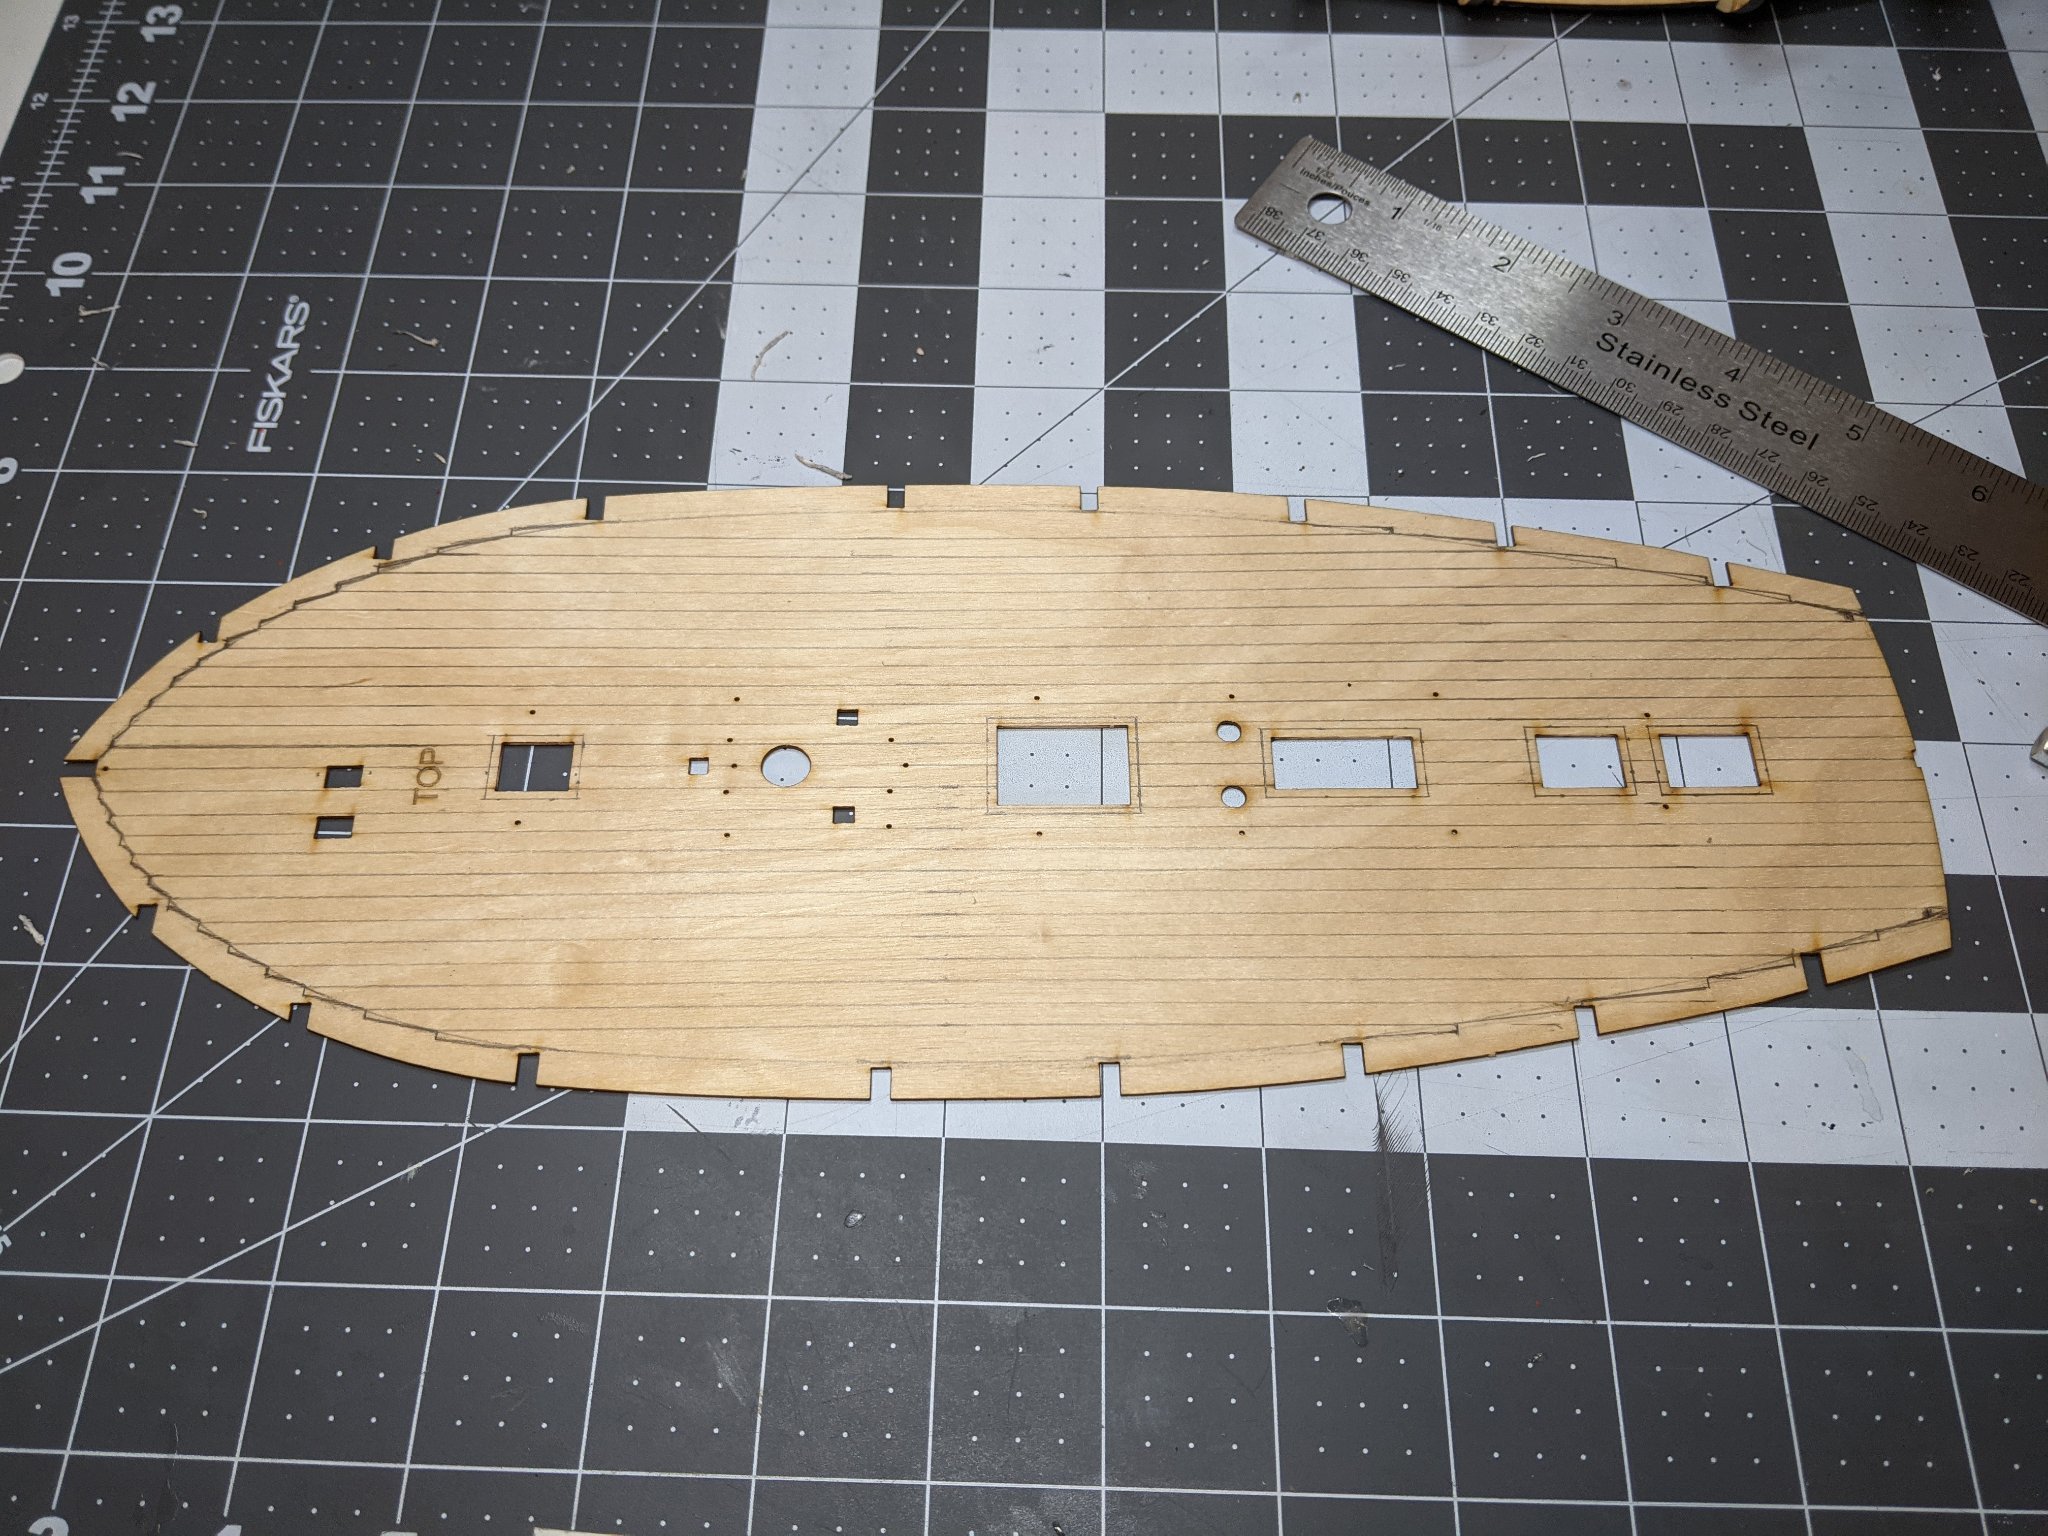
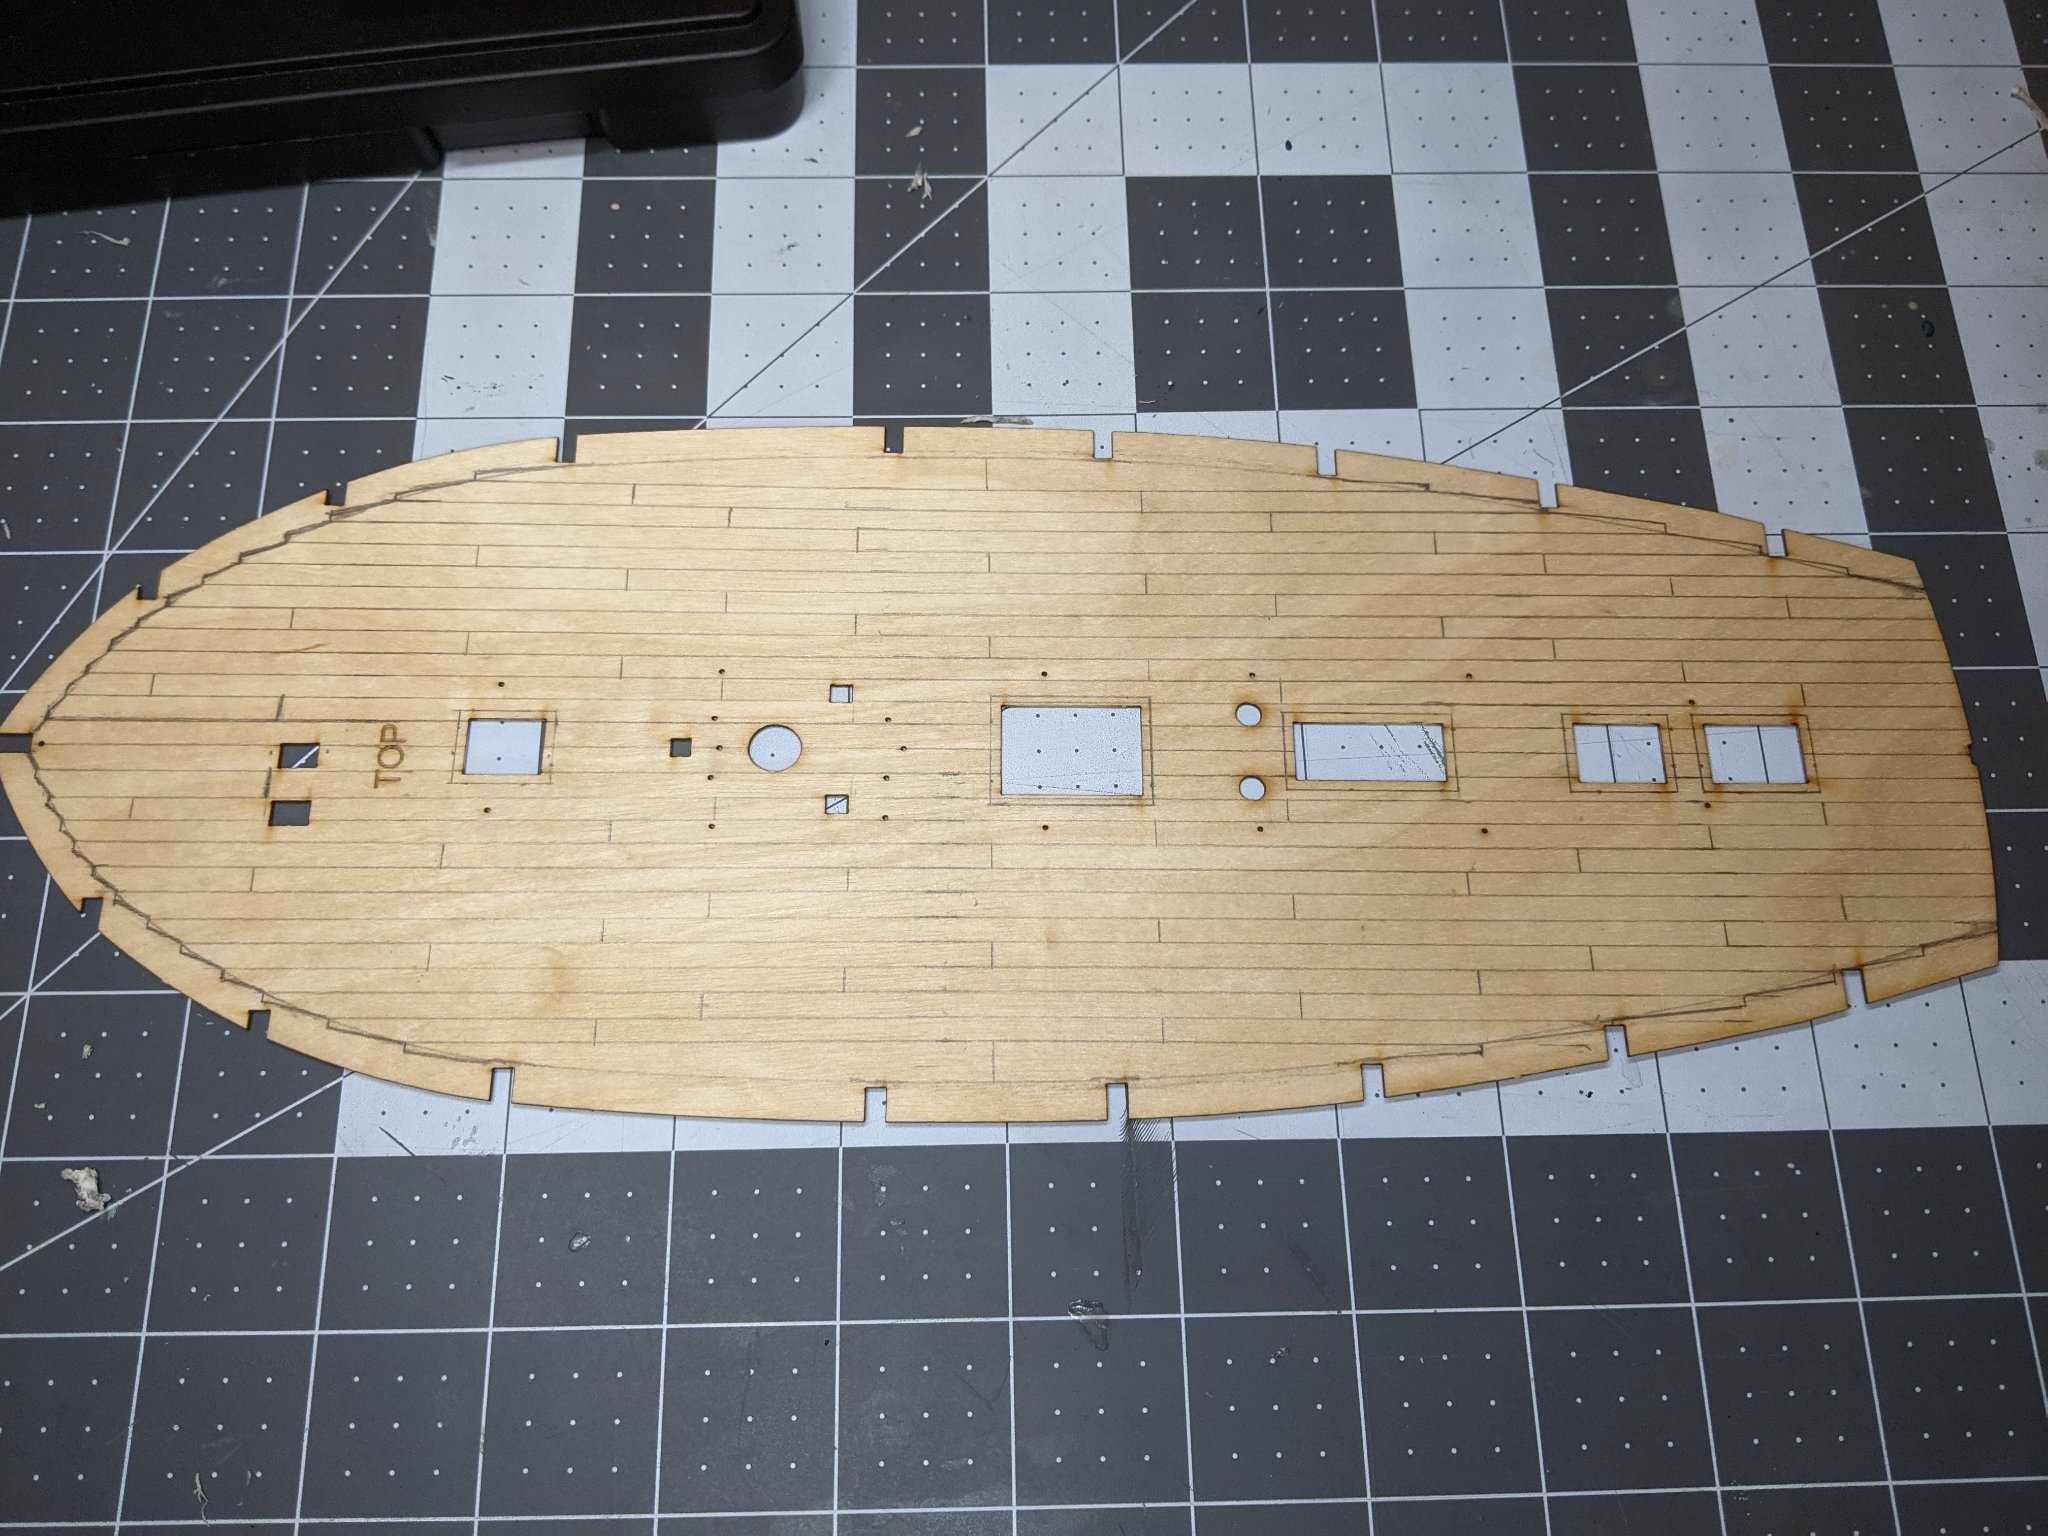
Finally, using the beam positions that blue ensign used, I marked the plank ends using a 4 plank shift pattern. This had to be adjusted slightly near the center to avoid any of the planks looking too short or too long.
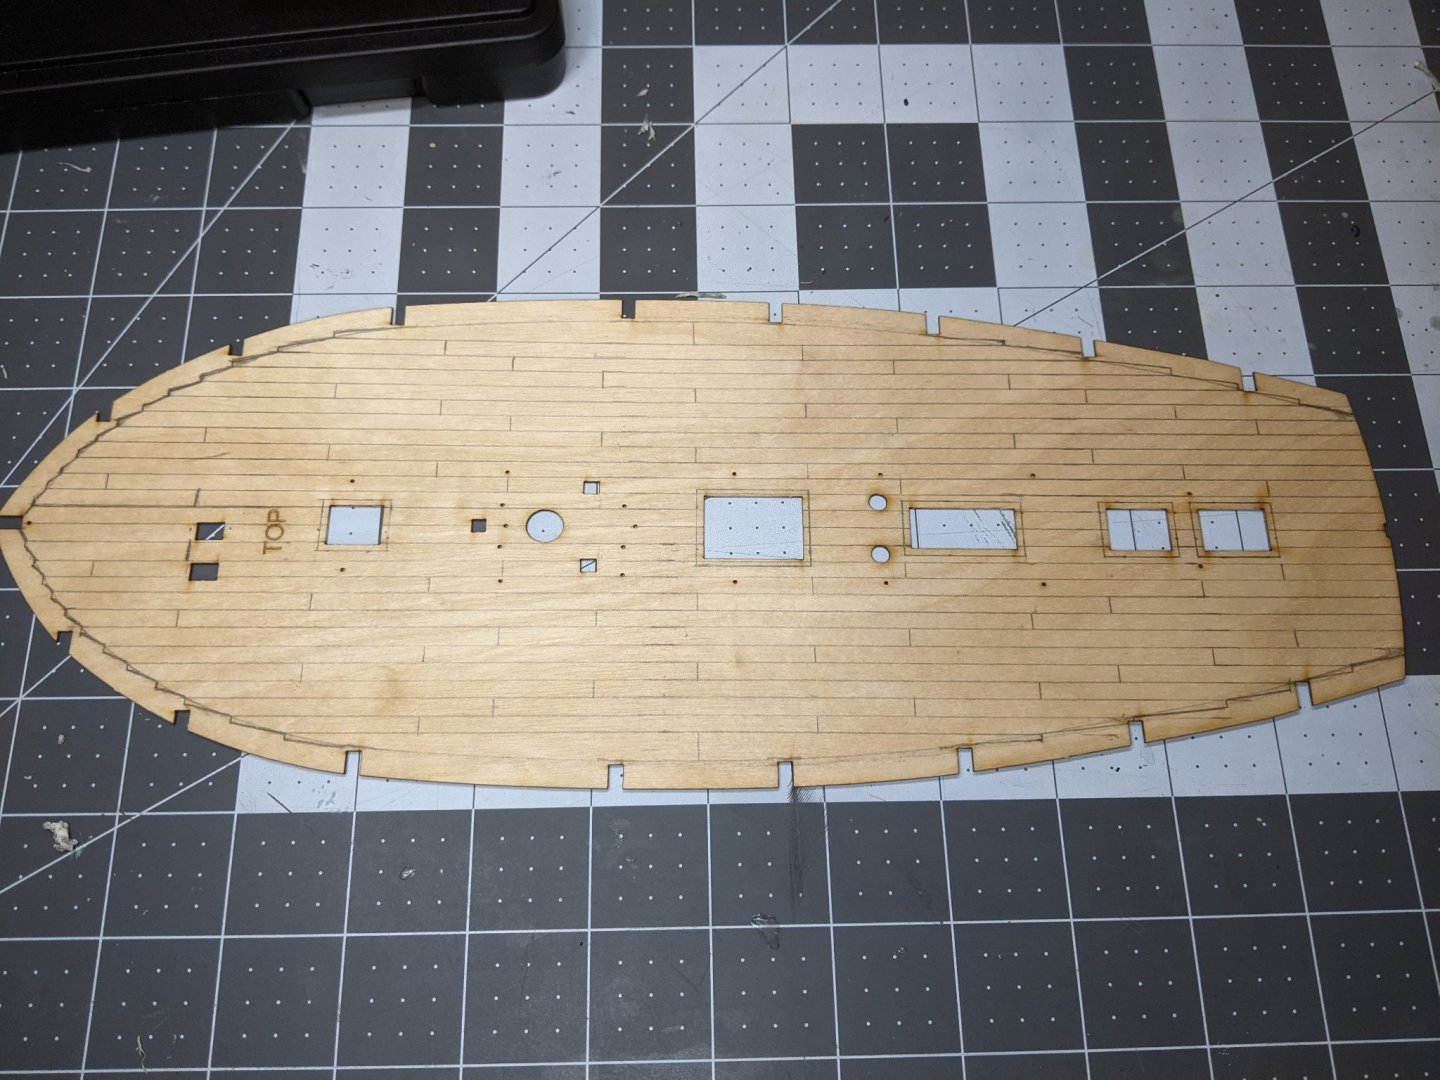
I would love some feedback on any issues anyone might see with the planking pattern. It turned out a little different than the one blue ensign did, likely due to differences in plank widths.
Next up, final assembly and faring...
- Obormotov, jpalmer1970, Marcus.K. and 1 other
-
4
-
On 8/4/2021 at 1:35 PM, BenD said:
I had the exact same gap between the bulwark strip and the first plank on my Cutter Sherbourne. I filled it just like you did.
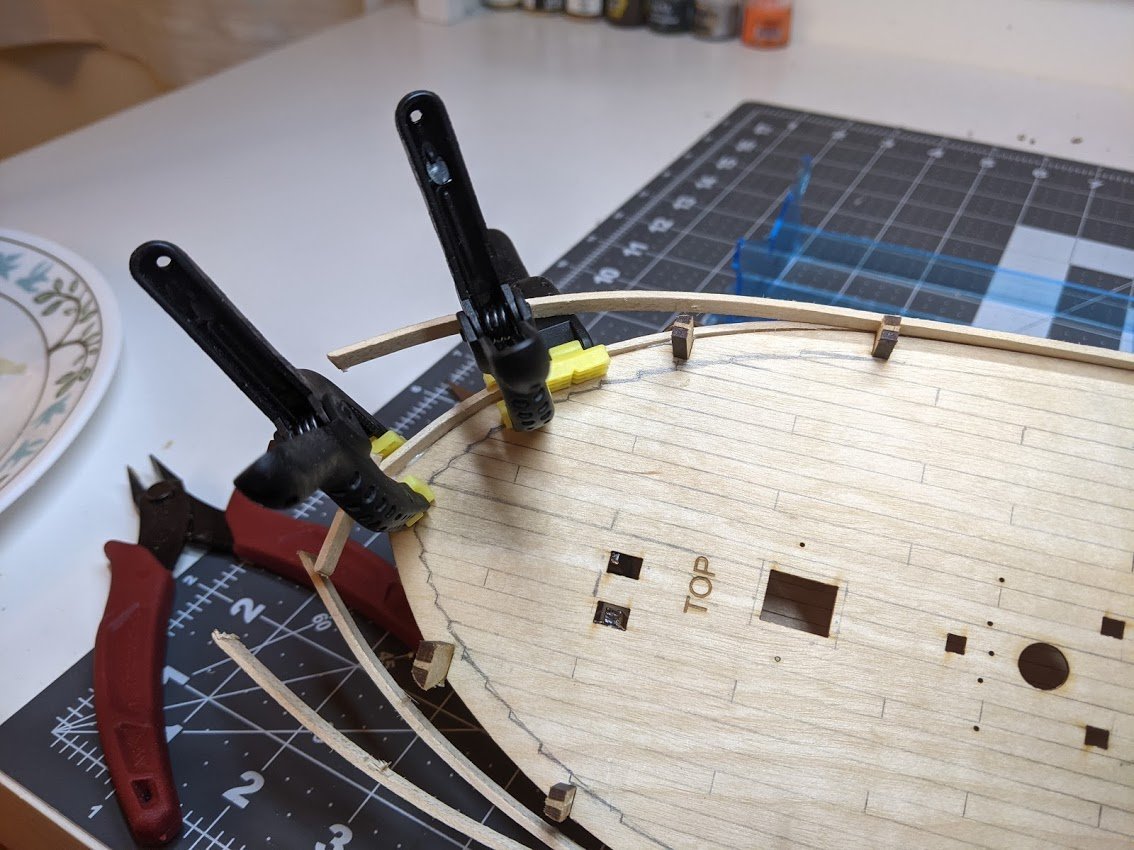
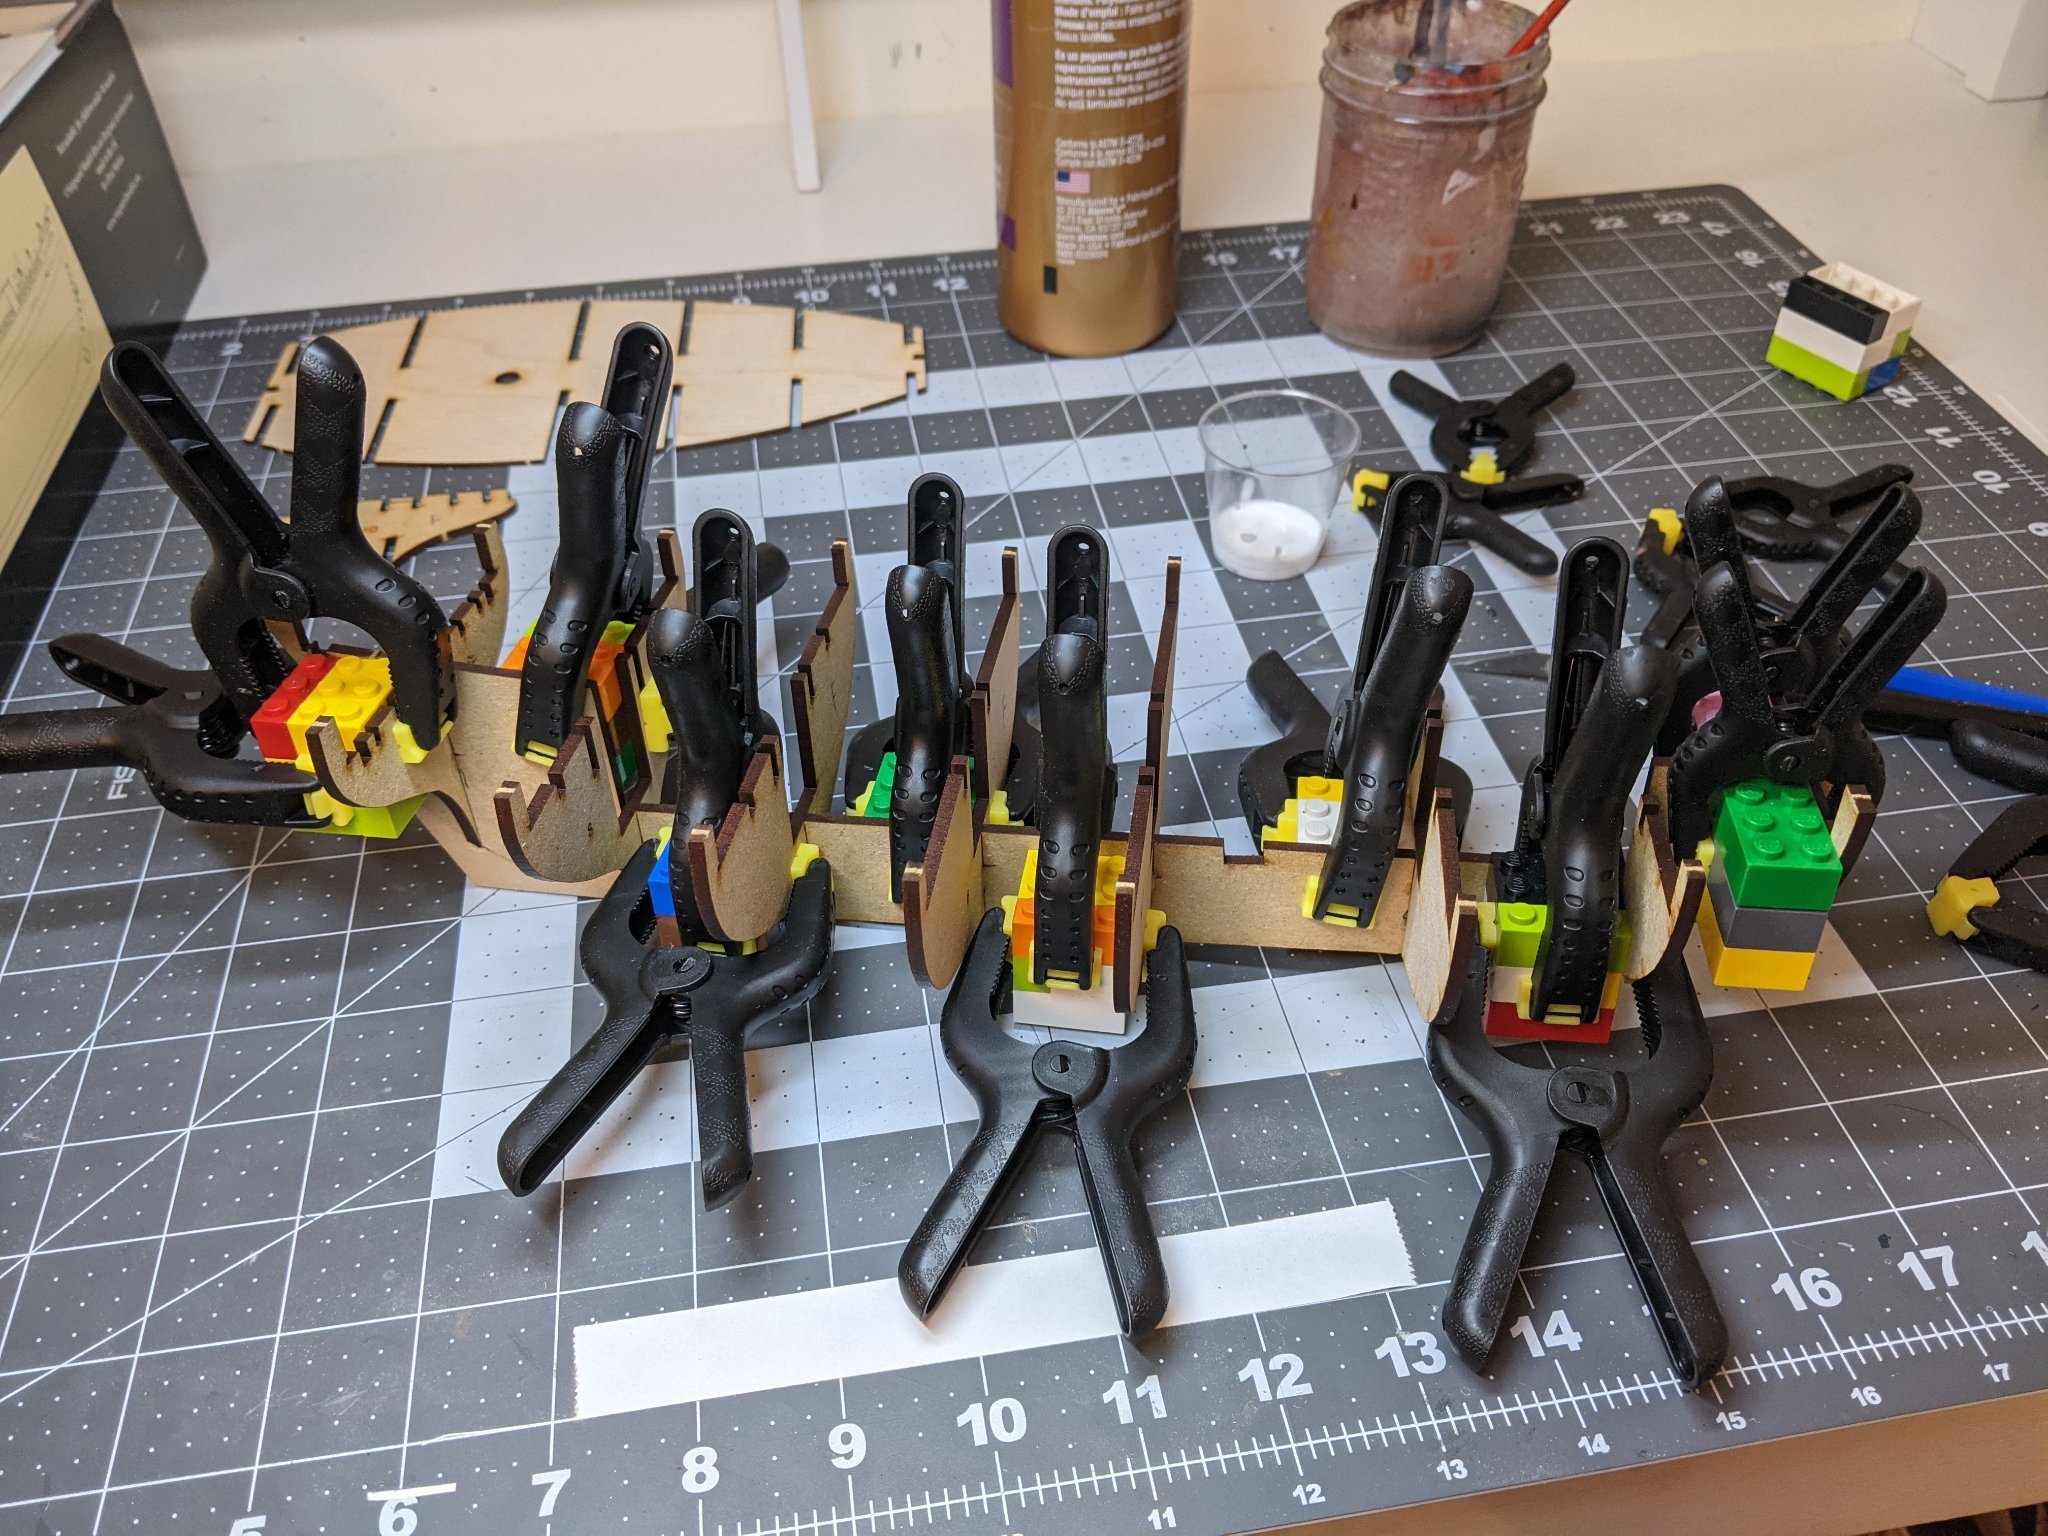
Get more clamps! You can never have too many. I've found even the dollar store ones work ok. Binder clips are also really good for ship building.
I love dollar store clamps. If the break you can always just get more.
-
I have a question relating to photos. I have been doing my log in Google docs (just so I have a record) and then copying and pasting it into my log her on msw. I have noticed that when I view the log on mobile the pictures appear squished. Is there anyway to fix this?
-
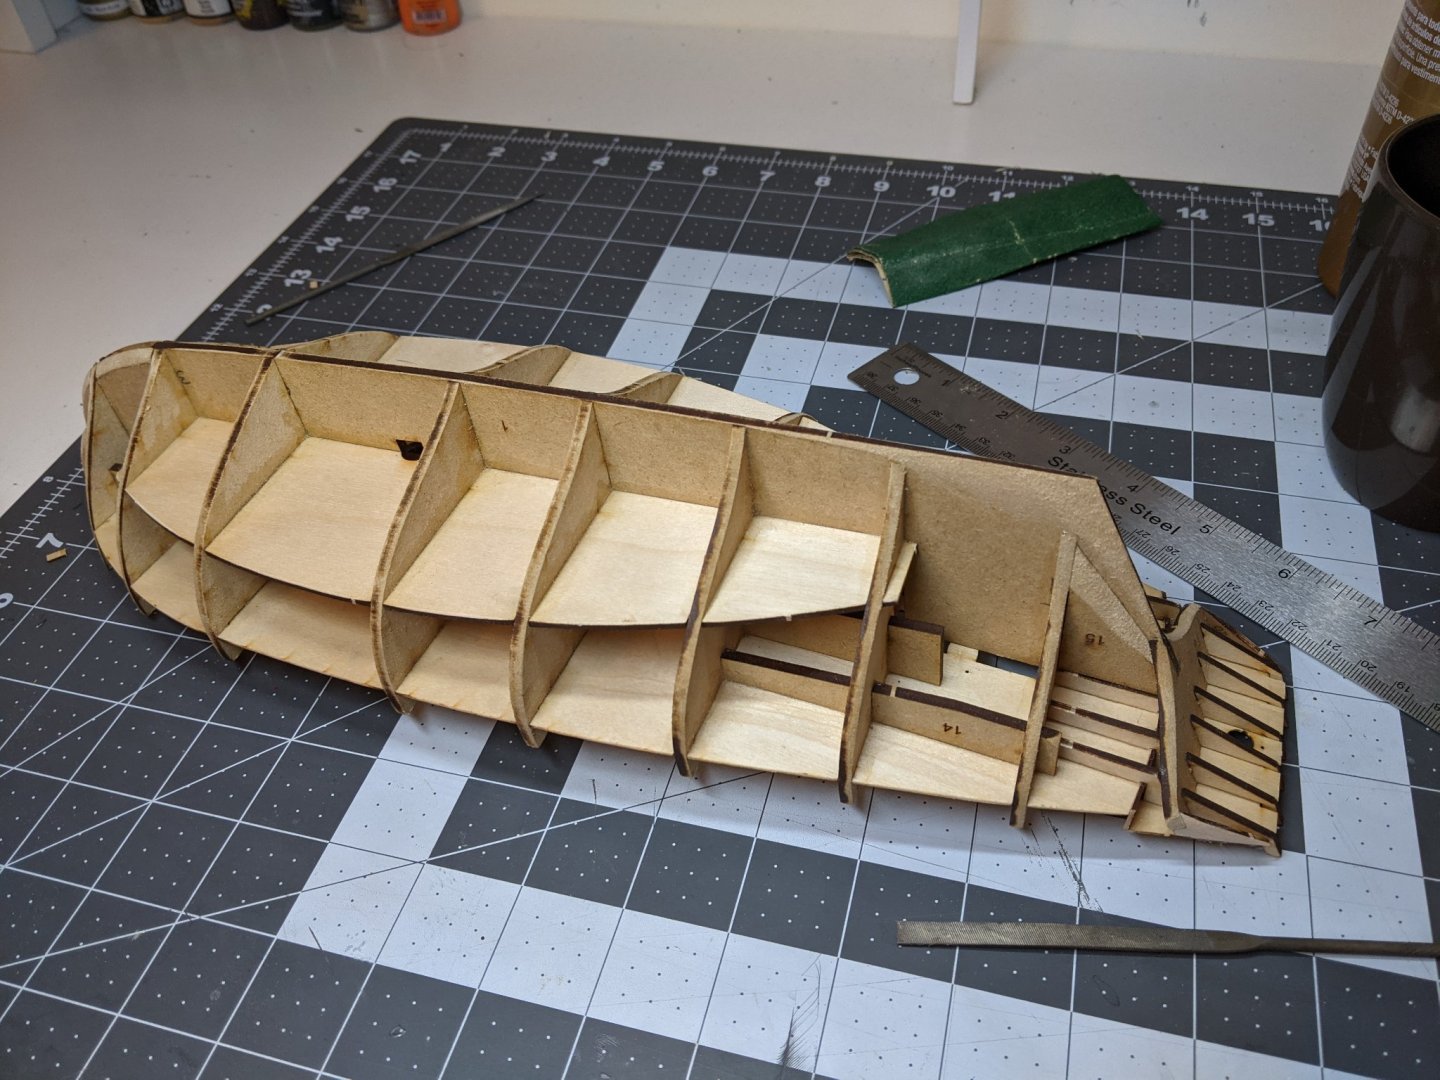
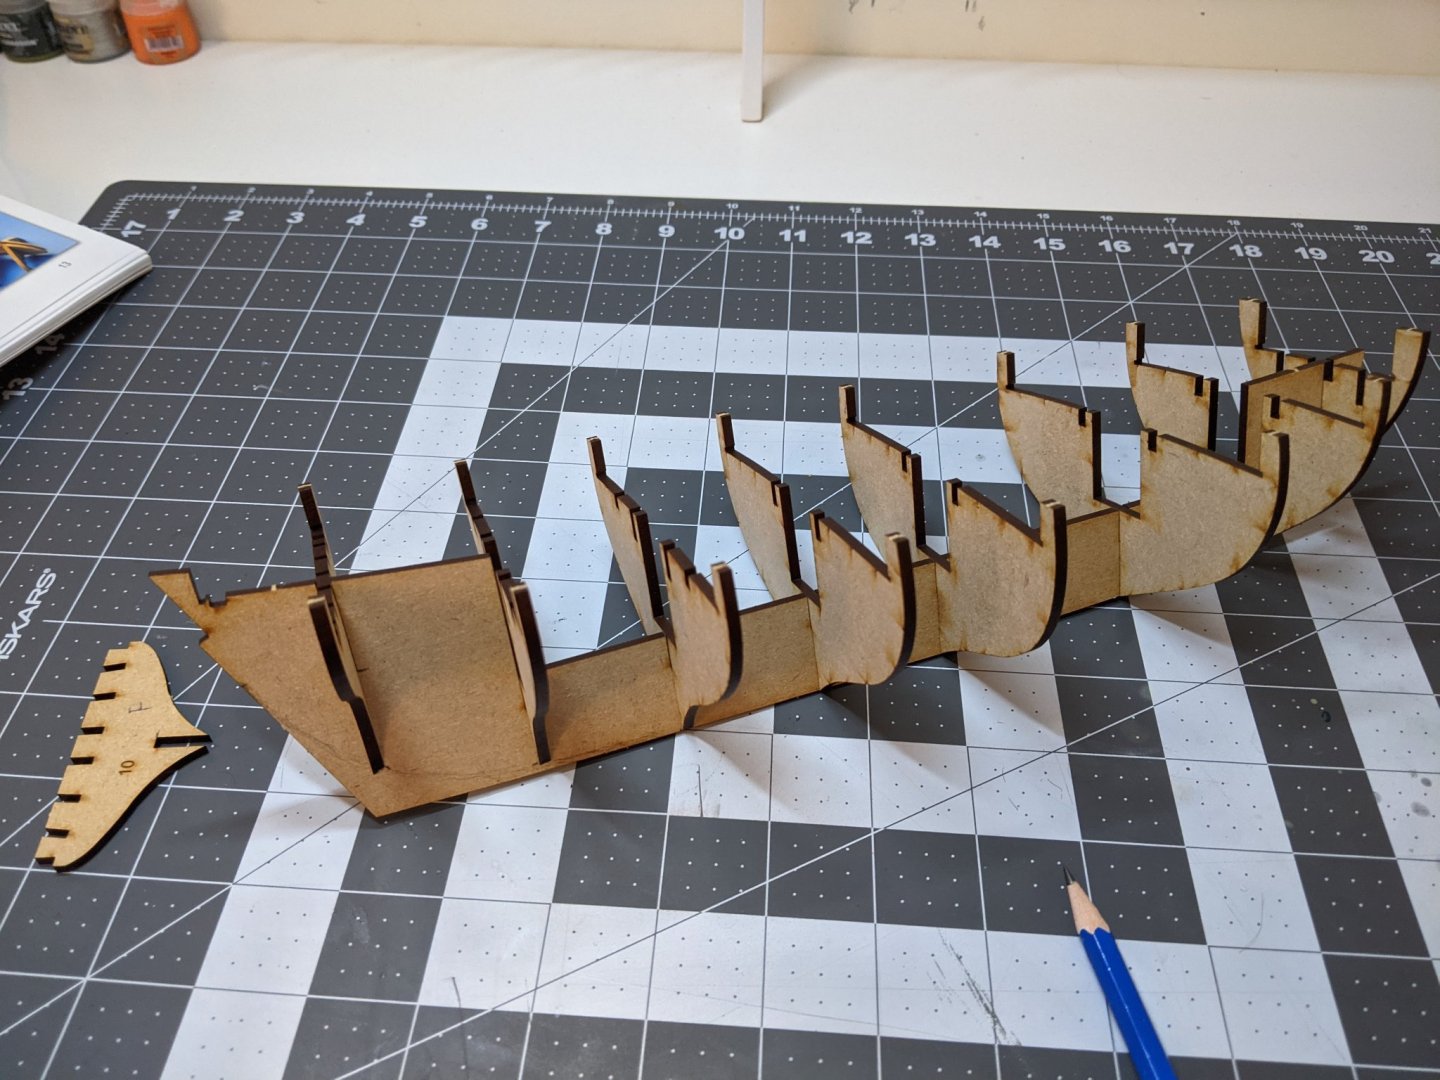
Log #2: Assembling the Frame
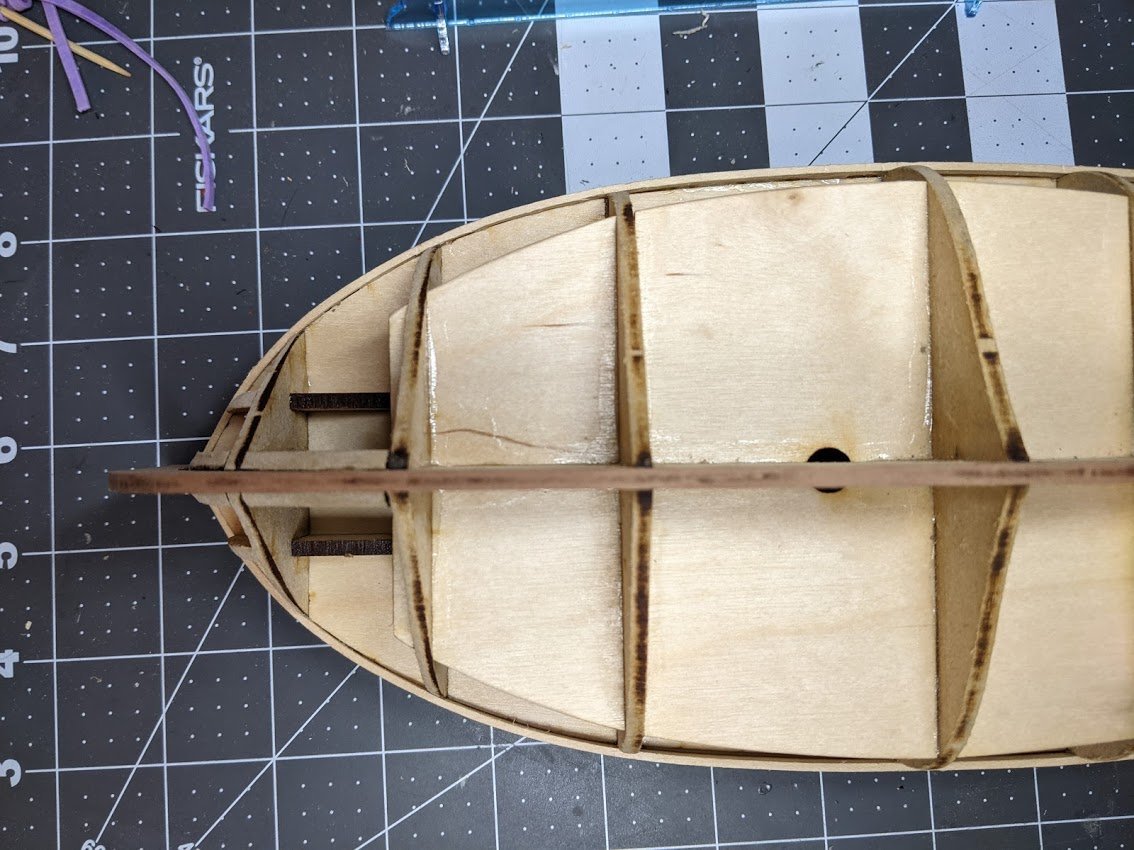
Having checked that all the pieces appear to be in the box I proceeded to dry fit the frame.
I also took the opportunity to mark how much I had to thin the keel using a 1.5mm strip I cut off some masking tape. This is one of those places where the knowledge shared on build logs here at MSW has been invaluable. This is the sort of thing that would never have occurred to me, but likely saved me a lot of hassle and I suspect the thinning would not have been nearly as even.
Having done this I then drew in an estimate for the bearding line and sanded it down to prepare for planking. Based on what I had read I figured this was easier to do at this stage before I assembled the frame.

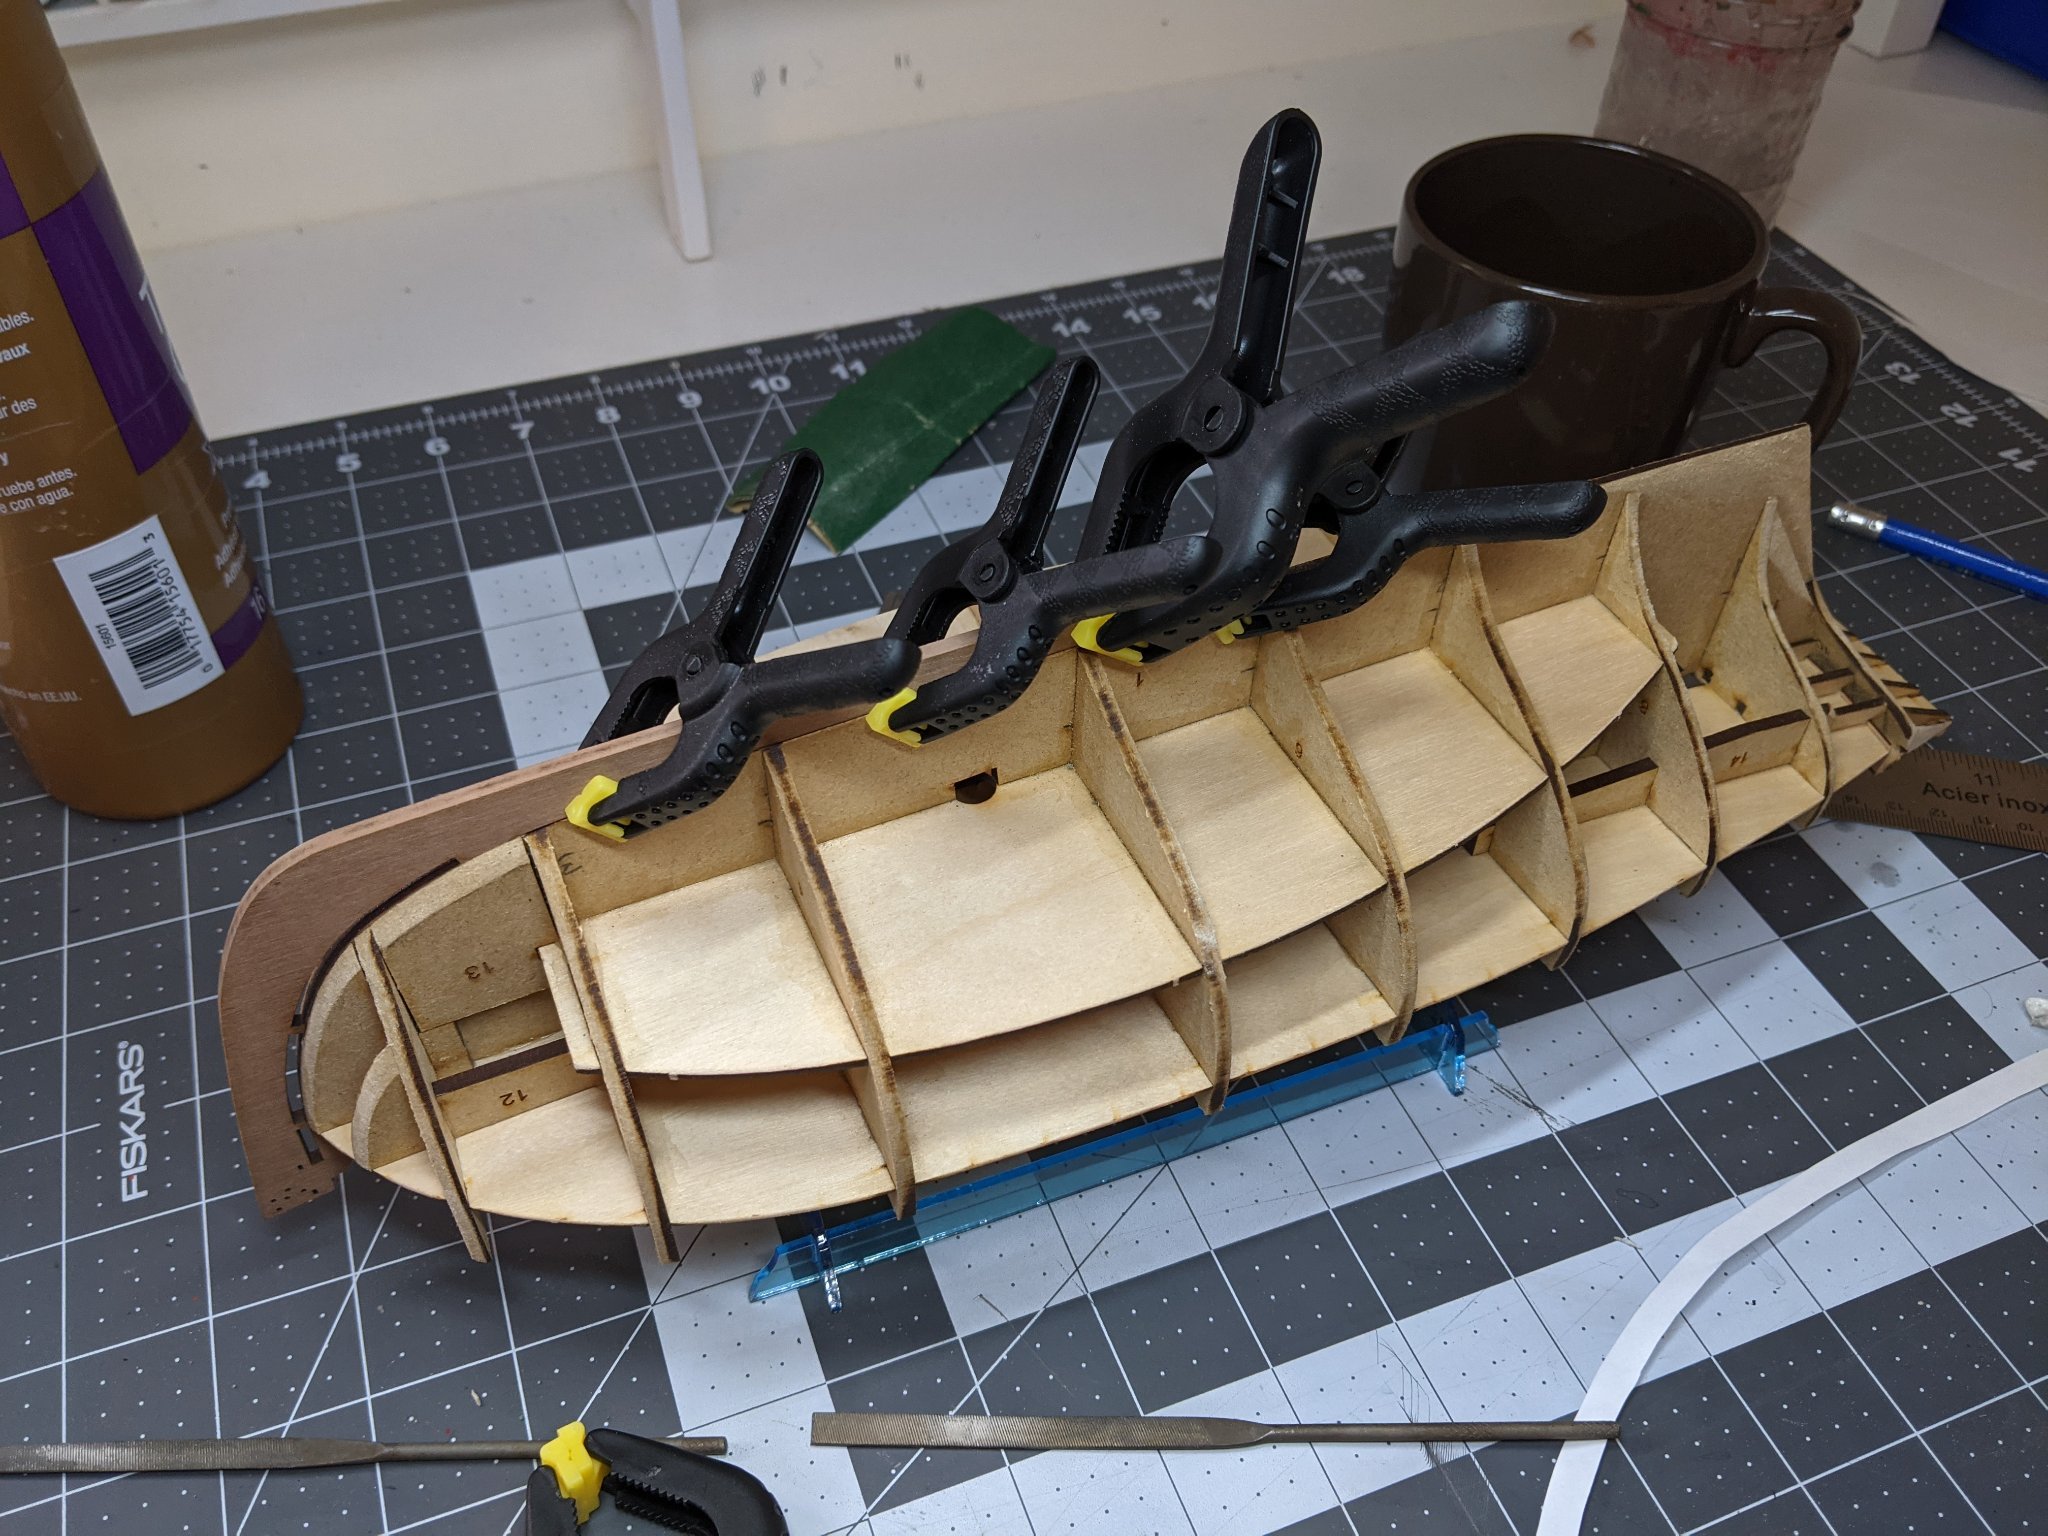
After that assembly was straightforward. I know that it had been mentioned in a few logs that the pieces fit together well and should hold themselves straight, but given some of the problems I had read about in other (non-alert) build logs I decided to be extra careful and ensure each bulkhead was square using the tried and tested lego block method. It was at this point I finally understood why everyone keeps saying you can never have enough clamps...

As many of the other Alert logs have mentioned I had some trouble fitting the stern frames into position. The problem is the outer two frames. The inner ones slotted in fine, but the outer ones required a slight bit of bending to get them to fit. I was worried they might break as I was doing this, but managed to get them in fine and the rest of the assembly proceeded without incident.
The final piece to add to the puzzle before beginning the faring of the bulkheads was the false deck. However, that will have to wait till the next log as I decided I wanted to try and replicate the deck pattern done by blue ensign so that needed to be measured and marked out before I could proceed.
Next time on Thukydides’ Alert Build Log: A novice tries to draw a deck planking pattern...
-
-
-
3 hours ago, Blue Ensign said:
Cutters make fine looking models, and I think you will enjoy the experience of building this kit.
Chris has done a great job in simplifying those areas that may present difficulties for those new to kit building, but the main challenge remains the hull planking; take your time with that and make as good a job as you can with the first layer planking as a rehearsal for the top layer.
Regards,
B.E.
Thanks for the advise. I do plan to take this very slow.
-
Log #1: And So It Begins
I have always had a keen interest in model ships, but never realized that kits existed or that there was ever the possibility of me making one. A few months back a video popped up on my youtube feed of the Amati Lady Nelson being built in a timelapse. This was my inspiration to start researching the subject and I discovered the wealth of information available online and in particular I discovered MSW.
Over the past month or so I have been reading many of the build logs on this site and trying to absorb the wealth of information here. I had originally wanted to start with a more ambitious project, but a number of posts on the subject here on MSW convinced me to start with a more modest one.
My model making experience has tended more towards things like this:

So this project will represent a bit of a departure for me from my normal hobby activities and I fully anticipate making many mistakes over the coming months. Hopefully as I document them in this build log they will be of use to those that follow afterwards. Please feel free to critique any mistakes you might see as I progress through this build as I suspect I will need all the help I can get :).
I would be remiss if I did not mention up front how thankful I am for all the completed Alert build logs on model ship world that I have to follow along with. I found the logs by Blue Ensign and glennard2523 particularly helpful.
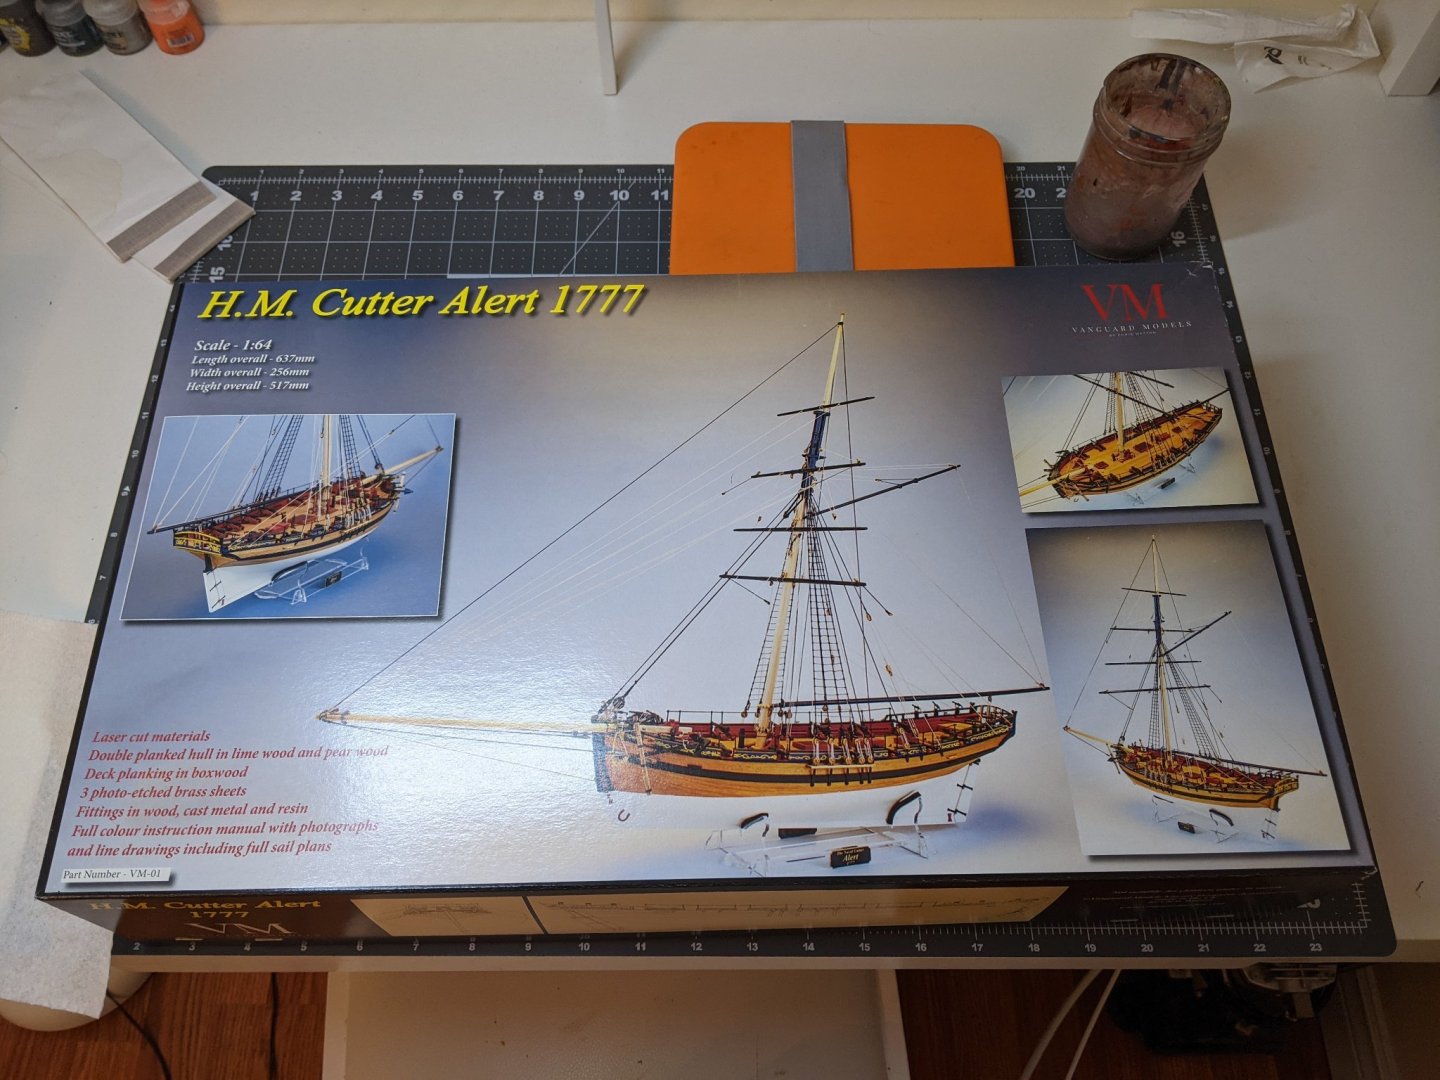
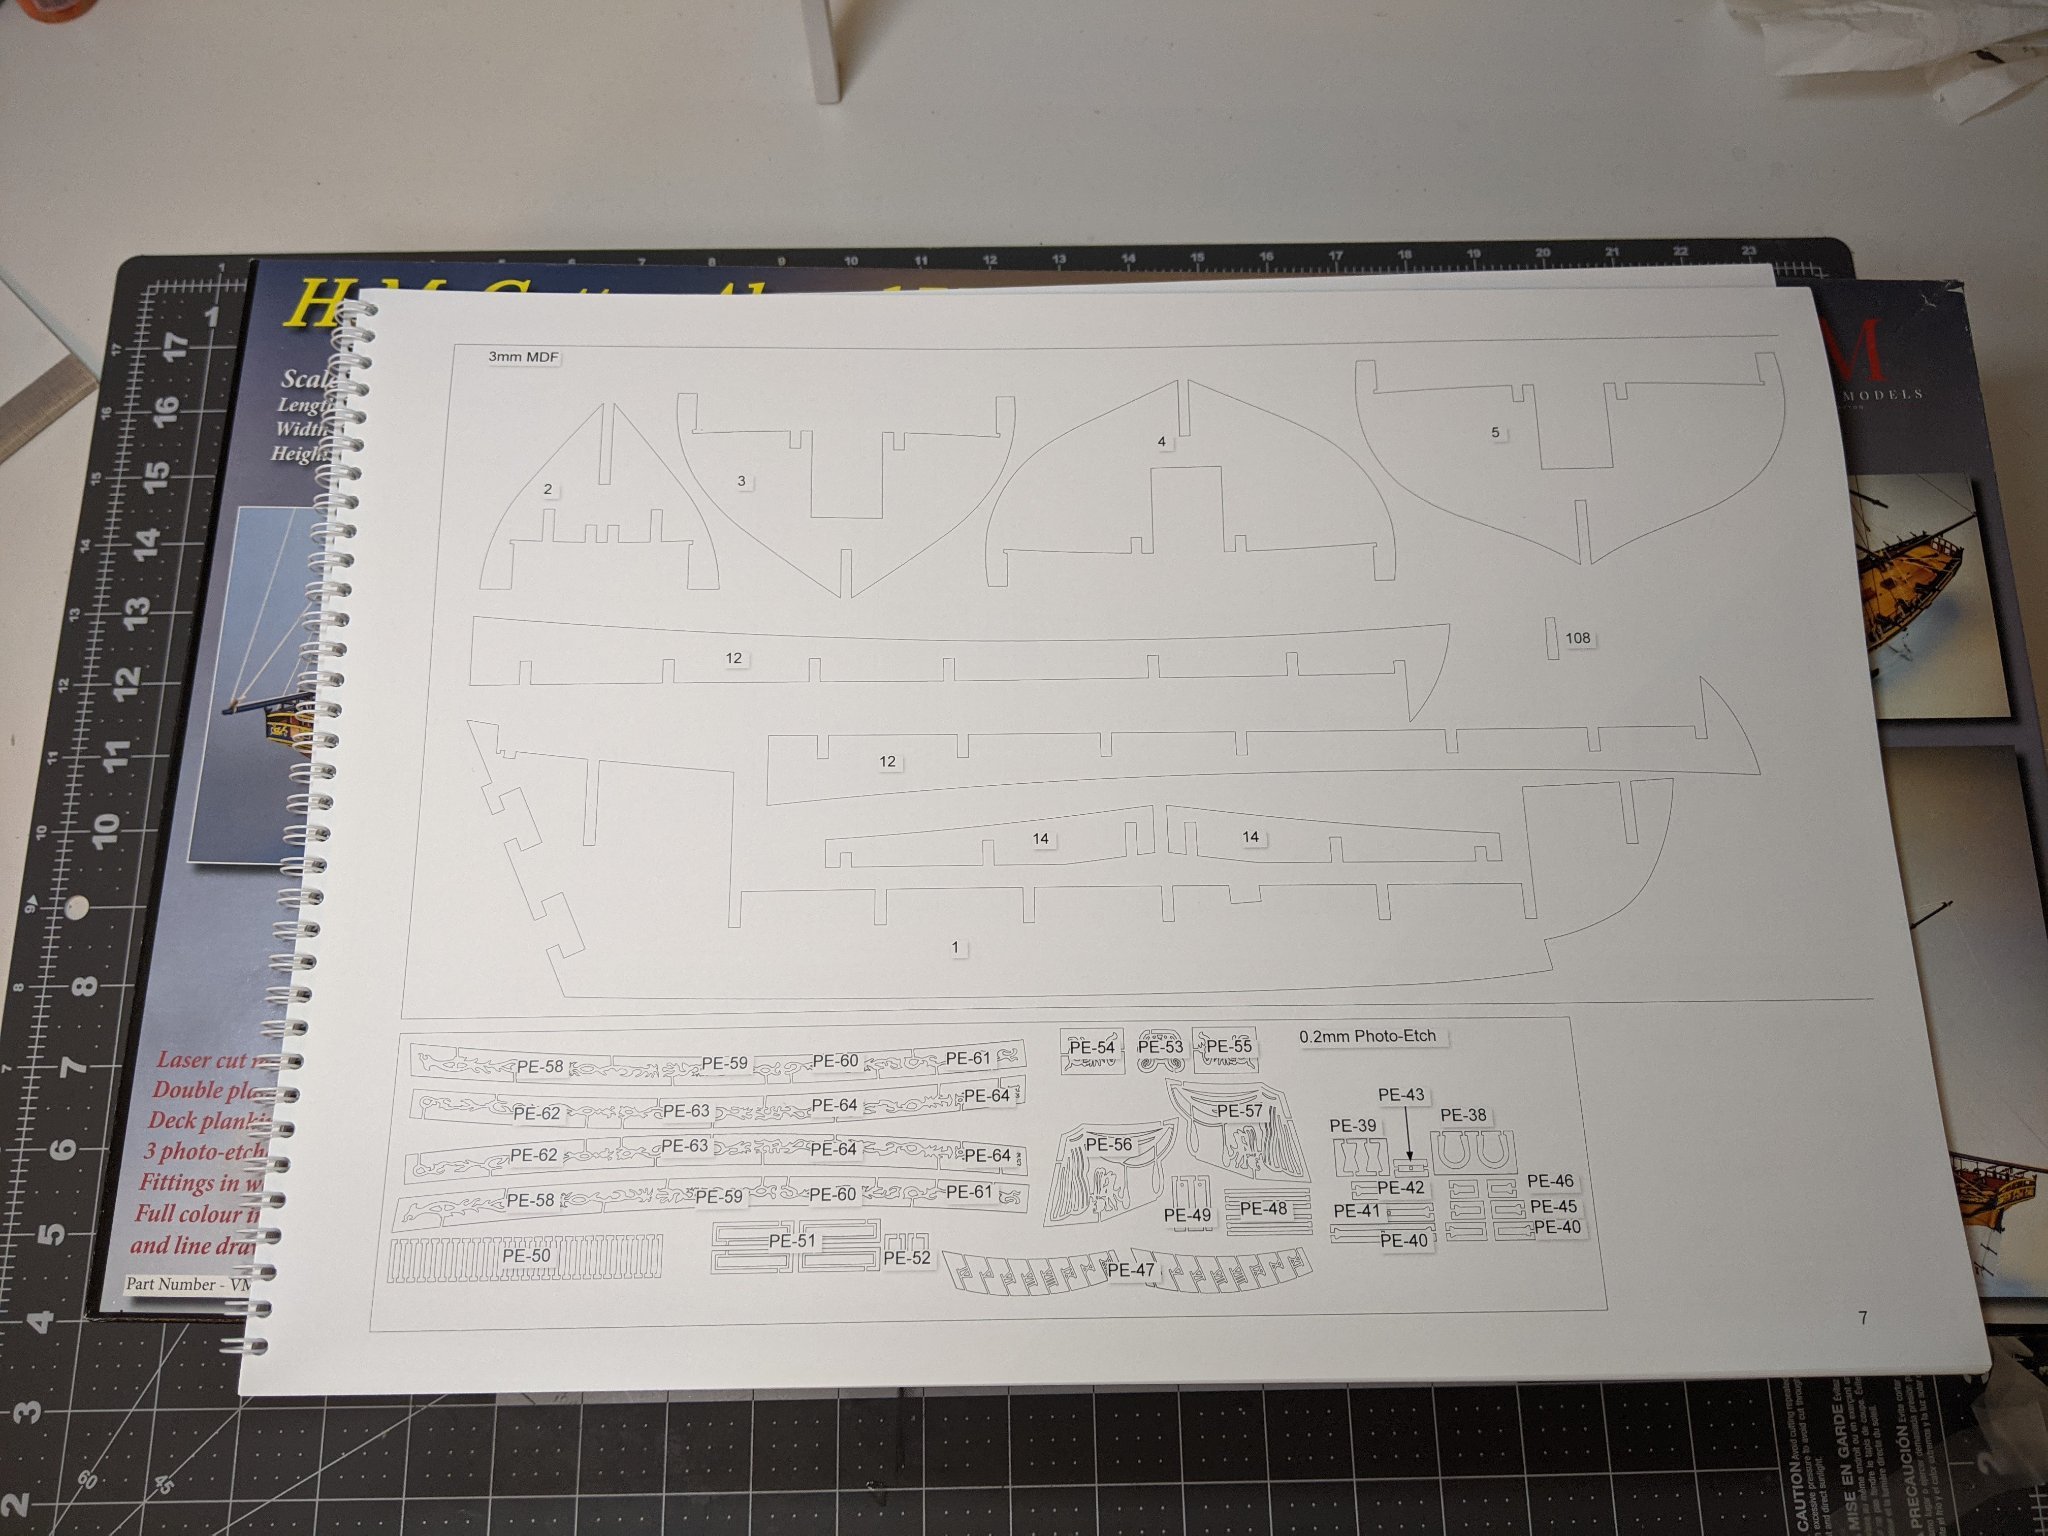
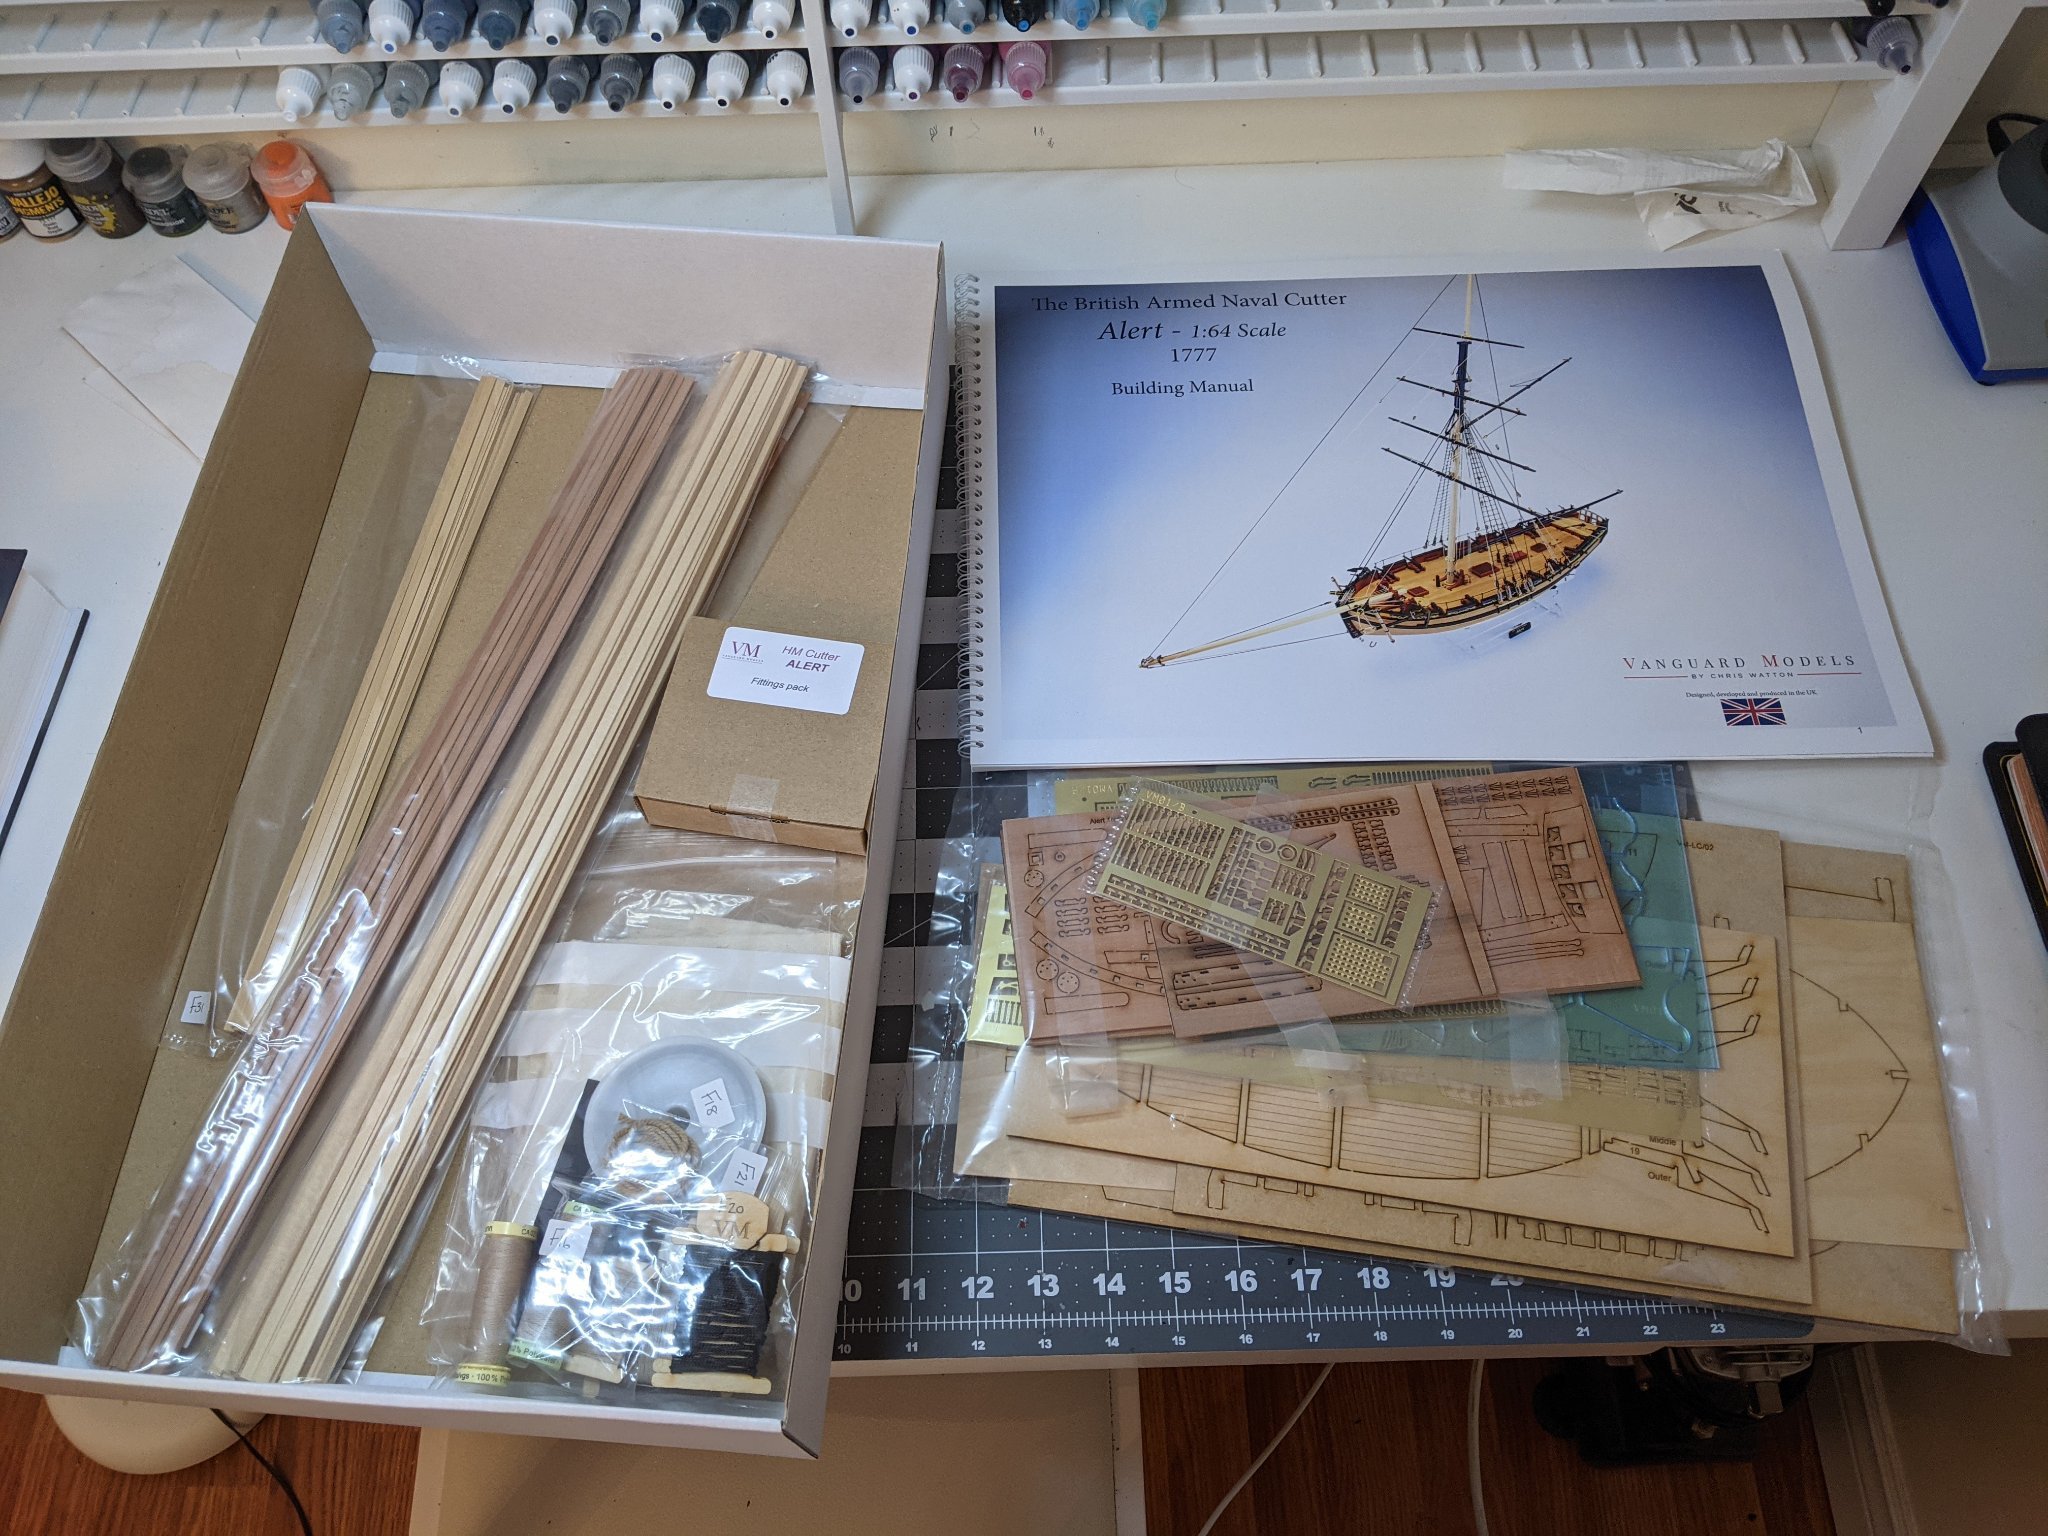
I know that one of the selling points of Chris's models is the lovely big build manual. But I guess I never really grasped how nice and big it is till it was there in front of me. Every part is clearly labeled and numbered in the manual making everything nice and clear.
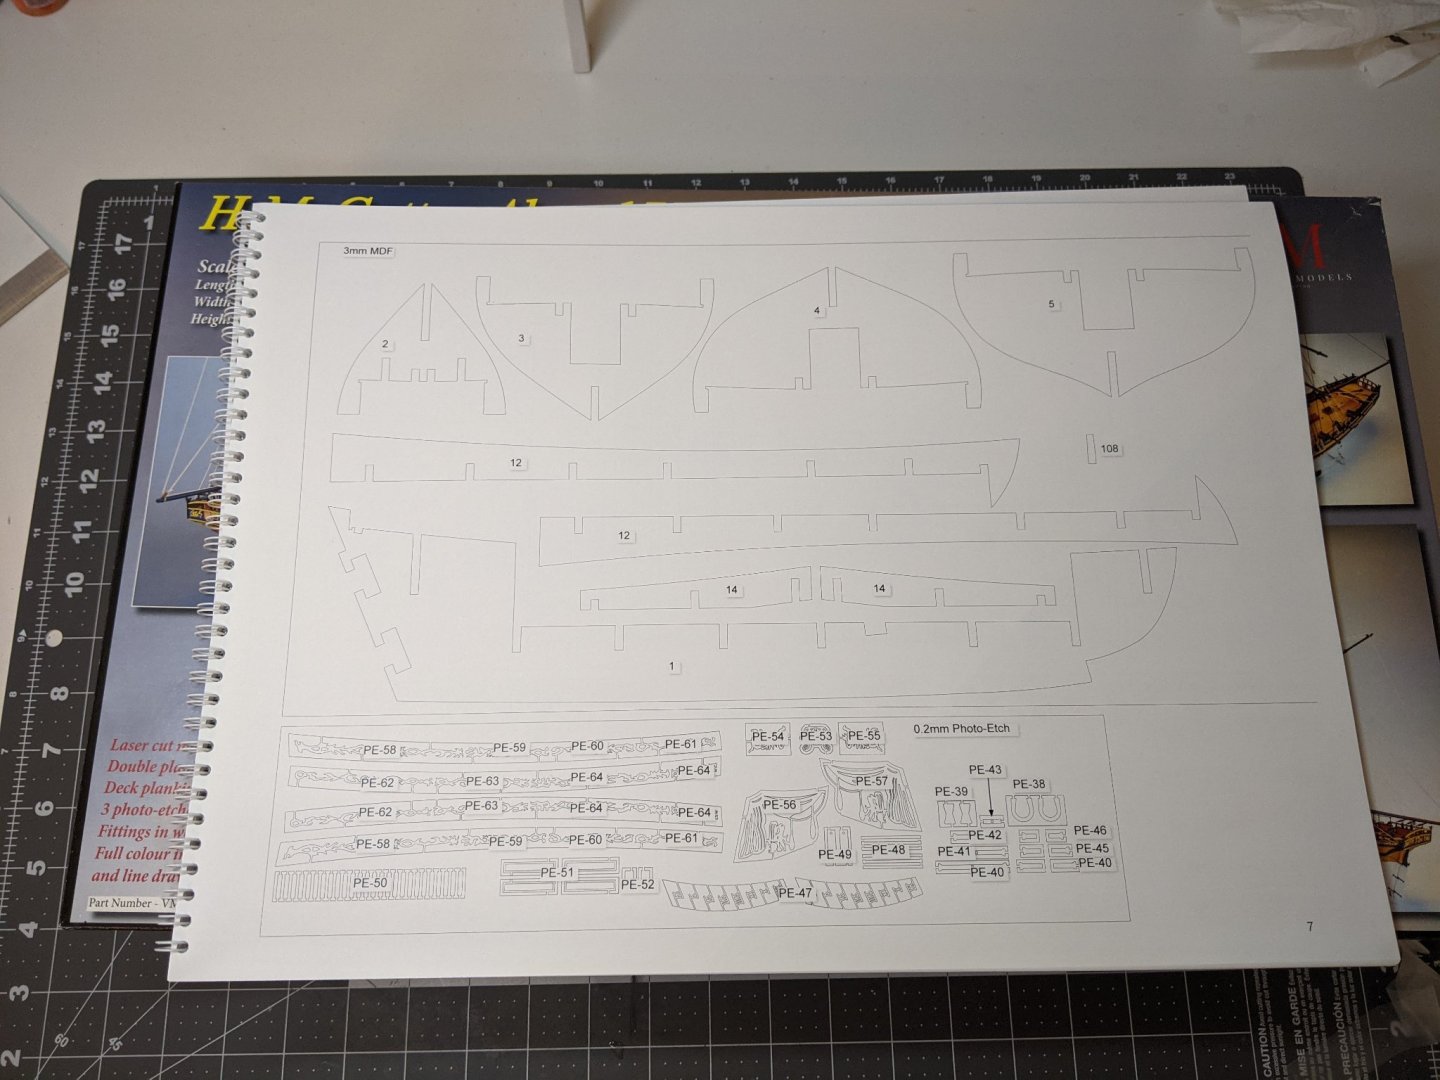
Having double checked that the contents of the box were all there, I was ready to begin. Unfortunately it was at this point that I ran out of time and the start of construction will have to wait for the next log.

-
Table of Contents
Welcome to my build log for documenting the making of HM Cutter Alert by Vanguard Models. In order to keep this organized I have reserved this first post for a table of contents in order to allow future readers to jump ahead to sections they are interested in if so desired.Log #4: Final Assembly and Faring
Log #5: Planking and then Re-Planking
Log #8: The Stern Bulkhead and Counter
Log #10: Concerning Drop Planks
Log #11: Adjusting the Second Band
Log #13: Planking Retrospective
Log #14: Building the Transom Part I
Log #15: Building the Transom Part II
Log #16: Building the Transom Part III
Log #18: The Inner Bulwarks and Fixing the Boom Crutches
Log #19: Cutting the Gun Ports
Log #22: Painting the White and Blue
Log #23: Painting the Inner Bulwarks and Edge Highlighting
Log #25: The Cap Rail, Timberheads and Catheads
Log #26: One Step Forward Two Steps Back
Log #29: Blackening and Bending
Log #30: The Cannon Carriages Part I
Log #31: The Cannon Carriages Part II
Log #32: Painting the Deck Fittings
Log #35: Cannons and Other Fittings
Log #37: Painting the Transom Images
Log #39: Rigging the Guns Part I
Log #40: Rigging the Guns Part II
Log #43: Rigging the Guns Continued
Log #44: Hiding the Super Glue Spots
Log #45: Blocks for the Gun Tackle
Log #46: Blocks for the Gun Tackle Continued
Log #48: Hull and Fittings Complete
Log #50: First Attempt at Serving
Log #51: The Shrouds and Standing Backstay
Log #52: Running Backstay and Fiddle Blocks
Log #53: Puzzling about the Mainmast Standing Rigging
Log #54: The Mainstay and Preventer Stay
Log #55: Preparing the Mainmast
Log #56: The Boom and the Gaff
Log #58: Revisiting the Rudder and Windlass
Log #59: Finishing the Mainmast
Log #61: Shroud Batons & Running Backstays
Log #63: Rigging the Preventer Stay
Log #65: Tying of the Stays and Shrouds
Log #67: Ratlines, Ratlines & More Ratlines
Log #77: Experiments in Lashing
Log #78: Methodology for Preparing Small Ropes
-
I think Chris (Vanguard Models designer) is working on a sub £100 ship at the moment if you want to wait. Not sure when it will come out. Also welcome to the forums.
- Keith Black, Razorbill, mtaylor and 2 others
-
5
-
9 hours ago, Jim Lad said:
Hello, and a warm welcome to the forum from 'Down Under'. if you're from the North Atlantic fishing grounds, I hope you're not getting too damp!

John
We do get a lot of rain drizzle and fog 😃.
- Keith Black and mtaylor
-
2
-
2 hours ago, Moab said:
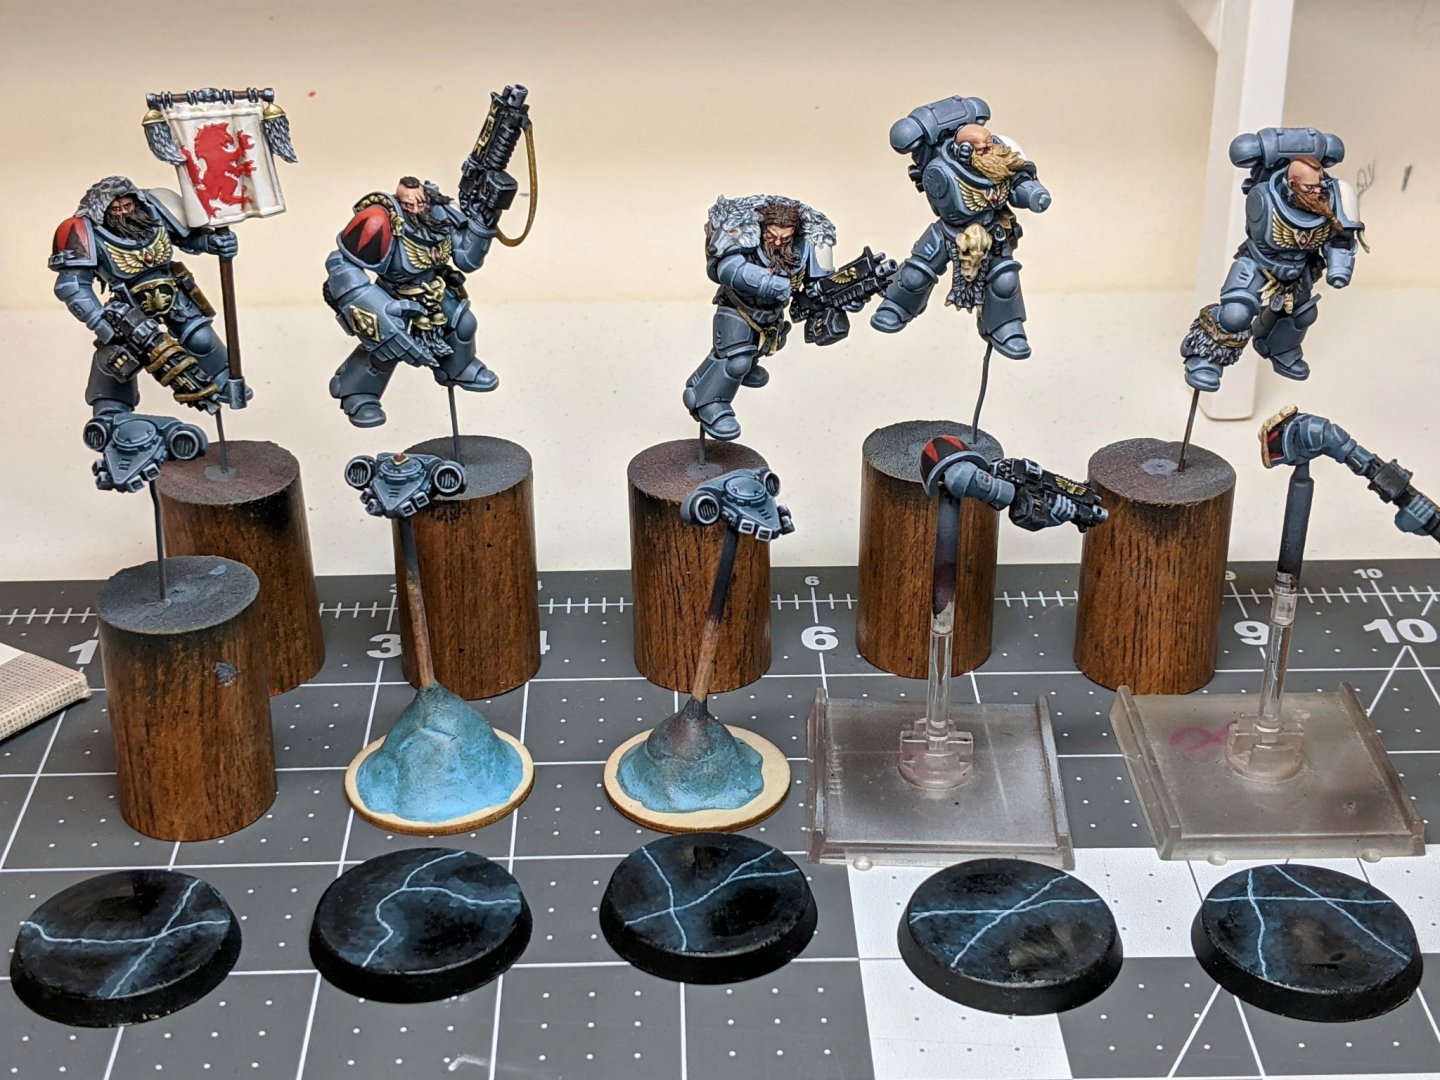
A warm welcome aboard. Love to see some of your plastic models...Moab
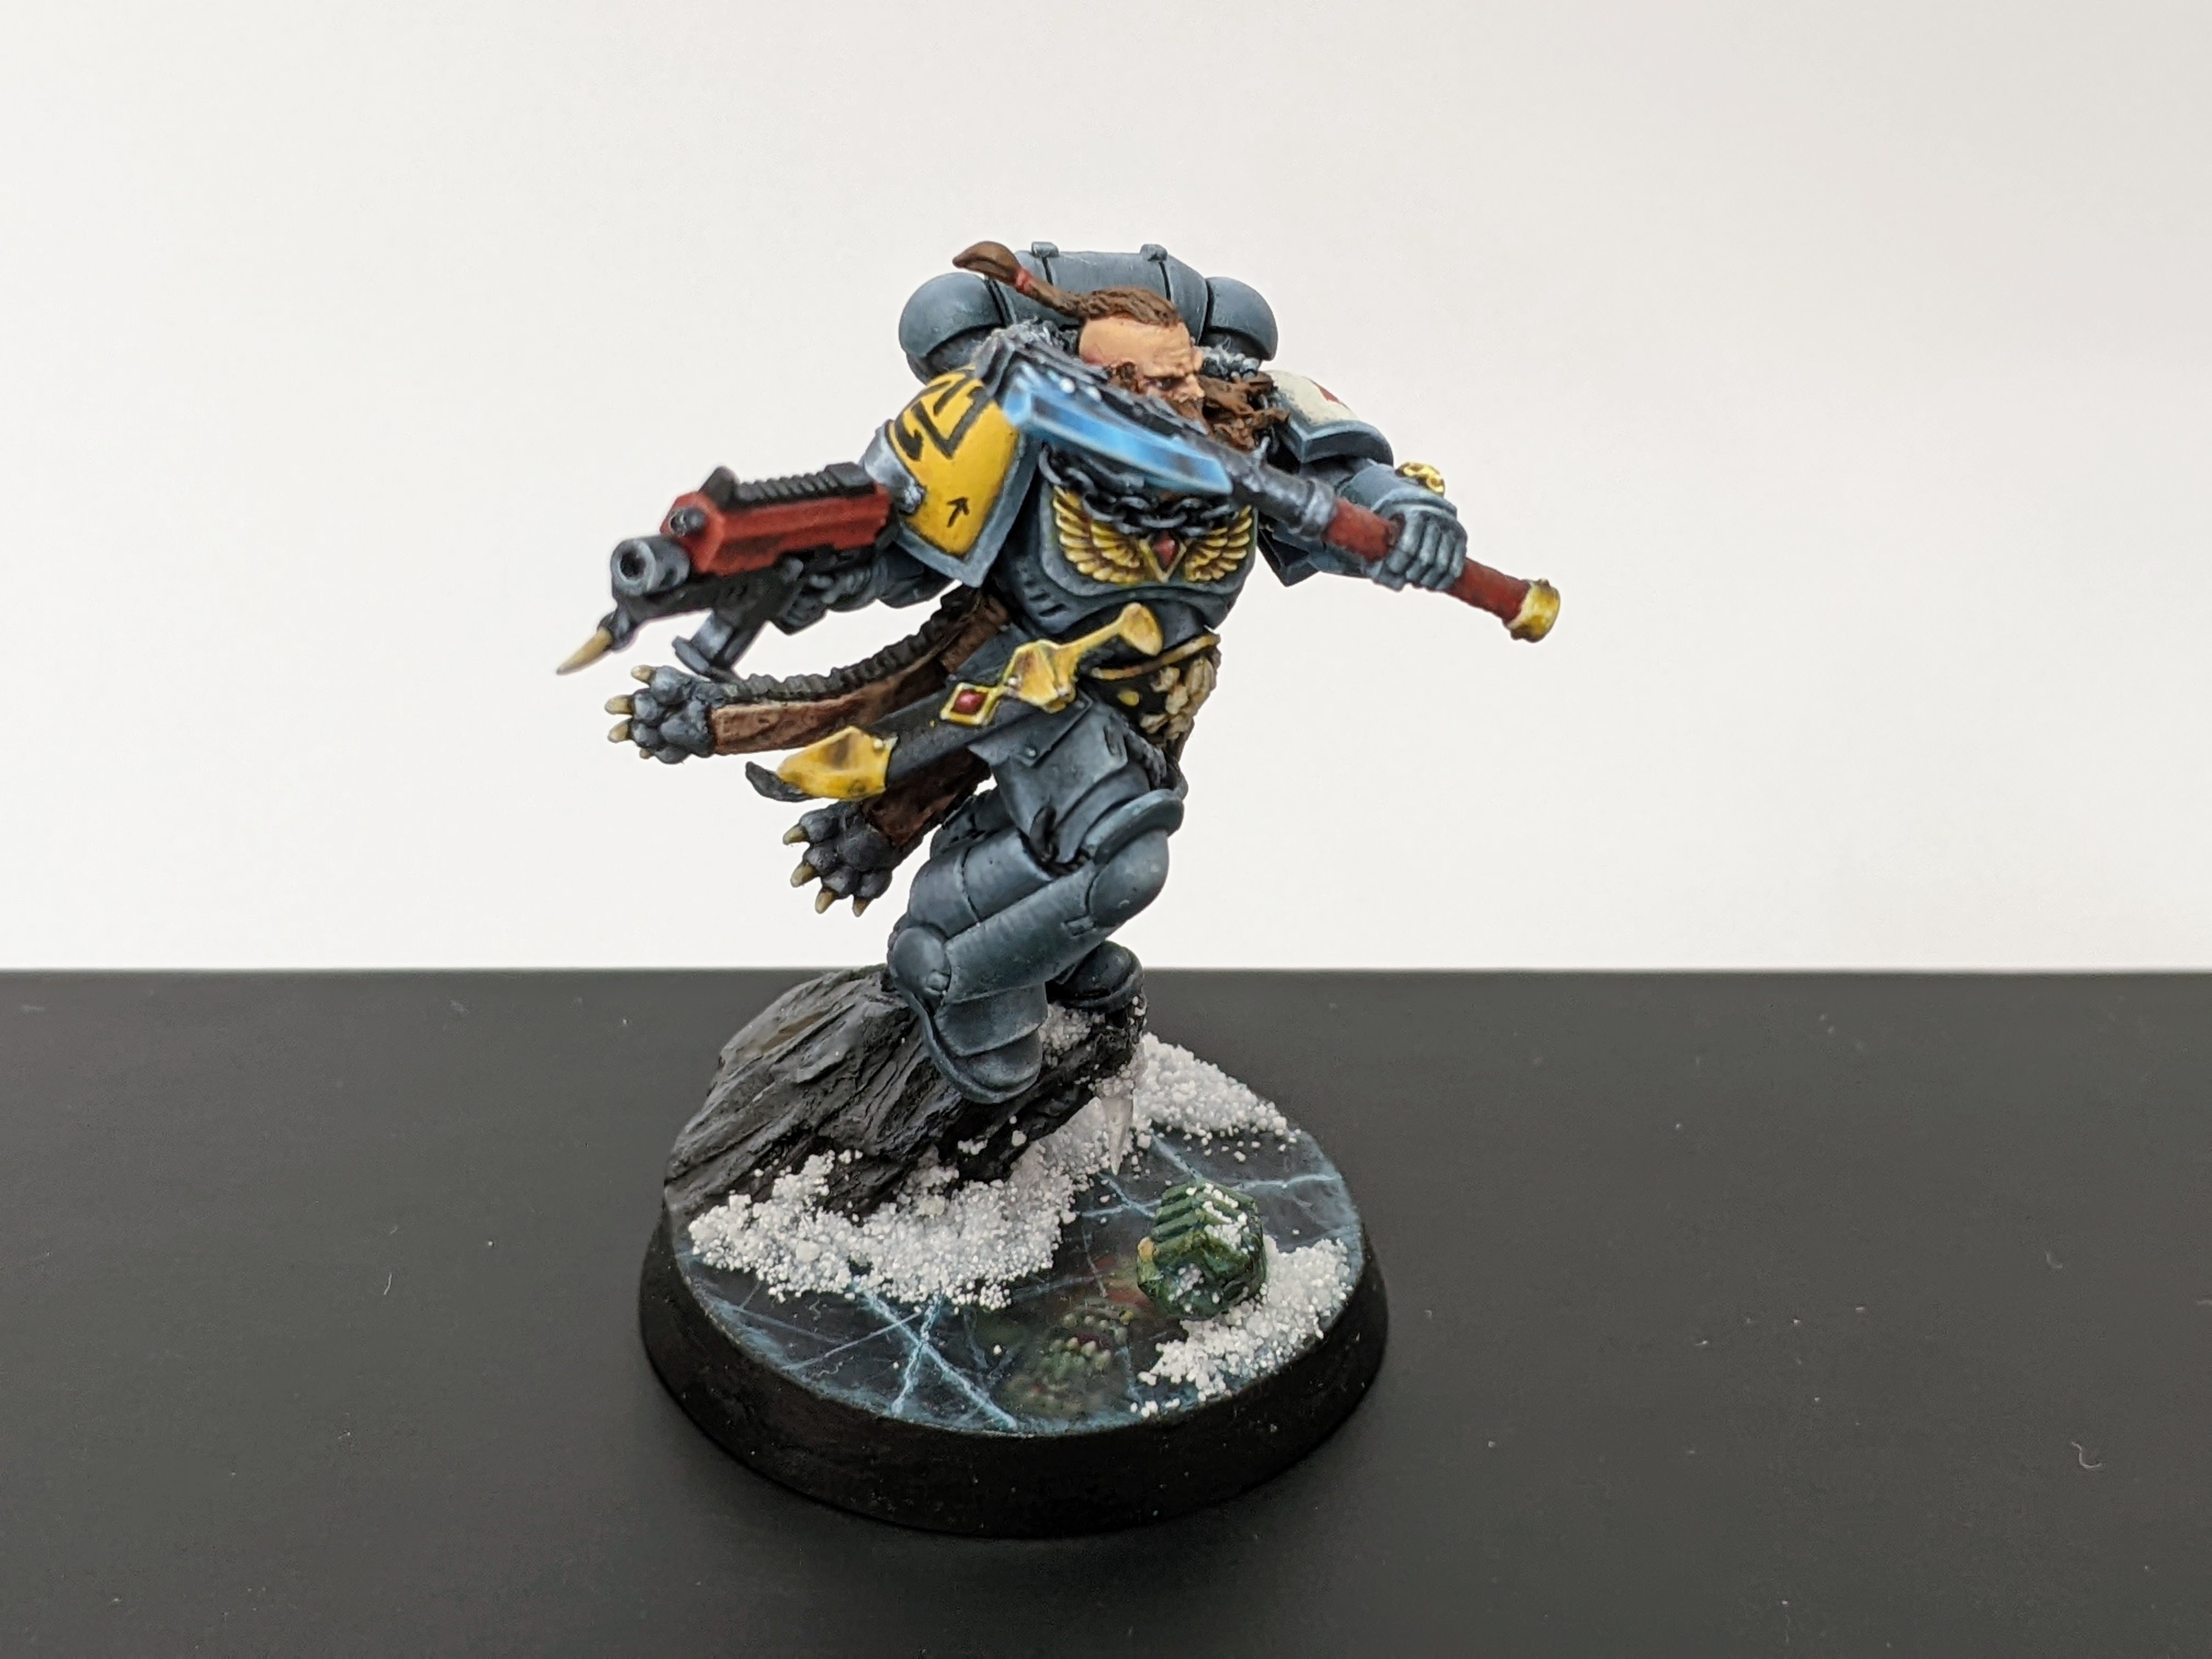
This is my latest project that I am trying to finish up. Almost done, just a few minor bits then I need to assemble them and add a dash of snow. Then on to the alert.
-
1 hour ago, allanyed said:
Thukydides,
Welcome to MSW!!! Is there a story behind your screen name in that you have taken the name of a famous general and historian rather than an admiral of old such Themisocles 😄
Hope to see some of your build in the near future!!
Allan
Not really, I have always had a keen interest in history and many years ago when I played computer games I needed to pick a character name for an MMORPG I was playing. I had been reading about the peloponnesian war at the time and so the combination of Thukydides being a bit obscure (so was not already taken) and me being fascinated with the melian dialogue tipped the scales. Since then I have consistently used it as an alias.
- Moab, Keith Black, druxey and 3 others
-
6
-
2 hours ago, kurtvd19 said:
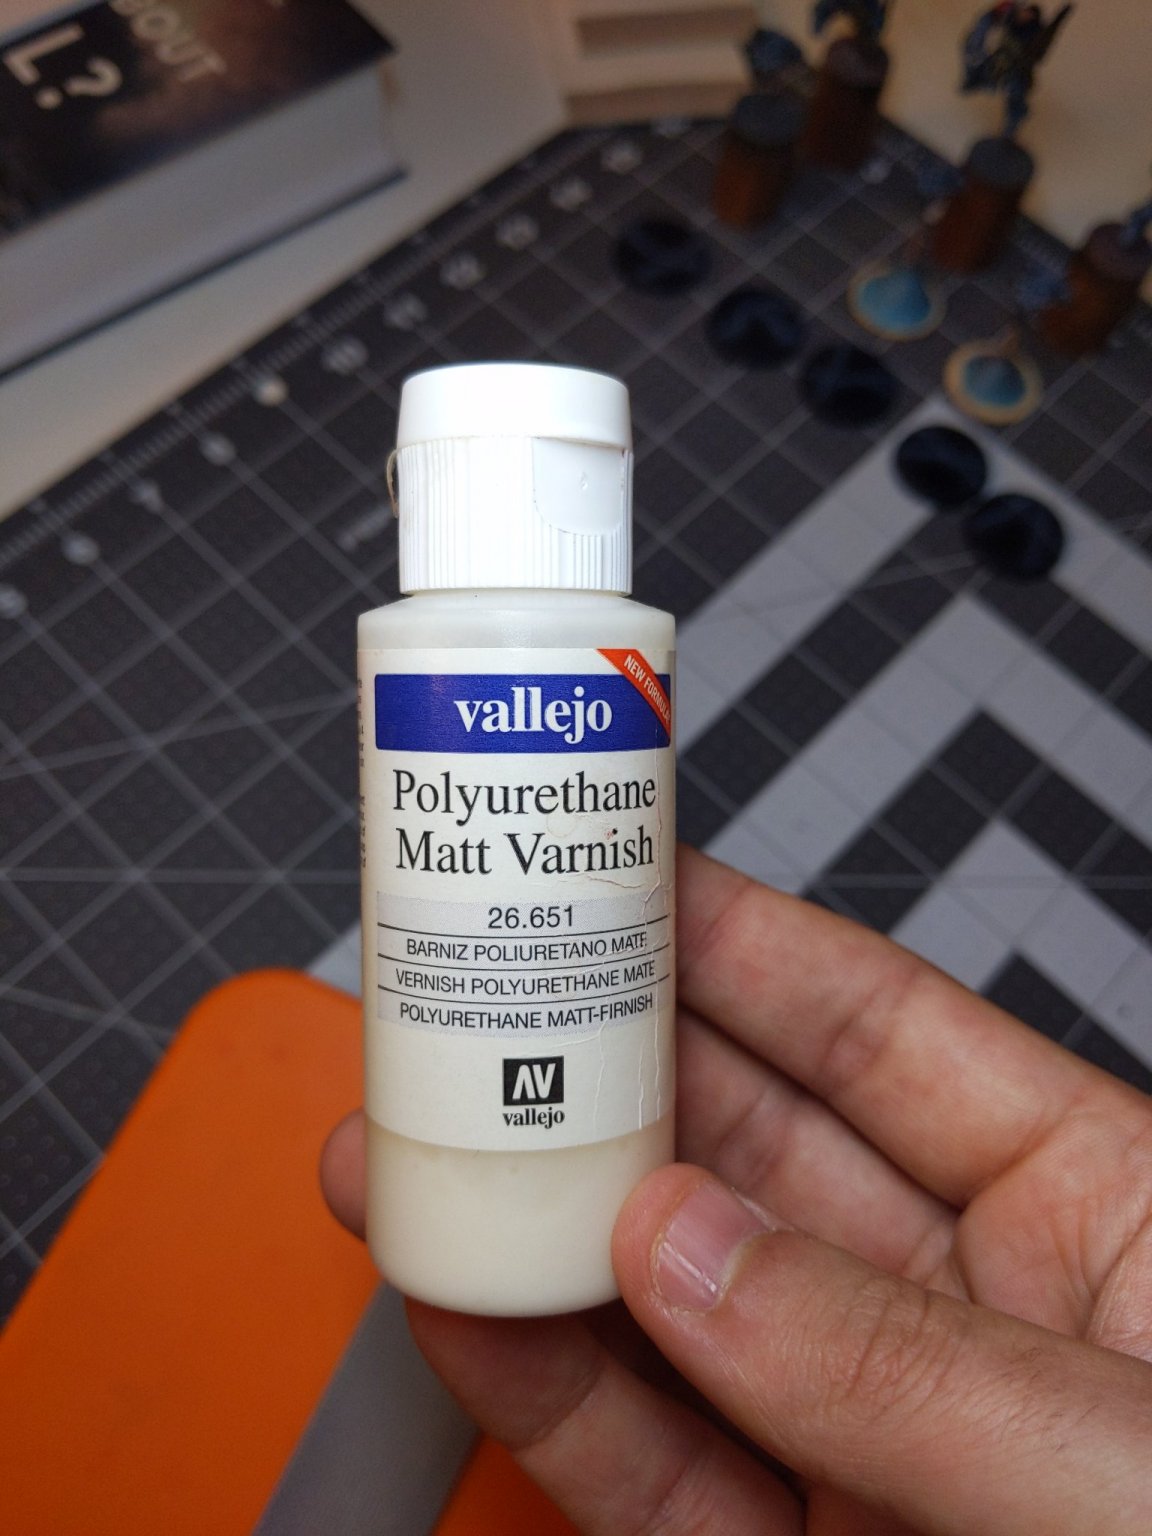
I have used Stynylrez for many wood models and it has filling properties. I would use wood varnish myself. Have no idea if plastic varnish would work - actually I don't even know what you mean by plastic varnish other than the Tamiya name denotes plastic.
Reverse the question - would you use wood varnish on plastic? Not trying to be a smart*** but I find it a logical question that can guide many decisions with unknown materials.
By plastic varnish I just meant the primary audience is for plastic models (see the picture below). I wouldn't use "wood varnish" on plastic models because the only ones I am familiar with are designed for use on say furniture. In a pinch I could use a spray can of clear varnish from the hardware store but where it is not specifically designed for small models the results might not be as good or I might get a bit of a tint etc... I guess my question relates more to if I can use many of my acrylic based products that I already own on wood such as the below Vallejo product.

- mtaylor, Canute and Ryland Craze
-
3
-
Hi everyone. I figured I should do a new member post as I have been hanging around the forums silently watching for a while.
I hail from the fishing grounds of the North Atlantic near where the HMS Pegasus went down.
Though I am new to building wooden ships, I have a lot of experience in plastic models particularly on the painting side. I have ordered the vanguard models alert kit and am planning to start a build log once it arrives.


HMS Sphinx 1775 by Blue Ensign - FINISHED - Vanguard Models - 1:64 scale
in - Kit build logs for subjects built from 1751 - 1800
Posted
Looking forward to seeing this