


allanyed
-
Posts
8,149 -
Joined
-
Last visited
Content Type
Profiles
Forums
Gallery
Events
Everything posted by allanyed
-
 Your capstan and capstan look really good 👍 Totally understand following the instructions and other logs and it is a big learning curve we all go through. It pays to take some time away from any build, and do a bit of research of contemporary based information on your own as sometime there are errors, this being a classic case in point. Look in your own library of books if appropriate or ask away here. There are a lot of VERY experienced and learned members here at MSW that have helped many of us for many years. Allan
 -
One of the many reasons to love MSW.... the help members offer to one another like the post from Ron above with an alternate source for Mr. Frolick. Nicely done. Allan
-
Have you tried pre-bending it with heat, ala Chuck Passaro's methods in his You Tube videos? Heat is key to soften the lignin. Softening temperatures for lignin range from 127-193C. While soaking in water is not necessary it will decrease the softening temperature drastically. Consider using distilled water as the chemicals in water coming out of the tap may cause discoloration of some types of wood. Does anyone know why so many kits use this wood? It is open grained so totally out of scale, often brittle, and overall tough to work with. Is it cost or more a kit tradition? Allan
-
Welcome to MSW from one merchant mariner to another! Do take the advice in the first response to your post, start a build log if you would like advice and help. It will probably help you overcome most of the obstacles you are going to encounter along the way. We have all bumped into them, so do not fret when you hit a snag. Allan
-
Occre Santisima Trinidad - Mast/Spar sizing questions
allanyed replied to bc_63's topic in Masting, rigging and sails
Further to Philip's post IF the masts are like early English masts, up 1719, they also tapered from the partners downwards. In the case of the English, the diameter at the heel was 5/6 the diameter at the partners. Of course if the hull is fully planked, this will never be seen. As he notes it tapers going up, and in the case of the English, the taper at the hounds was 9/13 the diameter at the partners. (Lees' Masting and Rigging, page 2) Allan -
Hello Lilly Clicking on the link you posted did nothing. Can you take a few photos and post it here? Thanks Allan
-
I think the old masters seemed to have made mostly hull models because they did noy enjoy rigging any more than many modelers do today🤪 Which books did you get? There are some that are period specific or even based on a single ship, while others are more inclusive. There is a rigging spread sheet by Danny Vadas here at MSW in the Articles database that you may want to go to for detailed dimensional information for your Endeavour. It is based on James Lees book on rigging which is one the best, if not THE best for rigging English ships. Allan
-
Just joined the fun, beautiful workmanship!!! The angles for the cant frames was a new one for me. I wonder if this concept was ever used in the shipyard. Very clever either way. Allan
-
How Did a Medieval Spice Cabinet Survive 500 Years Underwater?
allanyed replied to allanyed's topic in Nautical/Naval History
As remarkable is that saffron is the most expensive food on earth, far more than even white truffles and caviar. But, a little rice, seafood and saffron and paella on the menu! Allan -
Hi Todd, What is the diameter of the holes you drilled for the treenails? Typically deck treenails were about 0.75" diameter so at your scale, 0.015" (0.4mm) Allan
-
Nokia, What is the diameter of the treenail holes you drilled? Thanks Allan
-
https://www.atlasobscura.com/articles/spices-500-year-old-shipwreck-baltic
-
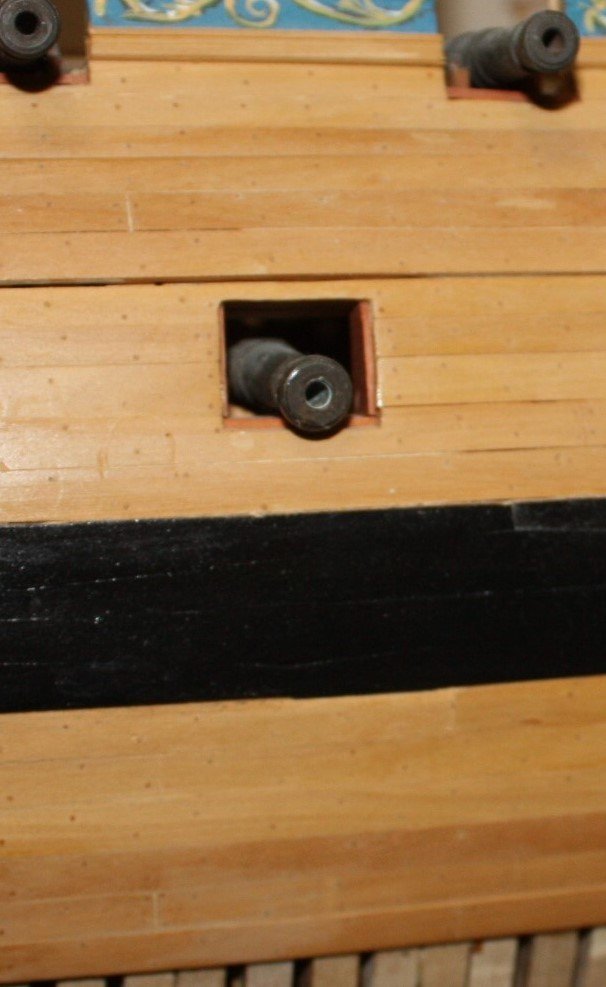
Hi Darius Did you make the cannon barrels? The one in the photo looks very nice. For future consideration, according to Adrian Caruana's research, carriages on British ships had two single blocks for both running out tackle and the same for train tackle, on guns smaller than 32 pounders rather than a single and a double. Allan
-
Yes, 1:48. The bamboo I use is always large skewers. The color has, fortunately, not varied much if at all . It splits and draws very nicely. For size I think most agree with you that undersized is preferable to over sized. Allan
-
The planking is some of the finest I have seen here at MSW. I wish more people visited your log to see the subtlety that should exist rather than the fat black lines and treenails. Allan
-
Hi Tiziano Did you make your own rope? If you did, what type of rope walk did you use? Looking really good!! Allan
-
POF - if fully framed it fills the spaces, but it is far more complex than POB. I have done scratch POB on a couple schooners in the past and tripled the number of bulkheads that is usually found in kits so too much space between them was not an issue. It would be fantastic if the kit makers at least doubled, if not tripled the number of bulkheads. This would give in the neighborhood of 30-35 bulkheads, far short of the 100 or so frames of a fully framed ship, but it should make things much easier than making filling blocks and would be sufficiently strong to support single planking versus the need to double plank. I realize there is a cost in every piece added, but if the first layer of planking is eliminated it would offset some of the cost of the bulkheads. Just a thought. Allan
-
Is this kit the Greyhound of 1719 or 1741. I thought it was for 1719, but..... In any case, I am pretty sure King George I would be appropriate for the former and George II for the latter. The monograms are pretty much the same except for the numeral 2. Can you show a picture of what you mean on this? The tops of the frames have a rail so they are not exposed. There were figures on top of bitt pins and such on ships to about 1710 but would not be appropriate for a ship built in 1719 or 1741. Then again, it is your model so whatever pleases you is the way to go. There are many examples at the RMG Collections site and close ups in a number of books from Franklin, Kriegstein collection and many more that should be of some help. One example: https://www.rmg.co.uk/collections/objects/rmgc-object-66347 Above all else, keep having fun. Allan

-
Hi Dean I hope we can agree to disagree on the first part. The below photo is my model of the Inflexible that was treenailed with bamboo. There is contrast, but for me at least, I think it is relatively subtle. The drill size in this case was #72 if I remember correctly. As to the second sentence, you may have solved my long standing question as to why my brain is not working so well anymore. 😁 Allan
-
Coming your way via email. Totally forgot I had this. Allan
-
Actually laser cutting started in the 60's. Unfortunately not for ship models back then😁
-
This does not sound right. Can you post a picture of the materials or what the instructions show? Dead eyes are stropped with round iron stock, or in our case blackened copper or softened brass wire. Uncoated copper is soft and easy to use and can be blackened in situ with liver of sulfur. Allan
-
Very well said. There are about 800 HIGH RES out of the 3000 plans from RMG on the WikiCommons site so no need to use low res or buy high res. I have the high res in a folder but it is over 40GB so I cannot post it here. I have asked MSW to set these up in the Articles database so additional high res can be added in the future, but no takers so far. The entire list for the Commons site is at https://commons.wikimedia.org/wiki/Category:Ship_plans_of_the_Royal_Museums_Greenwich Allan
-
I find that if you use this method with a hot air gun (any local hardware chain for less than $20) it goes faster and is MUCH easier than using an iron. It is the heat, not the water that does the trick so can be done dry or wet as you wish. Depending on the wood, I find wet is sometimes easier so soaking a bunch of planks in a piece of PVC pipe with distilled water ahead of time is a good idea. Then again, if this is hobby, not an occupation there is no need for speed. Fast ship modeling is an oxymoron if ever there was one. Allan
- 587 replies
-
- 8
-

-

-
- Indefatigable
- Vanguard Models
- (and 1 more)
-
Well said Dean! I was trying to think of a nice way to say that the world does not need another build of the HMS Victory be it kit or scratch. An exception would be if it is the quality of the build by Steve Anderson seen here at MSW https://modelshipworld.com/topic/32888-hms-victory-circa-1765-1791-by-steve-anderson-164-scale/ Allan


