yvesvidal
-
Posts
3,642 -
Joined
-
Last visited
Content Type
Profiles
Forums
Gallery
Events
Everything posted by yvesvidal
-

Berlin Tram by Etcher - OcCre - 1:24
yvesvidal replied to Etcher's topic in Non-ship/categorised builds
Very nice benches that you put together. Glad that you started that kit as we do not see many of them. Yves -
Great choice of kit. I am hoping to purchase that kit one day as well as the other kit produced by Italeri. I will be following your progress with intense interest. Is that kit a re-packaging of the old PROTAR kit? Yves
-
I think you are ready for full wood construction.... Yves
-
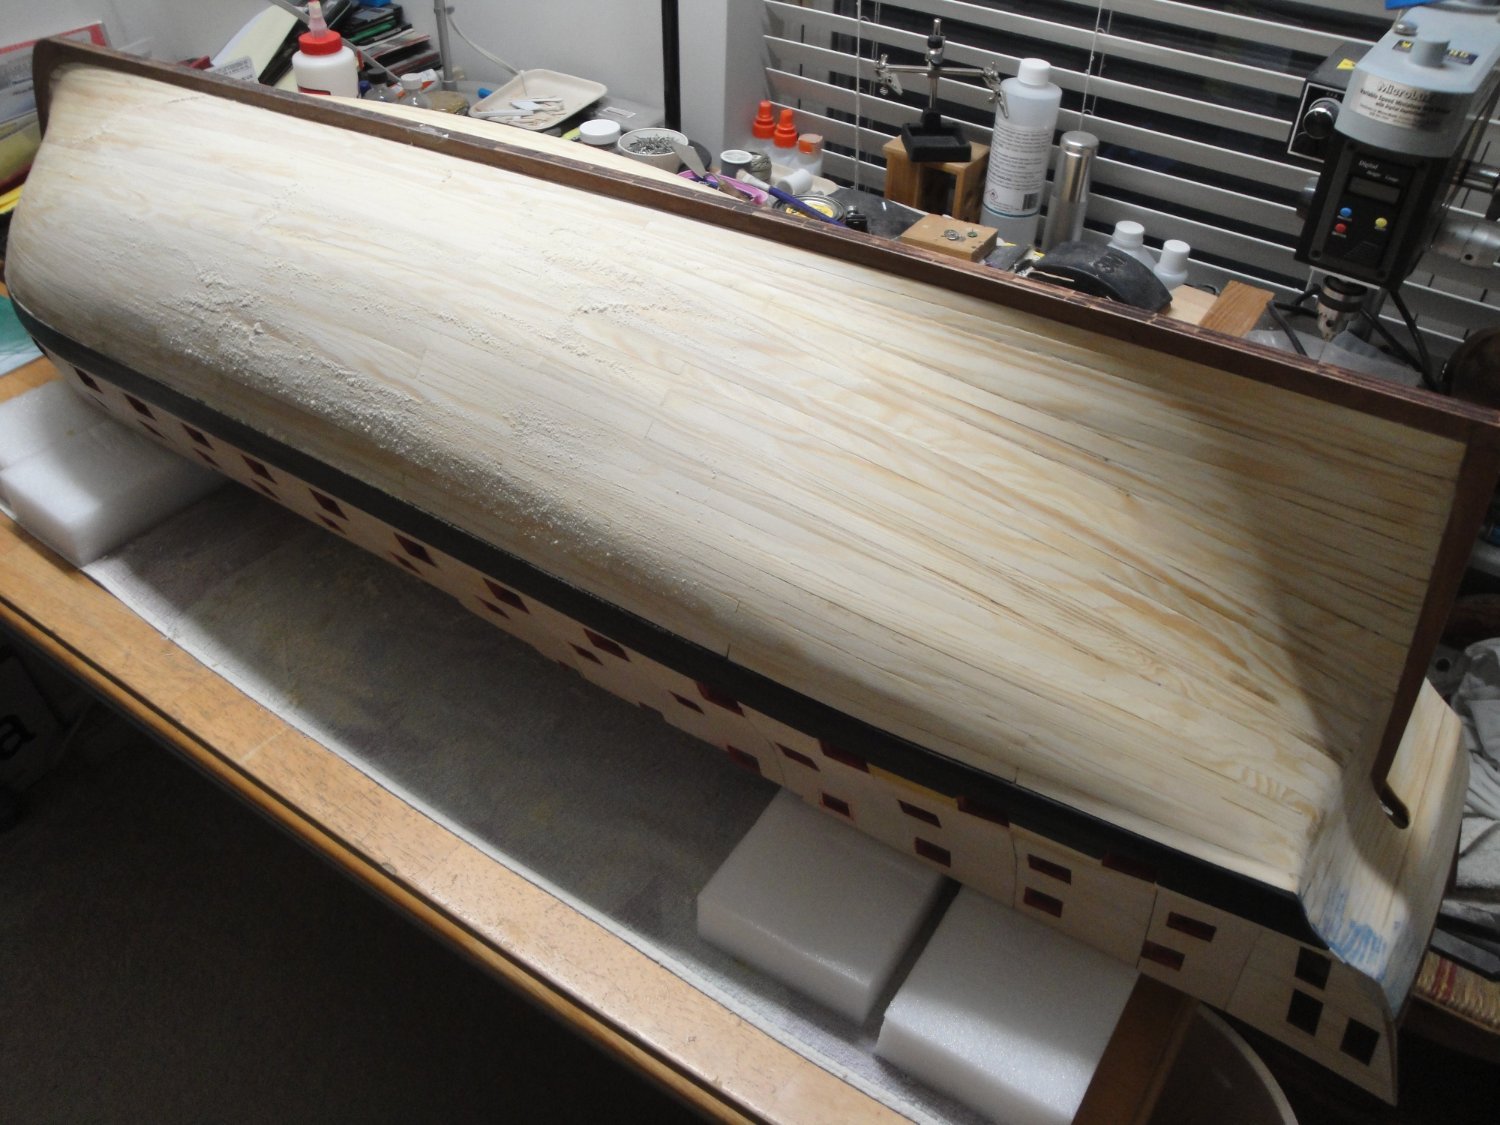
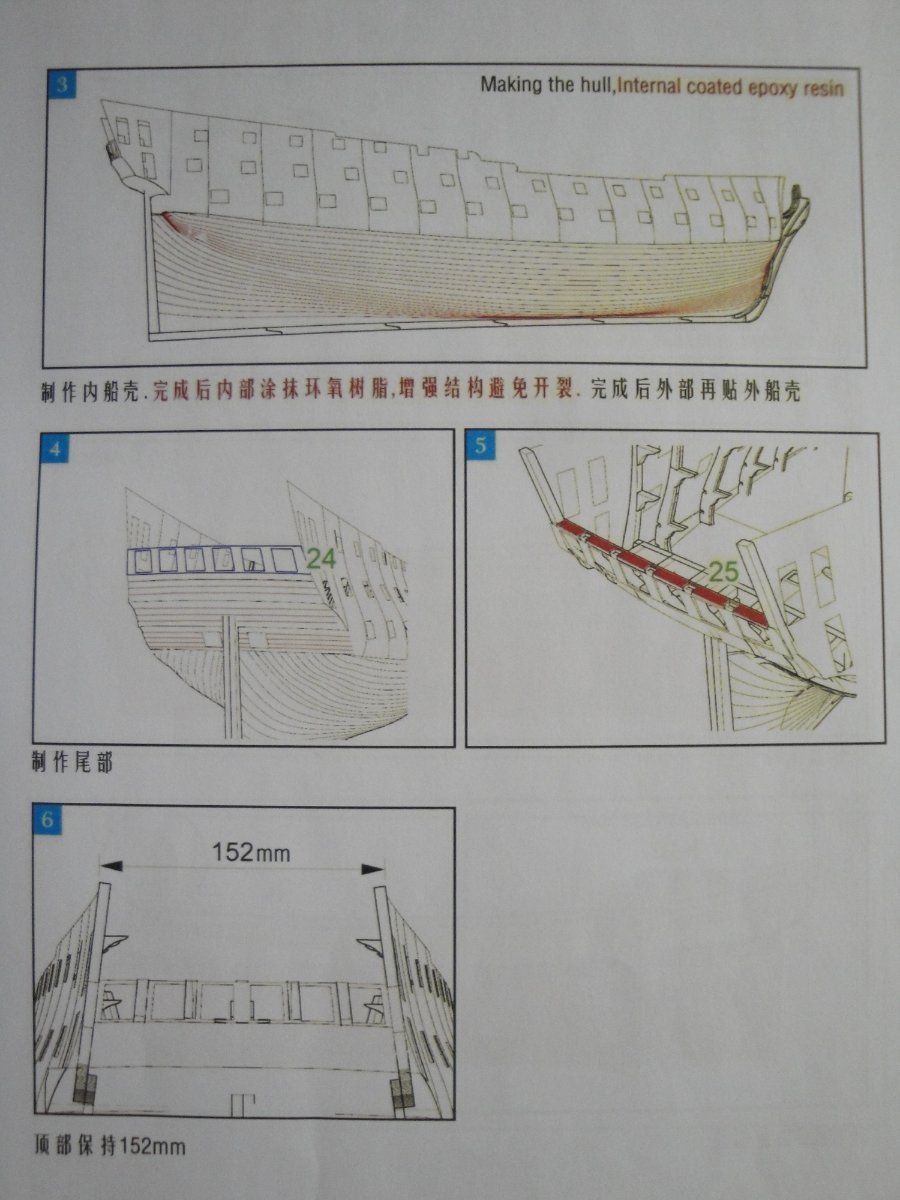
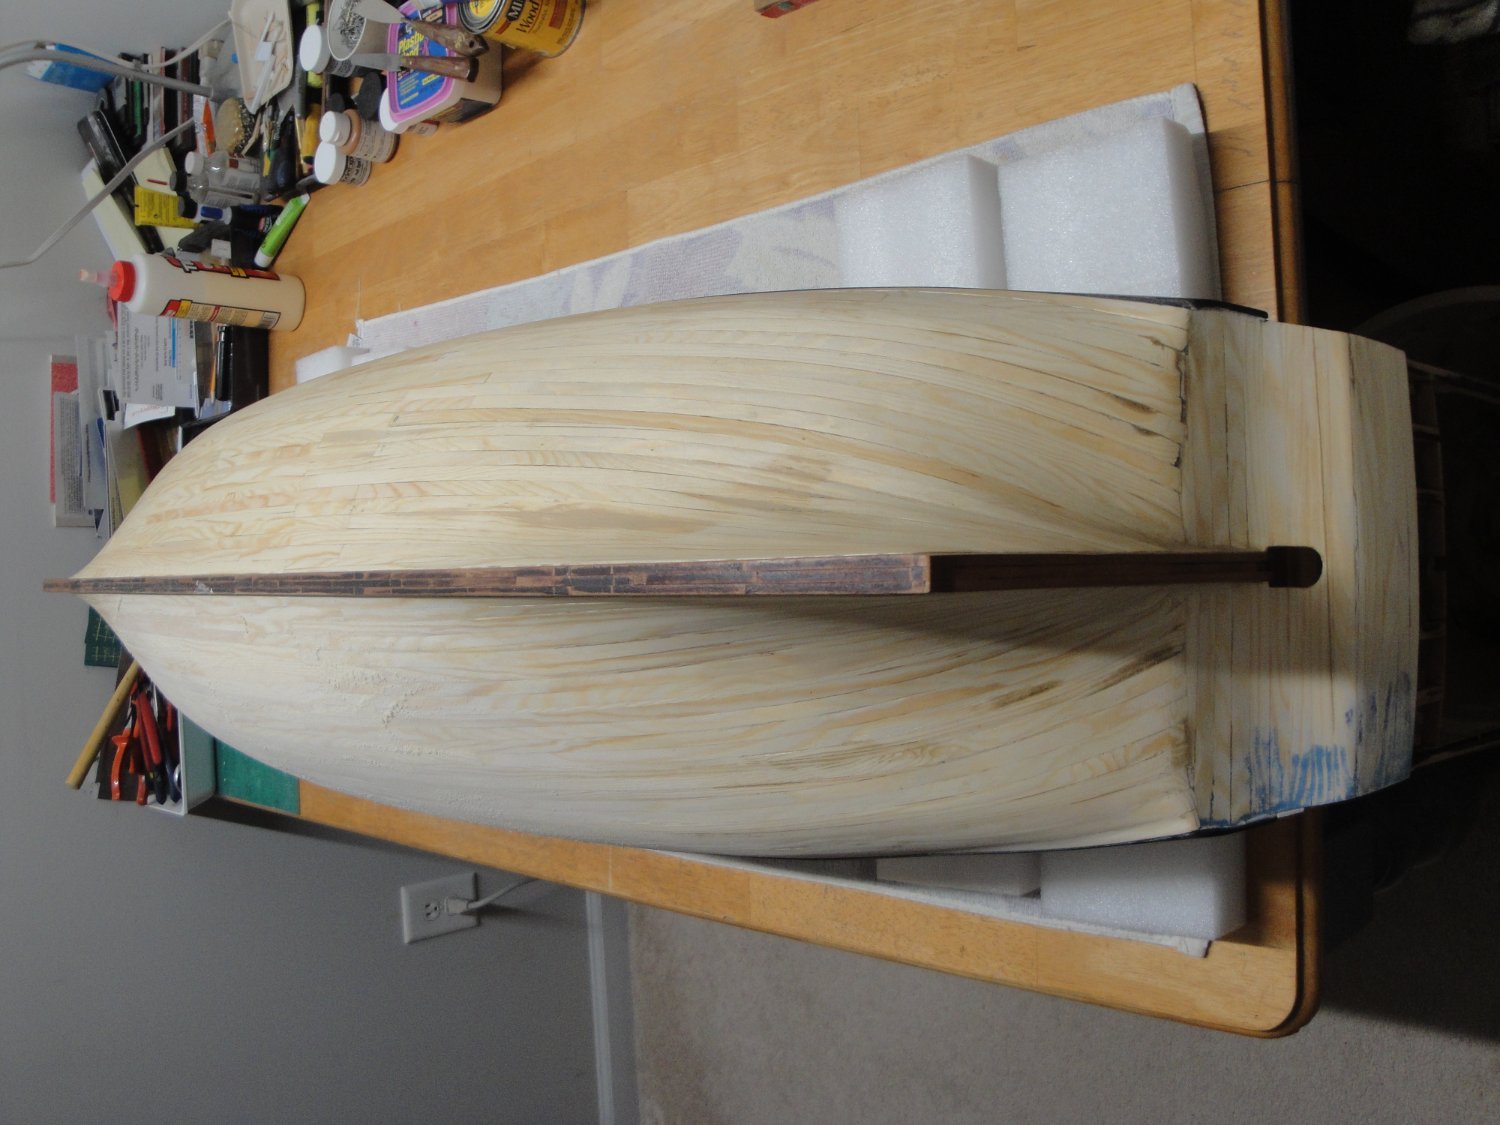
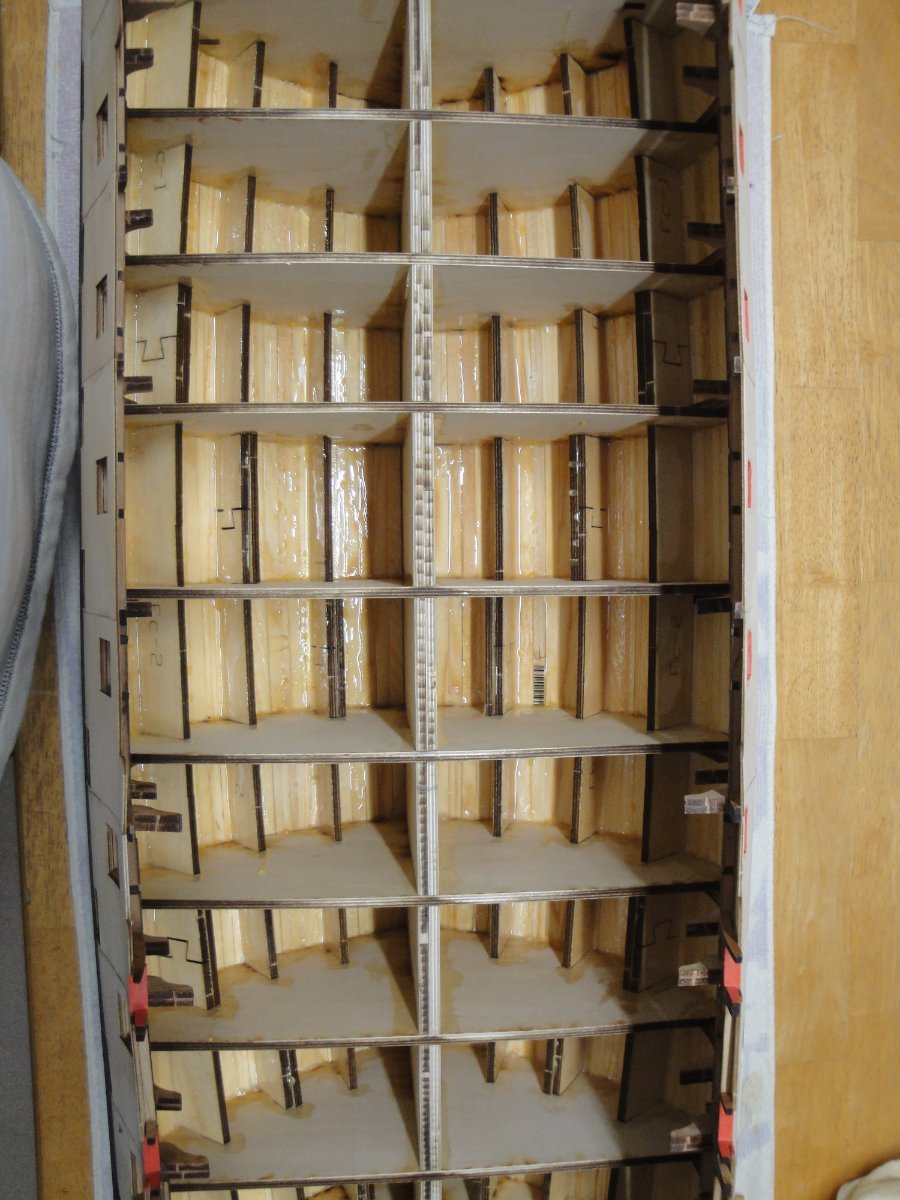
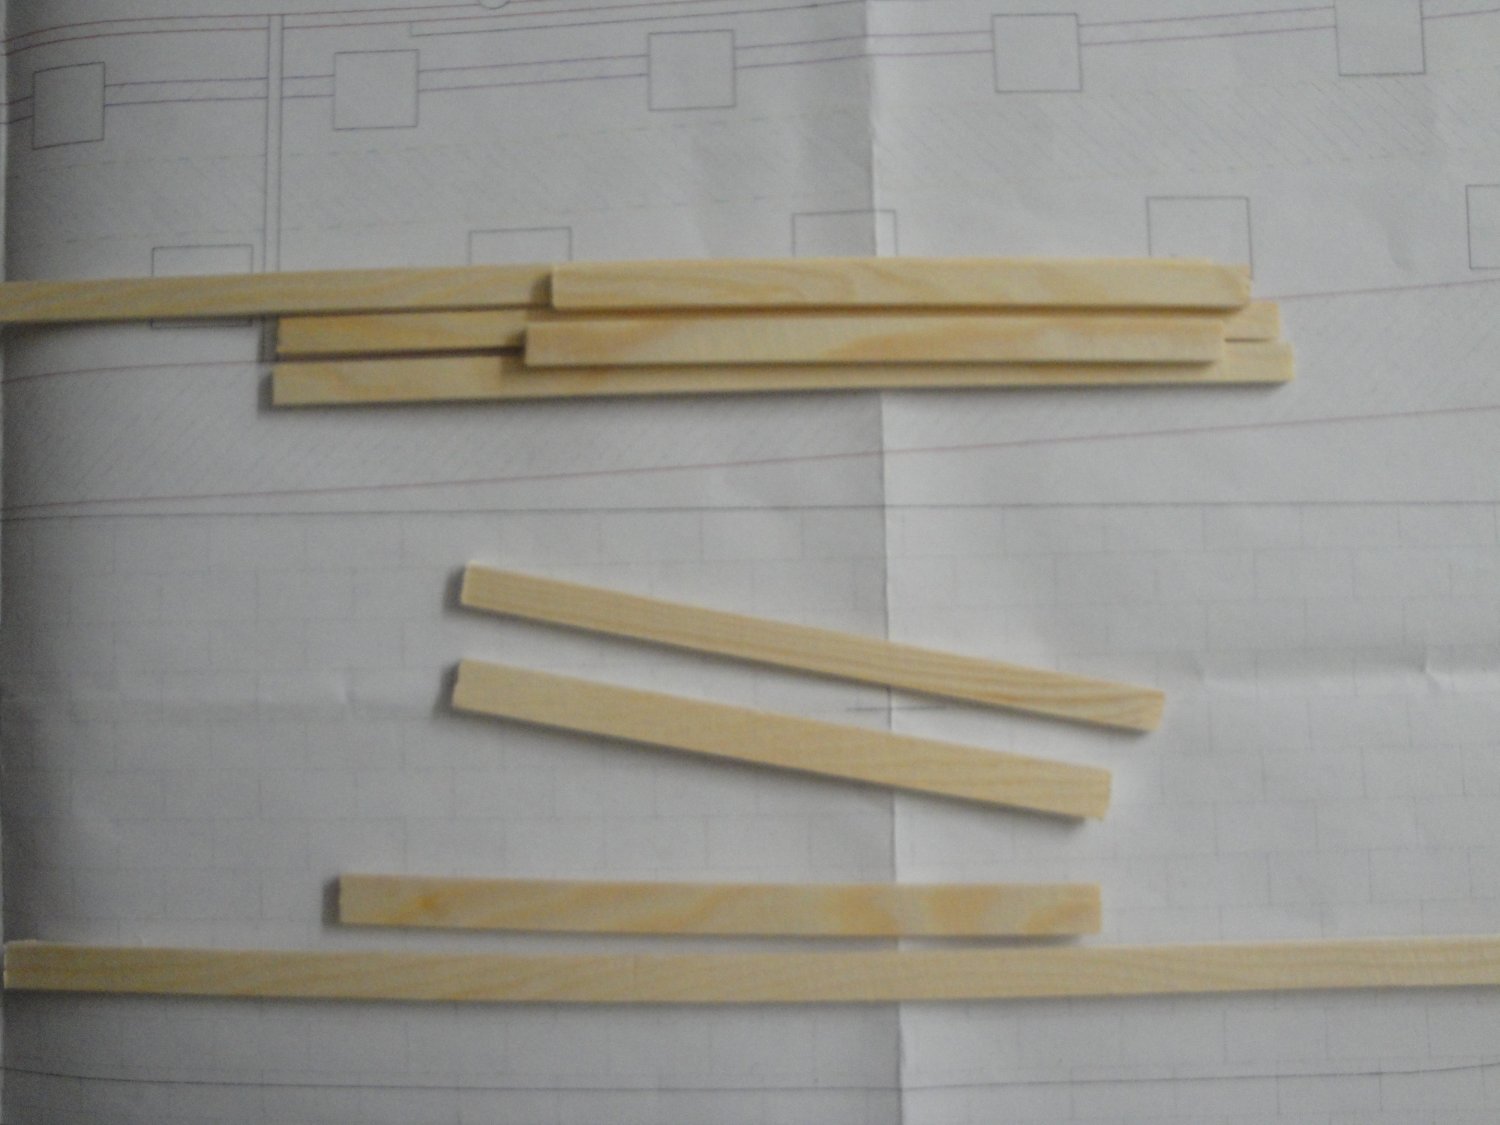
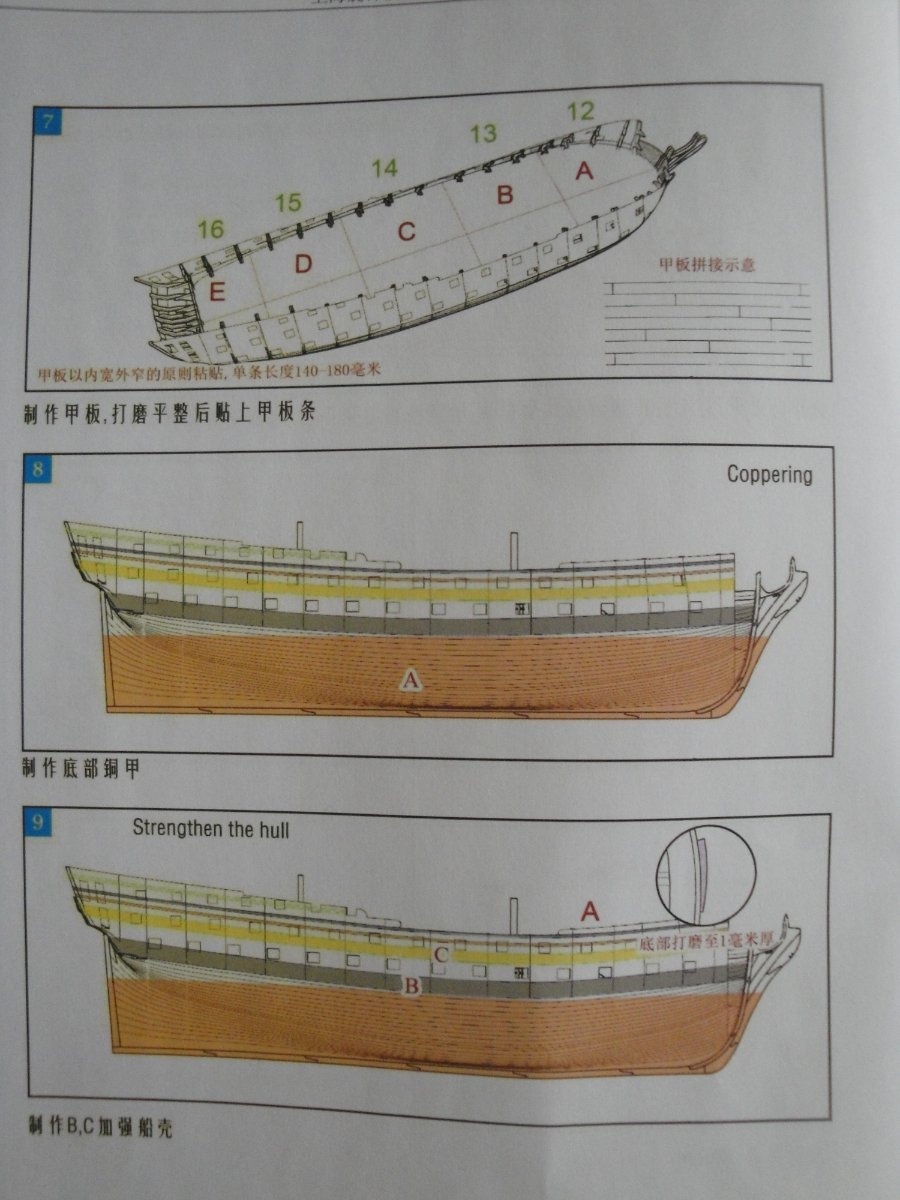
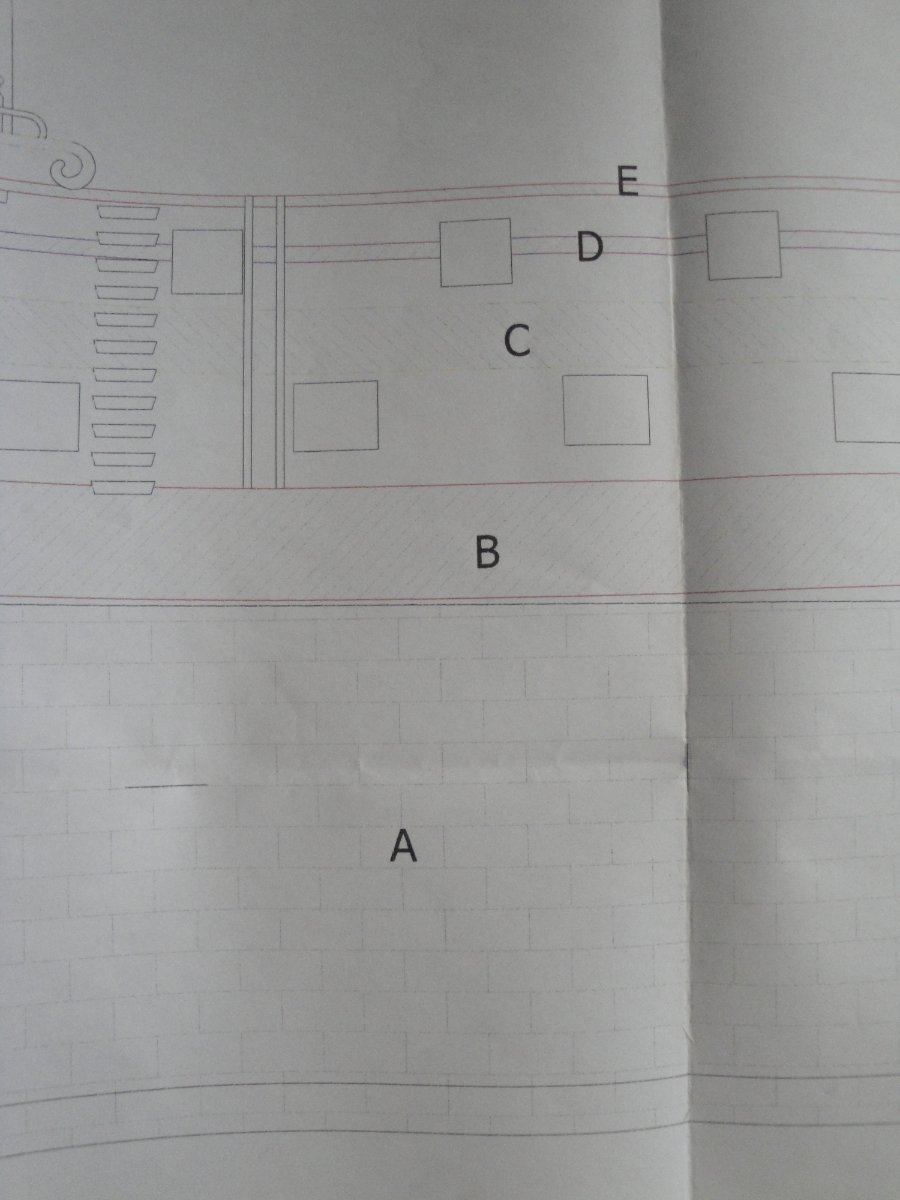
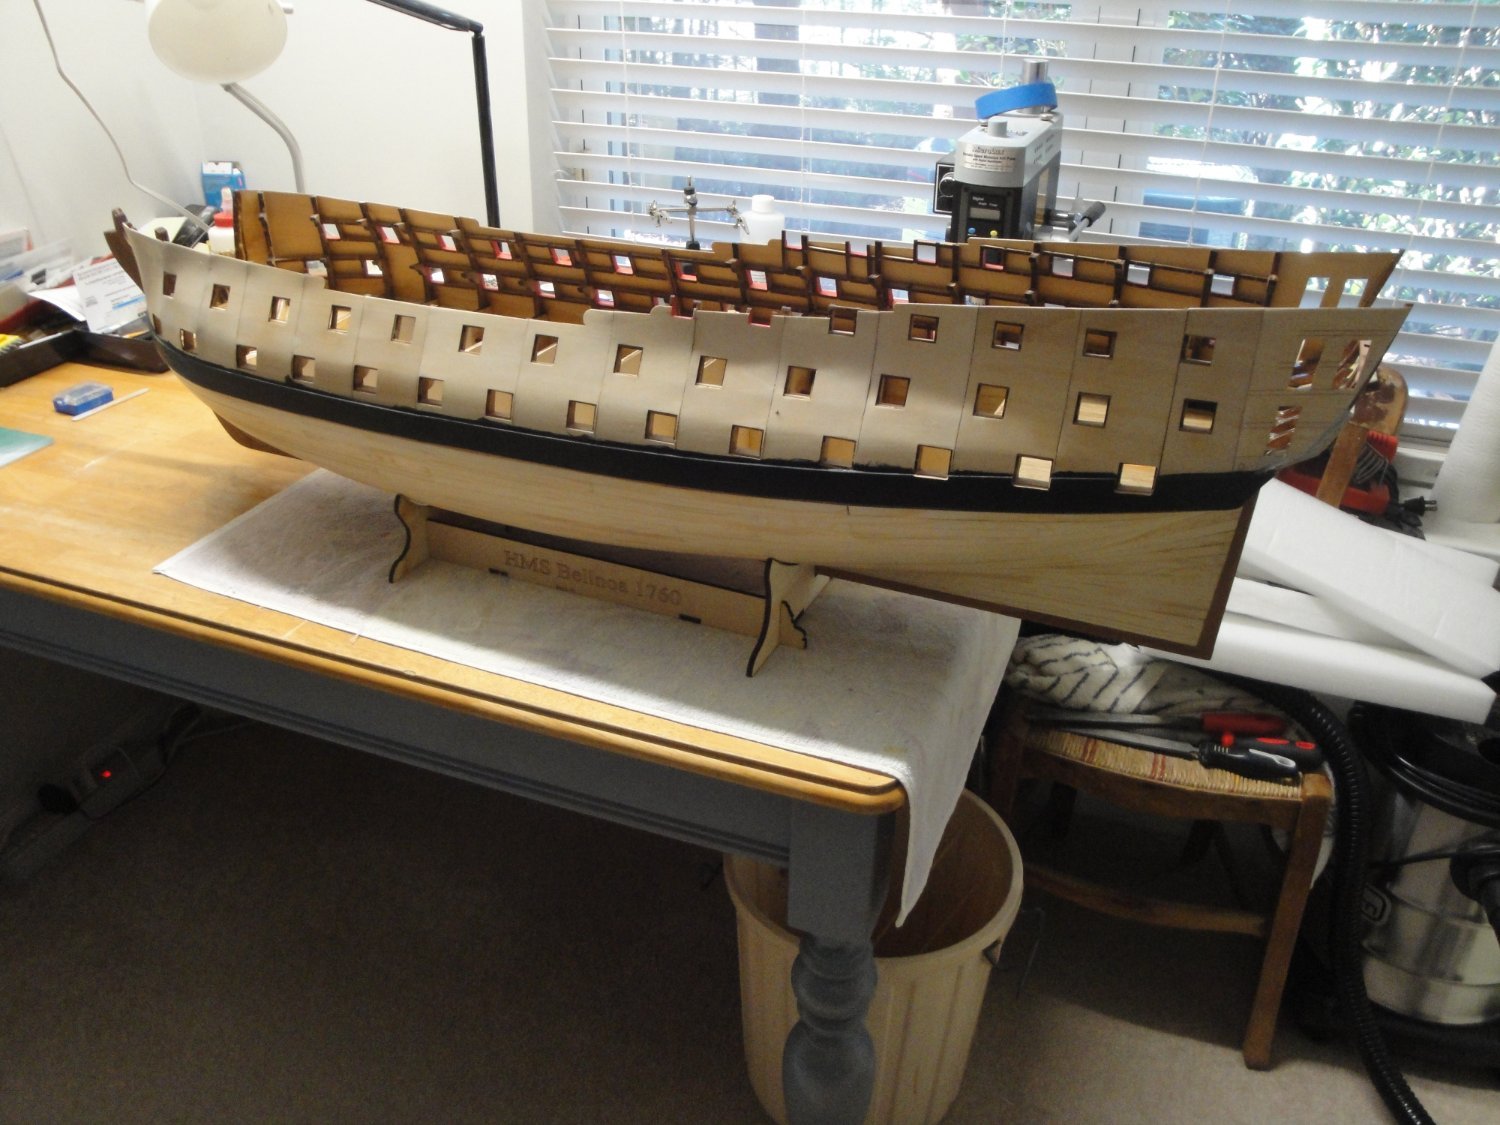
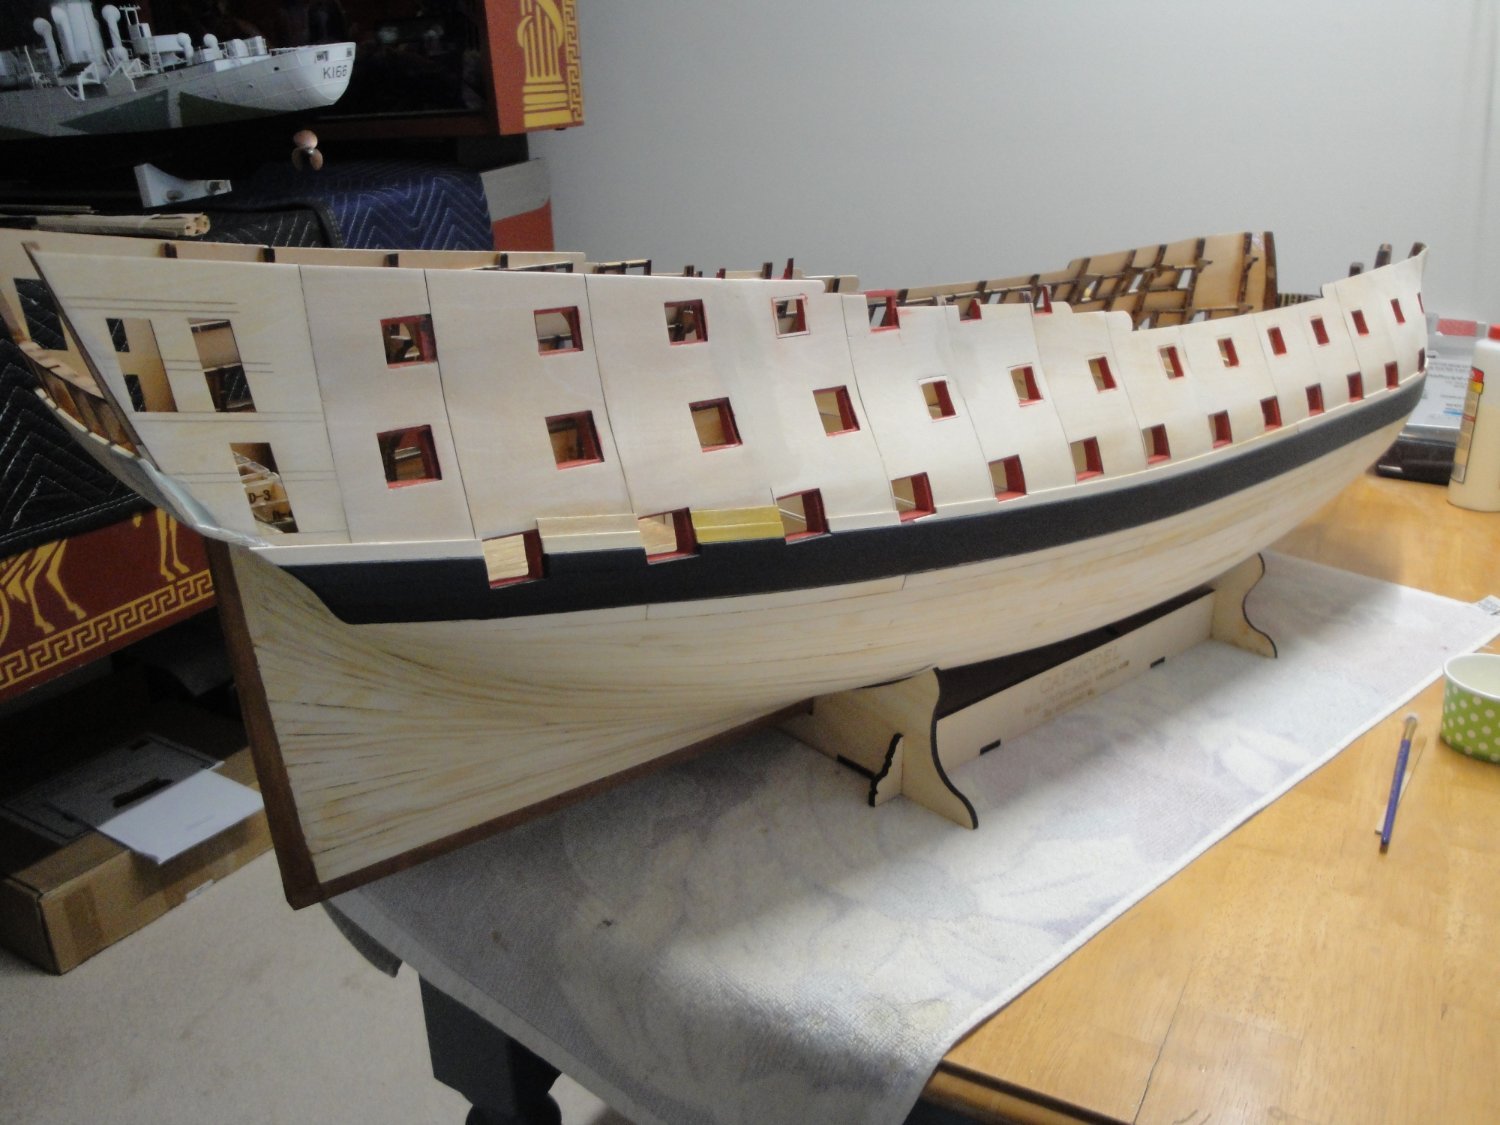
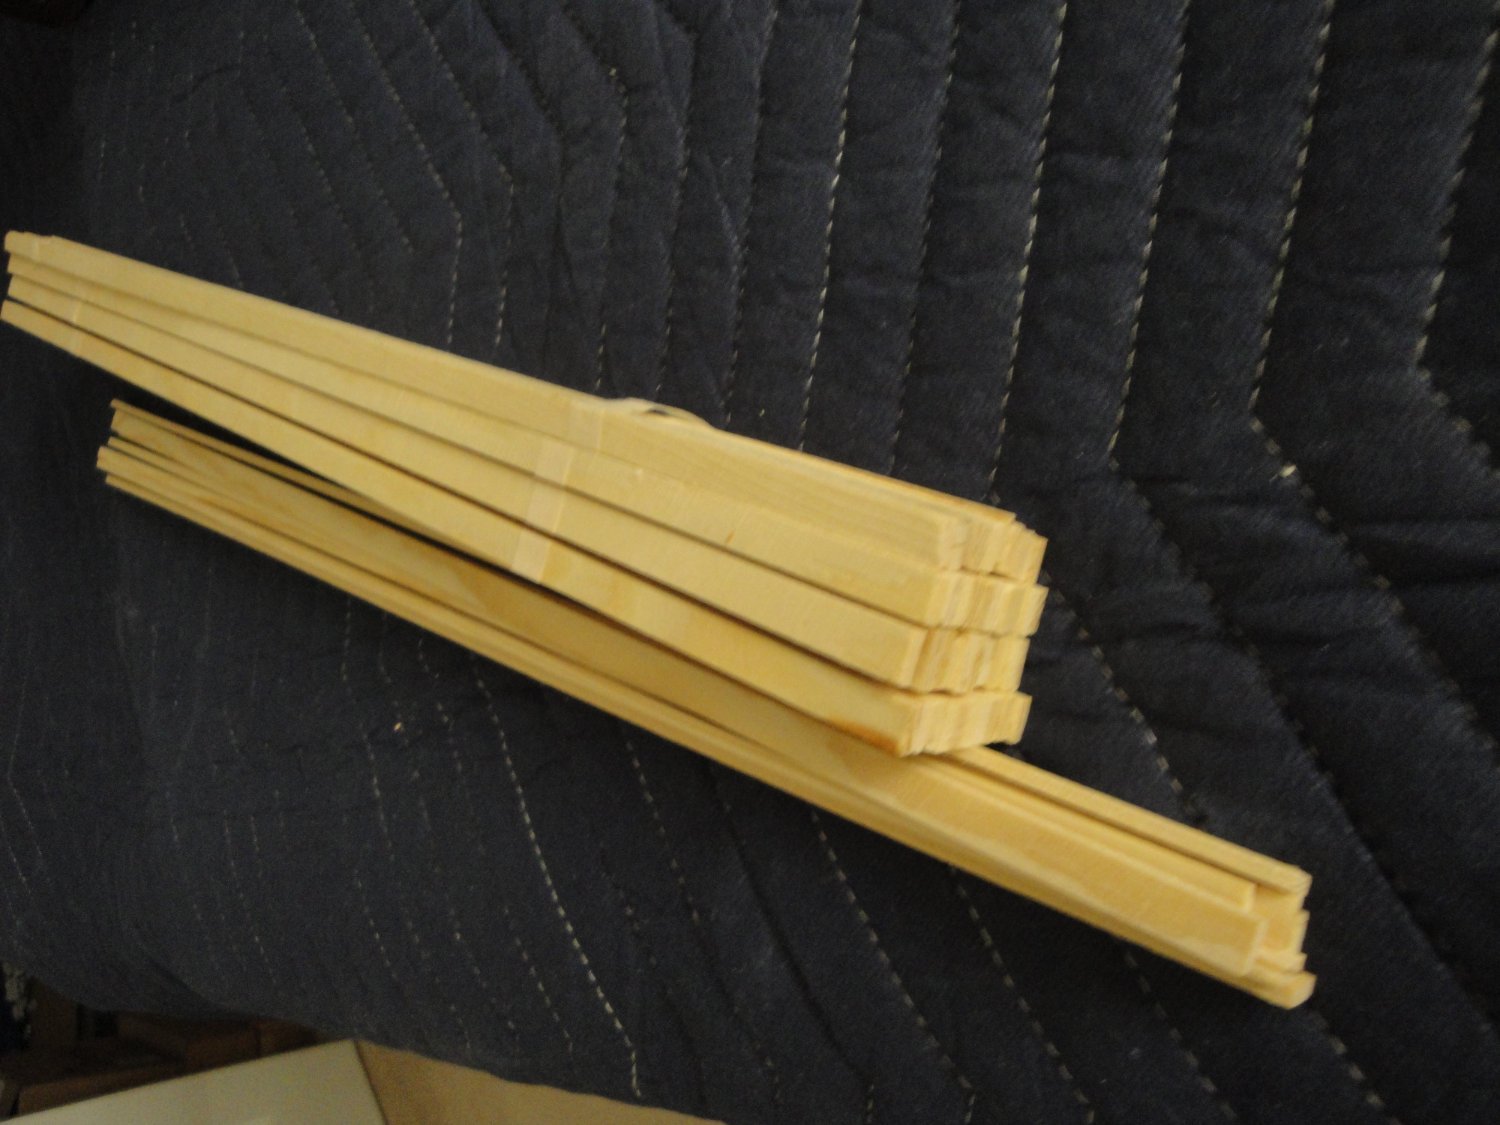
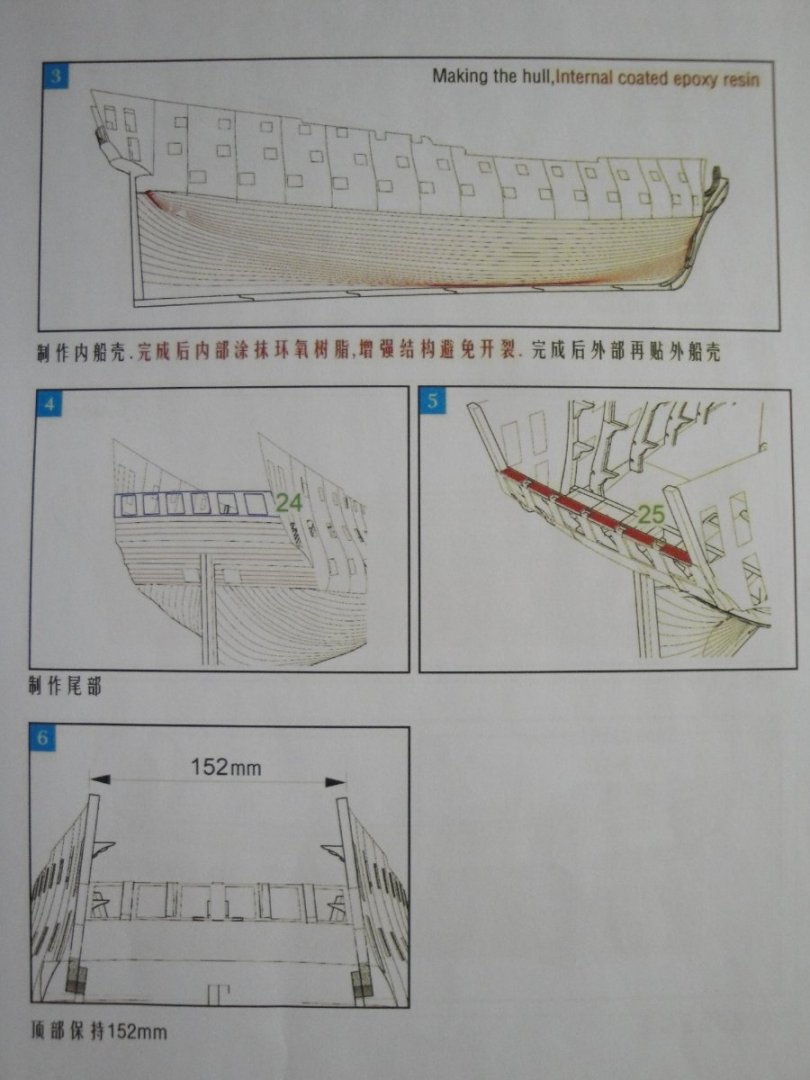
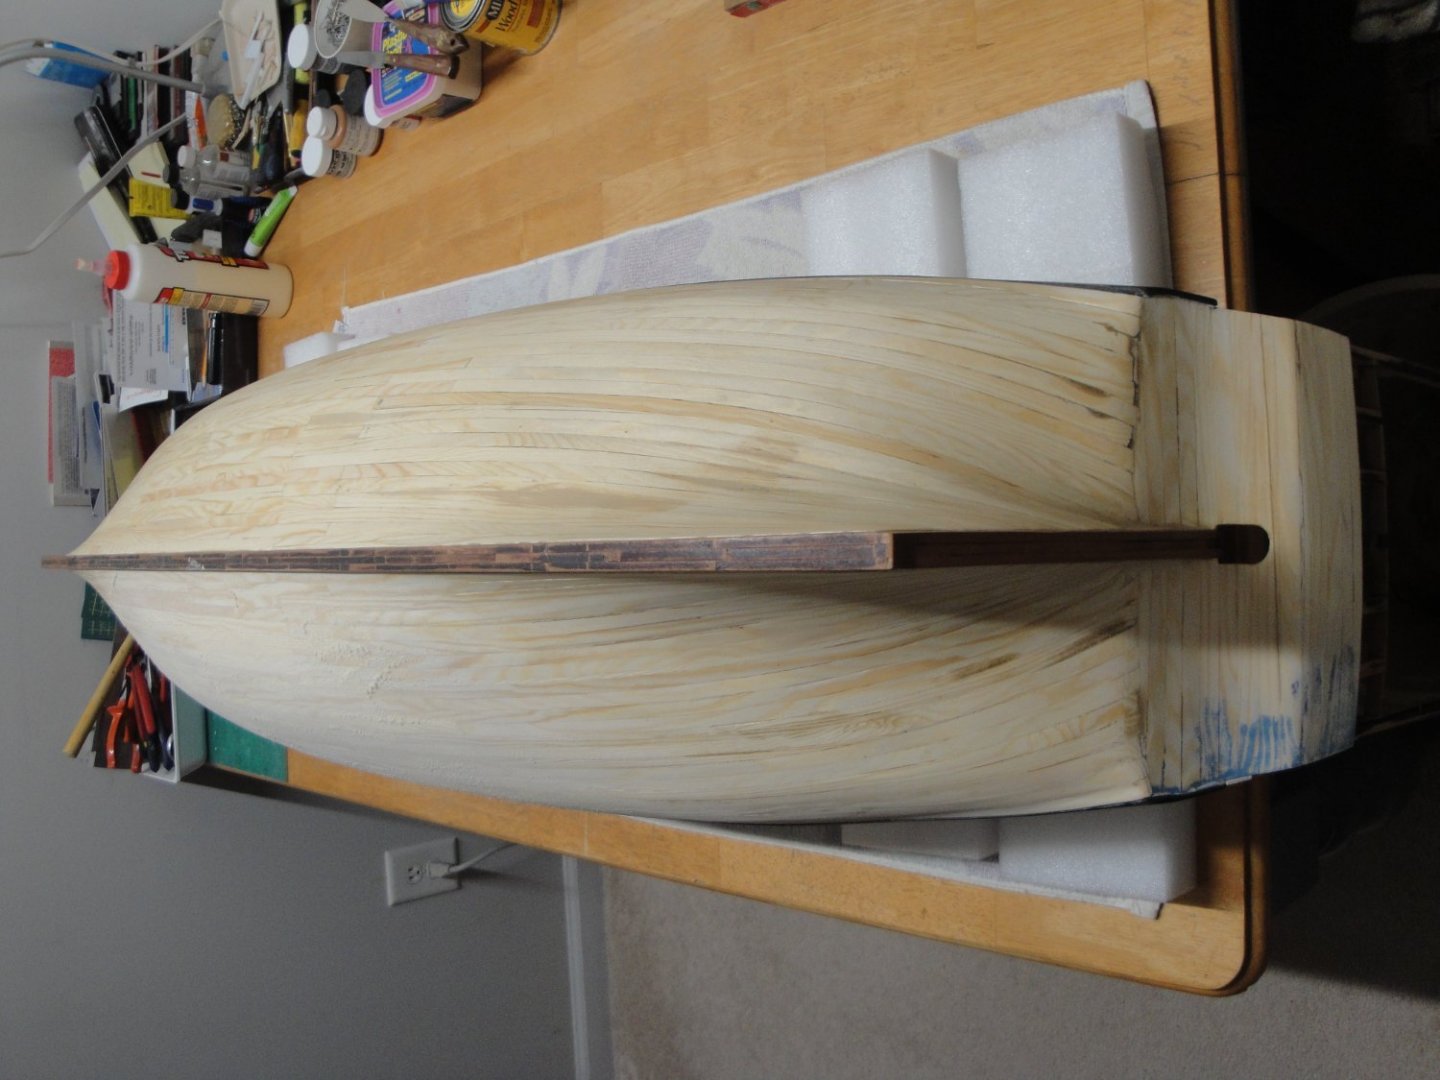
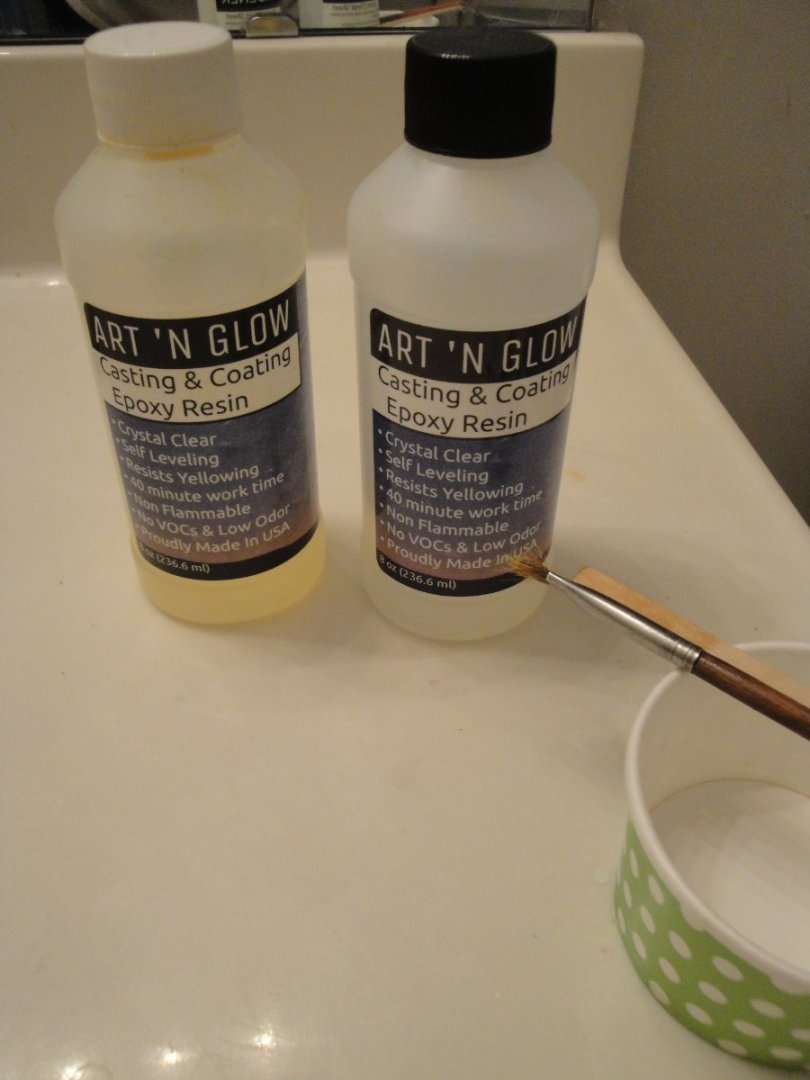
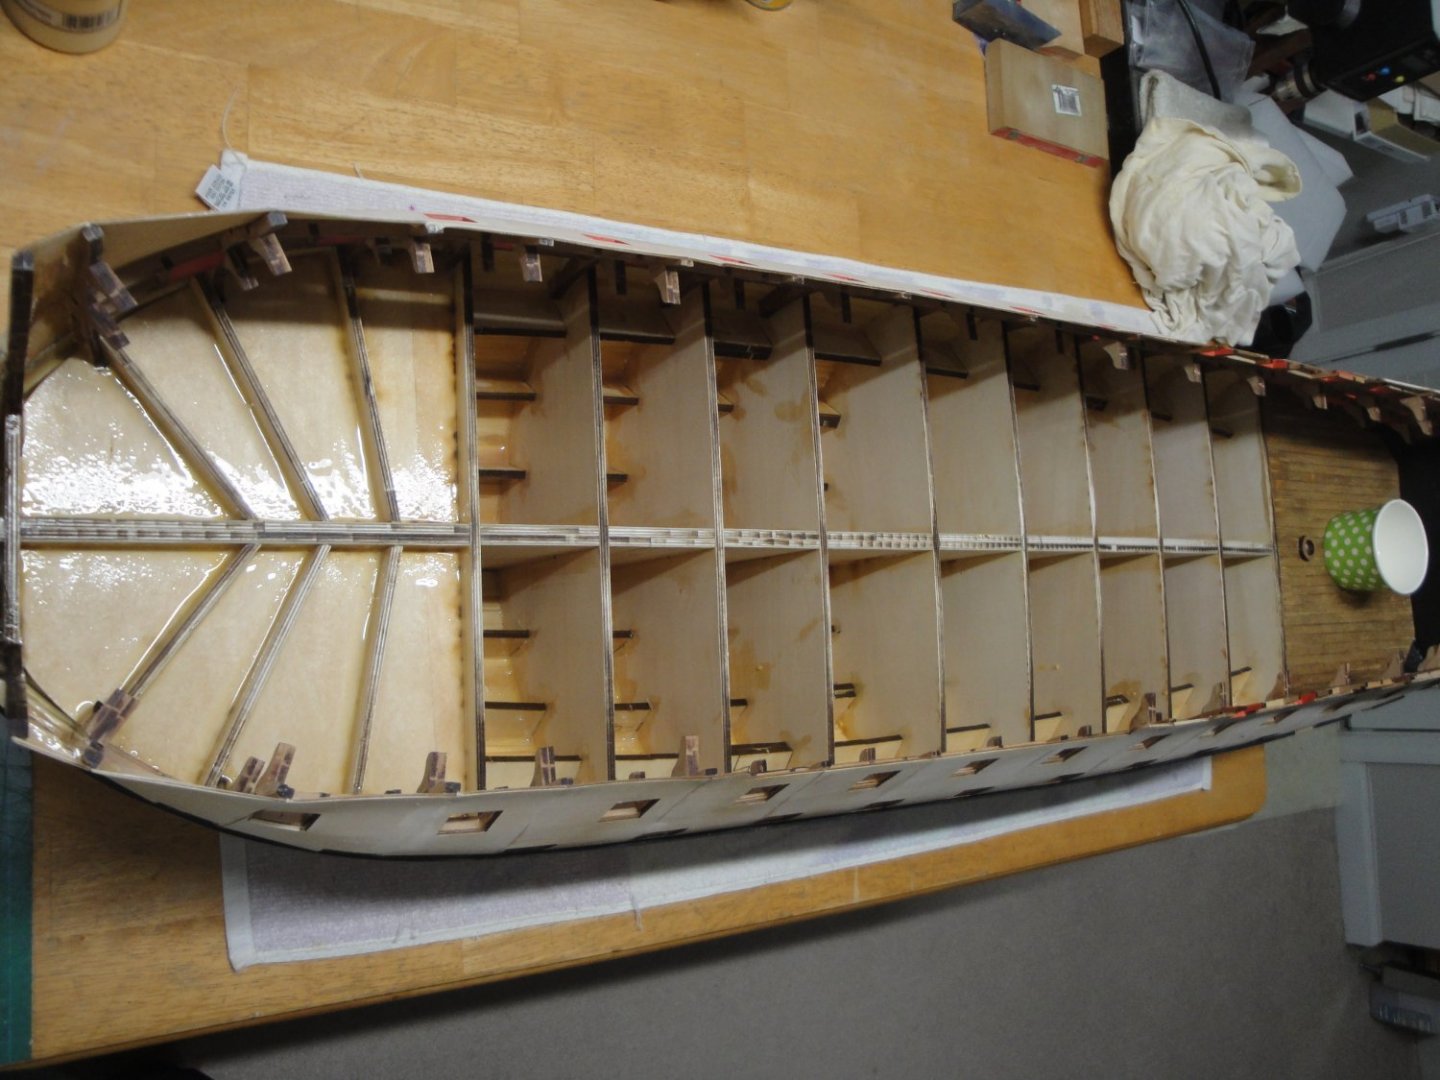
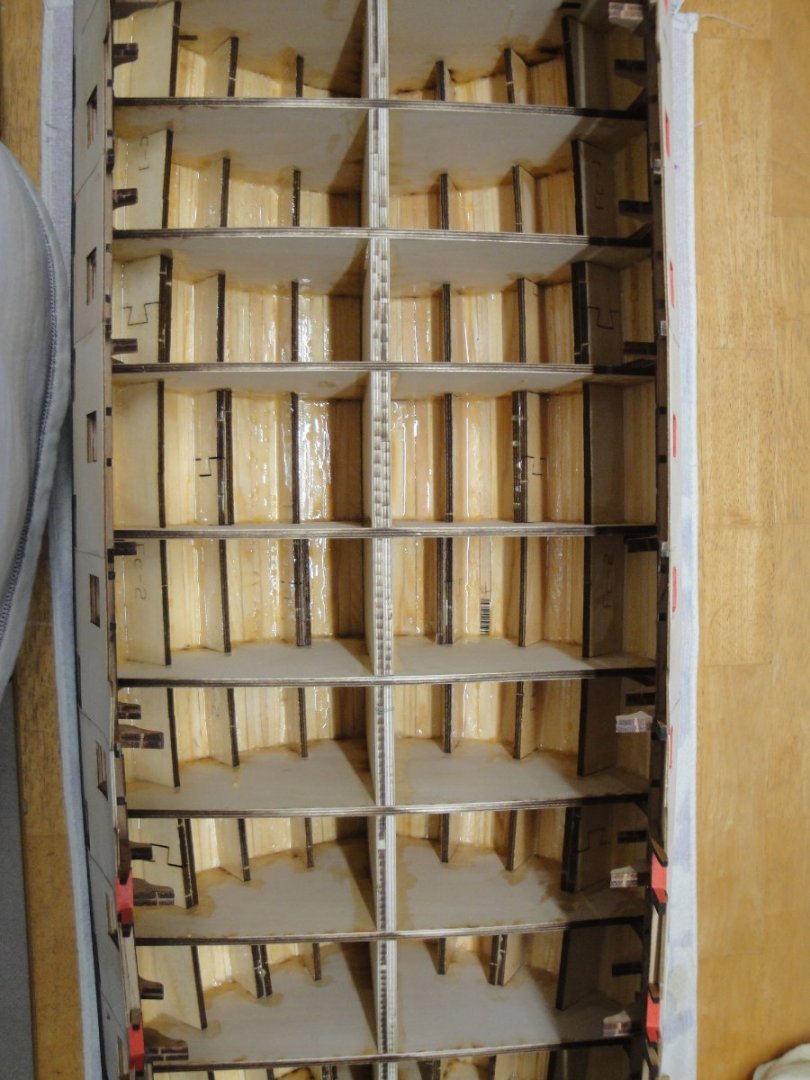
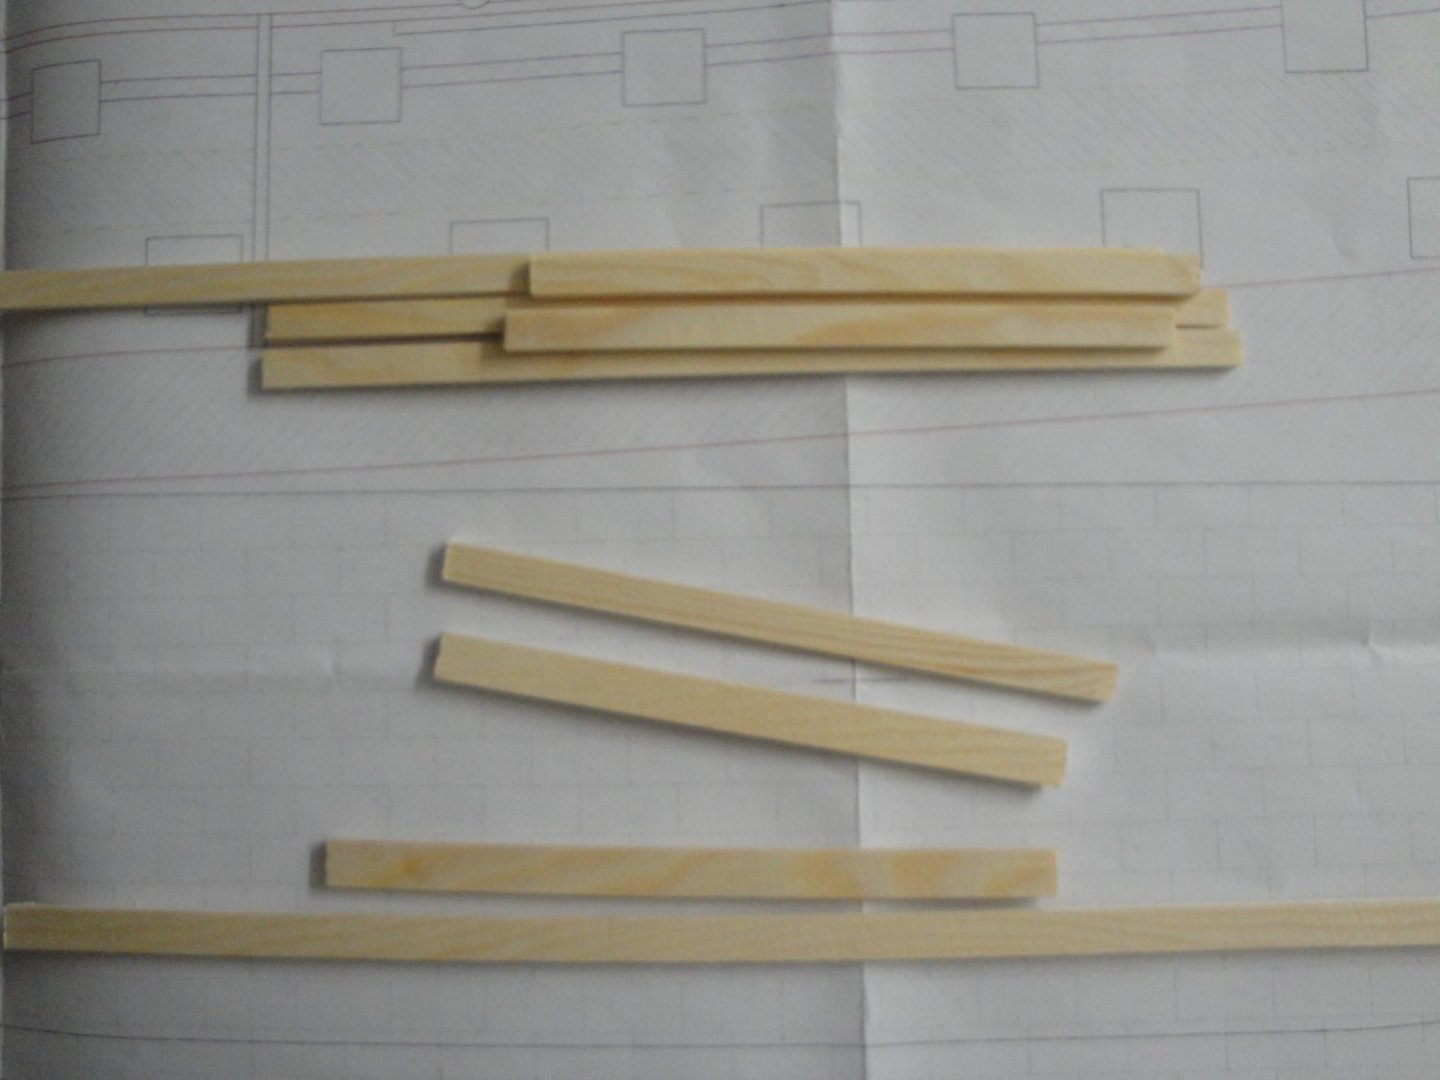
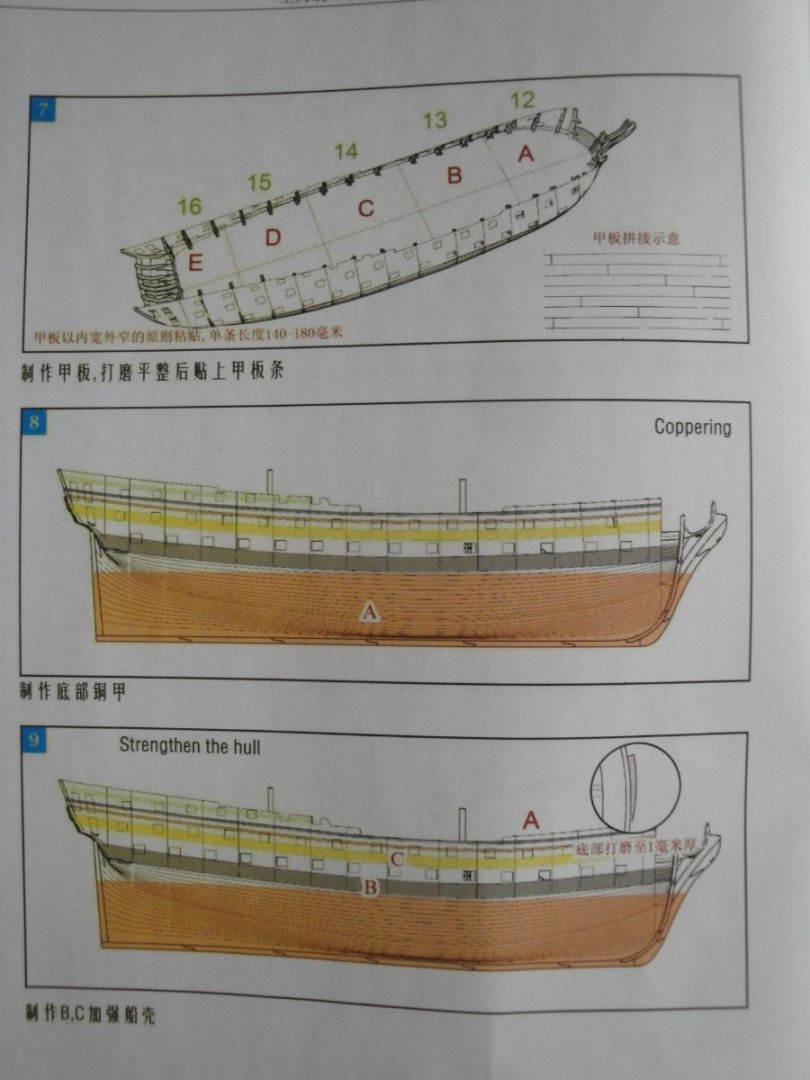
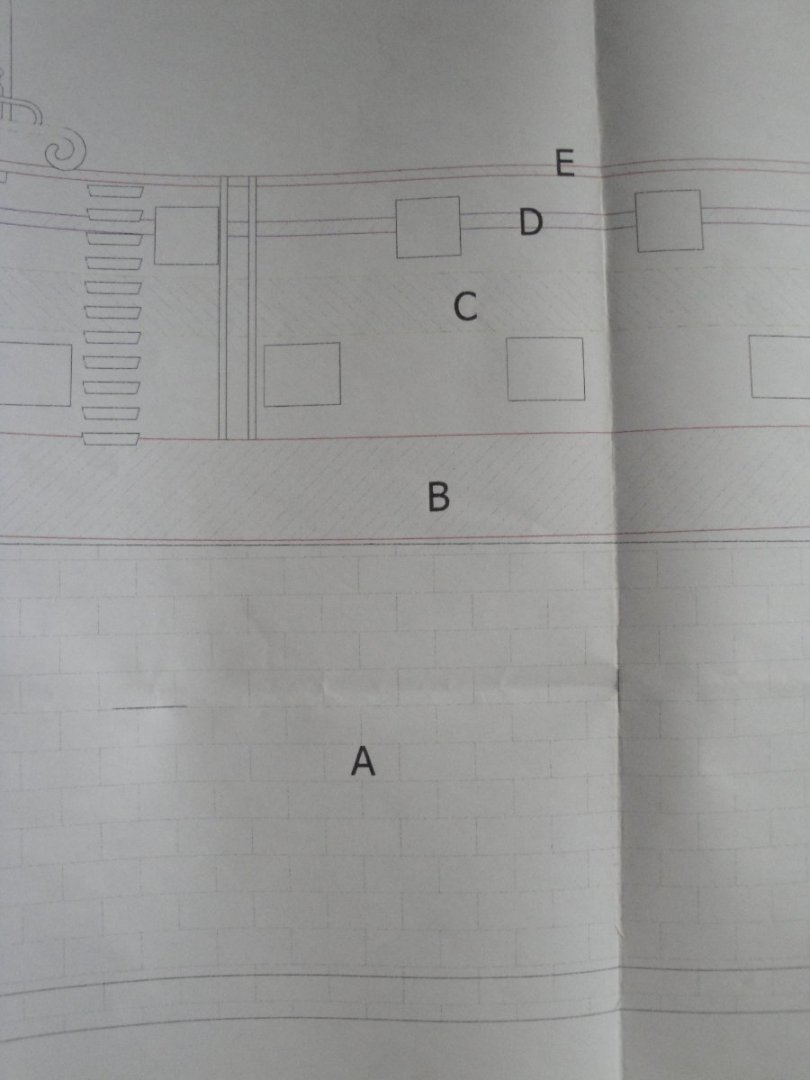
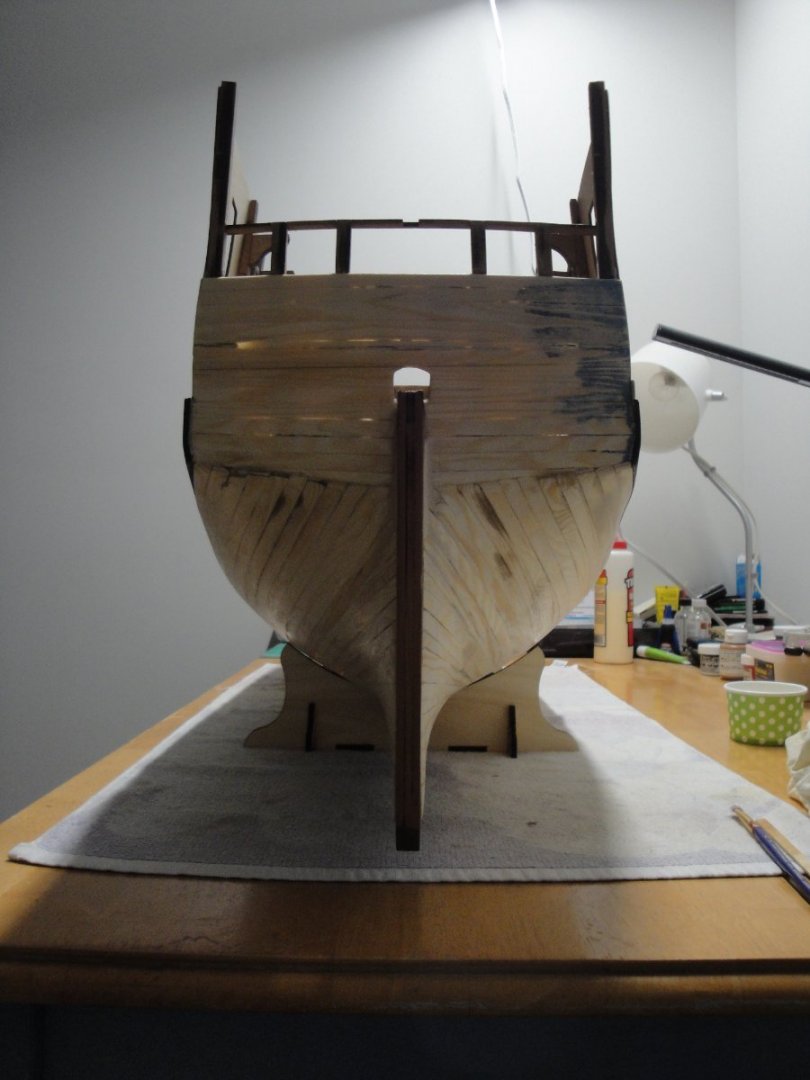
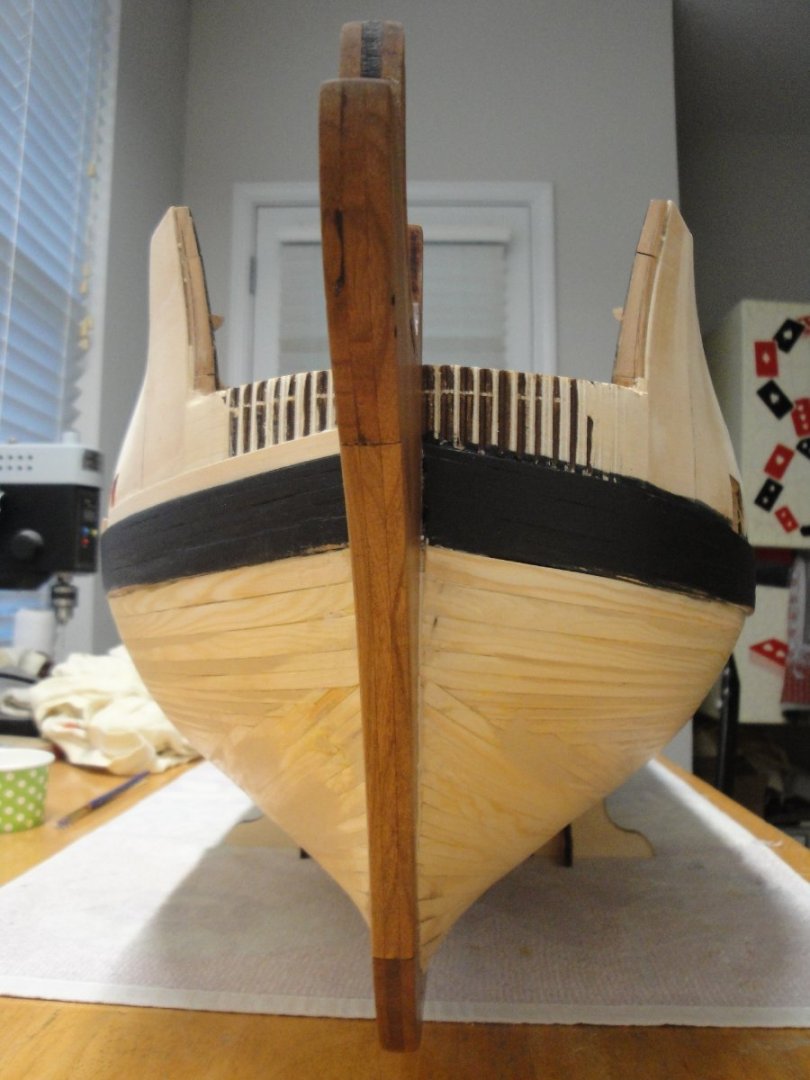
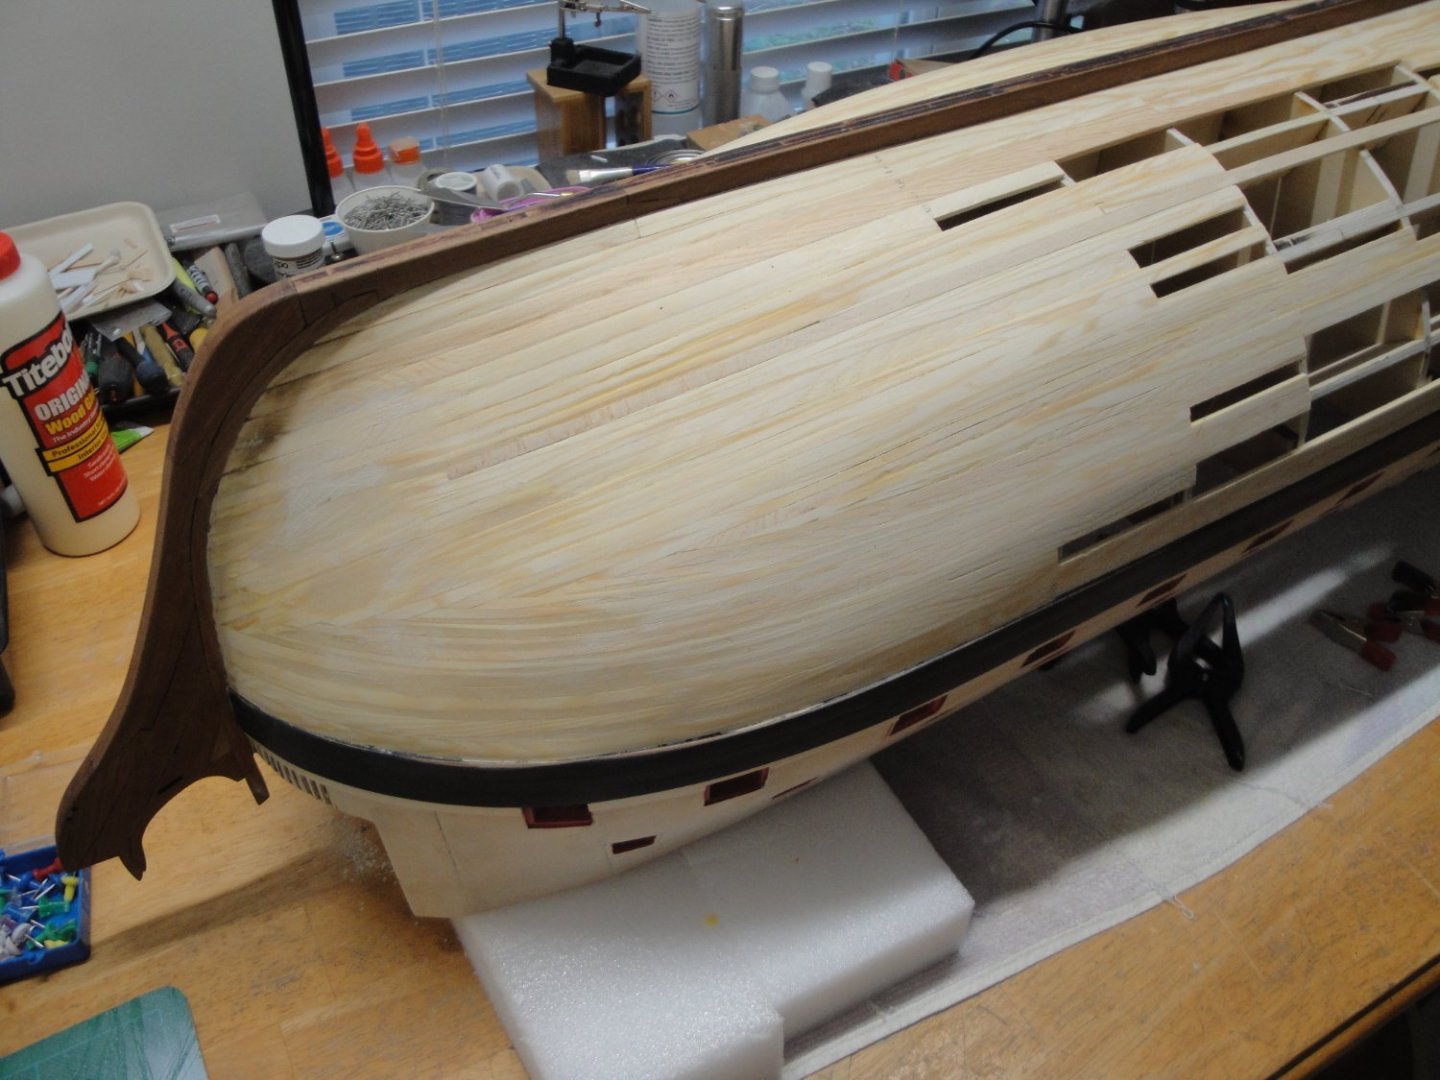
Planking of the hull is now over. Phew !!! That was a major task ! An enormous amount of sanding needs to take place but that will be for later. Let's take a look at the instructions from CAF Model: The above steps have all be completed, although in a different order: - Step 5 - Step 6 verification. - Step 4 (minus part 24 which will be glued much later on). - Step 9 (wales) - Step 3 (planking of the hull) Hull has been planked and coated internally, with epoxy resin. The stern has been built (it was actually built before the planking) and the Part #25 has been glued. On the other hand, I am not placing part #24 yet, as it includes eight windows and would be automatically broken at this stage (not sure why the instructions only shows 6 windows...go figure....). To coat the inside of the hull and protect the wood in the long term, I use an epoxy resin: easy to mix, odorless and fluid enough to be brushed inside the hull: Planking the hull was done in a very conservative way and I would recommend this approach. The wood strips provided in the kit are not of great quality. Quite a few strips did split, providing me with two nice triangular shapes, that can come handy occasionally. Technically, the planking would require a set of 25 planks from keel to wales and three sets of planks per side (Bow, stern and side), or the equivalent of 75 planks. CAF model provides exactly 150 strips of 3x8 mm wood. Some of the planks (a small number fortunately) were 10 mm wide, some were made of a very soft wood, some made of very hard poplar or white wood. Basically a lot of disparities in the strips. Because of that, I went with a very conservative route and tried to use as much as possible the left overs and cuts. I managed to plank the entire hull with exactly 103 strips and have 47 left of various qualities. The next set of instructions calls for the following: Although I have glued the rear decks, I disagree with the approach of gluing all decks at this stage and prefer to wait until the hull is completely done. After a thorough sanding of the hull, the flotation line should be marked and coppering (tiling - A) as well as a light second planking (0.4 mm thick) in the visible wood sections, should be made. Step #9 has been done in part, as the wales (B) were glued before the start of the planking. Upper hull and channels (C) will come later (see below): I am going to take a break on this hull, in order to try to finish the 3D printed Corvette that I have neglected for a few months. In the meantime a few pictures of where we stand: Hope you are enjoying this massive build log. Yves


- 507 replies
-
- 23
-

-

-
A few progress, despite a lot of time off during the Holidays. The fourth quadrant has been completed: Now, I just have to connect the quadrants and fill up the holes. Yves
-
Superb work and model of that legendary train. Yves
-
I think your cat was mad for not getting enough attention. I have had many many cats and wood models, and I have never experienced such thing. You need to spend more time with your cat :-) Yves
-
Rod, Thanks for the compliments. I submitted some pictures of my model to Benjamin but he probably used his own assembly for the article, for various reasons. Yes, I am trying to finish the planking (1st layer) of Bellona and I will then go back to the Corvette and try to complete her. Wood dust and PLA parts do not mix too well..... Yves
- 321 replies
-
- 3
-
-
- Finished
- Flower-class
- (and 1 more)
-
Thank you Allan. Yes, Bellona was coppered later on during its active life on the oceans and I intend to do that on the model as well. You are also correct about the armament that was modified later on and to be totally correct, the guns on the quarter decks would have to be replaced by carronades, which are not included in the kit. There are risks that this model will never be exact, in one form or another. I think I can live with that :-) Yves
-
This is getting really impressive and exciting. Yves
- 454 replies
-
- 3
-
-
- Union Steamship Company
- Stepcraft 840
- (and 3 more)
-
Beautiful Model Bruce. Absolutely outstanding. Happy New Year and many more models. Yves
-
Brian, What a fantastic model. I love the attention to details and the creativity with materials and parts. Your bench is looking great with all these organizing boxes. Yves
-
I love the sand and plants. Very nice touch. Yves
-
Your pictures are not showing up... Yves
-
I am not a supporter of tree nailing but I admire your patience and skill. Yves
-
Excellent Summary of this great kit. I agree completely with your review of the kit and share your enthusiasm about it, even if I did not complete my ECB yet. Yves
-
You will love the Calypso. I built mine 35 years ago and had it navigating on the mediterranean sea, and various lakes in France and America. I still have it and will refurbish it one day. Yves
-
Beautiful work Derek. Happy and Merry Christmas to you as well. Yves
- 345 replies
-
- 2
-

-
-
- Duchess Of Kingston
- Vanguard Models
- (and 1 more)
-
Tamiya acrylic paints have to be diluted with their thinner. I use 50% paint, 50% thinner in the summer time. In the winter, you may want to go more 70% paint and 30% thinner. Otherwise, it will run way too much. But you probably know all the above, already. Yves
-
What a beautiful l ship... and that bow is amazing of perfection. Yves
- 345 replies
-
- 1
-
-
- Duchess Of Kingston
- Vanguard Models
- (and 1 more)