HOLIDAY DONATION DRIVE - SUPPORT MSW - DO YOUR PART TO KEEP THIS GREAT FORUM GOING! (Only 44 donations so far out of 49,000 members - C'mon guys!)
×


dvm27
-
Posts
2,459 -
Joined
-
Last visited
Content Type
Profiles
Forums
Gallery
Events
Everything posted by dvm27
-
 Magnificent work, Mark! Your carling runs fore to aft are perfect. Happy New Year.
 -
ancre Le Fleuron 1729 by rekon54 - 1:24
dvm27 replied to rekon54's topic in - Build logs for subjects built 1501 - 1750
Bravo! -
ROYAL CAROLINE 1749 by Doris - 1:40 - CARD
dvm27 replied to DORIS's topic in - Build logs for subjects built 1501 - 1750
Stunning work, Doris! Best of health and ignore those who question your model making - they're obviously jealous. Greg- 883 replies
-
- 2
-

-
- royal caroline
- ship of the line
- (and 1 more)
-
Looks wonderful, Gary. Look forward to your 2014 updates. Happy Holidays! Greg
-
Good luck with your project. For inspiration you may wish to check out the build by Narim on the Russian Ship Model forum. His build will either inspire you or cause you to give up ship modeling! http://forum.modelsworld.ru/topic8068.html
-
Great job, Rusty. Now could you come and clean my shop so I can work on my model this weekend?
- 421 replies
-
- 1
-
-
- granado
- bomb ketch
- (and 2 more)
-
I agree with your refit Michael. The lines of the narrower cockpit flow beautifully into the cabin structure.
-
At least you have Chuck's beautiful sculptures to fall back on. It's hard to imagine any kit produced chunk of metal complementing your skillfully done model.
-
Lovely work, as usual, Rusty. Any spring back in those main hatches after unclamping?
-
Chain pumps
dvm27 replied to dvm27's topic in Discussion for a Ship's Deck Furniture, Guns, boats and other Fittings
So true Michael. I love looking at old scales and scientific instruments such as Horace Harrison's maritime clocks. Sheer genius. -
Congratulations on completing this important milestone, Remco! She's beautiful.
-
Very nice, Danny. Now all you need to do is make 39 others exactly like that one.
-
I look forward to your build Rob. It's nice to see so many clipper projects happening. You must really like rigging!
-
Just beautiful, Johann. I also love the pillared columns in the background.
-
Announcing the Model Ship World Ship Kit Database Project
dvm27 replied to SkerryAmp's topic in Wood ship model kits
Do you wish to include scratch building projects with available wooden framing package ? You could include them in a separate category. Examples might include Admiralty Models Swan and Echo class ships as well as the Echo cross-section, Naiad, Triton, etc. -
I love the caulking, Michael and the grain of the wood works very well at your scale. Is the glue just tinted carpenter's glue and have you done this before? Just wondering if the glue might shrink a bit over time.
-
Beautiful lines, Ed. Can't wait to see her faired. Thanks also for the larger photos!
- 3,618 replies
-
- 1
-
-
- young america
- clipper
- (and 1 more)
-
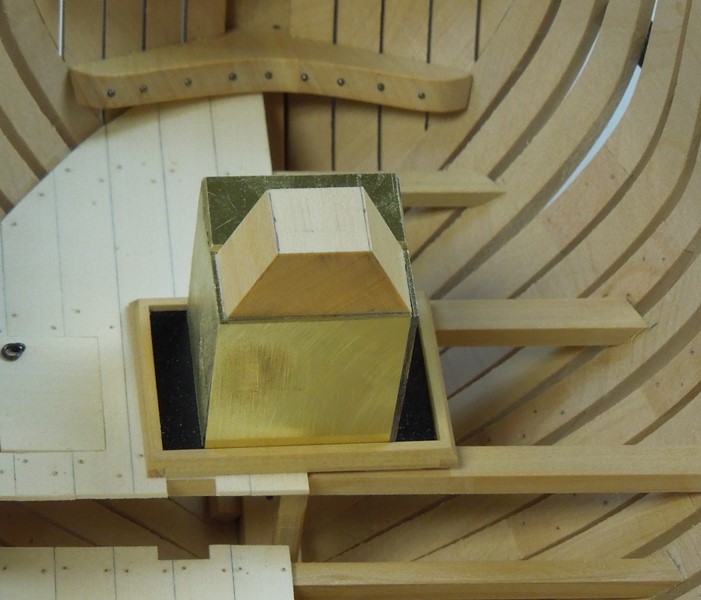
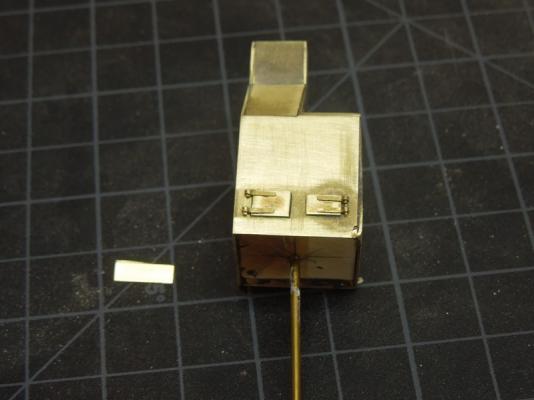
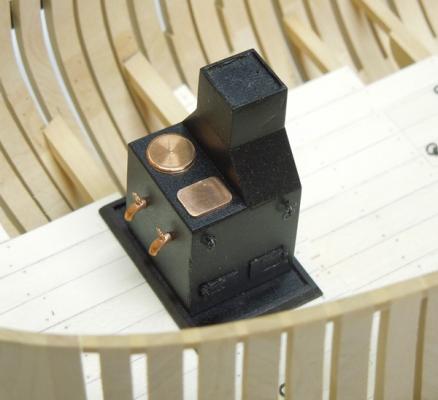
Thanks for all your comments! Remco - There's no need to fix Fiebing's dye. It covers and penetrates beautifully and buffs to a nice finish. As a matter of fact, they recommend applying it to wet leather. Learner - I adapted my stove from Lavery's Arming and Fitting... It depicts an iron firehearth contemporary to Speedwell. Brodie stoves appeared decades later, c.1780. Here are a couple photos of the strove during construction. All brass parts were constructed over shaped plugs of holly and glued with J&B Weldbond. This creates a very strong bond and fills the joints which can then be sanded. The finish is automotive gray primer followed by automotive black. Mark - trunnels are drilled and applied after the wales are in place. They are easily touched up using the dye on a q-tip. Kind of a wasted exercise though as they become invisible. Speedwell is a nice little project at 1:48. She'll fit easily on my one remaining shelf.

- 345 replies
-
- 25
-
-
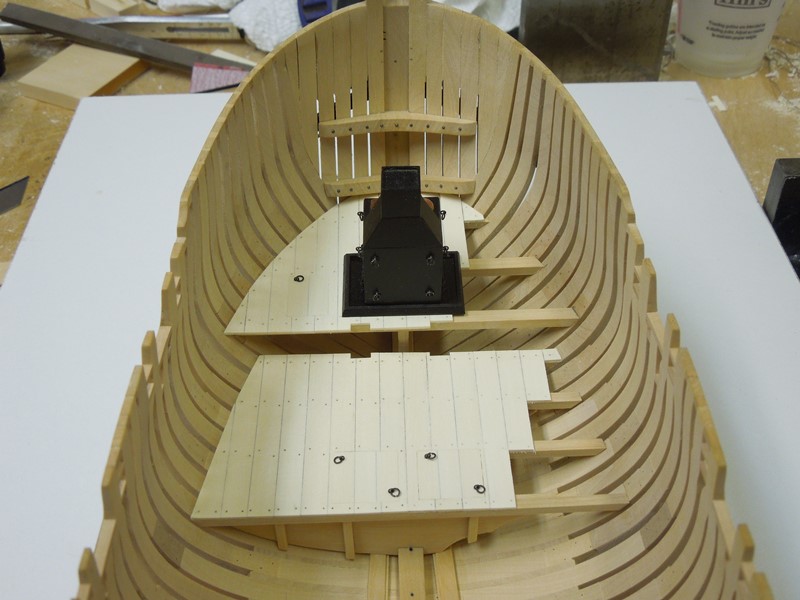
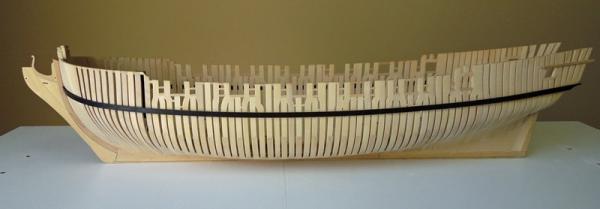
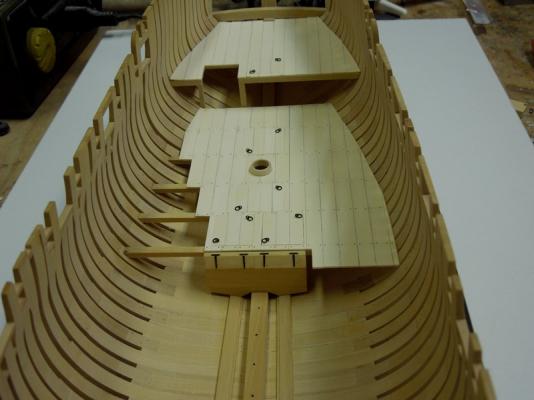
It's been a few months since I've posted an update to my build log of Speedwell. All four platforms are now in place, as are the shot locker and galley stove. Besides the wales, there will be very little external planking in order not to cover those wacky, fun to make shifted and cast toptimbers. The single wale was made of holly and stained with Fiebings black leather dye (off the model). The two completed fore platforms The very small shot lockers accommodate the three pound cannon balls The very small shot lockers accommodate the three pound cannon balls The galley stove was made of brass over a holly plug

- 345 replies
-
- 39
-
-
Splendid work, Ed. There's even a precision to the bolting pattern. Is it possible to take higher resolution photos? In many logs, when clicking on the photo a much larger version pops up. Yours is essentially 1:1.
- 3,618 replies
-
- 1
-
-
- young america
- clipper
- (and 1 more)
-
A fantastic little detail, Remco! I had forgotten I had done this on my main deck gratings and sure enough, they were there. I believe I'm the only person who ever noticed this detail on my model...and promptly forgot about it. I also notice how perfect your gratings and battens fit the coamings and head ledges. Coincidence, or did you build them around the finished gratings?
- 1,215 replies
-
- 1
-
-
- sloop
- kingfisher
- (and 1 more)
-
Well done, Toni. I cut those mortises on my table saw but your results with a no.11 blade look equally good.
-
I do so admire your commitmant to accuracy Ed. I've only seen one other model with the scores mortised in and, of course, you can't tell once the cants are installed. http://nautarch.tamu.edu/model/report3/inprogress.htm
- 3,618 replies
-
- 1
-
-
- young america
- clipper
- (and 1 more)
-
I read somewhere that you can just wash the residue off but I'm sure someone has tried that. Perhaps the implication was just wash off as much residue as possible before gluing. The other problem with laser cutting is that the cut is not always perpendicular. The thicker the piece, the more exagerated this is. Did you note a larger gap on one side vs the other Jay? Dave Stevens, of the LumberYard, addresses these issues on his website http://www.dlumberyard.com/oneida-laser.html
-
Brilliant milling work, Mark. The Starrett wiggler would have saved me hours of fine tuning on my last project and I shall now get one. Love those perfect carling mortises also.