
HOLIDAY DONATION DRIVE - SUPPORT MSW - DO YOUR PART TO KEEP THIS GREAT FORUM GOING! (89 donations so far out of 49,000 members - C'mon guys!)
×


popeye the sailor
-
Posts
16,007 -
Joined
-
Last visited
Content Type
Profiles
Forums
Gallery
Events
Everything posted by popeye the sailor
-
 amazing how all that fits into the hull....one neat little package! looks to be a super new project. looking forward for the start of that one
 -
the structures look awesome! can't wait to see them on the deck together
- 83 replies
-
- 2
-

-
- melvin
- blue devil
- (and 2 more)
-
hello John......haven't seen you for a while. wondered where you had gone I've been watching all these ships being built......and my son drops this one off to me. I felt a strong urge to put 'er together. happy to have you aboard...and thanks for the good word. thanks Ken.......I found another. the instructions pointed to a place on the stern for this one part to go........come to find out, it's the wrong place. to relocate it meant cleaning up the blemish on the stern, and fixing the part so it could be reused. once it's painted, it should look alright. should have something of an update soon
- 133 replies
-
- 4
-
-
- jeanne d arc
- heller
- (and 2 more)
-
glad you were able to recover........I thought you were gonna come back ad tell us that you have a very nice walkway cemented to your index finger {ya have to laugh about it...no sense the frown}. I've been looking at pictures of the ship I'm working on.......there is one picture where the stern is all full of dents. so, I would think that a minor ding here and there could be acceptable. carry on........your doing a swell job

-
glad to see the start of Pickle Tony .......and I get a seat near the front too.....an even bigger boon! have fun with your new project
-
it's slow and meticulous.......but the end result is very pleasing to the eye I love that last shot.......it looks so smooth! beautiful work
-
oh dear........sounds like someone hasn't had "the talk" yet chat about the difference between scratch and kit over a glass of wine. don't word it the way I did though........if you do, she'll expect you to make all your parts and you won't be able to buy any
- 83 replies
-
- 2
-
-
- melvin
- blue devil
- (and 2 more)
-
she's filling out nicely amazing work my friend that one picture of the entire lower deck says it all!
-
superb progress Nils.......are you going to frame in the rest of the deck? might be a good alternative, if you want to leave some of the deck open.
- 692 replies
-
- 4
-
-
- eagle of algier
- chebec
- (and 2 more)
-
superb progress Jim.......shrouds look very well done. I know what you mean with ordering stuff......got a few in the spare parts inventory myself
-
the stand looks sweet! I still have the first stand I ever made. if you look in the Nordkap instructions, you'll see it........and I assembled it that way. I made another one for the Nordkap later, and the original stand has hosted most of my past builds. I fear though, that it may finally find a home under the trawler Syborn.........what'll I do then!?!?!?! good to see your still working on her. she's a fine model......just wouldn't do, to see her on a shelf or something. look forward in seeing more of her progress
- 420 replies
-
- 3
-
-
- captain roy
- lugger
- (and 2 more)
-
hello Bill,
haven't seen you post in a while......hope all is well with you and yours. just here to wish you the happiest of birthdays, and I hope your day is all you could wish for. hope to see you back with another fine build.......take it from me......it does get better.
-
I thought that was the plan??? good to hear your doing well
- 291 replies
-
- 1
-
-
- bounty
- billing boats
- (and 1 more)
-
used to do legos with my oldest son.......during a blackout one time {storm related} we built a street front {just some buildings using city street tiles for the base, it was lots of fun. looks like a really cool project
-
see.....you figured something out.......I knew you would "wrinkle envy!" looks much better!
- 653 replies
-
- 3
-
-
- trabakul
- marisstella
- (and 1 more)
-
there ya go.........gett'in into some of the nuts and bolts action look'in good so far!
-
look'in good Sjors......you might want to cap off the ends of the bulwarks though. you can see the plywood some mahogany or walnut perhaps
-
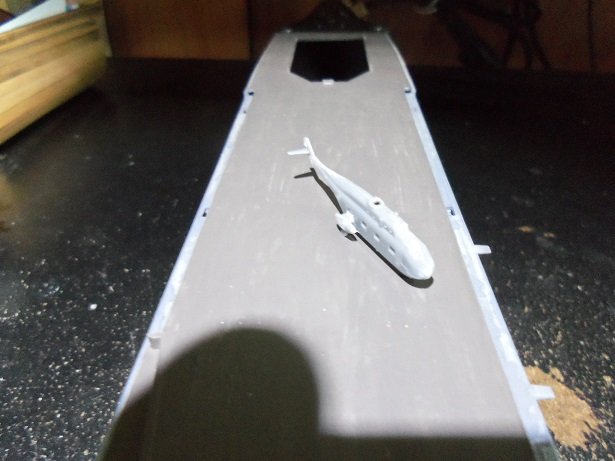
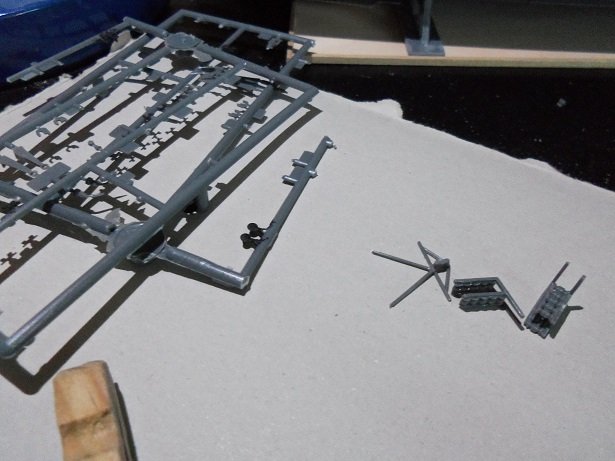
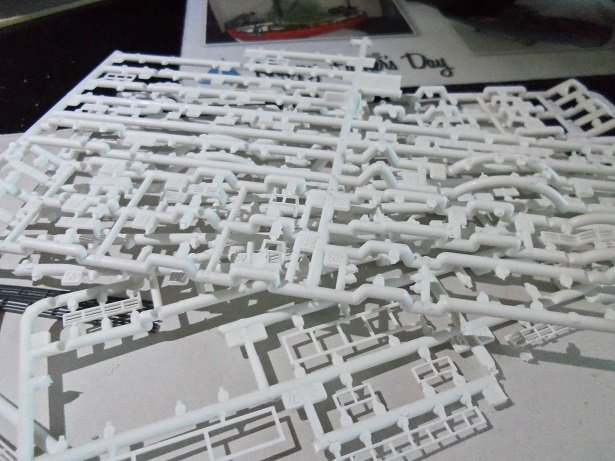
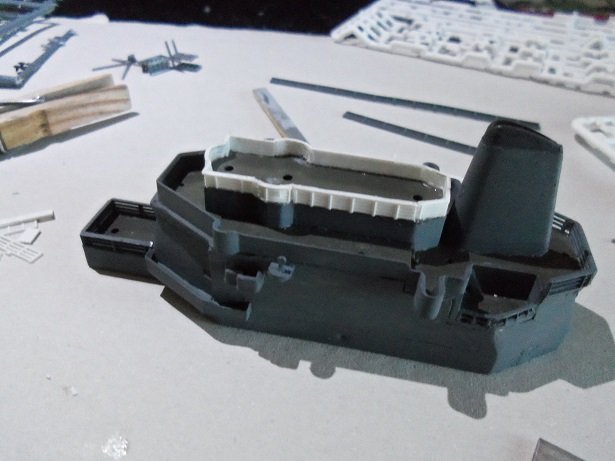
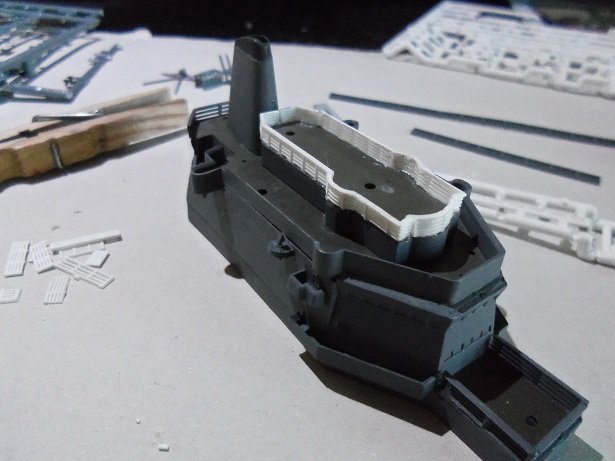
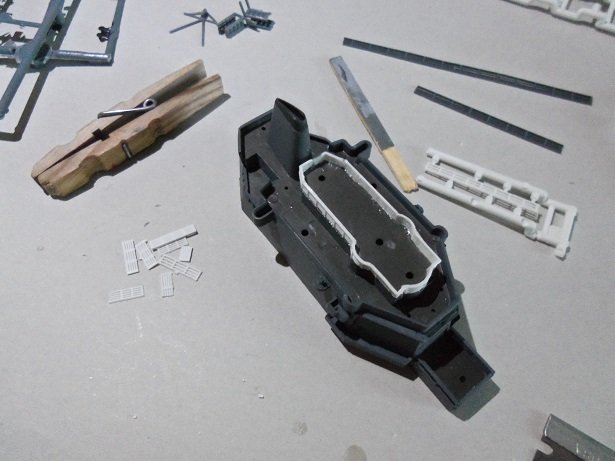
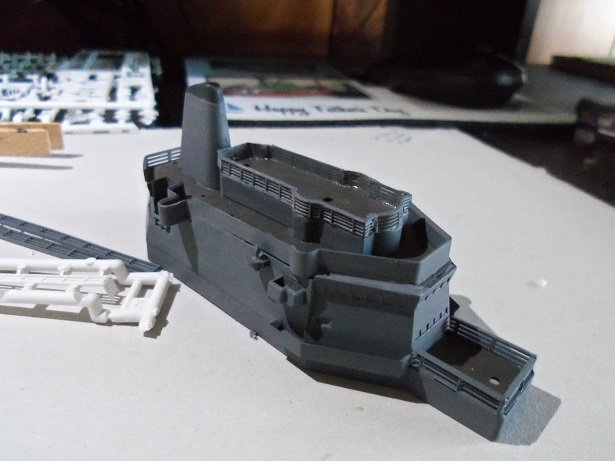
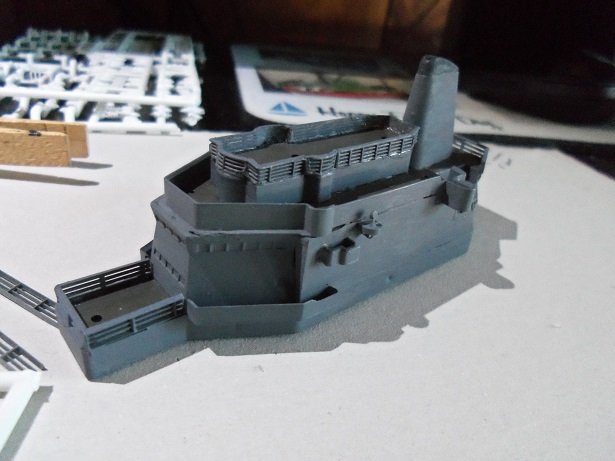
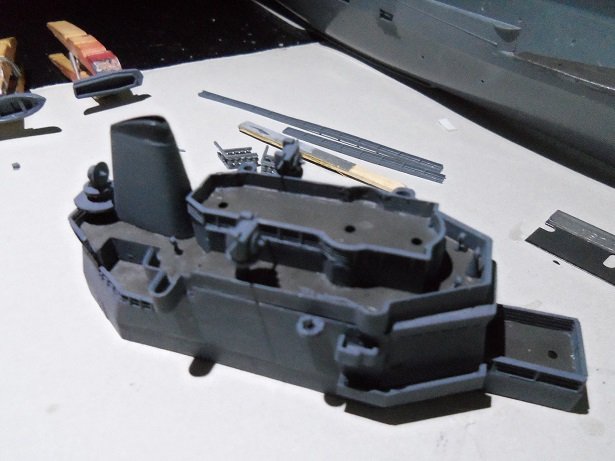
it took little effort to see where the depth charges were located. looking at the instructions, it looks as if they have you cementing then in the recesses aftward of the superstructure. my first thought was, from that height {point of launch to impact in the water}, this might cause them to detonate prematurely. glad to see that they are actually located at deck level. the next thought was the supplied railings........they are all straight pieces. there are some curved areas to consider here, and judging on how brittle they are.....bending would have to be done using heat. how much would be needed, as not to distort the plastic? leaving that to think about....there was one thing I had to do....cement on that last stabilizer so it doesn't get lost again! the depth charges and the aerial antenna that locates on the funnel, were assembled at this time. I will have to make a second set of legs for the charges rack. there is to be a railing around the uppermost part of the superstructure. this is what started me to think.....do I leave gaps where they are, or do I try to bend the railings to shape these areas? the answer and idea came from an e-mail I got from one of the onlookers..........I looked at the Titanic railings. I still have quite a bit of it......and some it won't be used on her anyway. the plastic used for these parts is very flexible......I was using my x-actor knife handle, as well as my pick handle for the smaller curves. it seemed the heat from my fingers was all that was required....I only had one breakage, and that fell at a cut off point......so I lucked out it really didn't take long either....I tried to stay with the same number of rungs, as the supplied railings. it looks better given a coat of battleship gray.......I failed to shake it enough, so it will need a second coat. second coat and some touch ups to the asphalt color. I added some of the radar bits as well........lost one of the range finders {like the one next to the funnel}. I made one from scratch. the helicopters were a toss up.........I could go with the gray camo, or the military green camo.......the military won out. there is really no wrong way to paint them...civilian aircraft was often visiting the ship from time to time. the life boats were also painted in the battleship gray. I would like to get the main deck on the model before I paint the hull. to do that though, the bow needs to be addressed first.......mainly the anchor chain. I do have to apologize ahead of time about the color. I see it in the pictures......I see it in other models........white anchor chain. >really< chain goes into the water......chain come out of the water......chain goes though a grease laden windlass system {depending on how 'well oiled' the machinery is}.......I see anything but a solid white. while I wrestled with a more notable color, I added the bollards and the capstan tops to the fore deck. there is no direction on how to run the chain either, so I'll be relying on pictures here.


- 133 replies
-
- 11
-
-
- jeanne d arc
- heller
- (and 2 more)
-
nice looking case Hof......the whole display is totally awesome she's a tall one
-
thanks for the e-mail this morning Lou.......it really got me think'in. I looked over the differences, and thought they were kinda cool! the depth charges have me wondering though.......I believe they modified them and have them along side the superstructure. I'll have to look at the pictures I have of the actual vessel to see if I can see the proper placement. I'm not to keen on where the instructions have them. I got out of work early yesterday........not too keen on the current direction my job is going. I did a bit of tinkering with the model, and continued this morning. I should have an update very soon
- 133 replies
-
- 4
-
-
- jeanne d arc
- heller
- (and 2 more)
-
hello Mobbsie.......the doors are cemented in place. sadly....too late for that. I think the best thing to do, would be to place the two with the folded rotors near the elevator, and leave it at that. the kit might have been better to supply one or two smaller ones.....it would have made it look more possible. as mentioned, the reason why the ship was decommissioned, was due to the fact it had become outdated, with 'copters getting larger and heavier. personally, I think it might have saved her life, if they converted her to a coast guard vessel, or play a less combative role in their nation's security. thanks for the good word always glad to have you following along where's that new project.......ya start it yet?
- 133 replies
-
- 4
-
-
- jeanne d arc
- heller
- (and 2 more)