
HOLIDAY DONATION DRIVE - SUPPORT MSW - DO YOUR PART TO KEEP THIS GREAT FORUM GOING! (89 donations so far out of 49,000 members - C'mon guys!)
×


popeye the sailor
-
Posts
16,007 -
Joined
-
Last visited
Content Type
Profiles
Forums
Gallery
Events
Everything posted by popeye the sailor
-
 thanks for the kind comments.....and to those who hit the like button. you might have seen that small imperfection on the starboard stern.....two small holes.....I took care of them. they were filled in and painted over. as I'm sure others do.......imperfections are fixed as we see them. we have our cameras as our worst critics......we have no need to do it ourselves I have four days off...... plenty of time to sit here and play my car inspection is due.......and I have a few things to do to it. one day I will have to get my butt in gear and get it done. I still have time. there's an odd point made Bob........I haven't done too many small scale projects. the AmericA was the smallest I've done, besides the Gundalow......the Nordkap was the largest. the odd thing about this one is...I seem gravitated towards it.......so much so, that the trawler seems to have taken a back seat again. fear not trawler fans.......I haven't forgotten it. the Syborn, as well as the other two have been on my mind.......anyone's guess what will erupt from there but I guess that's the beauty in having so many projects.......I can gravitate anywhere, and never leave my seat thanks for look'in in and following along....I appreciate your comments and suggestions
- 453 replies
-
- 8
-

-
- thermopylae
- sergal
- (and 1 more)
-
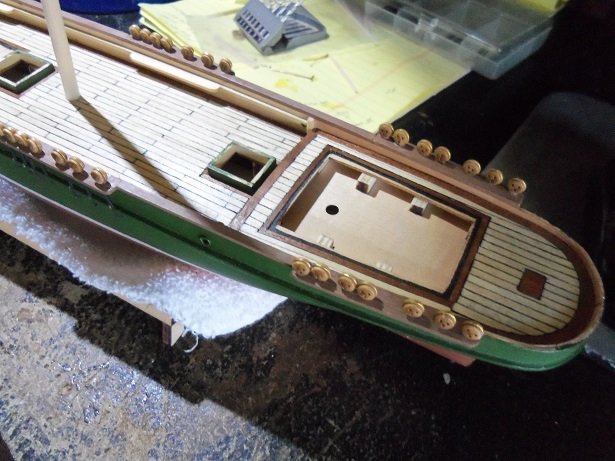
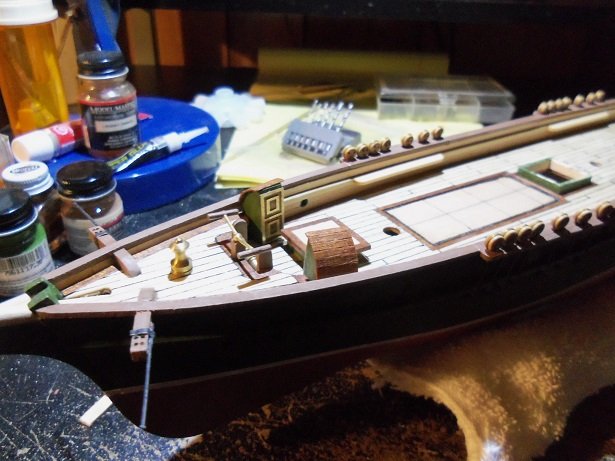
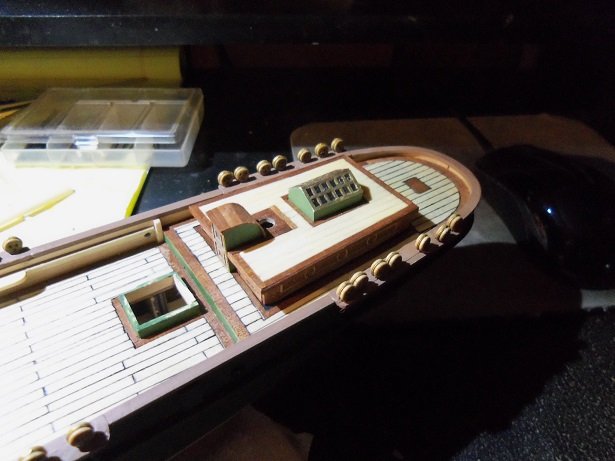
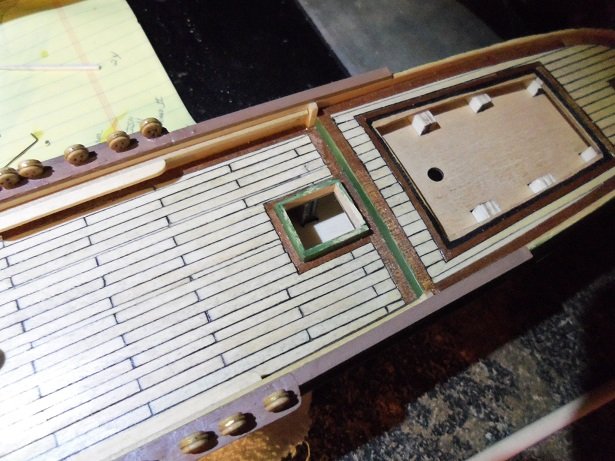
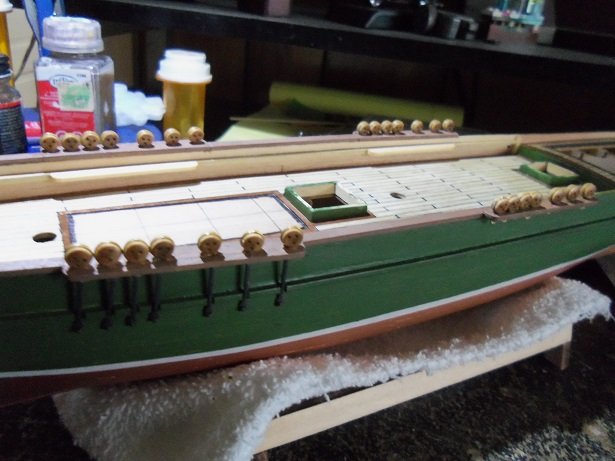
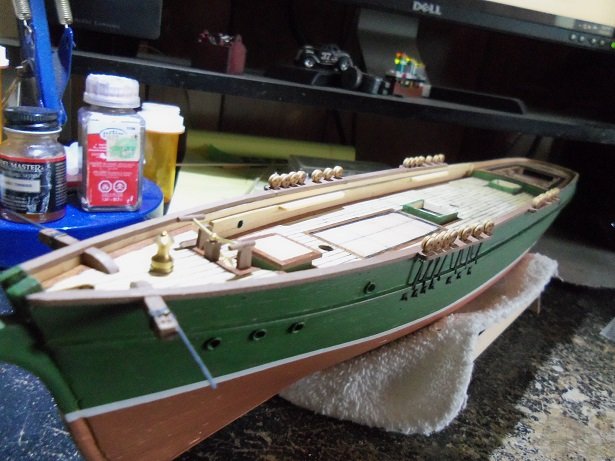
Ain't I da devil? we'll see.......it's supposed to be here tomorrow. I didn't think I'd get much done......it doesn't seem like much. the stern is where I began...cutting out the transom railing.....both of 'em. I figure I'd work on both of 'em......if one bites the dust, I still got the other one. the way the grain ran was the biggest problem....they did break in a couple places. but I'd glue them back together and continue on. while I was sanding them into shape, the chain plate assemblies were cemented in place. sanding.......another break and fix......more sanding. cut 'em to size, and I had a winner............ then came the bars to hold the dead eyes in place......as mentioned, I installed them above the rub rail, instead of cutting the slots through it. fasten them down with brads after painting them, and touched them up. I had painted the gun port lids {there's another term for them....I forget}.....now that the assemblies are in place, I have a better idea of their placement {the instructions and diagrams have them in awful places. the lavatories are cemented in place........ but the fun stopped with the aft cabin. the mizzen mast runs through the cabin and through a hole inside. the aft cabin is just dry fitted at the moment, but the holes are off, and this gives the mizzen mast more rake than the others. I have a couple of ideas.....tomorrow I'll see which one is better. I should hold off on the rest of the deck stuff anyway......I should do the rudder next.

- 453 replies
-
- 20
-
-
- thermopylae
- sergal
- (and 1 more)
-
thanks Rich........our posts crossed in the great void
- 956 replies
-
- 3
-
-
- andrea gail
- trawler
- (and 1 more)
-
thanks Nils.........I finished this one around the same time last year........hard to believe that she's a year old already. {they grow so quickly}. she's the result of a spin off hull from the Holiday Harbor project. there is another one that has left the fold.........I'll be getting to her very soon. still not sure how she will evolve .....perhaps Forest Gump's shrimp boat? I take that back........the build was finished in May of 2015! time really did get away from me!
- 956 replies
-
- 4
-
-
- andrea gail
- trawler
- (and 1 more)
-
thanks Pete.......this was a fun model to build thanks for all the likes.......I hope you enjoyed the article.....what there was of it.
- 956 replies
-
- 4
-
-
- andrea gail
- trawler
- (and 1 more)
-
amazing work Patrick.......the cabinetry is superb! so what are we look'in at.......his 'n her lavatories with a walk in closet for hers? very well done
-
glad to see your back as well !
-
I'm thinking that you haven't painted them........just the color of the wood that's throwing you off. John has a cool head.....if it looks good Mark, leave it
-
you'll work it out.....I'm sure. just follow the bow......angled, and bevel the mating surface of the edge. you'll get a good fit.
-
Exactly! there are a few kits out there, that are slotted and have backings for the dummy guns. one of these days, perhaps I will have a chance to enjoy such demented pleasure
-
done with my work week.......and damn glad of it!!! it's all good Patrick........I've become clairvoyant.......I see a man in a red union suit and a pitchfork, roasting my landlord's butt over an open fire! what comes around, goes around! tried to visit here last night, but the focus just wasn't there. kept falling asleep at the computer..............but I'm MUCH better now!!! we'll see what I get into today.
- 453 replies
-
- 6
-
-
- thermopylae
- sergal
- (and 1 more)
-
I haven't had the pleasure of building a ship of this size.......I always wondered what would be done with the gun port spacing. not sure about a hull entry.......as with anyone who has built the Vic, it might depend at what time your modeling. wish I could help.
-
I've not done from the keel up. usually, I'll start at the bulwarks.......the line stays pretty straight, till the curve of the bow takes over and tapering planks is warranted. the stern will go the opposite way.....there may be stealers in your future {noting wrong with it}.......but you will see the line creep up at the bow. if you taper to keep the line straight, you will run the need for jogging planks, to create the fill in row I spoke of. you'll just have to see how the curve of the bow accepts the plank you'll do just fine.
- 714 replies
-
- 4
-
-
- lady nelson
- victory models
- (and 1 more)
-
thanks Mark and Sam..........there is a lot more to the story. yesterday, we had an electrician who kept shutting off power to parts of the house. you would know that my computer was in the circuit he was playing with! needless to say, I shut down, rather than reboot. I did get a little more done. the aft sections of cap railing was added to the rest of the cap railing. the fore and main masts were cut out and set in place. still trying to decide if the height is correct.......no measurements to go by on the instructions. the first part of the bow spirit was created as well. the spirit part of the bow spirit was also cut. the biggest thing was that I assembled the mizzen channel assemblies. I made the arrangement just a little bit different. I hope to have more after I get through the work week. thanks for look'in in
- 453 replies
-
- 15
-
-
- thermopylae
- sergal
- (and 1 more)
-
good to hear your still working on her......even if it is from another state {that's quite a reach } look forward in seeing you back in the sunshine state, and back at your table
-
thanks every one for the kind comments and the likes. sometimes it pays to save the stuff not used in kits. the mizzen will be easier......if I use the shorter ones, the brads won't be seen. if I have the time today, I will try and complete the cap rail and assembly. thanks for look'in in.......even though it might look like I'm hav'in it tough with this kit.......I'm enjoying every min of it
- 453 replies
-
- 6
-
-
- thermopylae
- sergal
- (and 1 more)
-
carpet.....rug......OK, apples and oranges looking better and better.......I recall the old Ambroid company.......they produced HO train kits {I have one}. you could also purchase scribed wood molding and such as well. it's gone now, becoming northeastern scale lumber. I did hear that the Ambroid co. move to Canada. very nice work.........
-
inspiring to see such a model.......the attention to detail is over the top! beautifully done.....can't wait to see more
-
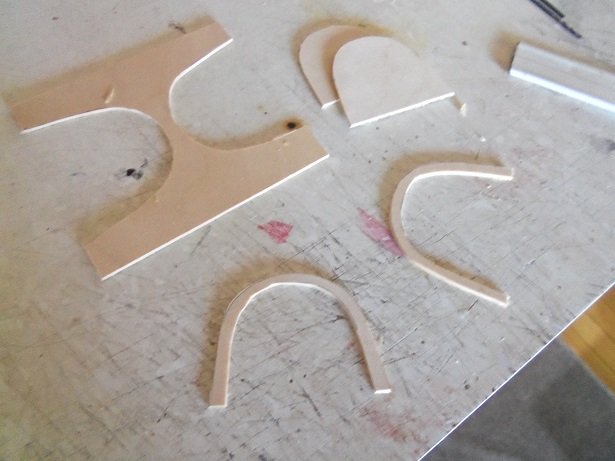
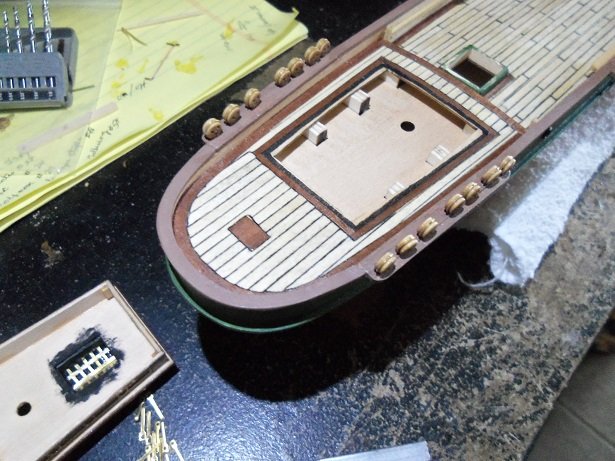
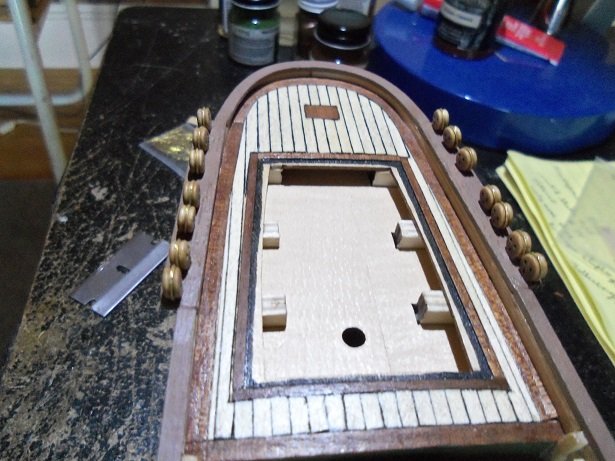
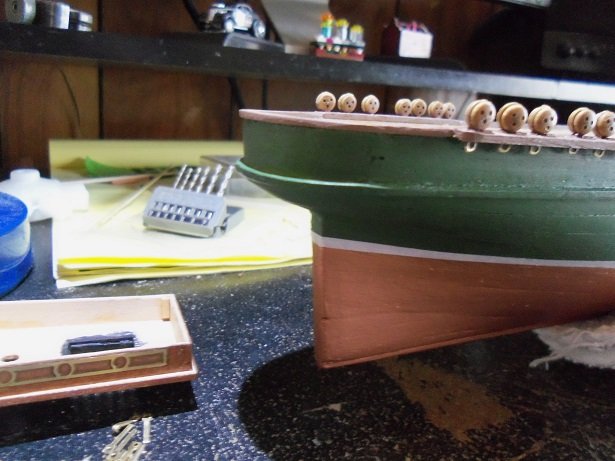
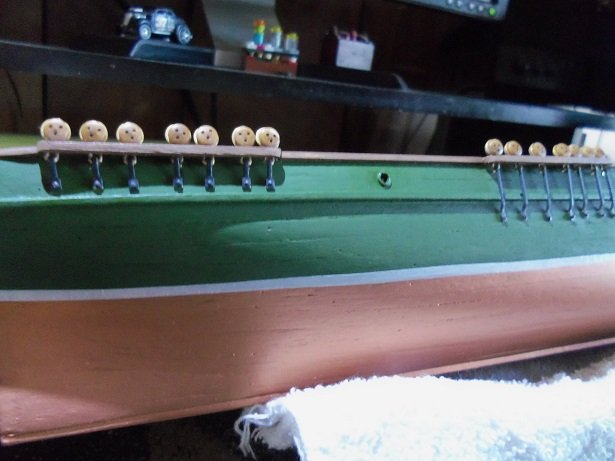
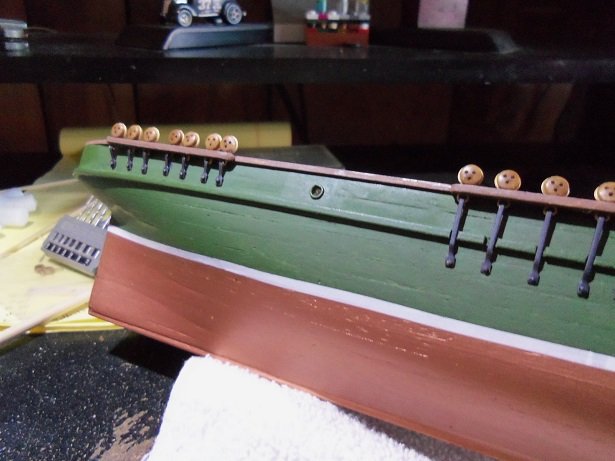
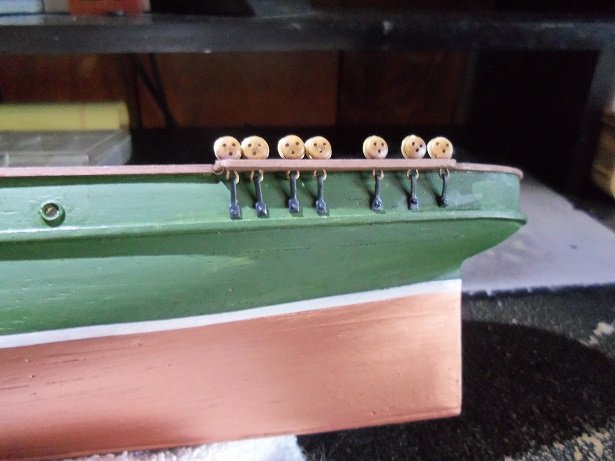
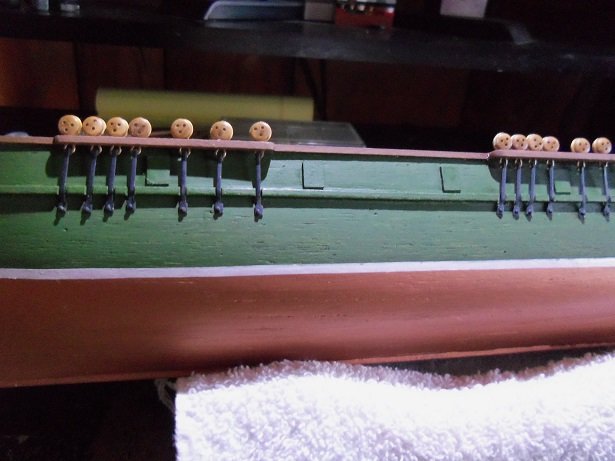
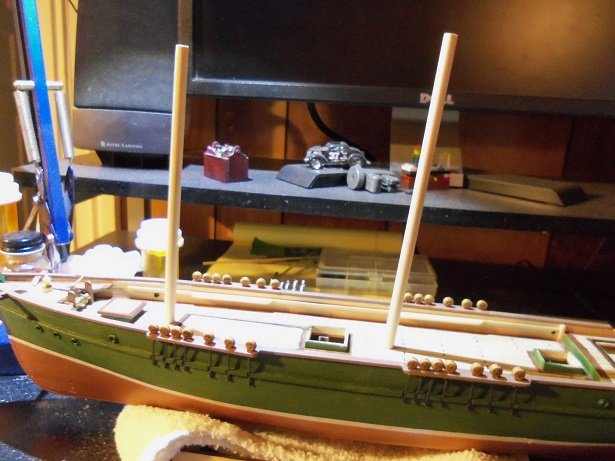
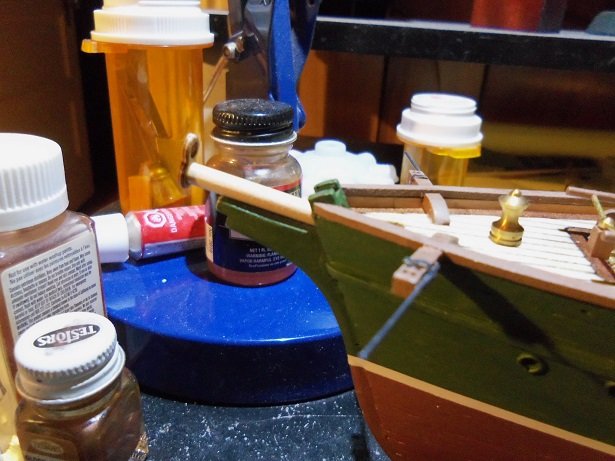
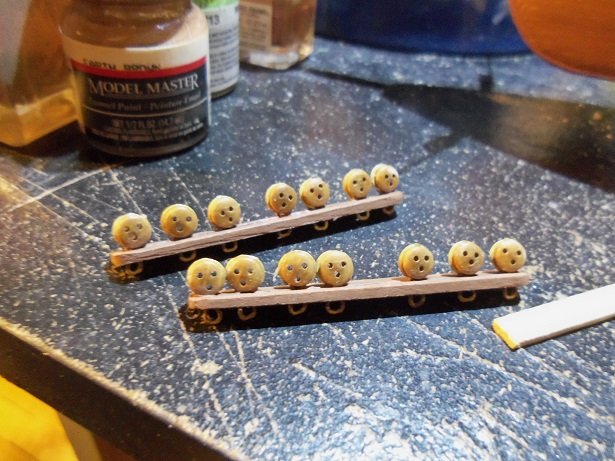
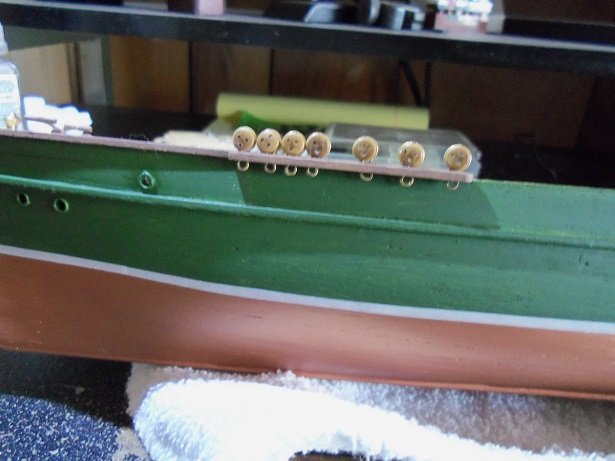
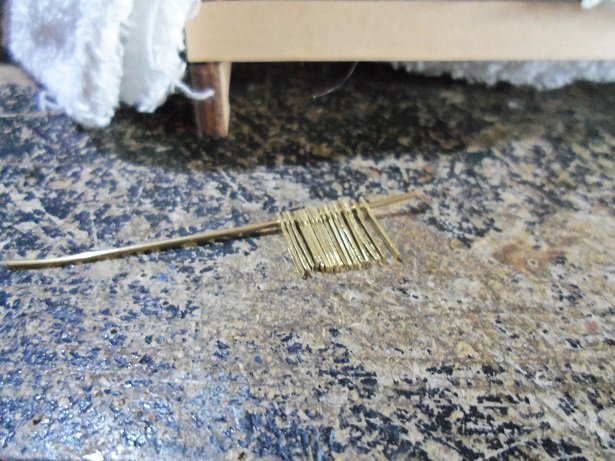
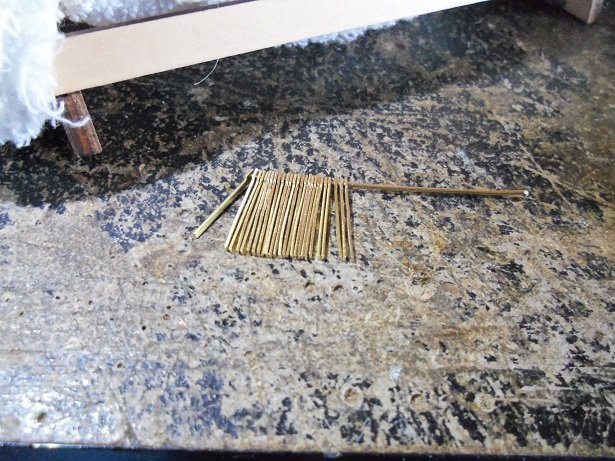
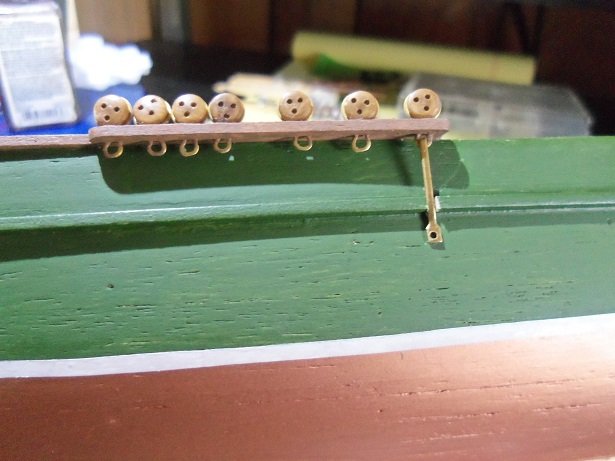
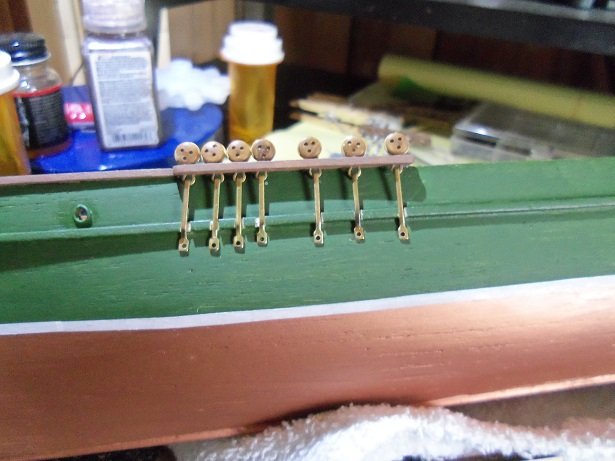
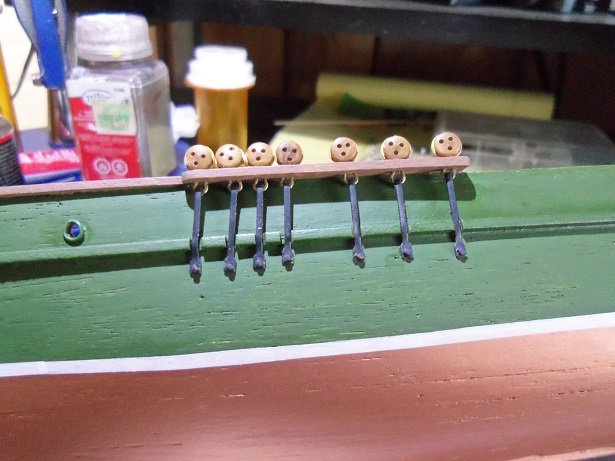
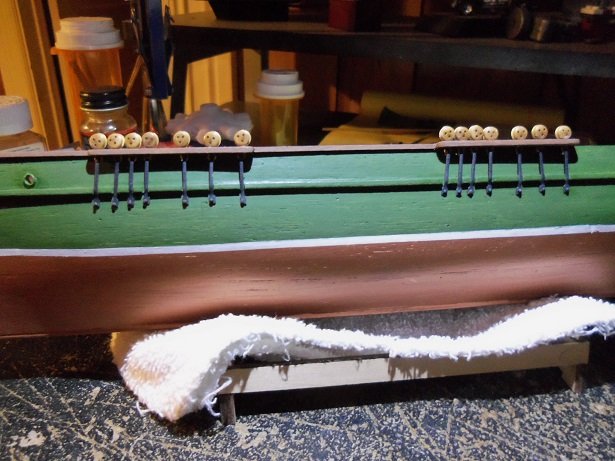
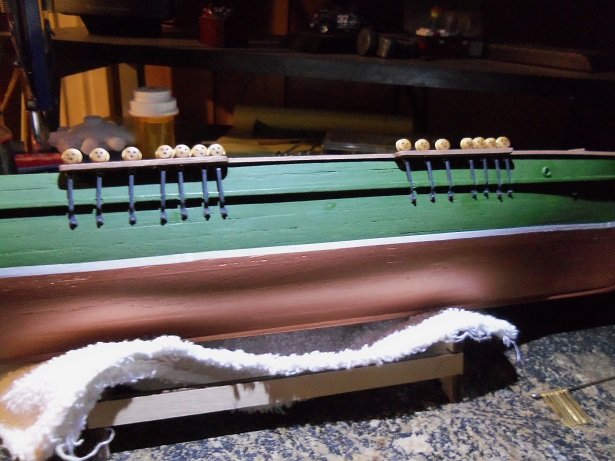
now let me see........what did I say? I wasn't going to scratch make these parts........I'm sure I did. well......to start the ball rolling, the port side fore channel / dead eye assembly was cemented in place. I counted out seven of those bars........in bending the top end into a loop, it broke! this is not good......it broke in a way that made it unusable. it makes me one short, and I wasn't going to try another one. since these were useless, I had to think about what to use instead.........and I remembered that I had these.... these are found in Billing kits.......as you can see, I've amassed quite a few of them. I didn't like using them in the kits I got 'em in, so I saved them and found other uses for them. I cut them to size, fitting them so they would be attached just above the rub rail. they are quite bendable......I was able to create the hook needed to go through the eyelet. setting the first one up {I wasn't going to paint them}, I drilled the hole for the brad. I was alarmed to find that the drill went through the bulwark, and skirted over the deck! I'm glad I noticed {actually woke the hell up}........can you imagine all these brads lining the bulwarks. the deck wasn't damaged.......I repaired the hole. I needed to make them longer. they have to fasten below the rub rail.........wasn't looking forward to bending them around the rail, so I decided to cut slots for them. stringing them on the wire, I was able to cut them all the same length. I did the first one with no problems at all. the hook at the top, and a brad down at the bottom......insuring that I made sure they were pulled down all the way, I wouldn't have to secure the top. the rest were done the same way. they were removed in order......the cuts were touched up with the med green. I had used the black I had created for the Titanic, to paint the whiskers on the cat heads. I decided to use it here as well. when they were all reinstalled and fastened down, they were touched up with the soot black. the port side main mast was next to do........during this time, I decided to add the starboard side fore channel assembly. I had cut the next segments of the cap rail, and they were added too, after they were painted. I also added the main mast channel assemblies. we have a major problem going on at the moment.......the refrigerator stopped working. I found it was beginning to get warm inside, so we headed out to buy coolers for the stuff in the fridge. we have a chest freezer, so the freezer part of the fridge was put in there {good that we bought it}. the session was broken throughout the afternoon.....I worked on her here and there while remedying the problem at hand. we found that it will be a few days before our landlord can get us a new fridge......so we went out again to get a bigger cooler, because the two little ones we bought wasn't going to cut it. more to the story........but I don't want to see a lynch mob come here for the landlord.......bad enough WE want to kill 'em! so a while later, the port side was done. it took me till just a short time ago to get the starboard side done too. all that's left are the mizzen channel assemblies. I have the segments that will lead up to them painted and ready to cement in place. from there, will be the transom rail, that will complete the cap rail assembly. what a crazy day!

- 453 replies
-
- 22
-
-
- thermopylae
- sergal
- (and 1 more)
-
look'in really good Frank
-
awesome bridge deck........gonna look cool when painted up agreed.......like the last picture as well
- 2,625 replies
-
- 5
-
-
- kaiser wilhelm der grosse
- passenger steamer
- (and 1 more)