popeye the sailor
-
Posts
16,007 -
Joined
-
Last visited
Content Type
Profiles
Forums
Gallery
Events
Everything posted by popeye the sailor
-
 more neat ideas........thanks very much of course Joe.......you can post a picture of your idea......no problem with that sounds great Greg.....you didn't lie though.......you didn't specified how many years, a few were I'd need to figure out how to do the laminant though. you got that right Kevin.........put out a hair brained scheme....and look at how it blooms! I hope it benefits someone down the road. for that to work, the backing {I use plastic wrap} would have to be adhered to the mesh. this way, when the colored glue is dropped in place, it won't run into the next facet. not a bad idea though.......it would need to be pressed til dry.....this would insure a flat mesh panel to be filled see.......I formed a partial plan already thanks Kevin....sounds doable happy new years........ happy first night.......happy flipp'in the year book to the next chapter.....whatever you wish to call it, everyone here at the Wharf and I, want to wish you the very best. stay safe.
 -
looks sweet Ben..........I hope the dipstick is accessible
-
Cutty Sark by NenadM
popeye the sailor replied to NenadM's topic in - Build logs for subjects built 1851 - 1900
one thing to consider.......your going to put anchors in the hull for the screws.....a pretty good idea. but remember that the outer lip of the anchor will protrude on the hull surface. adding them after you drill the holes might cause them to go out of alignment......adding thickness between the hull and stand contact. if you could find small metal ones might be good.......they won't have much of an outer lip. {picture #2}. better yet....if they have to be used { all that you have on hand}, perhaps you could sand them down so the lip is not so prominent. have a great 'first night'- 4,152 replies
-
- 7
-

-
- cutty sark
- tehnodidakta
- (and 1 more)
-
have a good new years Patrick.......you and your family I see your going to hold the suspense over to the new year, on the progress of this fine build. well played Orange
-
Bismark is really coming along Kevin.......believe me, the time your spending on her really shows looking great! hope you folks had a good Christmas.........wishes for a super new year!
-
what a great looking ship! the rigging looks fabulous! you really did a super job.......congratz to her finish
- 274 replies
-
- 3
-
-
- Santa Maria
- Artesania Latina
- (and 2 more)
-
I'm finally in the process of getting caught up...........thanks all for the kind comments. hoping to start on the chain plates soon.......ordered some parts to make it easier. hope you all had a great Christmas....{mine was really nice }..........and I wish you a very happy New Year
-
it's so good to see your back in the workshop the hull looks awesome! for a waterline.....I just use a block of wood with a 'V' in the top for the pencil. I have different size blocks, depending where the line needs to go. nothing too fancy...and gets the job done
-
the workbench shot shows how small it is awesome work my friend! she's a sweet looking boat!
-
it's a good scale to do this........I recall doing this to a 1:16 scale funny car. I was going to ask you about the boat........but I figured that you had a plan. it would be good though.......you'd have a better reference for the mounts and such. nice looking engine......once you do the touch ups
-
thanks for the added thoughts..........I'll look into it. I probably can find stuff like this at Hobby Lobby {I got a gift card for Christmas }
-
Cutty Sark by NenadM
popeye the sailor replied to NenadM's topic in - Build logs for subjects built 1851 - 1900
well thanks for understanding glad to know that I haven't missed it. have a great time during your time off.- 4,152 replies
-
- 4
-
-
- cutty sark
- tehnodidakta
- (and 1 more)
-
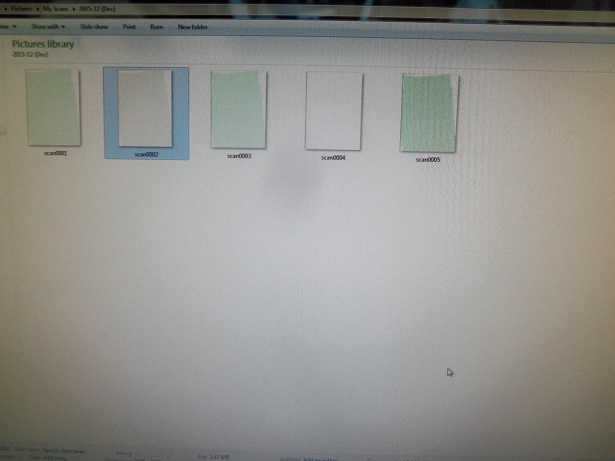
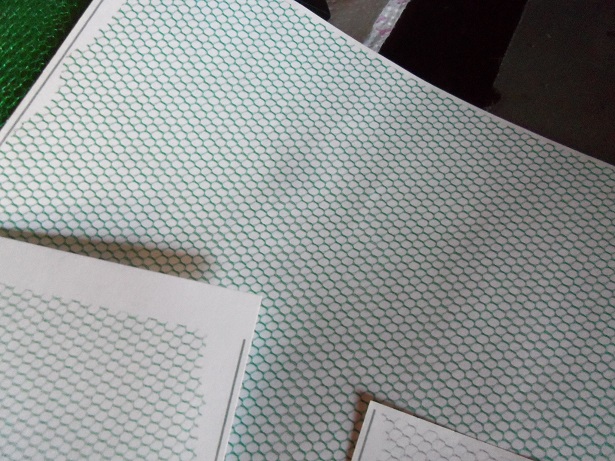
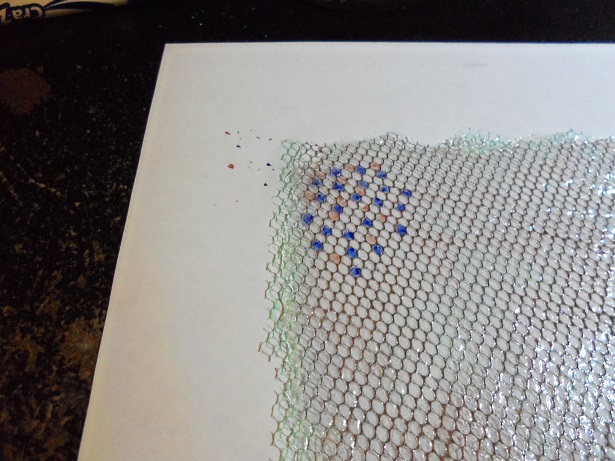
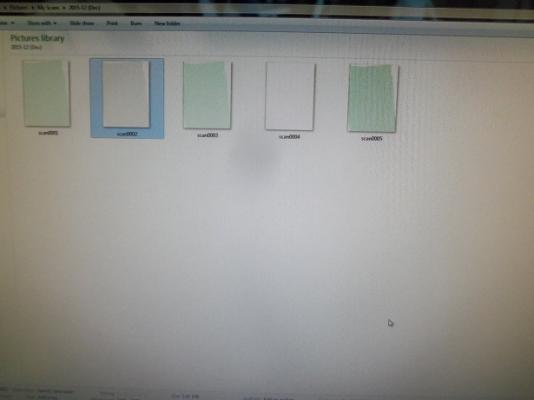
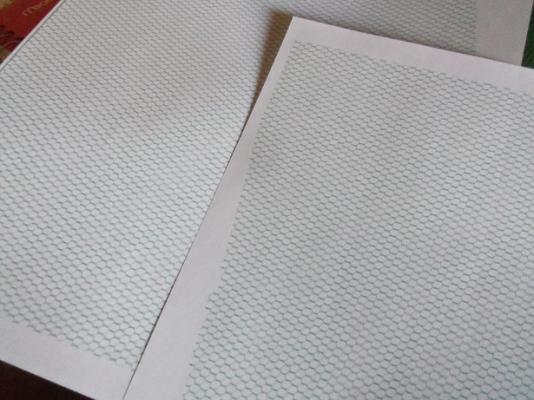
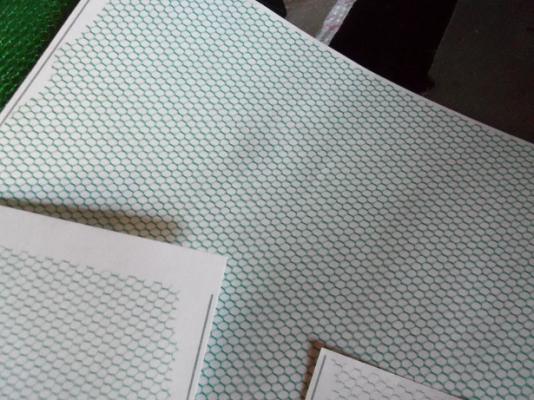
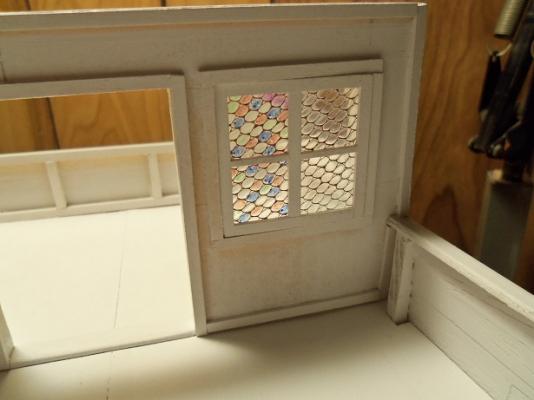
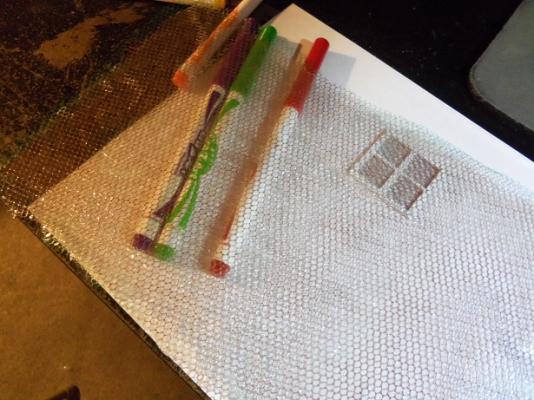
OK.......if we can't put the color directly on the 'glass' .......perhaps we can add a backing. I took another piece of mesh and scanned it. I did a few adjustments as I went along. the first two I did normally......the third is in grayscale .......the fourth one I tried black and white, which didn't come out.......and the fifth one I adjusted the gamma and highlights the normal ones in greyscale and then the one where I made the adjustments I should perhaps paint the mesh copper and then scan it again. I can color in all the facets and the line them up to the panes. once marked off, they can be glued to the back of the windows. of course, I'll have to treat the paper with decal bonder, so the ink doesn't run or go nuts when it glued on. whadya think?

-
a big thanks to you all.........I'm so overwhelmed with all the suggestions. they make me feel that it really wasn't such a fool's errand after all when I showed the admiral, she loved it.......but when I told her what it was doing.......kinda bummed her out. I'm not going to give up the idea just yet.. in all of the suggestions, it still boils down to the fact that I'm working with something that is water soluble.....which means that anything introduced to them will upset the apple cart. I didn't think the window maker was either.......but I guess I found out with this final test. it doesn't say anything about the makeup of the window maker on the bottle.......oh well......we know now I have two more ideas that might work: attempt to bond the mesh onto some clear cello......I have some really thin stuff in my inventory. then I can try to color the cello instead, using the mesh as a guide. take a ride to the local Hobby Lobby and see if they have sheets of stained glass in the doll house dept. they have carpeting, wall paper, and different treatments for the interior and exterior. I just thought of one more idea.........see you folks in a moment
-
wonderful progress Piet........the paint work looks great....lots of cool detail work too! nicely done!
-
....told you about that 'inner critic'........he'll bring you down man! you should be looking up! she's looking great! still can't wait till she's finally off the slip and on her Keel. those darker marks ain't nothing.......once you put the Gundgeons, pintles, and rudder in place.......and then add the depth markers, you'll never see them. Janet's a smart lady
-
seeing you wearing a backpack, suggests that it's a bit of a hike to get up there still looking good though.........makes you think of the archaeologists who stumble onto it in the distant future........perhaps they'll think they found another Stonehenge hope you and your family had a great Christmas........and the new year brings us another of your doiramic tutorials
- 33 replies
-
- 2
-
-
- trinkstein
- frigate
- (and 2 more)
-
Cutty Sark by NenadM
popeye the sailor replied to NenadM's topic in - Build logs for subjects built 1851 - 1900
all the best to you and your family as well Nenad. too bad you can't use the pedestals....folks who plan on using them, tend to make provision for them when they lay the keel. the cradle is your logical choice. putting screws in the model itself?.......I've never had to do it. as others have said, if the cradles are deep enough and contoured to the hull, there is little chance of the model pitching and will give you better support. they do make a stick on felt, as a cushion for the model in the cradle....or just get some thick soft material and glue it on the cradle with rubber cement of sorts. if the inlay your trying to do seems too daunting, perhaps a raised relief may work. doesn't really need to be the star of India.......you could make a pair of anchors {one for each end} and add chain decoration.....or weathered rope. there are many possibilities. you'll figure it out my friend.......you've made it this far in fine shape I hope your Christmas was good......and the new years rings in the continuation of this fine build.- 4,152 replies
-
- 6
-
-
- cutty sark
- tehnodidakta
- (and 1 more)
-
glad to hear Paul......looking forward to your return!
-
she's such an awesome build Nils. congratz on such fine work! really love the extras you've put in there
-
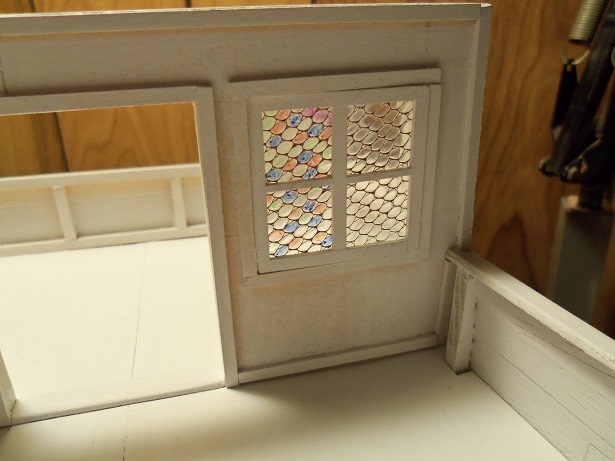
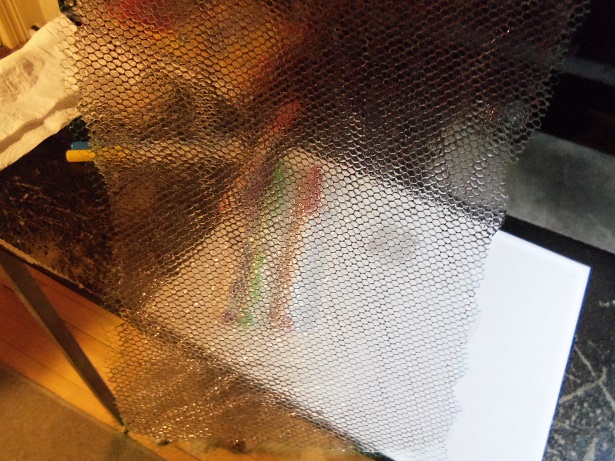
thanks Lawrence......got a few things that seem to be slowing me down, but I'm still finding time to play. I'm trying a couple of experiments at the moment......not looking too good for the stained glass look. now that Christmas has past......and I've taken a vacation, I tried the last process for the windows. it worked out for a short time.......but the longer I lingered with the marker pen, the more apt I was to go through the 'glass'. when I began to see what was going on.......I stopped. the liquid chemicals in the ink marker was breaking down the white glue. holes were forming.......I turned to the sample of netting I had treated with the window maker. I took it off the board it was pinned to. to my surprise, it came right off the plastic wrap I had used as a barrier. it wasn't as clear as I thought it would be either........ up close to anything though, it was a different story..... I thought that it might be best to make another set of windows.......removing the existing material would be quite messy. but before I did that, I wanted to see if this material could handle the marker ink. it didn't. it bled through.....sigh.......... so that's a bust. I think I have enough material to finish the last set of window frames....and redoing the one I ruined. oh well........it was a good idea while it lasted. back to the drawing board.


-
as they say......looks great on paper. it's good to do a mock up.......it will give you a better view of the concept. she's looking really super! shaping up to be a fantastic build! have a great Christmas and enjoy the Holidays!