HOLIDAY DONATION DRIVE - SUPPORT MSW - DO YOUR PART TO KEEP THIS GREAT FORUM GOING! (Only 51 donations so far out of 49,000 members - C'mon guys!)
×


popeye the sailor
-
Posts
16,007 -
Joined
-
Last visited
Content Type
Profiles
Forums
Gallery
Events
Everything posted by popeye the sailor
-
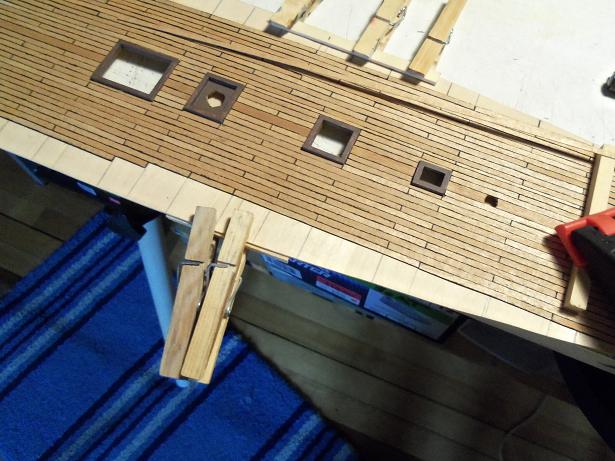
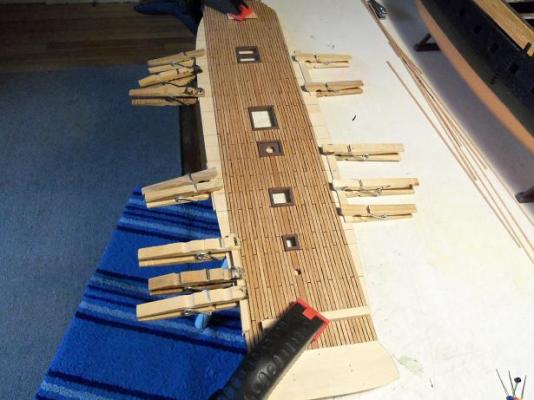
 thanks Adam I finally did what I've been wanting to do........they are done! I learned quite a bit through all this.......it's a lot harder to do what I would consider.......'in scale' planking. makes me think that the deck planking supplied in these kits, can be scaled down a bit, and at the same time, create a nicer looking deck. the other big thing I learned....is the construction of the deck platform. grain direction plays a huge part in how the platform will behave. the spar deck didn't do half of the weird stuff that the gun deck did......the grain running fore and aft is the best way to go.....by a long shot. looking at pictures of the gun deck now.......it's pretty flat and level, unlike what it used to look like before I started to plank it. as the platform was being planked, I had clamped it to the table........time and the relative humidity in the air, brought the deck back to it's normal parameters. to combat the ripple effect that was going on along the side edges, clamping stiff flat stock under them, has reshaped them as well. now, comes the sanding of the gun deck, and re doing the spar deck {I'm still not happy with it}.....and spray them with the flat lacquer, using the airbrush this time. thanks for the good word Adam.......and thanks again for all the likes
- 165 replies
-
- 1
-

-
- united states
- revell
- (and 1 more)
-
your eyes are going to play tricks on you, you know..........all through the rest of the build, your going to see things that might not look appealing to you. it's all part of the process from one step to another, you will encounter glue marks.......simply dabbing over them what ever seal coat you've been using, will hide them quite well. from where I'm sitting........your doing a fine job! bravo....that your able to move onto bigger and better things.
-
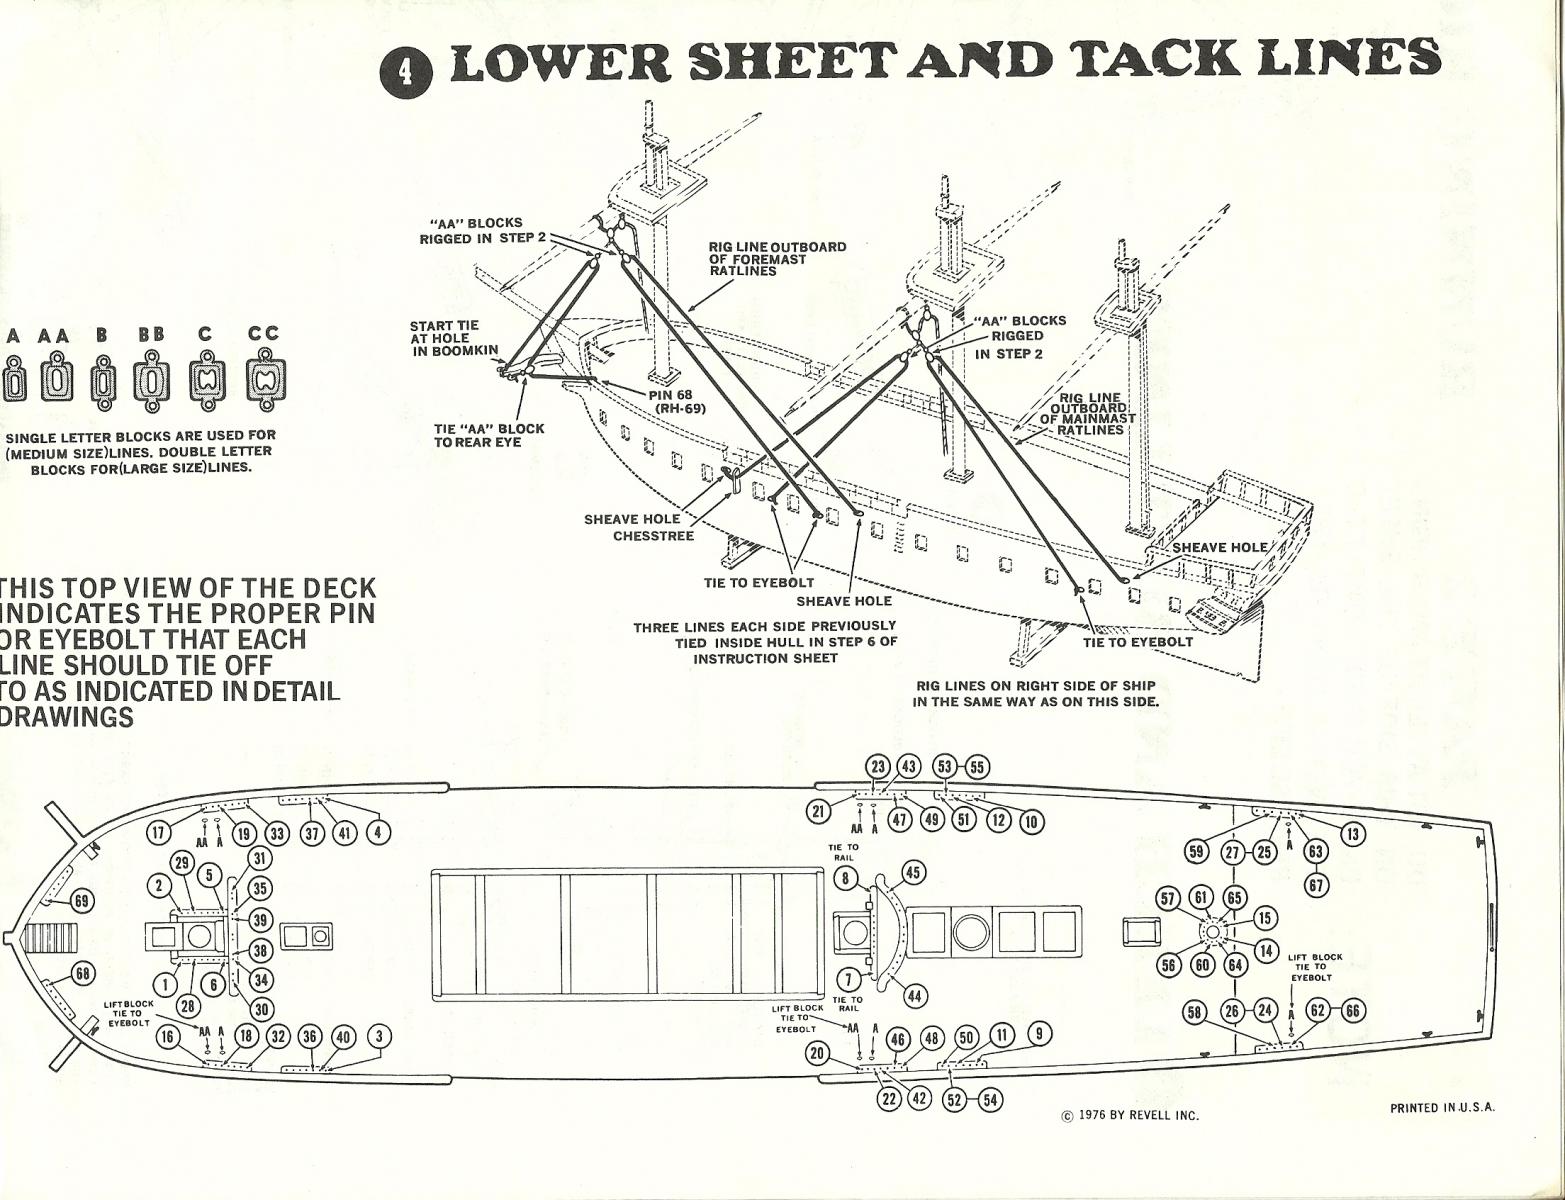
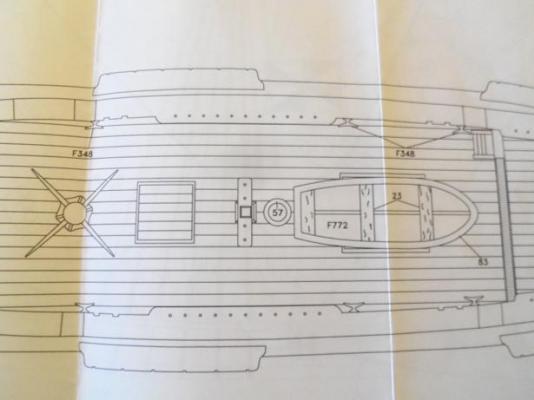
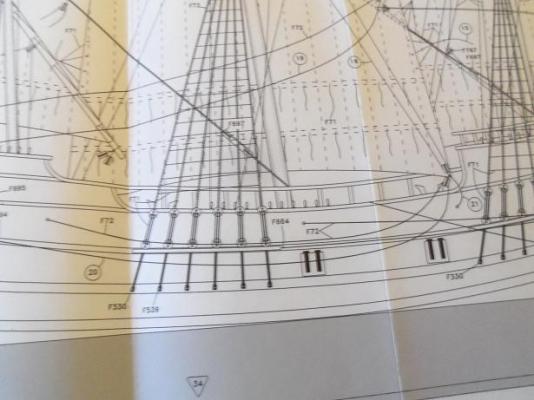
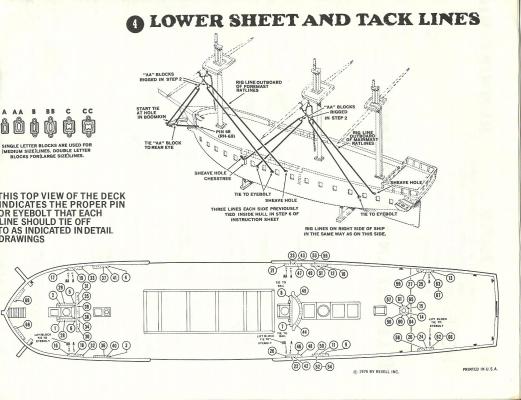
they will will be used as sheaves for the lower sheet tack lines. I would imagine you've already drilled the holes to complete them. arranges the way they are, they will require cleats to terminate the rigging. here are the cleat locations for the Billing's half Moon I mentioned not having these sheave plates for the Billing's kit.......sad to find that the Billing kit doesn't show them. the function of these sheaves are decorative........but the main function is to protect the ropes as they go through the bulwarks......reduce rubbing and becoming frayed

-
thanks Mobbsie.....the gun deck is planked.........finally! at the moment I have the side edges clamped with flat stock in the meantime, to straighten the ripples that developed. tomorrow is my last work day..........I can then get the edges trimmed and sand the decks. thanks for looking in and the good word..........update soon!
- 165 replies
-
- 1
-
-
- united states
- revell
- (and 1 more)
-
first planking doesn't matter too much......I think it looks great! she'll look much better when you get the hull sanded
-
very nice gun ports Sjors....it looks like you have them sticking out far enough for the second planking....splendid!
-
NICE!!!
-
congratz Kats on a build well done! who would have thought that mess you showed us in the beginning, would transform into this beautiful looking ship! your efforts definitely show..........I certainly hope to see another fine build with your name on it
- 237 replies
-
- 1
-
-
- cutty sark
- revell
- (and 2 more)
-
don't feel bad.......I have the same problem I haven't 'rigged' the lines yet there's still time.
-
you could get one like I have..........just a run of the mill Kodak 'easy share'........to keep at the museum. it has a few bells and whistles and takes some fairly decent pictures. it will dock to any computer.....so if you have a computer you can use at the museum, you can transfer them to a memory stick and bring them home.
-
thanks Matti..........only a couple of rows left to do! I will try to wrap it up tonight. nice weather is in store.......I hope to get the decks sealed {includes re sanding the spar deck again}. this way I can give them a proper presentation thanks for the good word
- 165 replies
-
- 1
-
-
- united states
- revell
- (and 1 more)
-
the picture in step 6 shows the same........and doesn't tell you what they are. what your showing there, is the sheet and tack lines with sails.......here is the arrangement without sails you must be planning to fit her with the sails........good choice. when I built the United States for the first time, I added the studding sails. really adds to her width, I can tell ya that! if you added extra thickness to the inner hull wall, you can drill a slightly larger hole , and embed the knot..........not that anyone will see it once the spar deck is in place.
- 601 replies
-
- 2
-
-
- constitution
- revell
- (and 1 more)
-
considering the inner bulwarks aren't red
-
top notch work Daniel.........you do know that the weather is getting better......the misses will want her clothes pins back you never fail to surprise though.....I like the way you rigged them.
-
looks real good with the stripes! I was curious though.......went browsing at images of her. some pictures had them and some didn't. makes no never mind.........she looks sweet with them on!
-
all of the kits I've done have been......of course, there are a few parts that need to be done scratch. mostly deck fittings though. good to see the masts fitted in place........and the nice weather you have to show her looking sweet!
-
I had the same thought about the Cutty.....that would be sweet, I'll bet! thanks for the good word Piet! almost done with the gun deck!
-
that's what he's talking about Henry.......I need to do the same thing on the United States. they have two different size tan thread in the kit. I like this thread........tried to get some from Revell, but they don't sell it. looking at the rigging instructions, these are the lower sheet and tack lines.
- 601 replies
-
- 1
-
-
- constitution
- revell
- (and 1 more)
-
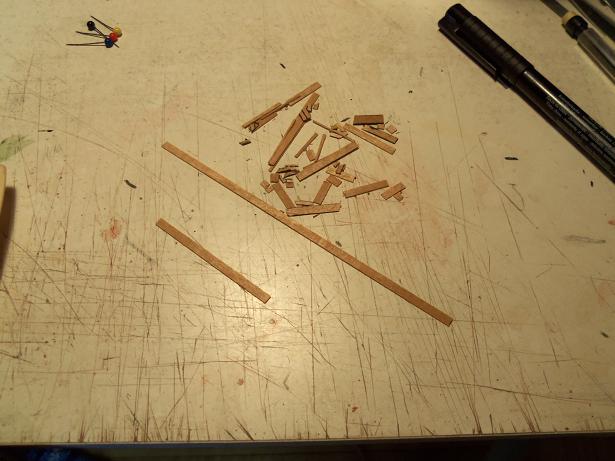
thanks Dave.......I kind of had to plan it.......these strips were not all exact. even a smidge here and there can create gaps. but I did try and utilize as much as I could.......it worked out quite well thanks for the good word. thanks to all of you who used the like button.......I really appreciate it {I keep forgetting....sorry}
-
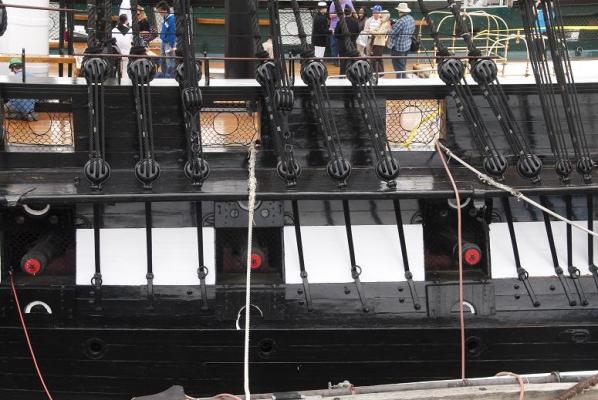
I have a few links bookmarked for the Connie.......one is the official site. while it is not shown as hard proof {actual pictures of the ship in that era}, today's Connie does support the fact that she does have gun port lids. this does not conclusively prove that she sported them back then. please consider that you both may be right. I'm afraid to say though that I don't give much credence to sketch drawings or portraits........they contain too much artistic licence. the model's box art should support this as well.........it's a painting too, isn't it? tied to a cleat on the ceiling, is the rope for the top section of the gun port lid. since I could not find any diagrams or pictures of the lids........I looked at pictures that might show them. here is a picture showing the chain plates and dead eye lanyards now, I'm not saying that neither one of you are wrong.........and I'm sure that tucked away in some obscure book, a single paragraph revels whether or not she sported them.......or whether they were split or full size. I amassed a bunch of info in my research into the United States.......even exposed some guy, touting he was taking collections to see her rebuilt. can't say what I called him, but I sent him packing I bookmarked info on the Connie as well.......she'll make a great window into some of the United State's fittings. build her as you see fit...........your well on your way in building a superb looking ship!
- 446 replies
-
- 2
-
-
- Revell
- Constitution
- (and 1 more)
-
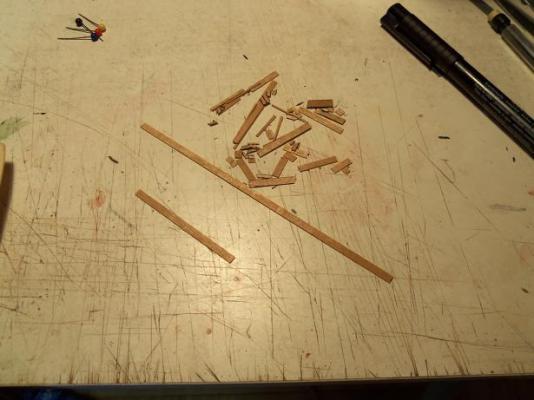
this morning, I took care of those three rows that needed to be on the port side. I completed one of them, the other two are about half way there. now......after 31 rows {counting the king plank}.........here is how much of this deck, 25 1/2 strips will cover! I started this with six packs of wood strips {60 strips}. I did the poop deck, the spar deck, and what you see here of the gun deck. this is all I have left......... it's amazing how far they went

- 165 replies
-
- 9
-
-
- united states
- revell
- (and 1 more)
-
thanks David.......more to come, you can be sure thanks and enjoy thanks Frank pro?..........a pro can do this without thinking. right now........my head hurts!
- 165 replies
-
- 3
-
-
- united states
- revell
- (and 1 more)
-
thanks Kieth for the interest.......but in the interest of the topic, I'll let it lay. if there's more to the story......I'll put it in the shore leave, for everyone to weigh in at their leisure. again, thanks for understanding. at one time, I tried to get a Connie kit. I am so sure that the United States kit is a spin-off, I wanted to measure and compare the hulls to see if this is true. you should have seen the admiral's face when I brought up this idea. she doesn't even like the idea that I'm building this one, since she's seen how the wood kits look. it used to be, that when I would bring up the subject of starting the United States, a wood kit would appear.........I guess that appeal has worn off. I figure that if I show her what it will look like integrating wood......she might say yes. as you can see......I'm still working on it. I try not to pull too much of a tantrum.........how can I see stuff, that would spark any ideas, if I'm told to stay in the car
- 165 replies
-
- 2
-
-
- united states
- revell
- (and 1 more)
-
we can thank Peter visser for that little tip: http://modelshipworld.com/index.php?/topic/1469-zeeschouw-by-petervisser-billing-boats-scale-122-small/ I'm gonna check out Hobby Lobby........don't have the time at the moment. what your doing looks very good......I like it!