


Bob Cleek
-
Posts
3,374 -
Joined
-
Last visited
Content Type
Profiles
Forums
Gallery
Events
Posts posted by Bob Cleek
-
-
-
12 minutes ago, mtaylor said:
I'd be careful with that one. I've heard of people getting into some minor trouble for "polluting".
I think there's sufficient "socially redeeming value" in recreating the demise of Orient at the Battle of the Nile to risk it.


- Roger Pellett and Canute
-
 2
2
-
Good advice from all above! Whether you have the plans may be a determining factor. Whether you're interested in restoring her is a question you'll have to answer yourself.
I'll add another option, perhaps with tongue in cheek, but your dilemma brought to mind a solution from my childhood regarding the disposition of unwanted models...
1. Get a bunch of friends together with a case of beer or a couple of bottles of the hard stuff.
2. Get a digital video camera and tripod (a cell phone would do) and set them up on the shore of a suitable pond. at dusk
3. Fill her with zip-loc bags full of diesel fuel and firecrackers (or cherry bombs, if those are still obtainable!) with the fuses tied together.
4. Start the video camera, light the fuse, and push her out onto the pond.
5. Enjoy!
6. Post the video on MSW!
Remember, it's not real fun unless your mother tells you it might put your eye out.
-
I'm glad to see somebody gets some work out of their kids! What's your secret?
- Jason, Landlubber Mike, mtaylor and 5 others
-
8
-
I suggest anybody who wants to master bending wood, before they do anything else, read Bending Solid Wood to Form, a 1957 publication of the U.S. Department of Agriculture: https://www.fpl.fs.fed.us/documnts/usda/ah125.pdf There's really no point in "trying to reinvent the wheel" here, guys.
There are a few basics. In the sizes modelers need to bend, the task is an easy one. (In larger sizes, the rule of thumb is one hour in the steam box for each inch of thickness!) Remember that bending quality varies greatly with the particular wood species used. Hardwoods bend more easily than softwoods, as a general rule. "Green" (unseasoned) wood bends well. Dried wood, not so well. Even so, bending quality is a crap-shoot. It can vary even based on the location the wood was grown. You do your best with what you have to work with. Again, bending small stuff is a lot less hassle than bending thicker stock.
The bad news is that the moisture content of the wood is a major determining factor is its bend-ability. Kiln-dried wood isn't good for bending and most all of what modelers will encounter will be kiln-dried. "Dry" is a relative term, however. It refers to the moisture content of the stock, not whether it's been soaked in water before bending! That moisture content has to be throughout the stock, not just on the outside. For the scientifically inclined, decent bending stock should have a moisture content of between twelve and twenty percent (of water by weight.) Air-dried stock stored at room temperature in average humidity should have suitable moisture content.
Wood with a sufficient moisture content will be more "plastic," or bendable. If wood doesn't have sufficient moisture content, it can be steamed or soaked in boiling water to increase its moisture content (which takes time) and heat it. (The steam or boiling water is often more effective in transferring heat to the stock than in increasing overall moisture content, though.) Steaming or soaking is often necessary for larger pieces, but much less so for small stuff used in modeling. Generally speaking, you don't have to soak your planking material to bend it and have it stay put. All that usually needs be done is heat it through and through and hold it in position until it cools sufficiently to lose enough of its plasticity that it "sets."
In most every instance, it's about the heat, not the moisture. So, you should try to do your bending with dry heat, some sort of a heating iron or in the microwave, before getting involved in the complication and mess of steam and hot water. Use a clothing iron, a curling iron, or one of the commercial electric "plank benders."
When planking, do as Chuck Passaro says in some of his great build logs: first spile the plank accurately (cut it to a flat shape that will fit when bent.) You can read up on spiling in the "planking' instructions in the forum resources section. After you have the plank shaped, it should be bent to fit first before fastening it at all. The goal is to have a perfectly cut and bent plank that fits right where you want it. Some trimming may be required, or some further tweaking with the bending iron, but a properly cut and bent plank should be easily glued and fastened in place. You should not have to be trying to bend one end to fit while the other is already fastened. A pre-formed plank will also be much easier to clamp in place while the glue dries. Trying to counteract the spring of an unbent plank with a glue bond is a poor practice that often promises sprung planks down the road.
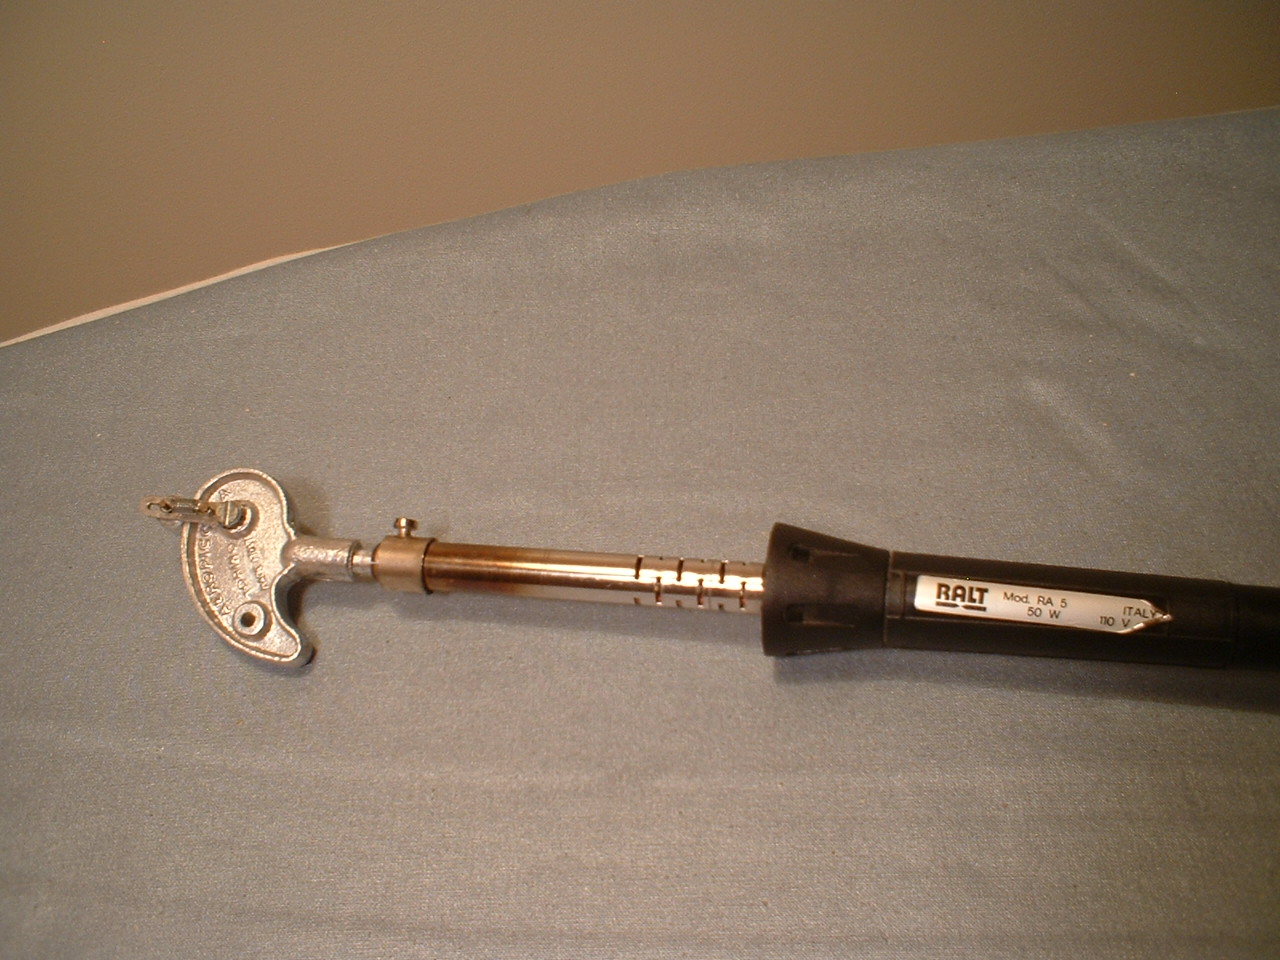
A heat source is a matter of personal preferance. I prefer my old Aeropicola plank bender pictured below. It has a "French curve" shaped heated head that permits bending a fair curve to whatever shape one wants. It also has a spring-loaded bail on the end under which the plank can be slipped to hold it while it is bent and/or twisted while the heat is applied. These two features, which I haven't seen on any of the other "plank benders" on the market, put it head and shoulders about the competition. Unfortunately, they are no longer made, but do come up on fleaBay occasionally.
With decent bending stock and sufficient heat, bending shouldn't be anything to intimidate the modelers starting out. It actually is rather satisfying work. Bending wood is the difference between "carpentry" and "boatbuilding!"
- marktiedens, Canute, JpR62 and 3 others
-
6
-
6 hours ago, druxey said:
You will need to find the size of the eye of the shroud off the model, apply the seizing in the correct place, then loop the shroud pair over the mast head, as in full-sized practice.
What he said.
- CaptainSteve, mtaylor and thibaultron
-
3
-
A small strip of paper placed between the two parallel served standing parts to be lashed together will permit the served parts to slide against each other for adjustment after they are lashed, after which the small strip of paper can be pulled out and the serving shellacked to hold all in place.
- mtaylor and CaptainSteve
-
2
-
50 minutes ago, Roger Pellett said:
This is important because this wheel looks to be too lightly built to stand up to forces from hand steering a sailing vessel.
I immediately thought the same thing. It appears to be a wheel intended for use within a pilothouse, not on deck in a sailing vessel. And it is still an interesting artifact, regardless of its lack of detailed provenance.
-
Interesting, but awfully expensive. The Veritas model, no doubt of higher quality, runs US$99.00 just for the base. The "Fence and Center Kit," runs US$89.00. The "package deal" runs US$209.00. http://www.leevalley.com/en/wood/page.aspx?p=73720&cat=1,43000,51208
On the other hand, Dremel's equivalent and apparently very similar plunge router base runs US$23.47 at Walmart online. https://www.walmart.com/ip/Dremel-5000335-01-Plunge-Router-Attachment/19303878?sourceid=csebr034463a7c072b44ed2bad68687d172aea0&wmlspartner=bizratecom&affcmpid=3750101013&tmode=0000&veh=cse&szredirectid=15607154435162350808410080302008005
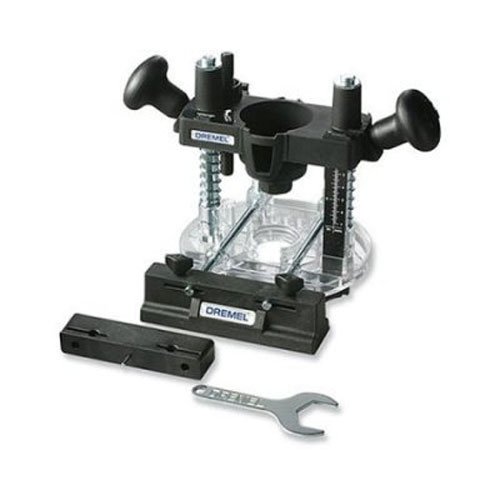 I'm sure the Veritas is a high quality item and the Dremel model is, well... Dremel, but I'd think twice before spending the big bucks on the Veritas if it wasn't something I'd be using fairly regularly.
 -
8 hours ago, CPDDET said:
Thank you all for the great advice here., So many tempting tools out there!
After giving it some thought I decided to invest in some books on rigging. This is something that I will be attempting quite soon on my current build (also my first build). Spent about $90.00 but it will be a good start for my rigging library.
Rigging Period Fore-and-Aft Craft
by Lennarth Petersson
The Rigging of Ships: in the Days of the Spritsail Topmast, 1600-1720
by R. C. Anderson
Rigging Period Ship Models: A Step-by-Step Guide to the Intricacies of Square-Rig
by Lennarth Peterson
The Art of Rigging
by George Biddlecombe
The Young Sea Officer's Sheet Anchor: Or a Key to the Leading of Rigging and to Practical Seamanship
by Darcy Lever
Ah... You chose wisely, Grasshopper.
-
5 hours ago, CPDDET said:
The plank bender sounds like a good investment. I managed on my Bluenose without it but there are some future builds I'm eyeing where it would be a big help.
Any thoughts on this bending jig?

I'd have to rank that one right up there at the top of the "useless scale," just below the infamous, but amazingly still sold, "Loom-a-line." (Full disclosure: I bought one forty-plus years ago. Still have it. Tried to use it once. Never touched it again.)
For whatever it cost, if you need a bending jig, it's easy enough to take a block of scrap wood and a few finishing nails and save a whole lot of money. If you have a decent plank-bending iron, you really shouldn't need anything more than that for bending planks.
My first rule for tool buying, admittedly sometimes broken, is to never buy a tool until you need it and then only buy the best you can possibly afford. It's very tempting to buy the latest gizmo on impulse, but a fool and his money are soon parted, as they say. There are very, very few "ship modeling specific" tools. Most come from other crafts and trades and purchasing tools from non-modeling sources often will get you much better quality tools at much lower prices than the stuff in the modeling catalogs.
If you are serious about the hobby and the sort of person who sticks with their interests, I'd urge you to start a "piggy bank." Whenever you have any "spare change," set a buck or ten aside for the day when you really have a use for a good tool that will cost you a few bucks. It's surprising how fast it adds up, even if you just throw your pocket change in a jar when you take off your pants every night before bed. Do that for a few months and when the day comes you realize how much money you are spending on pre-cut wood at the hobby shop, you'll have enough on hand to join the "Model Machines Club" and buy a Byrnes saw, a decent micro-lathe, a mini drill press, a scroll saw, and cool stuff like that which can really pay for itself over time and will always hold a lot of its value if and when you ever no longer need it.
If the money you've got is irresistably burning a hole in your pocket, you might consider buying a small machinist's vise and a jeweler's vise. Those are a couple of tools I find I'm always using. They are simple things, but very handy to have. The same goes for a "third hand" device of some kind, although I have never found one that was a well-built as I would wish (alligator clips and loose ball joints don't cut it.) Sometimes making your own is not only less expensive, but also much better. A draw plate for making variously sized micro-dowels is an excellent investment. Jim Byrnes makes a very fine one and at $25, it's a good "gateway drug" that will get you hooked on his other really fine tools. http://www.byrnesmodelmachines.com/index5.html
Finally, don't limit yourself to tools. One essential for any serious modeler is a reference library. The internet has made a huge amount of information easily available, but there's still a lot of data that isn't on line. A lot of the old timers here started building their modeling libraries before there ever was an internet or an Amazon to make used books readily available. We'd have to pore through used bookstores or subscribe to antiquarian booksellers' monthly or quarterly catalogs in the hope of snagging a treasured out-of-print title before one of our modeling colleagues did. If one buys a used book or two a month, often for less than $25 a piece, they can build a very useful, and valuable, modeling library. Only buy the good books. (There are lots of mediocre ones aimed at the beginners.) Look for the "classics" and the books that are full of good reference materials. These books will hold their value reasonably well and always be useful. If you watch for them on eBay or look for them on Amazon and similar sites, you can find the works of Davis, Underhill, Longridge, Chappelle, and other "essentials" fairly reasonably priced. Building a reference library can, and likely will, become a collecting hobby in and of itself. Besides, if you fill your house with books, people will think you're smart.
- VonHoldinghausen, mtaylor, MEDDO and 5 others
-
8
-
I doubt anybody has taken the time (and expense) of producing a "translation" spread-sheet for these two brands. The last one I saw was for Floquil and another popular brand, which became available when Floquil (great stuff) went out of production. That one was obviously produced because the remaining brand wanted folks who couldn't get Floquil anymore to buy their product as an equivalent replacement. I doubt that has occurred with Model Shipways paints which aren't exactly everybody's favorite brand.
It's often difficult to get exact paint matches. Different brands are rarely exactly alike, save for pure white and black. I'm not aware if "chip sheets" are available for model paints. (A "chip" is a piece of cardstock with the actual paint applied to it. These are commonly available in paint stores.) Most model paint companies only provide printed color cards. These are not entirely accurate, given that the colors are produced by printer's inks, rather than the actual paint itself, as with "chips." Even worse, colors on a computer screen are almost never accurate when compared with the original color.
There's no guarantee that a "kit set" of colors is at all accurate. They only insure that your model will be the same color as everybody else's model whose paint came from the same batch, which may not be the same as the prototype's color, if that is even truly known. The best one can do is experiment and judge by eye. Even then, one person's ability to judge color will differ from another's depending upon their own physiology. (Many people are "color blind" to one degree or another.) Keeping in mind that most all paints will appear darker after drying, the best one can do is to get as close to where you want to get and live with that. "If it looks right, it is right." Volumes have been written on "what looks right," and I'd recommend reading the fine article in the NRG's Shopnotes Volume II on selecting paint colors for ship models. That's the most scientific treatment of the subject of ship modeling colors I've ever seen.
-
I love it! This one is a "save" for sure. I only wish such places still existed. (Davey and Co., London, and Toplicht, Hamburg, come close, but they're the last of the breed.) If only the prices were the same today. Actually, though, adjusted for inflation, the stuff in this catalog would be as pricey as anything sold today. Boats are a hole in the water into which you pour money, as they say.
Thanks for sharing this!
- mtaylor, bruce d and Keith Black
-
3
-
Everybody agrees that there is no historically accurate data on what these vessels looked like, specifically. At best, we might have some idea of the type they were, but that's about it. Nevertheless, they just keep on putting out books and model kits of the Nina, the Pinta, and the Santa Maria. The demand just never lets up.
-
On 6/8/2019 at 4:12 AM, davidrasch said:
Welcome! I've been off and on with ship model building. Currently I'm doing some WW II models for the 75th anniversary. Wish there were a creditable HIGGINS BOAT kit and/or plans. From the Louisiana swamps to Normandy and Okinawa, this plywood boat was there. Then again, I'm an old(er) man(age 69).
At the risk of being accused of "thread drifting," the plans for the "Higgins boat," ("LCVP") are widely available online. There are plans freely available not only for modeling, but also the original official plans for the full-sized vessel. Knock yourself out! https://www.bing.com/images/search?q=lcvp+plans&FORM=HDRSC2


-
There is an excellent epoxy product specifically formulated for sealing wood. It penetrates the wood surface and when it cures the wood is fully sealed and hardened by the flexible epoxy that has soaked into it. I would use it on any model hull I intended to put into the water. It's extensively used by the professional wooden boat trade. It was originally invented for use in restoring rotted and damaged architectural details on old Victorian "gingerbread" buildings and later as a wood preservative for use in the tropics. From there, it found its way into the wooden boat trade. It's been around now going on 50 years. It can be painted over without further preparation, unlike many other resin coatings which develop an "amine blush" that must be removed before further painting.
Smith's "Clear Penetrating Epoxy Sealer (tm)" or just "CPES(tm)."
-
13 hours ago, mtaylor said:
As a side note, Yellow Ceder works very well for modeling.
While I expect it won't make any difference to the question at hand, i.e. how well cedar of Lebanon holds with glue, Alaska Yellow Cedar is actually a cypress, not a cedar.
(I know, ... picky, picky, picky. :D
-
-
23 hours ago, cooltouch said:
Yes, but you did write "As I'm sure you'd agree, if I were to buy a guitar-building kit and followed the instructions to the letter, no matter how much care I took in building it, I could never hope to match the quality of a Martin guitar, let alone a custom built instrument from one of the masters."
And that's what got me going because, you see, a guitar built from an excellent quality kit is a custom guitar in most respects. It might not be built by a luthier with years of experience, but it was put together by one. And so the end-user, as long as he or she is diligent in the assembly process, will wind up with a custom guitar that was designed and laid out by a master luthier. And it will sound like one. And if I may draw a parallel here, I'm sure it's the same with model ship building. The best kits will offer the best result no doubt because they were put together by experts in the craft.
Yes, that's so with ship kits, too. While I've never built one, I've followed a number of build logs on the Model Shipways laser-cut models designed by ChucK Passaro and they are as good as I've ever seen in terms of quality and they do produce very fine results. I built my first wooden ship model kit about forty years ago when a "kit" was a couple of sheets of plans, a handful of sticks and dowels, a roughed-out block of wood, some string and wire, and a pile of really rough cast lead and tin parts. They all had to be practically "scratch-built" by today's standards. The kit really just cost you enough to motivate you to start building the thing, but my guess is that probably no more than one out of ten was ever finished. It only took two or three of those kits before the people that stayed with the hobby figured out that they were spending a lot more on kits than they needed to.
Today, most all kits have come a long way from the days of a cardboard box with a label pasted on the end with a small photo of the boat one could supposedly build out of what was in the box. In many instances, though, the materials and parts aren't any better than they ever were. The big leap with models today, though, is the laser-cutting technology. That really takes a kit from something you have to build to something you only have to assemble... although I'll admit that's painting it with a rather broad brush. My point is, if you get into kits today, especially the laser-cut ones, they really have to be top end kits to ensure the laser-cut pieces are accurately done so the thing fits together properly. There are a lot more crappy kits out there than there are good ones. There are some quality foreign-made kits, but a newcomer is probably best off sticking with kits from US kit makers so as to be on the safe side.
As for stringed instruments, I probably shouldn't have used the guitar as an example. Those bowed-string instruments like violins and cellos get their special sound not only from properly selected tone-woods, but also from the contoured carving of their shaped bodies and the shape and placement of their "F"-holes. That's way above my pay grade! (Mmmm.... Good thing those holes are shaped like the letter "F" and not the letter "A," huh?)
-
21 hours ago, cooltouch said:
So, all I'm saying is, don't sell instrument kits short, especially the better ones that you can buy from places like Stewart McDonald (stewmac.com) and Luthier's Mercantile International (lmii.com). You get what you pay for -- just like model ship kits, I'll bet. With the better guitar kits, you're getting top quality tonewood -- and quality tonewood isn't cheap -- plus you're paying for all the exacting work that they've already done that will help make assembly go that much easier.
Well, I did say I didn't know anything about making musical instruments.
-
MicroMark sells wire gauge numbered drill bits in all sizes in tubes of six. I've bought them in the past in tubes of a dozen. They are sometimes a sale item. When they are on sale, I stock up. They break easily and from a hobby shop at six bits or a buck apiece, that can add up fast!
- Canute, moreplovac, mtaylor and 2 others
-
5
-
The biggest difference between building stringed instruments and ship models is that the luthier with any competence has a far better chance of selling what they build. My neighbor is an internationally known master violin and cello maker. It takes him as long to make one of his instruments as it does the master ship modelers to make one of their masterpieces. His instruments start at $25,000 and go up in price exponentially from there. He's quit taking commissions for new instruments because his repair and maintenance work is so much more lucrative. I have a friend fifteen miles up the road who is a master guitar maker whose work is in the collection of the Smithsonian and whose clients include a number of Rock and Roll Hall of Famers. You'd need a rock star's money to buy one of his guitars. He's not taking new commissions, either, and now passes new work over to the apprentices in his shop.
I have most all of the tools both of these luthiers have, except for the very specialized musical instrument making tools, and I have a fair amount of skill working in wood and metal, but I'd never begin to attempt to build a musical instrument because I know nothing about playing them. So also it is with ship model building, which can be a lot more complicated than might be expected. One can buy a kit, or even plans and instructions for a model to be built from scratch, and produce something credible if it be a simple model and the instructions good ones, but beyond the rote following of instructions, a ship model builder won't get too terribly far unless they have an extensive knowledge of ships and boats, particularly in the period of the ship they are modeling, and a working familiarity with full-sized boat and ship building procedures, again specifically those of the period in which the ship they are modeling was built. As I'm sure you'd agree, if I were to buy a guitar-building kit and followed the instructions to the letter, no matter how much care I took in building it, I could never hope to match the quality of a Martin guitar, let alone a custom built instrument from one of the masters. That takes decades of apprenticeship, mentoring, and dedicated, full-time, journeyman's experience. I could probably build a violin if I had a good kit, but it would never sound like a good violin, that's for sure.
The kits mentioned above are the best around for a competent woodworker to start with. It's "buyer beware" in the ship model kit world, for sure. There are a lot of very mediocre, if not flat out crappy, kits out there selling for hundreds of dollars. Just remember that in most every instance, the picture of the finished kit model in the advertisements and on the cover of the box is never possible to be built from the materials and instructions in the kit. The "finished" models in those pictures were usually built by professional master modelers who went far beyond the instructions and materials supplied to produce the model in the photographs. It's sort of like putting a photo of the real Mona Lisa on the cover of a paint-by-numbers kit box. Fortunately, the models mentioned above are among the few for which this warning doesn't apply.
At the same time, you'd do well to read up on the craft of ship modeling and learn all you can. (Use the search engine in this forum to find lists of the best of them. Lots ship modeling books have been written, some good and a lot not.) Many find simply learning the nomenclature of ship construction a daunting task and, like all languages, it takes a lot of "immersion" to learn to speak it as if it were one's mother tongue. Ship modeling is a fascinating hobby, or profession, but the amount of learning that is involved, and indeed the amount of historical research, while most enjoyable to many of us, isn't always everybody's cup of tea. I encourage you to try it and see if you like it, but don't discourage yourself by biting off more than you can chew with a learning curve that's way too steep.
If, on the other hand, you are seeking a source of retirement income that involves woodworking in miniature, you'll probably make a whole lot more money building collectors' dollhouse miniatures like miniature reproductions of Chippendale dining room sets at 1:12 scale, than you ever could building ship models!
I offer these thoughts not in an effort to scare you off, but in the hope that you'll get off to the right start. Finding your way to this forum community is the right first step. You'll find all the help you'll ever need along the way from fellow forumities in MSW.
- pontiachedmark and druxey
-
2
-
1 hour ago, makalakalak said:
My current thinking for barnacles is (semi)crushed kitty litter with tiny holes drilled into them followed by a very dark, dark green wash. May have to do some tests.
Yes, the scale will determine the level of detail. Drilling tiny holes in thousands of bits of crushed kitty litter may land you in the loony bin, but there's no limit to how far a dedicated modeler will go to achieve realism!
Battle damage will be a function of the period of the model. In the Age of Sail, before the development of the torpedo and mines, and particularly, in the age of cannon balls, there wasn't much, if any, damage below the waterline. At most, it would just be at the waterline or a few feet below. Customarily, the object in those days would be to damage rigging and rudder sufficient to render the opposing ship incapable of maneuvering, at which point it would be so vulnerable that there was nothing else to do but strike its colors and surrender. The enemy ship would then be taken as a prize. Prize money was awarded to the ship that took the prize and divided among the officers and crew in proportion to their rank. If the enemy ship was sunk, it wasn't going to result in any prize money, so the object was rarely to sink the enemy, but only to disable and capture.
- makalakalak and Canute
-
2
-
That looks more like really, really big shipworms than it does barnacles.
These are barnacles. Shelled sea creatures that are shaped like volcanoes.

This is shipworm damage from the outside. (A type of clam, burrow into the wood beneath the surface, like termites.)

This is a boat bottom in need of a cleaning and anti-fouling repainting with barnacles or mussels growing on it. The green seaweed and algae growth isn't too bad because it's been running at speed through the water regularly.

And this is a boat bottom that has been sitting still in a berth for quite some time.

You might consider looking at model railroading scenery catalogs like MicroMark to see what's available in terms of "greenery." Beyond that, it's just a matter of how creative you want to get. You might want to consider, though, that most bare mahogany is usually too coarse-grained to be suitable for modeling work (although some high-priced species are not so much so,) and no boat with a mahogany hull would ever go without paint or varnish, and particularly so below the waterline. The mahoganies don't weather well if left bare.
- makalakalak, Roger Pellett, mtaylor and 1 other
-
4

Plank Bender....
in Building, Framing, Planking and plating a ships hull and deck
Posted
Use it however it works for you. The "bail" is for slipping the strip of wood under to hold it while the bend it made over the curved face of the iron. You can slip the plank through the bail and bend in increments progressively to get whatever degree of curve you want. The bail can also be moved to the other hole so you can pick a gentle curve or a sharper one. The iron can also be held in a vise and the plank bent over the iron while it's held in two hands at either end. This is a good way to work twist into a plank.