

Sailor1234567890
-
Posts
995 -
Joined
-
Last visited
Content Type
Profiles
Forums
Gallery
Events
Everything posted by Sailor1234567890
-
 Sorry to be keeping you up for 2 days straight Ed. It just struck me as odd how it was laid out. I've got some experience sailing square rig (not with Stunsl's though) and I quickly picked up on that little discrepancy. I Googled the Barque Picton Castle, admittedly a much later vessel. She is however extant today and has stunsl's. The gear is set up funny in that instead of a straight bar from the yard to the ring of the iron, it's a curved bar starting on top of the yard behind the jackline and curving forward so the ring is located where yours is. Outer boom iron isn't an issue as it's located outside the earing and does not interfere at all.
- 3,618 replies
-
- 2
-

-
- young america
- clipper
- (and 1 more)
-
I have underhill's book. It really is a goldmine. I purchased plans to a boat last year with the intention of building her. She's a 57 footer with a number of different rigs. I would love to put the Hermaphrodite Brig rig on her and if I can, I will include stunsl gear. Underhill has been invaluable in planning her rigging work. I have a few other sources like D'Arcy's book and a couple of others. Maybe the uppers were the only ones hauled up bunt first and I was mis remembering seeing a lower hauled up that way. I know the smaller like moonsails, skyscrapers and such were often hauled up on the yard.
- 3,618 replies
-
- 2
-
-
- young america
- clipper
- (and 1 more)
-
Are you including the lashing to ensure the booms don't slide out? normally they would have been lashed together at their butt ends to prevent them sliding out as the ship rolled. There's a tackle rigged to haul them out and a lashing to keep them secured together when not in use. I love stuns'ls and find the rigging of them intriguing. Sure you won't include some in your model?
- 3,618 replies
-
- 3
-
-
- young america
- clipper
- (and 1 more)
-
My understanding of square rig has it done as follows. Bending sail was done, as you say by hoisting the sail up, stretching it along the yard and making the robands fast to the jackstay. It wasn't hoisted with the bunts and clews though as far as I know. The reason was that for upper sails, those lines are not even close to long enough to reach the deck. Even the lowers would not quite be long enough to reach the deck as the sail was above the deck height and having more line than necessary to work the sails was wasteful. It was hoisted by a single line made fast to the bunt of the sail. This was hoisted from well above the yard in question. In other words, the sail would be prepared on deck then folded in half, hoisted bunt first up higher than the yard then lowered as the earrings were hauled taut to the end of the yard and robands made fast. I don't see how the head of the sail could be lashed tight to the jackstay as you've got the images of your model. The booms were triced up and the inner irons were hinged as you show but how do you get the head of the sail lashed up tight against the jackstay with that boom iron in the way? There would need to be a slot in the sail. I'm better versed with more modern yards and ships like Cutty Sark where they generally had two jacklines and the boom irons were often below the yard to keep them out of the way a bit more. I guess the questions remain.
- 3,618 replies
-
- 3
-
-
- young america
- clipper
- (and 1 more)
-
Looking closely, I have another question. The boom iron is shown on the forward 10 o'clock position or so in that second last image. It's significantly forward of the jackstay. The jackstay was used to fasten the sail to so how was the sail bowsed up tight to the jackstay if the boom iron was so far rotated forward of the jackstay? Or was the sail not lashed tight to the jackstay?
- 3,618 replies
-
- 2
-
-
- young america
- clipper
- (and 1 more)
-
Question about how you've temporarily rigged the bridles. Were YA's sails furled to the bunt or the yard arm? I ask because you've got the bridle about mid way out the yard which would not be proximal to the edge of the sail if it's furled to the yard arm and may or may not be if furled to the bunt, depending on how the sail ends up furled. I tend to think that if the sail was struck below, she wouldn't have the bowlines rigged at all. I may be wrong though.
- 3,618 replies
-
- 2
-
-
- young america
- clipper
- (and 1 more)
-
It would have been more a useful move for the French than the English. The French aimed high to damage rigging. The English aimed low to damage hull and crew.
-
question for sketchup users
Sailor1234567890 replied to hamilton's topic in CAD and 3D Modelling/Drafting Plans with Software
Thanks. -
Picture posting skill? Check. Now you may proceed with wowing us with a build log. Aggie's a beautiful ship. Enjoy the build.
-
The balloon idea came to me when people spoke of putting weights on the fortunes. In my mind, that would create straight lines between the weights. A single weight between stirrups would cause a V shaped fortune between, two weights would give a V with a flat ish bottom to it. I picture the balloon making it as close to catenary shaped as possible. there may be issues with it though. If anyone tries it, let the rest of us know.
- 3,618 replies
-
- 3
-
-
- young america
- clipper
- (and 1 more)
-
Period ships with draught marks always strike me as odd. The Plimsoll mark and attendant draught marks were not invented until the mid 1880s.
-
That's a bigger model than I thought you were building. I just walked past her sister HMCS Sackville about 30 minutes ago. She's tied up in our dockyard at her winter berth.
-
Just thinking out loud here but what if one were to install the footropes and then soak them in their favourite goo, be it diluted dark wood glue as Ed mentioned above or some other solution. After all the fiddly bits are done, insert a small balloon between each stirrup and inflate them just enough to provide the catenary desired. Once the glue dries, deflate the balloon and remove it. It should hold in a relatively catenary shape. Close enough for our purposes. Or maybe that's already been tried?
- 3,618 replies
-
- 2
-
-
- young america
- clipper
- (and 1 more)
-
question for sketchup users
Sailor1234567890 replied to hamilton's topic in CAD and 3D Modelling/Drafting Plans with Software
How would one use Sketchup to lay out say a ship's helm. I'm picturing a classic 8 spoke with a bronze hub. The hub is round and has square holes around the perimeter. I understand making spokes round but how do you get a "hole" in the outer rim of the hub into which the spoke would fit? -
What did her stern look like originally? Does anyone have an image of a model of her with her original stern or are all models of her build with her rebuilt stern?
-
MONTAÑES by Amalio
Sailor1234567890 replied to Amalio's topic in - Build logs for subjects built 1751 - 1800
What is the space with the little door at the bottom? Shot locker? I can't imagine opening that if the locker was full.... Can't figure it out. Thanks, Daniel -
Snorkers, Right-O! I'll be watching this one. The only flower class left in the world is tied up about 1.5 km from where I sit now. HMCS Sackville.
-
I like the dark images. Really shows up the lines of the hull.
-
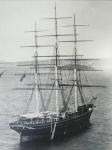
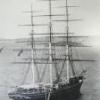
The wrecked clipper ship is beautiful. Very well done.
-
Pins further forward were for lower down bits and pieces. The further aft you went on the pin rail, the further up the line went. There's a logic to it. Pin rails were generally in the same location in each vessel, as near as can be, and the general sense of things was understood by anyone rated anything over landsman. For anyone interested in the subject, Harold Underhill's "rigging the clipper ship and ocean carrier" is an excellent tutorial on the subject. Written for modellers but it talks of the full sized vessels mostly. He was writing at the end of the age of sail, (WWII) and had knowledge of the subject matter first hand having sailed in some of the vessels earlier in his life. It may not be as pertinent to rigging your Victory or Sovereign of the Seas but for getting Clipper ships, larger steel vessels and a general sense for any vessel, I don't think it can be beat.
- 3,618 replies
-
- 3
-
-
- young america
- clipper
- (and 1 more)
-
Re-reading your question, I think using the waterlines would be the best way, not buttocks or ribbands. I think by ribbands, you mean the diagonals right?
-
Could you put up an image showing what you mean? I can't picture how buttocks would be used to show the breadth of a vessel.They are essentially longitudinal station lines. They couldn't be used to determine breadth any more than station lines could be used to delineate profile in a profile drawing...... I need an image of what your'e talking about to picture it properly. Thanks, Daniel
-
Write it off as battle damage repaired at sea. She's still a beautiful vessel you've built.