alde
-
Posts
1,028 -
Joined
-
Last visited
Content Type
Profiles
Forums
Gallery
Events
Everything posted by alde
-
 Thanks Bob, your Halifax was my inspiration to take this on.
 -
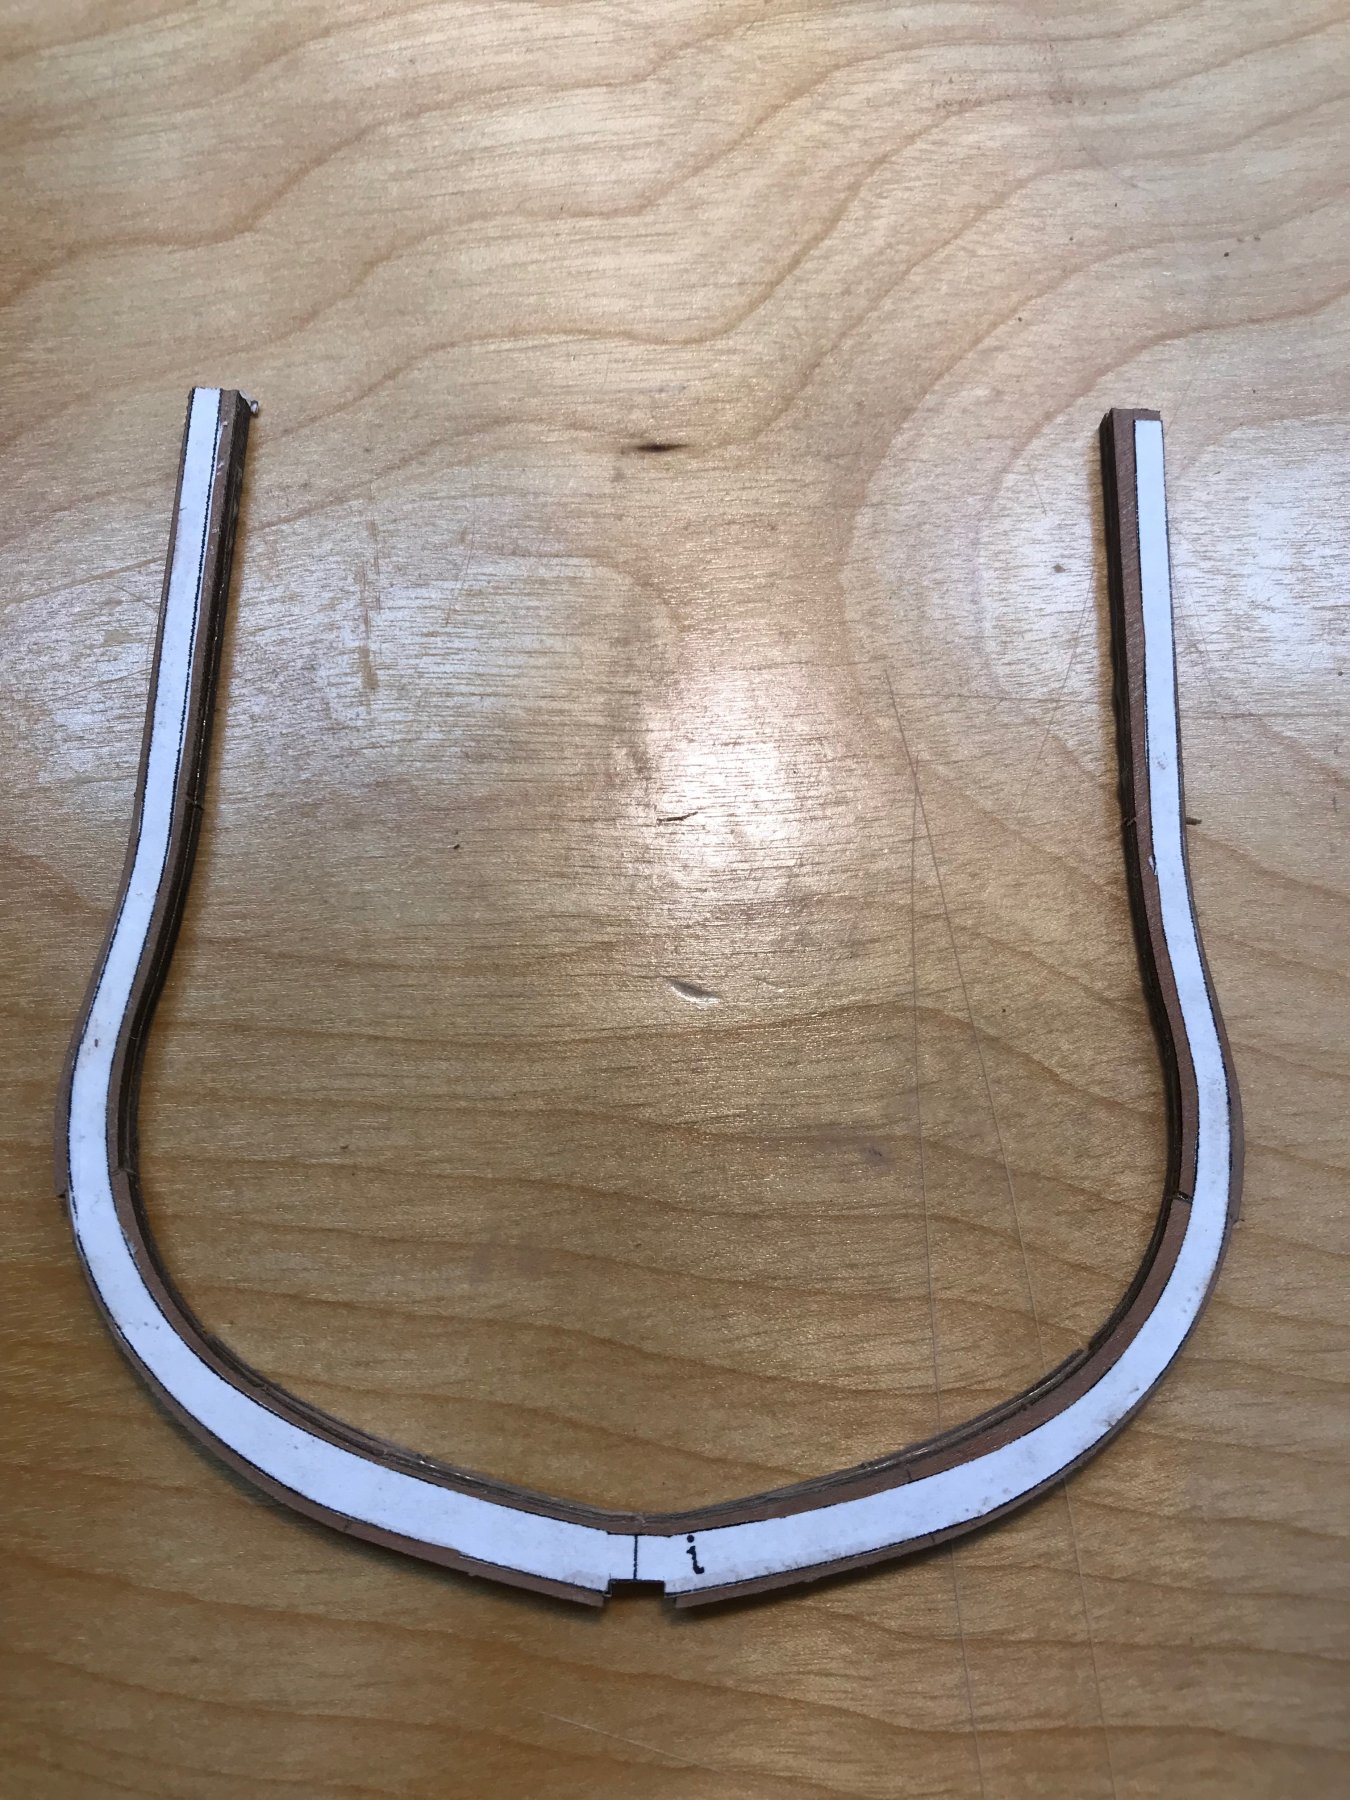
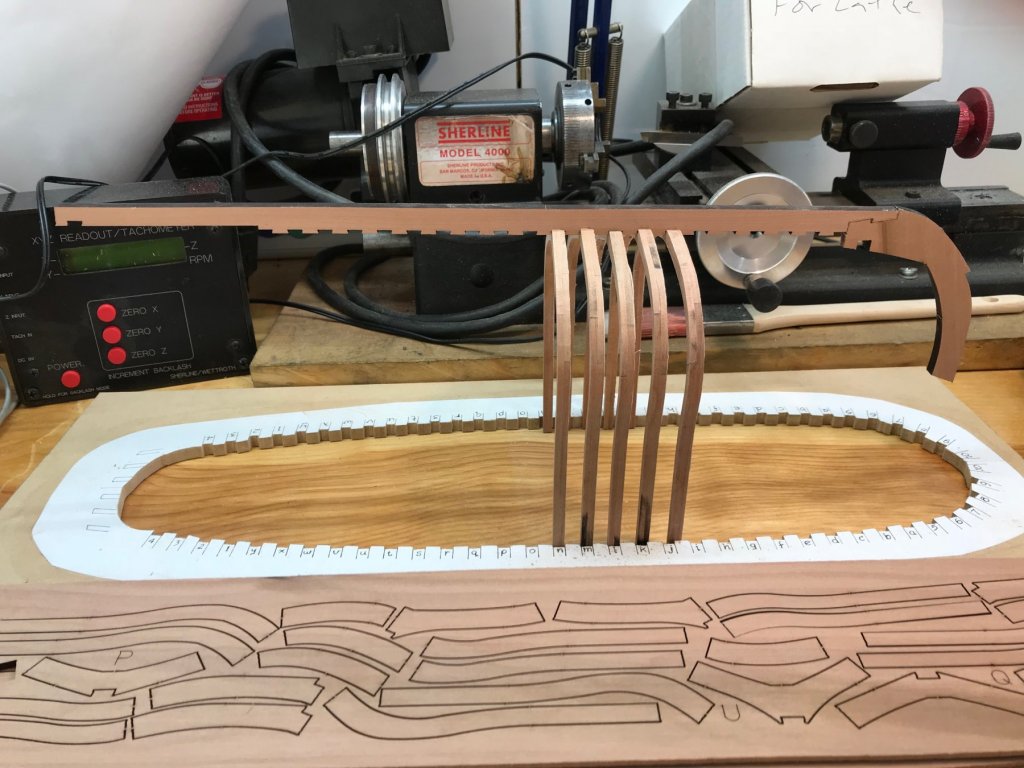
Just a quick update. I forgot to mention an important step in the frame building process. They need to be sanded to a thickness of 3/16". The laminated pieces come out to 1/4" before they are sanded down using a full sheet of 150 grit sandpaper on a flat surface. You can also see how much the frames need to be sanded to match the frame outline on the plans. The more I use the oscillating spindle sander the more I like it. With a light enough grit it's easy to control.


-
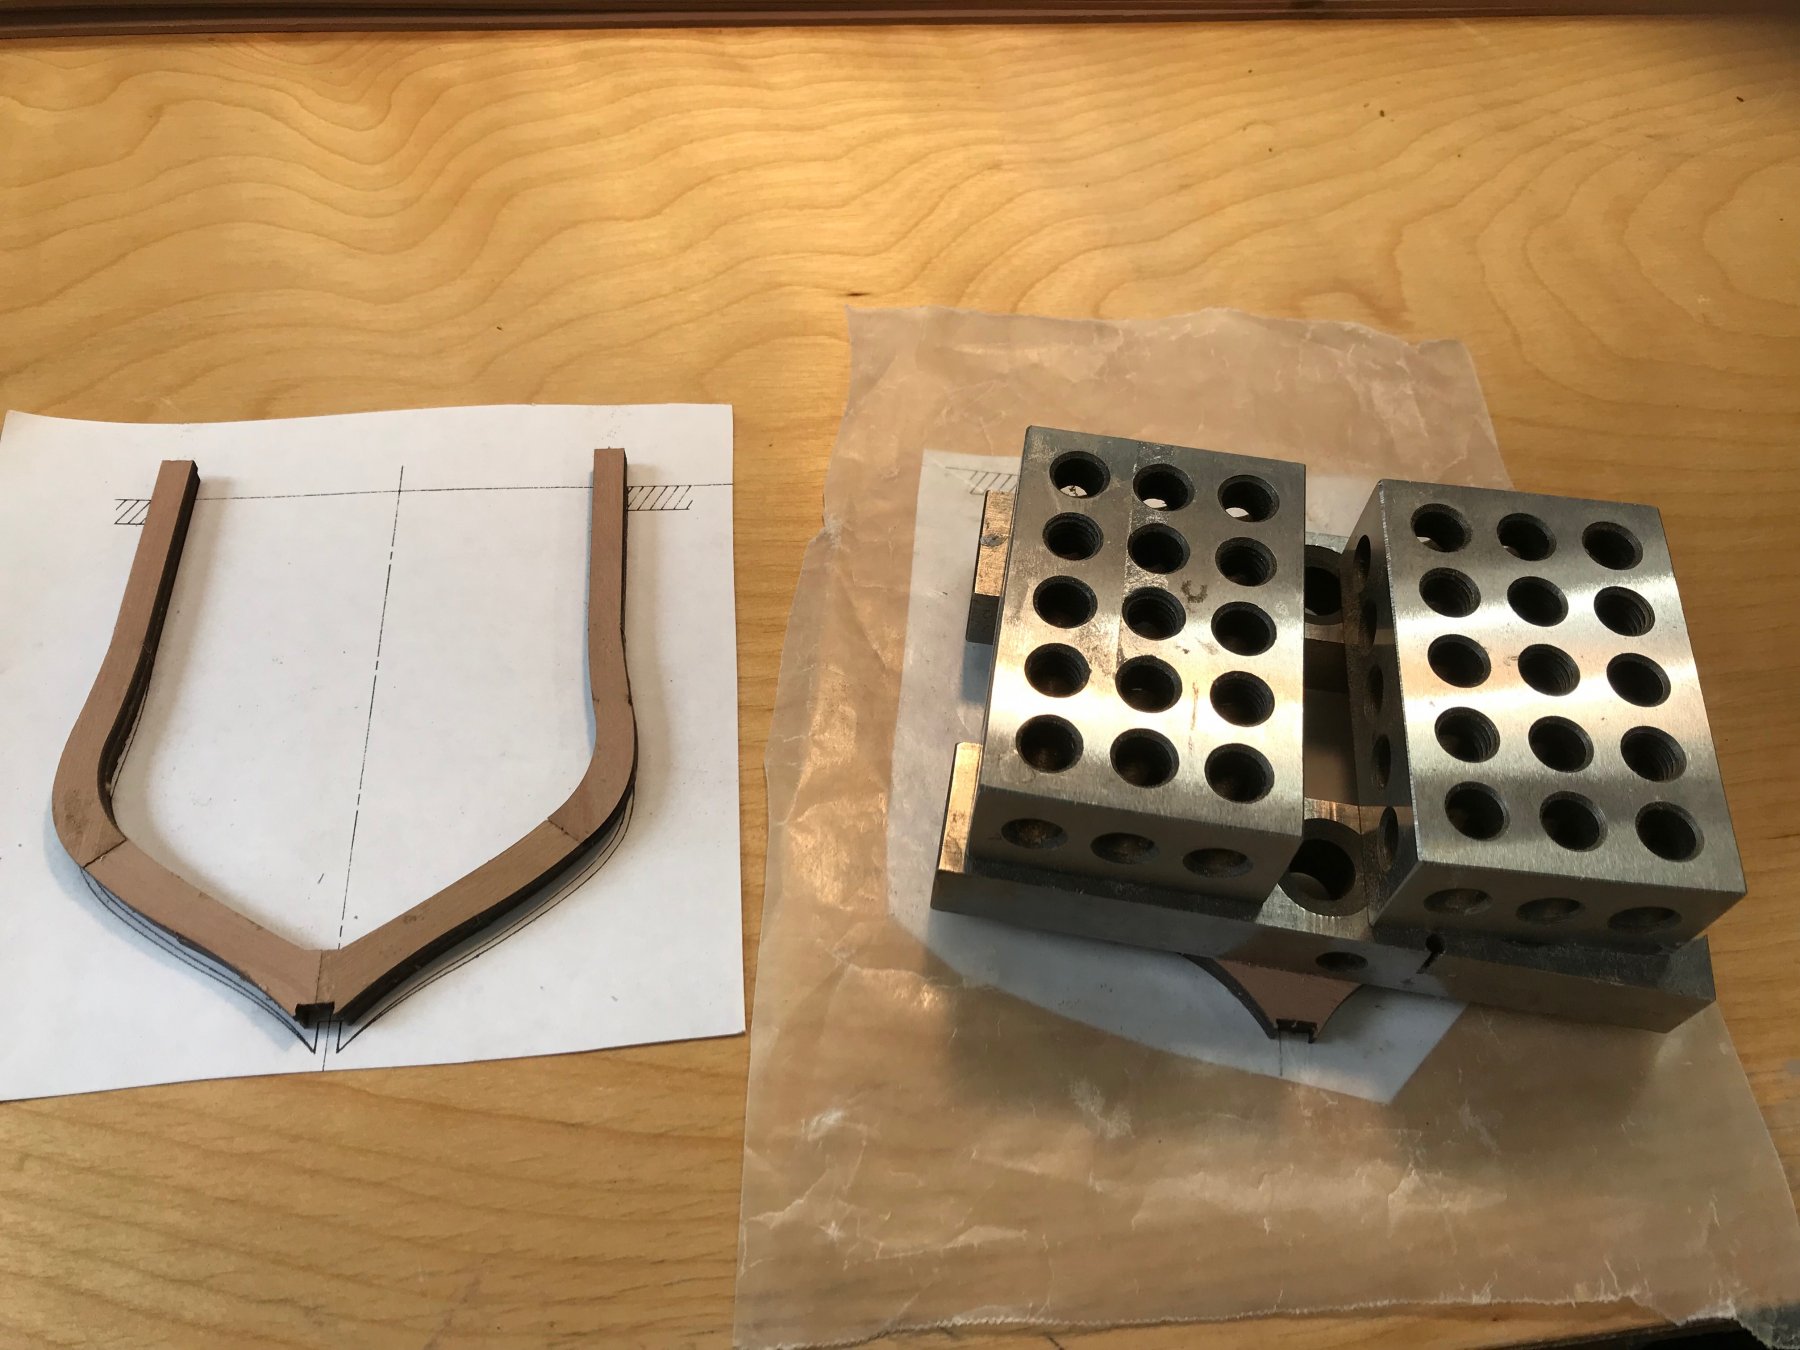
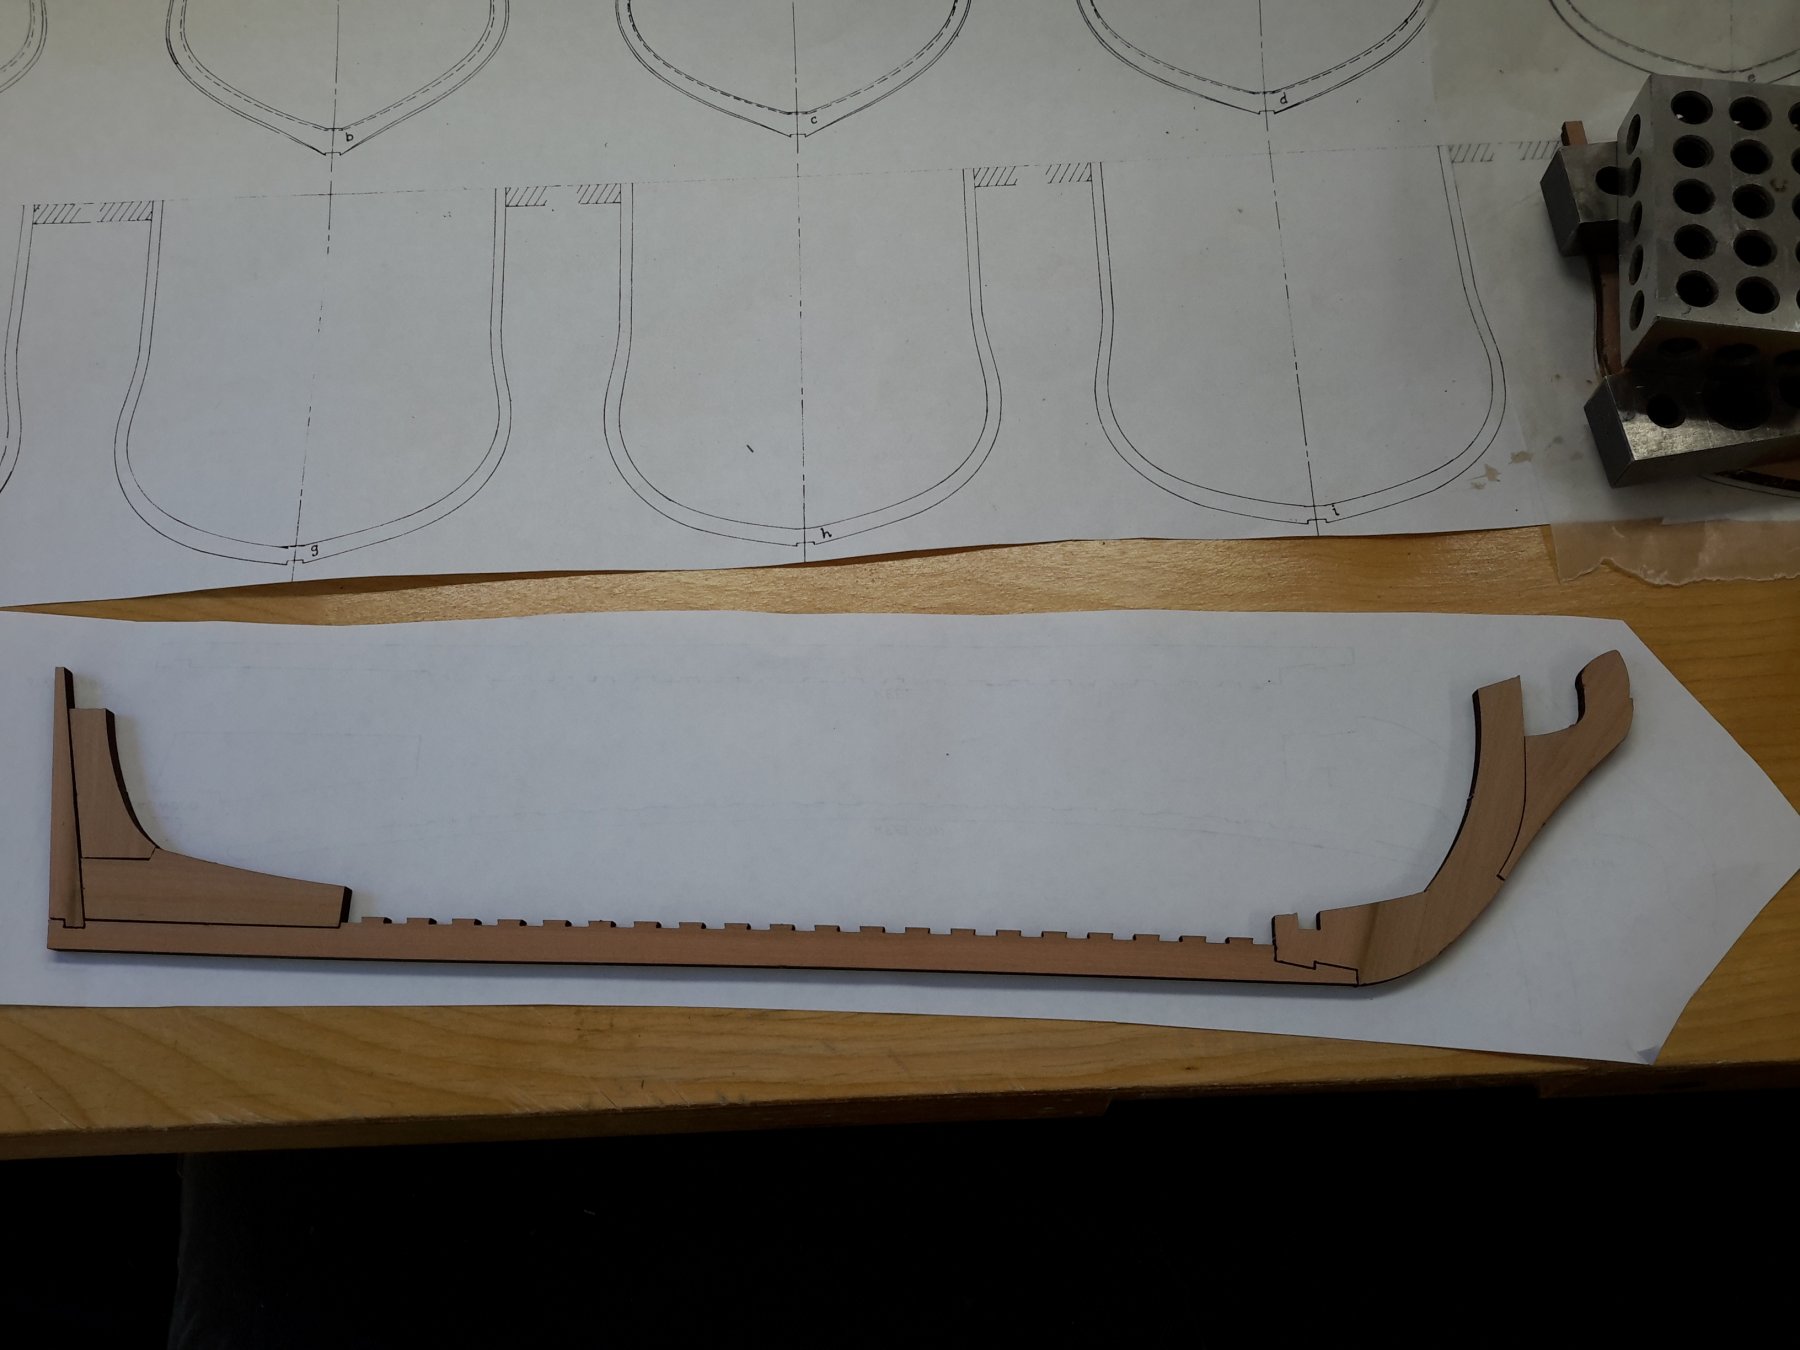
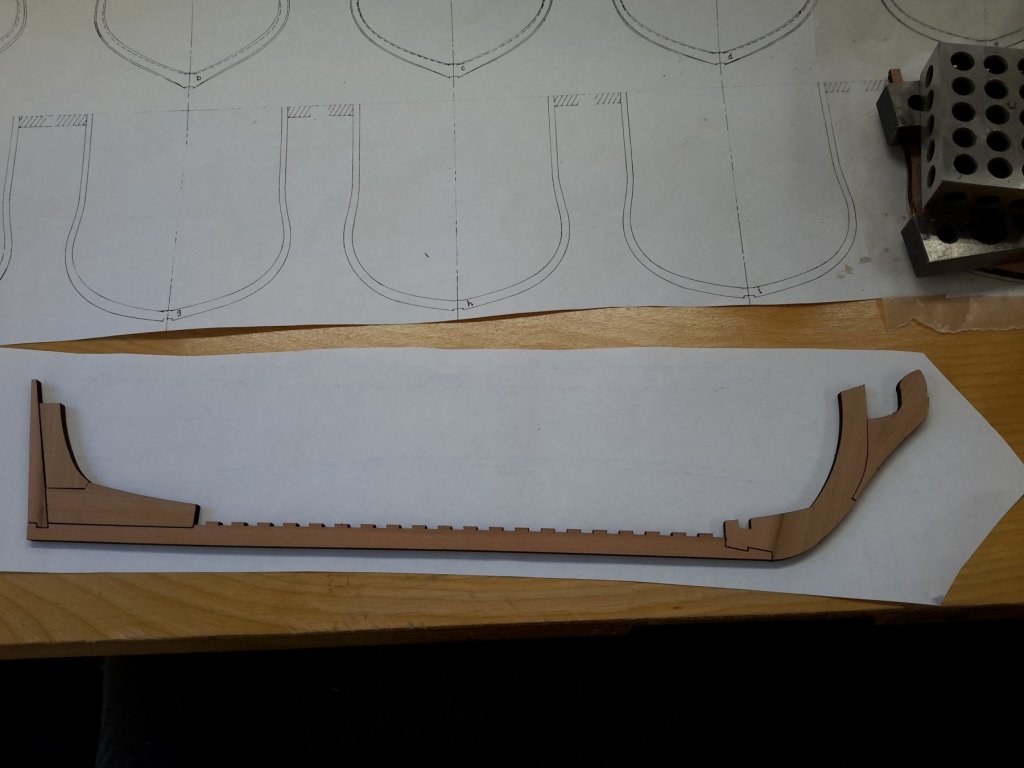
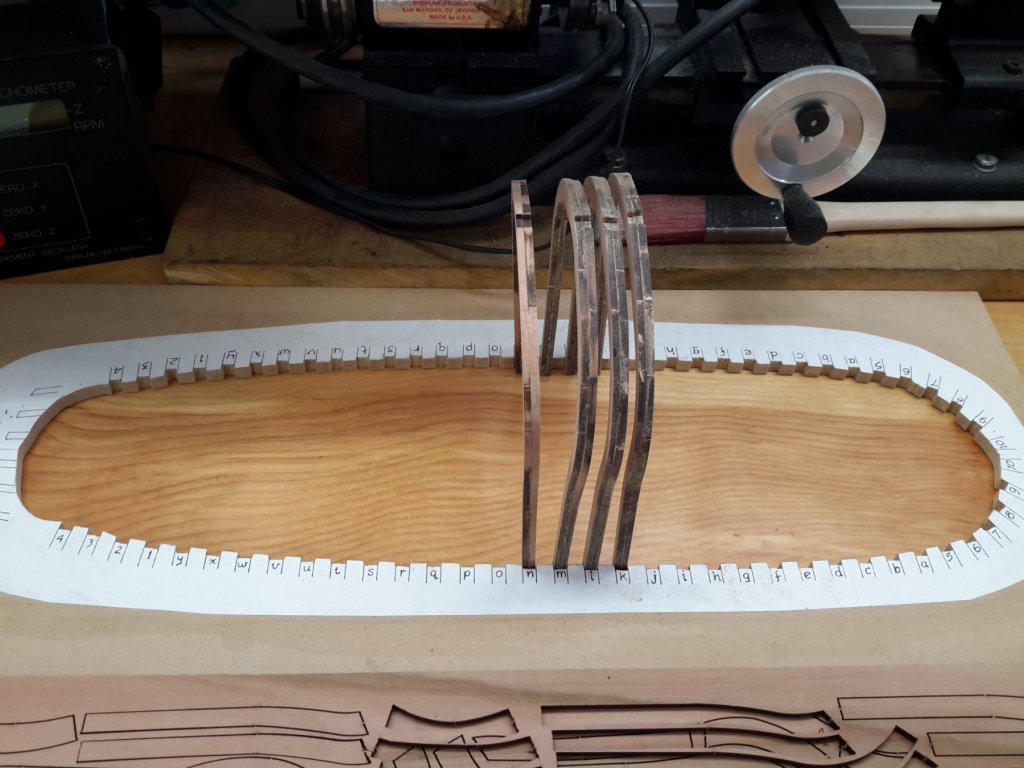
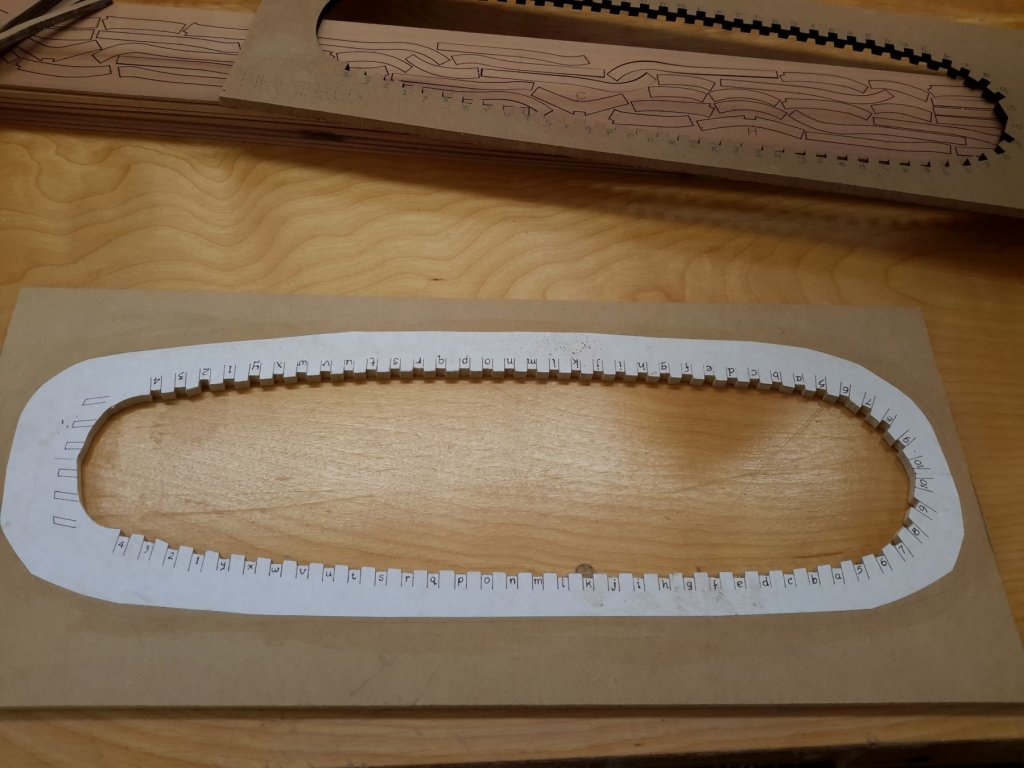
Not much new but I have the first 5 frames sitting in the jig with the keel set on it just to see how she looks. What I have been doing with the frames is assemble the 9 frame parts, then rubber cement the drawing to the frame and take it to the oscillating spindle sander and sand it to the lines with 150 grit. I love the spindle sander and it does the frames great. The build is going along great and I love the kit so far. This is going to be a great step toward my goal of scratch building a larger more complicated ship.
-
I measure 15 - 15/16".
-
Mark, I was surprised about the jig being off that much too. The other parts match the plans perfectly. As of right now I plan to use the kit guns. They look pretty nice and are well cast.
-
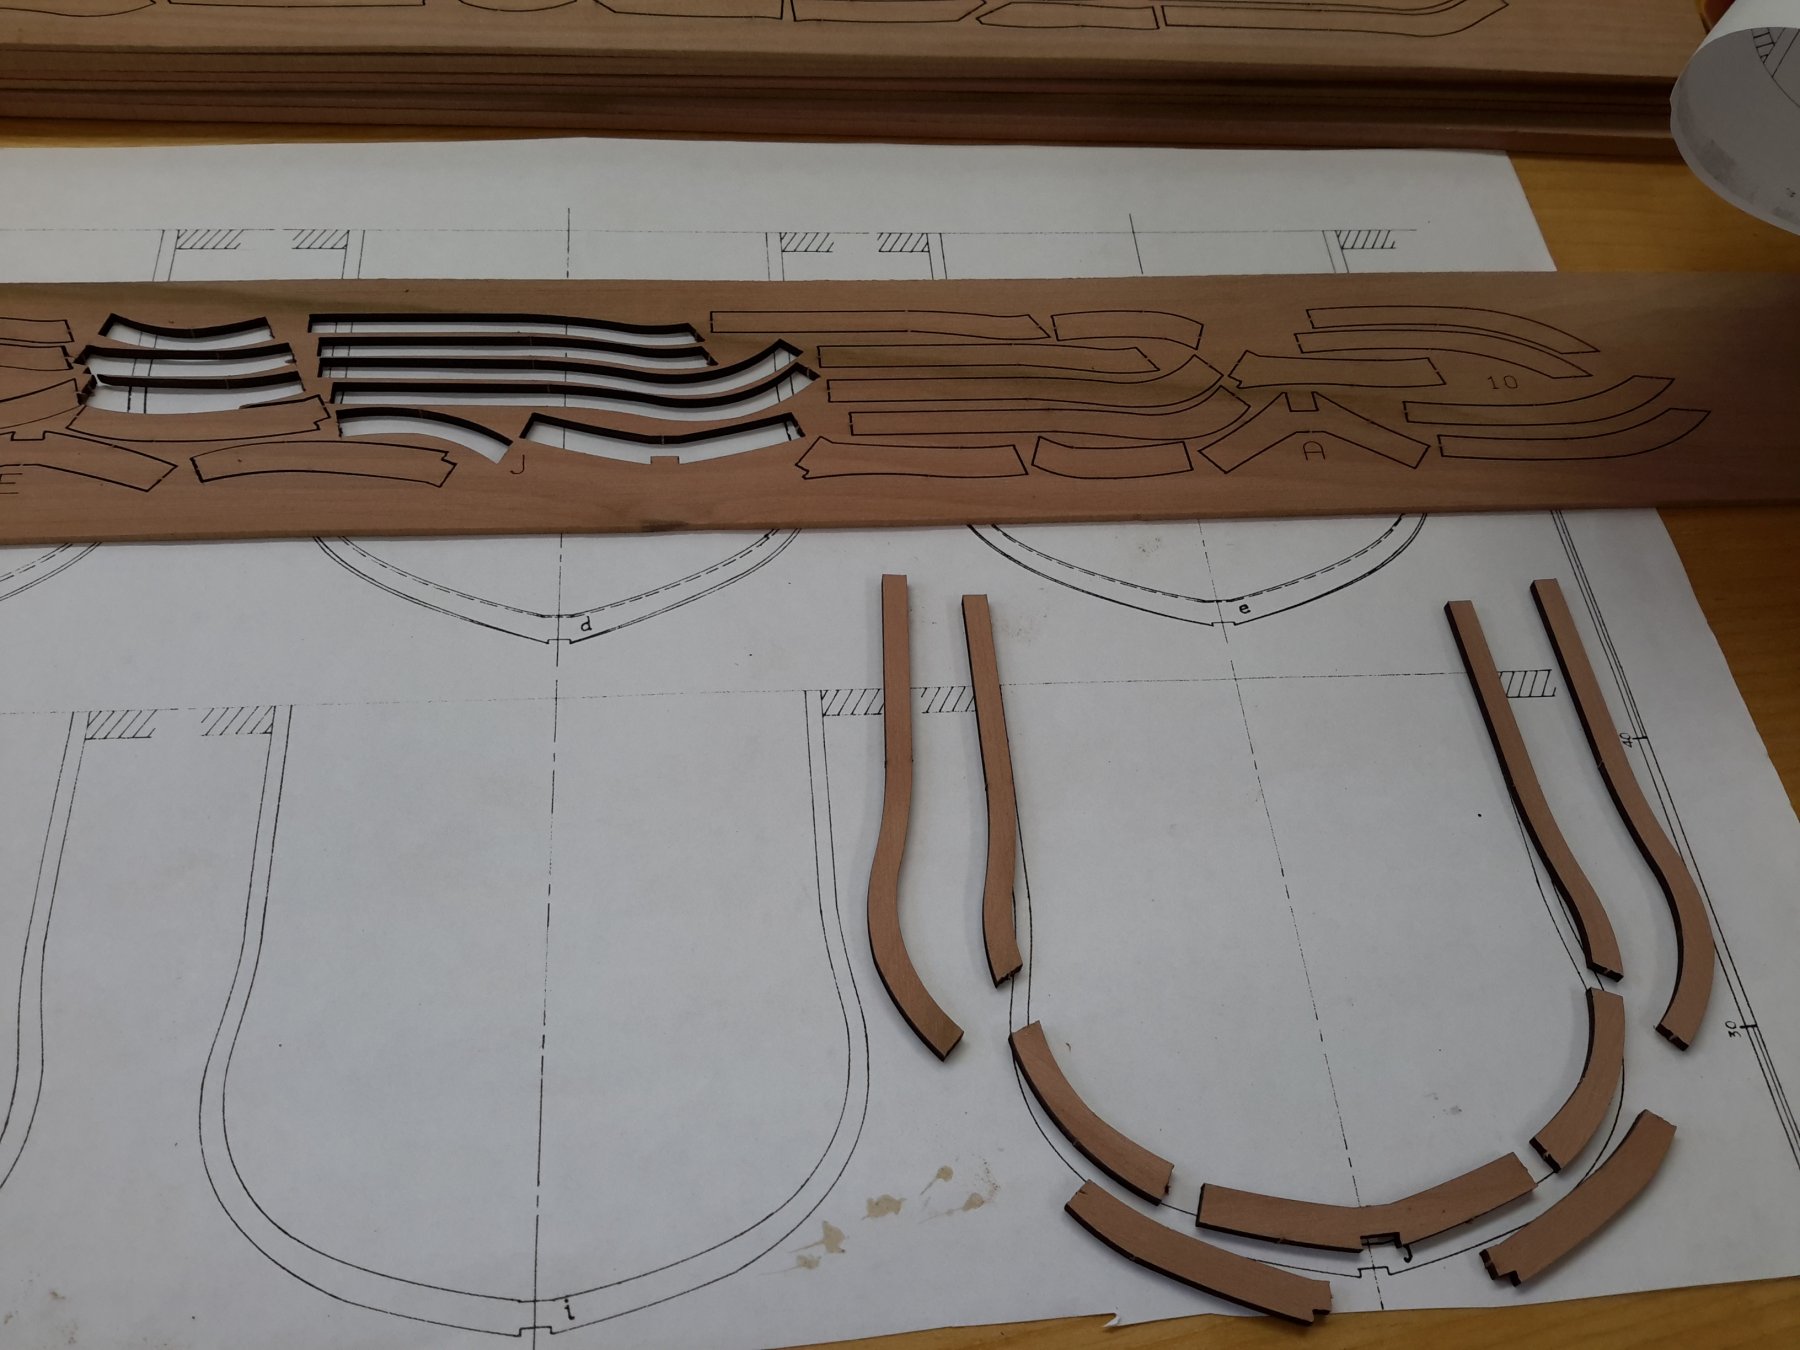
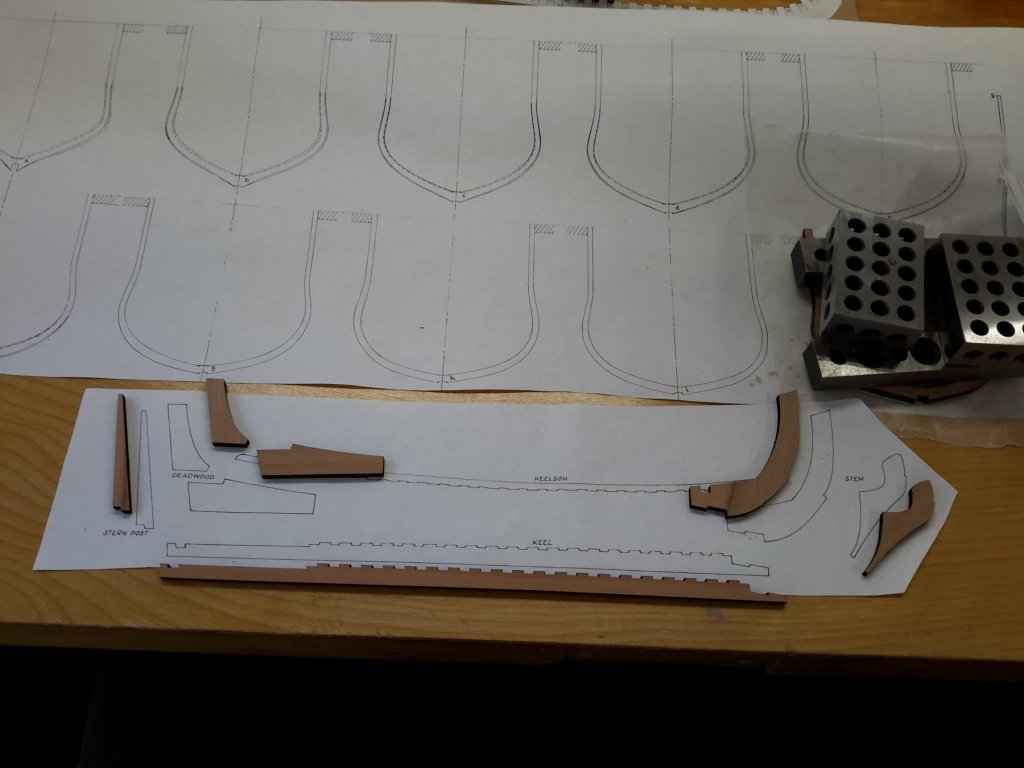
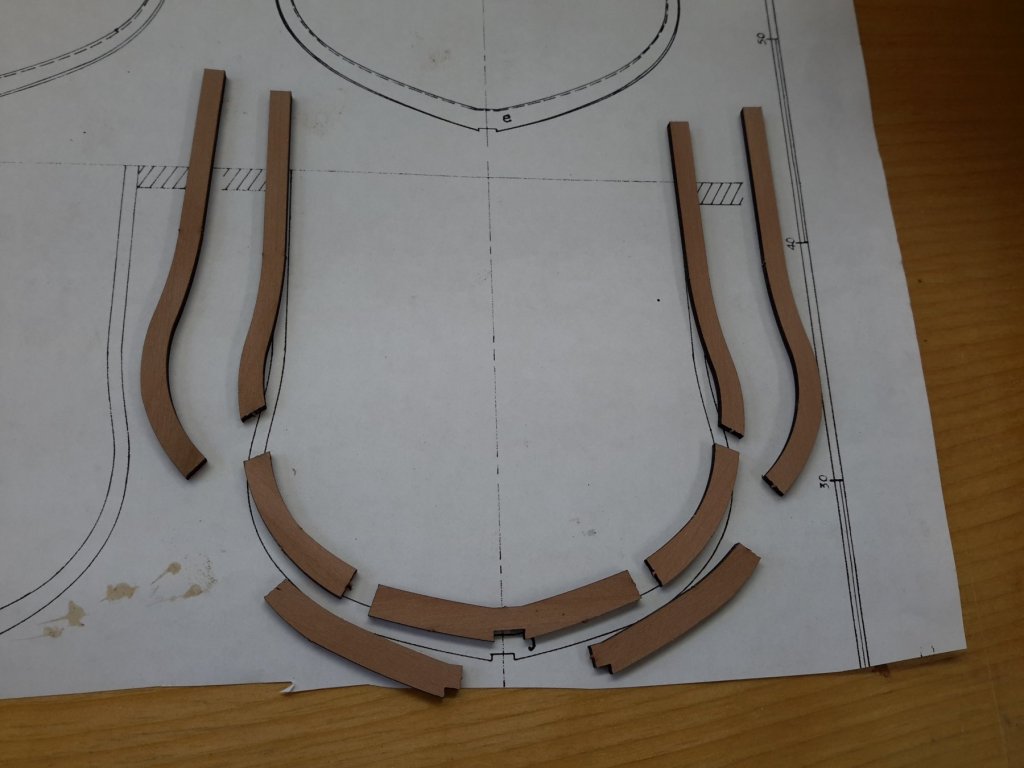
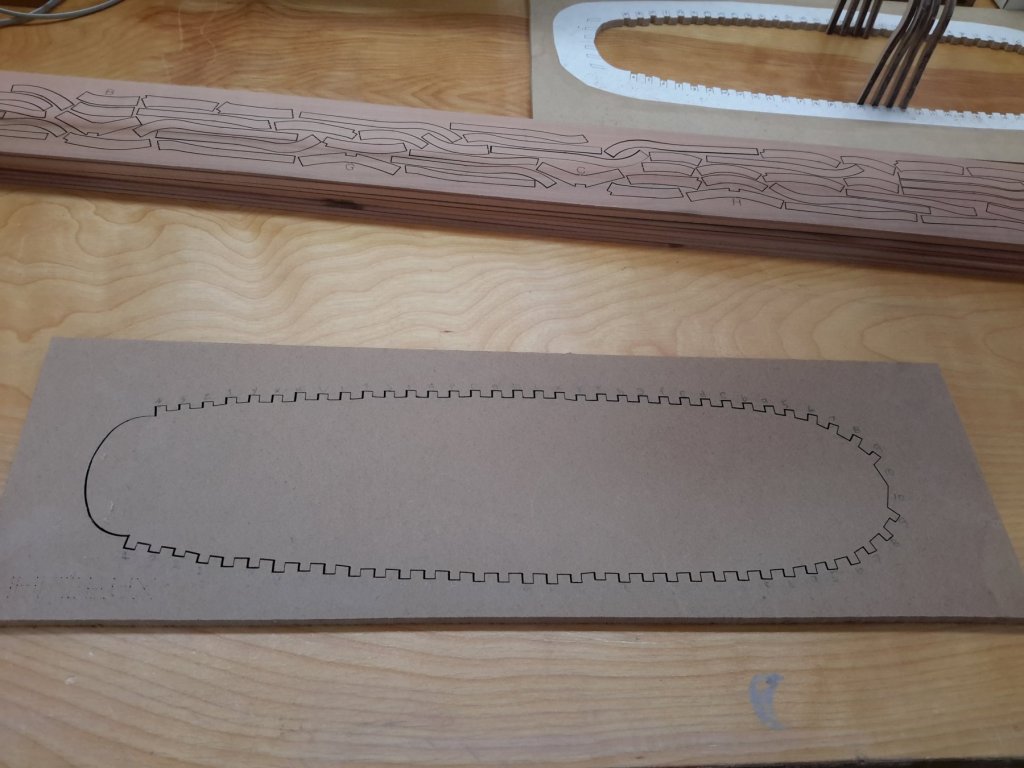
Here are the frame components. They are very accurate to the plans and fit together perfectly.
-
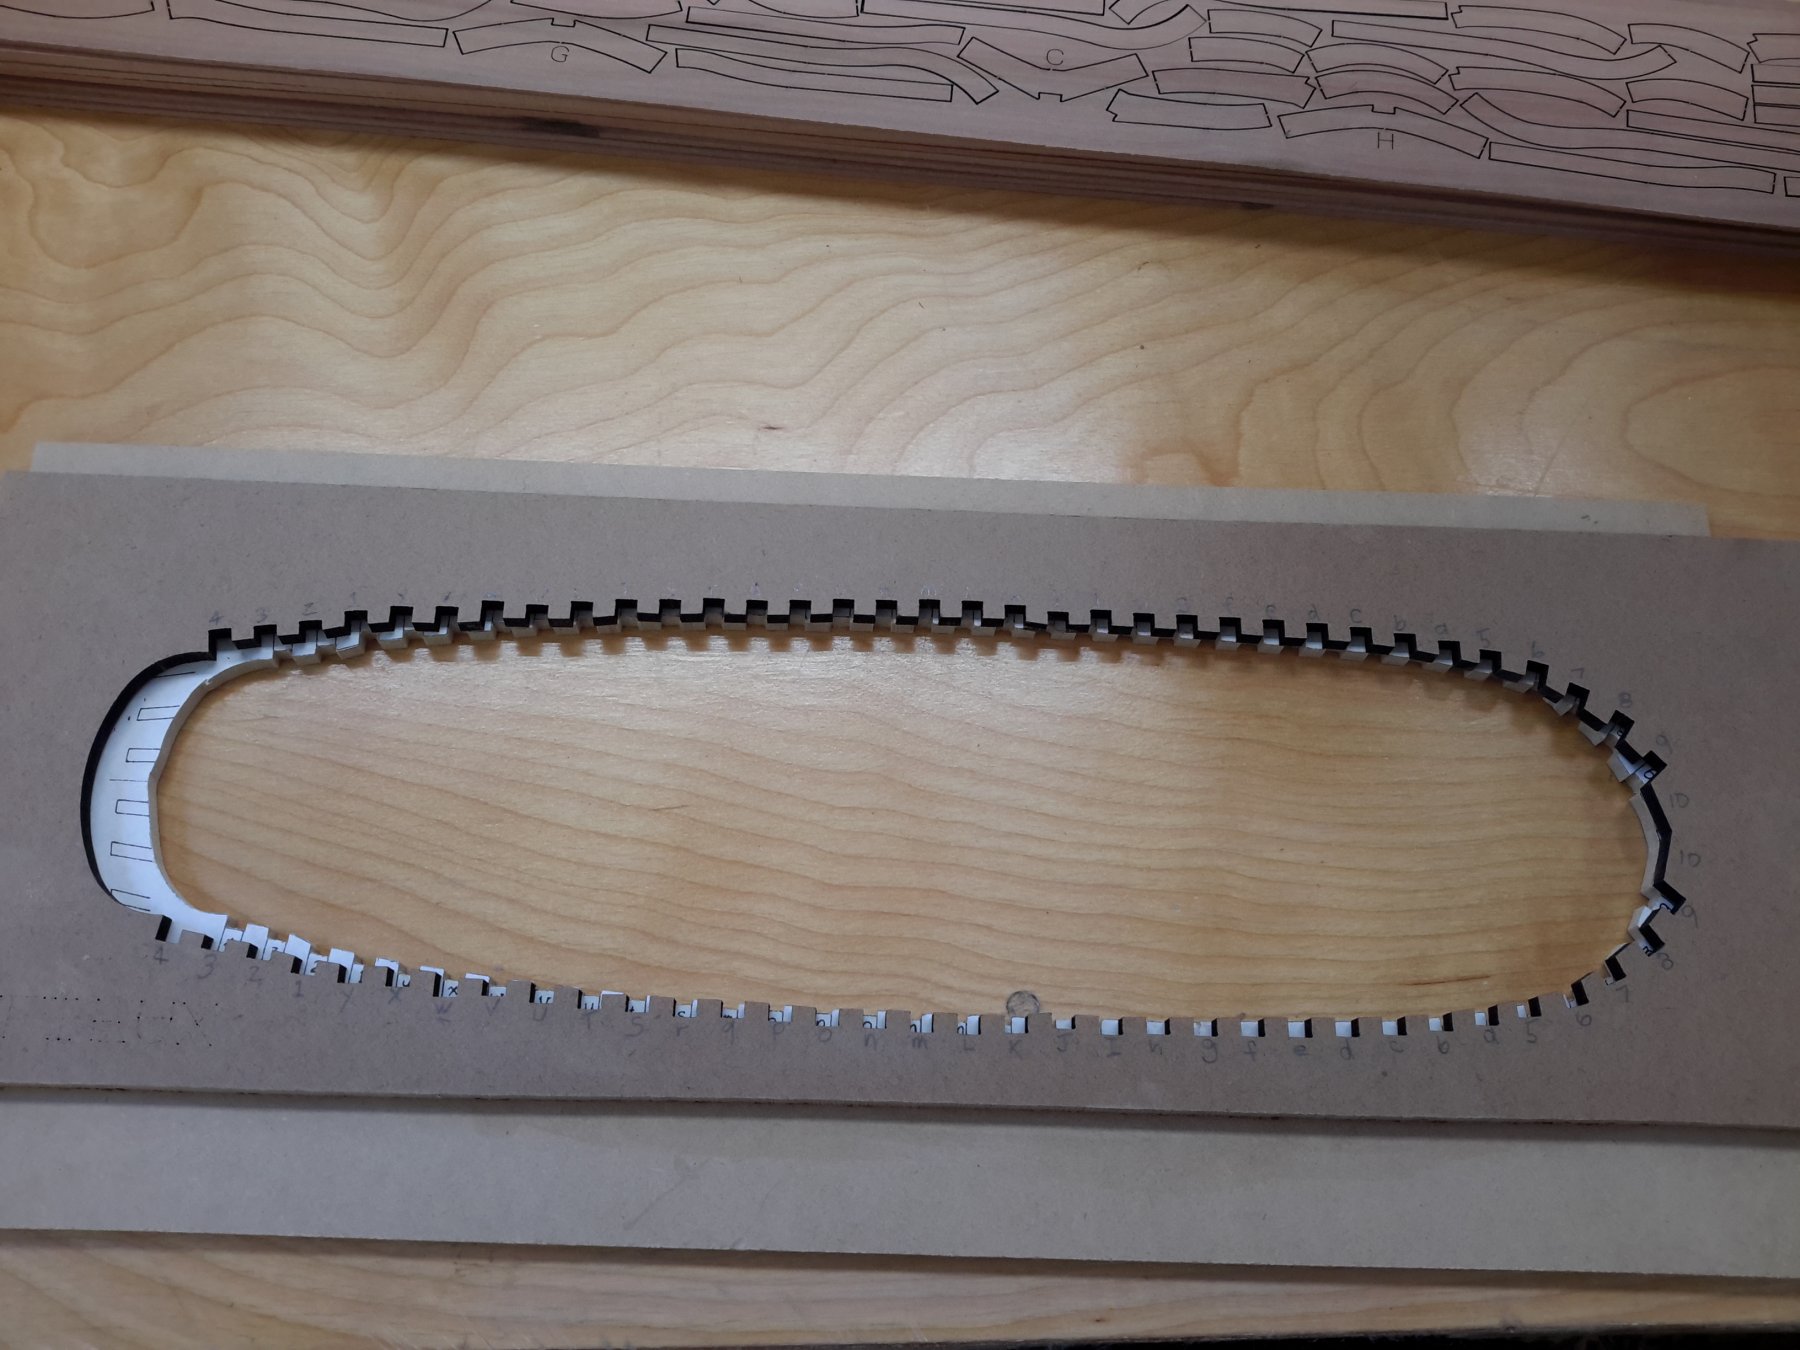
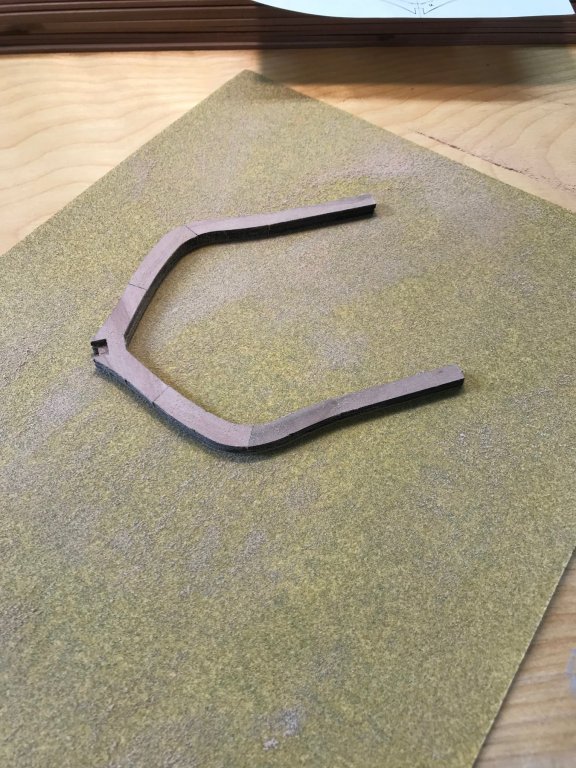
I started putting some frames together using the 9 parts for each frame and the plan sheet as a guide to make sure they keep to the correct dimensions. After I got a couple of frames together I sanded them to approximate thickness as Hahn shows in his book The Colonial Schooner 1763-1775. Then I tried setting them in the building jig and noticed they did not fit well. I compared the kit jig to the plans and found that it was off by a bit too much for me to be comfortable with. I headed off to the hardware store and bought a sheet of 1/4" MDX and rubber cemented the jig from the plan to it and cut out my own on the scroll saw. A couple of hours later I had a jig I was happy with.


-
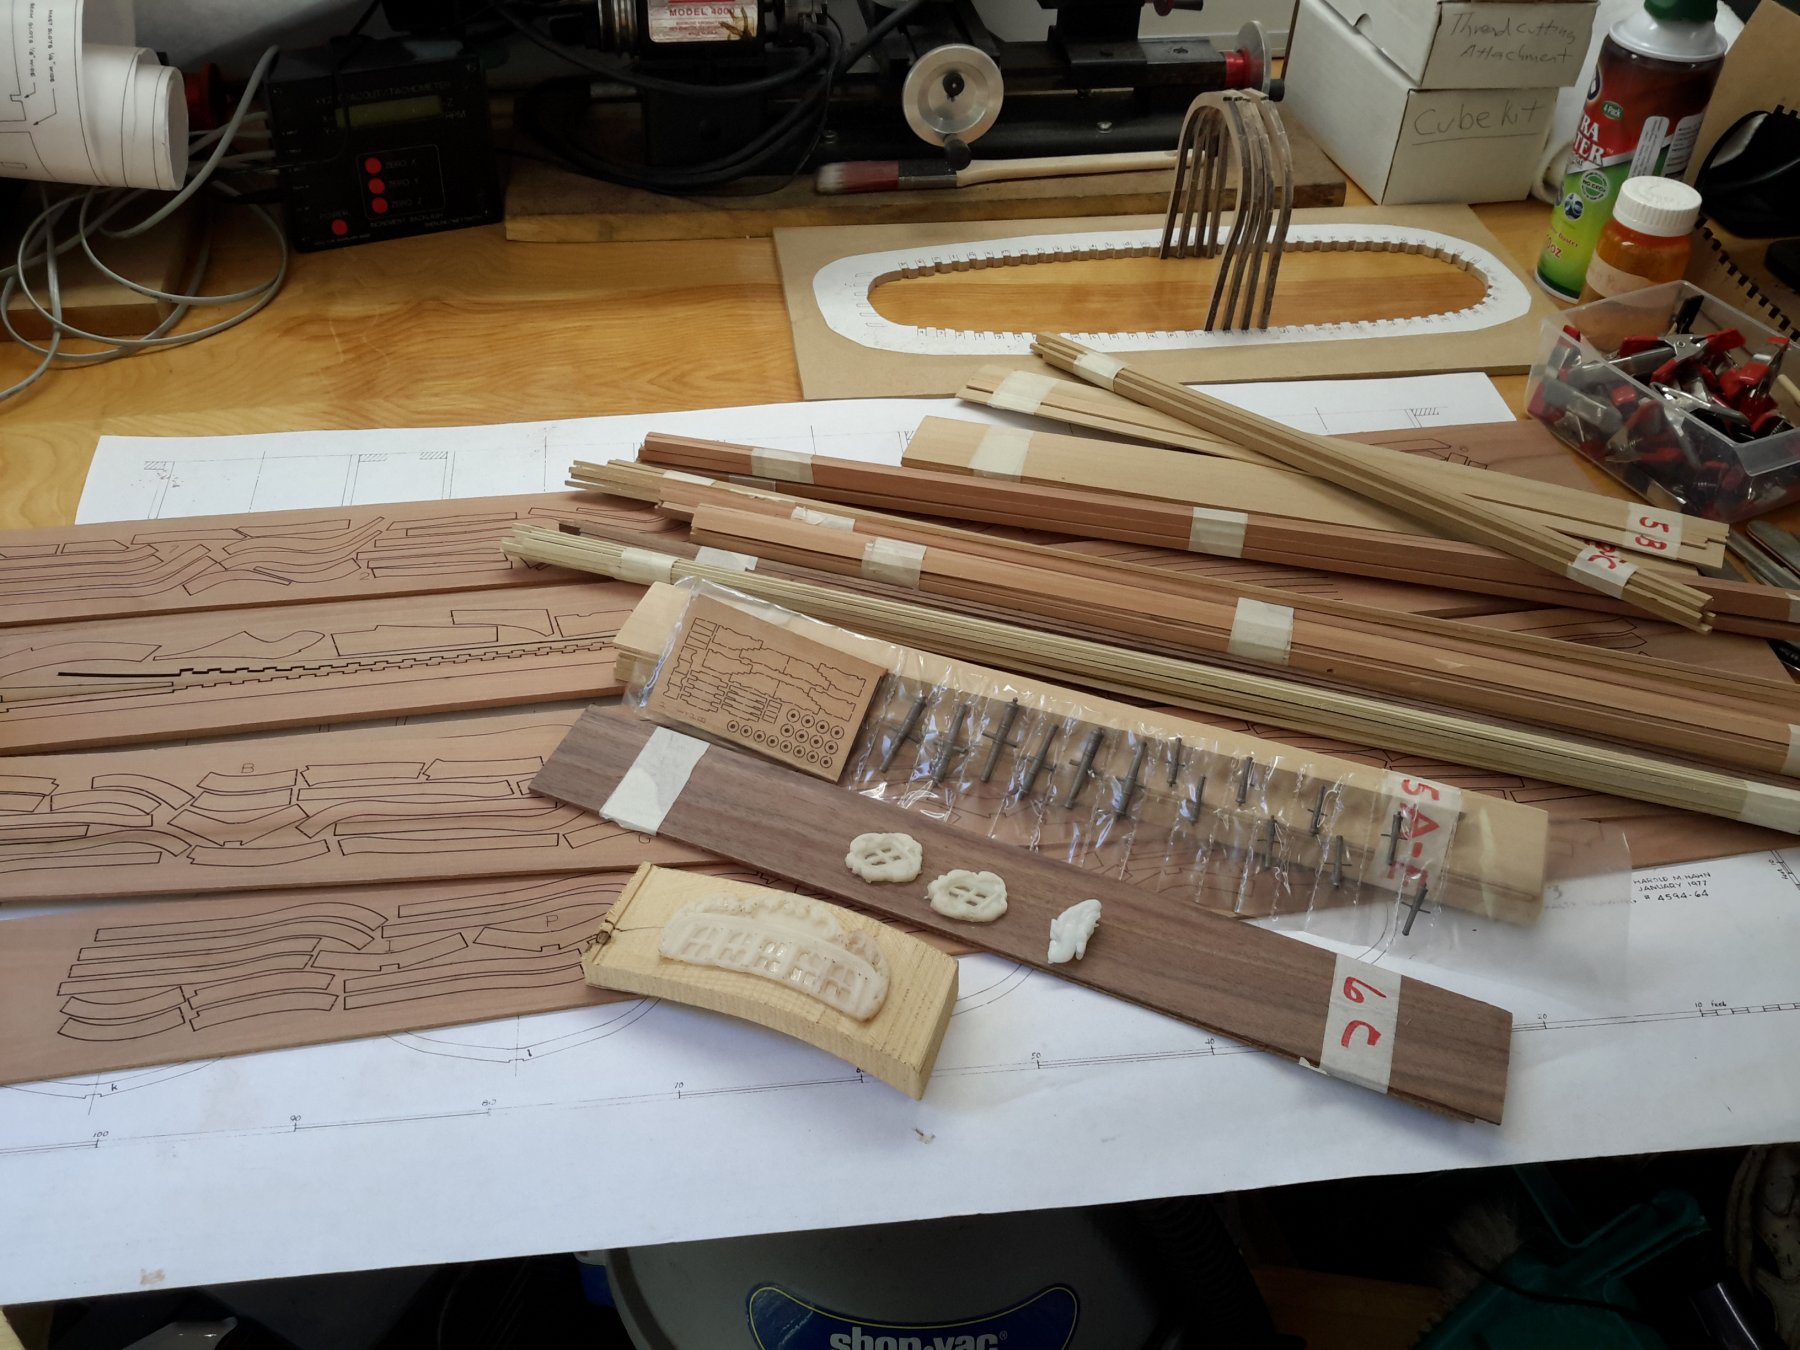
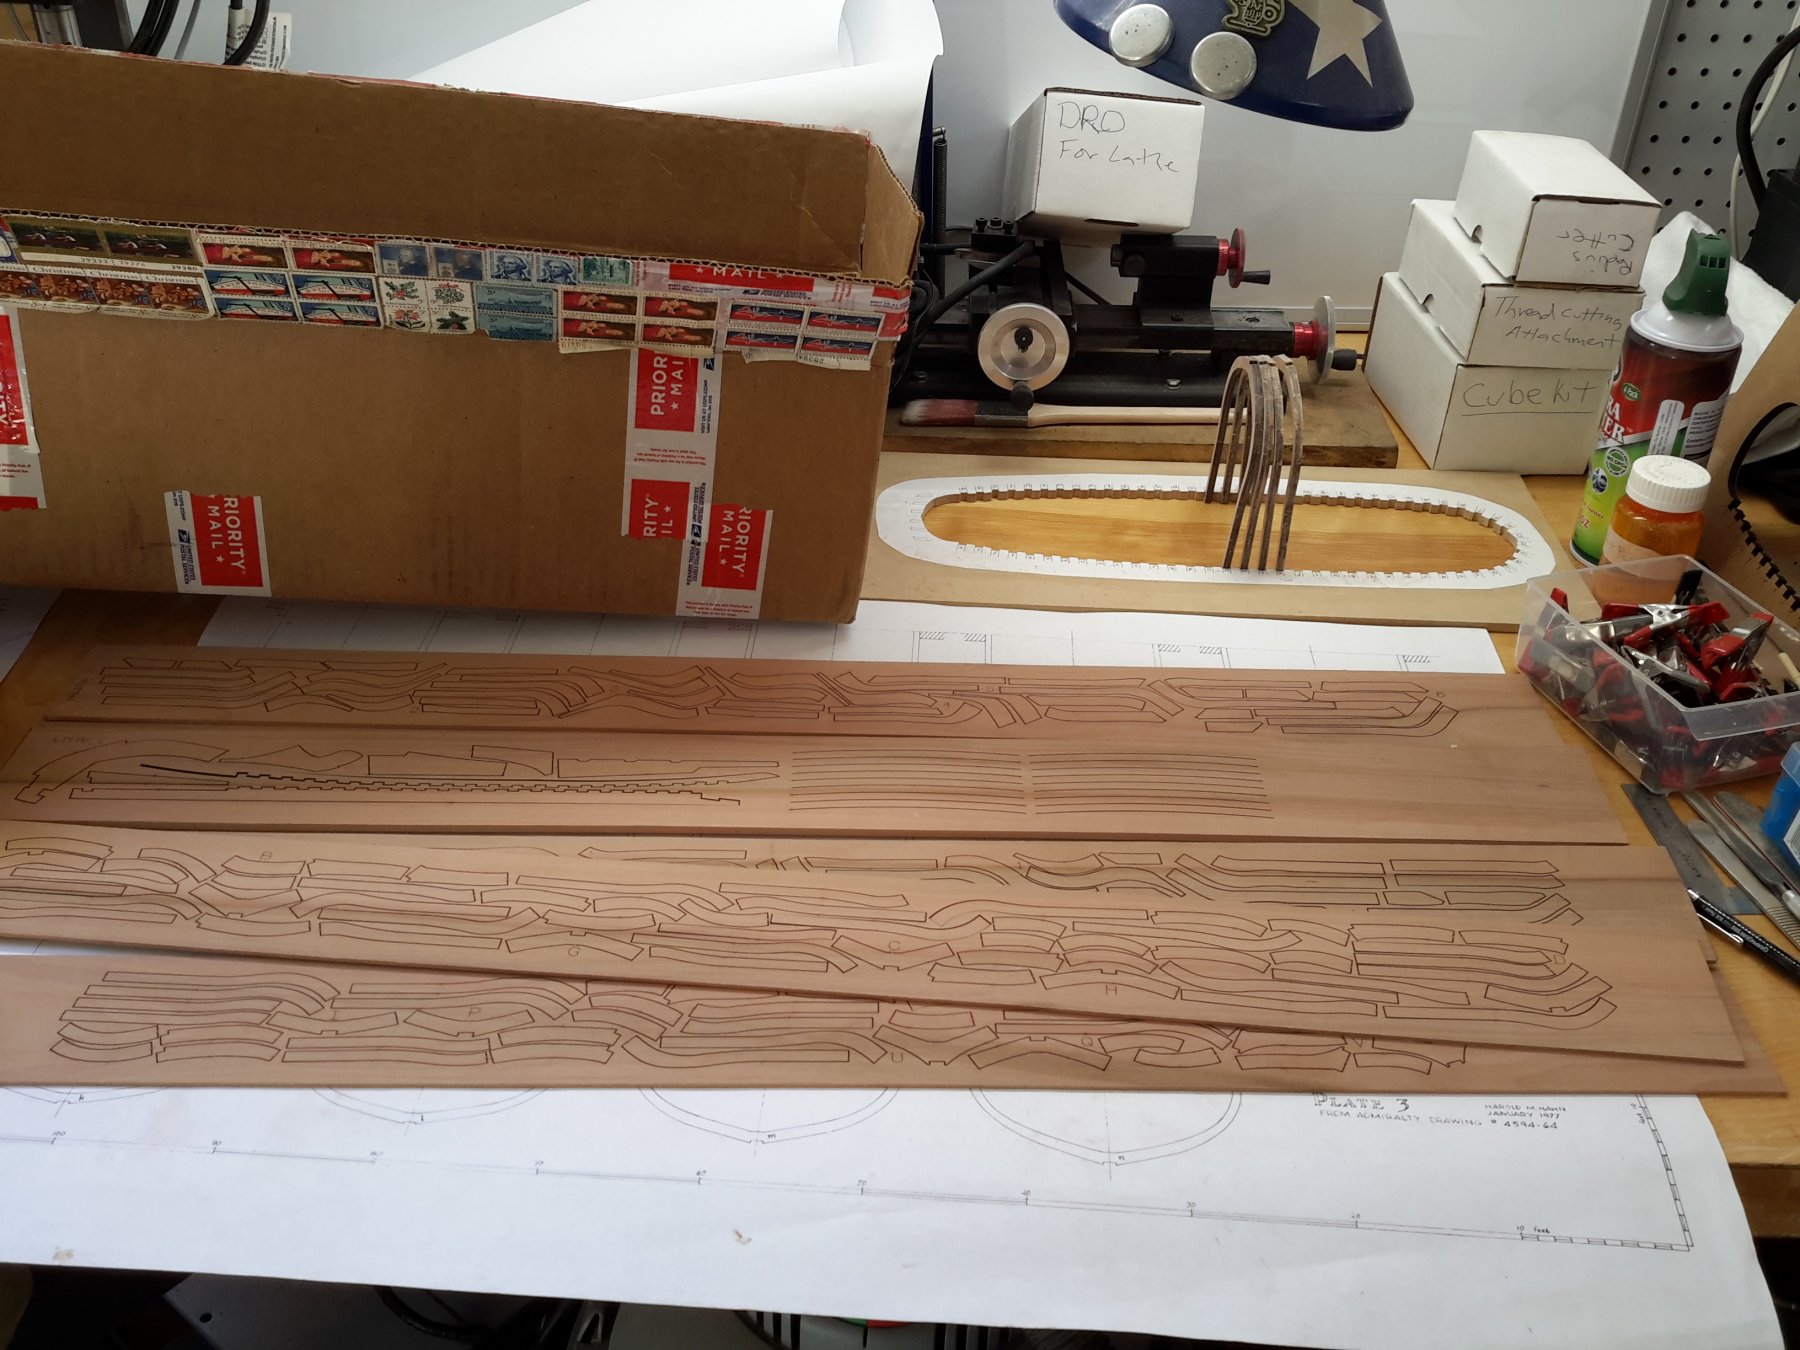
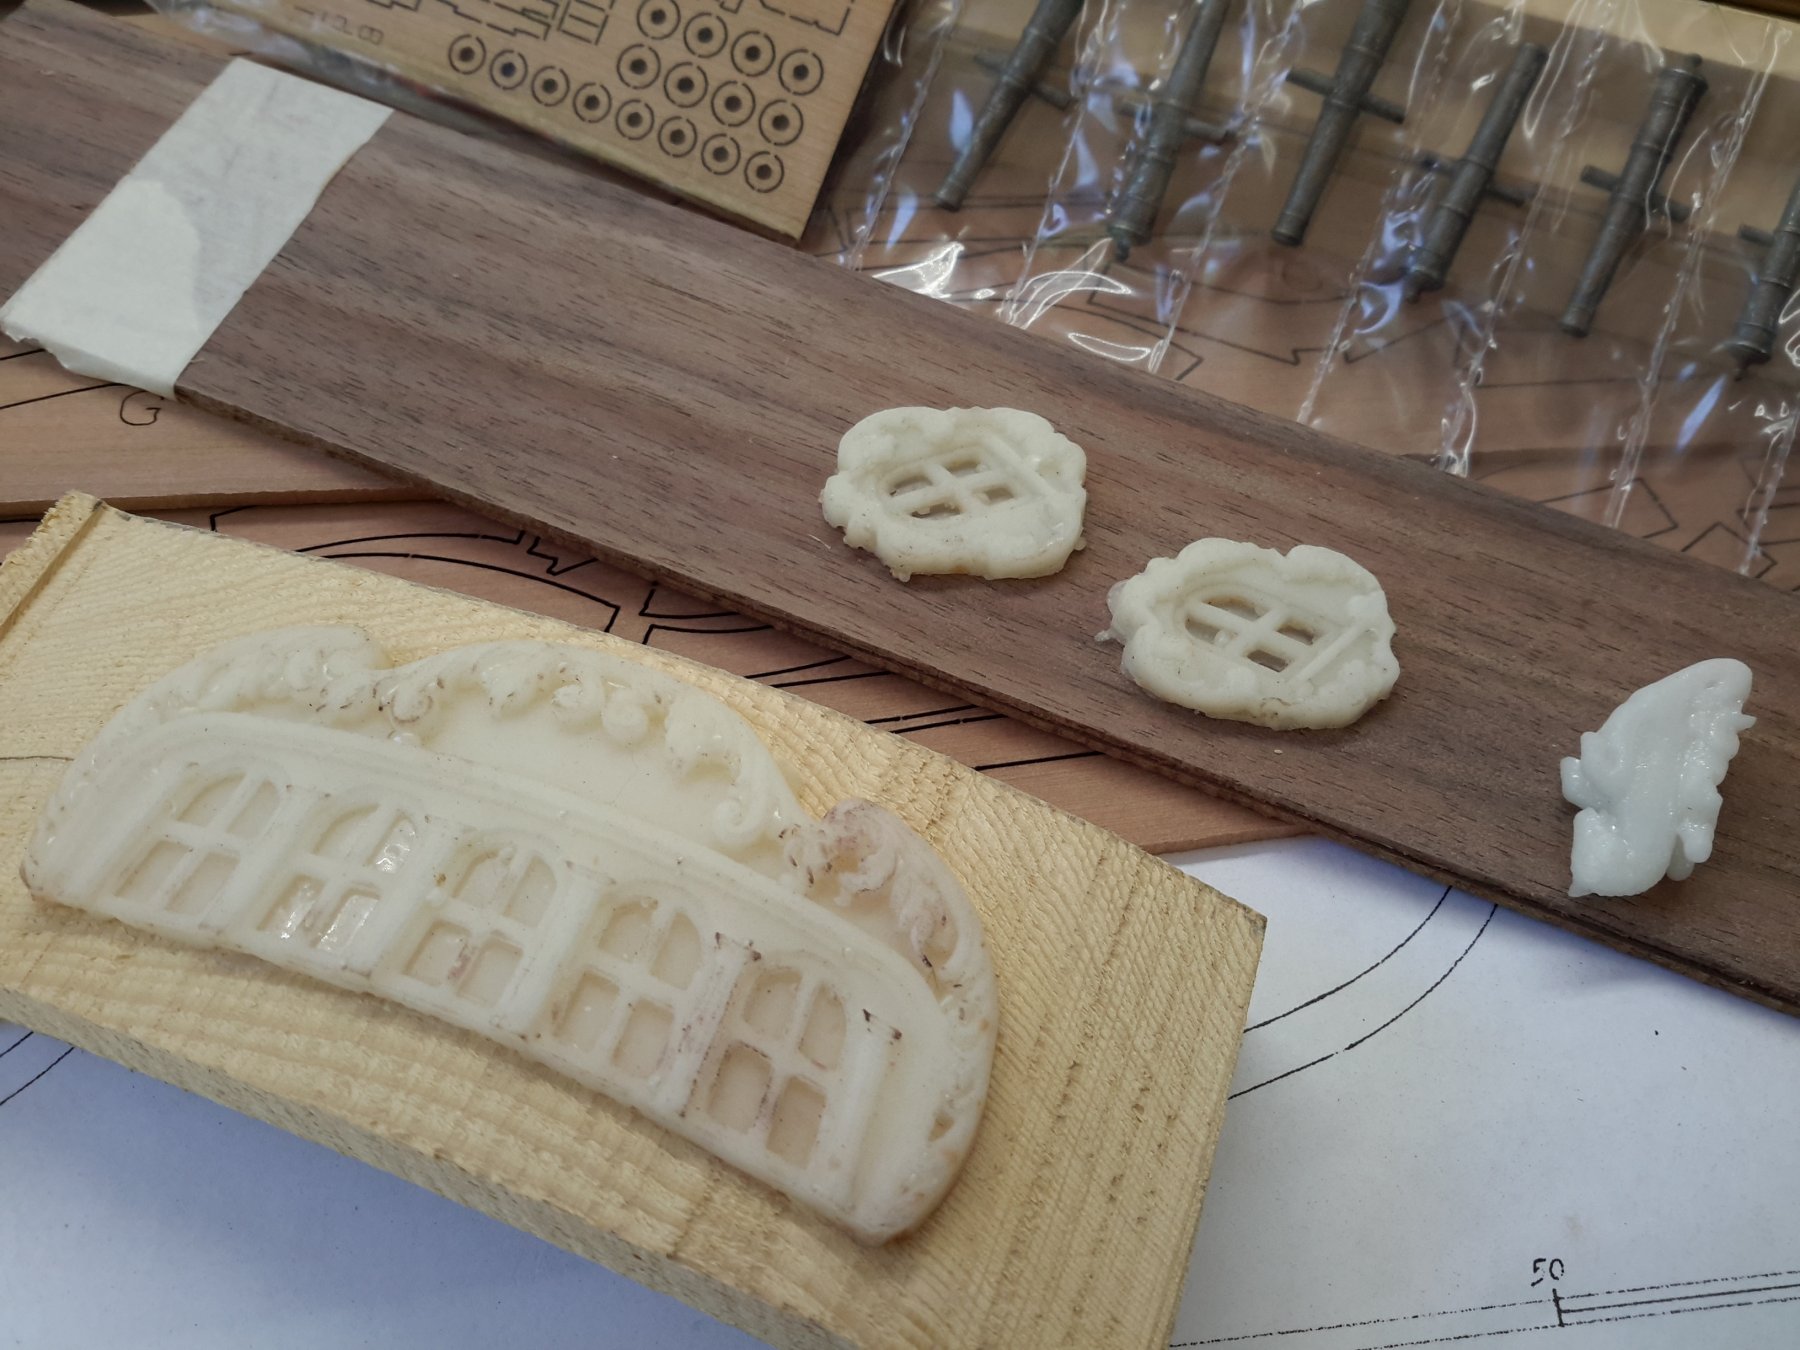
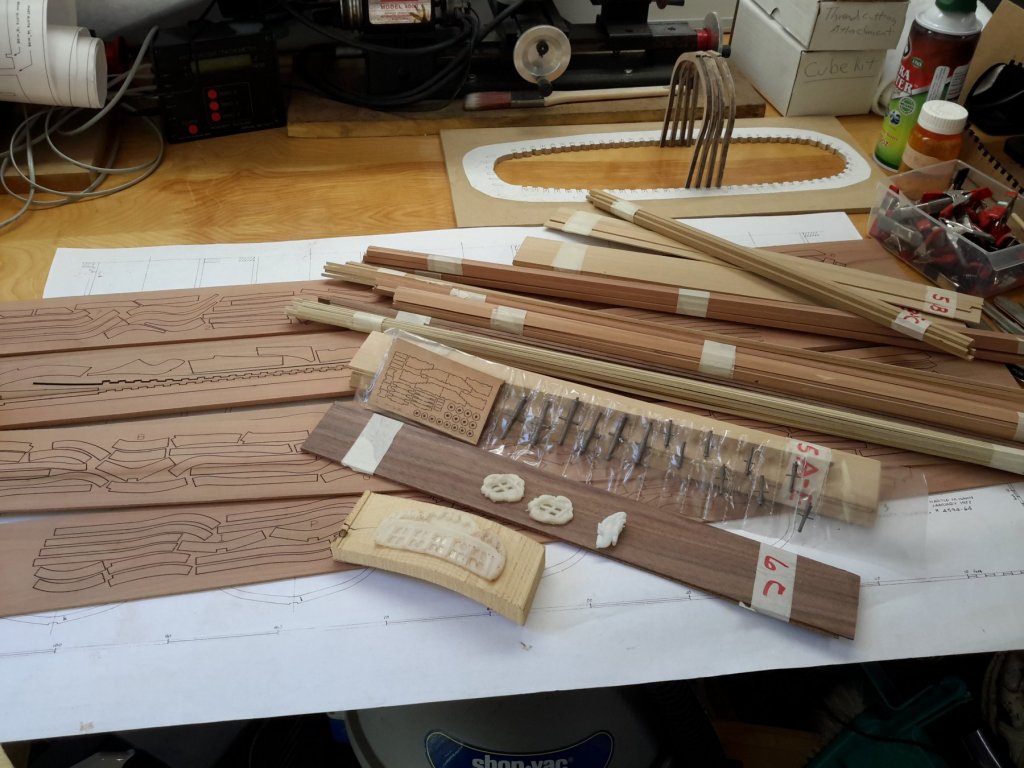
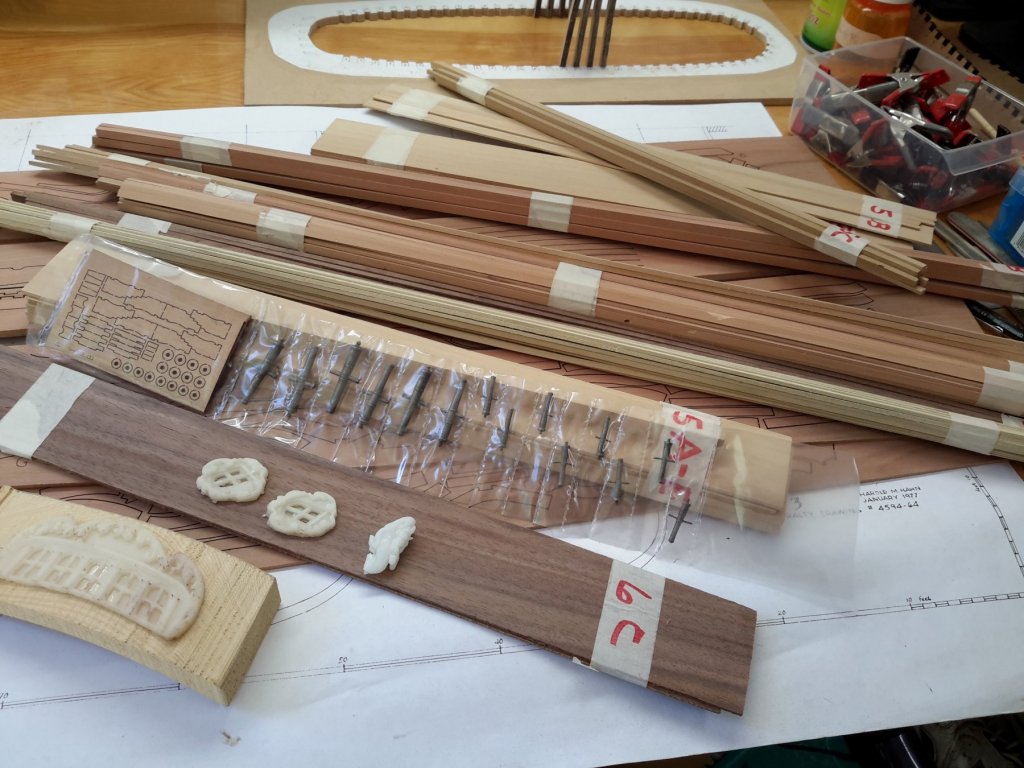
For years before ever became interested in ship modeling I have admired the photos I have seen of Harold Hahn''s ships. Years ago I was able to see some of his models in the Maritime Museum in Norfolk Virginia and the memory stuck with me. I think these little Colonial Schooners are beautiful ships. I bought a few of Mr. Hahns plans from his son and had planned on starting with the Hannah from scratch. Then I saw the build log of the beautiful Halifax build by rafine on this forum. Before that I didn't know there was any kind of kit available. I had to have one. Late last year I went ahead and purchased the kit with the laser cut frames in Swiss Pear. The kit looks really nice and the wood and laser cutting look really good. My plan is to build this while I continue on with my Glad Tidings Schooner. I will be updating that build log soon too. Here are some pictures of the kit parts.


-
Thank you, I will. Maybe this week I'll try something.
-
Thanks for the info Gaetan. I got a good deal a while ago on an Emesco dental engine and a big variety of burs but have not tried using it yet. Your beautiful work gives me insensitive to try it out.
-
I was also wondering about the tools you use to do that amazing carving. It's absolutely beautiful.
-
You sure can build a hull Bob. She looks great.
- 359 replies
-
- 5
-

-
- prince de neufchatel
- model shipways
- (and 1 more)
-
Thanks for posting this. I have this book on the shelf in line to read. Glad to know it's a good one.
-
You sir, do some amazing work.
-
From the Lumberyard you can get the HMS Halifax kit with laser cut frames. There are some great build logs here. I have the kit in pear and it's beautiful.
-
Nice work Mario. I hope your recovery from knee surgery goes well and your 100% soon. Having the model to work on should make it a little easier to deal with.
-
I'm not up on the technology but that is really incredible. I'm looking forward to seeing this progress to sea trials.
-
Laying out plans in a smaller workshop
alde replied to alde's topic in Modeling tools and Workshop Equipment
I do make copies and cut them up as I go. It's nice to have the profile and rigging plans to refer to though. I did think of something after I posted the question though. How about a painters easel with a magnetic board on it? That way it can easily be moved out of the way or folded up when not needed. -
I've been trying to come up with a way to lay out a plan sheet so I can refer to it while building. I thought about a magnetic white board or some foam board but don't have the wall space for it. Maybe something like a roll up map would work. What do you guys do? I wish I had the space for a drafting table in my shop but don't have near as much space as I would like. I have just been keeping the plans rolled and unroll them as I need to measure or get info from but that's a real hassle sometimes.
-
The barge is looking great. Your Confederacy is looking really nice too.
- 74 replies
-
- 2
-
-
- queen anne barge
- Syren Ship Model Company
- (and 1 more)
-
HMS Naiad 1797 by albert - FINISHED - 1/48
alde replied to albert's topic in - Build logs for subjects built 1751 - 1800
Your ship is absolutely incredible and beautiful. A true inspiration. -
A test comparison would be interesting to see. I’m not familiar with beech and just how light it is.
- 574 replies
-
- 1
-
-
- cheerful
- Syren Ship Model Company
- (and 1 more)
-
Your Cheerful looks great. I agree about the boxwood planking being left natural. It’s a nice look for a ship like this. As far as the decks goes the beech might be too light but wouldn’t some contrast with the hull look better?
- 574 replies
-
- 3
-
-
- cheerful
- Syren Ship Model Company
- (and 1 more)