Search the Community
Showing results for tags 'finished'.
-
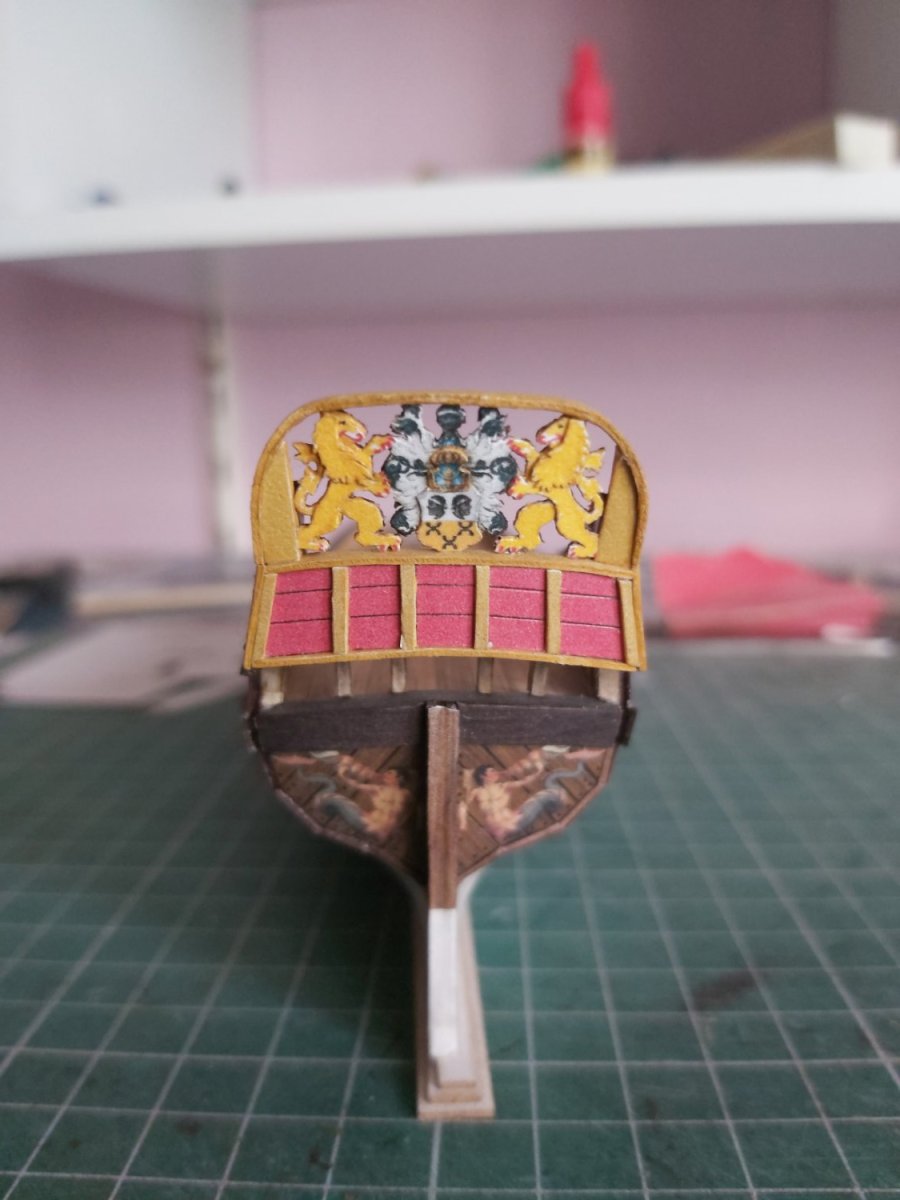
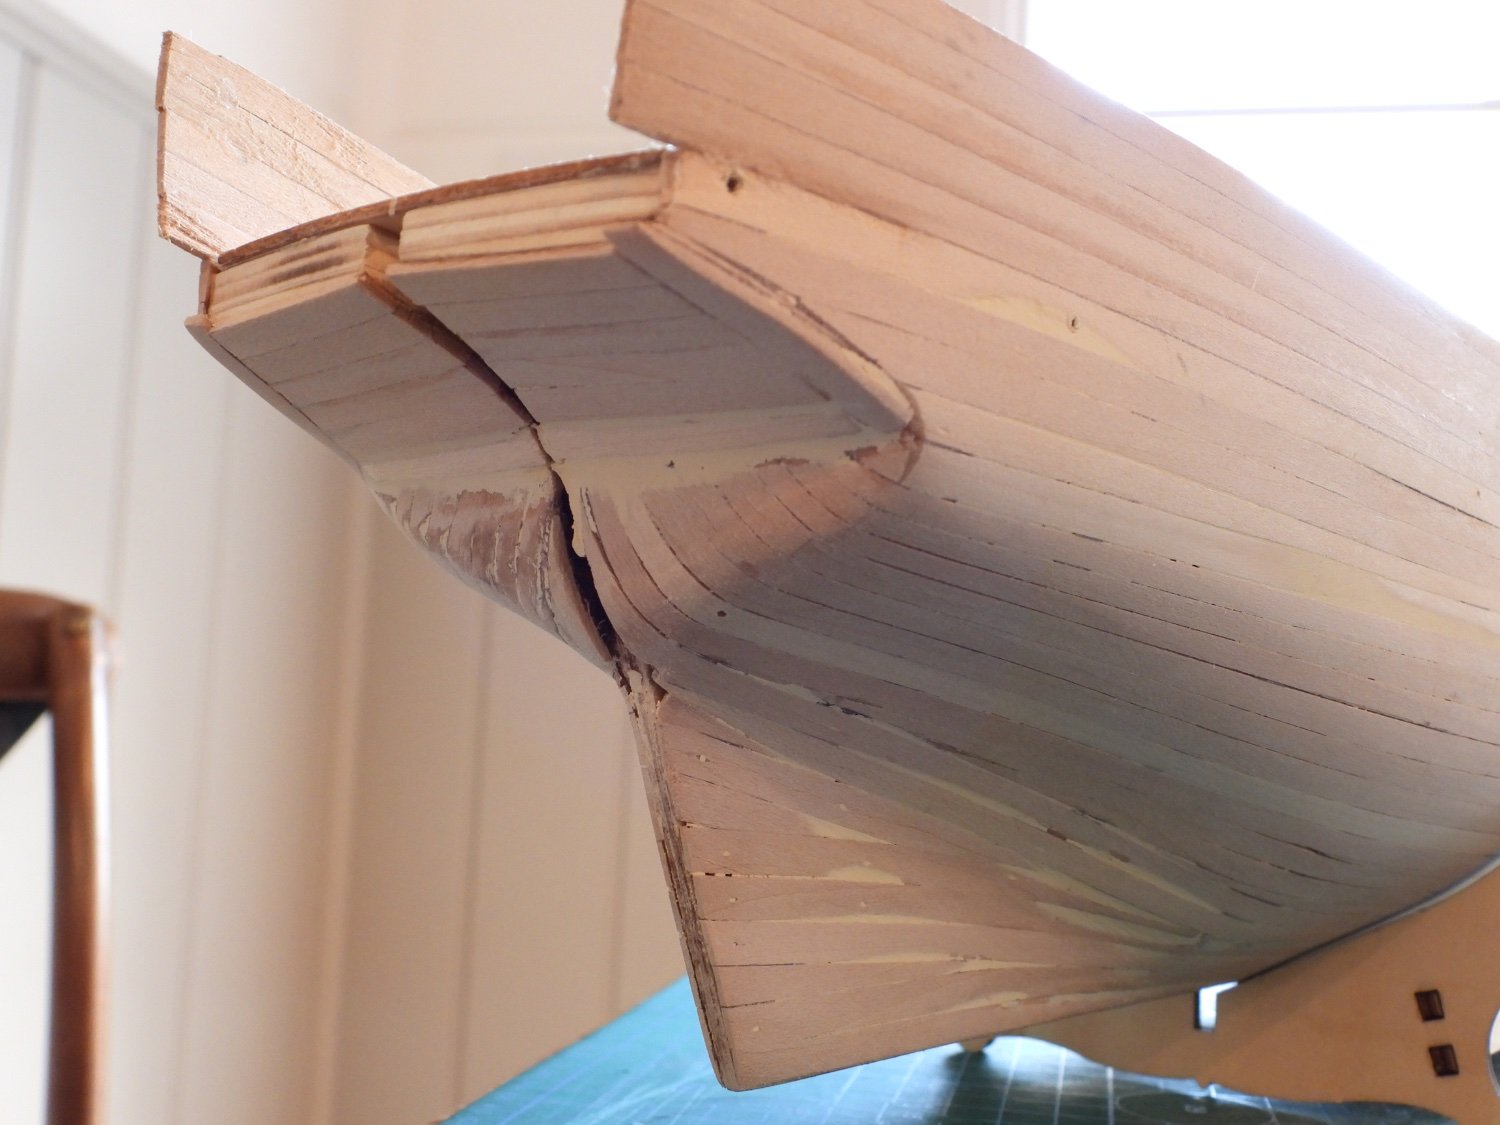
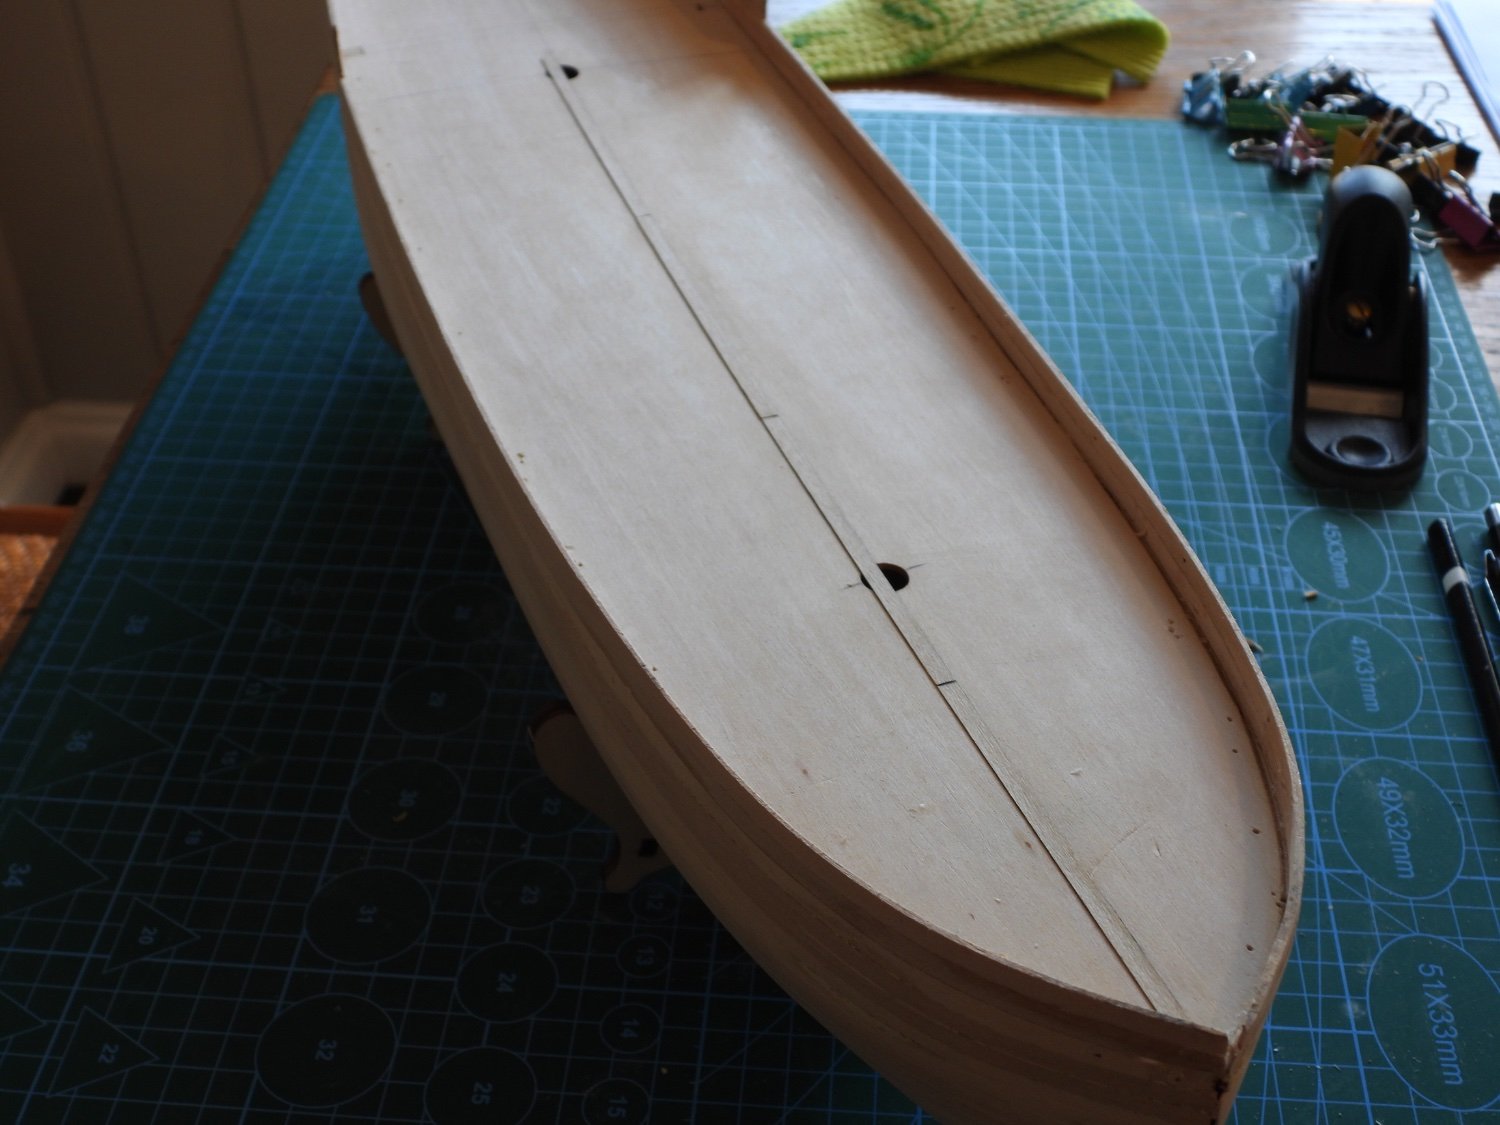
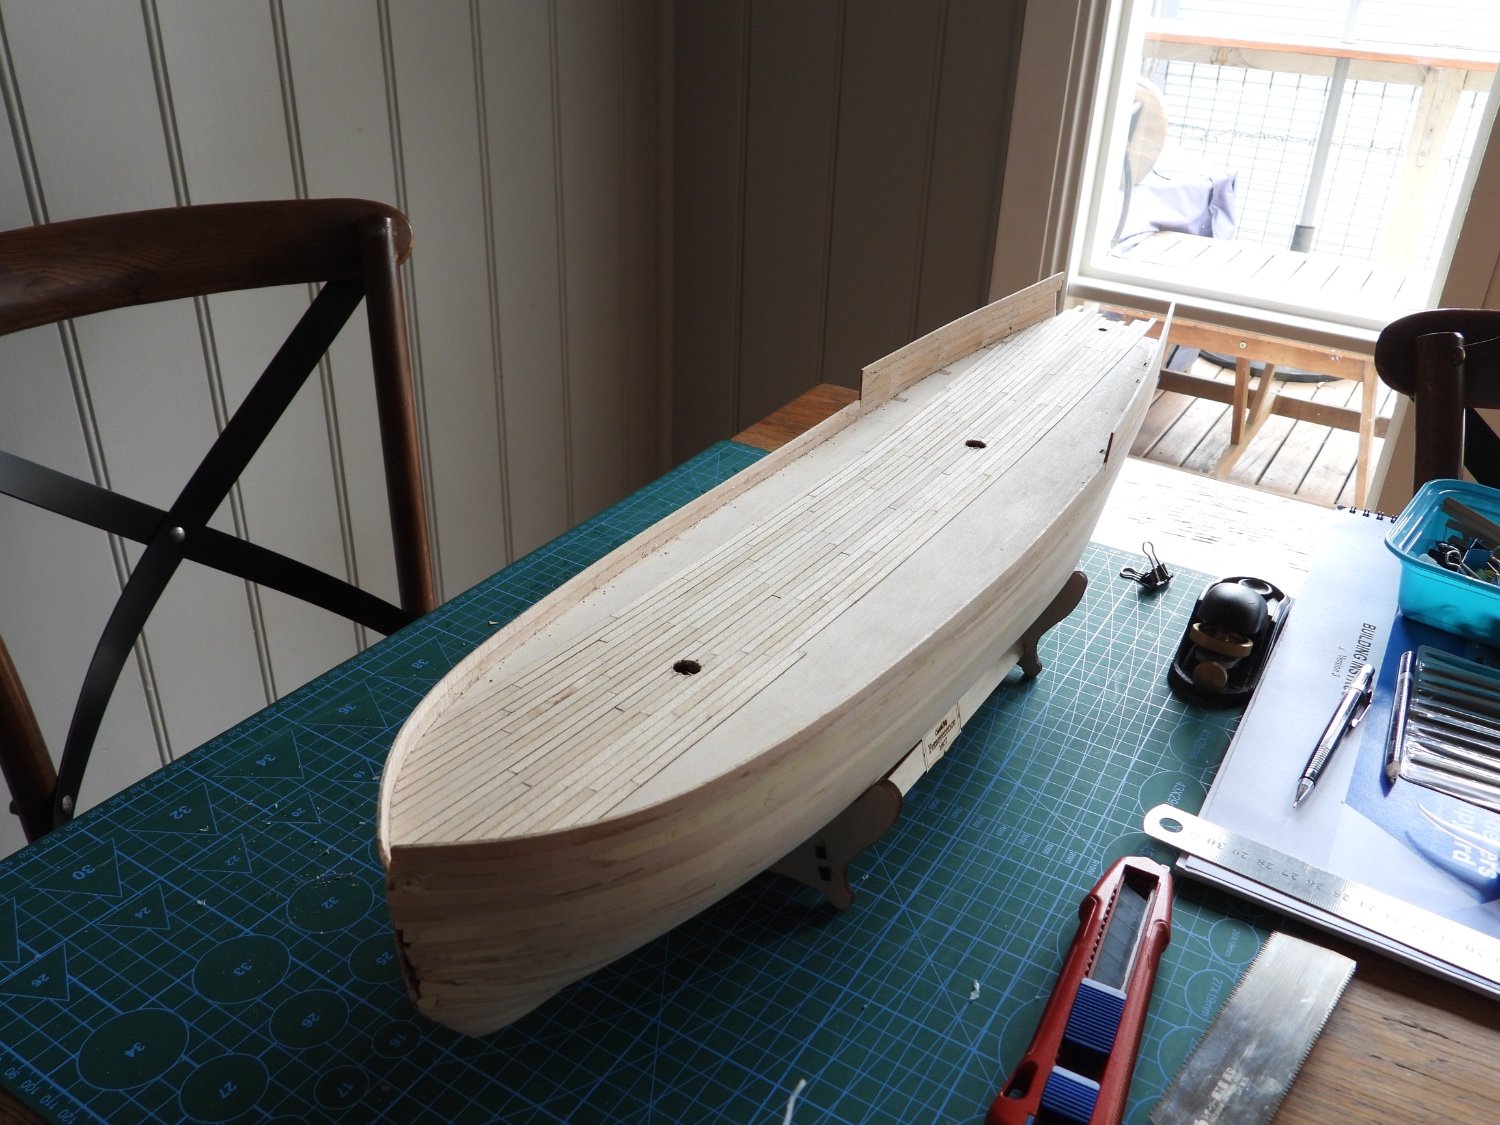
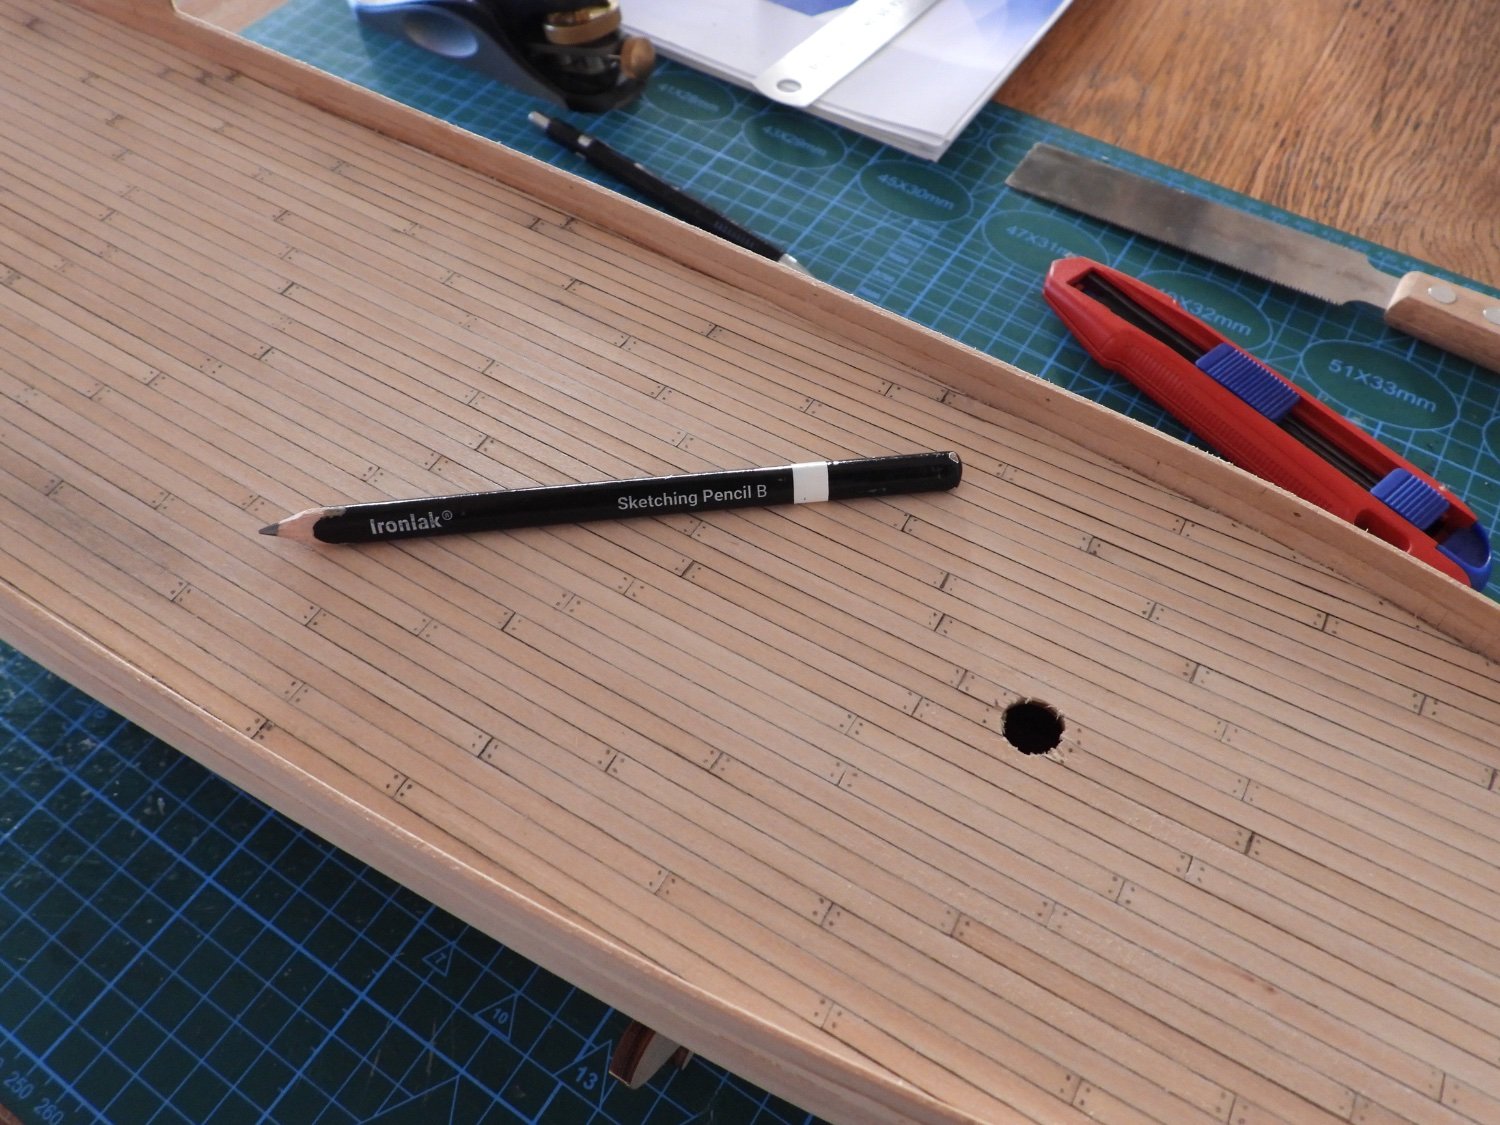
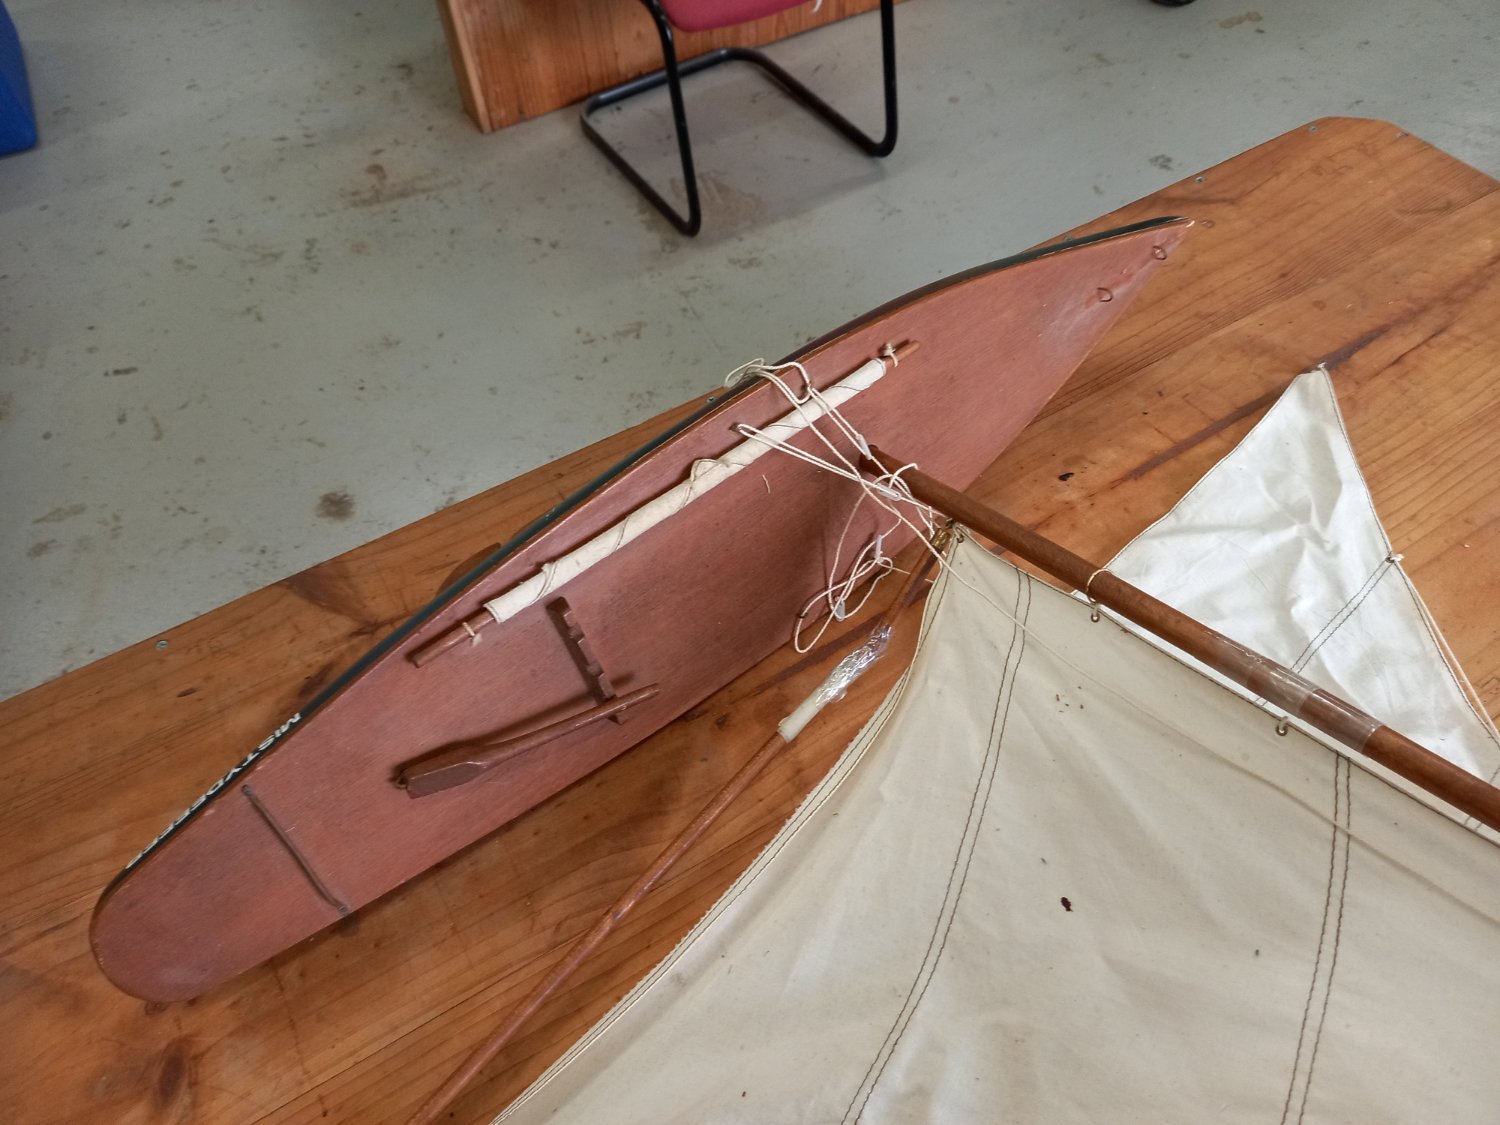
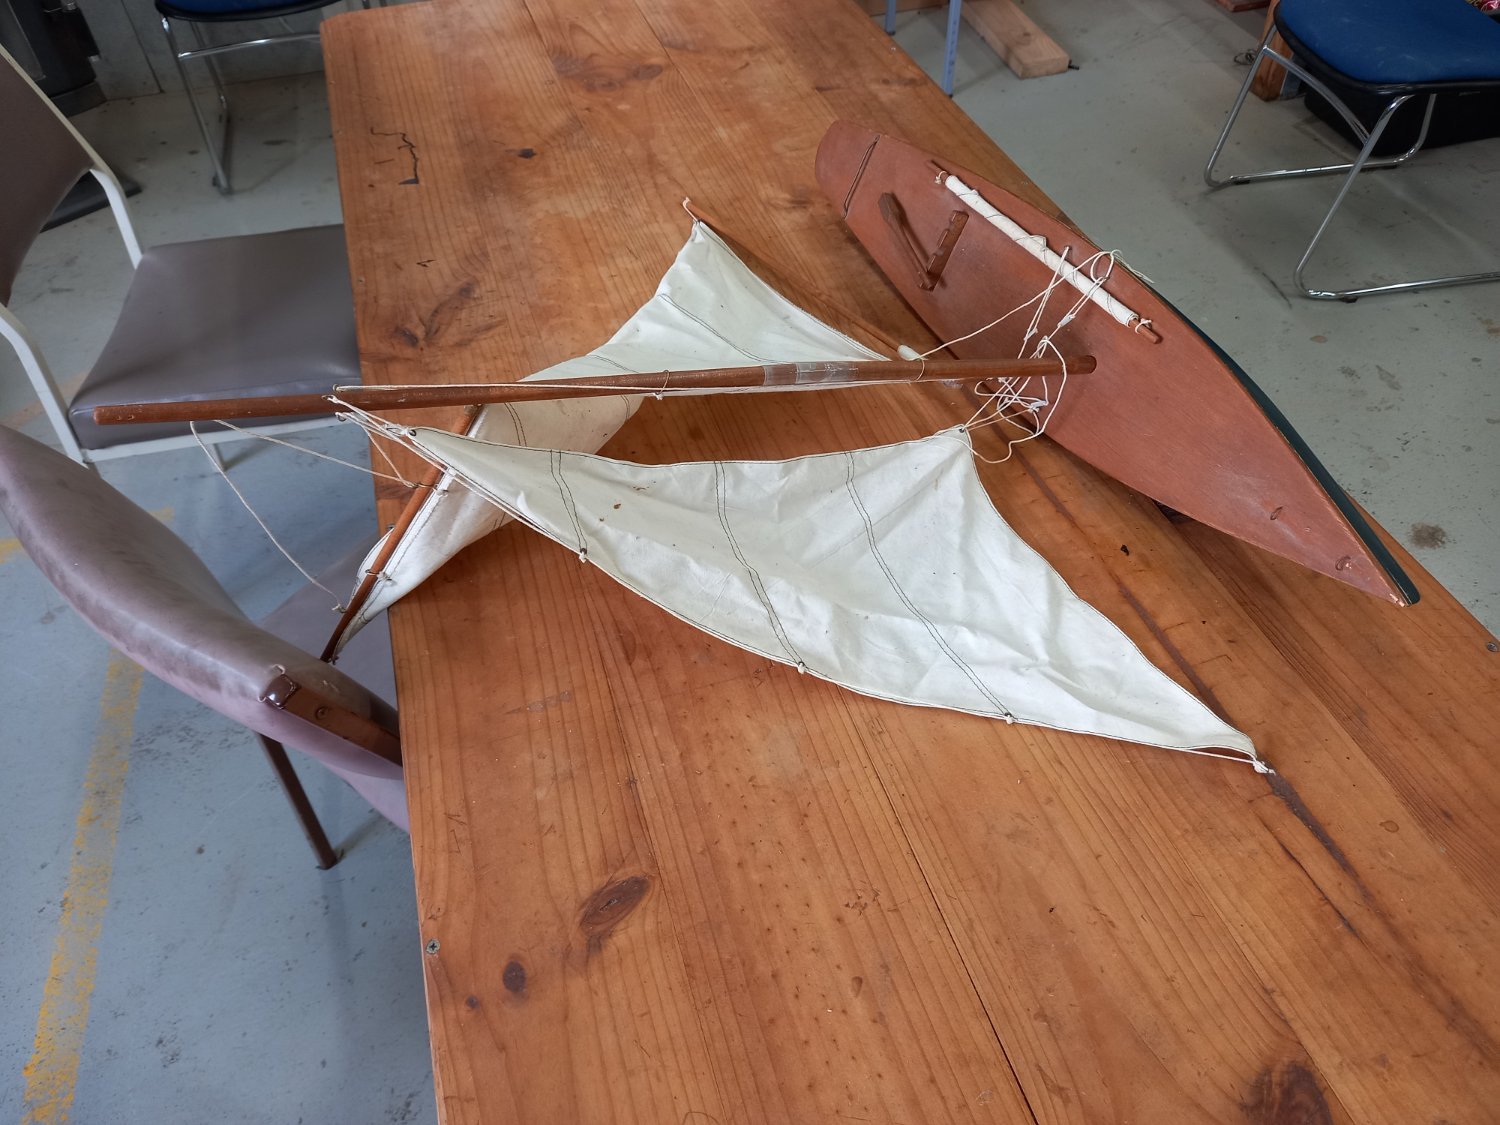
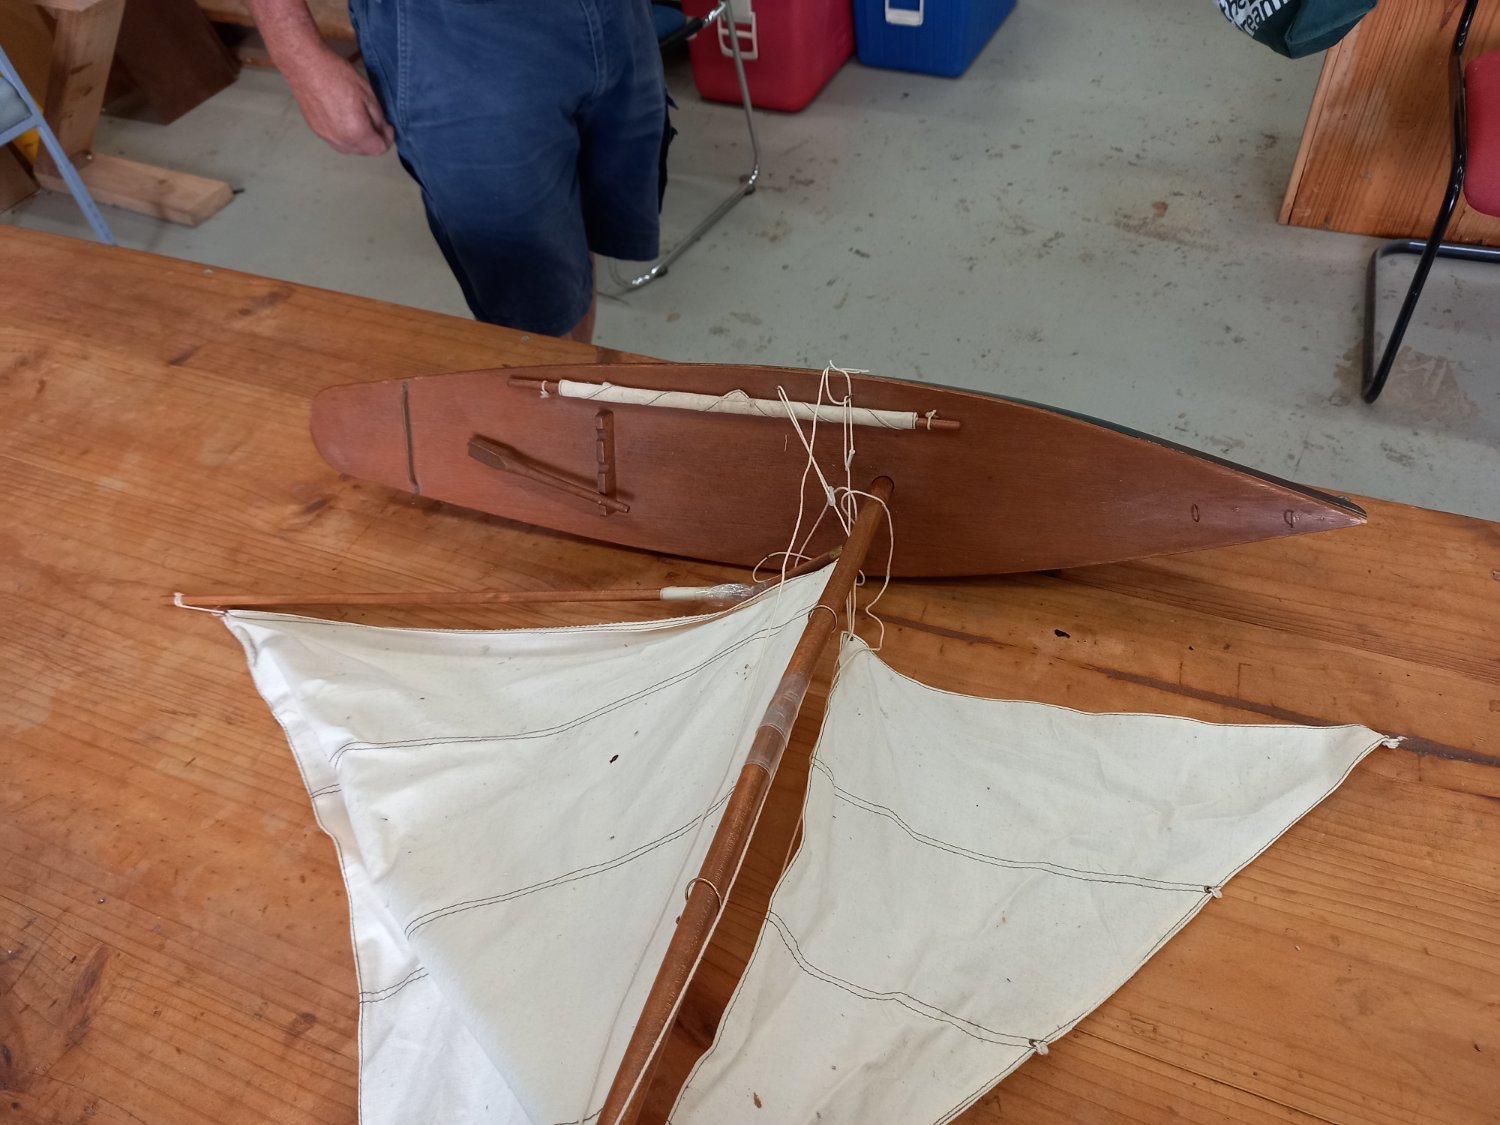
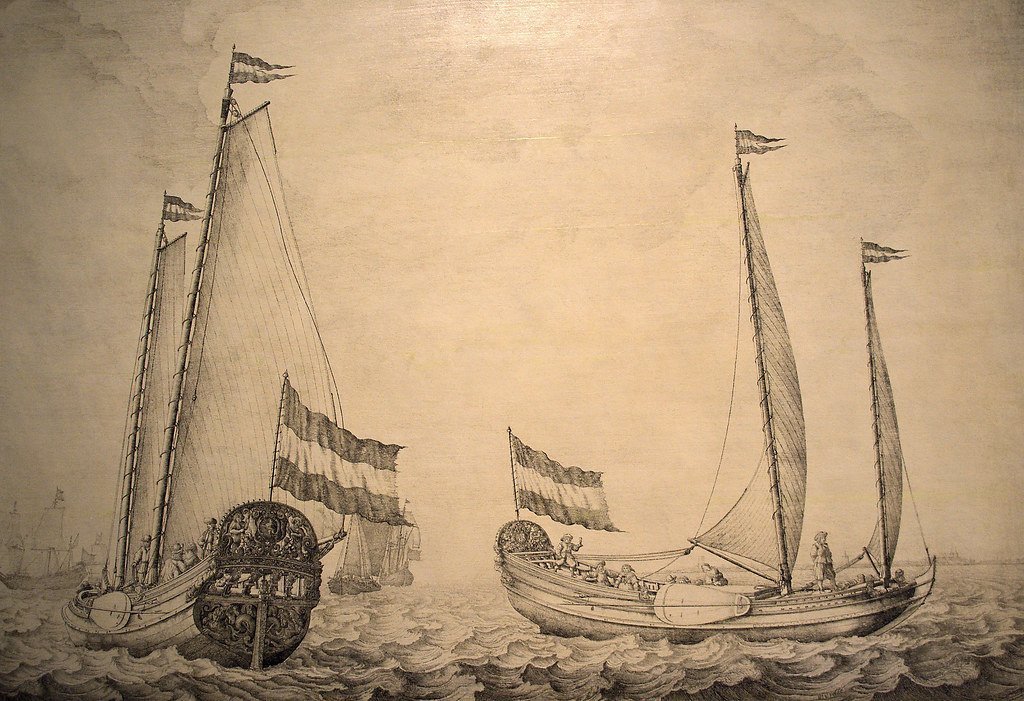
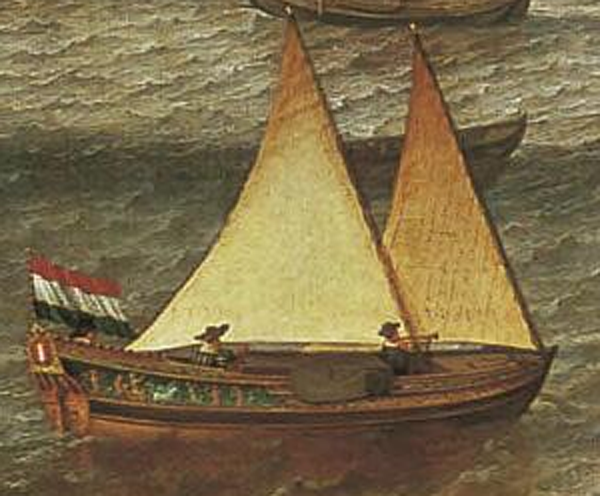
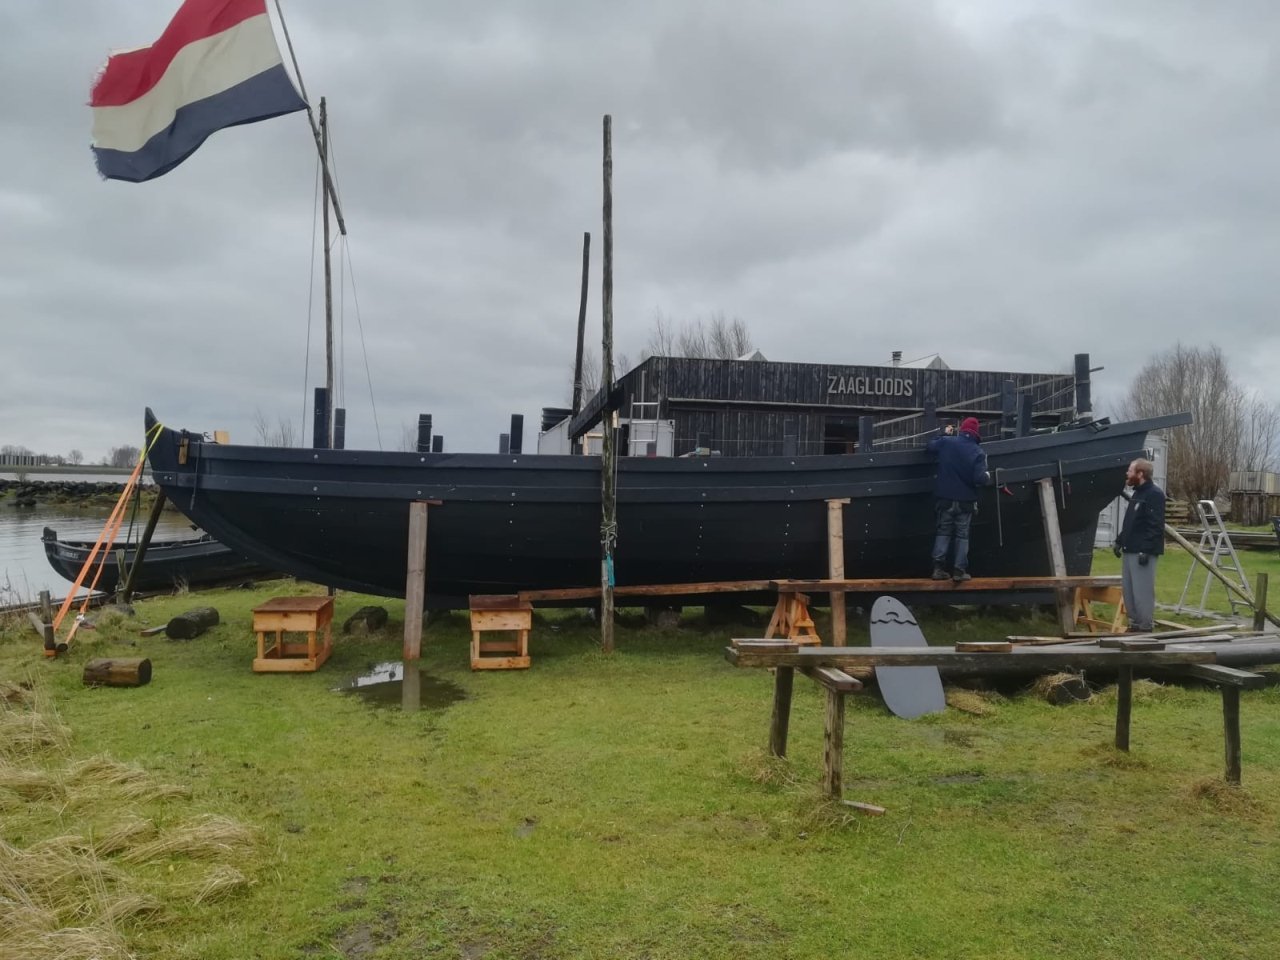
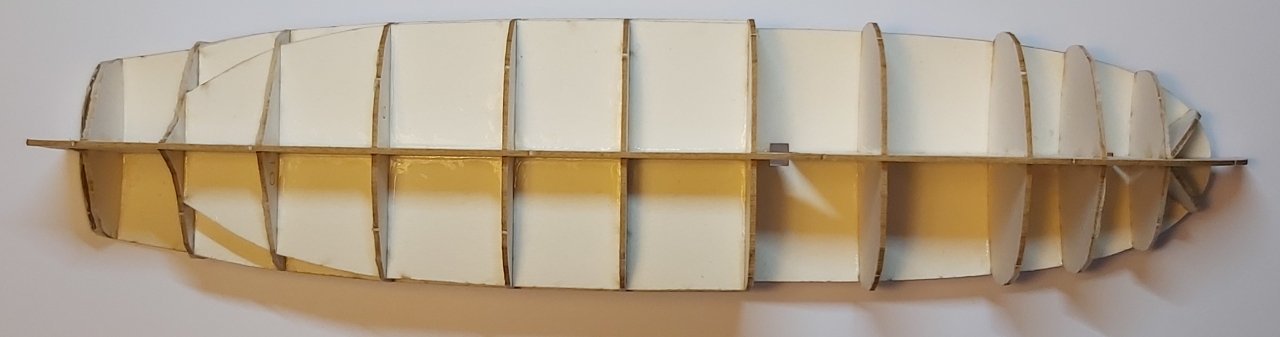
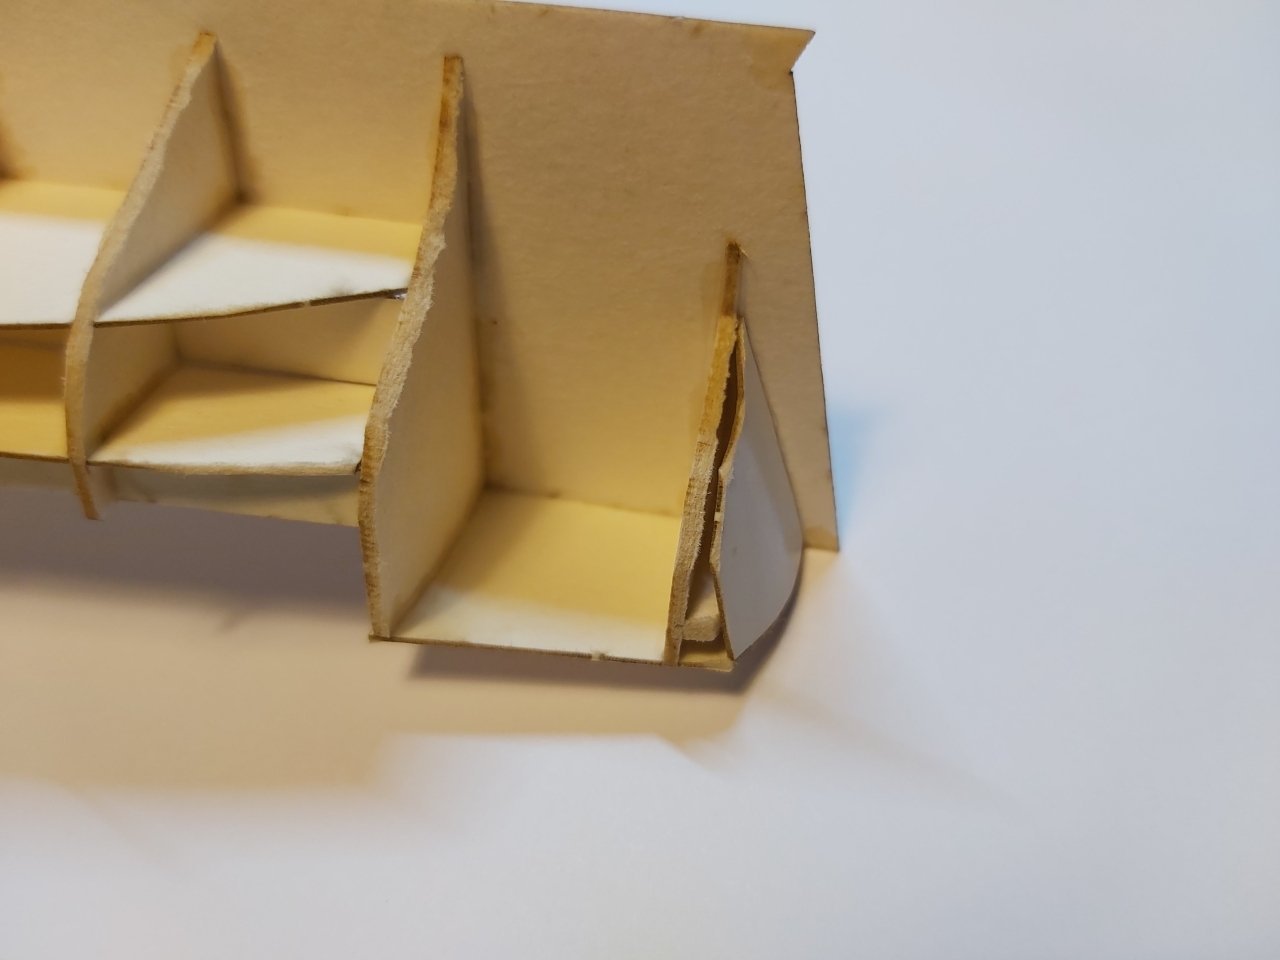
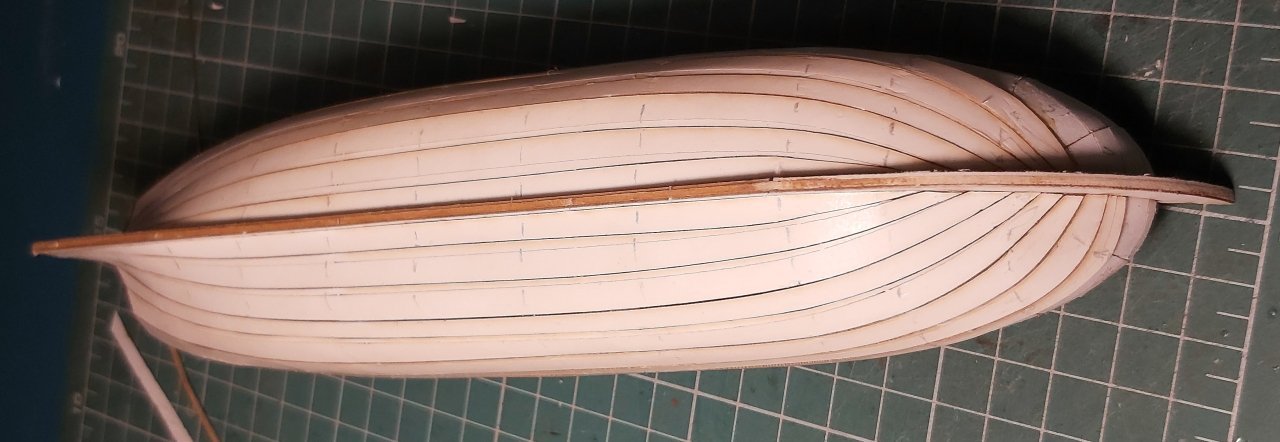
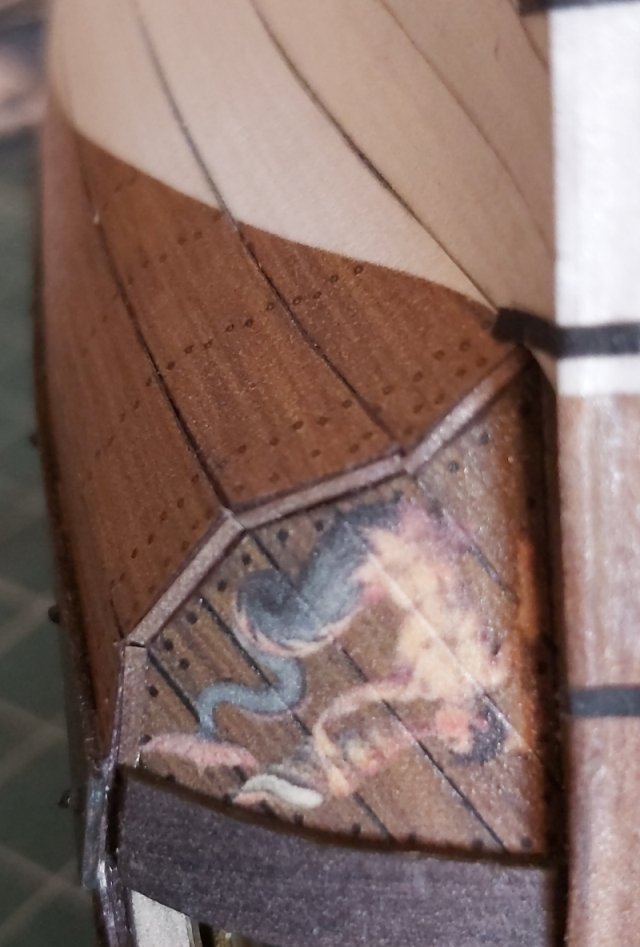
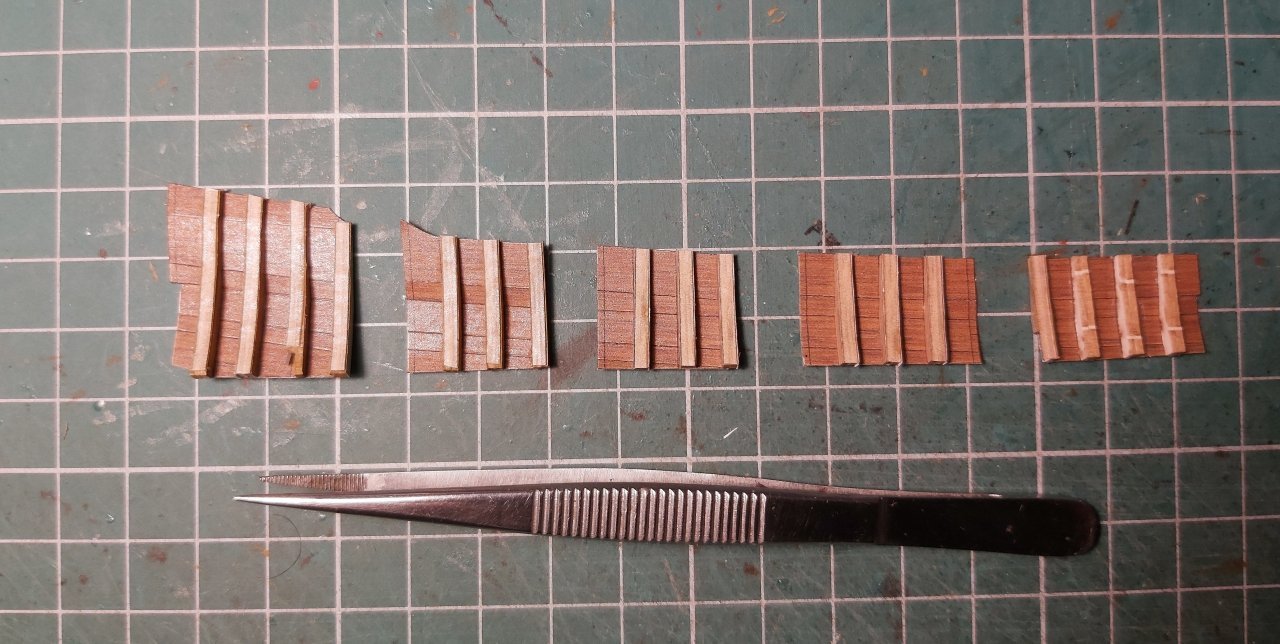
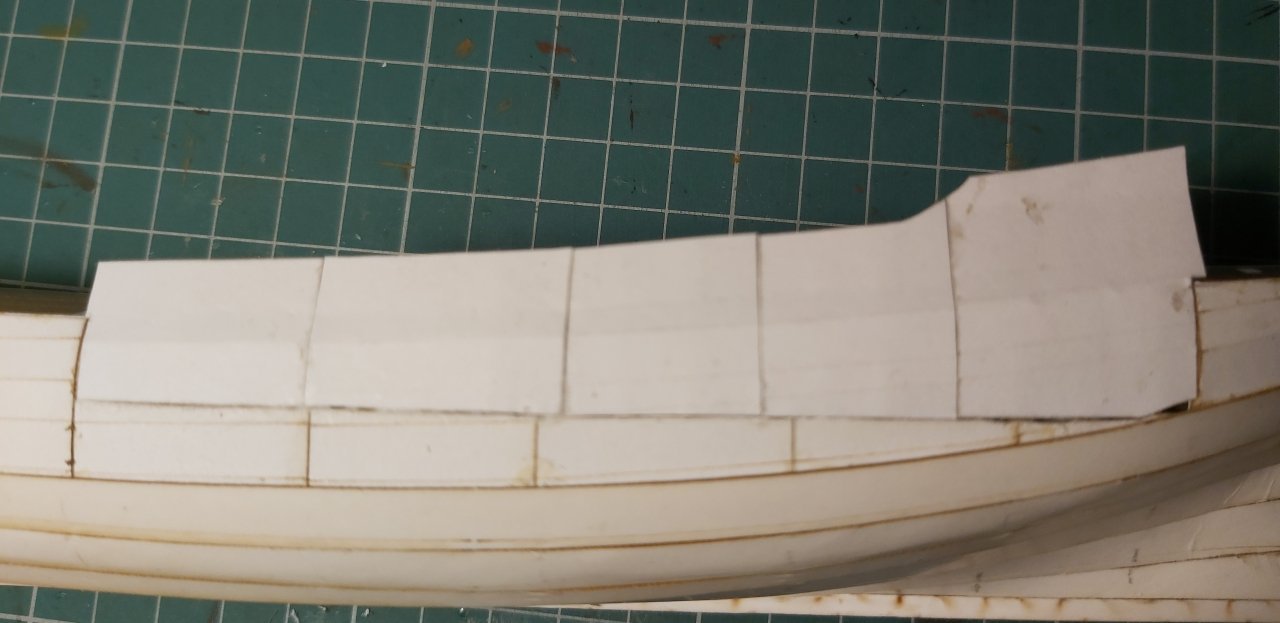
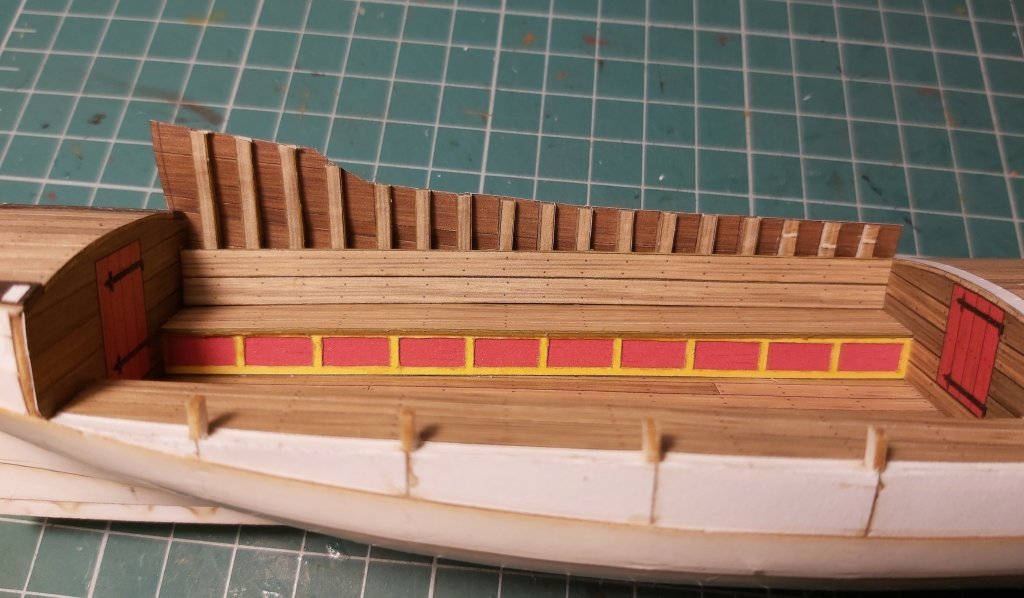
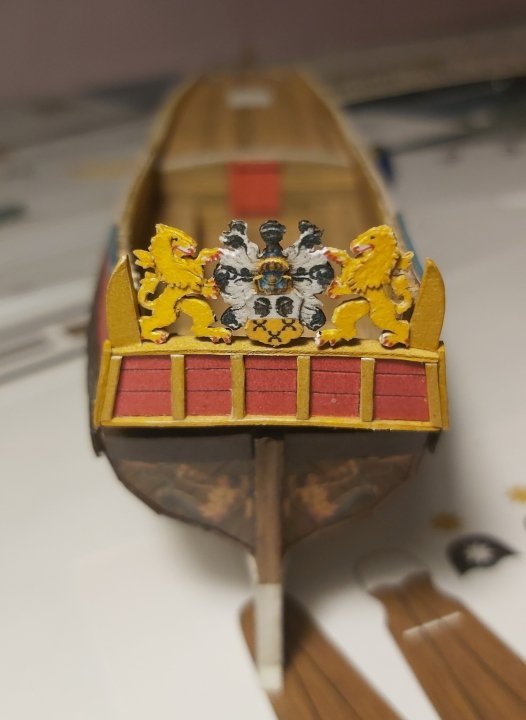
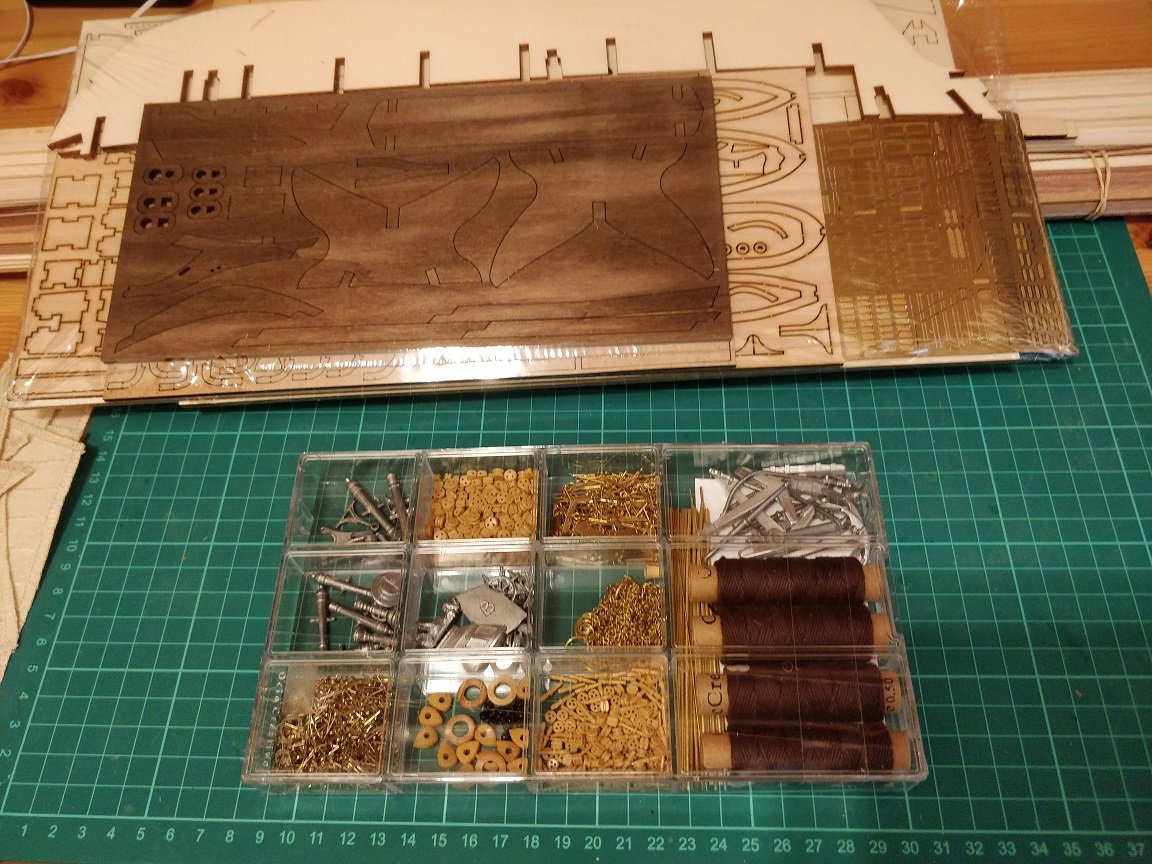
 Hello colleagues Many modeler friends said to me that it would be nice to assemble a cardboard sailing ship, but rigging is generally too difficult. Therefore, a few years ago I asked Ab Hoving for an idea for a simple model with the simplest possible rigging, and I didn't have to wait long (2-3 hours) when a precise and immediately three-dimensional design of a "recreational yacht" appeared on my computer. ", i.e. "Speeljacht". This design is very similar to the commercially available plans drawn by Cor Emke. [url]https://www.modelbouwtekeningen.nl/nvm-1006017-speeljacht-volgens-nicolaas-witsen-167.html[/url] Recreation on the water was probably not an invention of the Dutch, because in the tomb of Tutankhamun an image of the pharaoh fishing on the Nile was found, which can be considered entertainment on the water. However, until the 17th century, sailing ships of various types fulfilled basically only commercial and war functions or were used for work, such as fishing. It was only when the trade in Asia enabled merchants to build great fortunes that yachts for entertainment appeared. Maybe it was then that "yachting" appeared as a way of spending time with family, friends or for business purposes. Not only did people relax by sailing for pleasure, but such expeditions were accompanied by delicious feasts, including plenty of drinks. Nicolaes Witsen even mentions a "beer house" under the aft deck. In addition to romantic trips, owning such a yacht meant prestige and/or wealth - a bit like modern billionaires and oligarchs. The decorations were chic, but not flashy. The Netherlands was a Calvinist country, so one had to be modest. There was usually a family coat of arms on the stern. A similar model was developed in wood by Kalderstock. And for the inquisitive and curious: the Clean2Anywhere Foundation has been experimentally recycling plastic for several years, building replicas of small historical yachts from it, including this speel yacht. Link to one of the videos where you can see the construction of a speel yacht: [url]https://www.youtube.com/watch?v=eqrIHFulcZU&t=3s[/url] And how is my construction going? So quick and easy that I didn't take many photos, especially obvious stages like frame frames,... ...or "first - false planking" The retouched cardboard edges of decks has always "disgusted" me, so I experimented a bit and glued narrow strips on the visible edges, imitating the face of the boards. The stripe is 0.7 mm, my hand trembled a bit and it didn't turn out perfect, but I think it's a very good idea for the future. Since masking the edges like this has a future, I went ahead and played with the edges of the planks at the stern. There is also something to complain about, but that's my fault - I liked the idea itself. A large number of visible frames required tedious gluing and retouching, and initially I planned to glue them to the hull first and then continue covering them with the planks. Fortunately, before I started committing such stupidity, I changed my concept and built this component separately, finally gluing the finished one to the model. In total, in four stages: 2 amidships and 2 aft. The last layer of planks (in color) went very well, and of course the corrections were made on the edges that are covered with wales. This is how it turned out: Modest decorations (as I wrote at the beginning) will only be made of cardboard (no resin), so that the model is fully paper as standard. It was necessary to choose the coat of arms of some noble family. The final choice fell on the van Loon family, also because their "palace" still houses a popular museum.([url]https://www.museumvanloon.nl[/url]) That's it for now, only decorations, leeboards and very simple rigging remain. Regards Tomek
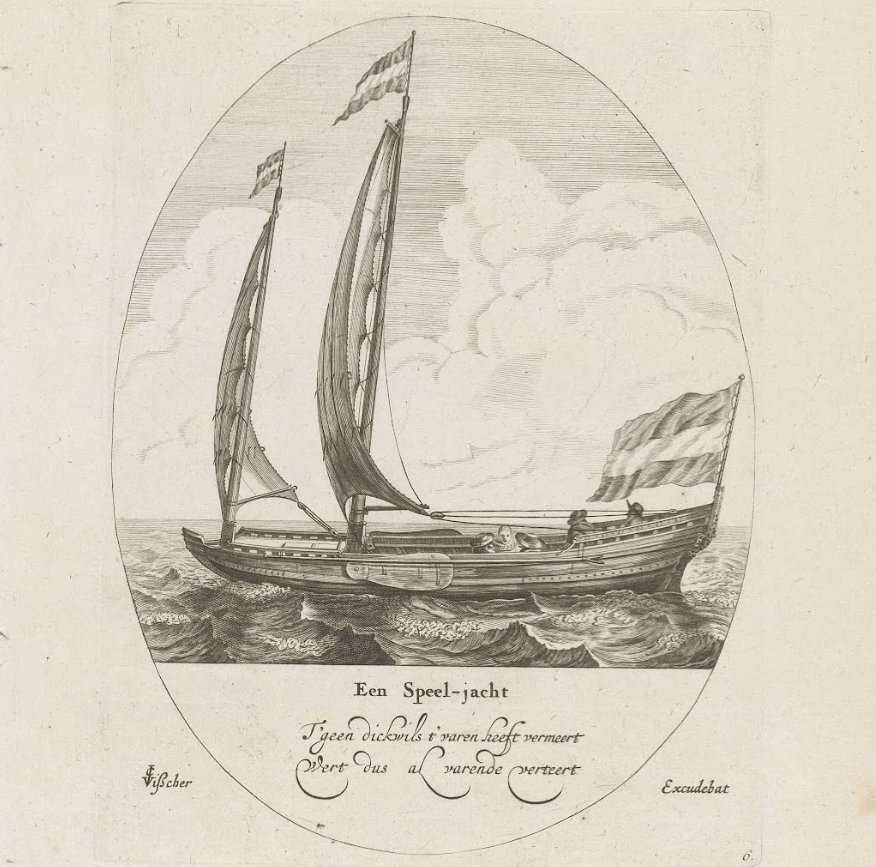


- 9 replies
-
- 17
-

-

-
- Speeljacht
- card
- (and 1 more)
-
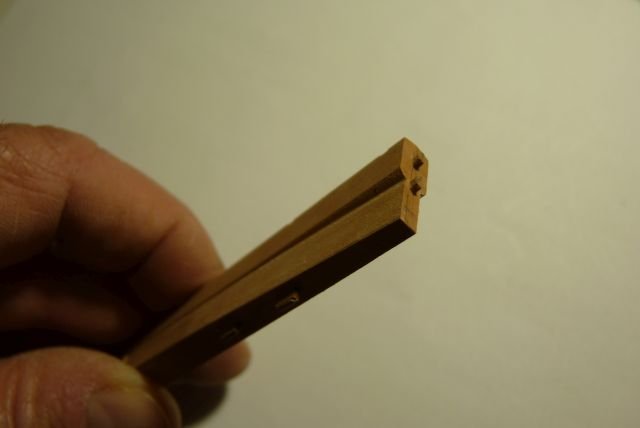
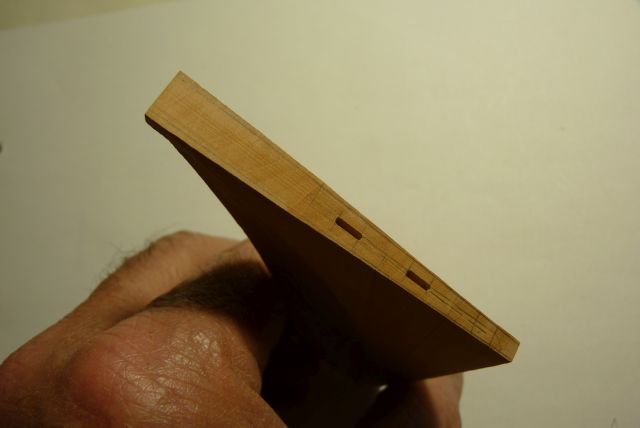
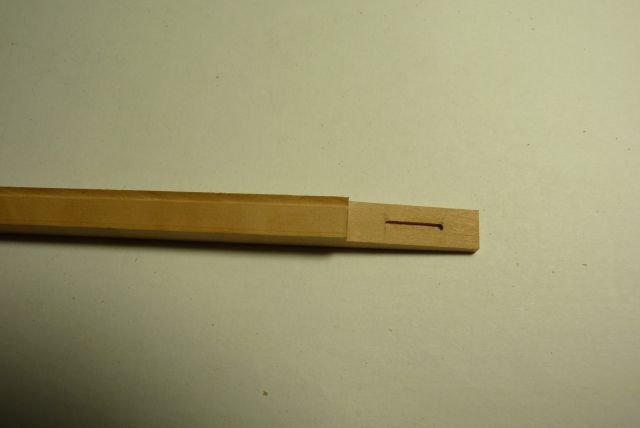
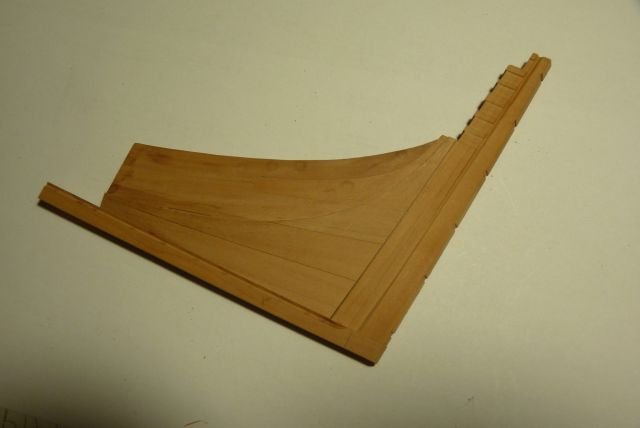
 Welcome to my Winchelsea build which will be done alongside Hayling. It will be based on Chuck's version II design. I have chosen to build the ship mainly from Cherry. It will be a P.O.B. model, using the laser cut parts and mini-kits that Chuck will offer. This will be a fun build for me and I'm looking forward to the many challenges that are ahead. The build starts with making the Knee of the Head from Chuck's laser cut kit. Cherry, being a softer wood than Boxwood, cuts somewhat cleaner and the pieces fit together quite nicely. Only a gentle scraping with a #11 blade was needed to remove the loose char. I used a #2b pencil to darken all the joints (optional) which were then joined with Elmer's Carpenter's Wood Glue. No clamping was necessary. The upper area from the stem down to the forward edge of the bobstay piece was gradually tapered from 3/16" to 3/32". The bobstay holes and gammon slot edges were softened as well. Mike
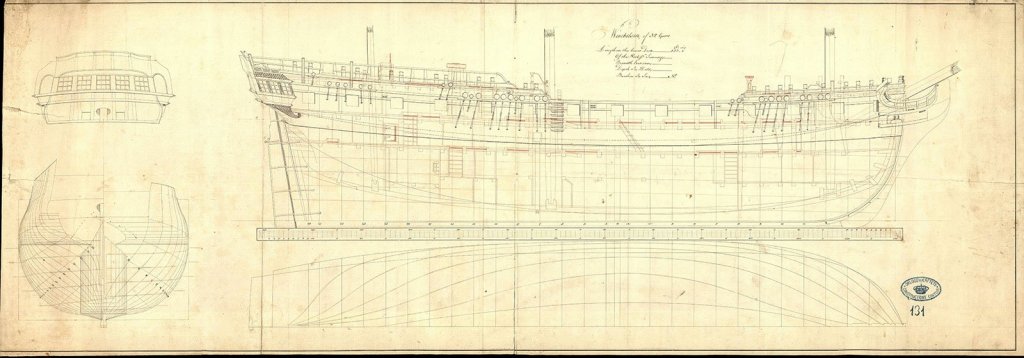

- 607 replies
-
- 27
-
-
- winchelsea
- syren ship model
- (and 1 more)
-
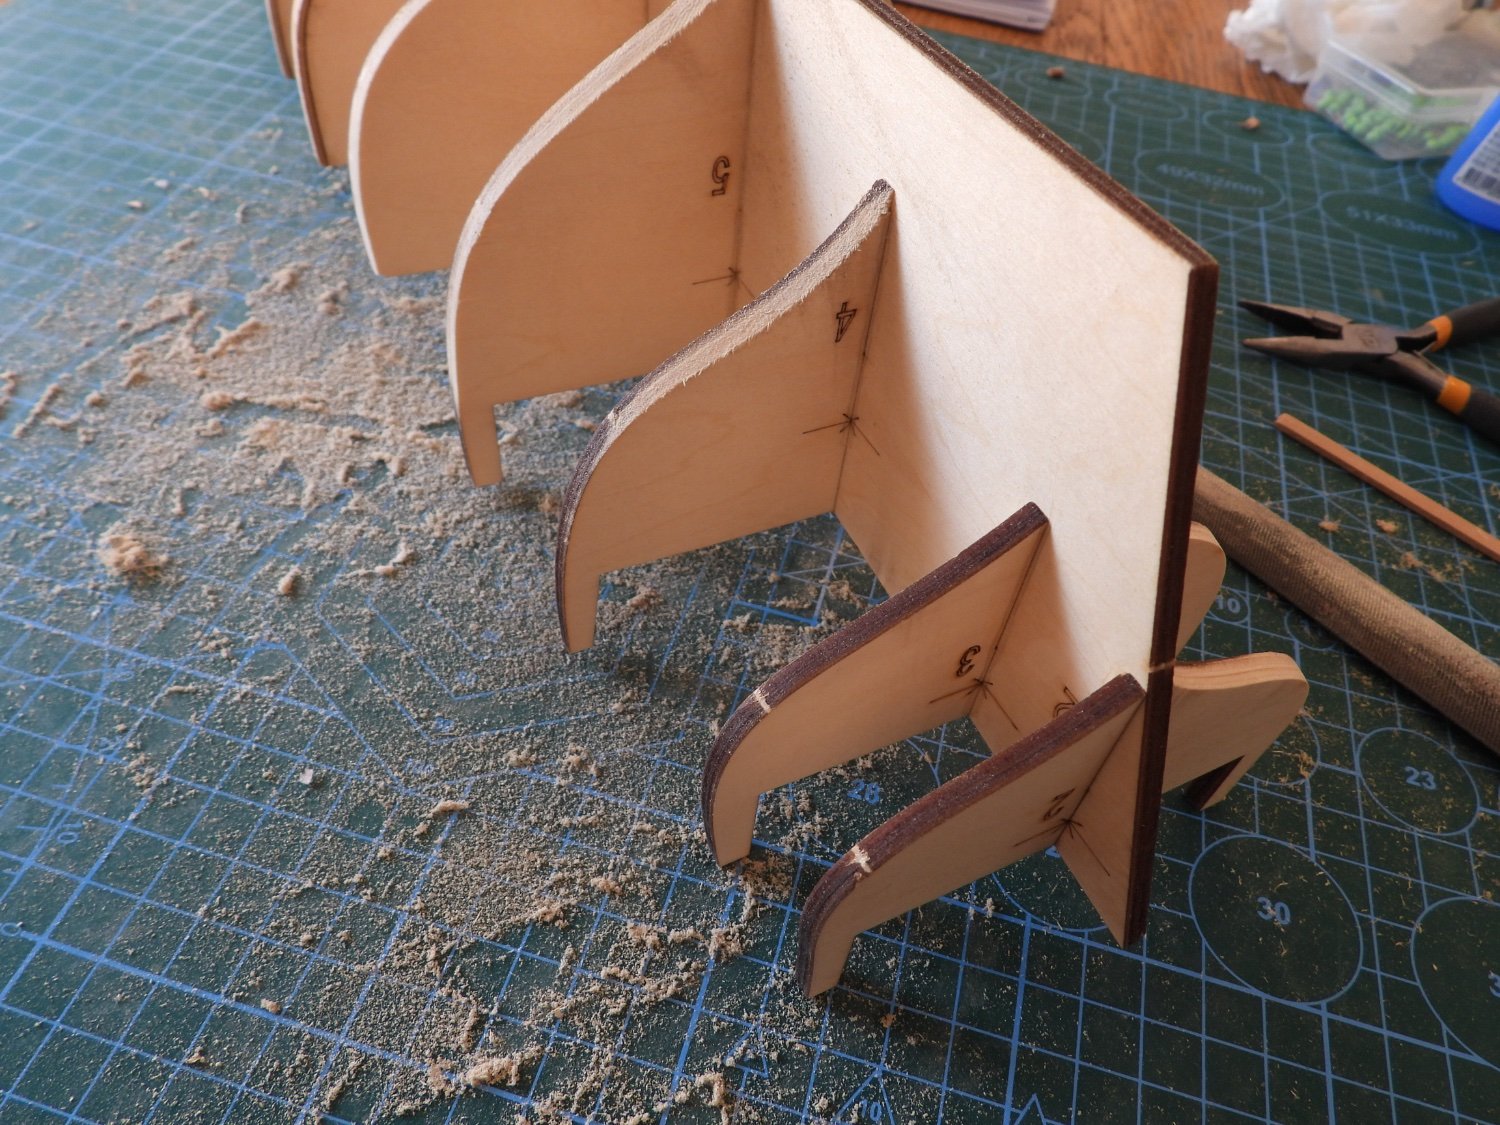
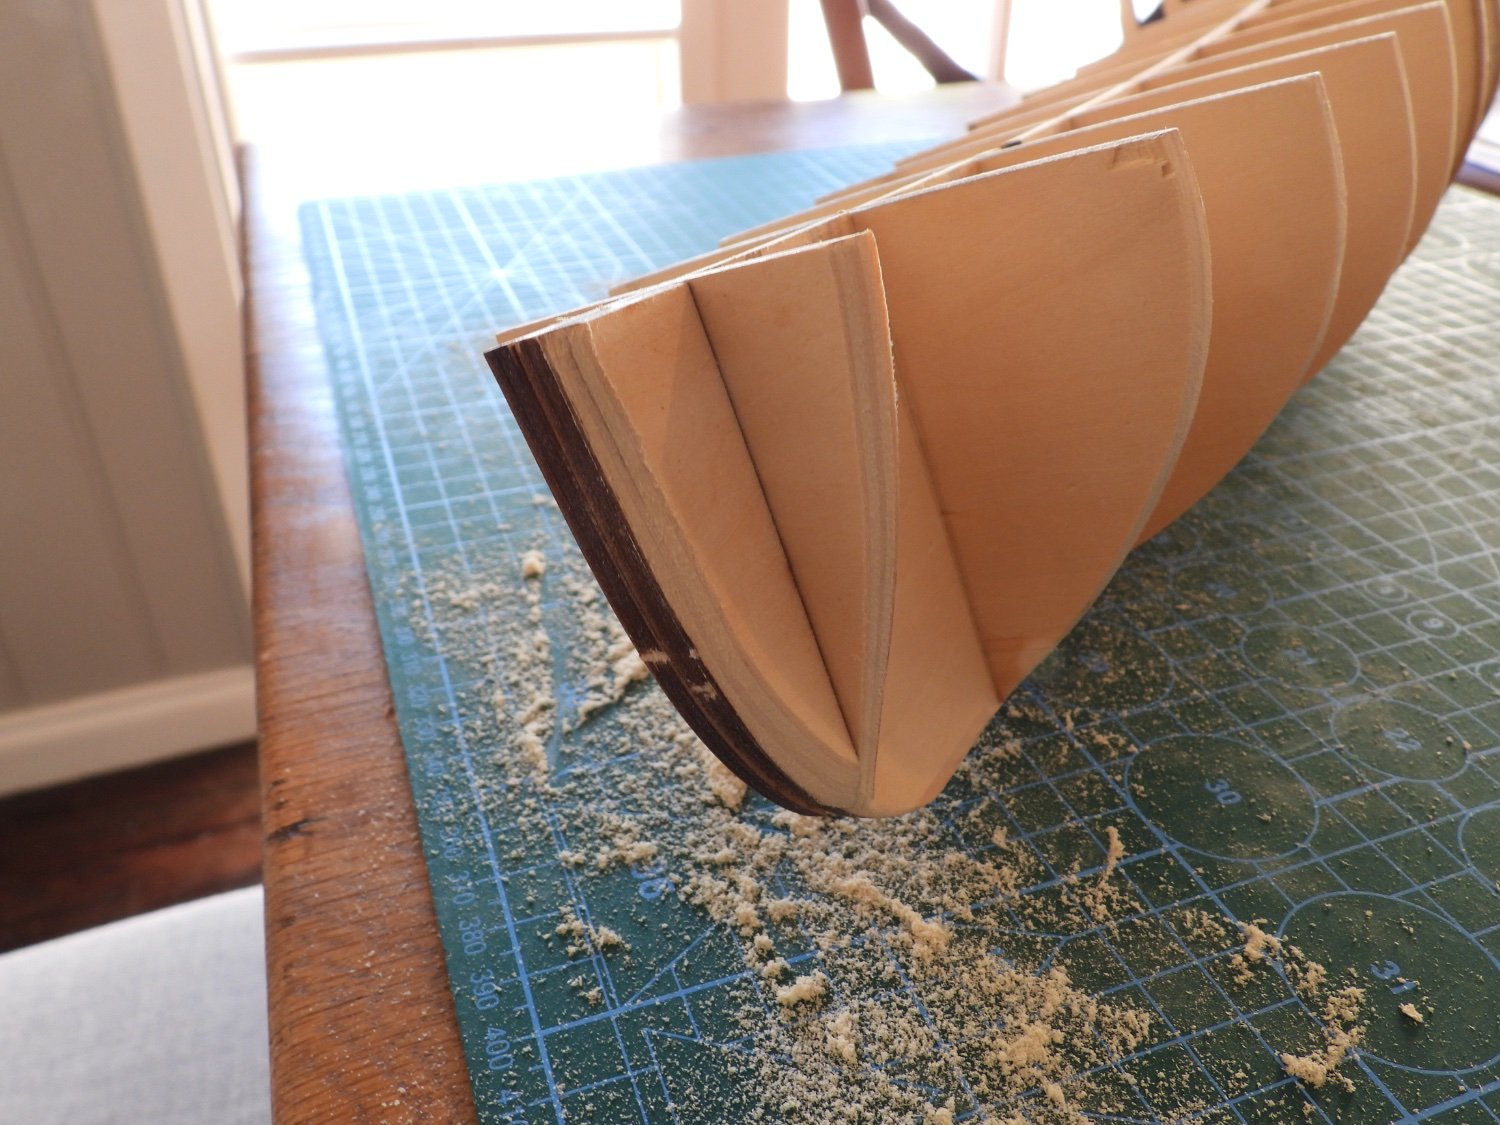
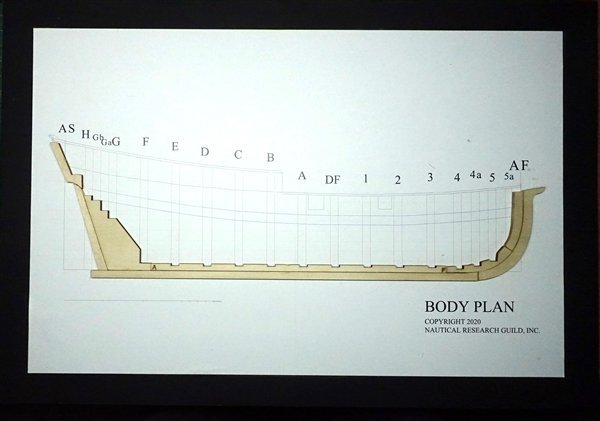
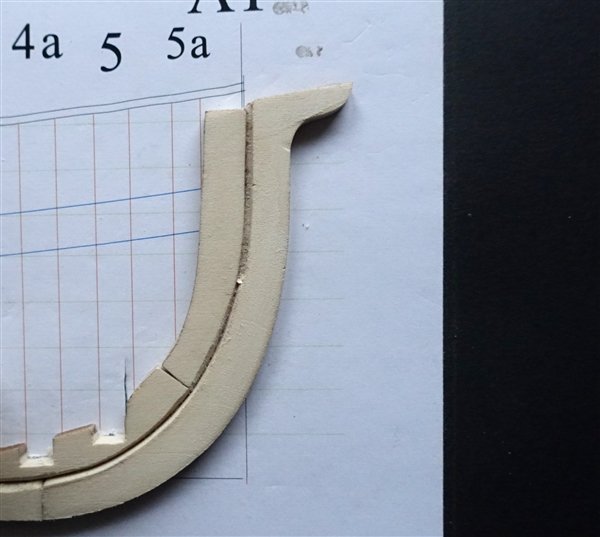
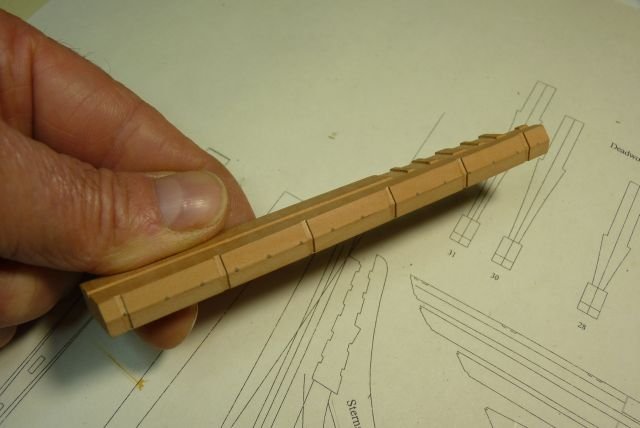
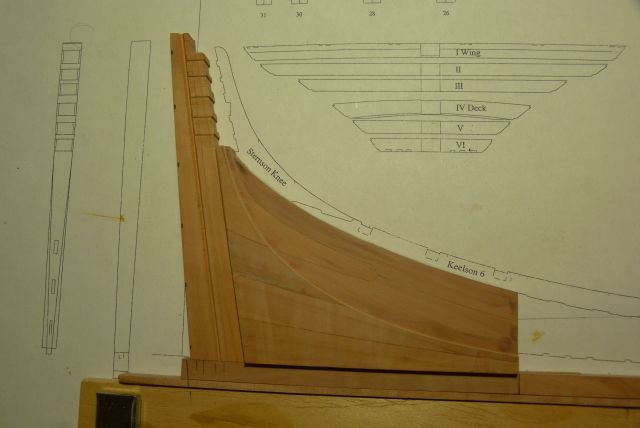
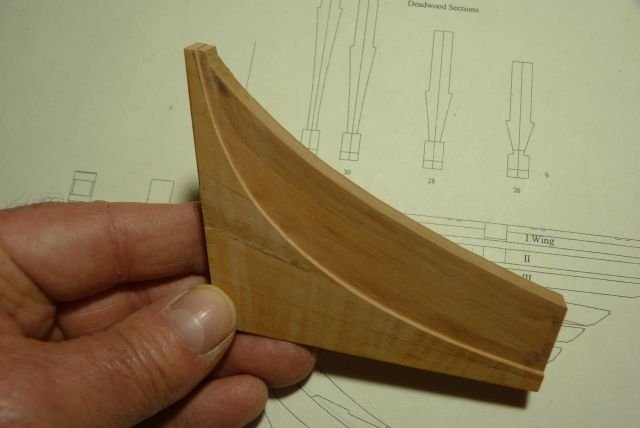
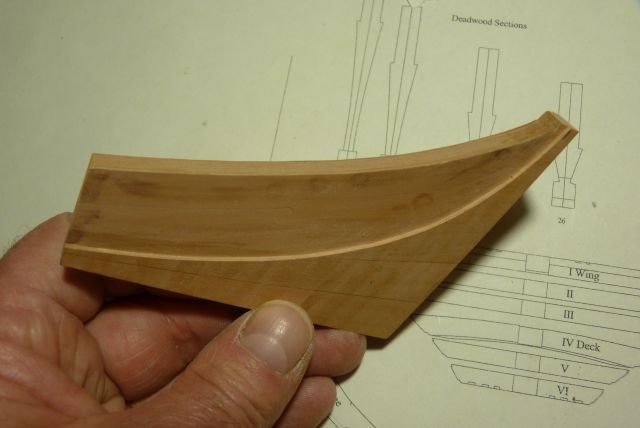
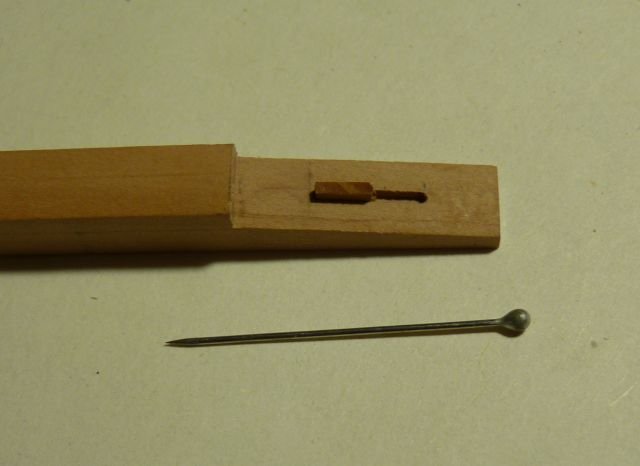
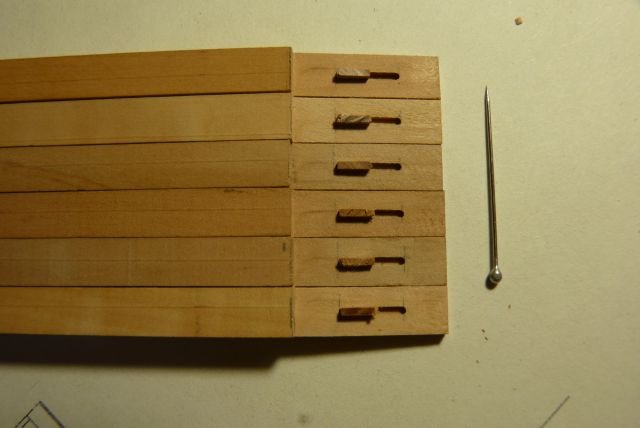
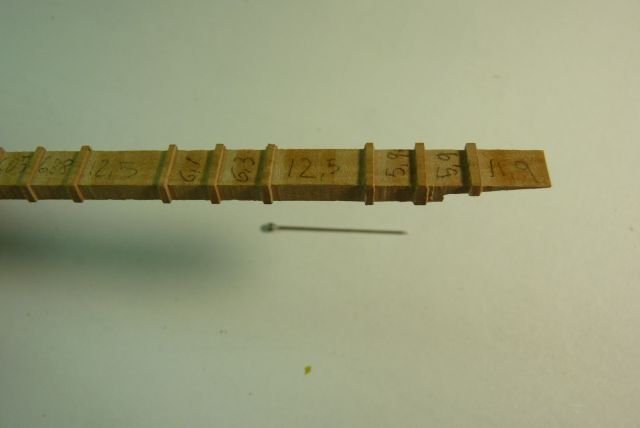
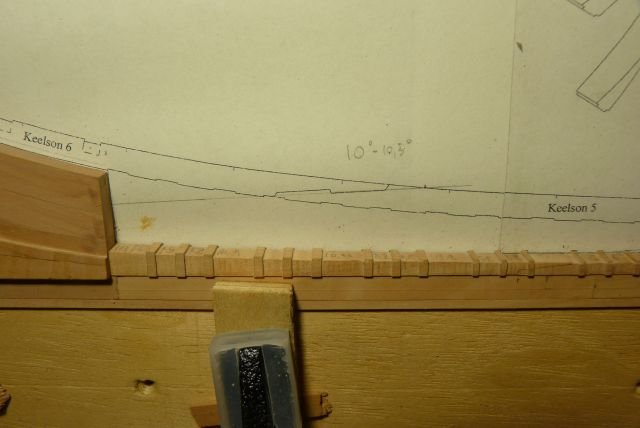
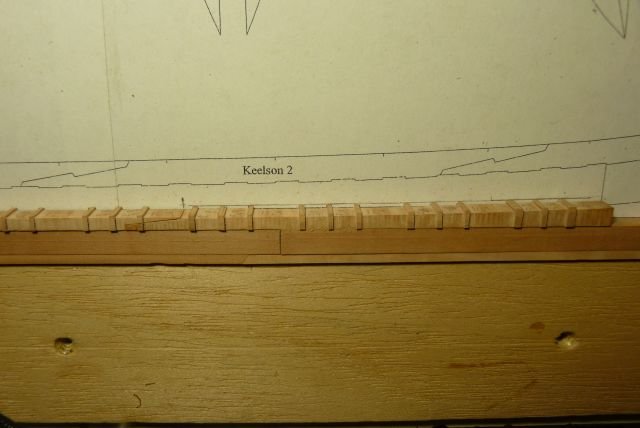
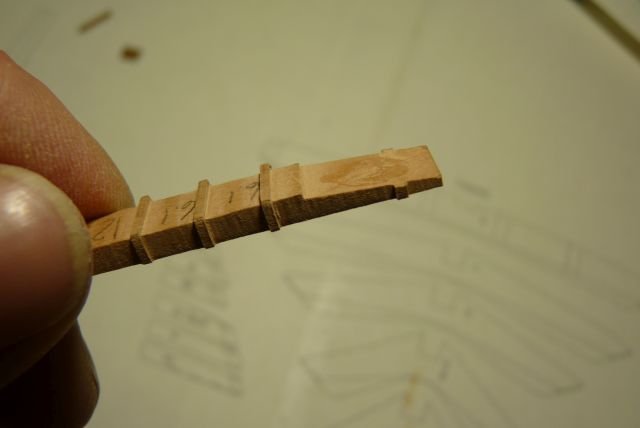
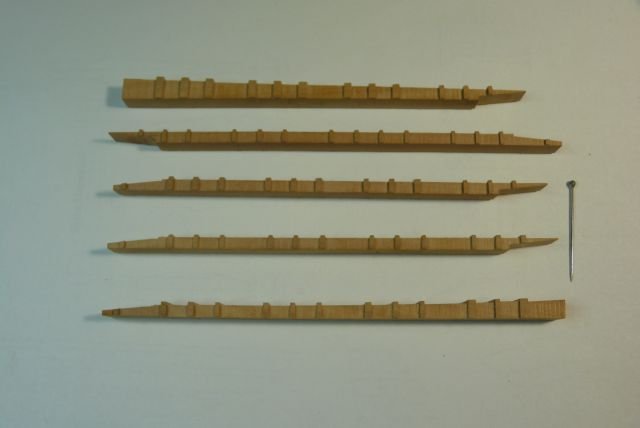
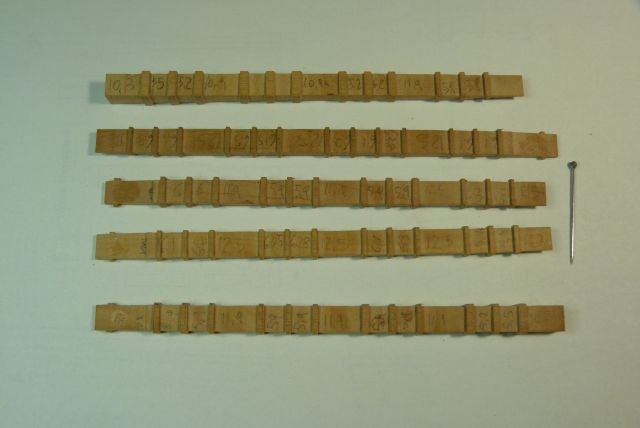
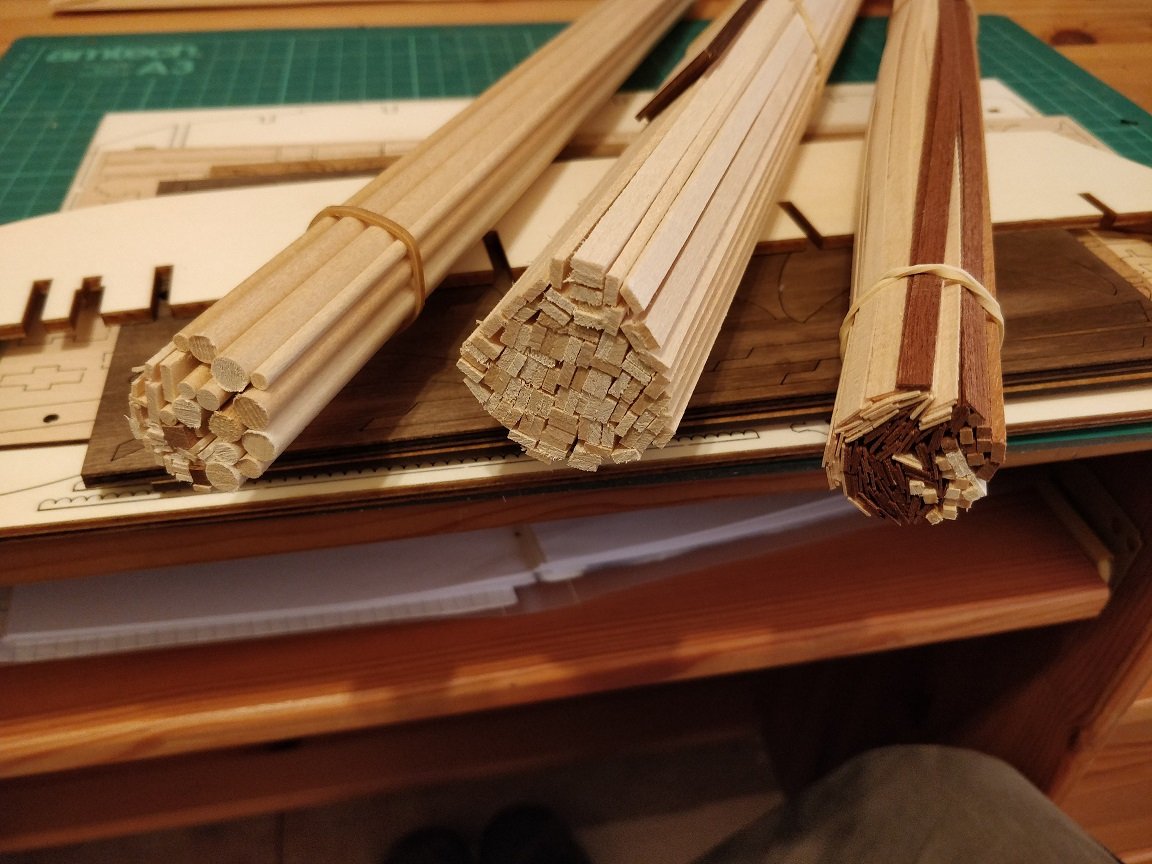
 While working on my latest model, HM Cutter Trial from Vanguard Models, I realised that it would be a good idea to have some further practice in hull preparation and planking before embarking on another full ship project. I’m hoping that this project will teach me some new techniques and help me make a better job of planking than I have previously. I am using the suggested ¼” foam-board as a base on which to build and used spraymount to glue the body plan to it. Laying out the keel, keelson stem and stern, it is clear that some trimming and fitting of the bow keelson is needed The whole kit is made in basswood making it pretty easy to cut and sand. The risk is taking off too much so slow and easy is the rule. Once the stemson is cut to length and sanded to fit the keelson lines up pretty well with the drawing. I didn’t need to fettle any of the slots for the bulkhead on the main keelson but the bow keelson required a bit of a tickle with a sanding stick. The rabbet is marked up with a pair of compasses. I measured the thickness of the sheets provided for planking which varied between 0.85 and 0.99mm. I took 0.9 as a rough mean and marked the rabbet. I used a chisel to remove the rough, then a file and finally scraped it clean with a razor blade. The keel and keelson were straightforward as a simplified 45º angle was used for the whole length. The stem is a little more difficult to do with a changing angle as the rabbet rises up the the stem pieces. However the manual provided and Toni’s log Half Hull Planking Project - Planking Downloads and Tutorials and Videos - Model Ship World™ provide plenty of useful detail and photos to help work it out Once the rabbet is cut, the keel and stem pieces can be glued up. I have used minimal glue to fix the pieces to the board to make it easier to remove the model when completed. At this stage the deadwood and stern pieces are not glued . David
- 15 replies
-
- 7
-
-
- half hull
- Half Hull Planking Project
- (and 2 more)
-
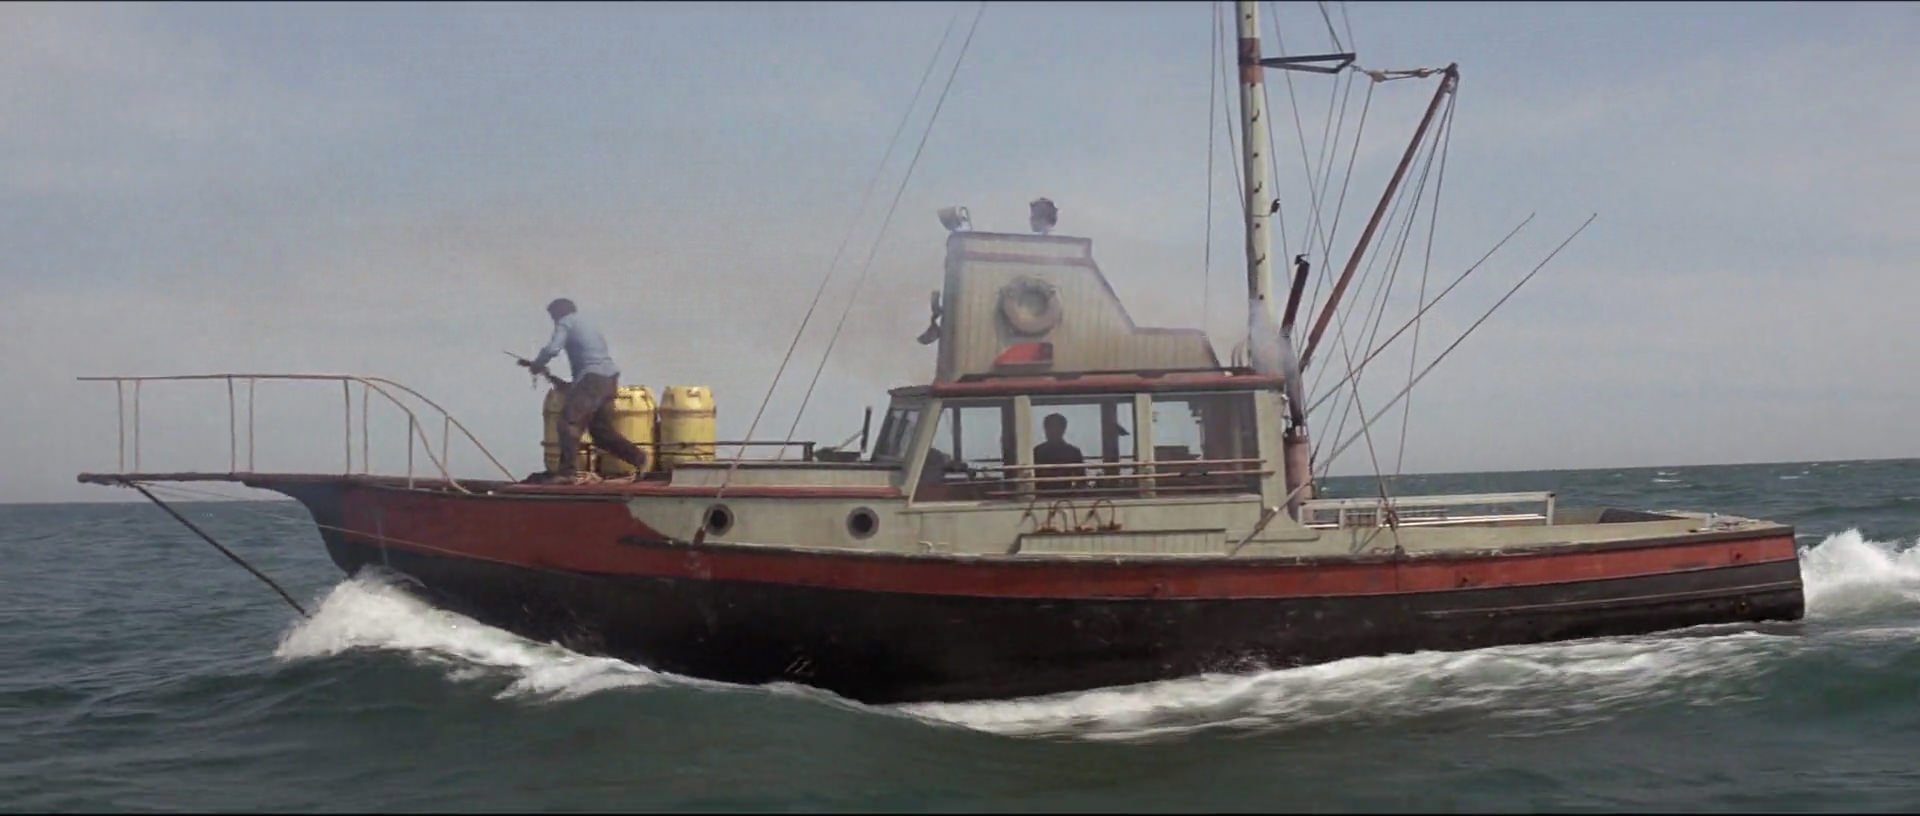
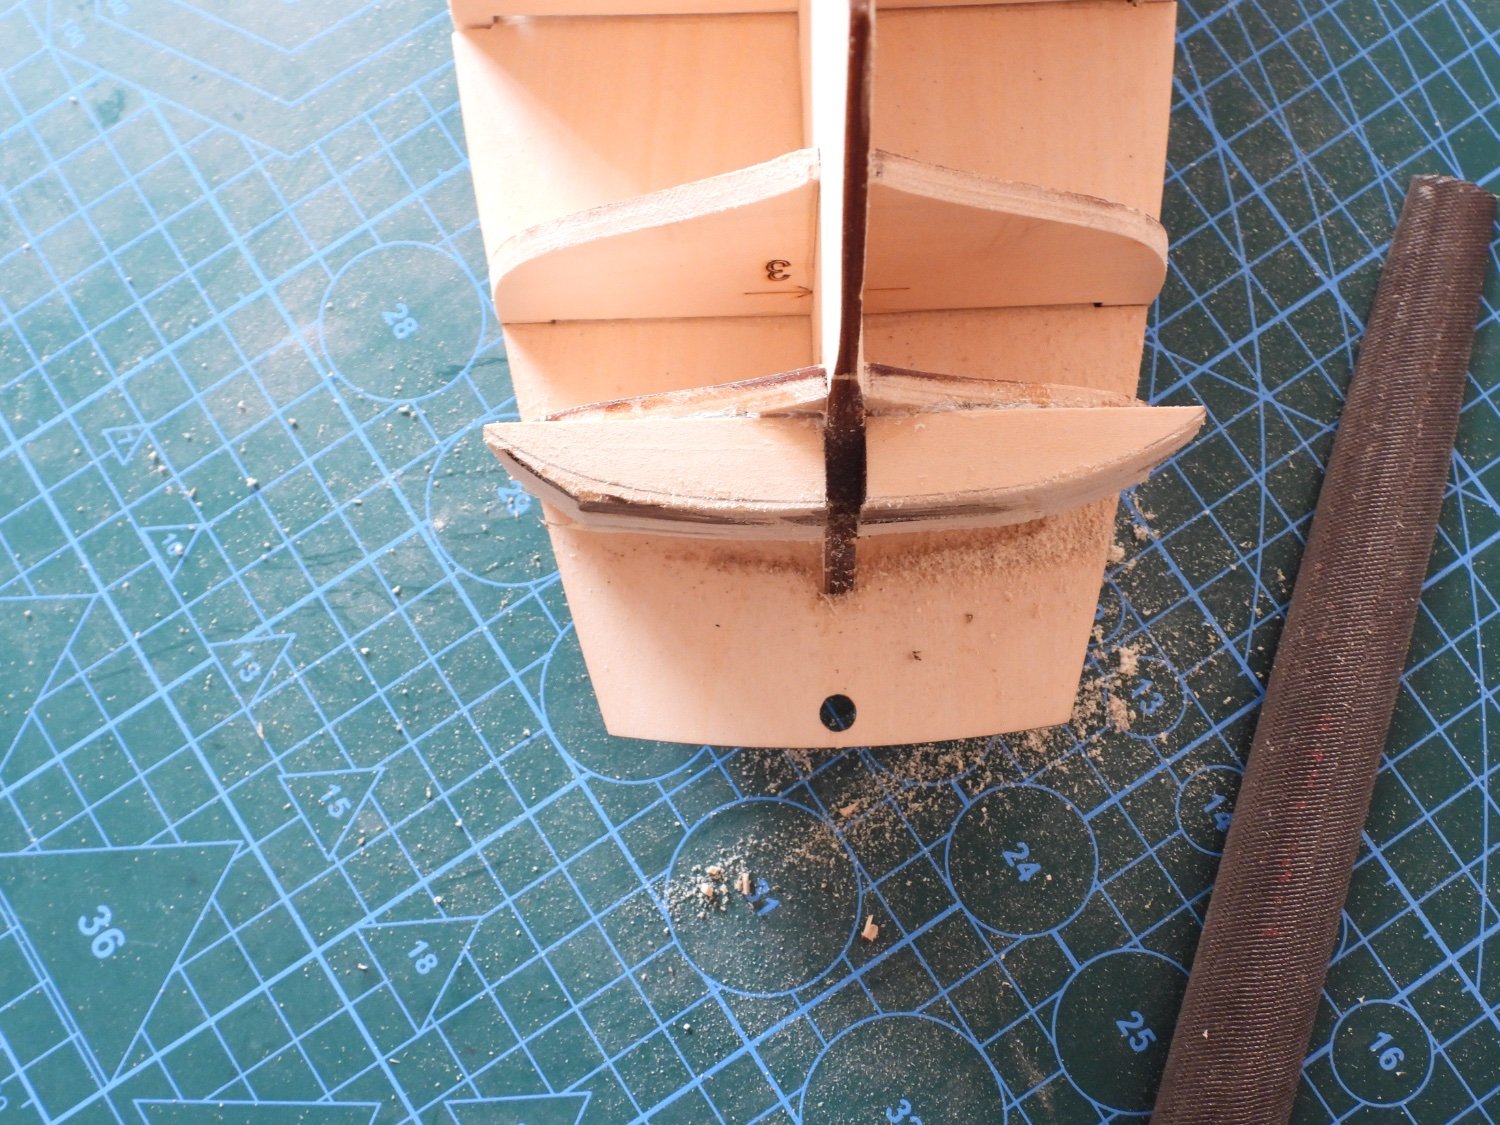
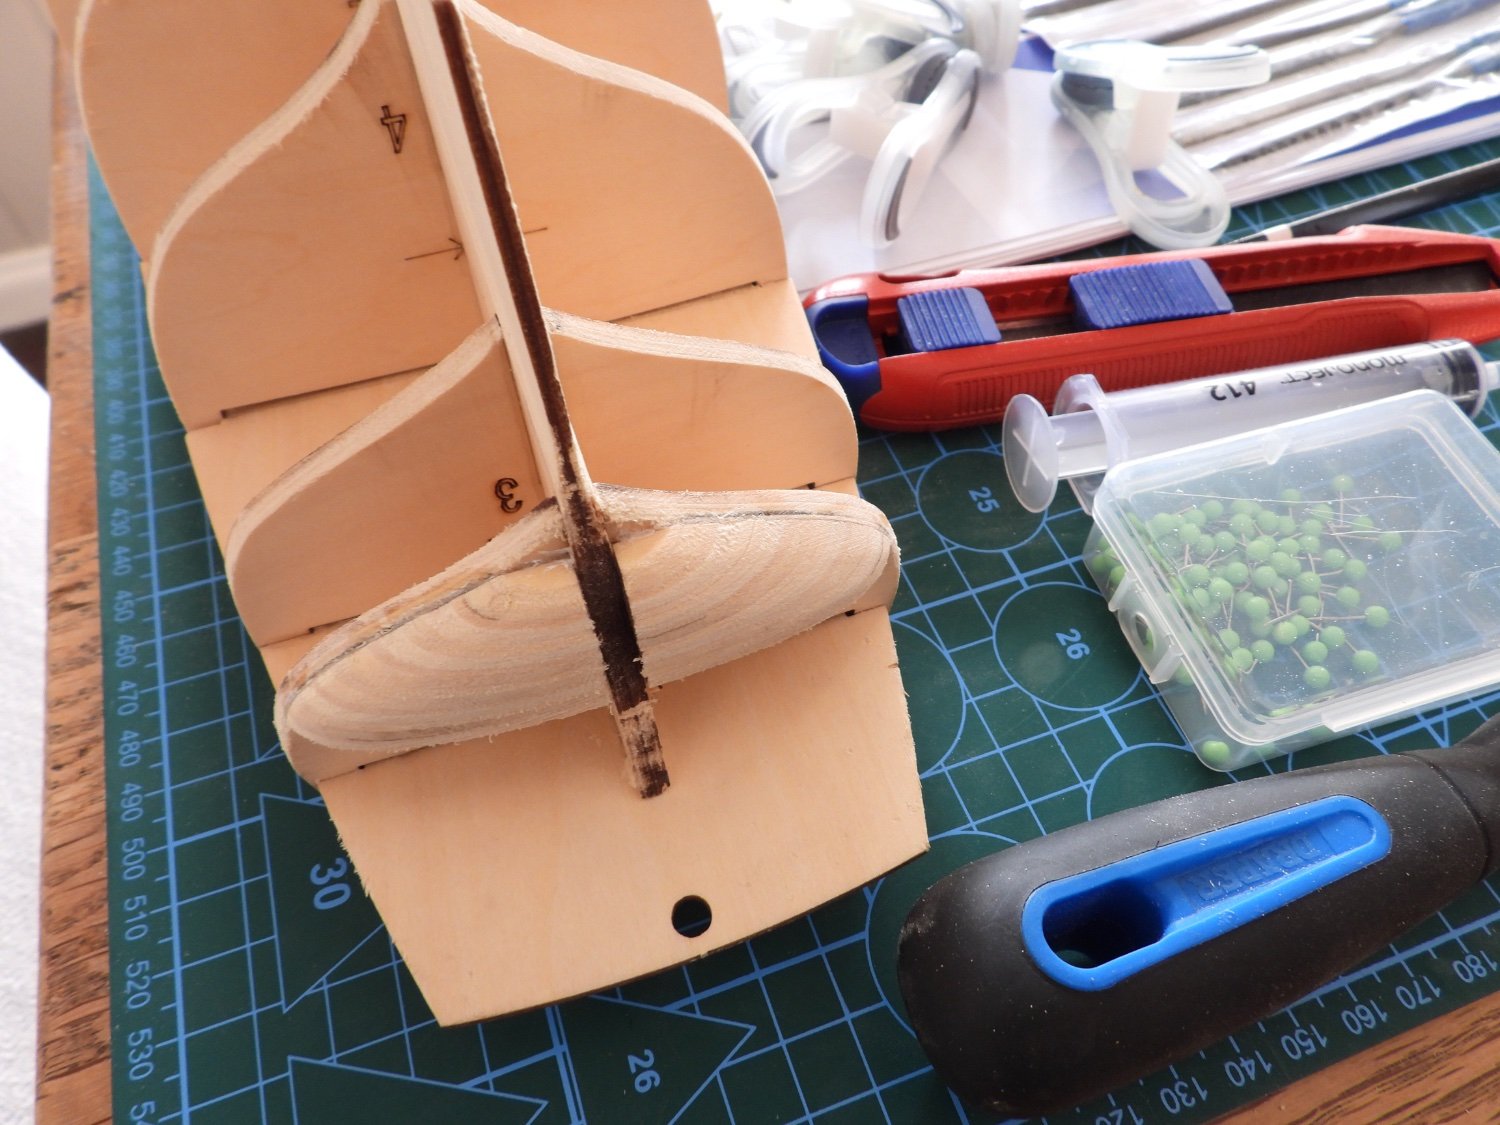
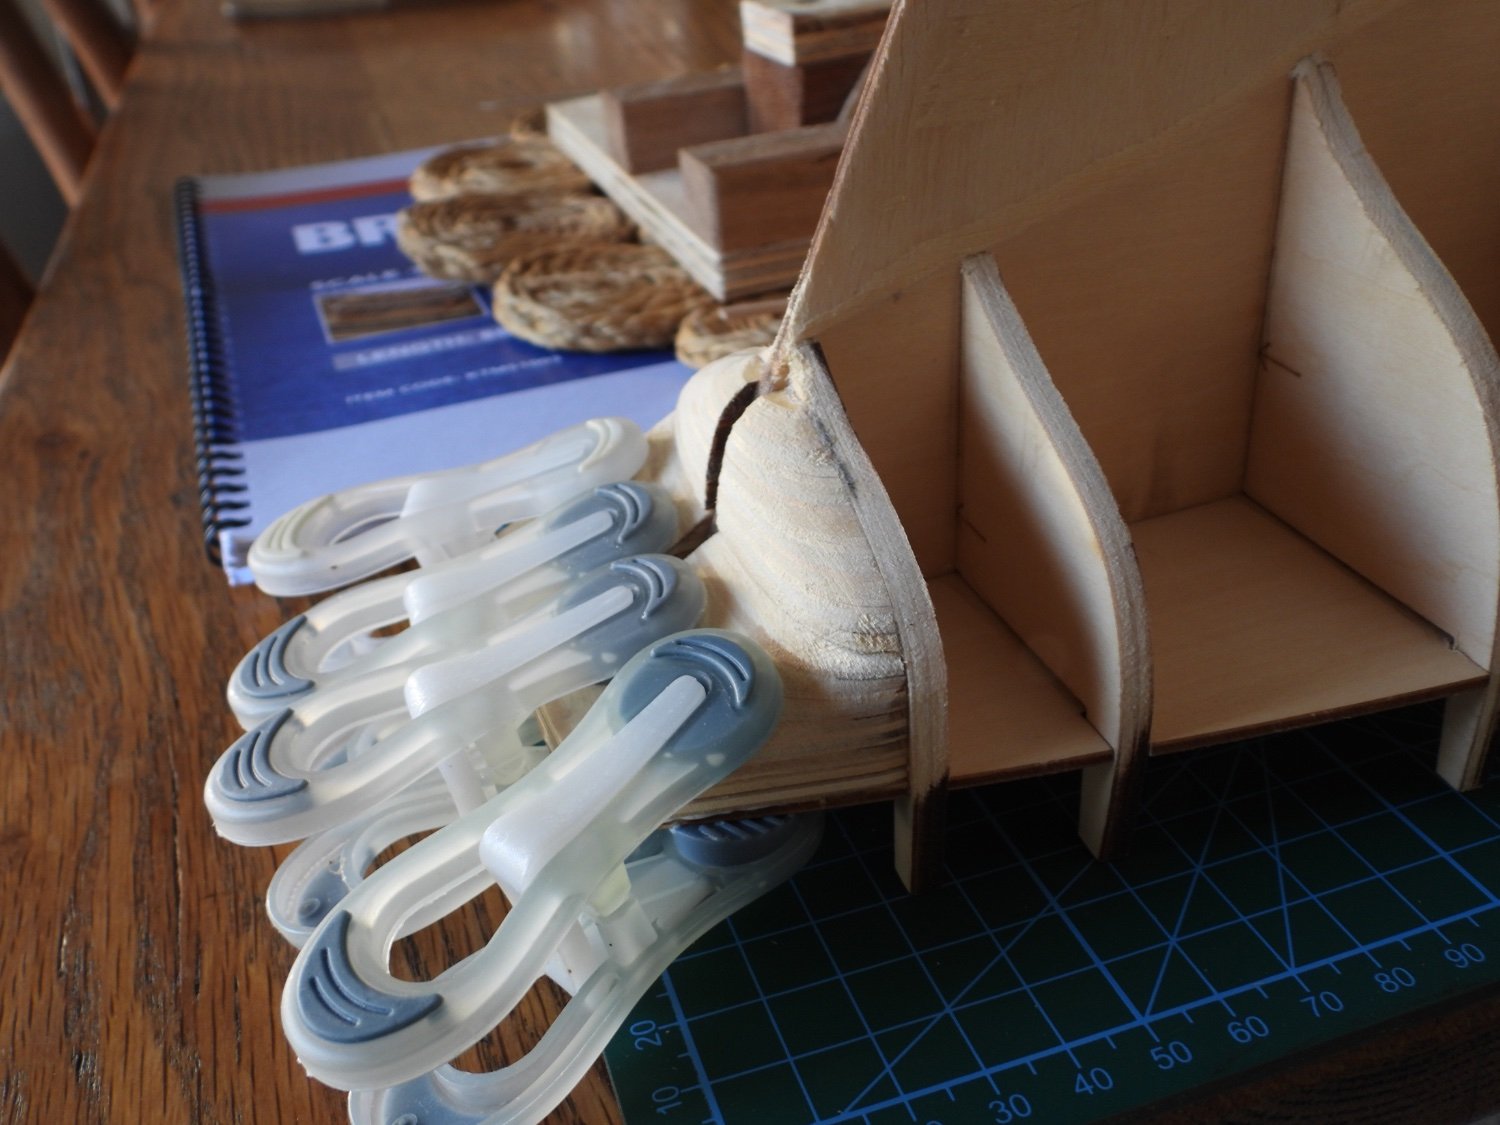
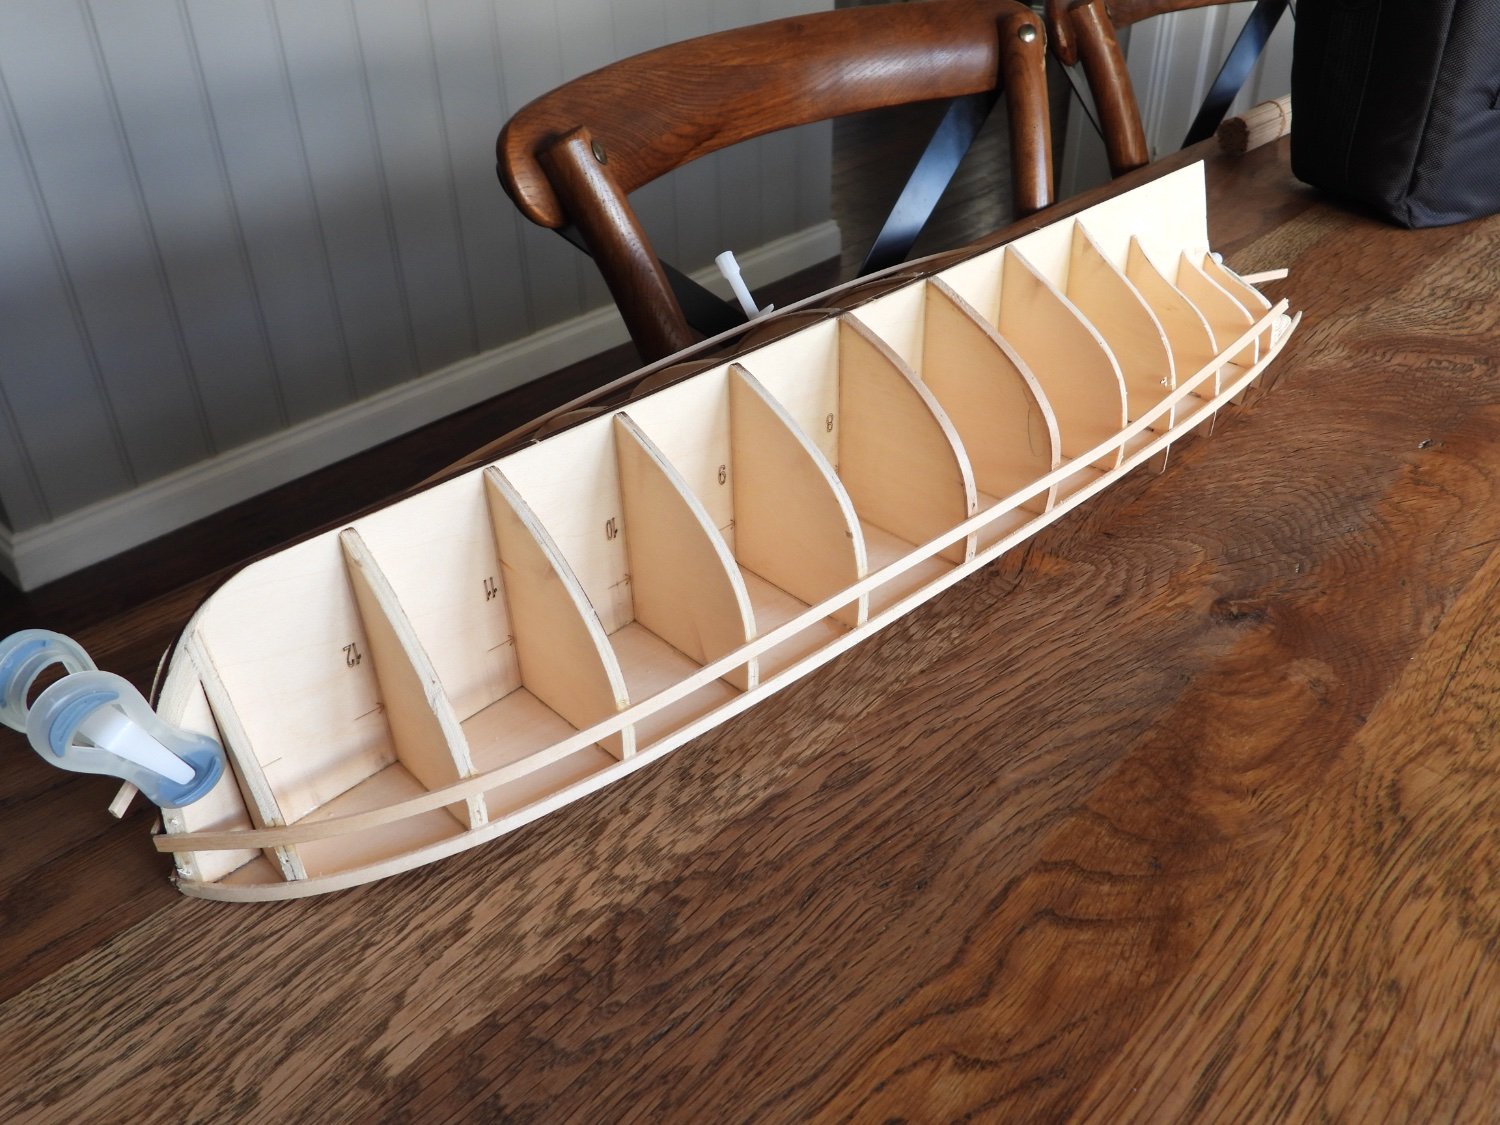
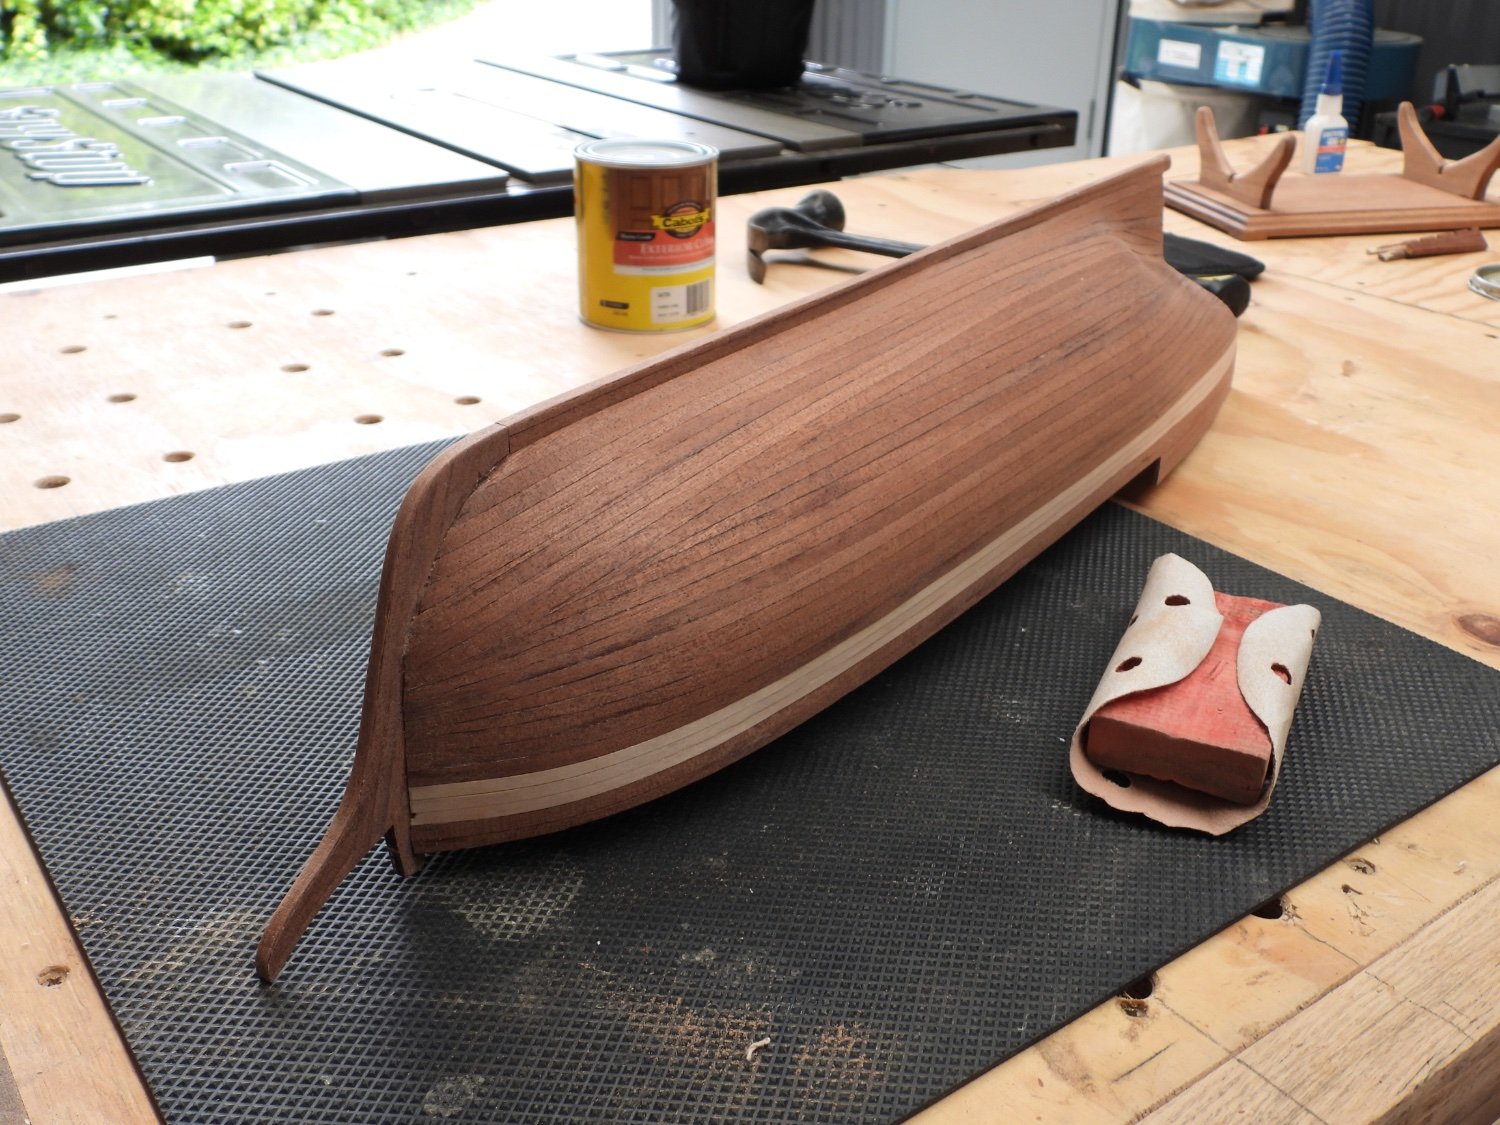
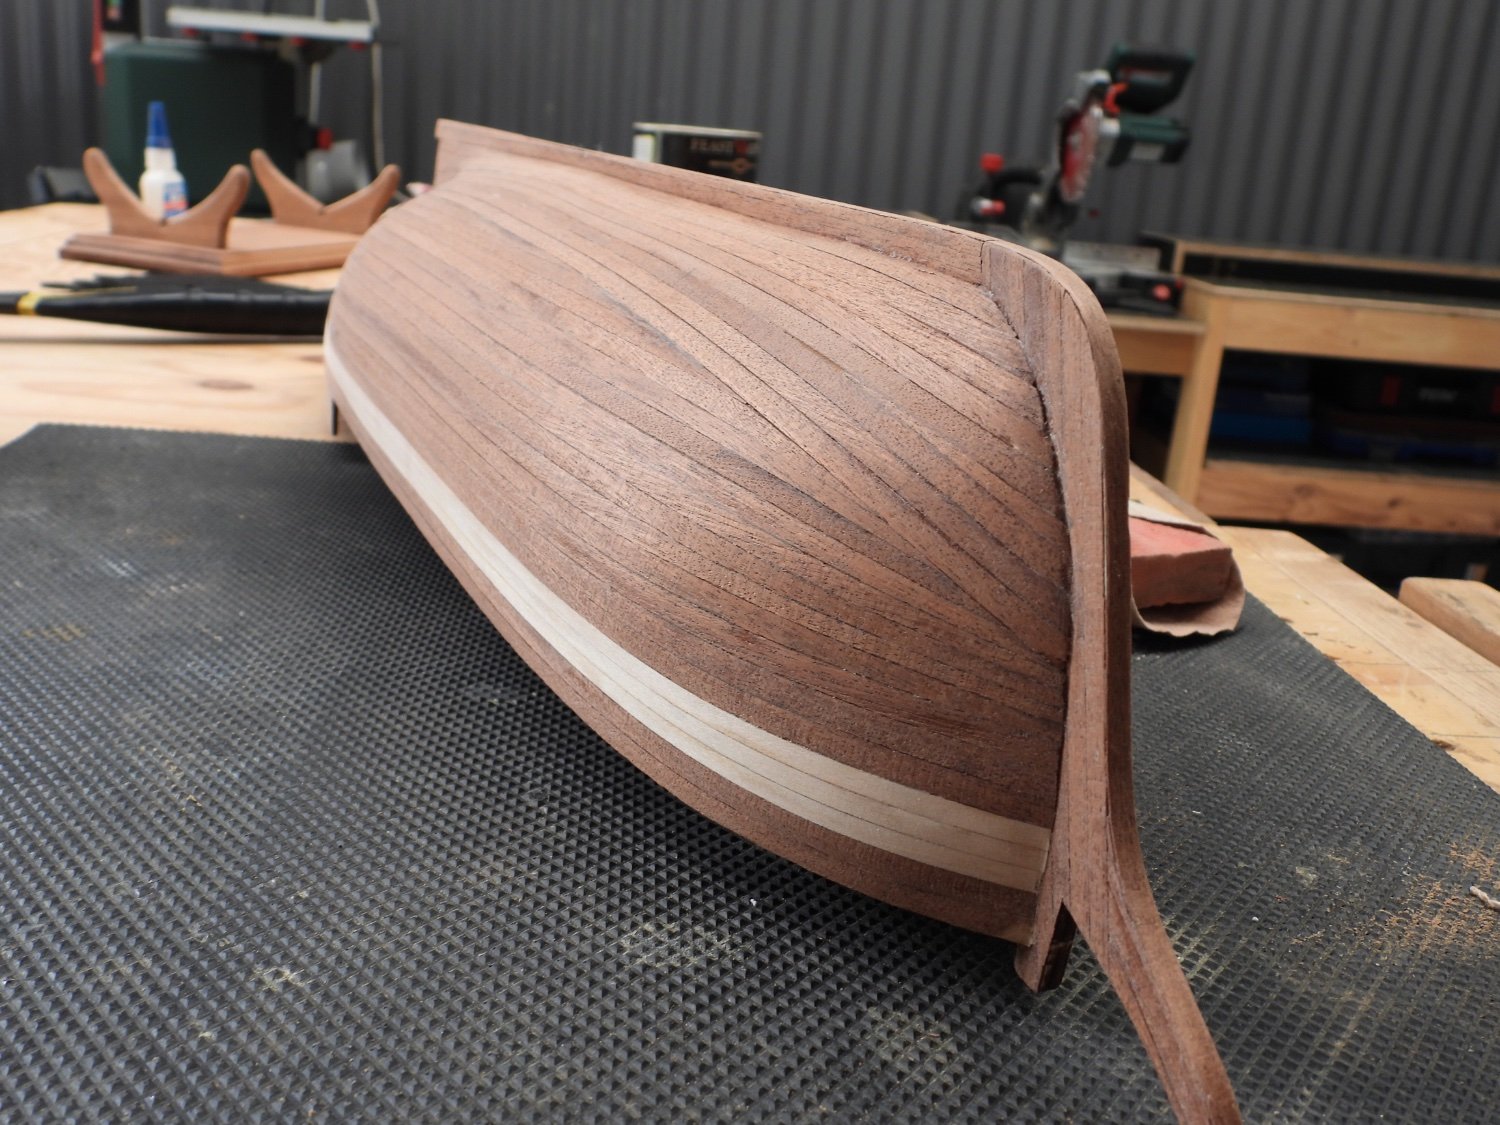
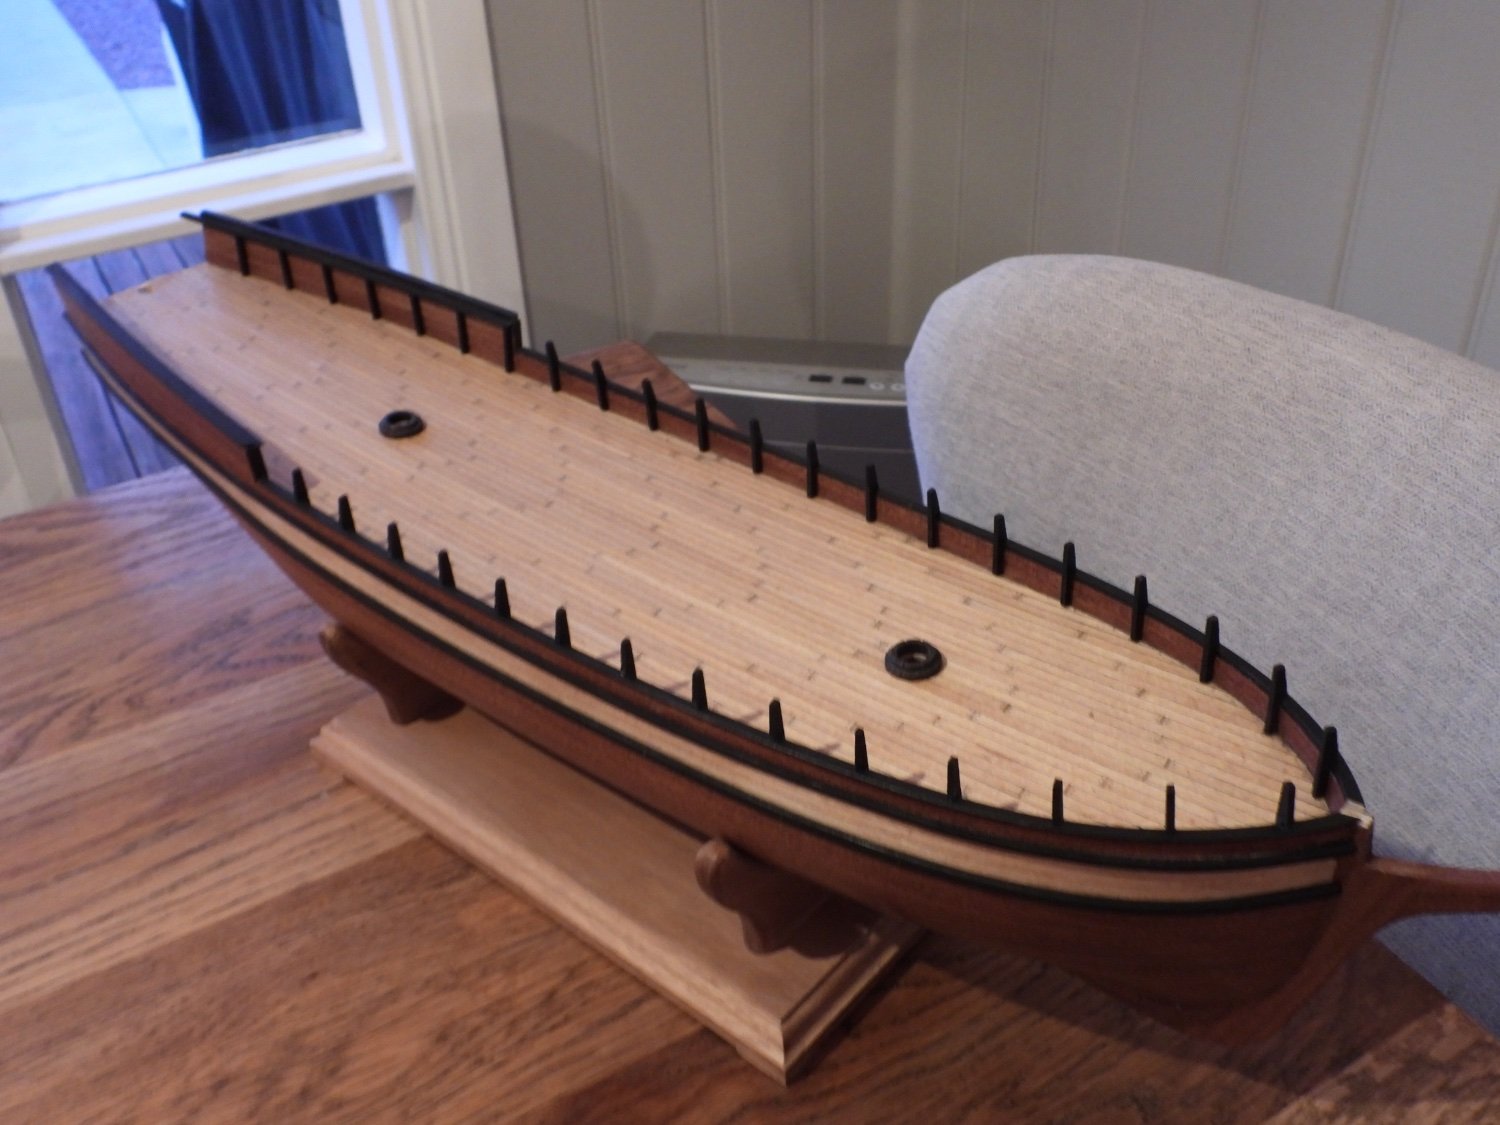
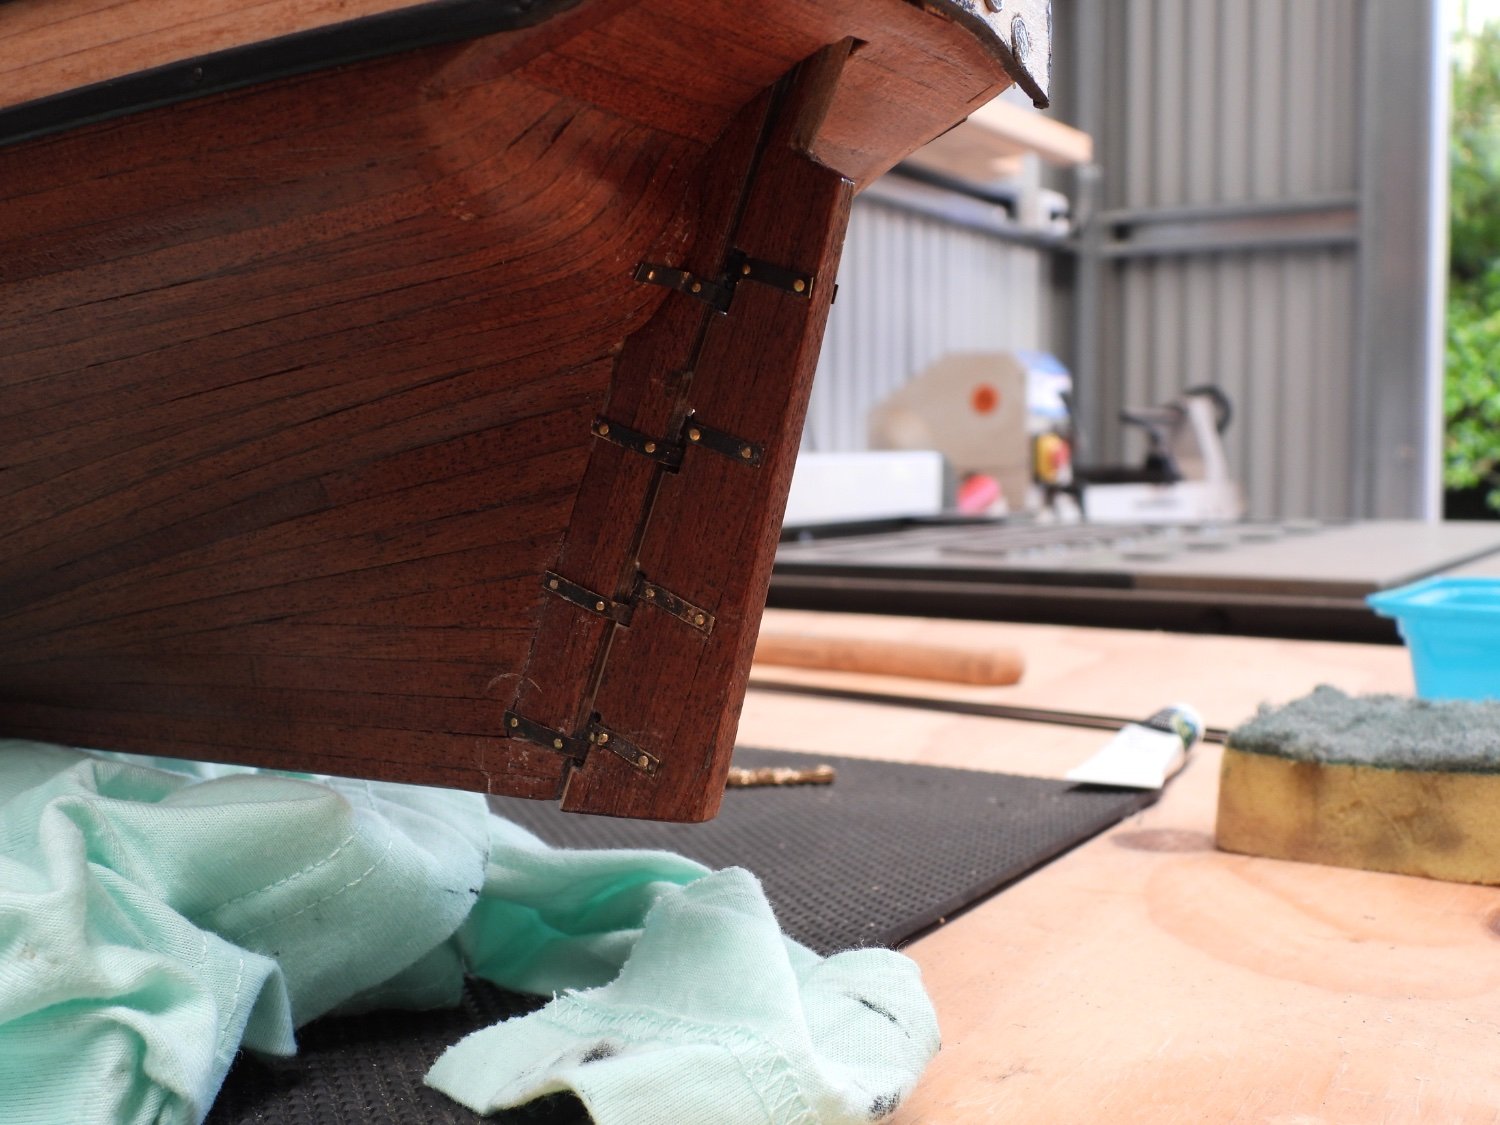
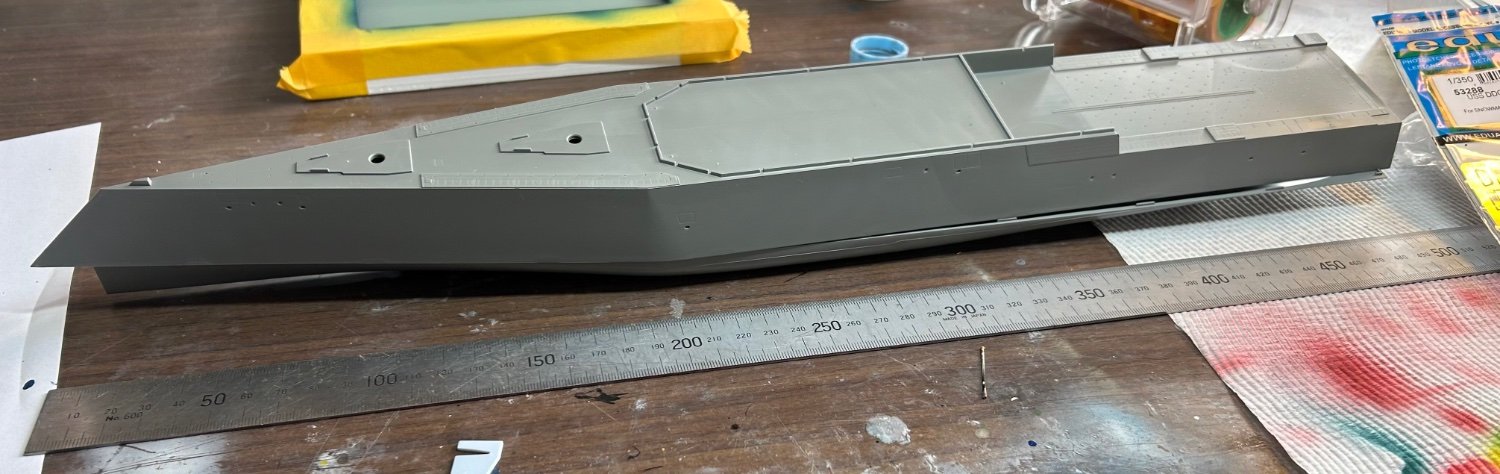
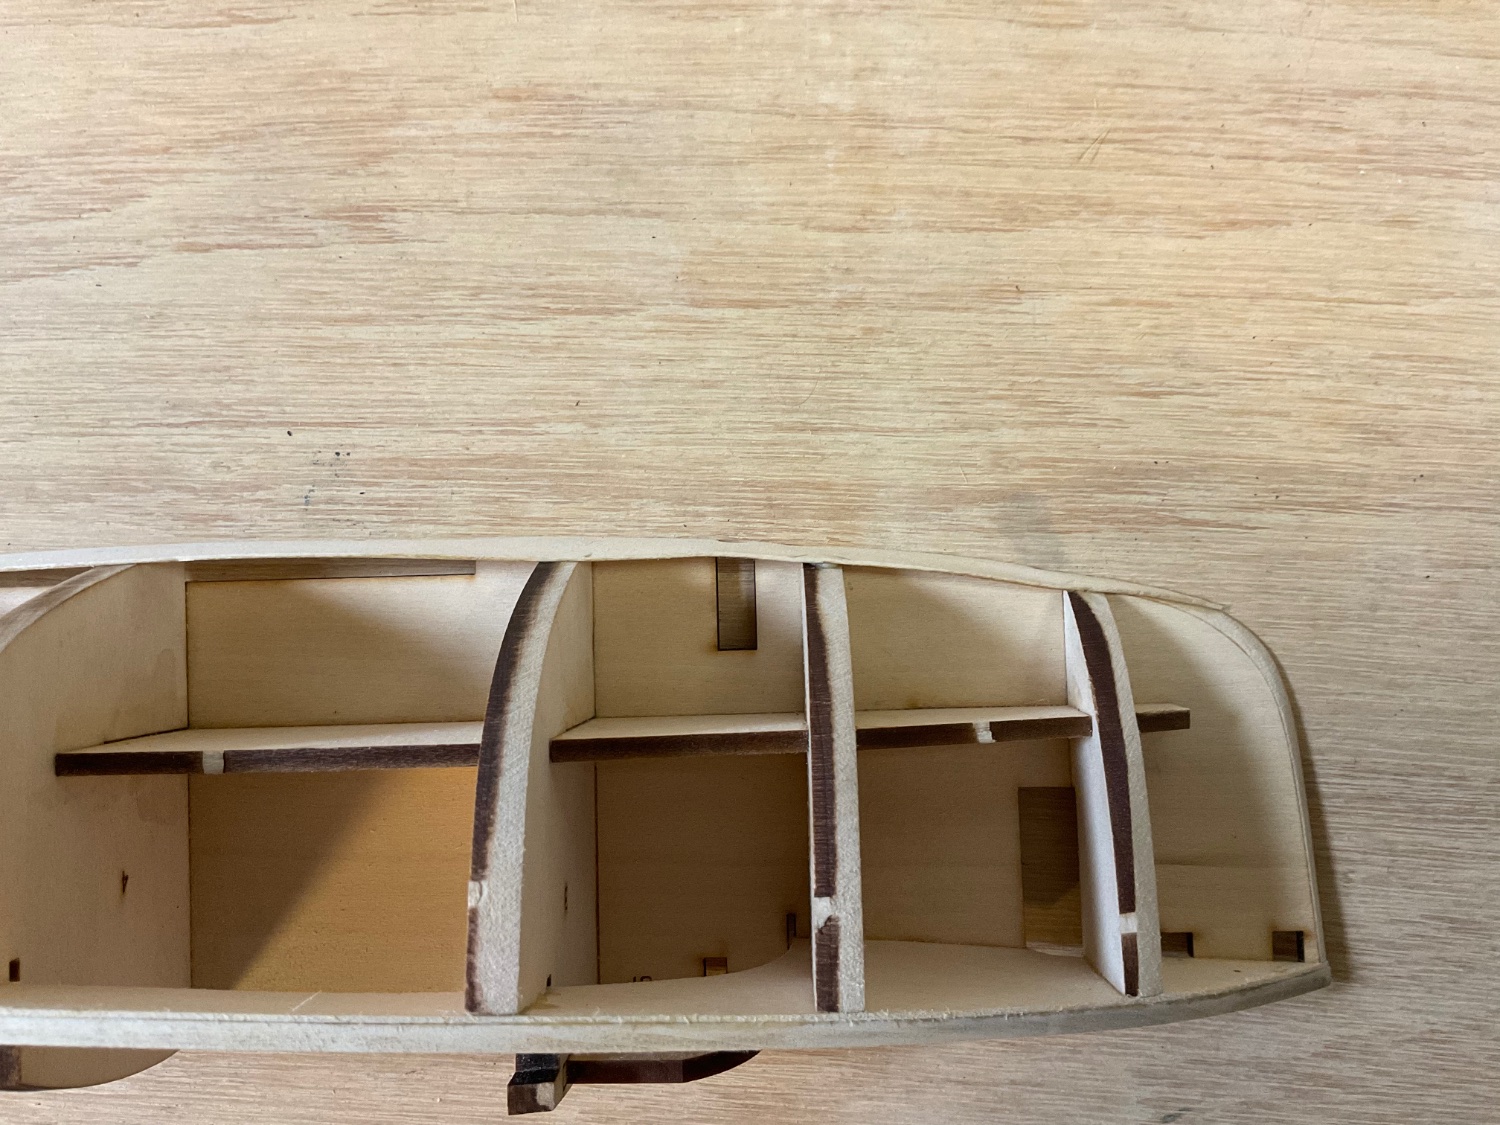
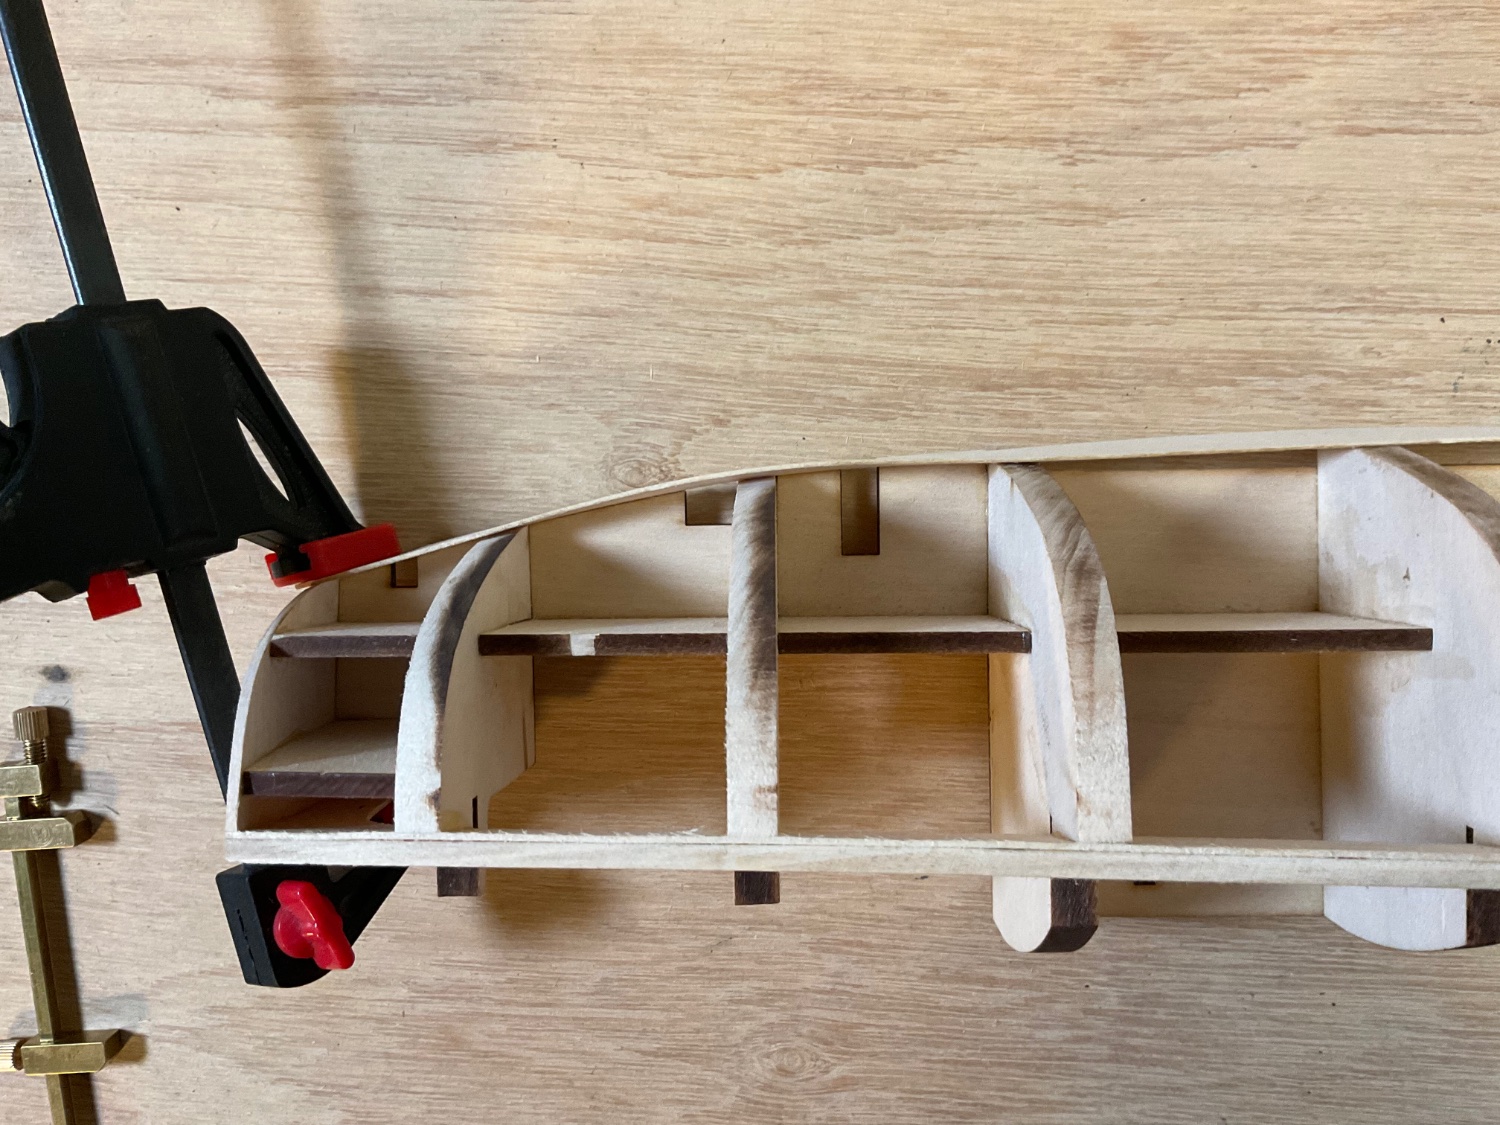
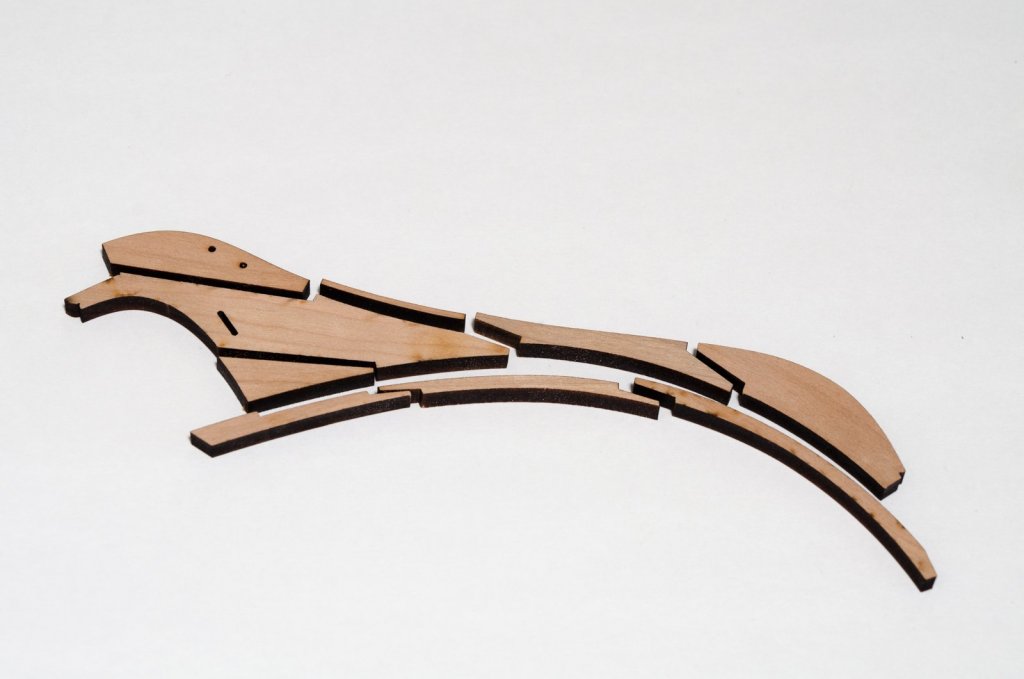
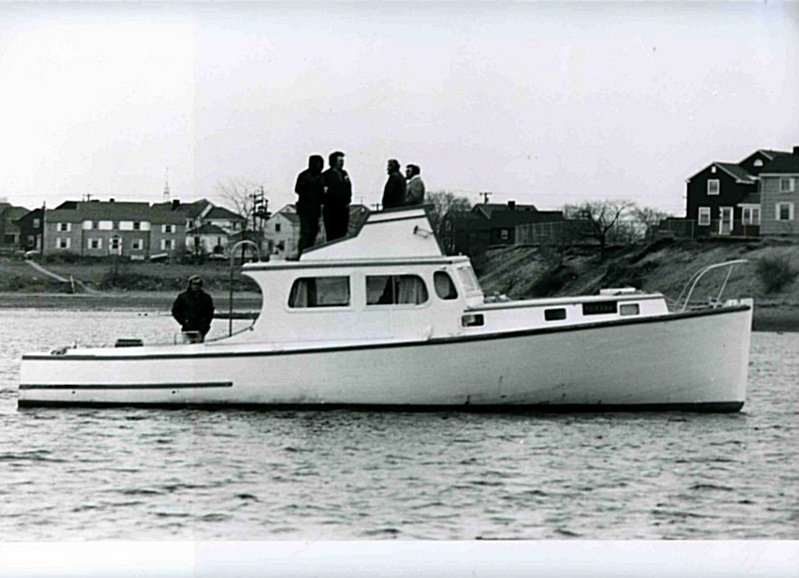
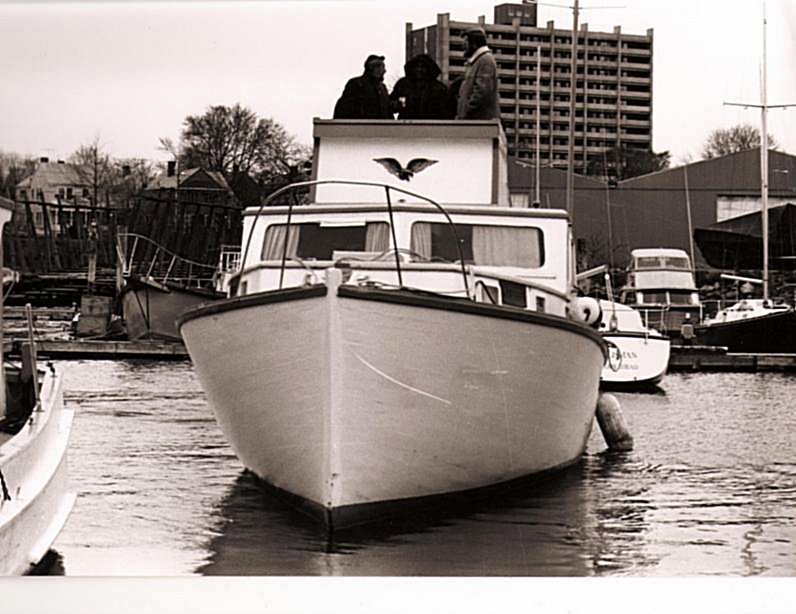
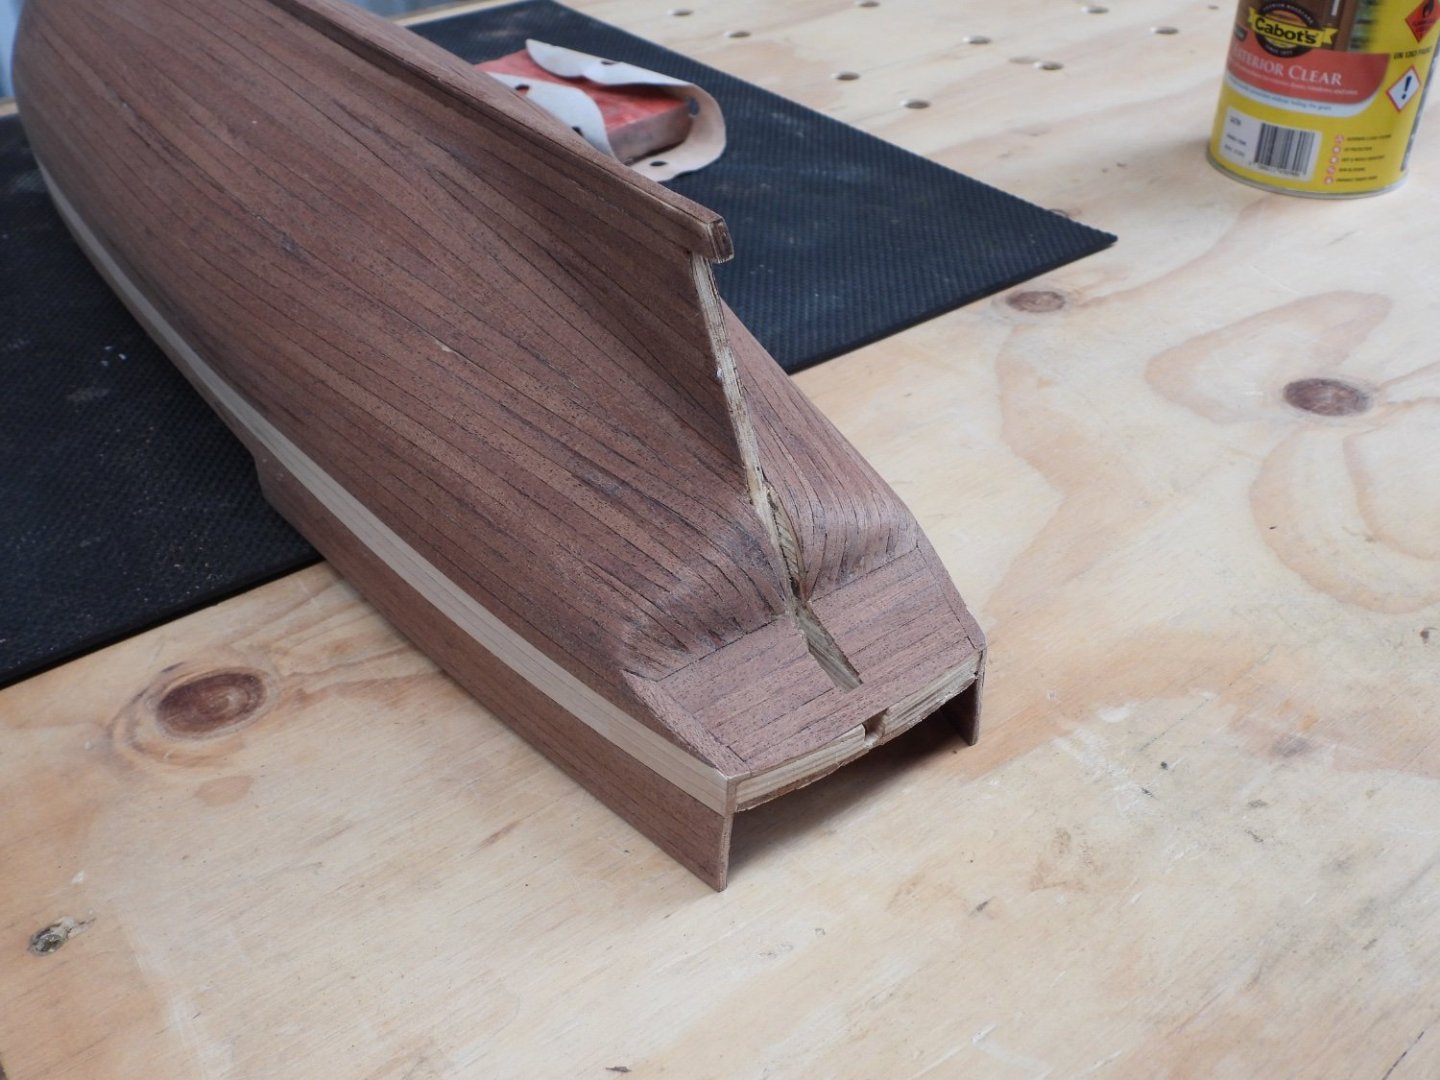
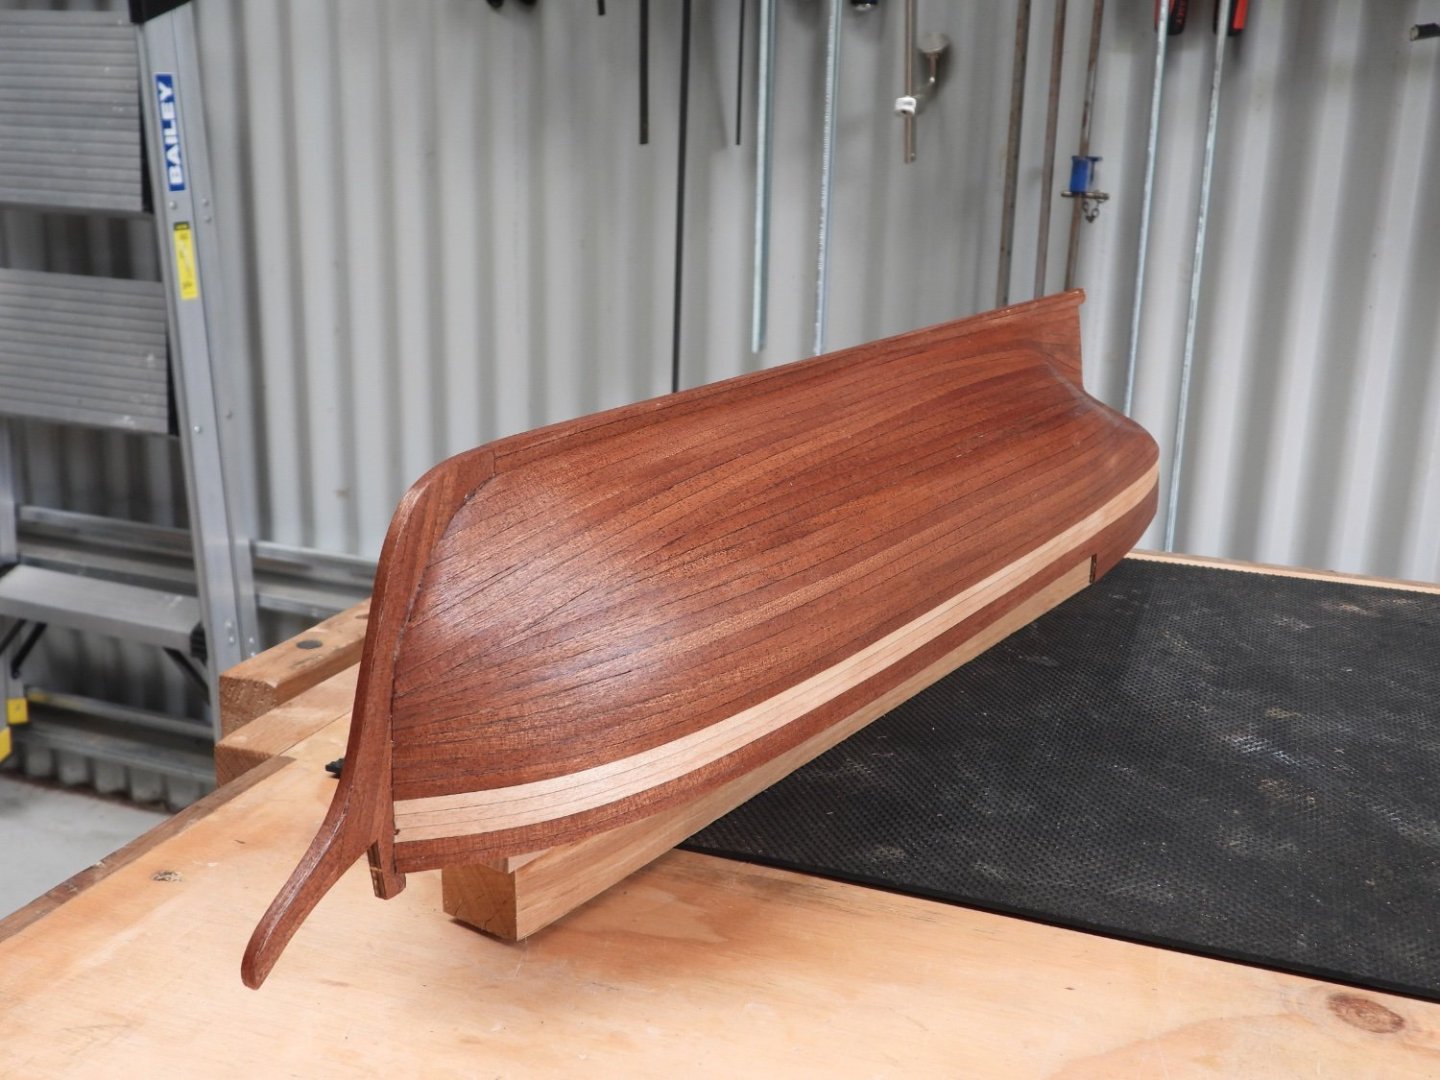
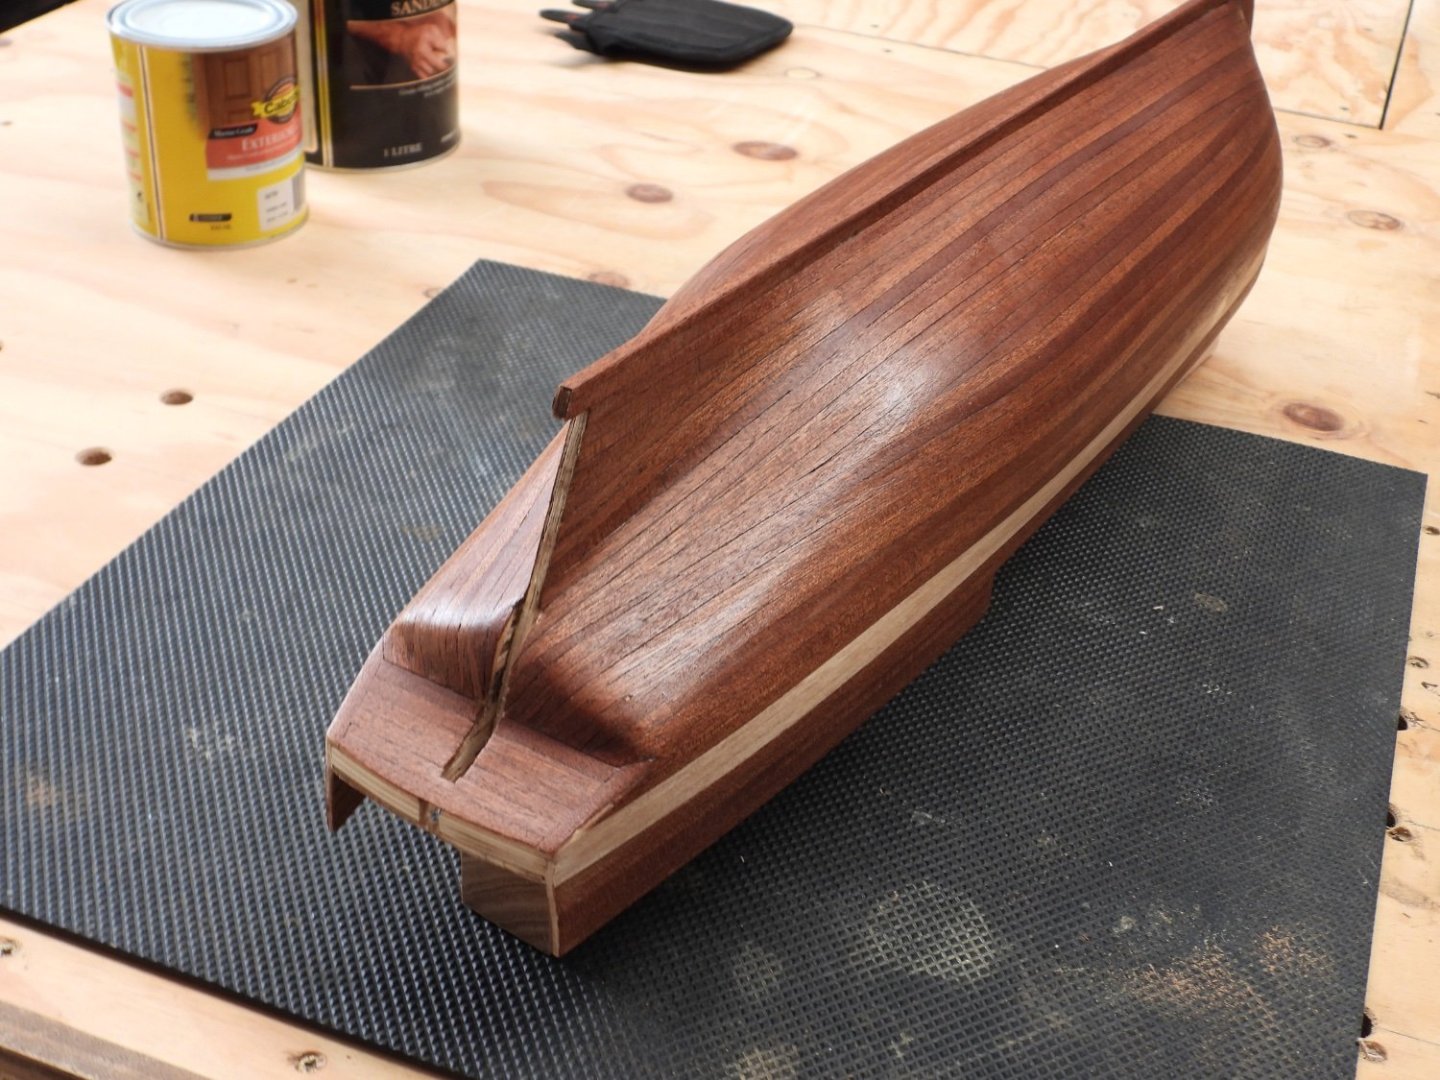
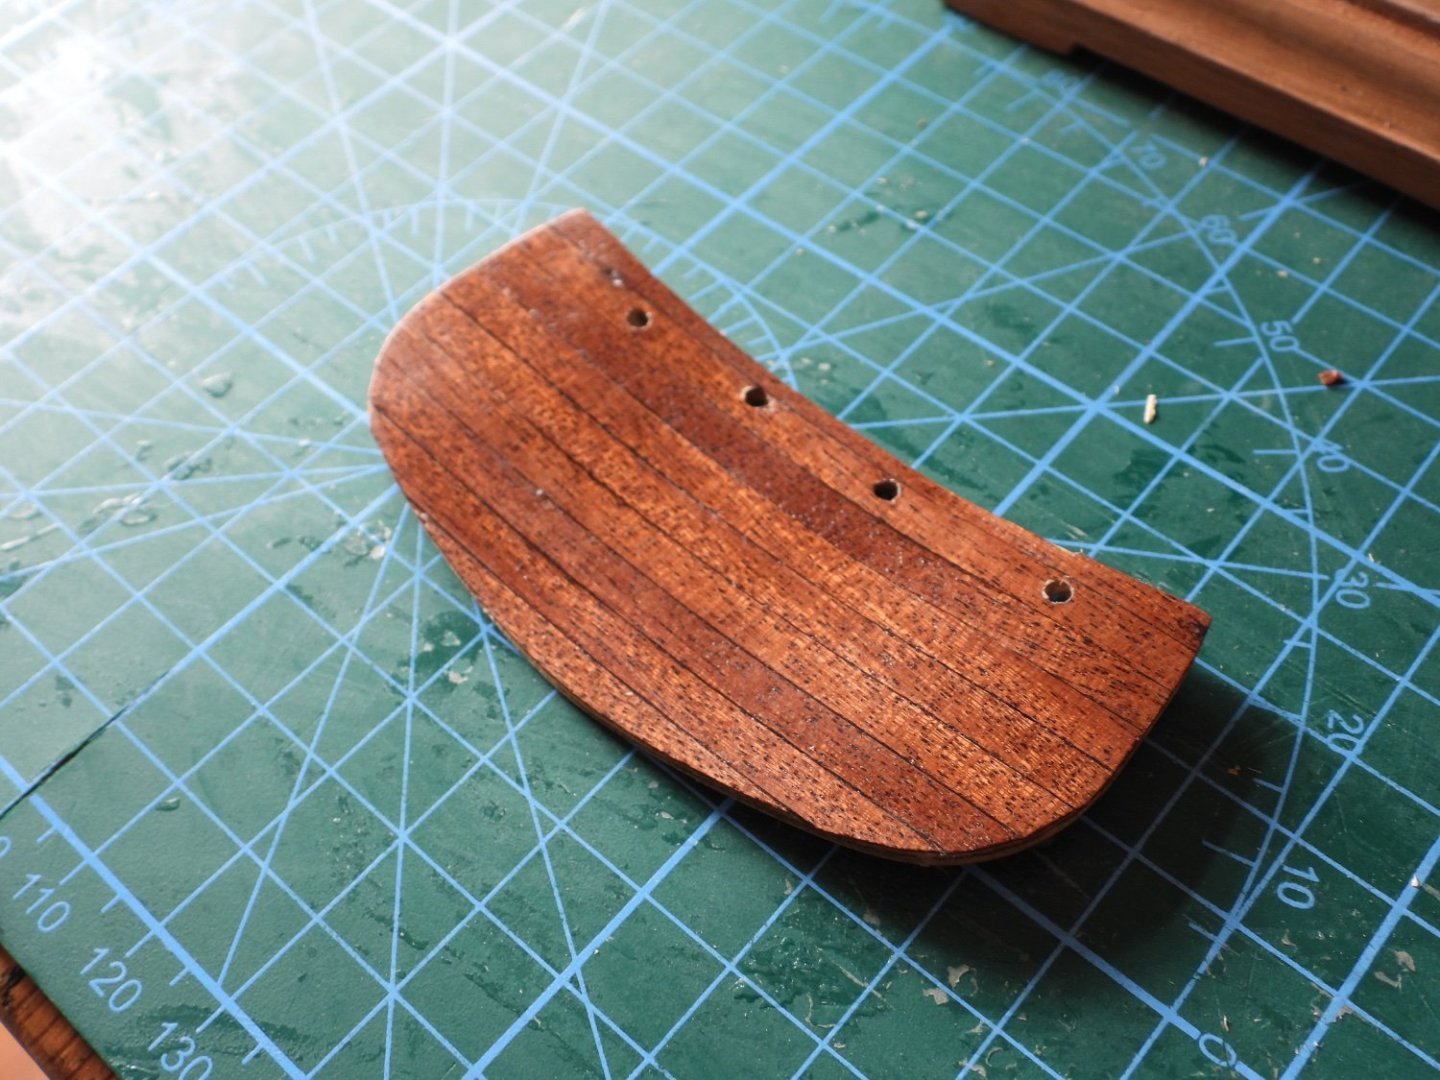
 This is my first build log on MSW , and second scratch built boat, both lockdown projects. Why Orca? It’s arguably the most iconic movie boat of all time, with all the associated romance of being a star in a huge film. It’s also a huge challenge, and a good test of the many modelling skills I have to learn to enable me to move on to more complex builds. Talking of romance, January 1st 1976 was the first date I had with my wife of 38 years – we went to the cinema – guess what we watched? So that’s why it has a special memories for me! The research for Orca has not been easy, despite there being a number of previous models built, with some excellent reference material available, and a fanatical fan base posting pictures. Her secrets are well hidden. As far as I can see there are no available plans of the original boat, Warlock, a Novi lobster boat typical of the Maine and Nova Scotia coasts, and only three photographs of her. Orca herself was sadly allowed to rot away, with only fragments remaining in the collection of fans, and in the memory of Joe Alves, the master production designer who transformed Warlock into Orca. The plans I’ve seen online for Orca are for an RC model, and whilst they are representative of Orca, they are not of the type of keel or hull nor accurate in the detail of the pilot house or foredeck when measured against stills of Orca from the film. I can find no images of Warlock or Orca’s keel, or shape below the waterline. The film images of Orca listing or sinking are of Orca II, a GRP copy, which had no keel, but a metal frame and barrels used to change the ballast as part of the effects. There are some differences between Orca I and II which can confuse, not least that Orca II’s mast is off-centre. So there is some detective work and guesssork involved. I have studied the plans of other lobster boats available, and there are some You Tube clips and galleries online of lobster boat construction. Orca has distinctive stem, straight to the waterline, unlike many lobster boats which have a continuously curved stem. These images of Warlock show what I mean: The first decision therefore is whether the hull is built-down or skeg-built. The latter is found in traditional wooden lobster boats, creating a shallower flatter hull section. However this usually required the engine to be higher necessitating a box or step up platform in the pilot house. Warlock had (surprisingly) a 4-cylinder petrol (gas) engine, but no box – the pilot house floor was the same level as the aft deck, suggesting a built down hull… As lobster boats moved from sail to power the hull design changed from a true displacement to a longer wider semi-displacement shape. They had a flatter aft but retained the keel and skeg to protect the prop and rudder and allow them to come right up on a ledge at slow speed, for example: It’s unlikely that Warlock had the horsepower to get the hull beyond displacement speed, and certainly she did not have a flared bow, but a softer chine suggesting she did not cruise that fast, and the flatter after section will have kept her prop deeper in the water, helpful in a following sea. I have chosen therefore to make her as a semi displacement hull, with a skeg built after section. The engine is assumed to be small enough to be enclosed below the pilot house decking. I will attempt to use the same method of build as the real boat, that is to assemble the stem, keel, keelson, prop shaft and hook, then attach temporary frames and ribbands before fitting steam bent ribs, then carvel planking up from the keel before removing the frames and ribbands. The whole process being illustrated beautifully here: https://wlb3.smugmug.com/Maine/JBBC I will credit and draw on the large volume of research already available though other model builders logs, and also from the upcoming series of You Tube postings of Master Shipwright Louis Sauzedde who is planning to rebuild Orca in his workshop on Rhode Island see https://www.youtube.com/watch?v=H-myybwQLeM&ab_channel=TipsfromaShipwright Of course much of this work will be hidden in the finished model, but authenticity is clearly important. I may well stand corrected, but I think If I manage this , it will be the first model of Orca built in this way. I would be very pleased to hear from makers of previous models on this methology. After the hull is planked, and deck fitted, the challenge is to reproduce the film prop complete with all the artifacts and weathering. Don’t expect to see much at first, I still have lots to research before I start. I hope this build will help others contemplating this build, and I encourage criticism from the many experts on this forum whose work is so inspiring! I have a small Delta band saw, scroll saw and hand power drills. Other than that this will be done by hand tools. All materials will be from wood and other stuff I have in my store, most of which is recyled. Finally no sharks will be harmed in the making of this Orca.
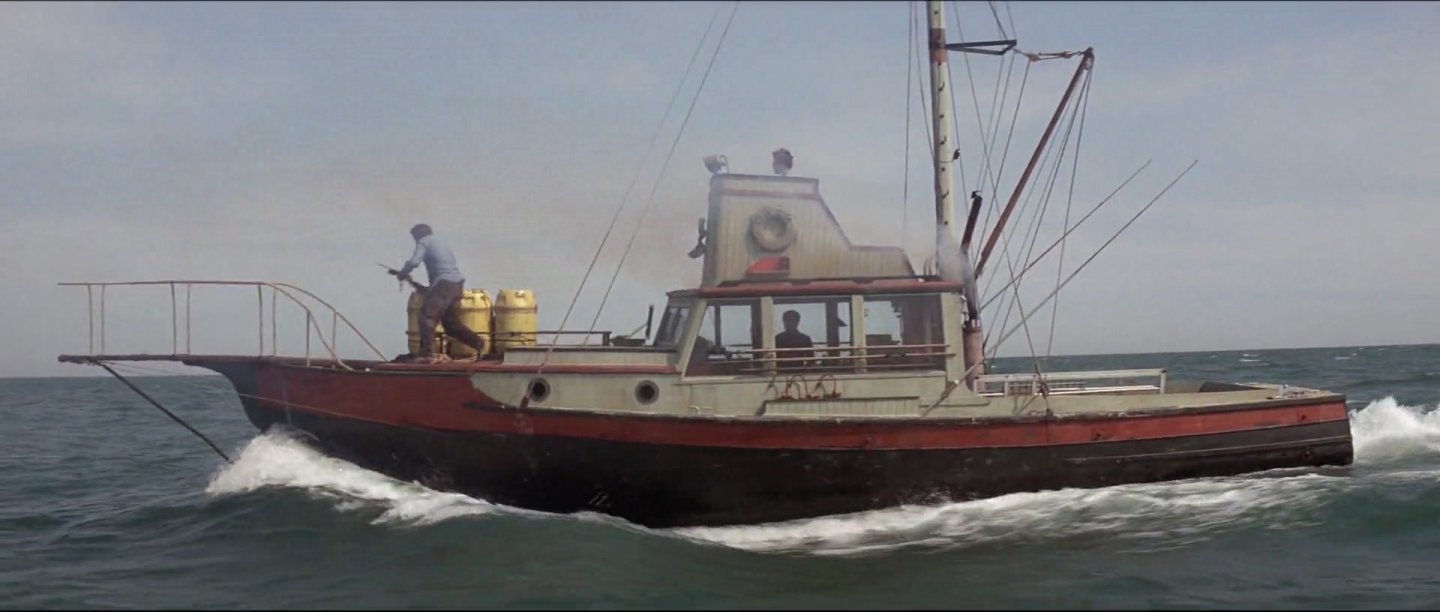
-
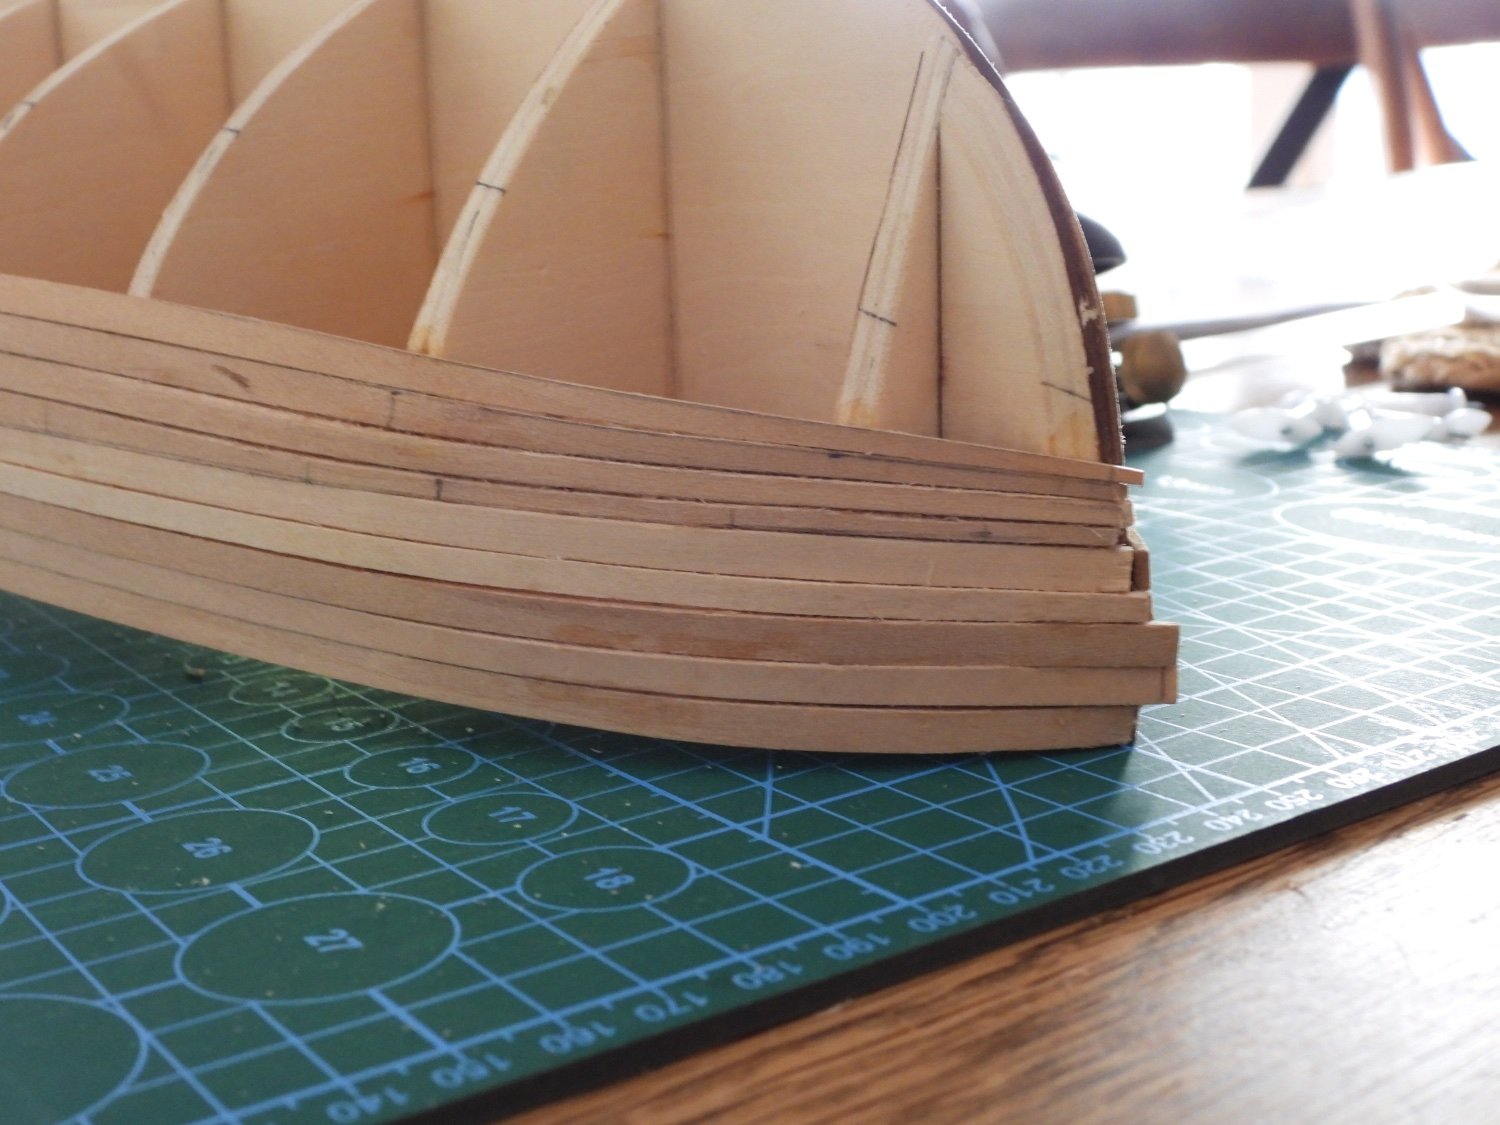
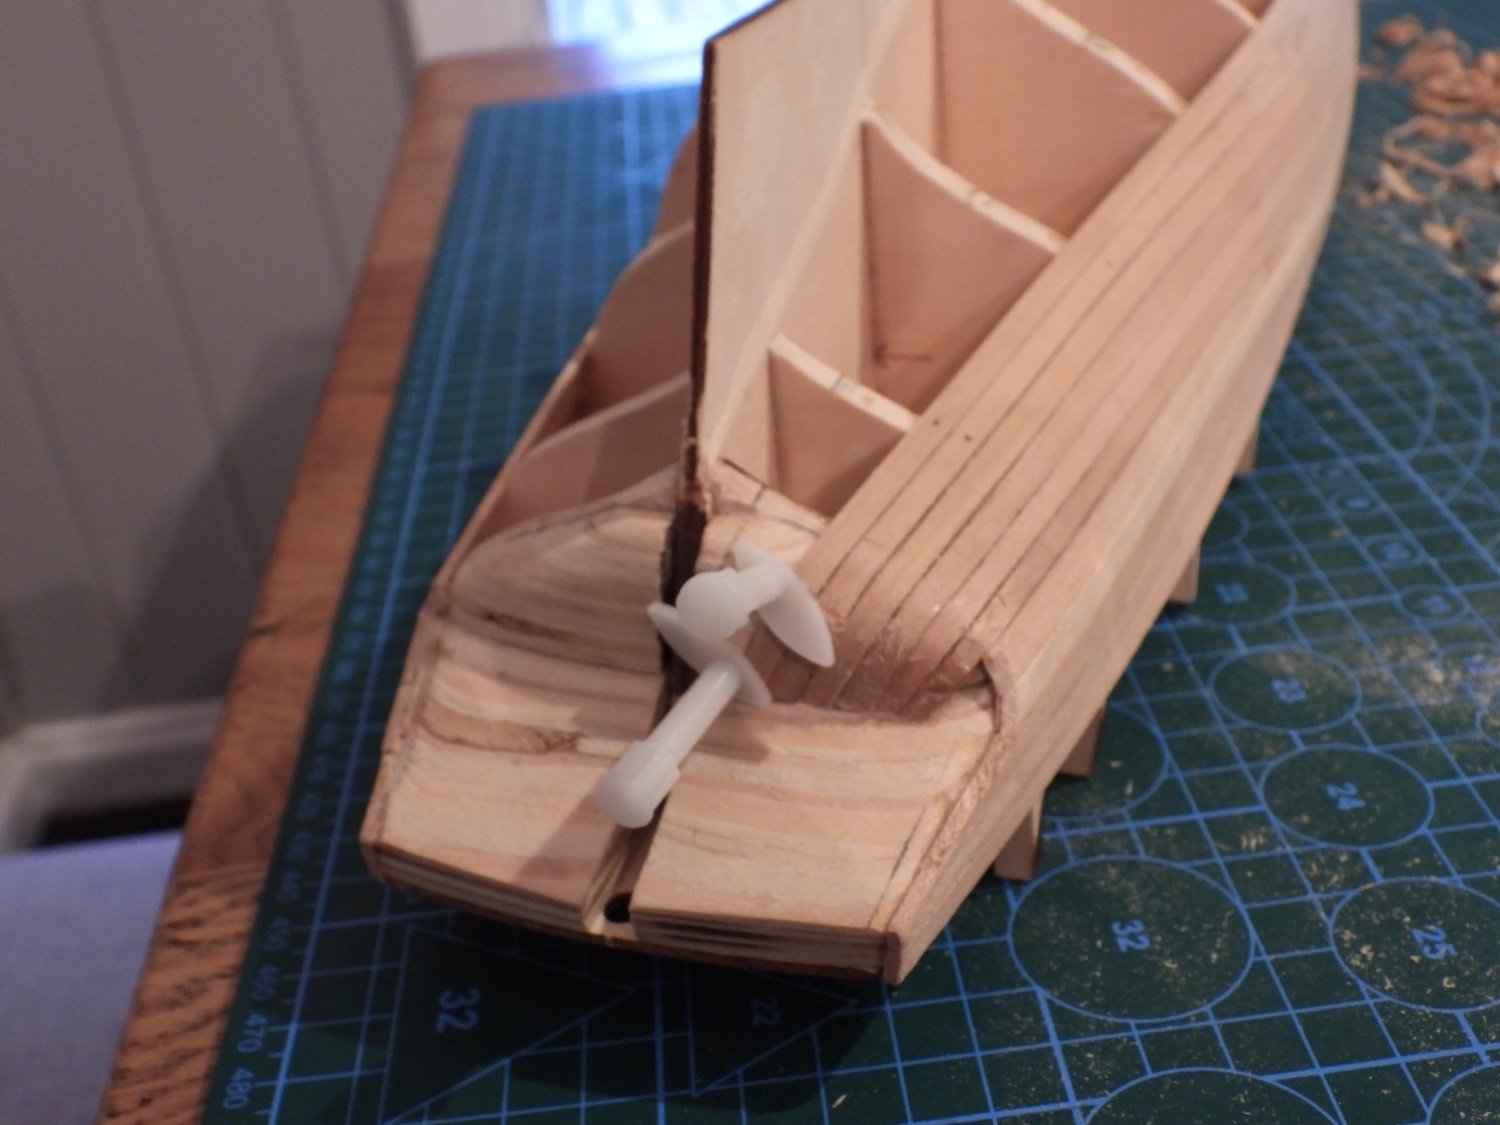
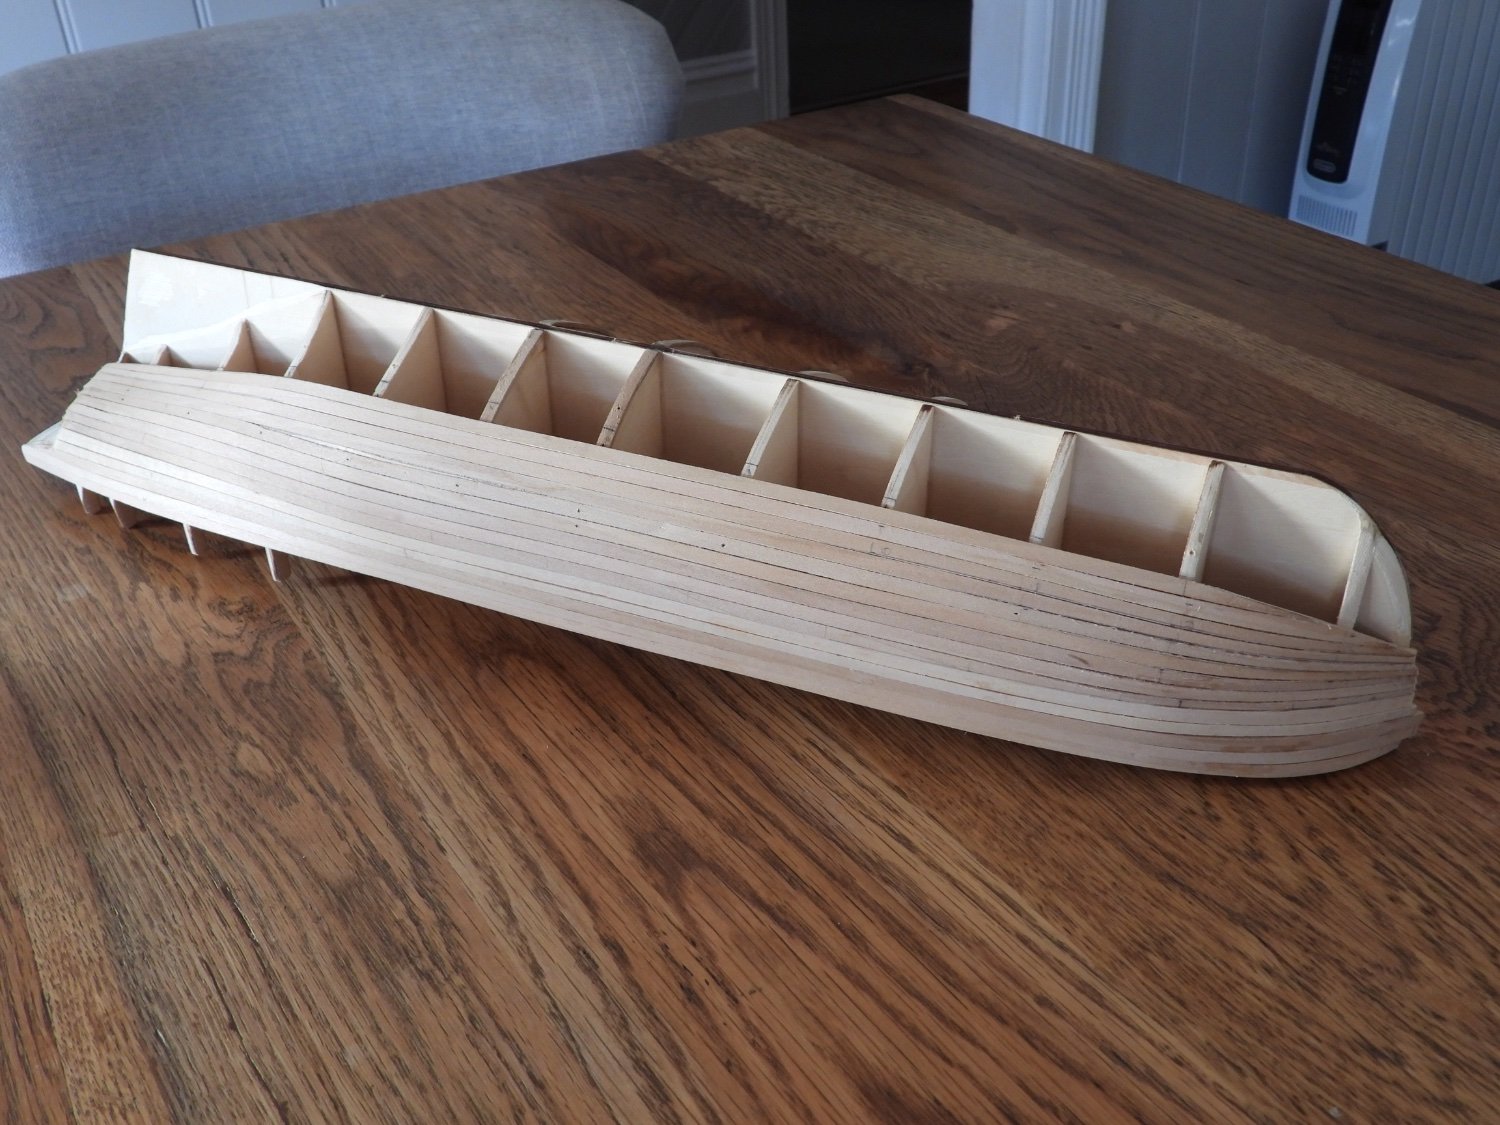
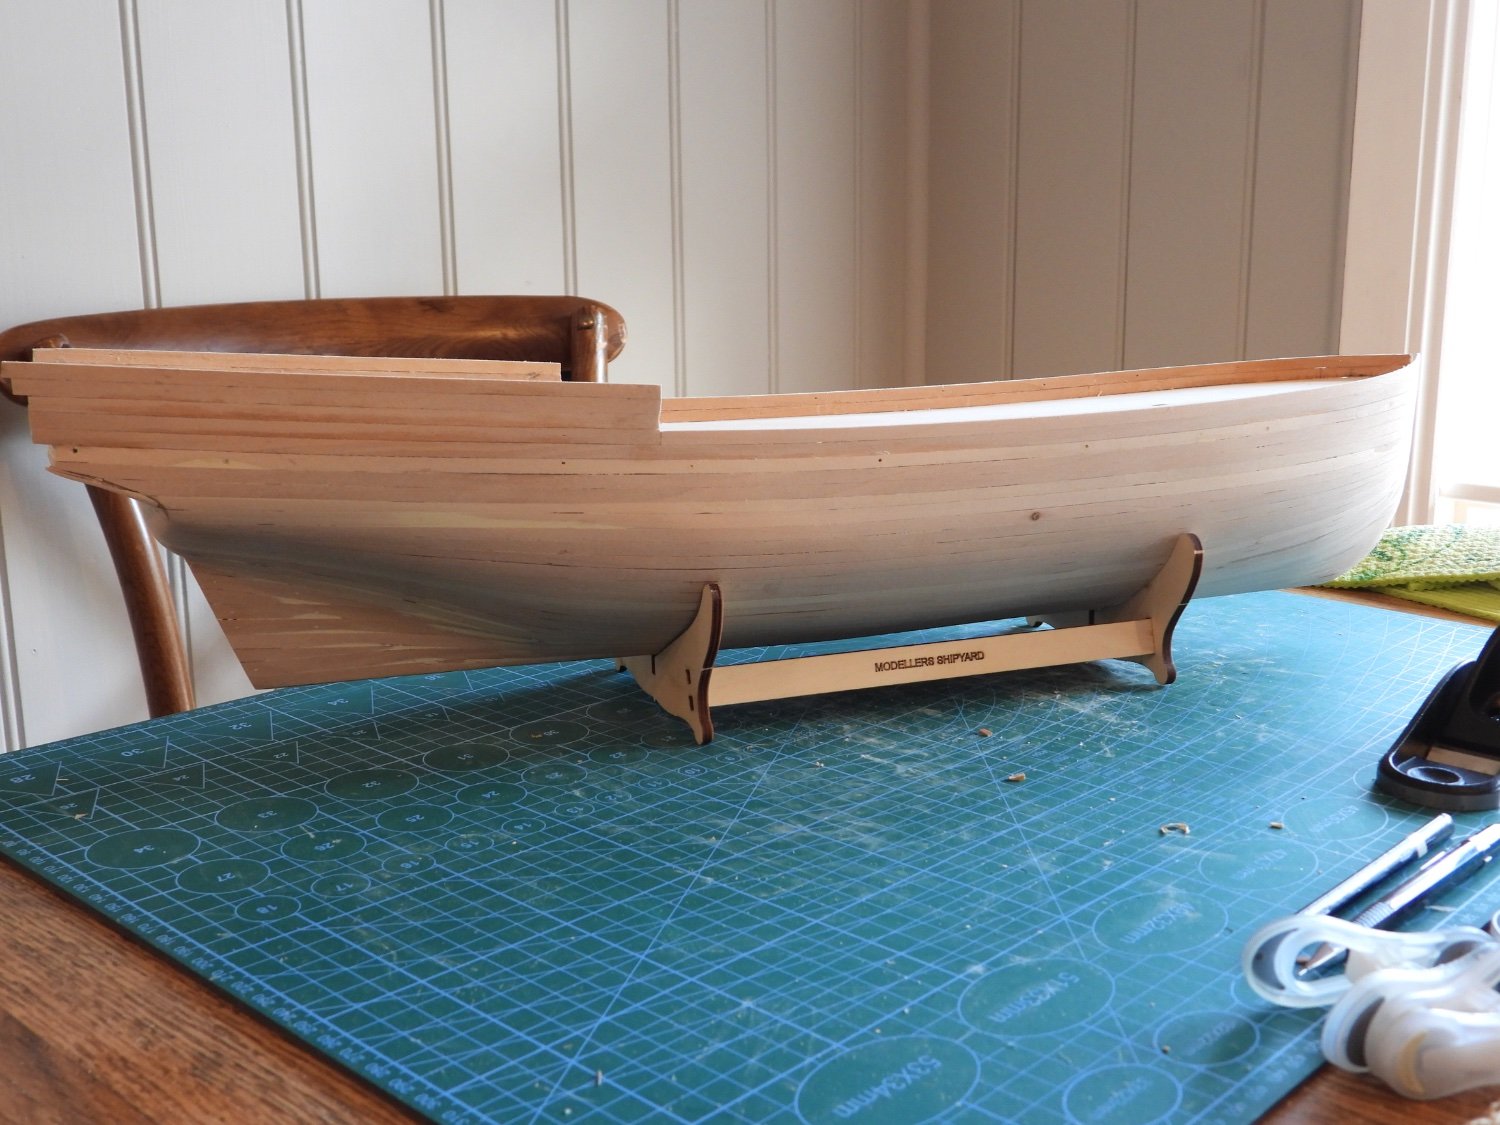
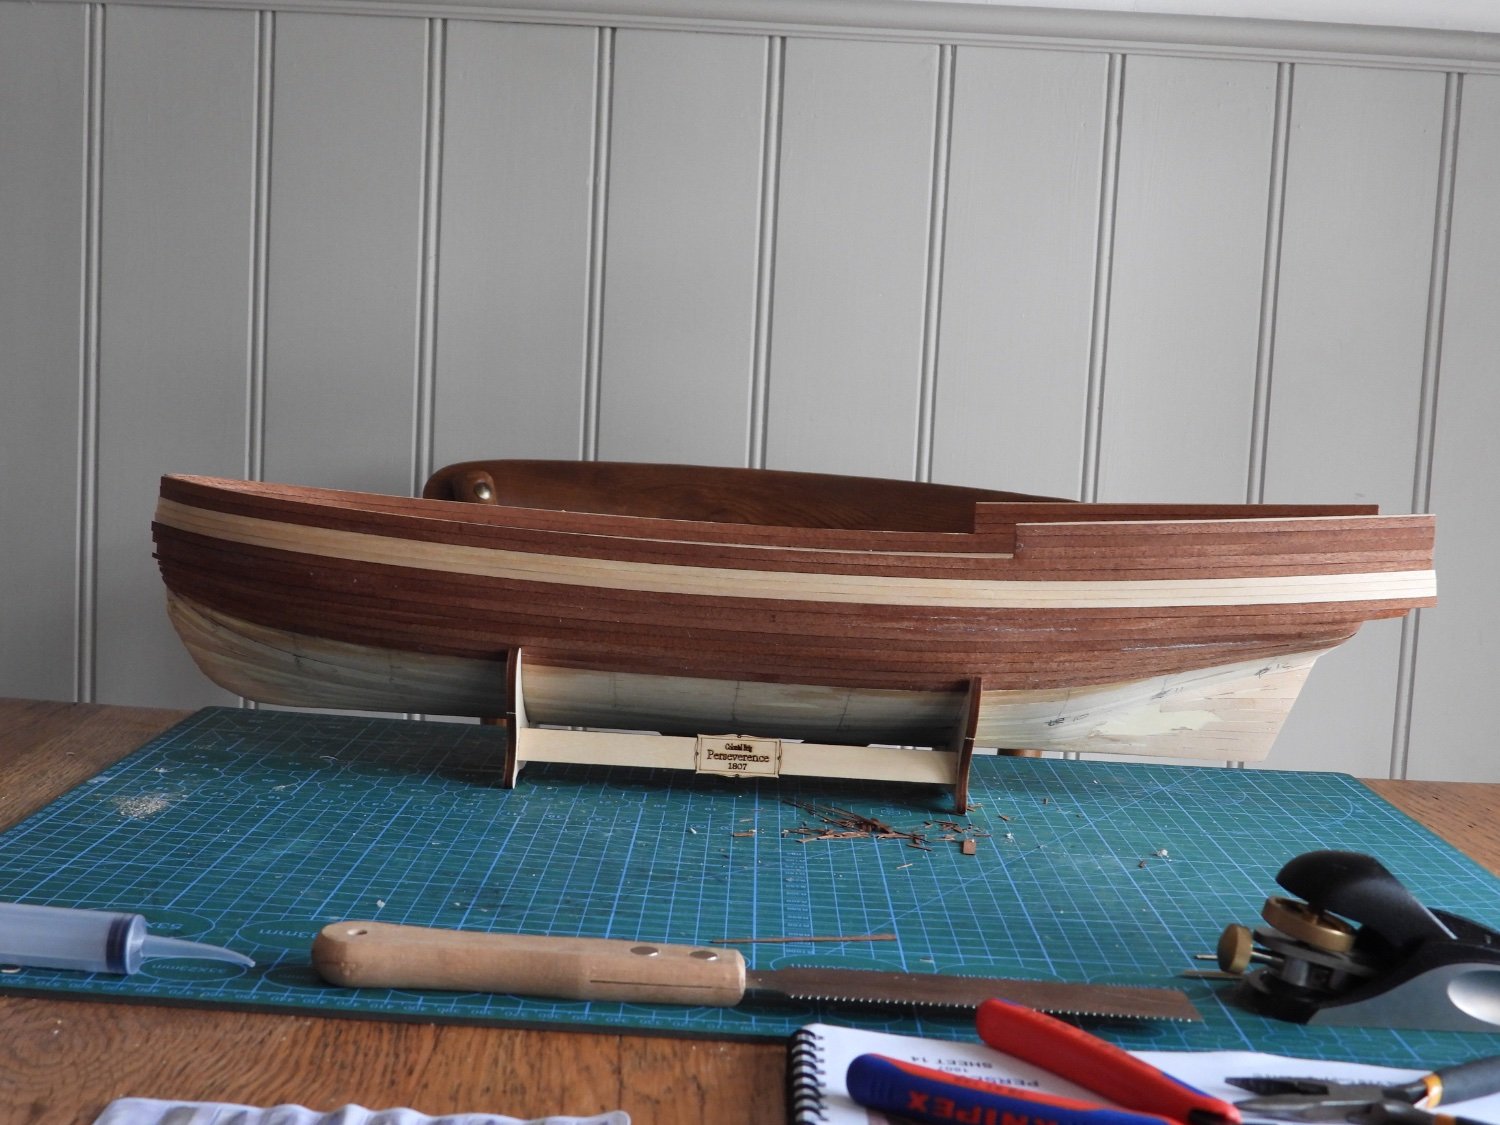
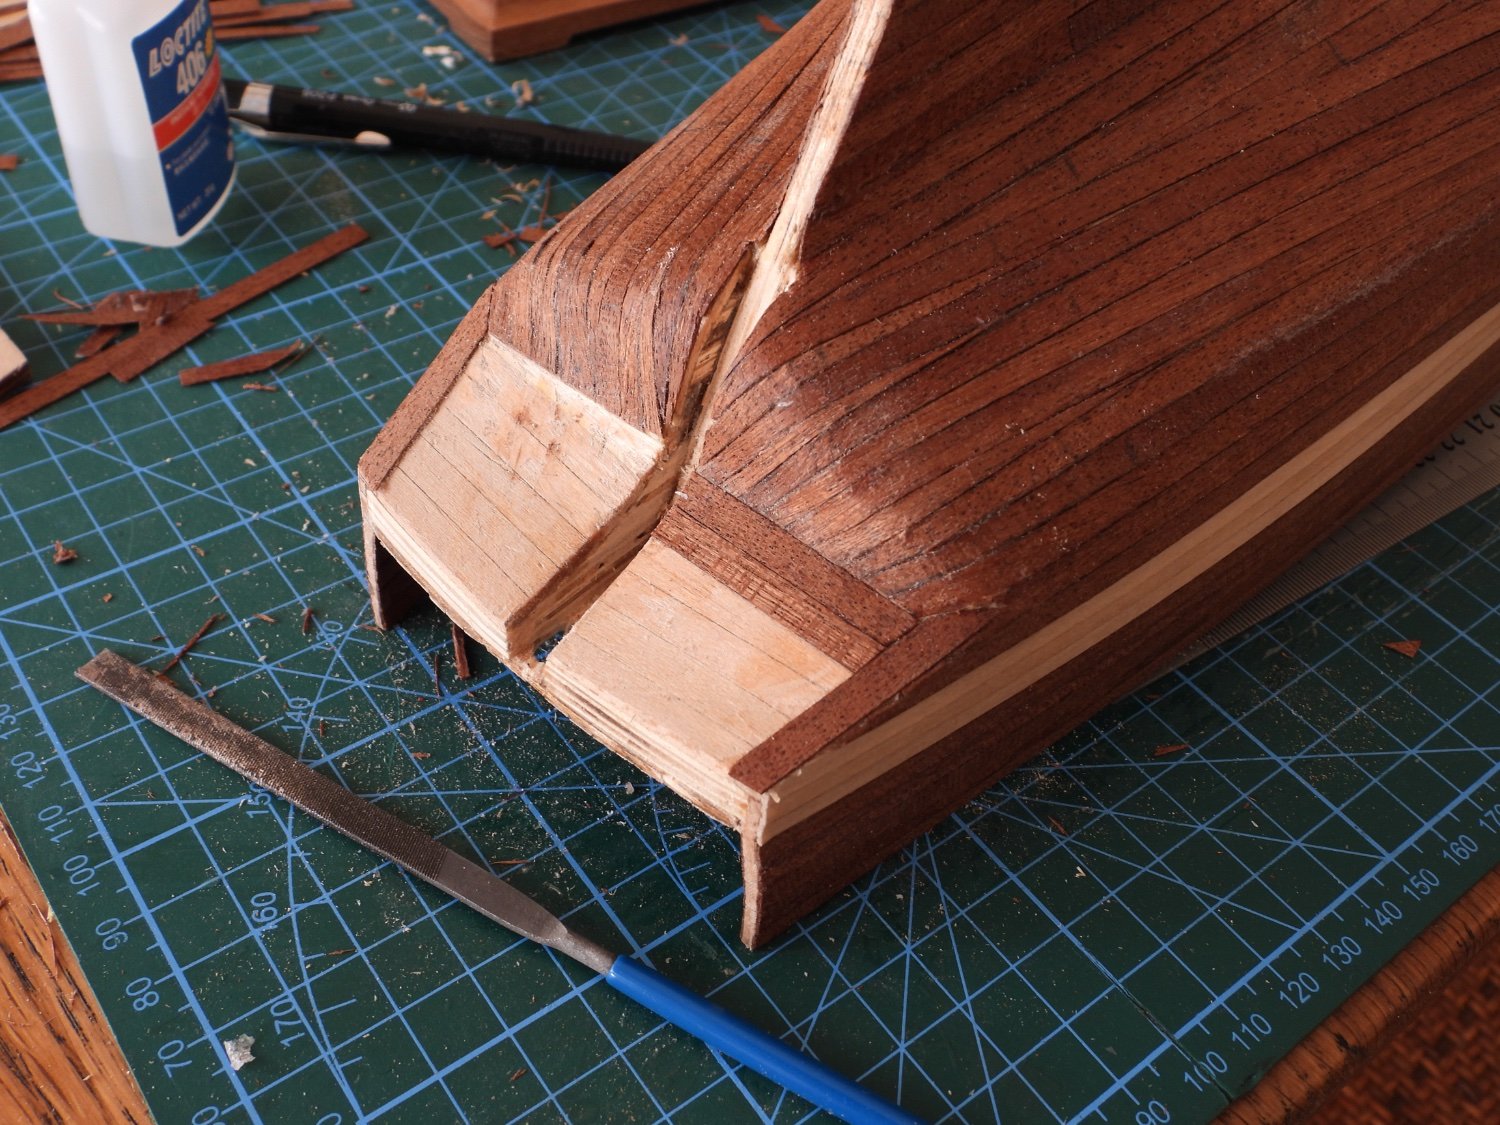
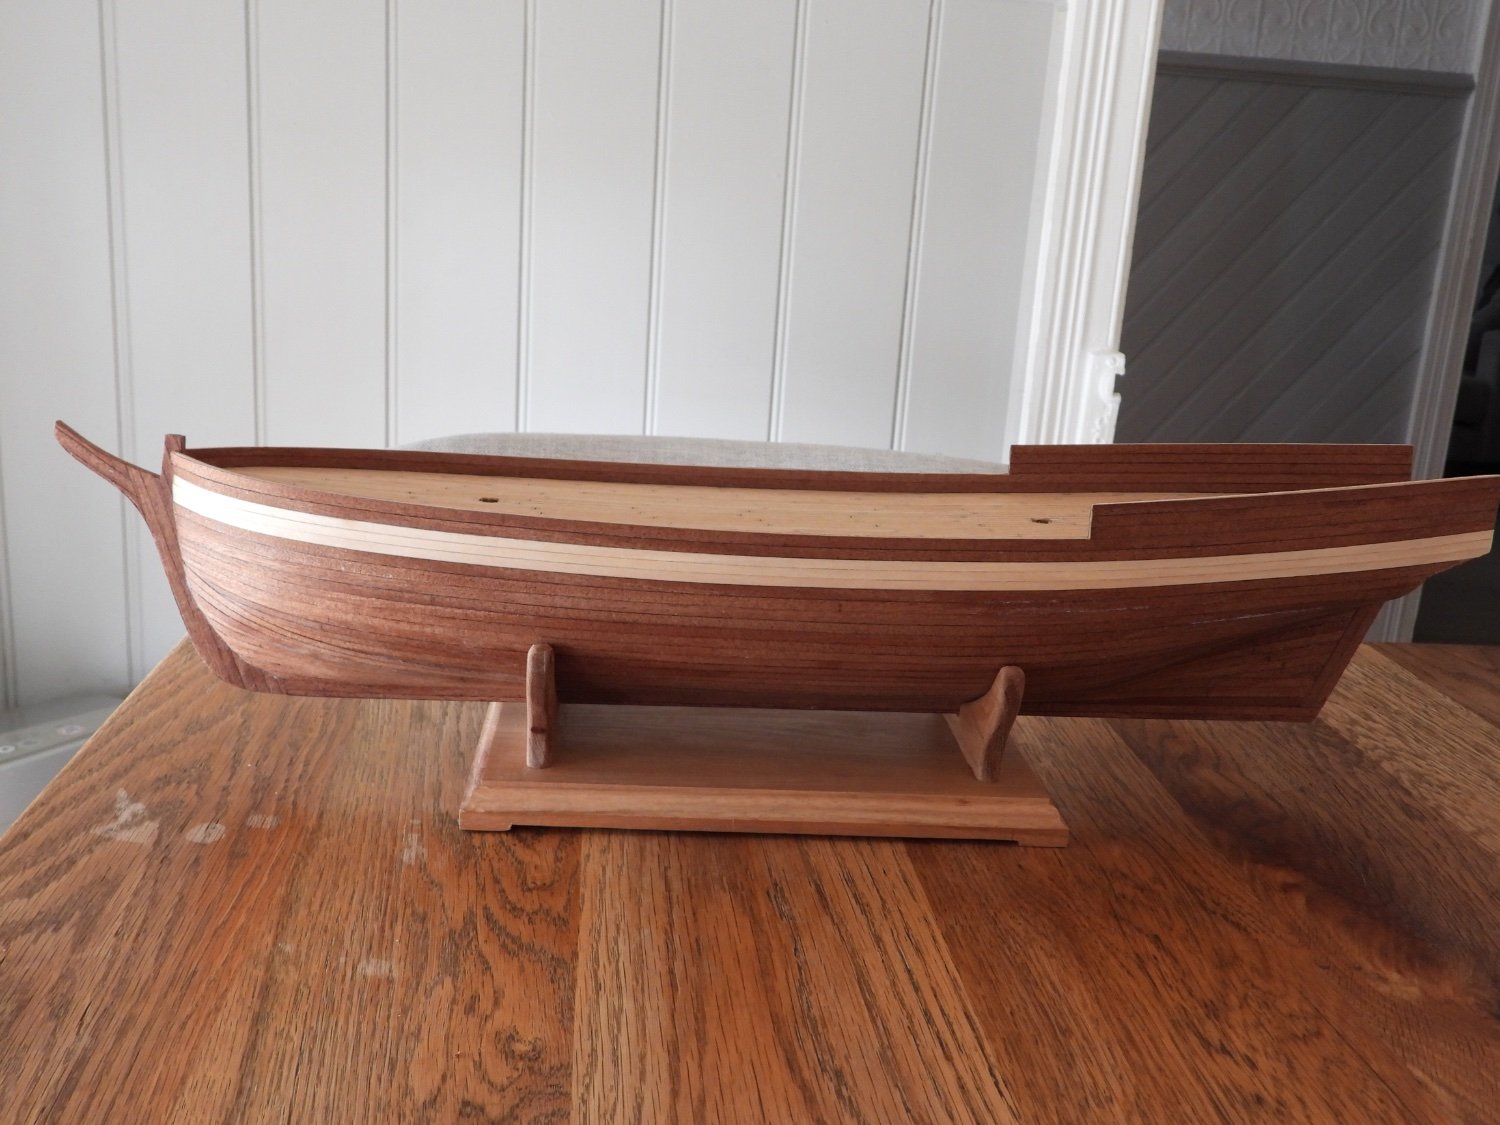
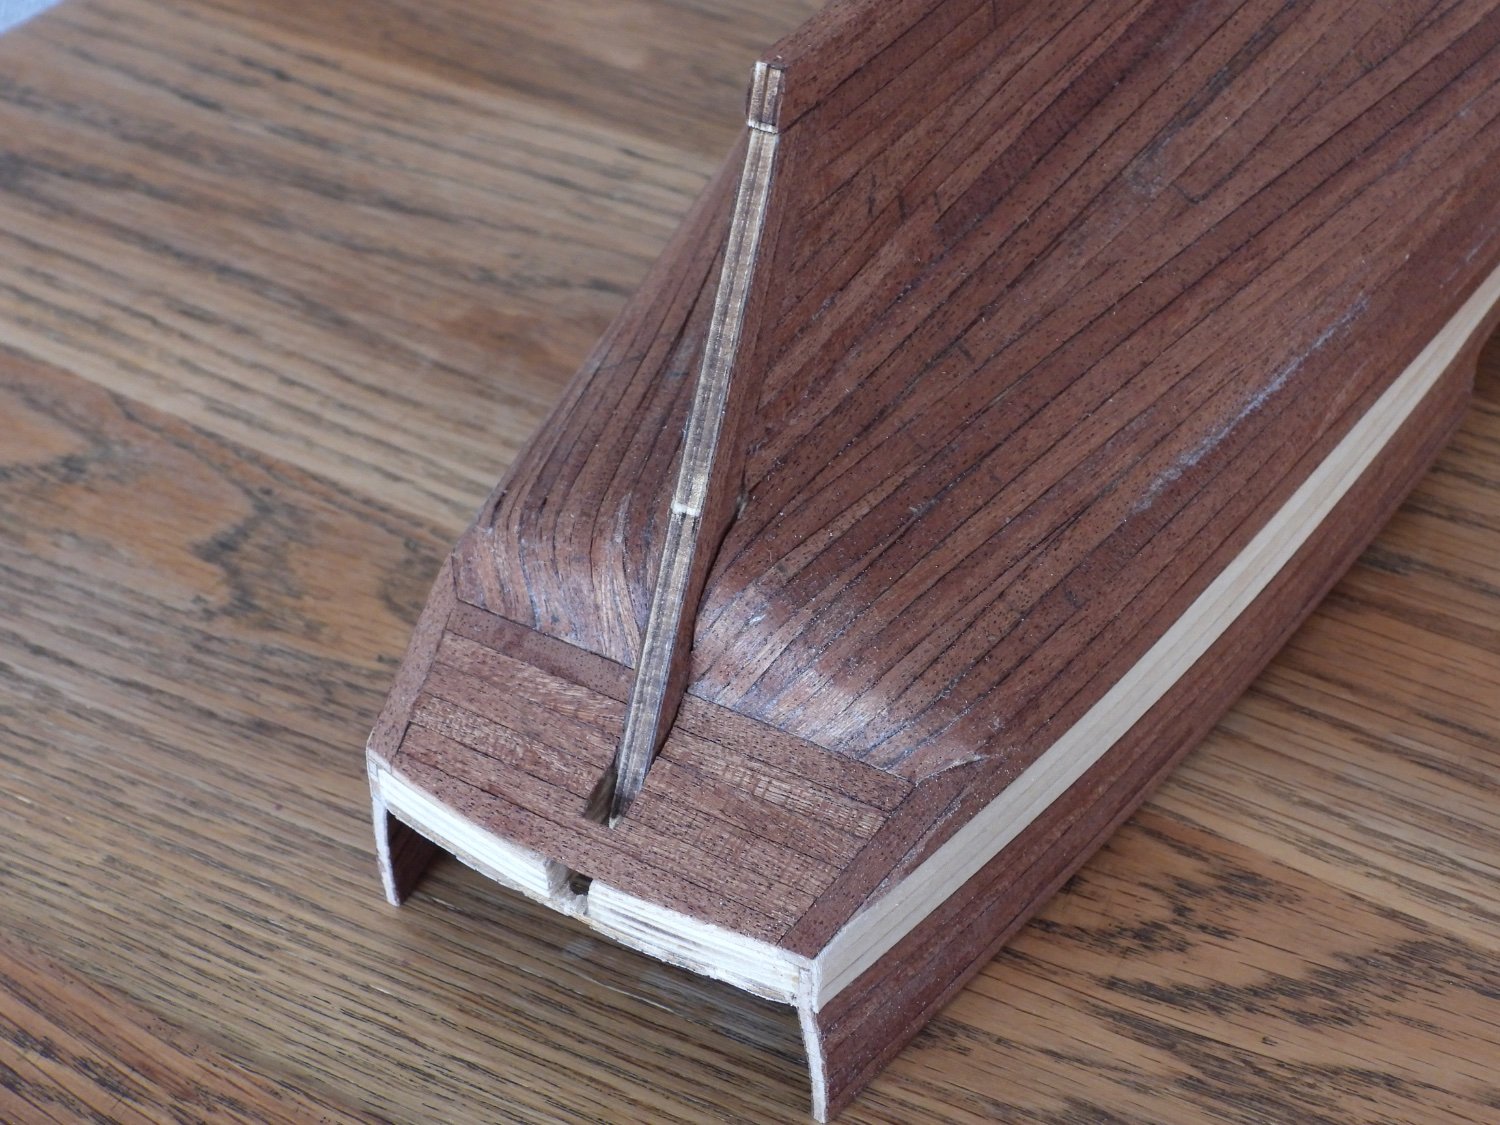
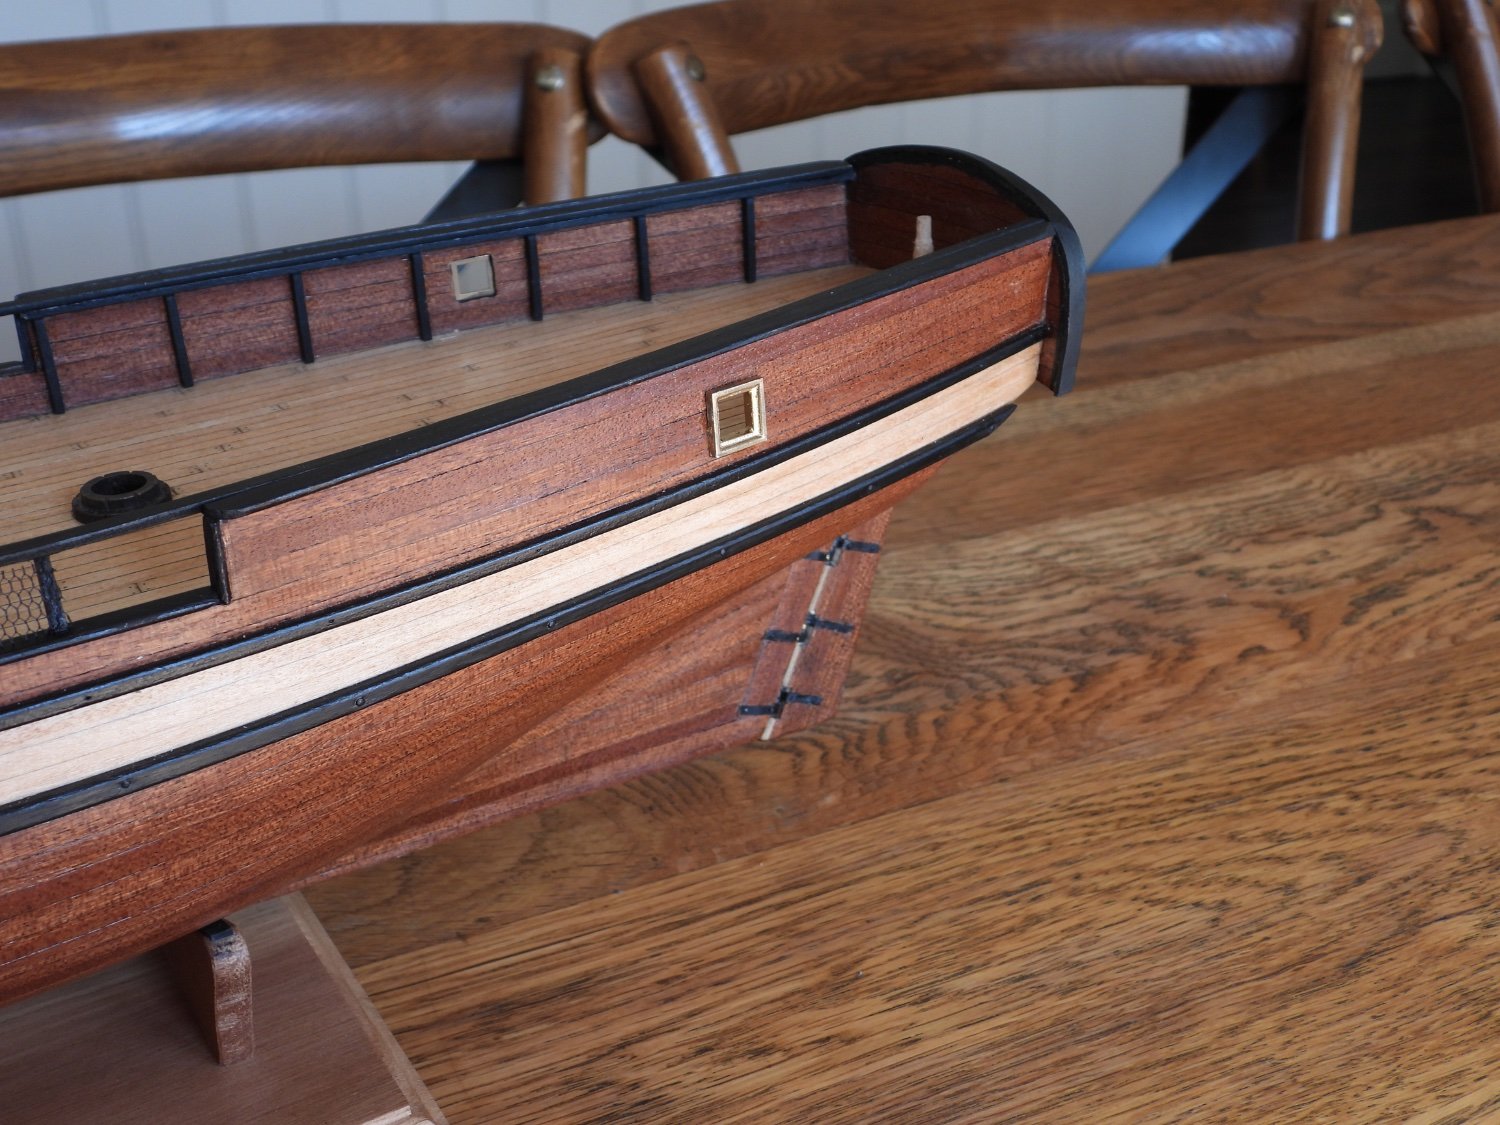
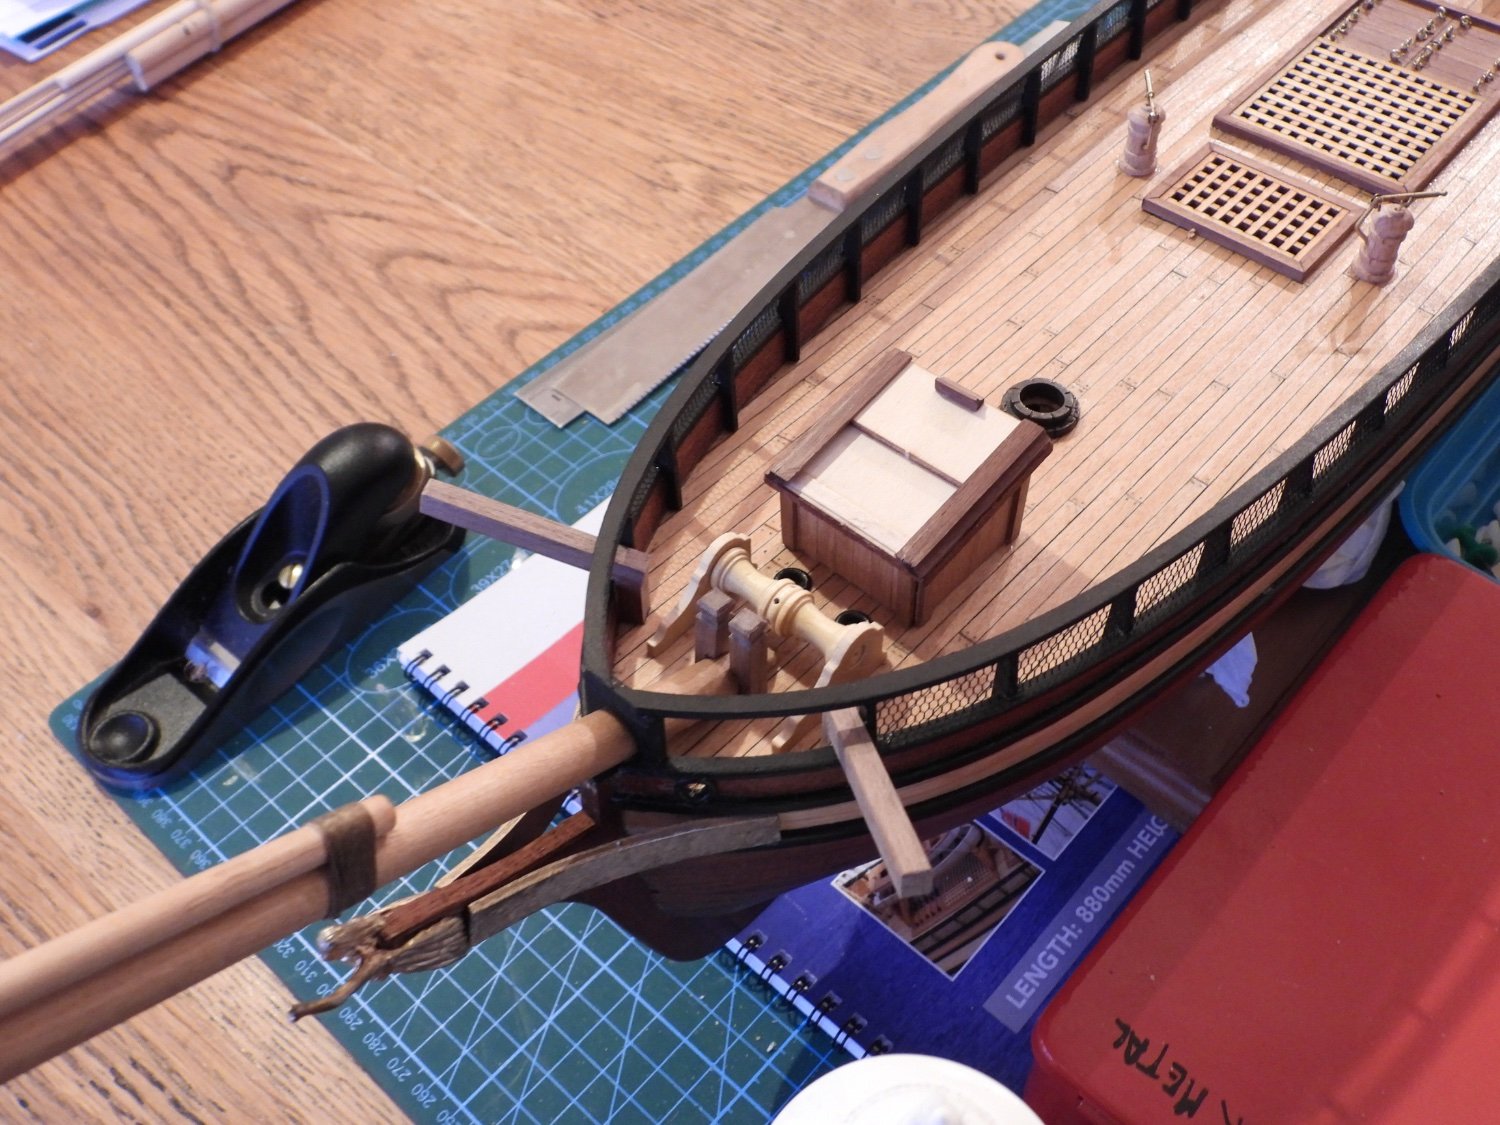
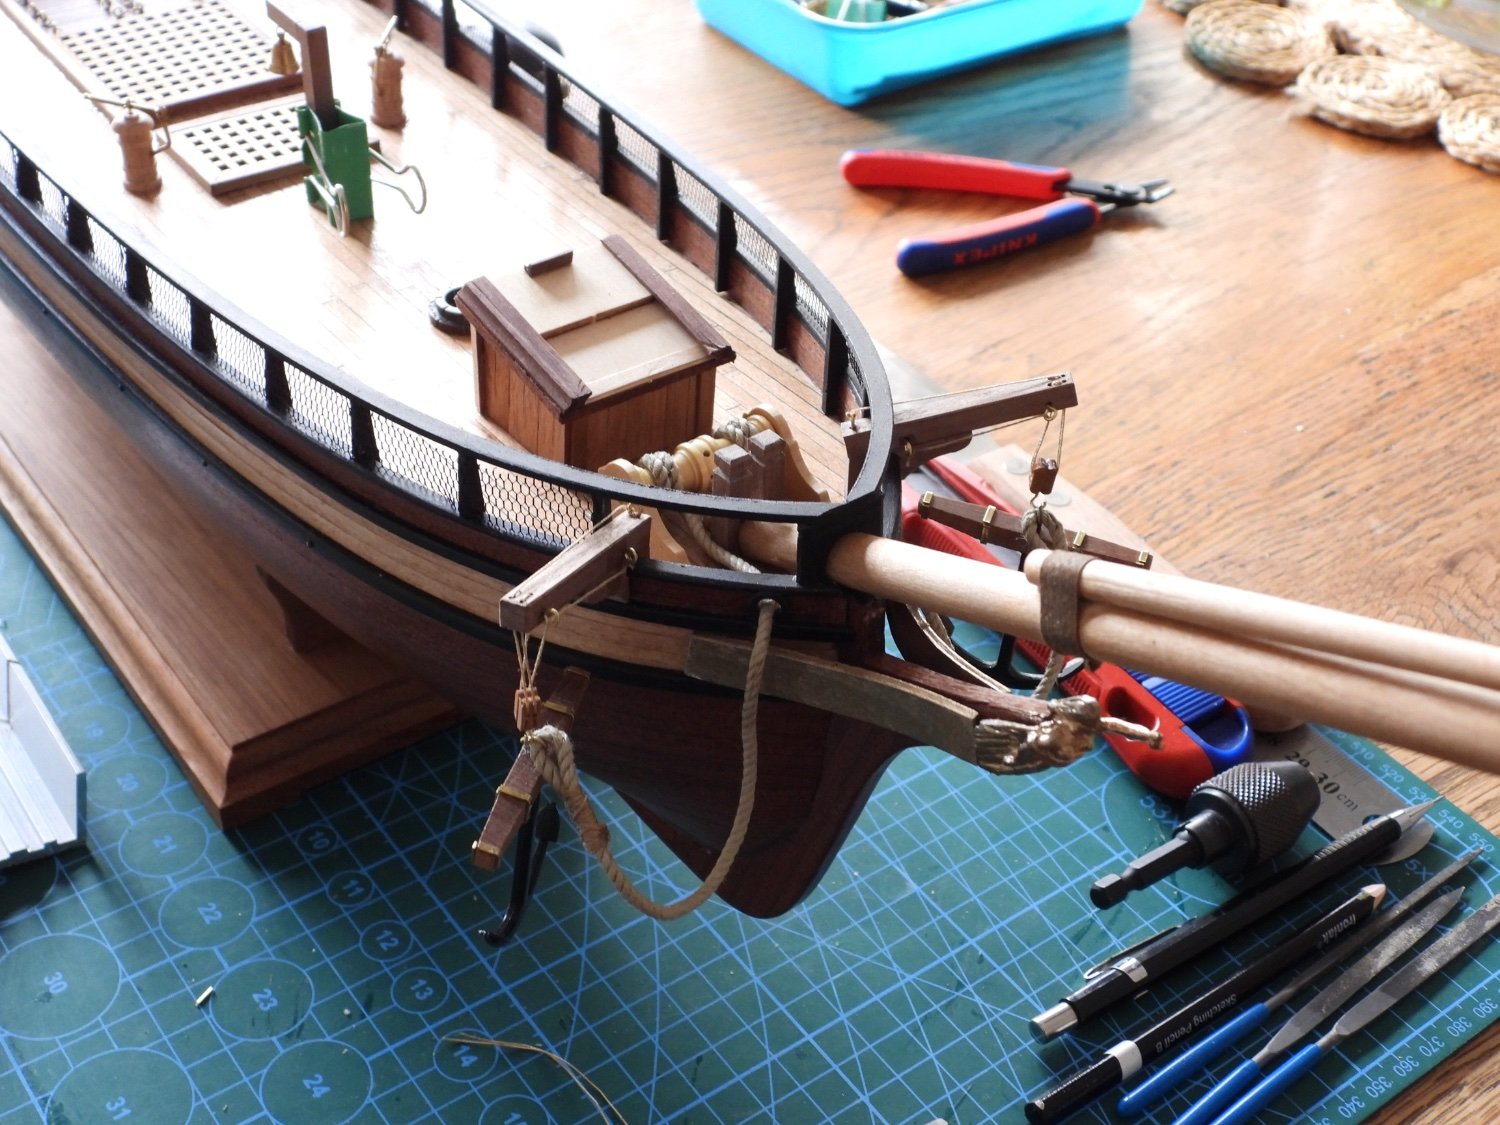
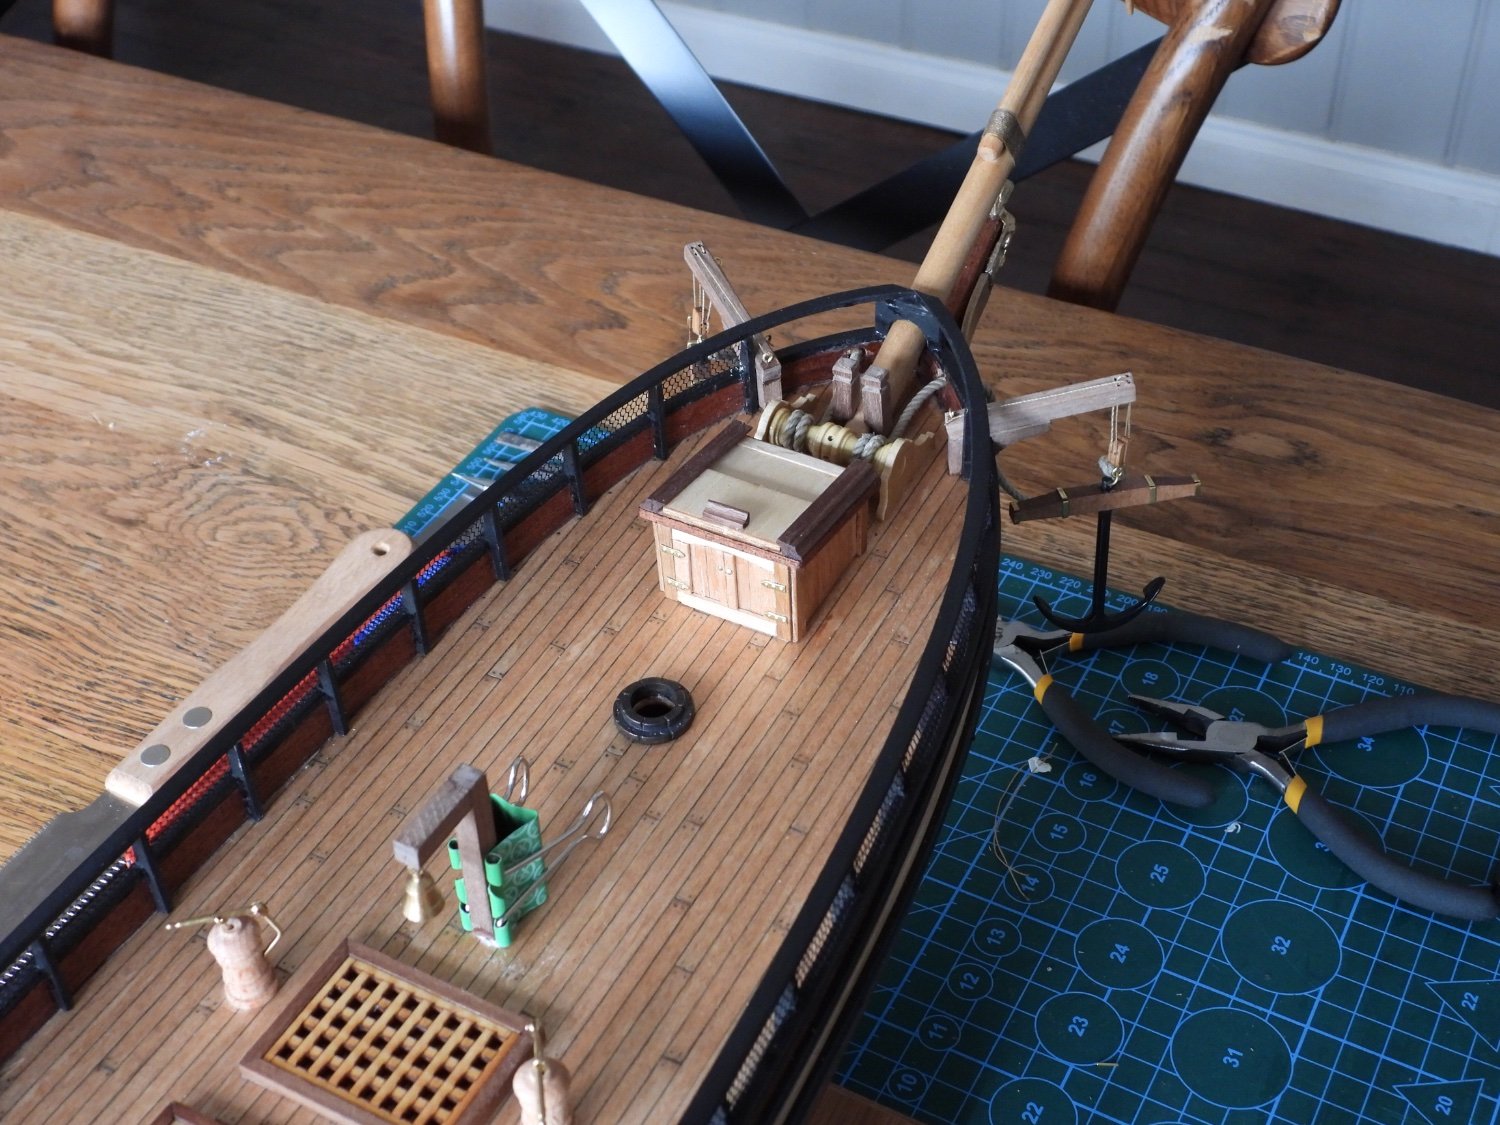
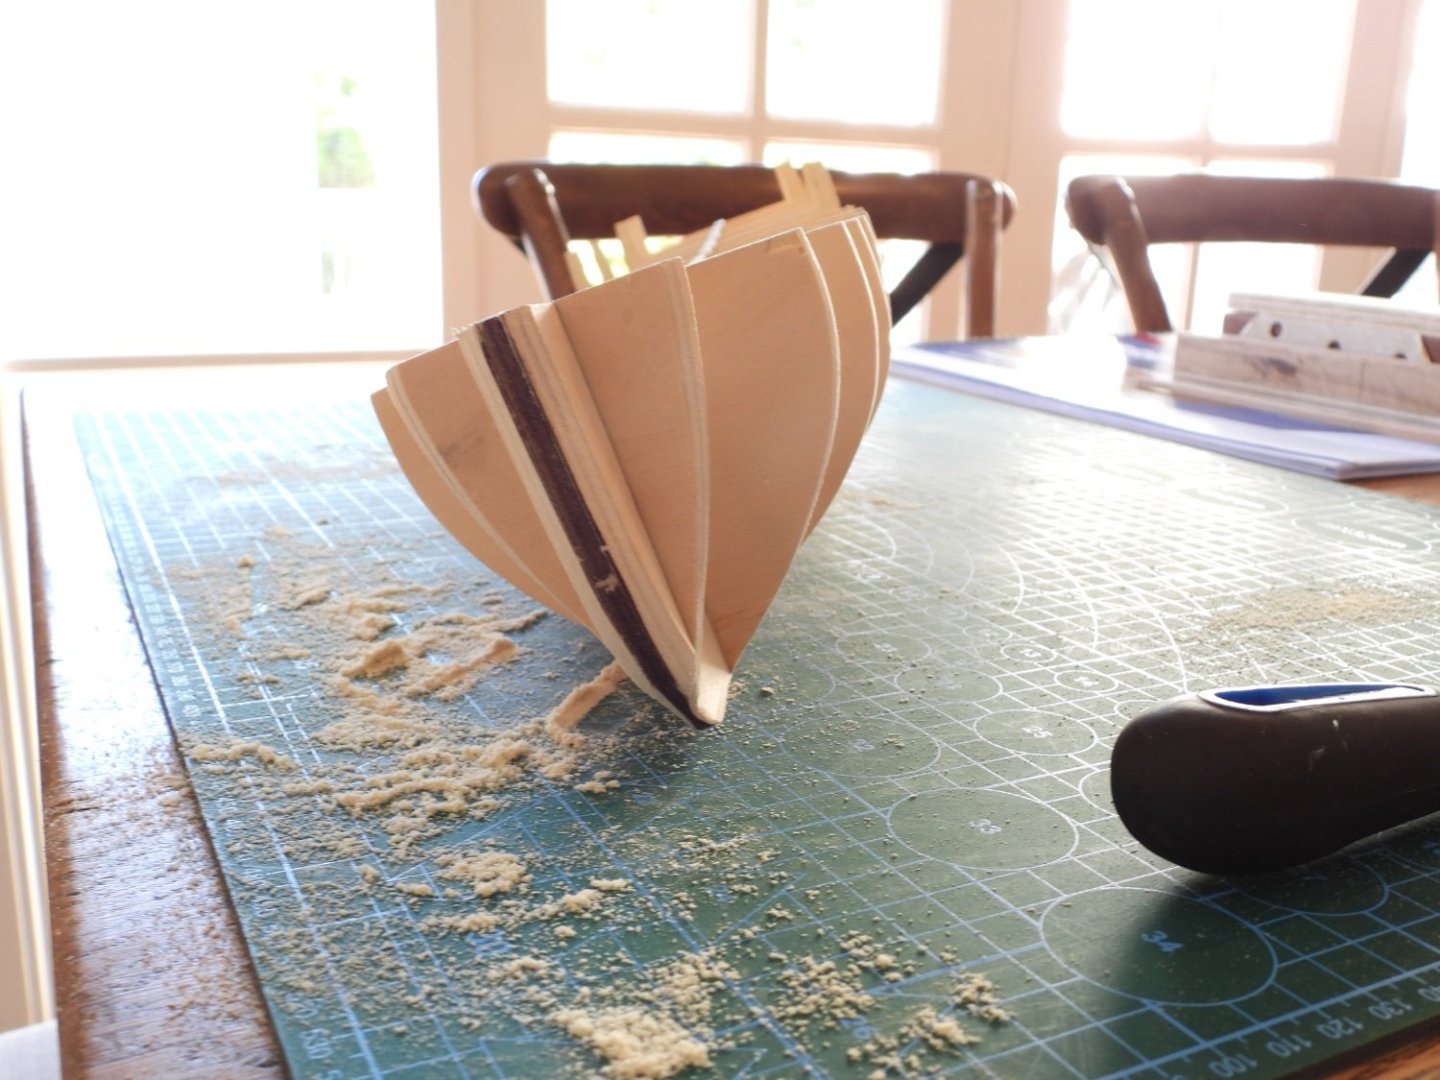
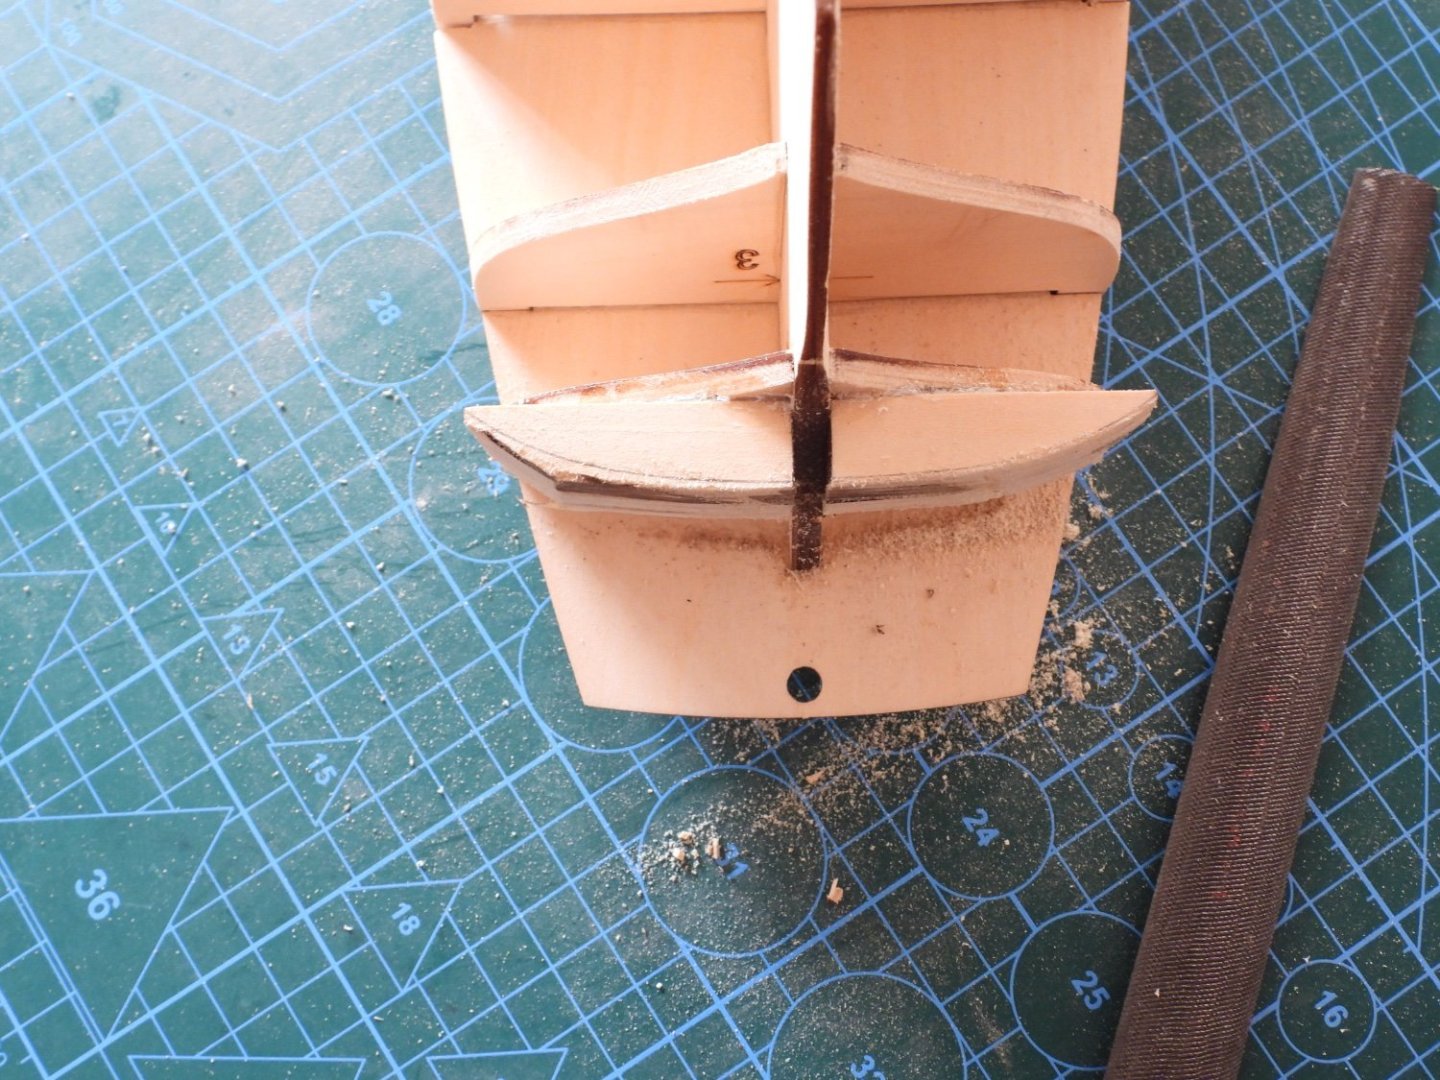
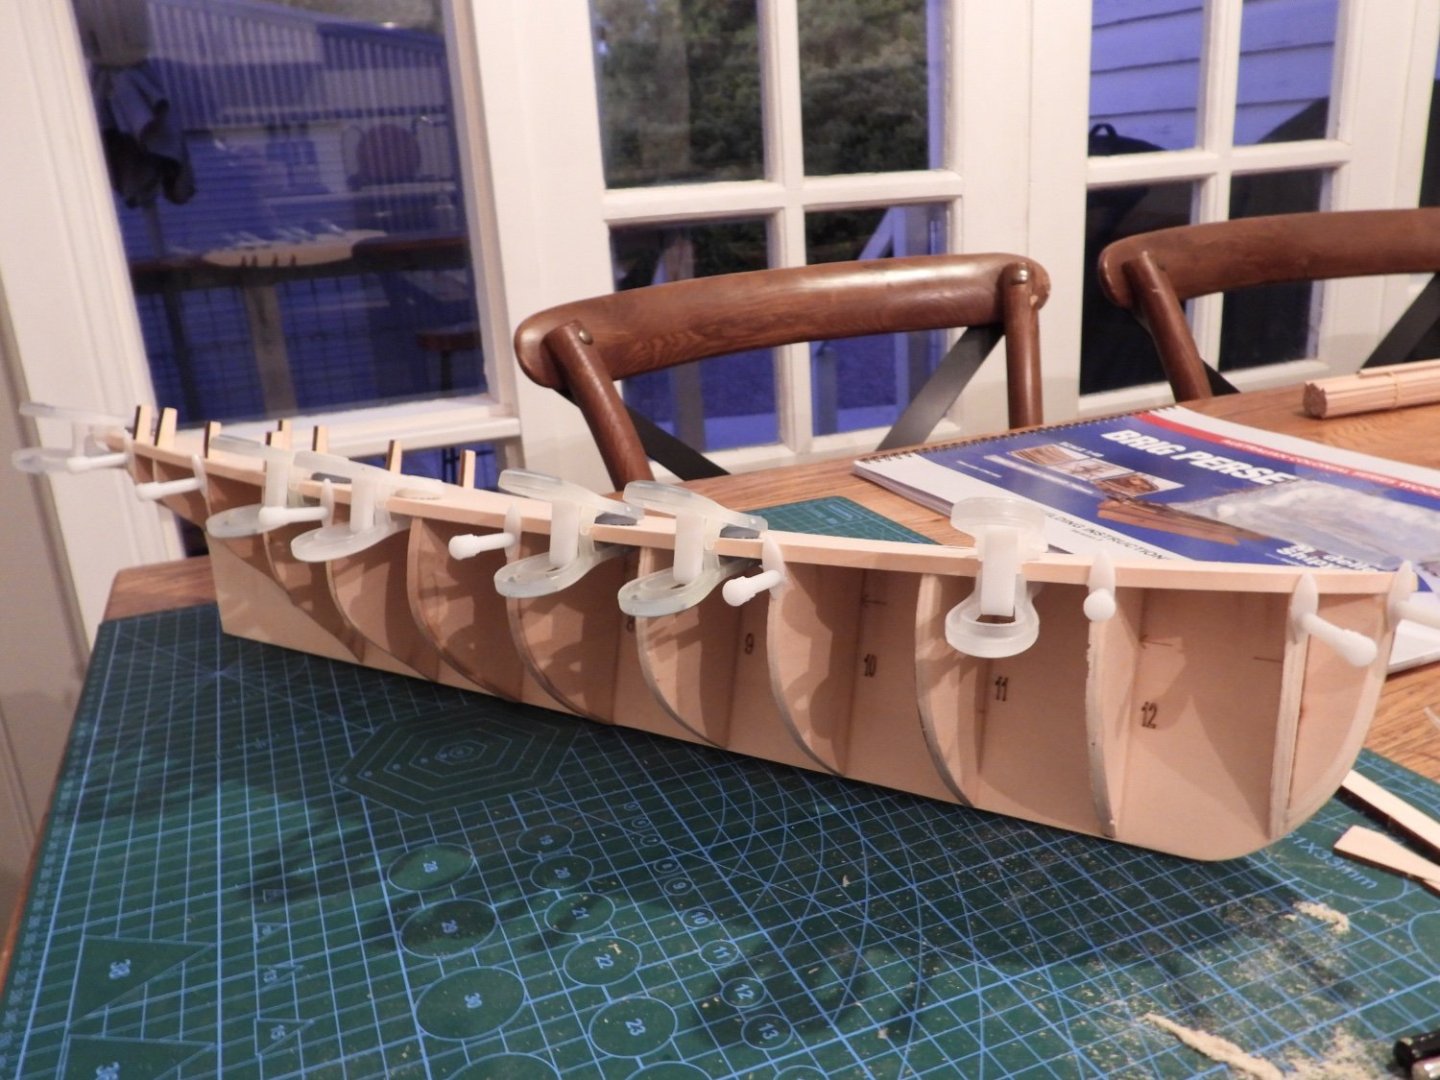
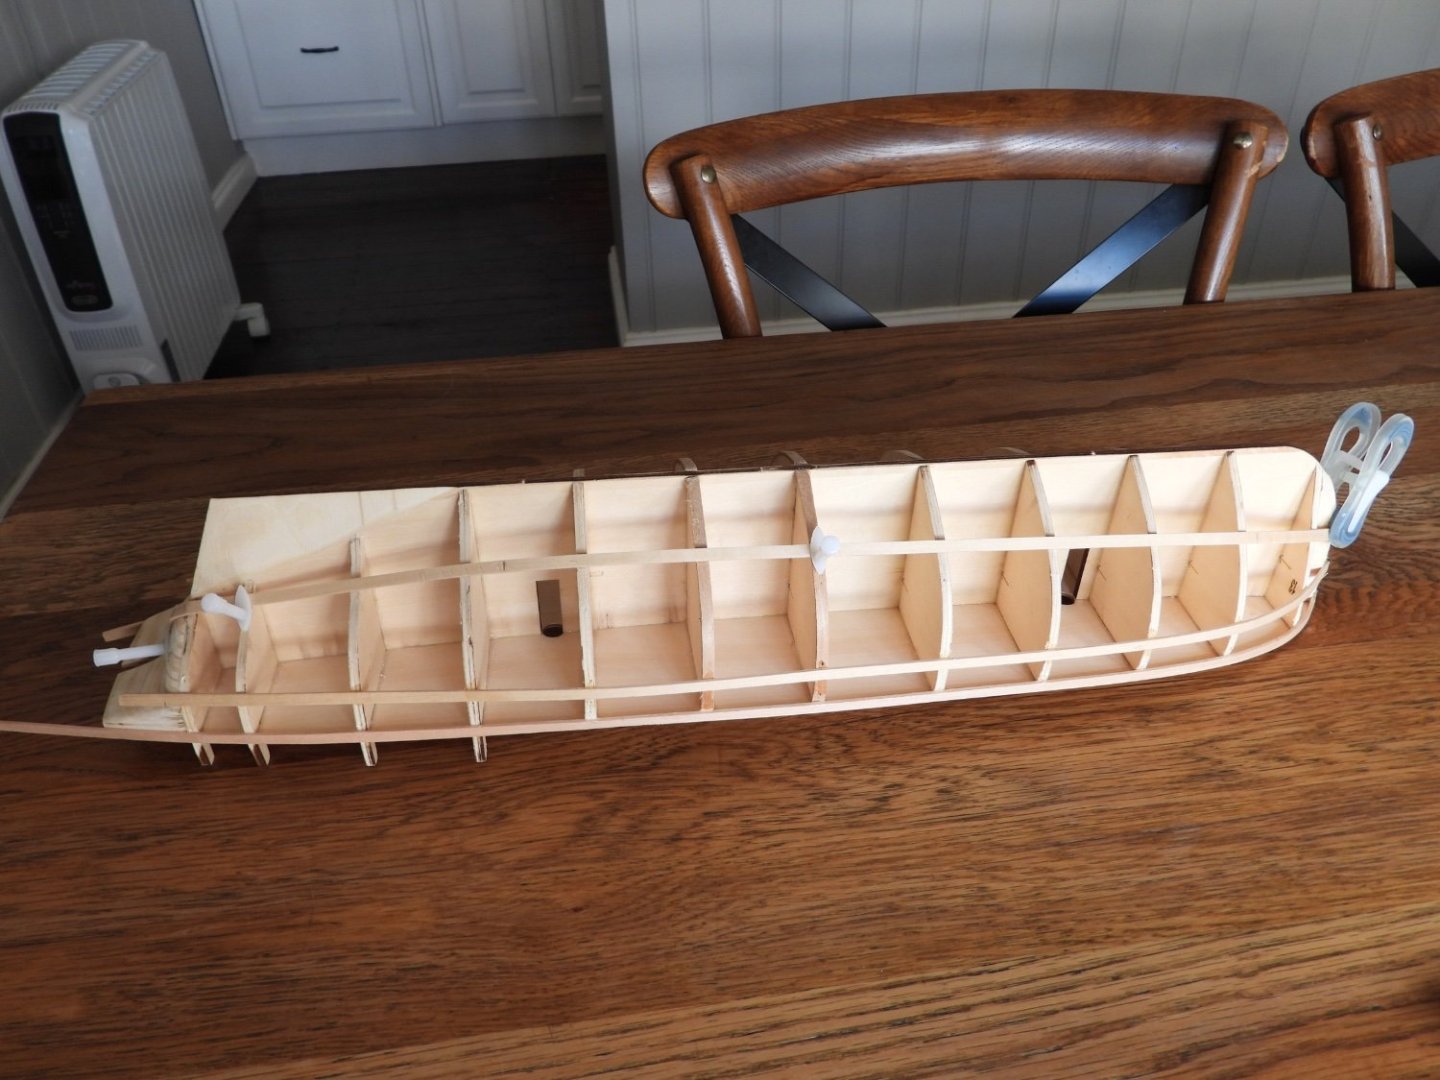
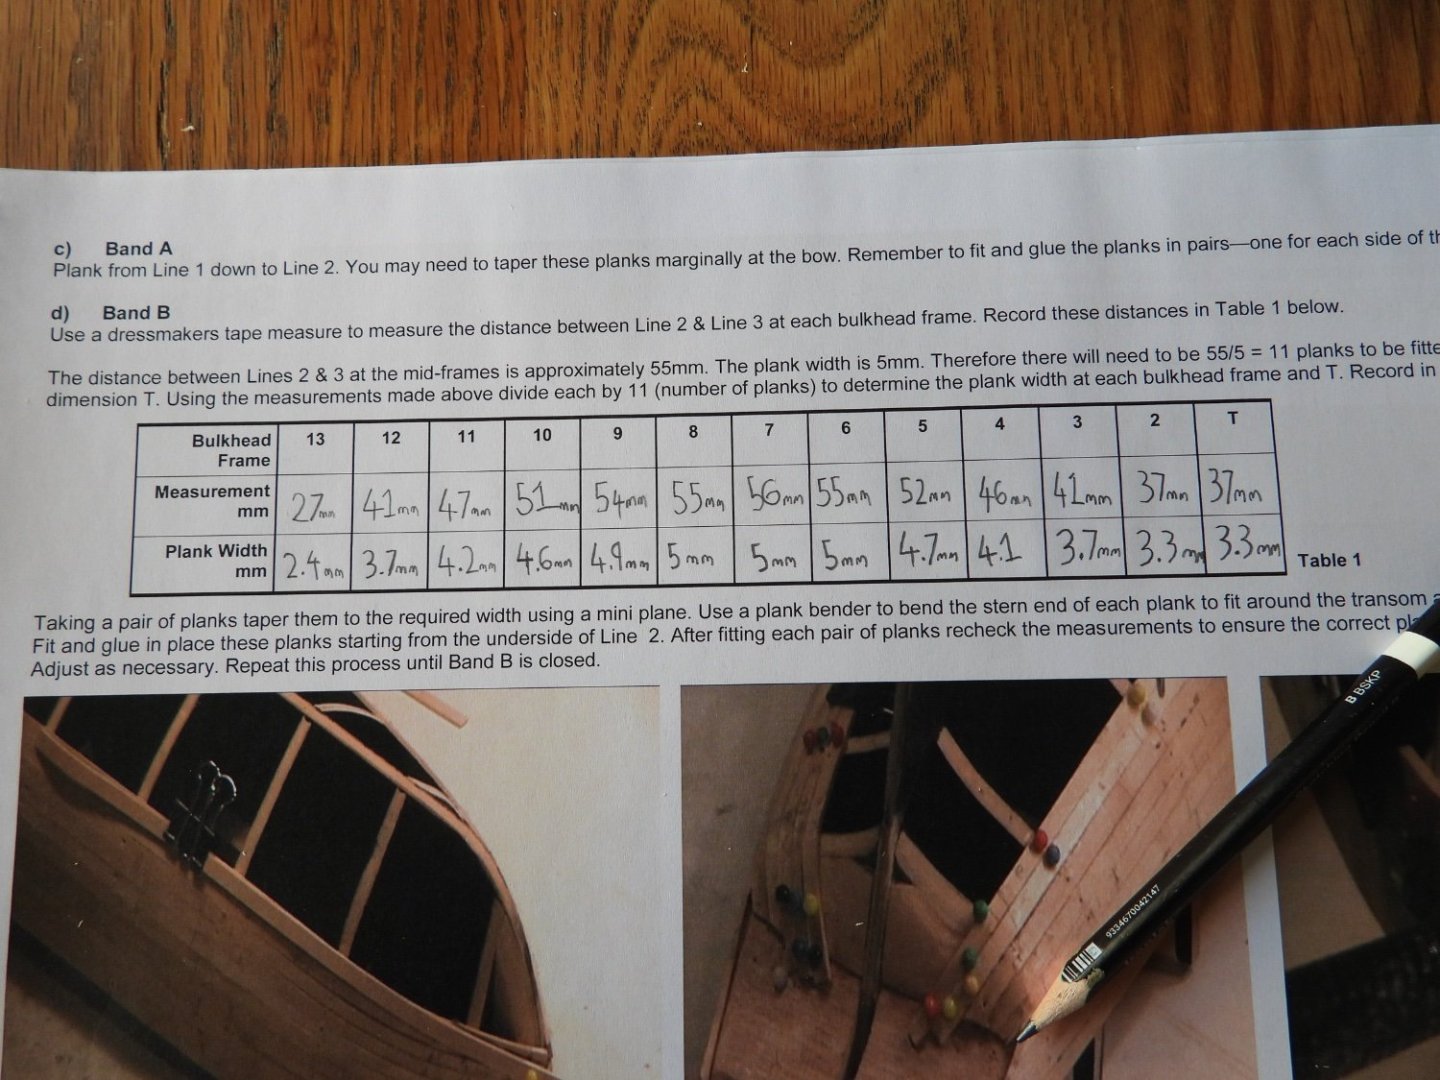
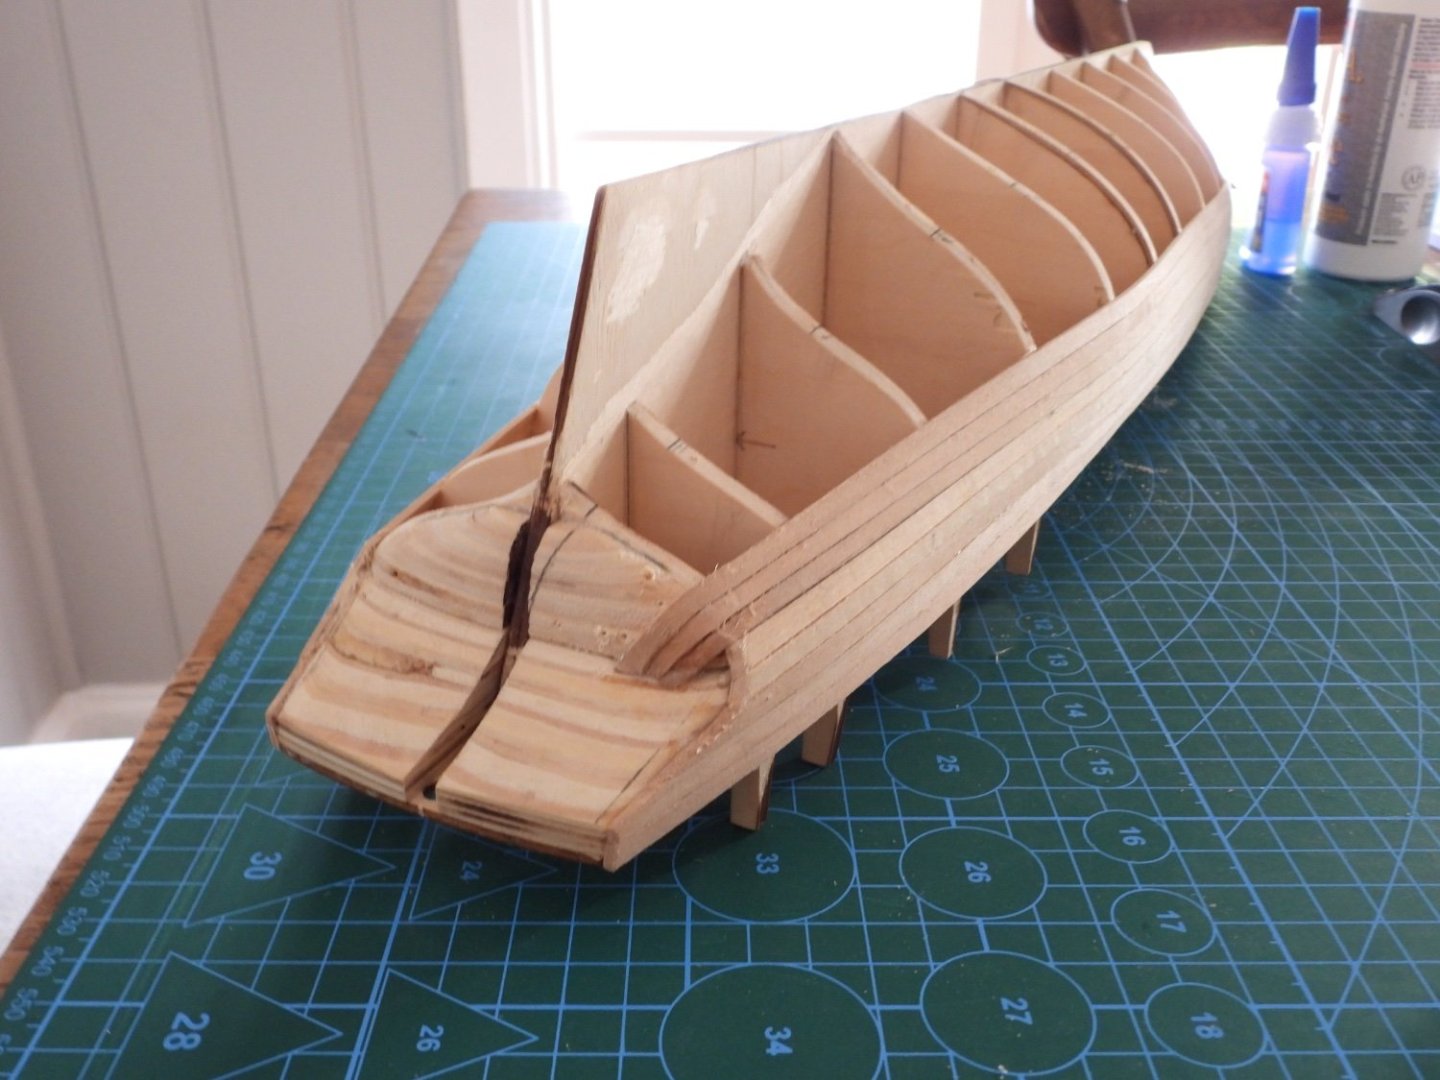
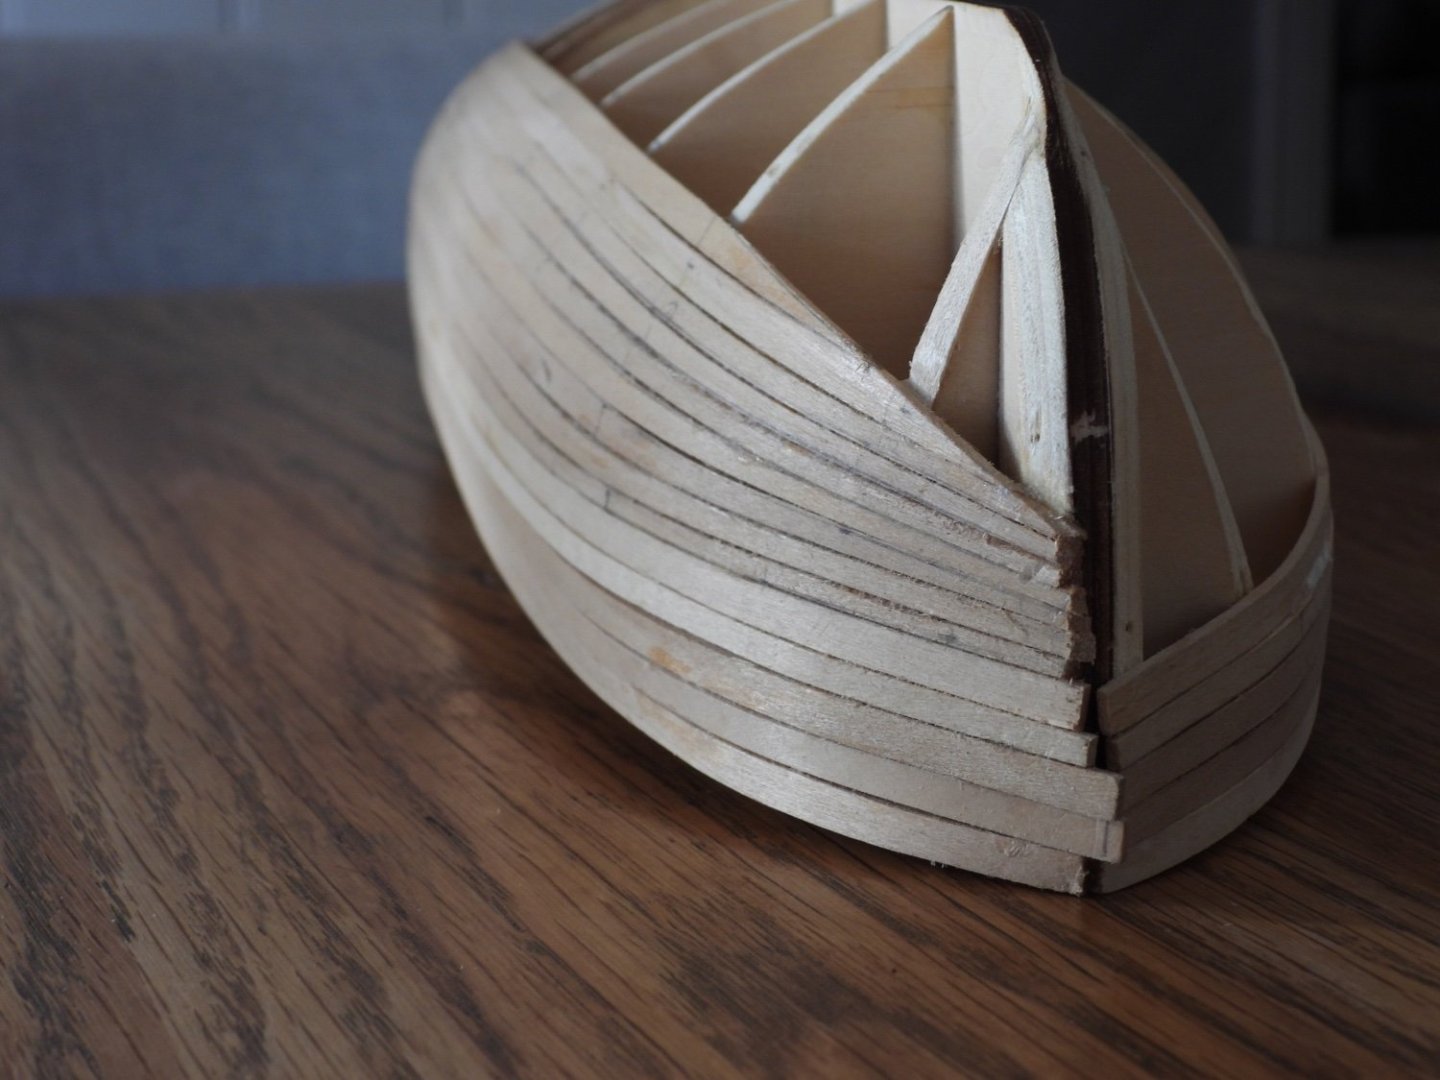
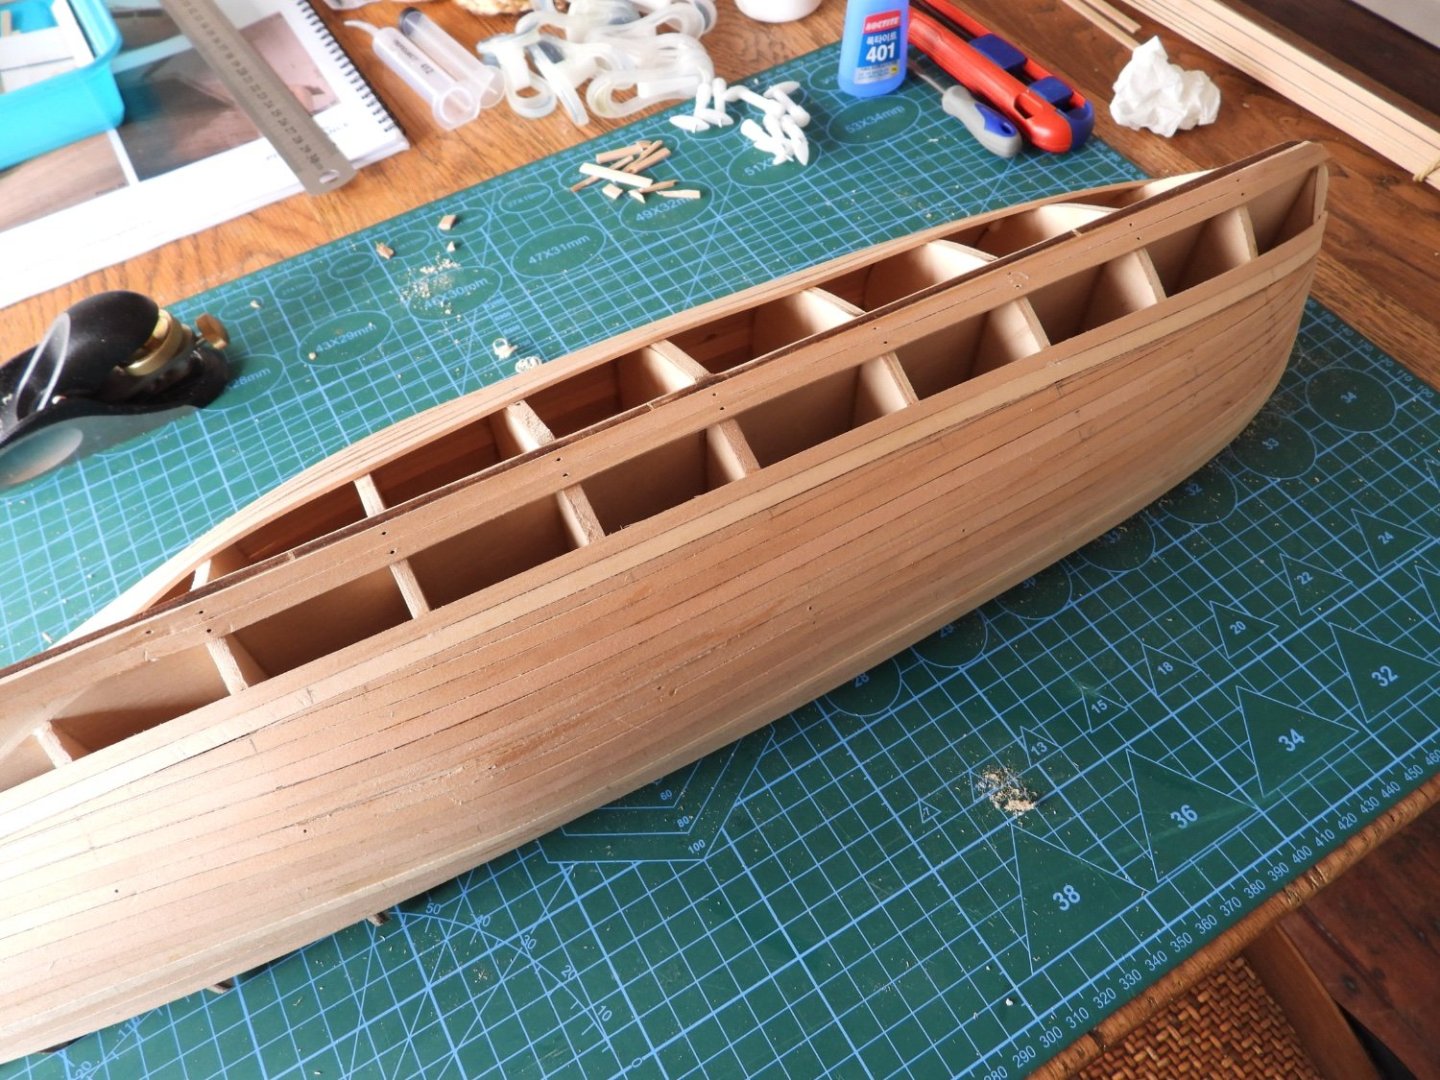
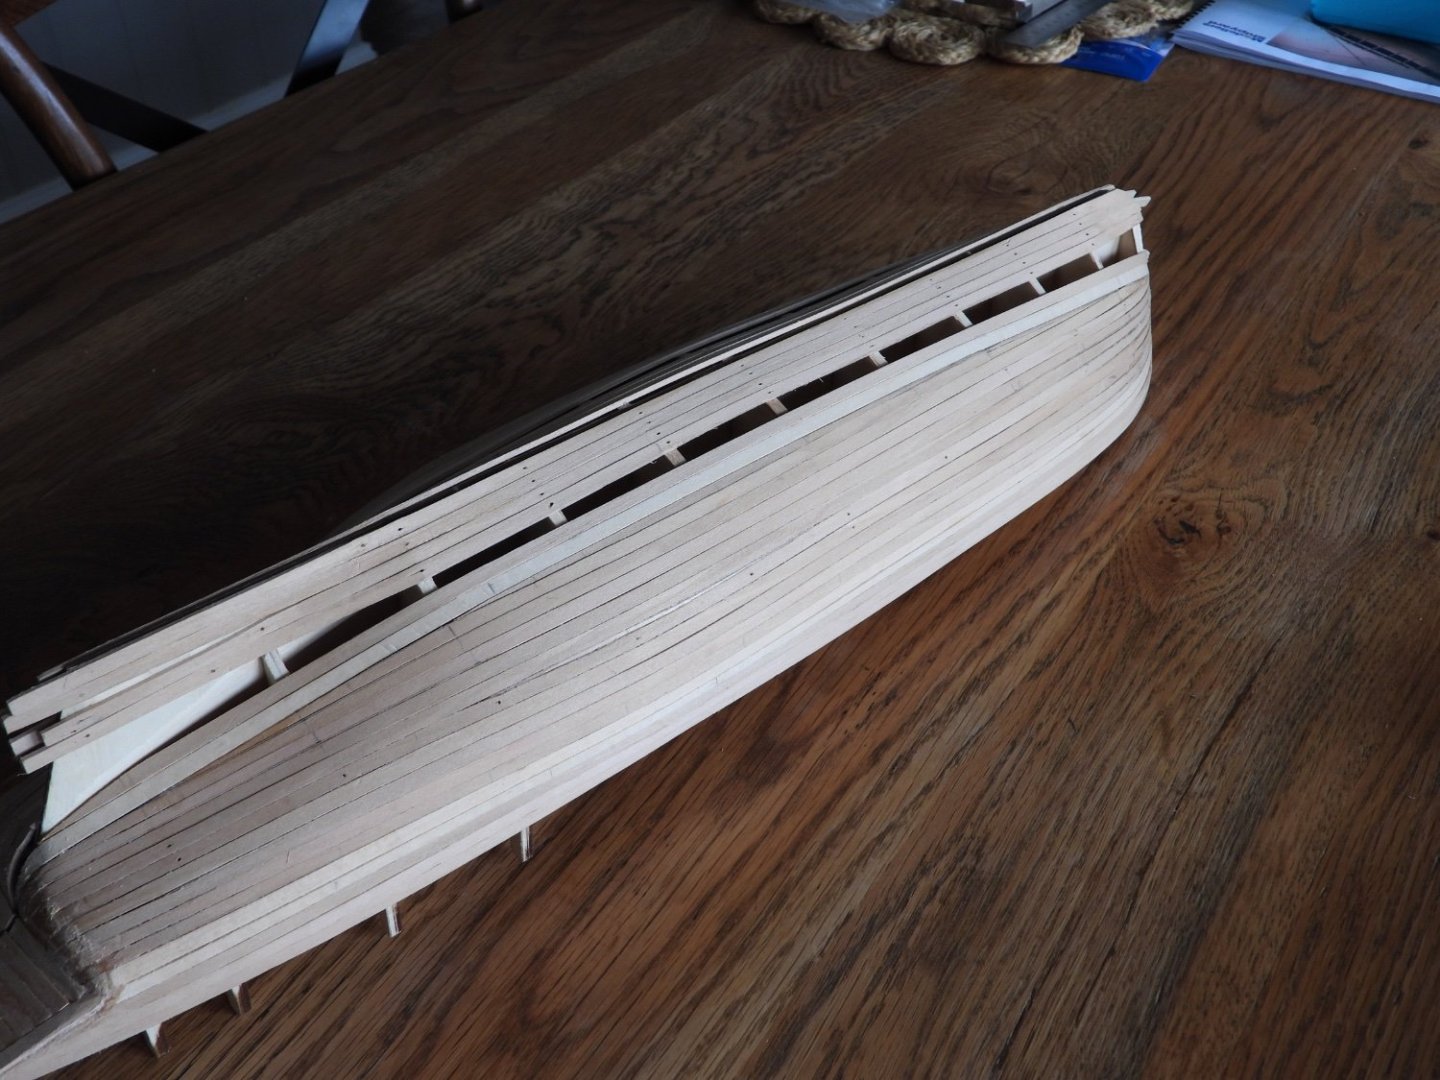
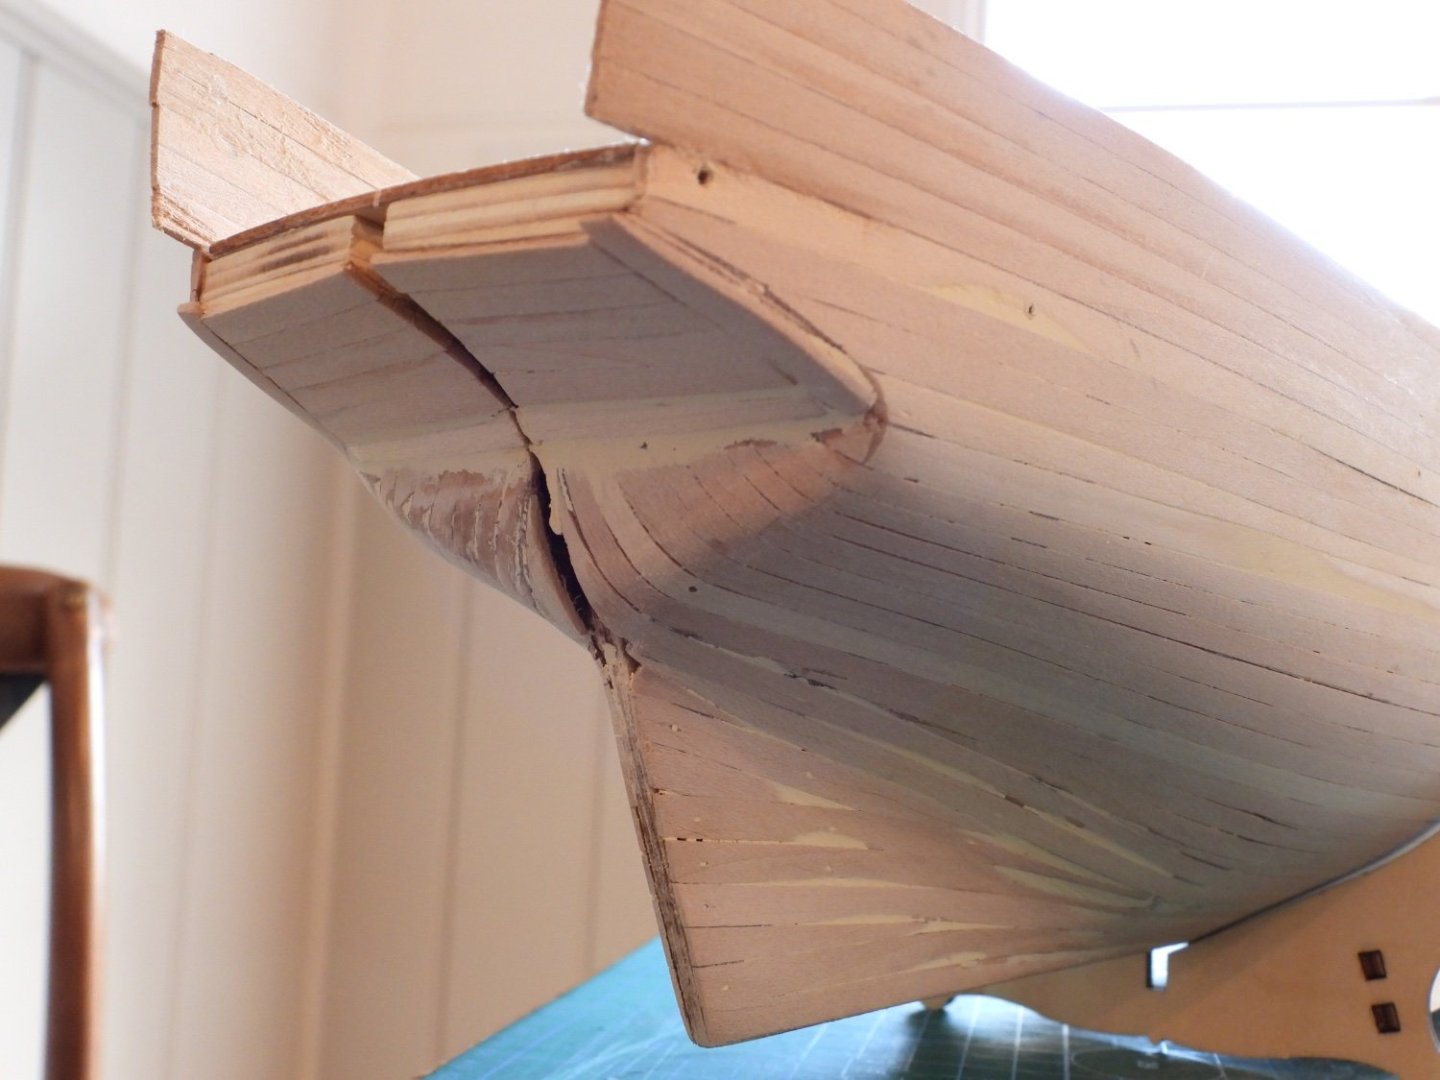
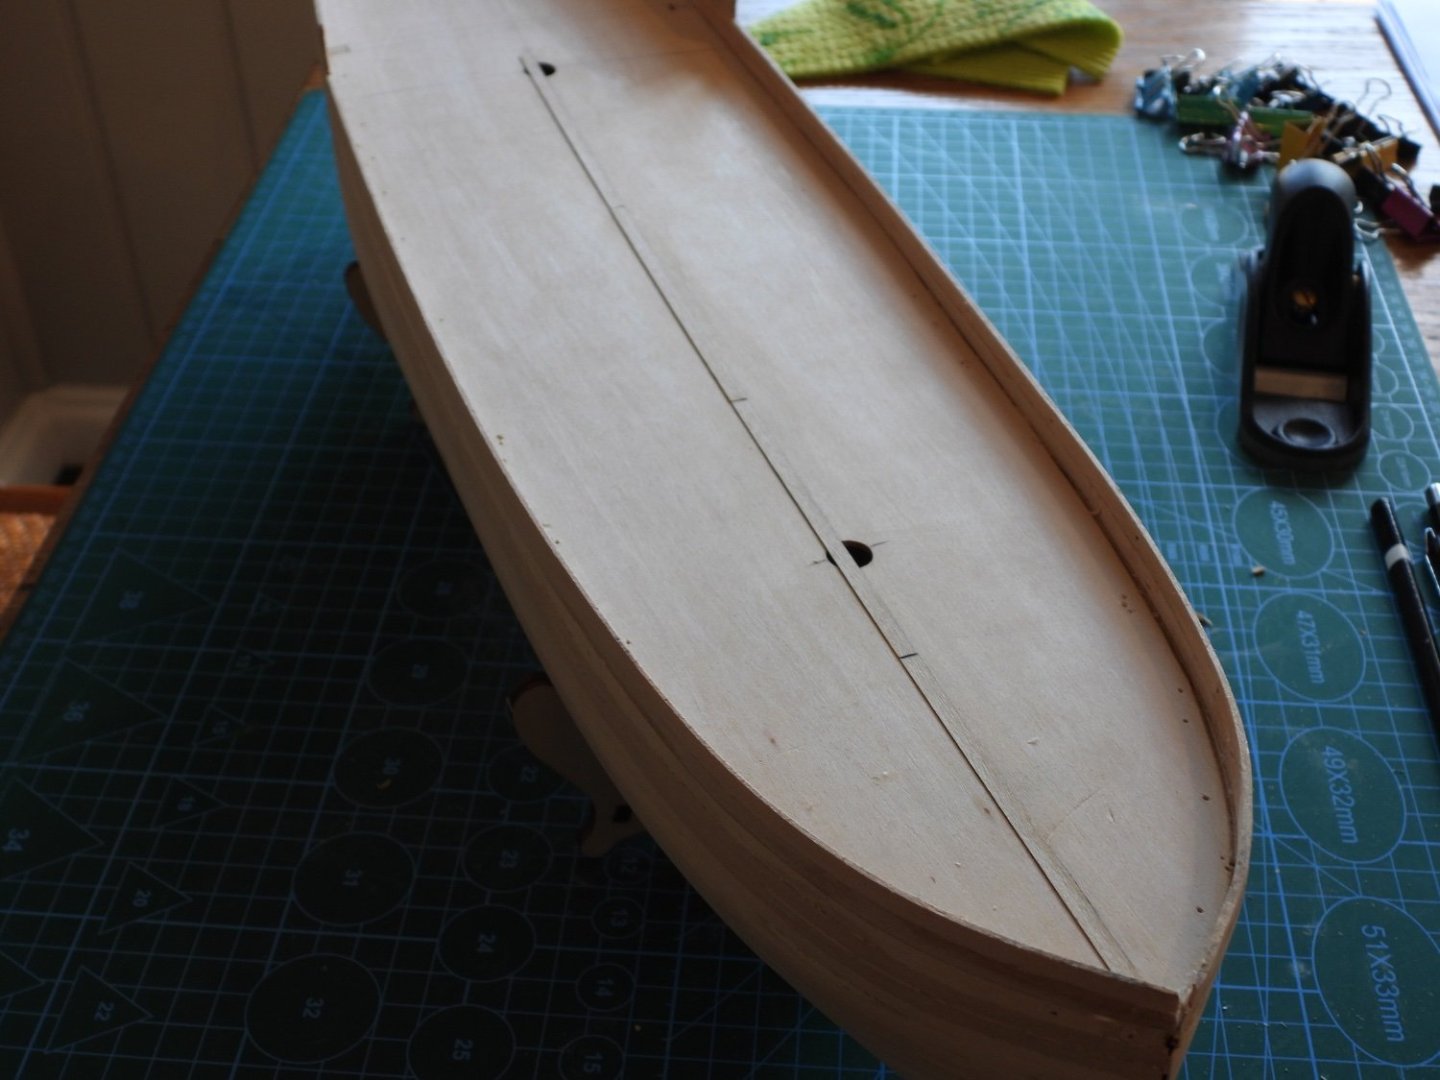
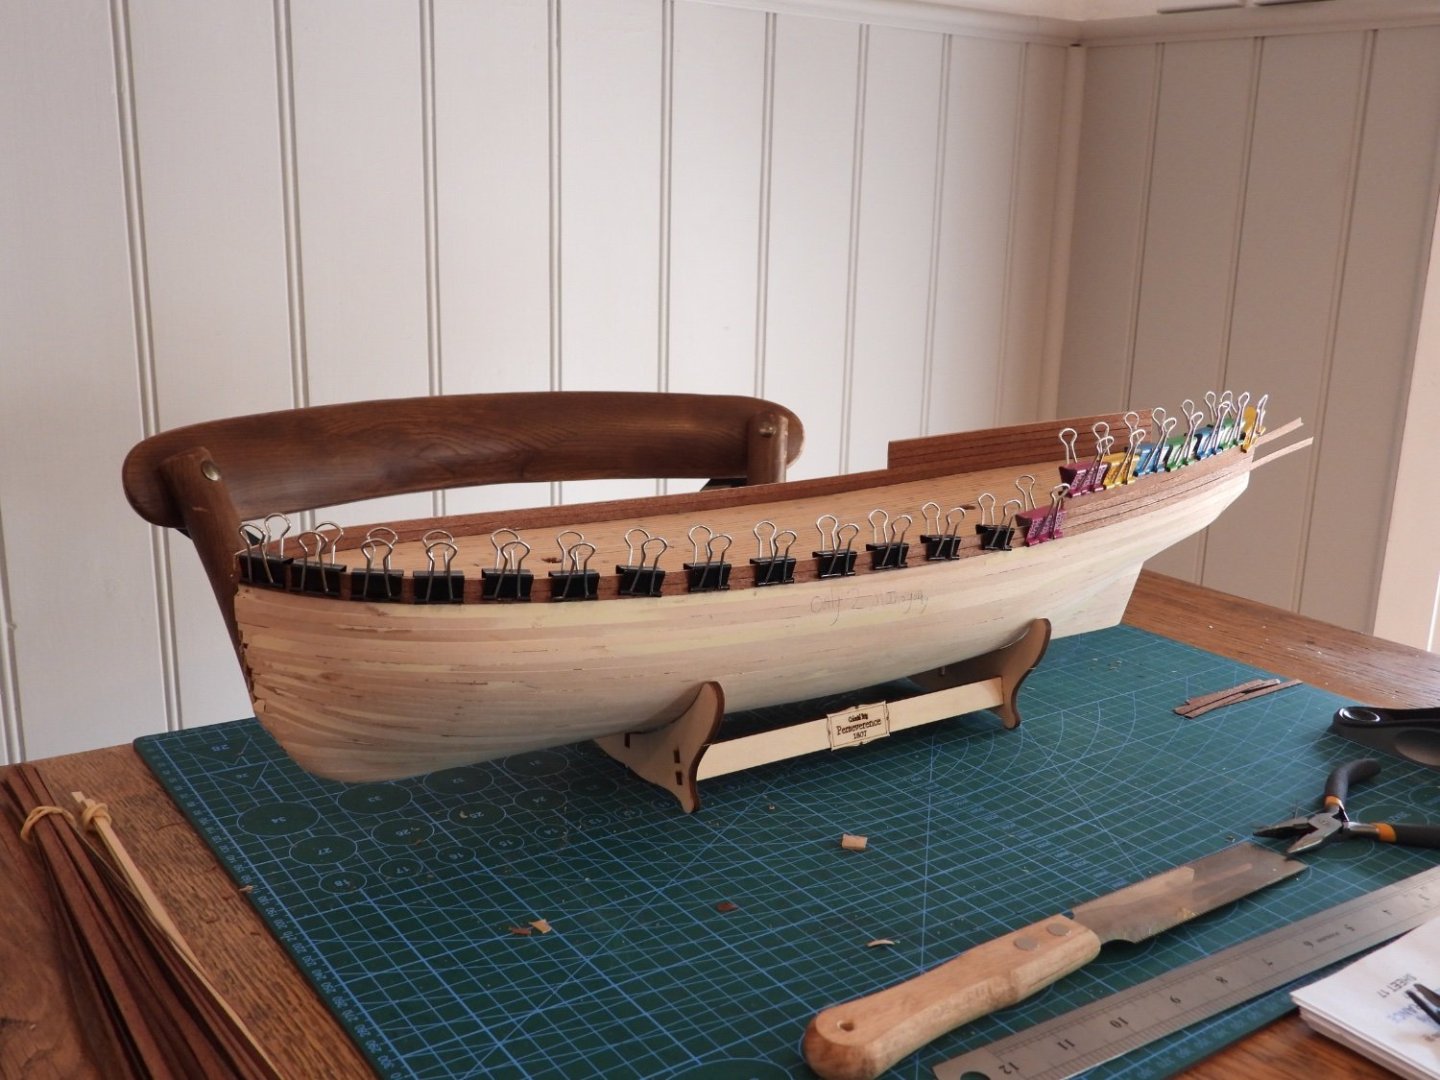
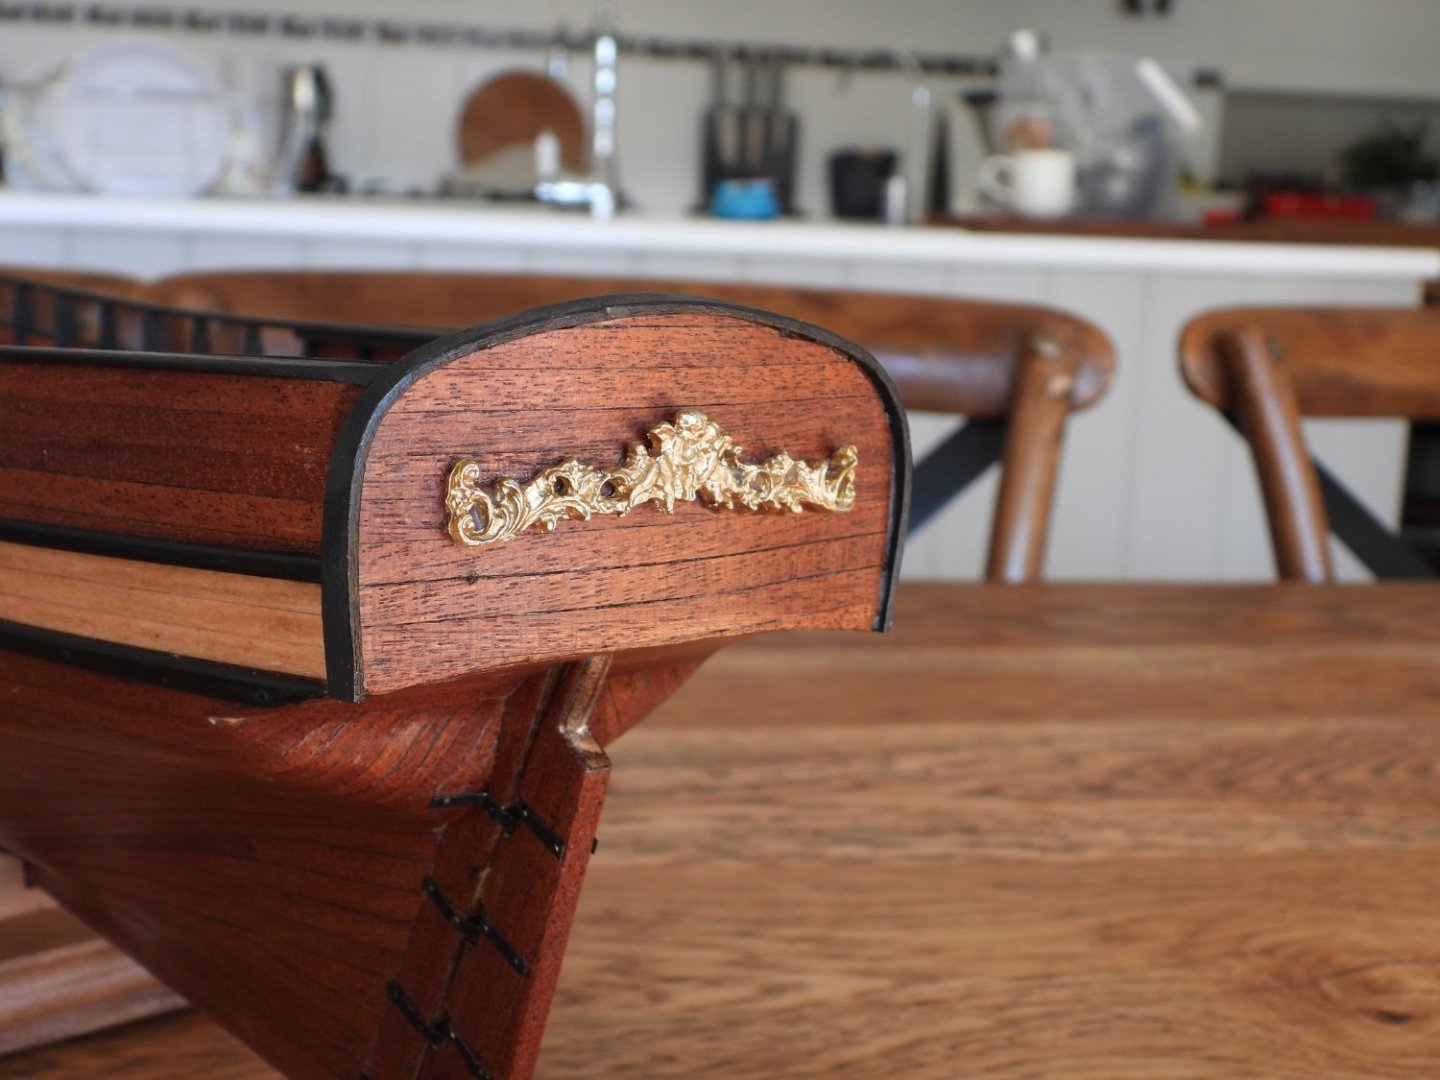
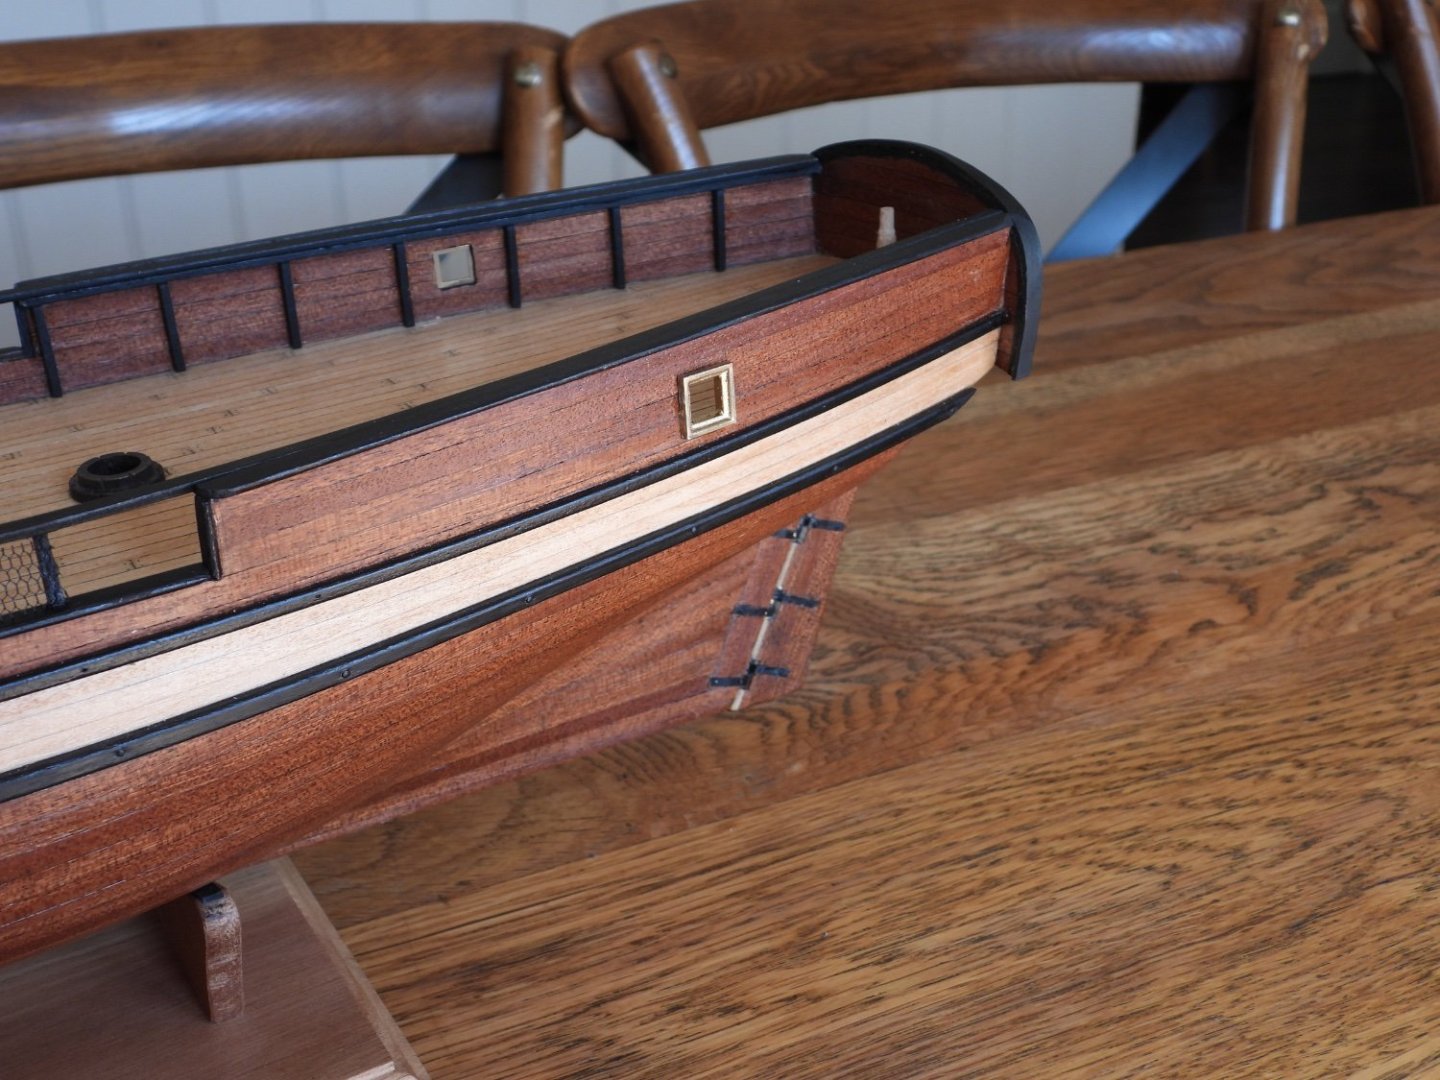
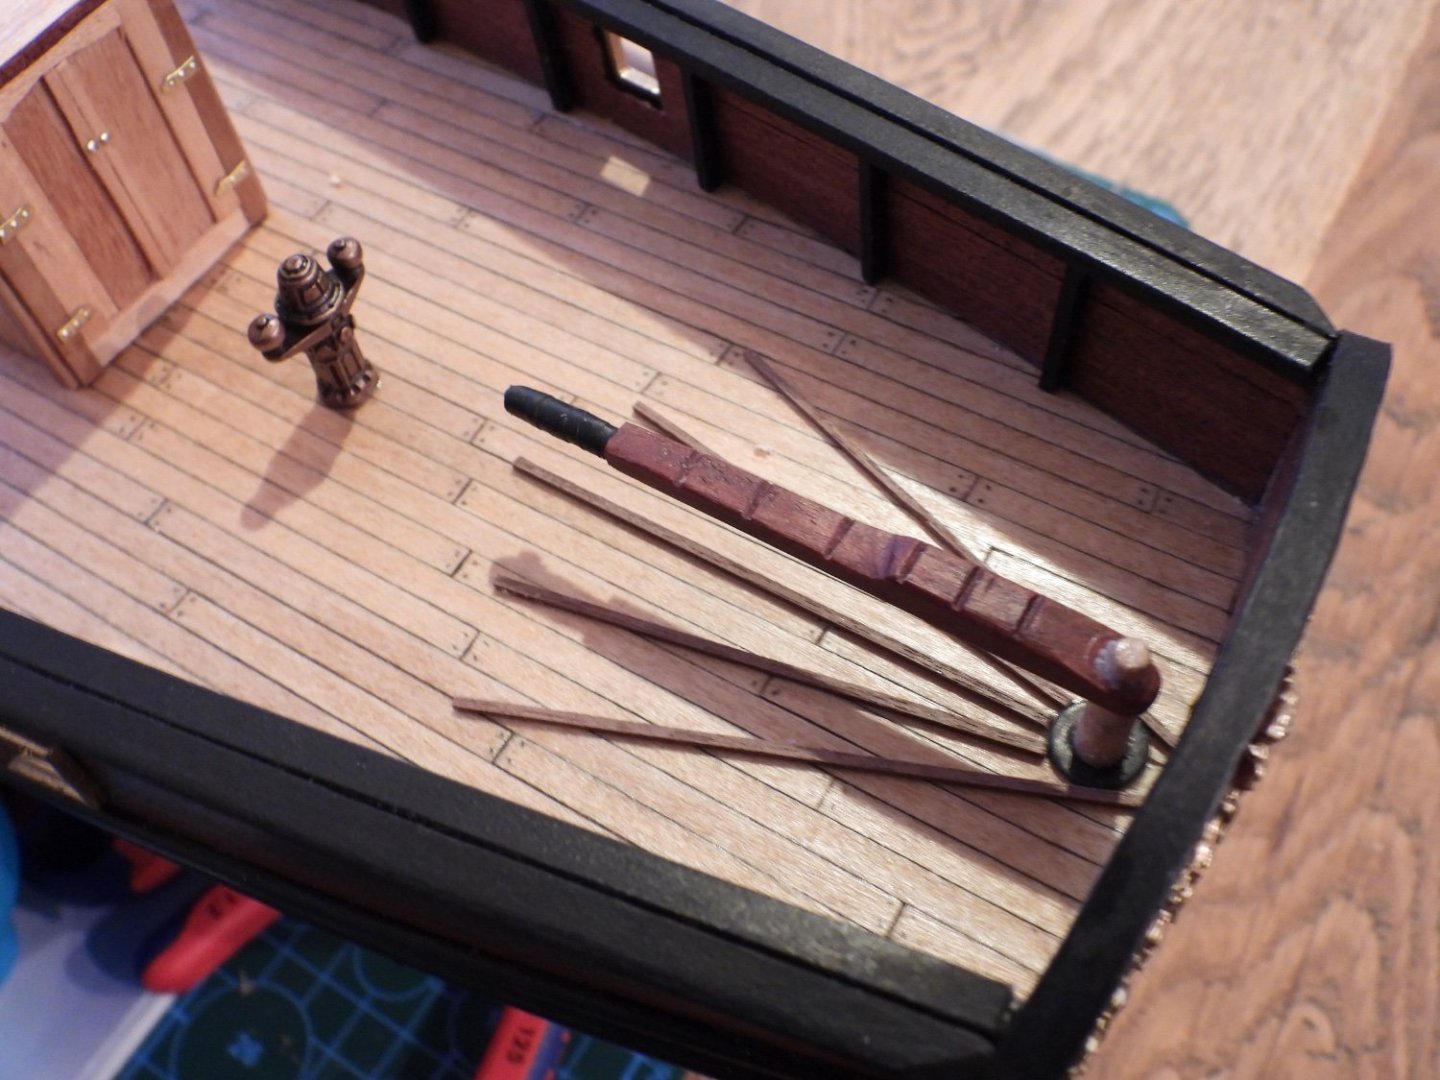
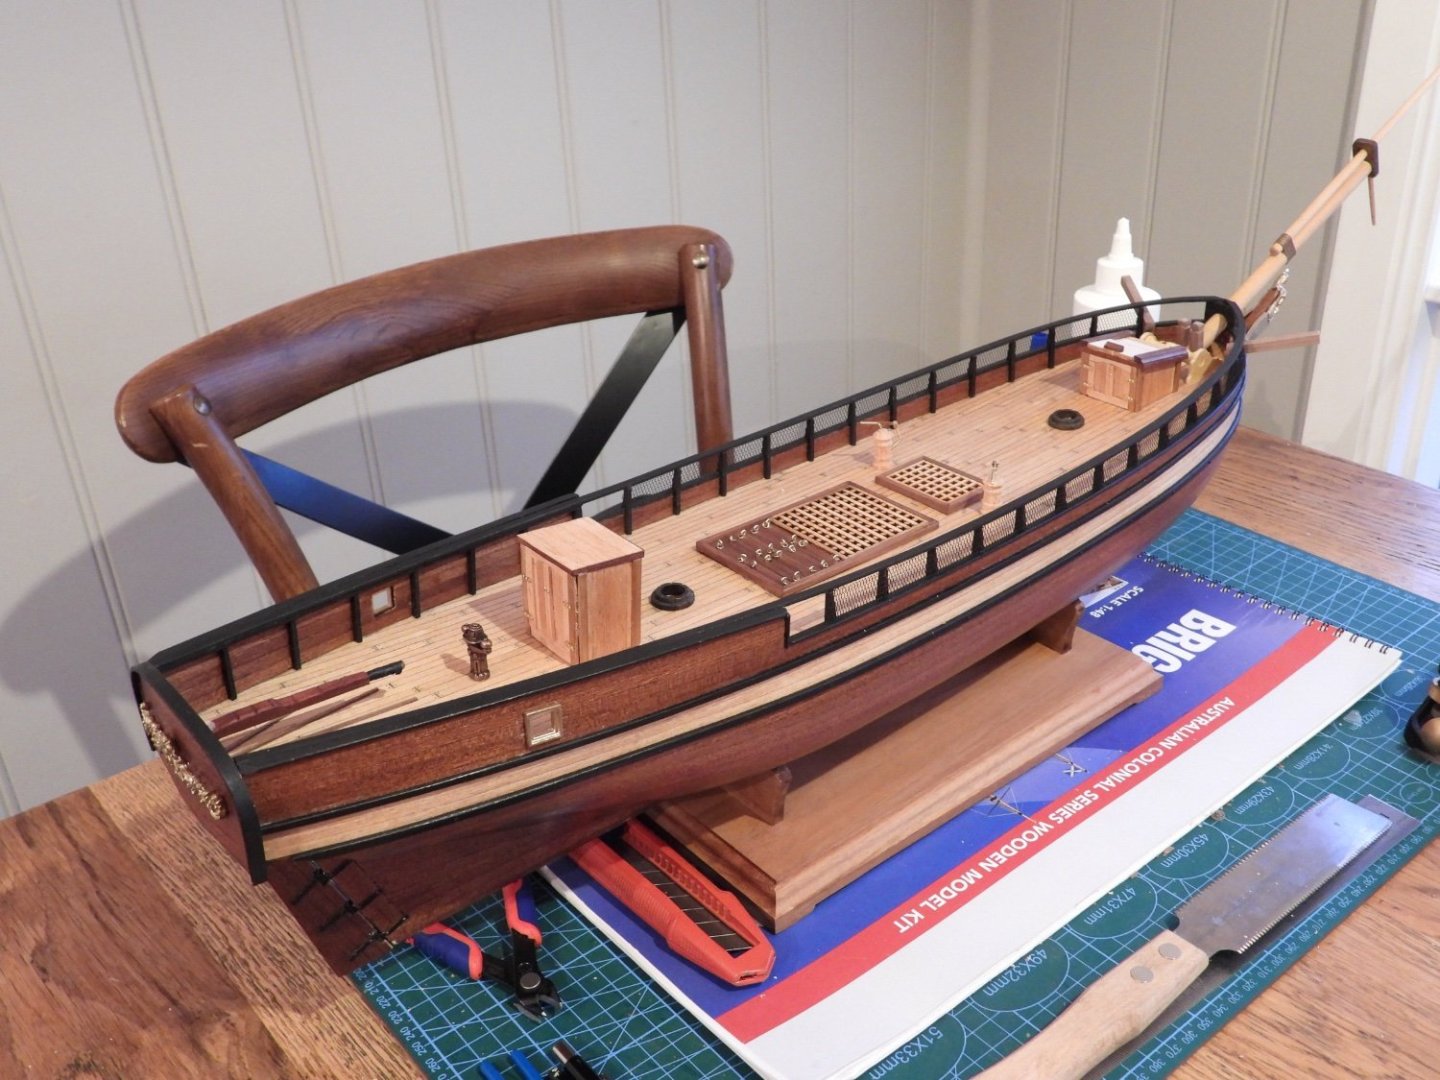
 Hi all, I’m 17 years old and this is my first ever model ship I’ve built. I thought I would share my progress. I wanted to build a model ship for a while but didn’t know where to start. I eventually settled on the Colonial Brig Perseverance 1807. It seemed like the right amount of difficulty while still being enjoyably challenging. I also bought the DVDs from modellers shipyard which have helped. I posted all these photos in one go up until I fitted the deck furniture. Up to that point it has taken 4 months. If there’s anything I’m doing wrong please let me know. Bulkheads glued, some of them were the wrong size so a bit of building up and shaping was needed. Fairing complete. Transom blocks glued. Shaping the transom blocks. Gluing upper transom blocks First plank being fitted. Temporarily clamping the plank in between the two planking bands for measurements. I just used the boiling water method for bending. First band complete. More planking. Second band completed. Commencing the third band of planking. First layer planking finished. It’s far from perfect, but I’m pretty happy with the result for the first time. planking all filled and sanded ready for second layer planking. Starting the deck planking, this is where I make my first big mistake. Somehow I forgot that the deck strips I was placing down were not lined up with the bulkheads. I only realised this after the deck was finished so I wasn’t going to remove them. I now know how to plank the deck properly on my next one. Starting second layer planking. I started off using PVA glue but it was too hard to hold while the glue set. I then moved to CA glue which was a pain to apply and also seeped through the grain making it stick more to your fingers than the ship, which pulls the plank away. I had a look at contact cement but seen too many bad reviews for model ships. So I just continued with CA glue but just adding a bit as I went. it also didn’t help that the mahogany was so brittle either. Any recommendations and/or tips would be much appreciated. Got there in the end. I definitely could do better as there are small gaps here and there but overall I thinks it’s ok. I definitely will not be using mahogany for planking ever again. Lightly sanding by hand. I applied 3 coats of sand-n-seal, then 5 coats of satin varnish. Transom cap steam bent and planked. It’s only planked on the inside for this moment. I didn’t know how to attach it other than nails. Once I glued it on I planked the outside. Gun whales and posts in place. Rudder attached. I made a mistake with the transom cap. I think it was supposed to be fitted at the same angle as the rudder post, if not it’ll hit the transom cap. I just added an extra piece to make it fit at a 90 degree angle. Figure head and transom decoration painted gold and fitted. Cargo ports cut and ready for frames. Cargo port frames installed. Bowsprit in place. Gluing most of the deck furniture. Cat heads in place. Anchors and cat head rigging finished. This is my progress so far.
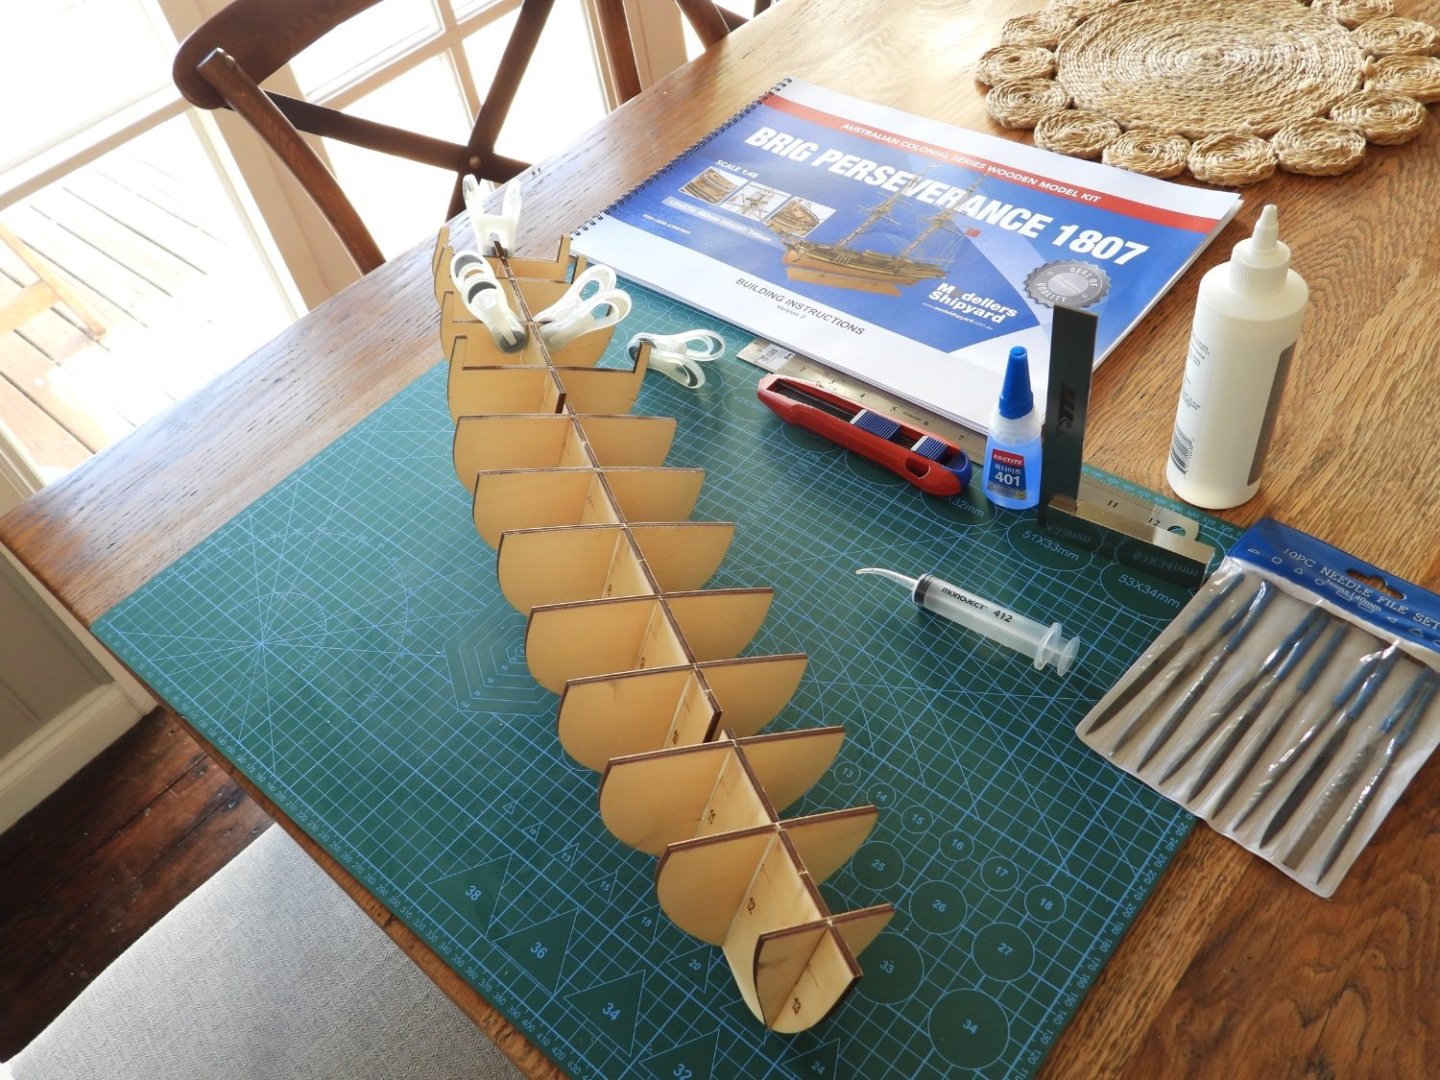


- 177 replies
-
- 15
-
-
- Perseverance
- Modellers Shipyard
- (and 1 more)
-
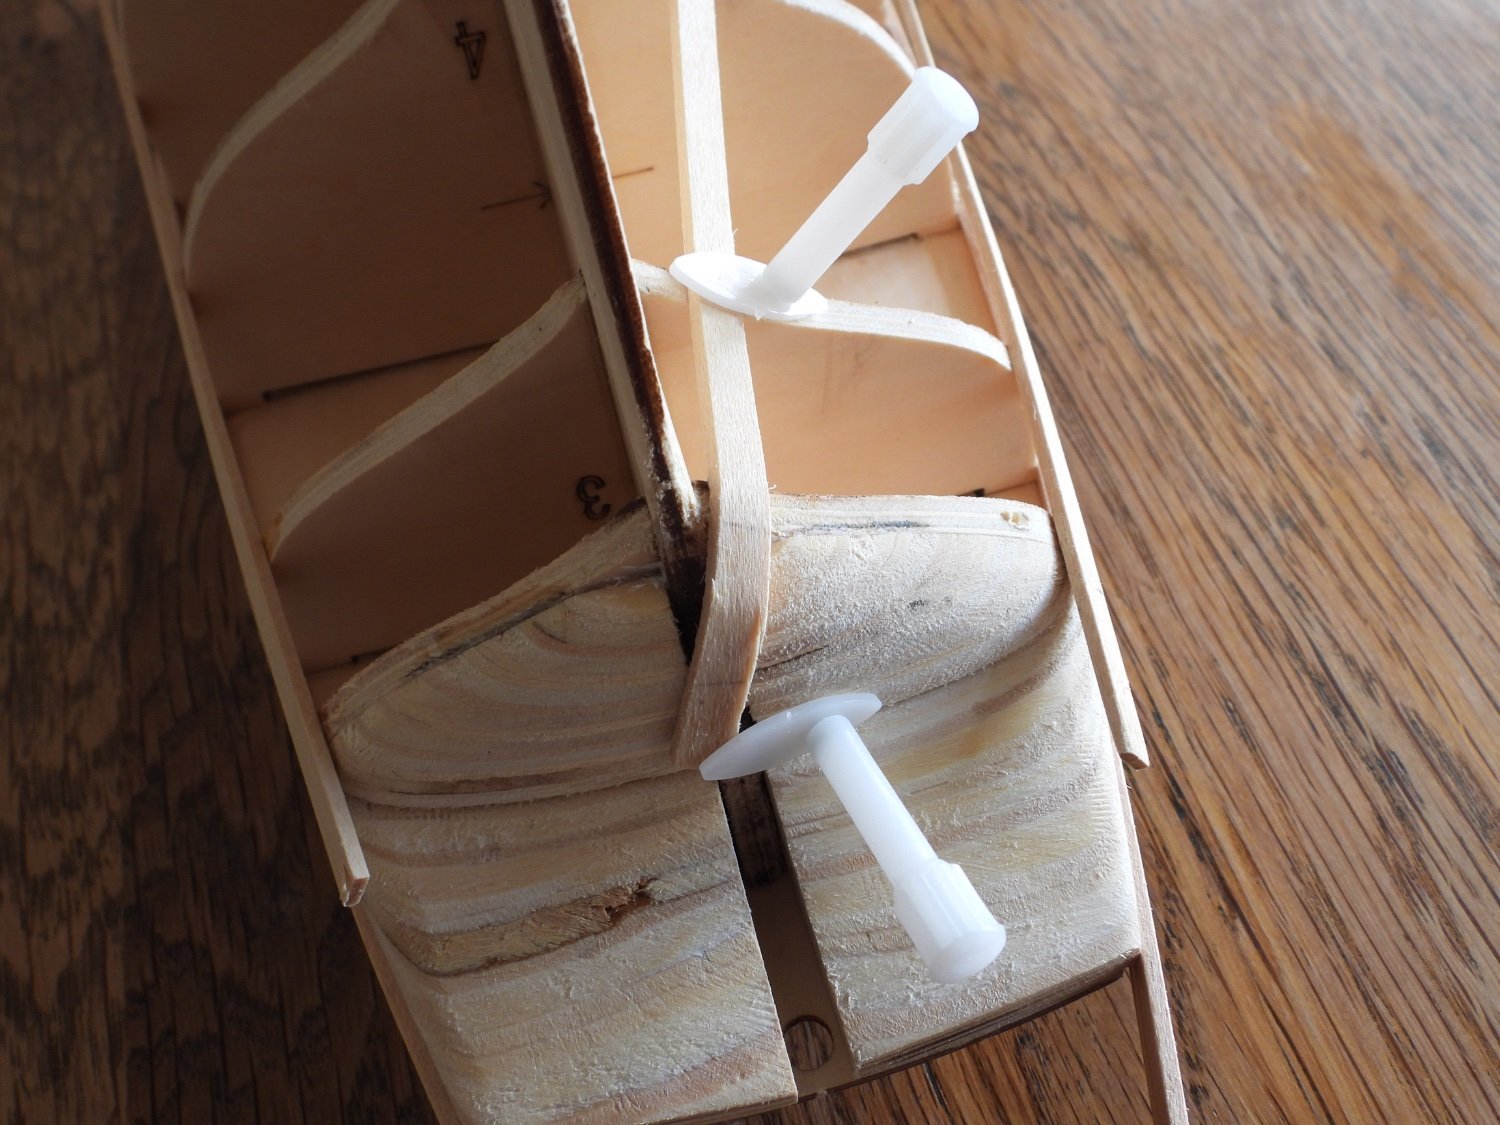
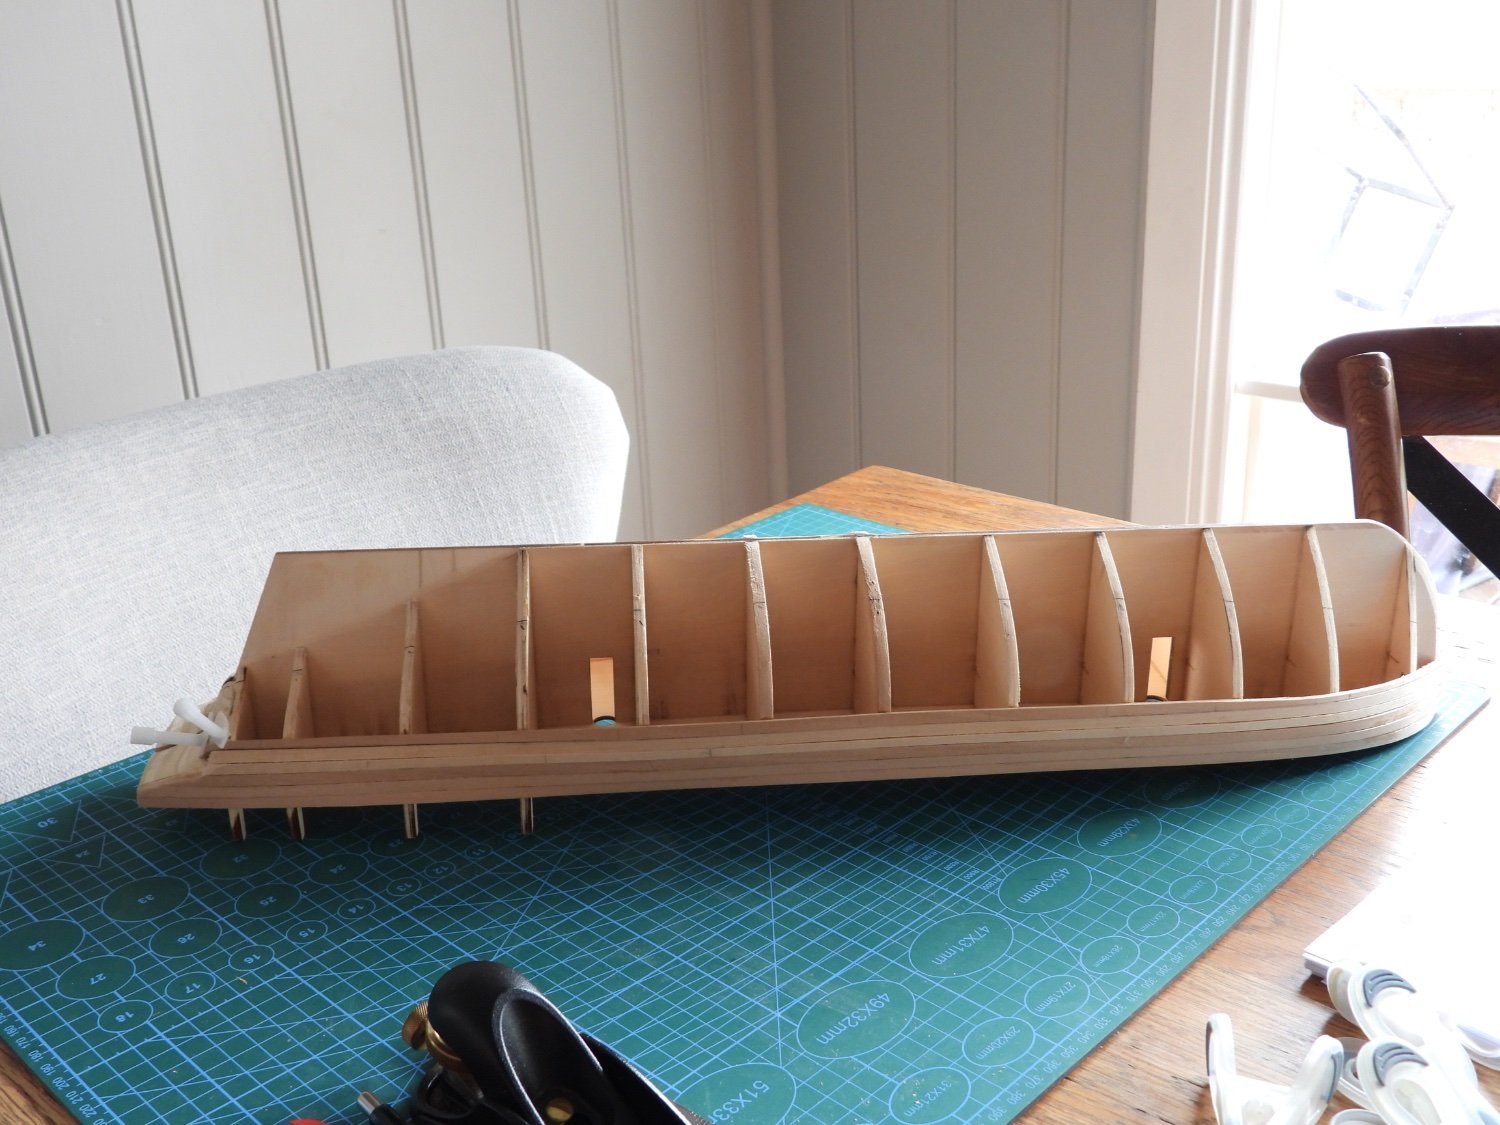
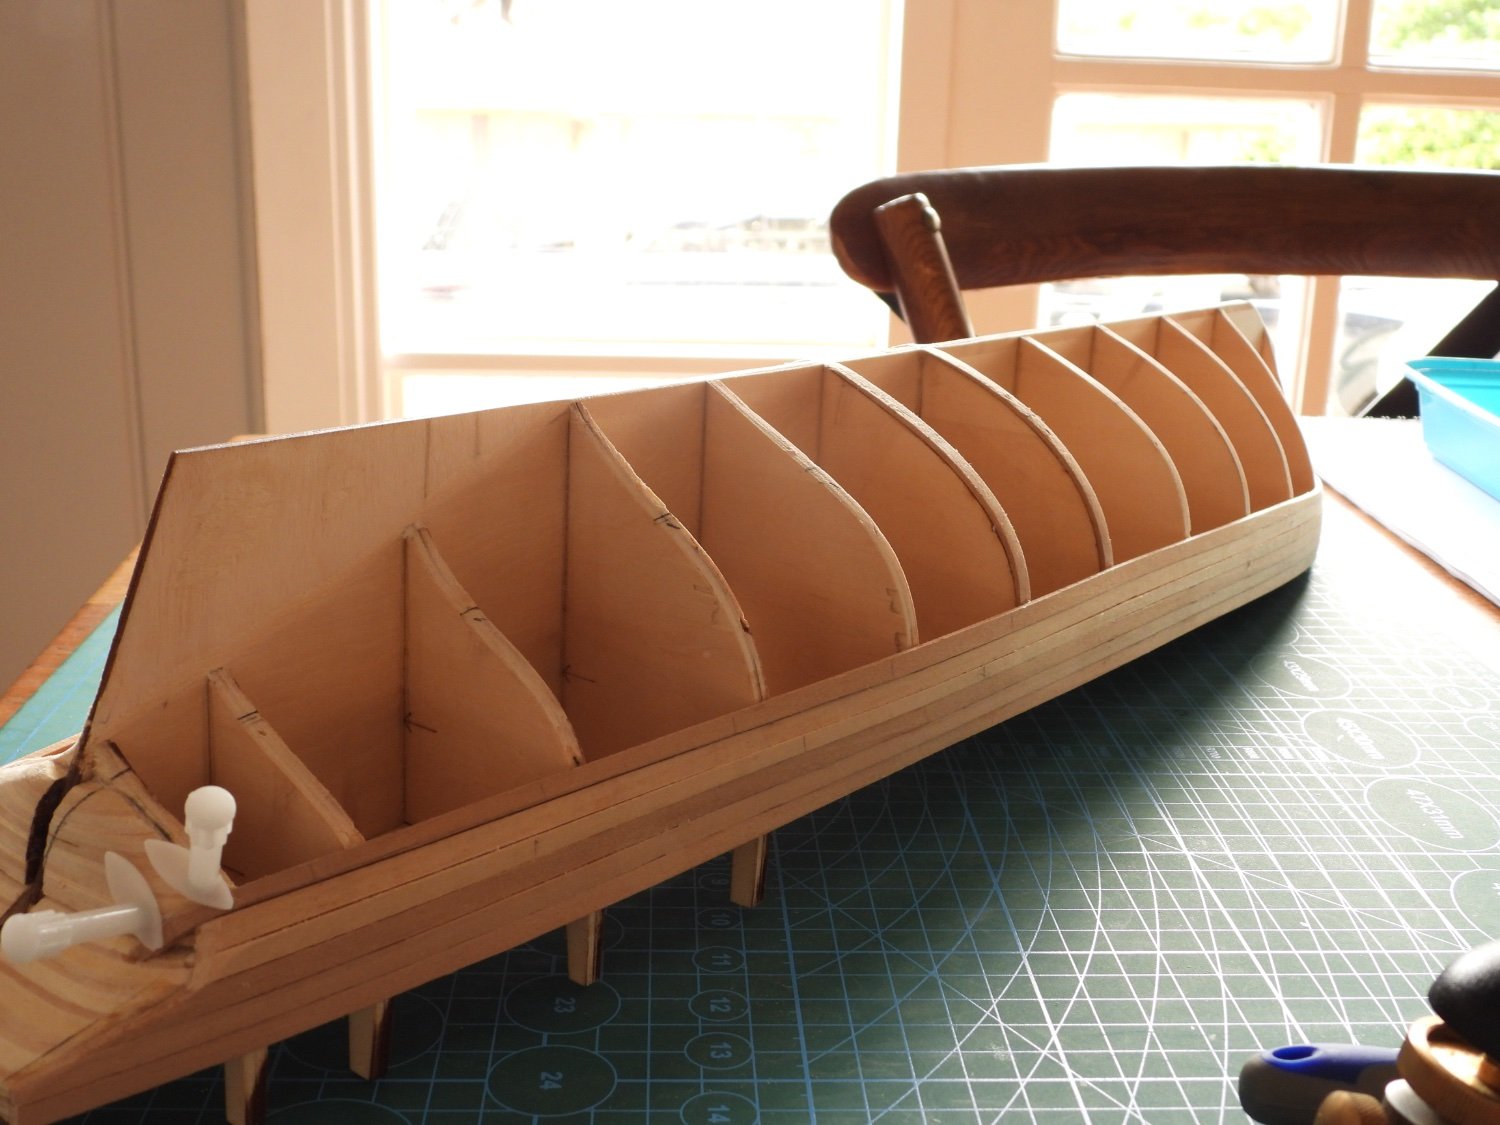
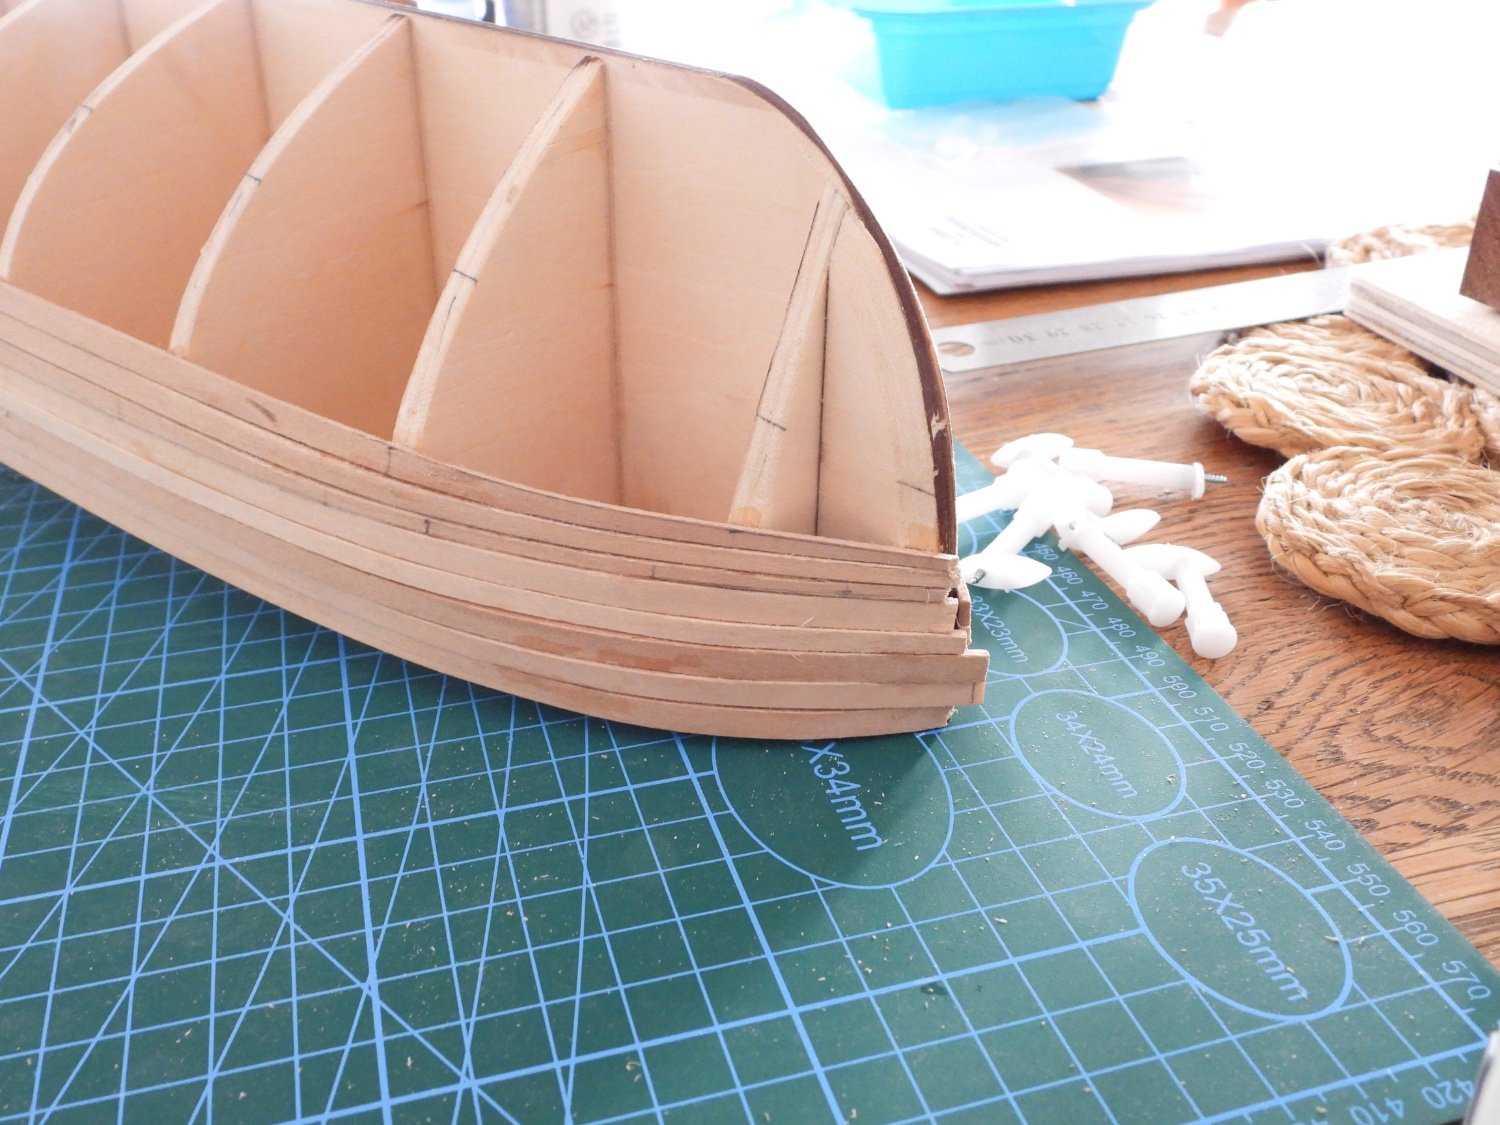
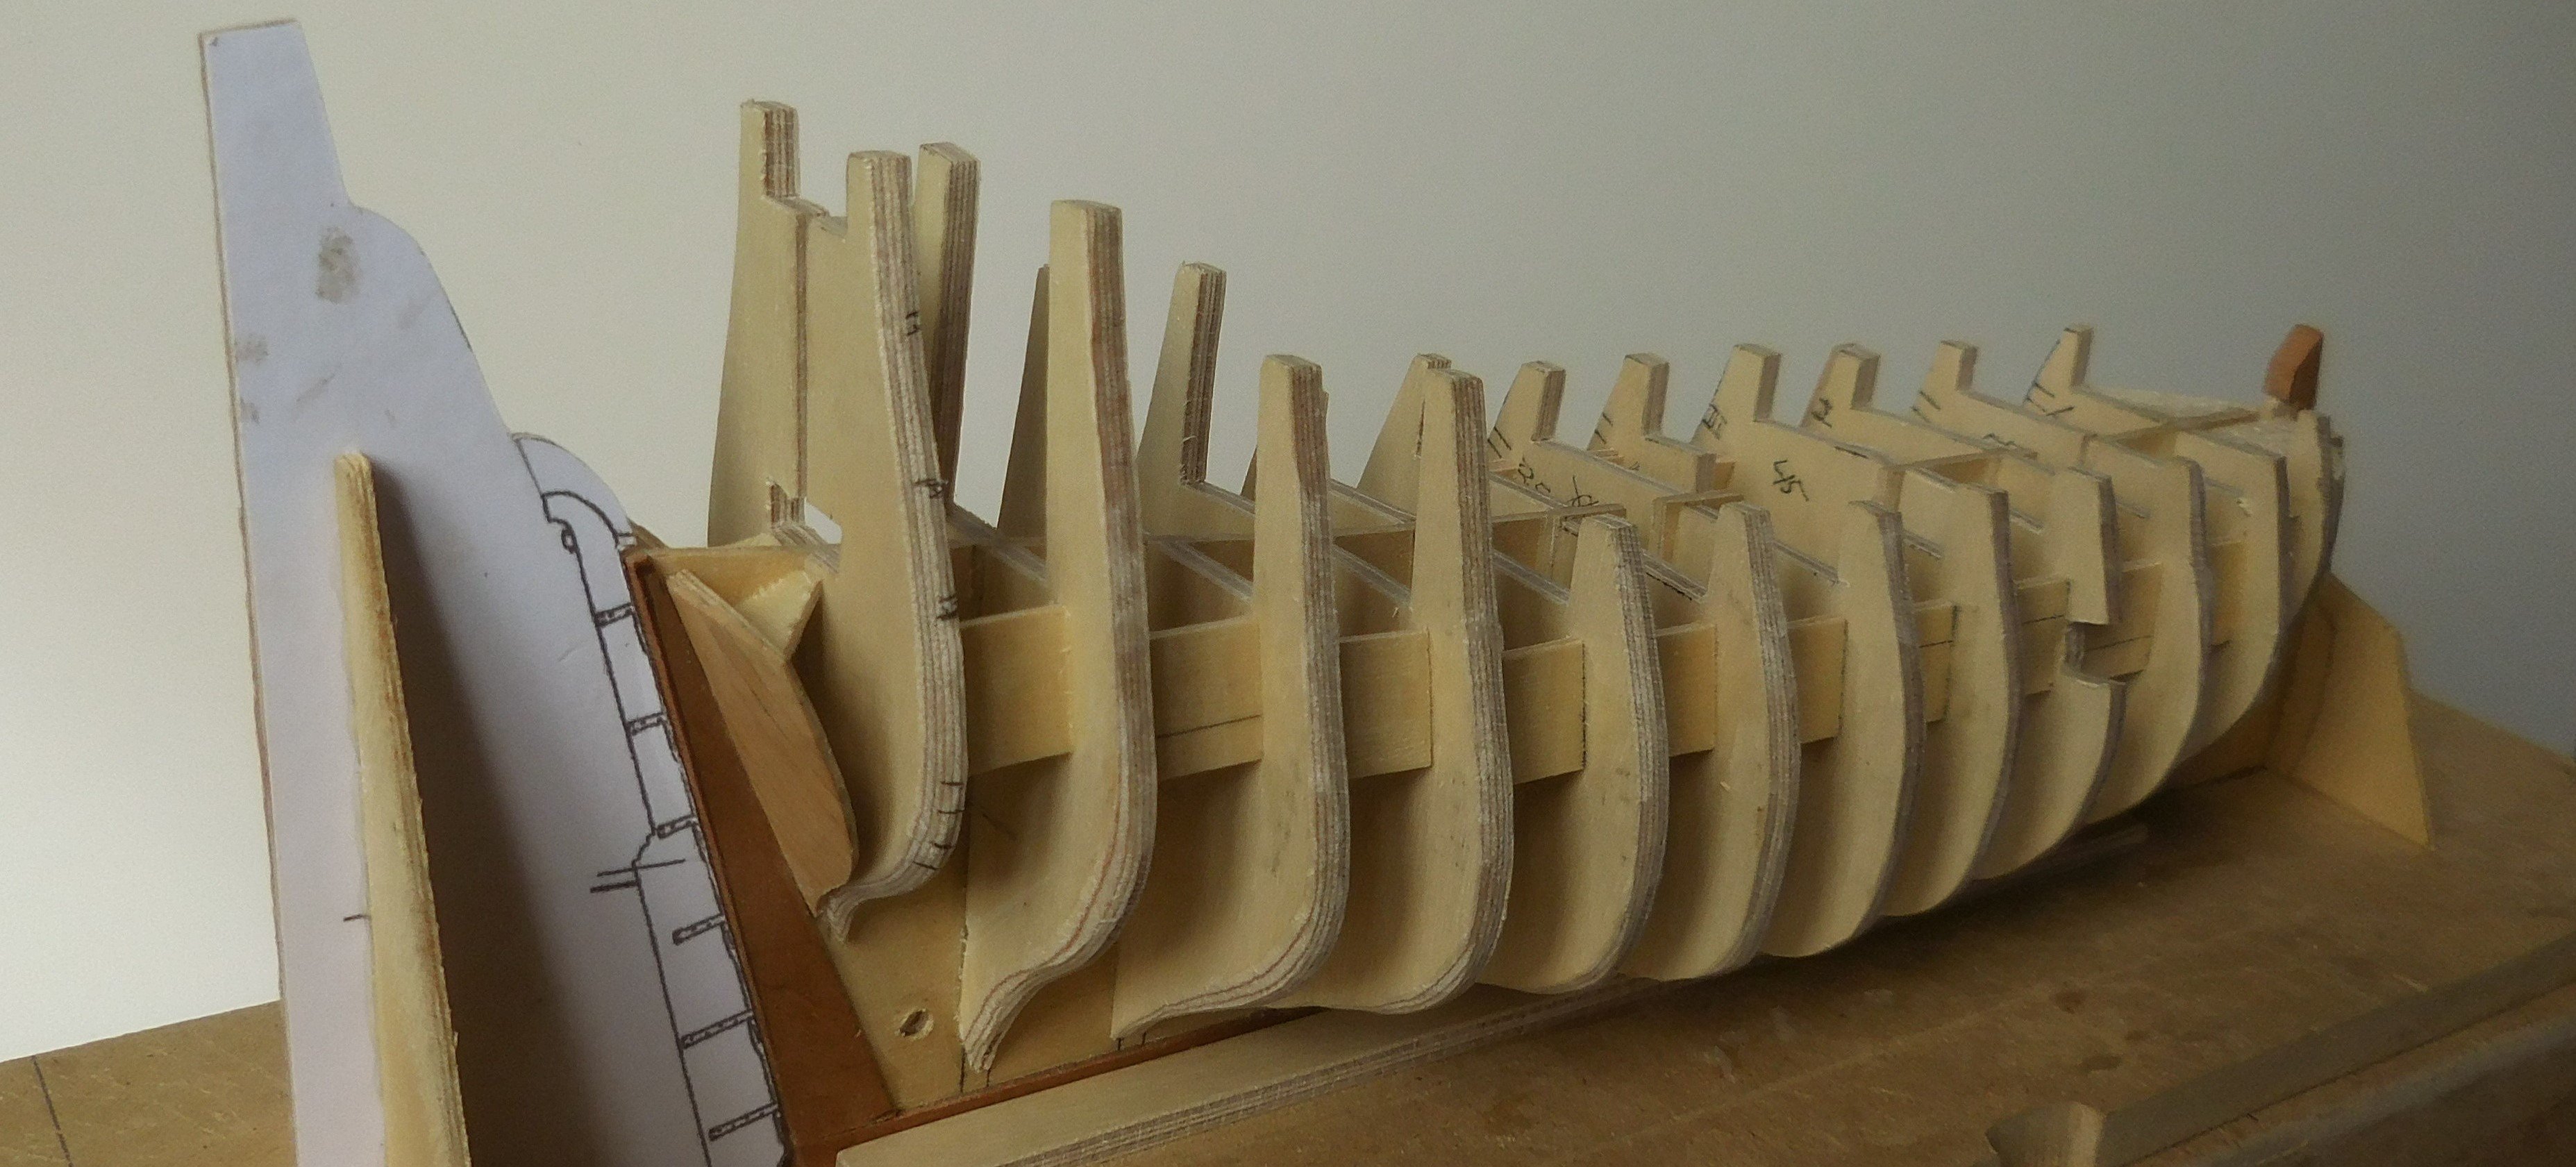
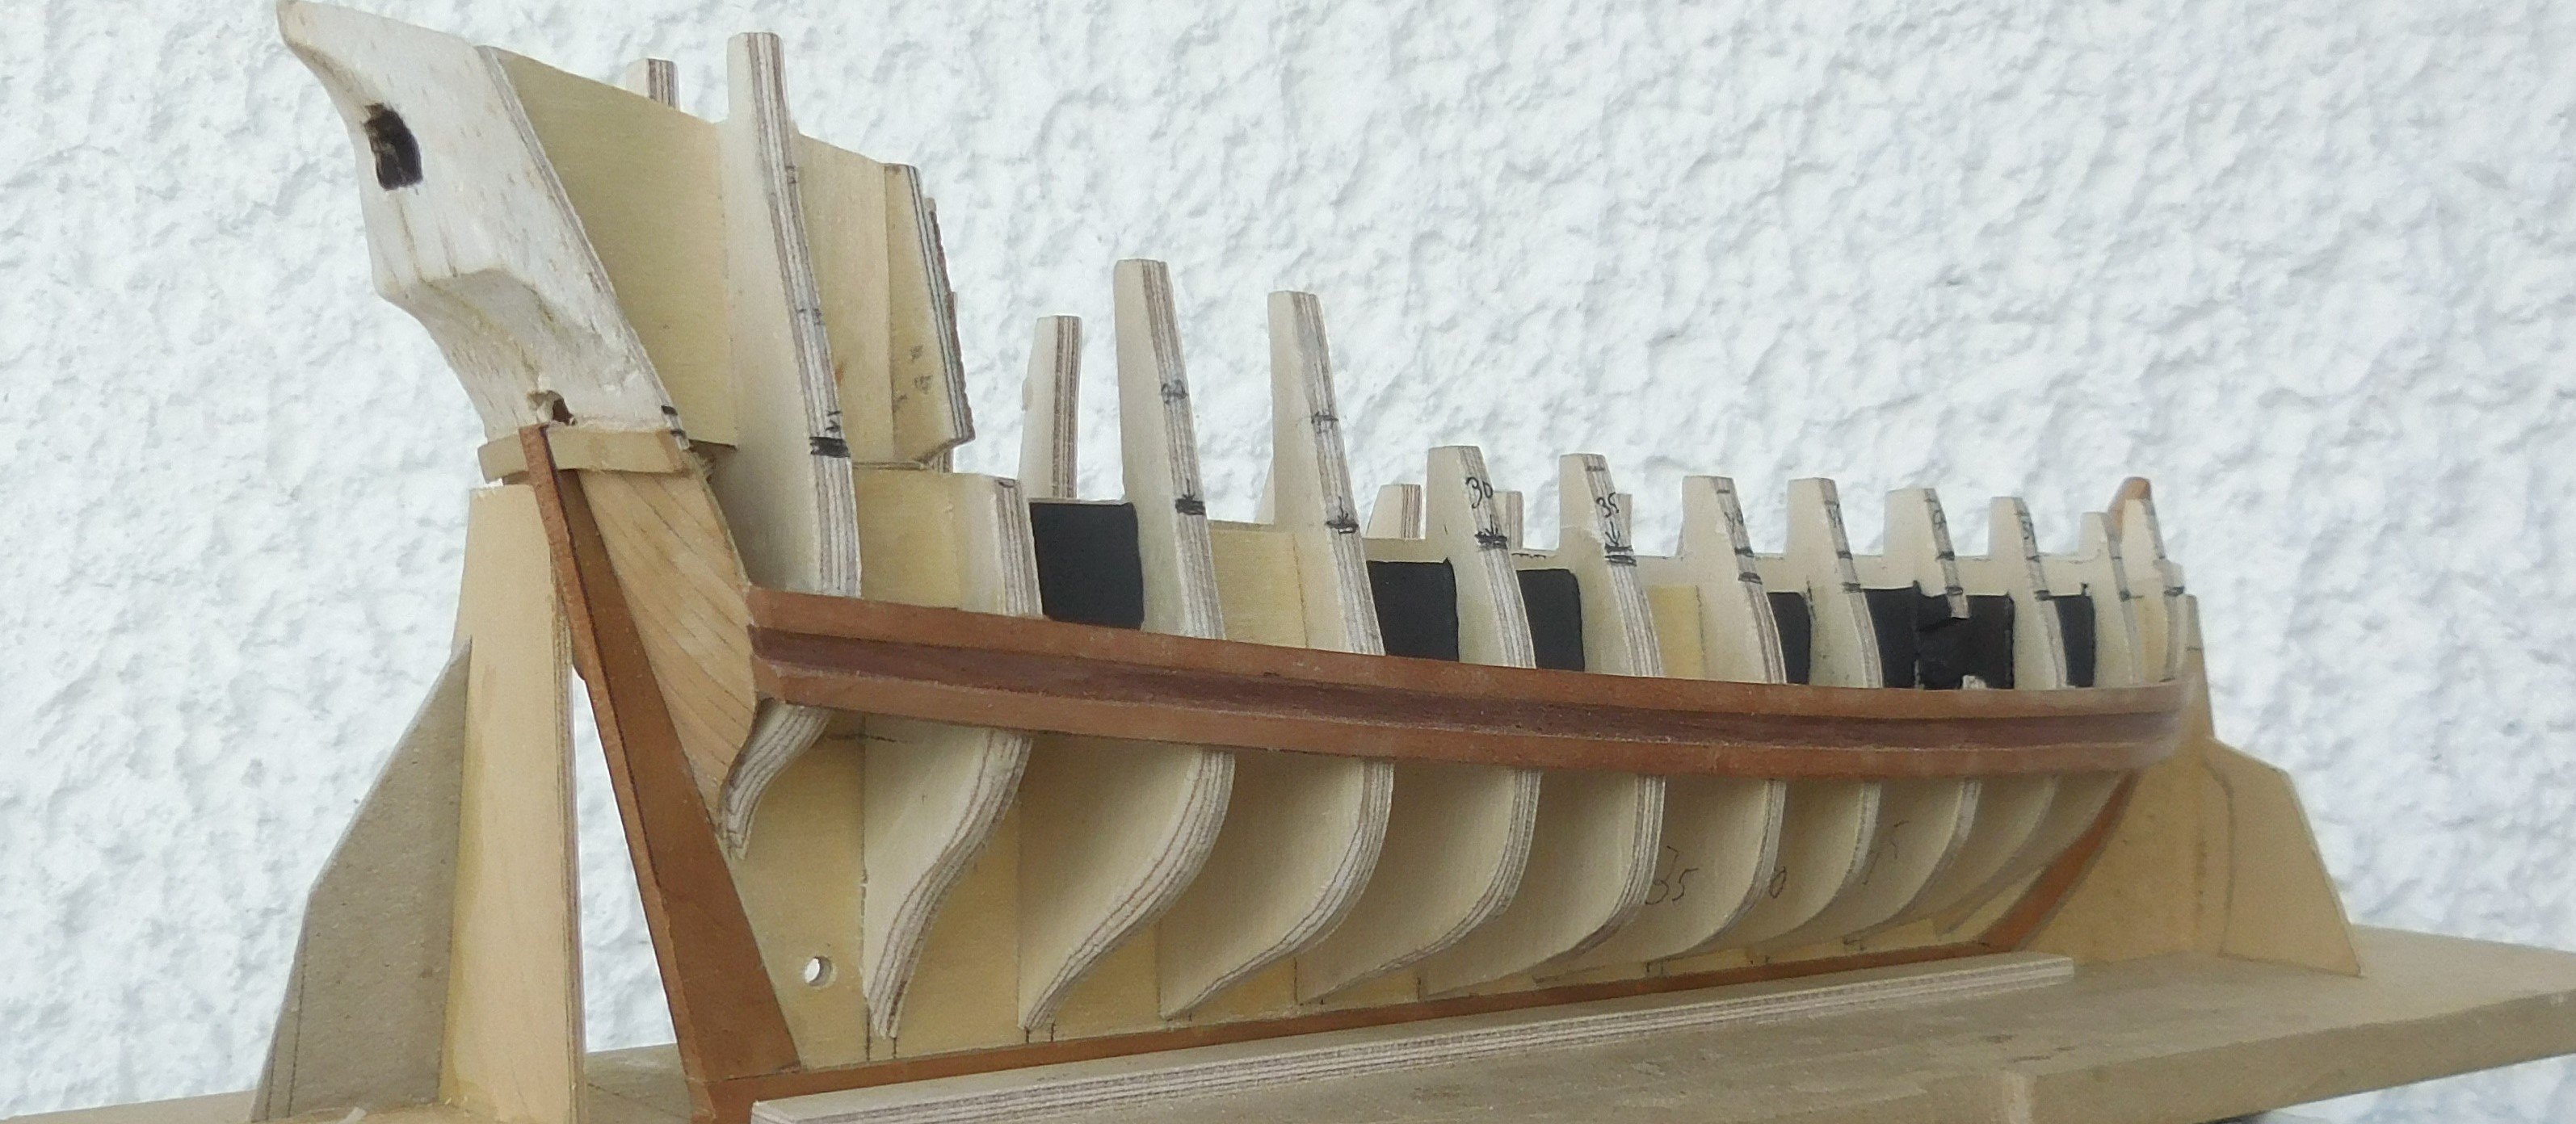
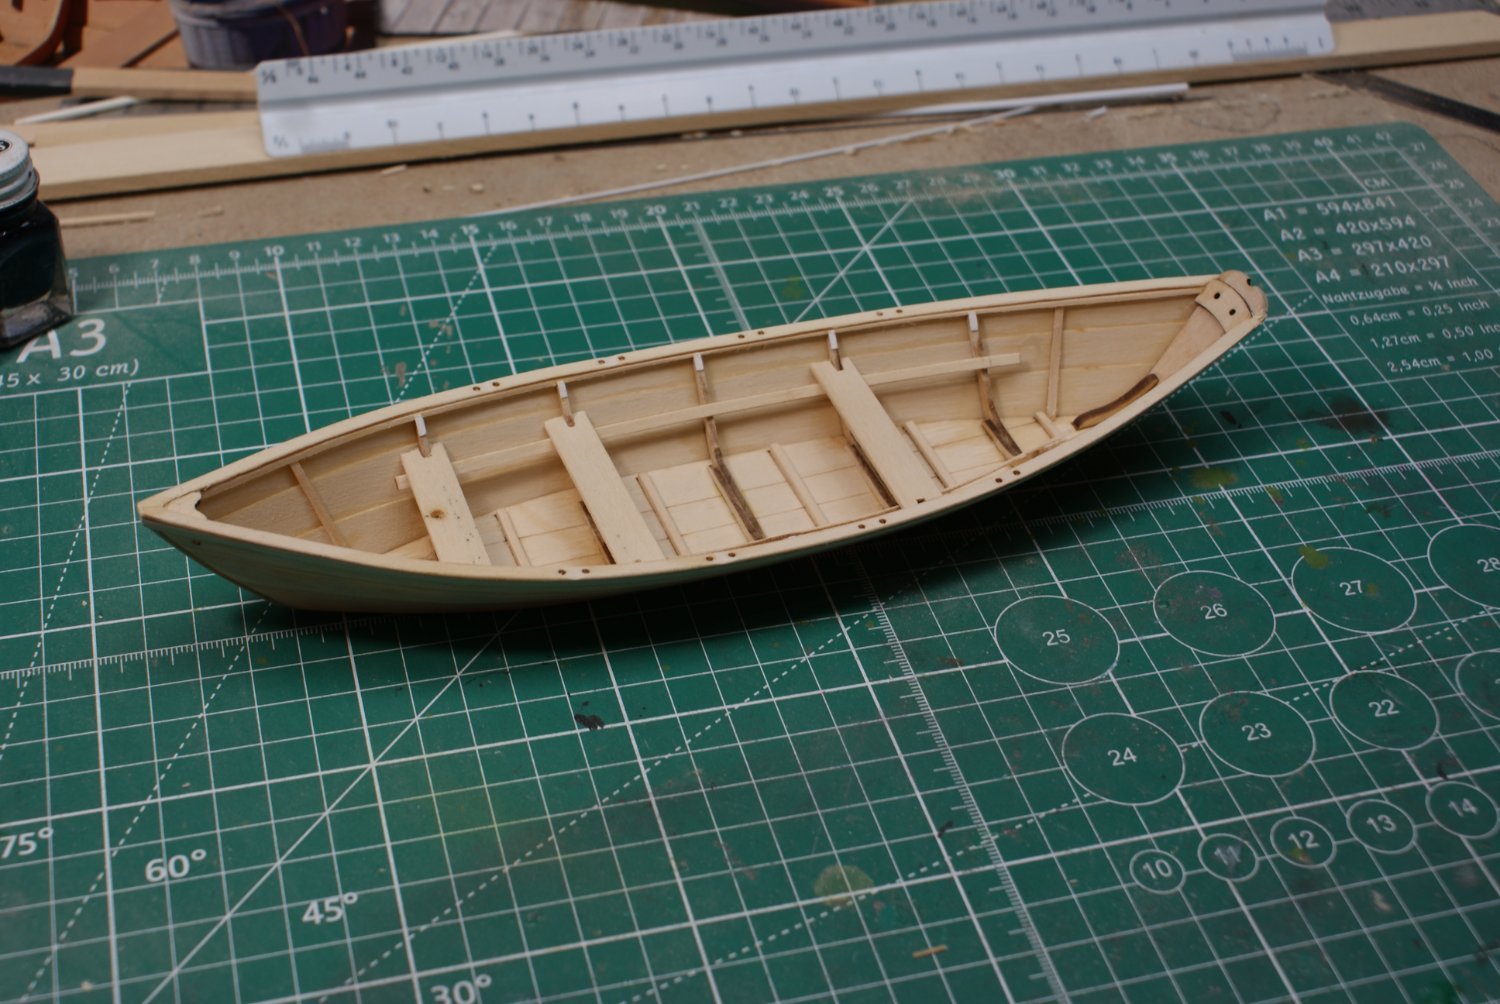
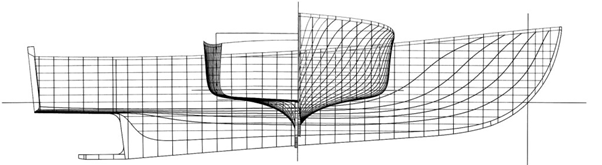
 Back in summer 2017 I scored a serious modelling injury - a deep cut in my left index finger that severed the nerves and nicked a tendon. The results were not only the immediate physical damage (despite surgery and physio I still have only very limited use of that finger and it still causes physical discomfort to bend the last knuckle), but also that my focus on modelling drifted in the extreme - a psychological barrier that I have found it much more difficult to overcome than the injury itself! My modelling hasn't stopped entirely, but the model I was working on when the injury happened has languished (I think I've spent maybe half a dozen days on it since the injury), and I have not been able to make much progress on the other project I have on the go - a 1:64 scale Bluenose scratch-built from the MS plans. I hope to finish both of these models one day, but I felt like I needed a smaller project just to get me back into the swing of modelling. I did not want to break open a new kit (I have quite a few on the shelf waiting) so I started looking for a good small project that I could dive into. Then last summer I stumbled across a site that I imagine some of the MSW crew are aware of - Off Centre Harbor out of Brooklin, Maine. OCH came up in a search for small boat kits (full size) and I discovered this great video series that follows the construction of a 14' rowing skiff, designed by Havilah Hawkins. The build was conducted by an OCH instructor and a group of what look like 7-12 year old kids. It was watching the kids build it that I think inspired me to have a go at modelling this and as an entry back into ship modelling. Here is a link to the first video in the series - the full set of videos is available only to OCH members - I joined and discovered quite a few useful and interesting resources, but am otherwise unaffiliated with them. https://www.offcenterharbor.com/videos/how-to-build-a-beautiful-skiff-part-1-introduction/ OCH makes the plans for this kit available at a reasonable price (40$) - and the 5 sheets (of varying scales but with all necessary offsets included) are accompanied by a wood list for the full scale boat that also serves as reference for modelling the skiff at scale. The video series shows an adaptation of the skiff for sail, but no plans for this are currently available. So in essence this build serves a couple of purposes - first (hopefully) to bootstrap me back into modelling and second to give a sense of how easy or difficult it might be to build one of these things full size at some point in the future. I'll be building the model at 1:12 (1" = 1') scale and following as much as possible, the process as outlined for the construction of the full sized boat - with some modifications. I'll close out this post with an image (cropped) of the profile and plan views of the skiff. Enjoy! hamilton
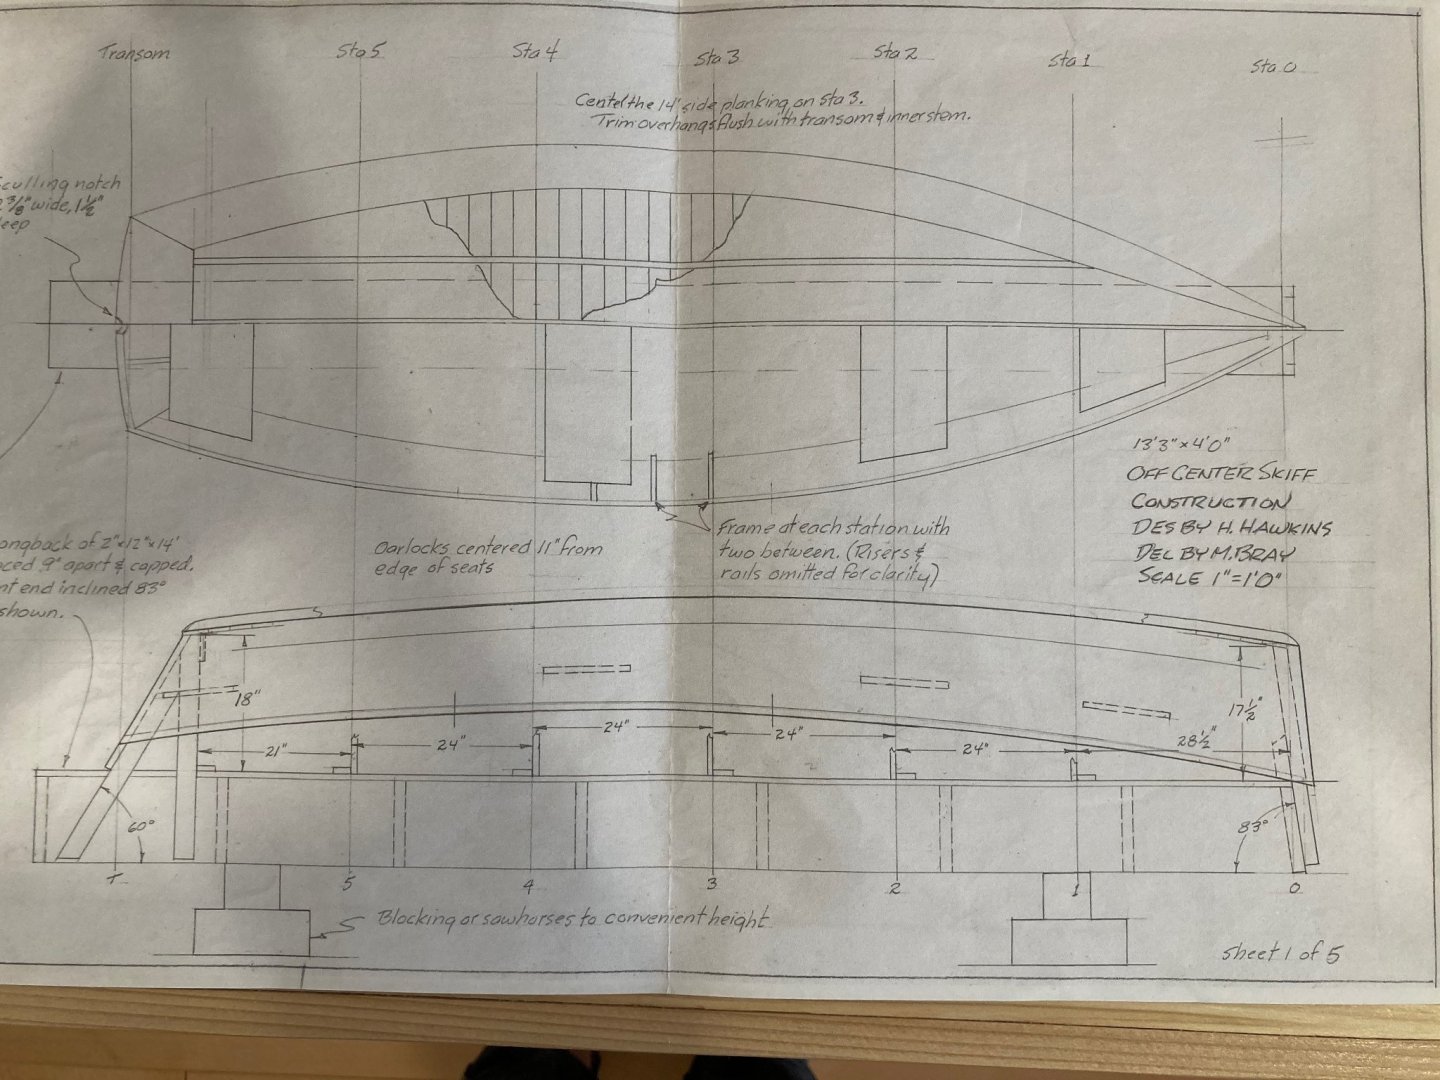
-
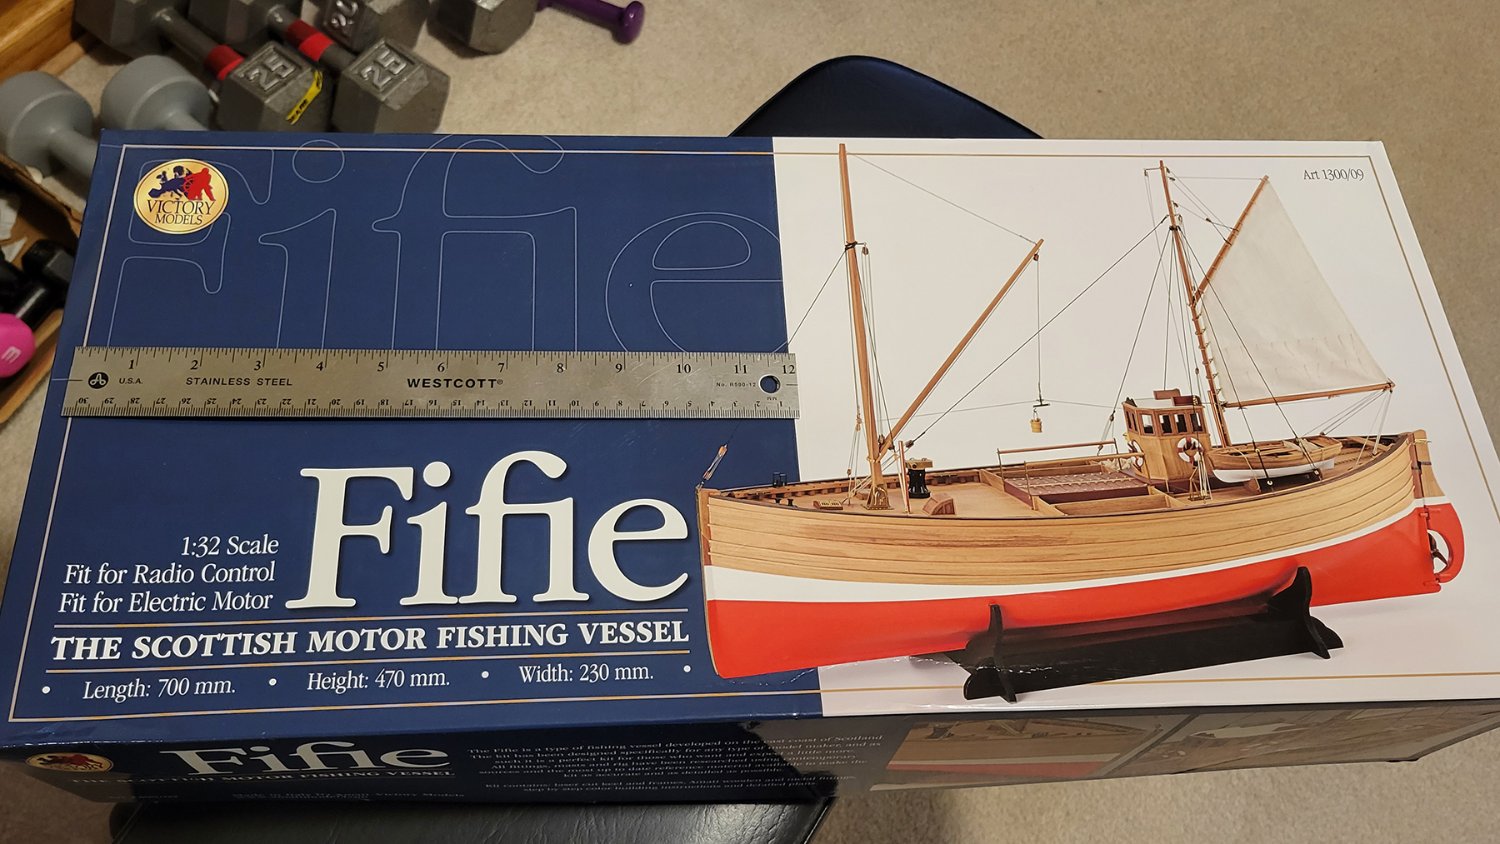
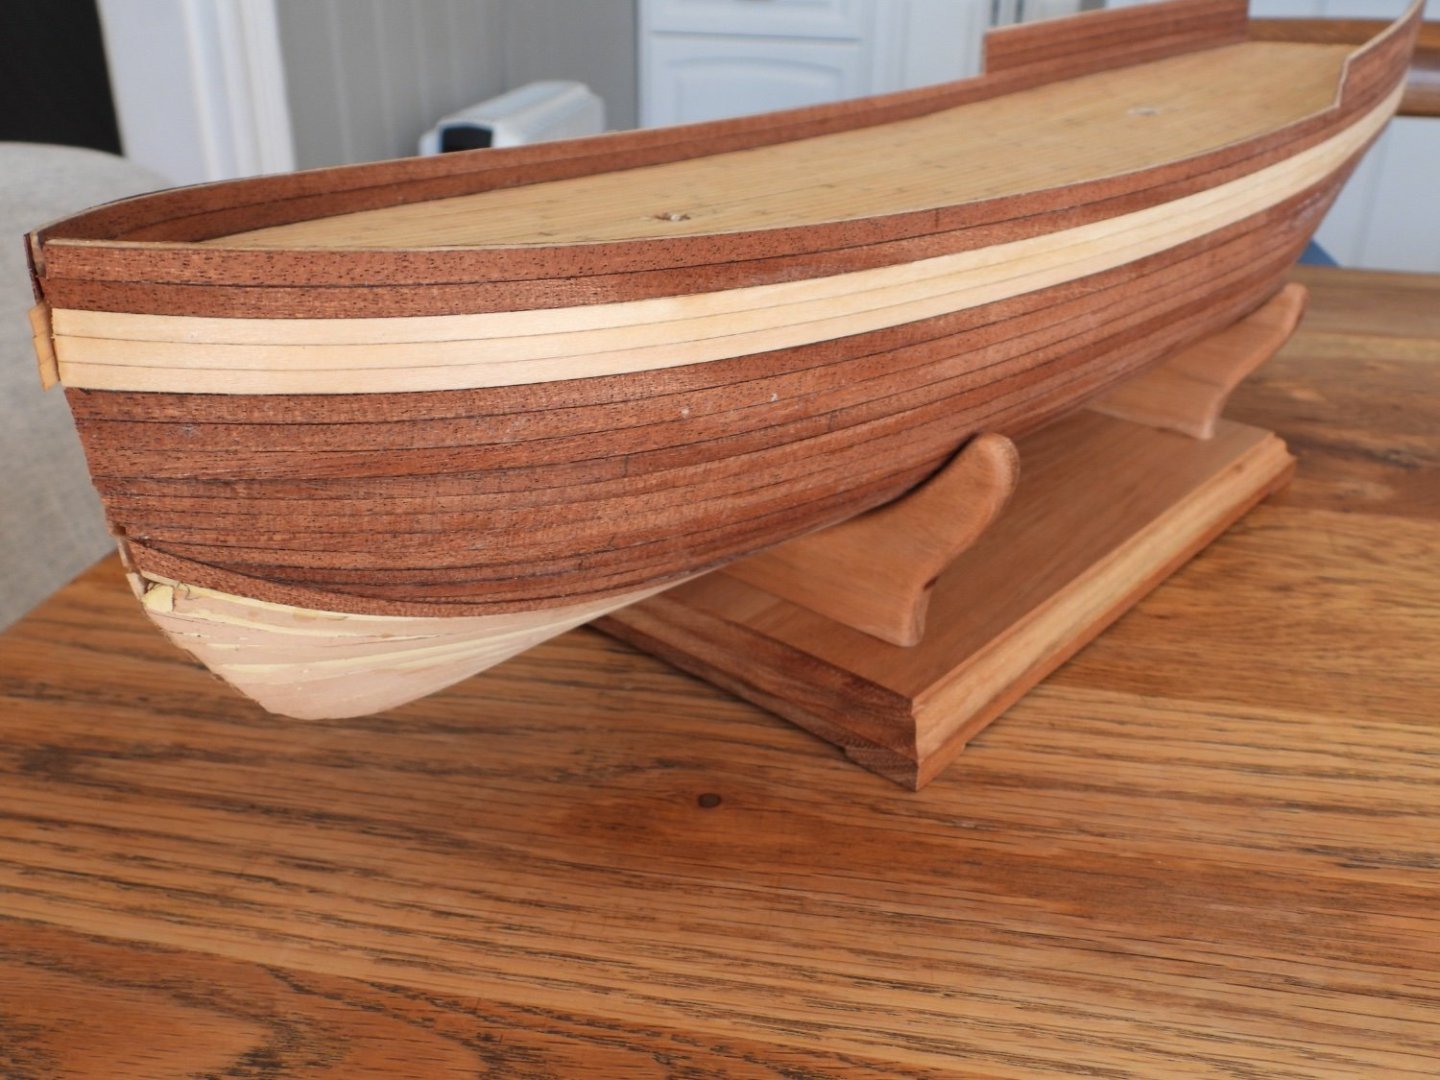
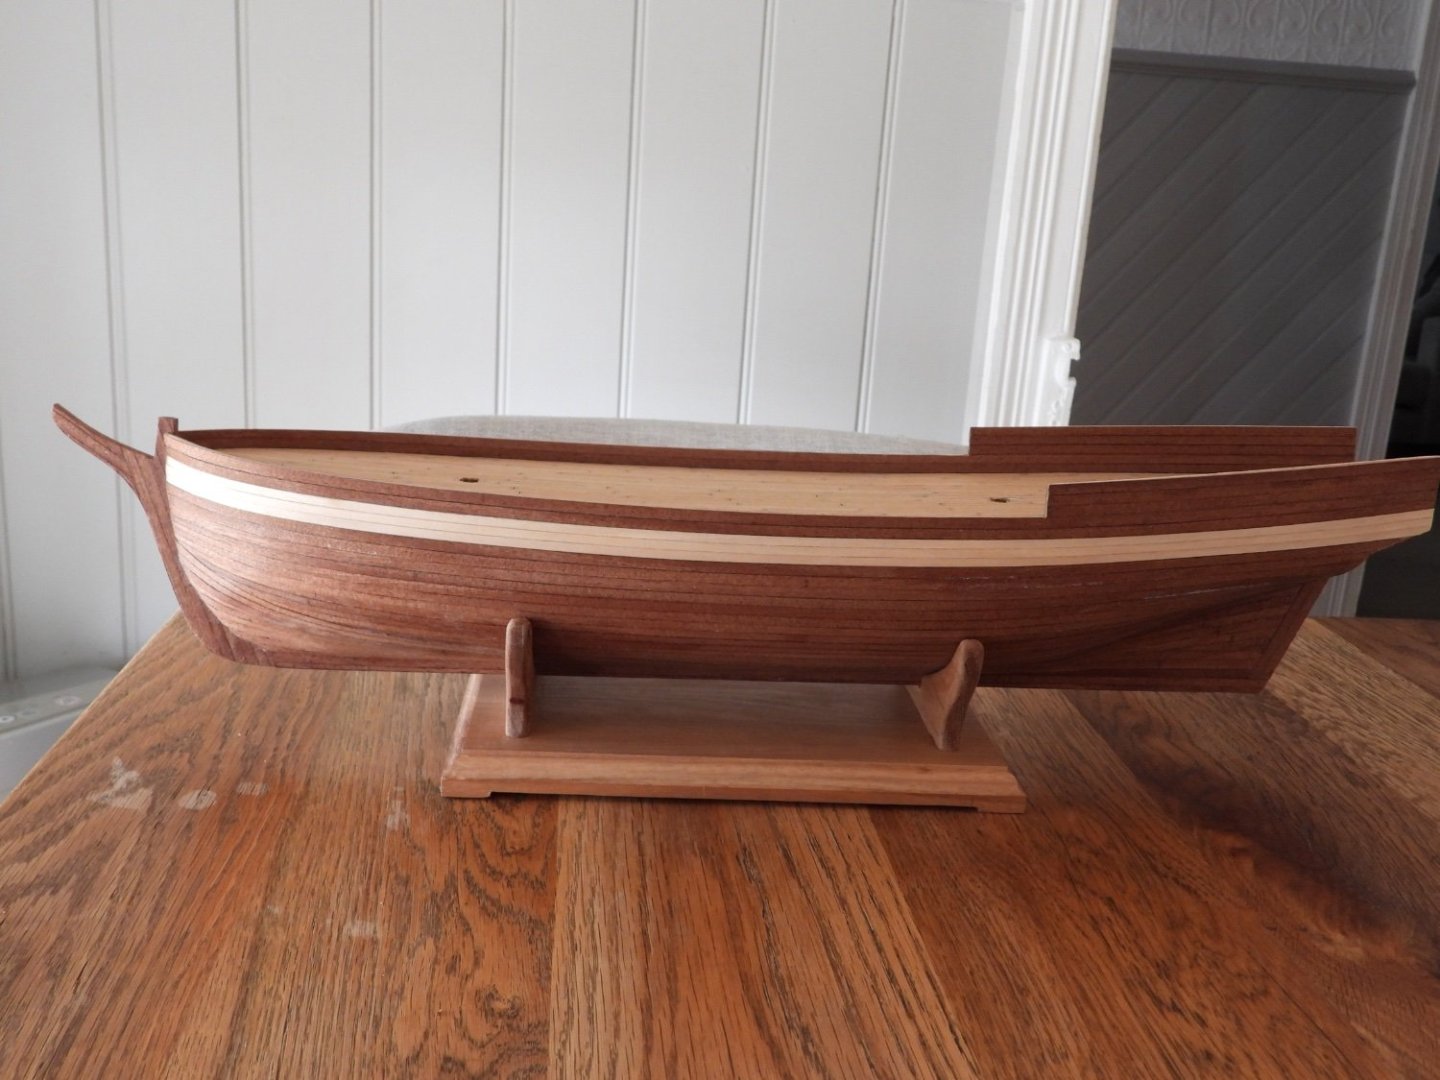
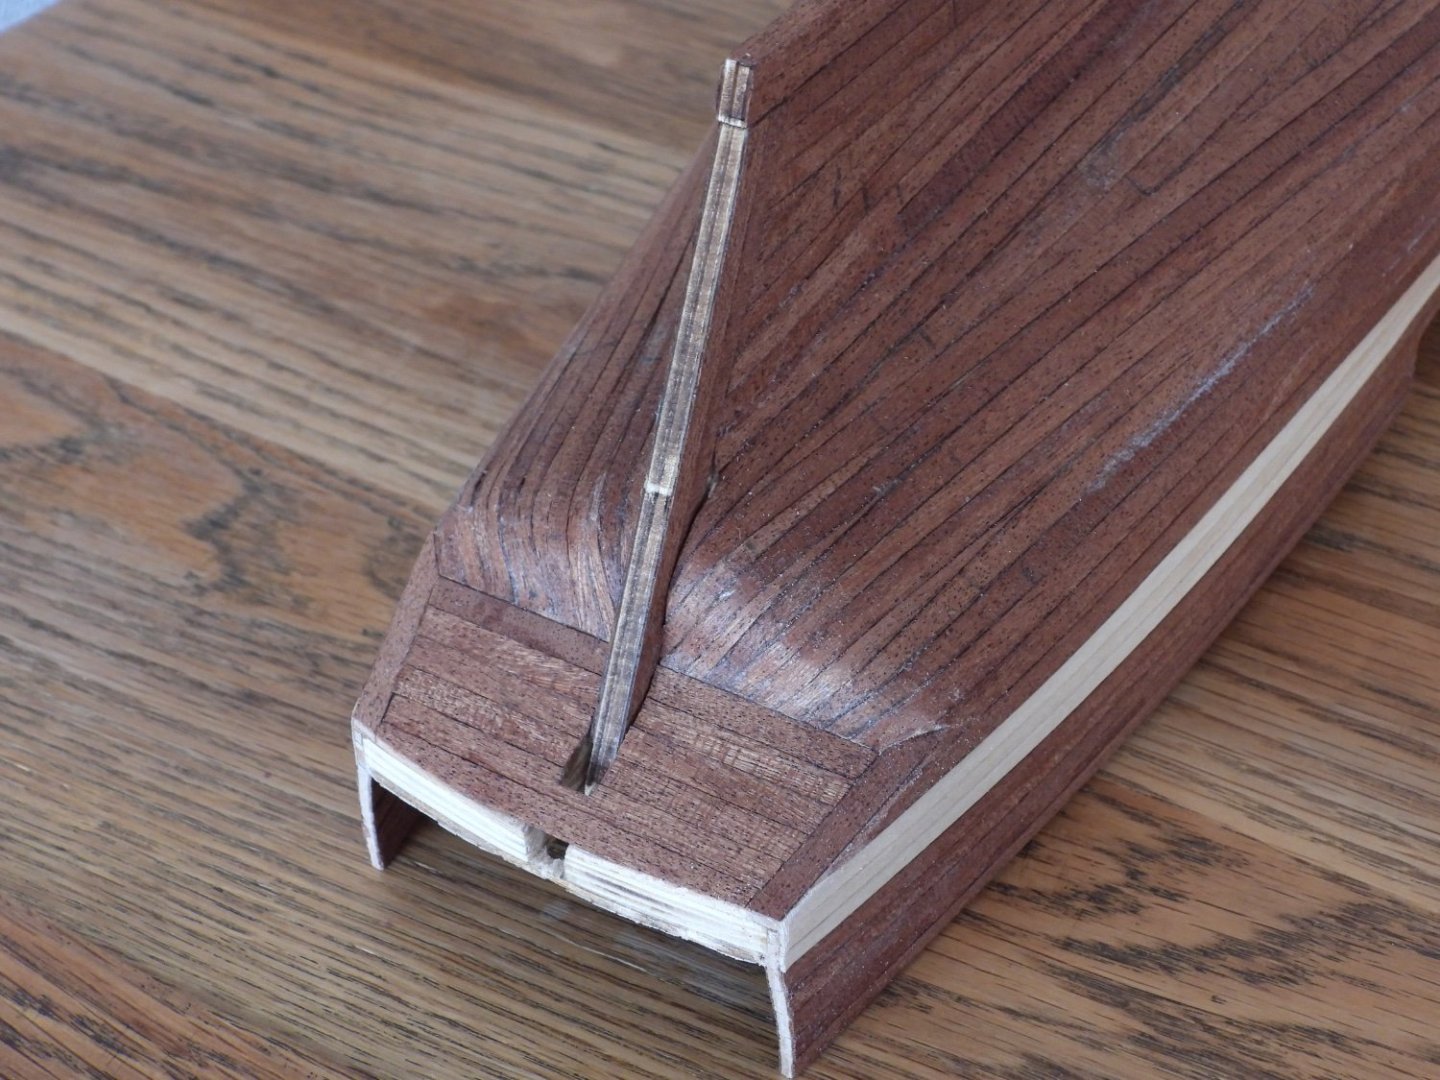
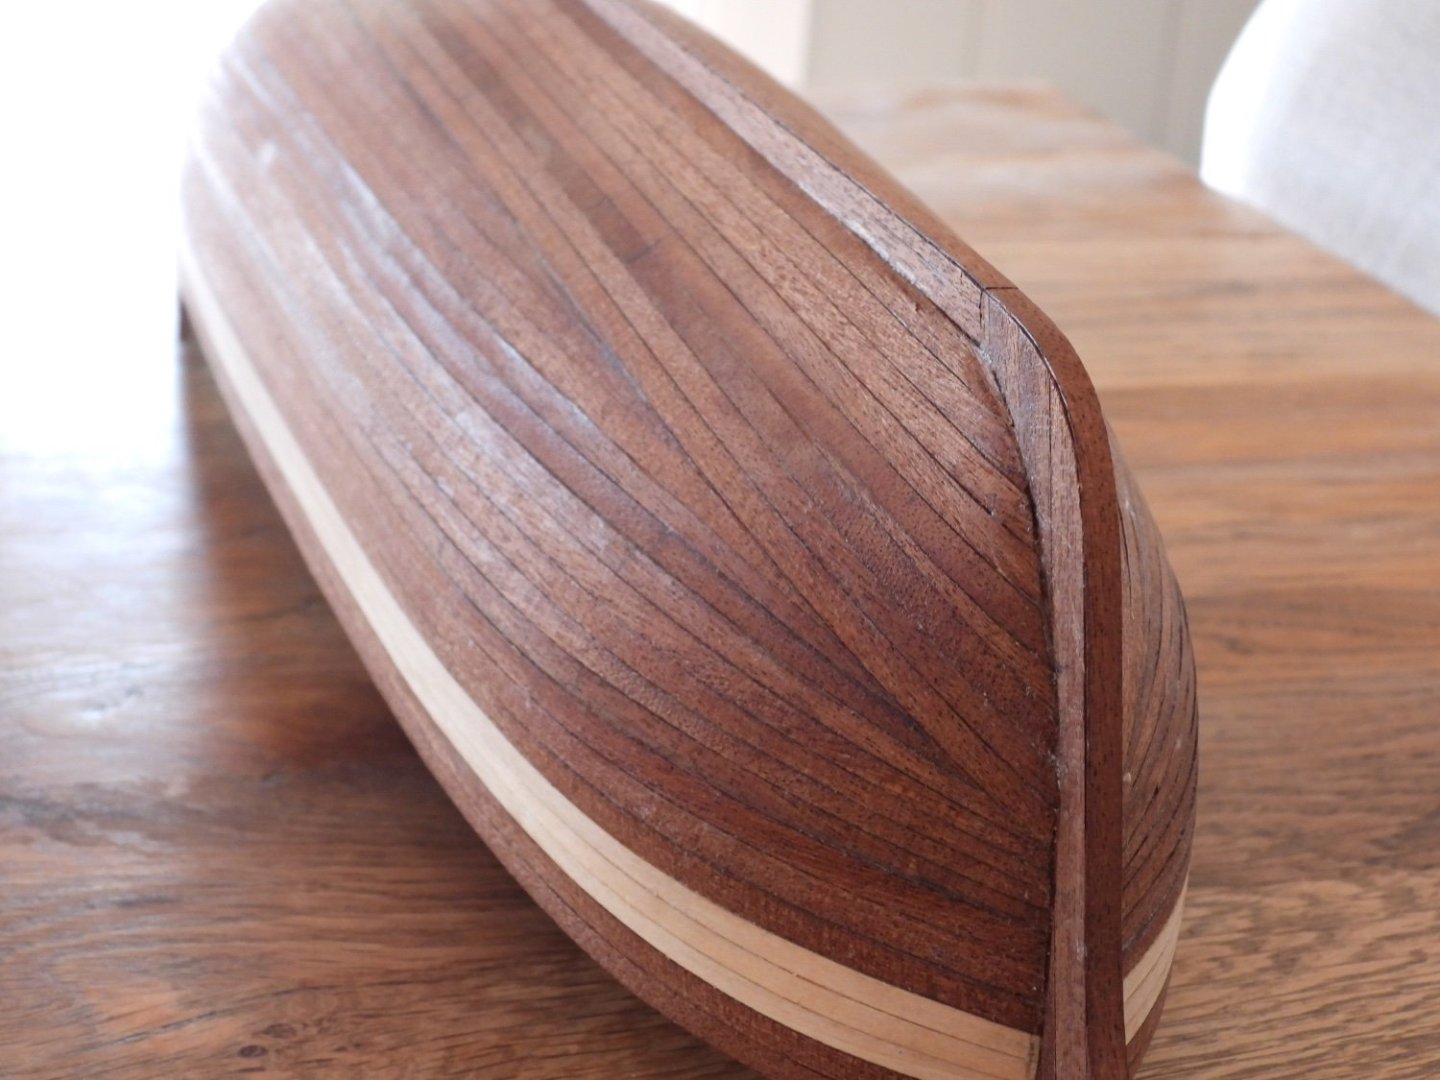
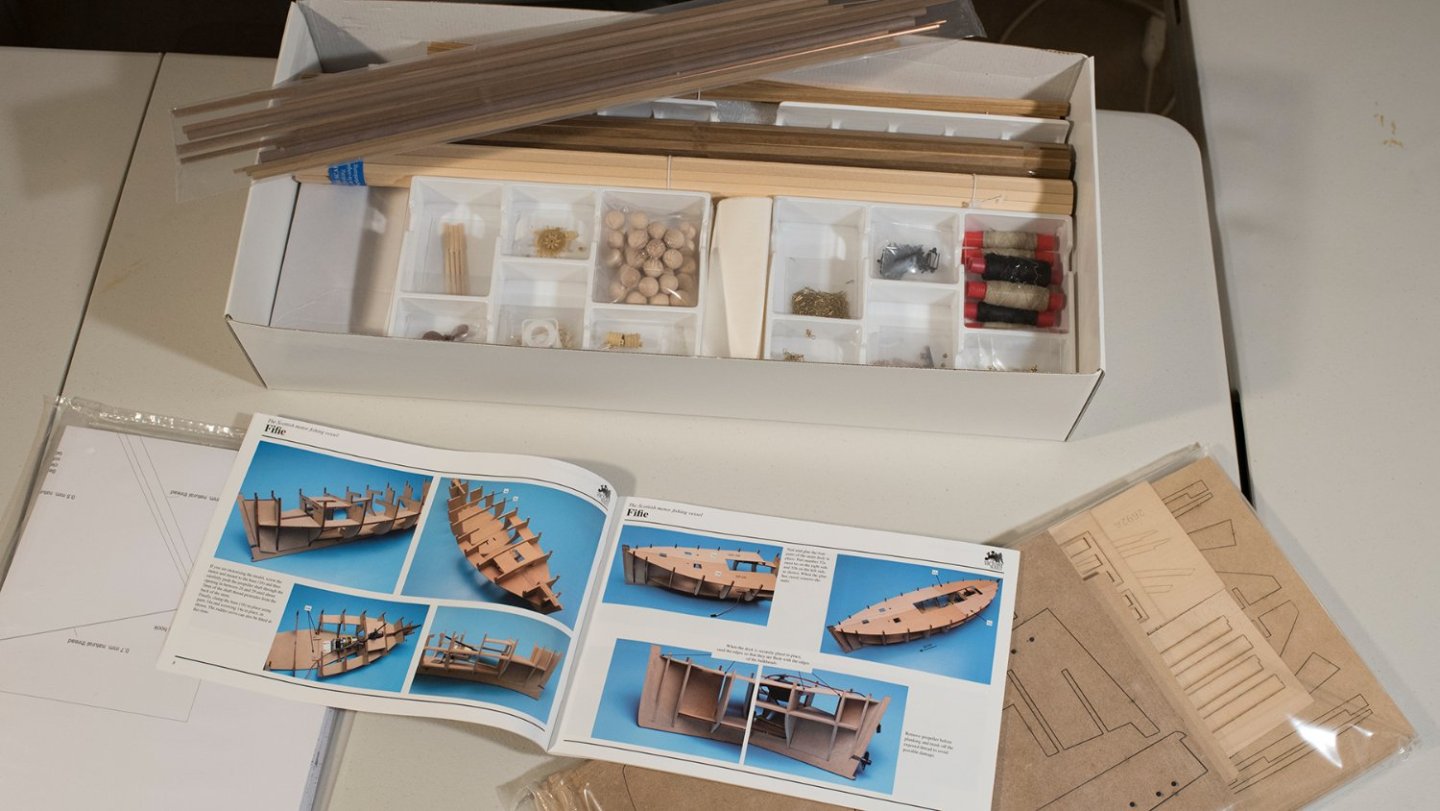
 The Fifie is a design of sailing boats that was a traditional fishing vessel used by Scottish fishermen from the 1850’s until well into the 1900’s. Their vertical stem and stern, long straight keel and wide beam made the Fifies very stable in the water. In the 1900’s many were converted to motorized craft. As and aside, this model will be the longest boat on my shelf when I am finished (at 27.5” long by 18.5” tall and 9.1” wide). As I progress in my boat building hobby, I am beginning to wonder where I will put all the boats I have built, and plan to build. I would like to know if you people are displaying all of your boats? I’m thinking my early creations will end up in a box in a closet, and my latest will be placed - . . . I don’t know where! . . . since I am running out of shelf space. The previous models are collecting dust, and I would like to continue building for many more years. I guess I will have to either buy enclosures or learn to build them. Still, the question stands - as to where I put them. Since the Fifie is larger than my previous boats, I need to determine my storage/display strategy very soon. I would like to know what all of you are doing with your boats! Back to the subject: the Kit itself looks like a quality set of components and instructions (so far).
-
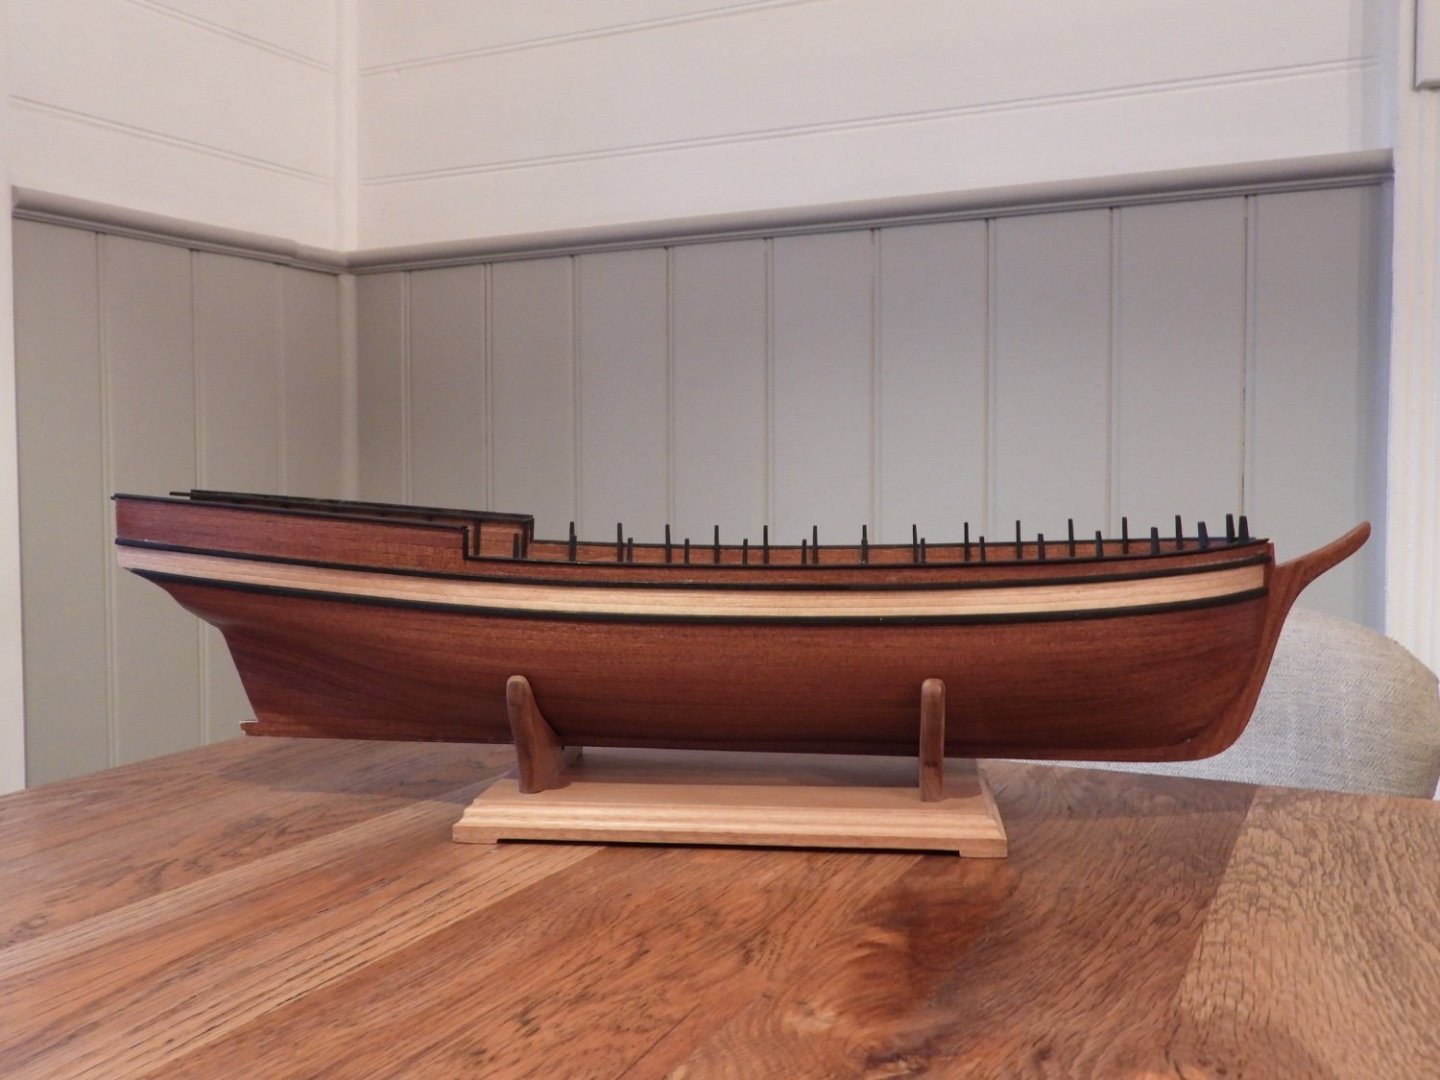
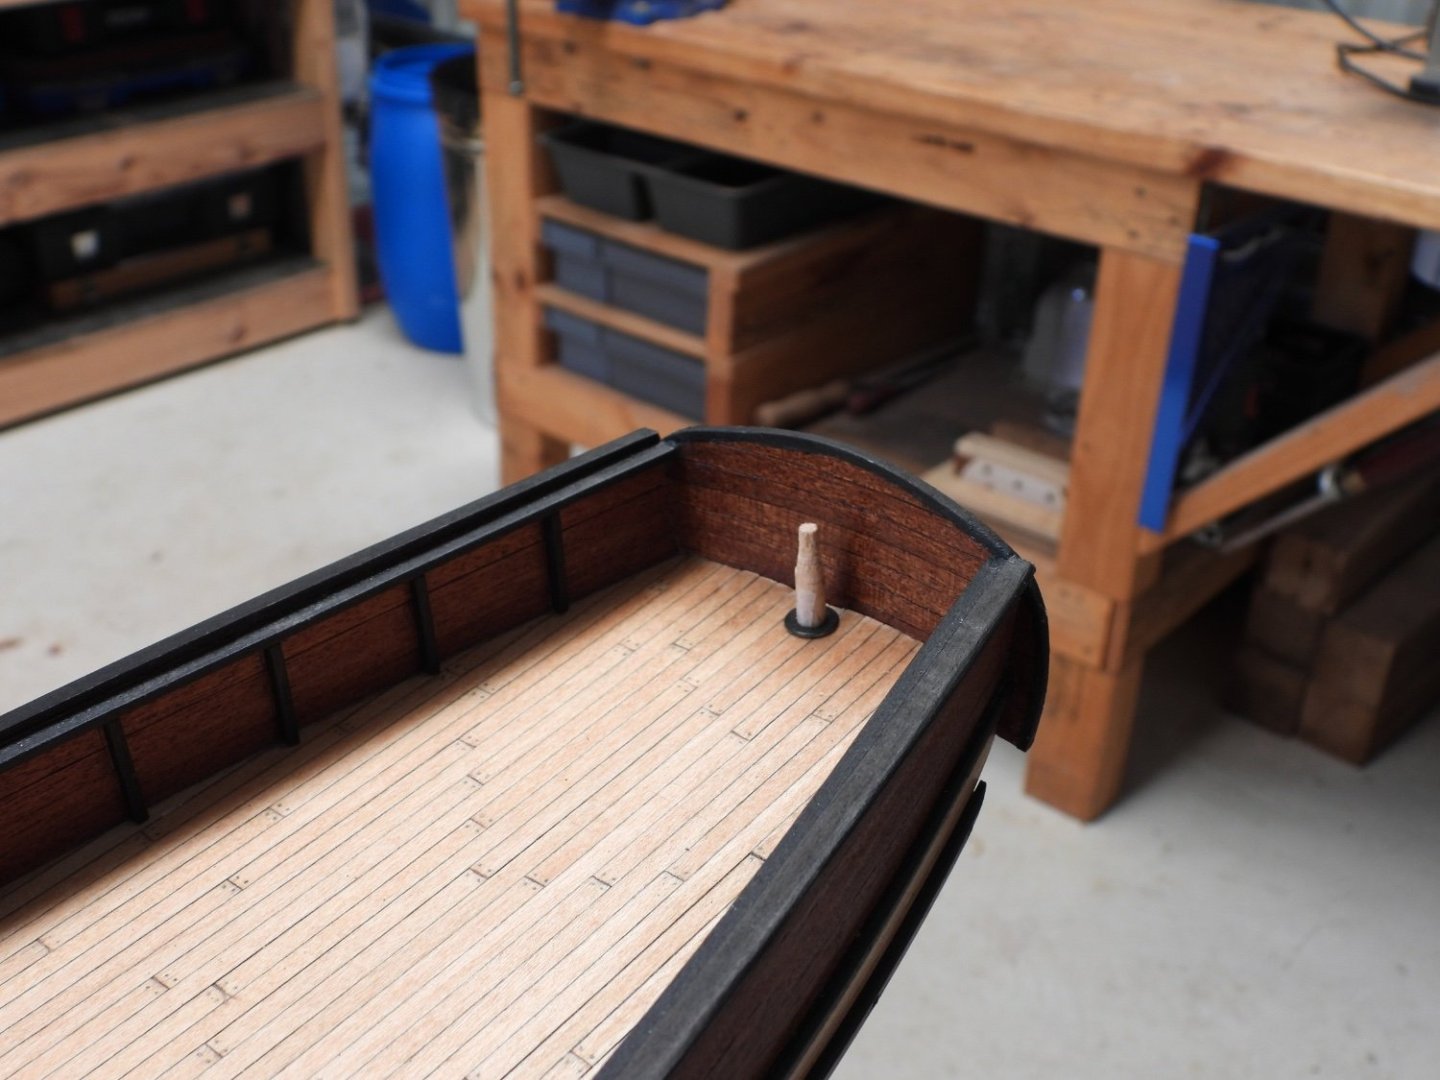
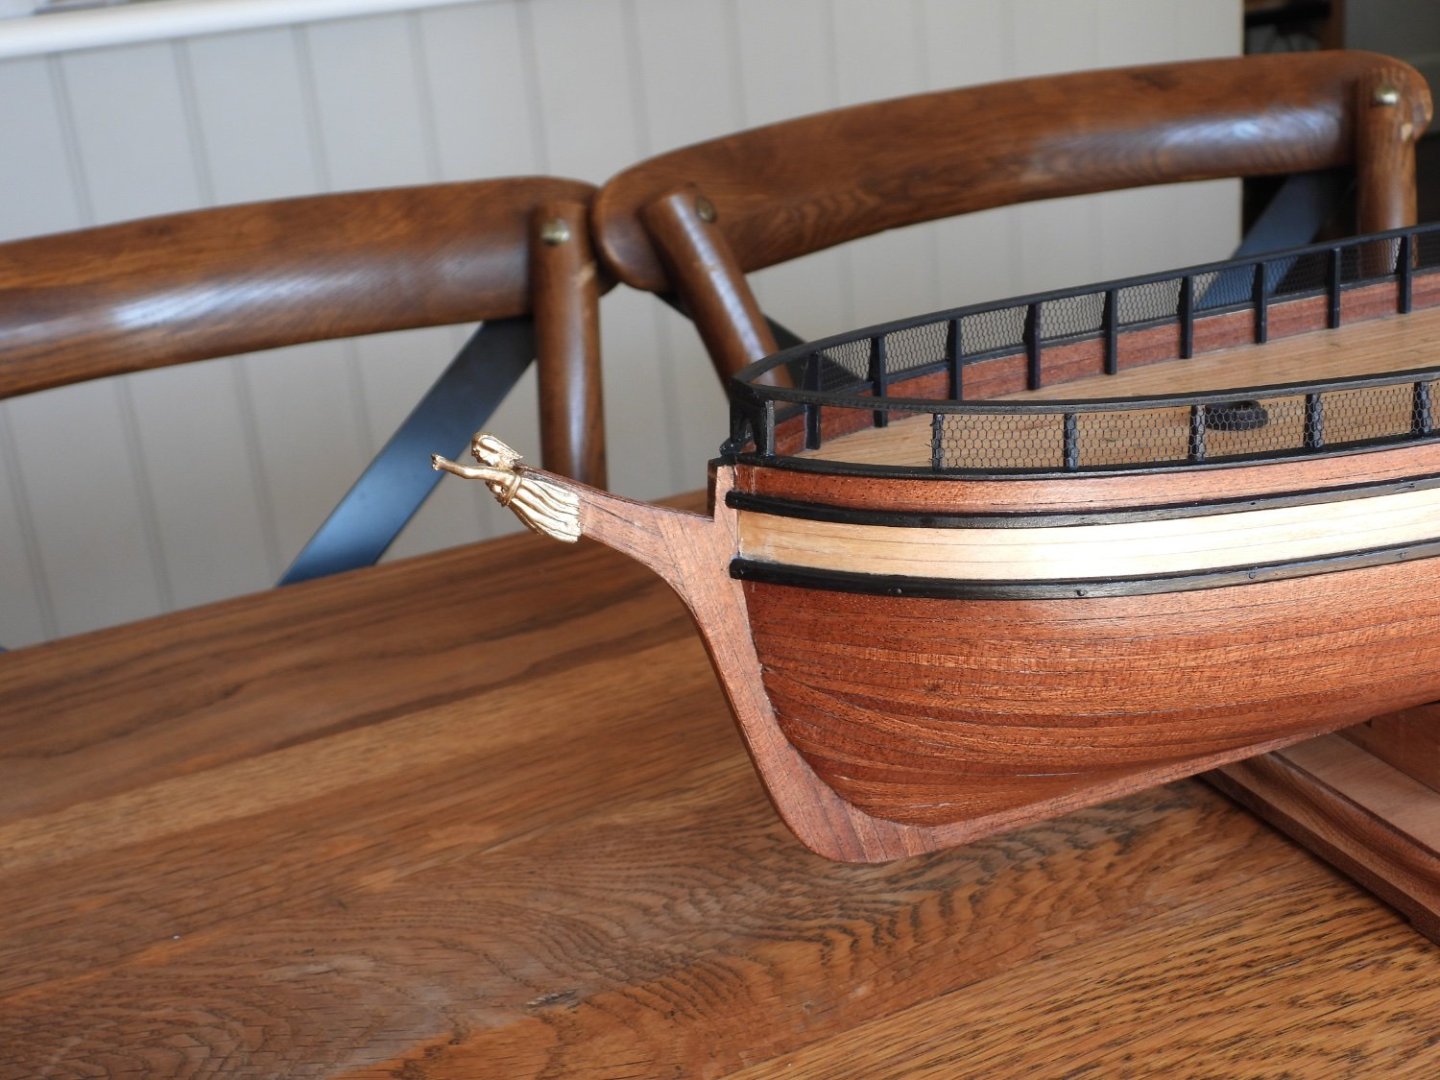
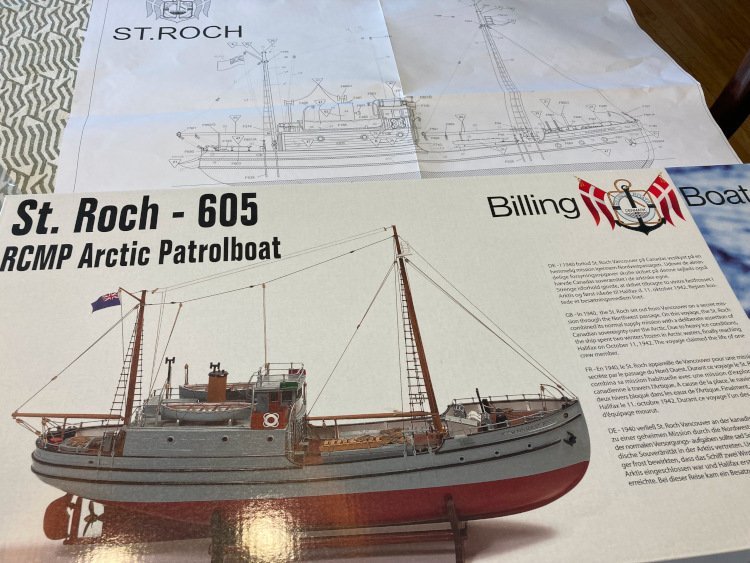
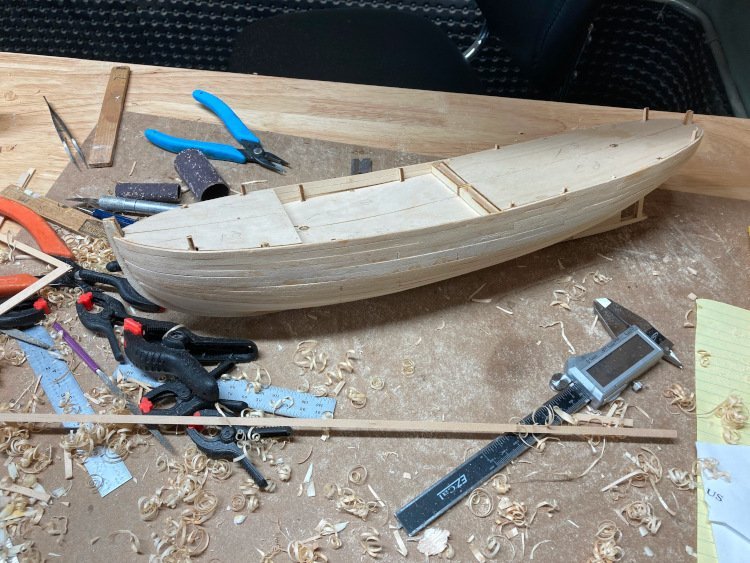
 I'm back with a build log after a bit of an absence. I've had multiple health problems over the past year, which is in part why I didn't do a build log for my HMS Pegasus and why it took me so long to build it, being away from my shop for long periods of time. However, I seem to be in decent shape for the time being (touch wood) and am back at my workbench. In my hiatus I had been pondering what my next project would be when I stumbled across this model on the Billing website, and after a little bit more research I knew I had found it. This one appealed to me for several reasons: -I wanted something simpler than my last few builds had been -this one has almost no rigging! -it's a Canadian boat. I haven't seen any other one available as a model, apart from the Bluenose -it has a remarkable history - it's only the second boat to ever travel through the Northwest Passage and the first to make the trip twice - it's the first do make the voyage in under one year and it's the first to circumnavigate North America - it resides today at the Vancouver Maritime Museum, has been declared a National Historic Site and the great Stan Rogers recorded a song about it. -there are plenty of pictures and videos online to use as a reference -did I mention that it has almost no rigging? When I was in my 20's I built (very badly) a Billing model, but I don't recall if the quality of the kit was good or bad and I had no frame of reference in any case. So this is for all intents and purposes my first Billing kit and I have a mixed reaction to it. So far the good things are: -the laser cutting is very good and the bulkheads and centre keel fit together extremely well. They're as good as I have ever encountered. -there are quite few specialized brass fittings which are really nice and of good quality. -while the model is simplified, there are no glaring errors in its representation of the real boat. However, there are some negatives too: -there are too many poor quality plastic fittings which come on a sprue just like it was a plastic model car kit. -the hull and deck planking material is pretty rough and not very consistent in width. -while I did want a simpler model, there is too much simplification with this one. Built straight out of the box it would look like one of those gift shop ship models. At 1:72 it's large enough for the designer to have incorporated much more detail. -the plans are poorly drawn. The instruction book is all but useless, which is fine - I didn't expect it to be otherwise, but the plans are disappointing. They appear to be a 1:1 representation of the model, but they are very inaccurate. For example for some of the deck components there are discrepancies in size of up to 1/2" between the elevation and plan views. It's impossible to take measurements from the plan. Nevertheless, it's going to be lots of fun adding detail and upgrading many of the fittings. I currently have big orders in at BlueJacket and Cornwall. So far, I have the hull planked, in my usual "suitable for filler and paint" style. I'm a terrible planker, but I never worry about it because filler and paint are my best friends. I've used some planking from my stash, rather than the kit provided planking. I've made two improvements to the stern area. The kit instructions would have you just cut all of the planking off even at the last bulkhead before the stern. Then you add the two stern blocks and sand them even with the finished planking, leaving them unplanked, just to be painted. I chose to install the stern blocks first and plank over them in the usual way, however I found it to be quite a difficult stern to plank. Secondly, the kit provides for no opening to accept the rudder; it's meant to just butt up against the bottom of the hull. The real boat has a framed rectangular opening, so I added that detail. That's where I'm at! David
- 61 replies
-
- 9
-
-
- St. Roch
- Billing Boats
- (and 1 more)
-
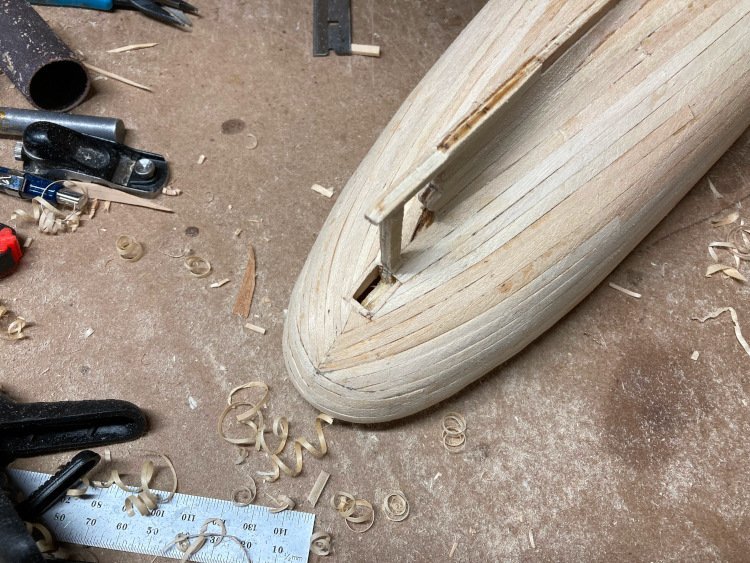
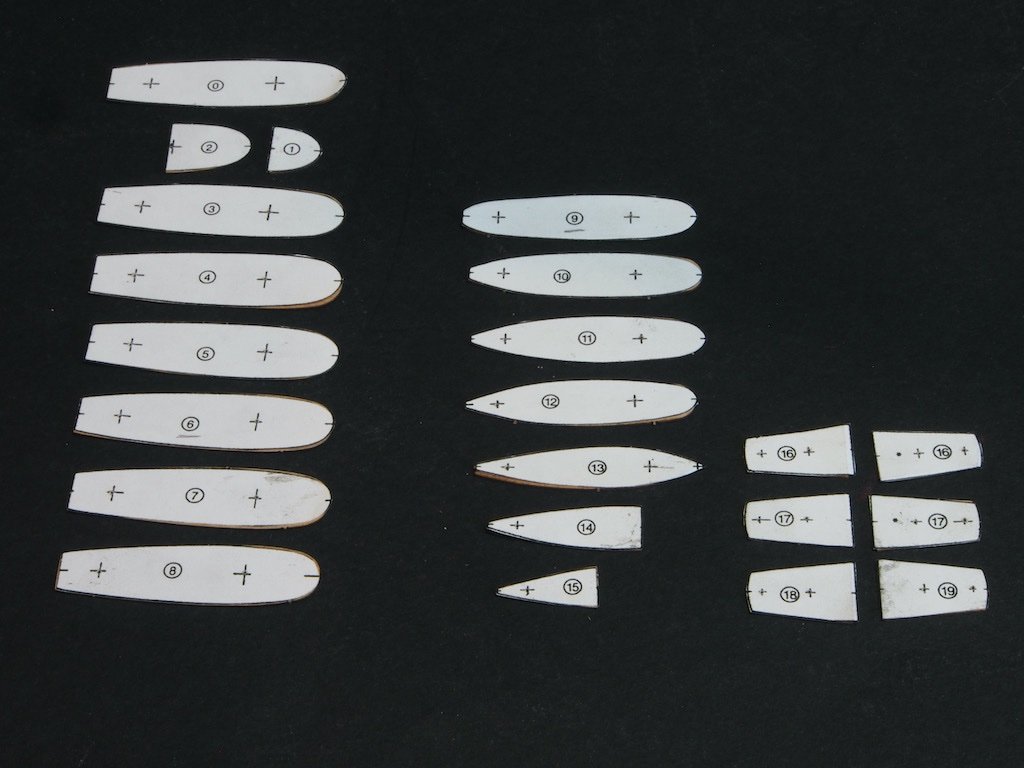
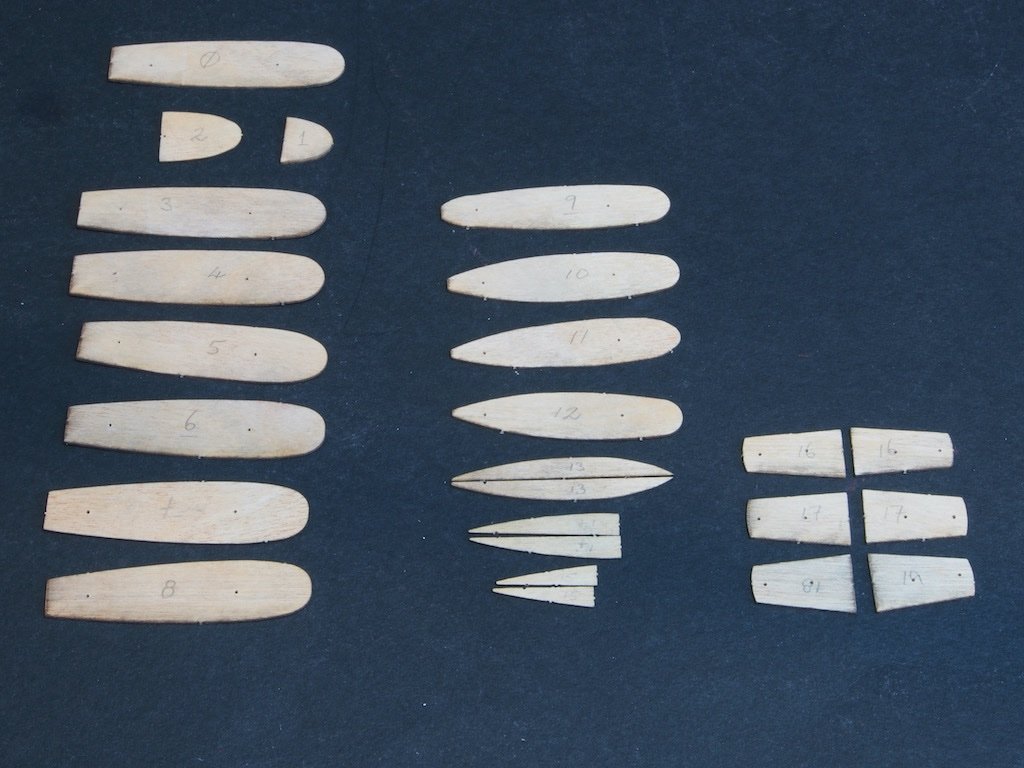
 A Ship-in-a-bottle has been on my “bucket list” for some time now. A little while ago, I was re-enthused about such a project when I saw Glen McGuire's excellent rendition of this kit. A heavy hint was dropped to my wife, who duly produced the kit for my birthday in November last year. Completion of another modelling project, the holiday season, and work on a new furniture project has kept me out of the shipyard until now. I will forgo the “unboxing” photos as there are several of these already on the forum. Suffice to say that the only item that immediately jumps out at me for replacement are the sails. These have heavy black lines drawn on them and they look nothing like the box art. I have asked the Admiral (an avid sewer) for some assistance in sourcing an appropriate replacement material. The Hull Building commences with the hull, which is assembled from a series of lifts. I have read in other build logs where some have found that these did not accurately match the 1:1 templates provided in the instructions, however I was pleased to find that in my kit at least, they were a very close match. These templates each have a couple of crosses on them, that I can only assume to be alignment marks. The instructions are silent on this point, and I do not recall reading in anyone else’s log where they have been put to use. The instructions simply invite you to assemble the lifts in numerical order, with no further guidance on alignment. I decided to make use of these marks to help align the lifts correctly. I scanned the 1:1 scale drawing, printed it and cut out the individual patterns. I then pasted these temporarily onto the lifts with a UHU glue stick and drilled a 0.8mm diameter hole through each of the reference marks. The paper templates were then peeled off, leaving the lifts ready to be assembled. I used two pieces of 0.8mm diameter brass rod to dry fit the lifts together. There are several more lifts to be added under the stern, but these will be fitted in two pieces to accommodate the keel. This seems to have been a reasonably successful process, so I will now go ahead and glue them up. It feels good to be back at the bench!
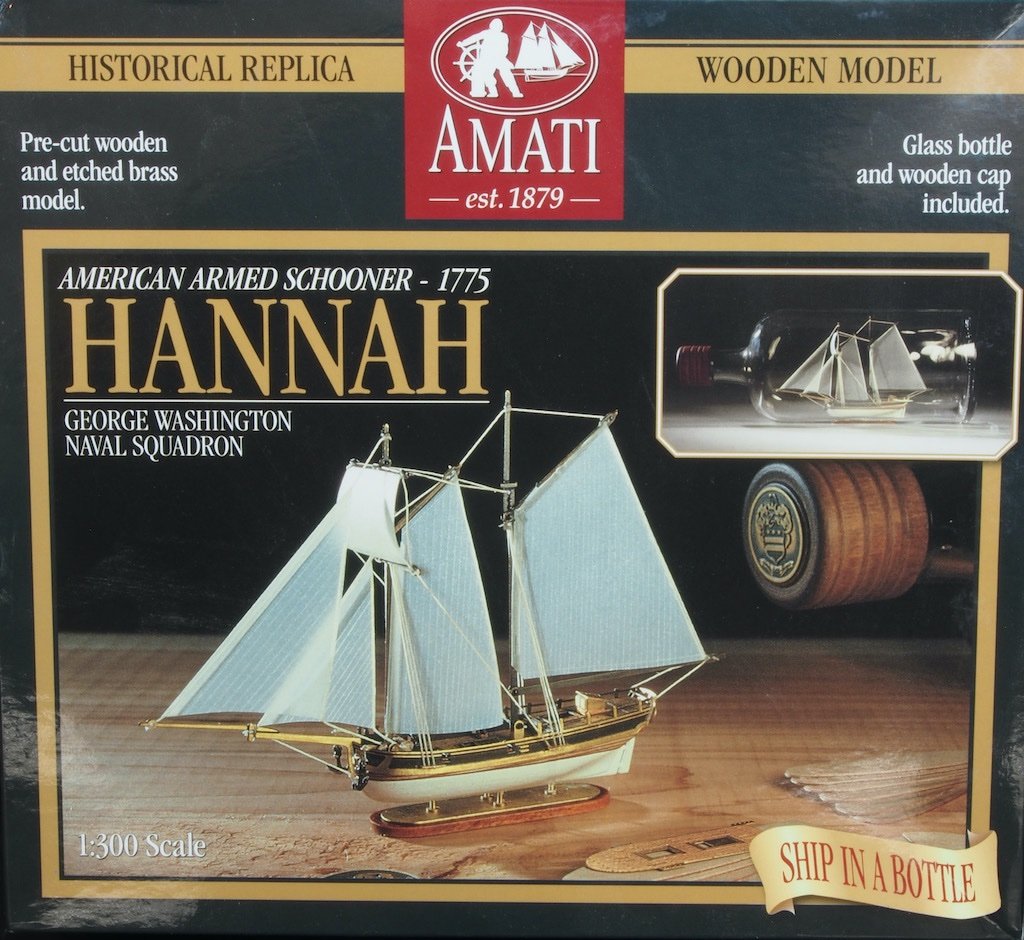
-
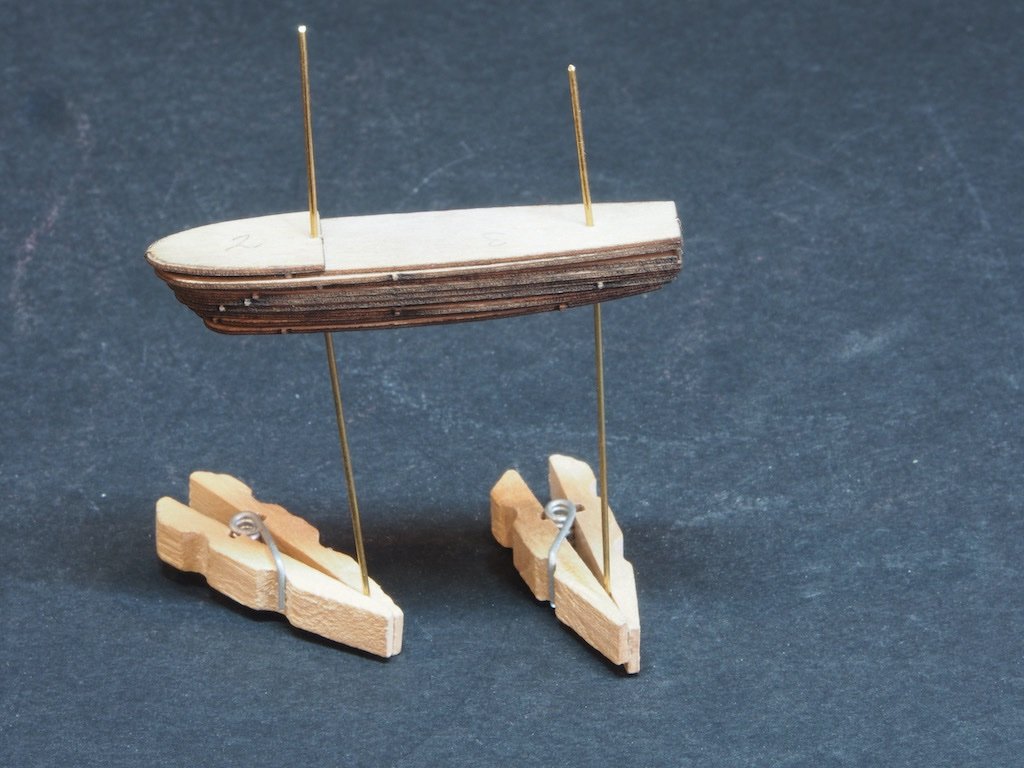
 A bit of a departure, but I was at an IPMS show in Sanford ME this spring, and decided to build a model to enter next year. Not anything too complex, like Cutty Sark of Constitution. This kit seemed perfect, and with just a little kit-bashing should produce a good model.
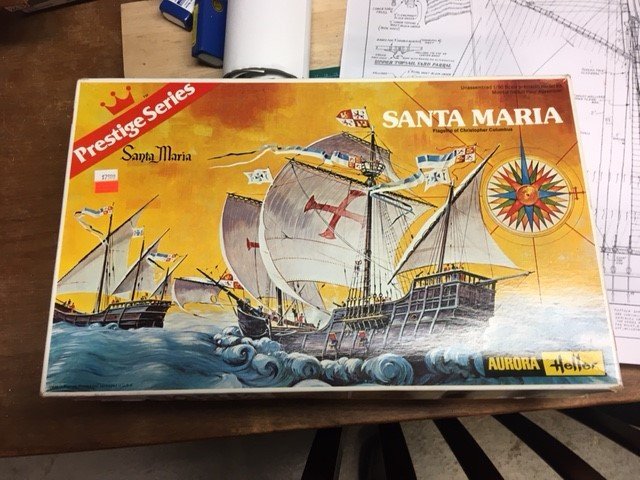
-
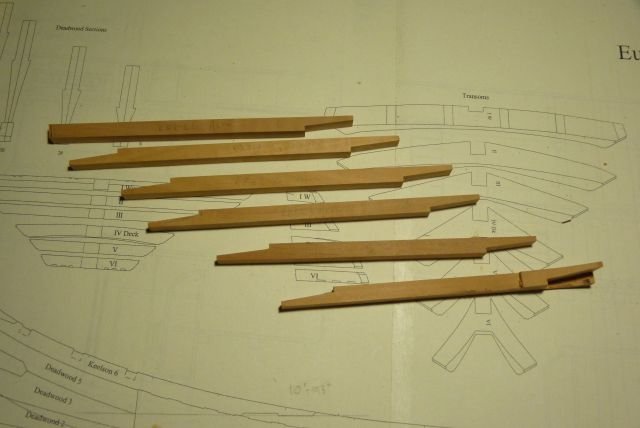
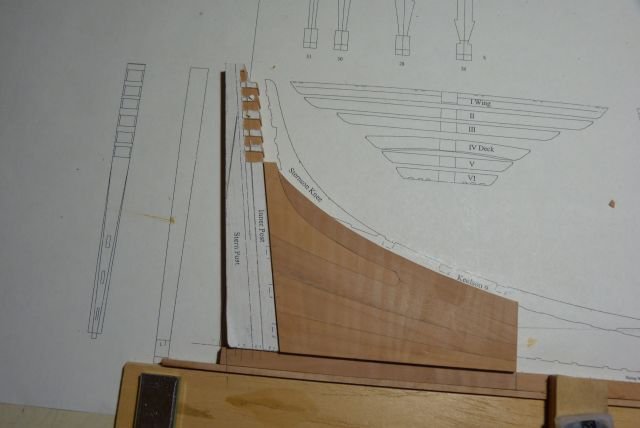
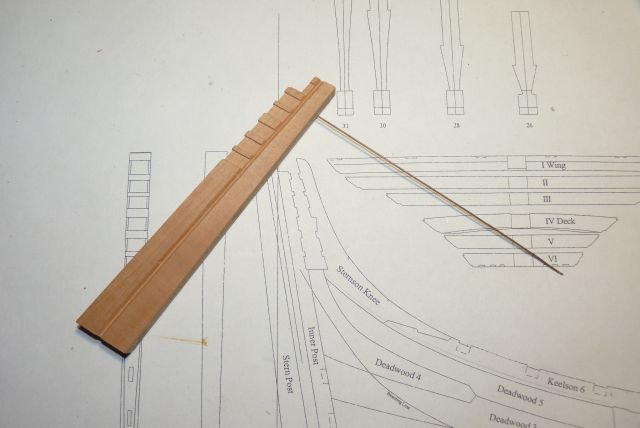
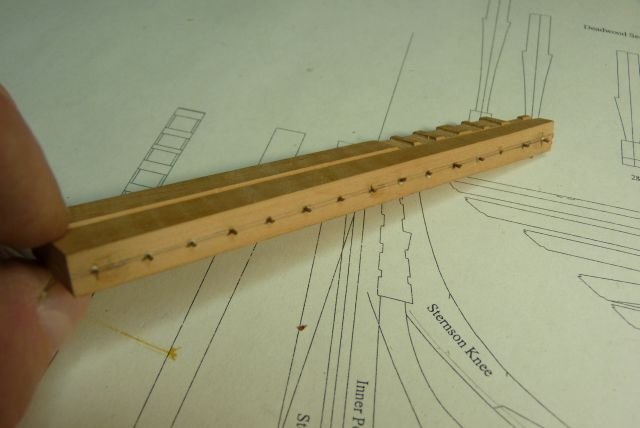
 Hi, I start the construction of a new model, it is the English frigate Euryalus, the scale that I adopt is 1:56, the usual 74 cannons🙂
- 350 replies
-
- 34
-
-
-
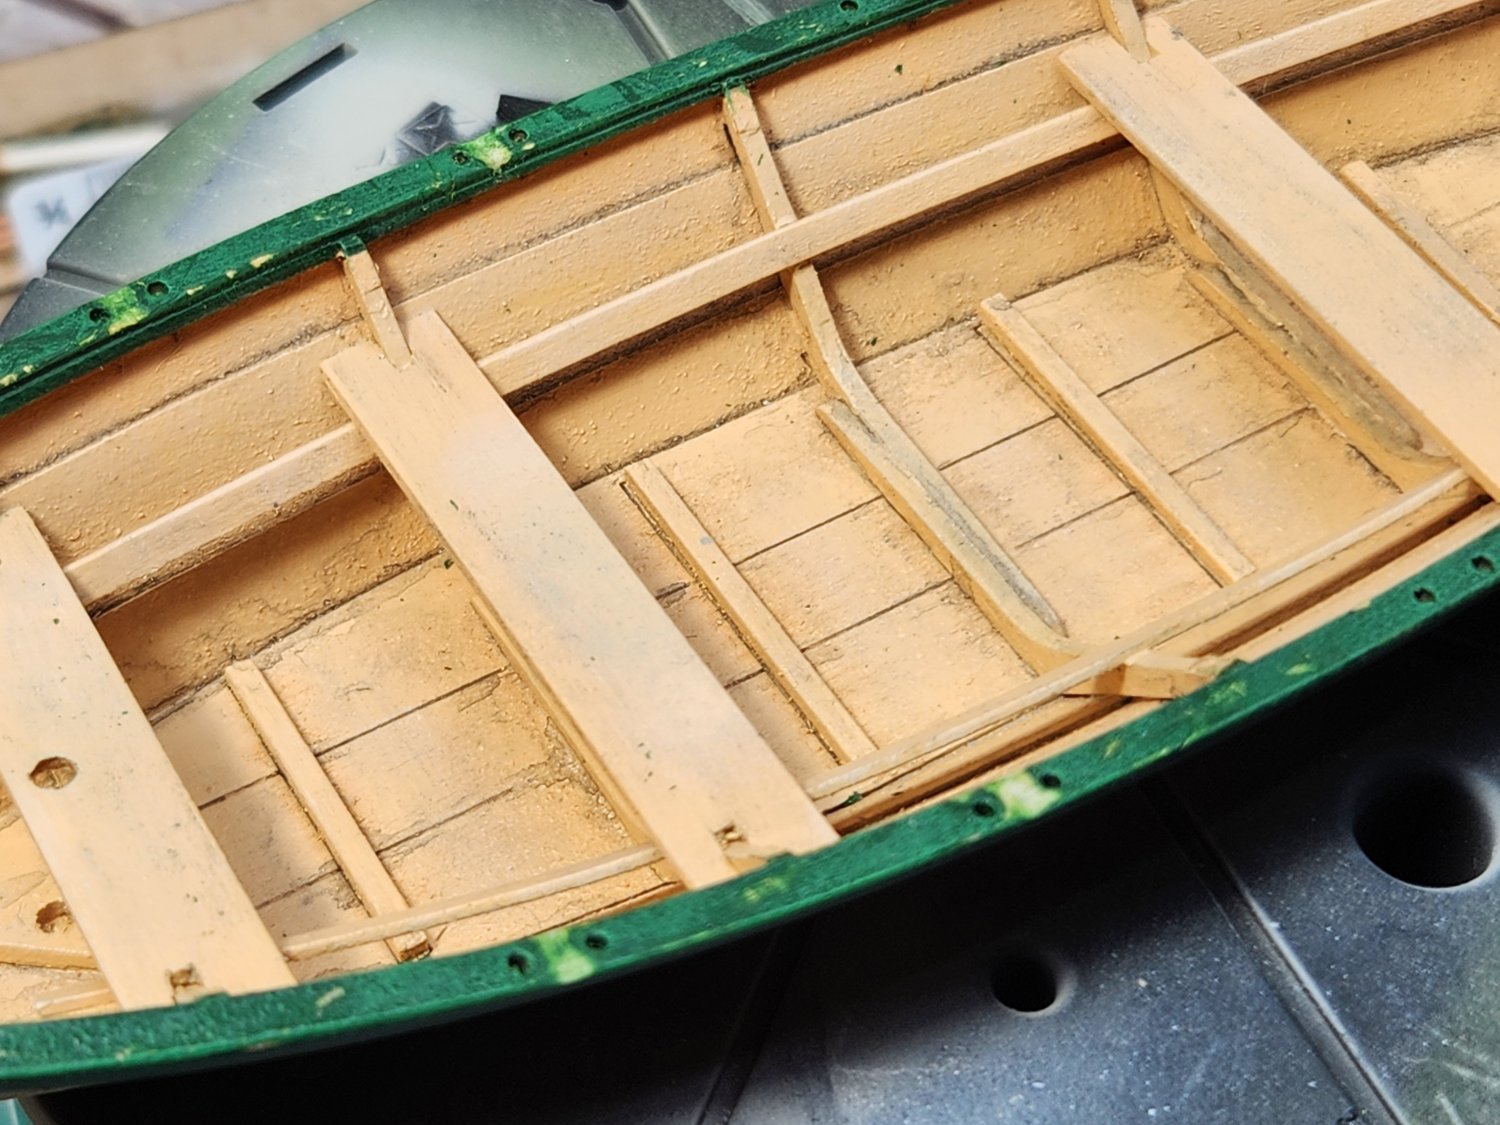
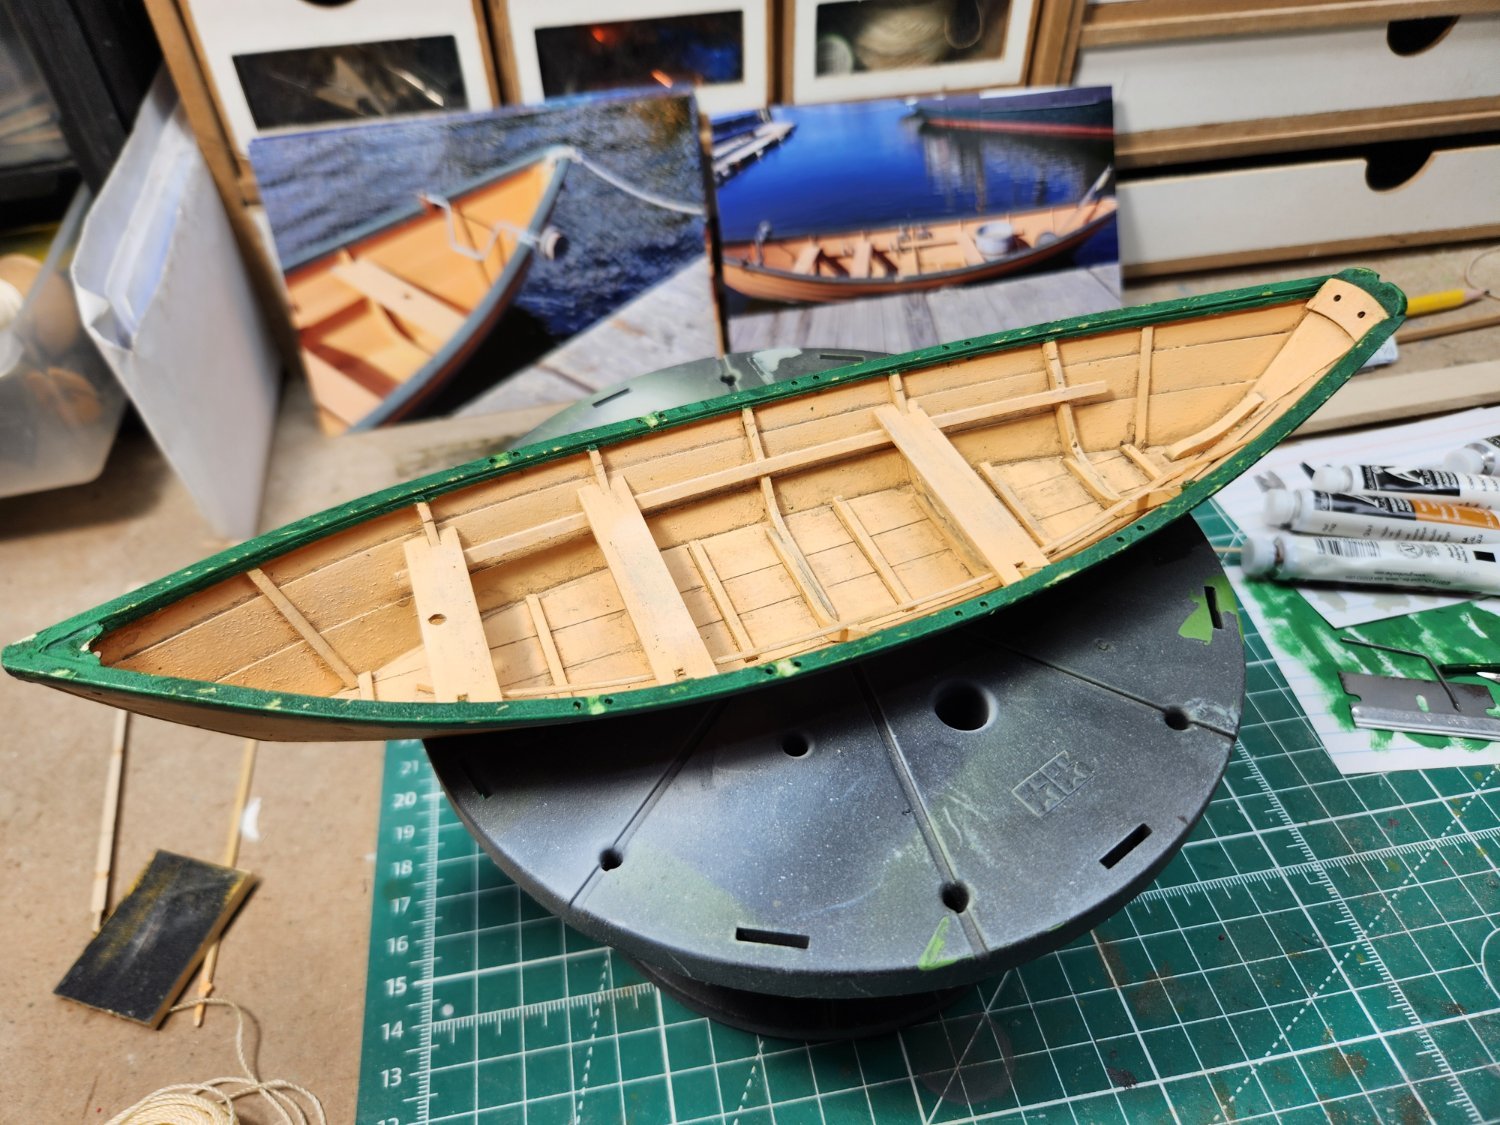
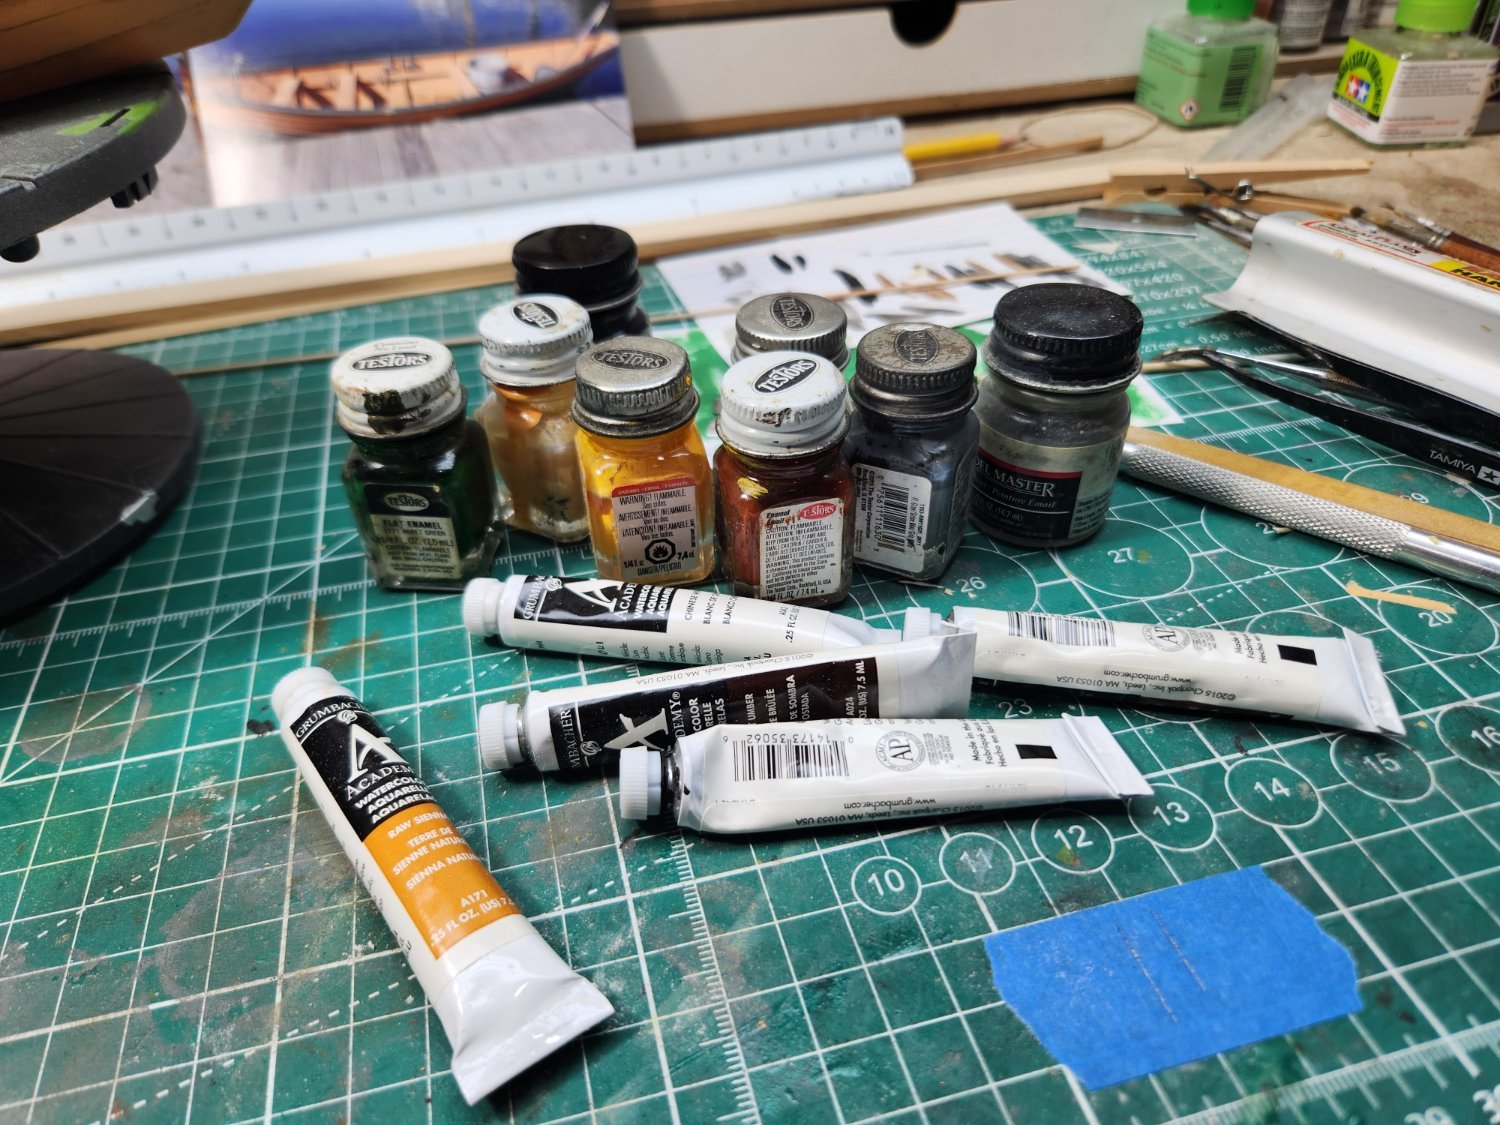
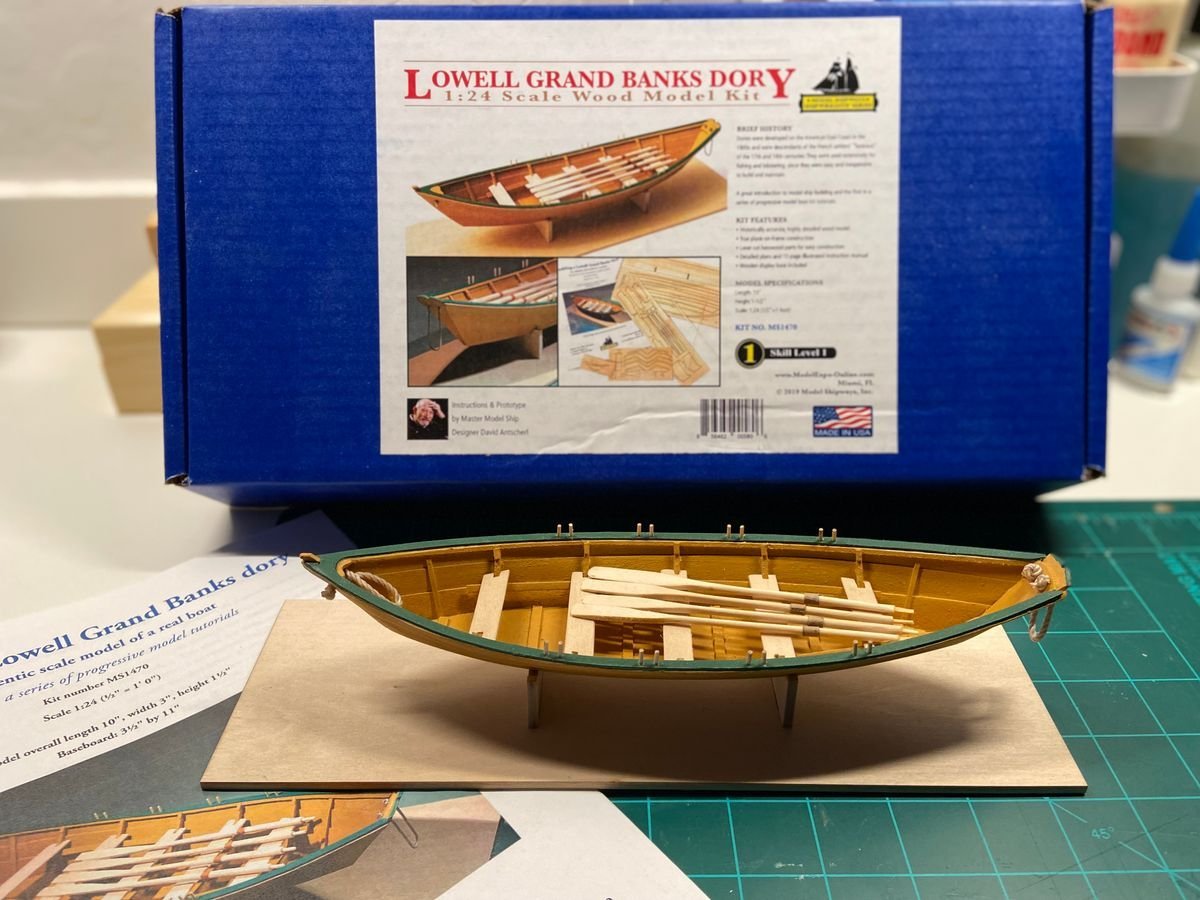
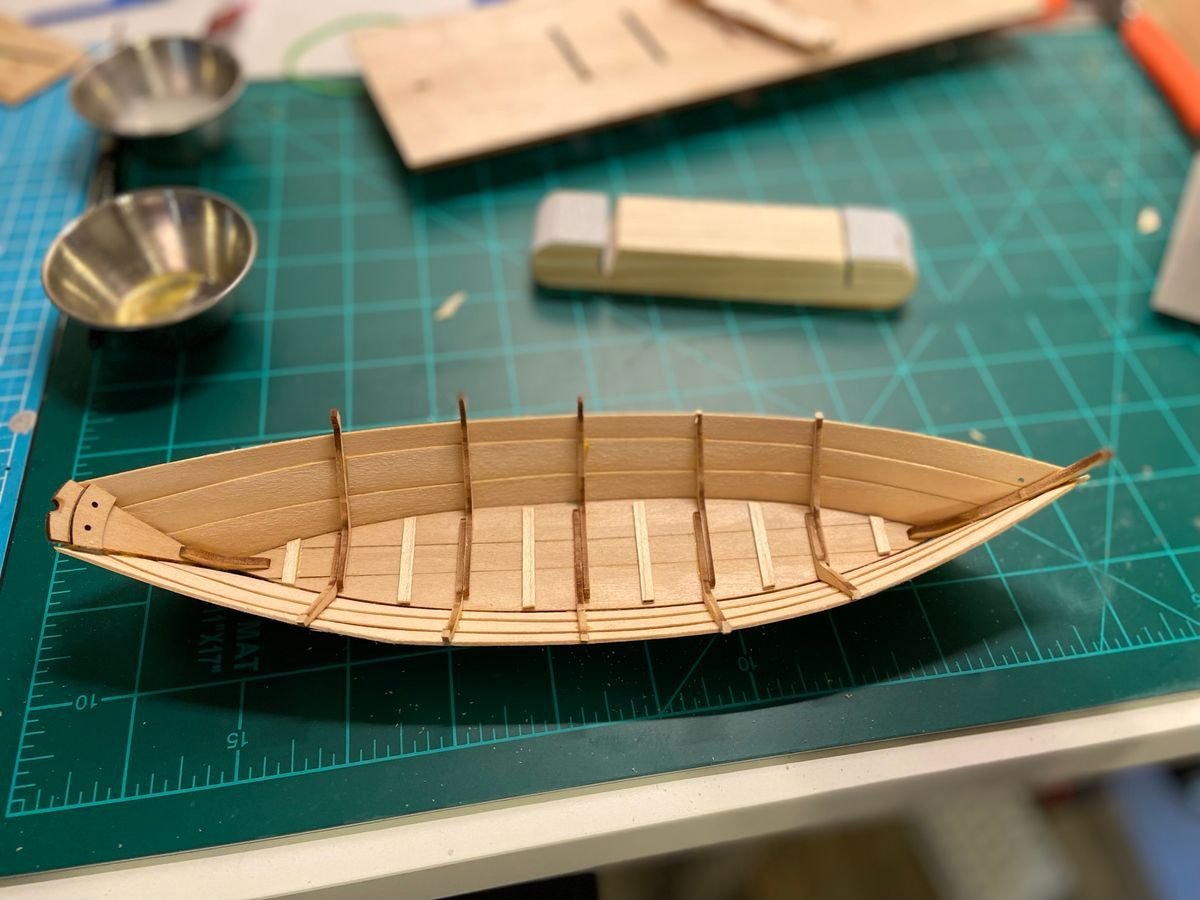
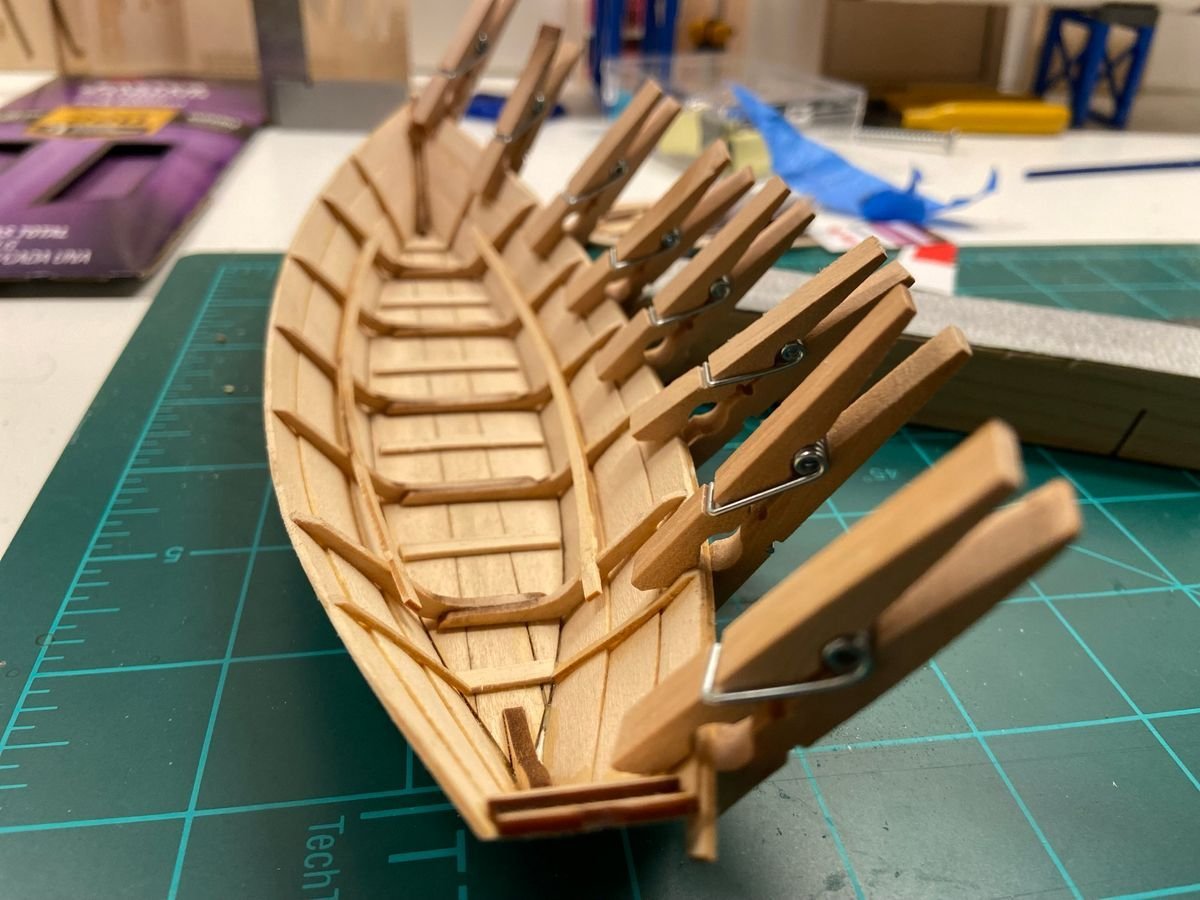
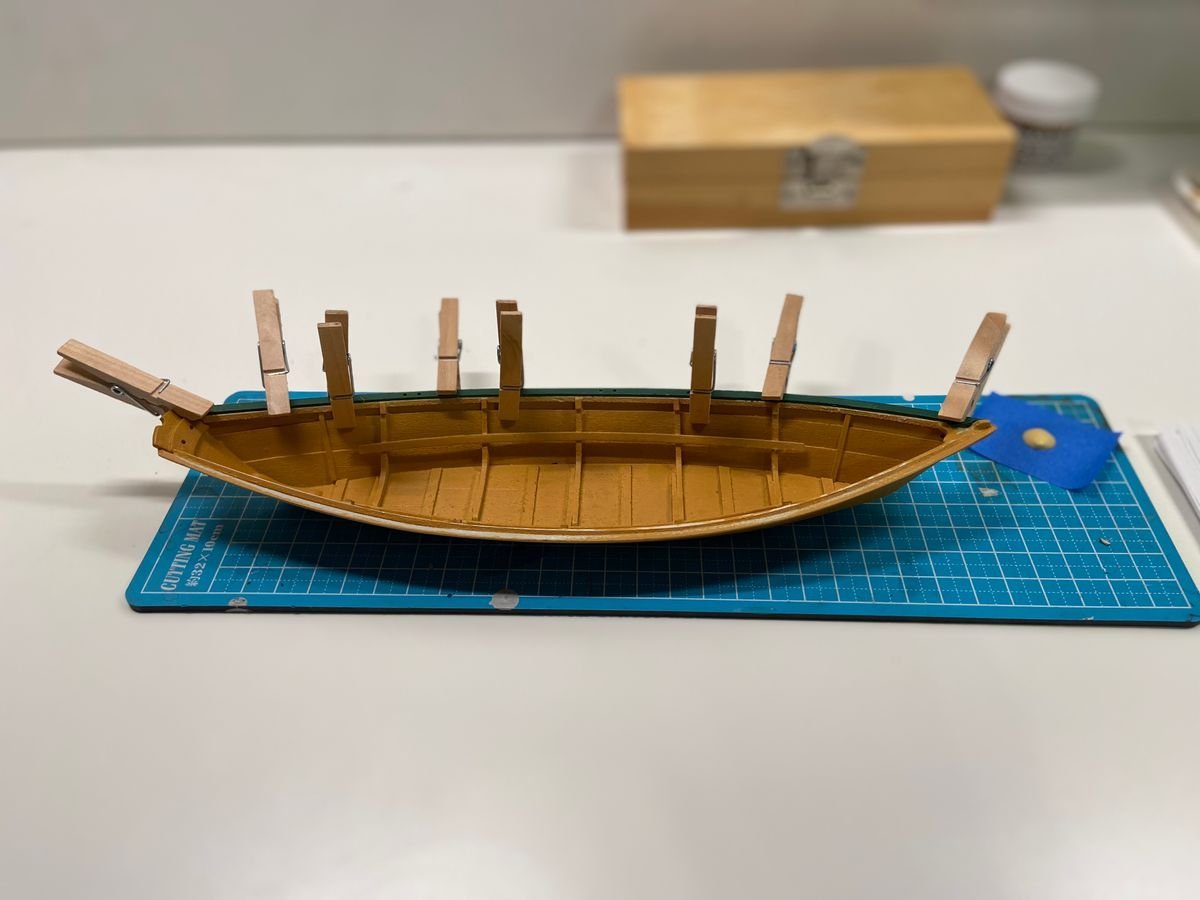
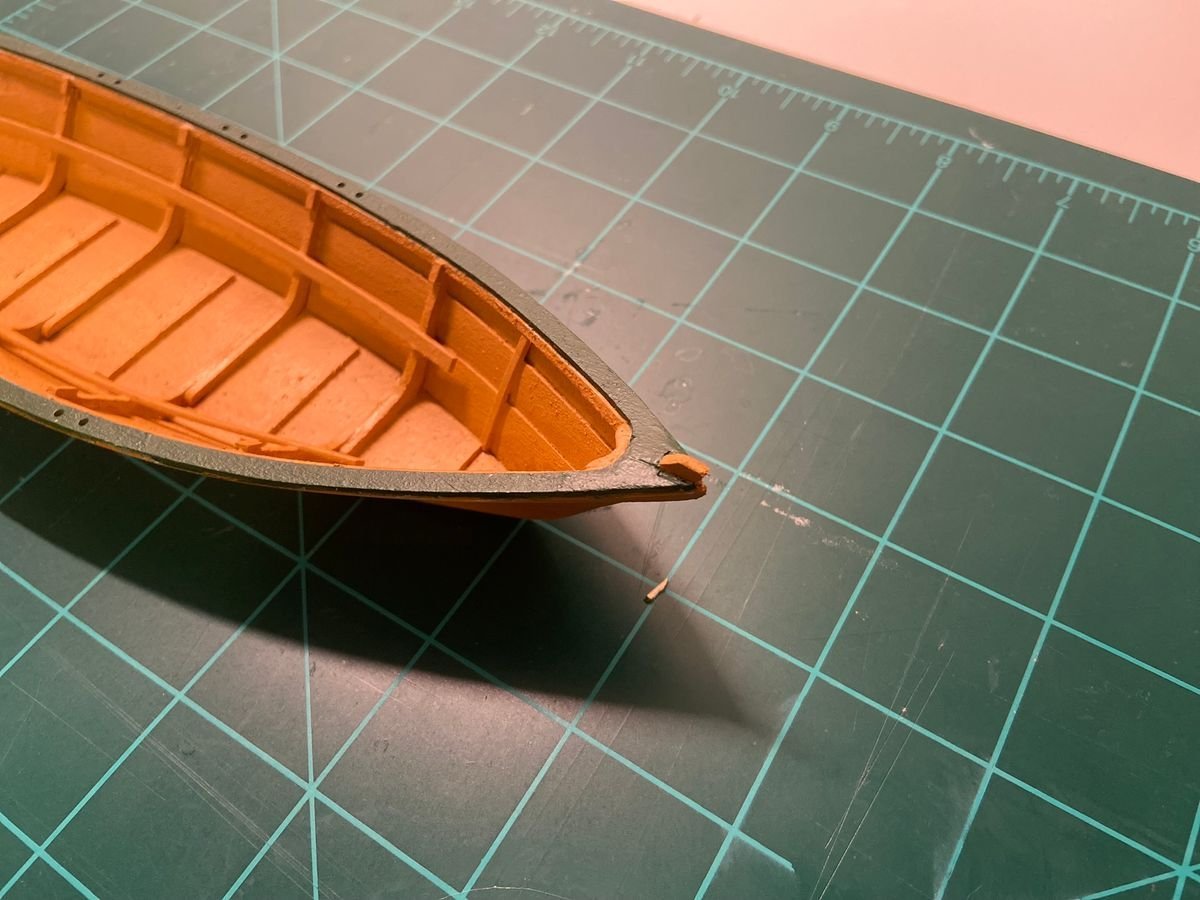
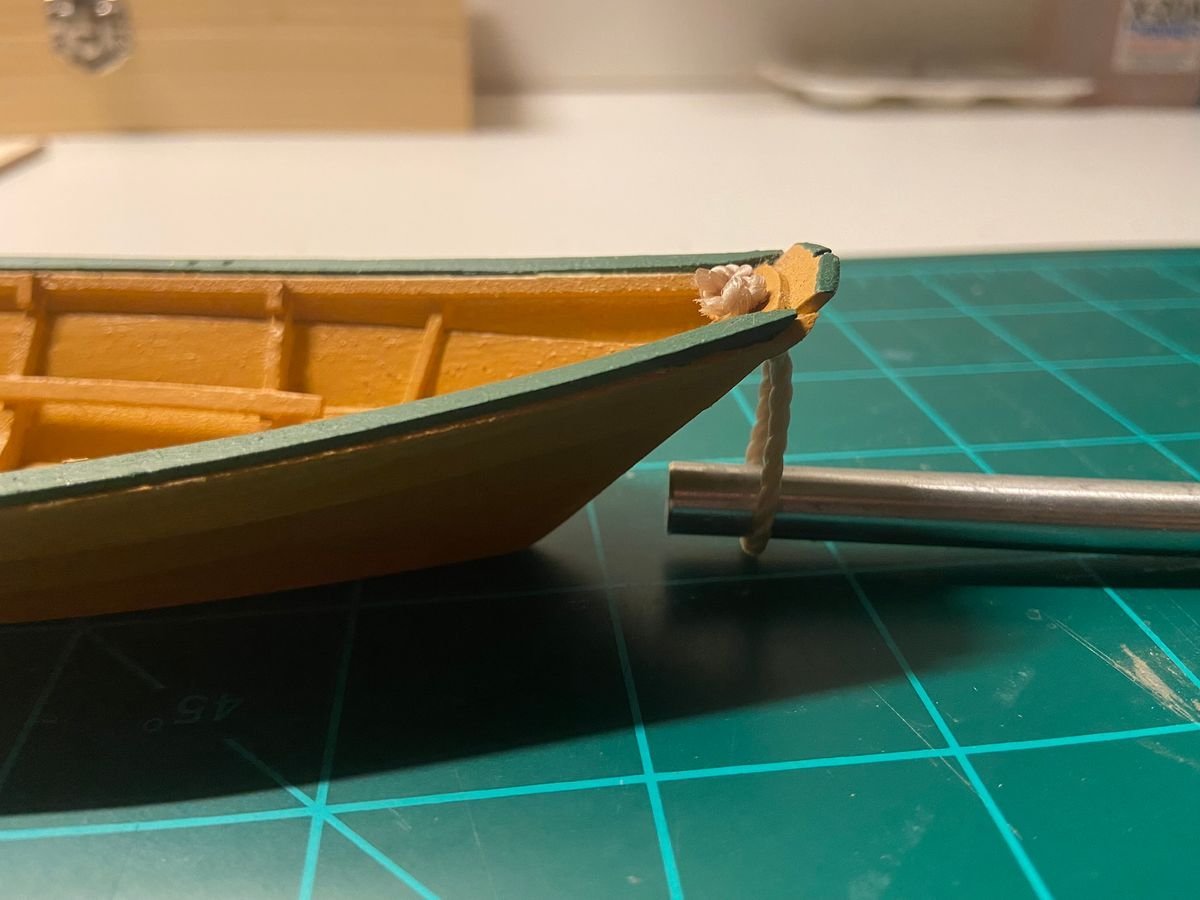
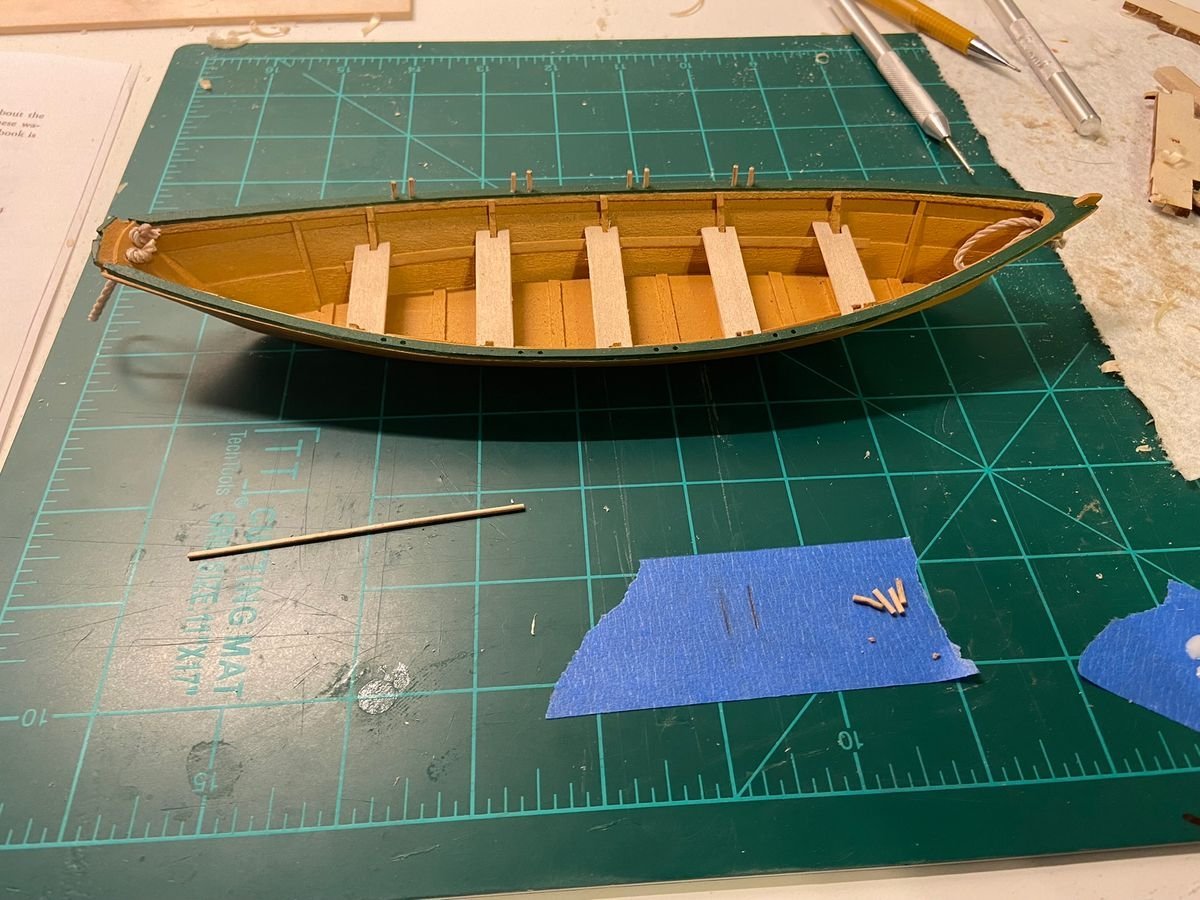
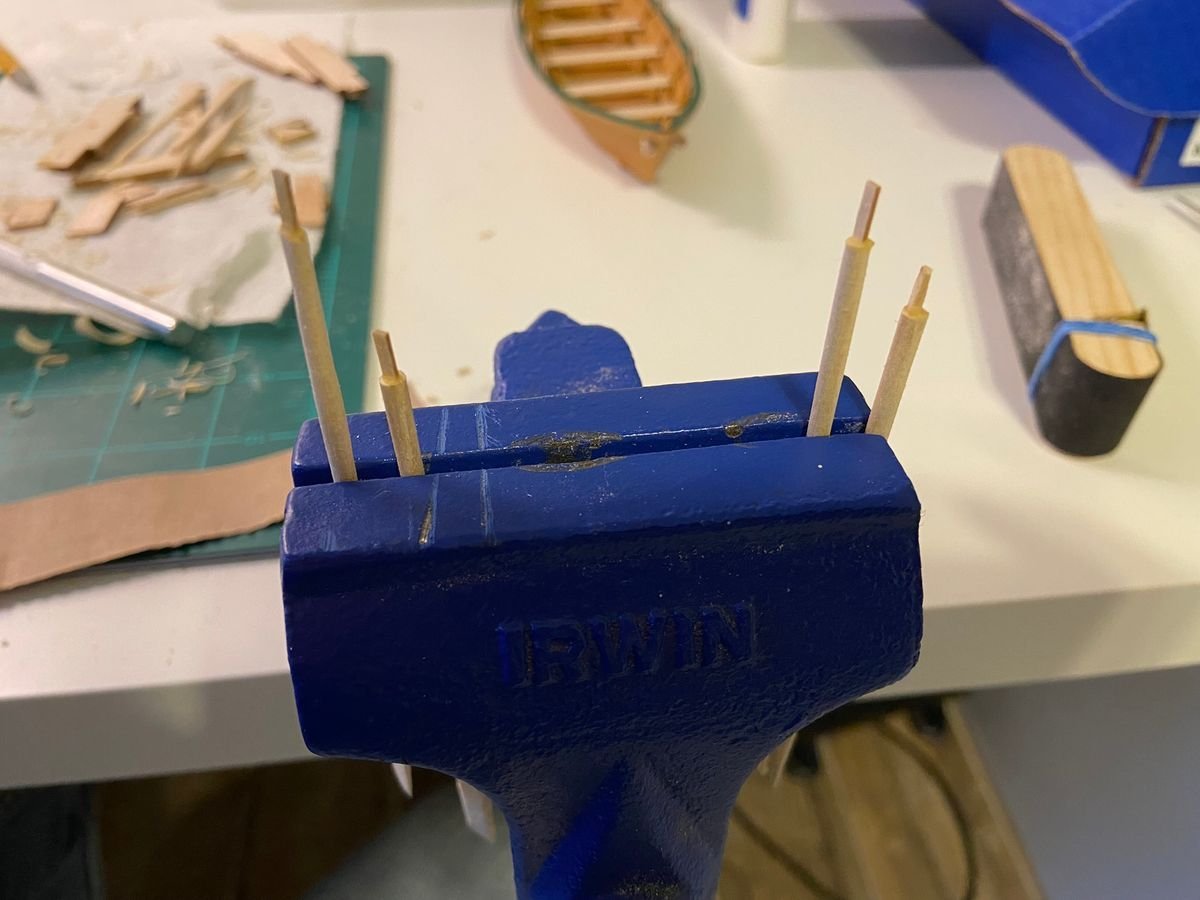
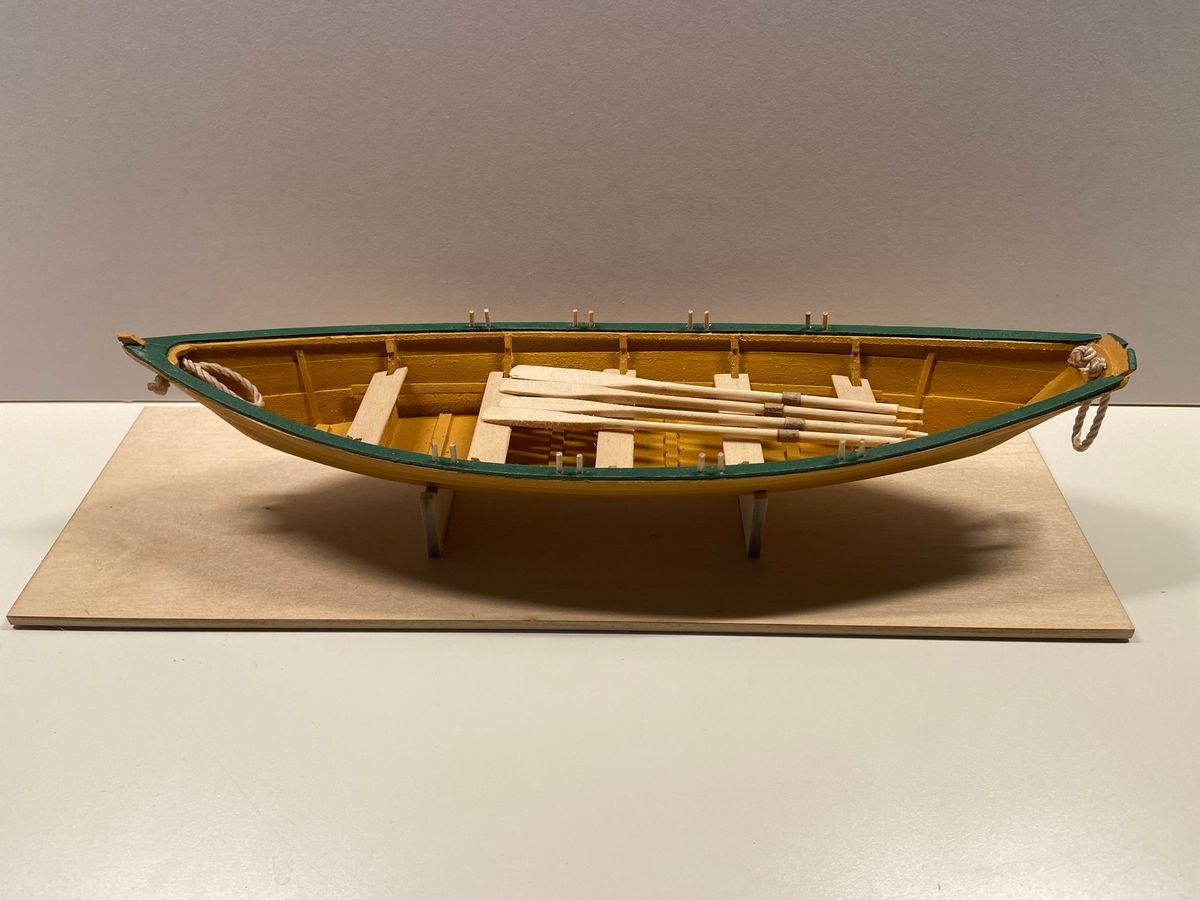
 Hello Model Ship World members. I’m Reece and I'm a new boat modeler. I decided to start my start my journey with the Model Shipways Shipwright Series. The first build is the Lowell Grand Banks Dory. I don’t have all the pictures from this build but I have a fair amount and wanted to post this for those that may be looking for references in the future. I thought this was a great introduction to ship modelling and thoroughly enjoyed my time spent on the project. I definitely learned a thing or two and look forward to applying those to my next build in the series. Here are some of the steps I struggled with on this build and how I corrected them: I had trouble aligning the bottom/stem/transom assembly with the frames and building board. This is something I should have spent much more time on because it ultimately affected the outcome of the planking. I should have spent some more time getting the stem and transom holders securely placed. Some slop here caused the transom to not be exactly perpendicular to base of the building board and resulted in the planks being slight asymmetric when viewed from the bow. I ended up just sanding this as best I could and the planks are slightly uneven. Lesson learned for next time for sure. My seat risers were slightly off and had to be removed and reattached as it made the thwarts out of level. I tried to thread the beckets without applying CA to the tips first. This caused me to waste an entire section as it unraveled before my eyes. I was able to salvage this step with the remaining pieces by dividing the remaining rope in half and giving myself extra material to work with beyond the recommended 4" section. I think in the end the pieces ended being about 5 1/2" each. I had just enough and was able to trim the excess to match the pictures in the instructions. The oars. I was too heavy handed when sanding the oars and completely lost one when it snapped in my hands. Yikes. Luckily the kit includes an extra laser cut piece probably for this very reason. I ended up snapping the hand holds on several of the oars as well and had to glue some little pieces of balsa I had left over to make them look somewhat like the pictures. Not my finest moment but I’ve definitely learned a lesson here that I can use on future models. I’m not totally satisfied with the shape and look of the oars. I might try to revisit in the future if I’m looking for something to do. Other Notes: I found the section on the thole pins was slightly different. In the instructions it mentions using a 3/64" dowel and cutting the pins to length. I spent some time looking for this until I realized that a dowel was actually not provided but was replaced in the kit by a strip of 3/64" balsa. I ended up cutting this in half and shaping it on a drill press. I inserted the balsa half way into the chuck, set the speed on the lowest I had available (approx. 500 rpm), and then proceeded to very lightly apply sandpaper to the strip as it spun. I flipped the balsa piece in the chuck and repeated. It made short work of creating the dowel. Overall I had a great time with this kit and would definitely recommend anyone who’s curious about building it to give it a go. Its a great model to learn some basic ship modelling skills on. The completed Lowell Grand Banks Dory. Attaching the sheer plank. The Dory right side up and about to clean the frame tops. Gluing on the starboard gunwale. Attaching the cap rail after painting the model using the recommend Hull Yellow Occre and Bulwarks Dark Green. Close up of the bow after rebuilding the stem top so that it was aligned better with the cap rails. This was a result of poor original alignment of the bottom/stem/and building board before planking. Using the handle of a model knife to force the becket into place after applying the watered down PVA glue. Cutting and installing the thole pins. Attempting to fix the oar handles. Another shot of the completed Lowell Grand Banks Dory.
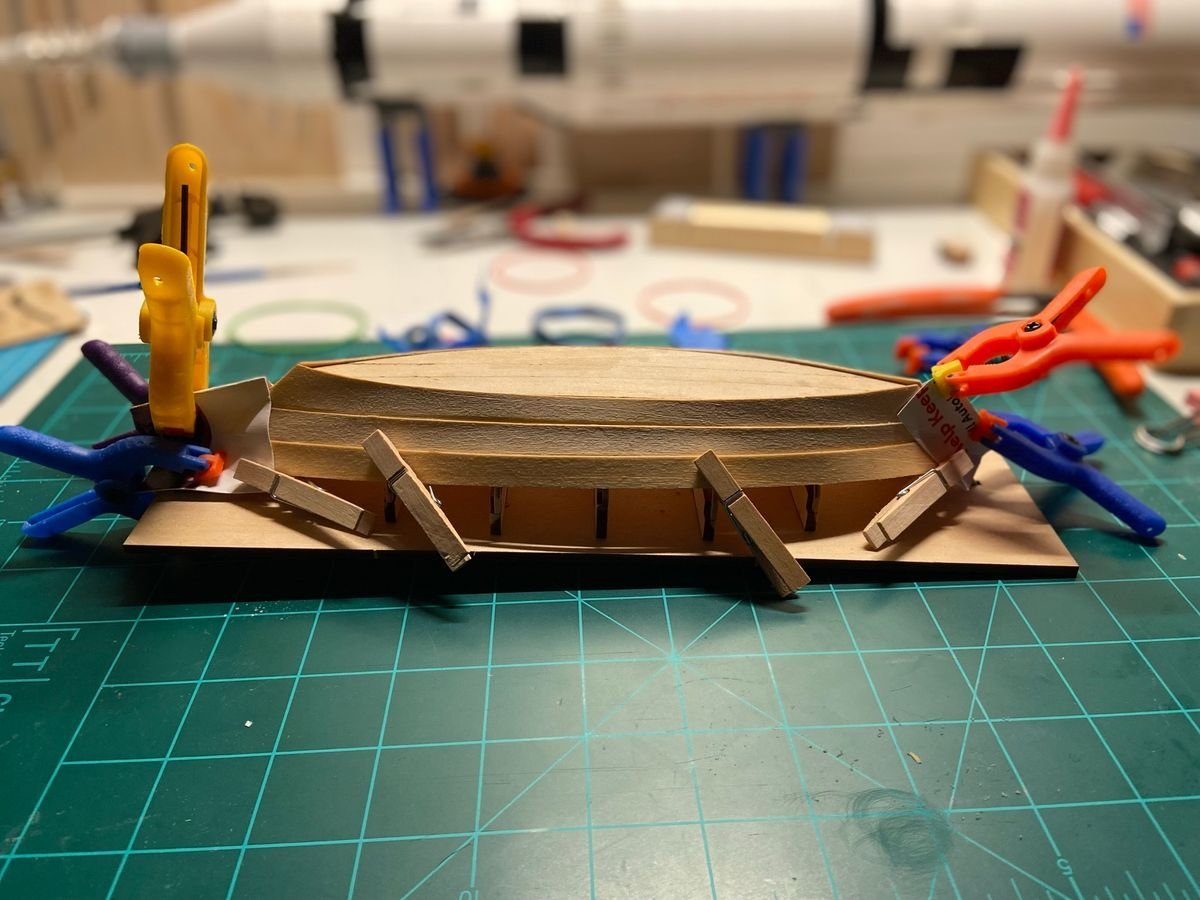
- 9 replies
-
- 12
-
-
- Model Shipways
- Lowell Grand Banks Dory
- (and 2 more)
-
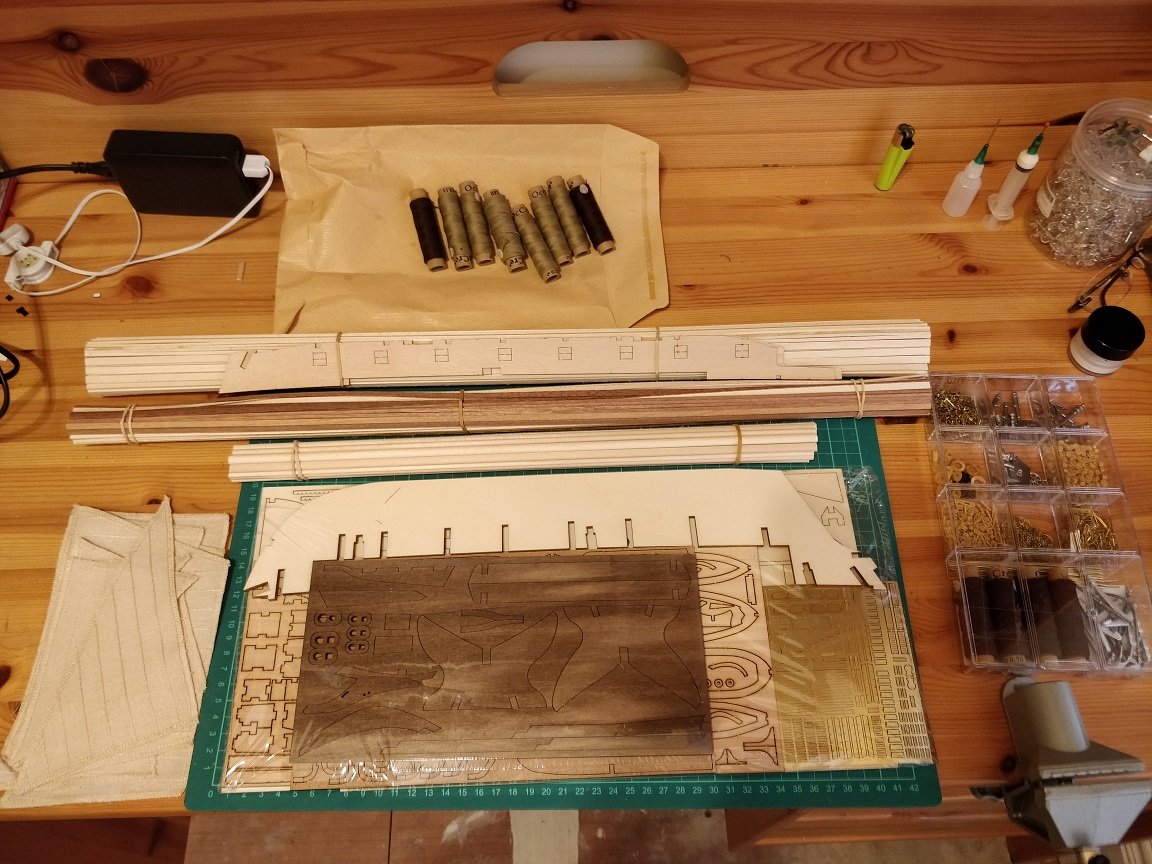
 I received a very nice delivery from UPS this morning. Yes the V2 kit has arrived. My plan with the V2 Sphinx kit build is to: a) take my time, making sure I am totally happy with everything before parts are finally assembled b) try to be much more careful with this build, my aim is to significantly reduce the number of silly mistakes I normally make c) try out some different ideas to improve my building skills, using the additional spare parts I've ordered. d) take note of the lessons learnt so far with my current build, which has become a practice build e) to have fun and to enjoy the V2 Sphinx kit build and to start and keep a build log charting my progress. f) to continue with the V1 kit build for the time being which is now being used as a practice build.
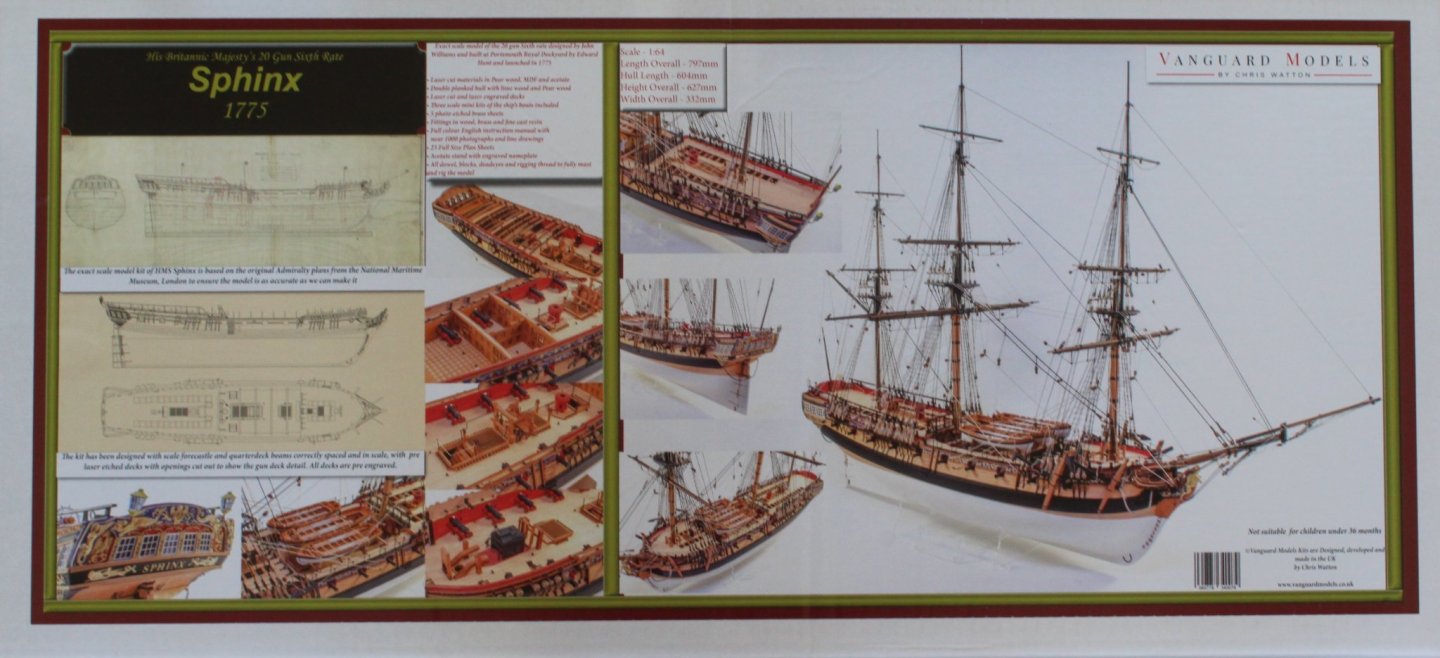
- 476 replies
-
- 11
-
-
- sphinx
- vanguard models
- (and 1 more)
-
 Hi guys, Here we go, starting my second ship. My first ship was HM Schooner Ballahoo, but I didn't make a build log for that one. To be honest I didn't think I would get very far with it. However, I did complete it and was quite happy with the result. During the build I relied very heavily on the build logs of others (especially The Lazy Saint) and now realize how important and useful build logs are to people new to the hobby. I'm obviously hoping this build goes well and I can get it completed. I must admit I'm still having problems with a lot of the nautical terms and the whole thing is a learning process for me. I started making plastic models of aircraft as a young boy back in the 60s and 70s (my father was in the Royal Air Force). That continued for many years, eventually moving on to military fighting vehicles in the 80s and 90s. Then last year, after a few years of deliberation, I took the plunge and got my first wooden ship, which as I said turned out okay. Now I'm converted Chimp

-
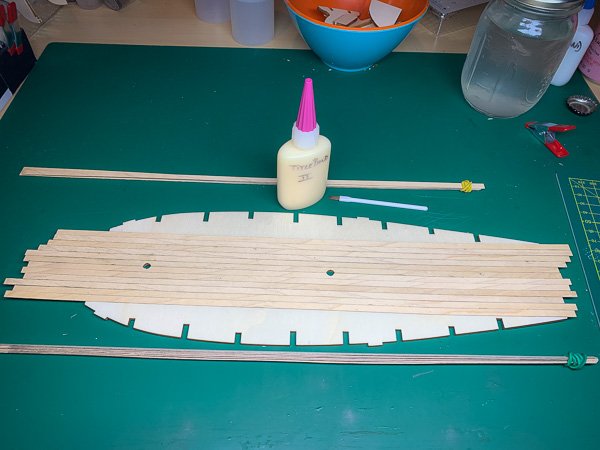
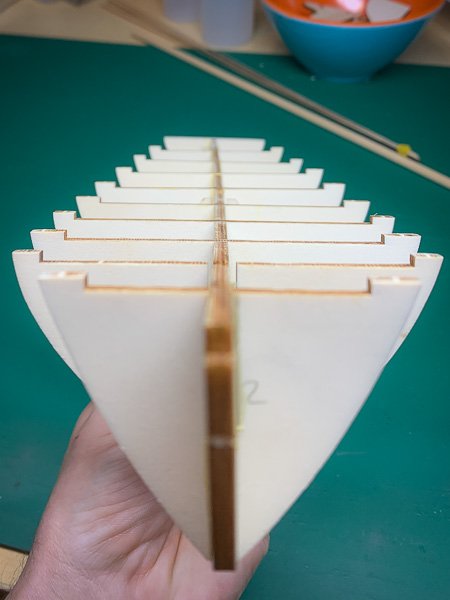
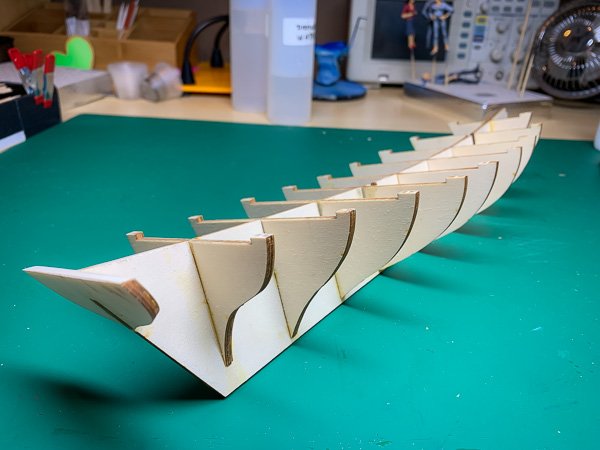
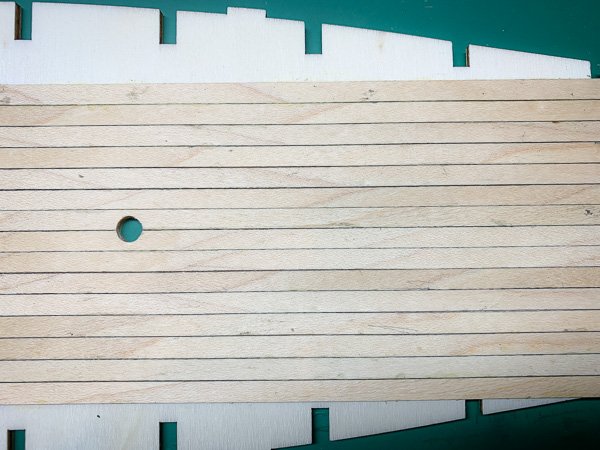
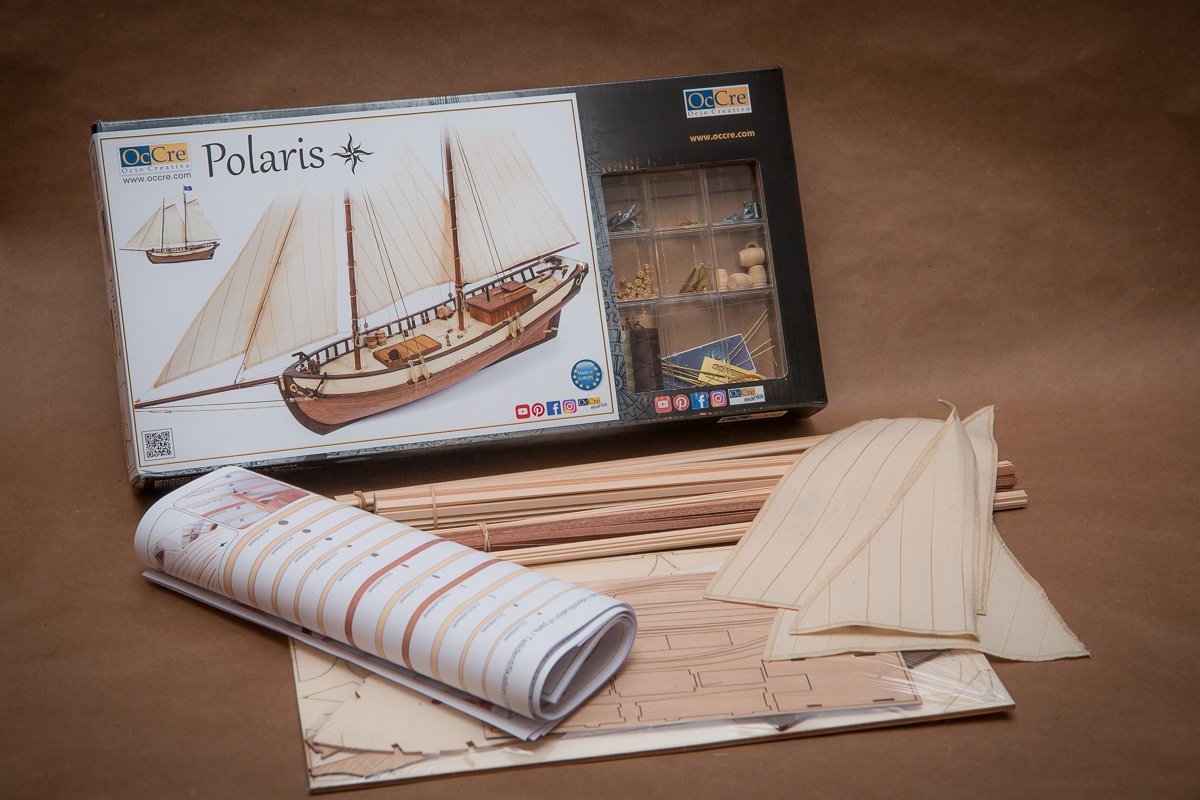
 Reflections on the kit and build: I thought it might be more useful for others, who might be thinking about building this kit, to write a short summary about my experience, and put it in this first post so it is easier to find. First off this kit is meant for first time builders, which I am, and I think they got it right. Its detailed picture-based instructions and the accompanying videos make it very clear how to build everything. There is no guesswork involved. I had only a few moments with the final sail rigging where the instructions were a little too brief but even then the videos helped fill in the slight gaps. The quality of the kit was also very good except for the deck planking strips but for my level of building that is a nitpick. However, the thing that I most liked about the kit is its level of difficulty; it was definitely challenging but not overwhelming. I felt that the time put into the build (which was 77 hours for me) was truly well spent. It really has a bit of everything so that when I now look at other more advanced builds I have a good appreciation of what level of attention and effort is required to achieve good results (which is actually very humbling). The other thing about the kit is that it's fairly forgiving with mistakes. I made a bunch of them and didn't executed things as well as I might have hoped but the design and relative simplicity of the boat is forgiving enough that you still end up with a good looking vessel. All in all I'm very please with the experience. It has whetted my appetite for more and that is a good result for a beginner's kit. Now back to the actual build log. Enjoy.... Another first time builder here, attempting to build OcCre's beginner kit: Polaris. I know nothing about ships or their historical accuracy and such, just want to get my feet wet and the Polaris seems like a decent enough kit to start out with. [There is a MSW review of the kit: here] I've managed to assemble the bulkheads/ribs to the false keel. This was relatively simple using small metal angle plates with clamps to get each rib square using Titebond II: I have to say there was quite a bit of play in the joints and while I did get the ribs square to the sides of the false keel, I wasn't paying attention to making it square along the top: And you can see that false keel has a slight bend too. However, I'm thinking it's not a problem as tolerances for mounting the deck shouldn't be that demanding. Well, I hope so. Currently working on the decking: Again using Titebond for glueing the deck planks rather than using contact glue per the instructions. I'm able to get a thin bead of PVA onto both the plank and deck, using the dispensing bottle shown in the picture above, and smooth it over with a small brush to avoid beads of excess glue forming. Working out really well. I get down 2 or 3 planks at a time and then use heavy books to press the planks while they set. Not so happy about the planks themselves. They have a lot of large grain criss-crossing them and I think ruin whatever scale effect the planks might have had to begin with. Not really a problem as I'm not looking to create a realistic model this time out. I'll be glad to just have something that doesn't look like a dog's dinner at the end of all this!
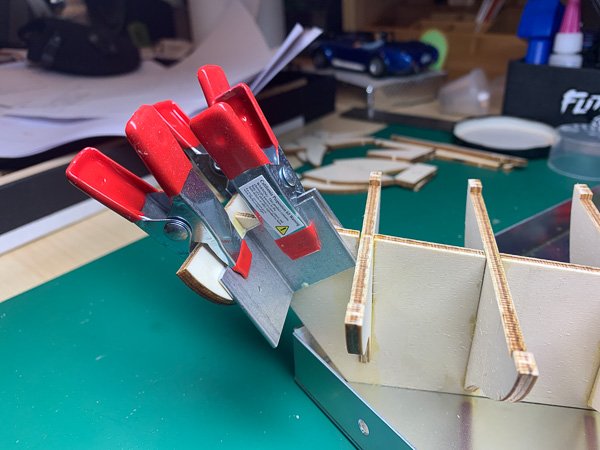
-
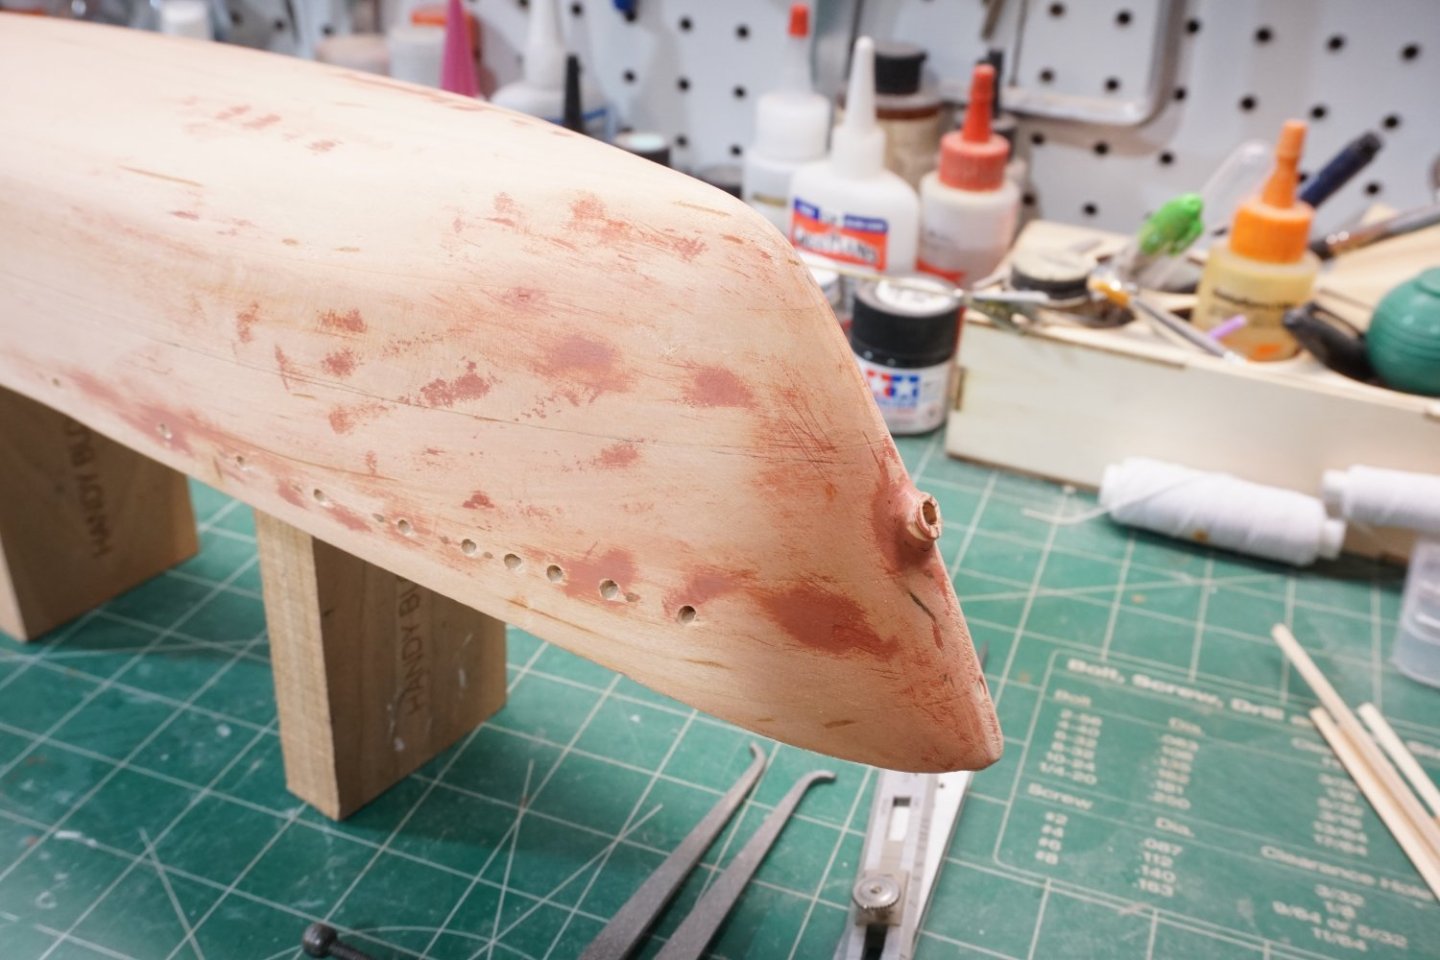
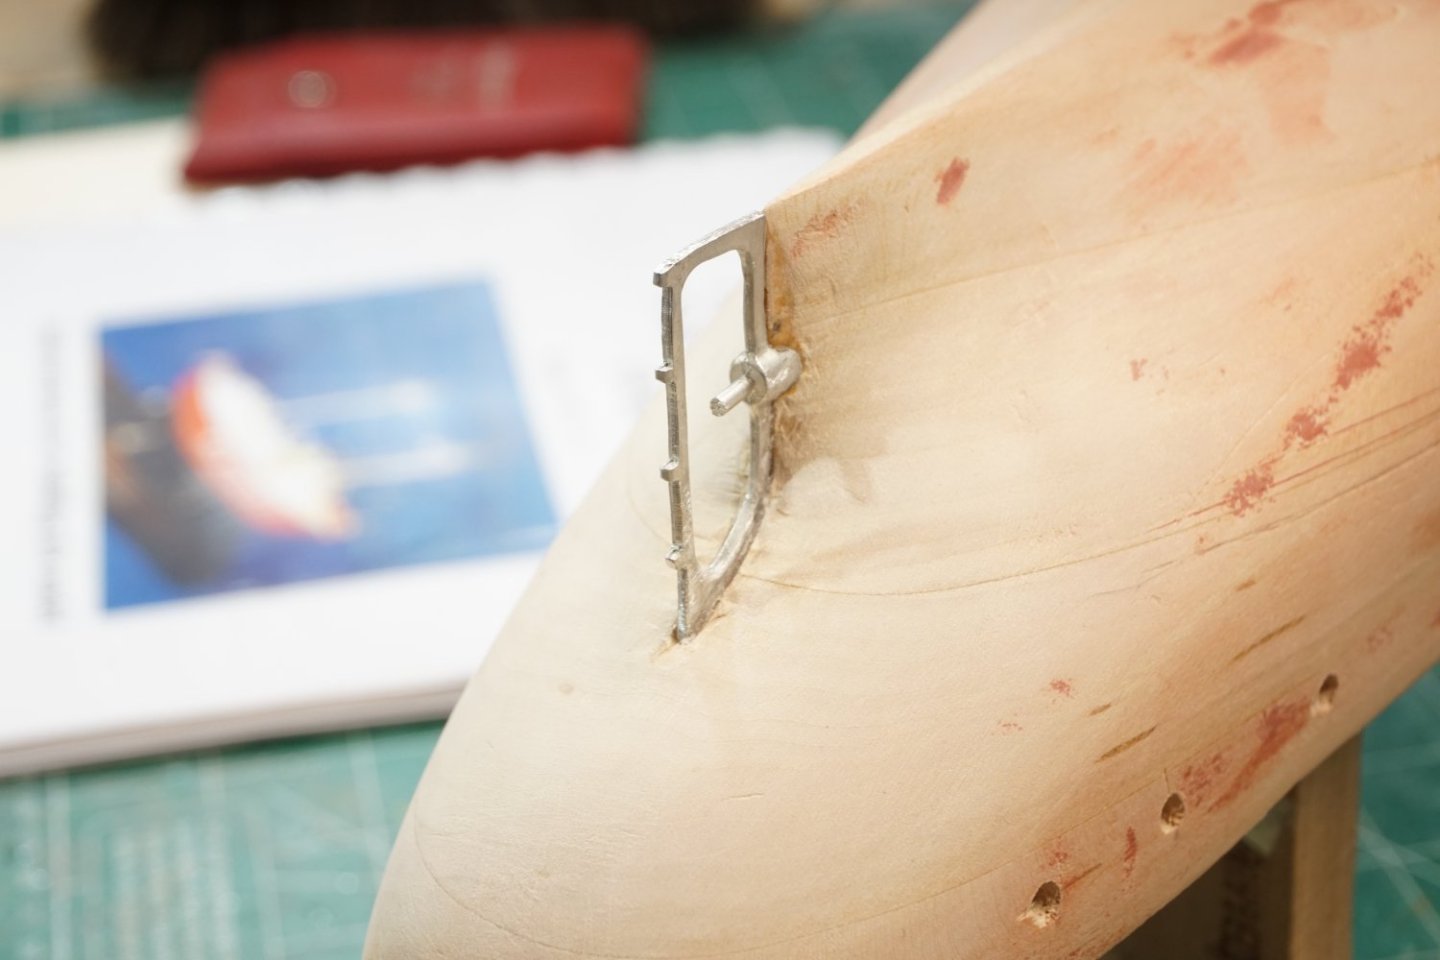
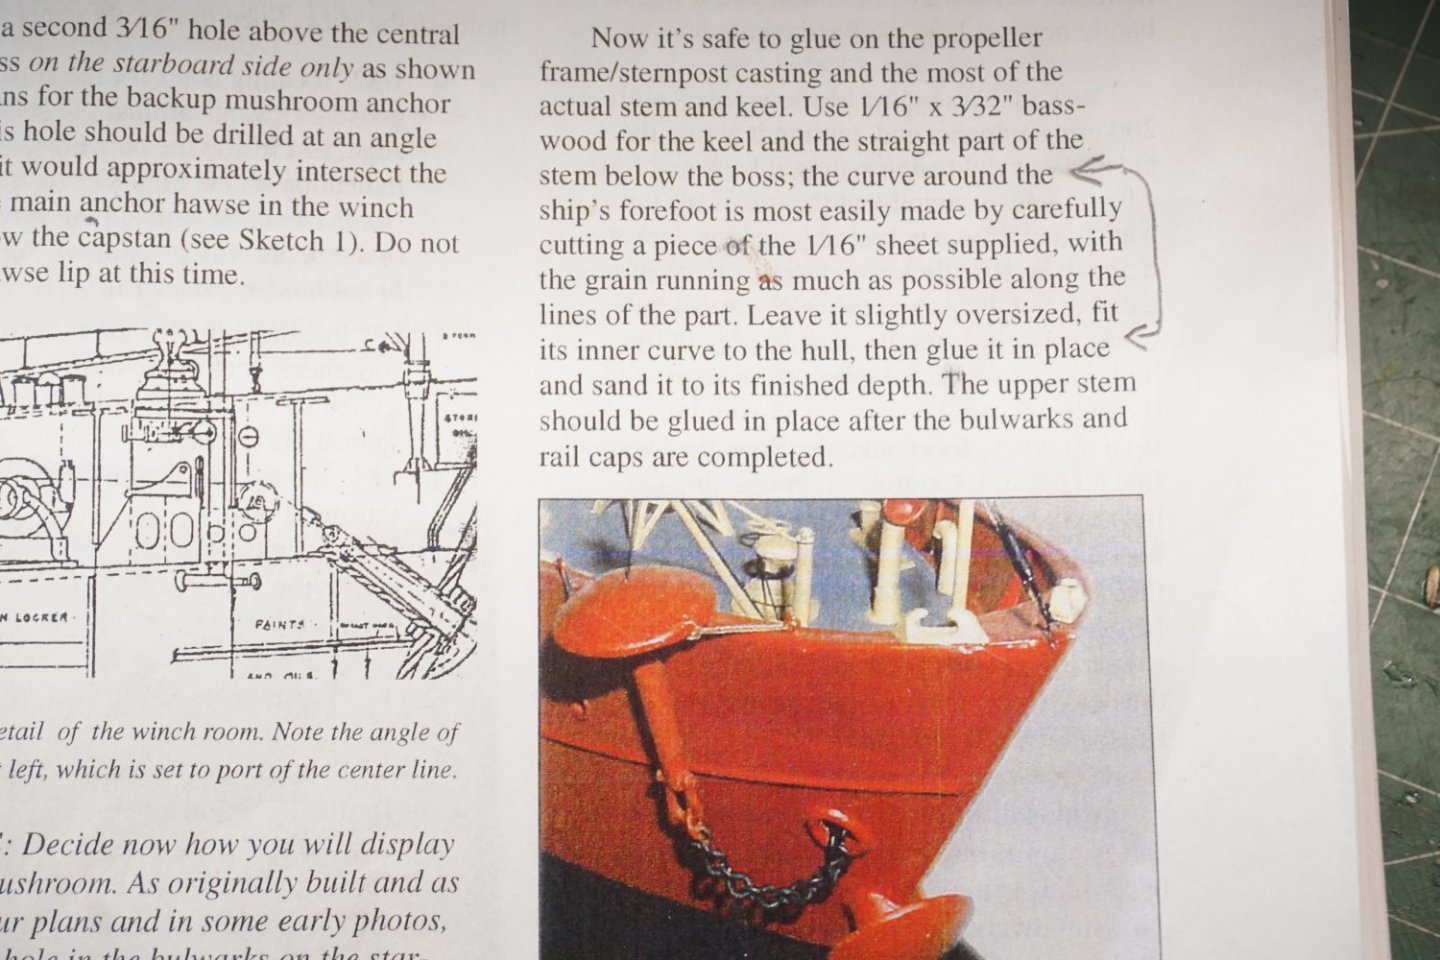
 After the last several months away from ship modeling, I started building Bluejackets Lightship #112 Nantucket from 1936. This was a kit that I purchased at Bluejacket several years ago while vacationing in Maine. After reading through the manual and studying the plans I proceeded to shape the hull. This solid hull was very close to plans and very little wood had to be removed, therefore, according to manual, the use of hull section templates was not needed. At the bow, I drilled out the hole for the central anchor hawsepipe boss and glued it in place. Marked out locations of all portholes and drilled them with an 1/8 drill bit. After gluing in the propeller frame/sternpost casting I proceeded to the next step but I'm a little confused. Unsure of the ship's forefoot construction, the kit gives you a 1/16" x 3" x 6" piece of basswood for this step. My question: Is this supposed to be just a continuation of the keel around the curve of the hull, or is it to simulate an additional plate of steel that was welded to the hull in this area?
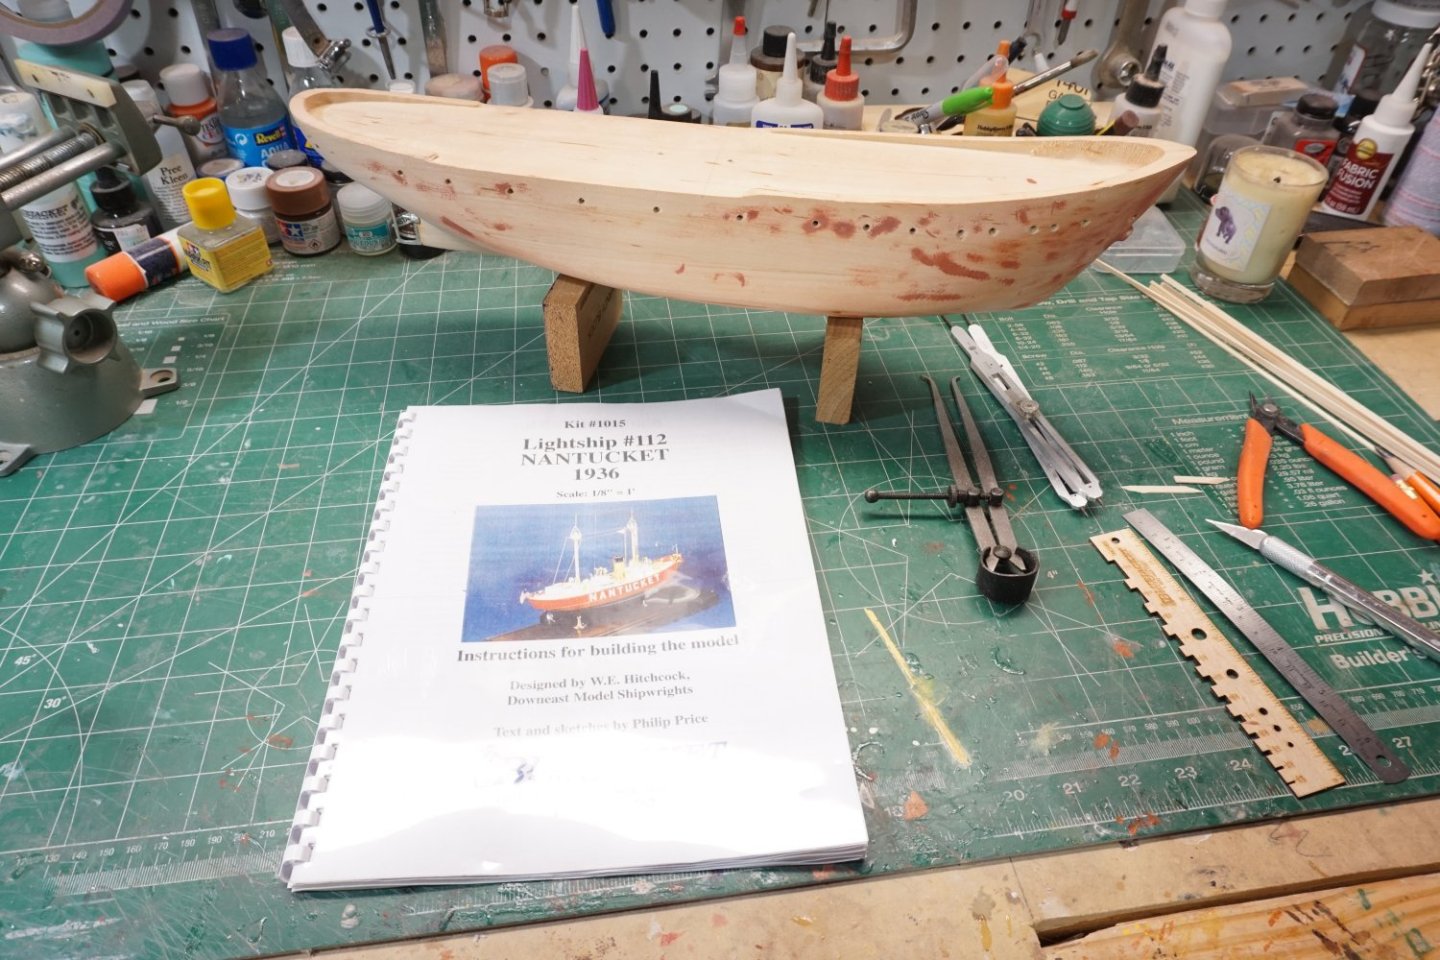
- 29 replies
-
- 9
-
-
- Nantucket Lightship
- BlueJacket Shipcrafters
- (and 1 more)
-
 HMS Indefatigable 1794 The Prologue. I find myself once again beguiled by that modeller’s honeypot known as Vanguard models and I finally succumbed to Chris’s latest offering, having mulled it over for several weeks. Why the wait, wots not to like, some may say, but this will be the largest project I have undertaken since Norske Løve way back in the 1980’s. Indefatigable is about the same hull size as Norske Løve, (1:70 scale) but not so tall. It will still demand a sizeable display area. As with my Sphinx build this will be Navy Board style, I’ve no room for masting and rigging, and I have developed an affection for the look. I opted for the basic kit as all the masting, rigging line, and block work will not be used, simply added to my ever-growing pile of discarded kit parts. If I decide to add stump masts my preferred material is Ramin. From a preliminary assessment I don’t think Chris has left me much to fiddle with. He has addressed the issue of realistic Quarter galleries, the provision of Lodging knees, and a properly fitted out Great Cabin, complete with Rudder housing. He has solved the issue of lower deck cannons coming adrift early in a build, and the stern decoration and Figure are wonderfully sculpted. In terms of authenticity this kit hits the spot and is what in the end persuaded me to go for it. As with Sphinx I will be taking a minimalist paint approach, and will look to represent the ochre band along the gunport line more subtly, using natural woods. It was the all-painted hull that also delayed my decision; authentic as it is, I prefer the natural beauty of wood on a model of this type, and I needed to have a clear idea of the approach in my mind. The makings are expected to arrive on Tuesday, and I will be working the initial stages of the build in conjunction with my current Medway project. B.E. 05/03/2023
- 614 replies
-
- 25
-
-
- Indefatigable
- Vanguard Models
- (and 1 more)
-
 In this topic consisting of several episodes, I am going to tell you something about the construction of this ship. Although it is very small in real life, and many times smaller on a scale of 1:87, it was a fairly difficult job to get it done and it is based on a lot of research. At the beginning of June 2018, I started building a model of the ship on which Willem Barents sailed to Nova Zembla in 1596. The Northern trade route had to be found, but that failed and Barents had to spend the winter on this island in the Arctic Ocean with 16 other crewmenbers. But the year after they returned to Holland. Shortly after this event, drawings were made of this ship that served as illustrations for the travelogue of Gerrit de Veer, one of the members of the crew. The two ships of Heemskerk and De Rijp. The commander was Barents, who was on Heemskerk's ship. The names of the ships are not mentioned anywhere. As a result, reconstruction attempts were made to find out what the ship looked like. Ab Hoving has written a book with fine detailed reconstruction drawings, which form the basis of the construction of the model with which I started. By the way, I am not supposed to call this model “the ship of Barents”. I never build models of ships that had a name, but only build ship types. In consultation with Ab Hoving, we decided to call this type an "Early Pinas". A Pinas is a very well-known type that was built frequently, especially after 1600 in Holland. This ship dates from just before that time, around 1590, and at that time a number of later inventions had not yet been applied. Since I have built more ship models on HO scale, so 1:87, it was logical that I would do that again. The models can then be compared in terms of size. Installing the rigging took a lot of time, also because it was all still unknown territory for me. In the previous 40 years, I did long-term research on Latin-rigged ships that sailed around the Mediterranean, and built models on a scale of 1:87 as a result of those studies. The rigging and hull construction are vastly different from square-rigged ships. This was my first square-rigged ship. At first I looked despondently at the drawings of the rigging, but after a while I understood all the functions. Repeatedly, I had to remove it again and try again. Ab Hoving was always ready to provide me with the necessary advice. His help was indispensable because he had also carried out the entire research on this ship and had described it in his book; HET SCHIP VAN WILLEM BARENTS. Een hypothetische reconstructie van een laat-zestiende eeuws jacht (A hypothetical reconstruction of a late sixteenth century yacht).ISBN 90-6550-772-8 Many of the techniques that can be found here are also described on my website; www.constantwillems.nl And the same applies to this model; it is a reconstruction, so there is a chance that the ship looked different in details. The construction of the hull A start was made with transferring the trusses, obtained from data from Hoving's drawings, to paper. Those drawings are on a scale of 1 : 75 and it was a simple action to take those drawings to a copy shop where they were transferred to scale HO., 1 : 87. Like all my models, I built this boat mainly from pear wood. Part of it is made of paranapine. It is built on rafters of plywood thick 3 mm. Actually a bit too thick but I tried to imitate the lip welds of the original construction and then a wide enough surface is needed to make those welds on those rafters. The trusses as I first drew them I always work with half-trusses, as can be seen in the drawing. When all the half-trusses on the port side are glued to the central truss, all imperfections on that side can be repaired very accurately by filing away excess material. When everything is satisfactorily secured, I start with the other side. To this end, moulds are made from the already glued trusses, which are carefully sawn out and glued to starboard. Thus, everything is completely equal on both sides. The longitudinal truss is made of plywood 1.5 mm thick. The bow, keel and stern are made of pear wood. These parts were glued all around against the longitudinal truss so that on the port and starboard side there is still above those parts 0,75 mm to support the ends of the planks. The locations of the numbered half-trusses are indicated on the longitudinal trusses, as shown on the drawings in the book. Because the longitudinal truss is quite thin, it can bend easily, so it was screwed onto a board and I added small distance partitions between the rafters. At the bow arrived a filler piece of balsa wood that had been filed into the right shape to give the planks at the bow the correct shape. After unscrewing the longitudinal truss, it turned out to be an indeformable unit and the other rafter halves could be glued. When everything was in place, on both sides of the longitudinal bilge, I made the stern. The construction has quite a few bends and to make that easier, a mold was placed on the work board to make the right shapes. The top piece was made of balsa wood. The black hole is the interior of the cabin where a window was later added. The lower timbers have already been installed here, which already gave the framework a lot of strength. The transom is of one mm. plywood with the planks glued on top in the right pattern. Later, the openings were added. The support boards between a number of trusses are painted black. They are behind the open, or closed, gun ports. The struts for the bulwarks were made of plywood. This is only necessary to attache the planks above the deck which form the bullwark. Once they are glued on, the plywood pieces were carefully removed and then be replaced by the struts in the correct dimensions and material. The top of the bulwark was called the rahout (Dutch word; ra is yard, hout is wood). On an early pinas it was customary to lower the yards on the bulwarks in order to stow or strike the sails. This is how the name rahout came about. On later ships, the sails were stowed or struck on the hoisted yards.
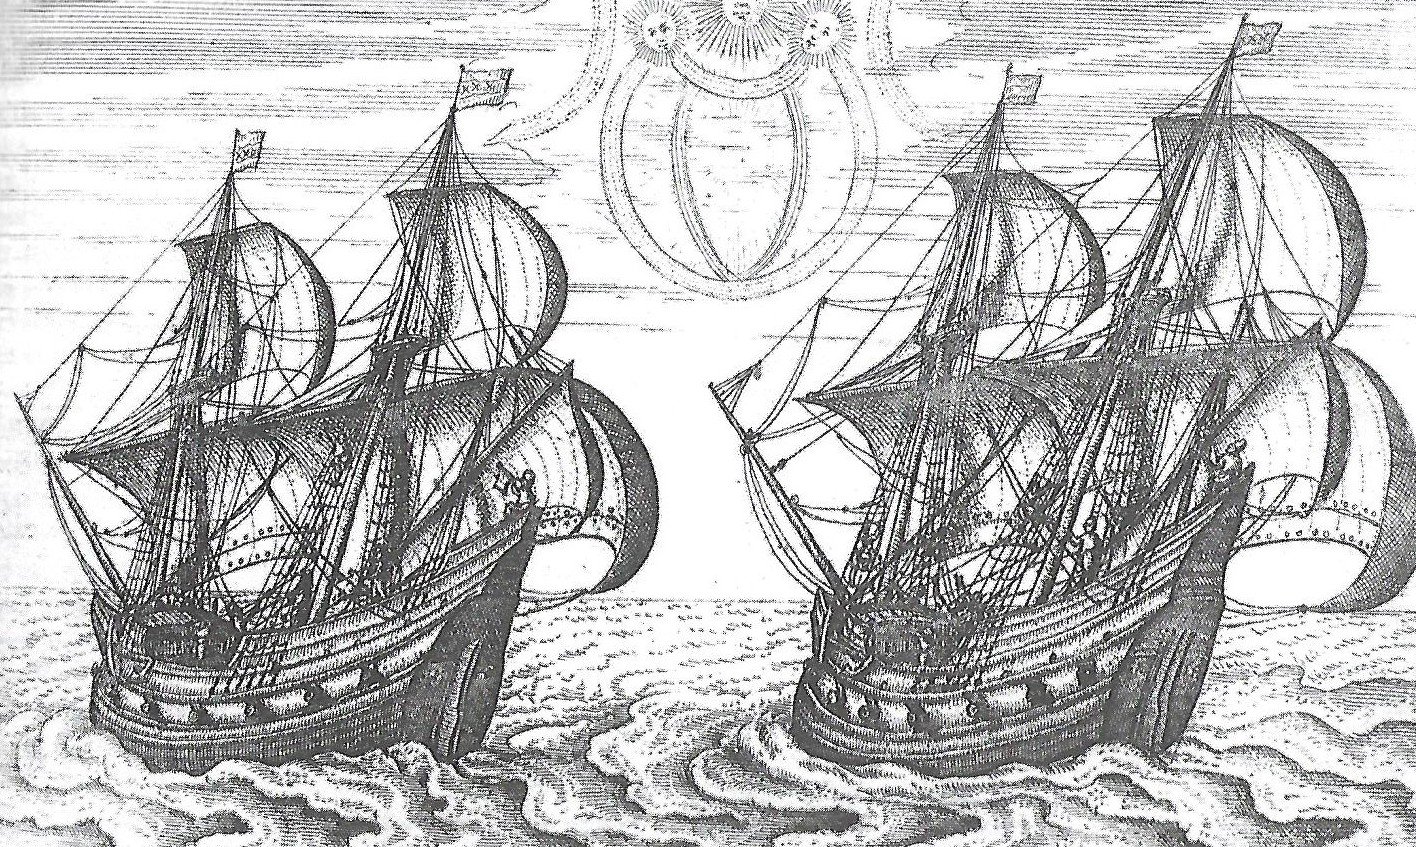
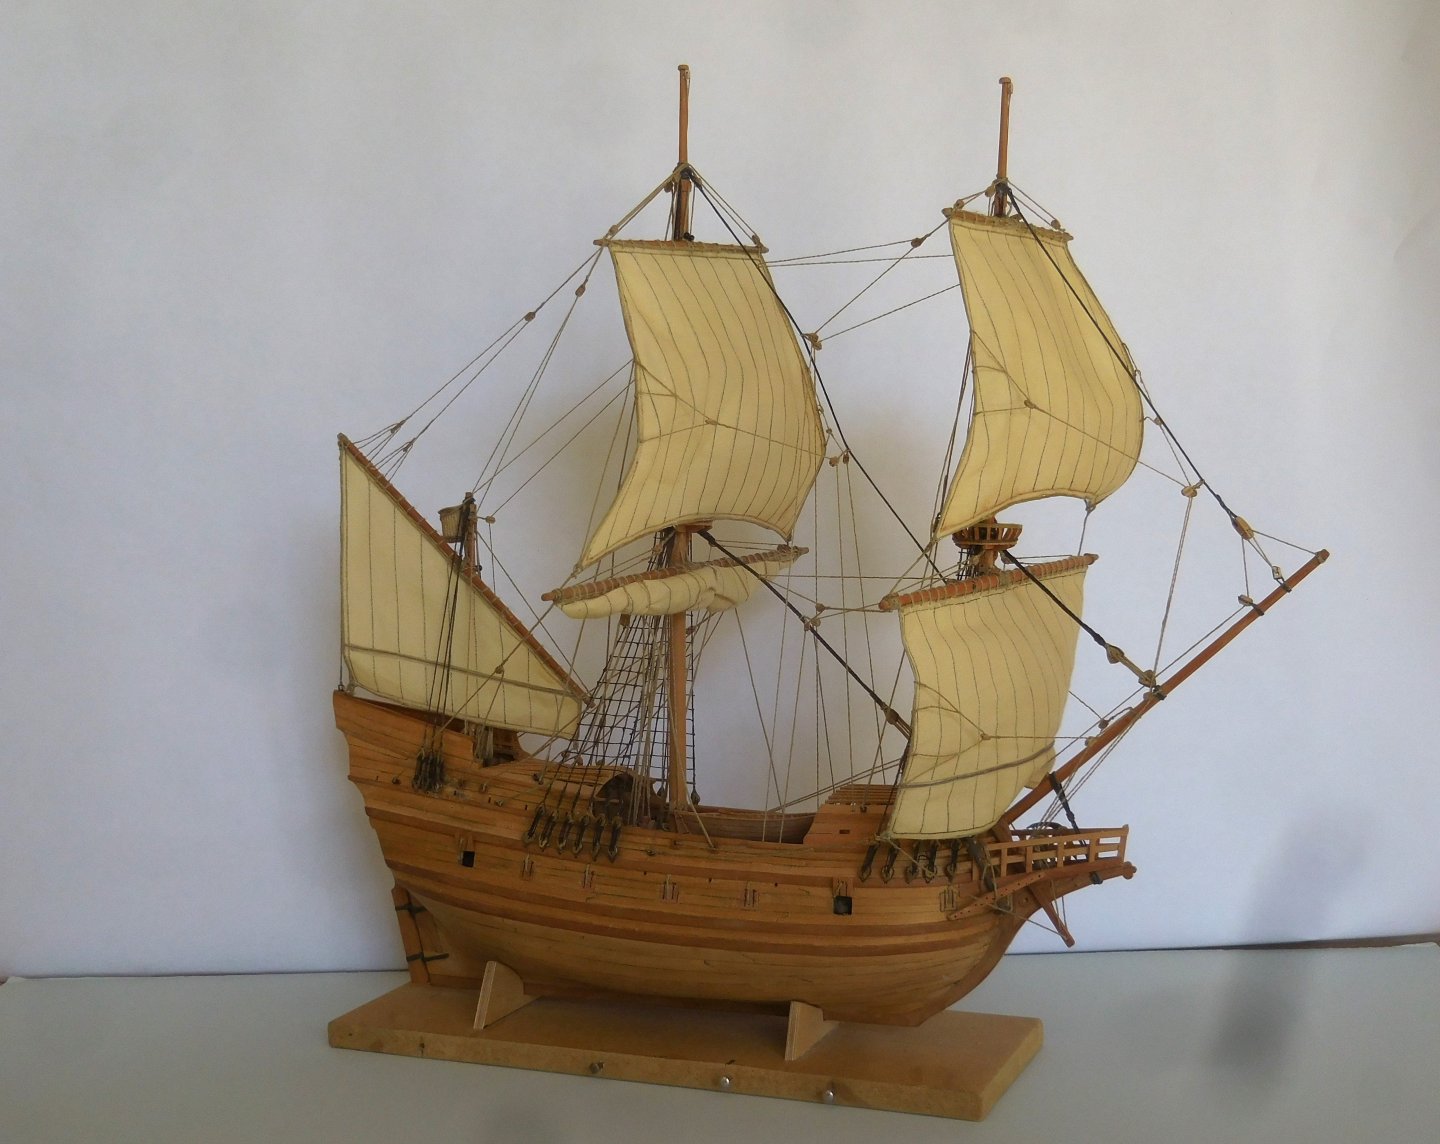

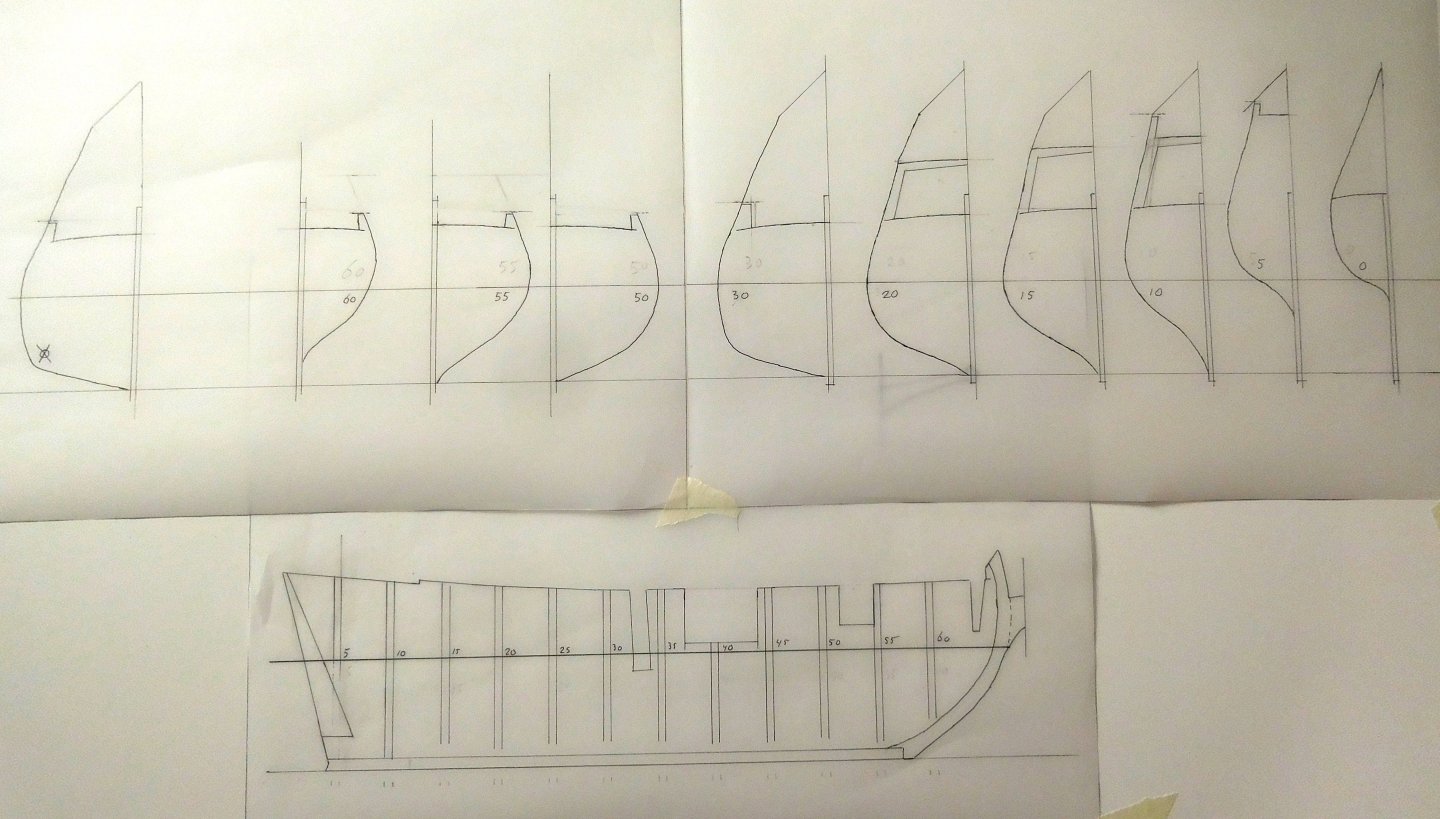

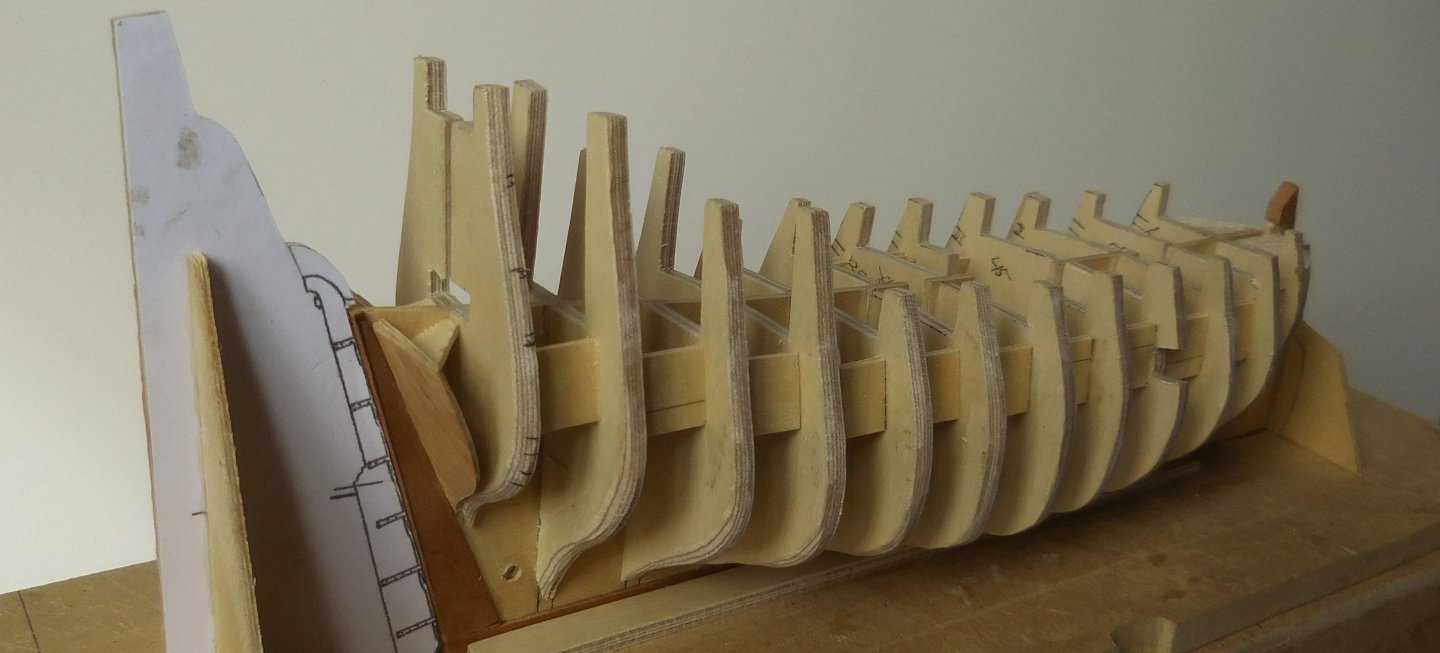

-
 Started this build approximately six weeks ago, it's my first build log. As a volunteer at Mystic Seaport Museum, I regularly pass a Dory exhibit and I thought it would make an interesting subject for a Diorama. My original thought was to recreate the scene in the photo, the boat tied to the dock. However, my biggest concern was modelling the water. If I mess that up, the project fails! Another option I considered was to build a scene of a Dory on a Schooner. So, that's my plan. Decided the base would be a section of deck, the last Dory being prepared for launch from the L. A. Dunton Gloucester Fishing Schooner, circa 1923 (currently undergoing full restoration at Mystic Seaport Museum) for daily fishing. The Dunton carried 10 Dory's stacked five high, port and starboard. She had a crew of 24, Captain, 3 crew, and 20 fisherman (2 per Dory). Dories could carry several tubs of longline trawl that would be set away from the schooner. Each tub could carry as much as 1,800 feet of line with a hook every fathom, or six feet. If a commercially viable fish was found on 50 of those three hundred hooks it was considered a decent haul. Dory's were painted a buff color which would show up in the fog and in bright sunlight, the same color the spars on the mother ship would carry and the dory might have a small rope on the bung, should the boat overturn. There's lots of small detail that can be added, line tubs, dory fog horn, trawl anchor, trawl buoy, bailer's, sail, etc... Fortunately, I found some 1/24 scale figures I think I can modify. To start with, build the Dory! The Kit is the Model Shipways Lowell Banks Dory, "a beginner kit is not just for beginners"! No need to document the build, there are many Dory Build logs. So, fast forward, after few minor kit modifications, base painting, I started the weathering is a work in process in process. I mixed my own batch of base colors using enamel paints. For washes I use "only" watercolor paints". Not acrylic paints. Watercolor paints are much more forgiving, if you make a mistake, just wipe off with a damp cloth or paint brush. I never weathered a ship model; I'm having fun with this! Some dark grey wash, dry brushing and paint chipping, the detail starts to develop.


- 11 replies
-
- 10
-
-
- Model Shipways
- Finished
- (and 2 more)
-
 I have just accidentally deleted my entire build log. I thought I was deleting one post rather than the whole thing. I must now redo the entire log. This is most distressing, but at least I have the opportunity to make improvements in what I did. Fortunately I still have all the photos that I used. Unfortunately, all the likes, comments, and photos that were posted to my log by other MSW members are lost. Work on this will commence this afternoon. Unless the moderators object, I will do a series of posts, rather than try to do the whole thing in one. I plan for each post to be on a particular topic, or phase of construction.
- 110 replies
-
- 3
-

-
-
- Bluejacket Shipcrafters
- Constitution
- (and 2 more)
-
Time to start a new model. Made in Rockland, Maine in 1853, the Red Jacket was a clipper ship, one of the largest and fastest ever built. She was also the first ship of the White Star Line company. She was named after Sagoyewatha, a famous Seneca Indian chief, called "Red Jacket" by settlers.She was lost in a gale in 1885.On her first voyage, Red Jacket set the speed record for sailing ships crossing the Atlantic by traveling from New York to Liverpool in 13 days, 1 hour, 25 minutes, dock to dock. That record still stands today for commercial sailing vessels. The BlueJacket kit has 5 sheets of plans. Sheet 1 has the pre-carved hull laid on top of it. This is going to be a large model! (41" LOA)

- 355 replies
-
- 17
-
-
- red jacket
- finished
- (and 1 more)
-
 When I first built Dreadnought I did not own an airbrush and used rattle cans and paintbrushes. I was really happy with the build at the time and it’s time to redo her in a different way. hopefully better.
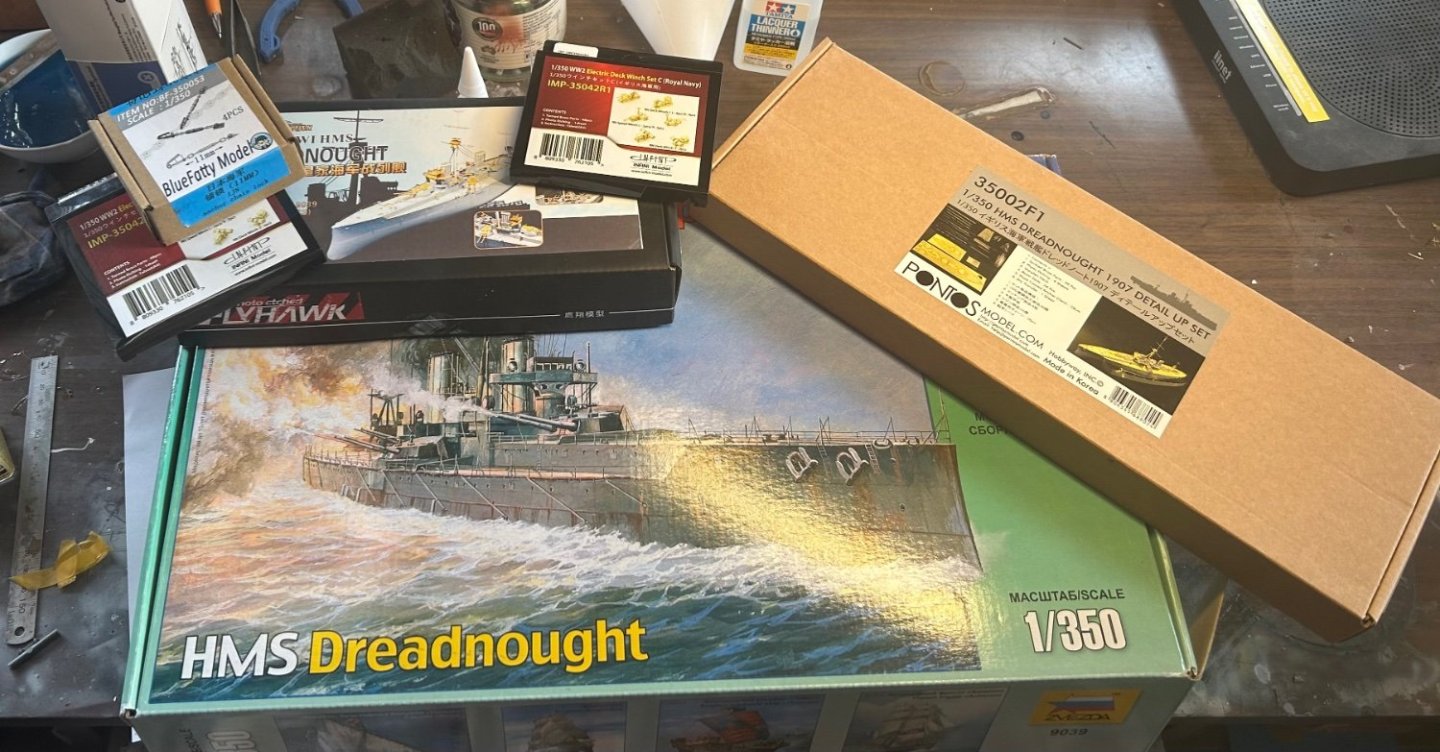
- 212 replies
-
- 11
-
-
I’ve been sitting in this one for a while, and there are not that many builds out there. Eduard makes a small upgrade kit and there are some aftermarket helicopters to use as well.


- 47 replies
-
- 8
-
-
- Zumwalt
- Snowman Model
- (and 2 more)
-
 Having built the Model Shipways shipwright beginner kits by David Antscherl, I thought I’d try out the latest kit by Antscherl being offered by Model shipways, the Nonsuch 30 catboat in 1:24. I just started the hull planking, up to this point the build process has been rather straightforward for a plank on bulkhead kit. However, the start of the planking process has not gone smoothly. The Garboard plank is the first one to be placed on the bulkheads. I could not get the plank to lay smoothly on the bulkheads and keep the precut holes lined up with holes in the spine. The next two pictures show how warped the plank turned out. I will have to remove this plank and reapply it. My solution was to cut the plank into 4 pieces and lay them individually. I just had to sand the edges of the pieces a little to get a good fit. The bulkheads are rather thick, so this worked out ok. We’ll see how the following planks lay down.
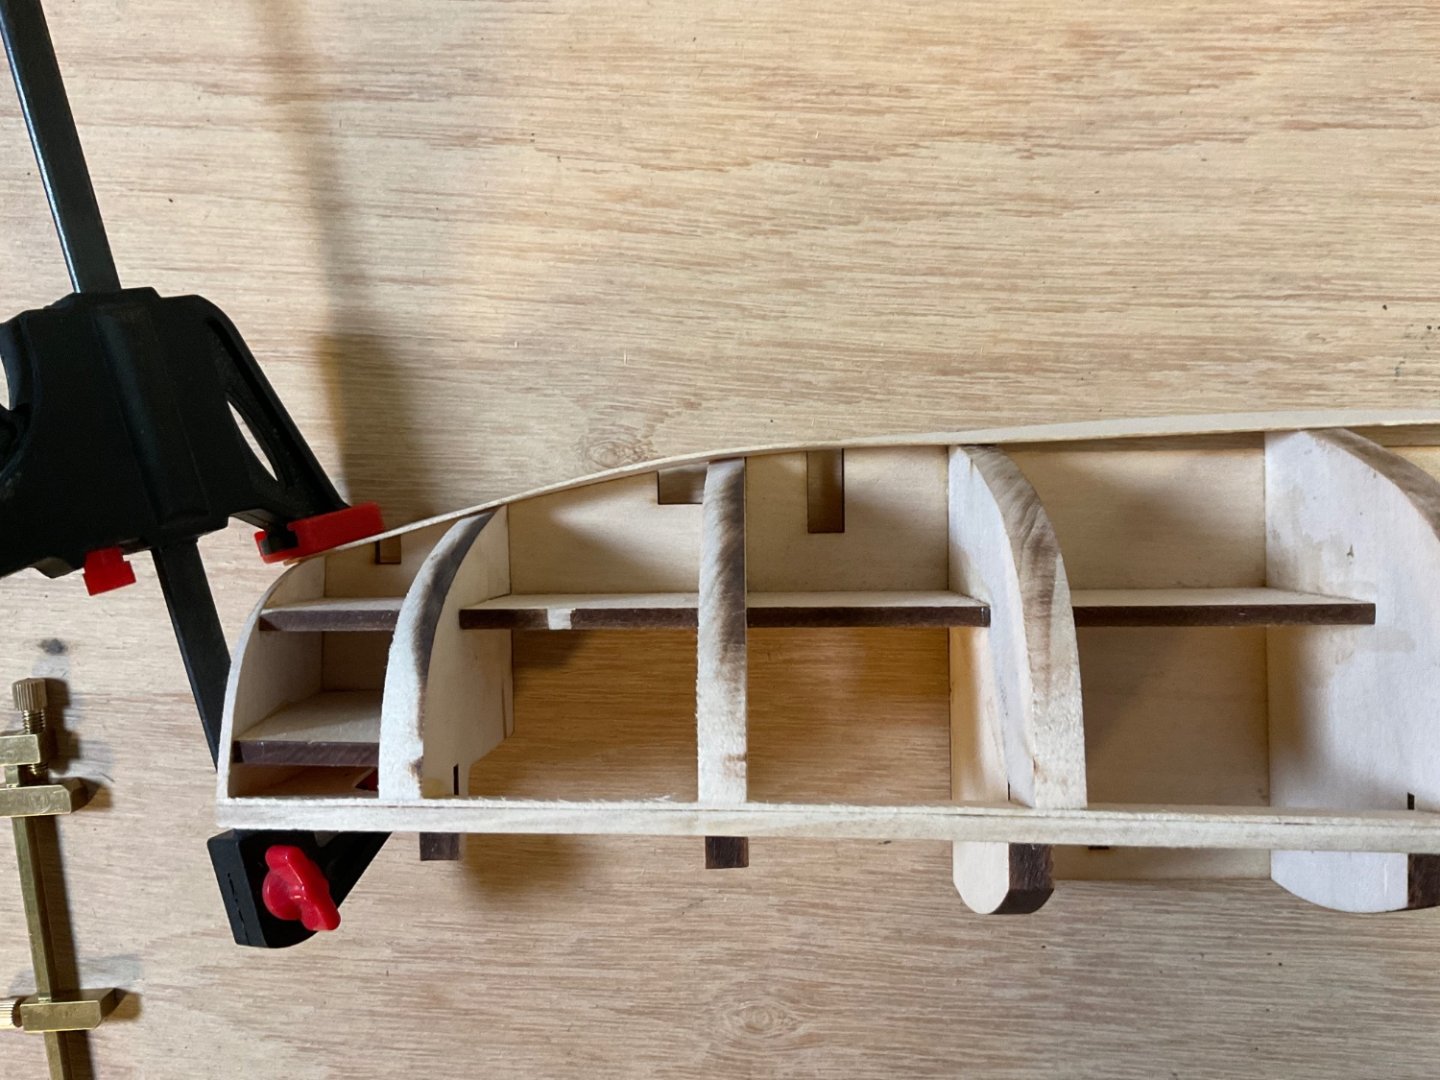
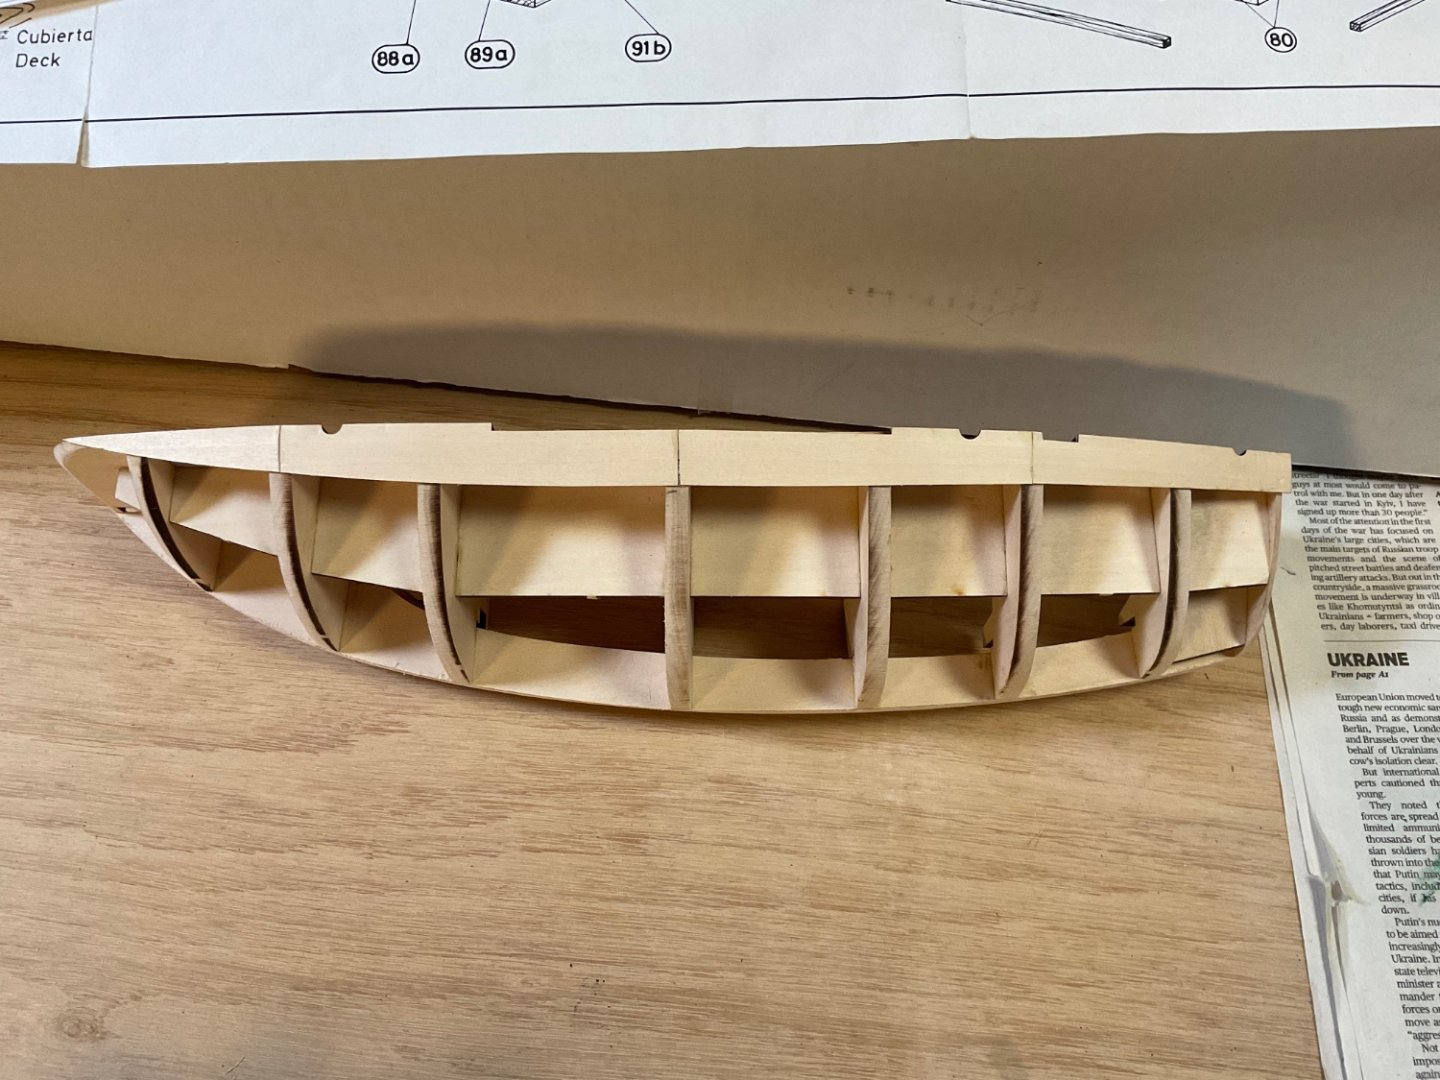

- 27 replies
-
- 2
-
-
- Nonsuch
- Model Shipways
- (and 1 more)
-
 As if I didn't have enough to do, a guy from the Men's Shed that I play at 2 days a week has brought in a damaged model yacht for me to fix. It's not really in terrible condition - a break in the mast, two breaks in the boom, bowsprit broken in at least three places and part of it missing, a broken part of the stand. And needs cleaning. It's a decorator model, solid hull. I've worked on it for about a day so far, allowing for breaks while the glue dries, and have made a new piece for the stand and repaired the mast and the boom. I left the sails and rigging in place as I was worried I wouldn't be able to work out how to replace them. A bit of a problem with tangled ropes as I fixed it, but I think it should sort itself out with a bit of patience. The bowsprit was beyond repair so I told the owner to buy a piece of dowel the same diameter and I'd make a new one. I'll post photos when that's done. Fortunately I was able to find some woodstain that matched the existing, so it's looking like it should all work out OK (touch wood!) Steven