


James H
-
Posts
5,618 -
Joined
-
Last visited
Content Type
Profiles
Forums
Gallery
Events
Posts posted by James H
-
-
Great to see a familiar name back in the fold 😙
- mtaylor, Ryland Craze and Nirvana
-
 3
3
-
1 minute ago, Sjors said:
Thanks for all te reactions.
Question.
What is CA gel?
Is that a kind of super glue?
Never hear of it.
I normally use wood glue that hold on the plank after 15 minutes and dry solid after 24 hours......
I will take care that I lay the planks smooth to each other.
I know that my sternpost is a little tiny at the bottom.
I was to fanatic with sanding.
I hope I can make the solution to glue a little wood on it and sand it down to the same thickness as the rest of the sternpost.
It's gonna be painted but I will see.
Sjors
Yes, CA is superglue. The one I use is this:

- mtaylor, glbarlow, Edwardkenway and 1 other
-
4
-
41 minutes ago, drumgerry said:
Sorry James! Like I said I have a former newspaper editor peering over my shoulder whenever I'm writing anything important and she wouldn't have let that through. The pictures are fab though as is 99.99% of the writing 👍
The embarrassing this is that I used to be an ex-mag assistant editor, but when you're writing stuff like this, then you are constantly cross referencing documents, plans etc. and putting the text together. I'll try harder next time 😂
- BobG, hollowneck, JpR62 and 3 others
-
6
-
7 hours ago, drumgerry said:
And part no 20 on Flirt goes between the second (part number 3) and third (part number 4) bulkheads! So yep not a mistake as such but an un-necessary muddiness. It might be simpler in the manual if the bulkheads were labelled 1 onwards rather than 2 onwards. I mean it's bleedin obvious where parts 20 and 19 go but for the sake of simplicity in the manual I'd be inclined to change it.
You can blame me for any 'muddiness', as I wrote it.
Thankfully, you have a nice set of photos which helps to negate any slight numbering errors
")
After all, you'd struggle to put those parts anywhere else 🤣
- drumgerry, BLACK VIKING and BobG
-
3
-
More like a jigsaw 🤣
Can't wait to see you make and fit those frames.
- mtaylor, Old Collingwood and Kevin
-
3
-
8 minutes ago, ASCNAVALAB said:
Hello, greetings to all the fellow modellers! Where can you find references on the internet of this manufacturer "TRIDENT MODEL"? .. Who sells them? is there a catalog? THANK YOU!
-
I know some purists hate it, and also talk of it crumbling away in years to come, but I used CA (gel). I've seen models that are decades old and made with CA, and they are still just fine.
...but this isn't a discussion on the merits/demerits of glue. It just works for me and of course, no clamping.
-
Beautiful job, Martin. That case really sets it all off too. Stunning

Big question.....what project next?
-
Can't wait to see you build this. You've paving the way for me and Coureur 😄
- Ryland Craze, Old Collingwood and BobG
-
3
-
1 hour ago, dkuehn said:
Damn, I just ordered this thing yesterday (Sunday) and the UPS tracking email I just got says it will be to my house on Wednesday. That's a heck of a lot faster than I would have guessed, UK to California. I guess I won't be sitting back and anticipating very long. 😃
UPS seem to be the most consistent out of the couriers I've experienced of recent.
- Nirvana, chris watton, Canute and 3 others
-
6
-
1 hour ago, Nirvana said:
Can't wait for a build log to appear!
That's the plan, as soon as I have enough of the Duchess built for Chris to get his manual done and kit into production.
@cafmodel Exciting to see things coming together like this. I really can't wait to see this and to get a log started here. I'll certainly be out of my comfort zone with a POF!
-
-
There's no difference between port and starboard bulwarks. Those are exactly the same.
-
-
20 minutes ago, Vane said:
I think i did the mistake here and dryfitted it to see if needed adjustments.. it didnt... in fact it squised so well into place it was really difficukt to get it out again and put in some glue...
That's why I now just fit a lot of the parts, and especially the deck, before gluing. I just paint glue in from underneath and that works just as well.
- popeye the sailor, JpR62, Rustyj and 3 others
-
6
-
-
9 hours ago, md1400cs said:
James,
Grabbed my chair, but really needed a ladder your shipyard is, as it should be, already a very full one indeed. 👌
This kit does look to be of amazing quality. Will follow along, learn and enjoy as well.
The Victory has and always intimidated me, still does. But so appreciate the talents of builders here who can do her proper justice.
Regards,
Glad your following.
I have a few weeks now until Amati send the replacement timber sheets, so I'm working on the Duchess of Kingston at the moment, and Vic is draped in bubblewrap. Won't be too long though!
- Ryland Craze, mtaylor, FrankWouts and 3 others
-
6
-
-
3 hours ago, cafmodel said:
Hello, I haven't cut my left rib yet,
I'm thinking about whether I need to cut these ribs
Because his ribs are quite different from salamandre's
Salamandre's ribs are only 2 mm apart, so you can't see the structure clearly without cutting the ribs,But the distance between the ribs of Le coureur is big enough to see the internal structure. Of course, if you want to see the inside more clearly, you need to cut the ribs。
The other thing is how different these jagged ribs are, and I want to keep them more
Of course, all of this depends on what kind of effect you need to express
I really cant wait to see this one! She's going to look very different to a regular POF
-
And as my Zulu article is in the latest, I highly recommend it 😆

- JpR62, JeffT, Ryland Craze and 7 others
-
10
-
15 minutes ago, Sjors said:
And now a question for Jim.
I'm not at that stage but are you using a spray can of paint or those little cans?
I used aerosol paint for the underside and all the red areas (but you can use enamel/acrylic etc). Humbrol enamel for the blue and yellow areas, and Vallejo acrylics for the small details. Check the manual as I put the paint type and numbers in there.
I wrote the manual and did the build, but forgot the blue paint code. That's Humbrol 25 Matt Blue. I also used 74 Linen for the Yellow.
- Sjors, BobG, popeye the sailor and 4 others
-
7
-
-
Time for an update.
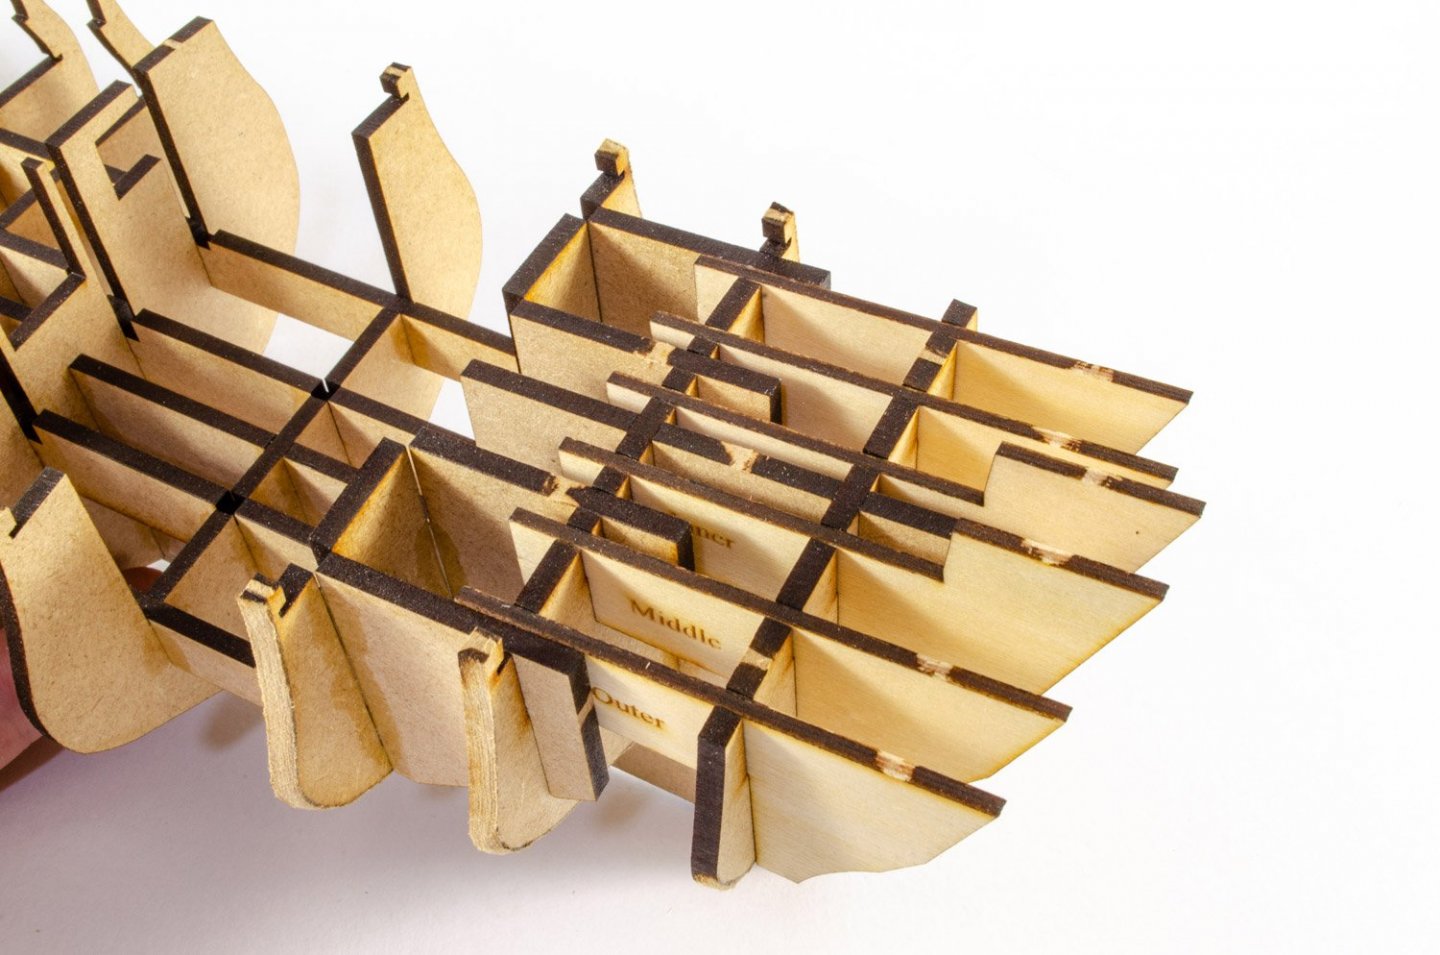
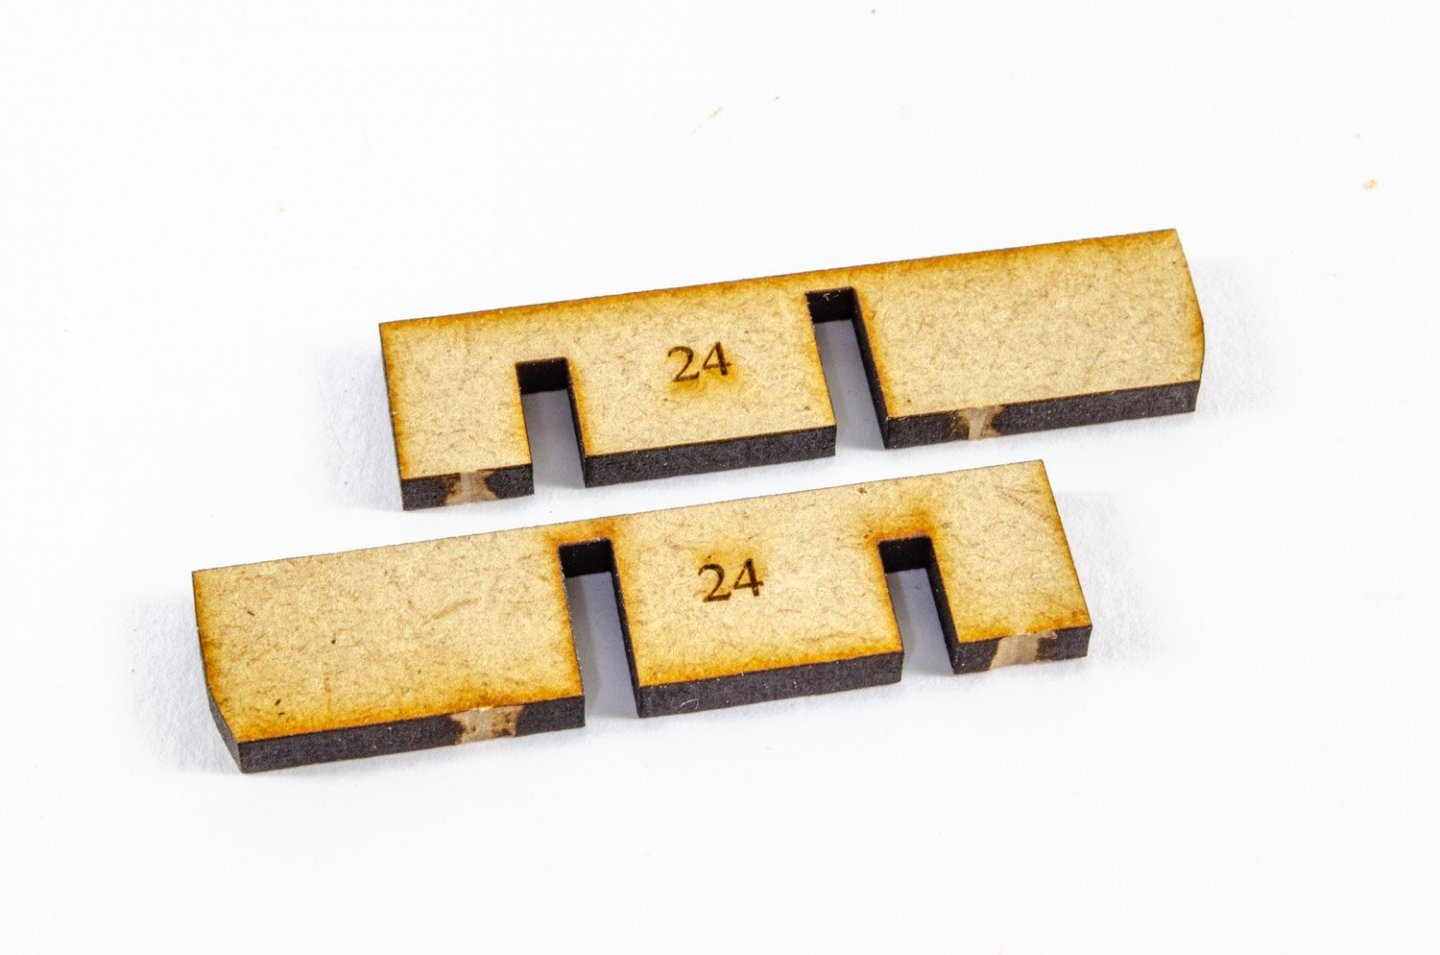
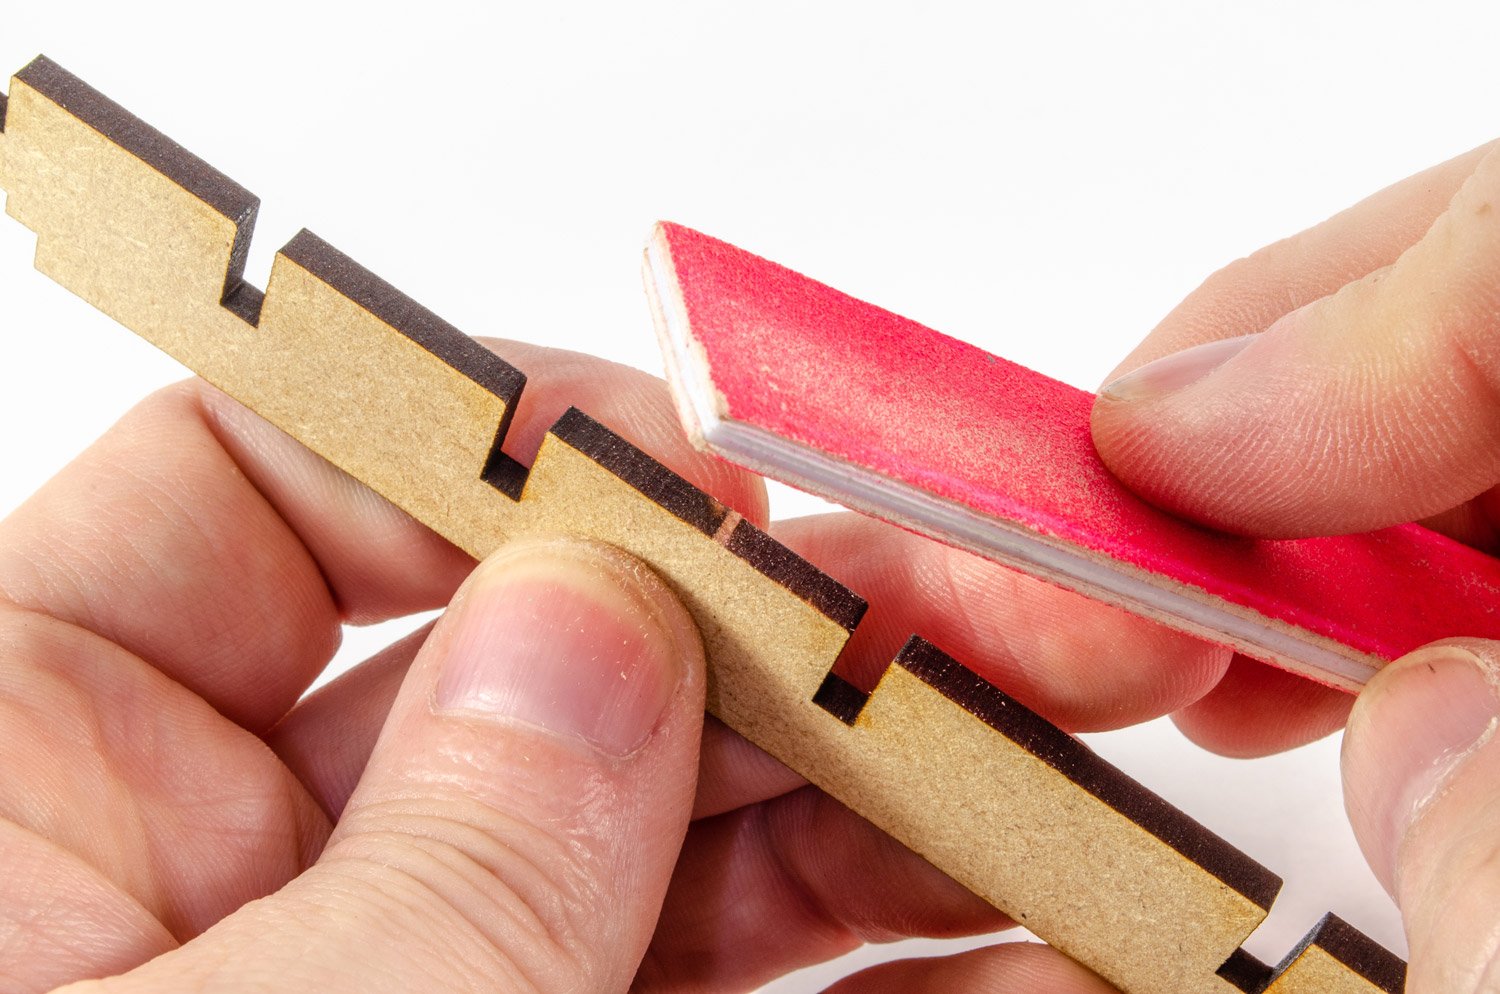
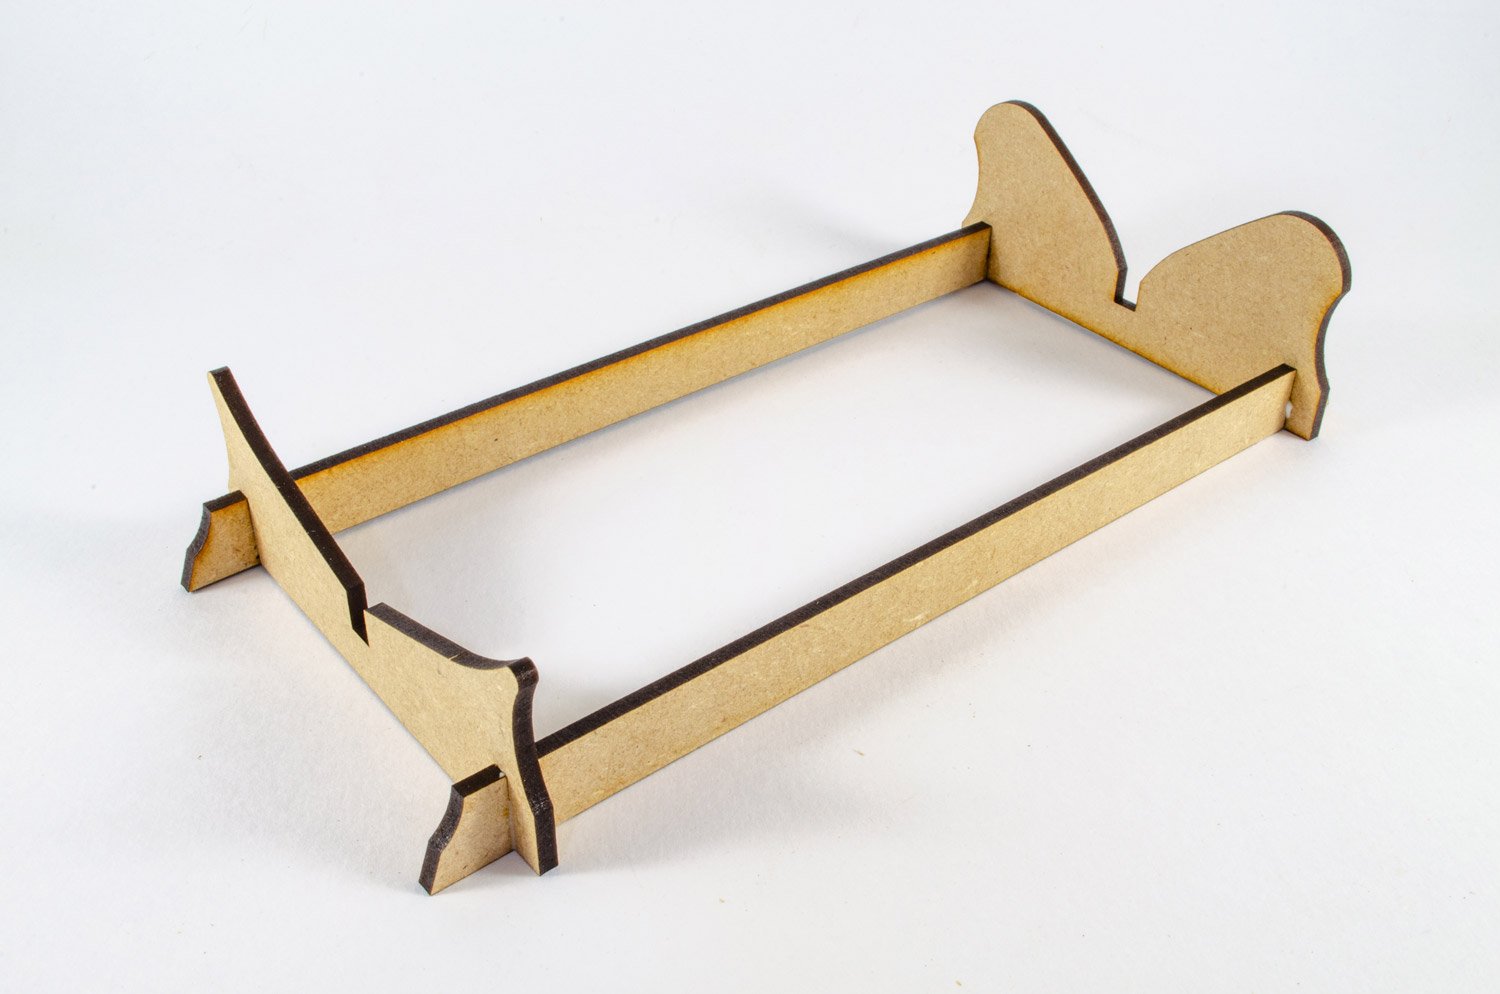
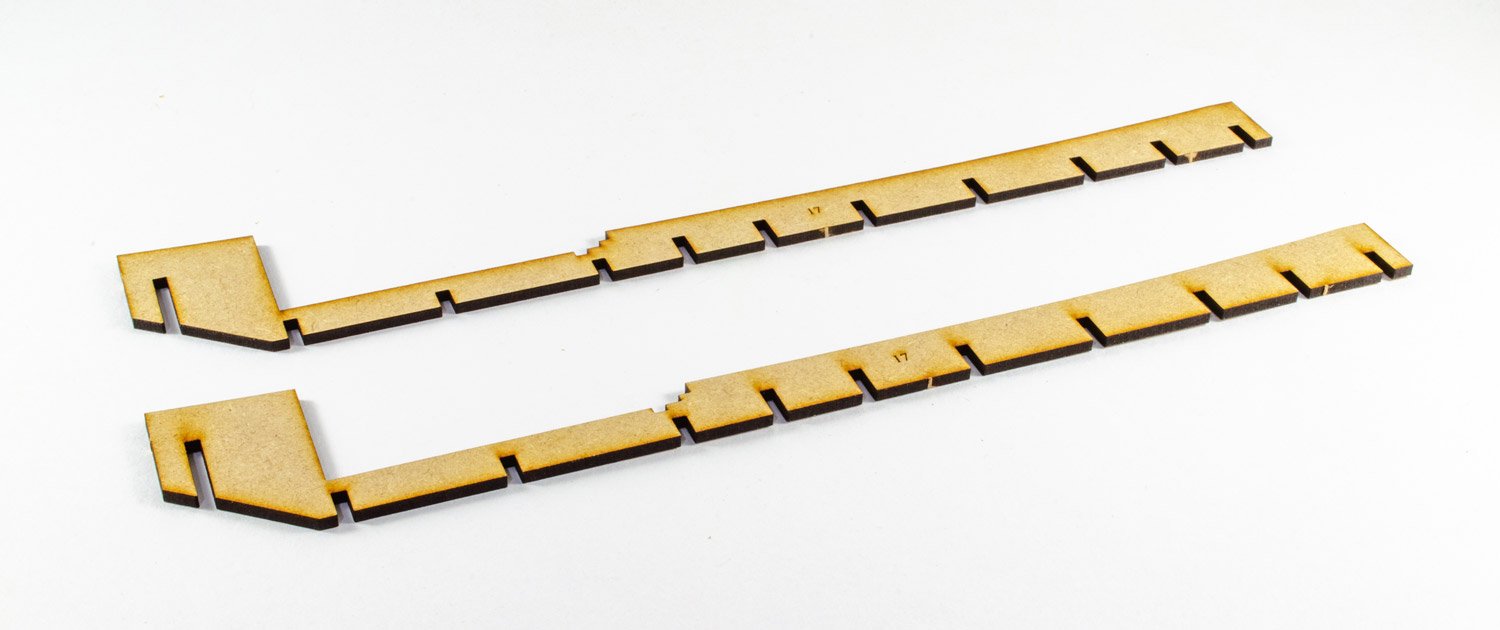
Of course, these photos are part of the instruction manual, so I've taken a selection to show where I'm currently up to with DoK. There are three 3mm MDF sheets, and I took my time to remove all of them and clean the tabs up with a knife and/or sanding stick. All parts are engraved with a number, and I knew all would be used in this quick bench session. First up, I built the temporary cradle. There's a gorgeous acrylic one for final use, complete with engraved nameplate, so this one is the scrapper that I'll throw away at the end.

As the model is single deck and won't have the usefulness of another lower deck into which the masts can align, a simple part is slotted into the keel before any work starts. It's most accessible to add at this stage. The part is a nice, snug fit. This is the main mast position.

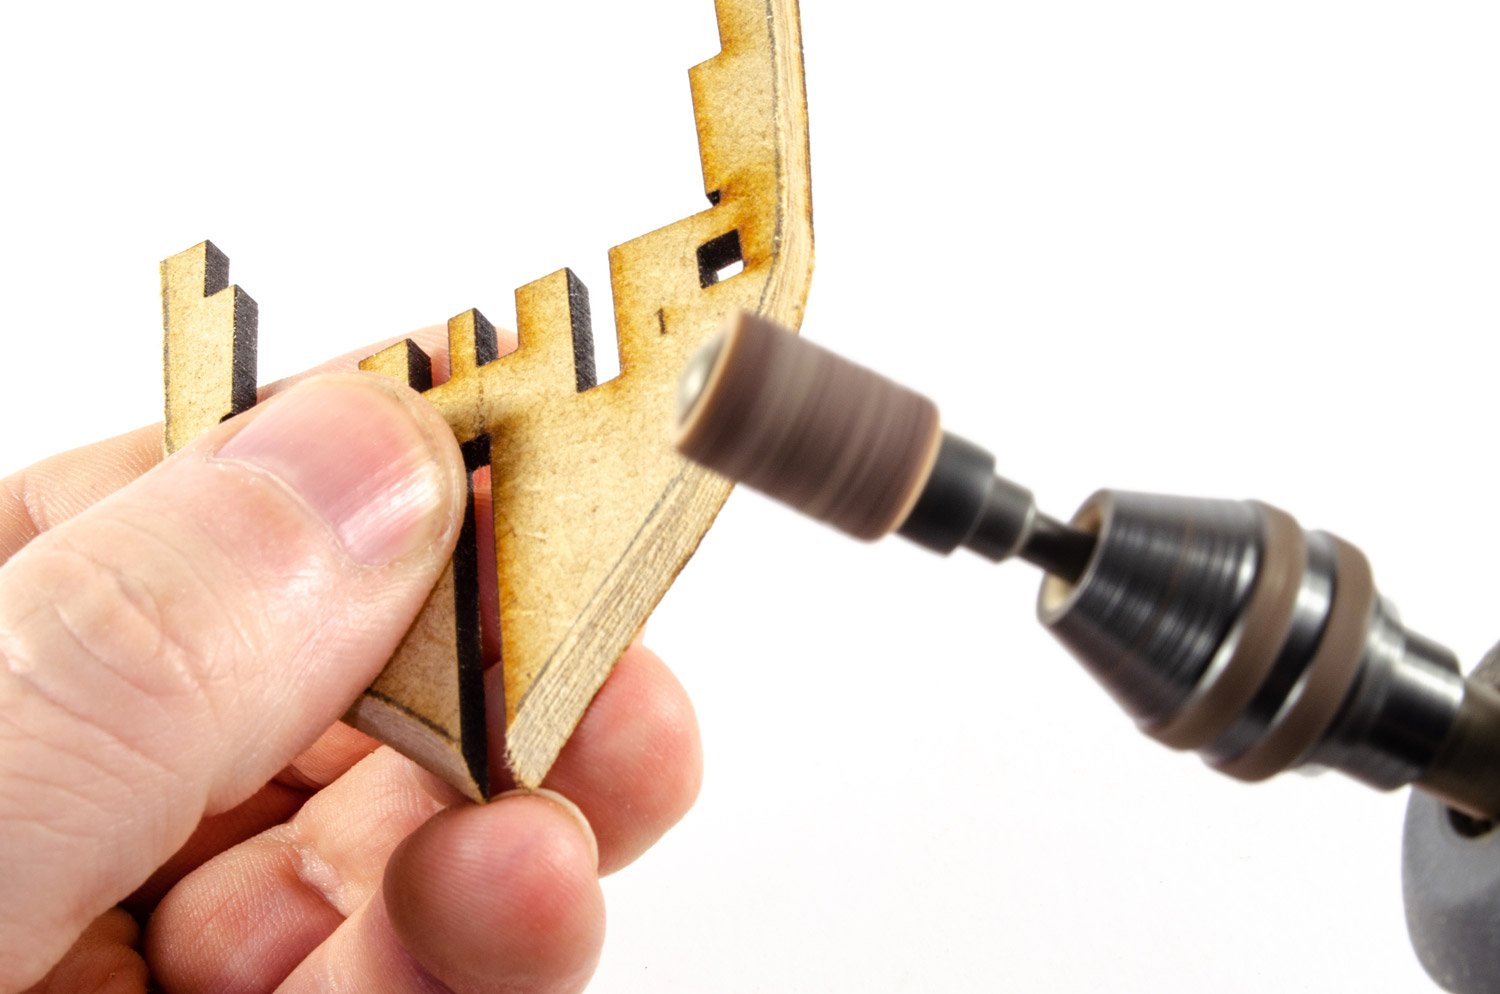
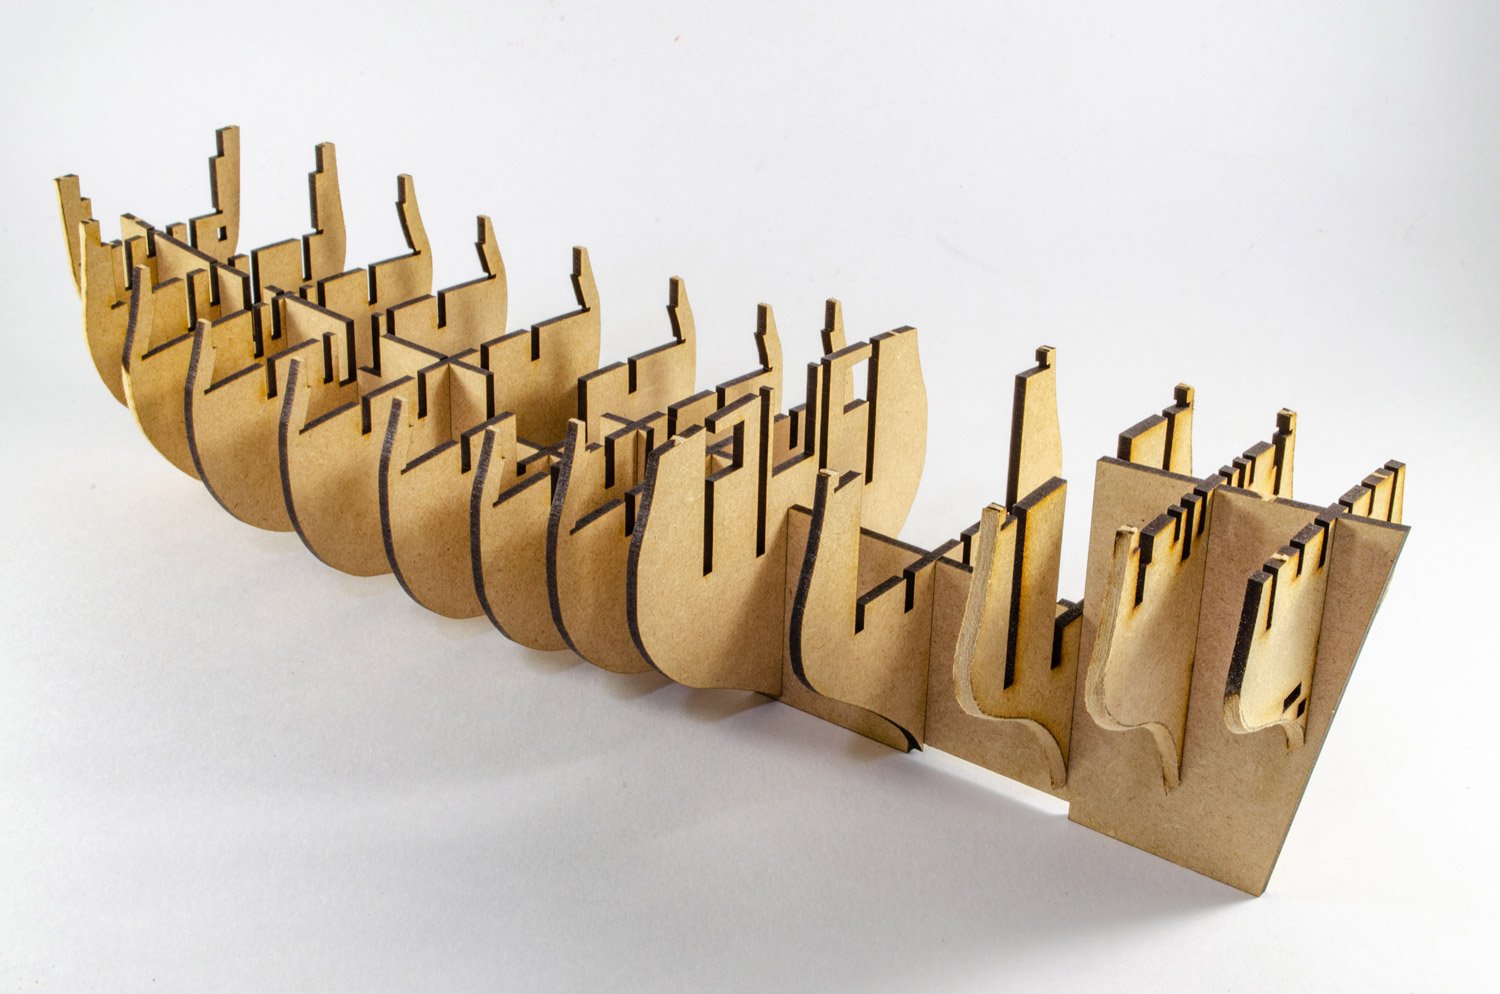
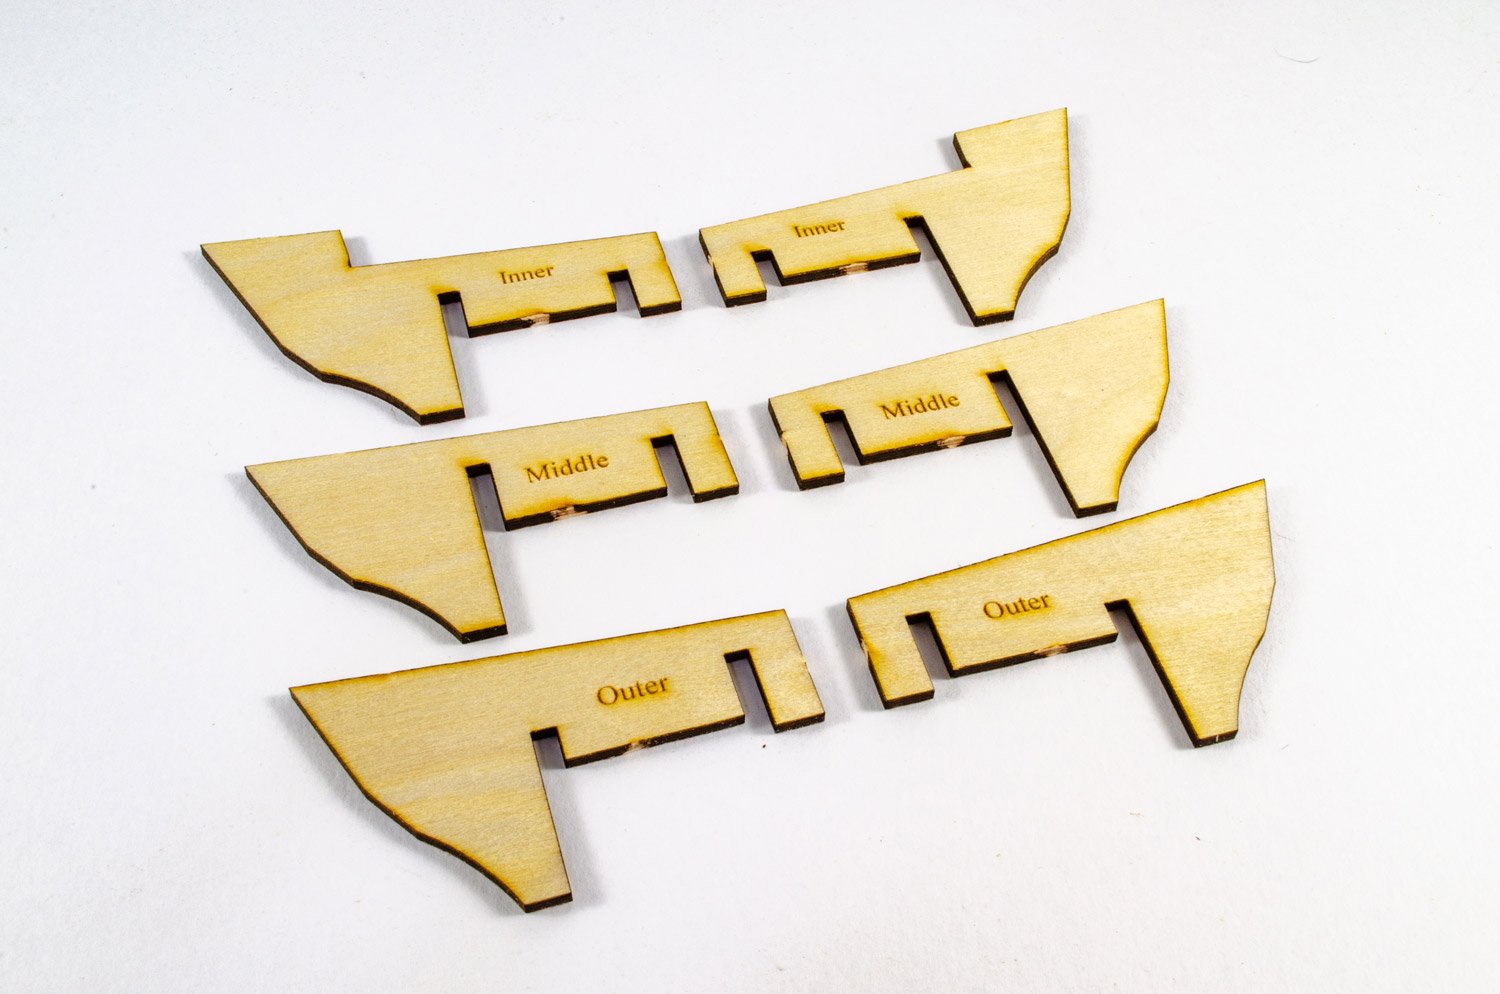
Before any bulkheads are fitted, I first mark a rough bevel line on the first and last three bulkheads and then grind this away with my Dremel. A number of other parts are also bevelled at this stage too, such as the outer cheek parts and the front of the inner longitudinal beams. All bulkheads are now slotted into place.


For the foremast, a couple of parts are added to the outer cheeks. These will create a round base into which the down will sit. These are then slotted into place.

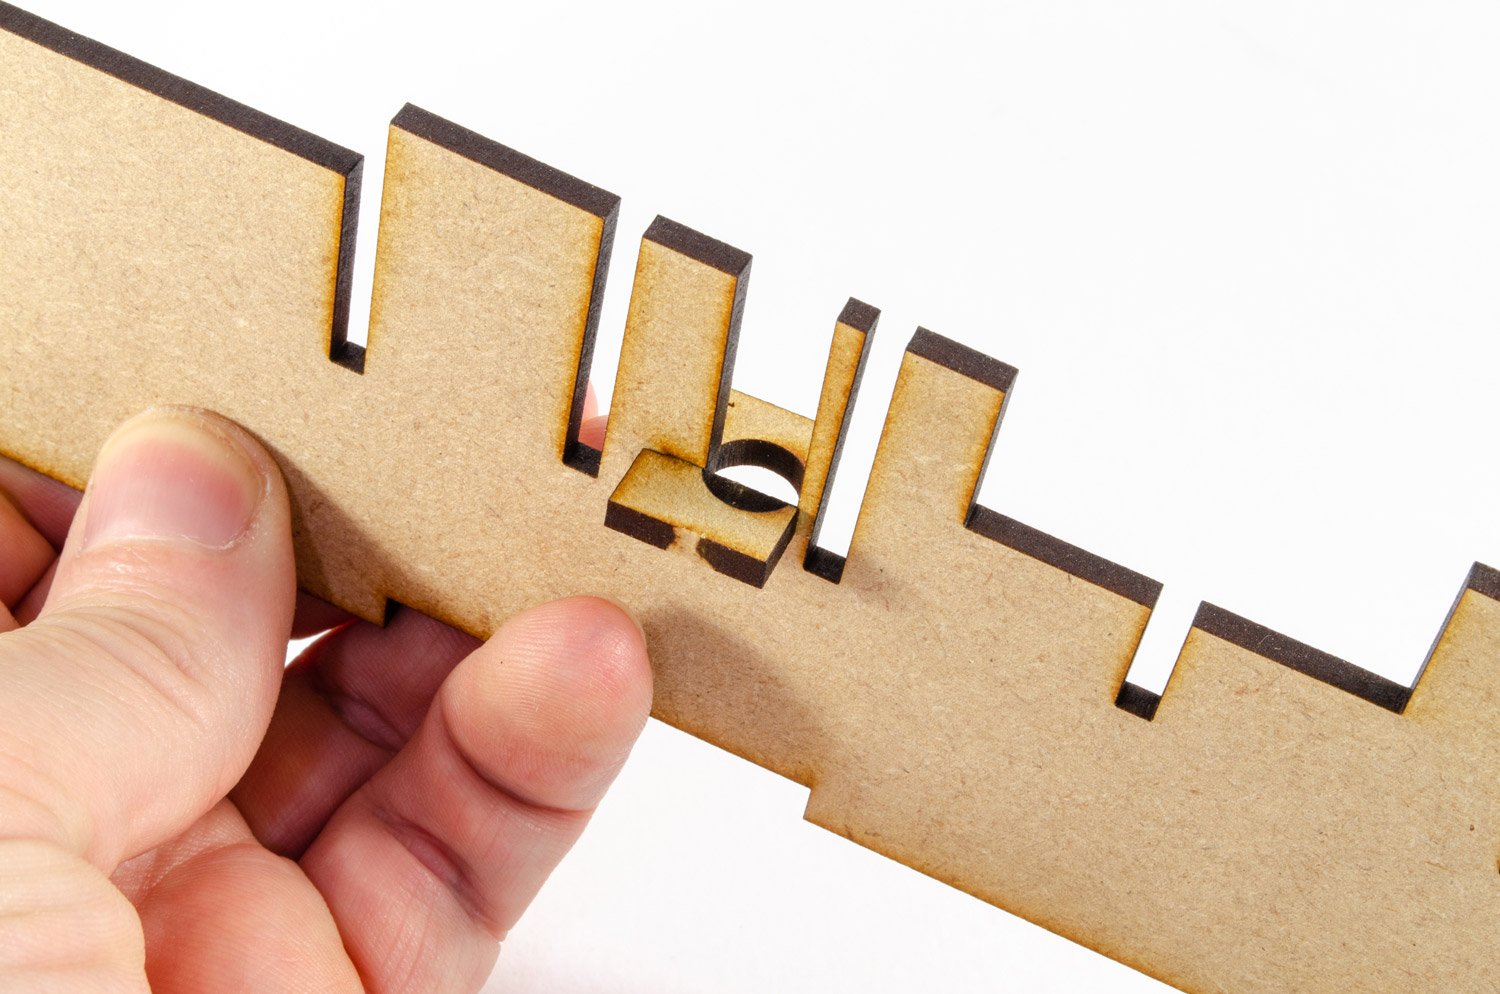
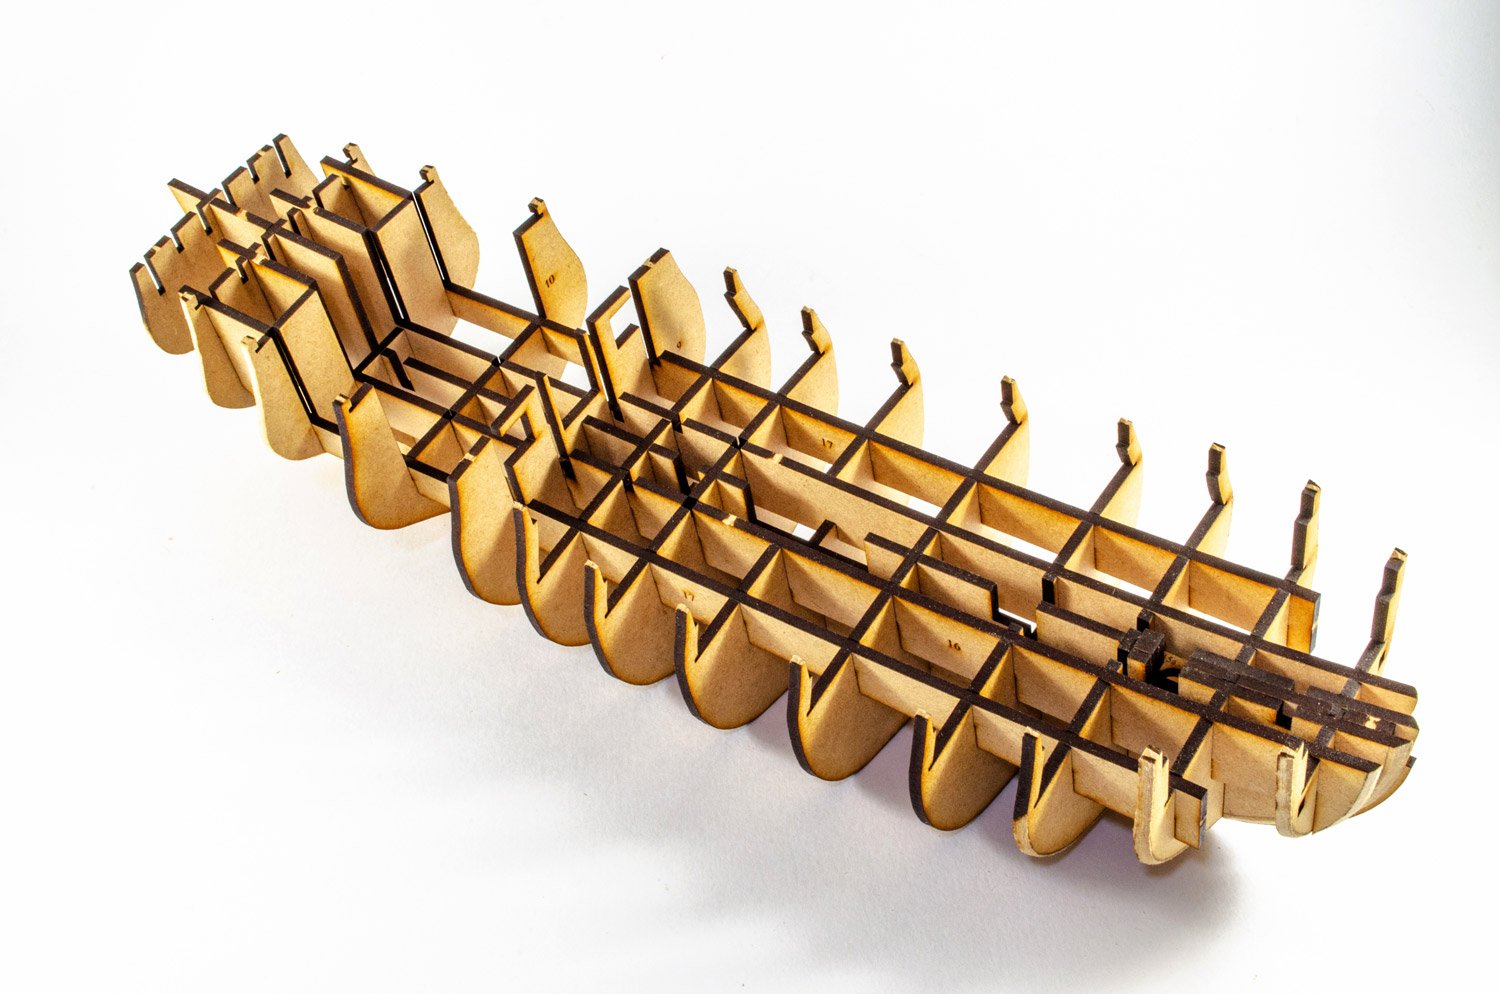
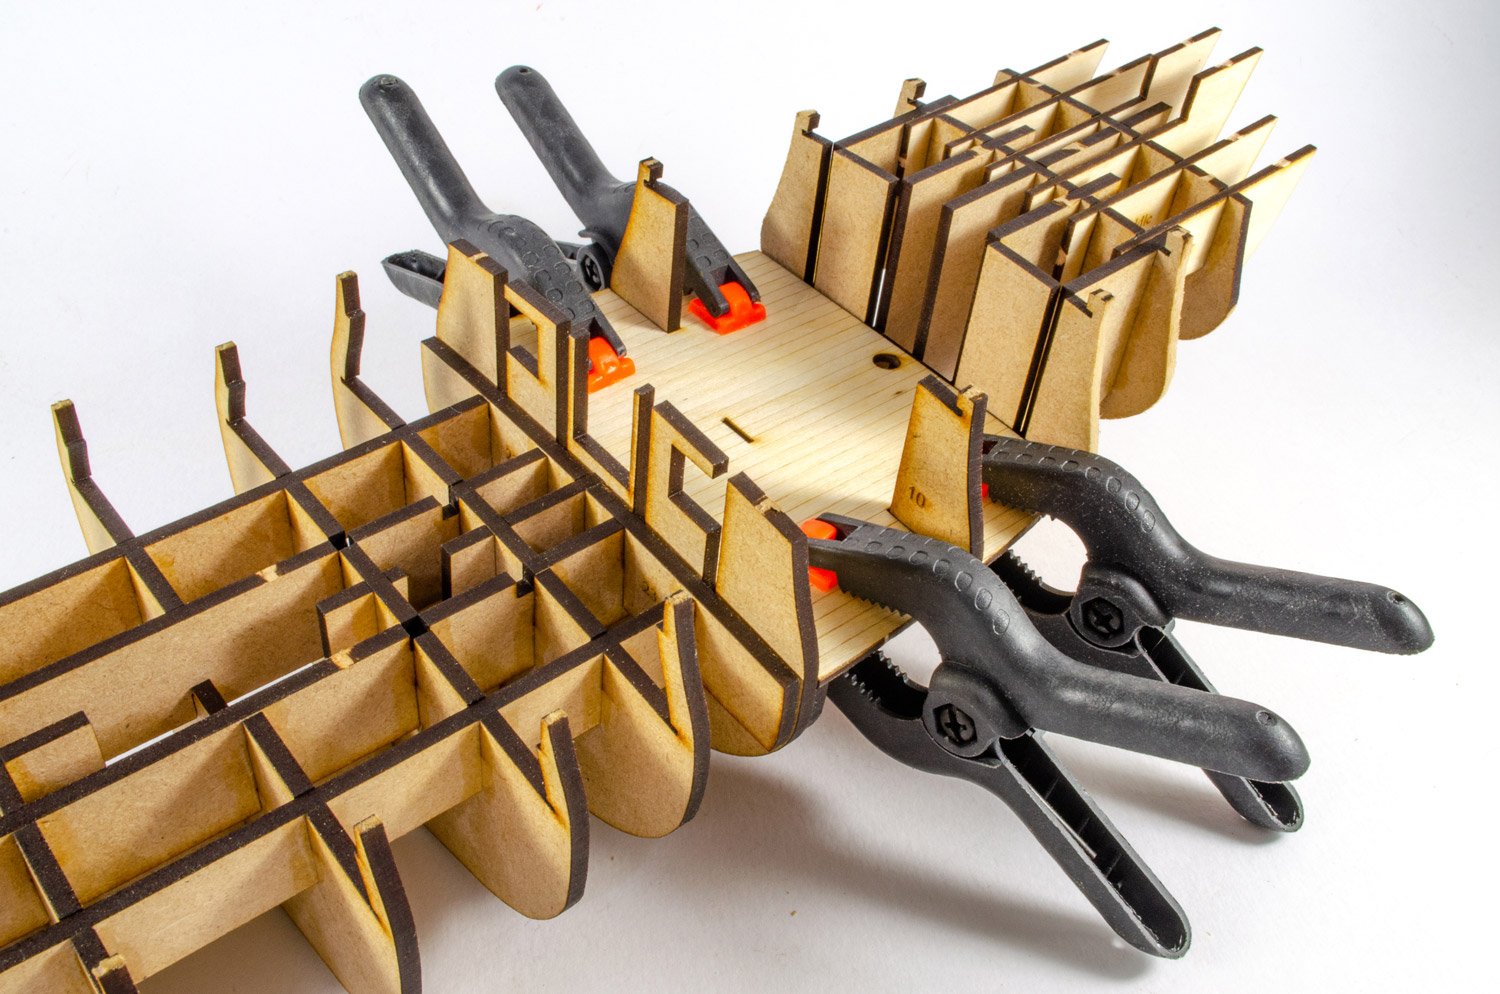
Now, those longitudinal beams are now added, starting with the inner two...

...and followed by the outer two:


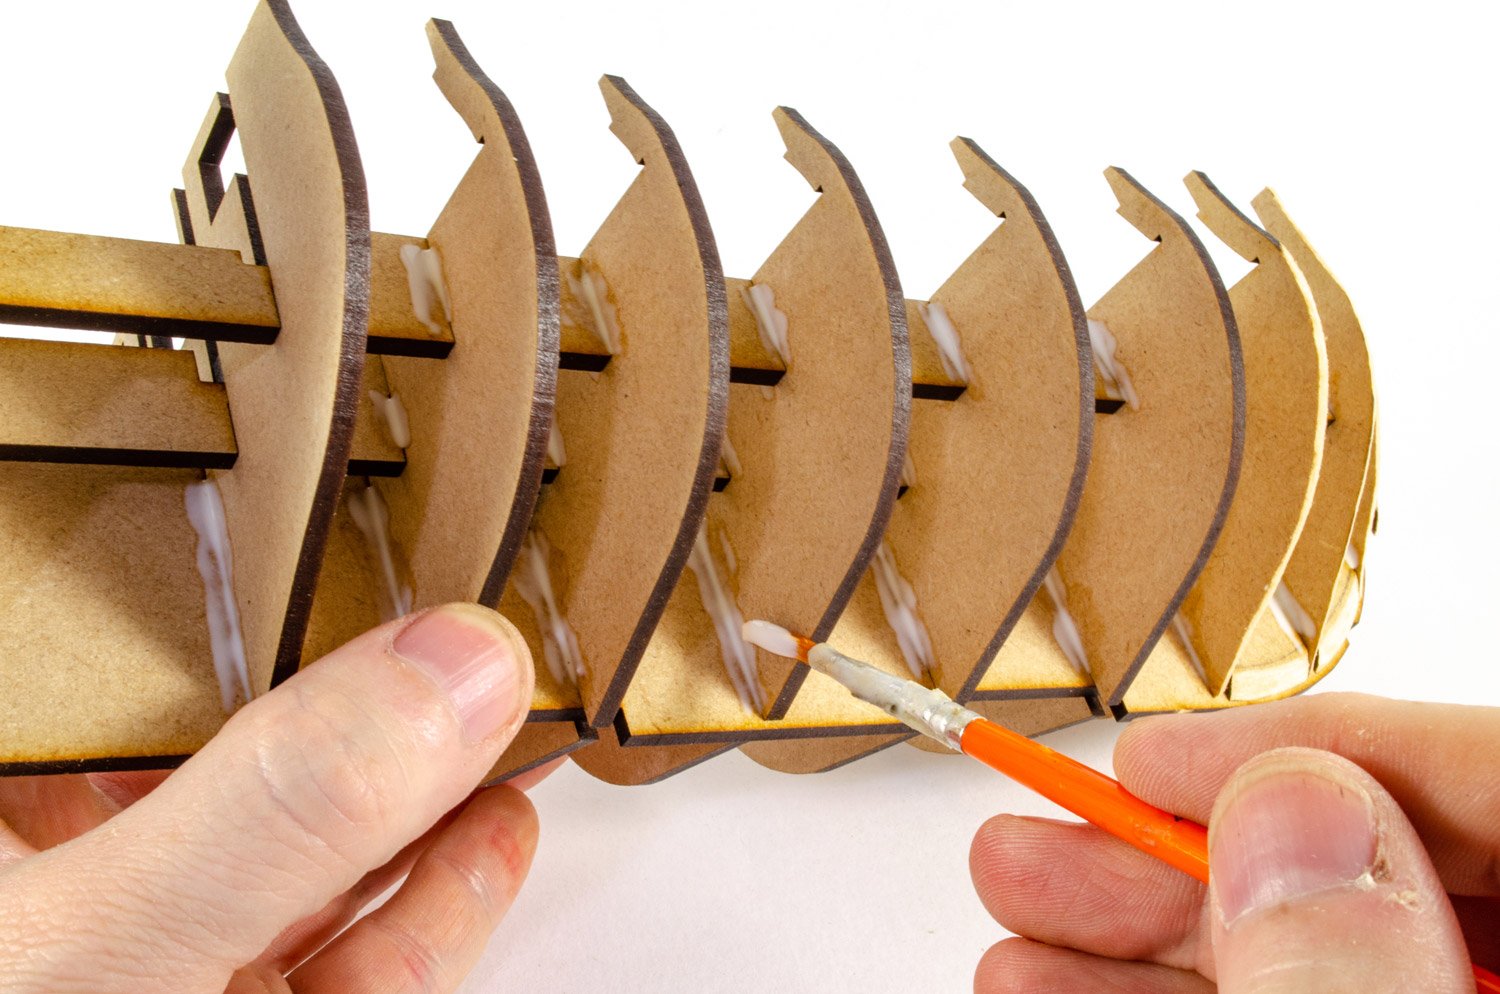
At this stage, I painted wood glue into the joints and left the whole lot for a few hours to cure. I prefer this method when there are so many slots and such perfect tolerances.

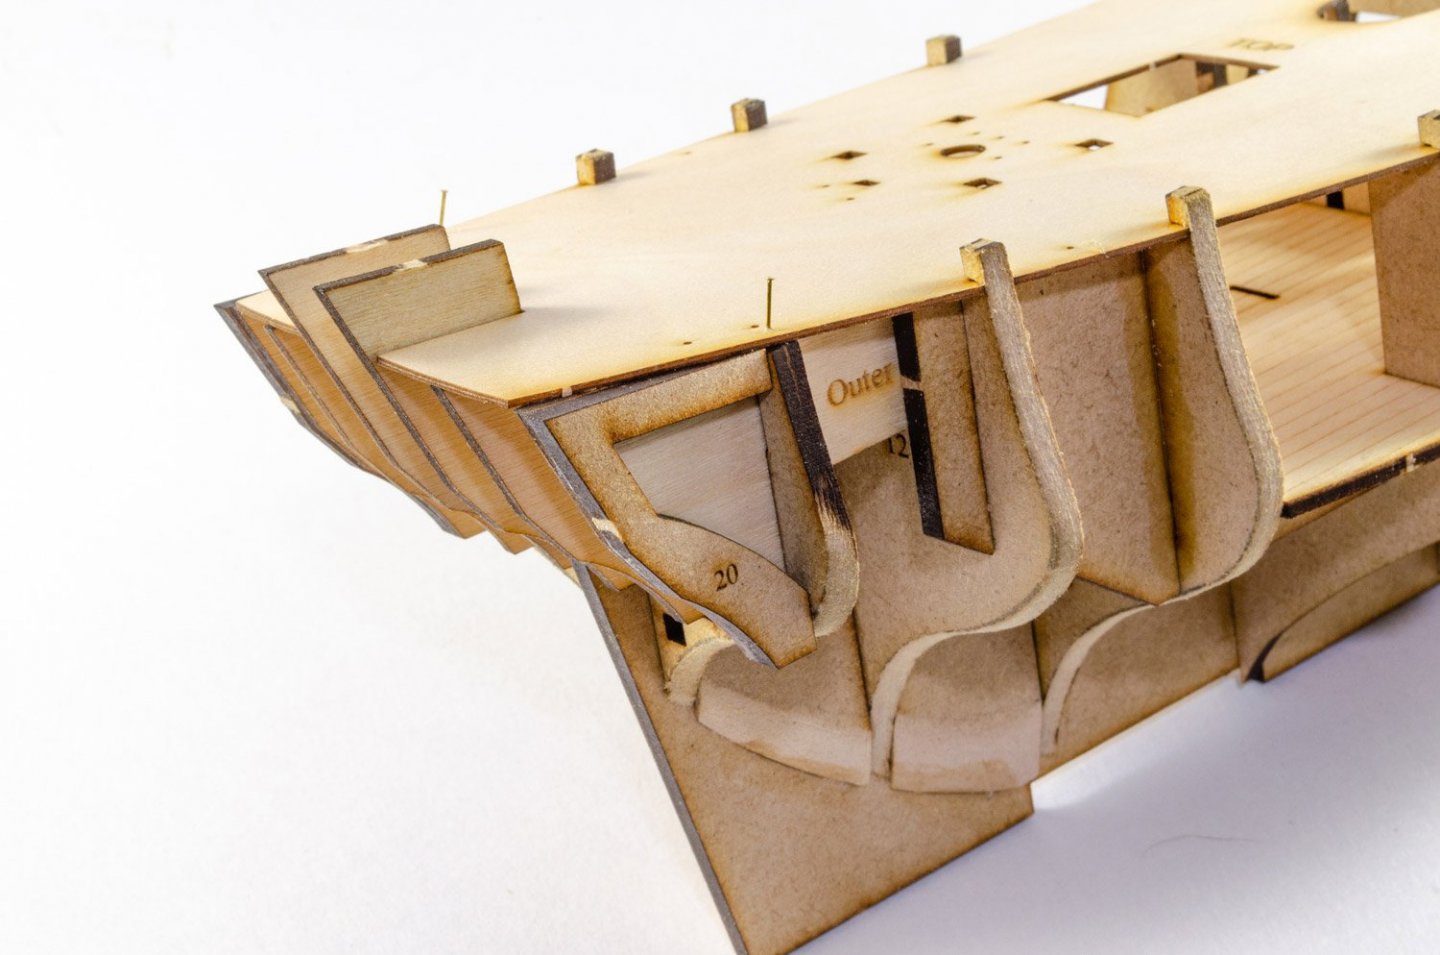
Construction of the stern gallery areas starts with slotting in three frames, easily recognised with their engraved position ID. These just slot straight into position as shown, and are then glued.

Four extra pieces are added just before and after the midships cabin area. These are to support the floor/deck at either side. The cabin floor is also fitted and clamped until set.
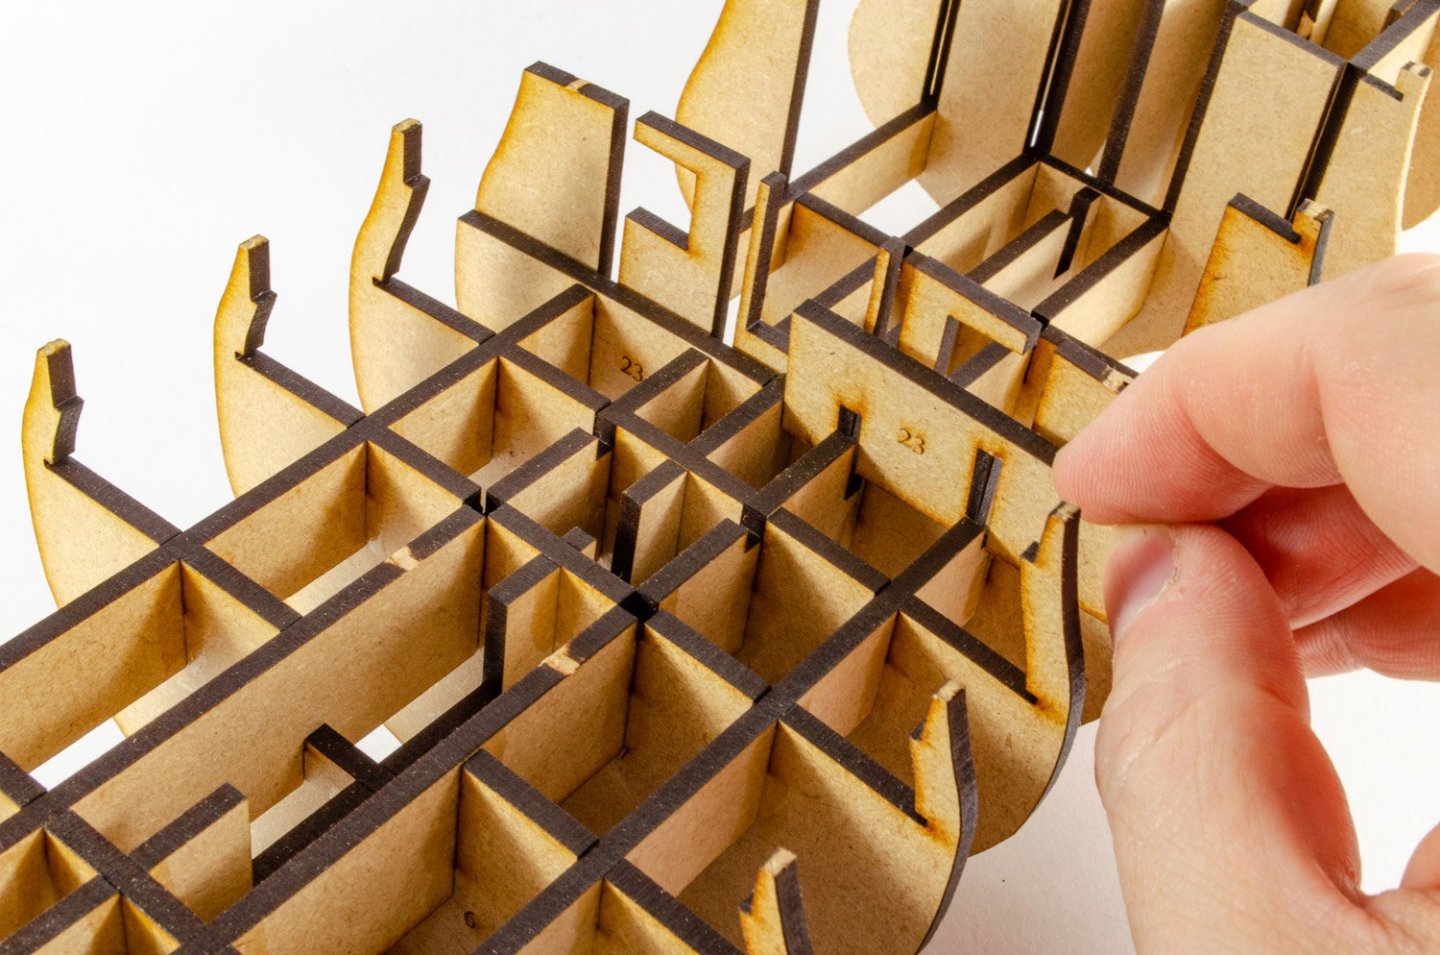


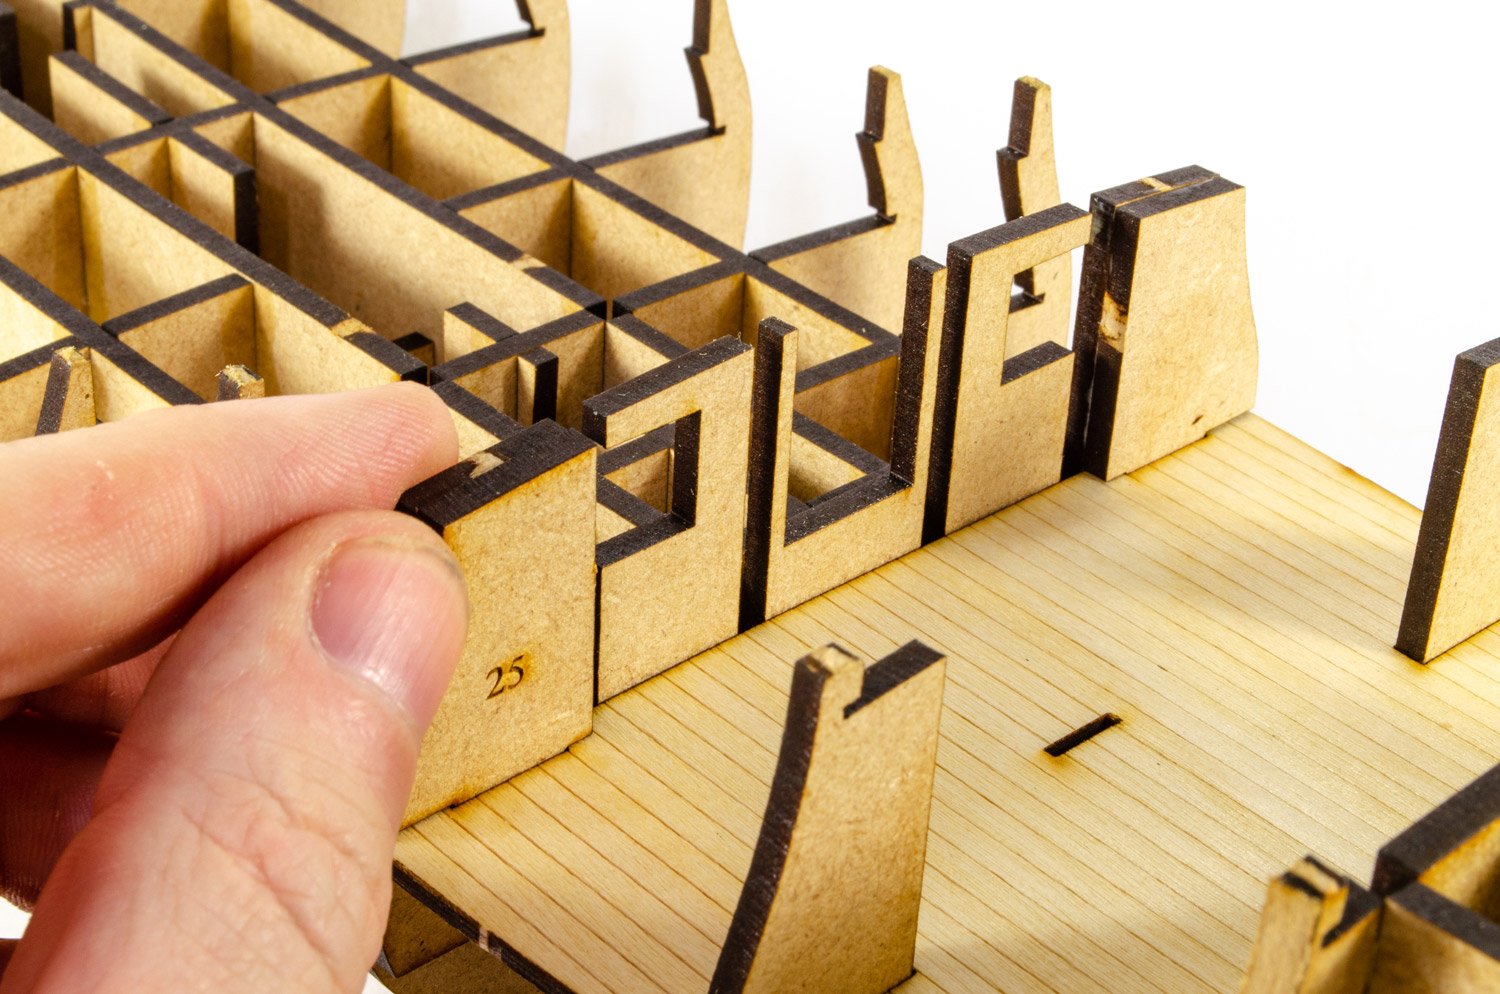
Both the main and upper false decks are now glued into place. These are 0.8mm ply and you need to bend them and allow them to fit into the slots in the bulkhead tabs. This holds the deck parts remarkably flat across all bulkheads. As an insurance policy, I also add a couple of brass pins to the forward upper deck as there are no slots there to hold in position.

One nice little touch are the temporary beams which now slot into the bulkhead tabs. These are to give everything some real rigidity whilst the hull is worked on from this point. Afterwards, the beams and tabs will be broken out and discarded.
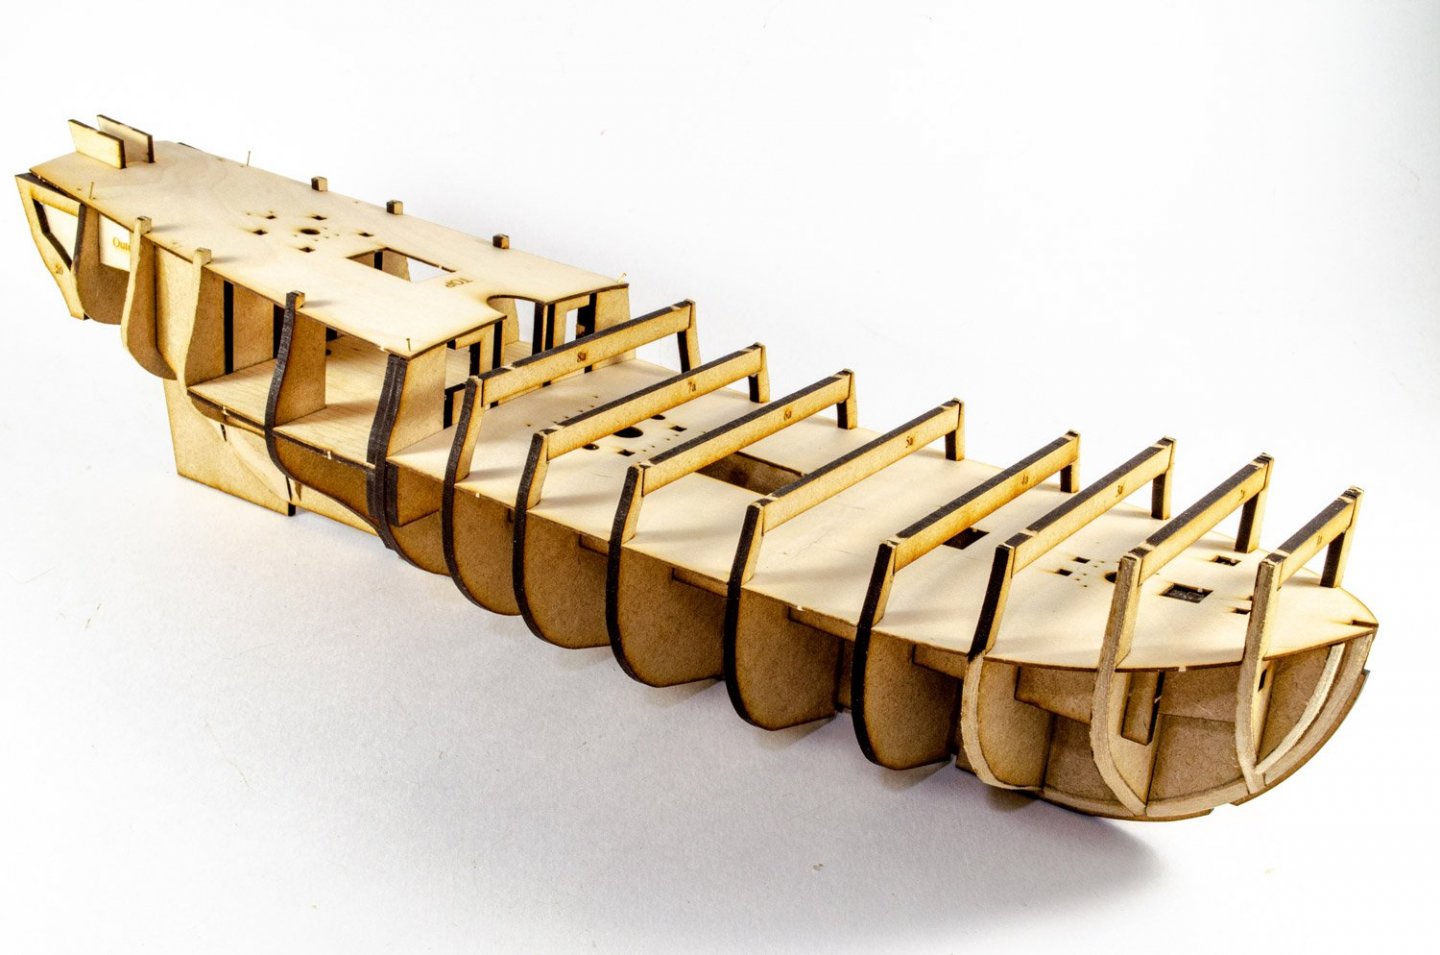
A few extra pieces at the stern, but not quite all. The model is now setting before I start to sand the hull to shape and add the ply bulwarks.
More soon...
-


HMS Flirt 1772 by drumgerry - Vanguard Models - 1:64 Scale.
in - Kit build logs for subjects built from 1751 - 1800
Posted
I'm doing the same thing for the Duchess of Kingston at the moment.
I promise to get the bulkheads numbered properly in the manual. 🤣