


James H
-
Posts
5,624 -
Joined
-
Last visited
Content Type
Profiles
Forums
Gallery
Events
Posts posted by James H
-
-
-
1 minute ago, dkuehn said:
Any update on this one? You get the correct parts yet?
I'm quite excited about this kit, so I can't help but ask. 😀
I know what you mean.
Still waiting for the replacement parts yet, and the discussion as to what timber is being used as the stuff I was supplied with with below par, and Amati are aware of this.
At the moment, Amati are prioritising Bismarck, which should be slated for release in November, but the current virus situation means that could change, affecting the replacement of Vic parts.
I'm still confident that they'll resolve this reasonably soon, but I can't see this being until New Year now.
- Old Collingwood, DelF, VTHokiEE and 9 others
-
 12
12
-
1 hour ago, Oboship said:
Nicely expressed...
I think Kevin's answer is a good idea. From what I saw in all the threads Chris' wife sincerely supports his passion and deserves a decent dinner or two (once this Covid issue is over). Thanks to both of you!
Cute dog, too!
All the best
UweChan is the one who calls the shots! Chris quakes when he asks her to make up the kits. 🤣
-
25 minutes ago, EKE said:
While I finish up the planking, I need to make some decisions about painting the hull, and I’m hoping to solicit some advice.
My plan is to sand and fill the hull surface, mark the waterline, and to paint up to the waterline with a matte red oxide spray to simulate the bottom paint. All good there. But I want to paint the hull above the waterline black, in conformance with nearly all of the photos I’ve seen of Zulus. My first thought was to simply use a matte black acrylic paint like the Vallejo acrylics I have. But looking at vintage photos, it looks to me that the topsides paint on the Zulus was most often glossy, or at least a satin finish. I’m having trouble locating a good satin black paint to use. Can anyone recommend one? I suppose another option would be to use the Vallejo black, and then topcoat it with a satin sealer of some kind, to give it a bit of sheen. I’d love to hear any advice you all may have on how to proceed. My plan is to do the bottom and topsides as described, and then to paint the white boot stripe last.
Another question, this one for James... in your build log, you mentioned after painting that you coated the entire hull with a matte clear varnish. Do you recommend putting the varnish over the painted surfaces, including the red bottom paint, or just the bare wood surfaces?
Thanks to all for any advice!
-E
First, for that black paint with a satin finish, I highly recommend Games Workshop's Chaos Black aerosol. Superb coverage will prob just have that correct finish you want. I would maybe apply some varnish to those areas before spraying it.
https://www.waylandgames.co.uk/citadel-sprays-and-aerosols/25619-chaos-black-spray
For the varnish, yes I apply over the whole paintwork/timber to unify the finish. Of course, you may want to keep the black area in satin, so you'd need to mask accordingly.
-
1 hour ago, bruce d said:
... and my CAF longboat build will be here soon. Same materials, will be interesting to compare notes. Mine's fiddly, how's yours?
Looks very. There must be a technique........maybe plank soaking and clingfilm over the resin mould.
I'm up for a challenge 😉
-
-
For a first time ship modeller, I envy your discipline and results!
Beautiful work, and soon you'll be on the real fun stuff.
- BobG, EKE and chris watton
-
3
-
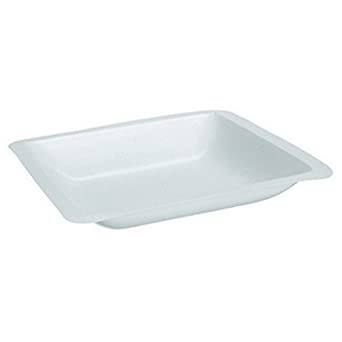
I use a toothpick (sharpened) and a disposable weighing boat. Just pop a spot into the boat and use the pick to apply.
Sharpen the pick as necessary.
No need for fancy tools.
- modeller_masa, BobG, Nunnehi (Don) and 5 others
-
8
-
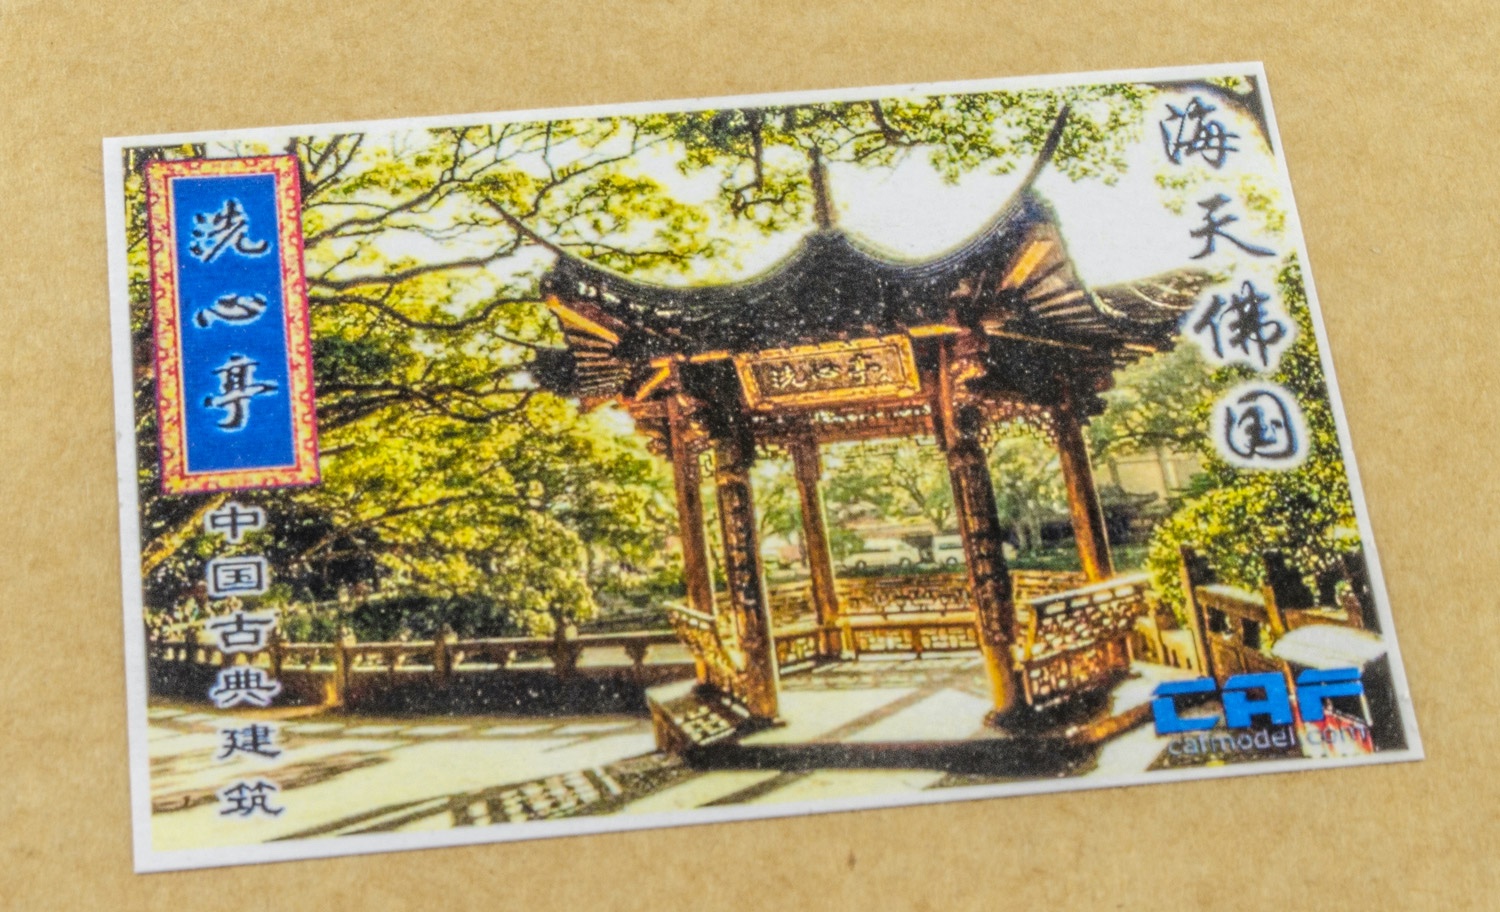
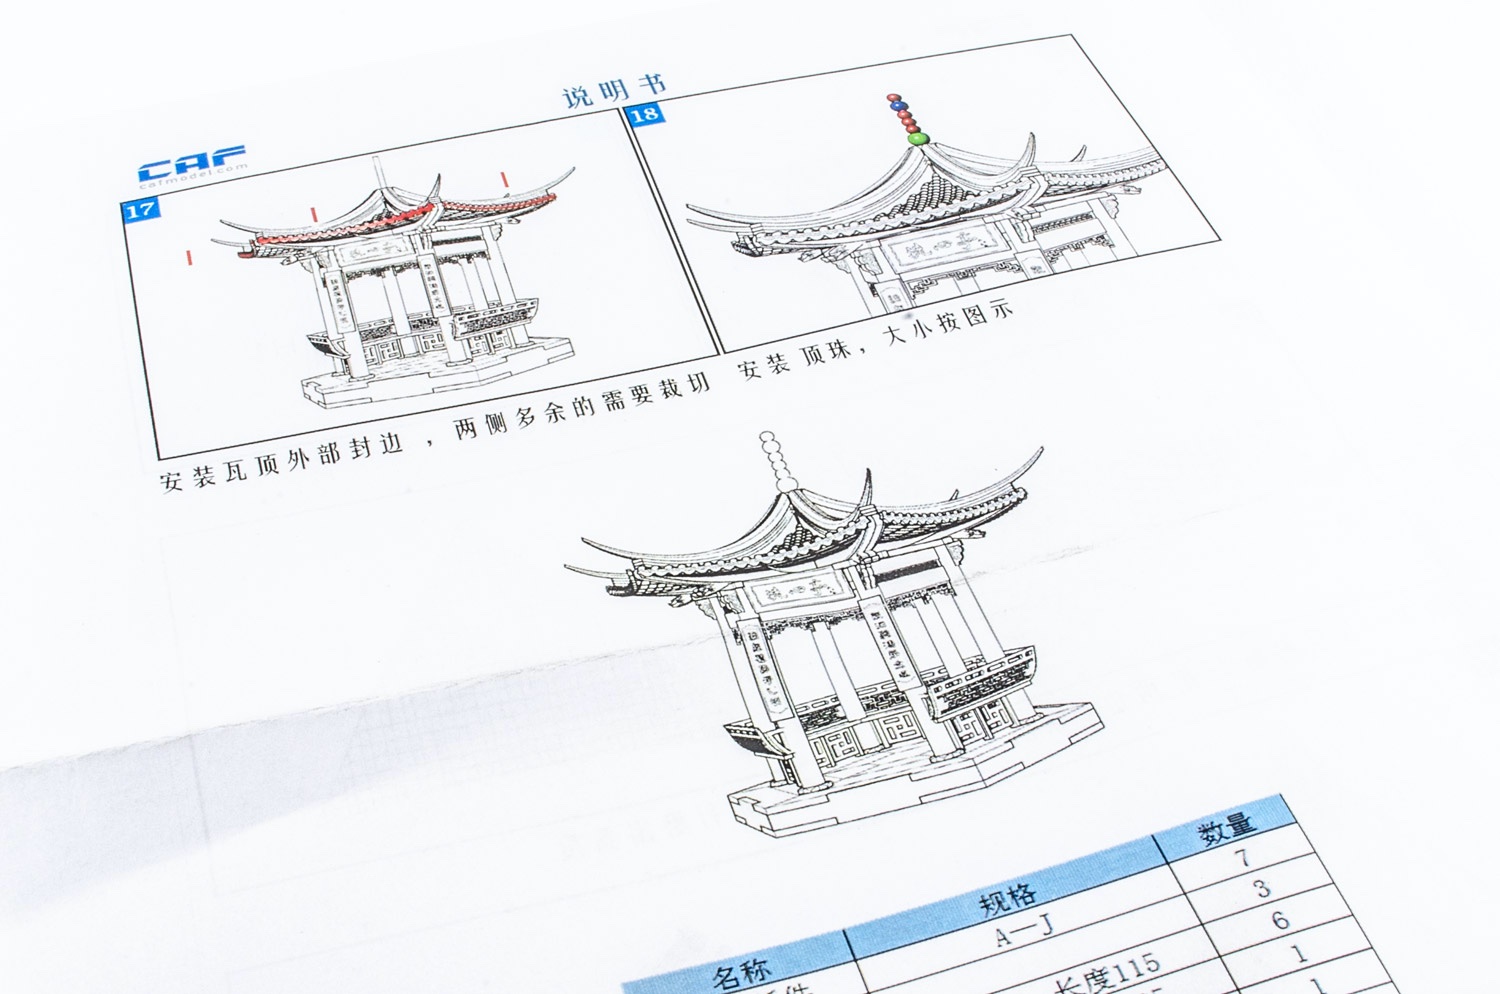
Ancient Chinese architecture XiXing Pavilion
CAF Model
Available from CAF Model for $32.00USD plus shipping
The kit
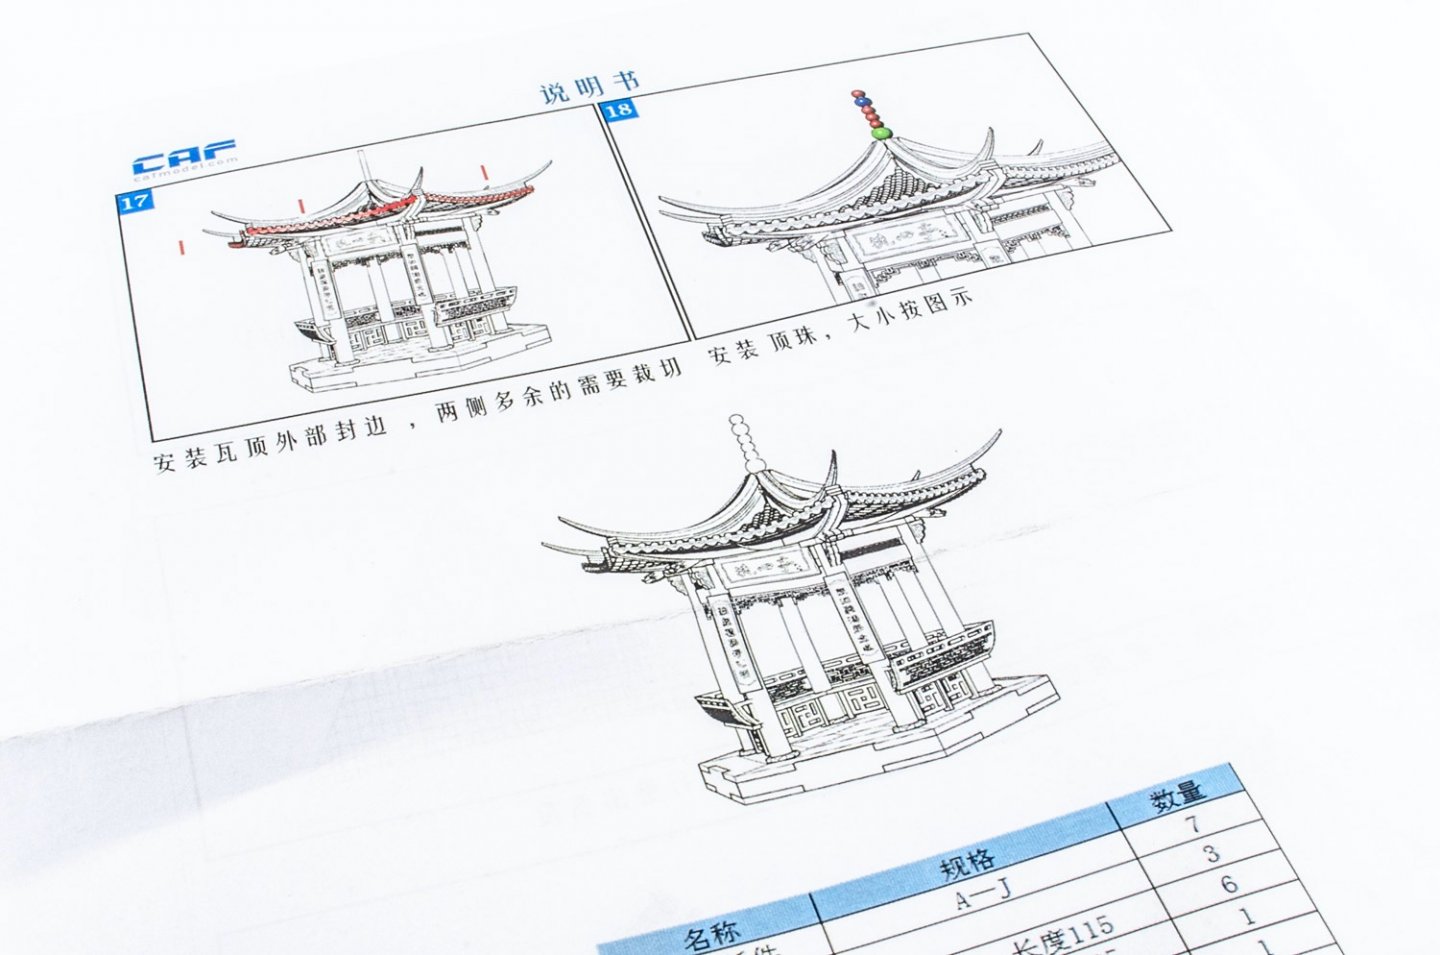
I love architecture from the Far East, having visited quite a lot of it when both times I've visited Japan. Some of the structures in old Kyoto are stunning, as they are in Osaka and Tokyo. I could lose myself in them for hours on end. Sometimes it's hard to believe some of these are around 1000yrs old. The same applies to China. I've always had a hankering to visit and see the cultural side of things. This little ancient Pavilion kit from XiXing (presumably in the Guangdong Province of China) is just the sort of thing that really appeals to me. I'm not sure of the actual scale, so here's a drawing of the completed model, with dimension: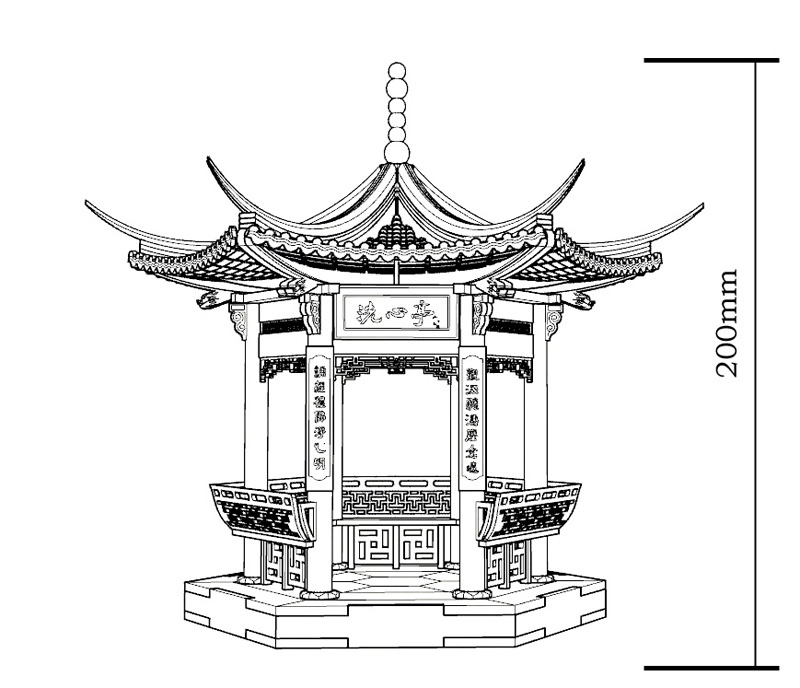
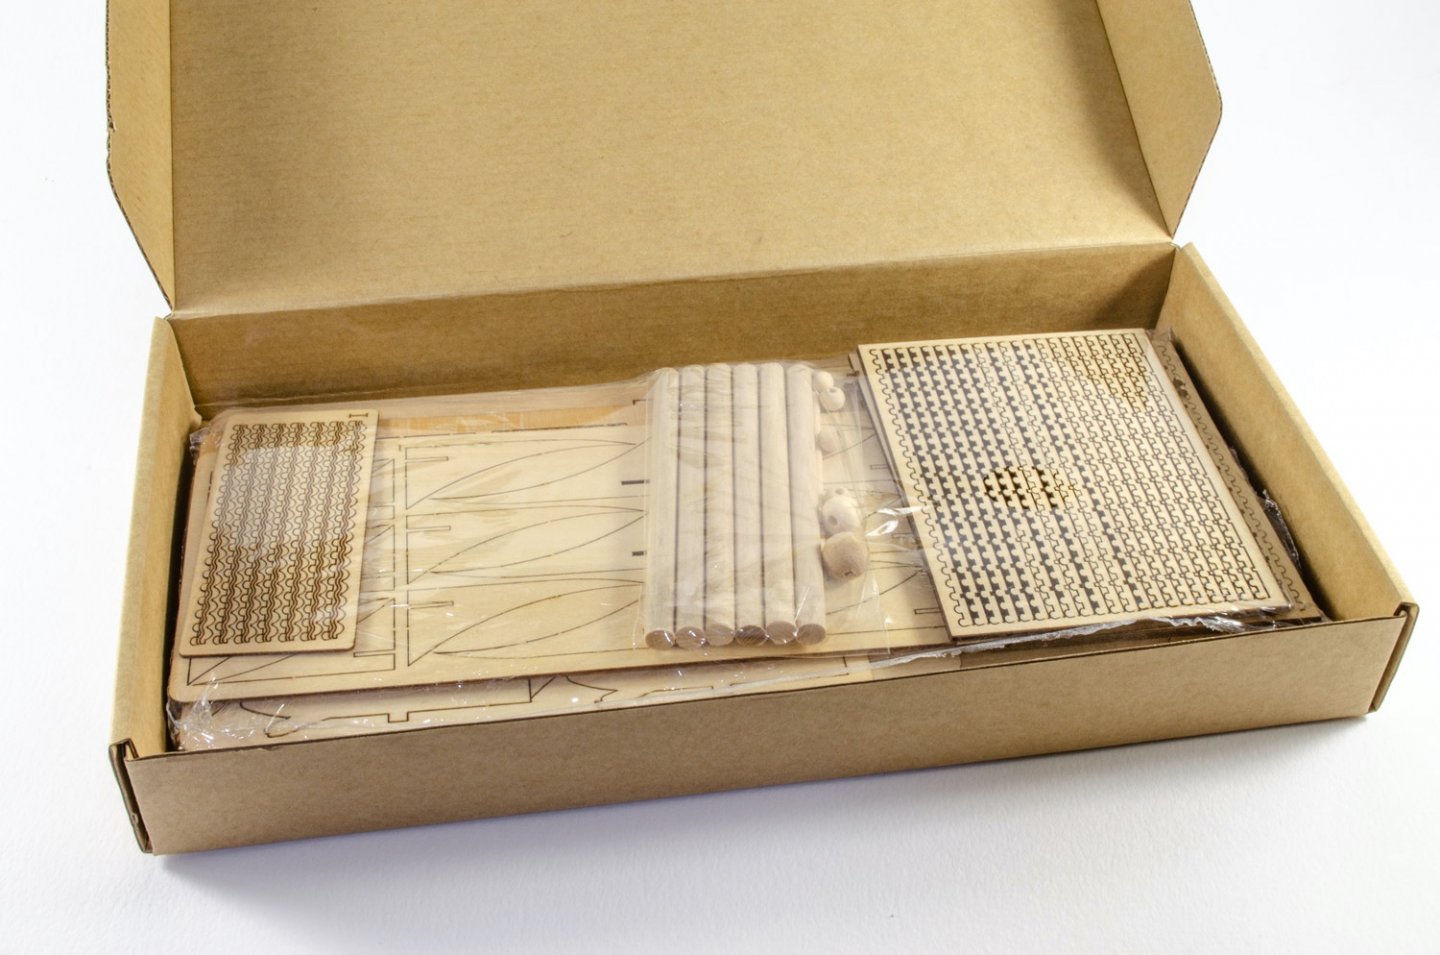
Th kit itself is packaged into a small box measuring 33xm x 17cm x 4cm. Inside, thirteen sheets of very nice quality, laser-cut/engraved ply, are sealed in a shrink wrap cellophane covering, along with a bag containing dowel and wooden balls, and two sheets of instructions. A small label is applied to the box lid to show what the box contains, and a piece of packing foam stops everything from rattling around in transit.


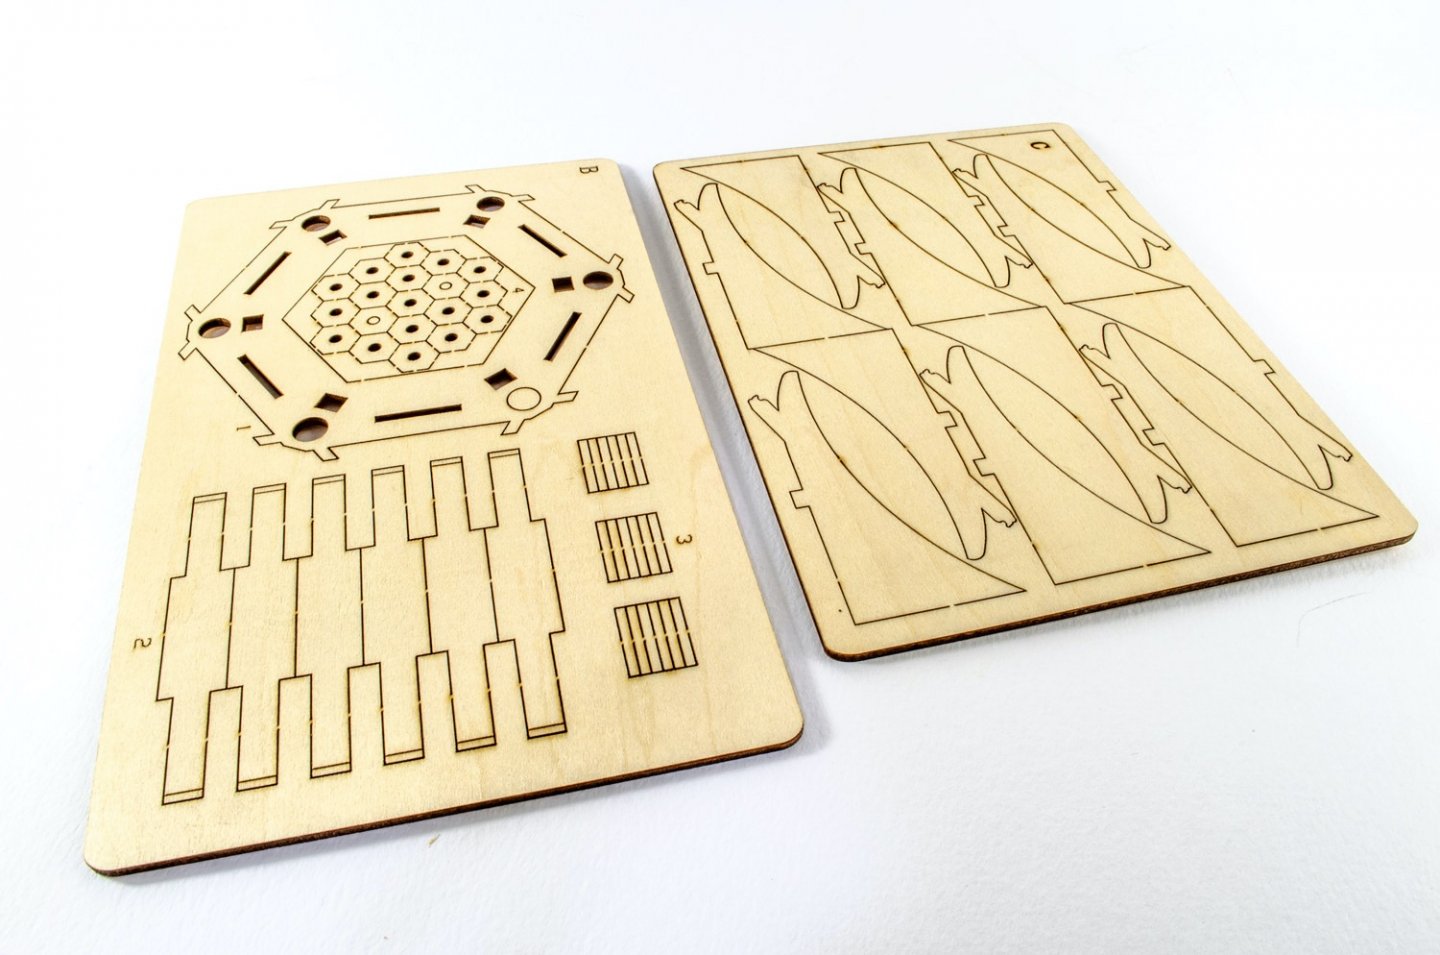
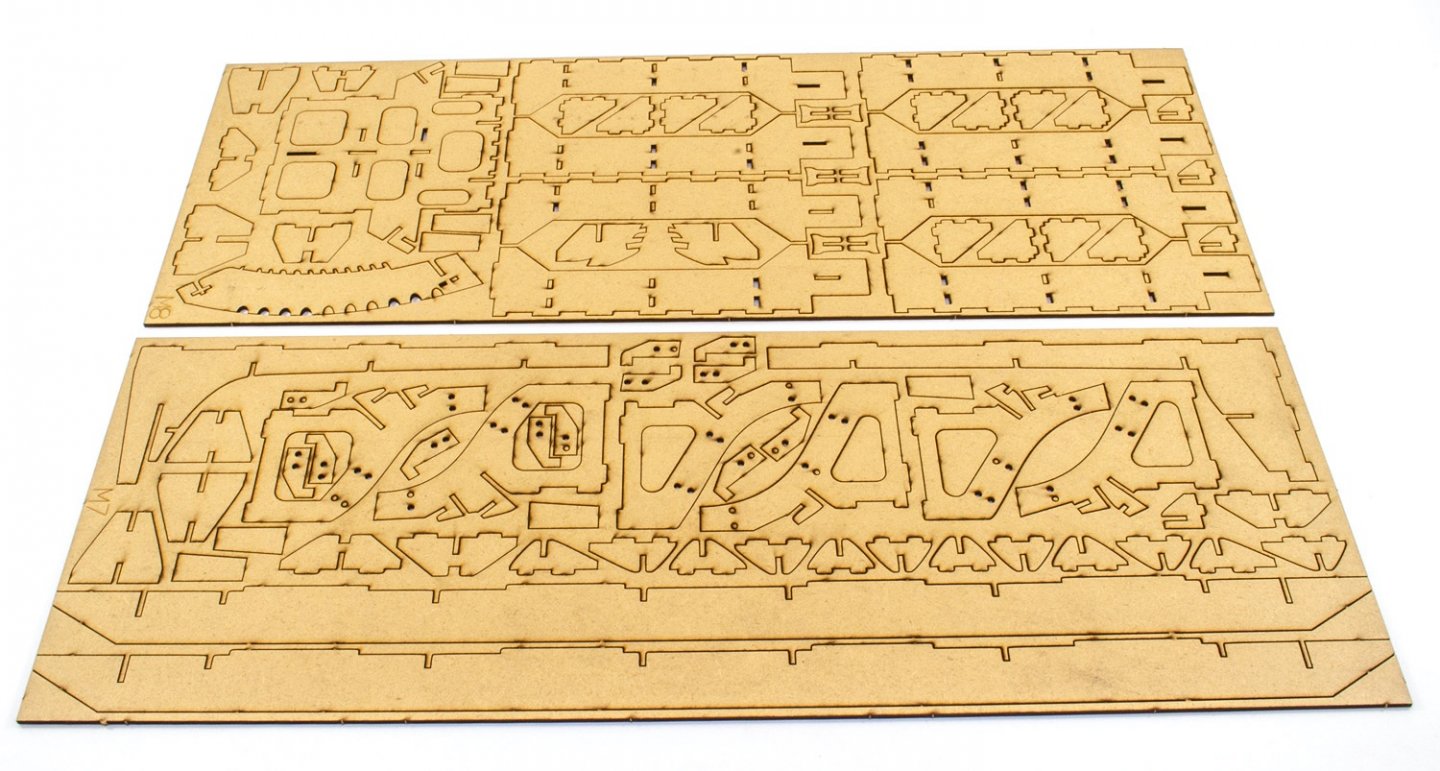
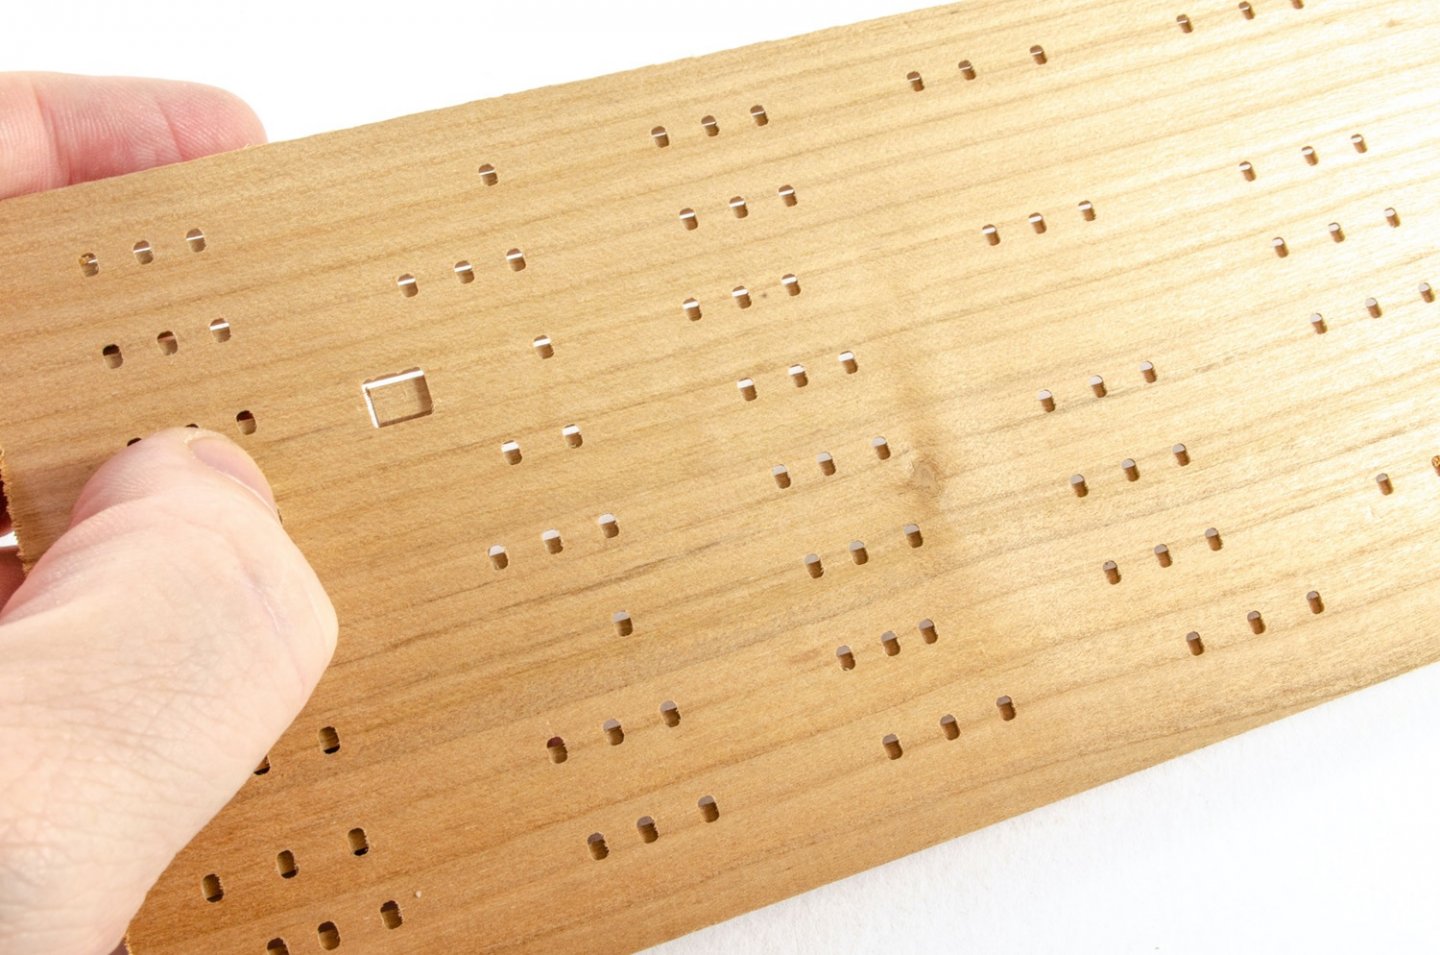
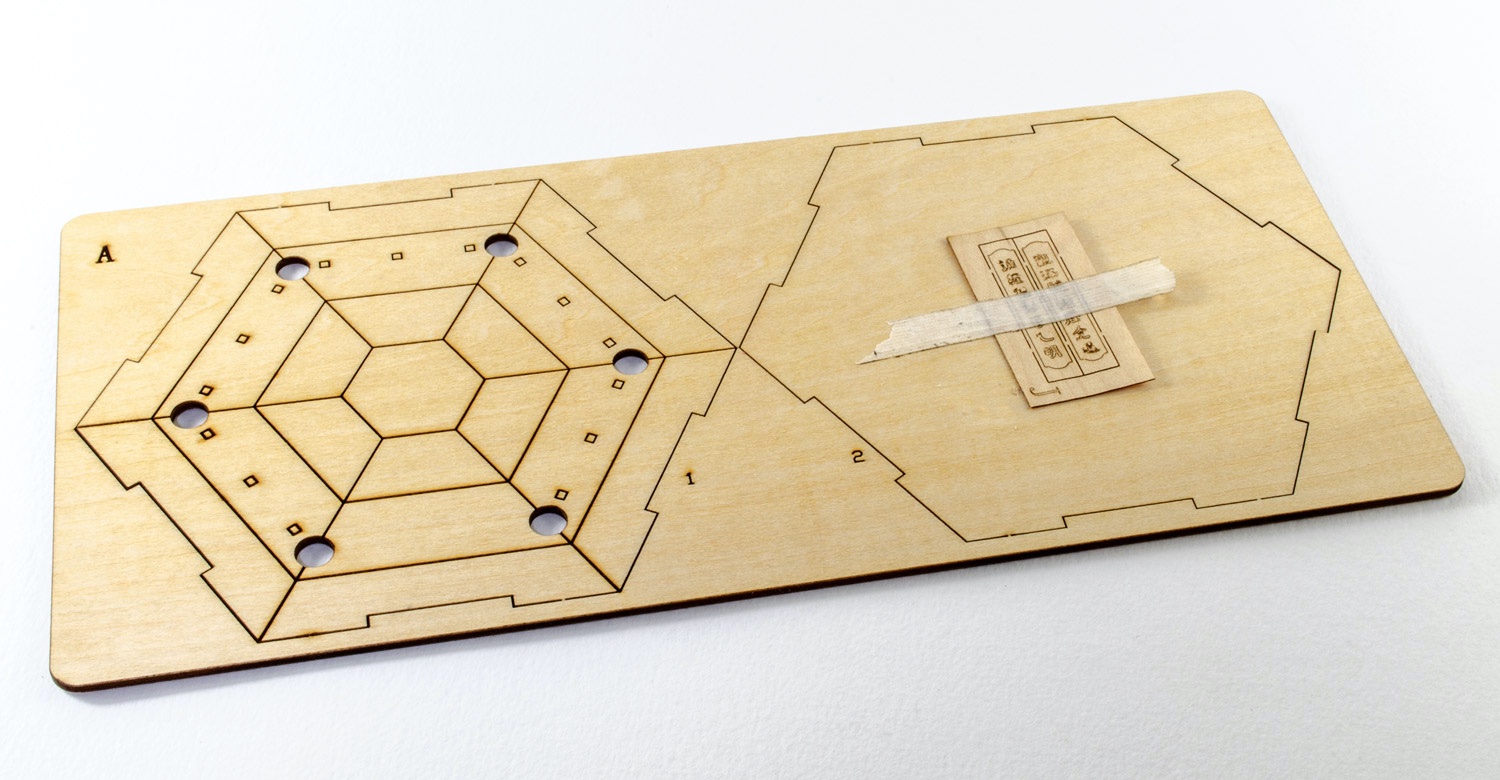
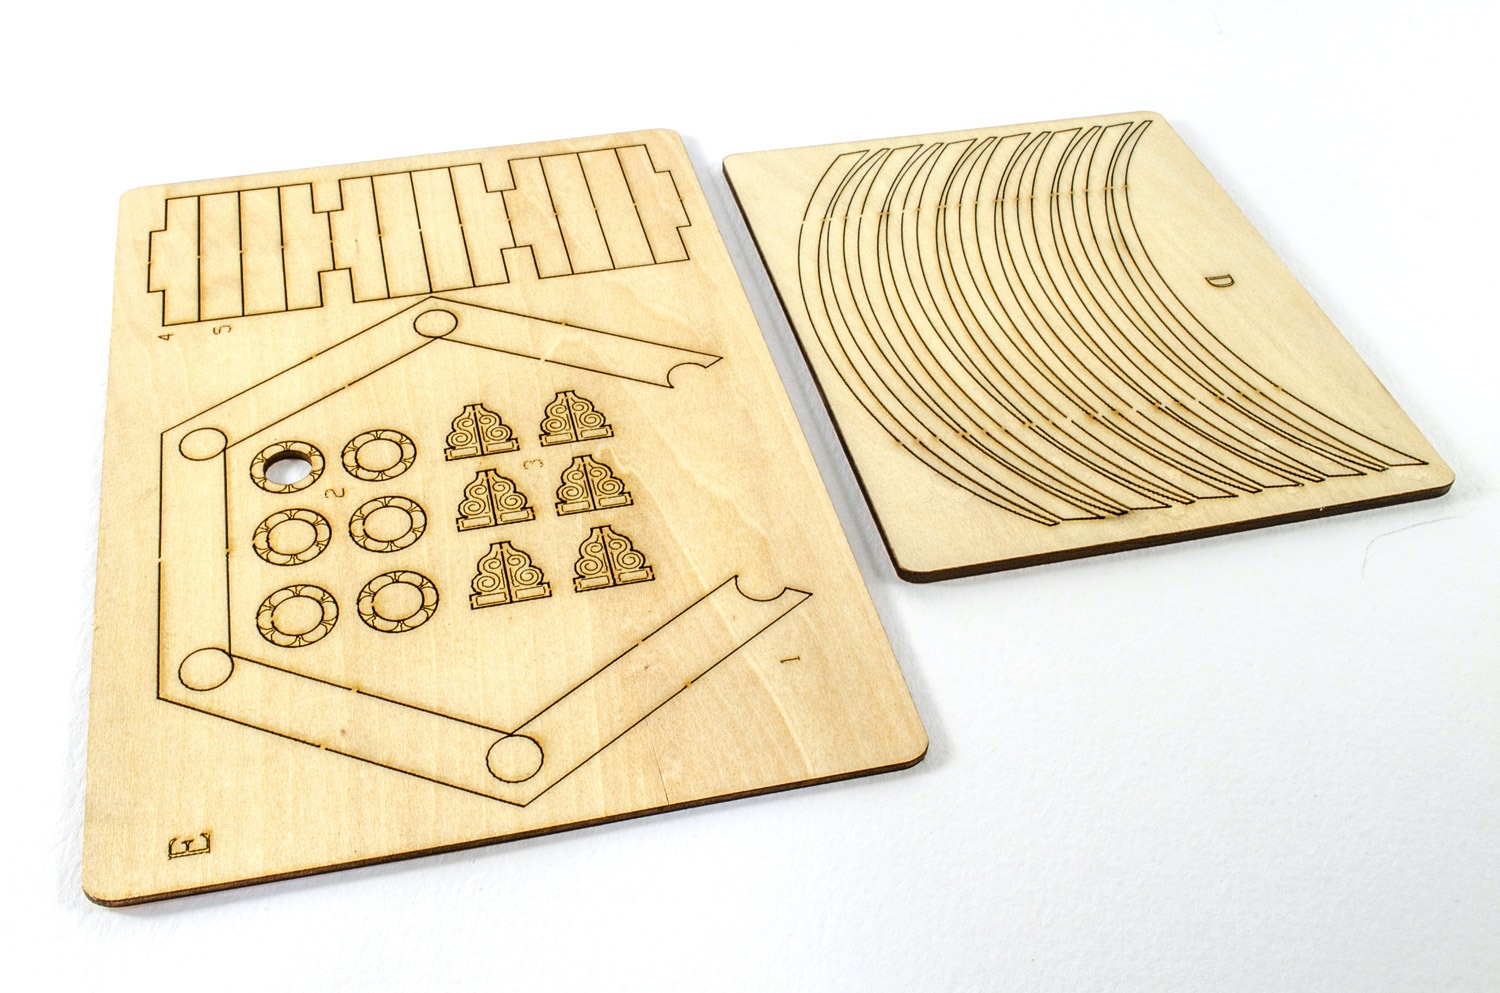
Construction starts with the large hexagonal base. You can see the two principle parts for this here and that the wooden pillars will be easy to locate because of the pre-cut holes. That should remove probably the main cause of possible error in the main structure, especially as there are infill walls and benching that need to precisely sit between the pillars. All parts could possibly benefit from a light coat of varnish and a little sanding to protect them from paint soak if you decide to add some colour to your finished Pavilion.
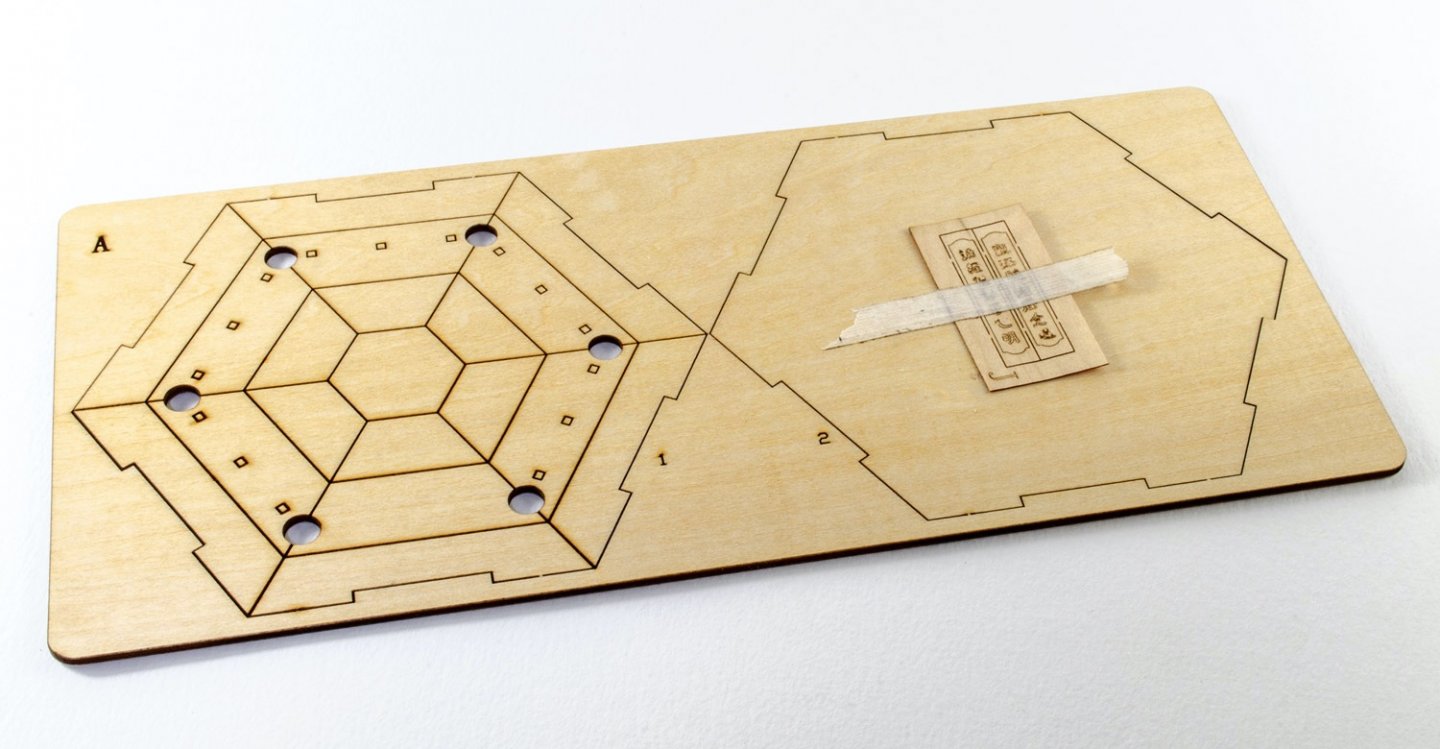
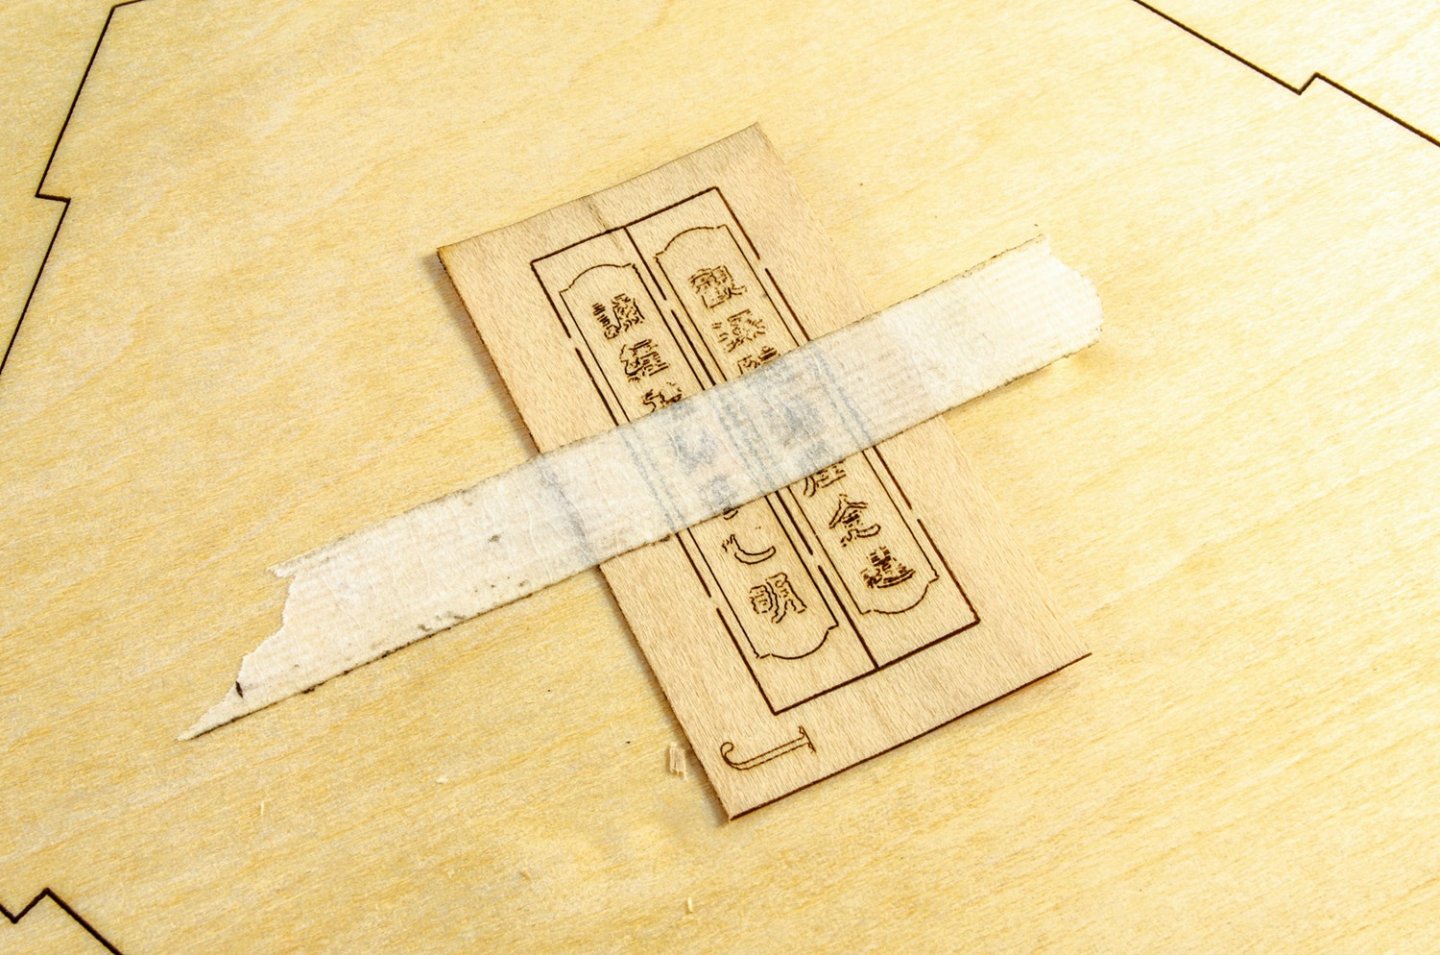
Tacked on top of the lower base are the signs, laser etched and cut in very thin veneer. These will wrap around the pillars on the entrance to the pavilion.
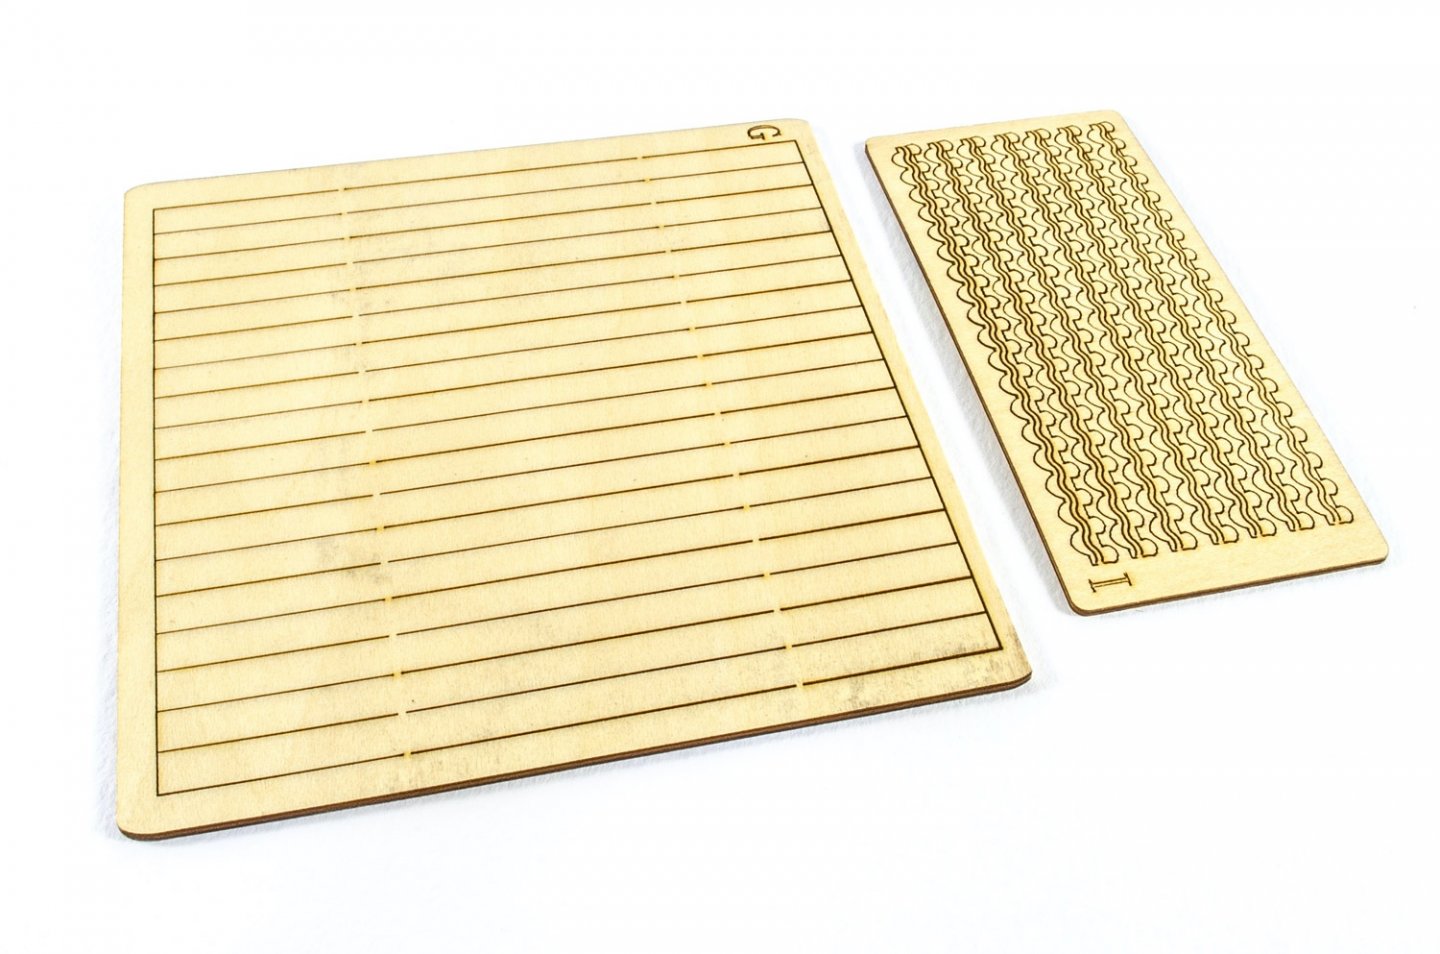
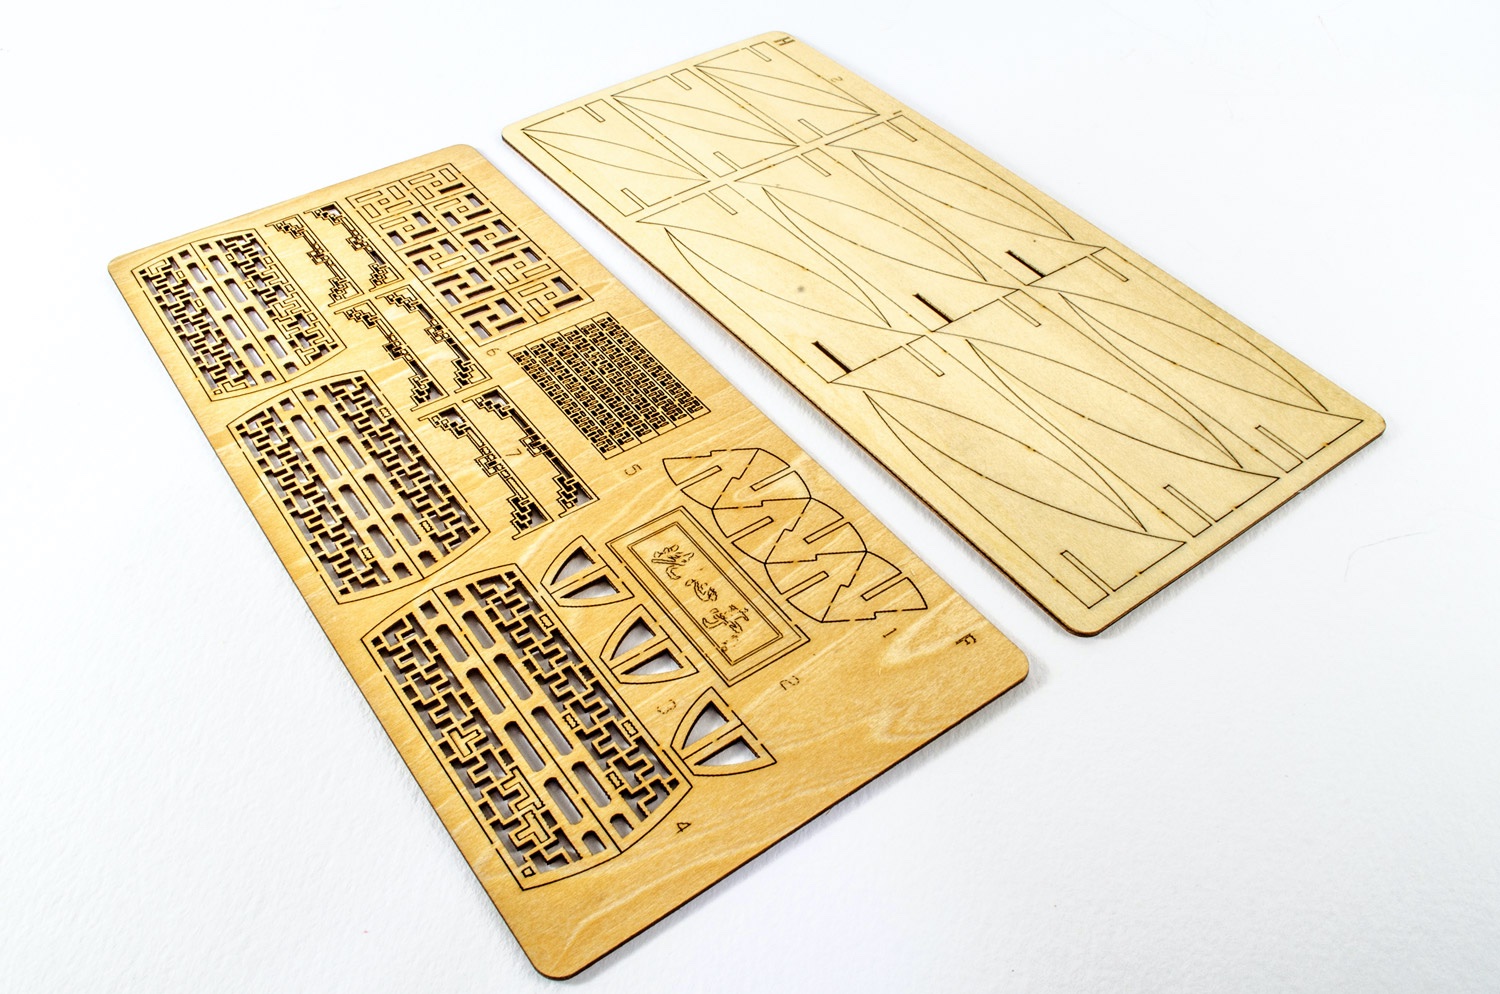
On top of your pillars will sit the crown of the pavilion, before the roof is fitted. That is the other hexagonal part. This can be seen here, with the corresponding holes for the pillars tops. The hexagonal parts within it are for the 'spire' section, whilst the '3' parts are the infills between the wall sections which skirt the bottom of the pavilion. Between the base sections, you will need to add the side parts, seen here. There is an engraved line on them indicating the bevel needed where the walls meet. The other sheet contains the roof frame parts.
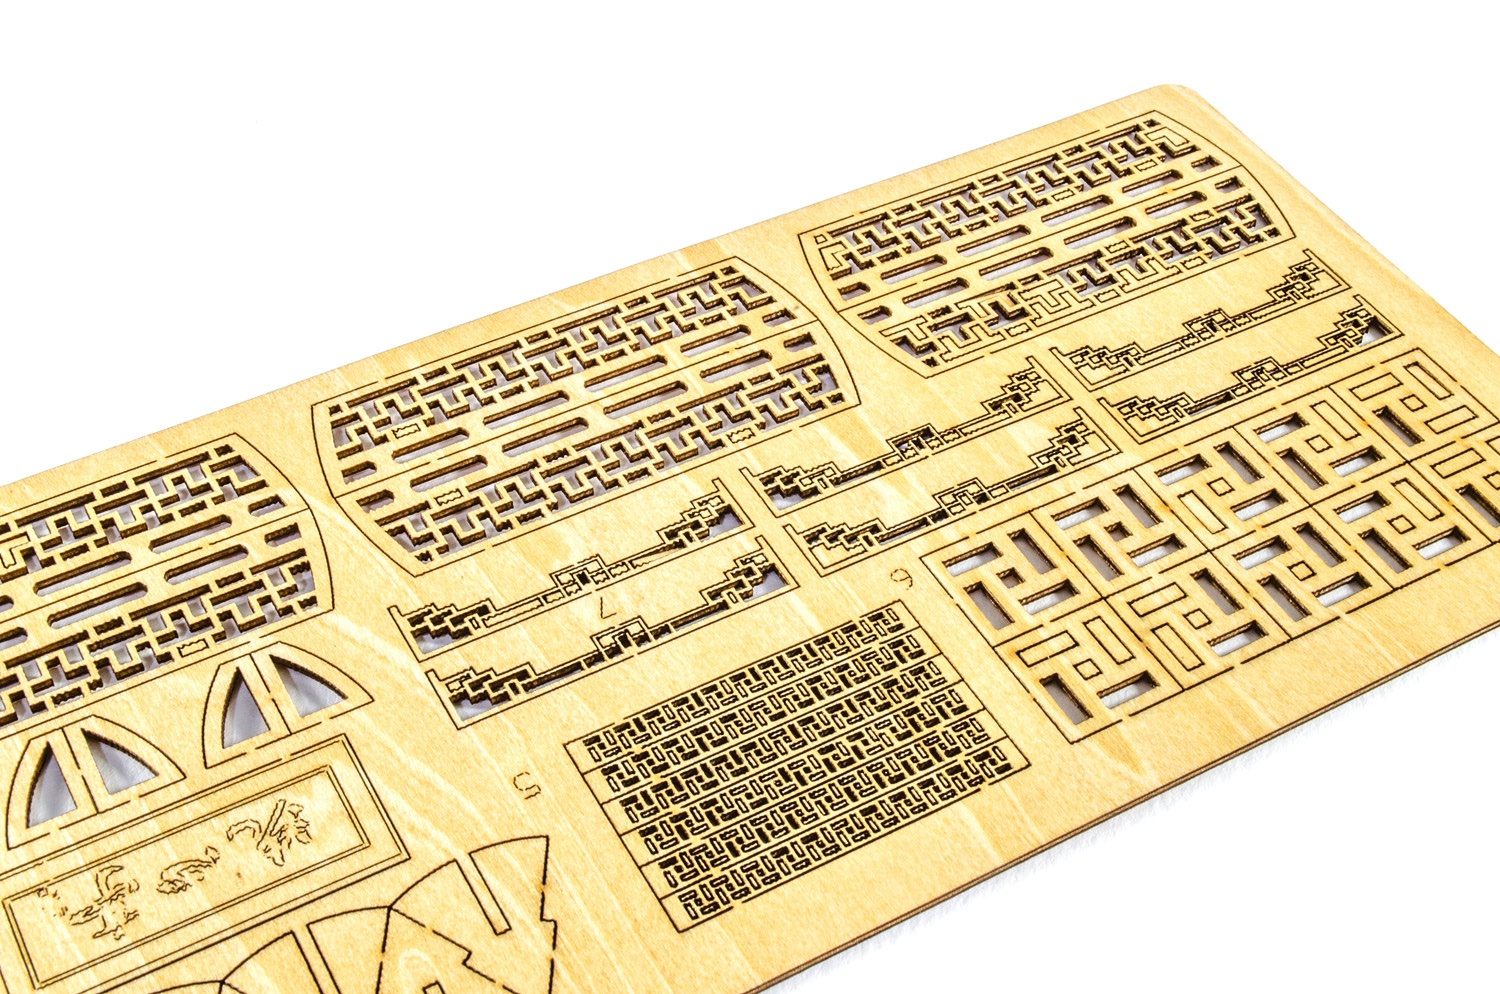
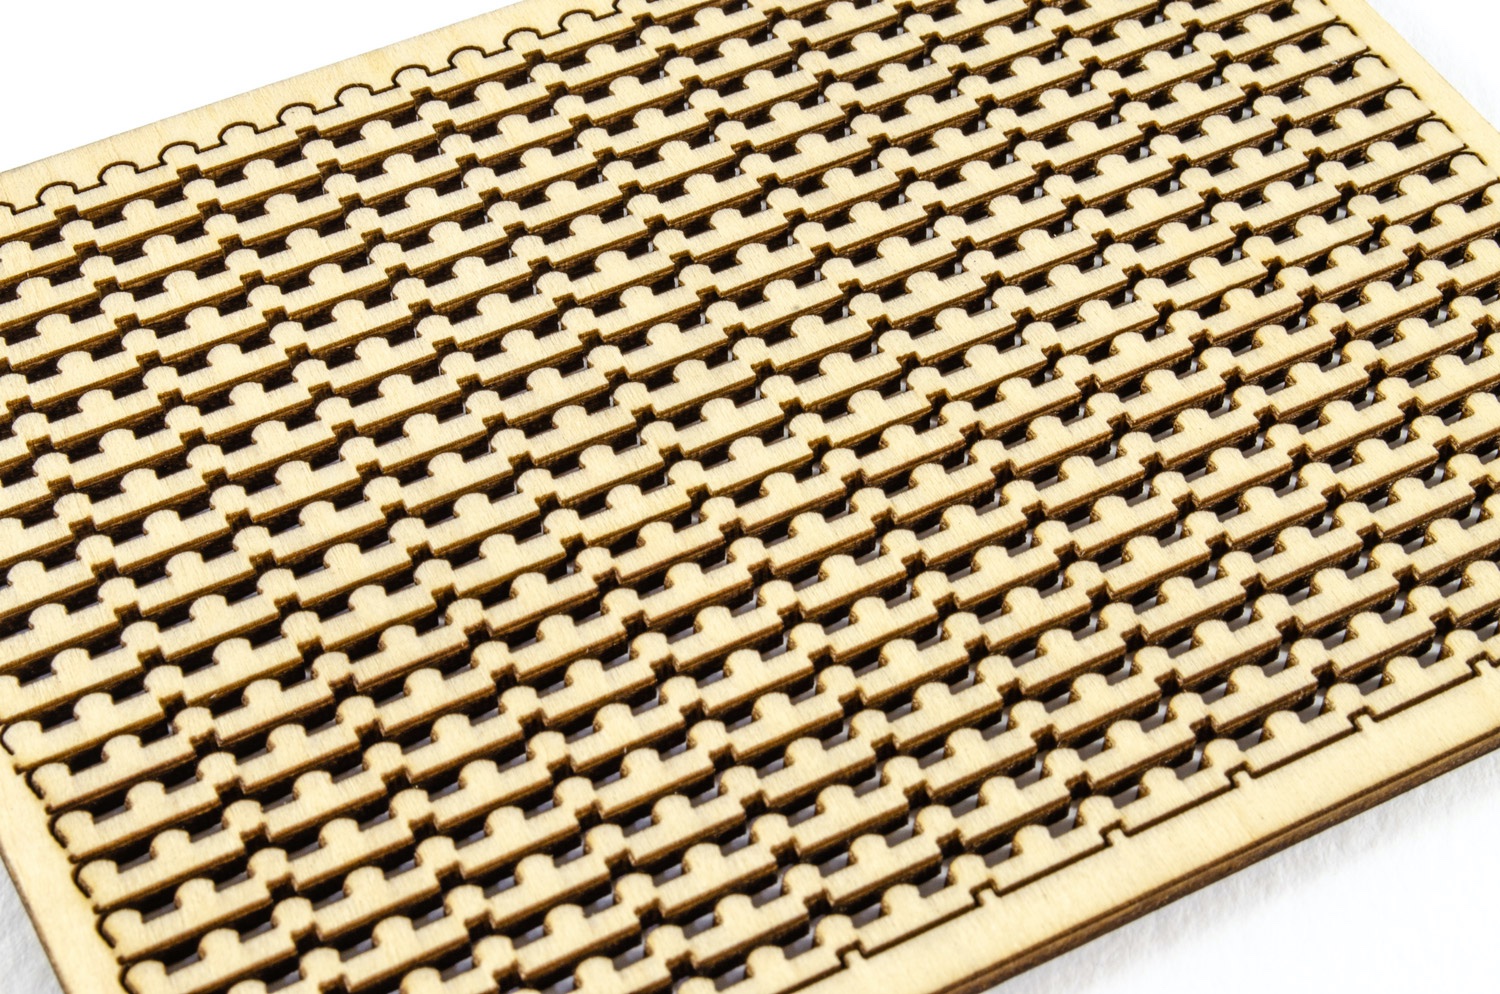
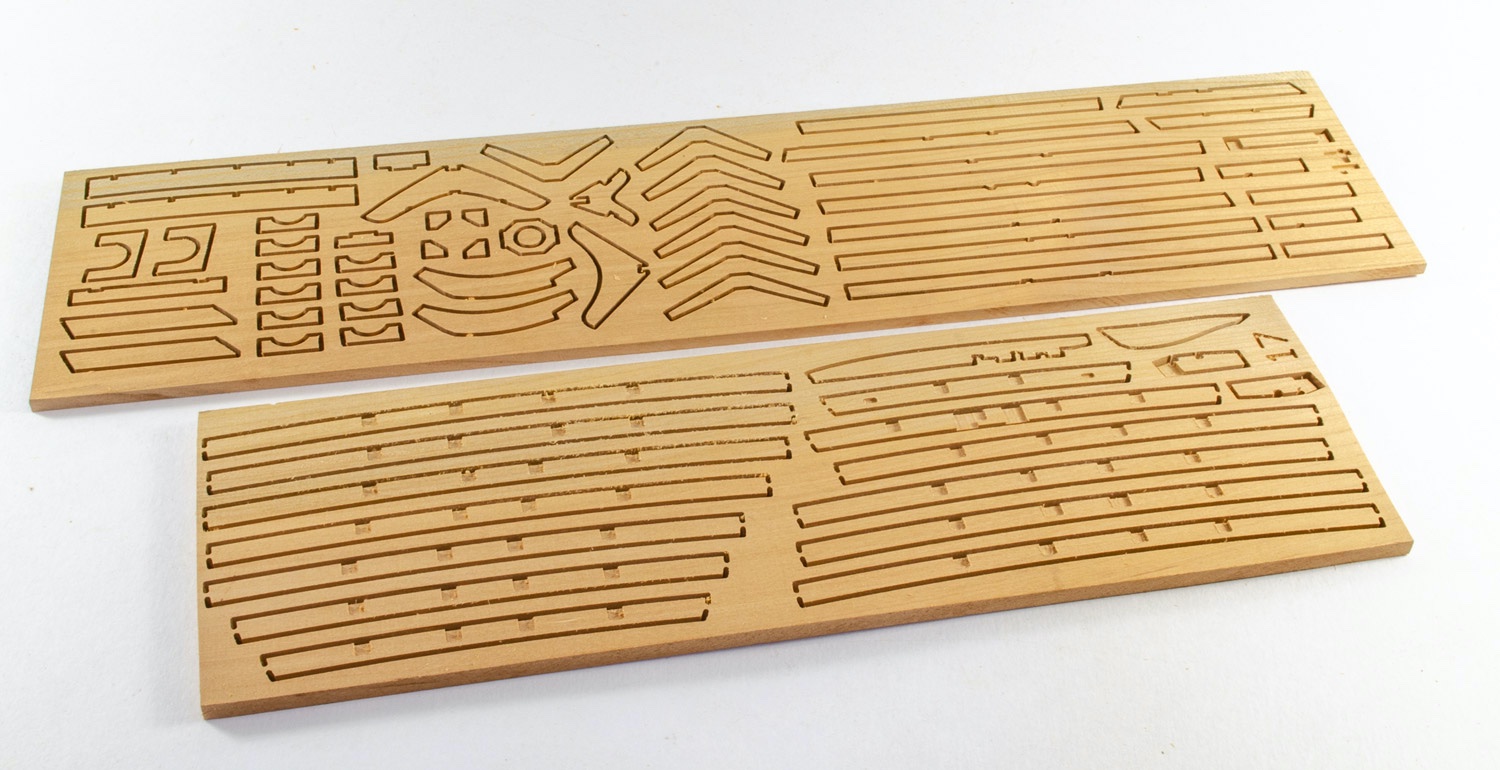
The very ornate sheet shown here holds the parts for the wall sections, bench backs and the fancy trellis work that adorns the pavilion, just below the rood section. Most of the infill parts are gone, but there's just a few more I need to tap out lightly. More roof frames are seen on the other sheet.
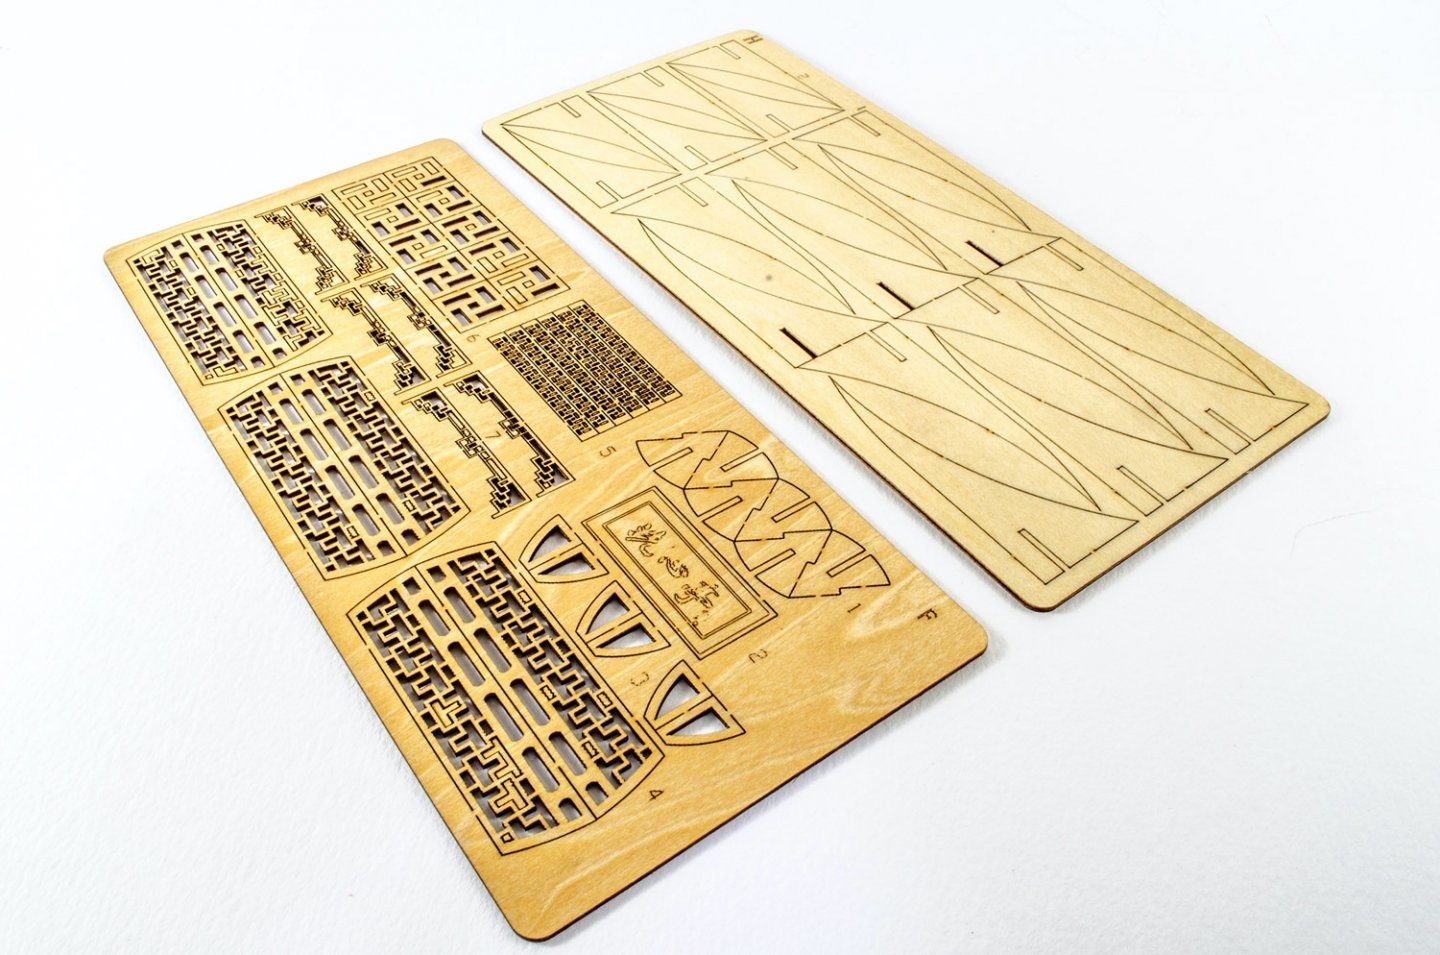

These two sheets contain the pillar bases, semi-hexagonal bench seating, decorative scrollwork, and infill panels around the top of the pillars. Again, another sheet contains some of the parts for that elaborate roof.
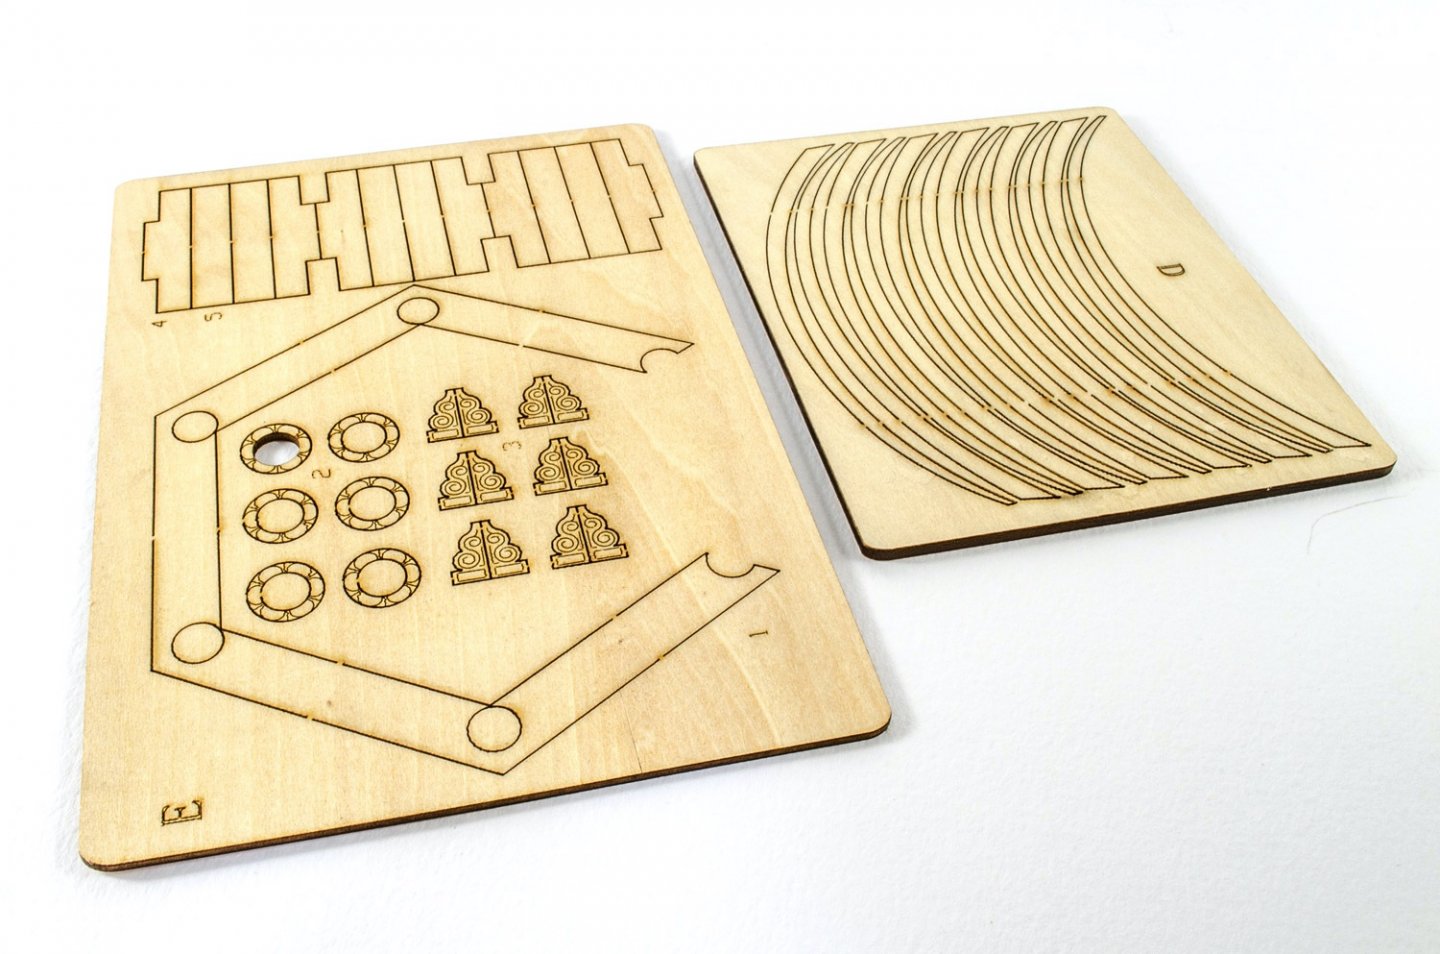
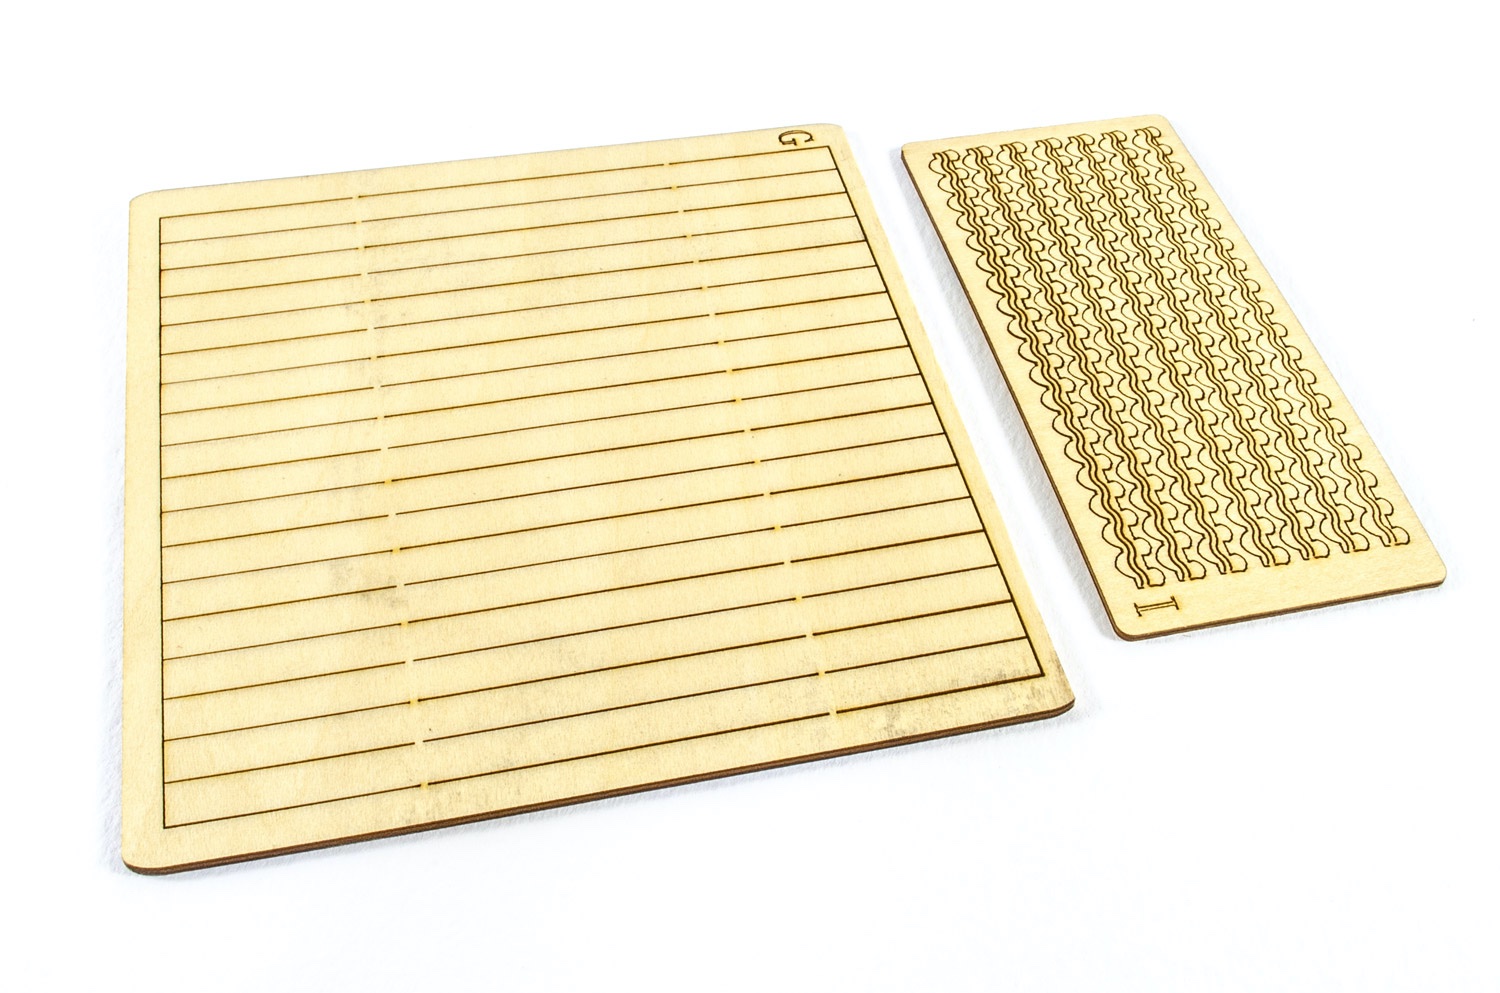
One sheet here contains the beams which sit atop the four main roof frame sections. These will lie three-deep and need to be flushed to the ends of the frame sections. The other sheet here contains parts that finish off the edges of the tiled roof panels.
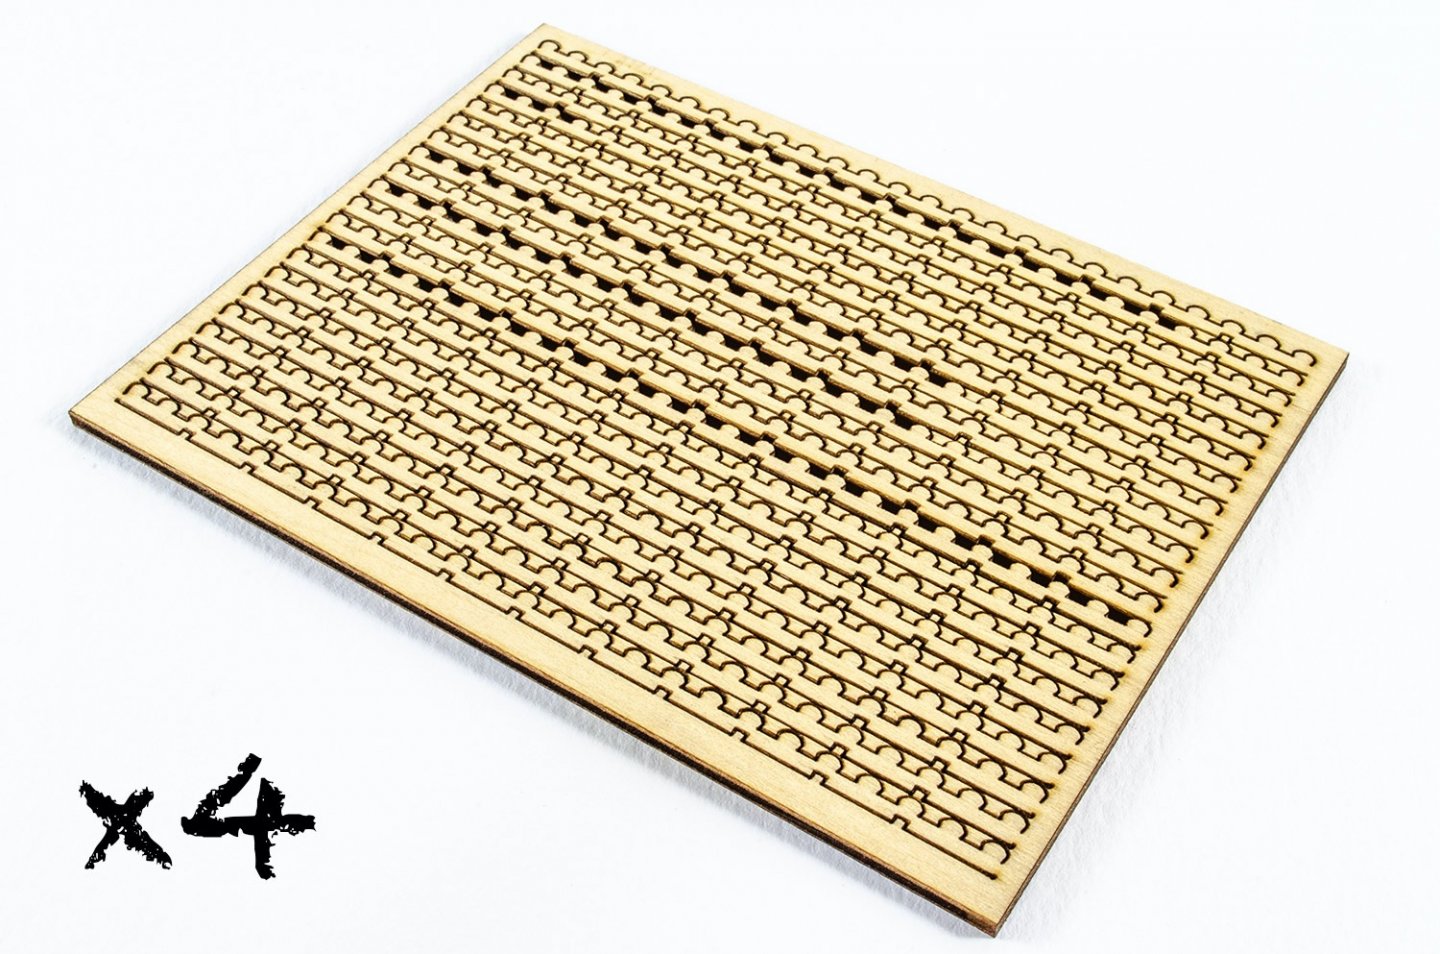
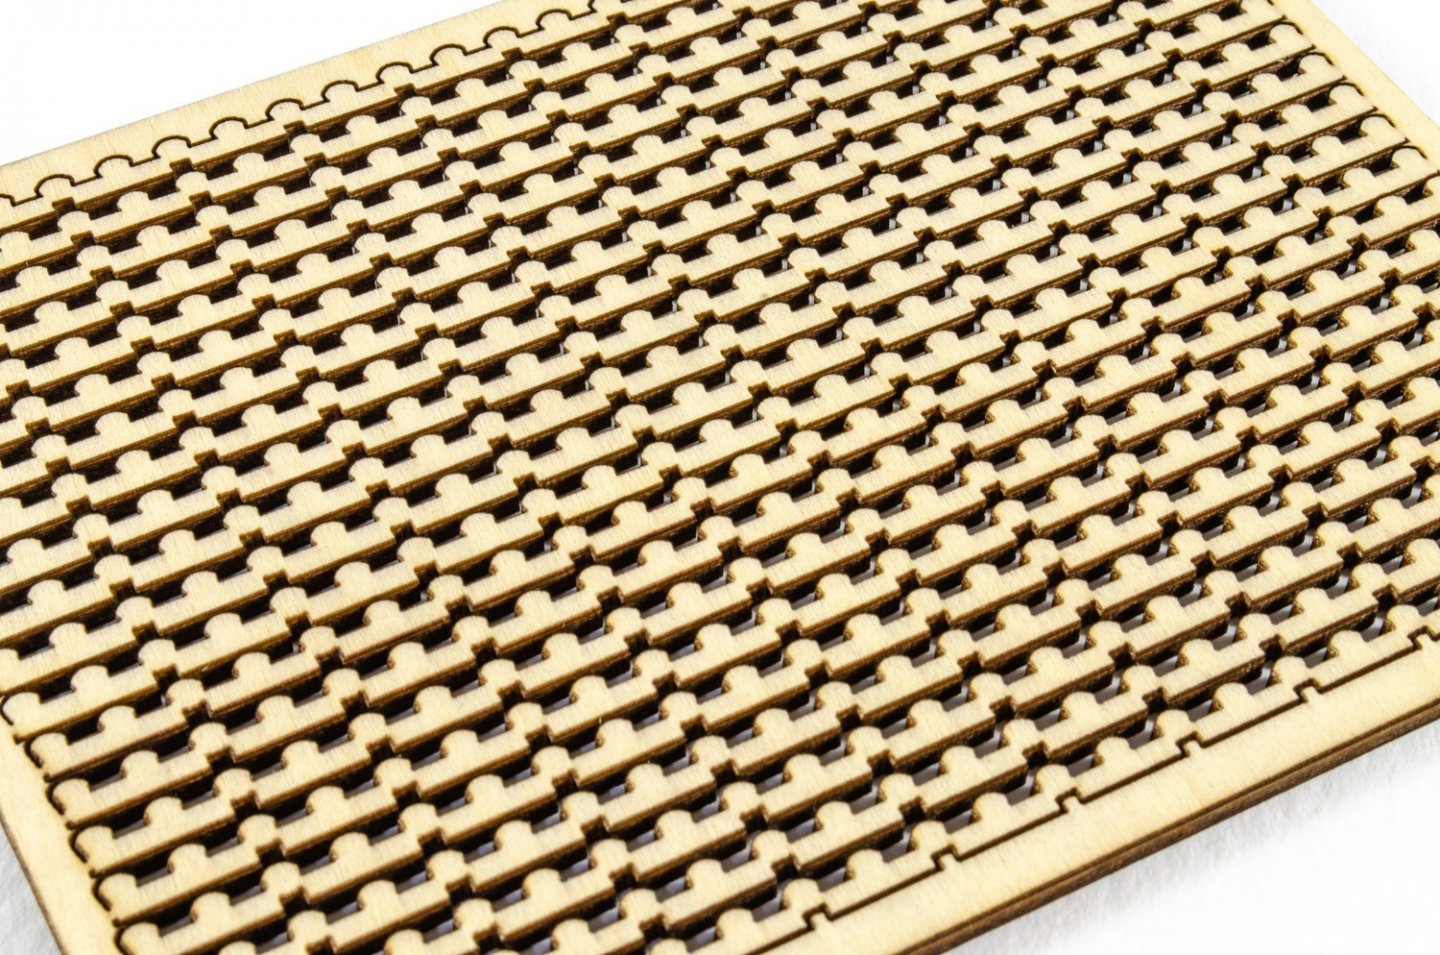
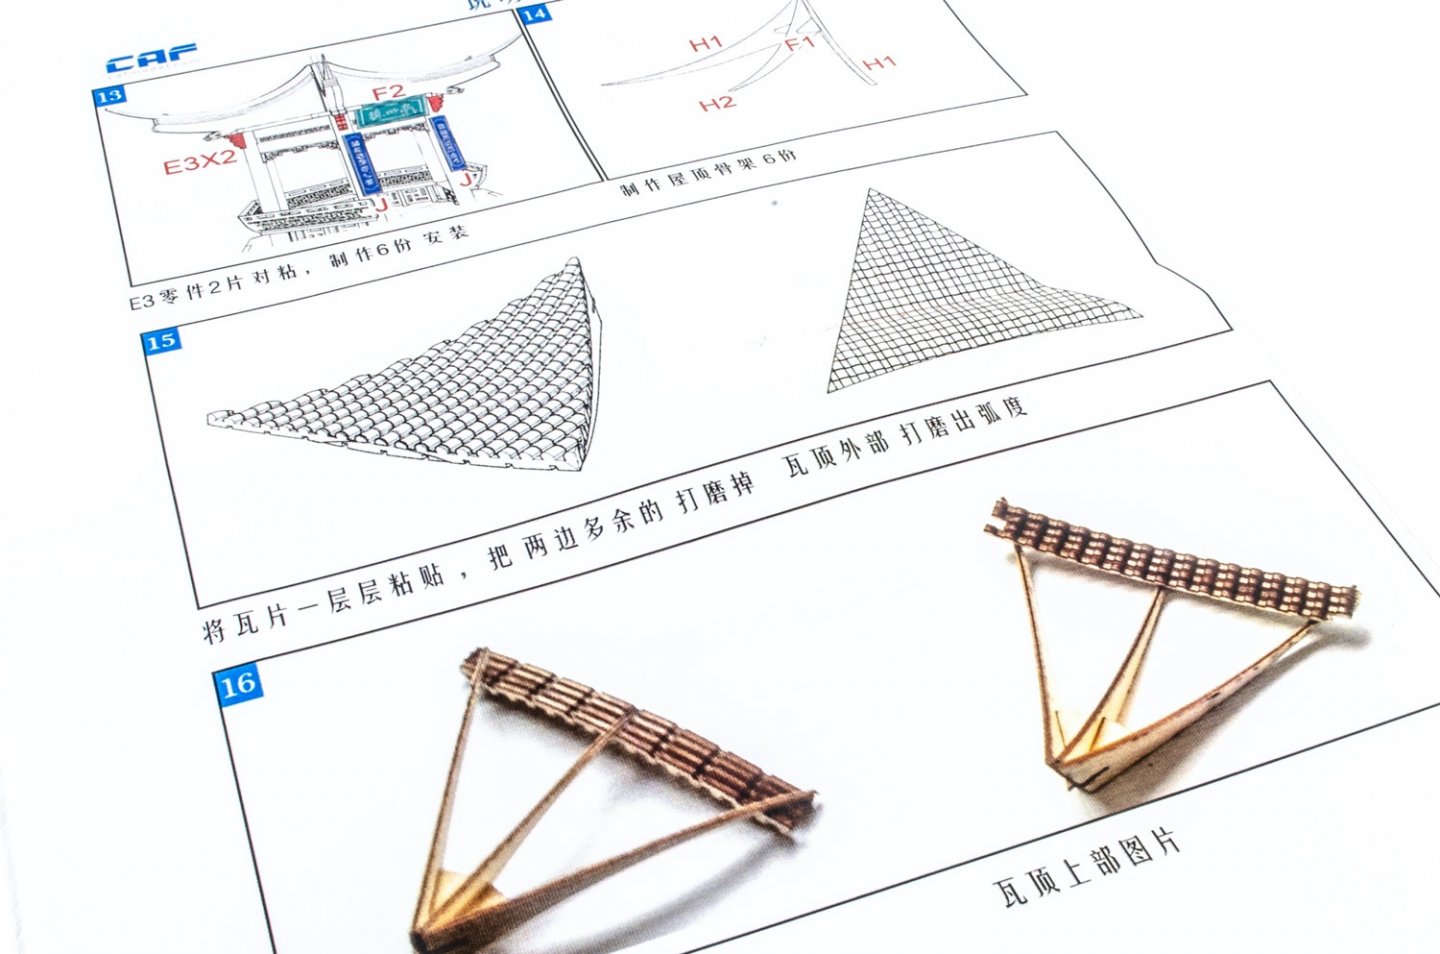
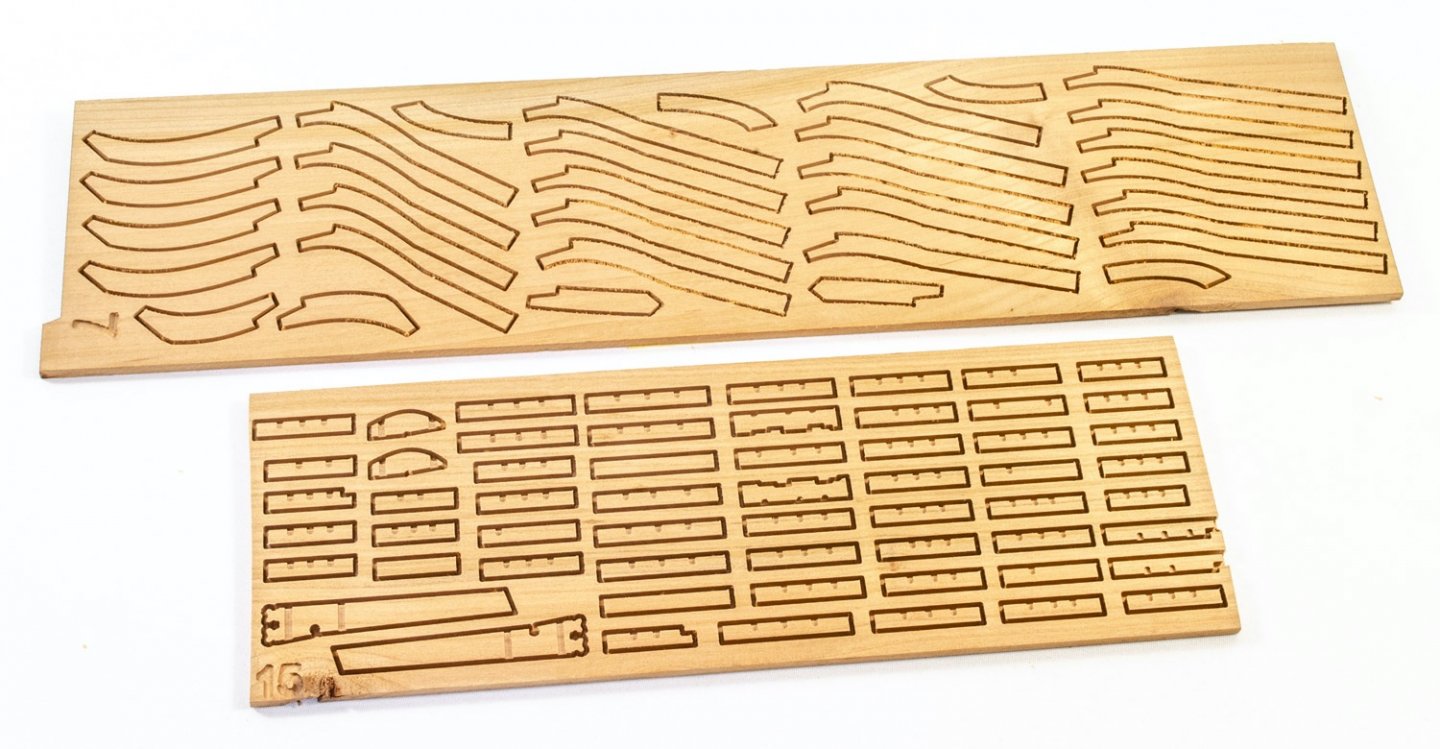
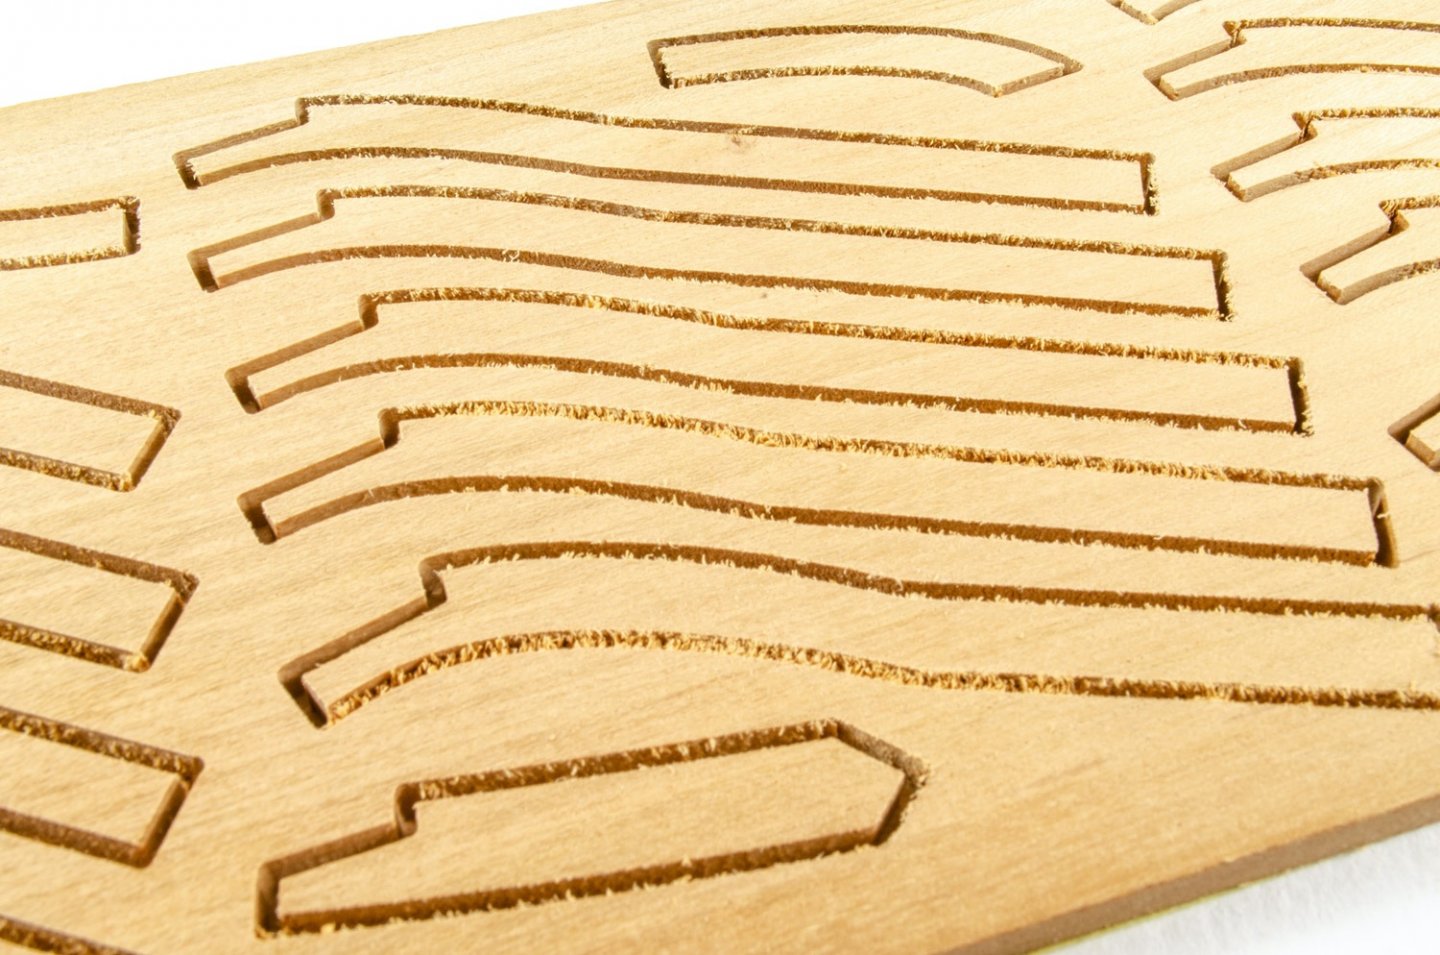
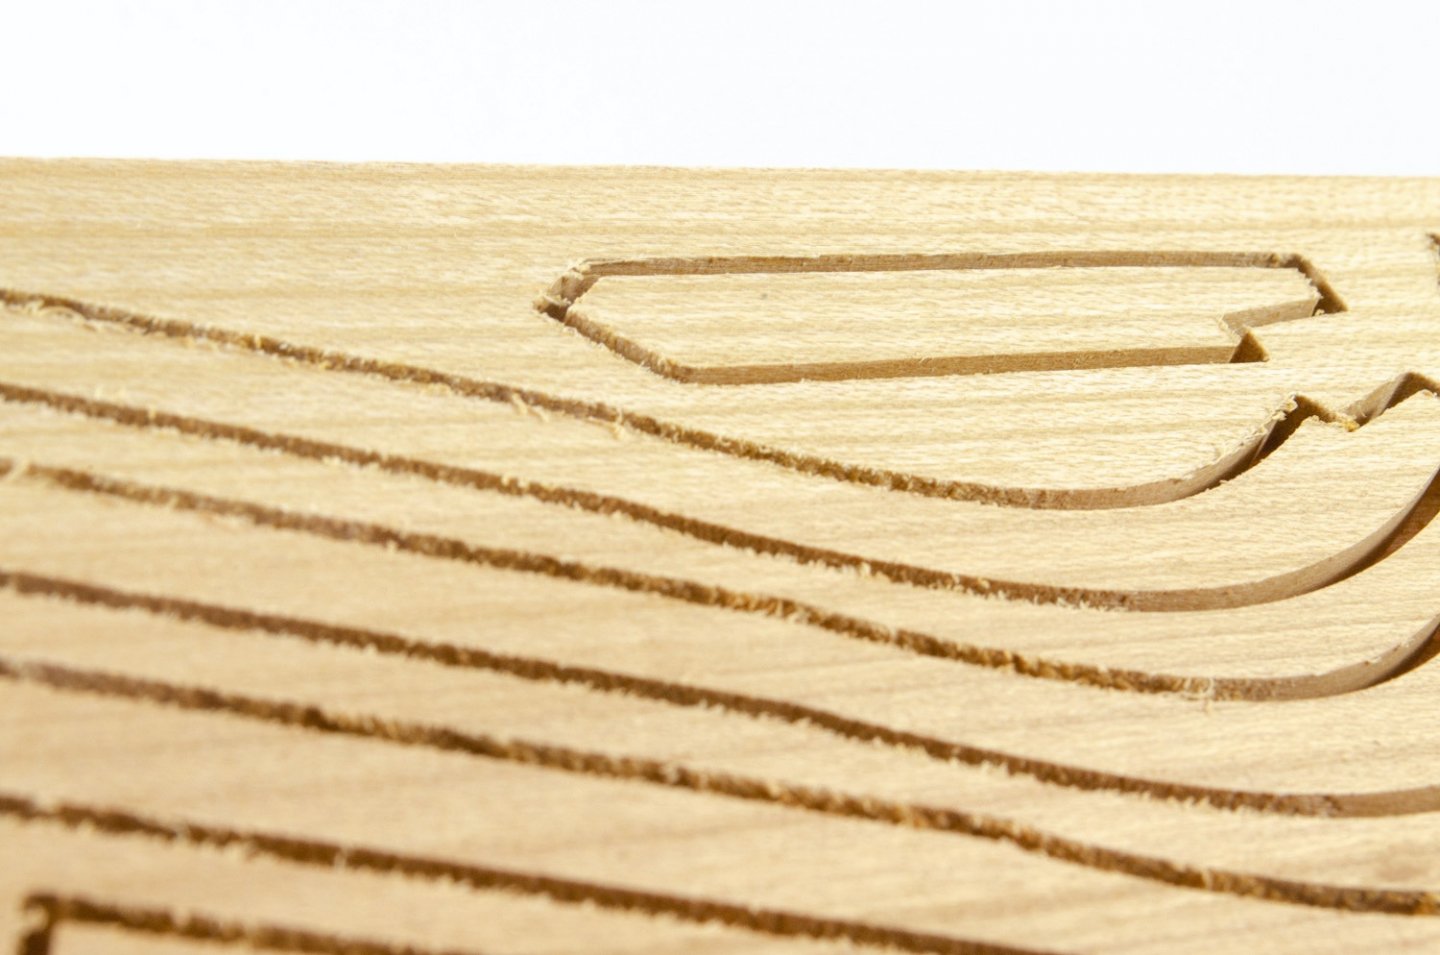
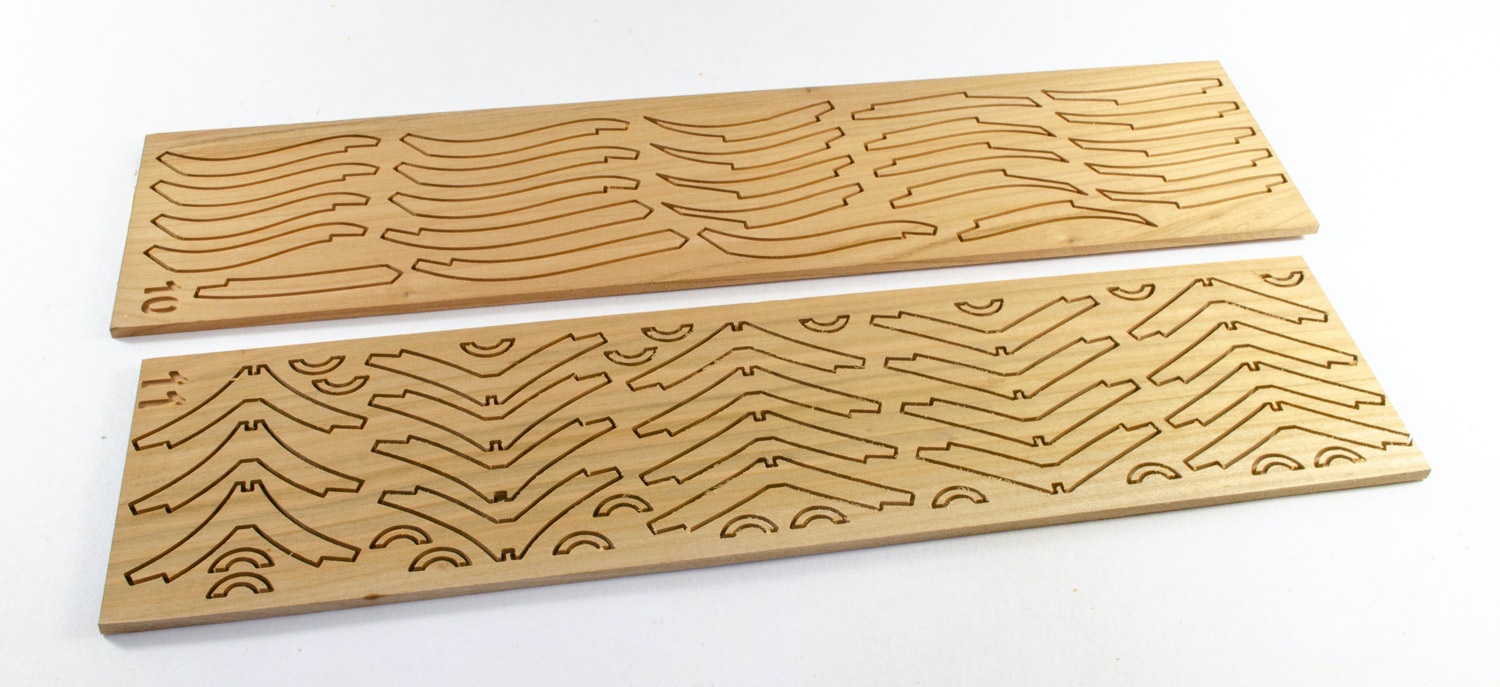
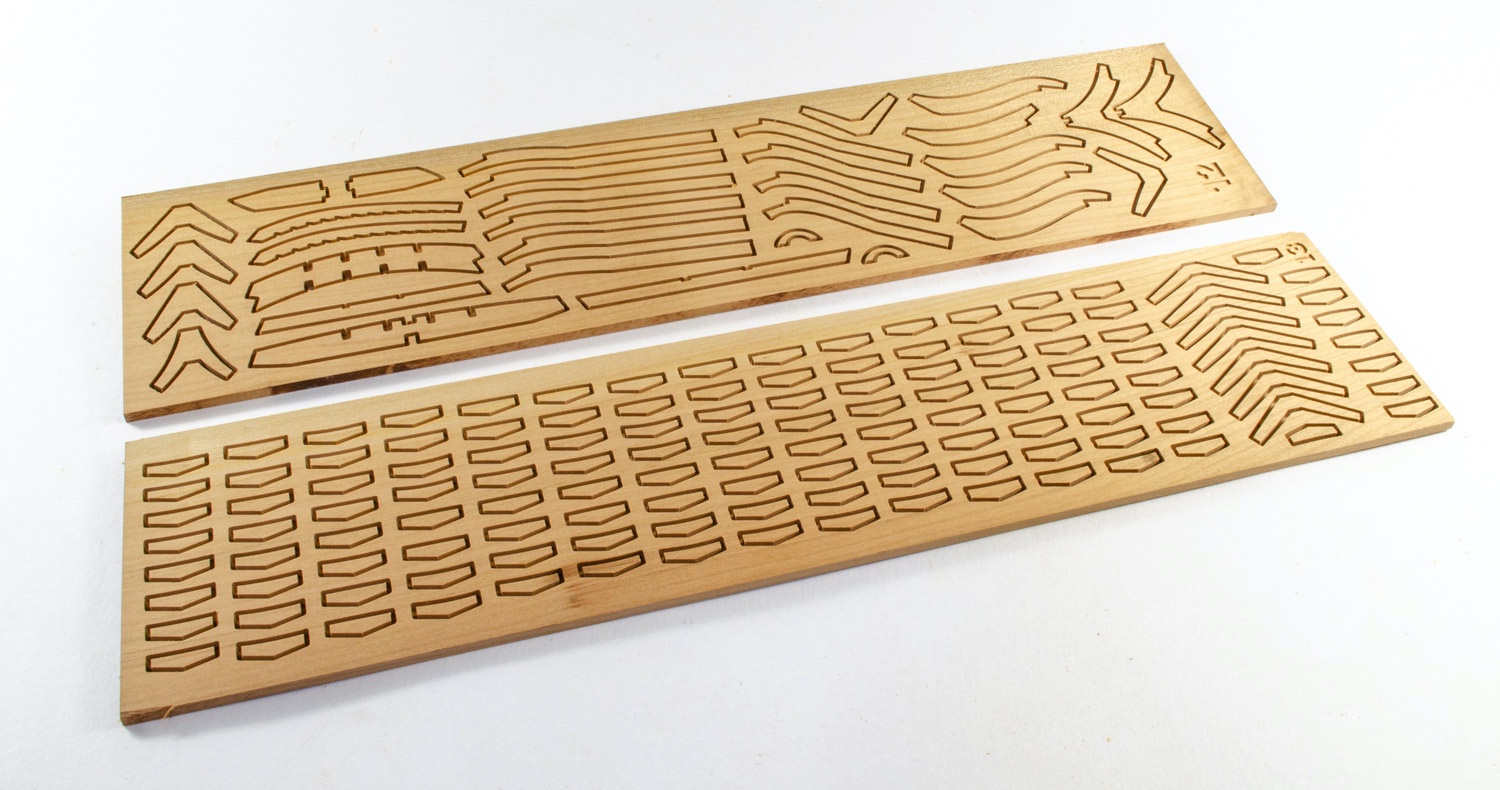
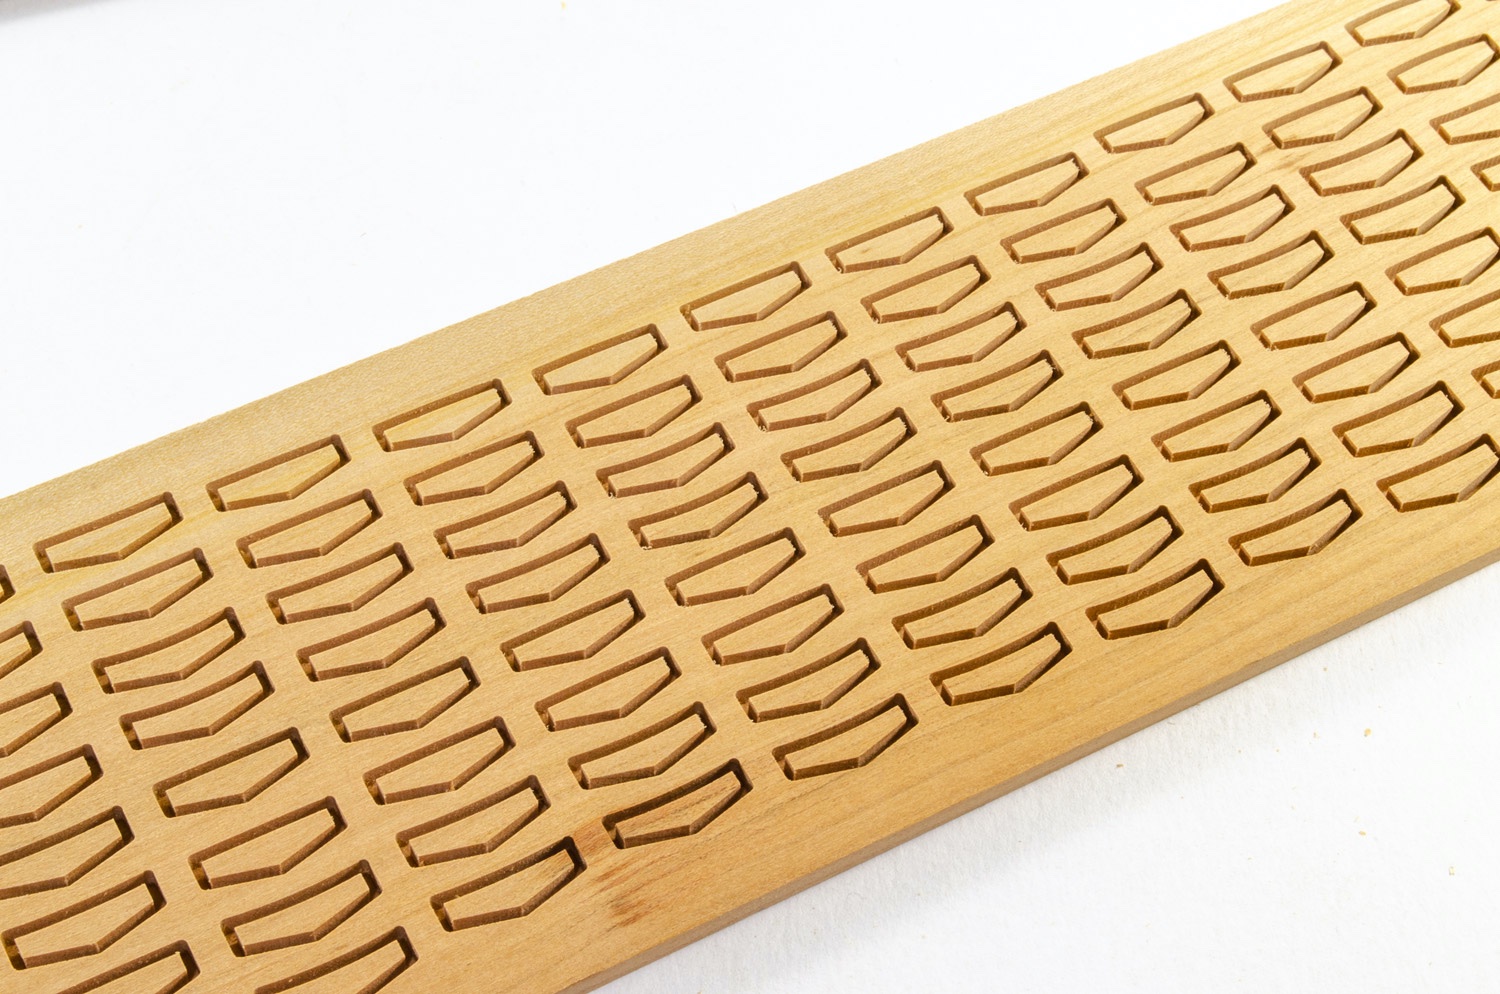
Now, talking of tiled roof panels, these FOUR sheets hold the strips which, when assembled, create that characteristic roof finish you see own many ancient buildings in the Far East. There is some infill between these sheets which I removed, as you can see here:
The last contents here are the dowels for the pillars and also the spire, plus the wooden balls which slide onto the spire in decreasing sizes.

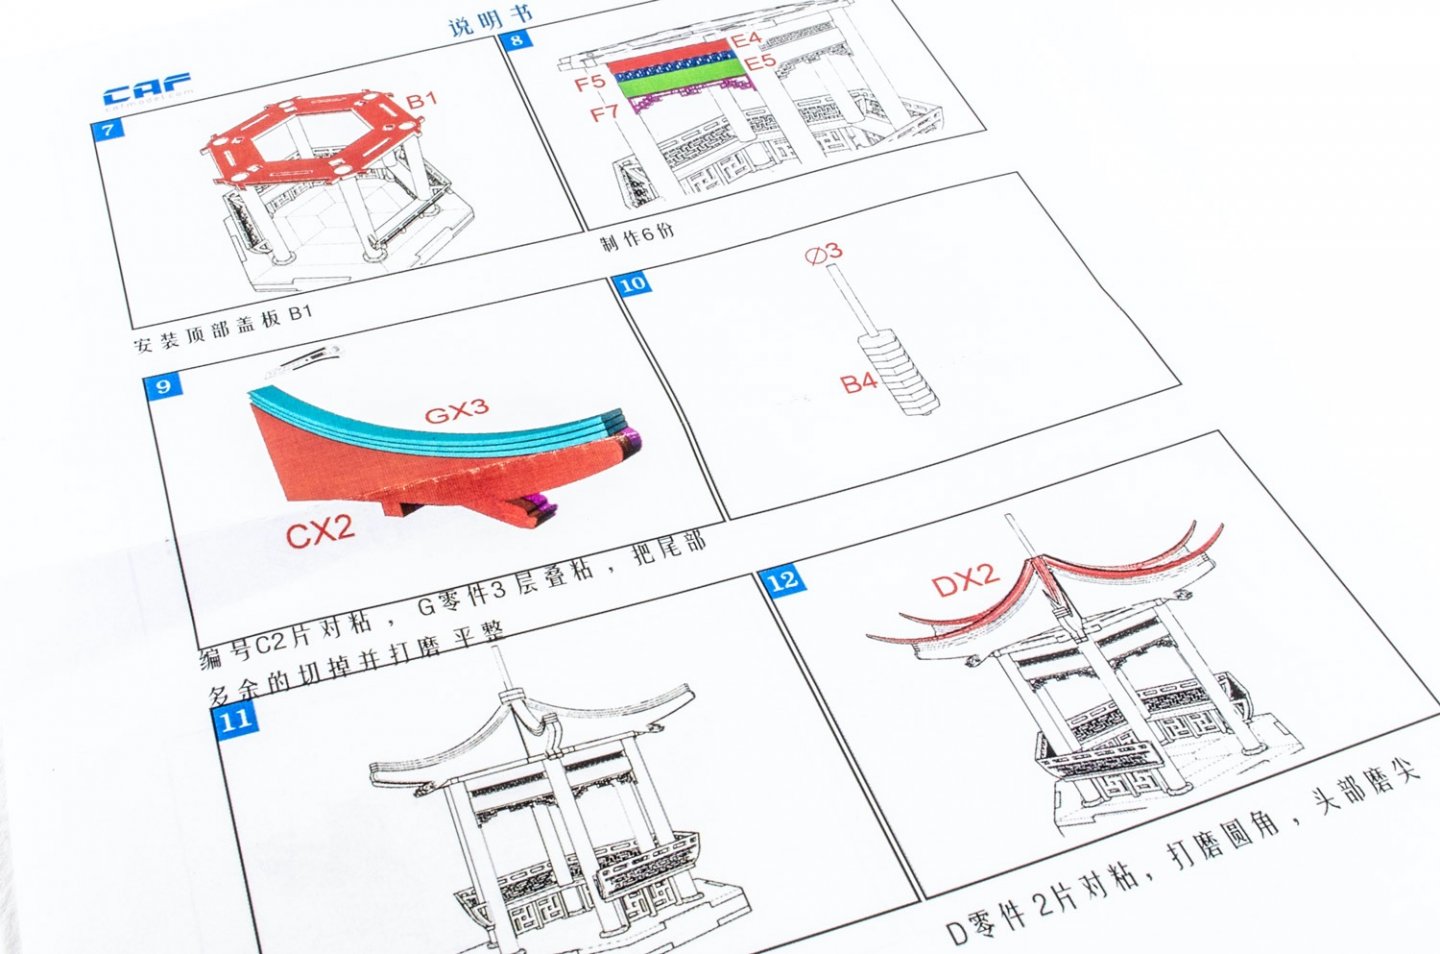
Instructions
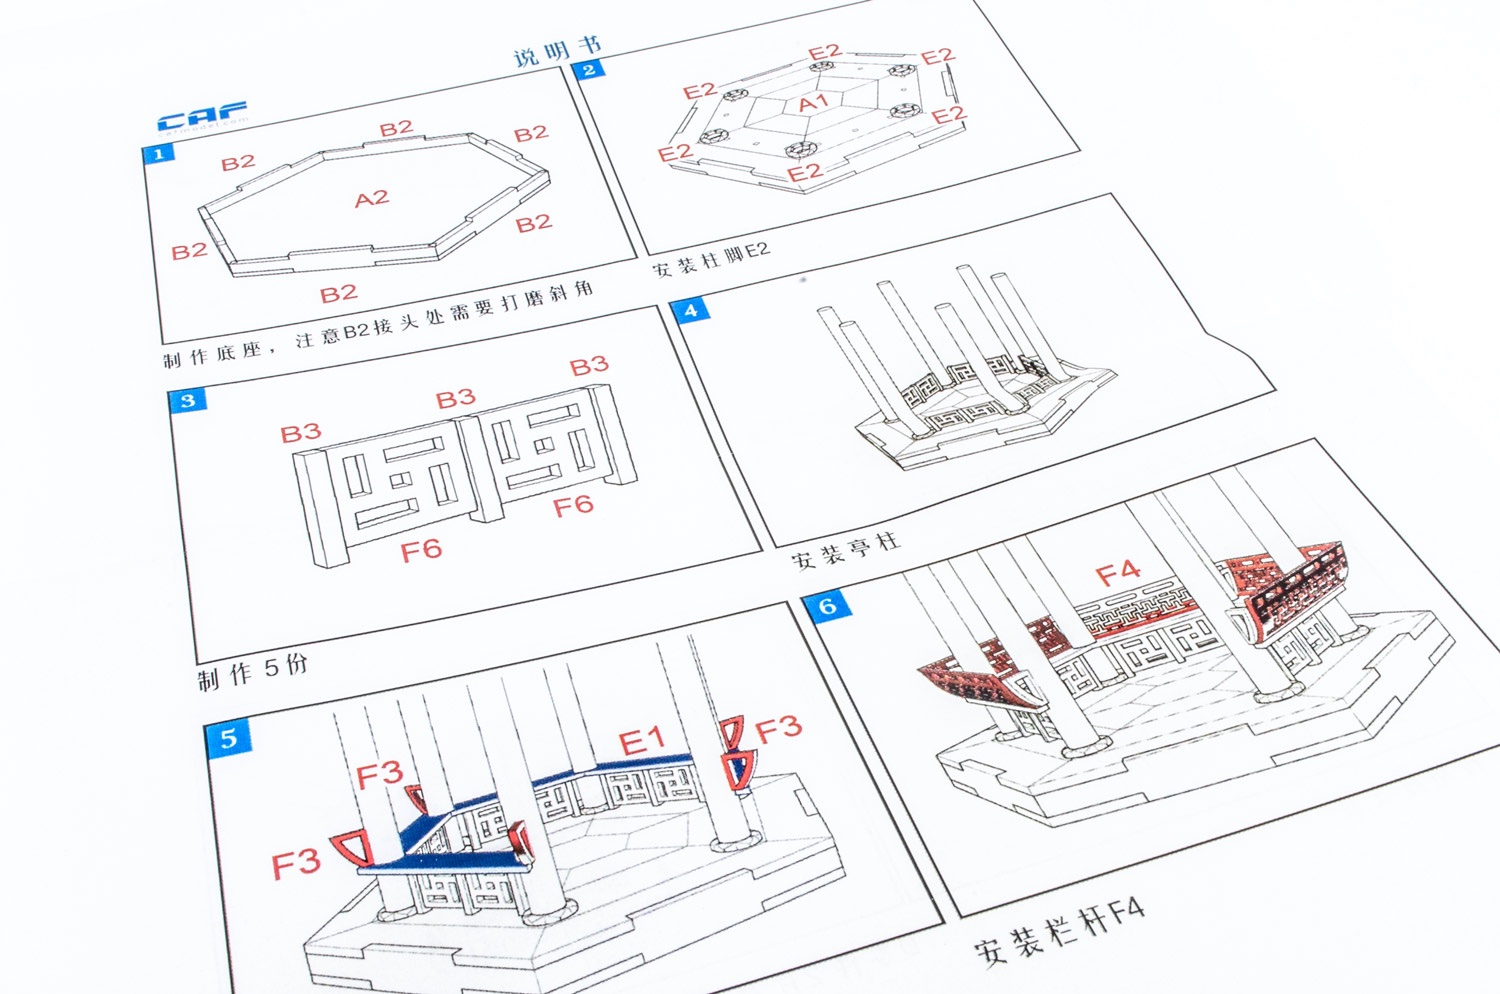
The Pavilion appears to be quite straightforward when it comes to the various stages, although I will use my phone translate app to make sure I don't miss any vital bit of information as I build. The instructions are printed on two sheets of A4 paper, double-sided, and also in colour to help identify the various components. Construction is completed over 18 stages, with all parts clearly numbered.
Conclusion
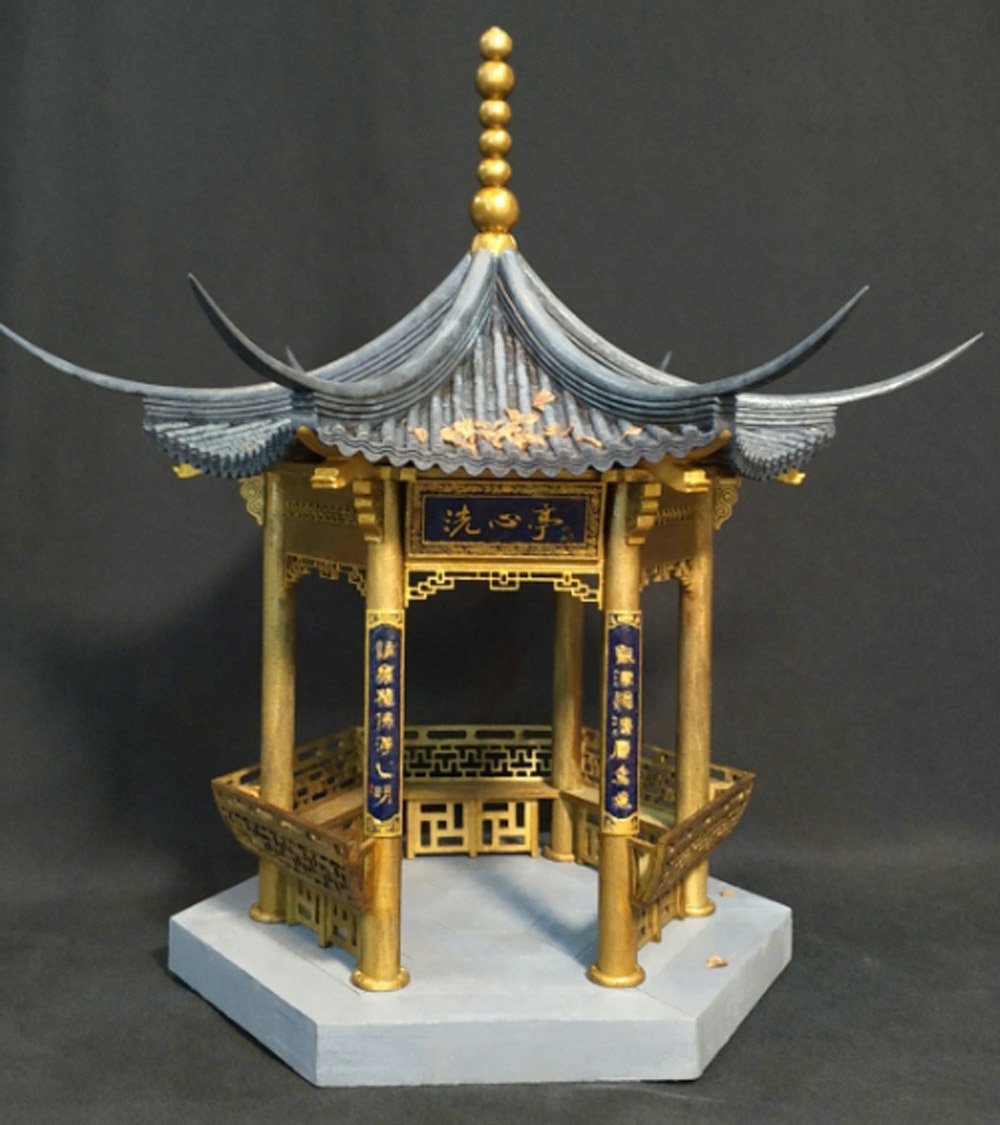
In all, this is a very nice, and also quite inexpensive kit from CAF, and it should provide many pleasant hours of construction. The photos of the finished build show the timbers painted in gold, with a grey roof and light grey base. Whilst the model can be left in bare timber, I do think a paint job would be the best option to highlight the details and male it more authentic. Sometimes, we all need a little side project, or perhaps a little something between our current shipyard work, and this little kit will certainly do that whilst sticking with wood and building something which looks beautiful when completed. Quality is excellent and the whole design looks nicely thought out.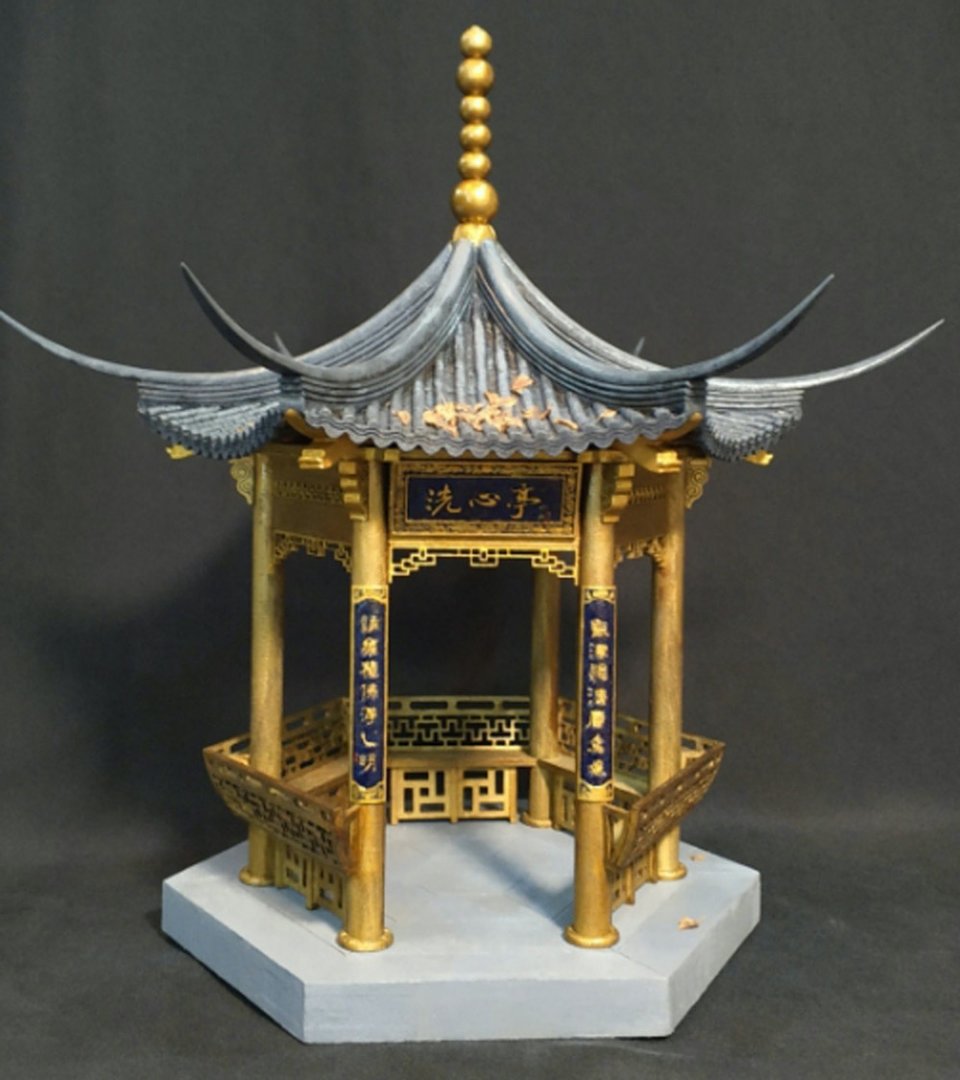
Finished ModelMy sincere thanks to Tom at CAF Model for sending this lovely little kit out for review on Model Ship World. To purchase, click the link at the top of the article.

- Rik Thistle, druxey, ccoyle and 12 others
-
15
-
-
She's looking real nice and you made a neat job of your deck too.
- Ryland Craze and Rik Thistle
-
2
-
-
10 minutes ago, Articcie said:
Work? I though you were a retired man. So you make all these ships besides a normal working day?
Respect!
I'm 'only' 50! 🤣
- Oboship, MEDDO, Ryland Craze and 1 other
-
4
-
-
4 minutes ago, stuglo said:
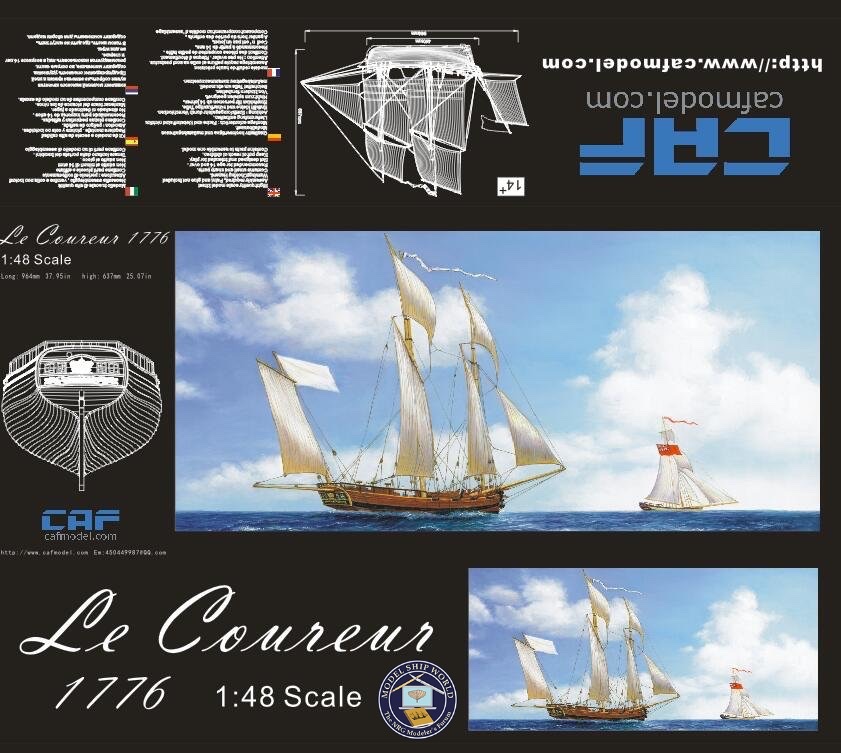
I have just received my kit of Le Coureur.
After purchasing more than 20 kits over 30 years, this sets a new and very high standard. The packaging, detail, ingenuity and value for money makes this a priority on anyone's list.
I totally agree. @cafmodel deserve to do really well with this kit. I think it's outstanding value for money.
Just now, Moab said:Thank you for your excellent review...Moab
You're more than welcome. It'd be rude not to share such a lovely kit like this, with a full article. My build is starting very soon. My baseboard (that the jig screws to) will be here on Saturday (hopefully).
-
15 minutes ago, yvesvidal said:
Chris better start warming up his wood cutting laser.... He is going to be busy very soon!!
Yves
I think everything is already cut and ready to go. He's just now waiting on the printers to do the 13 plan sheets, 80+ page manual and the box art label. I reckon a week tomorrow and these will be done. 🤪
- yvesvidal, chris watton, dkuehn and 1 other
-
4
-
-
I'd go with that. It looks clean and if you're happy, then there's nothing wrong with doing that whatsoever. 👍
- Ryland Craze, robdurant, TimC and 1 other
-
4
-
1:48 H.M.S. Alert 1777
Trident Model
Available from Trident Model
HMS Alert was a 10-gun cutter launched at Dover in 1777 and was converted to a sloop in the same year. On 19 September 1777, during the American War of Independence, Alert caught and engaged the American 16-gun brigantine Lexington in the English Channel. After two hours fighting, Lexington damaged Alert's rigging, and broke off the action, but Alert's crew quickly managed to repair the ship and caught up with Lexington, which was now virtually out of ammunition and unable to reply to Alert's fire. After a further one and a half hours bombardment by Alert, Lexington struck her colours, surrendering to Alert. Lexington had lost 7 men killed with 11 wounded, while Alert had two killed and 3 wounded. During the Action of 17 June 1778, Alert engaged the French 10-gun Lugger Coureur, and after 90 minutes, forced Coureur to strike. Alert was captured in the Channel by the Junon on 17 July 1778, and foundered December 1779 off the coast of America. French records show her serving as Alerte, a cutter of fourteen 4-pounder guns.
WikipediaThe kit
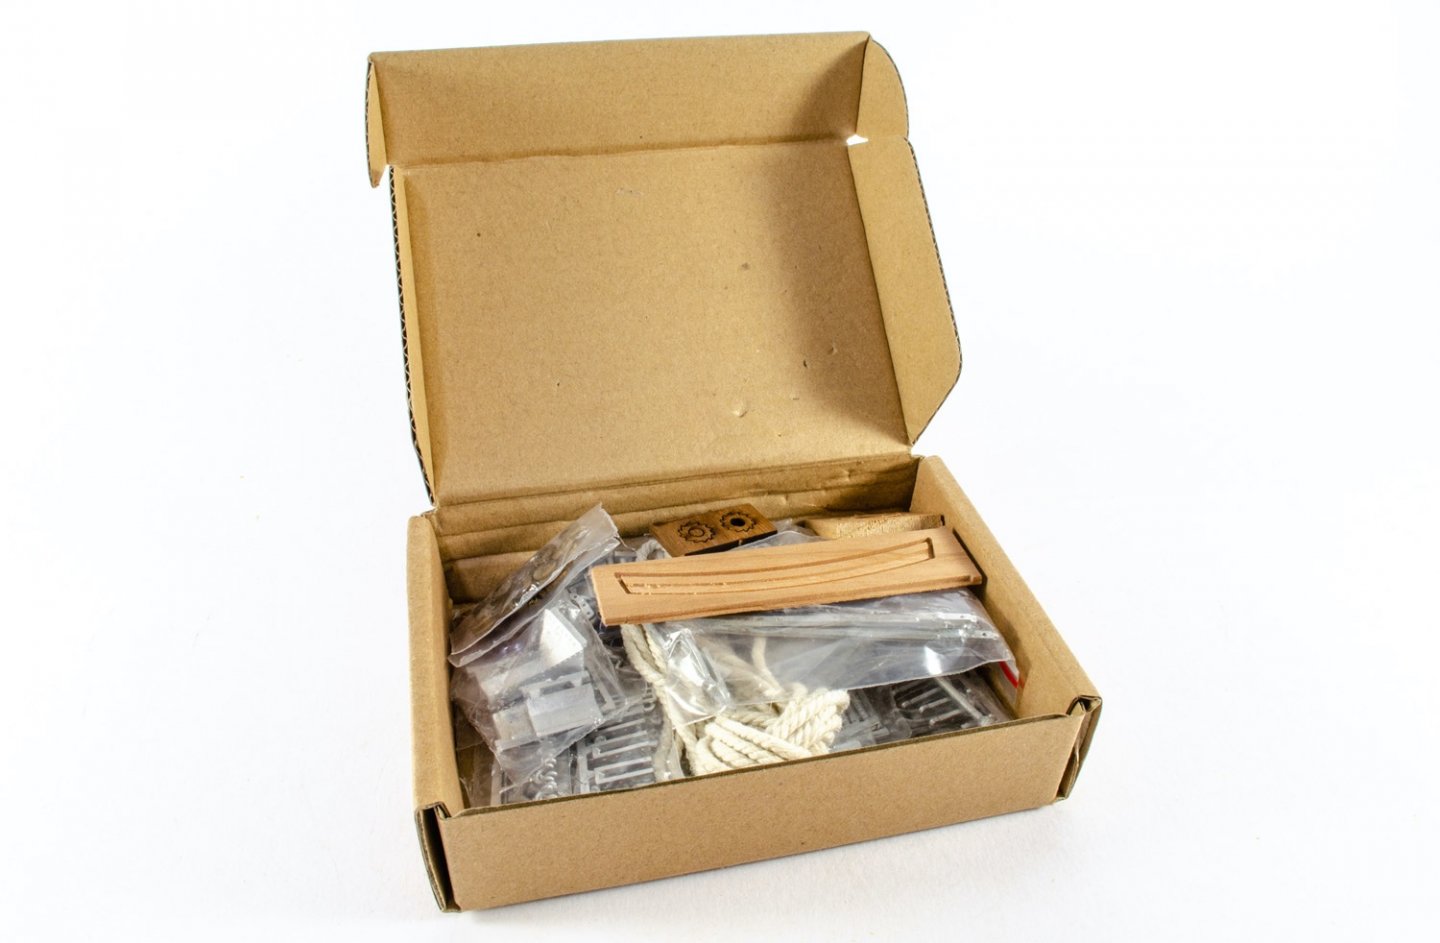
Alert is packaged into quite a large and heavy box, as befits the quantity of timber and fittings within. The box itself is sturdy and plain, except for the Trident logo and motto in the bottom right corner. When opened, you will see that the parts are broken down into different packages, labelled A, B, C and D. Each pack is protected with layers of bubble-wrap and all other parts within the box are also protected with infills of more bubble-wrap and foam.
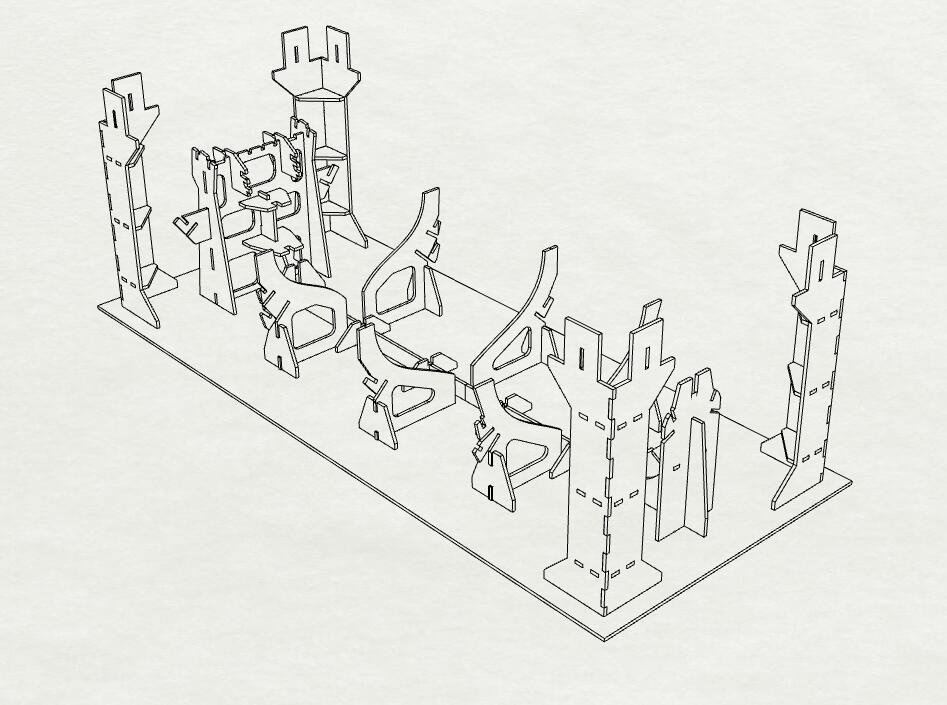
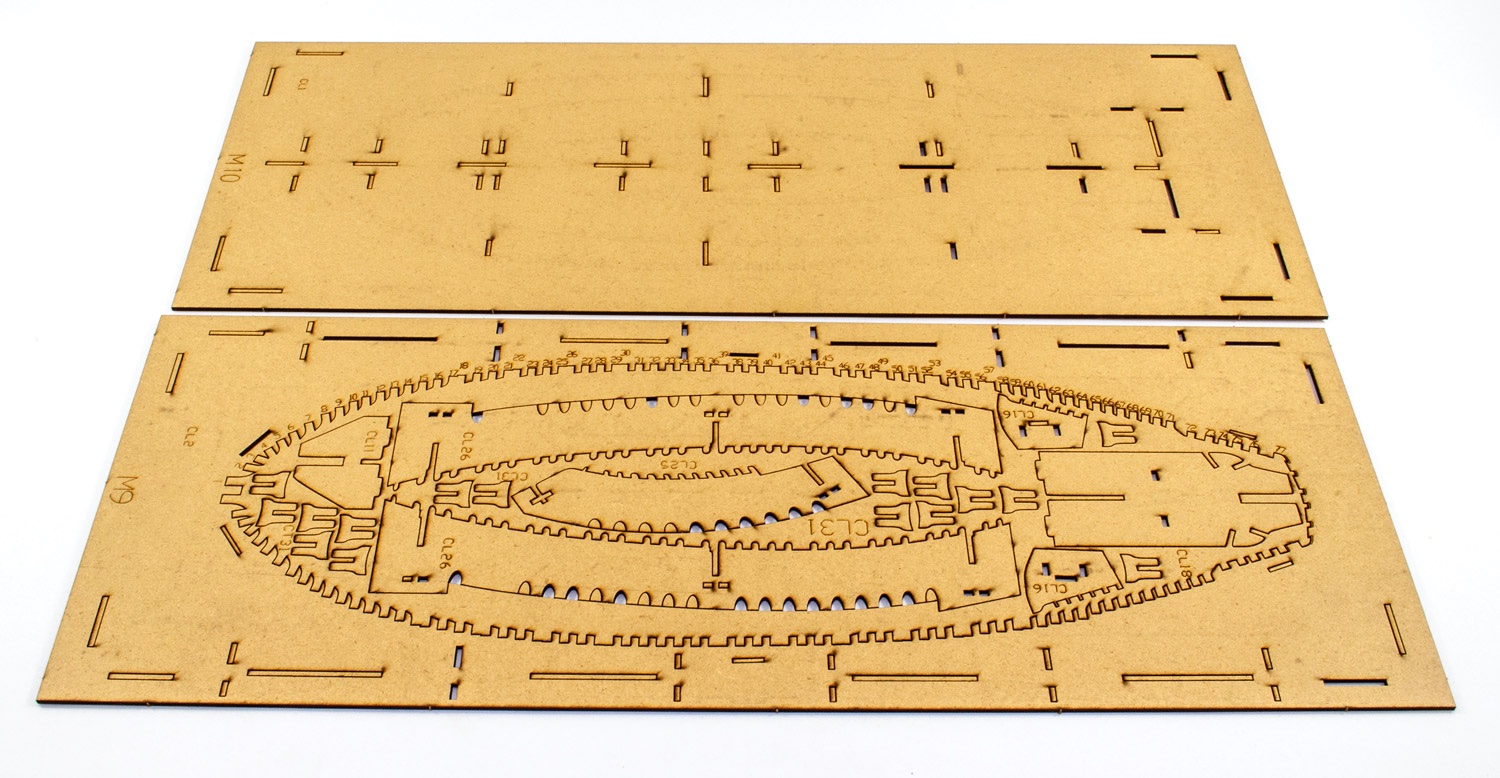
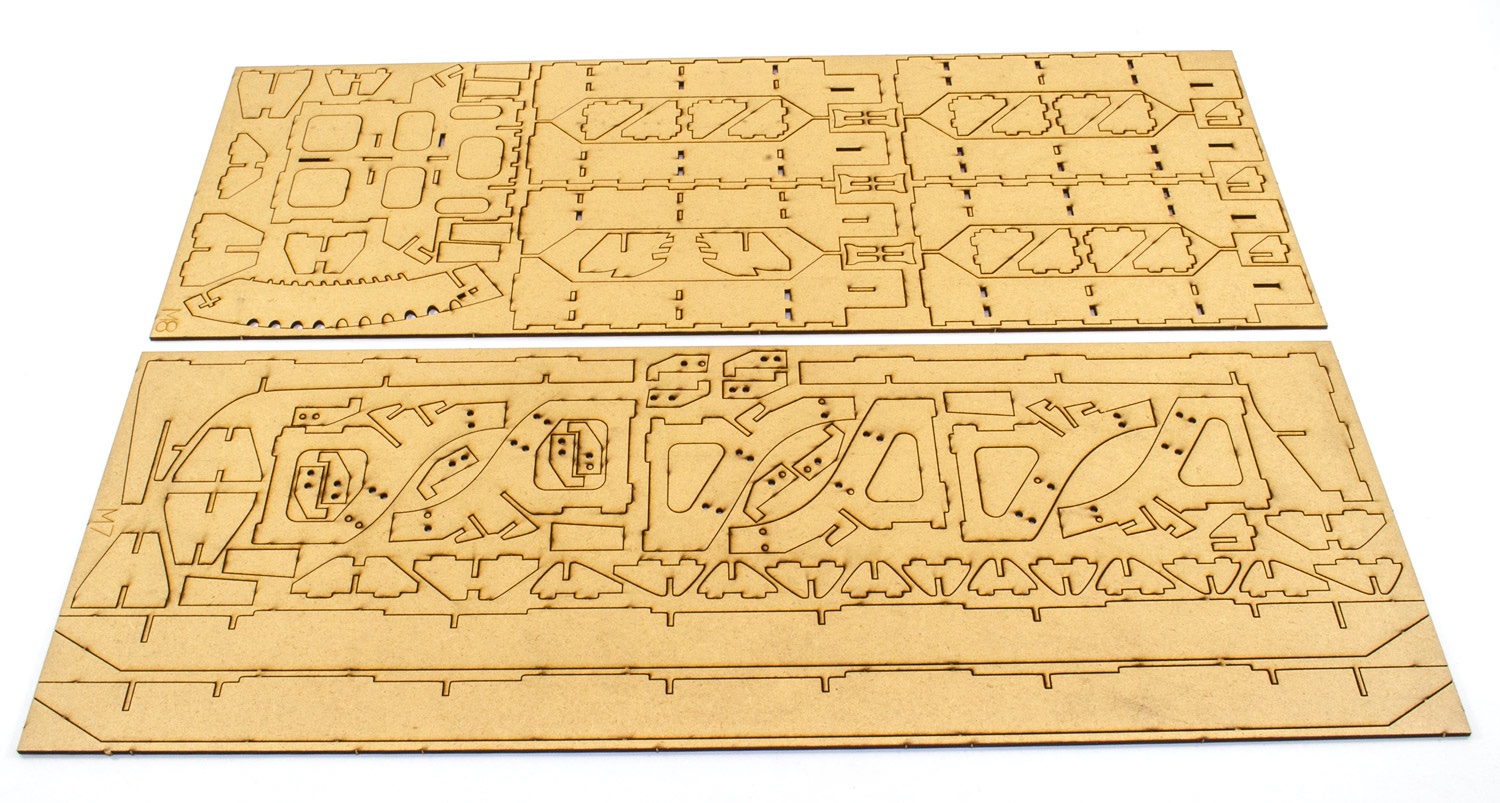
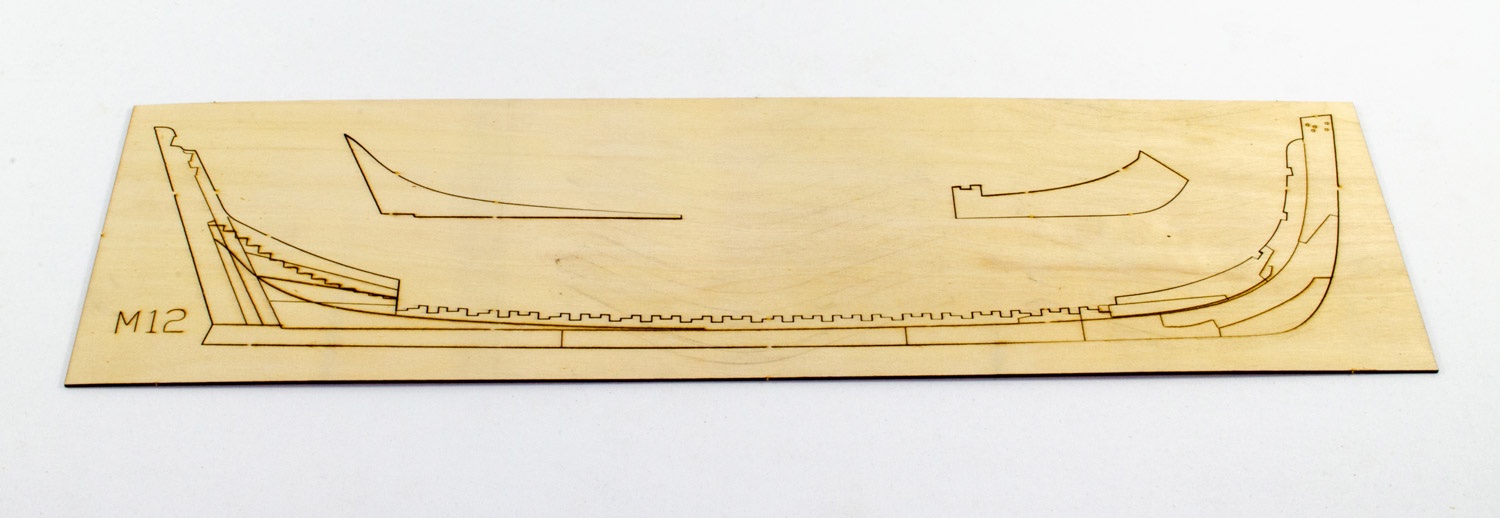
Cradle Pack
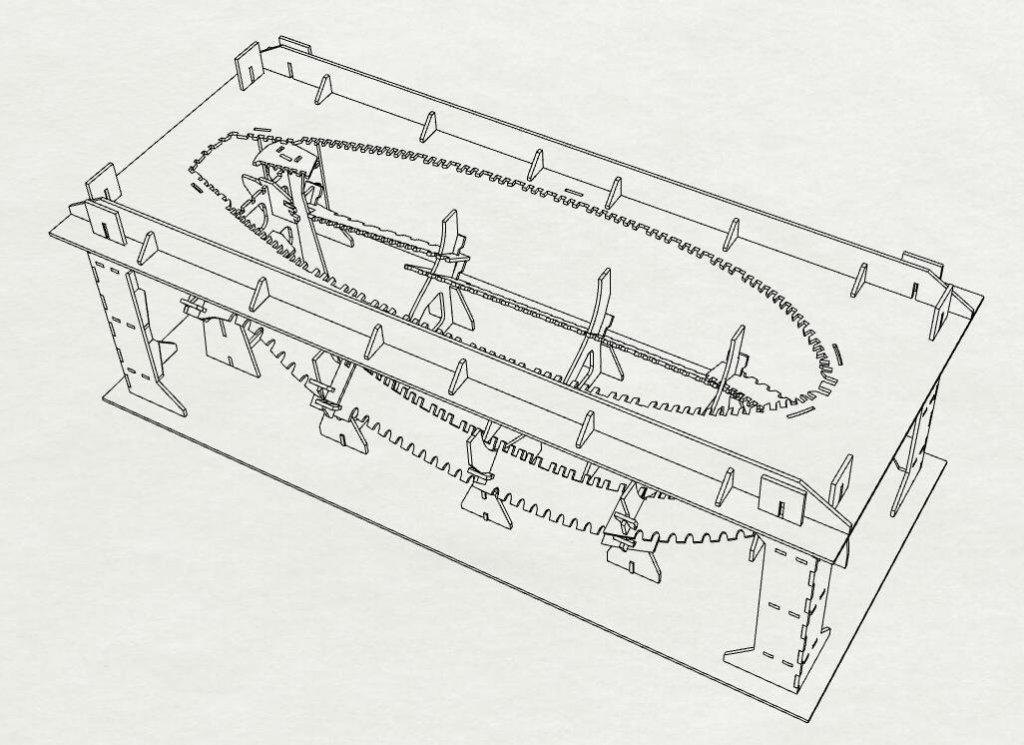
As you’d imagine, this pack contains all parts to build the complex building cradle that a model like this really needs. In fact, this is probably the most unusual looking cradle I’ve seen for a POF model, but I don’t get out much really!
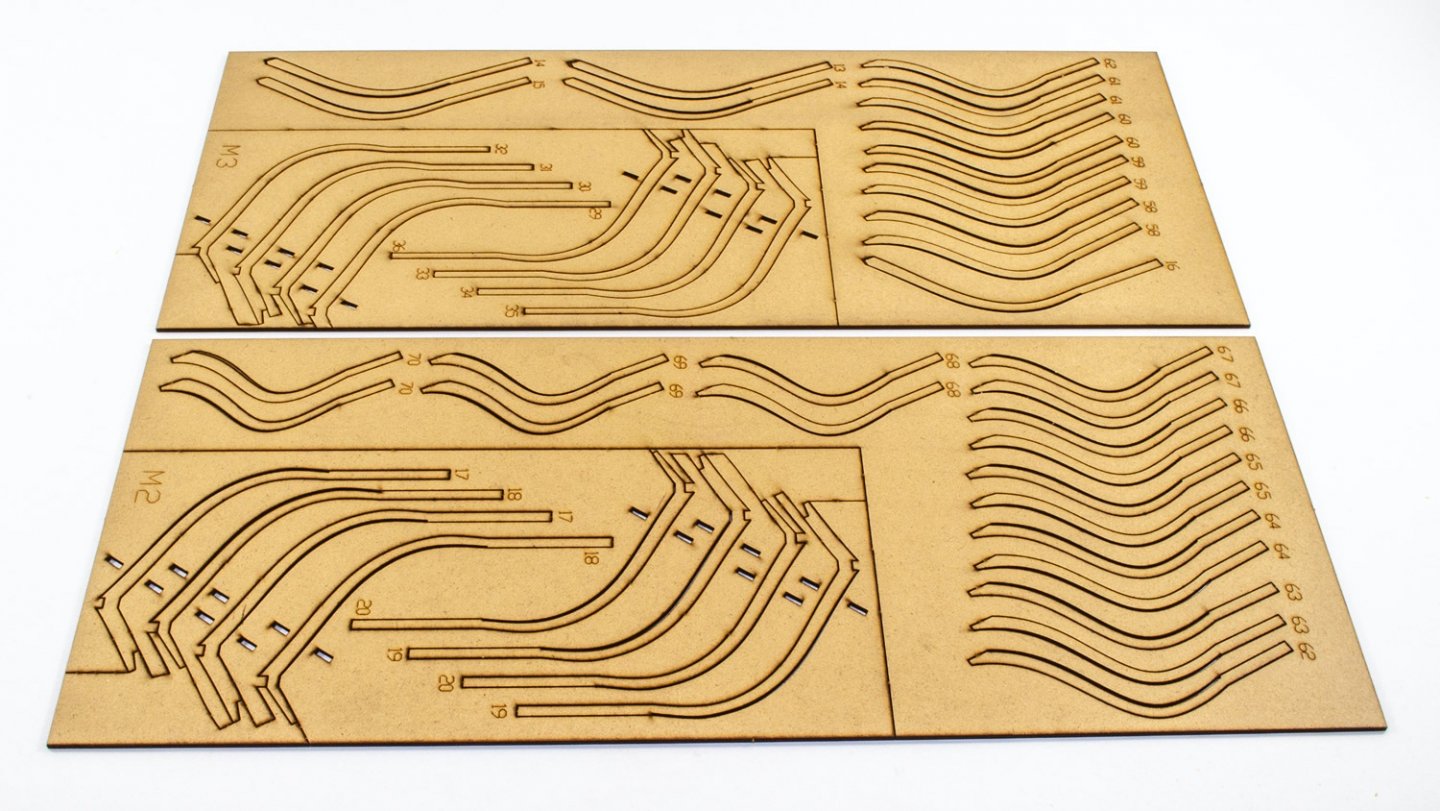
Most parts in here are in thin MDF and are generally very flat. You will need to take exceptional care in making sure the cradle is 110% accurate as you work. A quick test of a frame sheet into a frame slot showed it to be very tight. I recommend you perhaps scrape away the laser char to make things better, but still snug. In my test, that worked for me. All the subsequent frame sheets from the other packs seem to be of consistent thickness, but you’ll need to assess each frame/slot in turn.


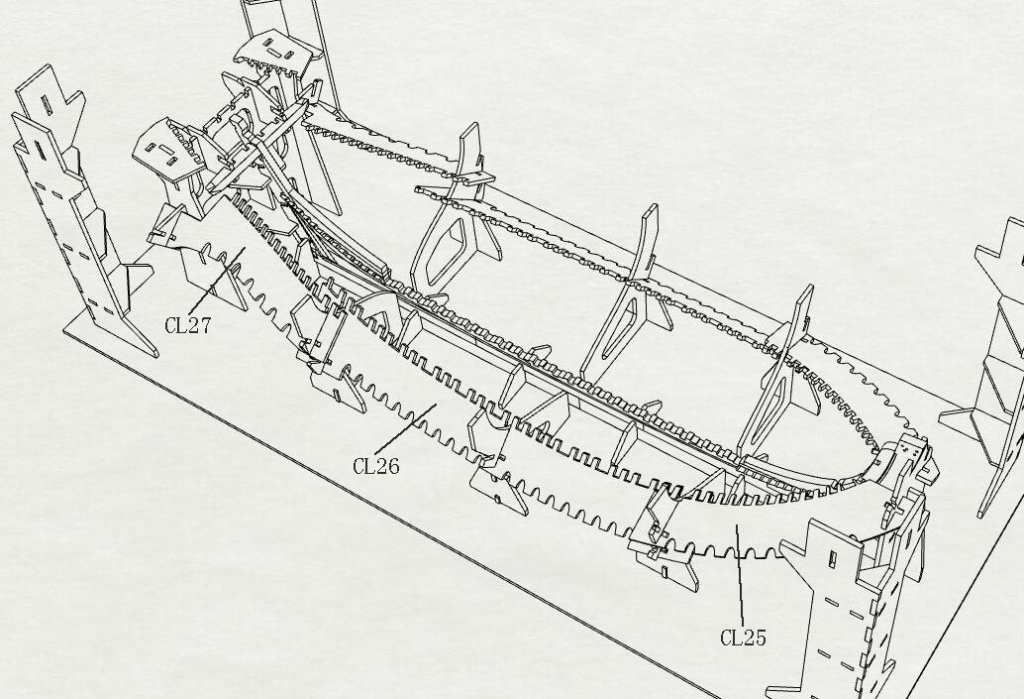
Unlike convention, the individual frames aren’t built over a drawing. Instead, they are built within a series of MDF jigs which have plugs to stop the jigs from splaying outwards when the parts are inserted. This will keep everything tightly together whilst the glue sets. There is a risk of accidentally gluing the frames to the jigs, so I would use some clingfilm, as it used for wrapping sandwiches, and lay it over the jig before you fit the components in.
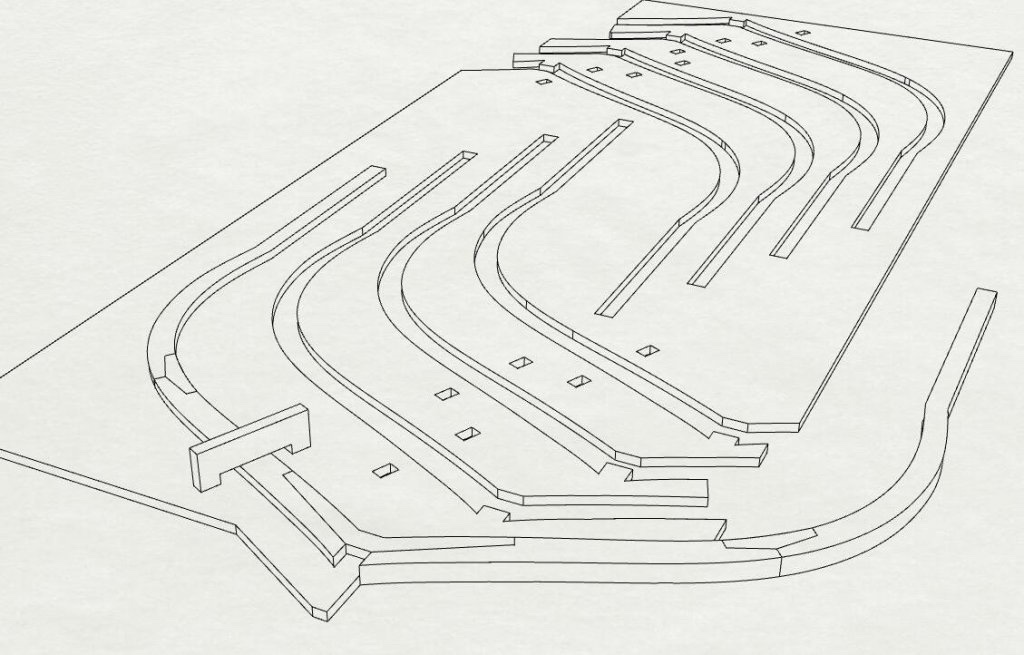
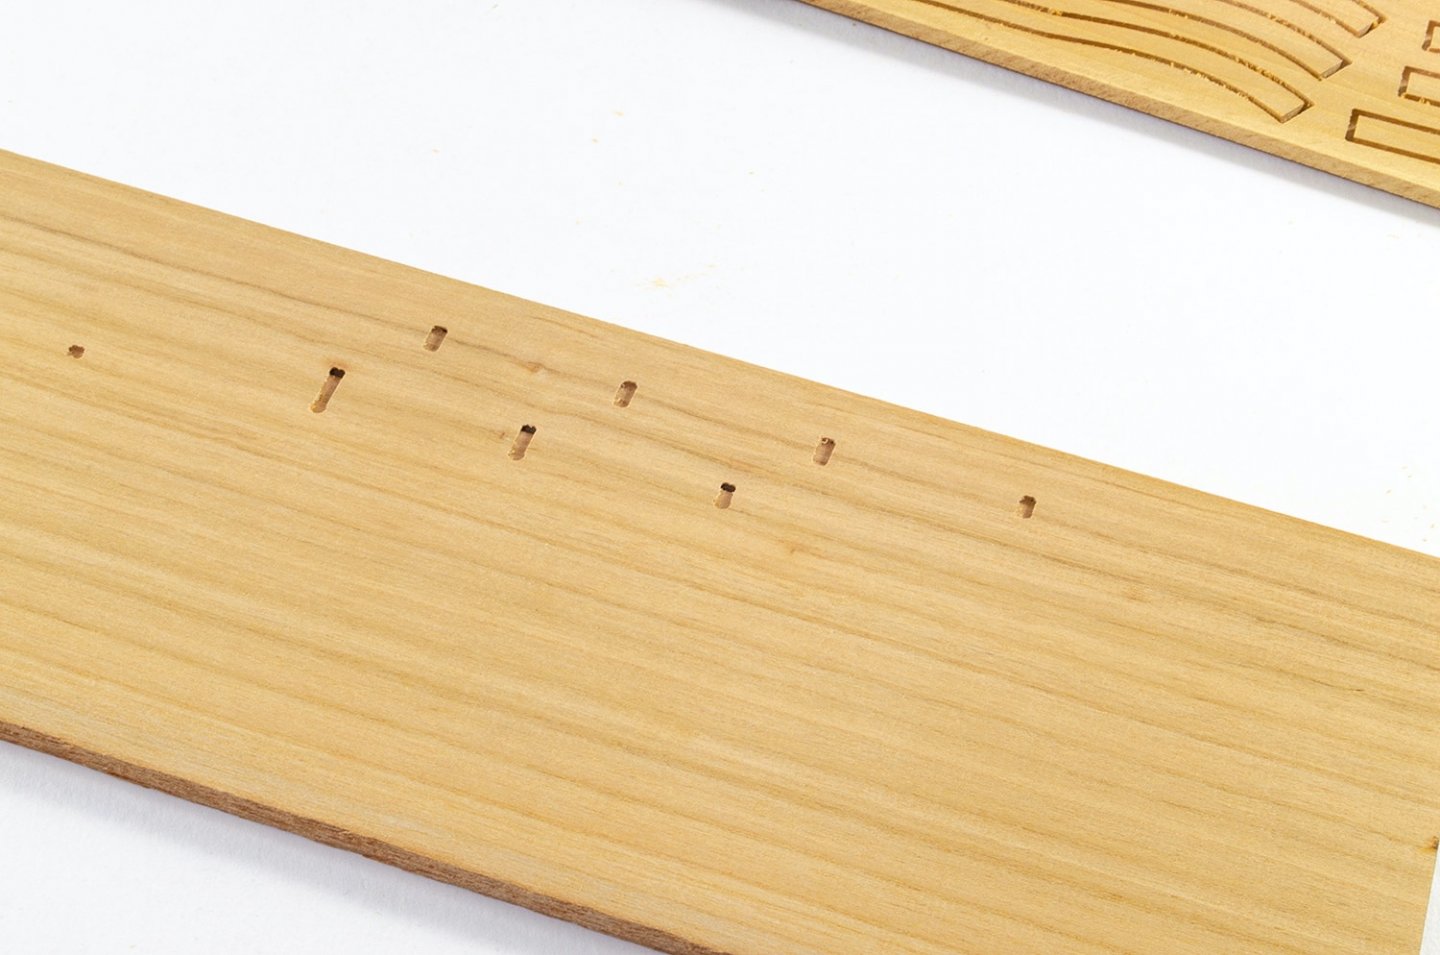
As with many POF models, the frames are taller than they should be, to help with construction. These need to be cut to length later in the build. This kit provides a template which fits to the cradle, and this gives the height of every frame so you can just mark the hull with a pencil before committing to the saw. Another jig is also included into which you will assemble the keel stern prow and deadwood timbers. This should ensure you get things absolutely correct before you progress to the many frames.
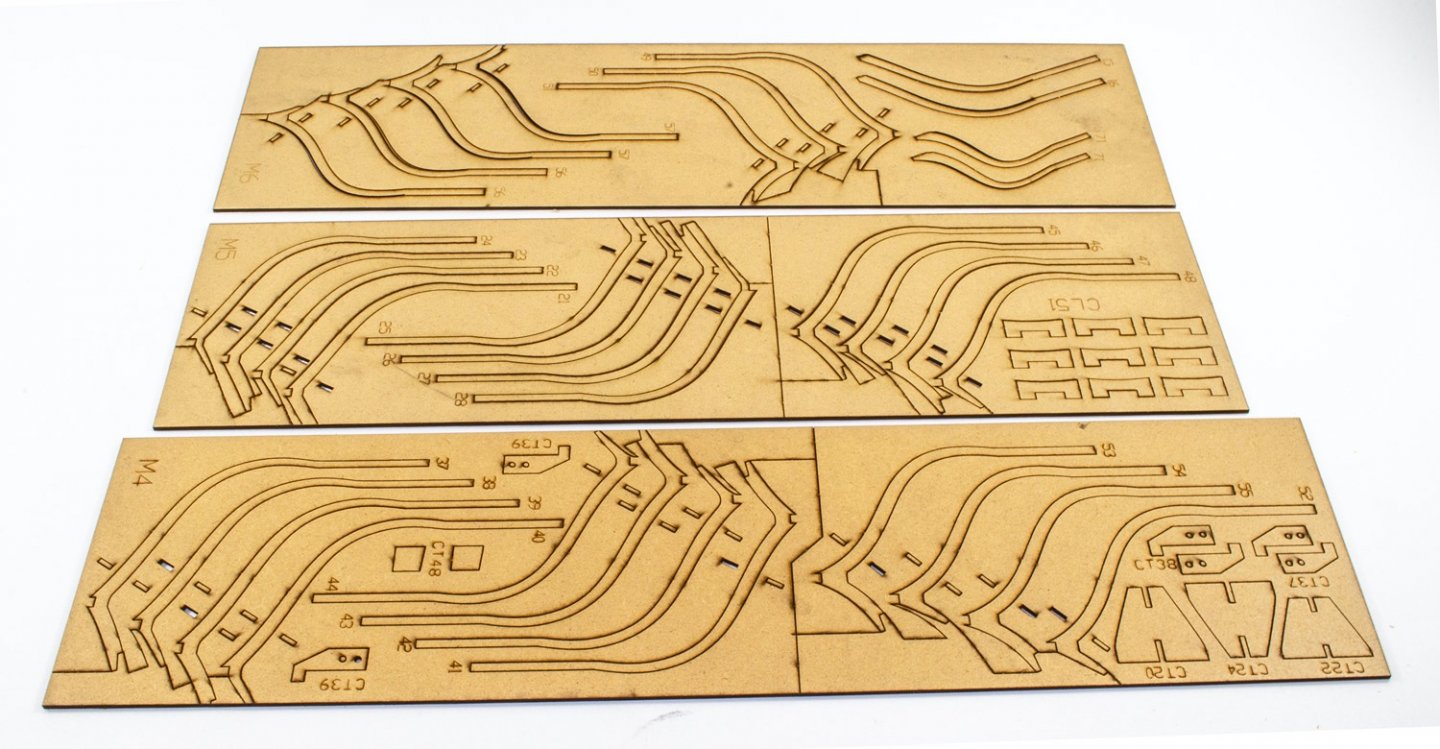
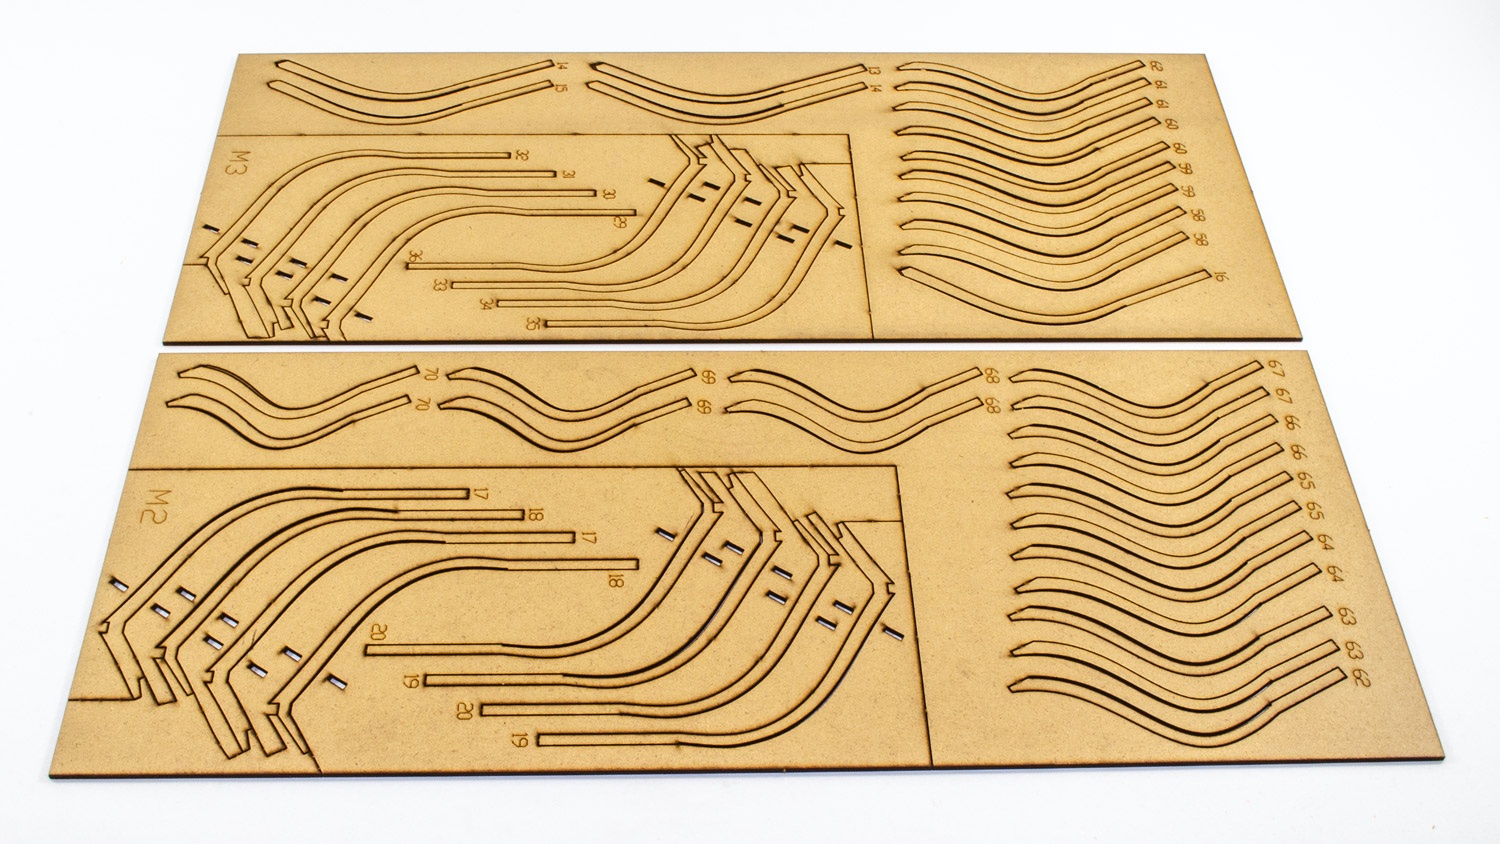
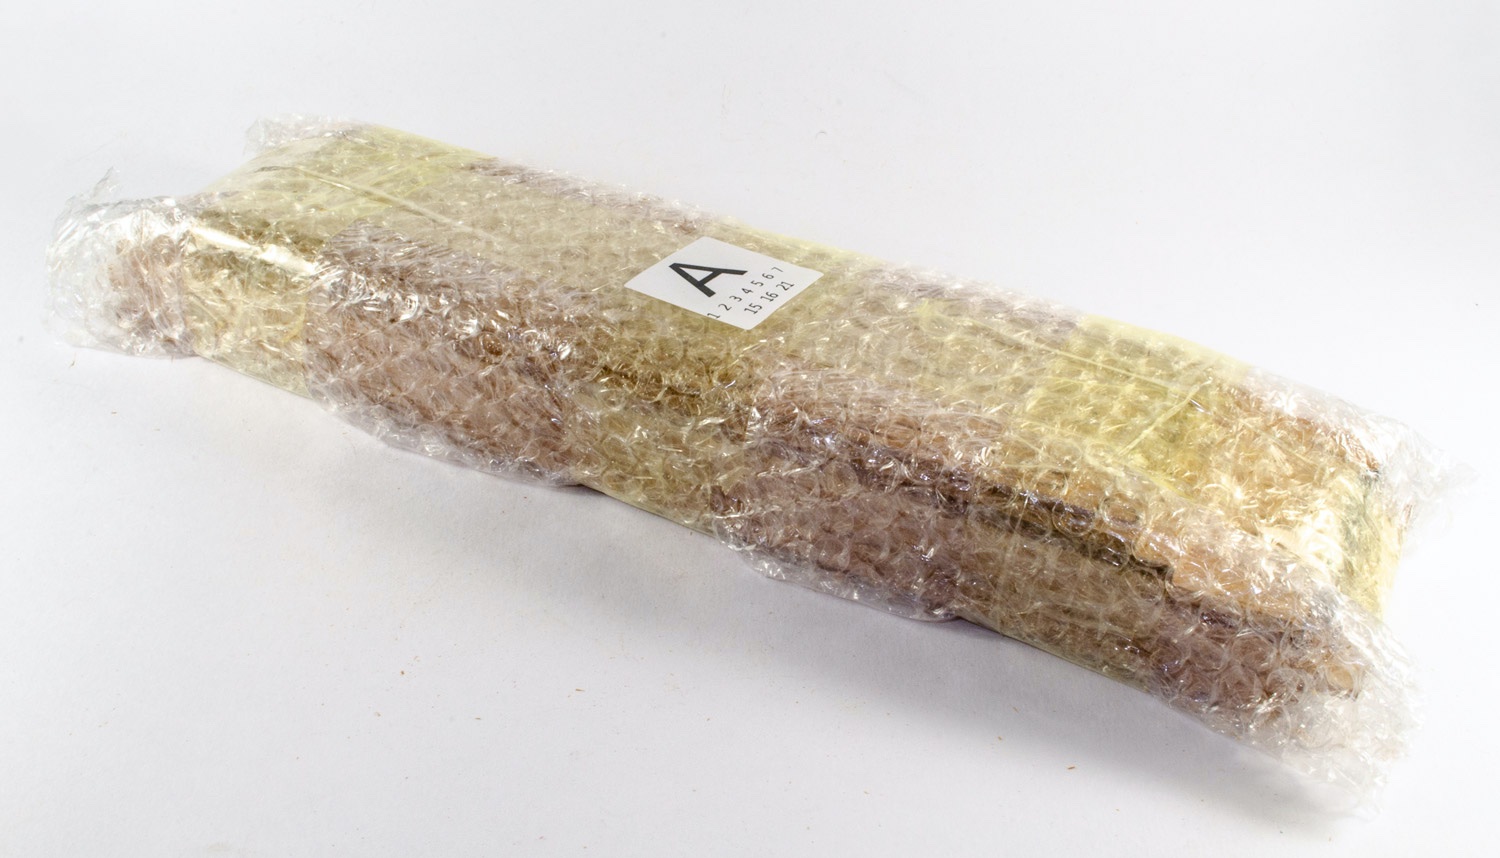
Pack A

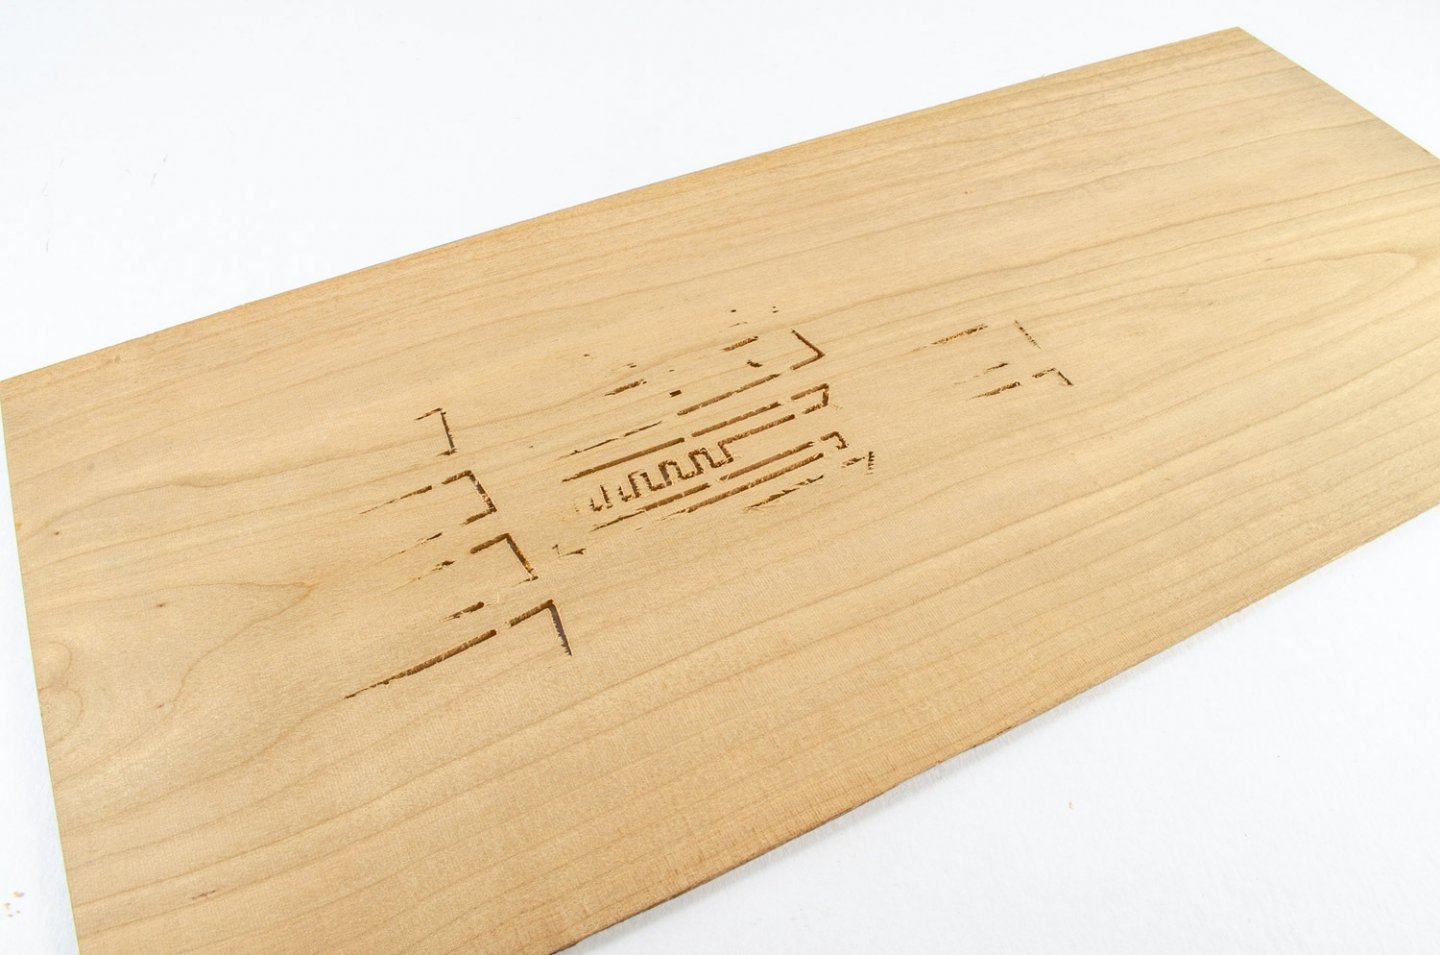
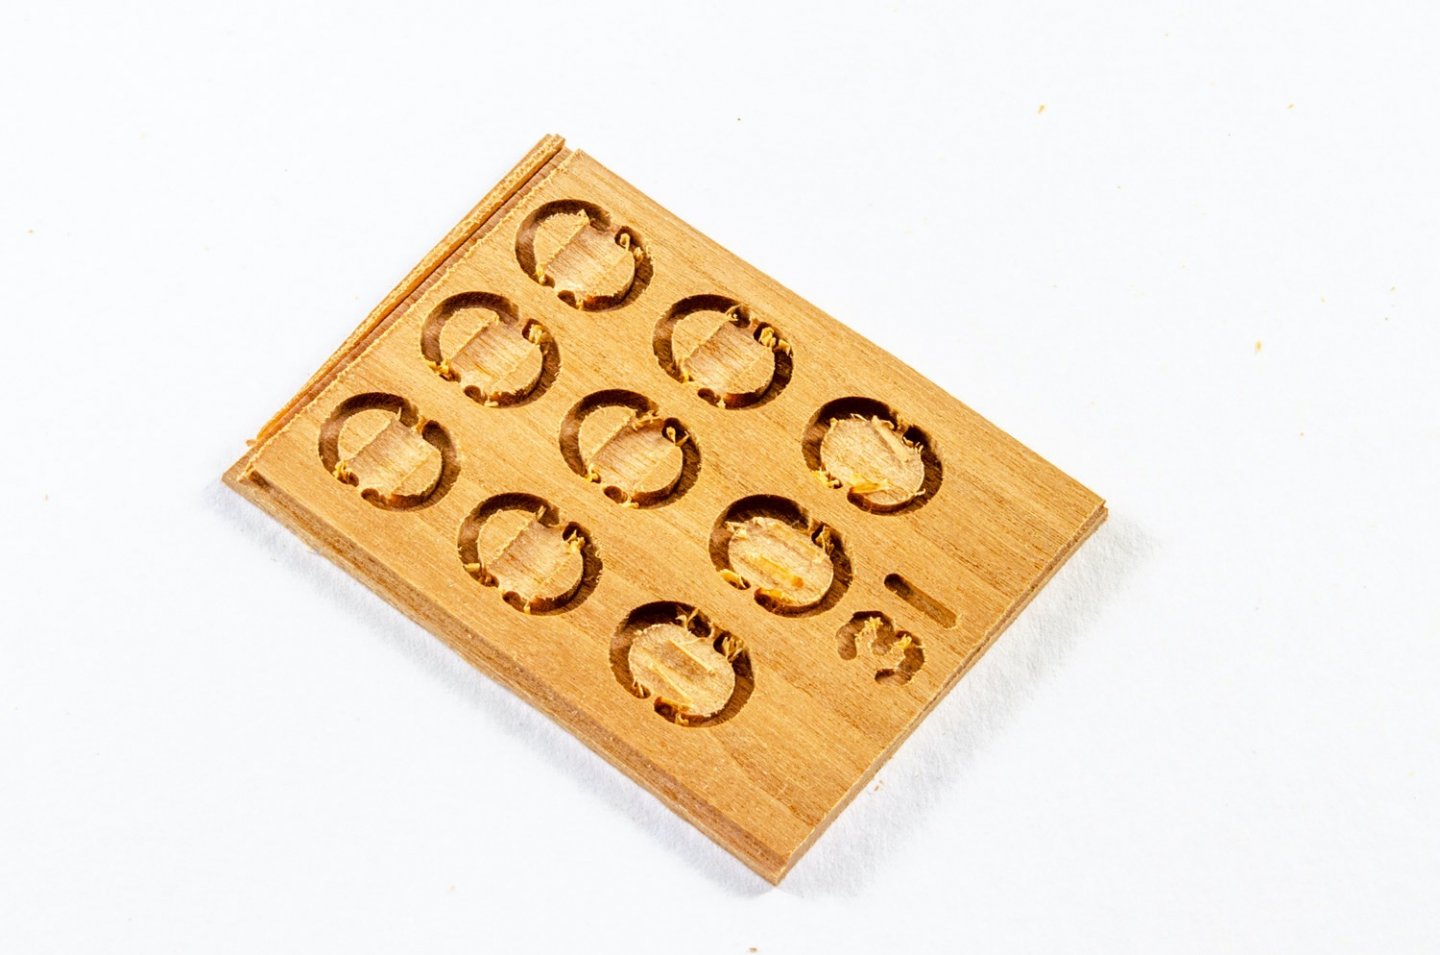
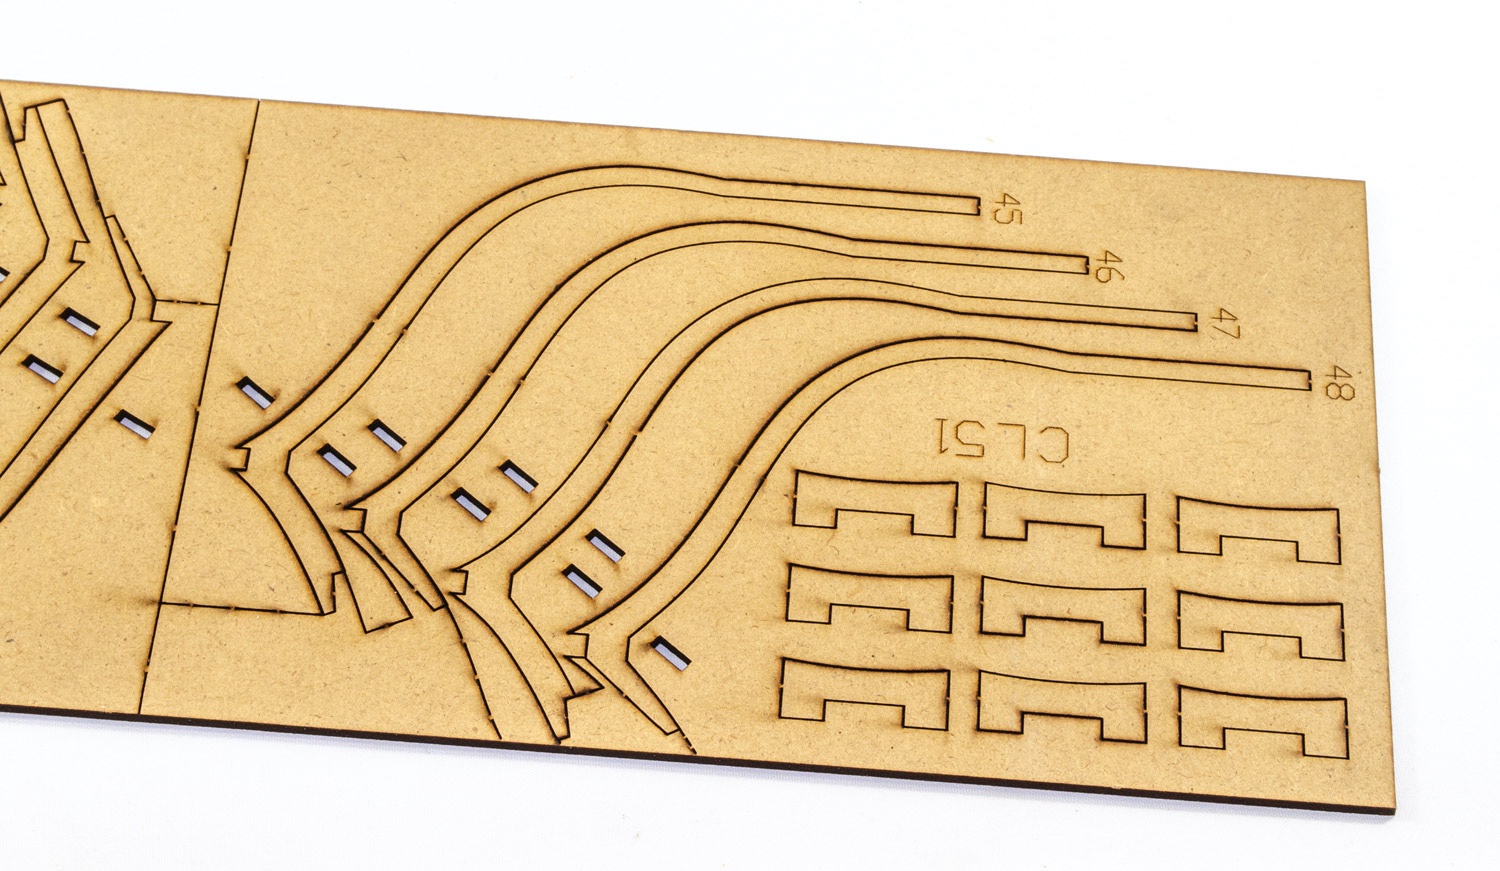
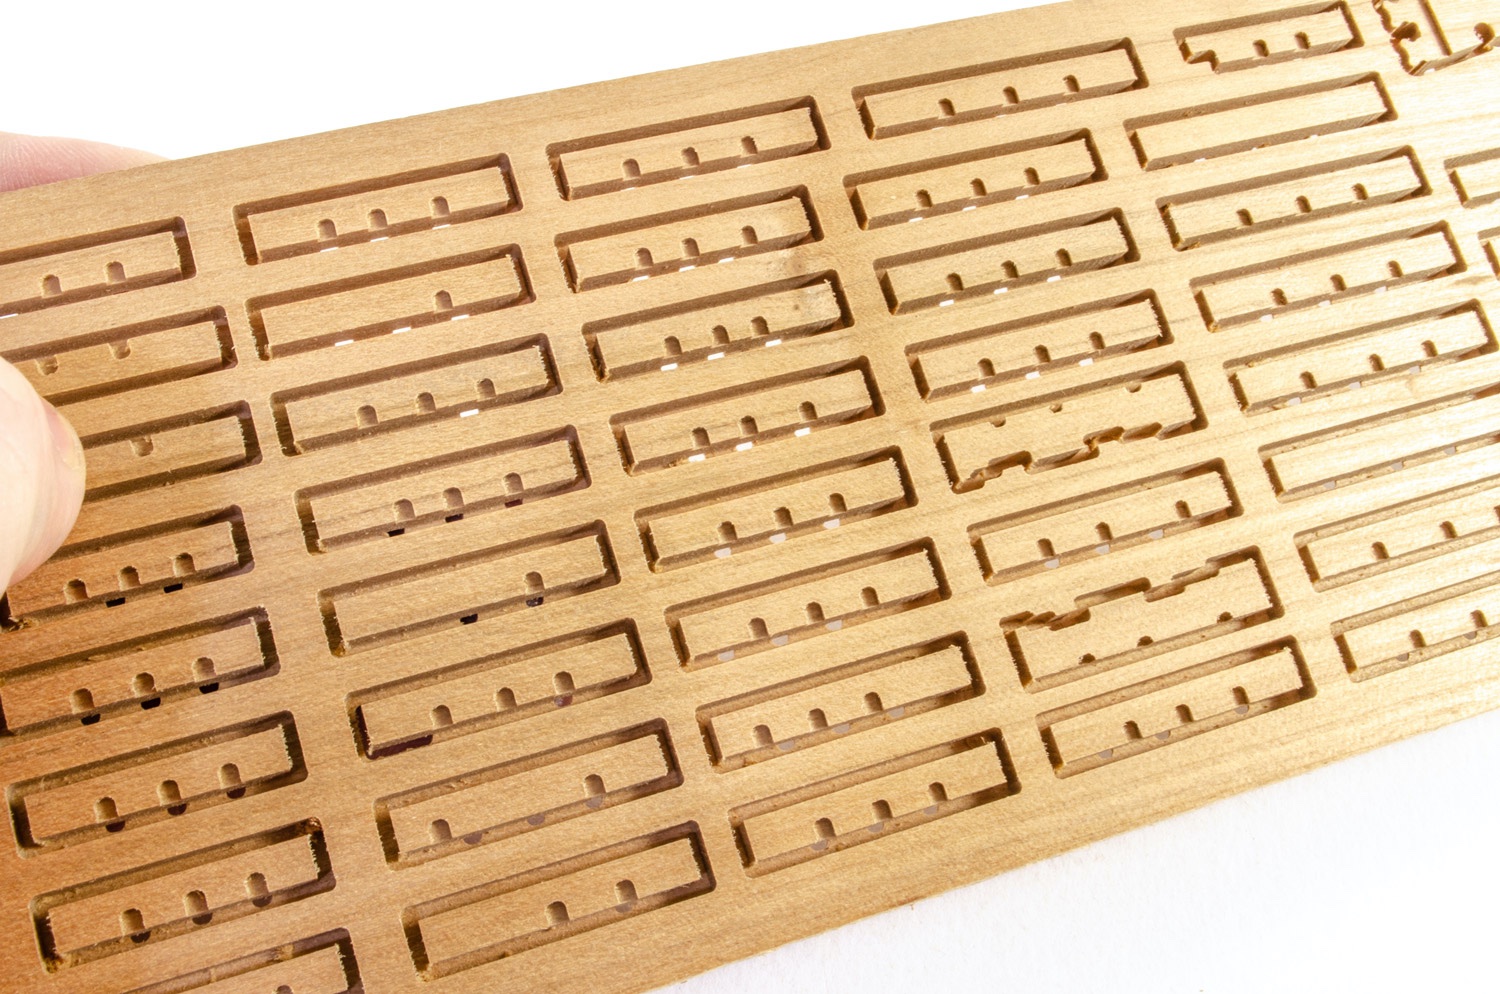
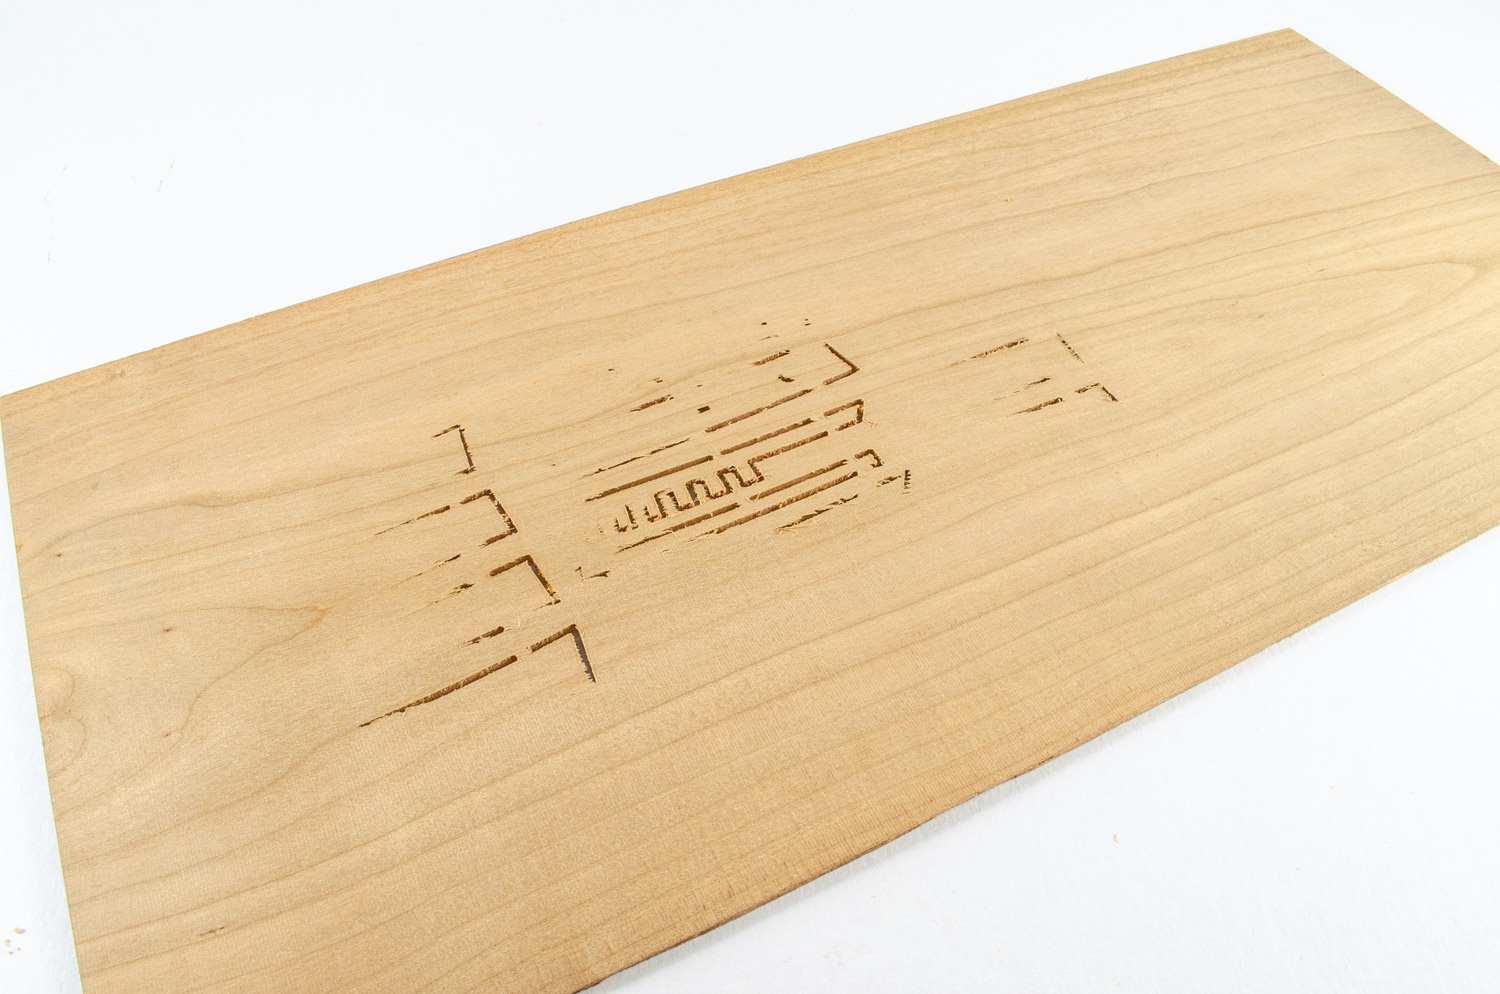
Each of the timber packs is labelled with the pack number, but also on the label are the numbers for the individual sheets, which is a nice touch. You can see from this one that Pack A contains 10 sheets of timber. All of these are in cherry wood. Some of the sheets in this packet vary a little in grade with regards to colour. More on that in a moment. The first thing you’ll note when opening is that all sheets are packed with cutting debris from the CNC router. A lot of this in my example is highly compacted and it takes far more than teasing it out to clean the sheets up. This material is substantial too, with both packs having enough debris to quarter-fill a small shopping carrier bag.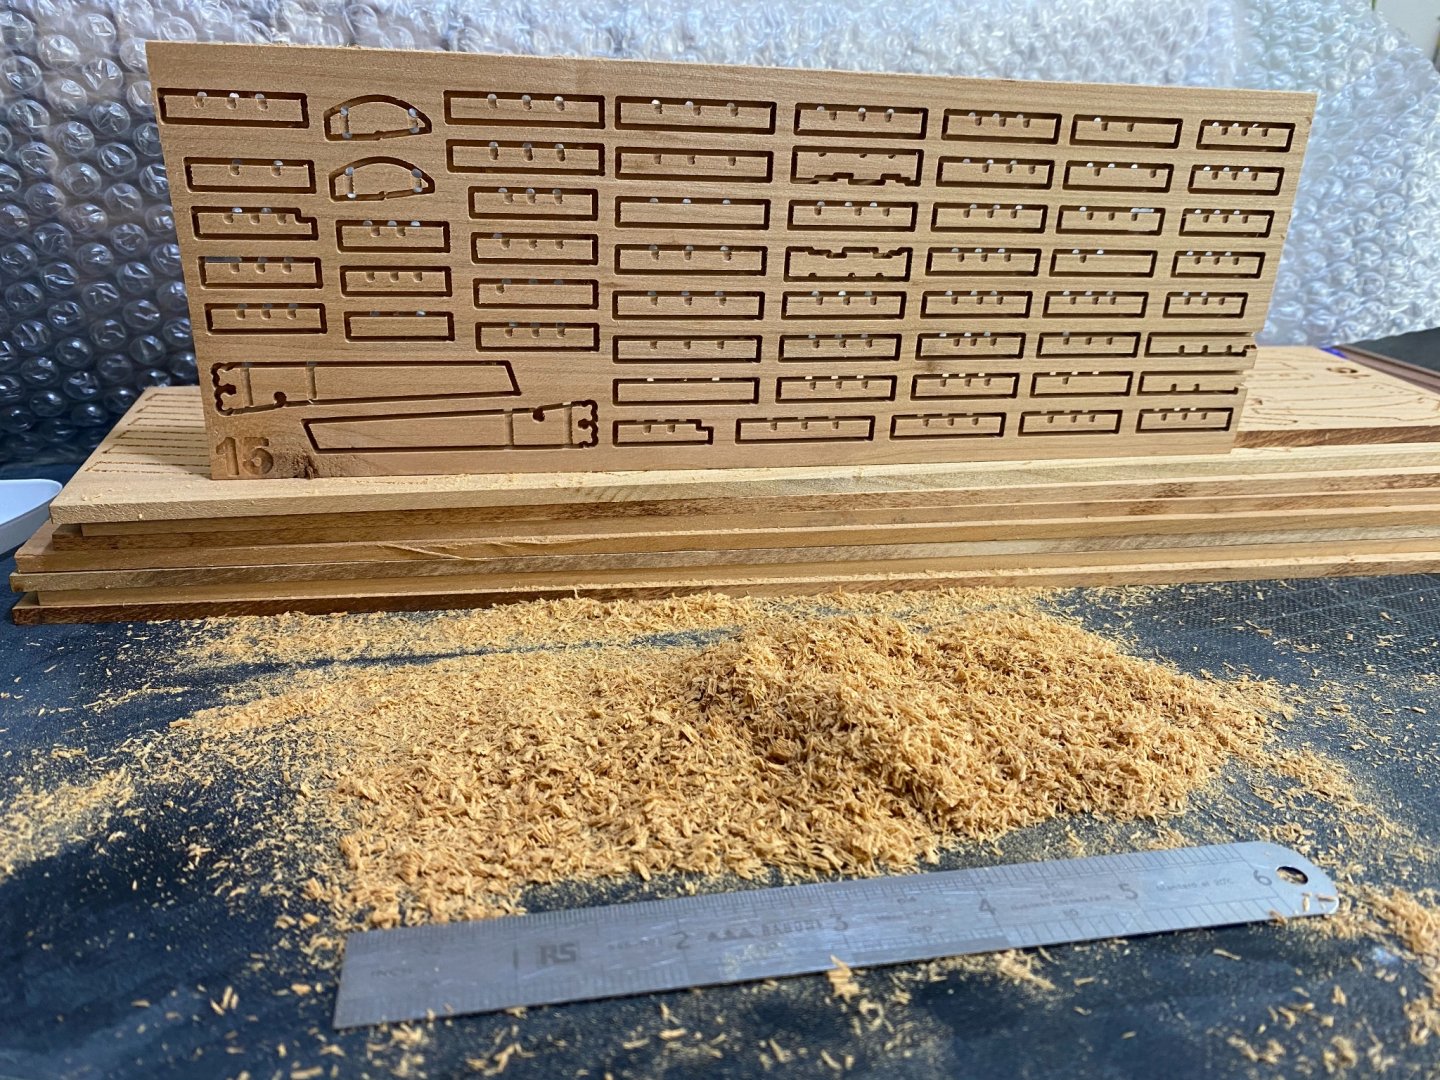
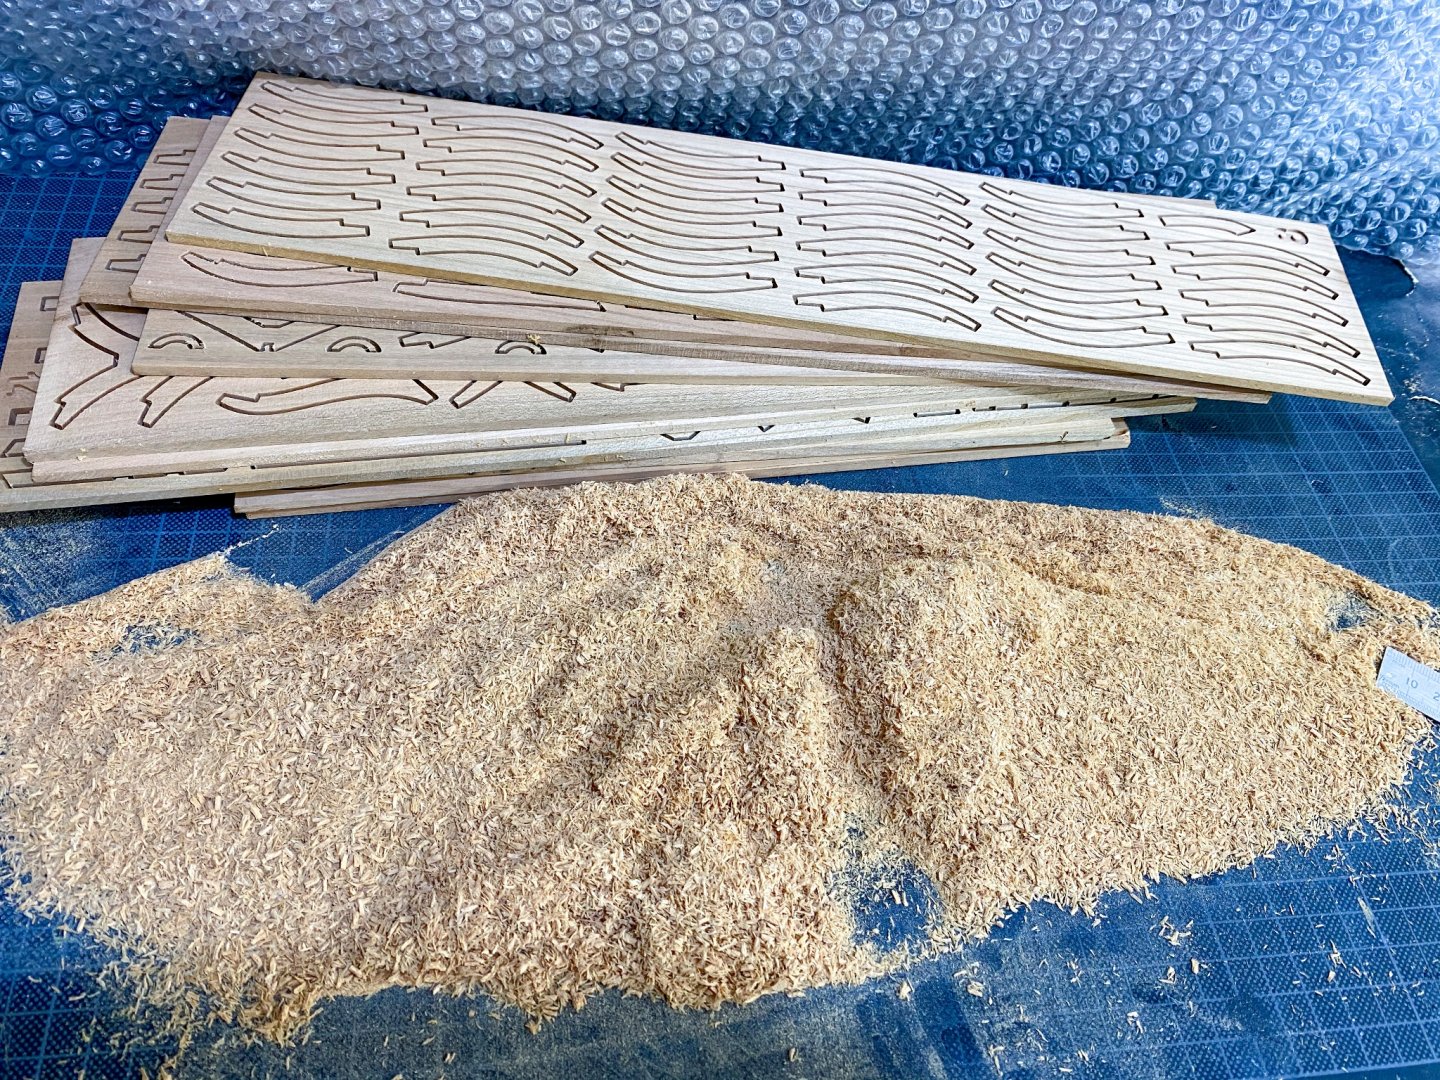
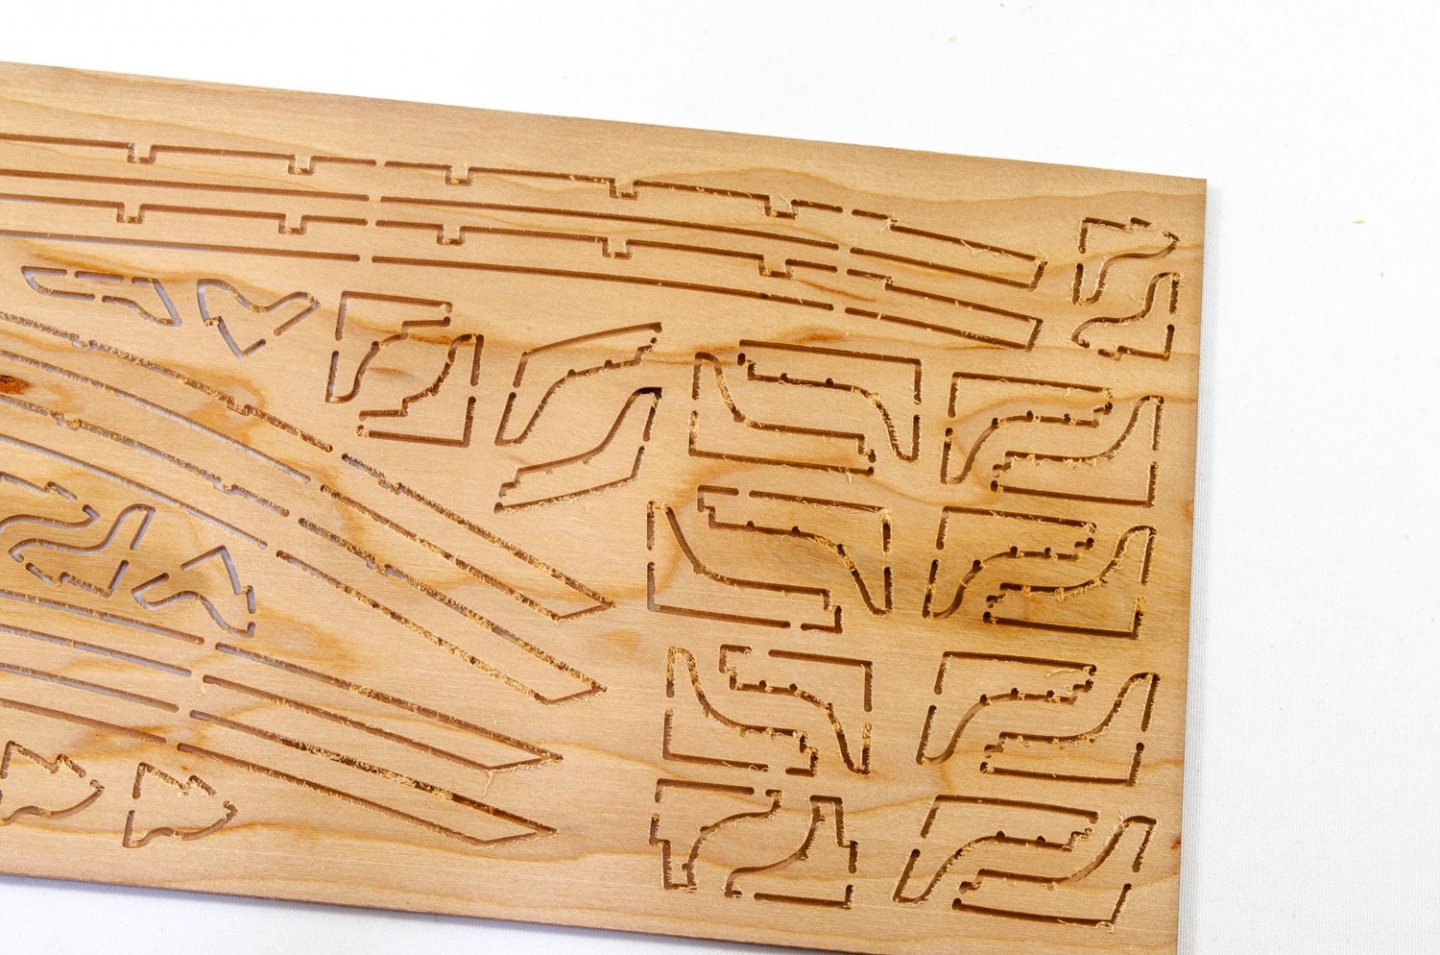
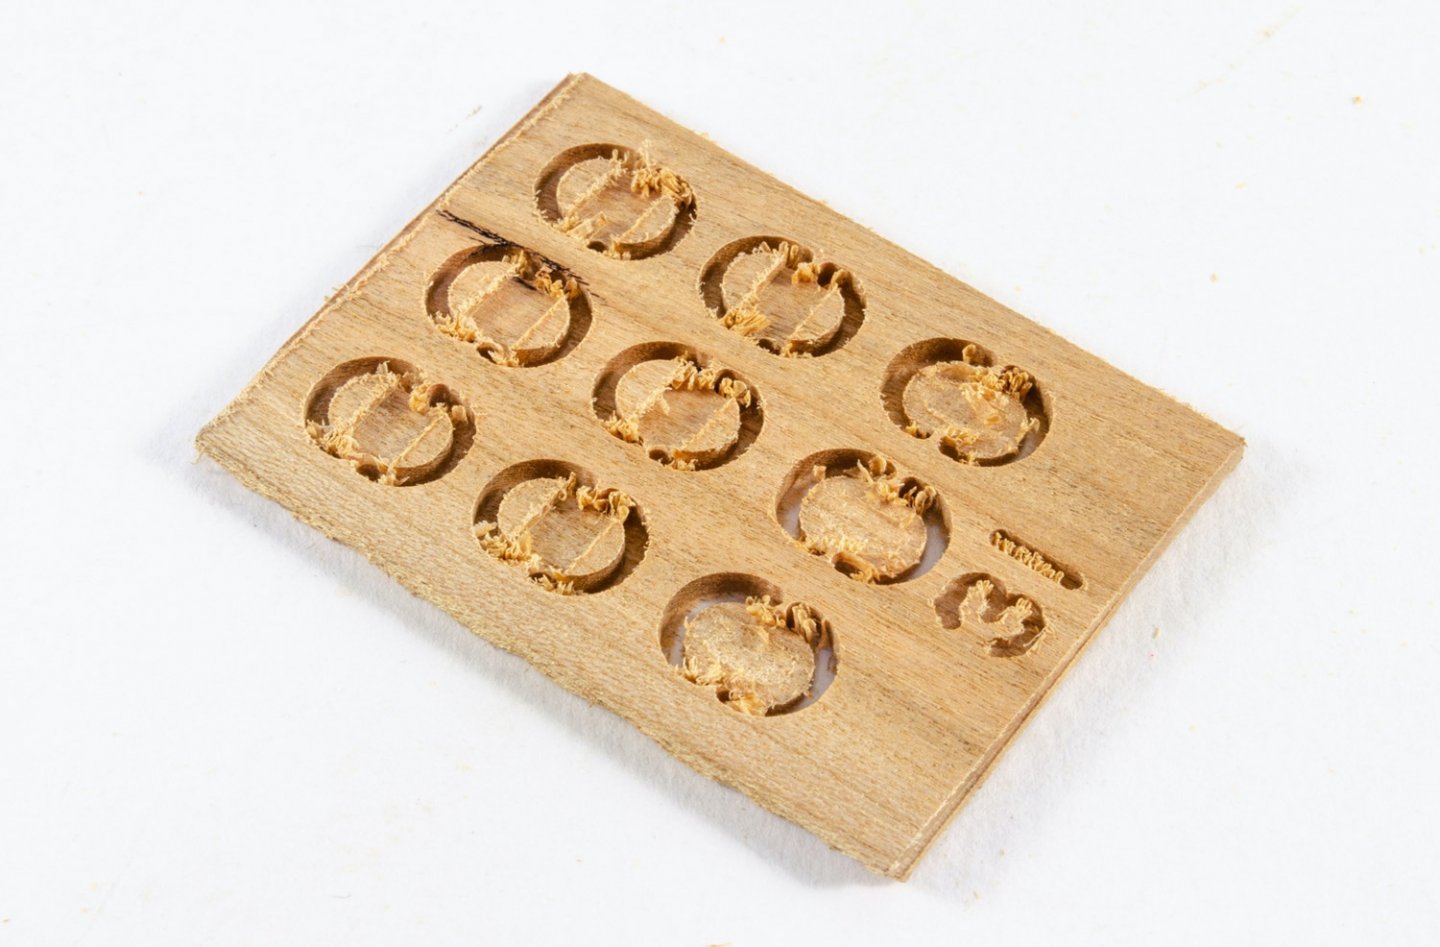
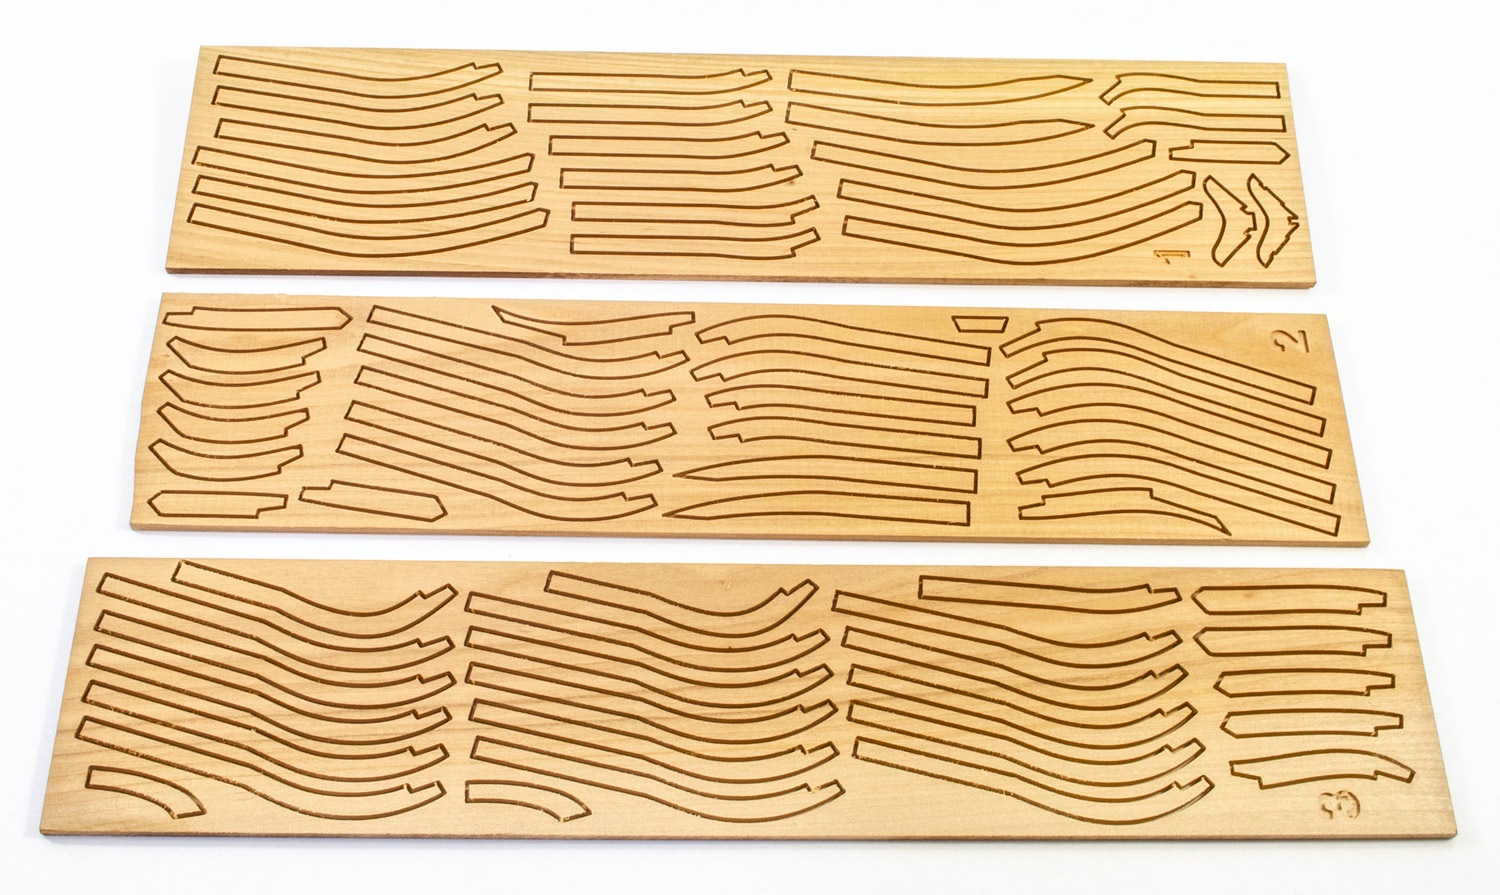
Now, the sheet colours can vary across individual sheets and here is where I found a problem in debris removal. Where the sheets are uniform and slightly darker, the material came out fairly easily, although still time consuming. Where the wood was lighter, the debris was very difficult to remove and the edges of the machined parts were rough, and in my opinion, needed replacing as it’s likely some of that roughness wouldn’t all be sanded away during construction.


One sheet in particular took a full afternoon to remove the debris, and the results highlighted lots of rough machining. As some sheets also had darker bands of timber, that is where the debris removal was quite easy, so the roughness generally seems to be limited to the lighter sheets or those with lighter bands on them. Of course, with CNC parts, whilst you get nice, sharp external corners, you do get rounded internal corners which then need to be cleaned up and the corner cut manually.
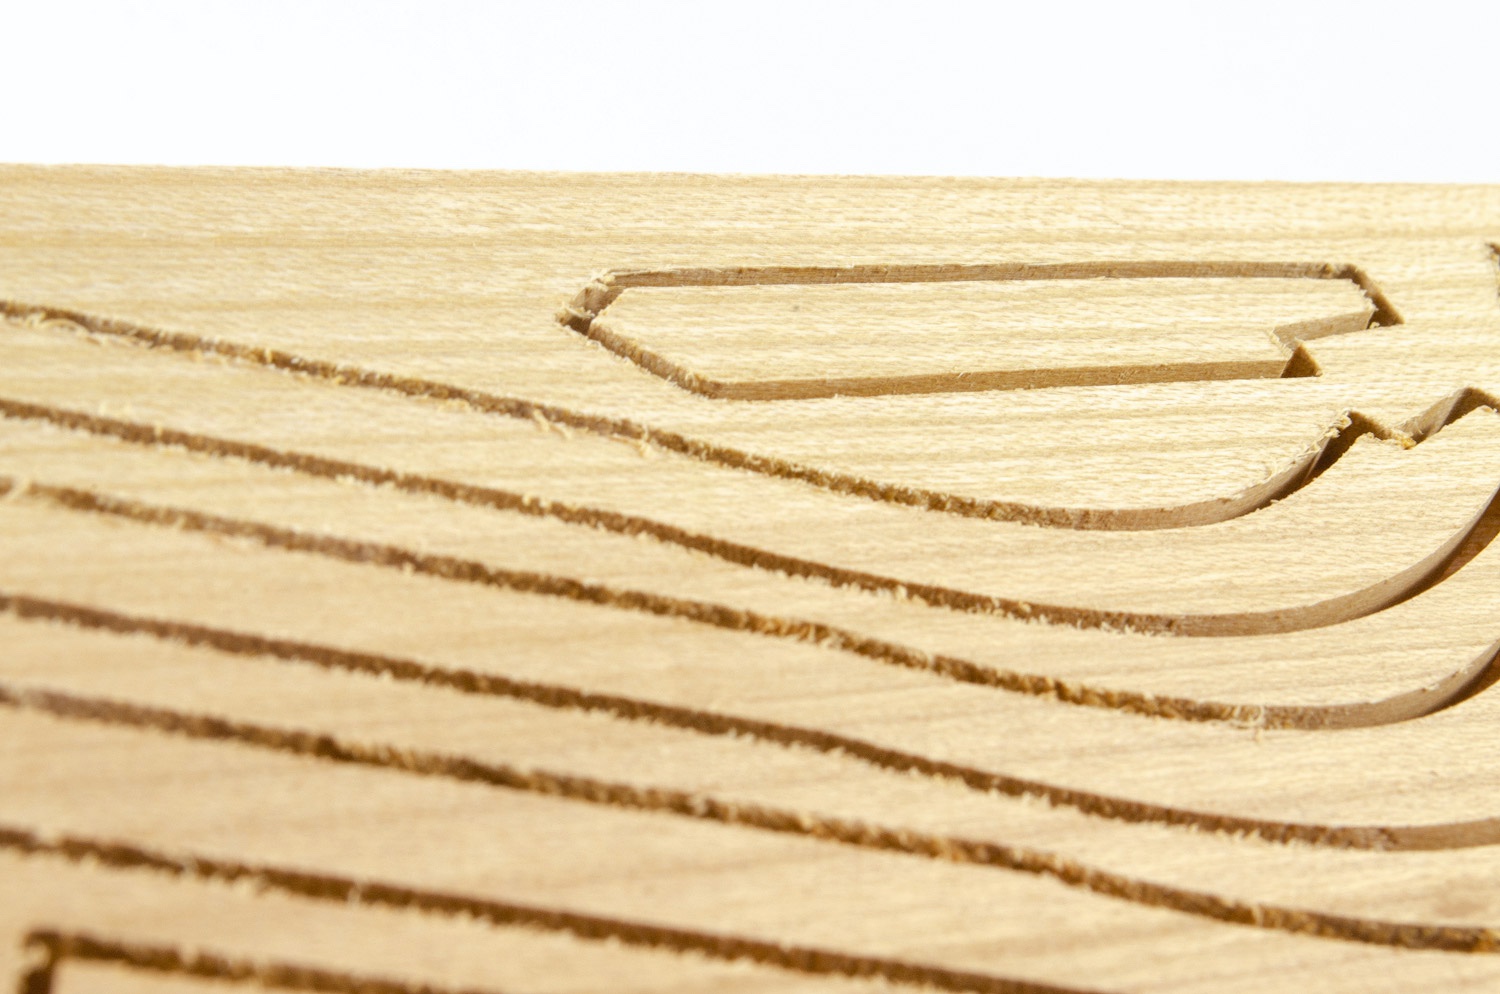
You can see on these photos the rough surface to some of the part edges, some of it very jagged indeed:
Aside from debris and the four aforementioned sheets, the CNC cuttings is actually very good, and each frame is constructed from around five timbers, plus chocks.
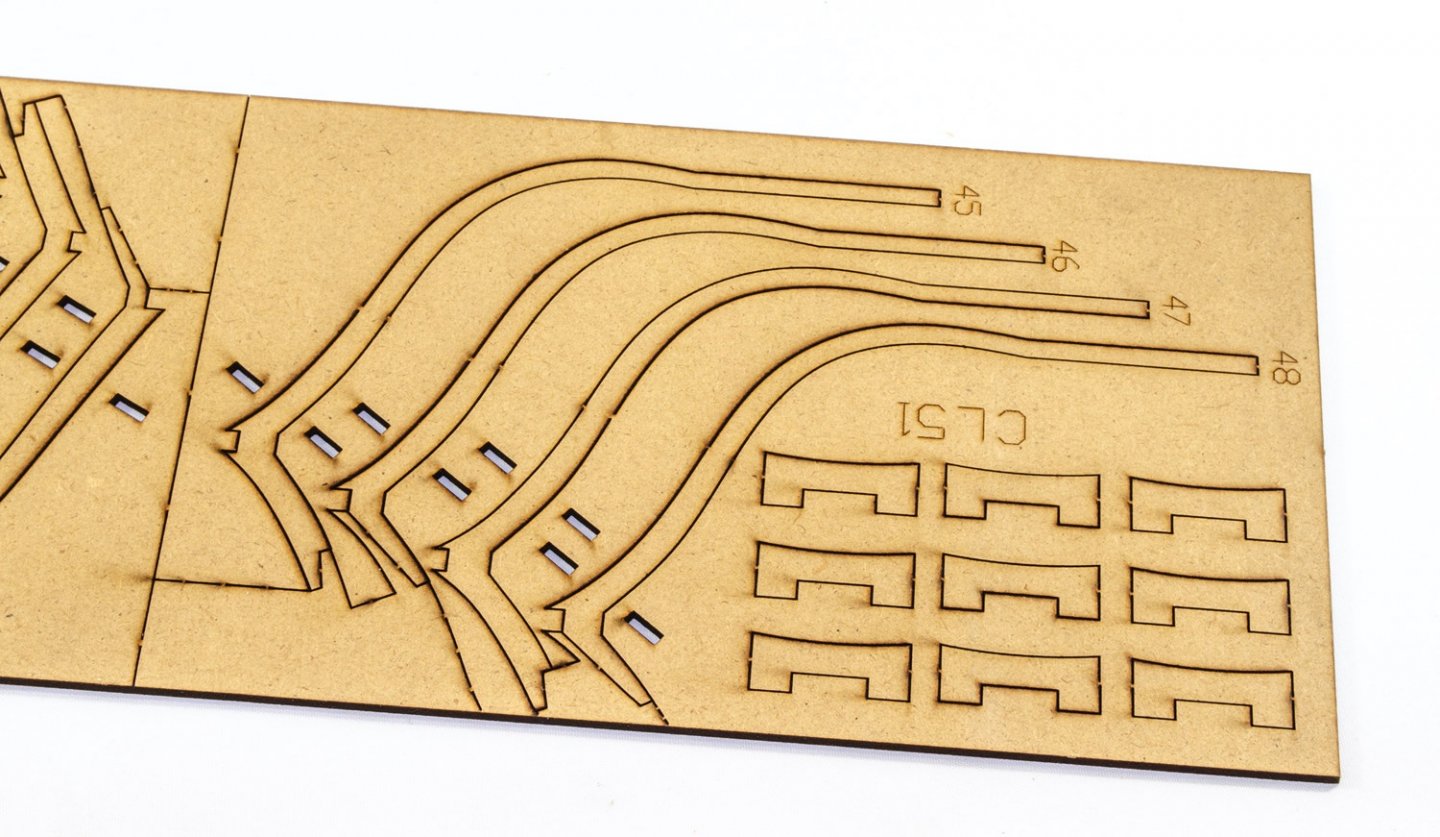
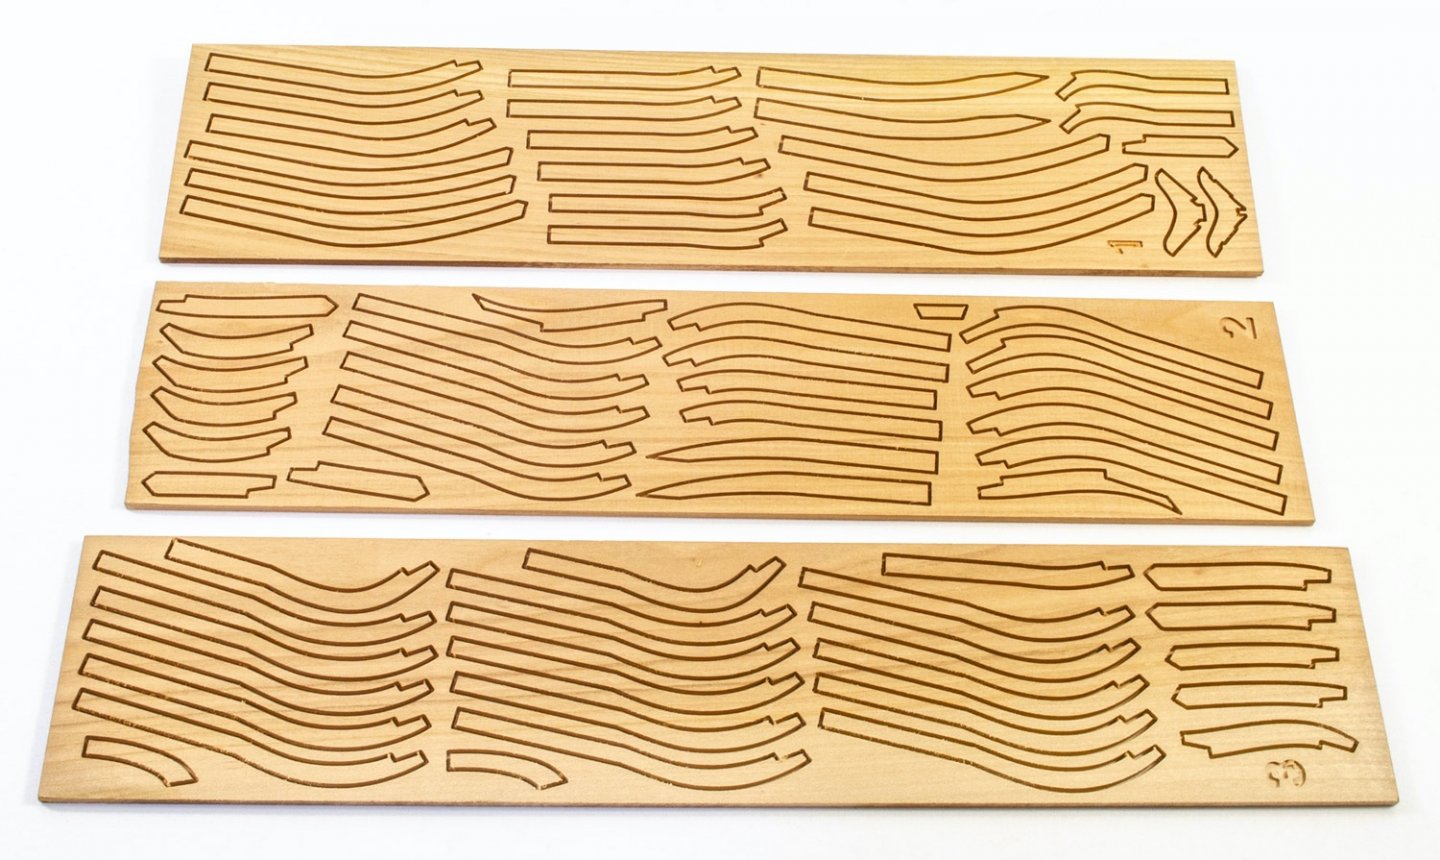
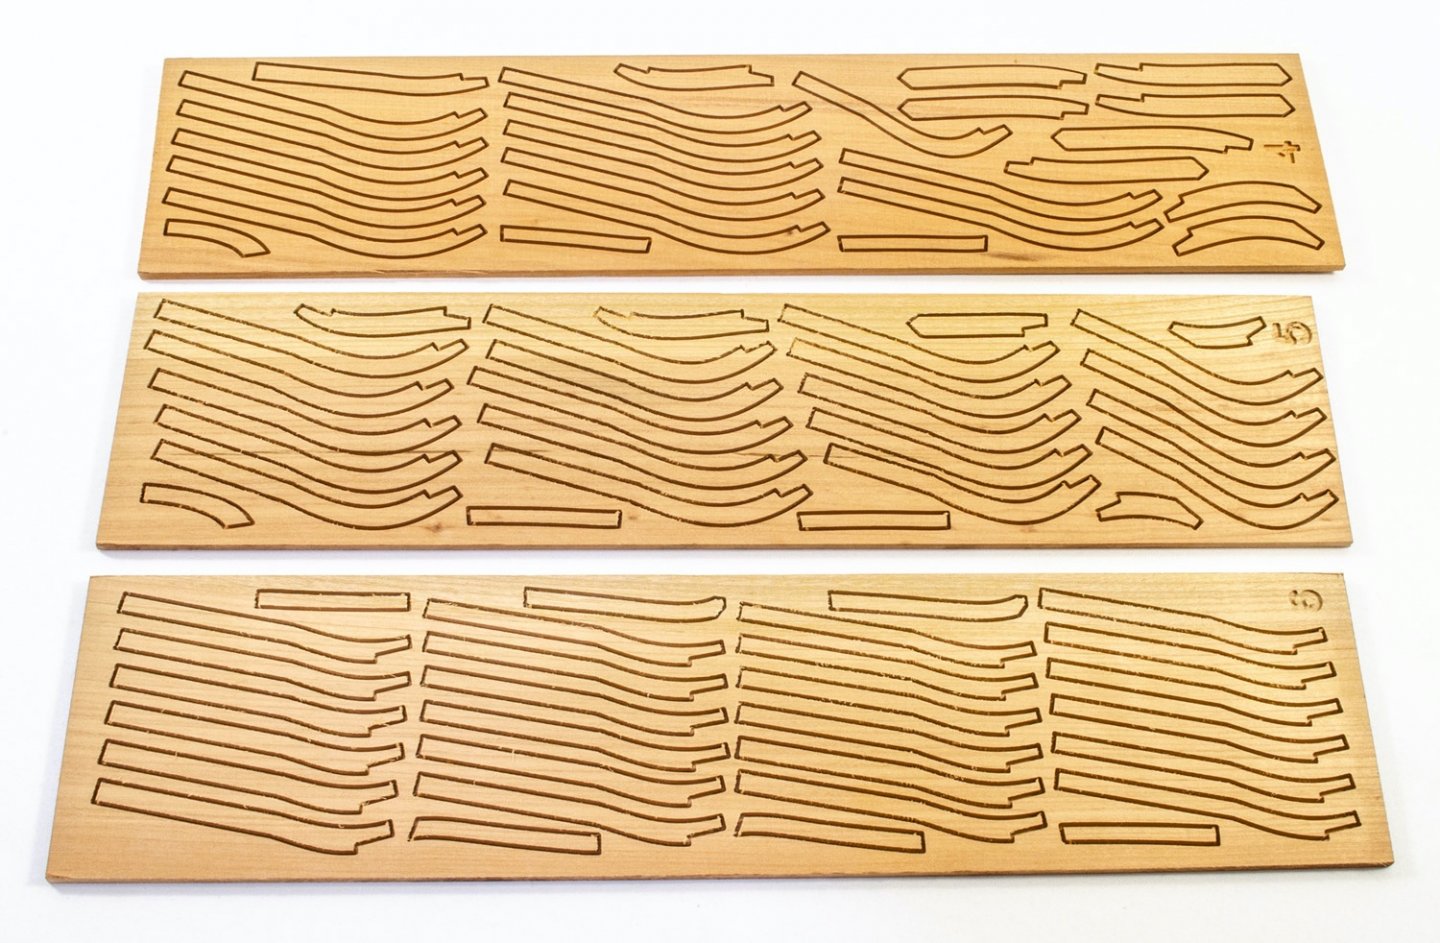
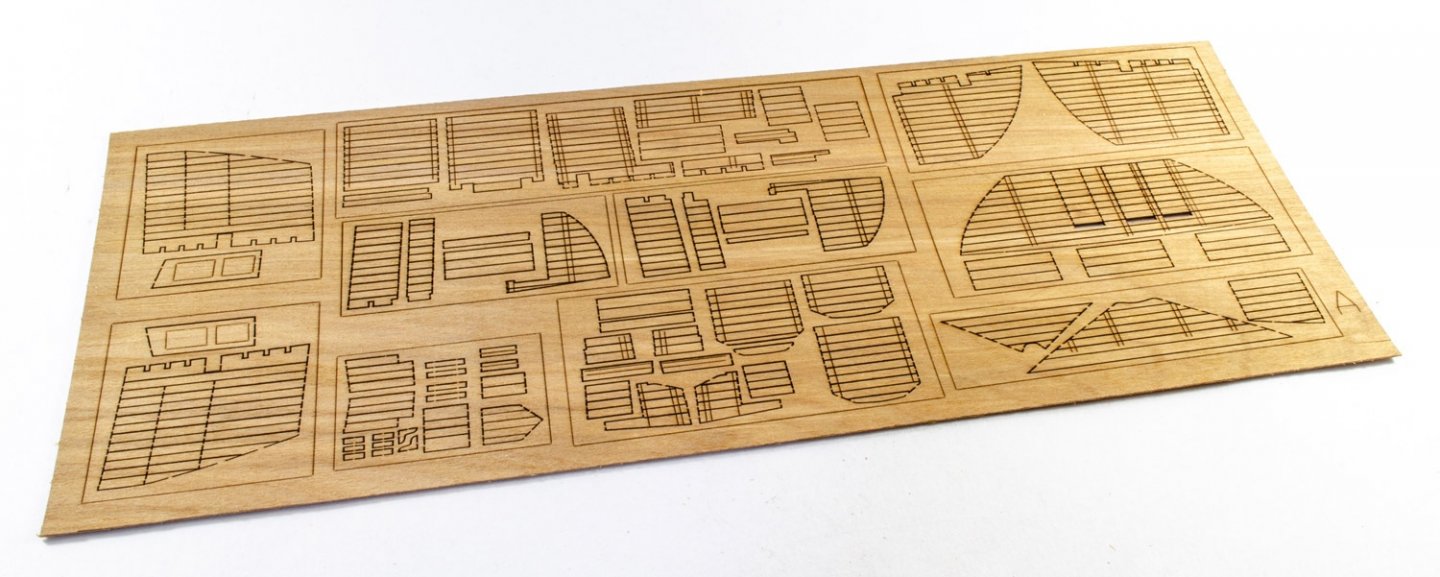
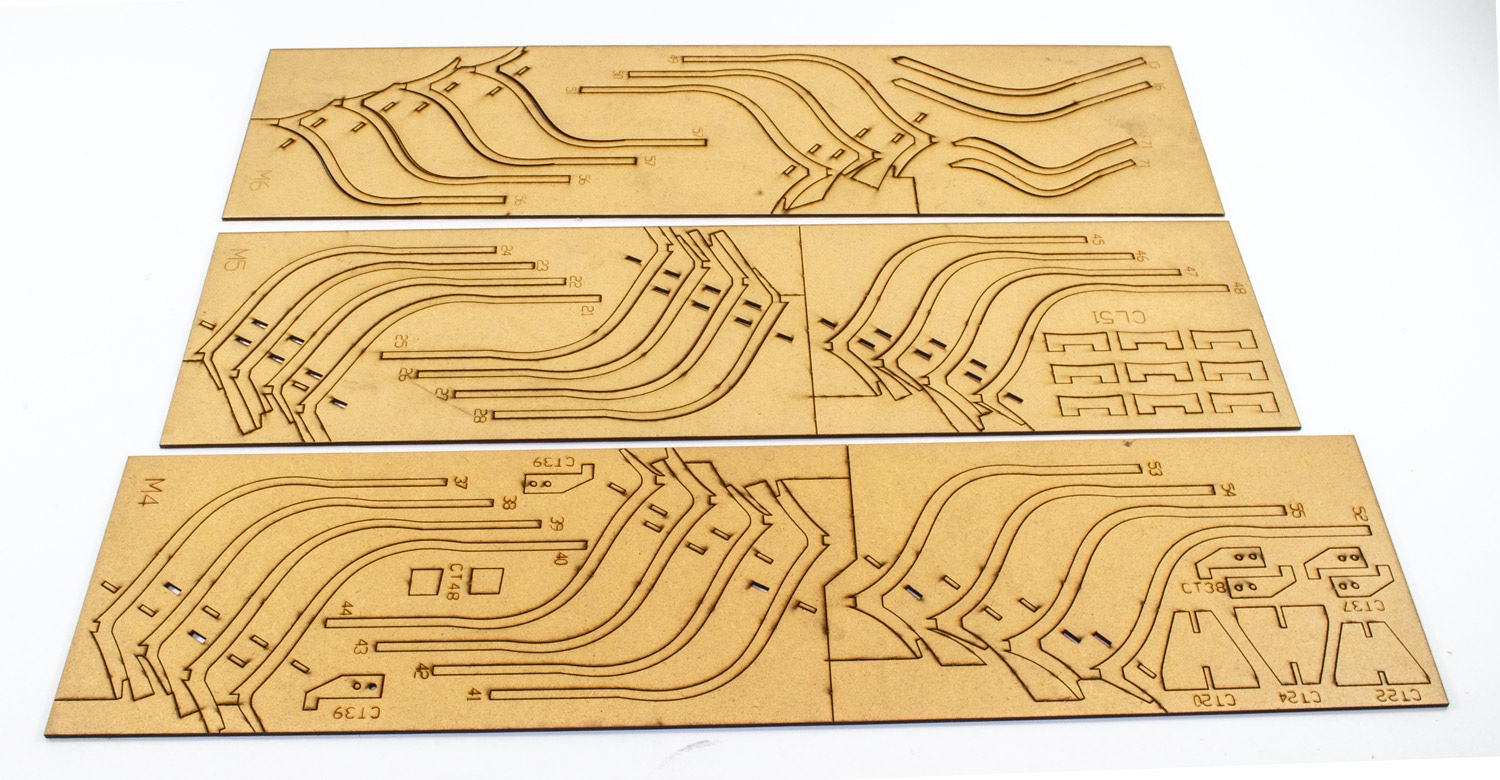
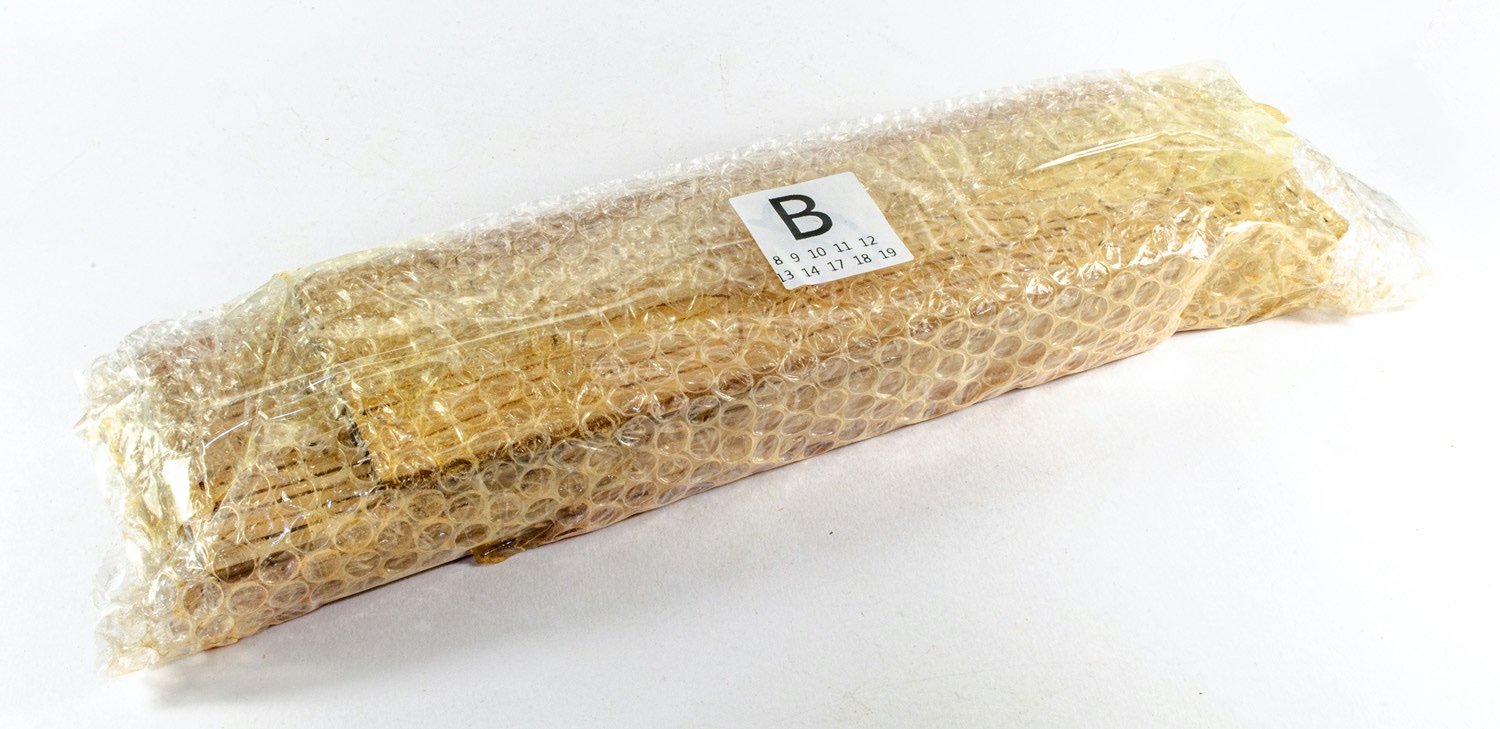
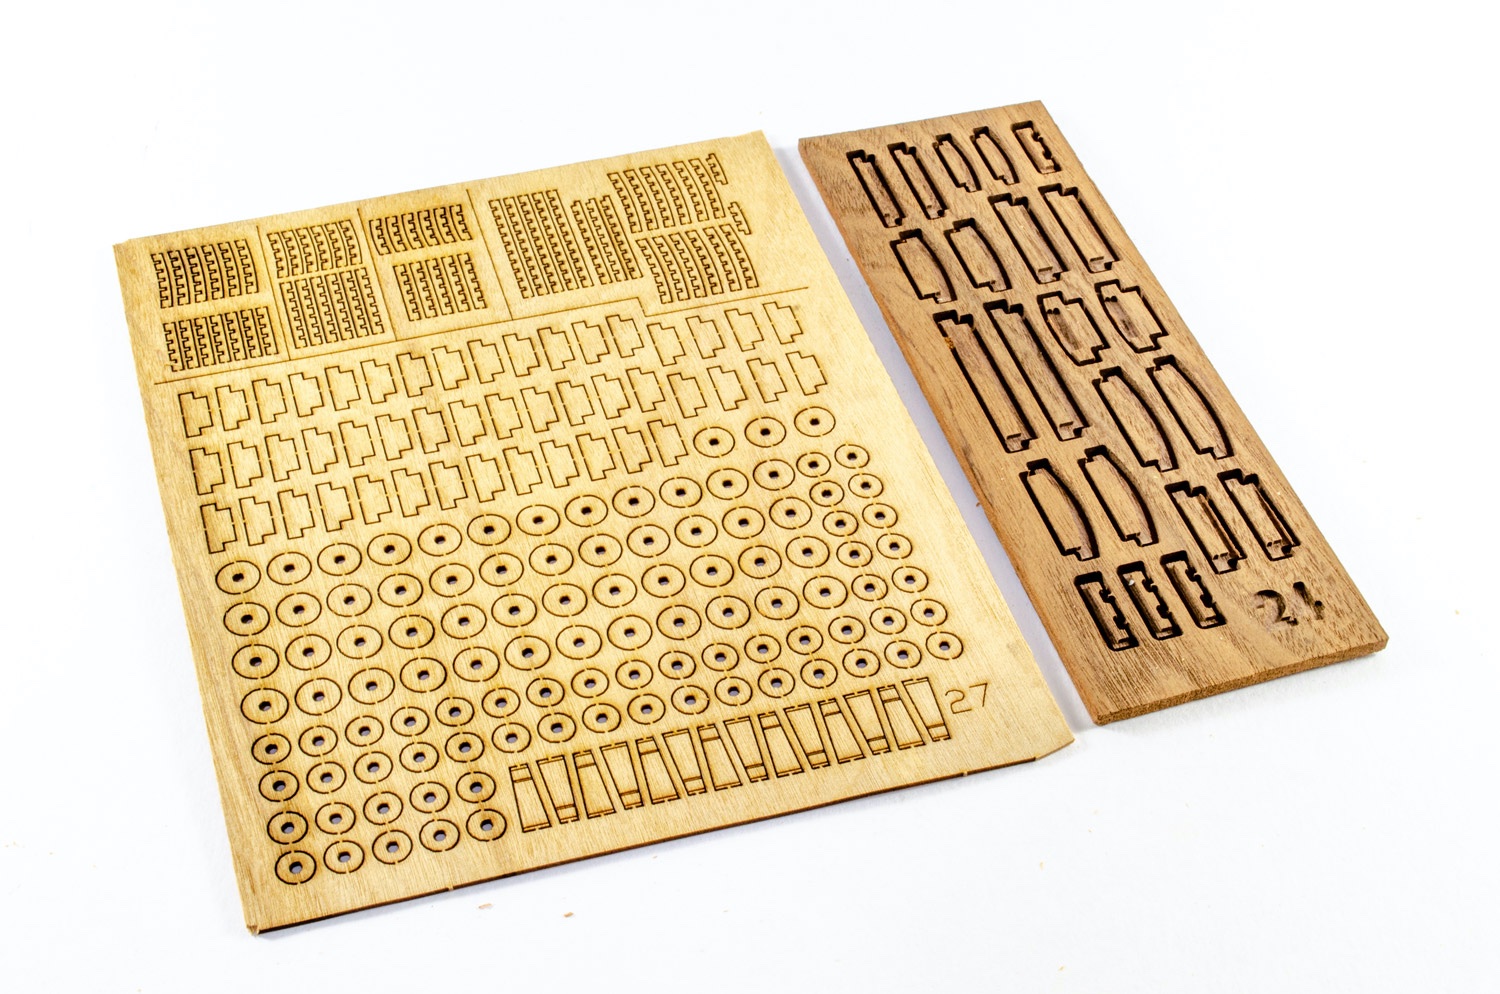
Pack B

A further ten sheets of cherry wood are included in this pack, again, all CNC-cut. As with the other pack, these parts, which make up more of the hull’s framing and the rest of the main construction, are simply removed from the sheets by cutting through the thin web of material that’s left from machining. A small number of parts actually dropped from the sheets as I tapped them on the bench to remove the last traces of debris from the CNC process, so I taped those back in place to protect them until build time.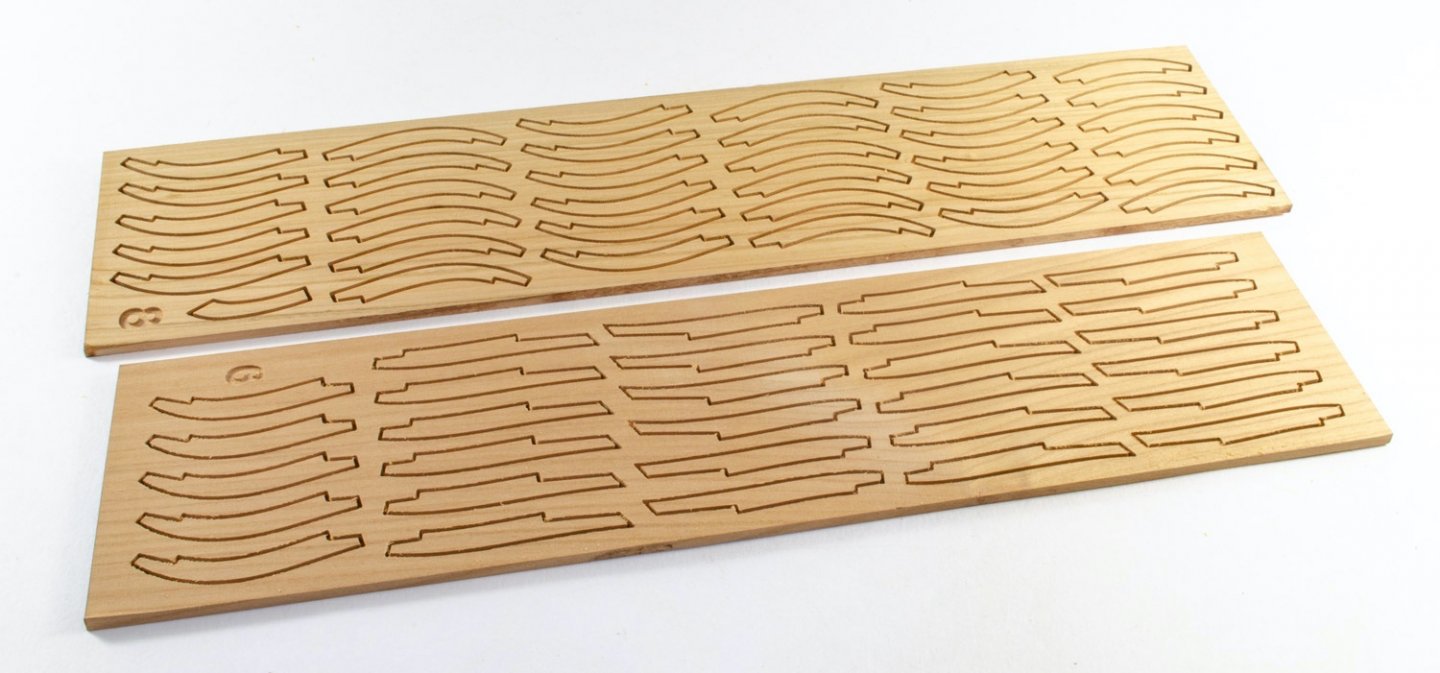

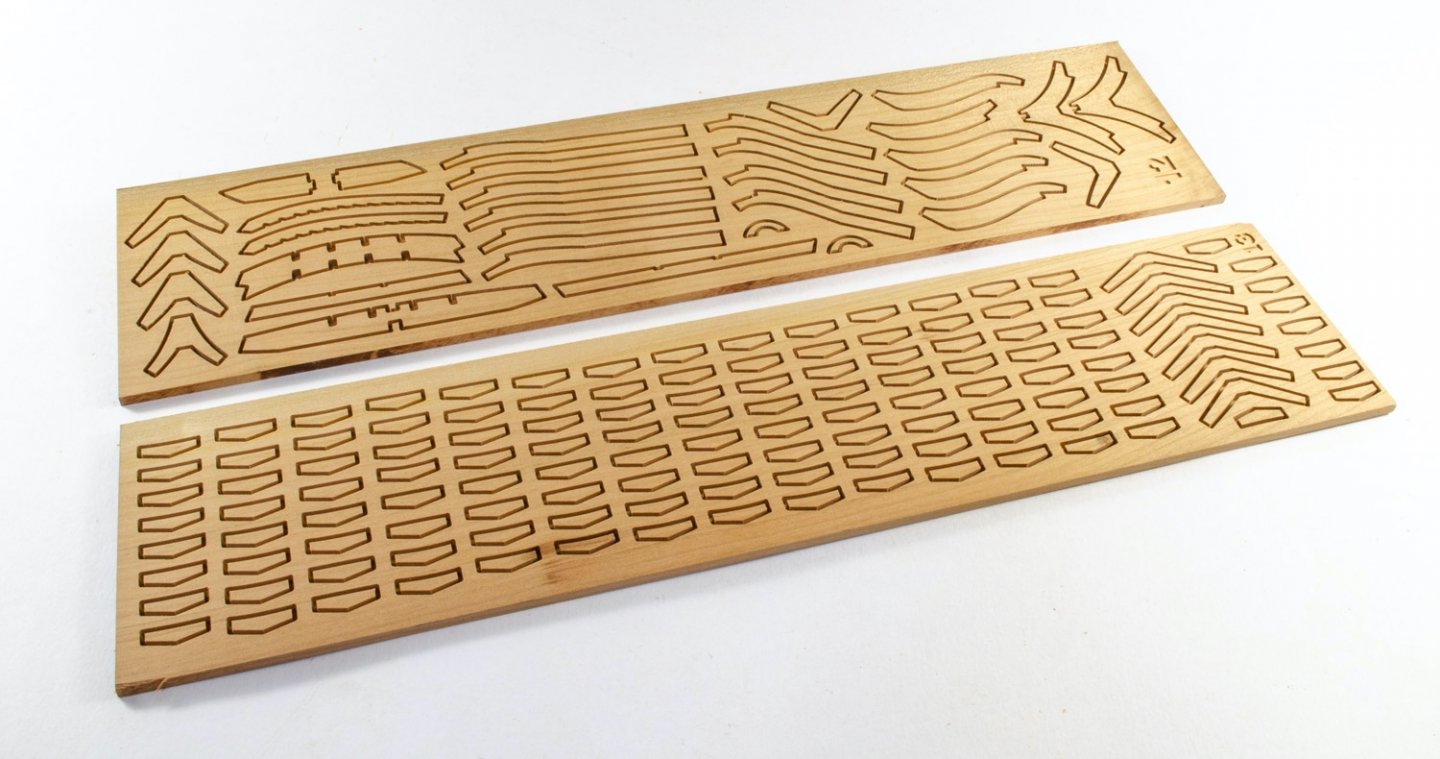


To contrast this, one part I removed from the sheet had a web of 1mm to cut through, so this varies. On the reverse of some sheets, there is more CNC machining for slots and channels etc. Timber grade seems to be very good, with a general consistency in the colour of timber and its finesse. All sheets are machined with the sheet number, making referral to the instruction parts plans, very simple.
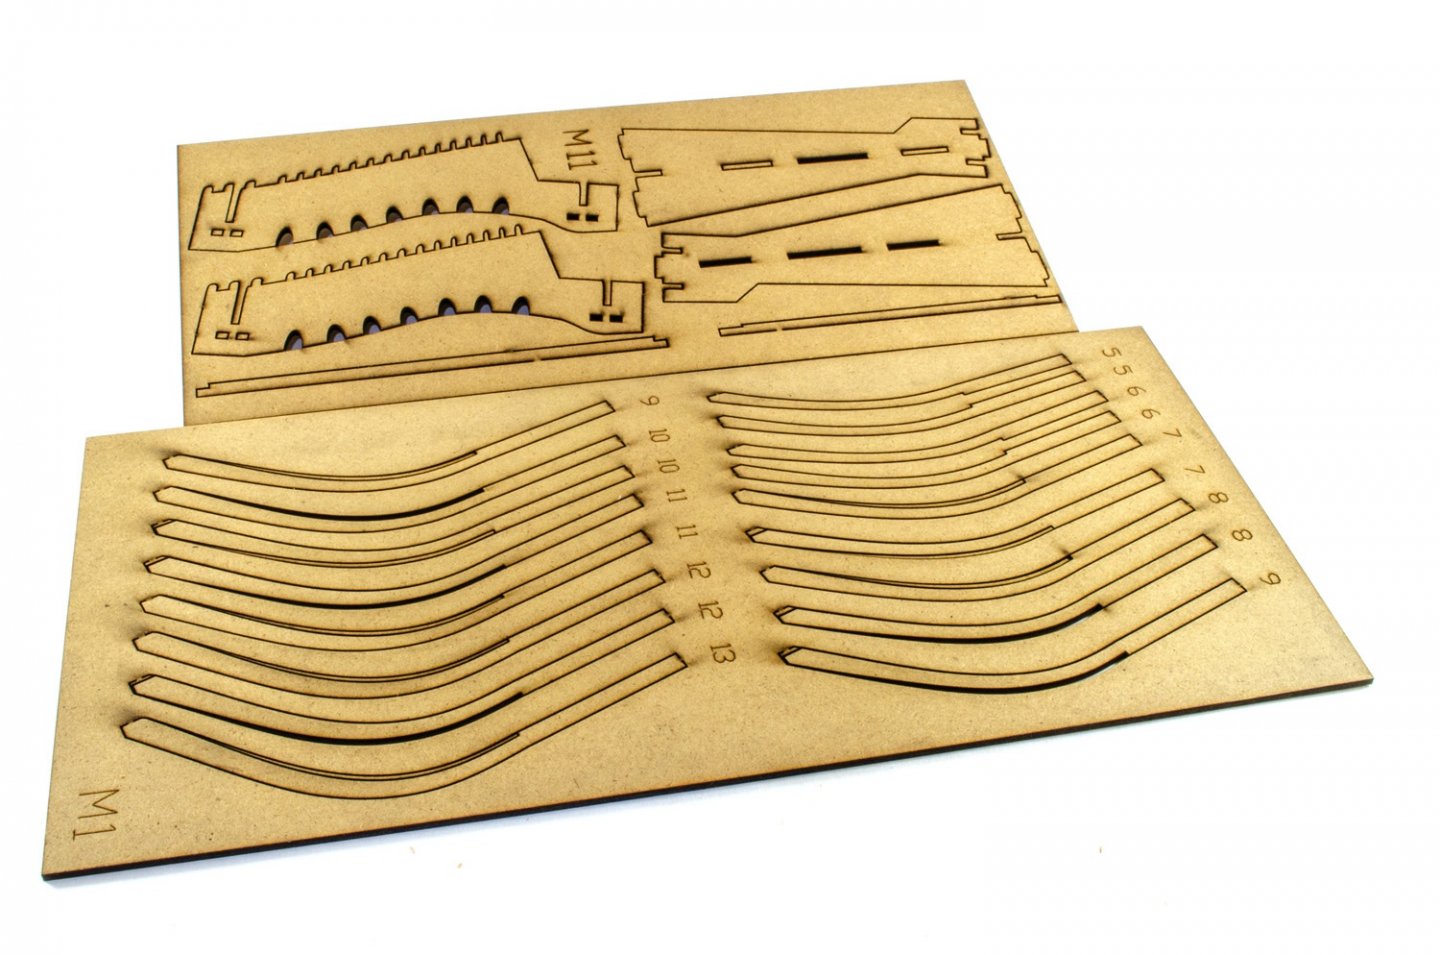
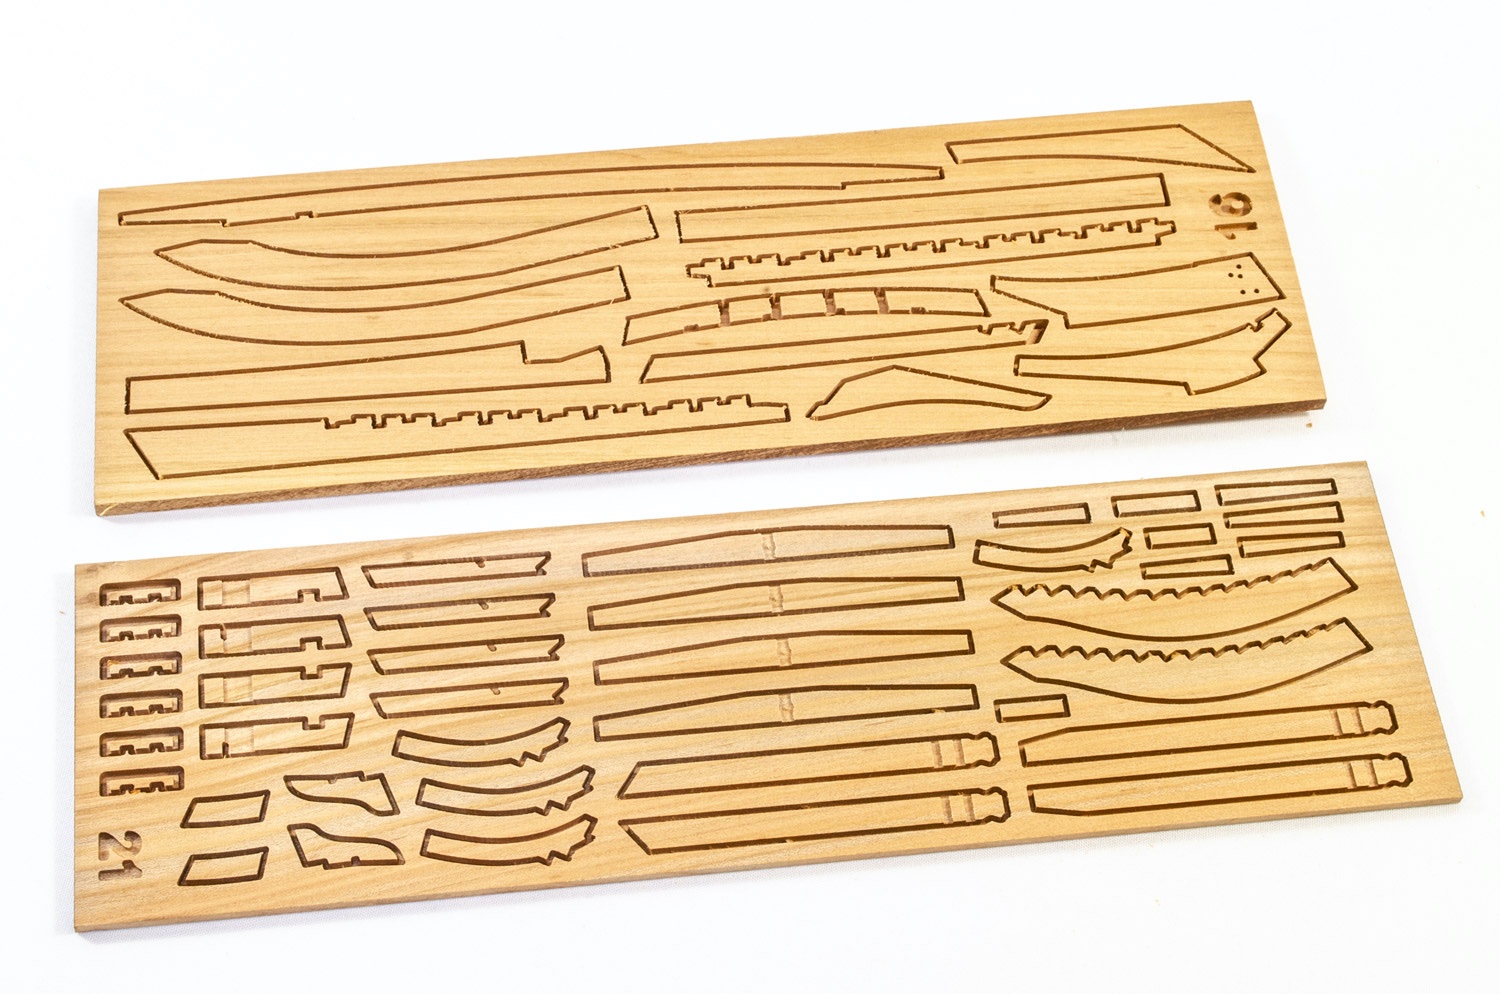
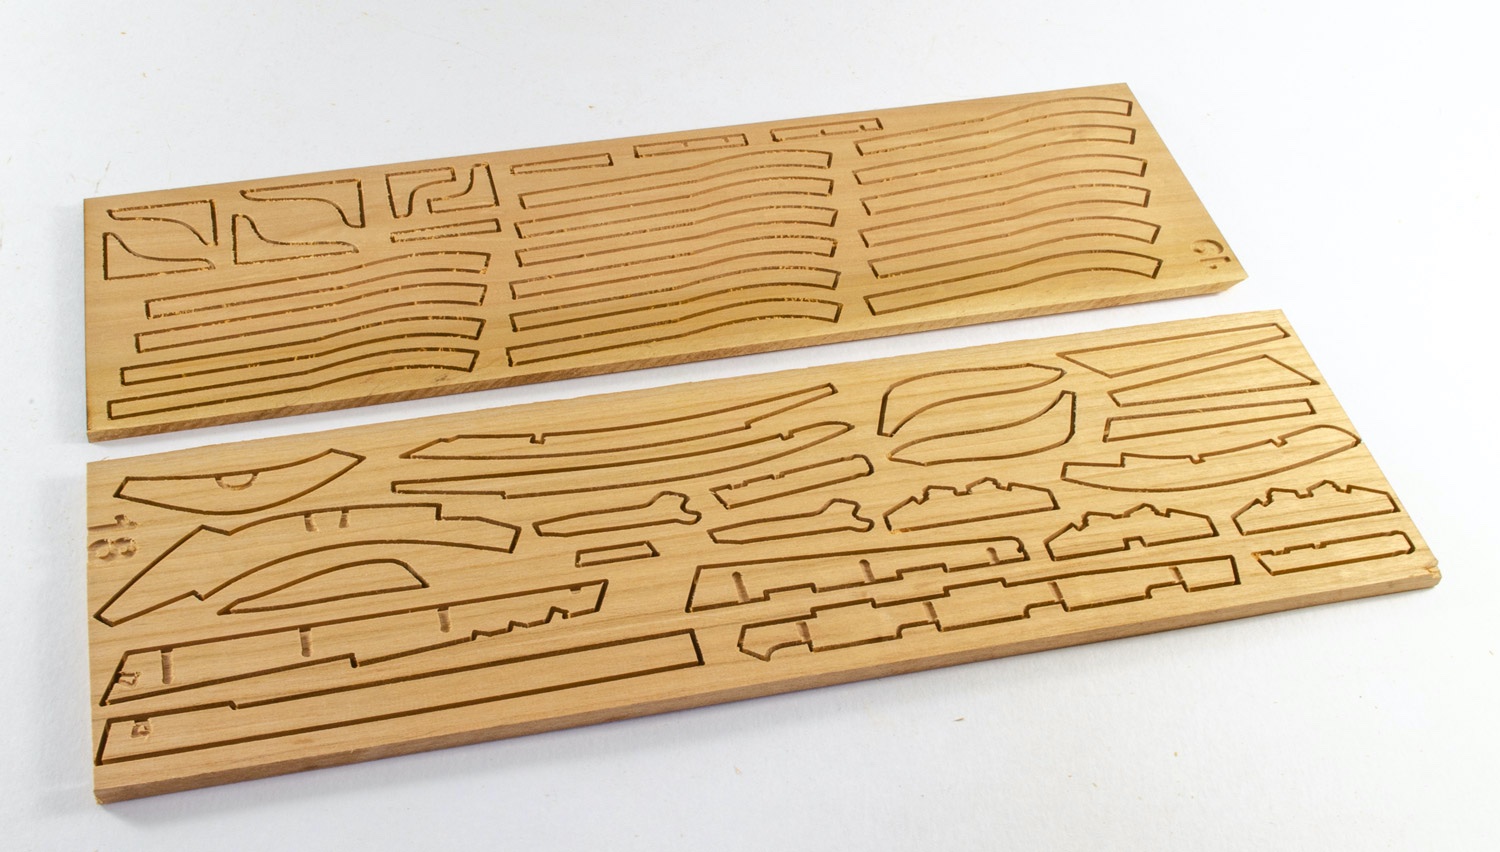
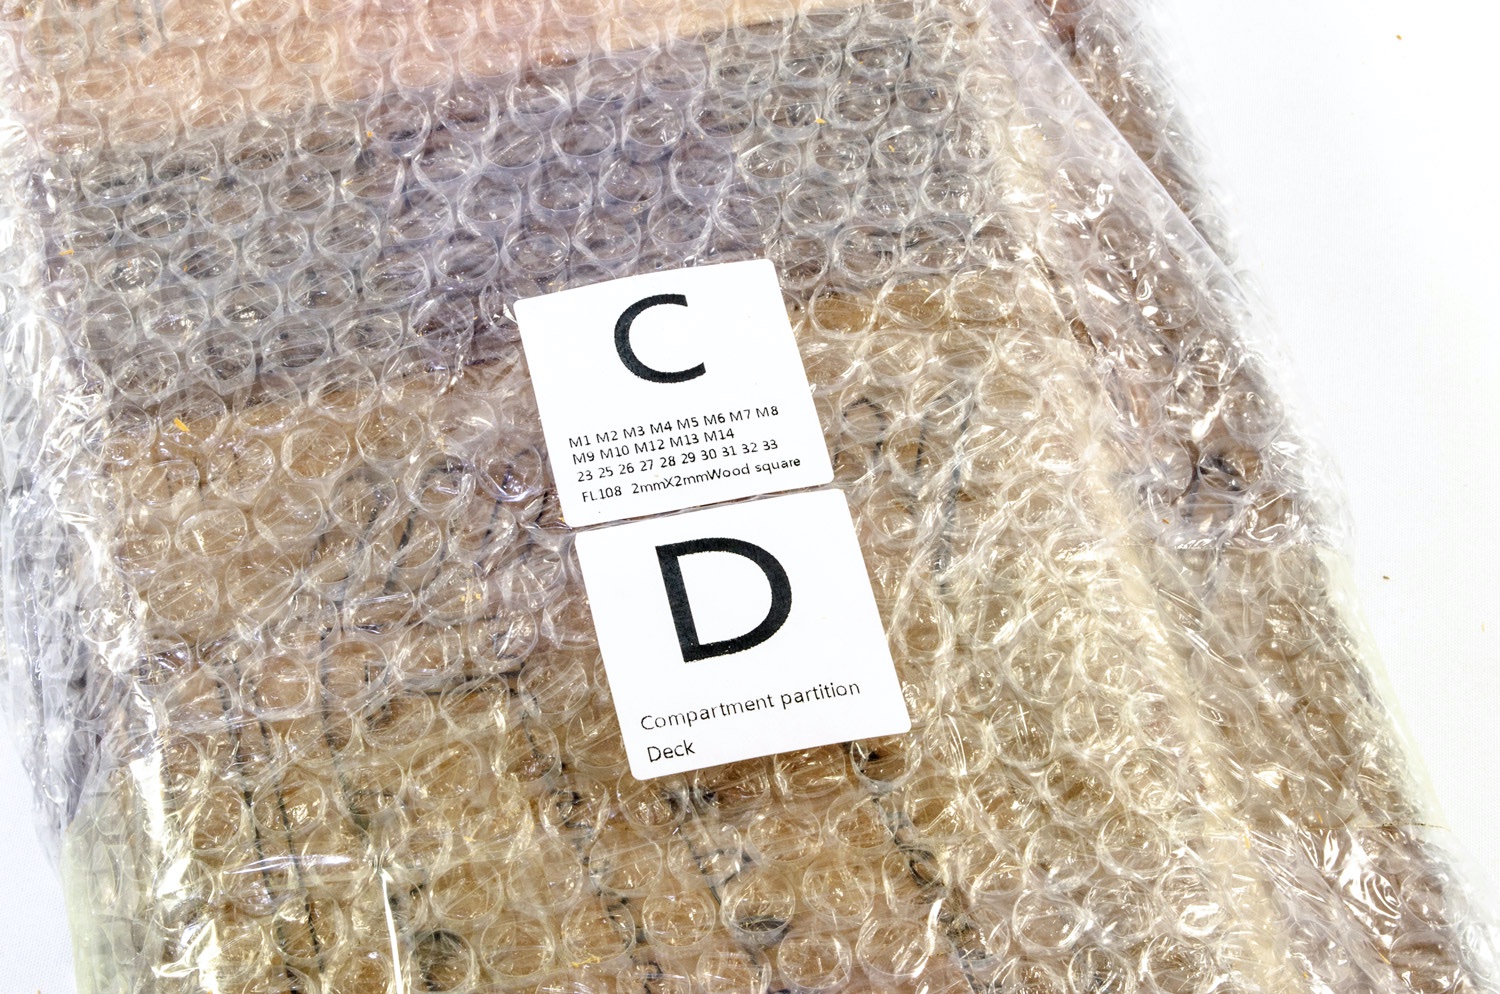
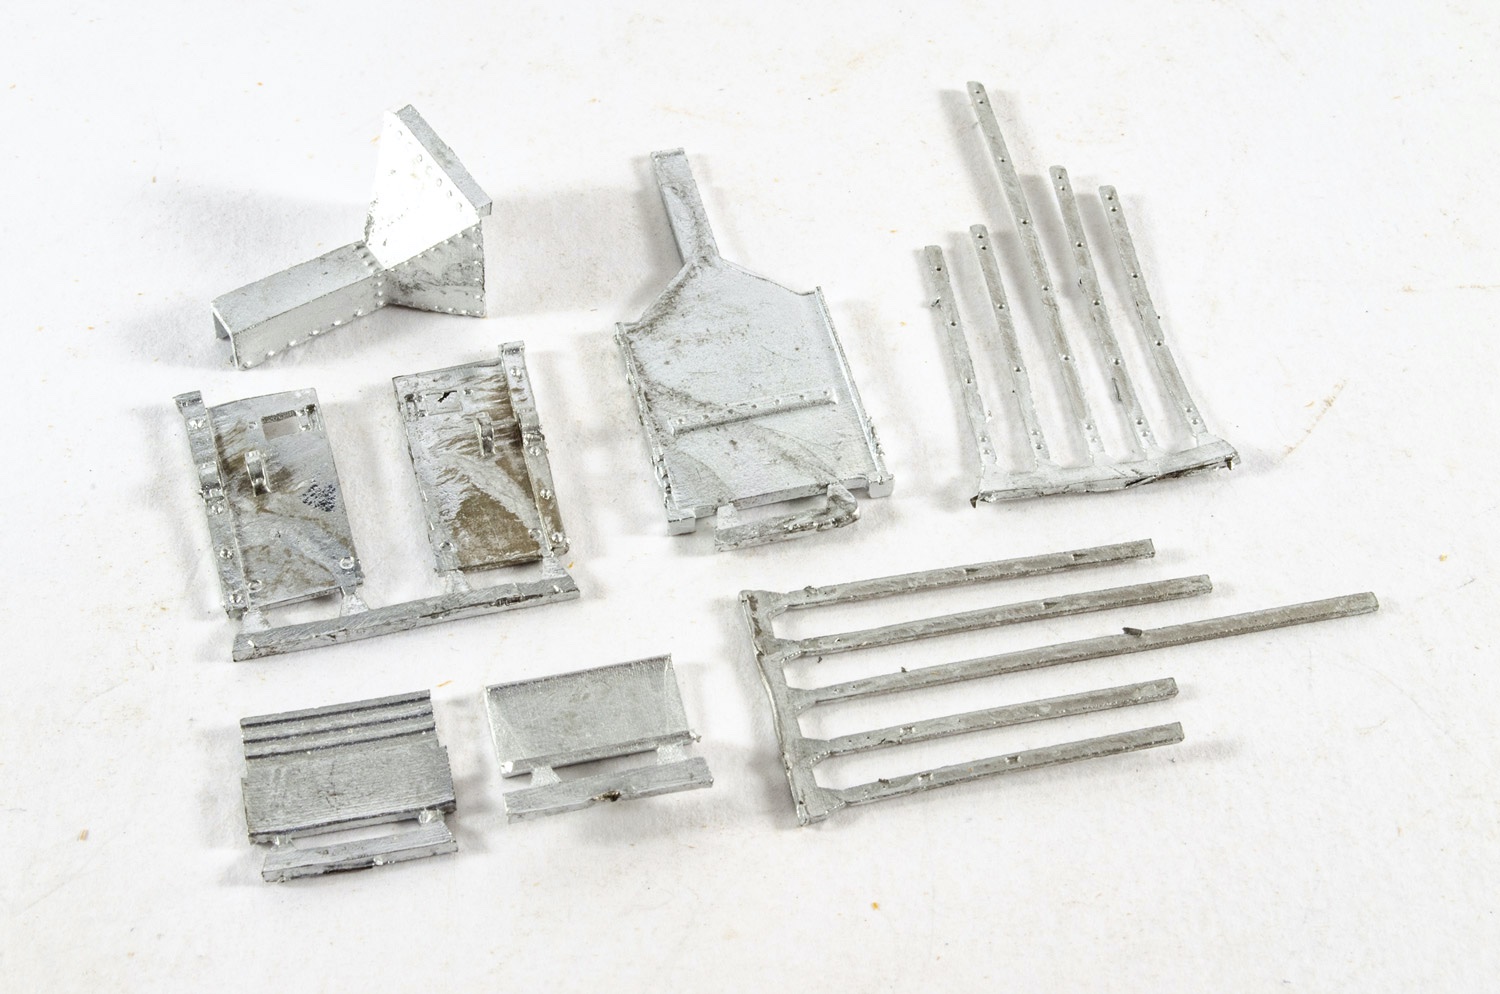
Packs C & D
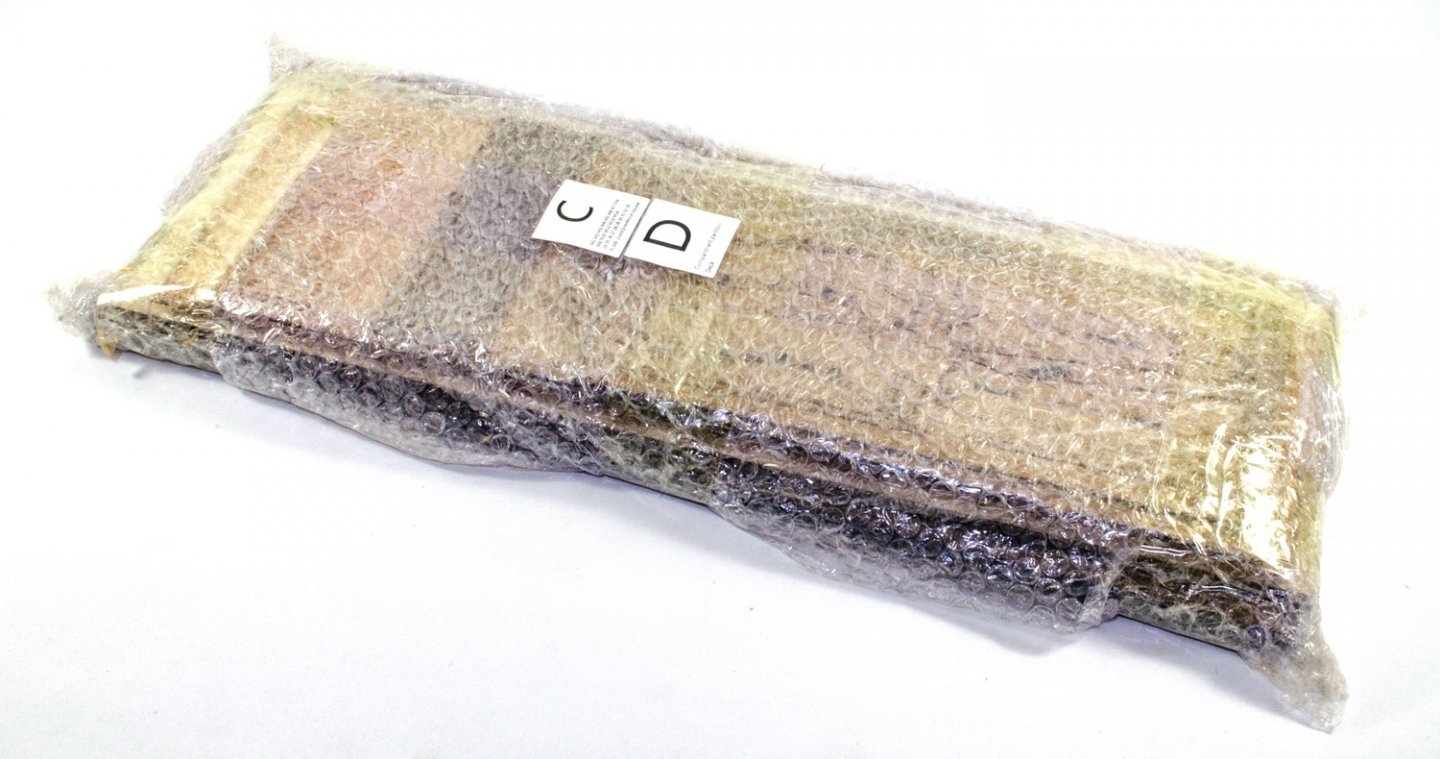
I could be wrong, but I’m fairly sure that the internals and barrels supplied with this kit (classed here as Pack D) are not standard, but for fairness, I’ve included them here as I see them as being integral to the kit review. If someone knows otherwise, I’m happy to correct this article. Both packs are wrapped into a single bubble-wrap covering, but with both labels denoting contents. Whilst C label has a list of materials, ‘D’ simply says ‘Compartment partition, Deck).
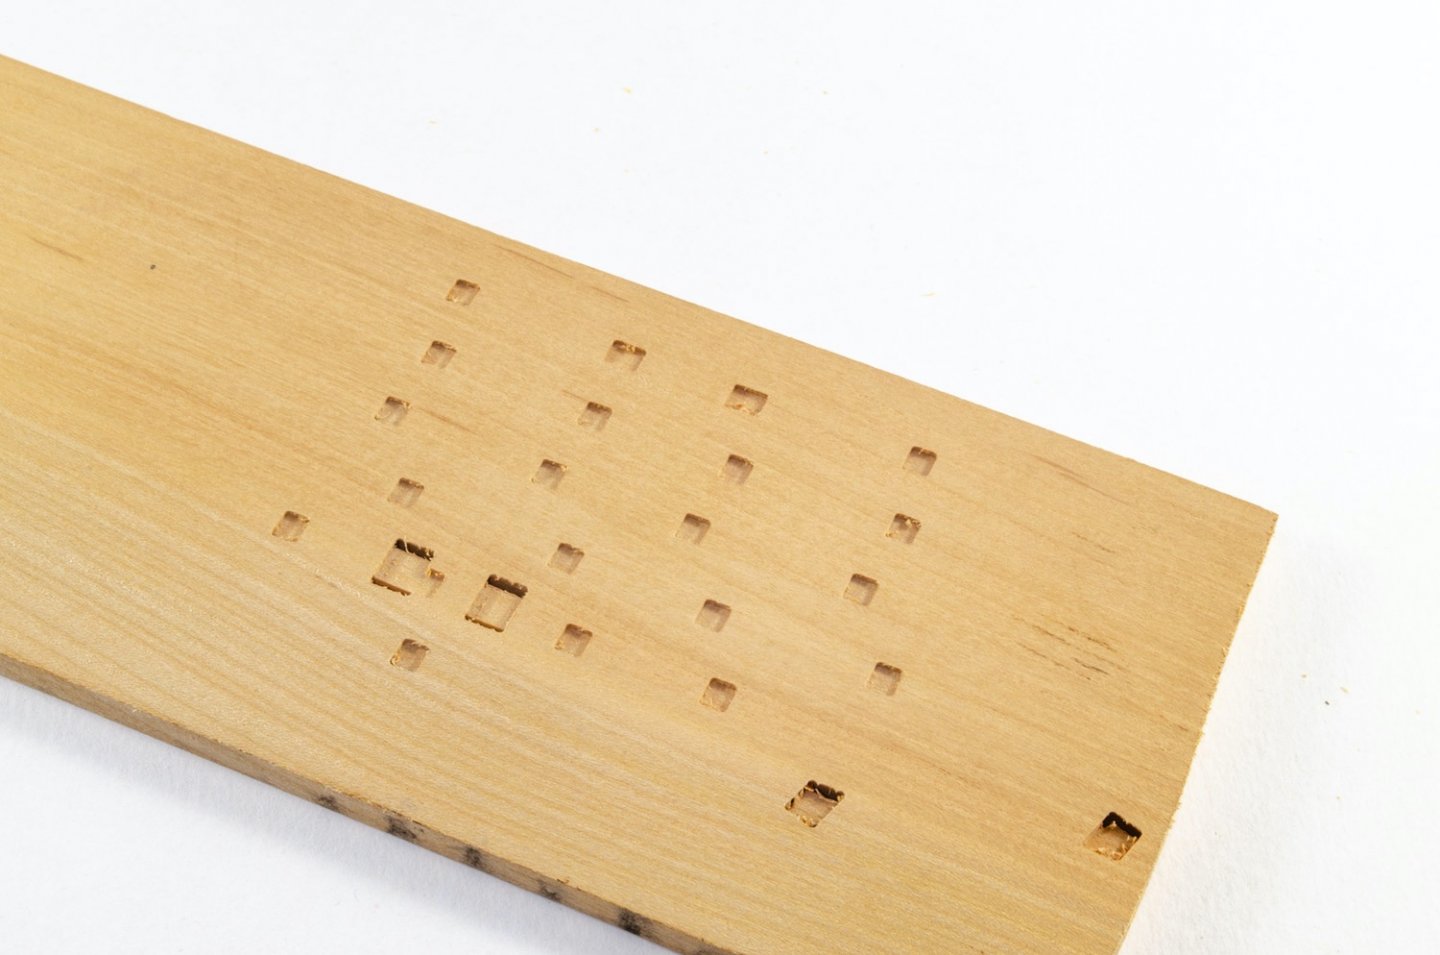
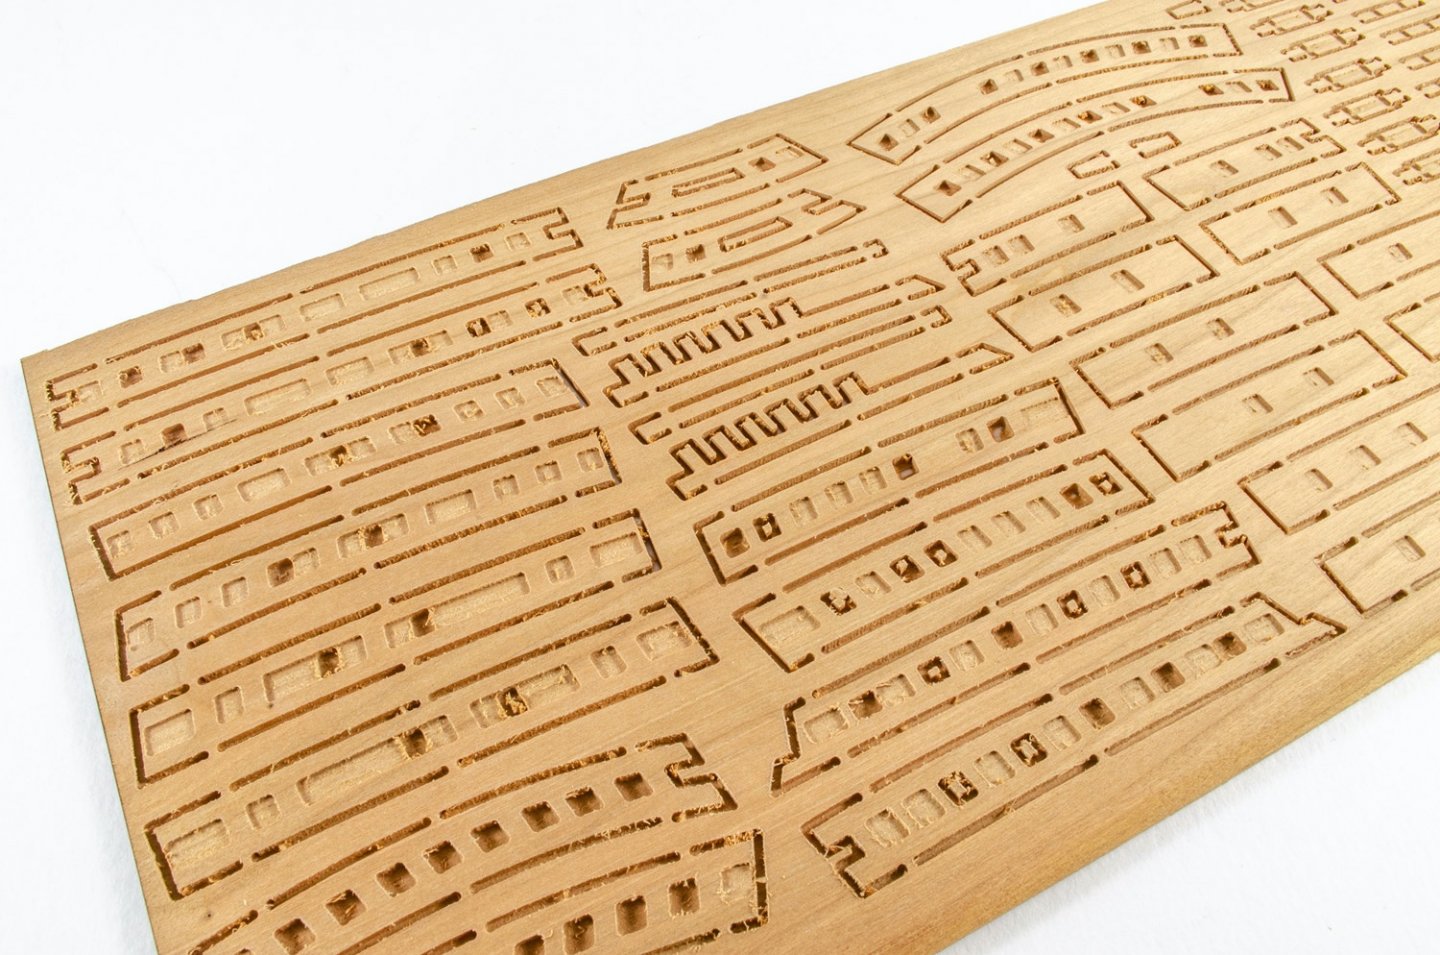
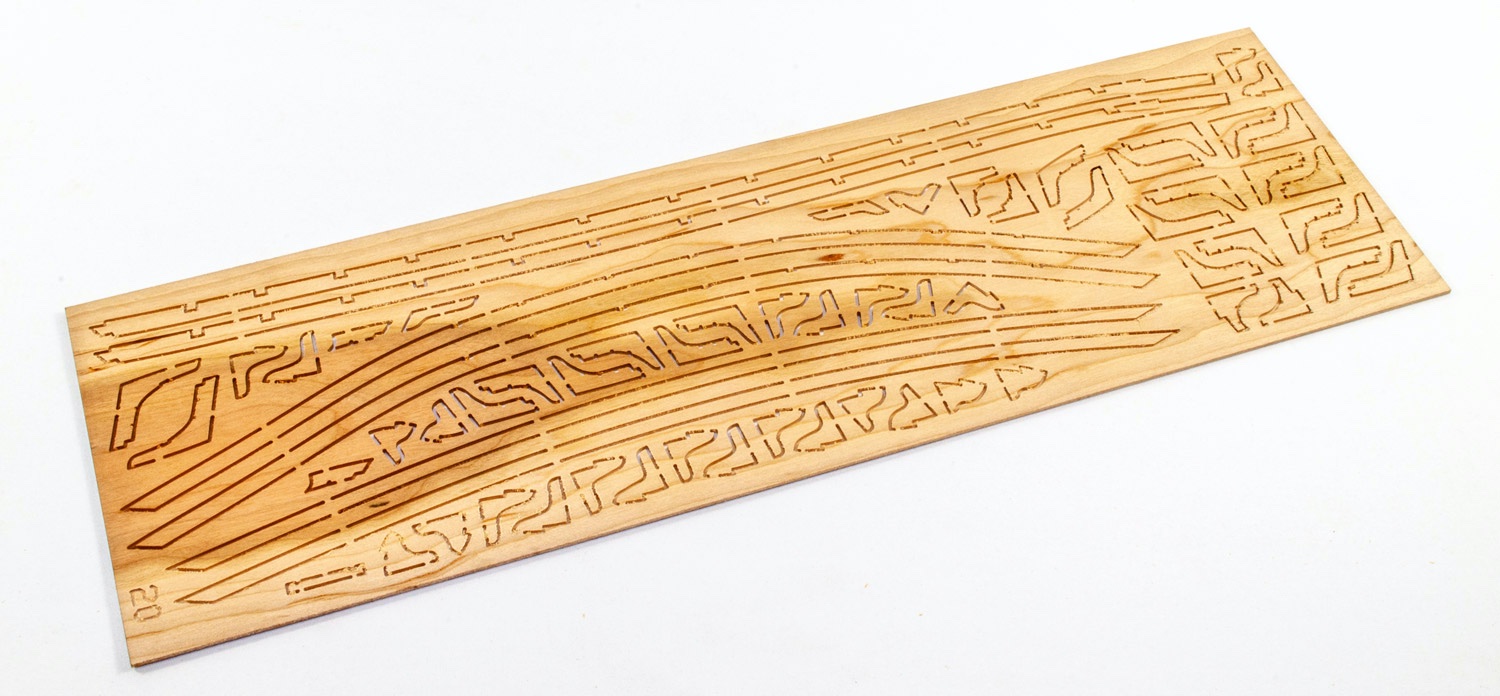
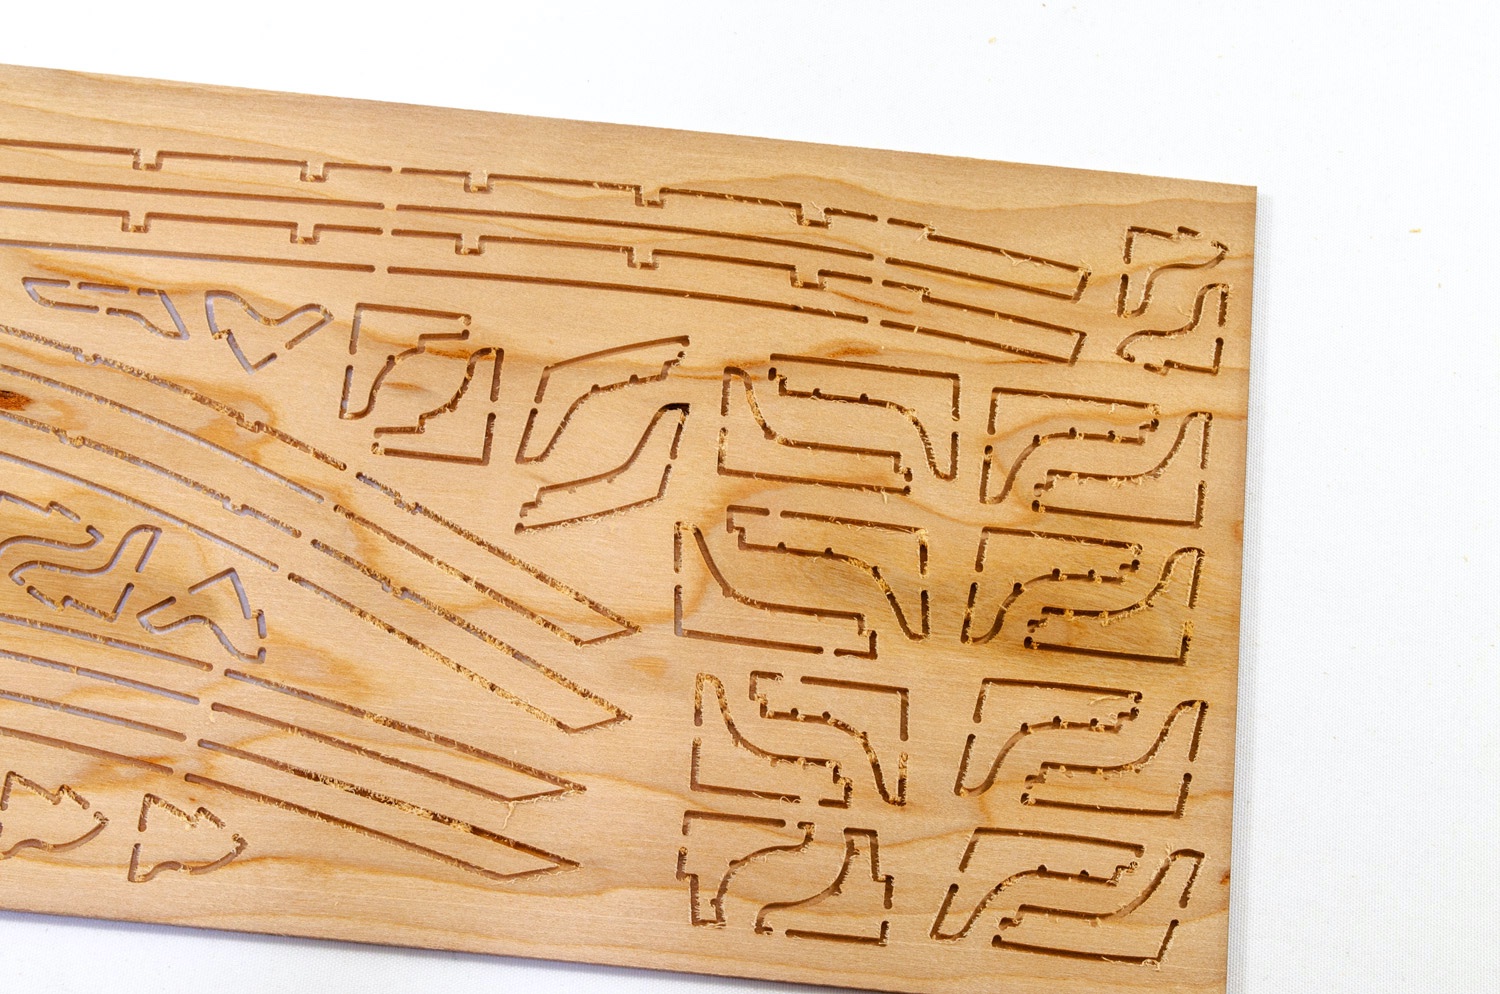
For ‘C’, you will find all other constructional elements such as beams, knees, etc. Many parts have extensive slot routing as before, with the only real clean up being to square off the internal corners cut by the CNC router. Also of interest is the bowsprit. This is supplied on a flat sheet but milled roughly to shape. You need to fold the sheet and glue together before fully shaping the part to create the bowsprit. I admit that I’ve never quite seen anything like that before. Whether it saves time instead of just supplying quare timber stock that needs rounding, I guess I’ll find out. Another unusual feature are the pump tube casings. These are supplied on flat sheets and routed. You just need to cut along the outside edges and then fold into shape. I don’t know how well that will work, especially with the metal hoops.


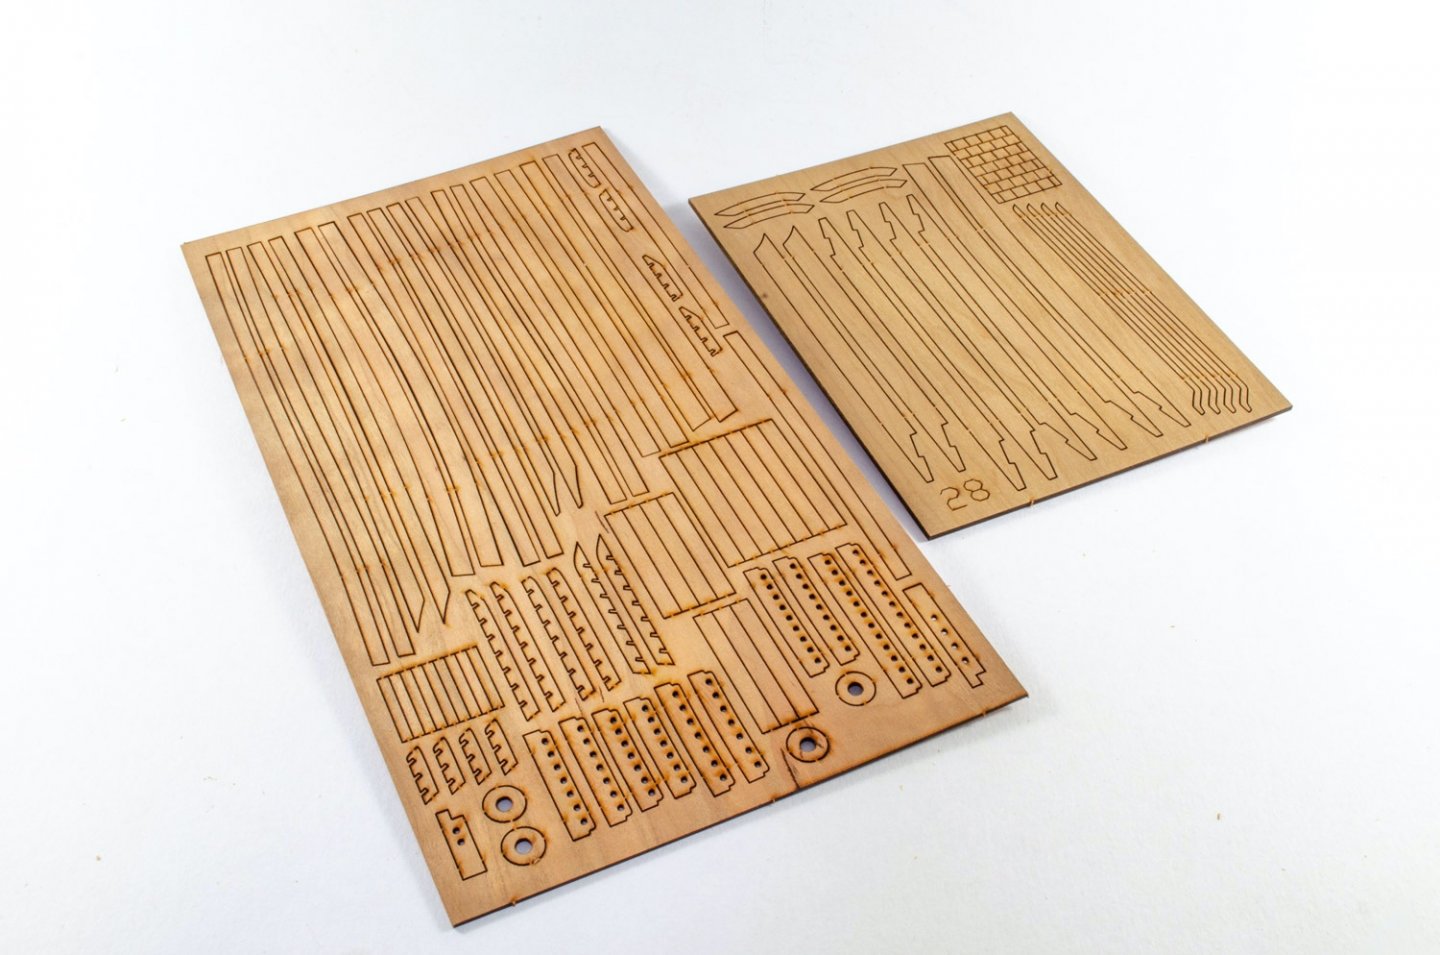

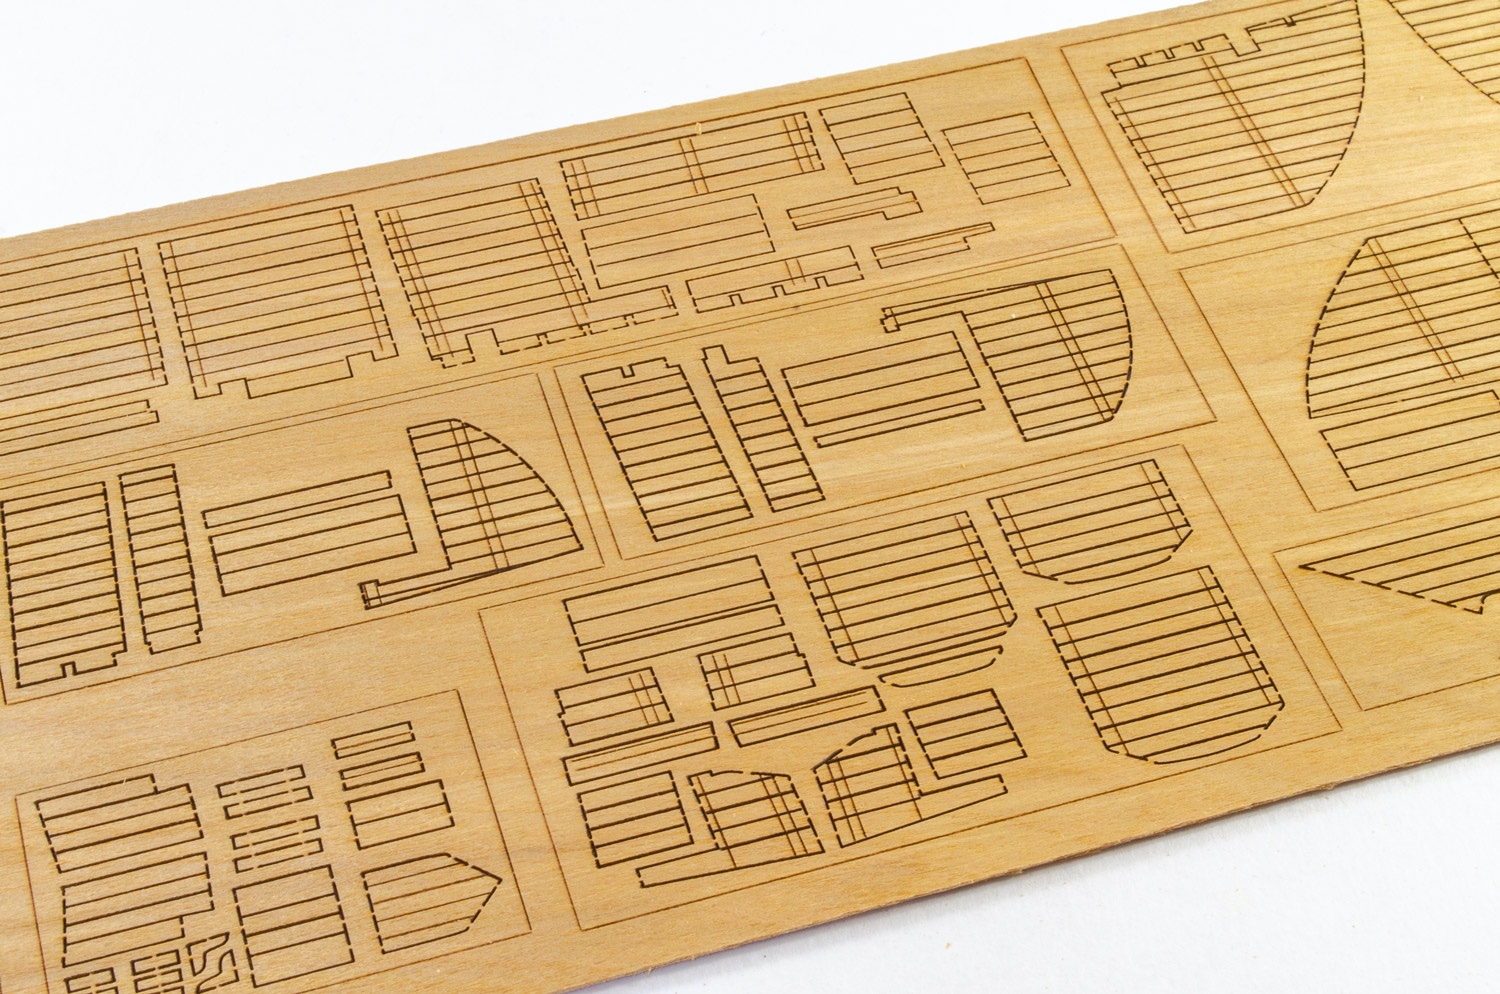
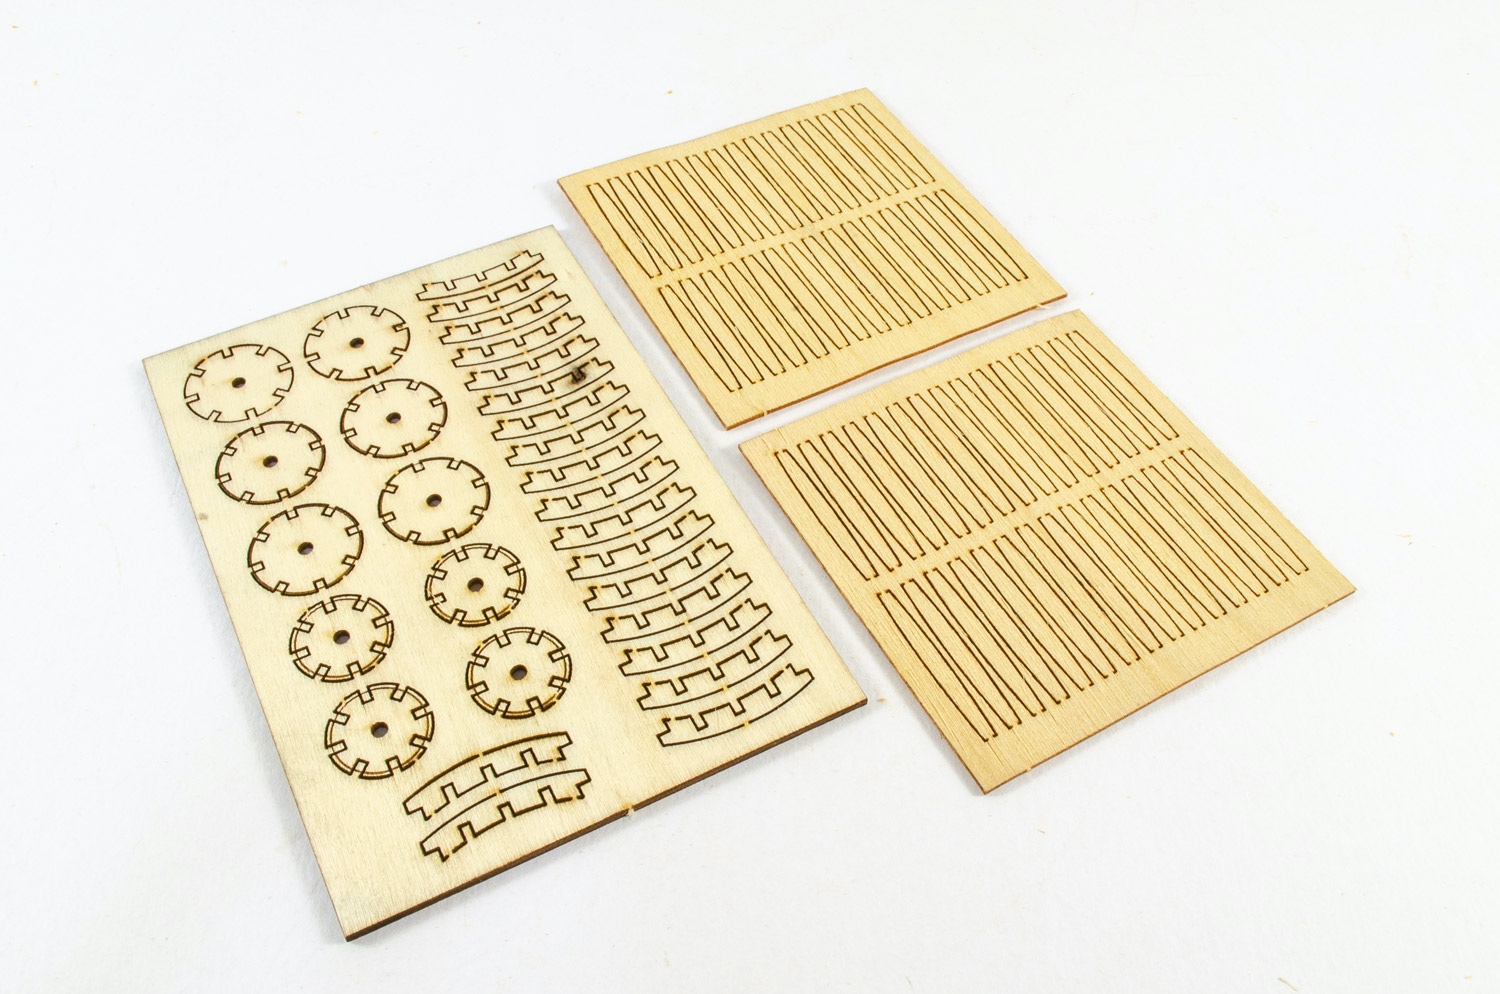
Not all parts in this pack are CNC cut. We have a number of laser-cut parts too, and some on walnut as well as cherry. Laser cut parts include the gratings, cannon cart pieces. Note how the gratings are also curved, as they should be. I have noticed how the wheels of the gun carts are devoid of any nail/bolt detail as I have seen on some of Trident’s own images. Looks like some sets were sent out without those details.
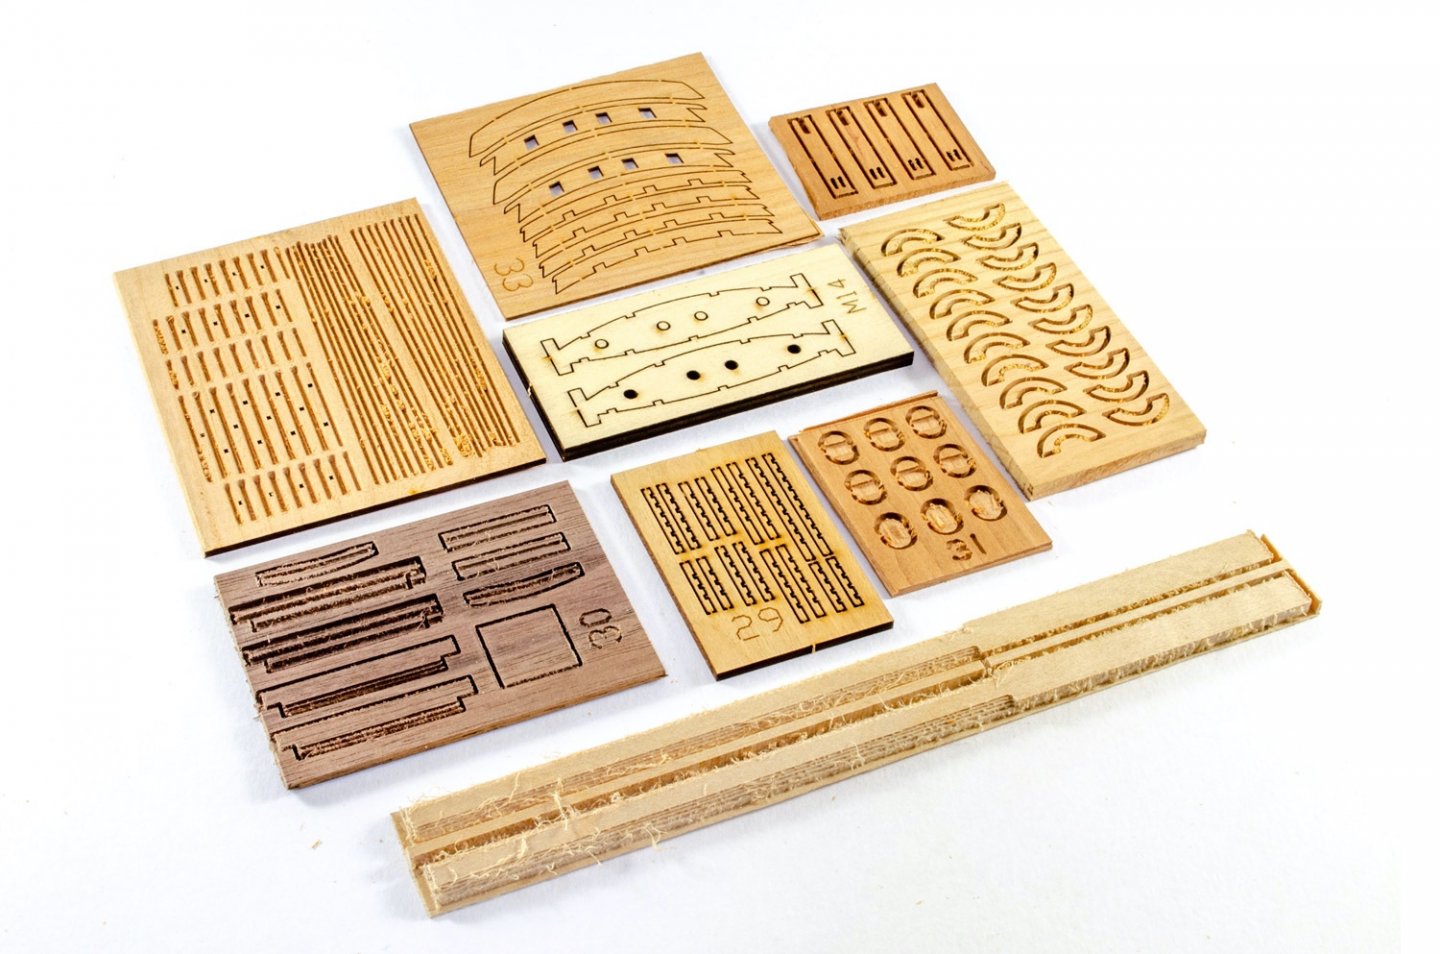


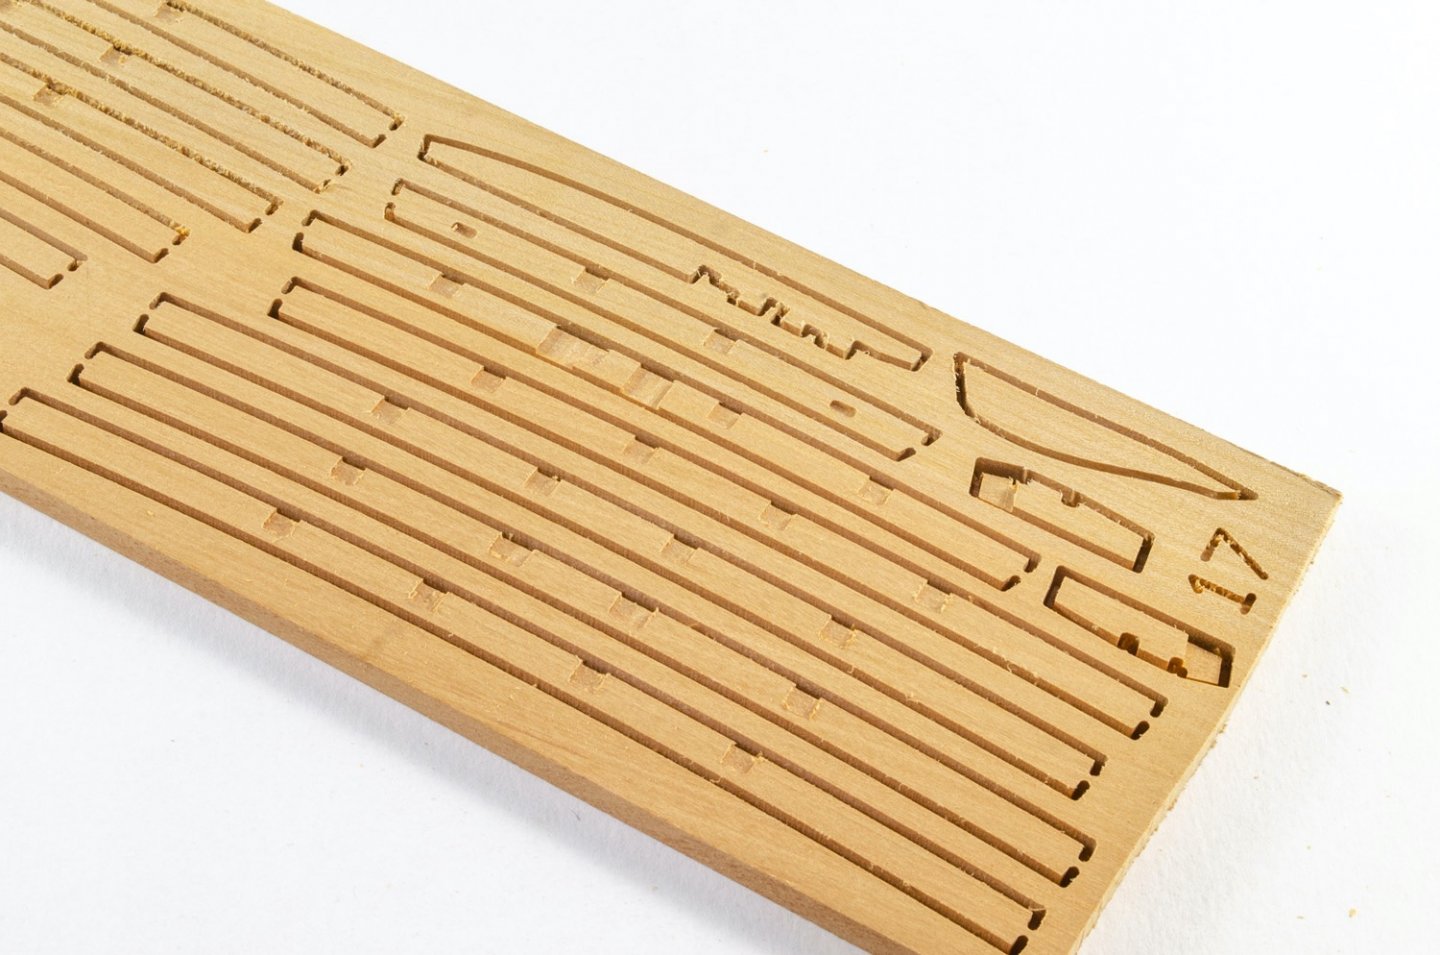
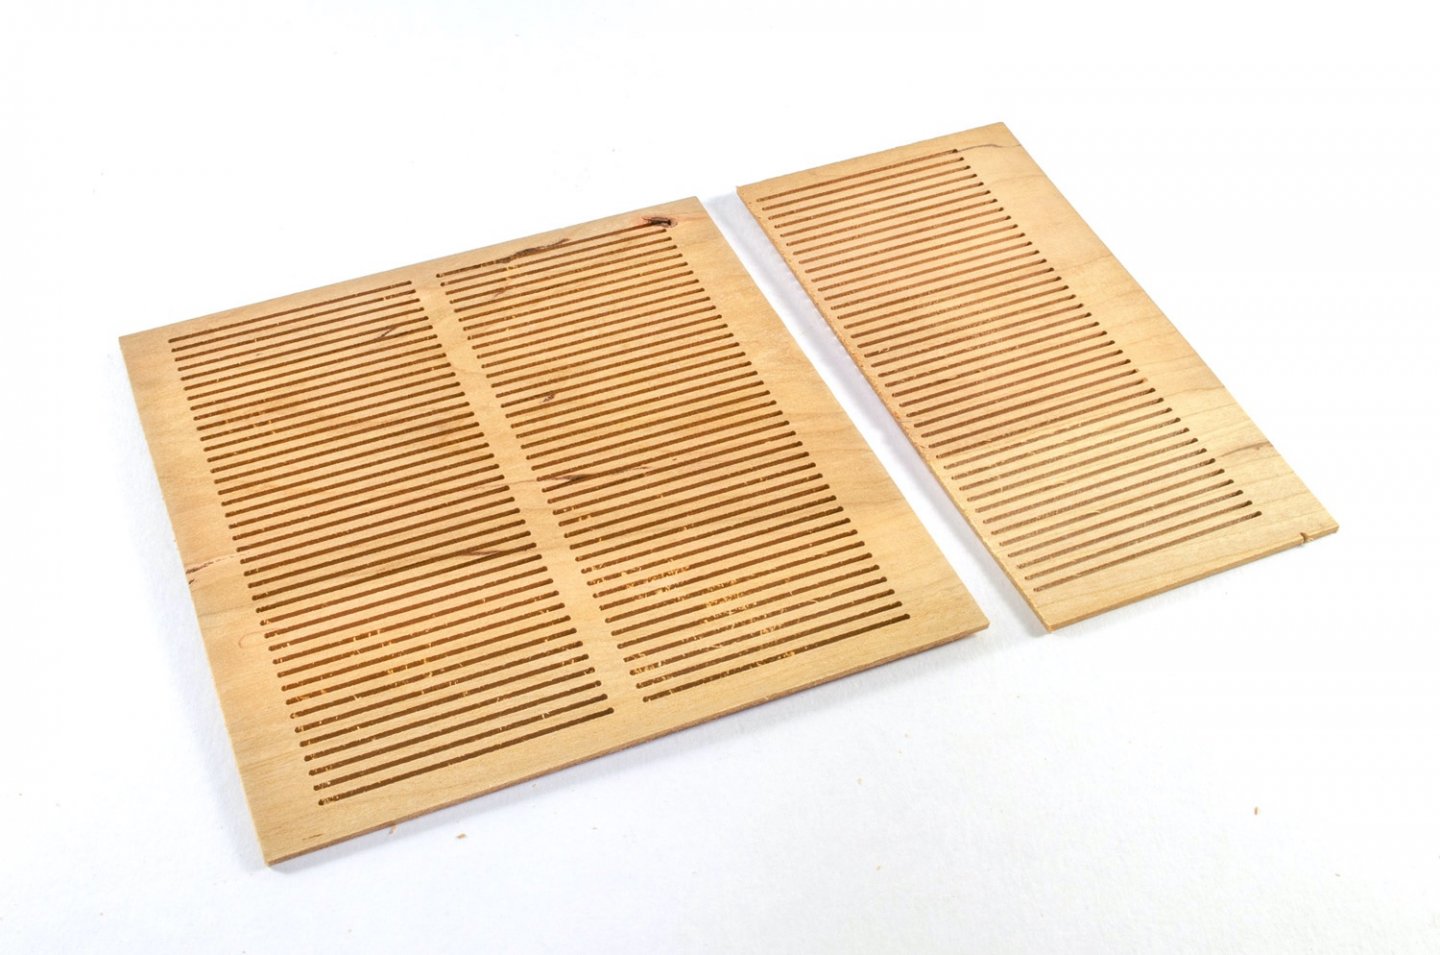
Pack D holds two cheery sheets which contain various interior walls, all laser-cut and engraved. As I say, there are no instructions to help me with this and my emails to Trident haven’t been fruitful. A small number of barrels are included as their own kit, complete with photo-etch for the hoops. Another sheet of PE is included for the interior
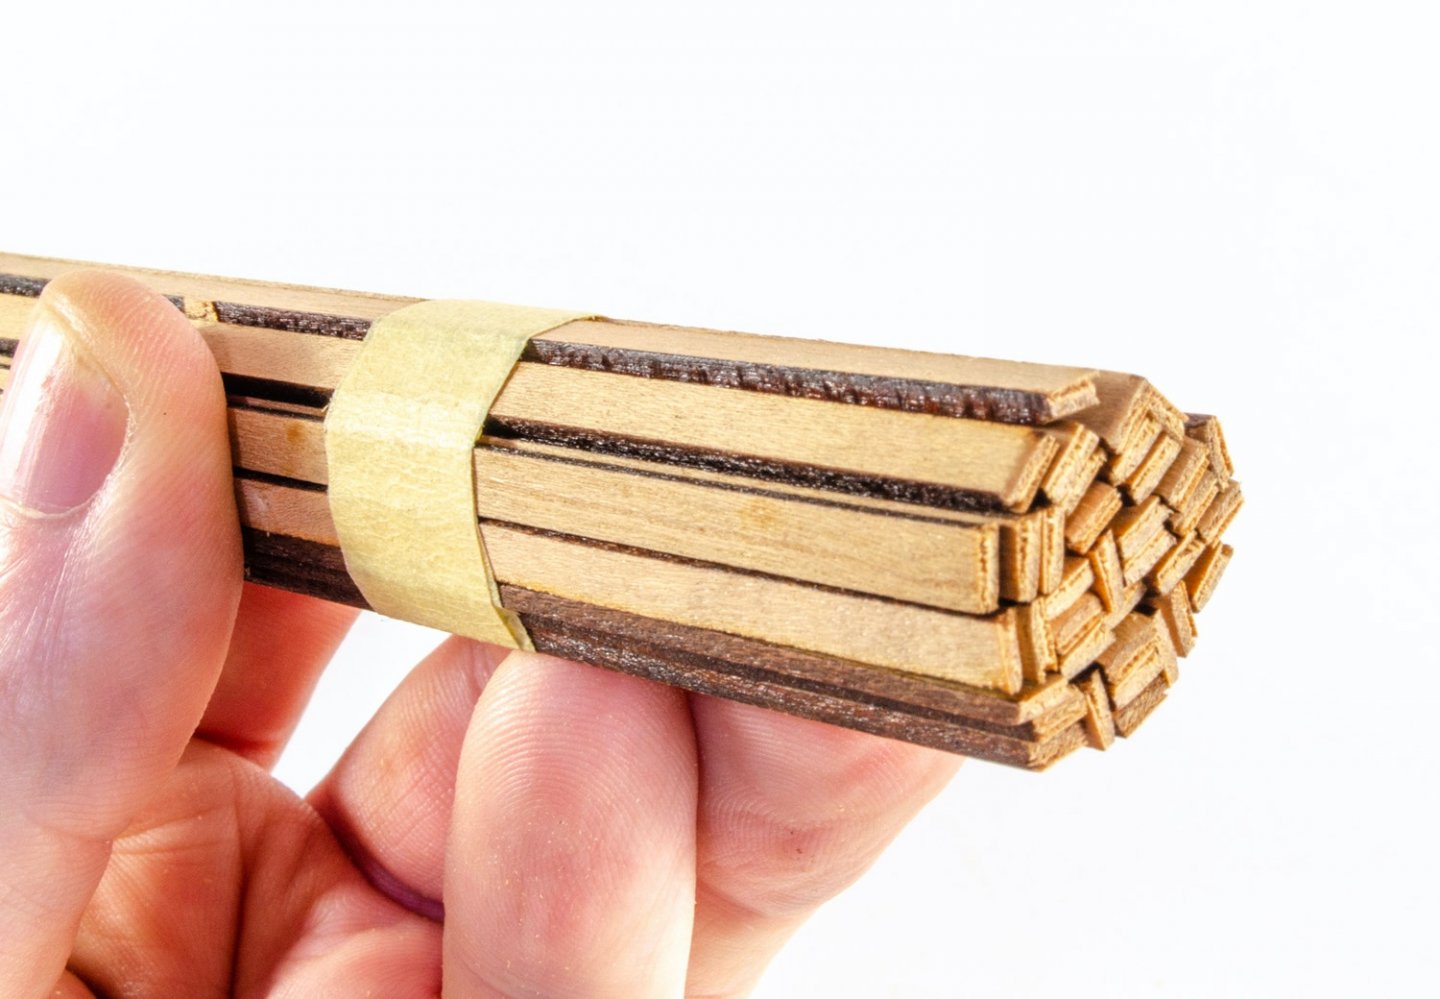
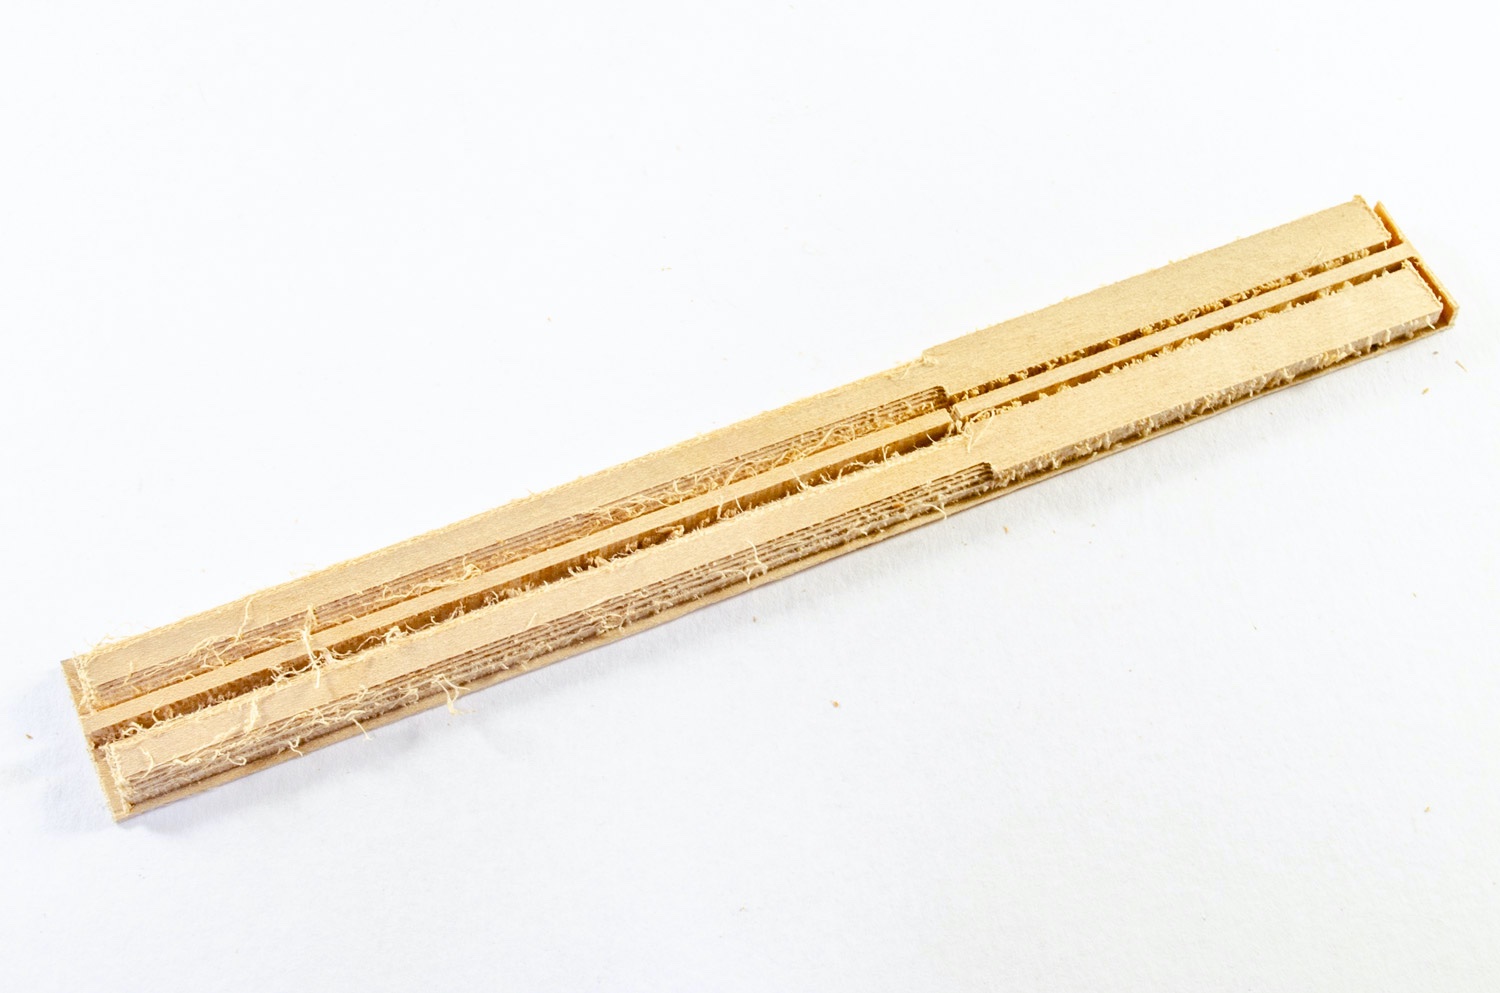
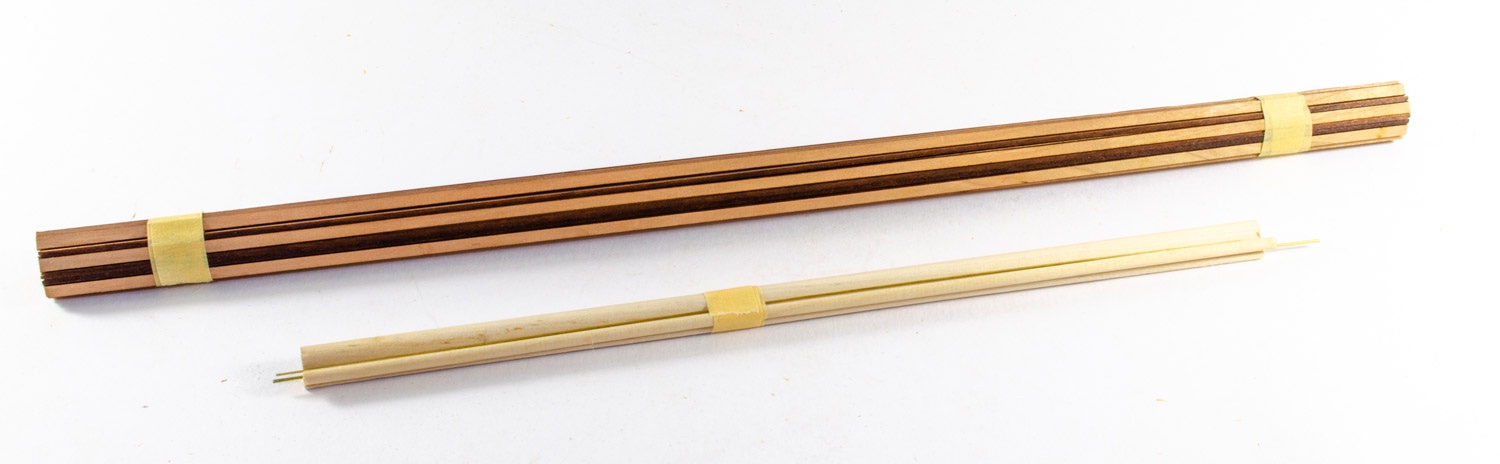
Strip Wood
A small quantity of strip and dowel is included. The strip also appears to be cherry and is laser cut. The dowel looks like lime or Ramin. Some brass rod is also included in the dowel bundle. Materials quality can’t be faulted.

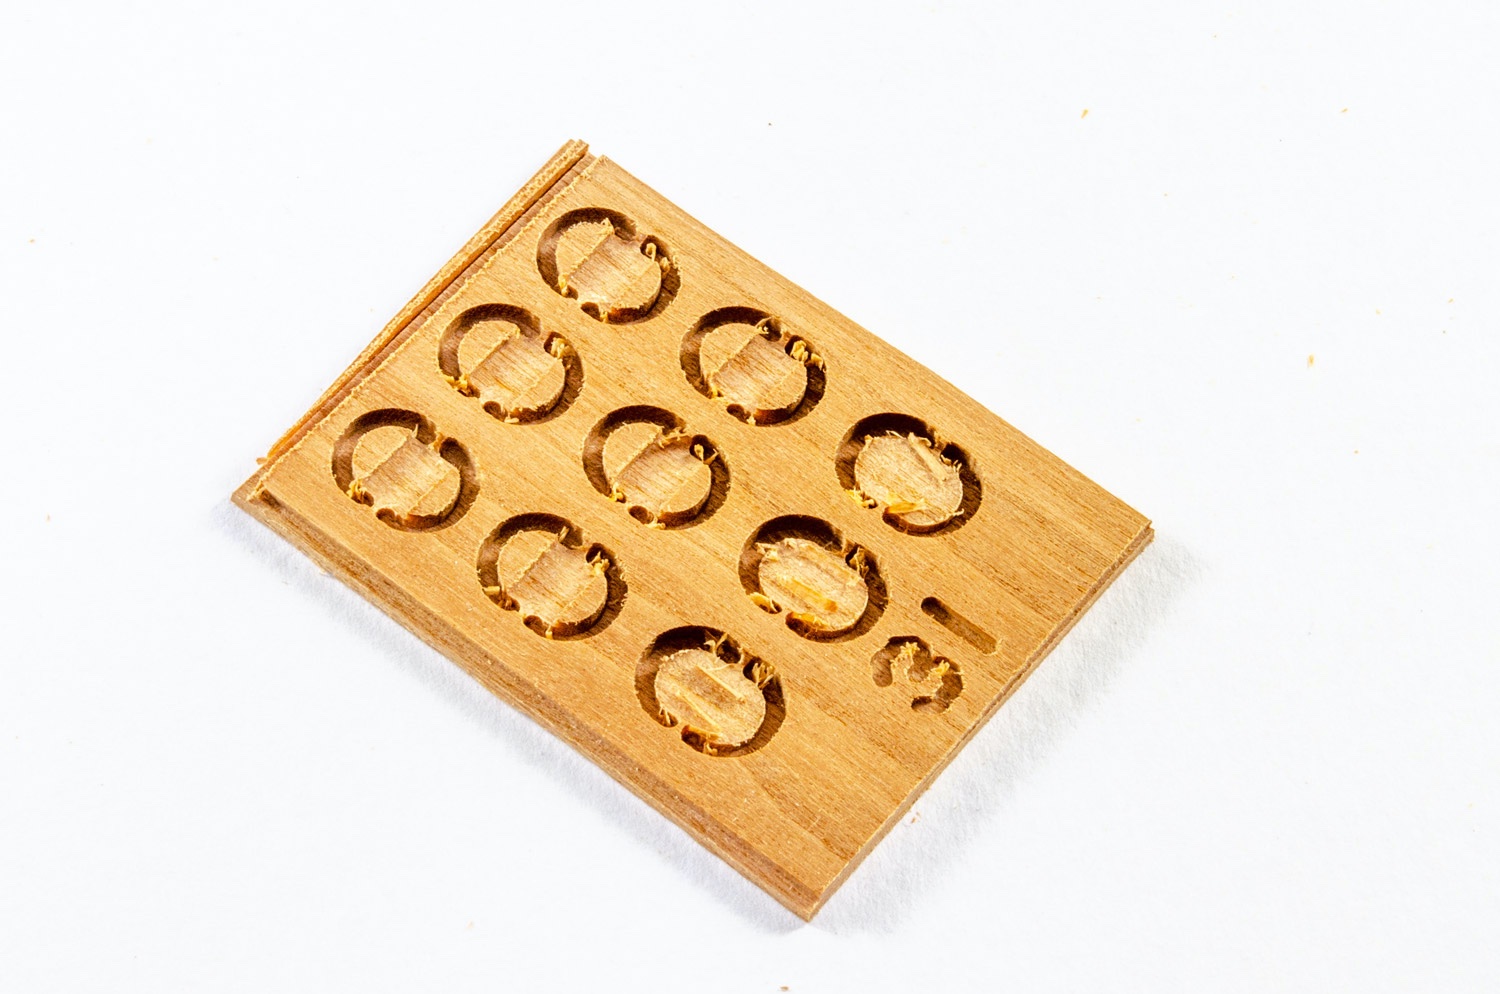
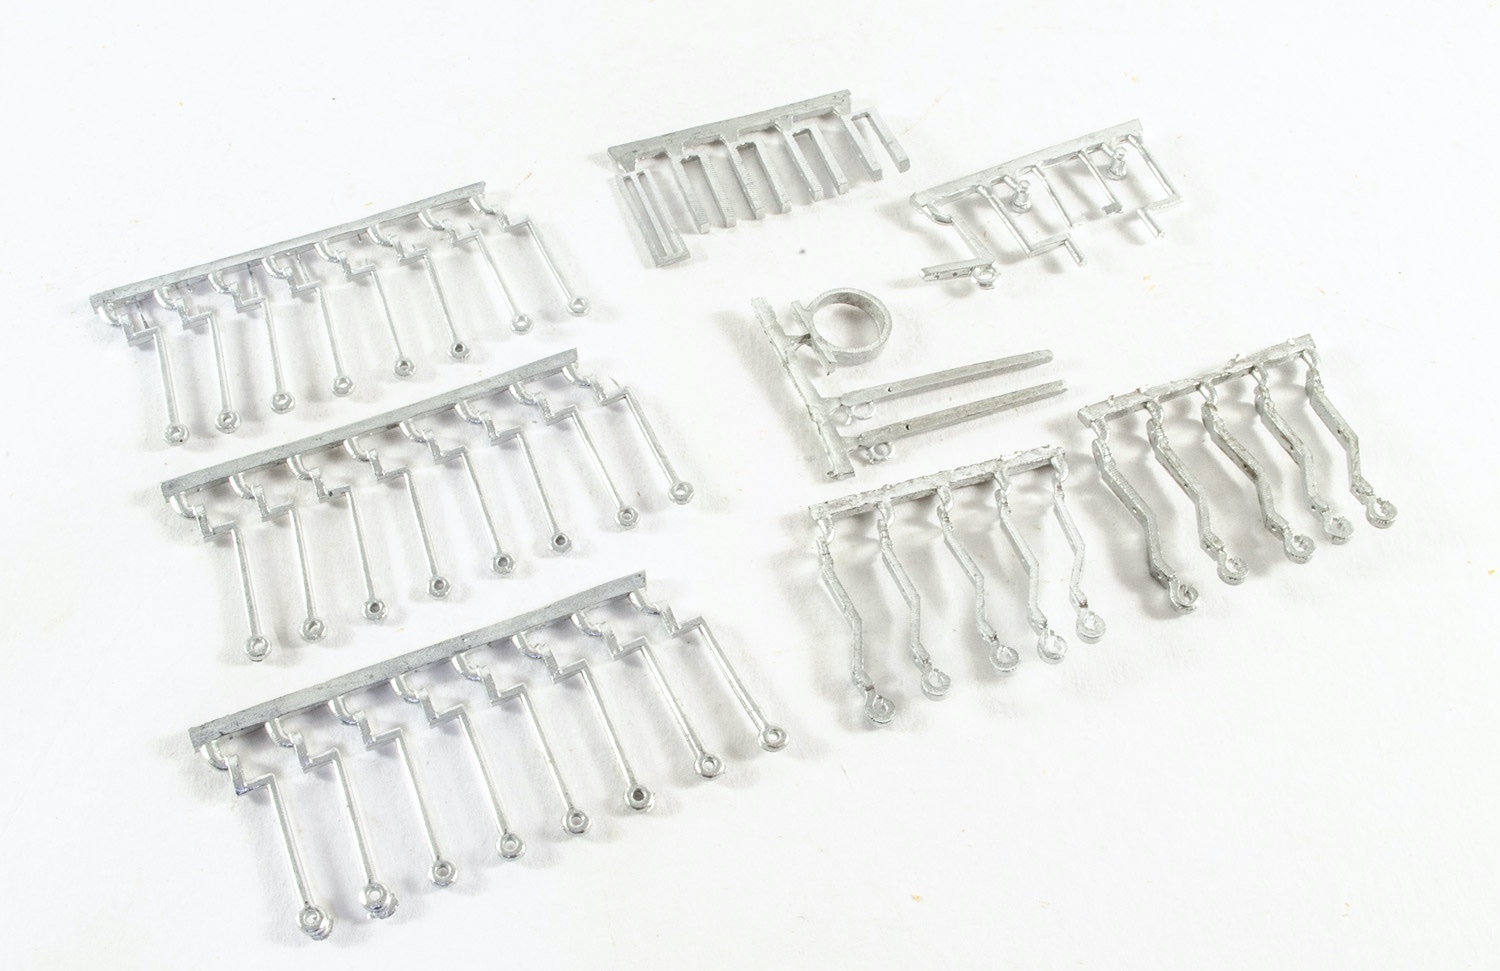
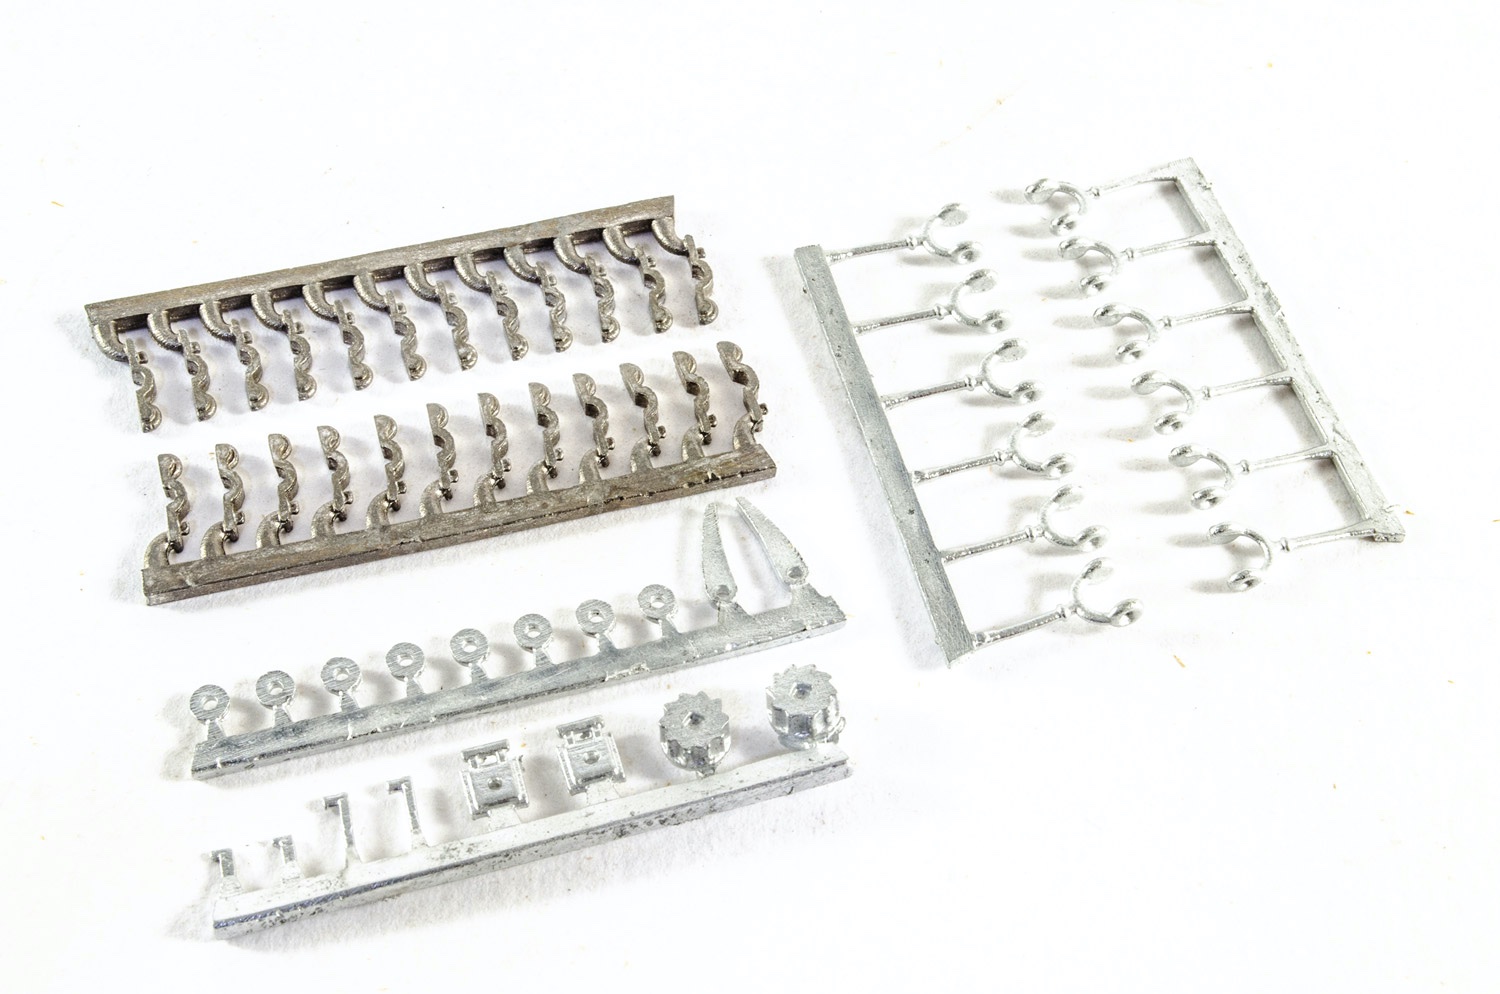
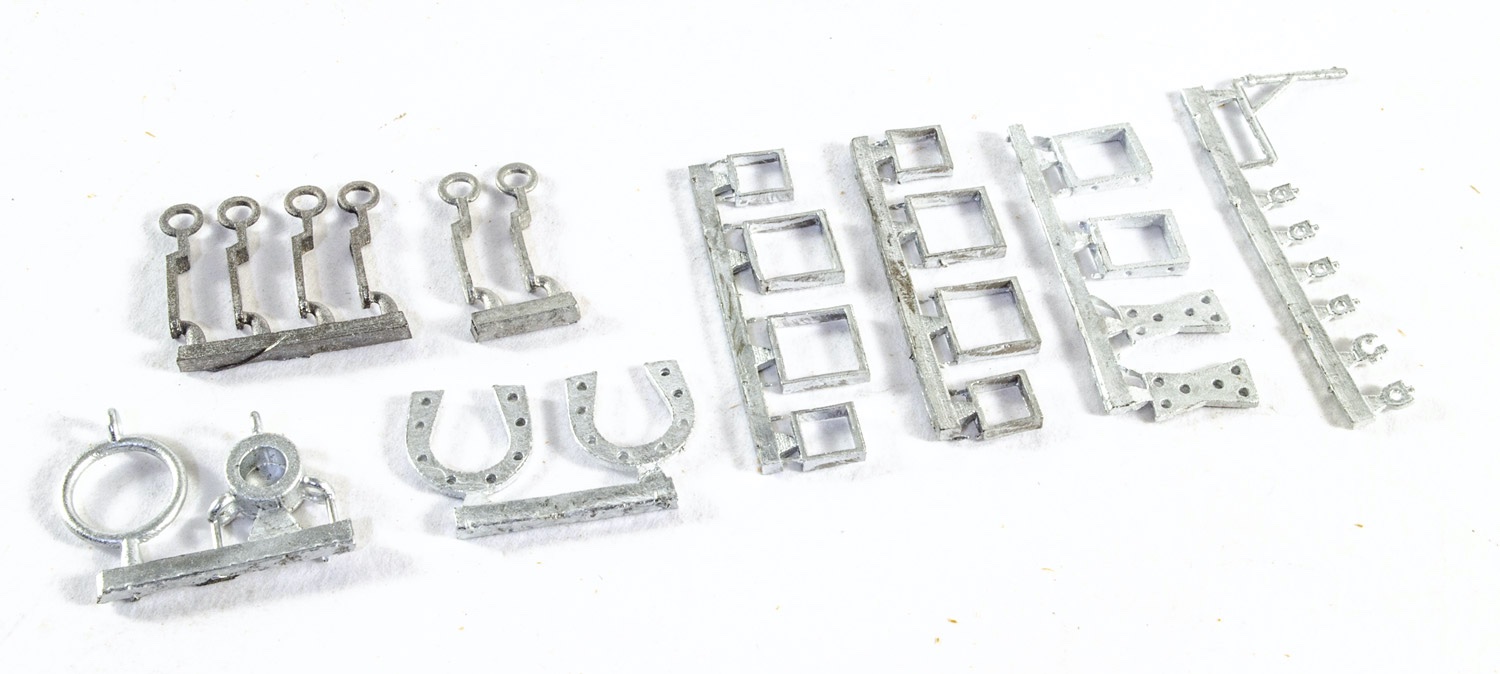
Fittings
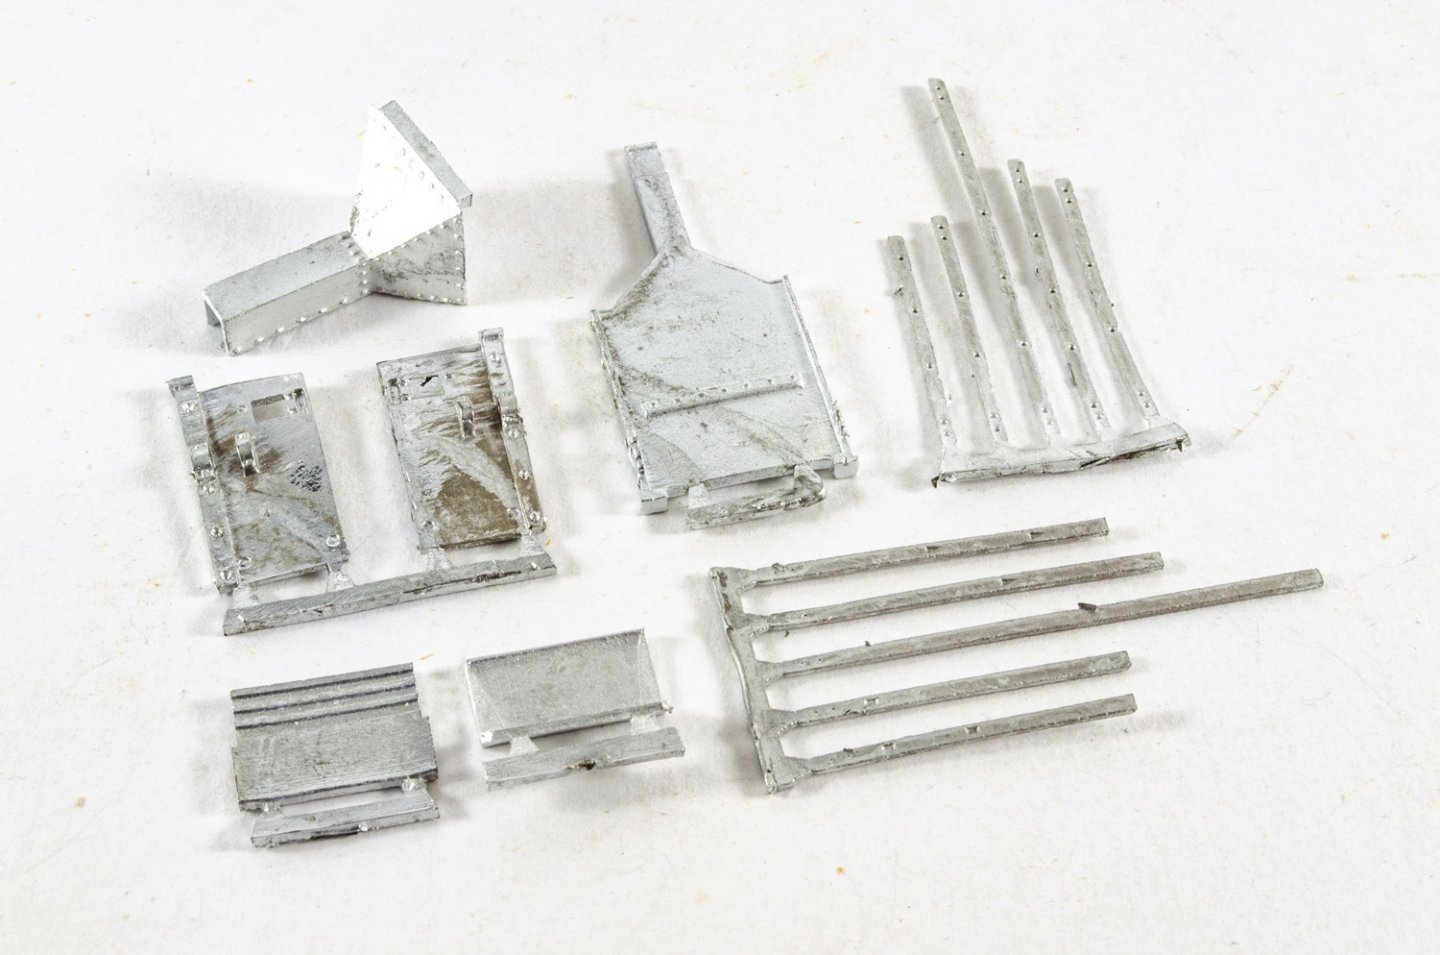
A single box holds all of the various metal fittings, plus some laser/CNC cut parts too. The various fittings are bagged separately in clear sleeves. The timber parts include a mast base, winch gears and a stern piece. There is a little raggedness on the mast base. That is quite deep so it may need replacing.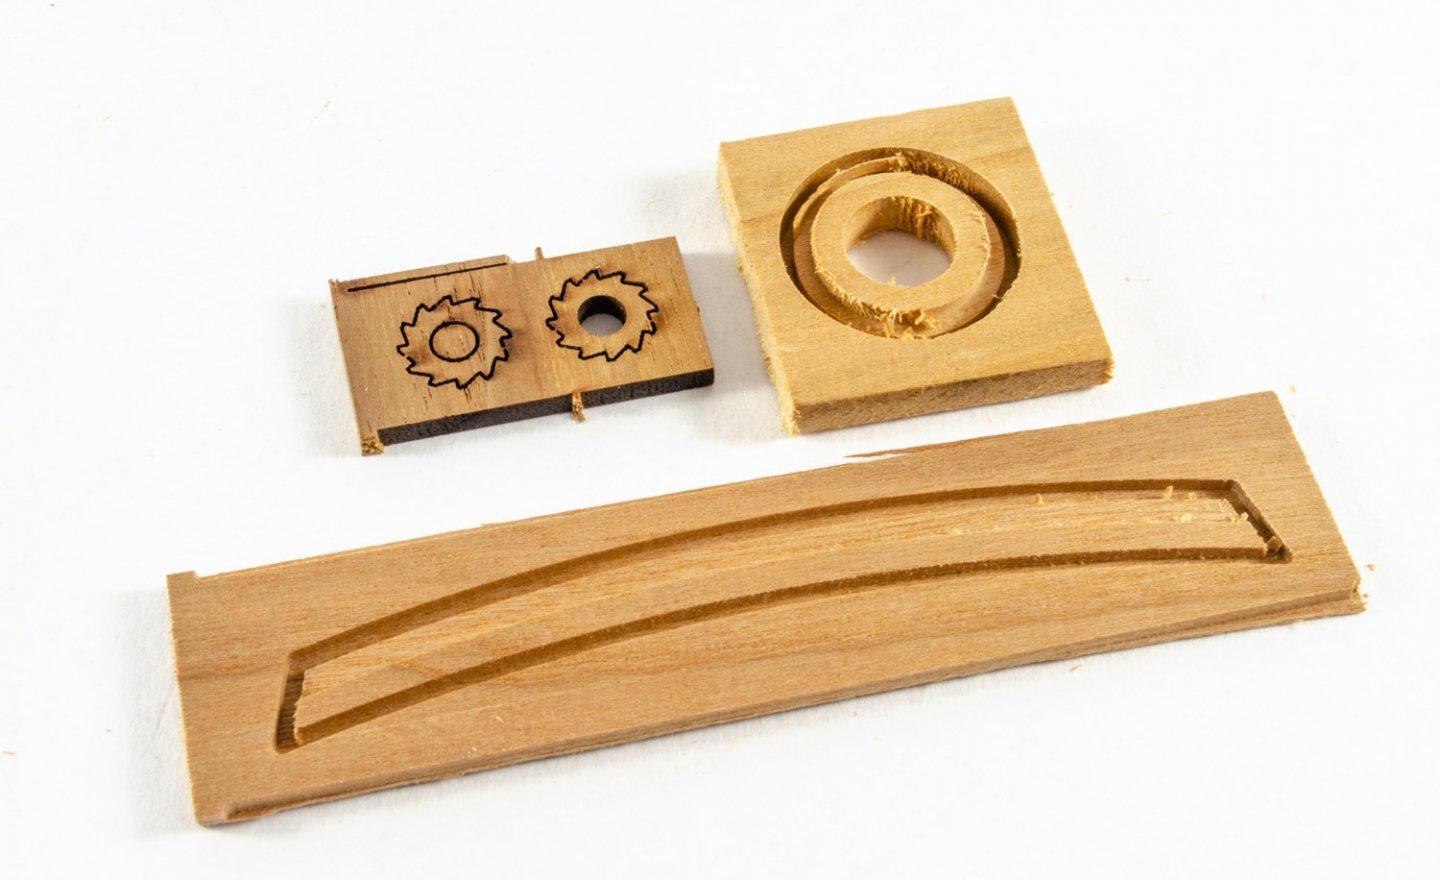
Rope quality is very good with no fuzziness.

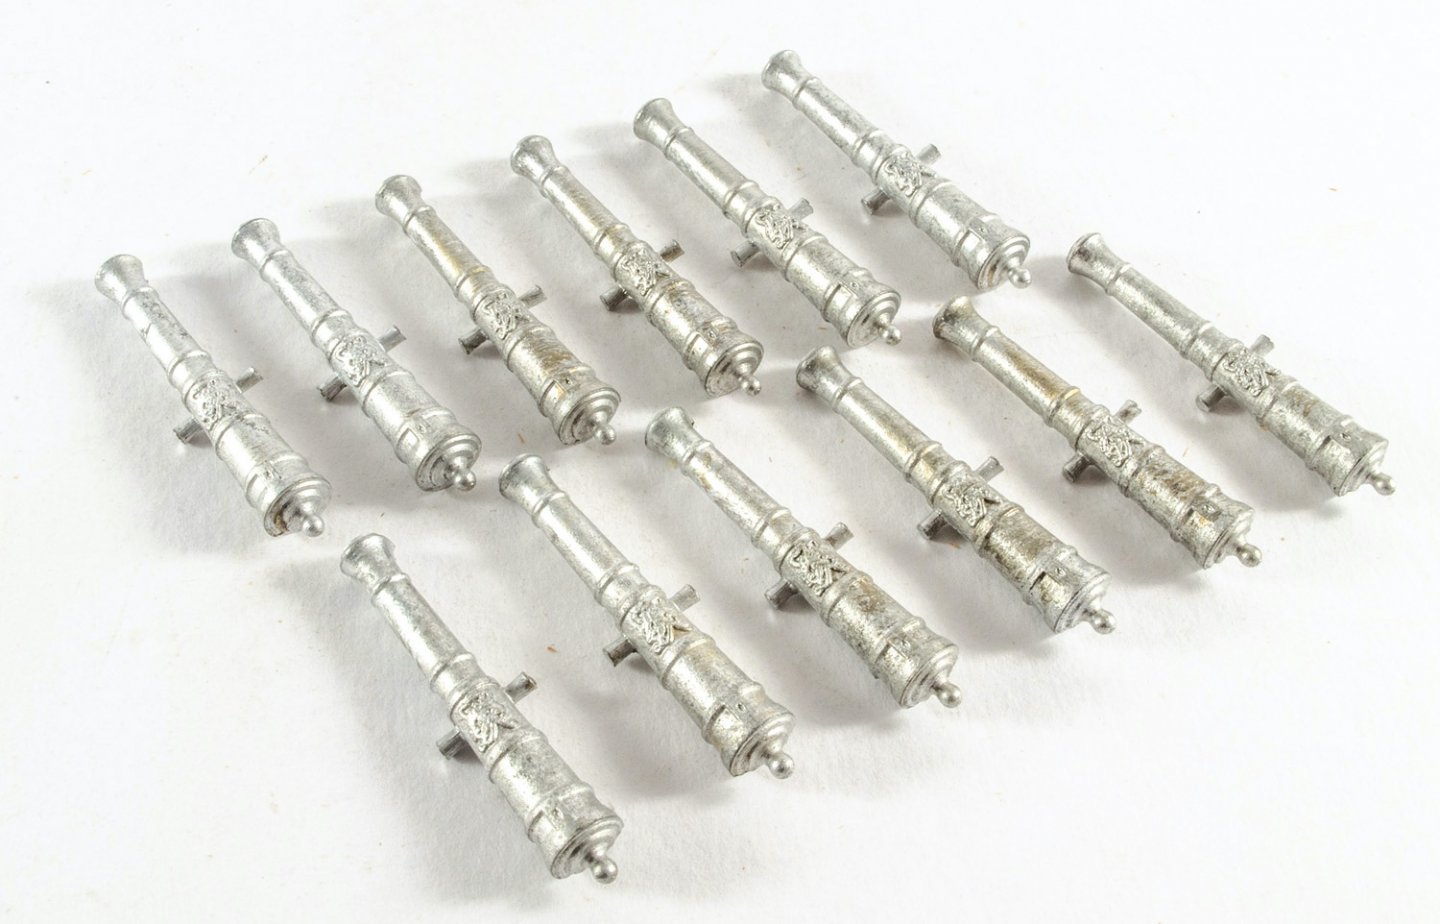
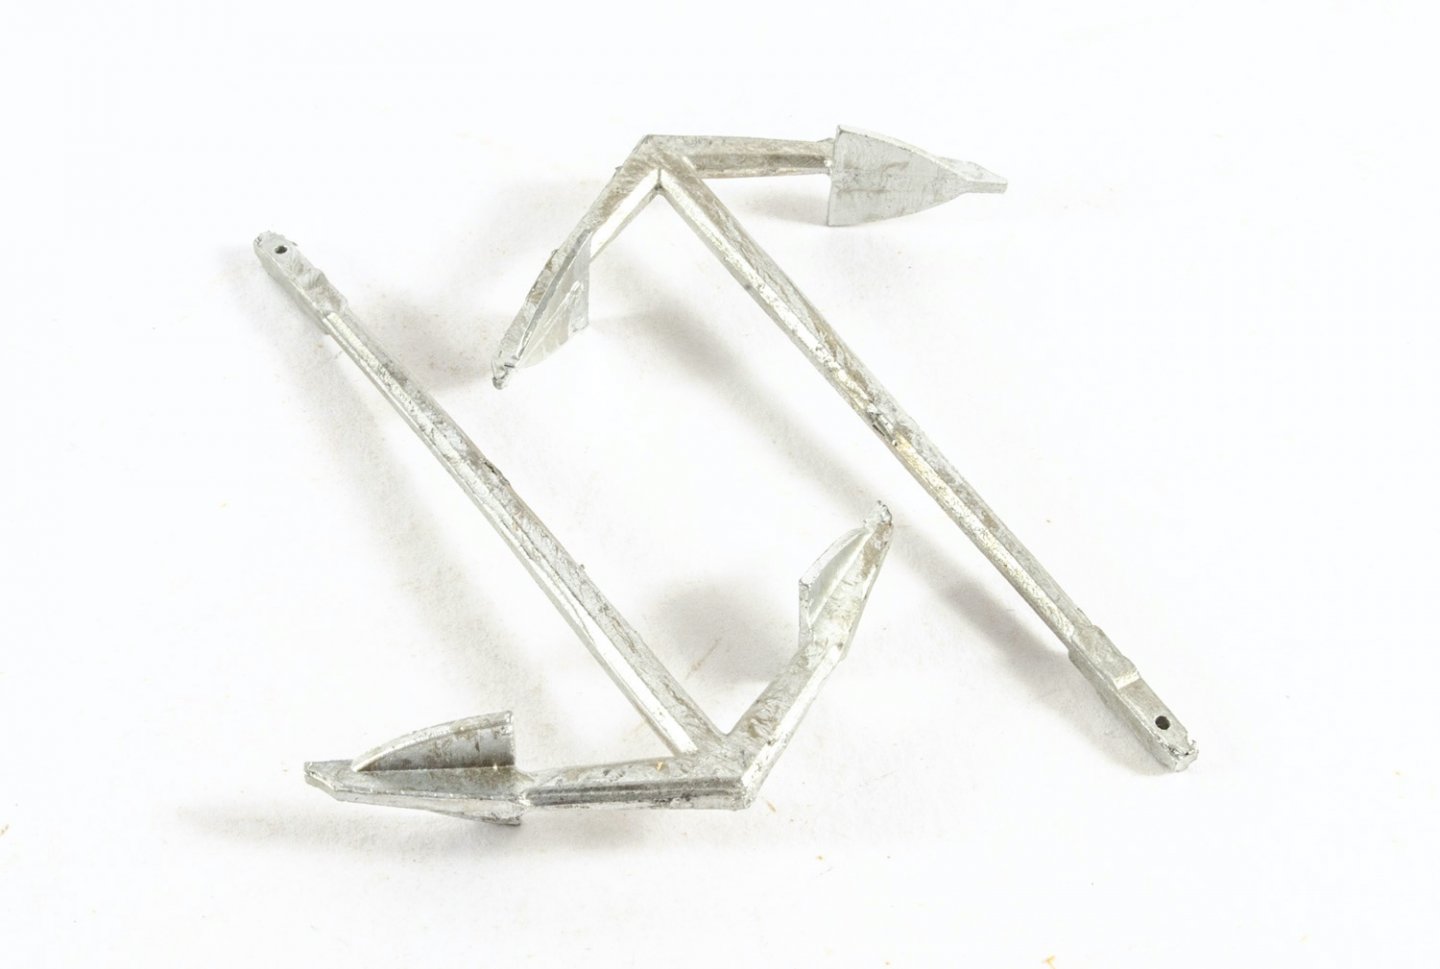
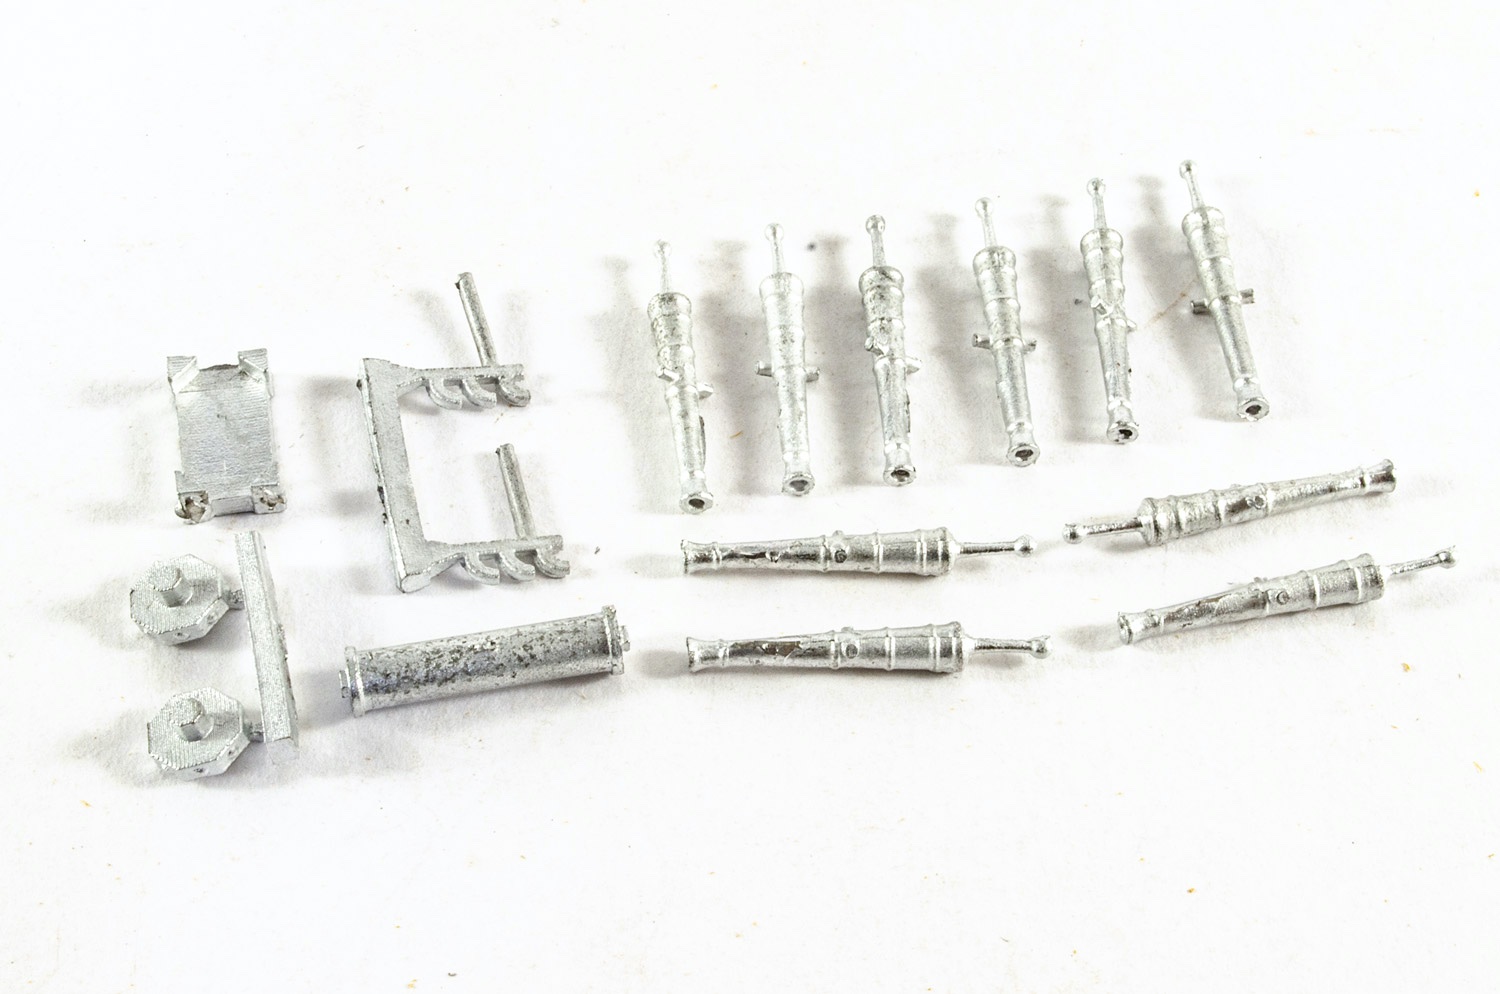
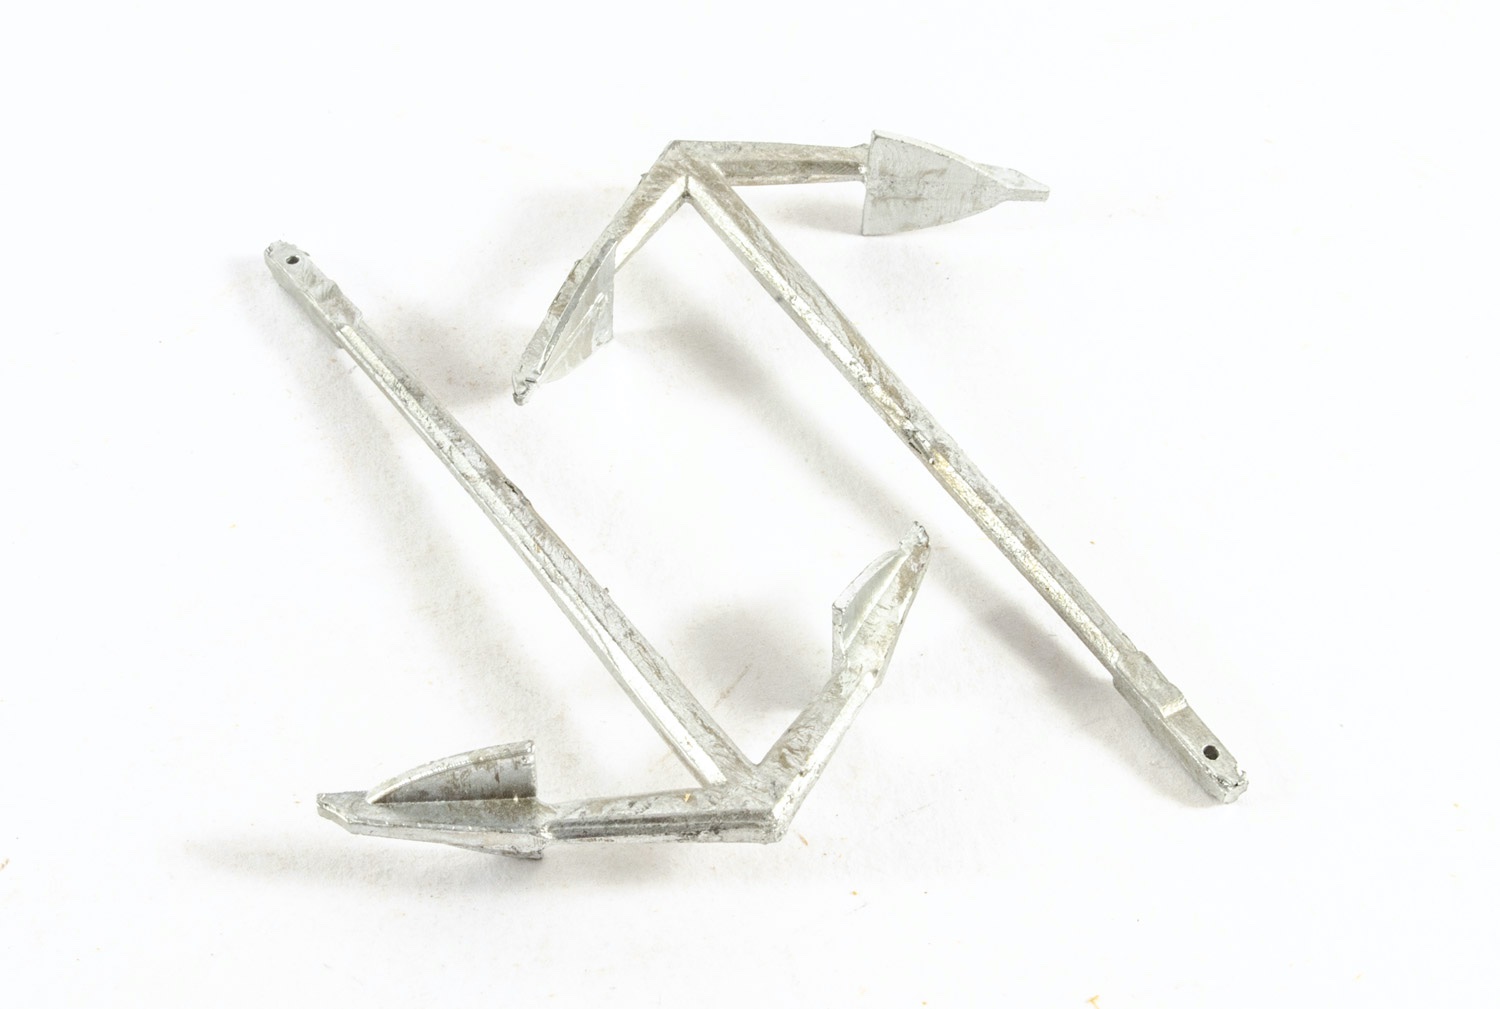
Castings are generally very good too, as seen here with the anchor and cannon. Details on the cannon are nice and defined. Many parts are provided on a casting block and will need to be removed from that before use.
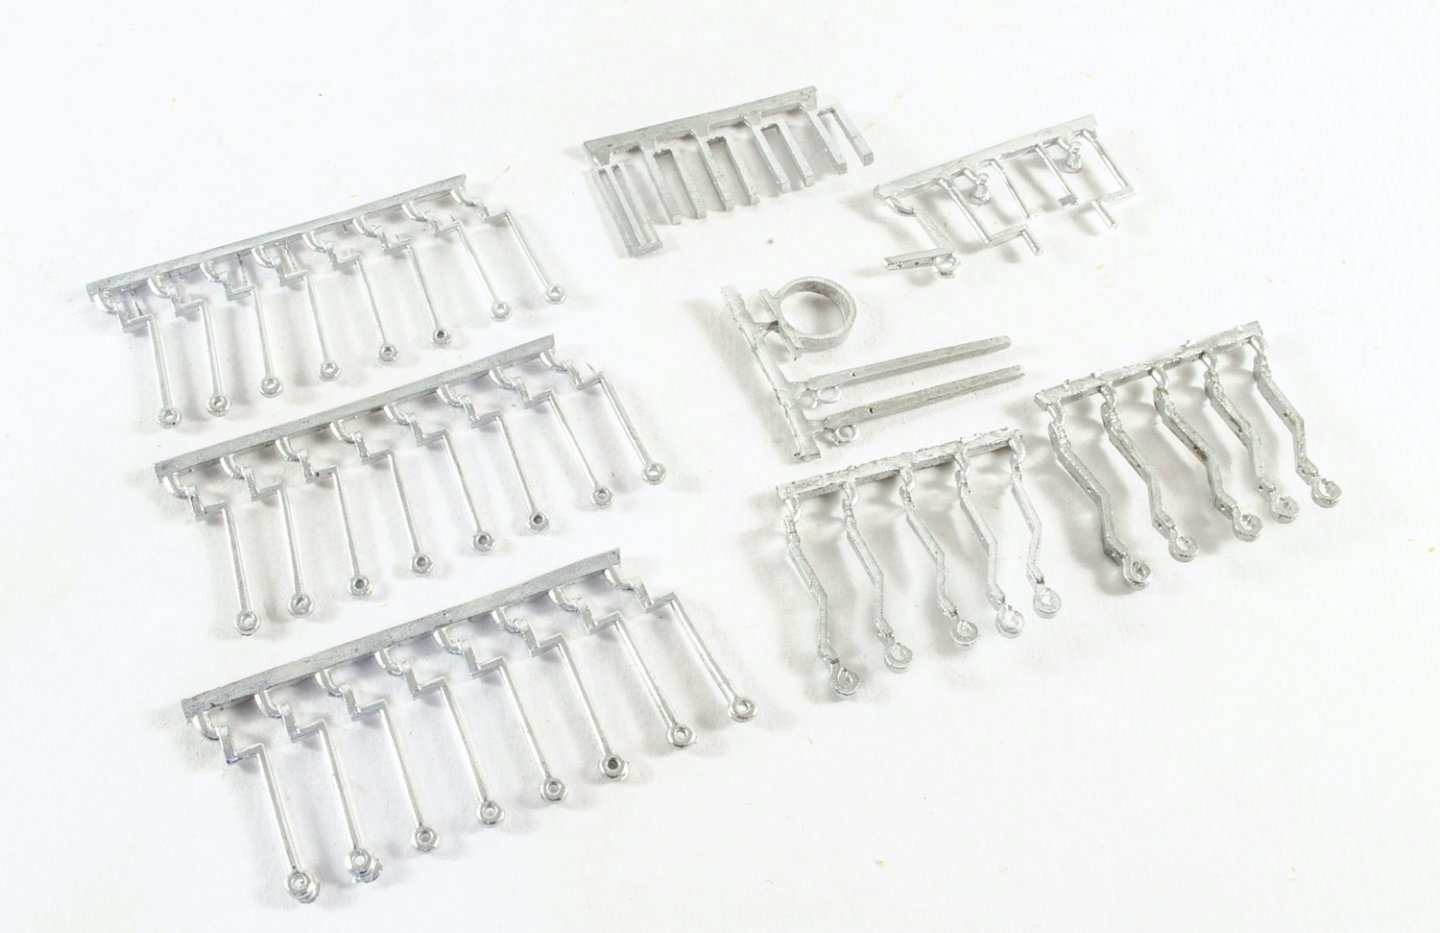
Some parts don’t have as good a definition as others, as can be seen by the swivel guns.
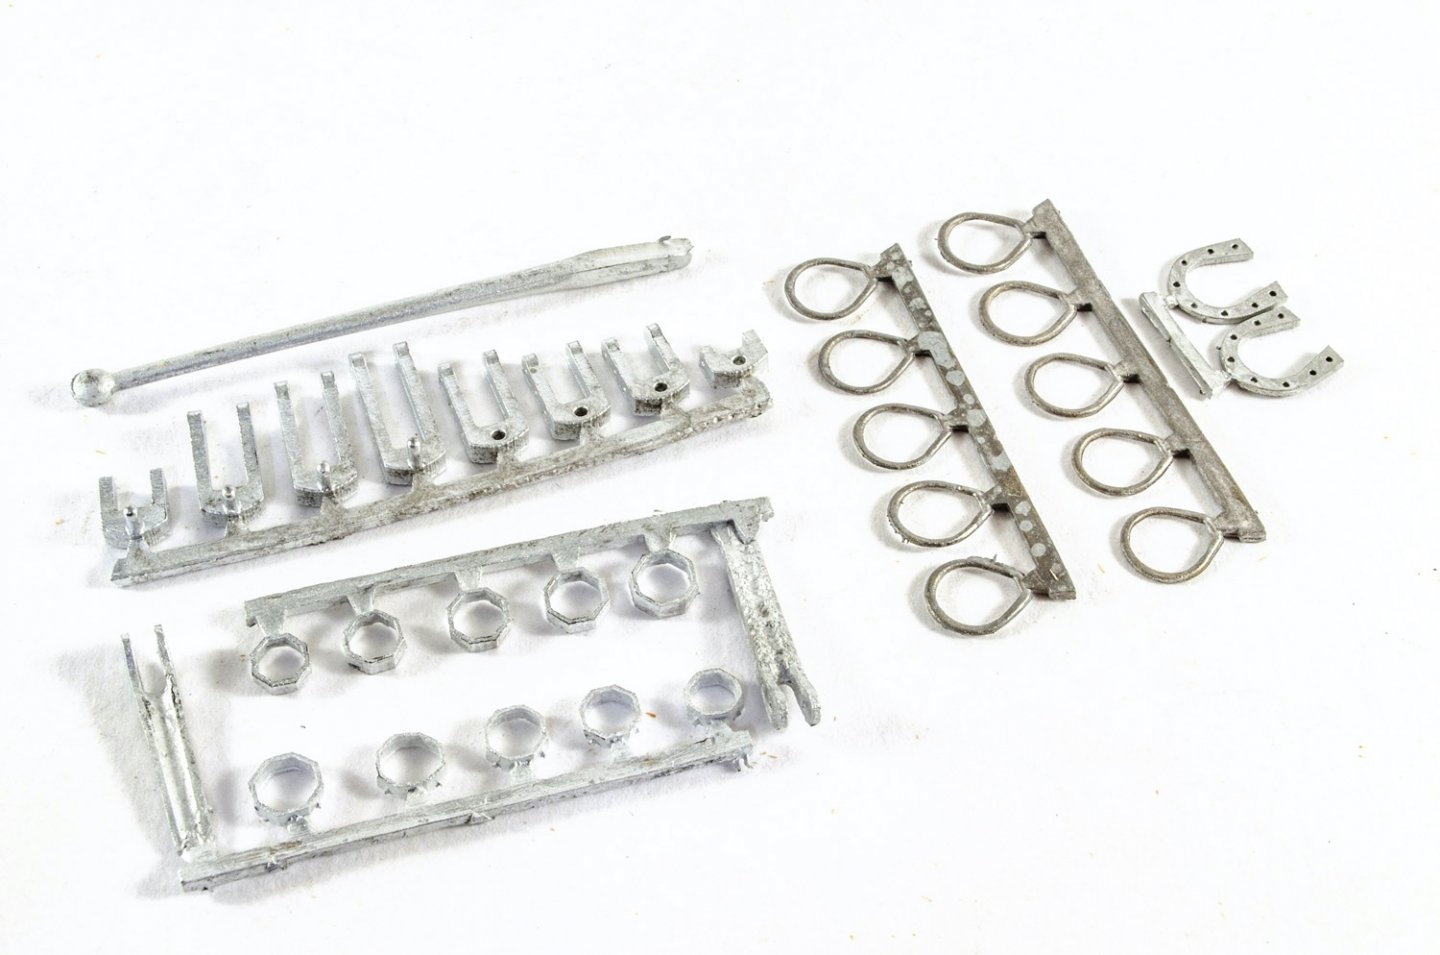

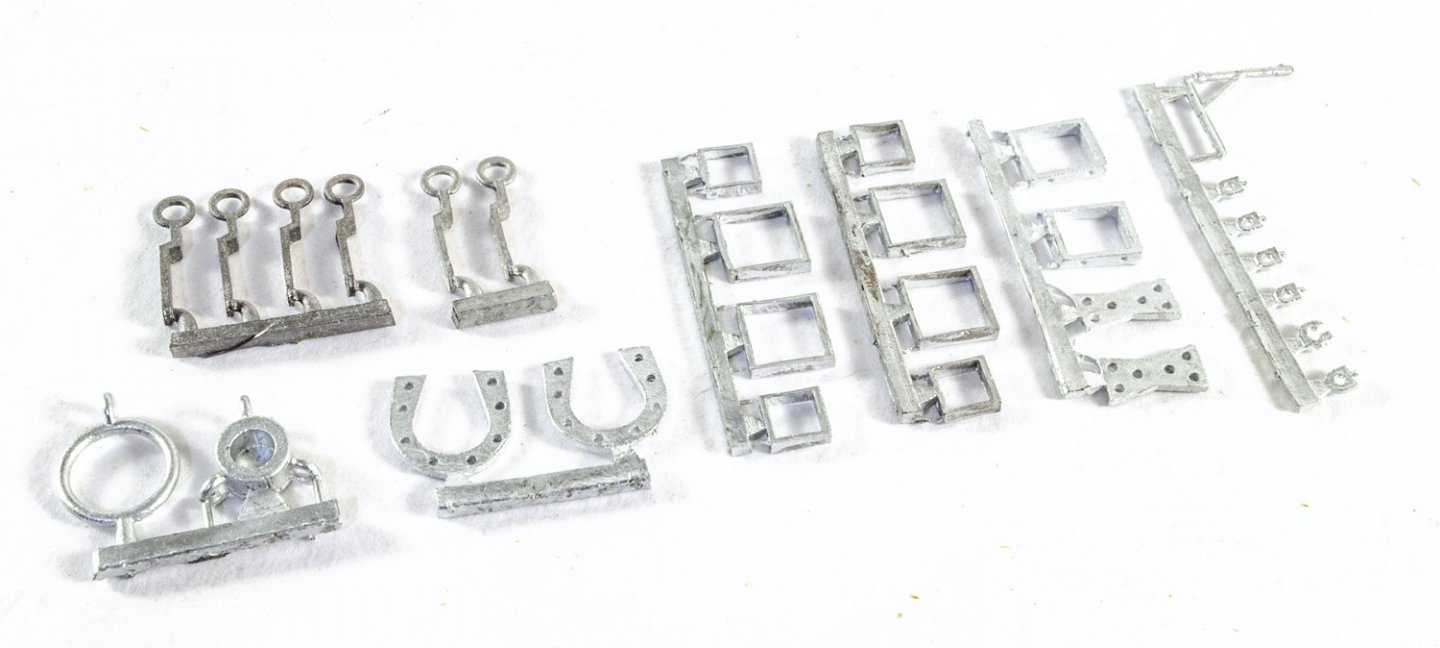

Ignore the dirty appearance of the stove parts, as these are cast reasonably well and should be more than useable.
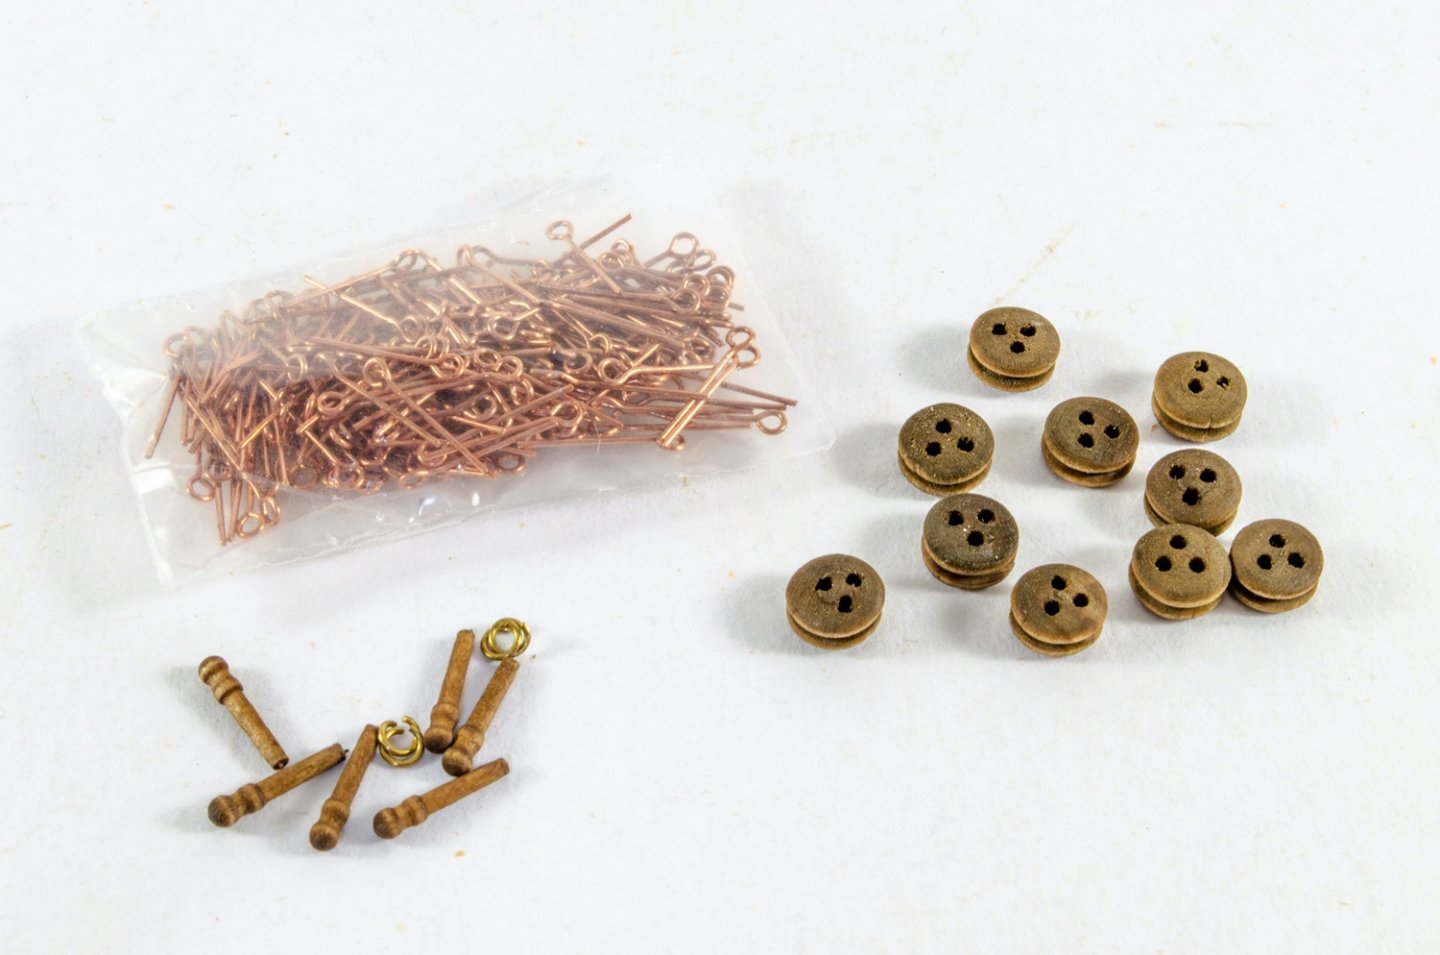
Other fittings include copper eyelets, belaying pins, and deadeyes.
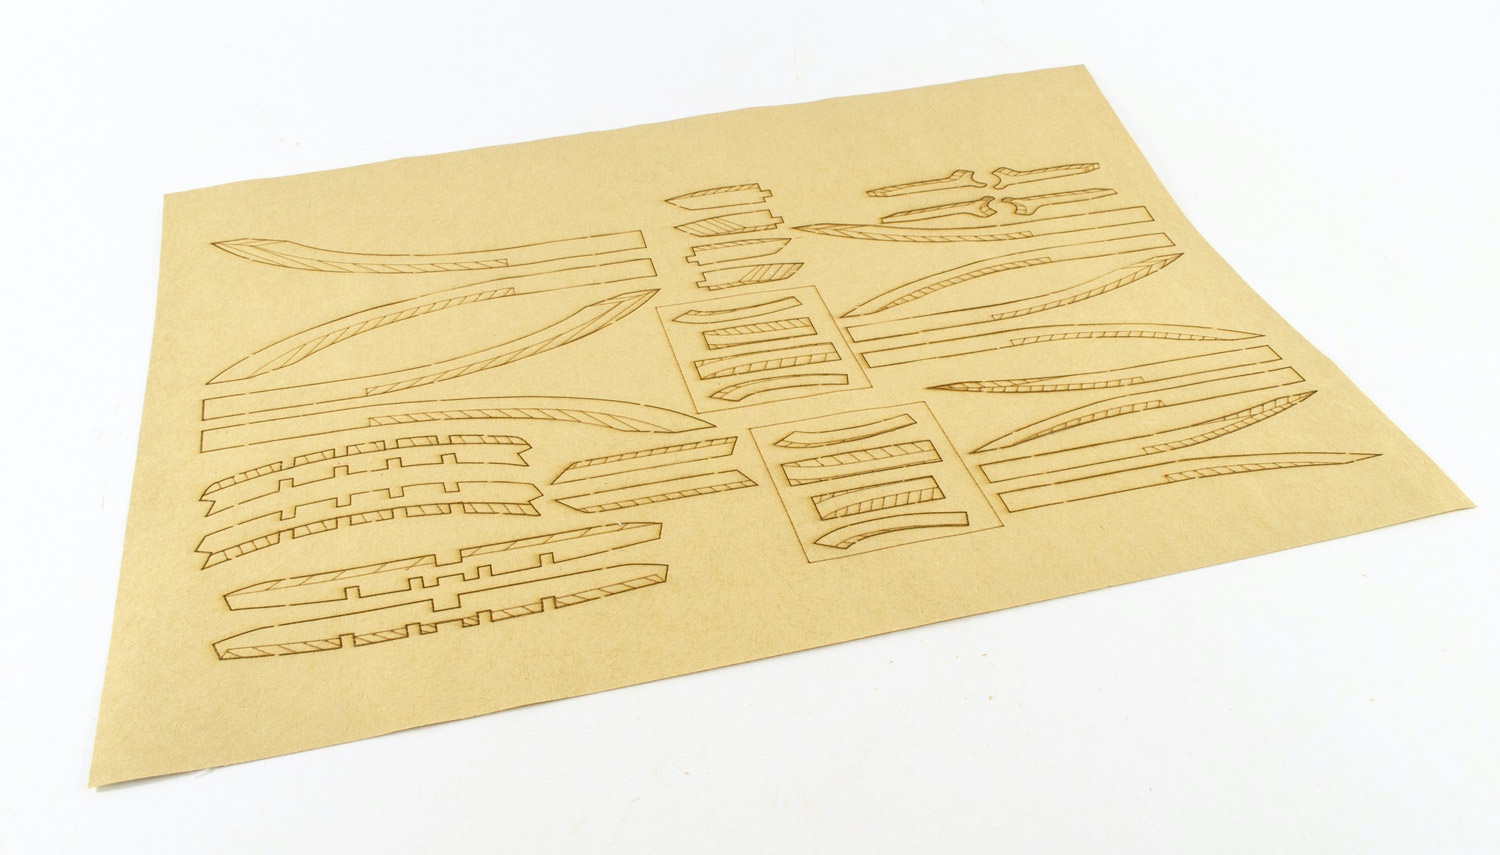
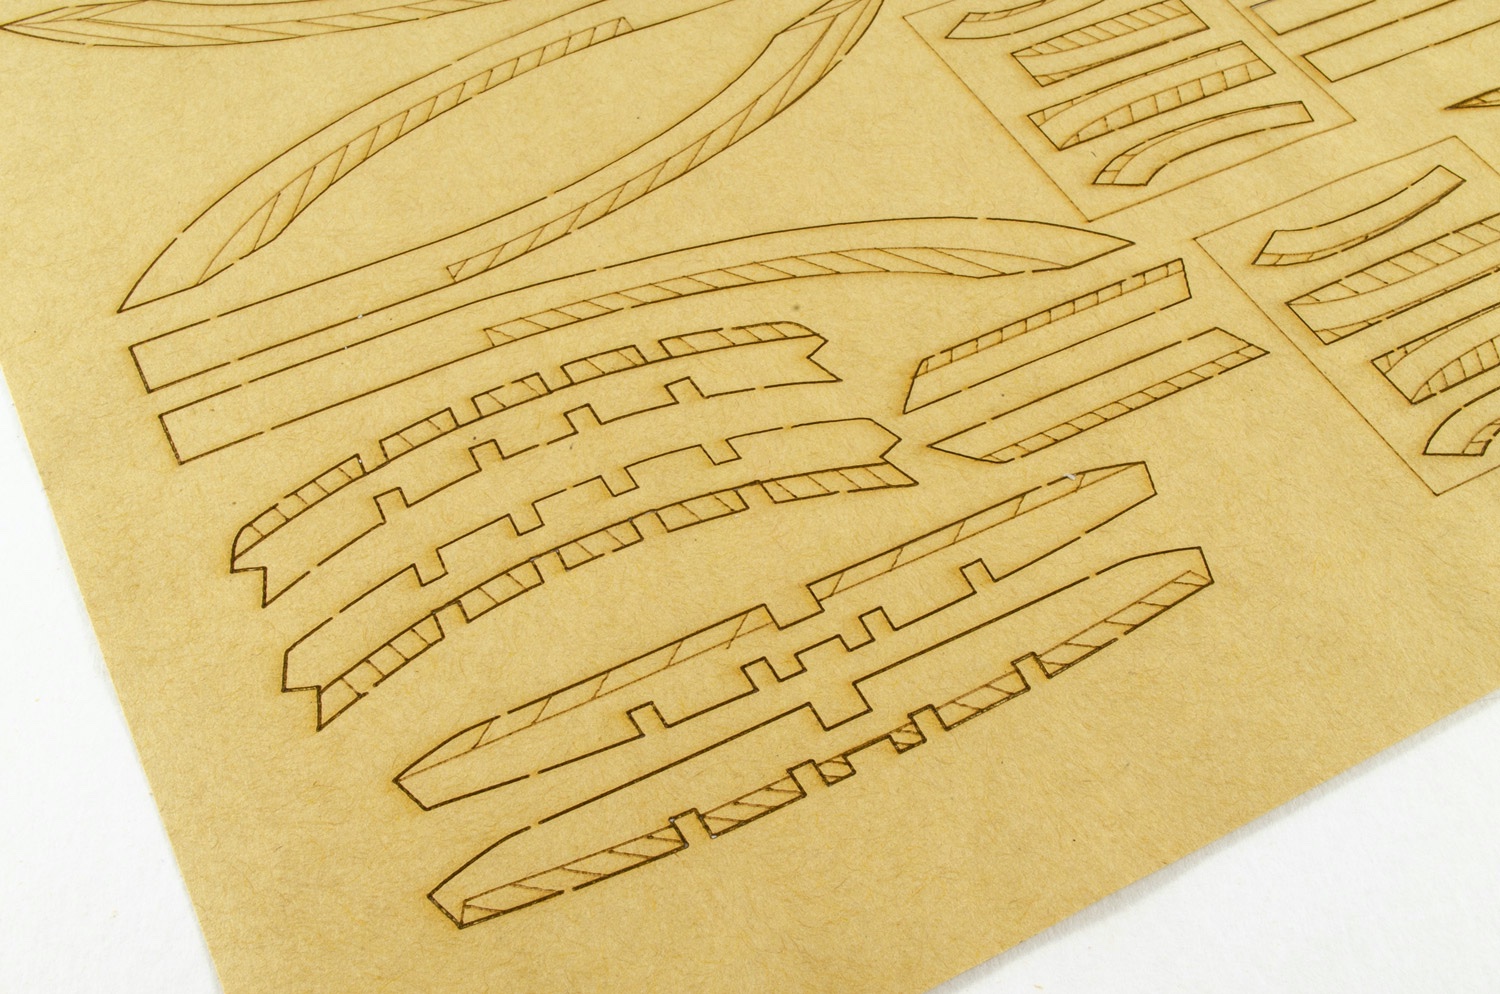
Instructions and plans
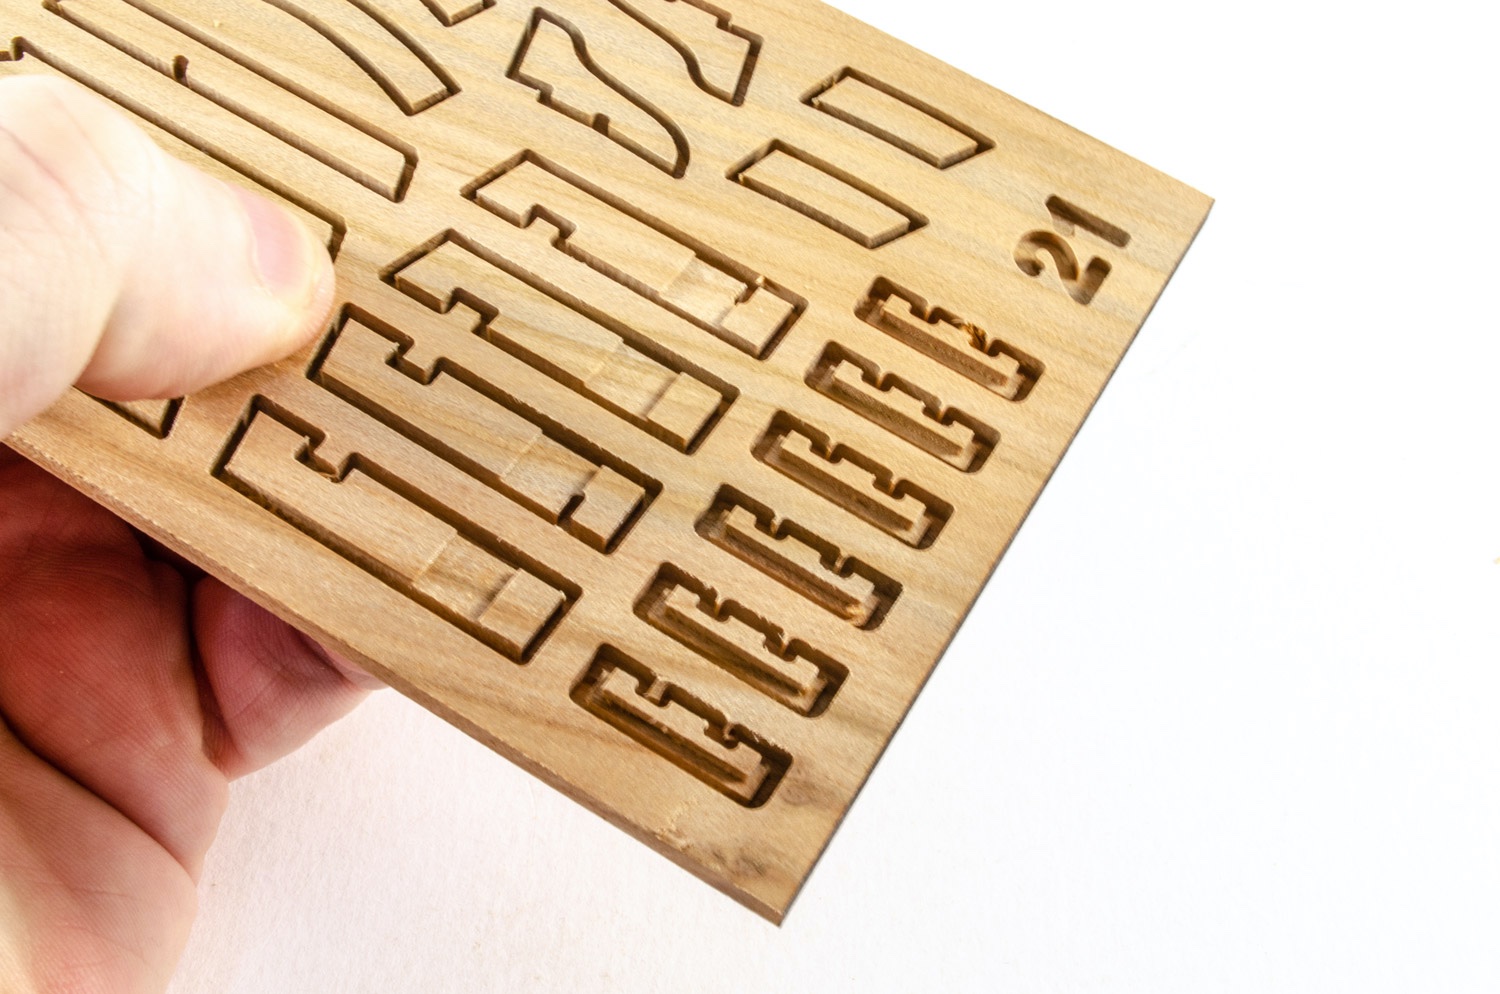
One large plan sheet is included with all the required elevations and details, including some part numbering too. This is printed full size to the model. A spiral-bound instruction manual is included which shows the various stages in line drawing format. The accompanying text is useable if not a little confusing. It definitely could’ve benefited from being proofread by someone who can speak English.

An unusual addition is a sticker sheet with parts drawn on it. These are applied to the respective parts and the hashed areas are used as your guide to bevel these parts. In the absence of a multi-axis cutting machine at Trident, these will serve the job pretty well.
Conclusion
Trident have produced a really nice model here, with extensive use of CNC routing and innovations that aim to make this as easy to assemble as possible. That CNC does come at the cost of the bag full of waste material you need to remove from around each part, of which there are many. On my example, sheets were severely impacted with waste material, and dental picks etc. still struggled to remove it. When the material was eventually cleaned out, four of these sheets exhibited rough/jagged machining which damaged the surface edges of many parts. Despite several repeated requests to replace these sheets for this review, Trident haven’t answered emails for around 7 weeks now, and I have sent quite a few. PMs to them here on MSW also haven’t been answered. The remainder of the parts are superbly made, which is a real shame. When it comes to fittings, again, these are very, very good, being nicely cast metal parts such as the cannon and anchors, plus numerous other fittings. A small number of these are perhaps not as good as other, such as the swivel guns which look a little messy.In all, for the money, and providing you aren’t unlucky enough to get some rough parts sheets, Alert could well be a nice project to guide you into your first POF model. I’m led to believe that the interior parts and barrels aren’t included as standard, meaning another purchase. Those parts also don’t feature on any instructions, and to date, there are none I can talk of. Of course, H.M.S. Alert makes a great stablemate for CAF Model’s Le Coureur. However, if you wanted to choose between one or the other, then my money would be on the CAF Model kit, with its complete mast rig and interior. CAF, unlike Trident, also seem to be responsive to queries and correct any mistakes.
My thanks to Trident Model for the sample reviewed here on MSW. To date, there is no website through which to order. When I know of one, I’ll amend this article.

-
-
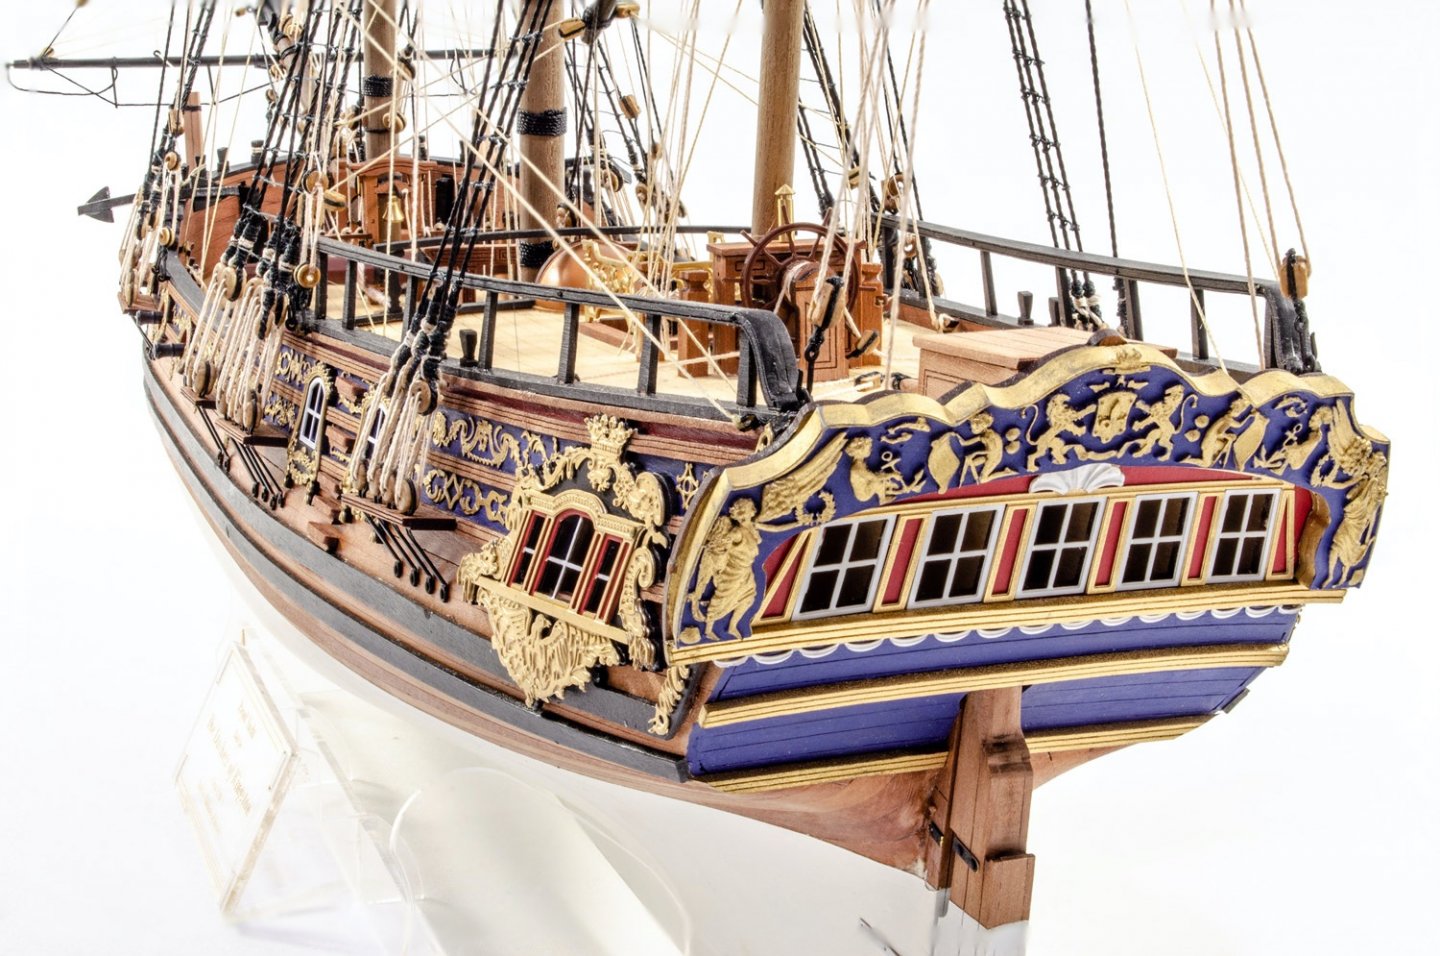
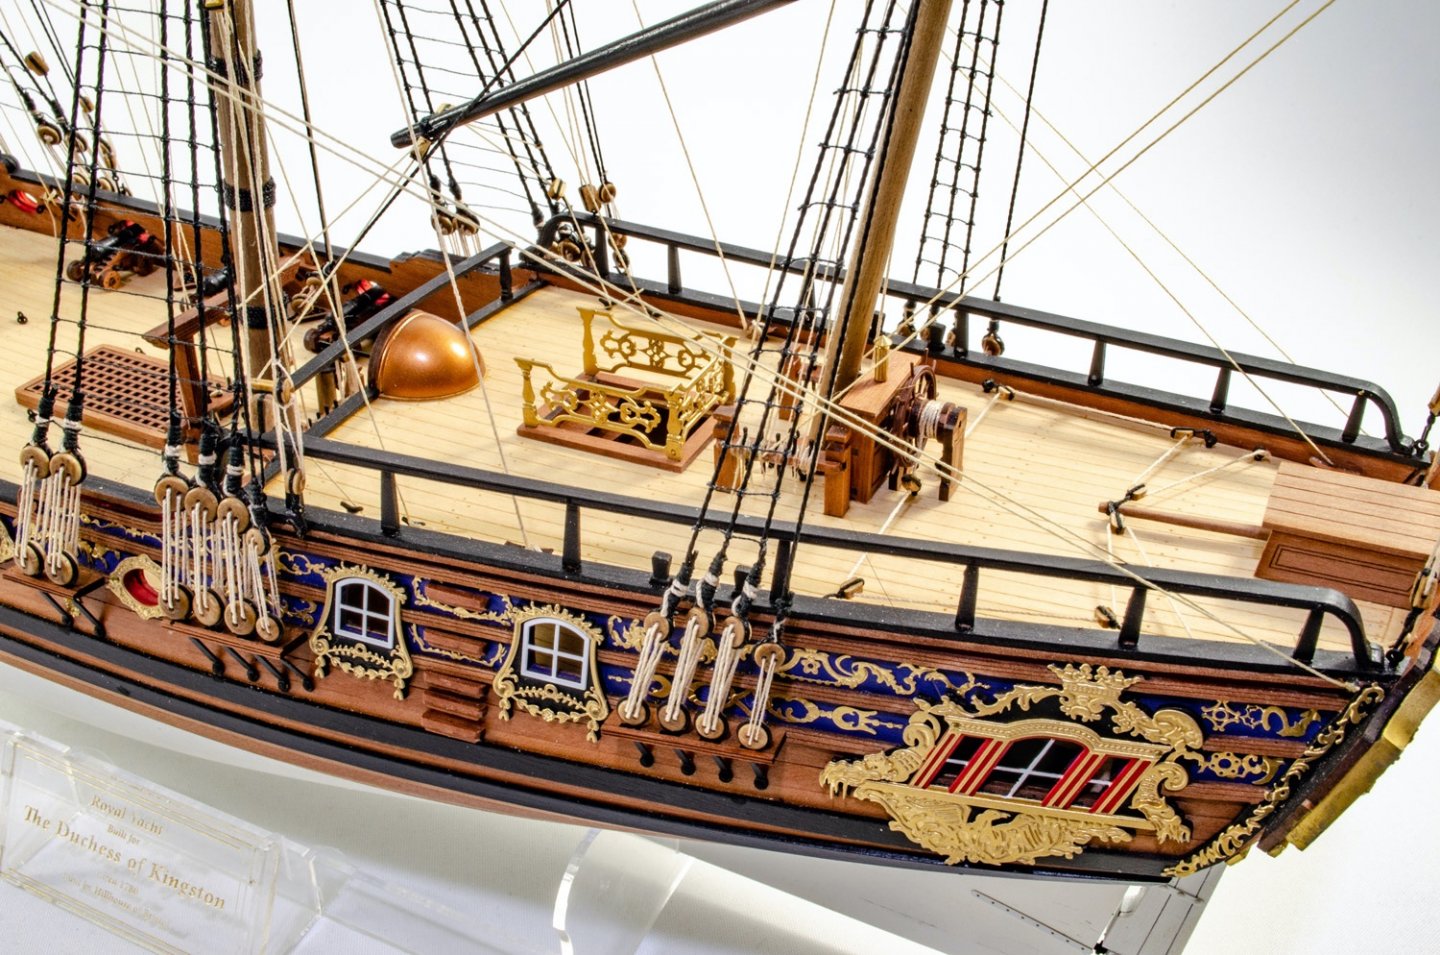
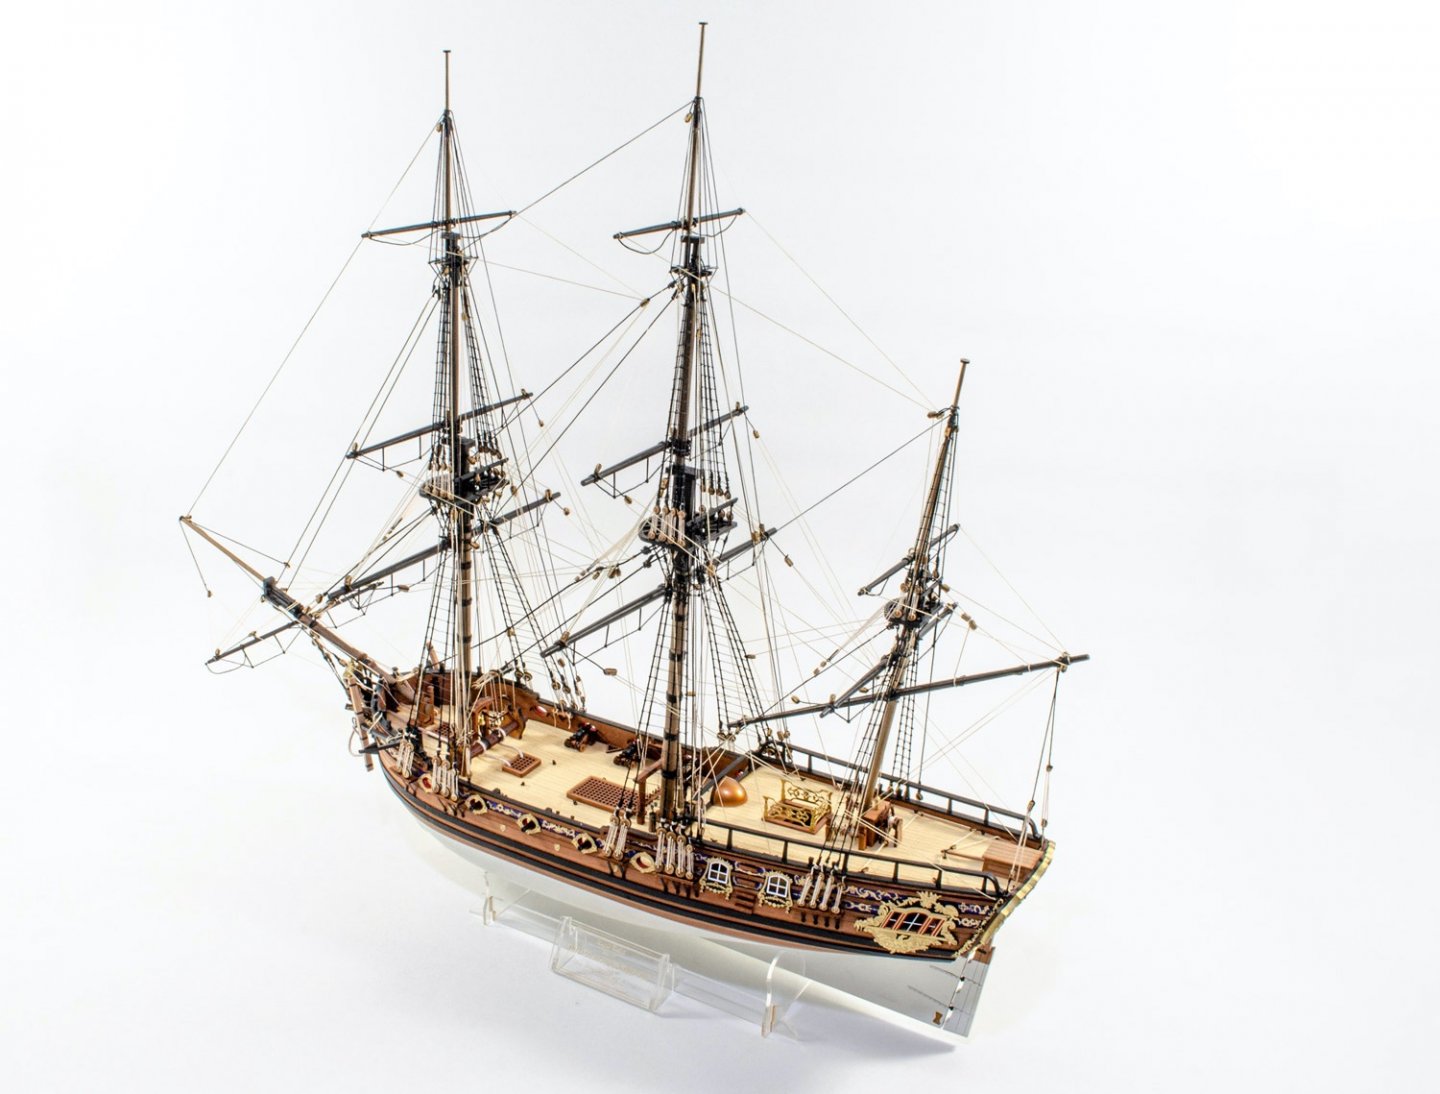
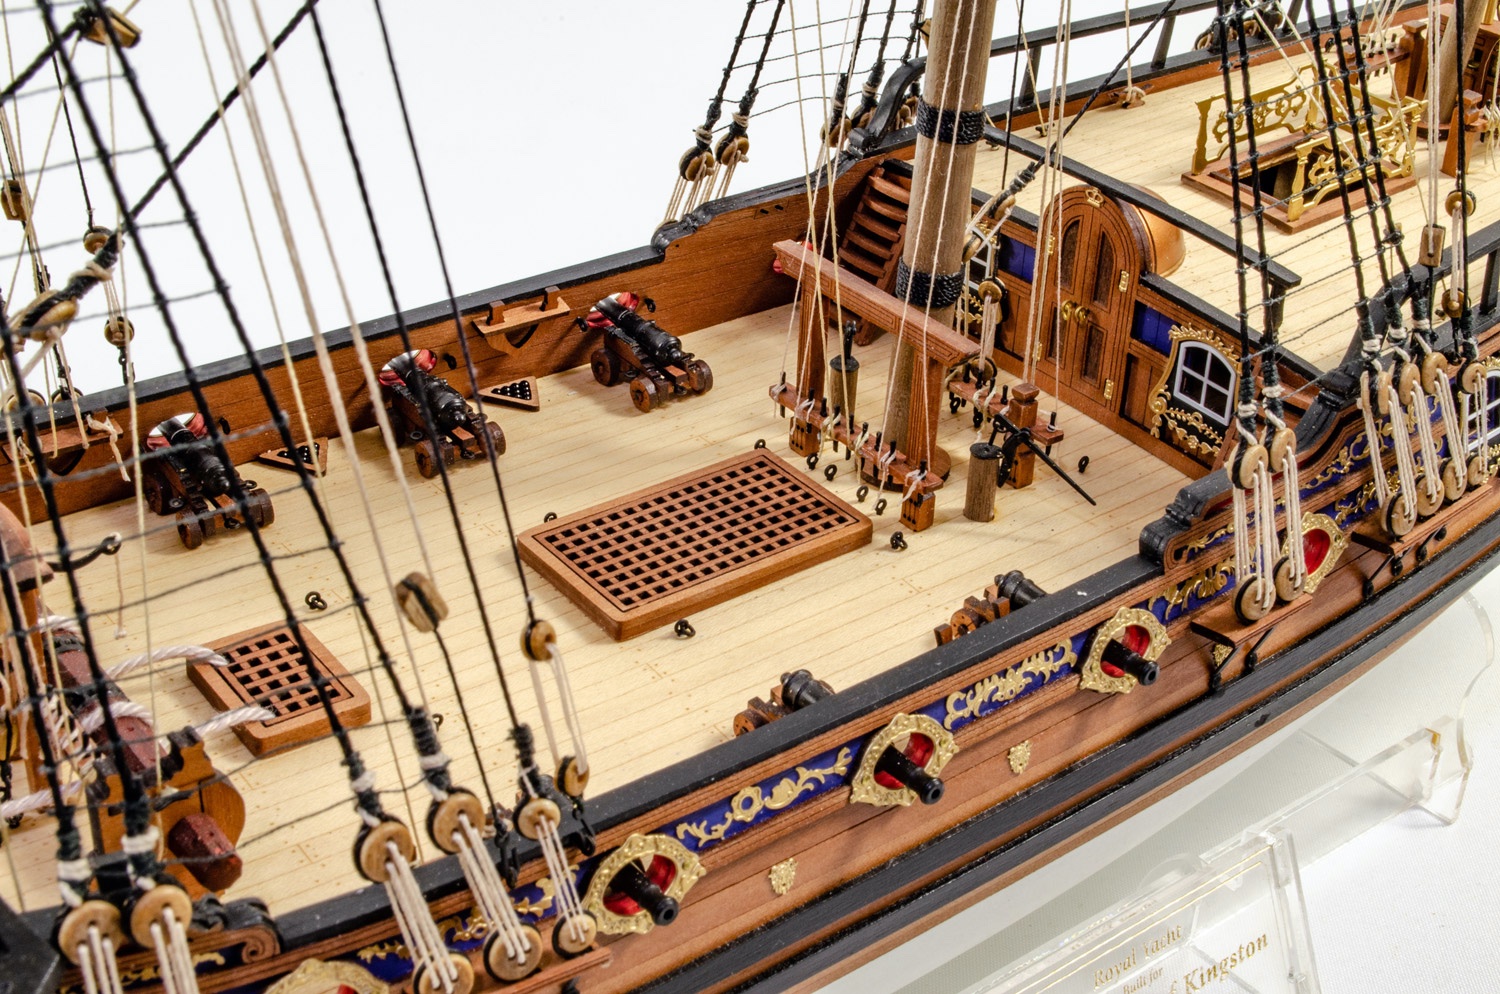
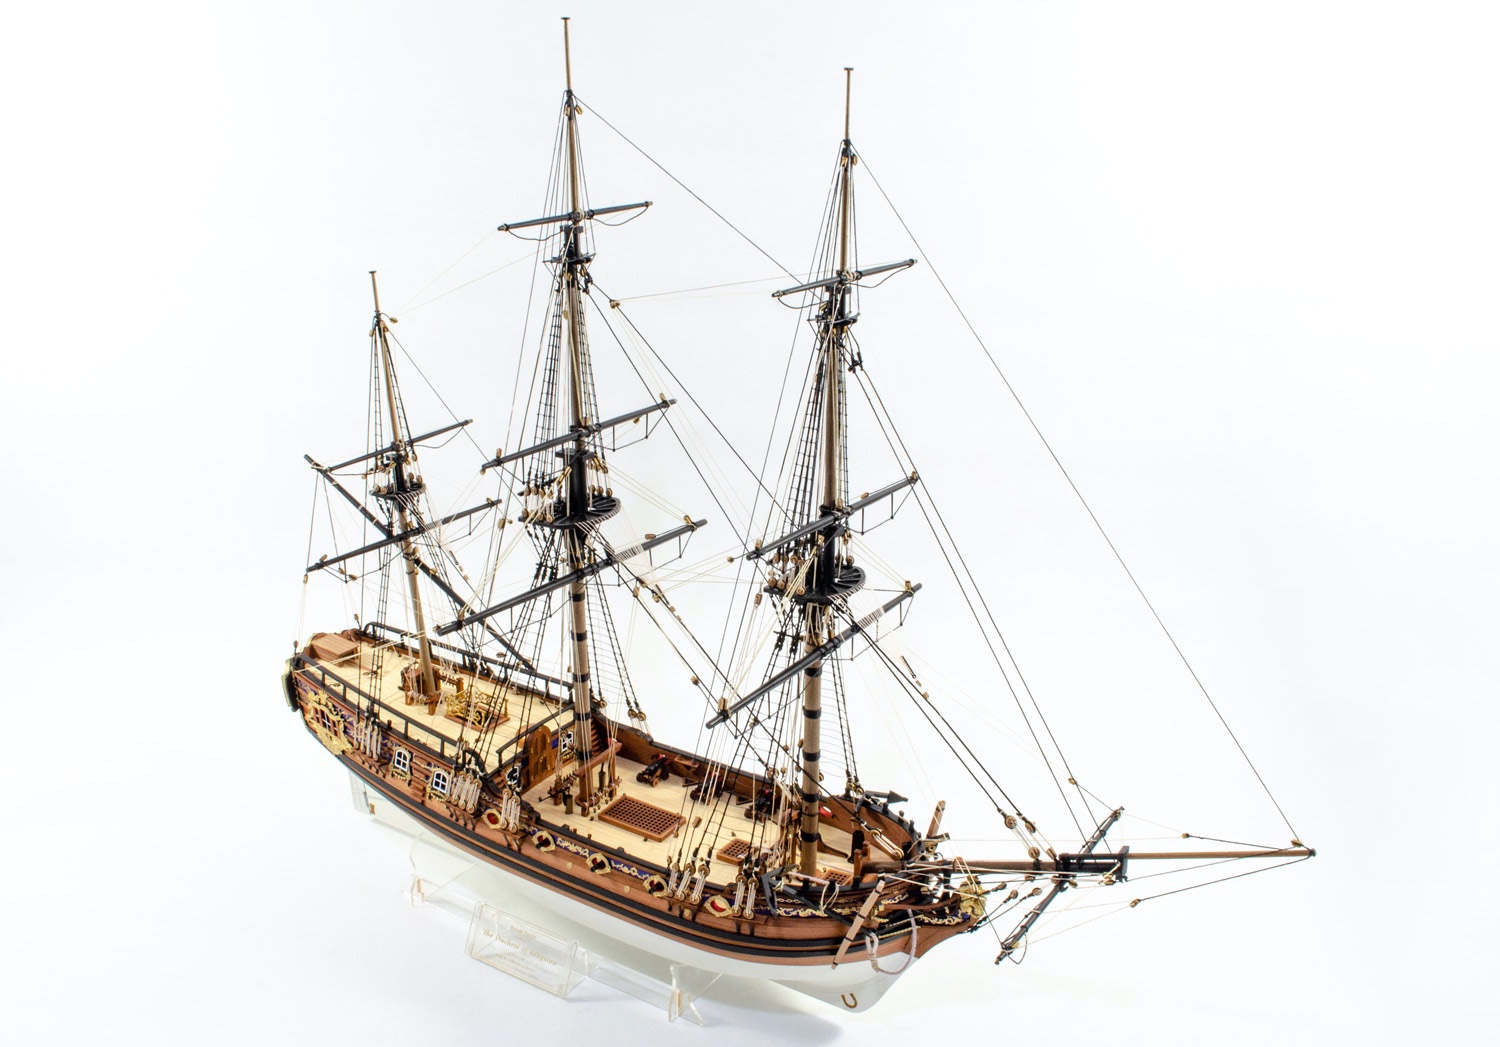
The Duchess of Kingston was finished yesterday and today I spent some time doing the final photos for the instruction manual.
I also did some images for the box art and they take a lot longer as I'm image stacking around 40 to 70 individual focus pictures to create a single, fully-focussed image.
This was a beautiful build and I completed her in a few days over 10 weeks. Not bad considering that I've been back at work for 6 weeks now, and when I built Flirt, that took a whole 10 weeks of lockdown to complete.
Hope you like her. Available either later today or tomorrow for pre-order at Vanguard Models.


-
Hi Tim,
Firstly, welcome to MSW. Also, great to see you get this log started here. There's no such thing as dumb question. They are all valid and it's how we learn. We are all still learning in some way.
Off to a great start. Take your time and ask as many questions as you need.
-
Just beautiful.
Now.....where's mine?
- MEDDO and Ryland Craze
-
2
-
I've pinned this topic for future reference.


HMS Victory by James H - Amati - 1:64
in - Kit build logs for subjects built from 1751 - 1800
Posted
Been a while since I saw that, but thanks for posting it here.