DONATION DRIVE - SUPPORT MSW - DO YOUR PART TO KEEP THIS GREAT FORUM GOING!
×


jwvolz
-
Posts
979 -
Joined
-
Last visited
Content Type
Profiles
Forums
Gallery
Events
Everything posted by jwvolz
-
 Very nice work so far Ken. What woods did you use for your planking?
- 238 replies
-
- 3
-

-
- sloop
- providence
- (and 1 more)
-
US Brig Syren by Gahm - Model Shipways
jwvolz replied to Gahm's topic in - Kit build logs for subjects built from 1801 - 1850
Fantastic work Thomas. -
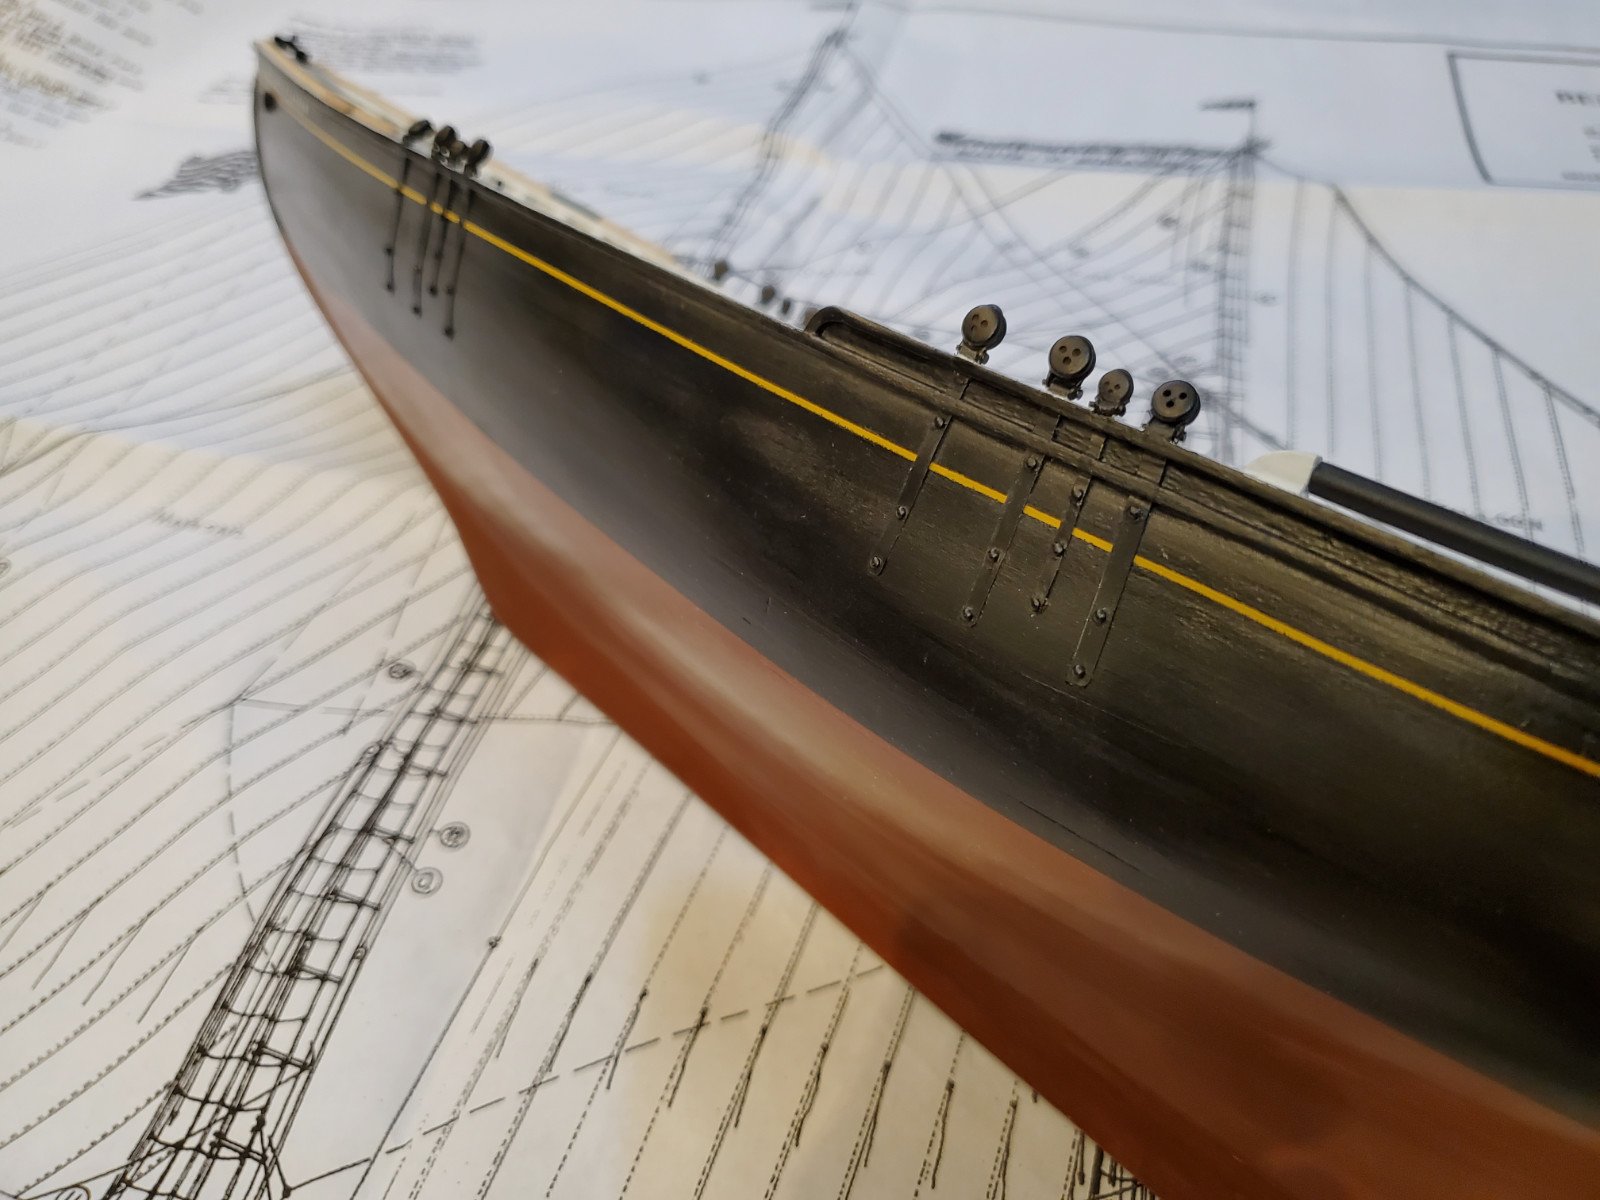
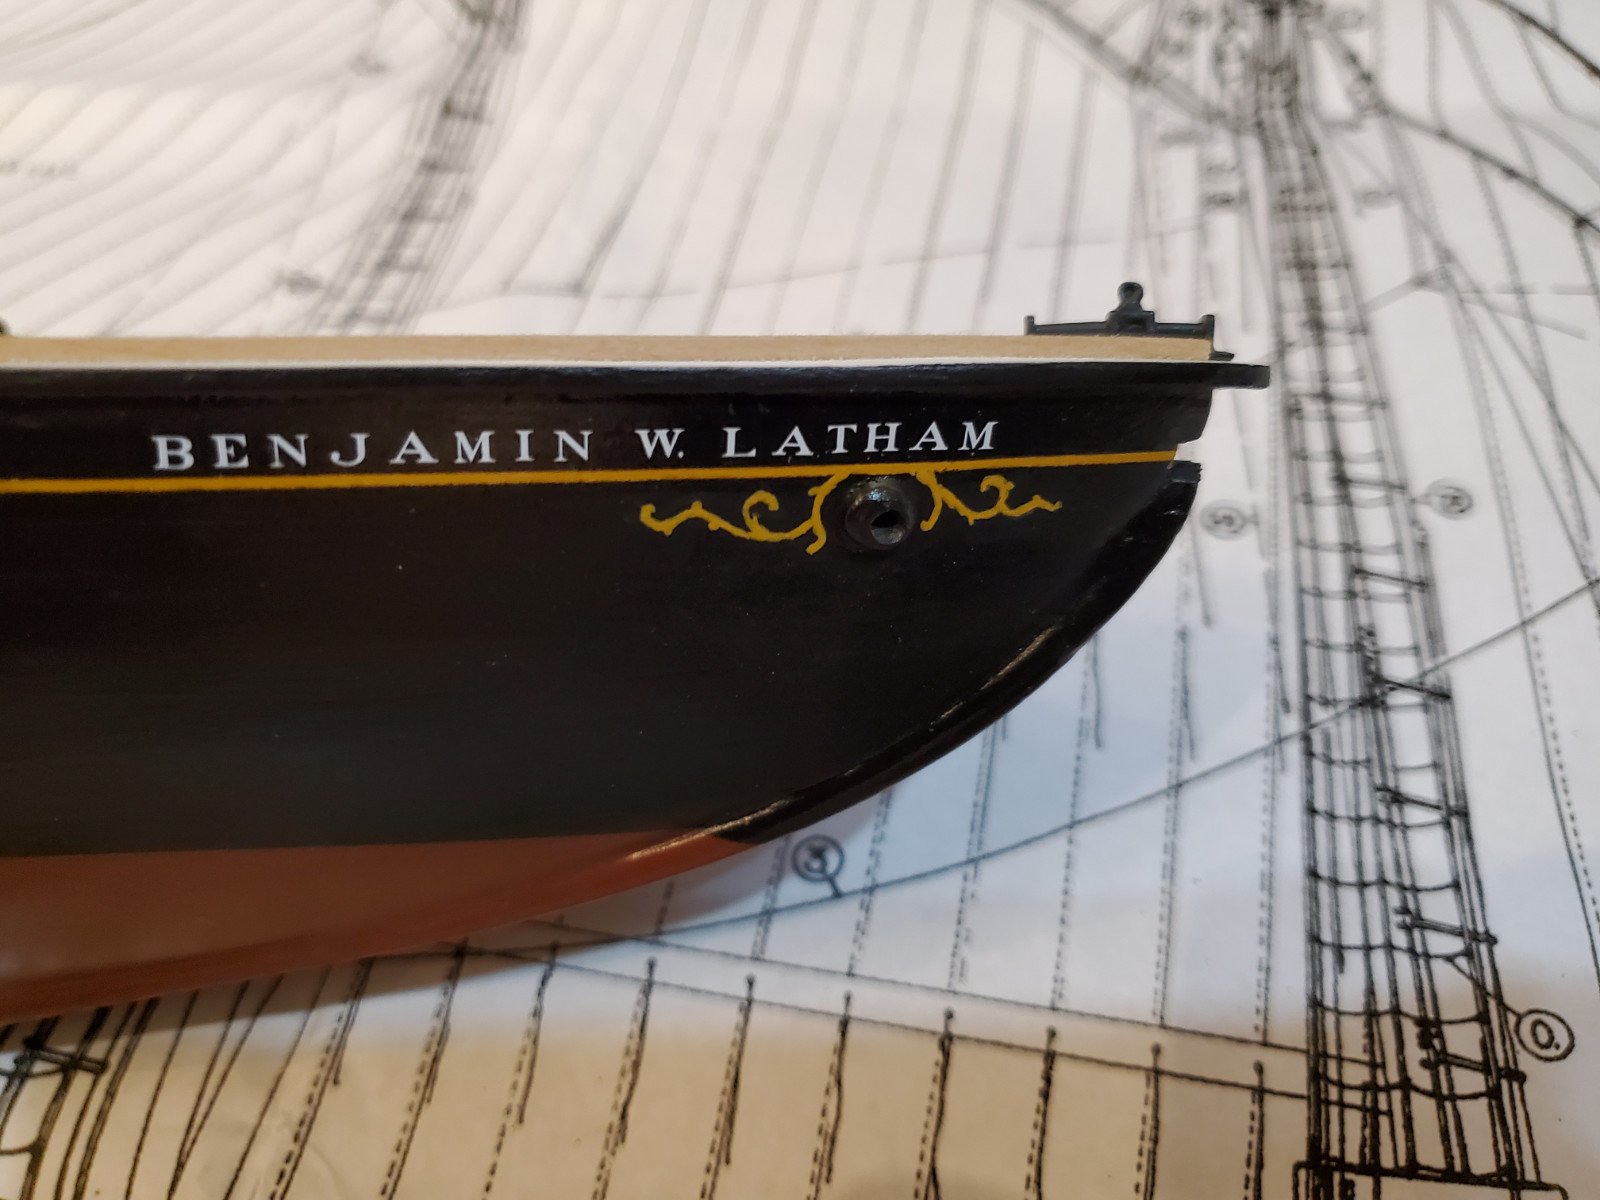
I've finished cleaning up and repainting the chainplates. . I also painted the decorative element around the hawse hole. A nice 20/0 brush and a careful hand got it looking good. This wasn't the first attempt, but re-doing acrylics is easy. The really hard part was getting both sides to look the same doing this free hand.


- 140 replies
-
- 14
-
-
- benjamin w latham
- model shipways
- (and 1 more)
-
OC, If I prime with lacquer I generally wait until I can't smell it anymore. Can be up to a week.
-
F-16c 35th FW Misawa "803" by Javlin -Tamya - 1/48 - PLASTIC
jwvolz replied to Javlin's topic in Non-ship/categorised builds
Nice, pylon and all. Forgot about the Wolfpack one... -
That looks very nice. Seems like those are some of the best designed kit head rails. Much more authentic looking than most.
- 725 replies
-
- 3
-
-
- vanguard models
- speedy
- (and 1 more)
-
Very nice work s far, and well planned out. That kink in the bulwarks will likely straighten out just fine once you get the inner and outer planking installed.
- 34 replies
-
- 1
-
-
- lady nelson
- victory models
- (and 1 more)
-
Nice work on the deck. Joggling looks good.
-
Nice job so far on the planking. Do you plan to paint or leave the wood natural?
-
F-16c 35th FW Misawa "803" by Javlin -Tamya - 1/48 - PLASTIC
jwvolz replied to Javlin's topic in Non-ship/categorised builds
Aires resin definitely makes a GE exhaust for the Tamiya F-16. With regard to the pod, it may be a case of the correct pylon for the F-16. Let me keep poking around my spares, I may have the pylon. -
F-16c 35th FW Misawa "803" by Javlin -Tamya - 1/48 - PLASTIC
jwvolz replied to Javlin's topic in Non-ship/categorised builds
Also, you can get the Litening pod in resin from Eduard. Here's one source on eBay: https://www.ebay.com/itm/EDUARD-1-48-AIRCRAFT-AN-AQ28-V-LITENING-POD-PHOTO-ETCH-RESIN-648237/402020807363?hash=item5d9a4eb2c3:g:mb4AAOSwMyteDOtM -
F-16c 35th FW Misawa "803" by Javlin -Tamya - 1/48 - PLASTIC
jwvolz replied to Javlin's topic in Non-ship/categorised builds
Great kits those Tamiya F-16s. Not sure how fussed you are about it, but the other big difference from block 32 to block 50 is the intake and exhaust. The block 50s have the larger intake (not a big deal visually) and are GE powered vs the P&W powered block 32s. The exhaust looks completely different. You've go the P&W exhaust. Some of the Tamiya boxings contain the parts for both. I just took a look through my spare parts and I have two extra P&W nozzles, but no GE... -
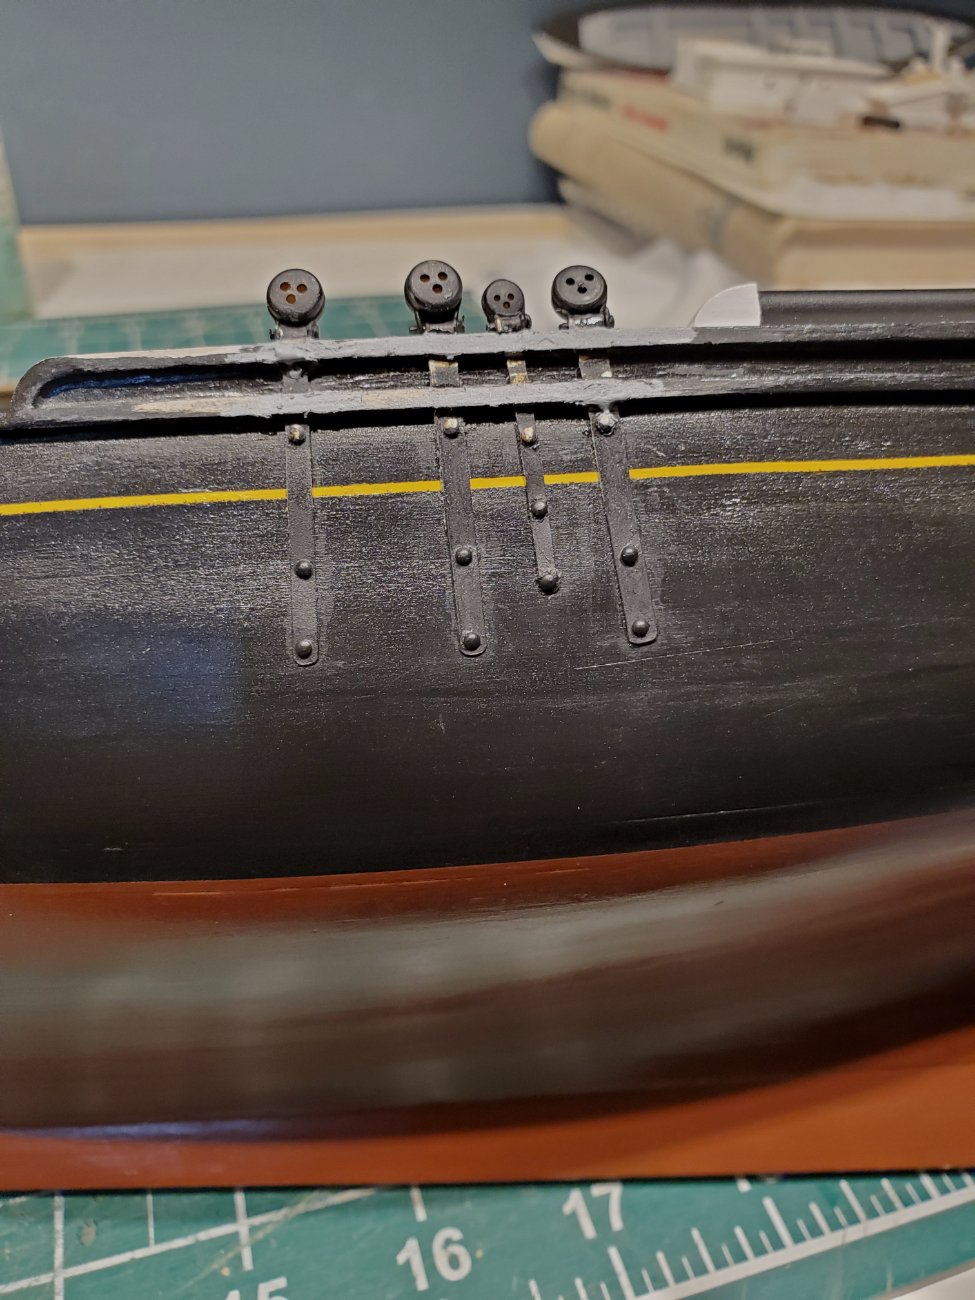
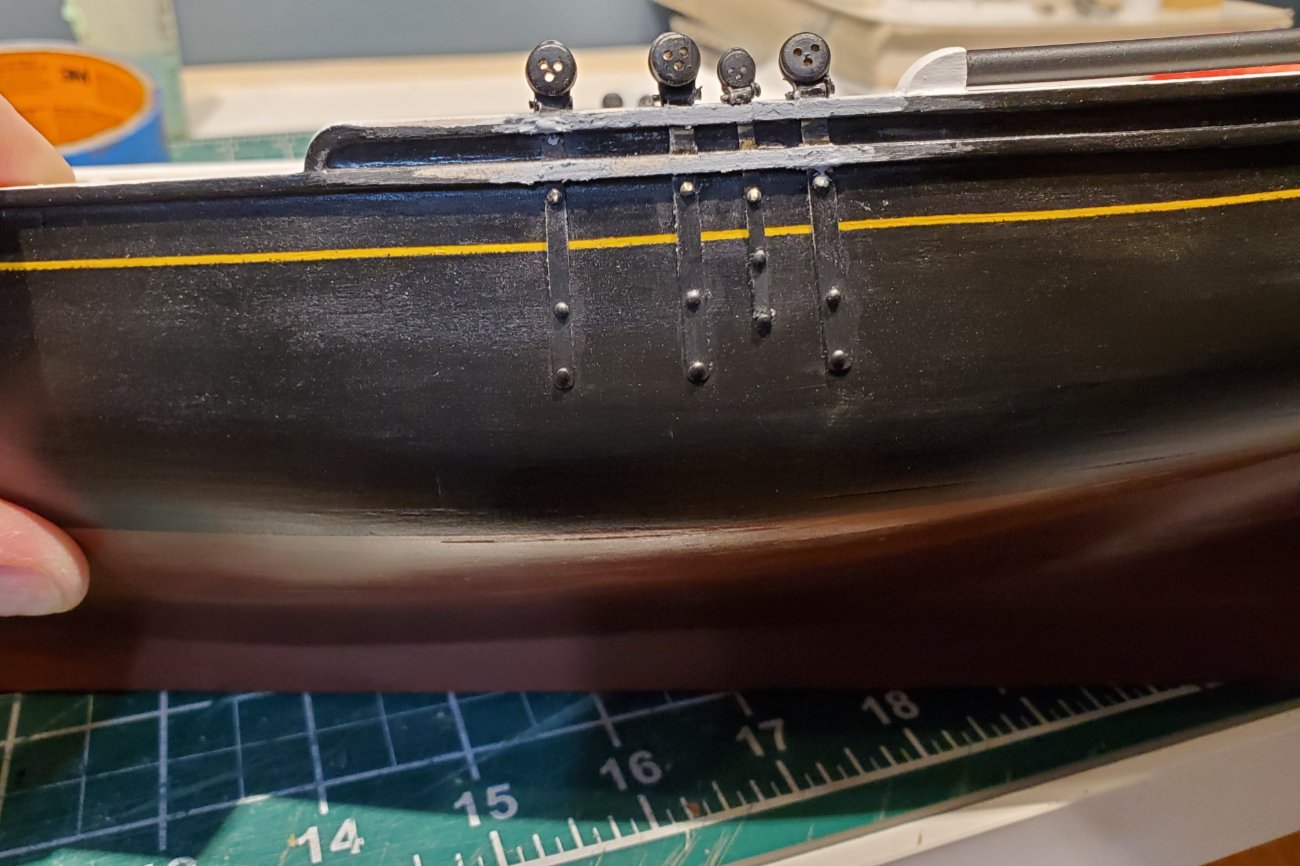
Chainplates are installed on the hull. Rather than try to carve slits through the two rails, I decided to cut appropriate full-depth gaps. Not a big deal since it all gets painted anyway. After the chainplates were glued and pinned in place a small piece of wood the width of the rail was glued over the top. I then puttied with Tamiya putty. Once all this is dry I'll sand it smooth and touch up the paint. Since there will be a final overall flat coat it should blend in just fine. This all had to be done after overall painting, as there was no good way to mask and paint the cove stripe with it being under the chainplates.

- 140 replies
-
- 12
-
-
- benjamin w latham
- model shipways
- (and 1 more)
-
Just caught up on your log Justin. Very nice work so far.
- 66 replies
-
- 2
-
-
- Finished
- Model Shipways
- (and 1 more)
-
Thanks Bob. It's a great kit, that has room for all kinds of detail work. Quality is good, and nice clear plans (other than the rigging). You don't see a ton of them built, which makes it a bit unique as well.
- 170 replies
-
- 1
-
-
- medway longboat
- Syren Ship Model Company
- (and 1 more)
-
Wow, amazing detail, just fantastic.
-
X Wing Starfighter 1/72 Bandai by kpnuts
jwvolz replied to kpnuts's topic in Non-ship/categorised builds
Great little kits, I've built two of them. Good luck with the build. -
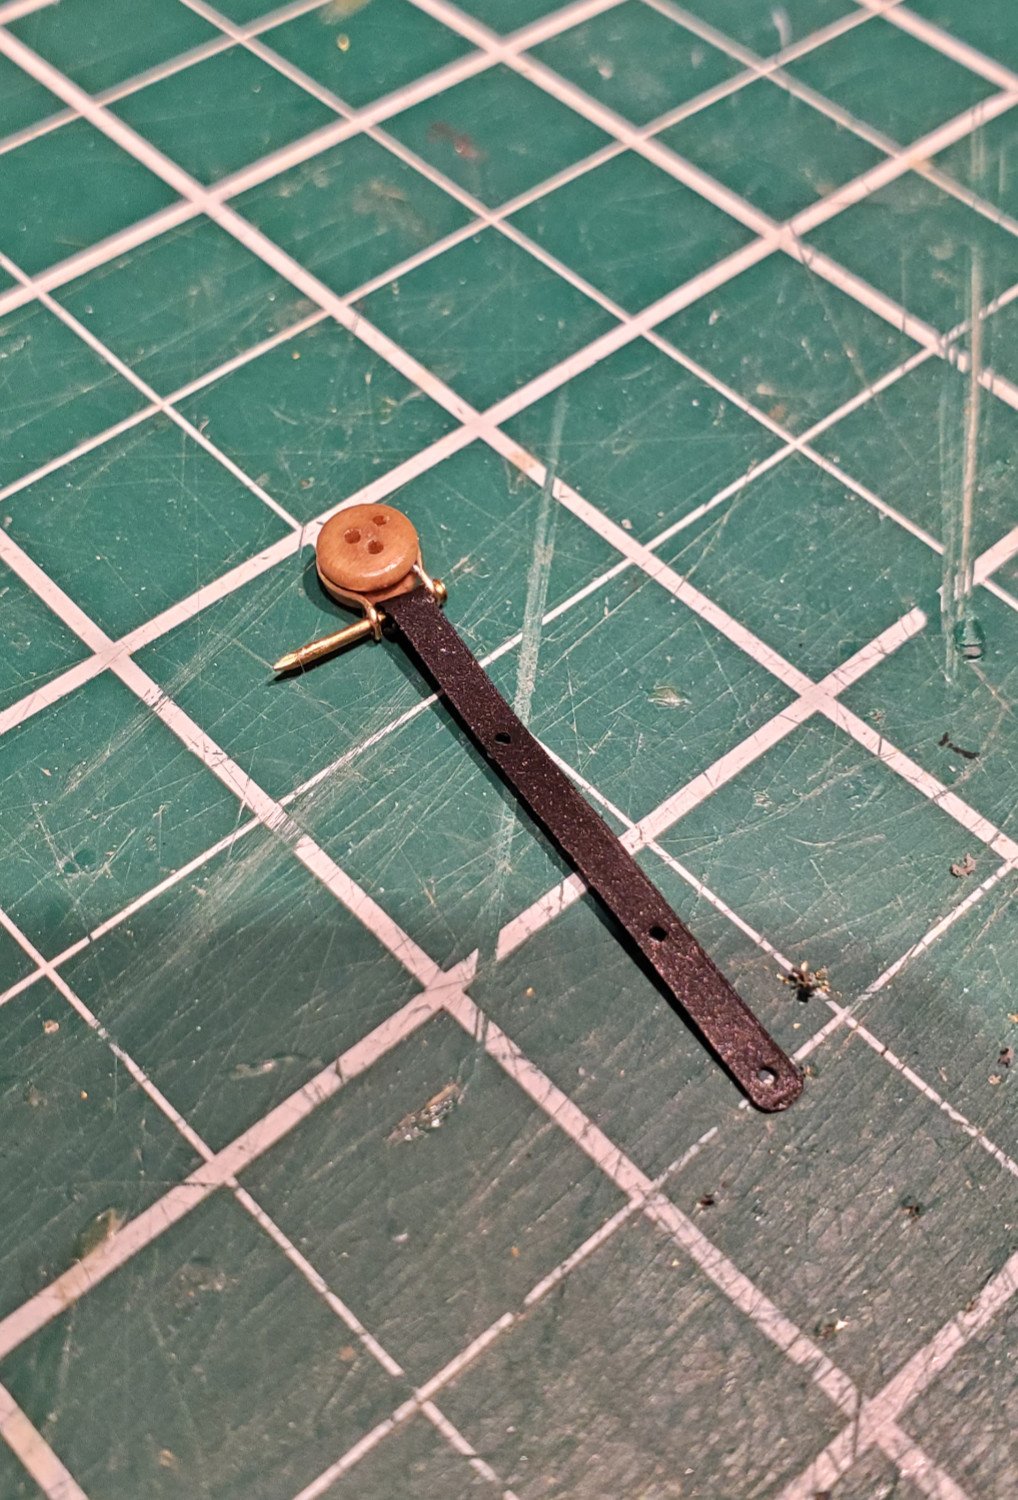
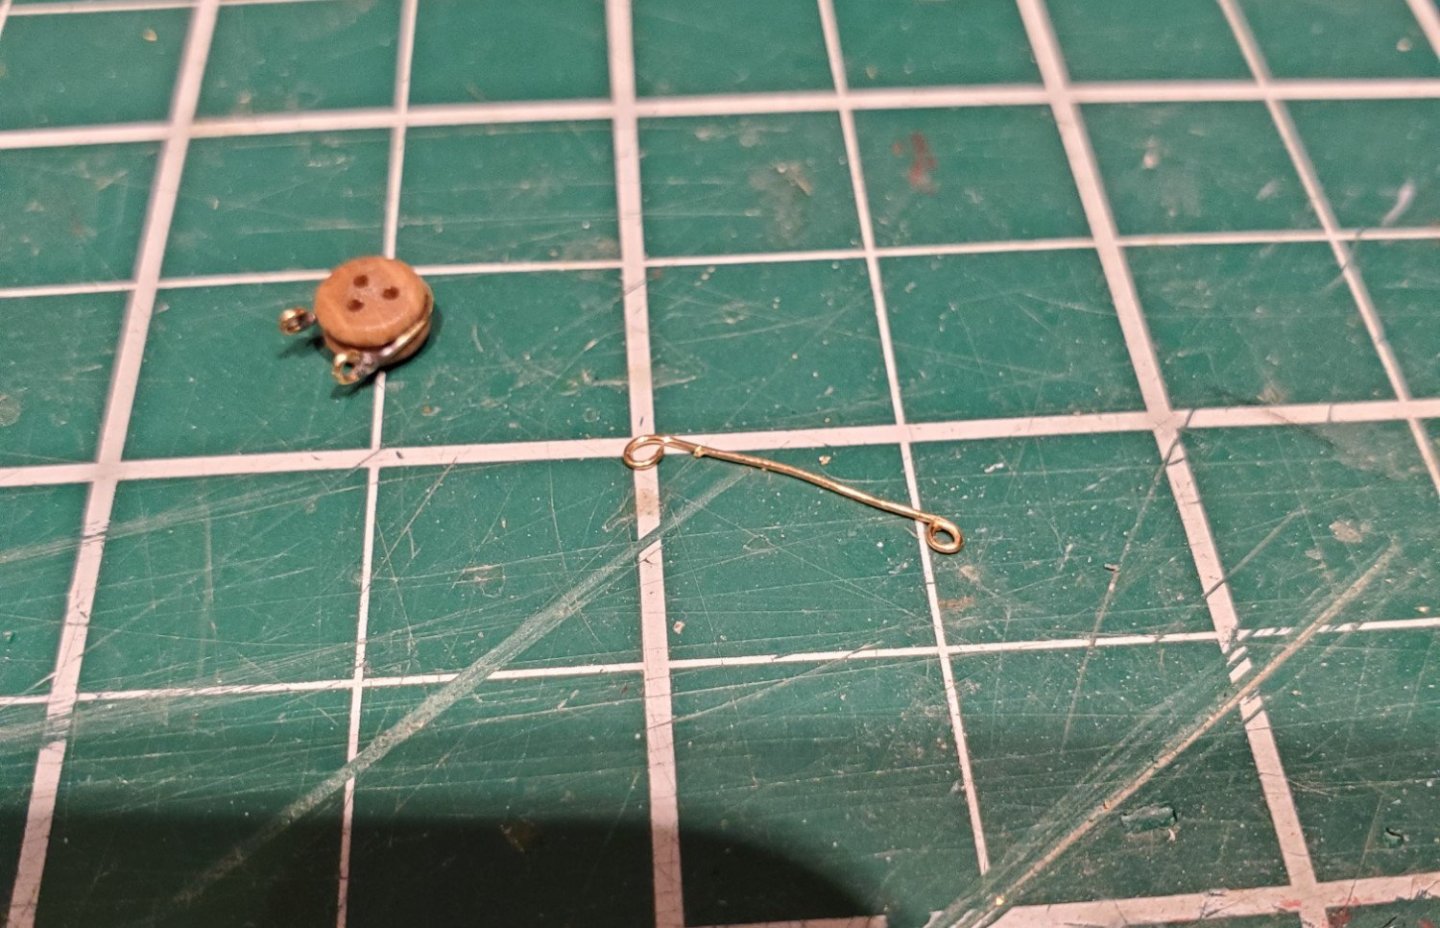
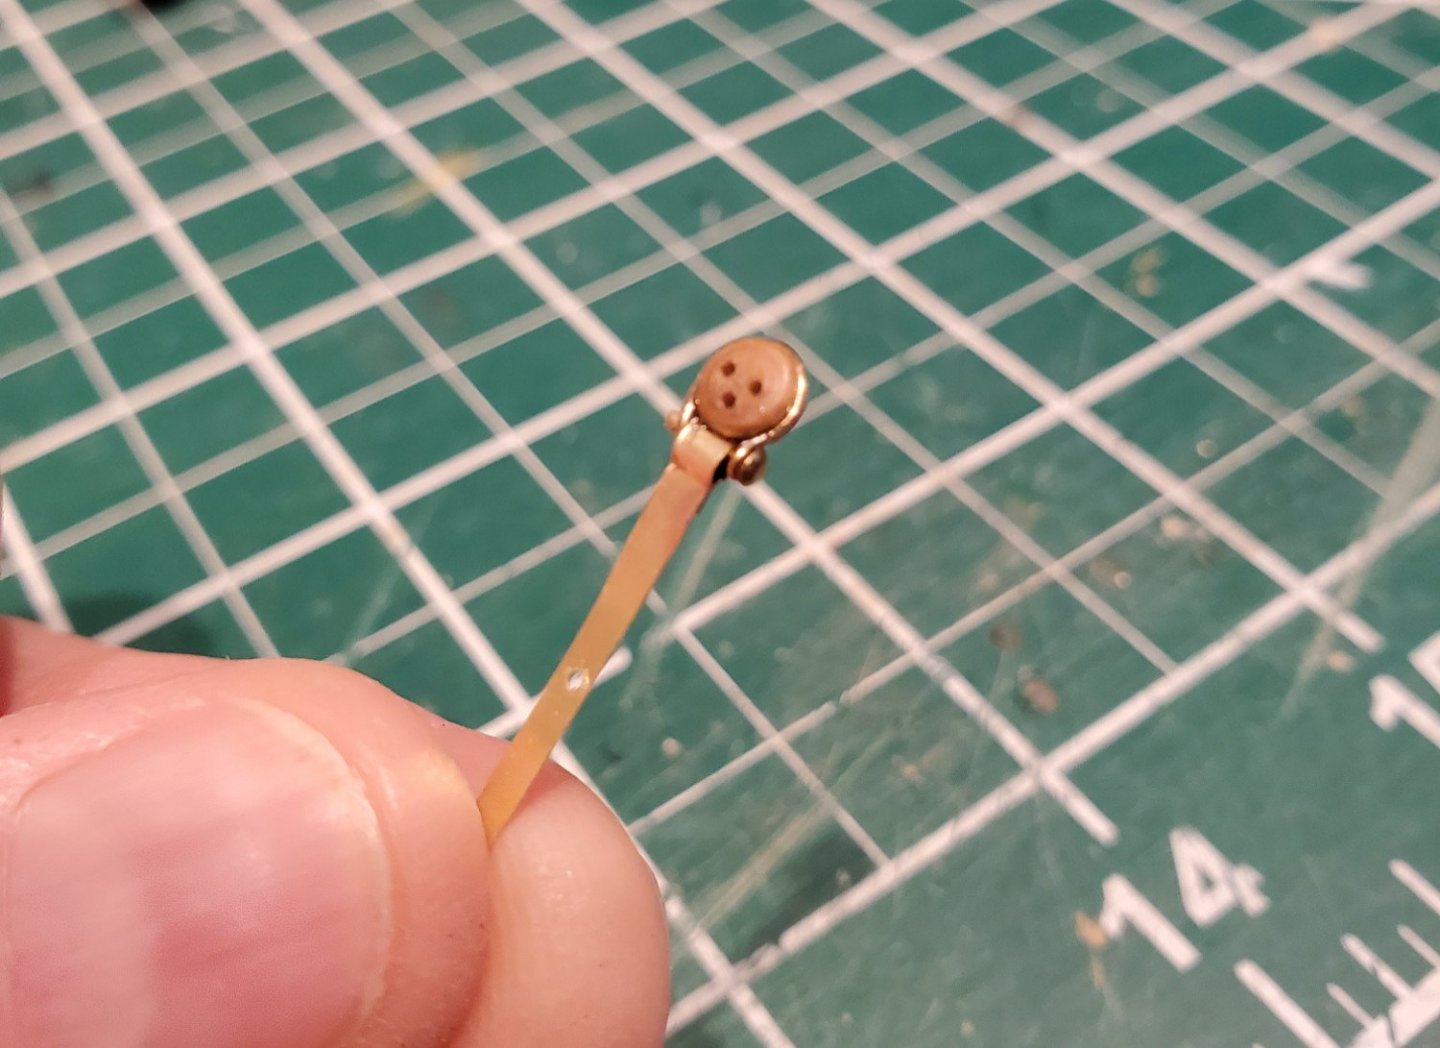
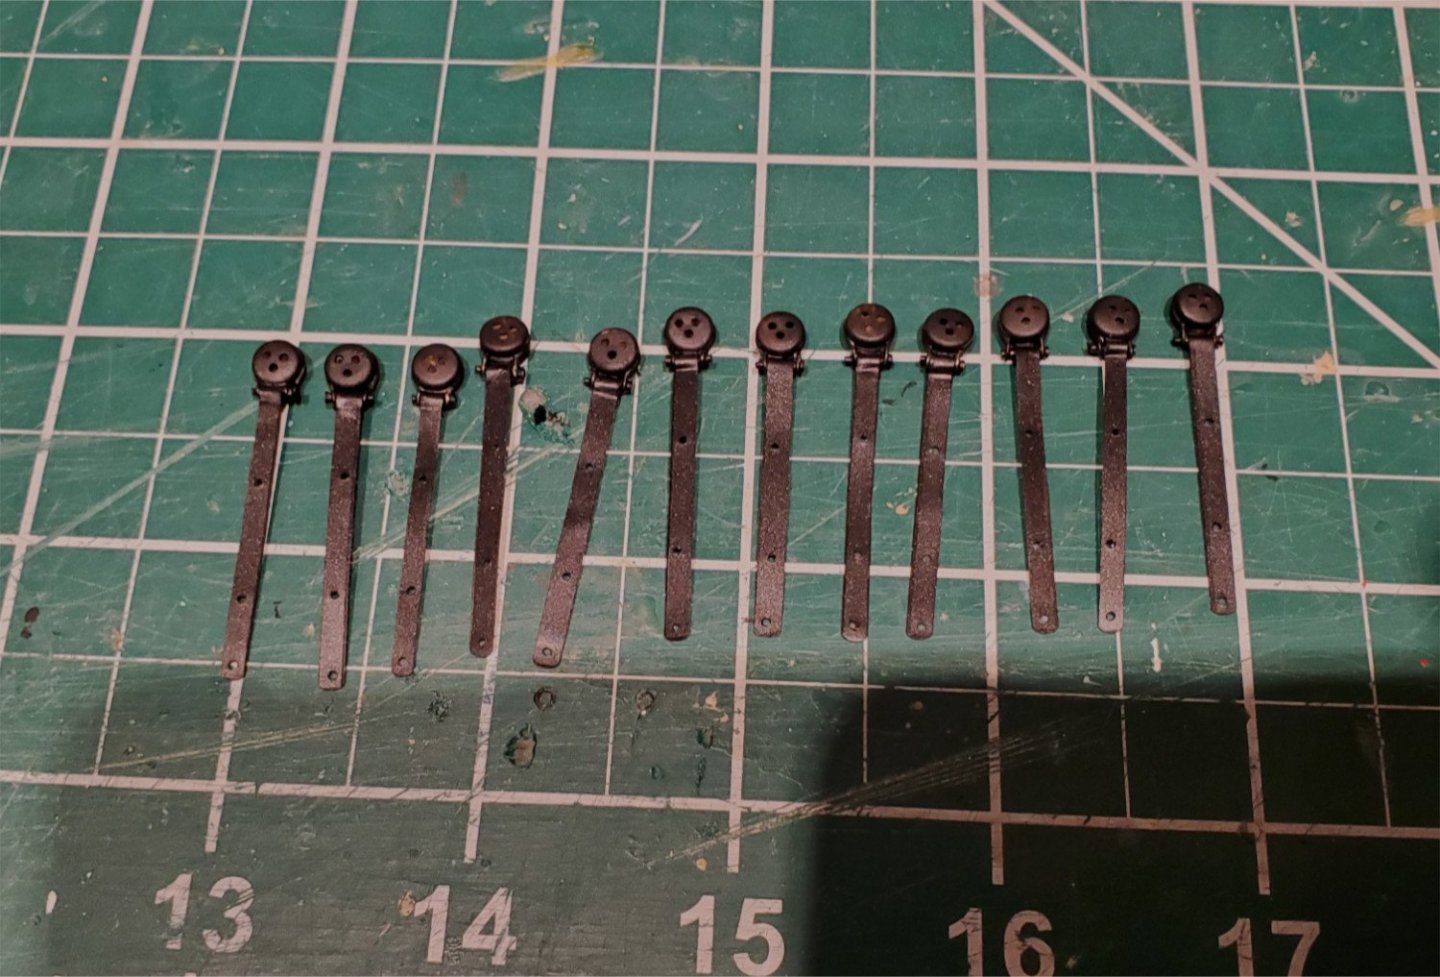
I worked on the chainplates last couple of days. I made the strop rings by creating a small jig to bend brass wire around, forming a loop on each, which were then cut and soldered closed. The chainplates were made from sheet brass, with a loop soldered in the top. I used some brass nails cut to simulate to bolts to attach the strop to the chainplate, and once painted it all looks reasonably good.

- 140 replies
-
- 9
-
-
- benjamin w latham
- model shipways
- (and 1 more)
-
Very nice work Bruce.
-
Thanks. No stand. The hole is an identification light, but the lens is not installed yet.