ccoyle
-
Posts
10,524 -
Joined
-
Last visited
Content Type
Profiles
Forums
Gallery
Events
Everything posted by ccoyle
-
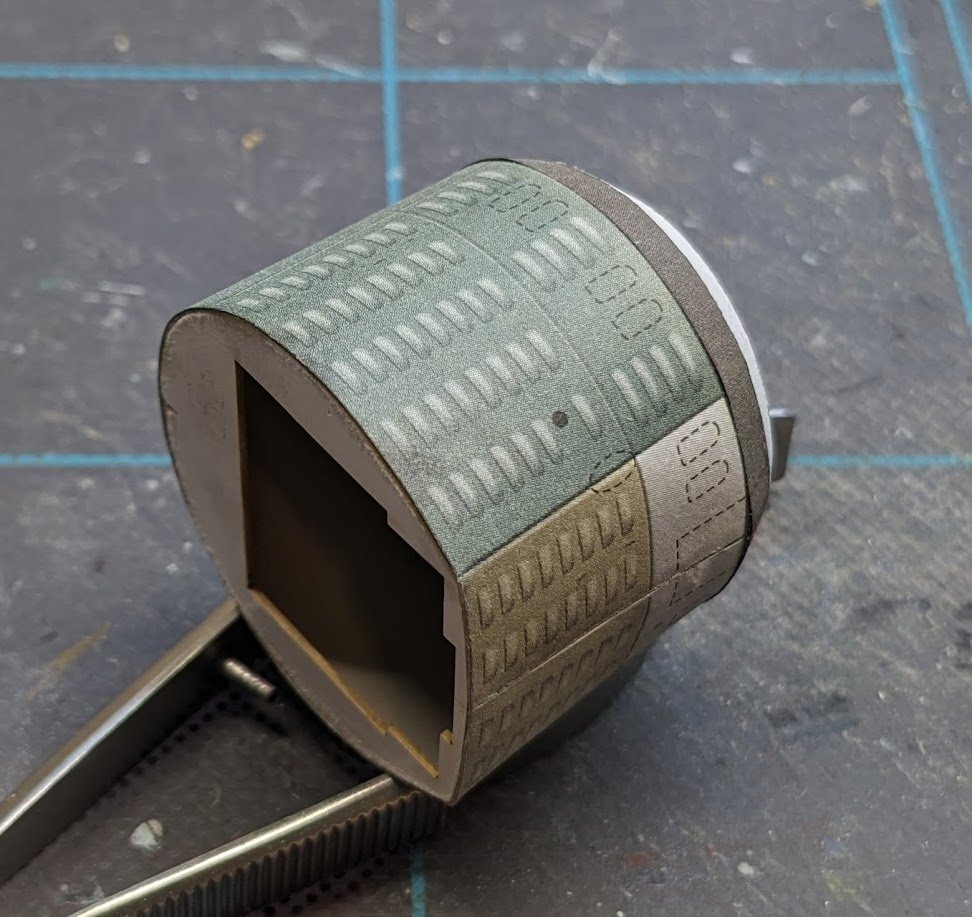
 When this kit first arrived, I noticed that it is designed to use butt joints. I really dislike butt joints. Because it uses butt joints, no joiner strips are provided -- not even the sort that are typically used to close rings. Hmph. Work proceeded on the first fuselage section. Regardless of what the kit designer intended, I simply made myself a joiner strip to close up the ring, which, as you can see in this first photo, is not entirely ring-shaped. It's a ring where it joins the cowl, but then flares to a flat bottom along the rest of the fuselage. The forward-most bulkhead is a simple circle, but the aft bulkhead has a cutout where cockpit elements will be located. I stiffened the entire flimsy-looking bulkhead with thin CA. I also painted the interior a sort-of canvas-colored tan, because I don't know how much of it will be visible once the fuselage and cockpit are assembled. (BTW, that's just an old, dried glue blob in the lower left corner.) Both bulkheads required some sanding to get them to slip easily into the ring. Here's the completed fuselage section, now mated to the cowl assembly. The cowl has numerous blisters, which I will add later to avoid smooshing them while working on the fuselage. That first butt joint turned out well. I'll be very happy if the rest turn out as nice. Moving to the next fuselage section, construction of the forward cockpit begins, so there will be a lot more elements. Cheers!
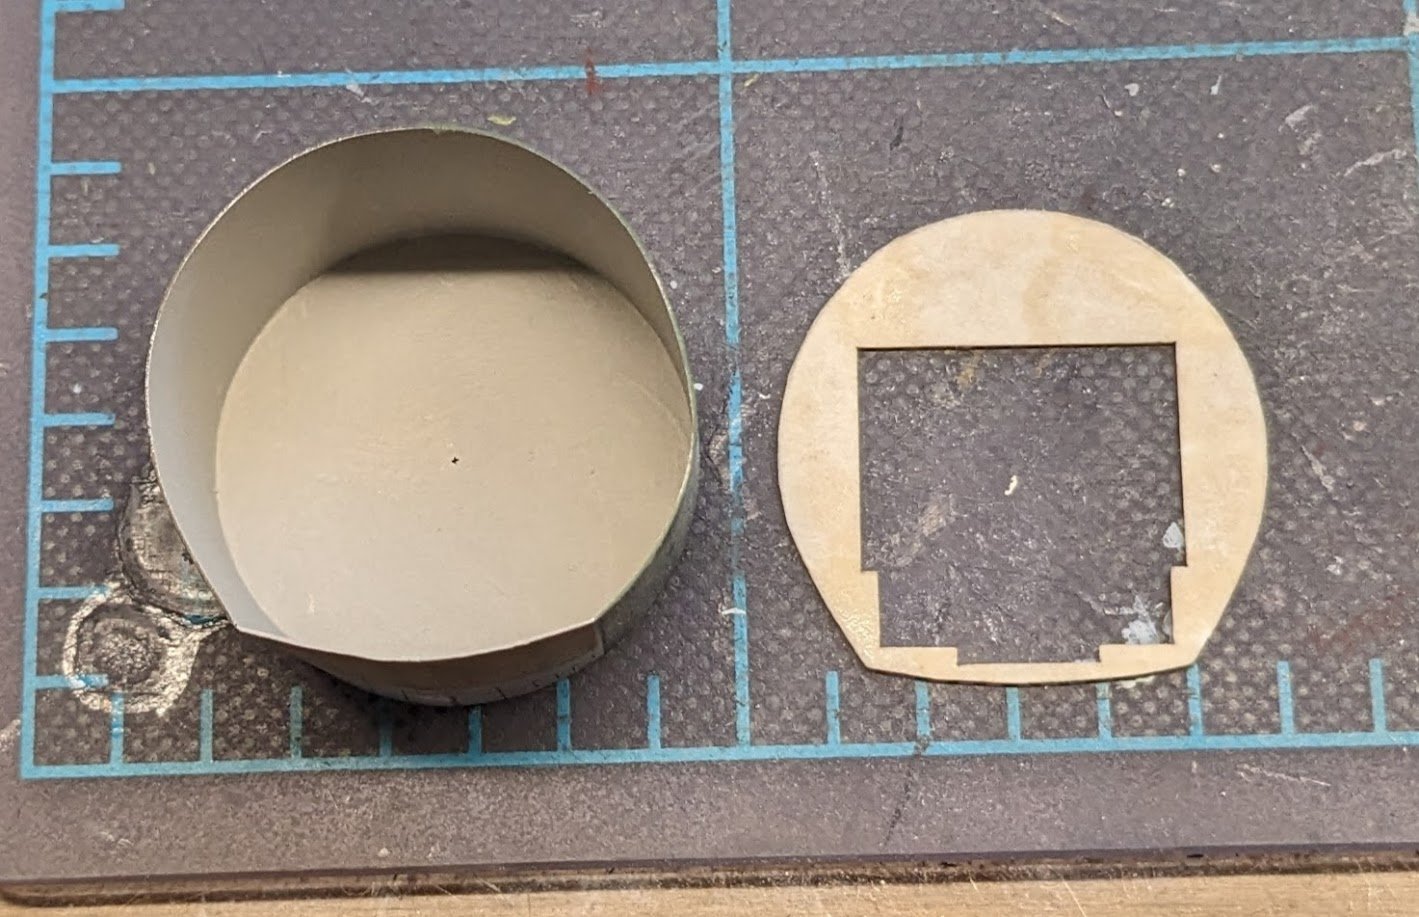
- 107 replies
-
- 18
-

-
First two cowl rings and radiator shutters completed. Now I'm busy trying to make sense of the assembly instructions and diagrams, which leave a substantial portion of the build process to the imagination.
- 107 replies
-
- 14
-
-
F-14D Super Tomcat by CDW - AMK - 1:48 Scale
ccoyle replied to CDW's topic in Non-ship/categorised builds
People sometimes ask why I don't build any jets in card. Simple answer: I only build in 1/33 scale, and at that scale jets are simply too large to fit on my available shelving! -
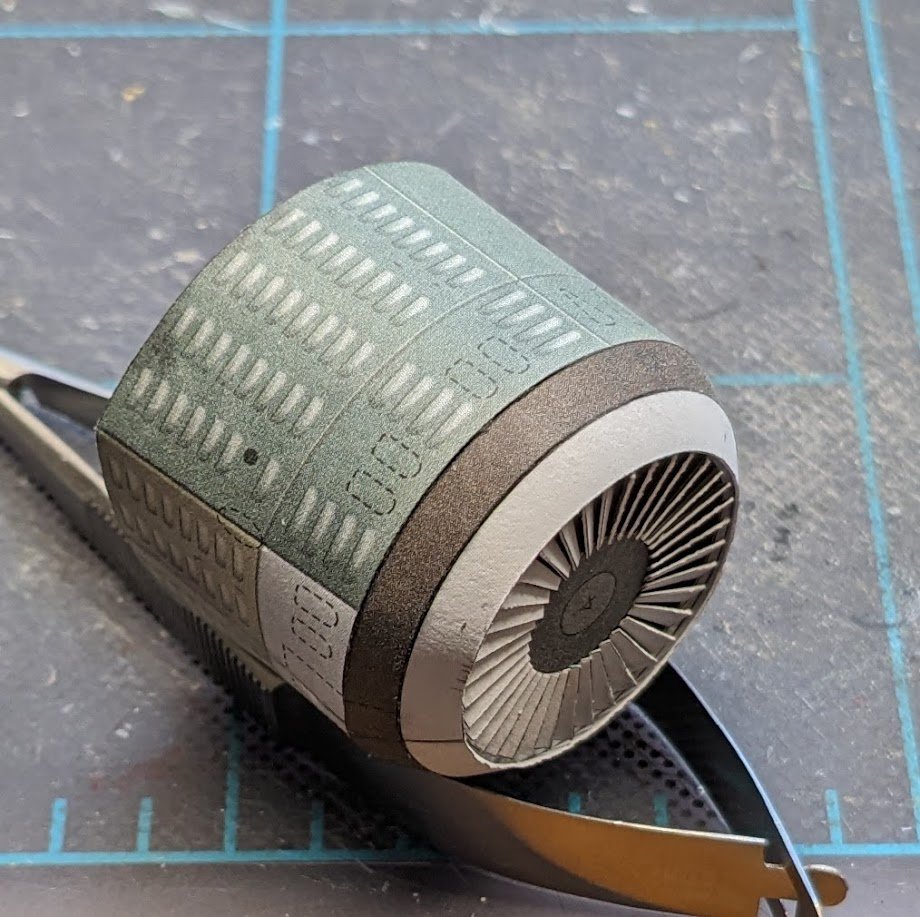
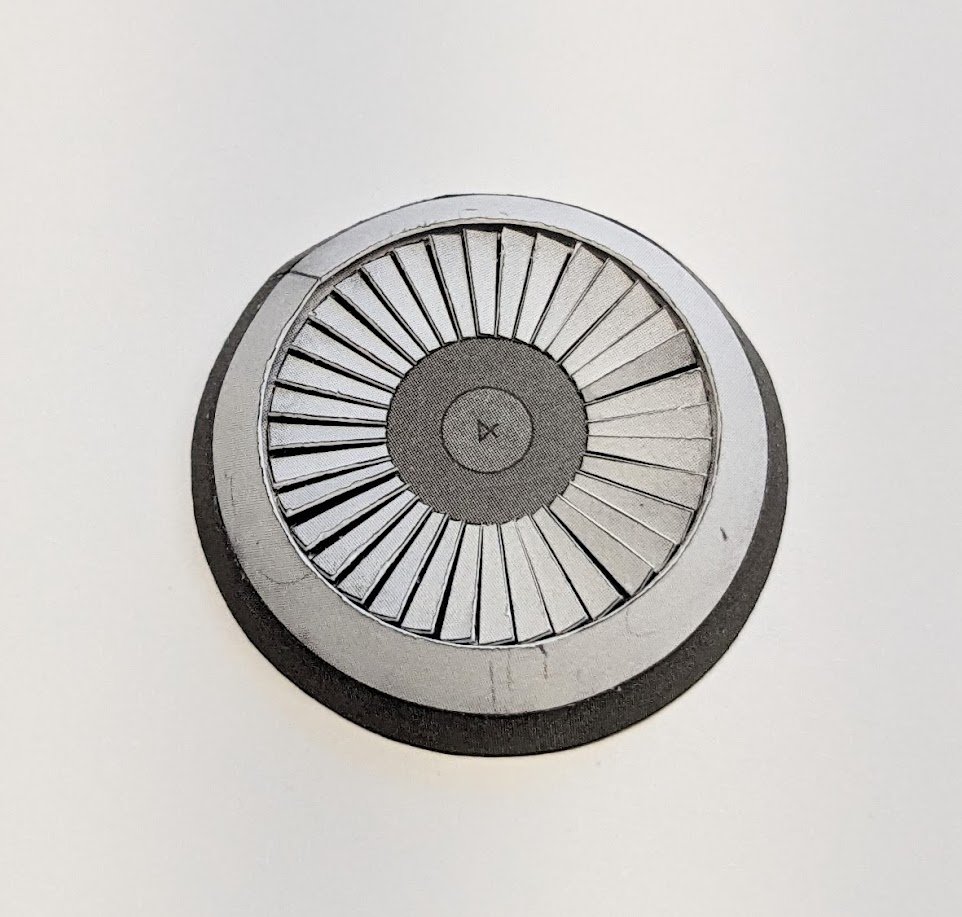
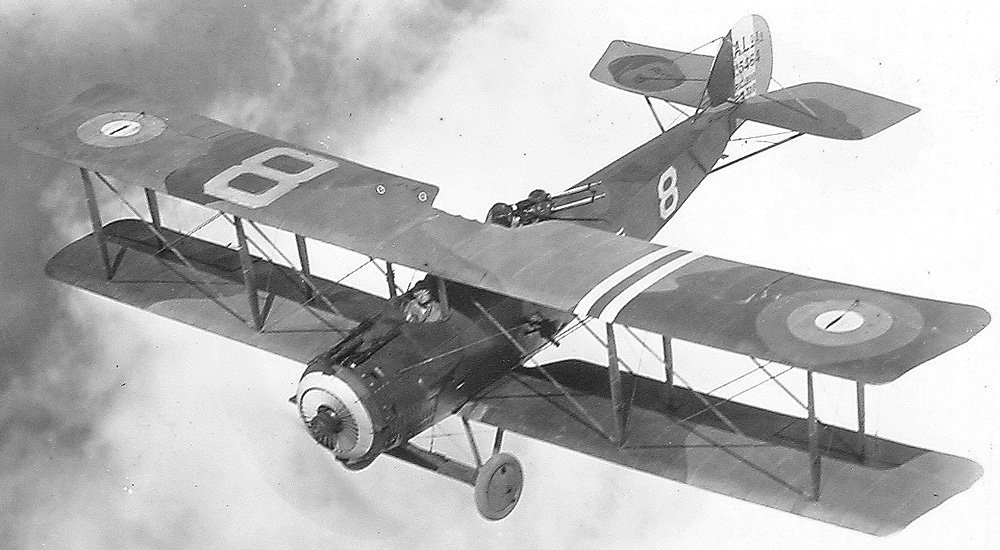
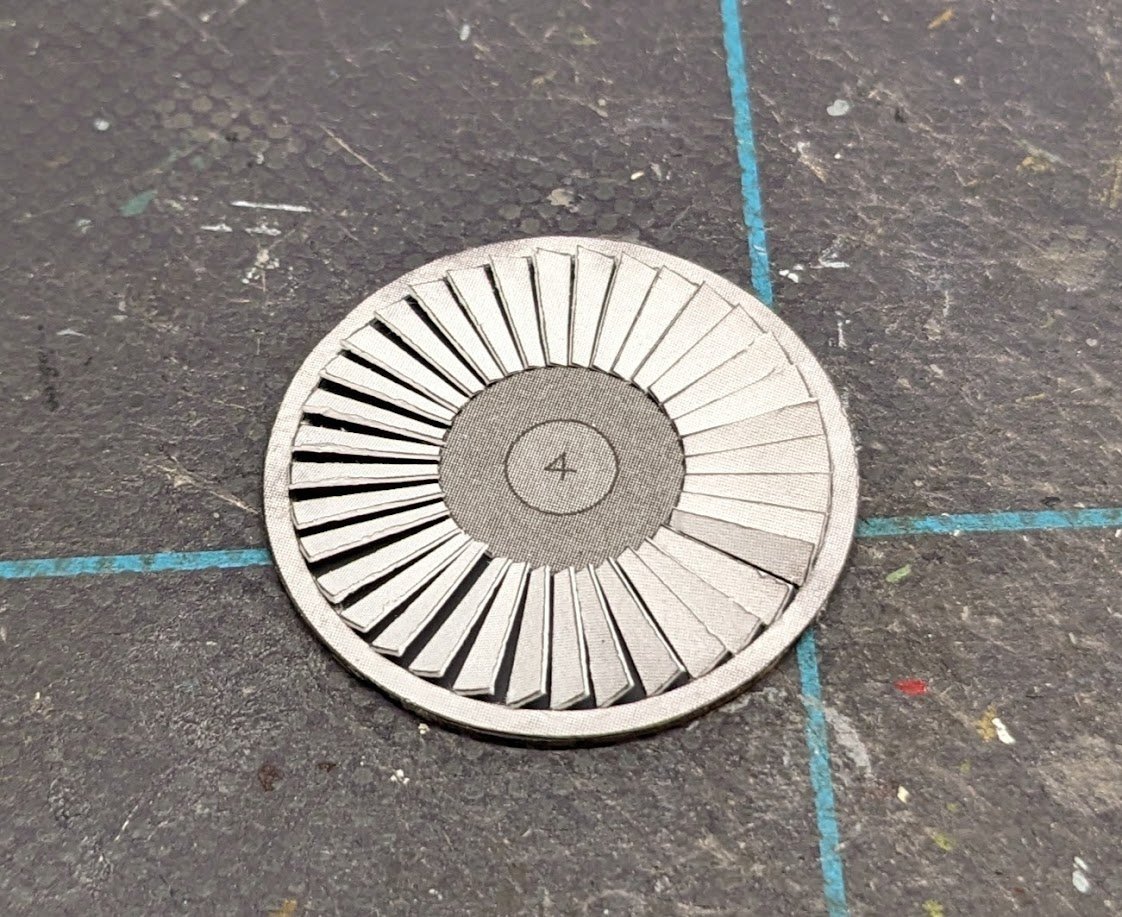
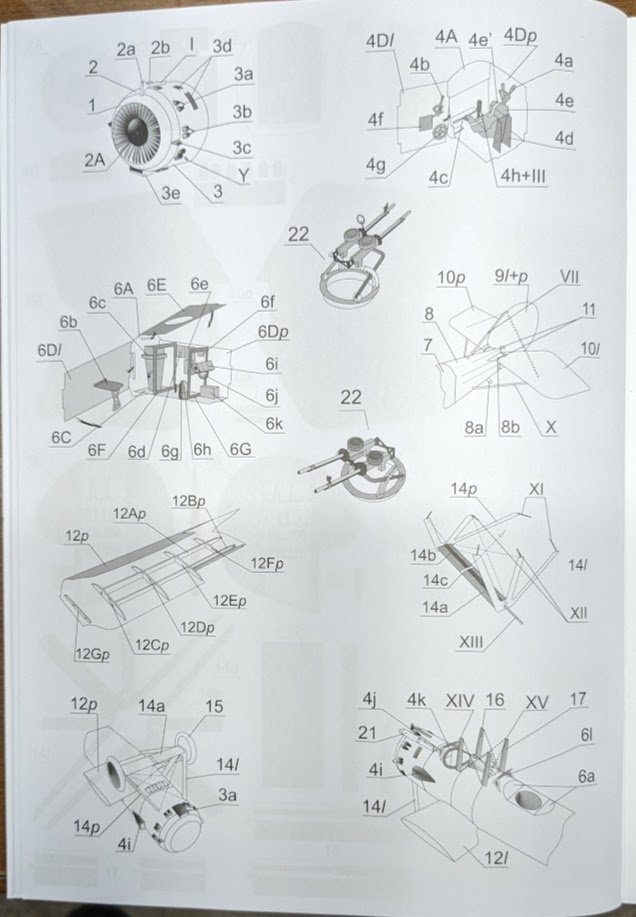
First Cuts Construction begins with the forward fuselage. One unusual feature of the Salmson was its powerplant -- a liquid-cooled, 9-cylinder Salmson 9Z radial producing 231 hp. The radiator layout featured shutters that looked rather like fan blades. You can easily see them in this photo: from Wikimedia Commons And here are the shutters as seen in the construction diagram: The shutters are provided as a flat, printed part depicting the shutters closed, but the instructions say that experienced models may attempt to display them in the open position. Challenge accepted: That job took awhile, so that's all I got done this evening.

- 107 replies
-
- 19
-
-
Guilty! I needed to pump up our stats -- at least, that's the excuse I'm going to use! 😳
-
I've since learned that Capt. Coyle was born in Vermont, making him one of the 'Northern Coyles', who were mostly Catholic. His forebears arrived in Quebec in the early 19th Century before eventually making their way south into Vermont. Our family were Ulster Scots who arrived in the Carolinas sometime in the 18th Century.
- 107 replies
-
- 11
-
-
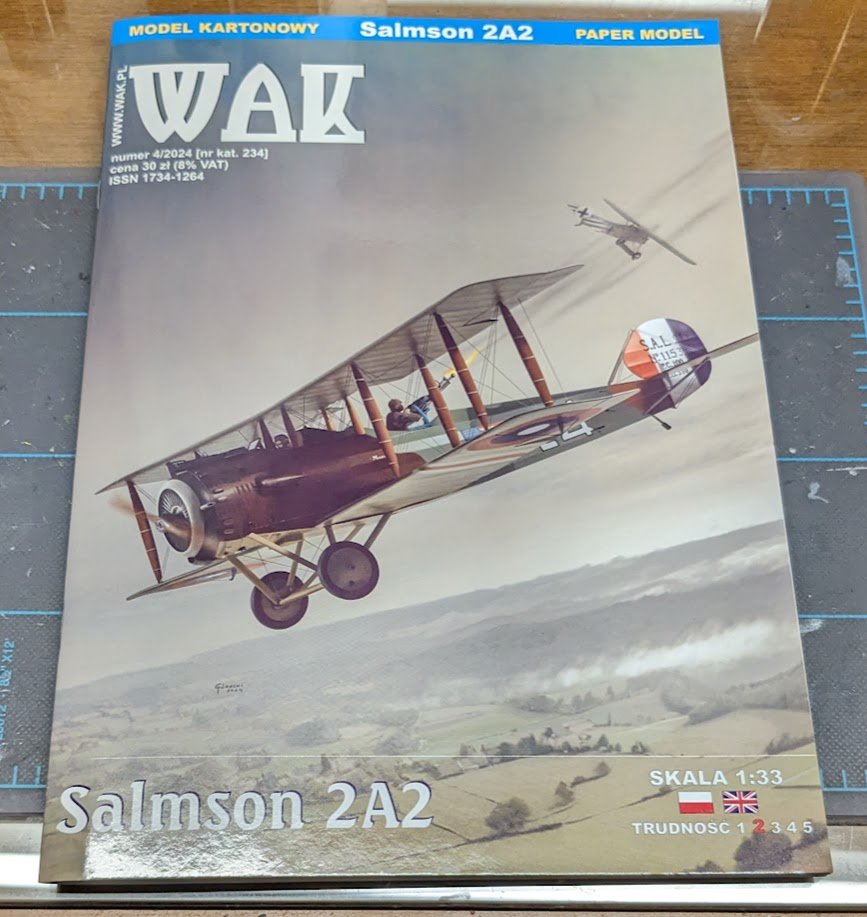
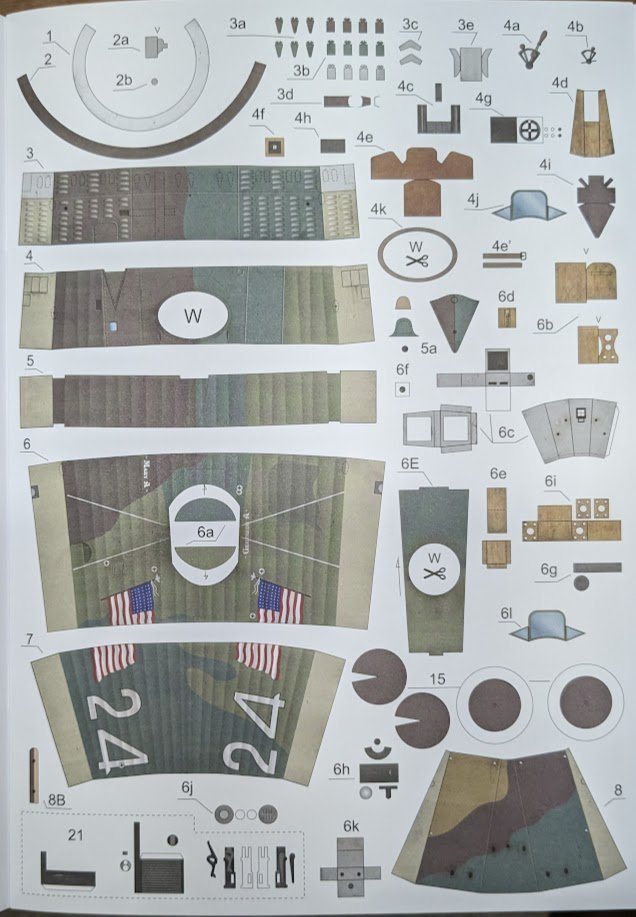
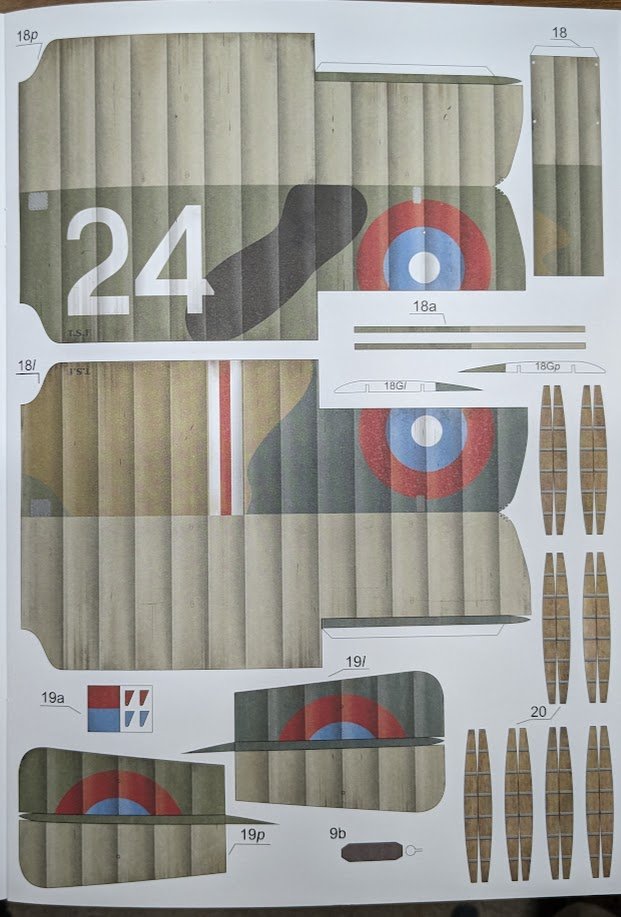
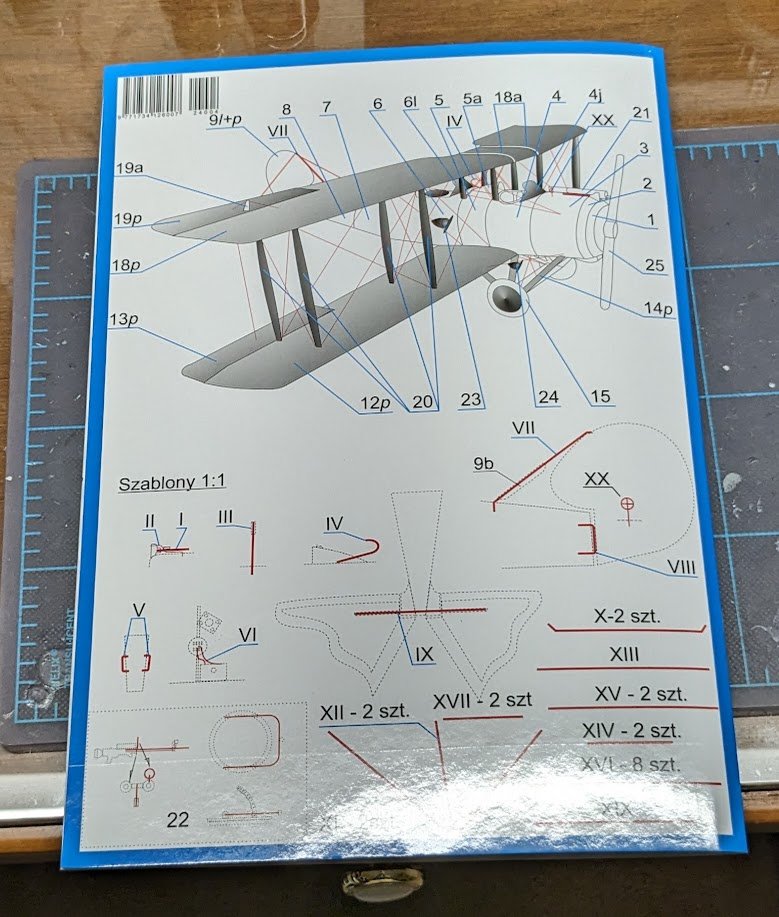
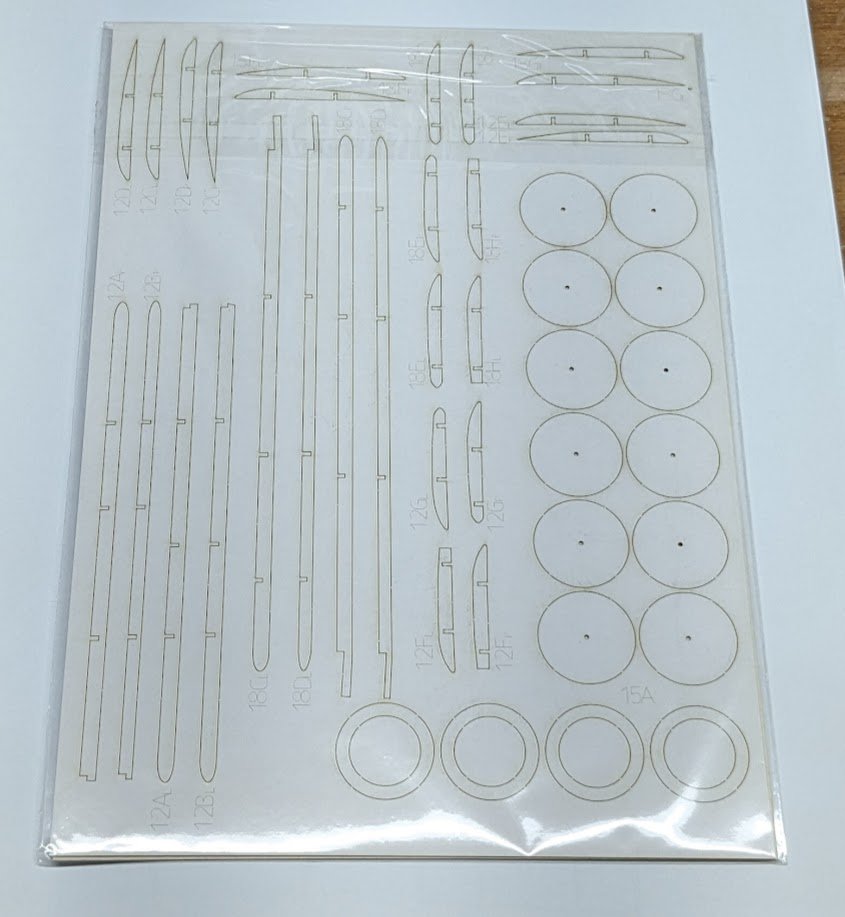
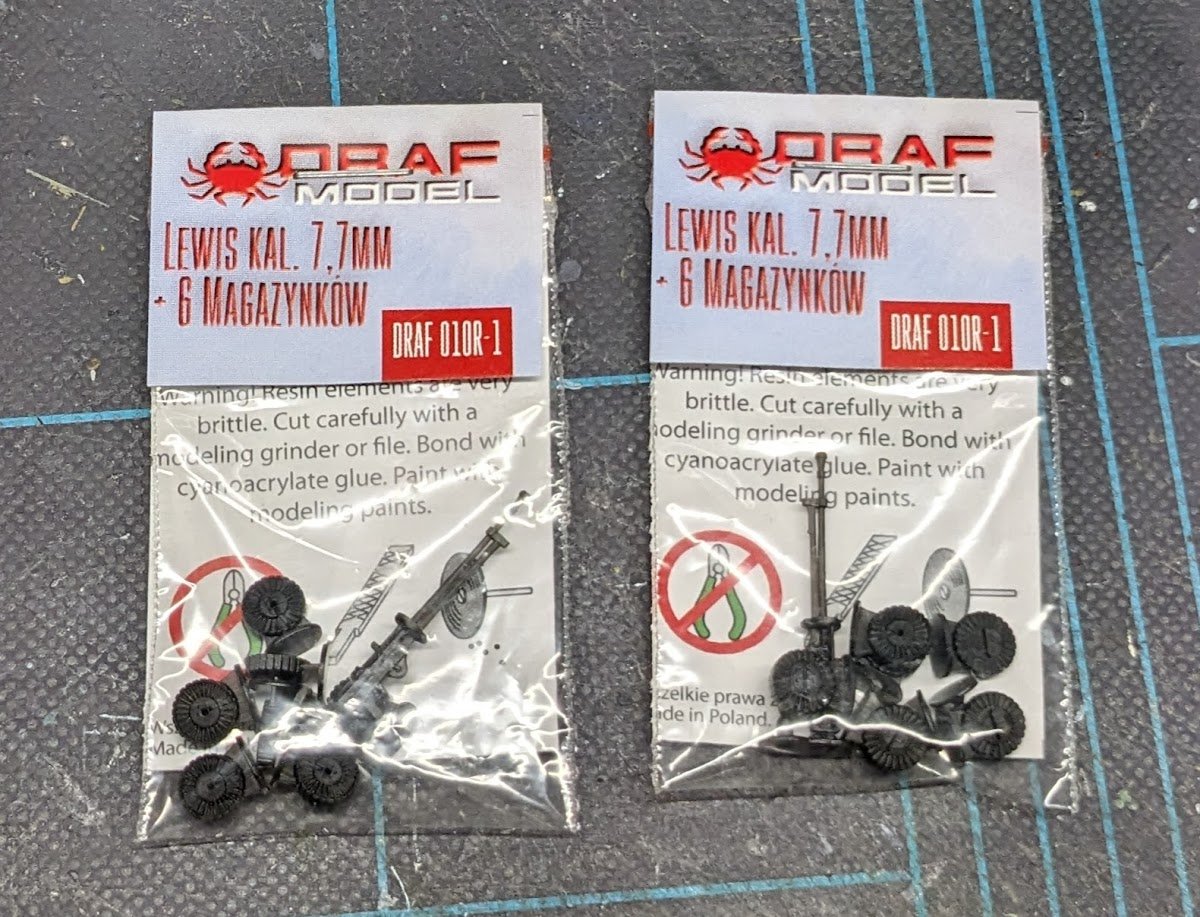
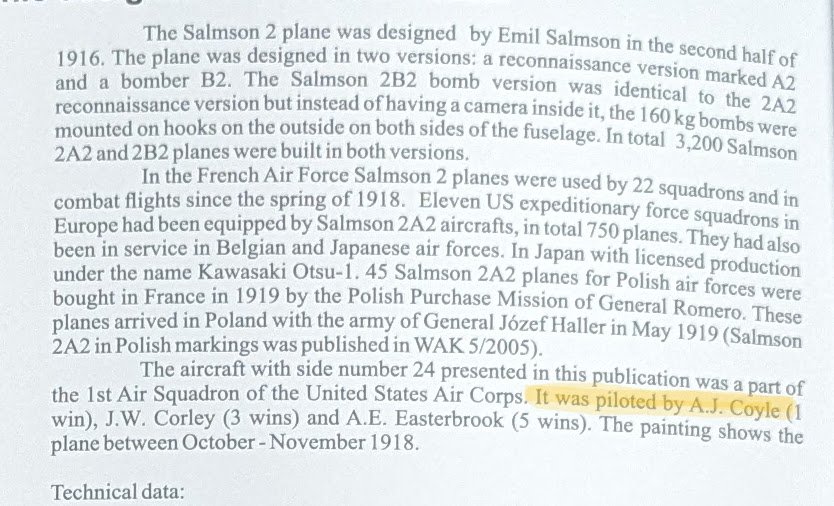
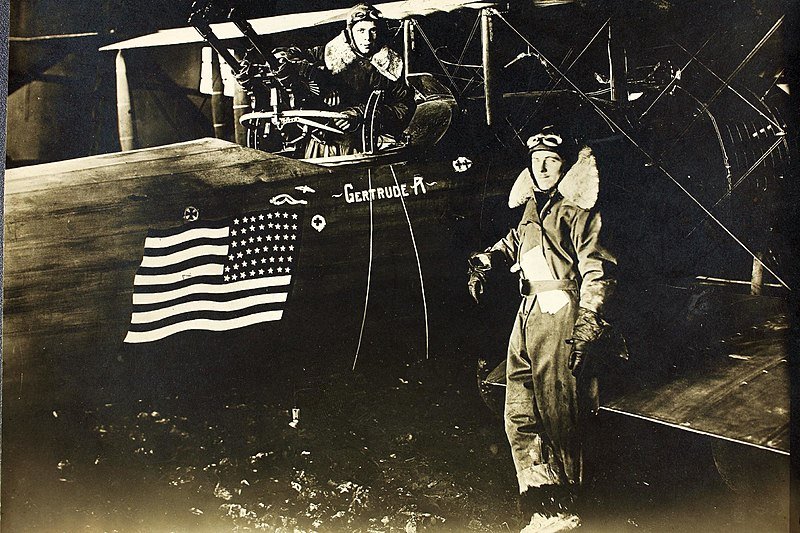
Greetings! Whenever I order stuff from Poland, I like to max out the order that can be sent at a certain shipping price point. That means that for my last order from WAK, received just this week, I was able to slip WAK's latest release into my cart. It's a Salmson 2 A.2, a French two-seat observation plane used in the last year of the Great War. First Squadron of the US Air Service also operated the type. The kit is designed by Maciej Lewan and features very nice artwork done by Marcin Dworzecki. A little skimpy on the diagrams, but hopefully enough to get the job done. Of course I also ordered the requisite laser-cut frames . . . . . . as well as a pair of resin Lewis guns for the observer's twin mounting. Okay, so you might be wondering why I decided to start this build when I just finished the Hurricane and had started back on Phoenix. Well, I'll tell you why. I blame this wholly on WAK. I checked the inside front cover to see if there was any information about the aircraft depicted in the kit, and there I saw the following (in English, no less): Yup, the plane was "piloted by A.J. Coyle." That did it. Hot new release . . . chance to be one of the first to build it . . . pilot with the same surname as myself (and it's not a common one) . . . the kit fairly screamed "build me NOW!" So I caved. BTW, I have not yet been able to determine if Capt. Coyle and I are distant relatives, but I have an extensive family tree, and he's not in it, so I suspect we are not. Oh, well. Capt. Arthur J. Coyle (standing), with Lt. A.E. Easterbrook. Anonymous unknown author, public domain, via Wikimedia Commons. I may try to build this concurrently with Phoenix, or I might not. I'll just have to see how it plays out. Plus, I have another project on my radar. 😬 So many projects, so little time!! Cheers!
- 107 replies
-
- 18
-
-
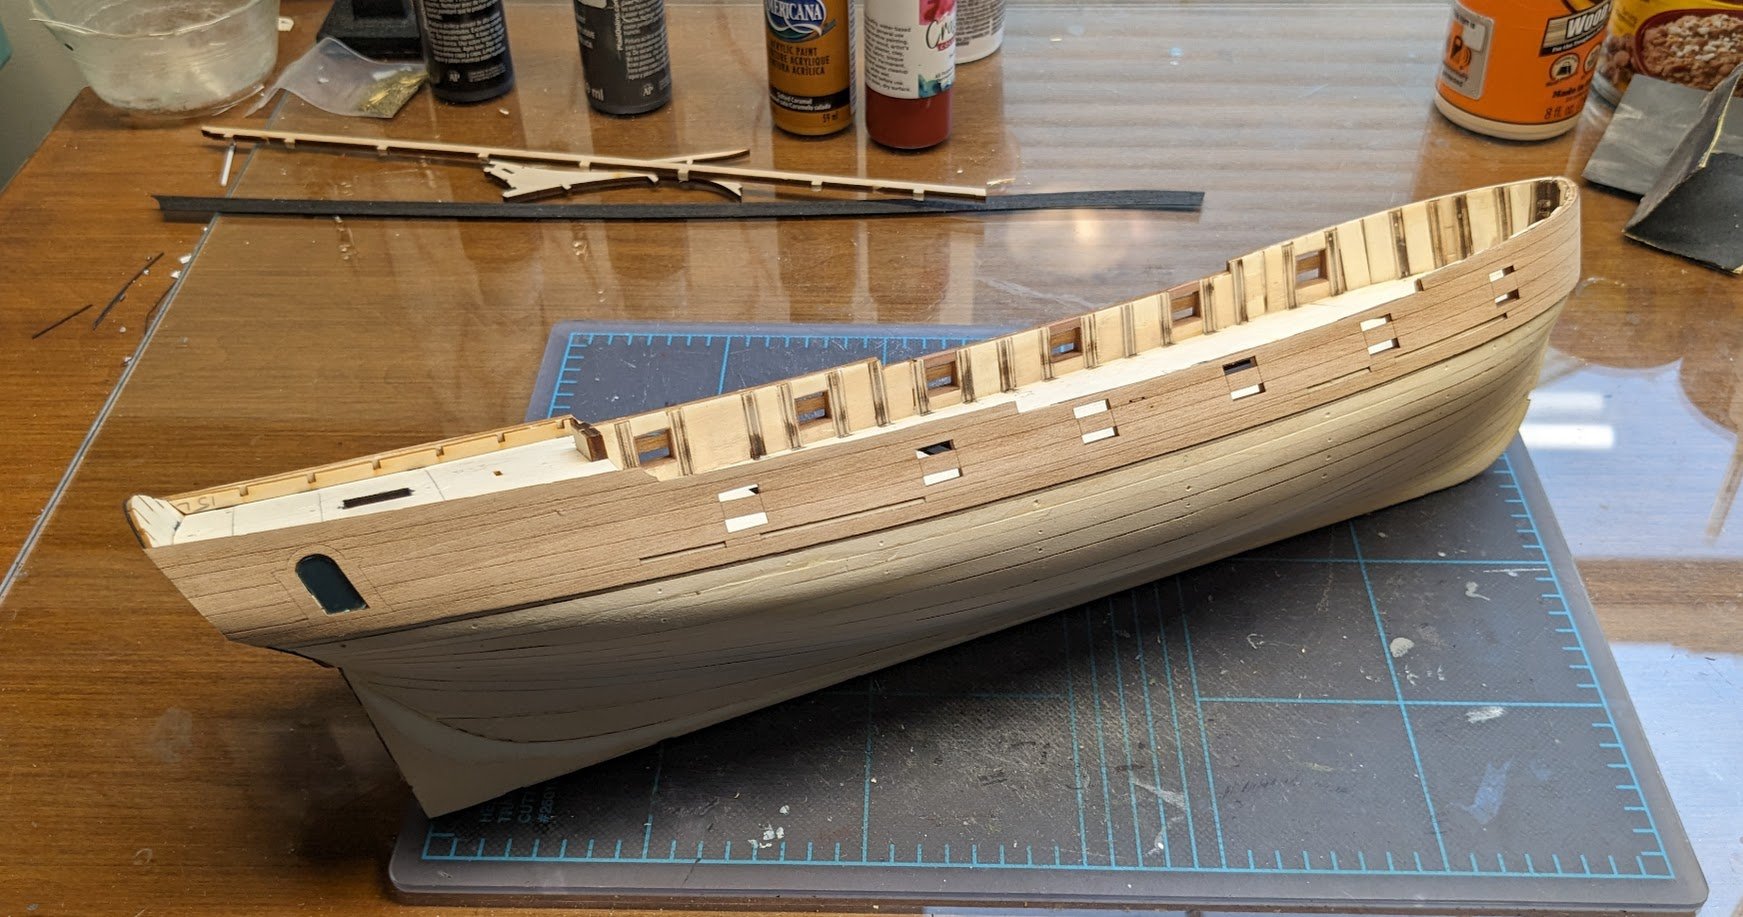
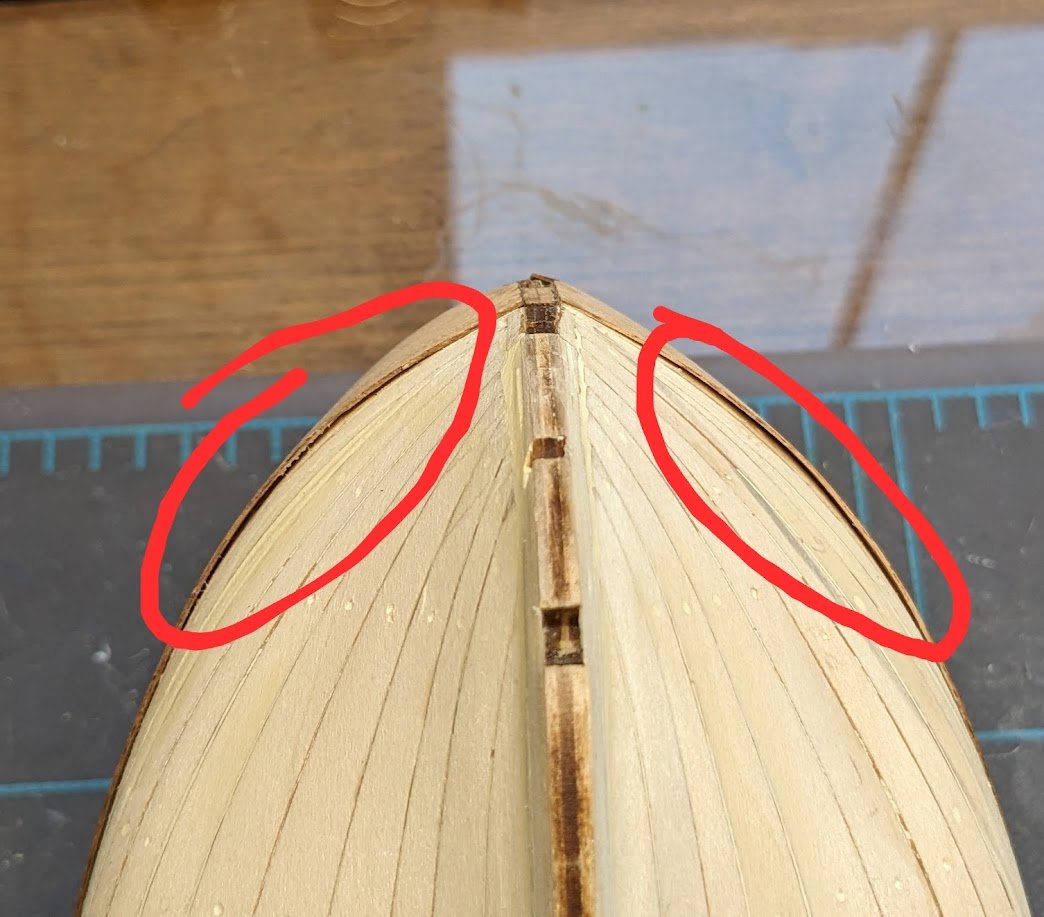
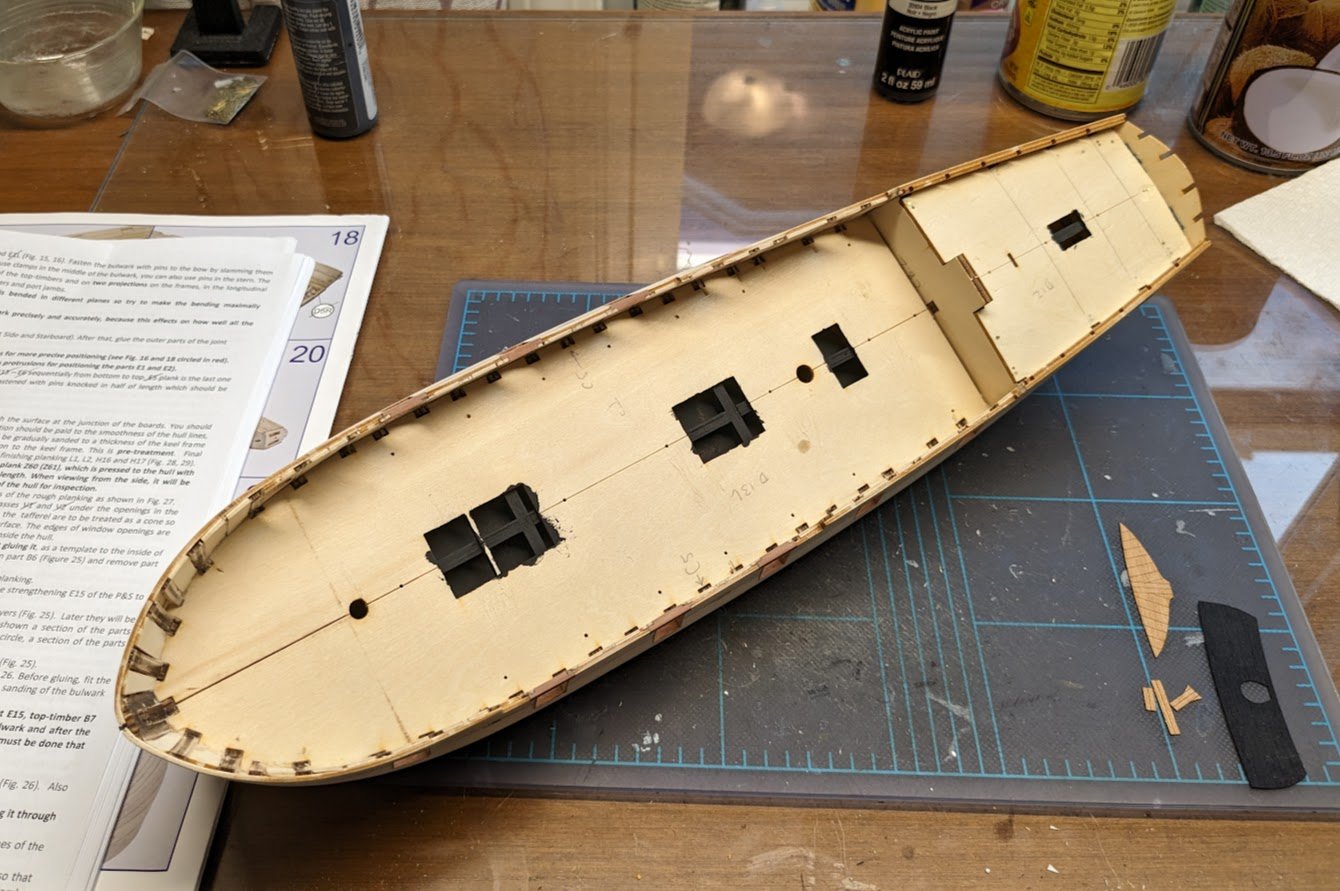
Got the two long pieces of veneer on the upper hull attached. Because these pieces are so wide, they are terribly unforgiving of any error in hull fairing, and that point is made apparent toward the bow. Here you can see that the natural curve of the veneer creates some small pockets where too much material was removed during the hull fairing process. You can't simply smash these down, because that will cause the veneers to buckle. Nor can you simply ignore them, because doing so will cause the wales (the next belt of planking) to sit too low relative to the upper veneers. Nope, I'm gonna have to add some material in those areas to raise the surface slightly and allow the wales to sit level with the upper hull veneers. An unwelcome task, but necessary. In the meantime, I may be hitting the pause button yet again on this build, for reasons I'll discuss in a separate topic. 😮 Don't worry -- nothing bad!

-
The term spars includes both masts and yards.
-
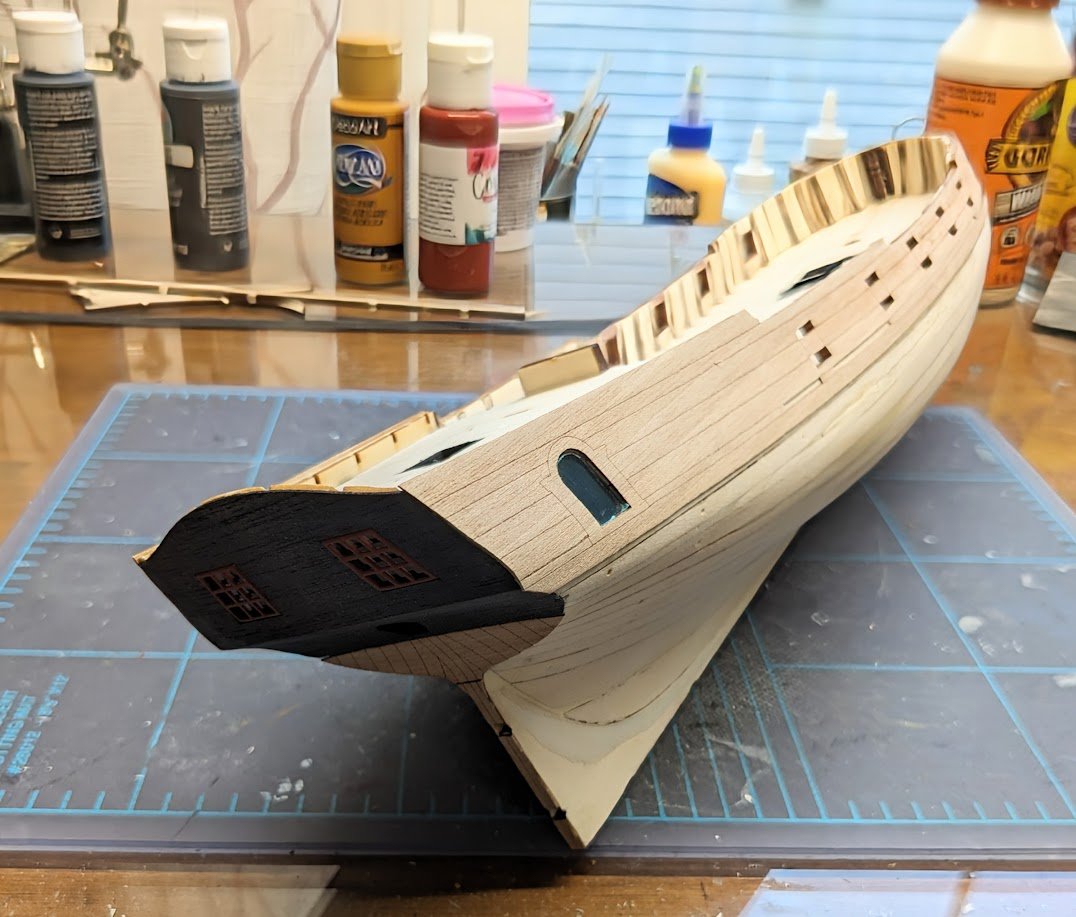
Sanding done (mostly) and stern veneers applied. You can tell from the photo that some additional minor sanding and filling will be needed to achieve the final stern shape.
-
Maquettes Gerard Schmitt model company?
ccoyle replied to Frank Burroughs's topic in Wood ship model kits
As far as I know, that company has been out of business for decades. The kit design is probably ancient and the kit itself made using outdated manufacturing techniques, e.g., die cutting. Personally, I would avoid it. -
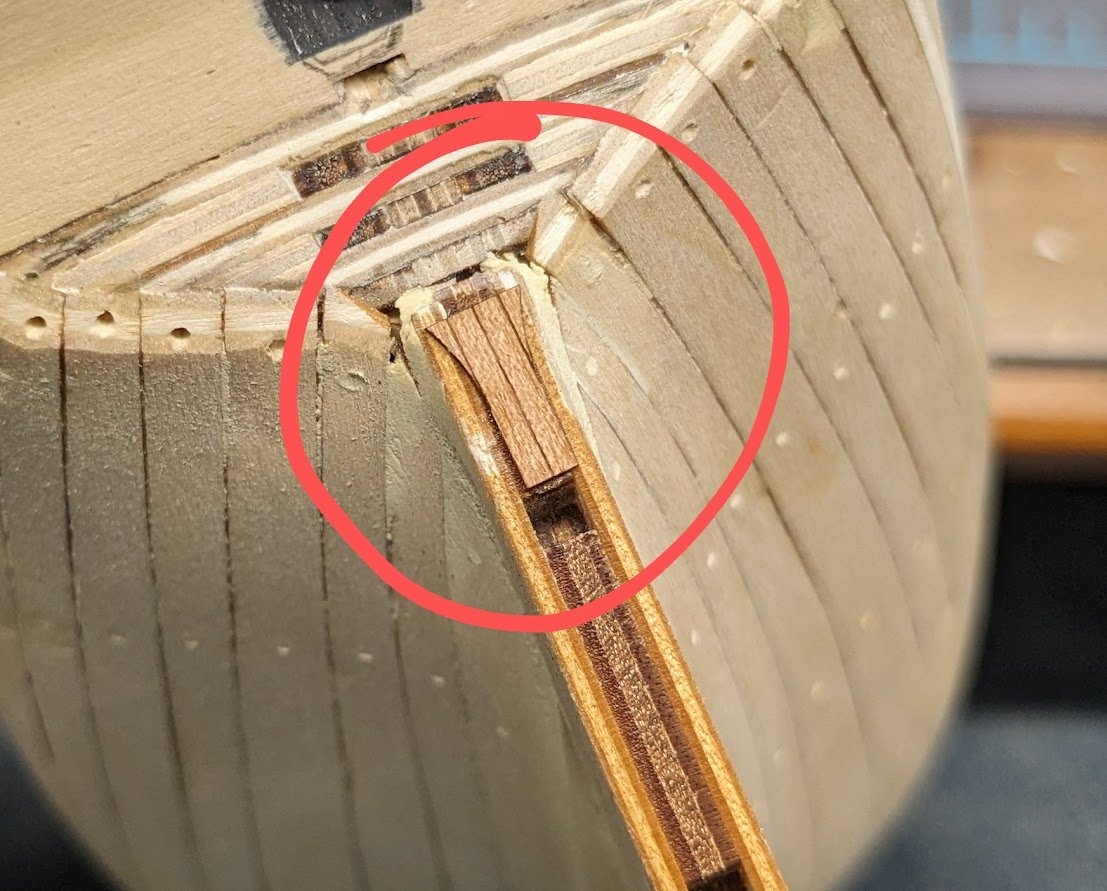
Okay, with the Hurricane now occupying a space of honor on the shelf, it's back to Phoenix! Following the instructions, we next darken the openings for the gratings. Exciting stuff, right? Then it's time to start applying finish planking. Yay! The process starts at the stern. Before I started gluing anything, I cut out the relevant parts and did some dry fitting. That's when I noticed that the sternpost fascia pieces are not wide enough to cover the width of the post. I went back and read through the instructions again. Sure enough, it looks like I overlooked some tapering that needs to be done. I will check some build logs to confirm this, but I'm pretty sure I have some more chisel & sandpaper work in my immediate future. Cheers!
-
Wow! That is a fantastic model and display! The awards are well-deserved. Congratulations!
-
I actually quite like the RAF desert camo and have a Halinski Spitfire Vb tropical that can be built in either RAF or USAAF markings. The latter had their RAF roundels painted over and then the USAAF insignia applied over the top of that. Several Polish publishers have offered the P-40 in North Africa camo, including WAK, Halinski, and most recently from Card Army (Marcin Dworzecki did the art on both the Halinski and Card Army kits).
-
Hey, G.L., what became of this fine build? It was so close to being finished!
-
I do have a P-40 in my stash (another Halinski kit), and, interestingly, its basic brown and green colors are nearly identical to the Hurricane's. But I'm not in any hurry to get to it, so you may have to wait. 😉
-
Welcome aboard, Pete! What sort of ship do you think you might work on? So many choices out there -- kinda like aircraft! P.S. Check out our Non-Ship Builds sub-forum to see what our members dabble in when they're not busy building ships!
-
I agree with the previous comments -- she looks quite sharp!
- 152 replies
-
- 5
-
-
- Vanguard Models
- Cutter
- (and 2 more)
-
Various companies have produced kits in plastic or card. An internet search will turn up quite a few examples, e.g., Revell, Glencoe, JSC (card). The Revell 1/600 kit should still be available new, and the 1/400 JSC kit is still in print.
-
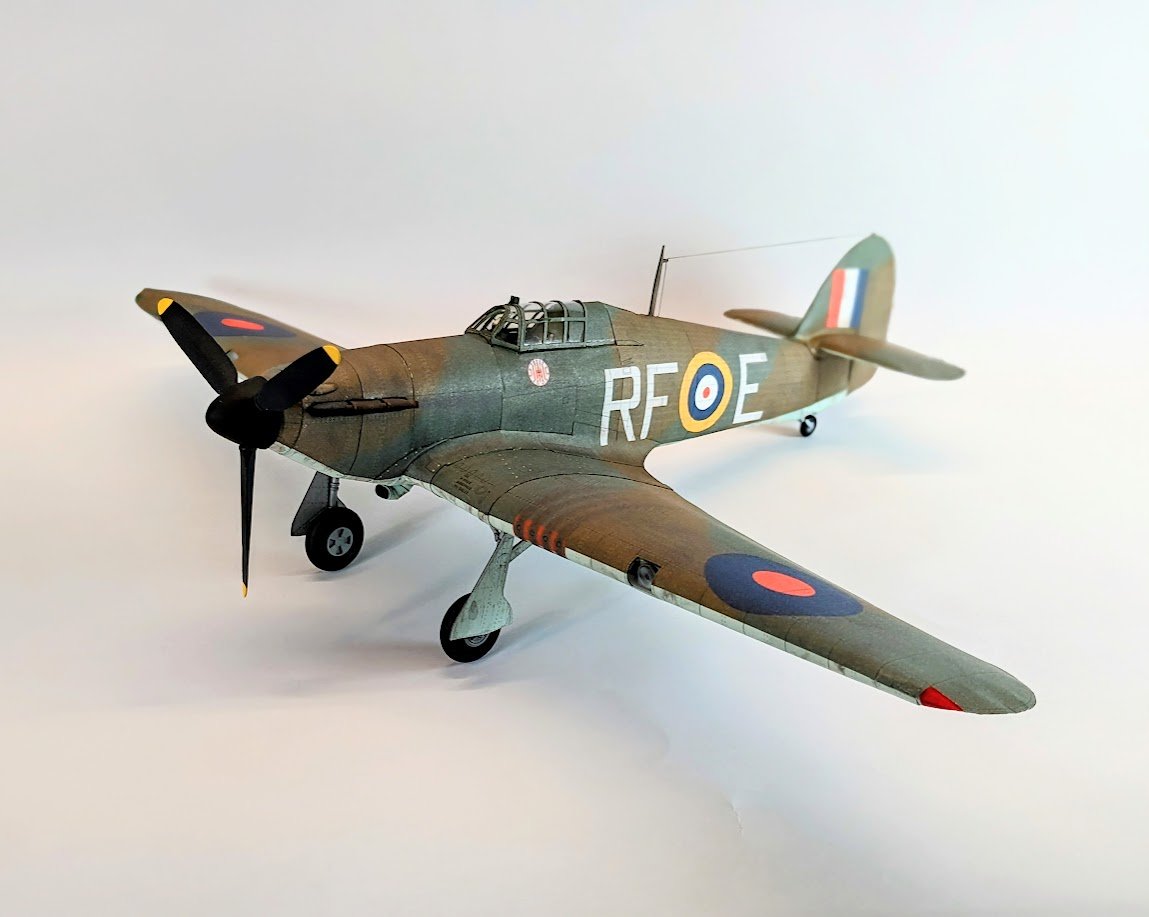
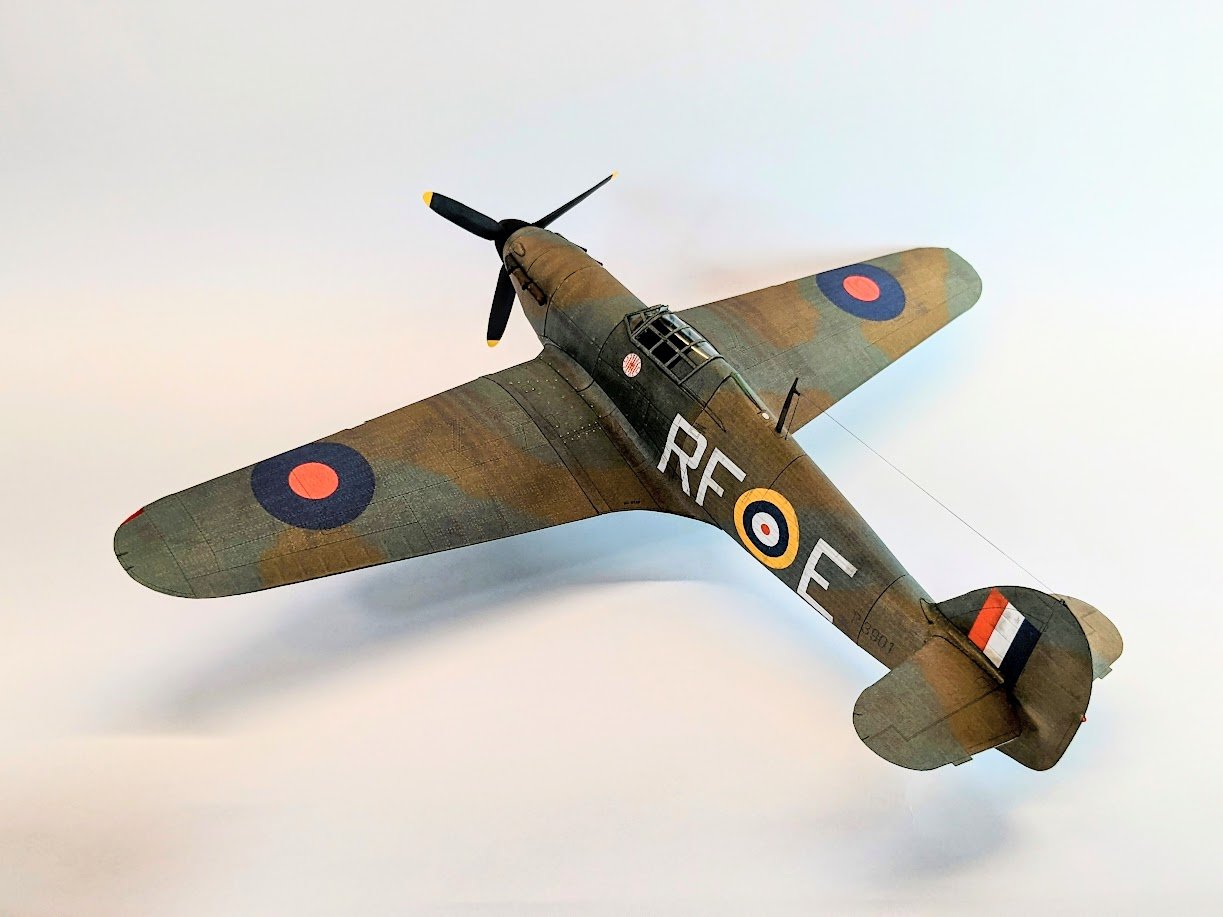
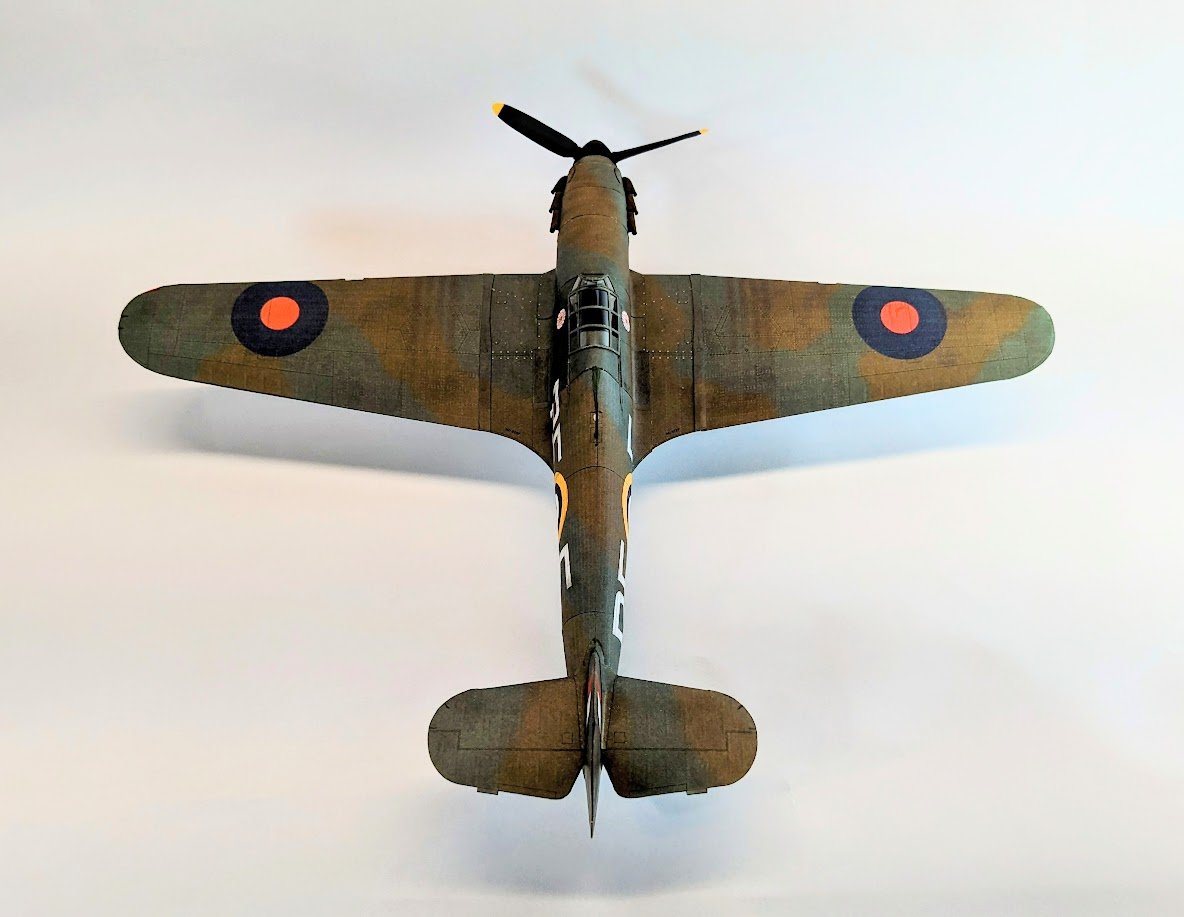
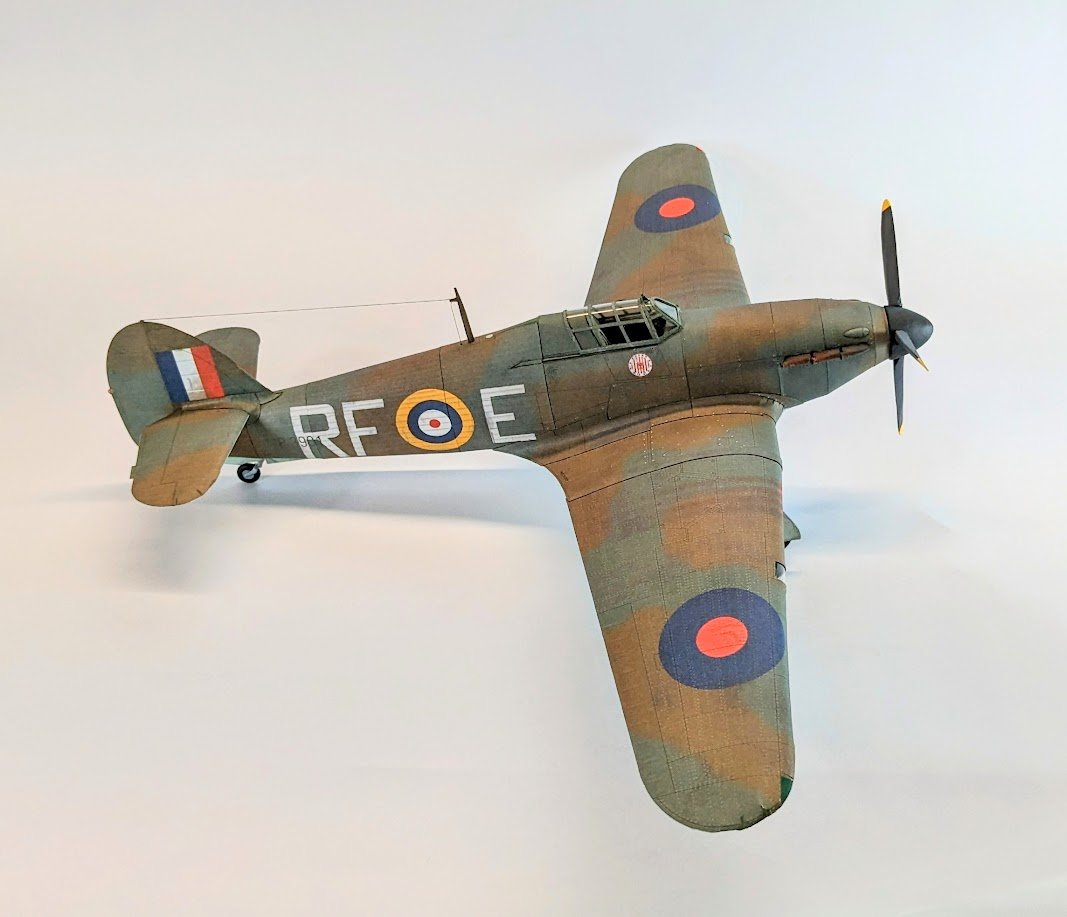
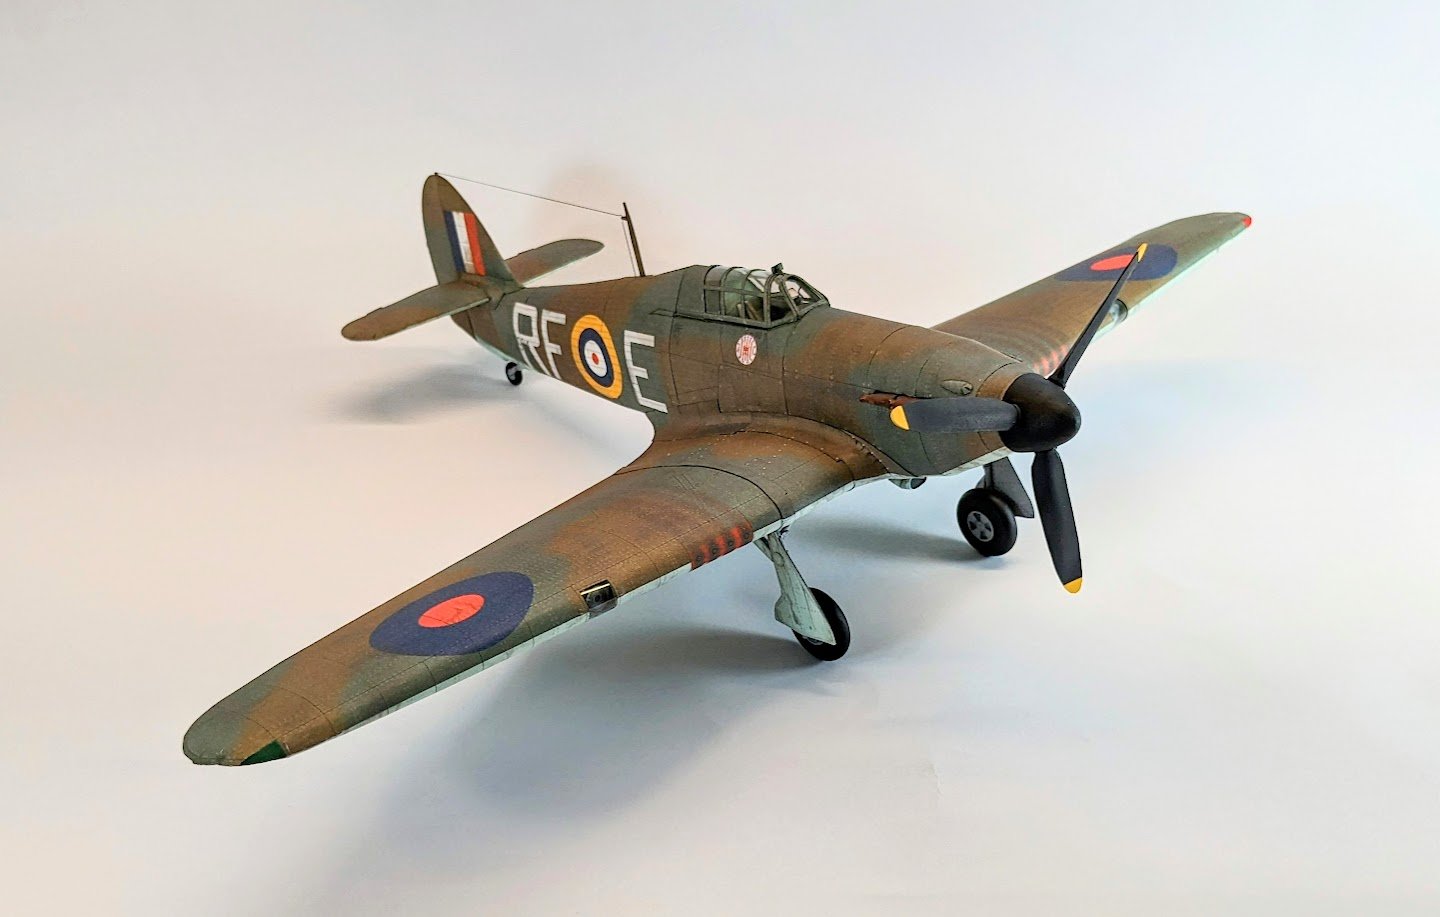
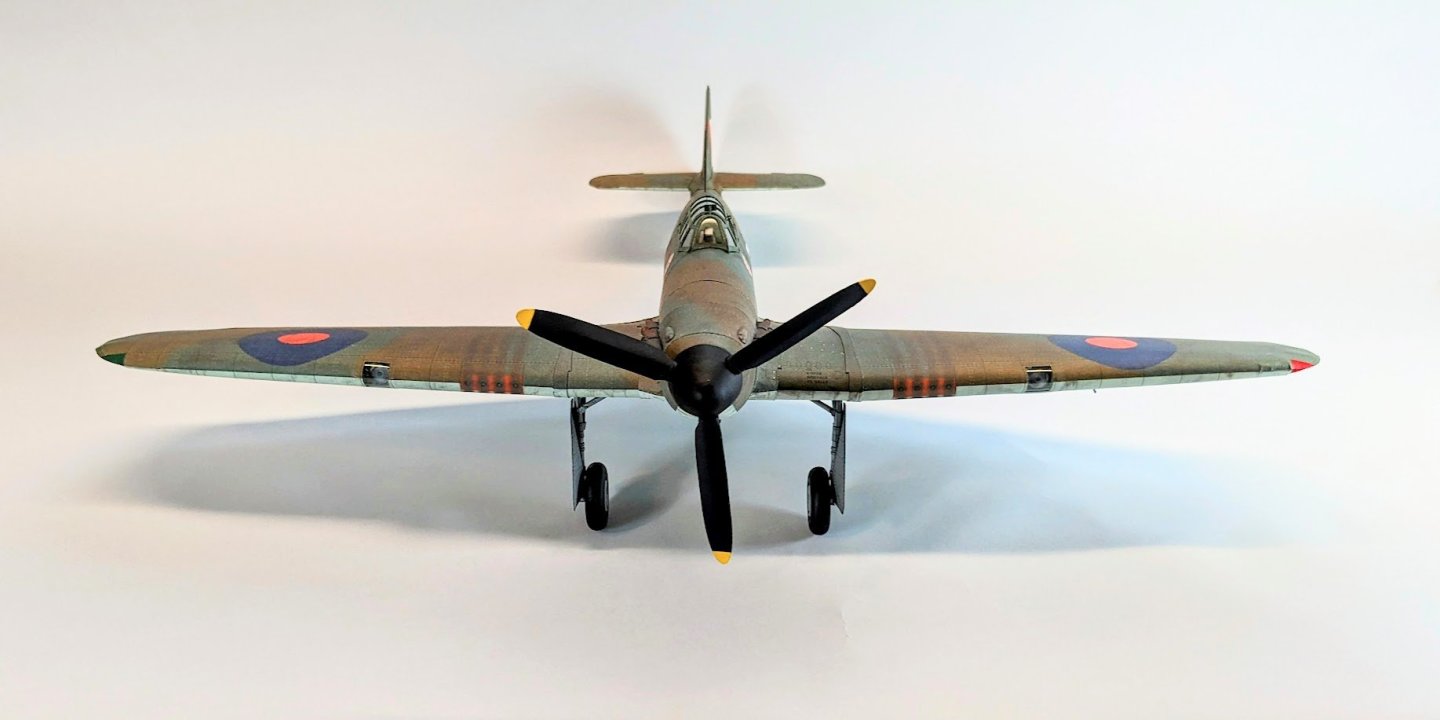
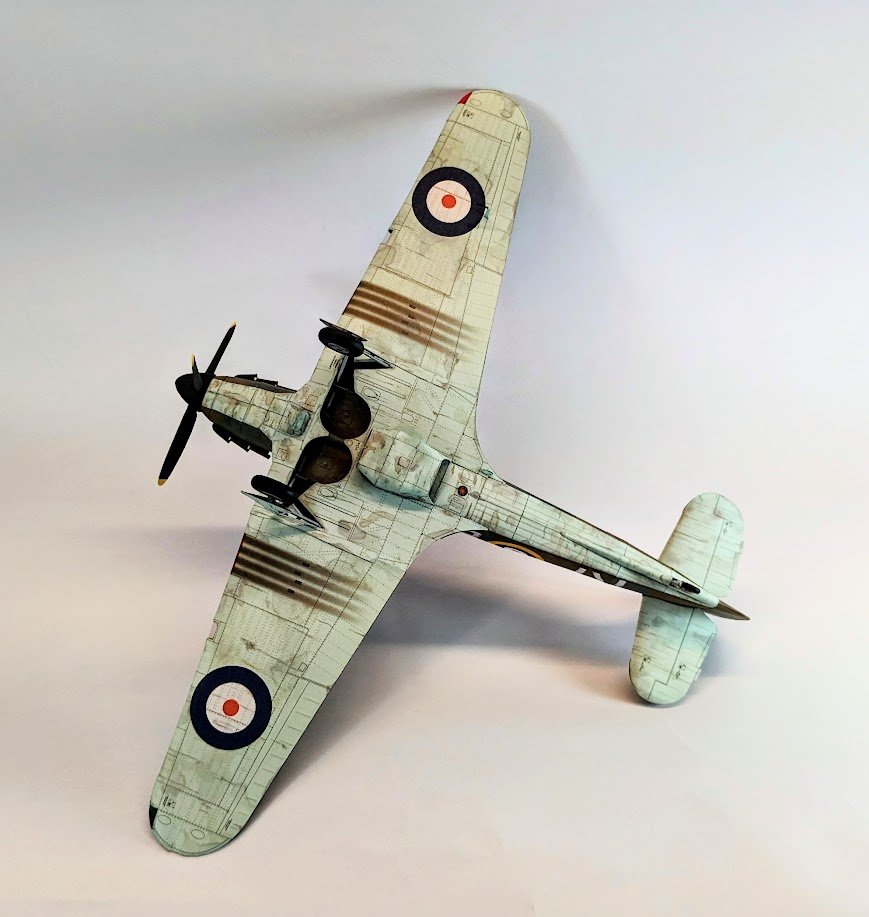
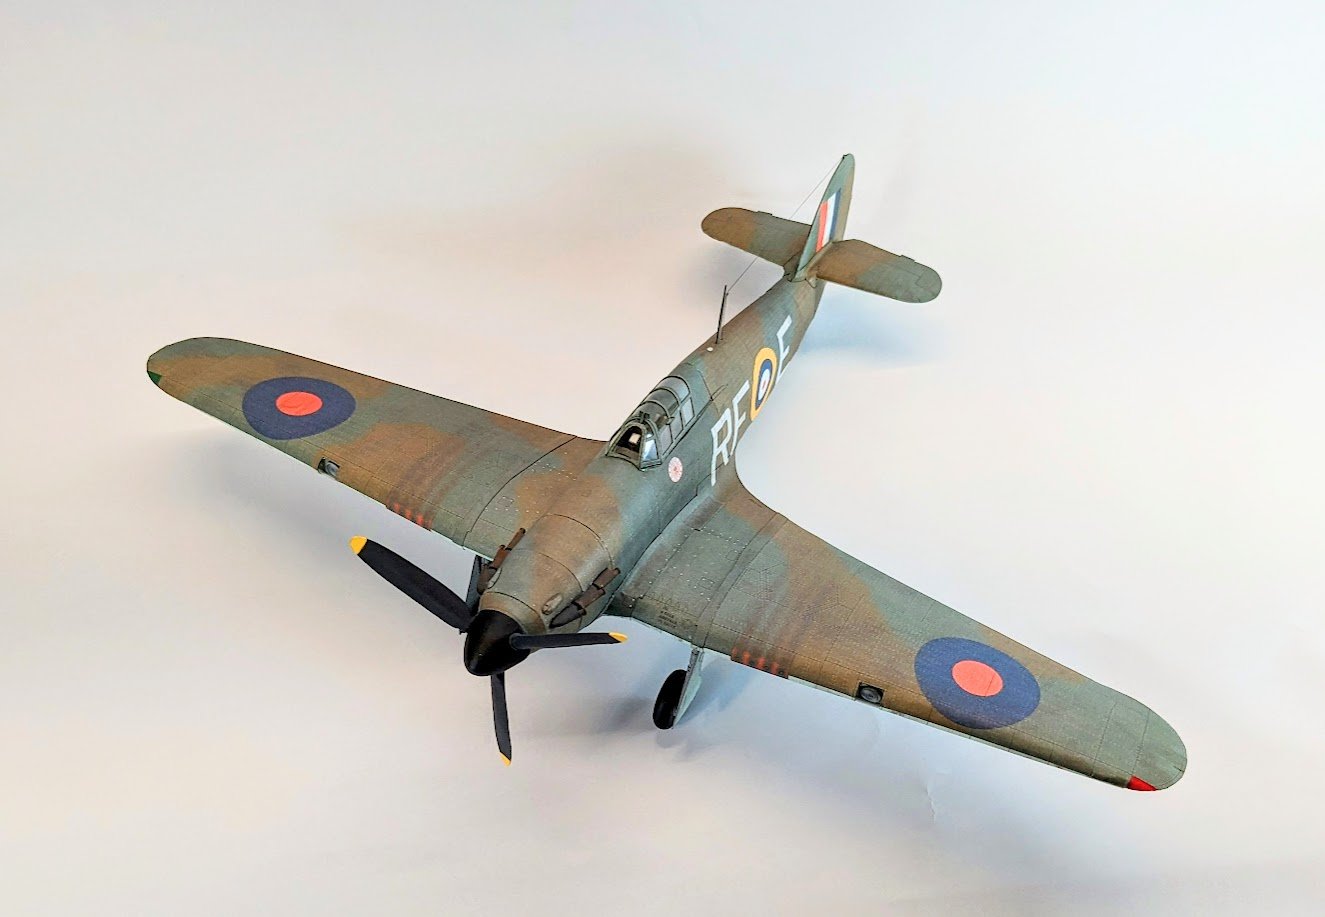
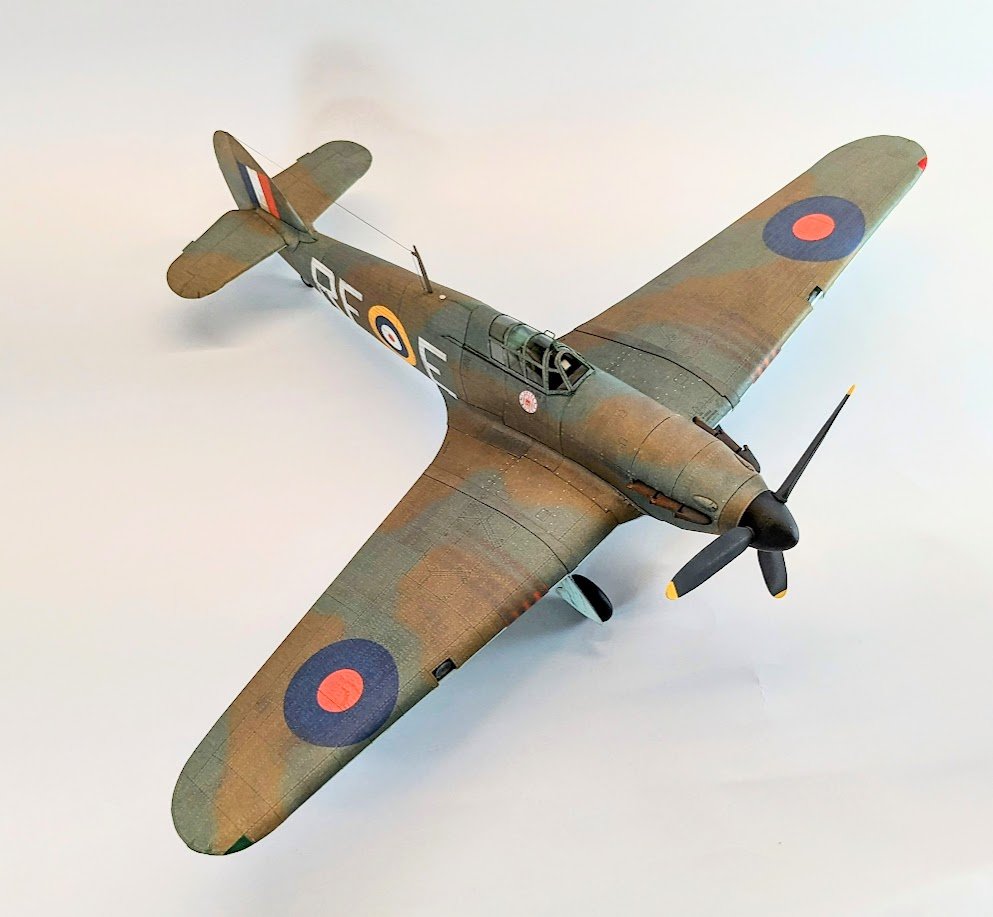
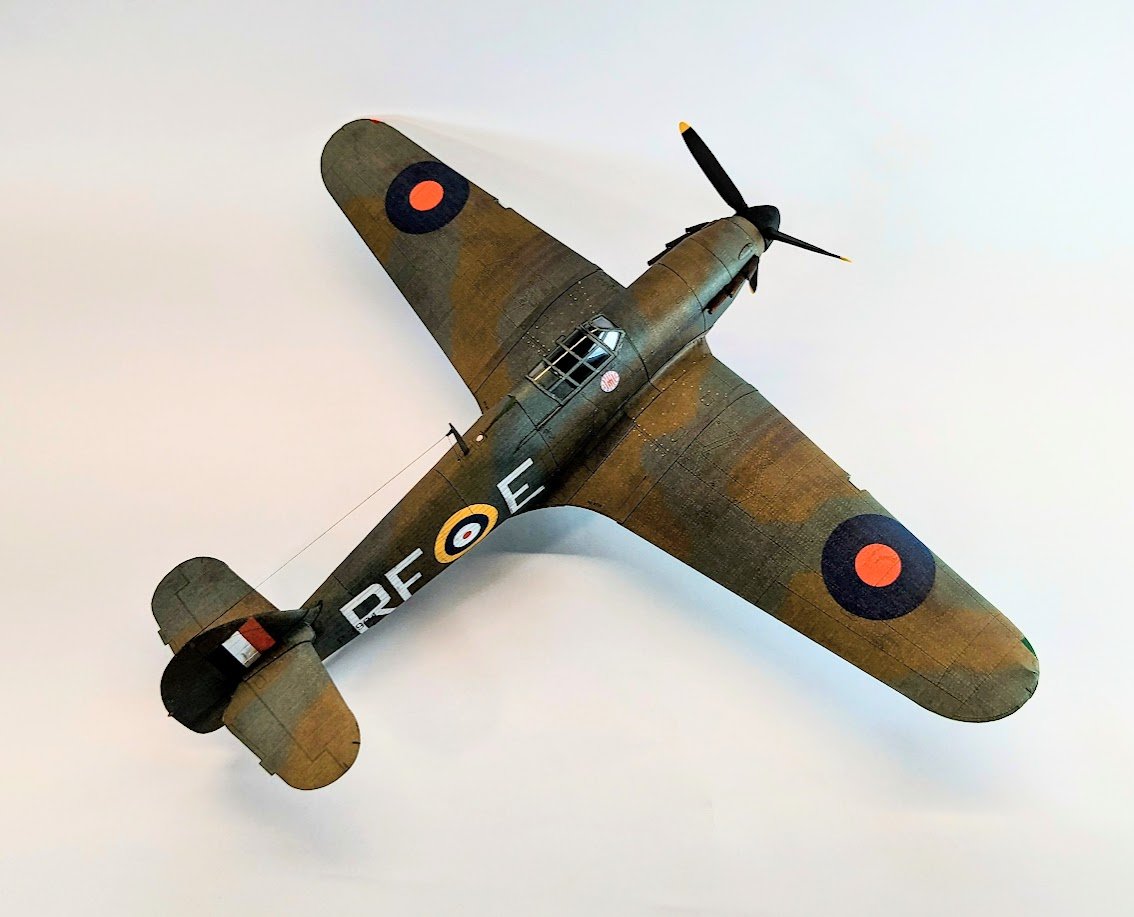
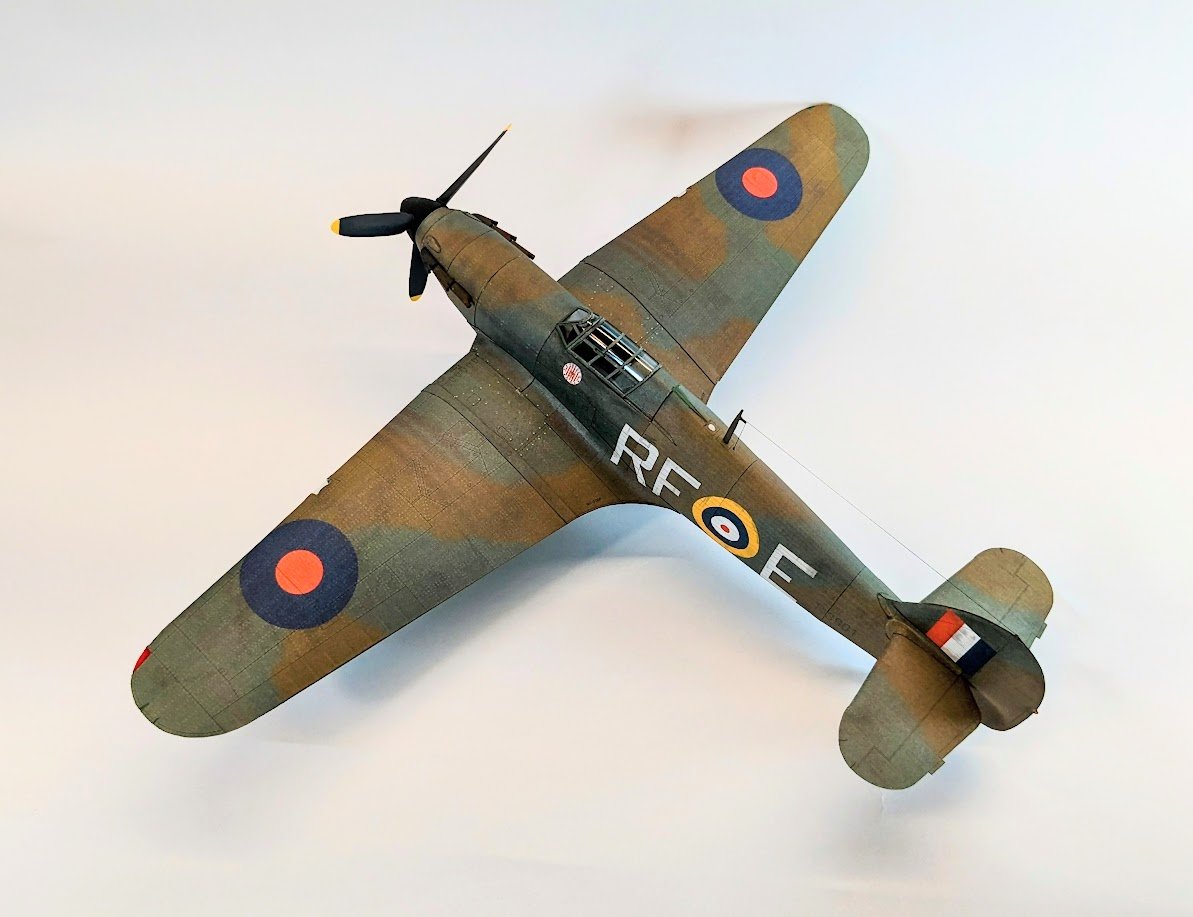
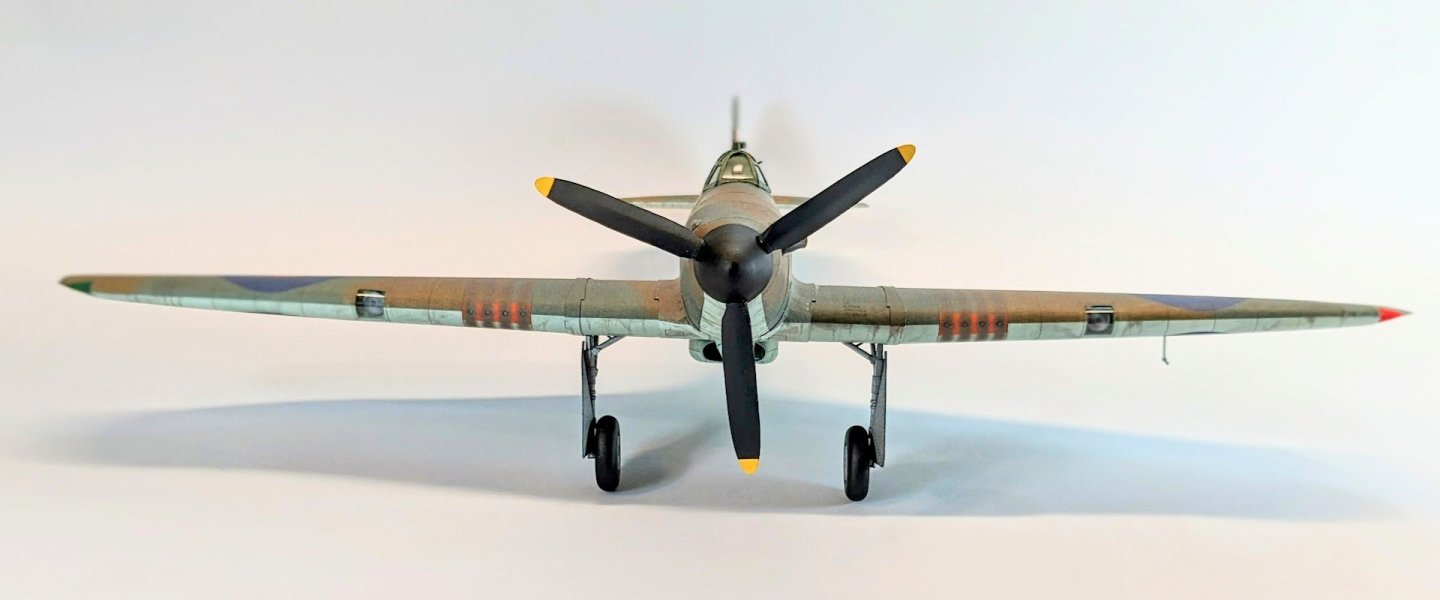
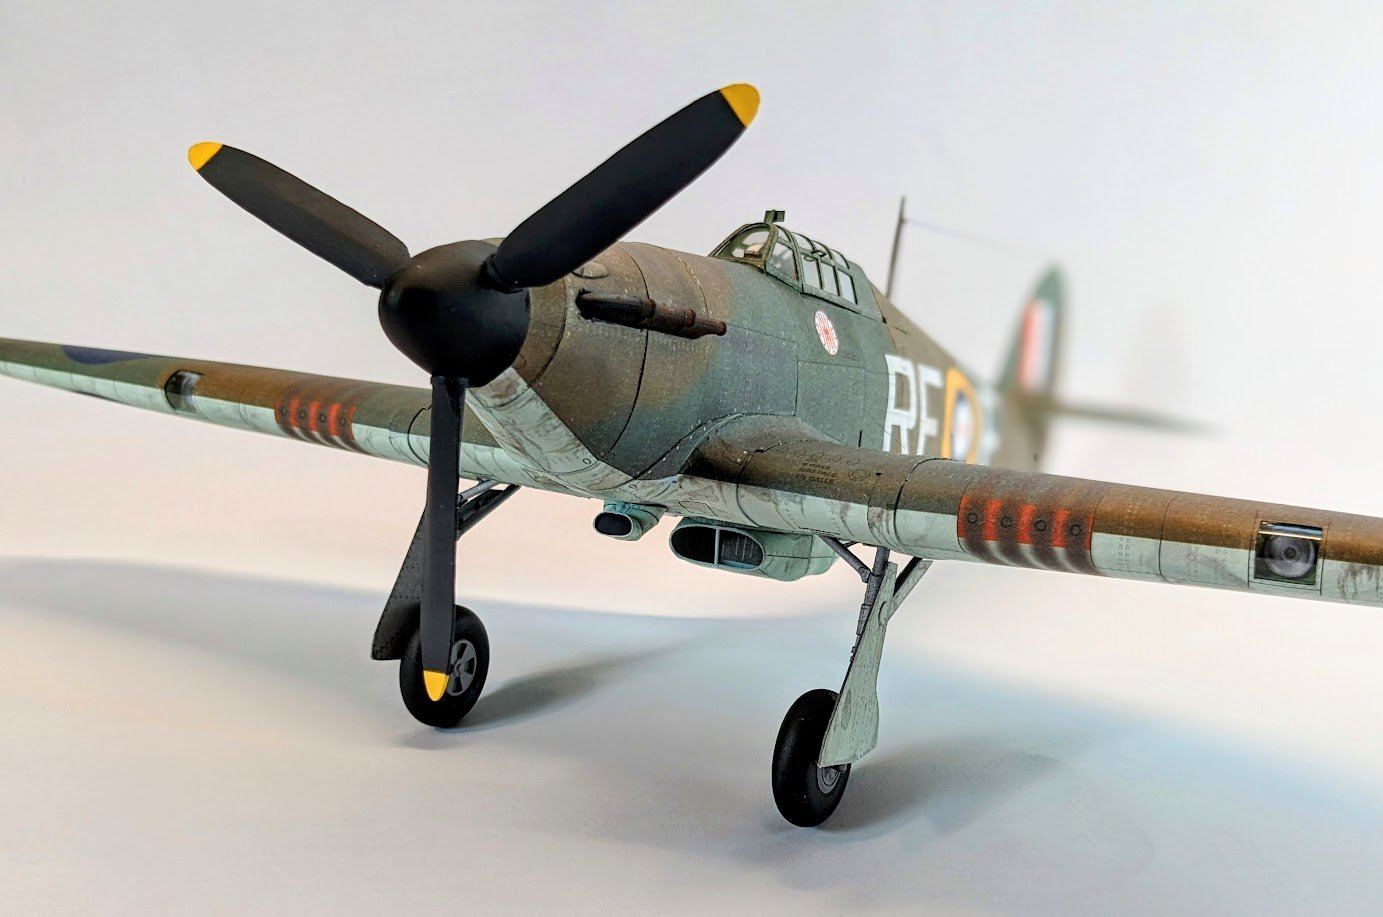
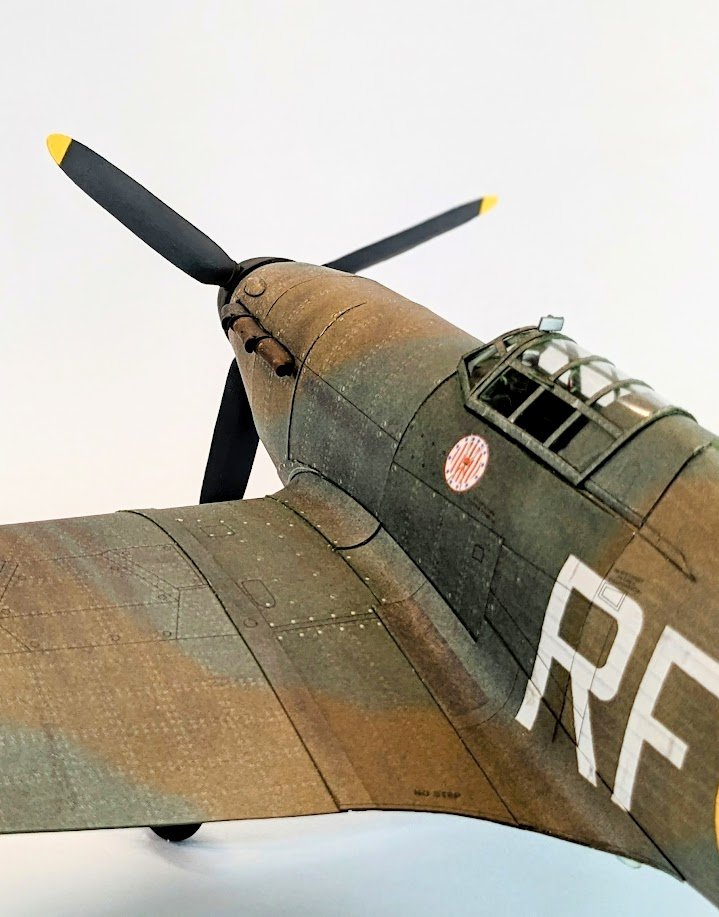
The Big Reveal! This kit proved to be much more challenging than I anticipated, but I am mostly happy with the result. The propeller hub ended up being a little troublesome -- the first painting effort produced a cracked finish, so several additional rounds of filling and sanding were needed. It wound up being pretty smooth, though, and easily wins the "Best Paper Hub I Have Ever Done" award. Enjoy the pictures! I really like the angle on this next shot because you can easily see the Typhoon's lines in the ol' Hurricane. This last one is the new wallpaper on my phone. Cheers!

- 126 replies
-
- 21
-
-