ccoyle
-
Posts
10,354 -
Joined
-
Last visited
Content Type
Profiles
Forums
Gallery
Events
Everything posted by ccoyle
-
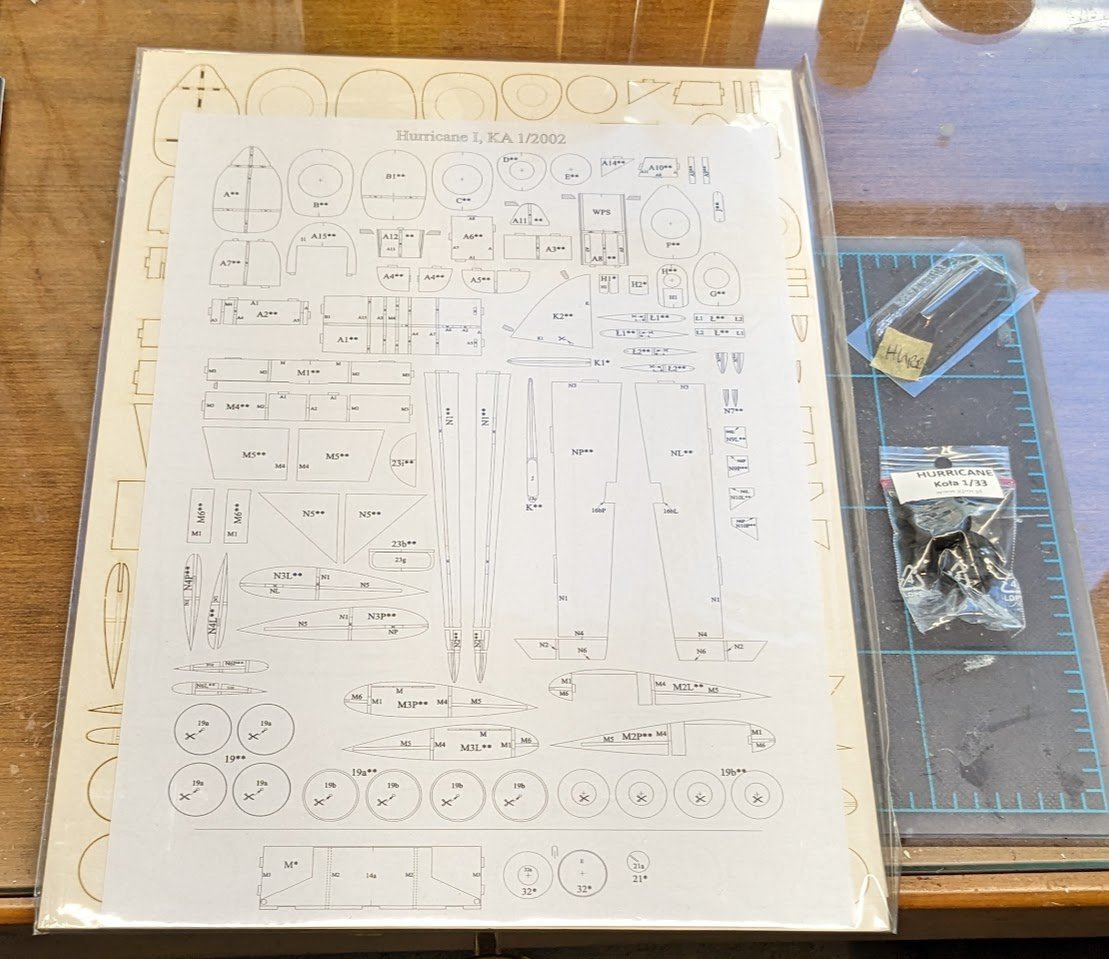
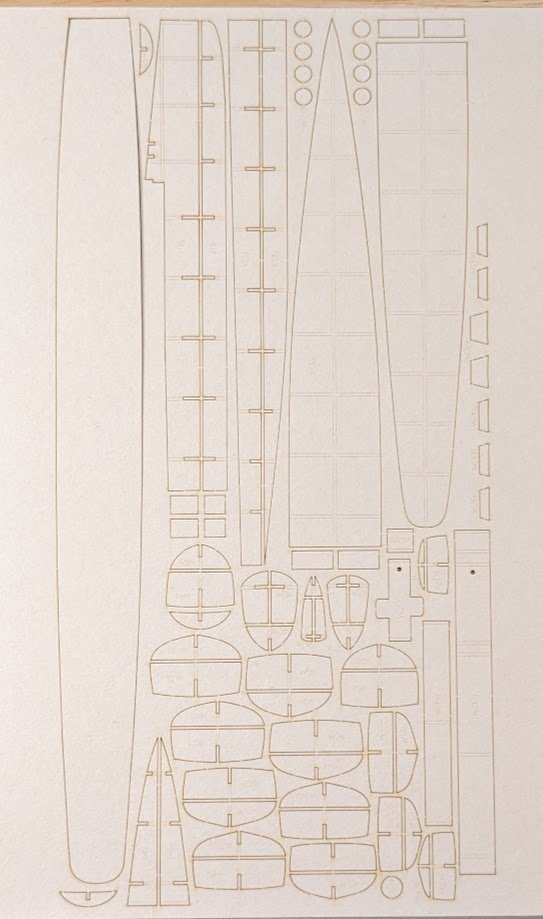
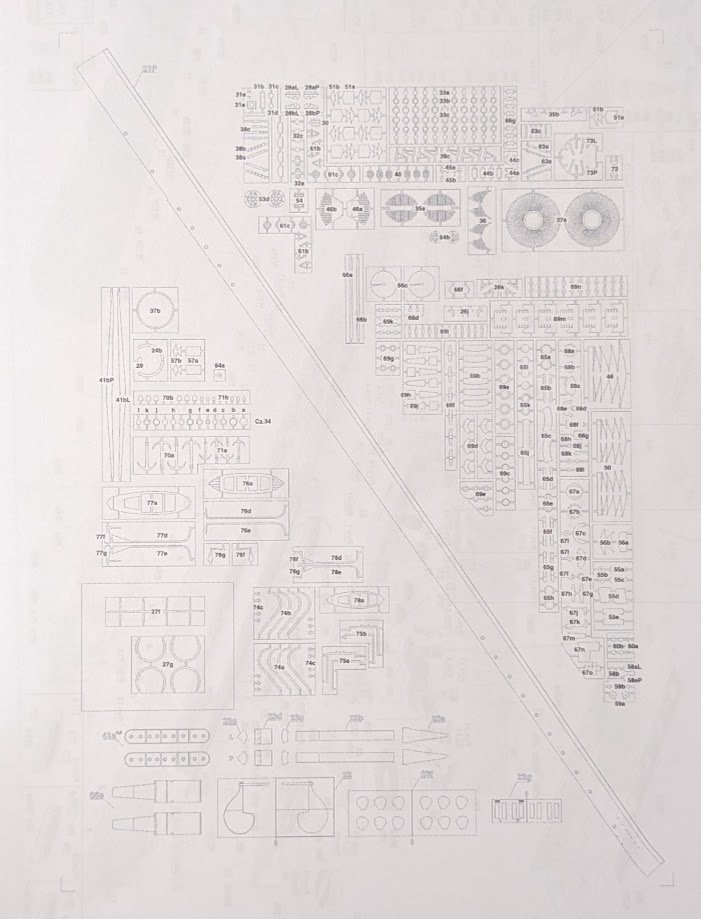
 Well, somewhat surprisingly for a Halinski kit, I ran into an issue with the diagrams. What's shown in them does not seem to match up well with the parts that are provided. The discrepancy was so jarring that I thought perhaps I had been sent the wrong laser-cut frame set, but I checked them against the printed structural parts, and they match, so that's not the problem. I have seen finished examples of this kit, so I know it can be built -- I'm just going to have to stare and ponder at the diagrams to figure out how everything goes together. Stay tuned!
- 126 replies
-
- 13
-

-

-
Hello, Malcolm. Although she is most famous for her actions in 1805, Victory was launched in 1765, so I have moved your build into the proper section. Cheers!
-
Triumph 3HW by Tim Moore - Italeri - 1/9
ccoyle replied to Tim Moore's topic in Non-ship/categorised builds
That certainly looks very realistic! -
Our forum has a built in resizing function. Double-click on any image in your post -- a dialog box will open that allows you to resize your images. I tend to resize mine to either 480 or 640 pixels in width; there is a checkbox to mark to have the software maintain the original proportions. Also, resizing only affects the display size -- members can see the original image by clicking the mage in your finished post.
-
I don't like to speak ill of any legitimate kit manufacturer, because I truly do appreciate the service they provide for modelers who can't scratch build or who otherwise just decide not to. But in this case I'm left wondering: Why? Why bring a kit to market that is neither a novel subject nor an improvement on an existing kit from a competitor? It makes little sense to me. Following on the heels of their equally unmoving Victory kit, this feels like two swings and two misses from the OcCre design department. But I'll leave it to the market to decide the fate of this new offering.
- 34 replies
-
- 10
-
-

-
Hello from Perth, Ontario - On to Victory!
ccoyle replied to Malcolm Brown's topic in New member Introductions
Welcome aboard! The Heller 1/100th scale Victory has been a popular kit over the years and is still held in high regard despite its age. Best of luck on your project!- 31 replies
-
- 3
-
-
- Victory 1:100
- Heller
- (and 1 more)
-
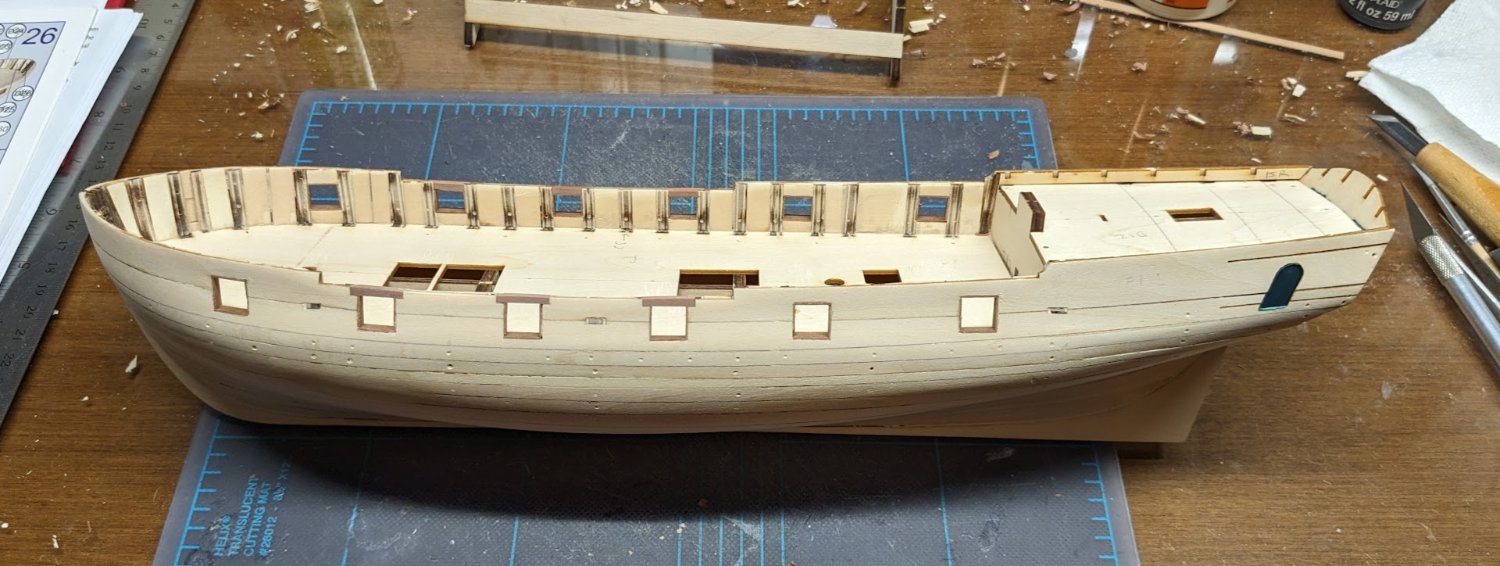
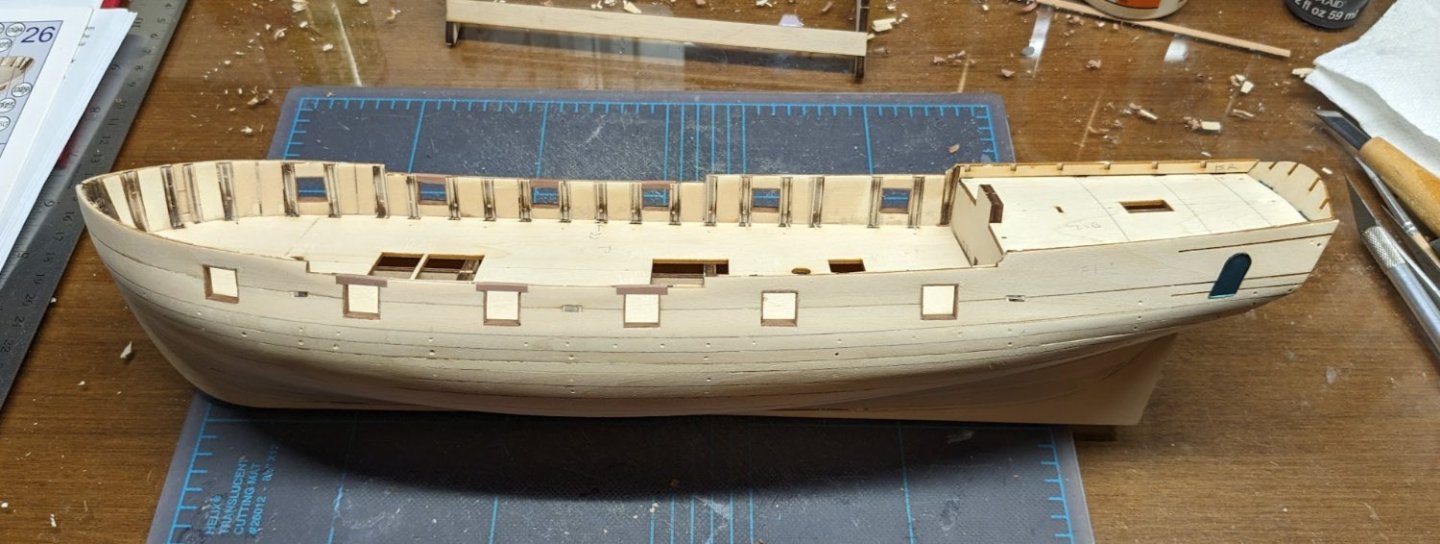
Cladding the hull with its laser-cut veneer is the next step in Phoenix's build sequence, so it seemed like a natural point to take a short break. Better to take a break now, I figure, than to wait until modeling malaise has set in. Thanks for tagging along!
-
Oh, but there is, my friend! Just not in the scale or medium that you usually work in. 😜 https://www.h-m-v.de/en/models/special-purpose-ships/light-vessel-elbe-3/
- 300 replies
-
- 6
-
-
- lightship
- Feuerschiff Elbe 1
- (and 1 more)
-
Hello from Seattle - looking to buy a built ship
ccoyle replied to wyapa's topic in New member Introductions
I'm not aware of any. If Wyapa would be happy with one of the three models he shared, I'd vote for the first one. I think that one looks the nicest of the three. I can't tell if it's in his price range, though, because one has to be a member of the Model Shipyard site in order to see prices. -
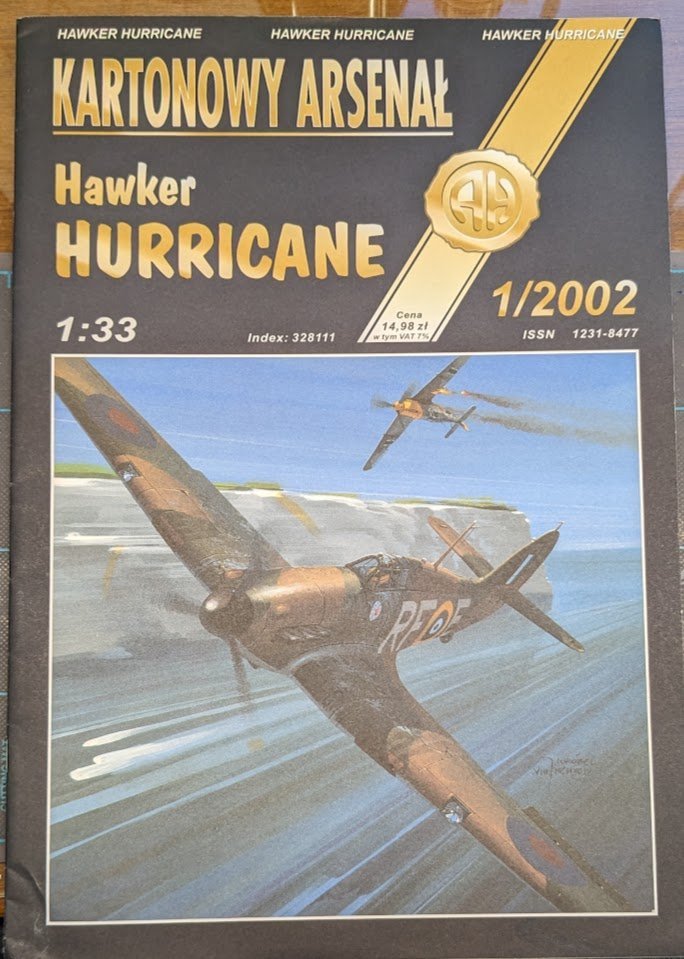
Hello and welcome! I have decided that I will occasionally break up the slog of building a wooden ship by taking a break here and there to do a side project. So, having finished the basic hull structure of Phoenix, I will now take a few weeks to knock out a card model. This time around it will be kit #1/2002 from Halinski -- a Hawker Hurricane Mk. I wearing the colors of Witold Urbanowicz's mount during his stint in the RAF's 303 Squadron, circa September of 1940 (click here for more about Urbanowicz). Urbanowicz shot down nine enemy aircraft while flying this particular Hurricane. I chose this kit for several reasons: I haven't built a Hurricane yet. I have built a Bf-109E-4 that fought in the Battle of Britain, but not one of the British fighters it would have faced off with. The Spitfire Mk. Vb I built earlier began entering service in 1941. I wanted to have one of Walter Oesau's potential adversaries sharing a shelf with his Emil. I now have more Halinski kits in my stash than from any other publisher, so it seems appropriate to thin out the Halinski herd a bit. This will be my fifth crack at a Halinski build. This kit comes from Halinski's "transitional" period -- a time when the company's kits didn't quite come up to the standards of kits produced even just a few months later in terms of complexity, artwork, and quality of diagrams. It's still a great kit, only it's just a half-step down maybe from the usual Halinski standard of excellence. This is not necessarily a bad thing, cuz it means the kit should be slightly easier to build than some of the massively detailed kits the company has published more recently. In addition to the basic kit, I have the laser-cut frames, molded canopy, and a set of resin wheels from GPM. First task, as usual, will be to match some colors for edge coloring. Look for first cuts soon! Witold Urbanowicz (image courtesy of Wikimedia)


- 126 replies
-
- 20
-
-
Hello from Seattle - looking to buy a built ship
ccoyle replied to wyapa's topic in New member Introductions
For the SoS, the proof of the pudding is in the stern ornamentation. All three of the images you shared have incorrect sterns. For comparison, check out the portrait of Peter Pett, SoS's architect. SoS is featured prominently in the painting. https://www.rmg.co.uk/collections/objects/rmgc-object-14422 -
Gun ports lined. This completes the basic hull structure. I'm thinking this is a good point to take a break from this build and whip out a card model. That has always been my plan for this build -- to intersperse it with other projects so as to not burn out on it. Fear not -- it's not gonna take 17 years, like some other unnamed project did!
-
Welcome aboard, Derrick!
-
The ornithopters are not described in much detail in the books. In fact, neither are the lighters, Guild Heighliners, and other modes of transportation. I feel that the filmmakers did a very good job of depicting these craft -- they feel true the books' narrative.
-
Hello from Seattle - looking to buy a built ship
ccoyle replied to wyapa's topic in New member Introductions
What constitutes a "decent" model ship is in the eyes of the beholder. There are plenty of websites that sell what they call "museum quality" models with a wide range of prices. One thing those models have in common, or at least most of them, is that MSW members would consider them to be el crappola grande. Such models are typically built on the cheap in SE Asia and bear only a passing resemblance to the ships they are supposed to depict. Now, with that said, you can get your hands on what most of us would consider to be quite a decent model -- but it's gonna cost ya. True scale models that faithfully depict real ships can only be had by either stumbling across one in a consignment shop or estate sale, commissioning one from a skilled modeler, or purchasing one from a maritime art gallery. The first option requires luck -- the other two require cash or credit, and usually lots of it. If you click here, for example, you can browse the current inventory at American Marine Models. If you do have a peek, take note that no prices are listed. It's kind of like shopping on Rodeo Drive. I hope you find what you're looking for! -
Welcome aboard, David!
-
Here's my old "Sherbourne Mk. I". Tweaked her to include a spreadyard rig. Never did get a case for her -- she's still sitting in the same wooden cradle.
- 991 replies
-
- 22
-
-

-
Short answer: Yes, you are. This area of the forum is specifically for discussing issues related to how the forum works. We used to have (and occasionally still do) members posting questions here about some particular modeling topic; those questions should be posted in the appropriate area of the forum. So, here's some examples: "I can't figure out how to change my avatar." (Goes in the "How to use the MSW forum" area.) "How do I shape the first layer of planking?" (Does NOT go in the "How to use the MSW forum" area.)
-
I will always fondly remember the Ar 196. The 1/72 scale Airfix kit is one of the earliest models I can remember building with my Dad back in the 60s. I built another one when I was old enough to do the job by myself.
-
USS Constitution by mtbediz - 1:76
ccoyle replied to mtbediz's topic in - Build logs for subjects built 1751 - 1800
Those would be early chain stoppers. They do in fact clamp down on the chain (or possibly rope back in Connie's day) to take some of the load off the windlass. -
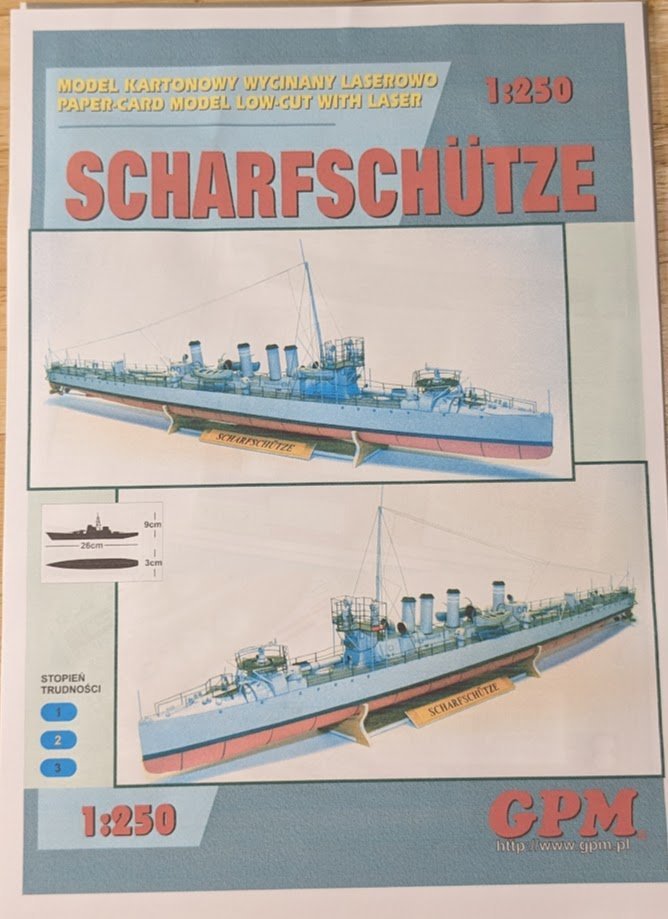
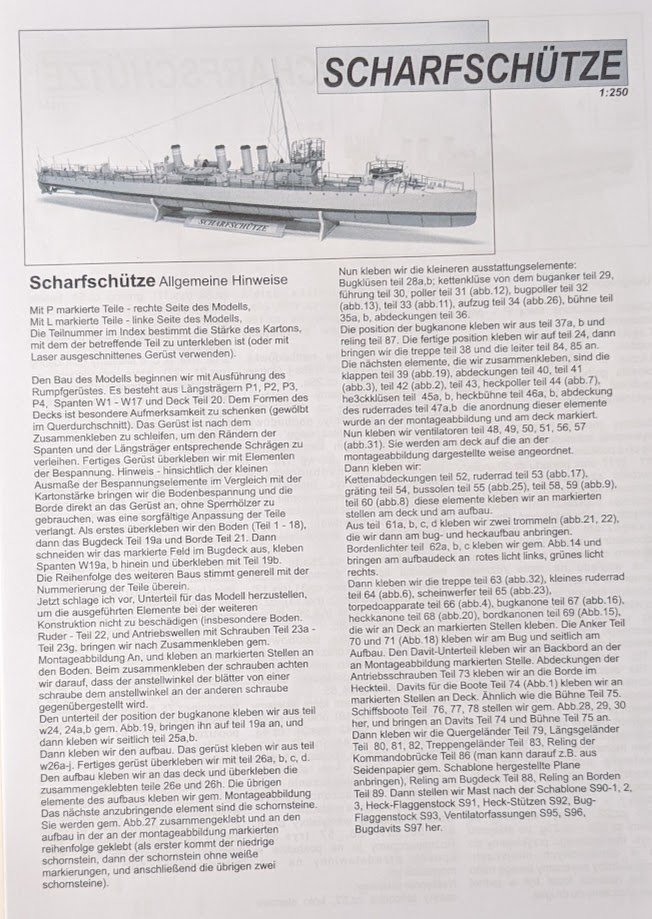
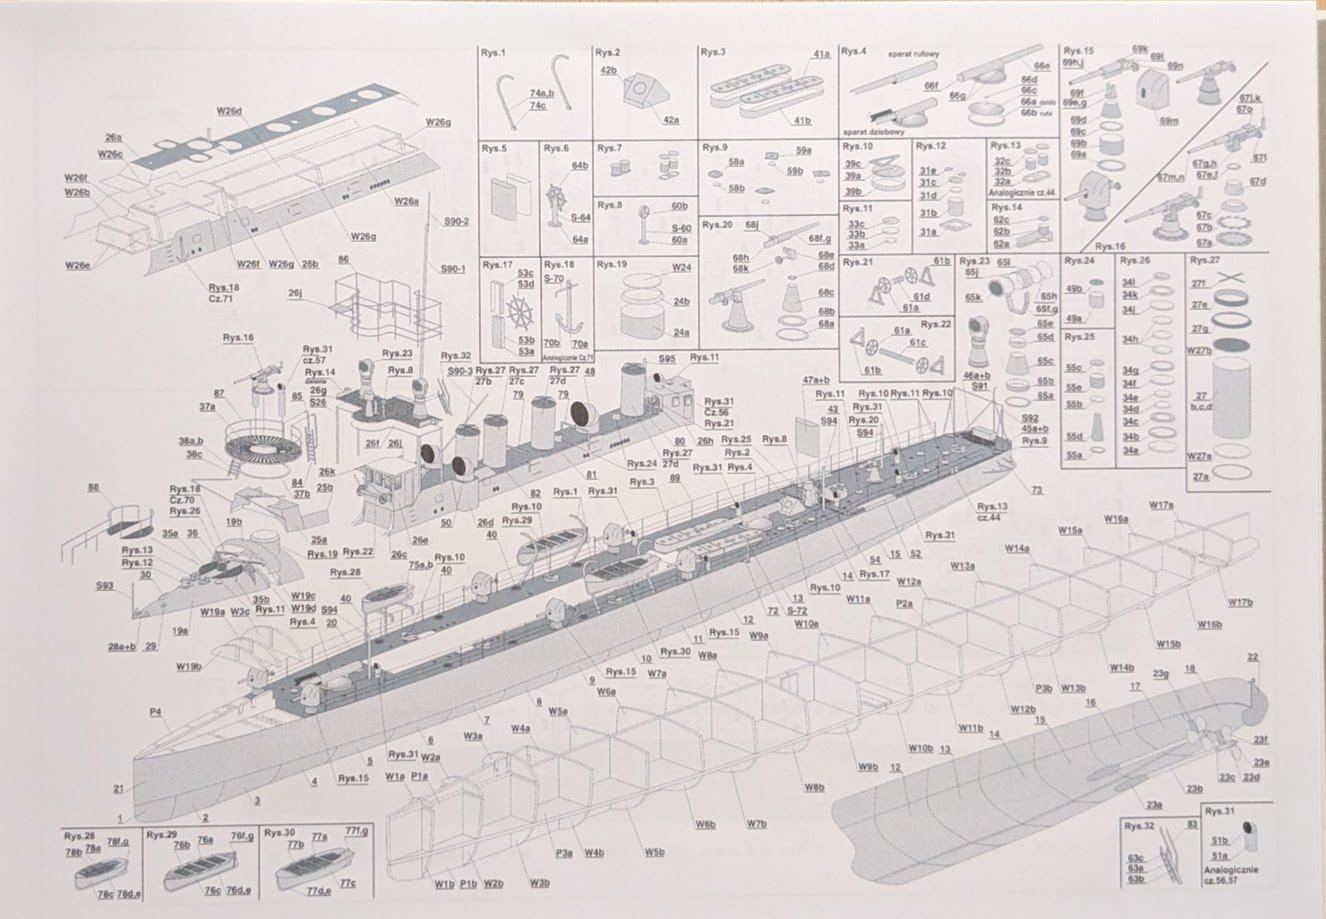
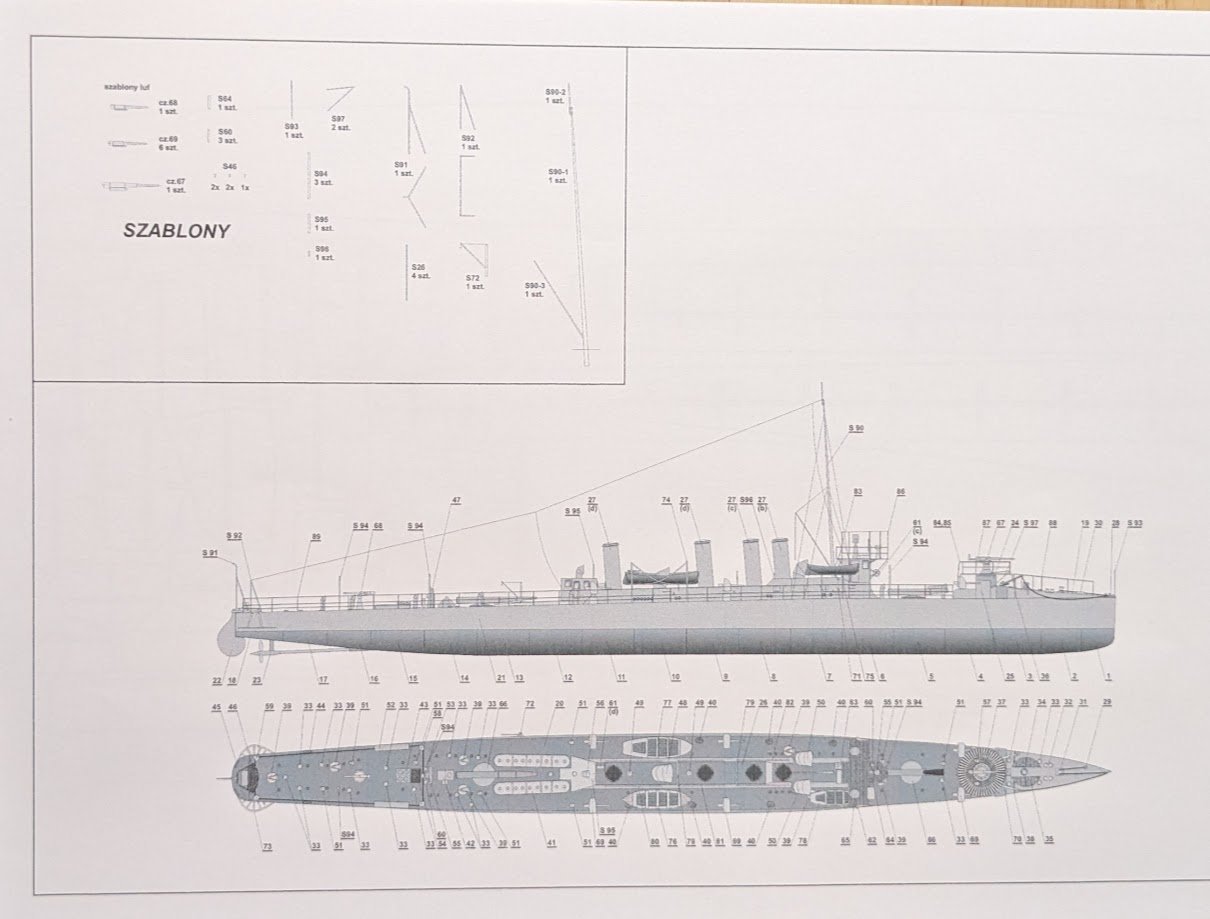
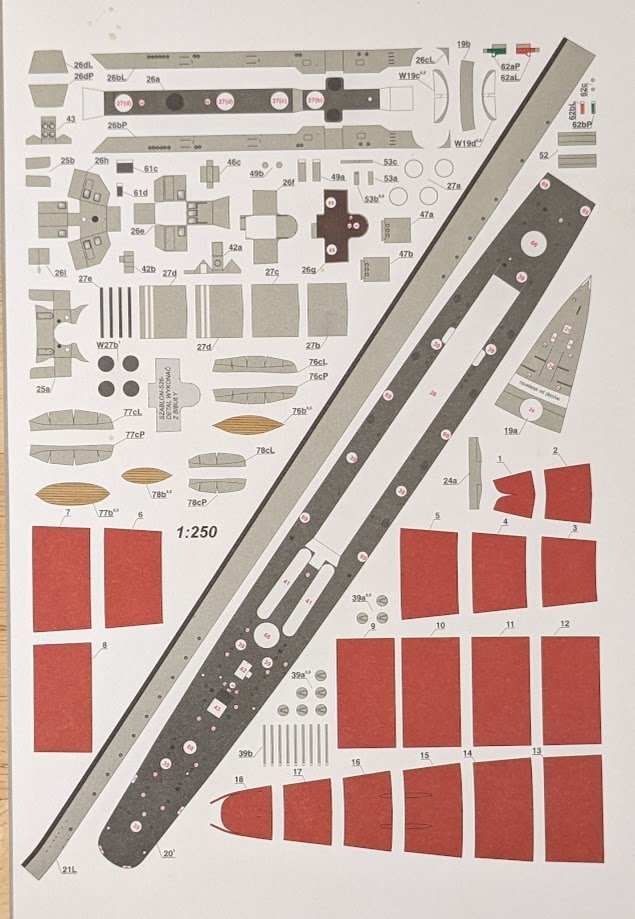
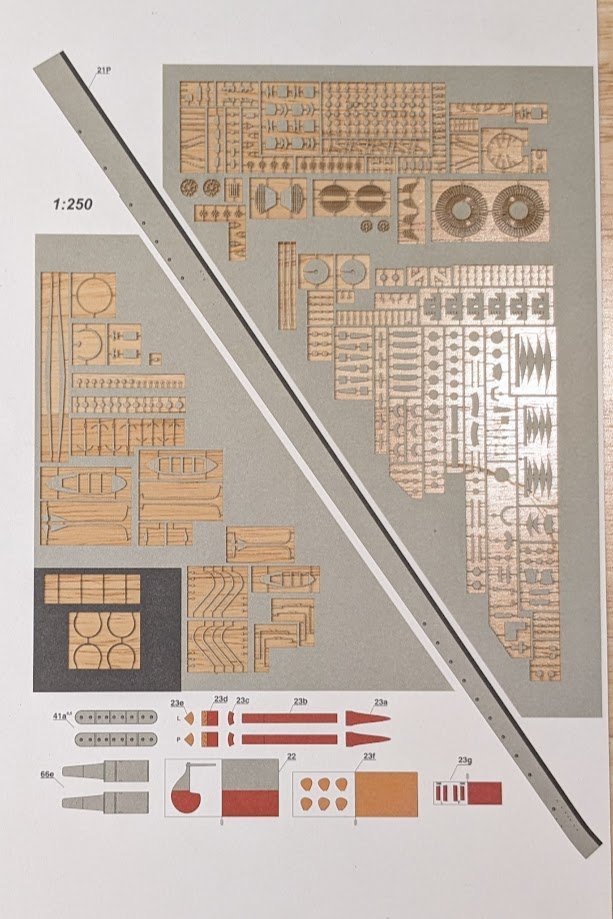
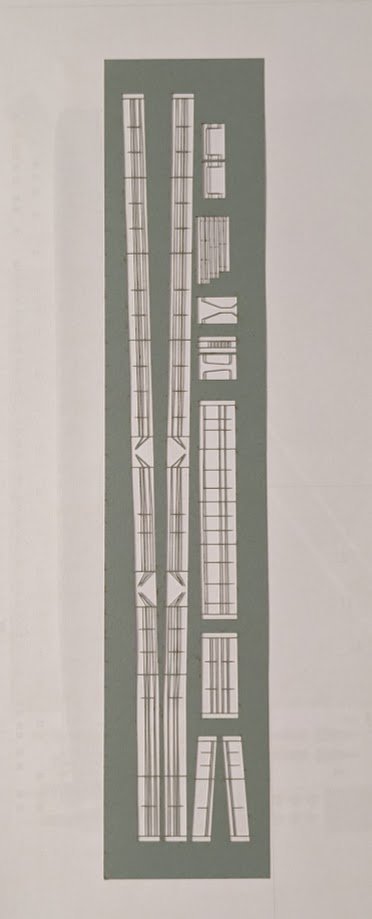
SMS Scharfschütze 1/250 available from GPM Hi, Gang! This will be a sort of quick-and-dirty review, since the kit is not a new release. Whenever I order stuff from Poland, I like to order the most stuff I can get for a particular shipping cost -- if I'm going to get a few items, I might as well get the most for my shipping buck. My most recent order from the Polish firm of GPM arrived today, consisting mostly of after-market canopies and wheels, but I was able to squeeze in a new card model as well. This one is SMS Scharfschütze (Sharpshooter), one of twelve Huszar-class destroyers built for the pre-WW1 Austro-Hungarian navy. The kit has been out for roughly a decade (there is no release date on the cover sheet), so I'm a little lucky that one was still available all these years later. It is available in either 1/200 or 1/250 scale. I chose 1/250, since pretty much all of my other card ship kits are in that scale. At that scale, the finished model will be 26 cm long -- a little more than ten inches. The kit has a number of interesting features. One is that it doesn't come in the usual booklet form, but instead is printed on individual sheets. A second unusual feature is that the designer's name is not given anywhere. However, the kit and its diagrams look remarkably similar in style to the V108 kit which served as the basis for the tutorial I posted in the card models section. That makes me suspect that Digital Navy's Roman Deytna may have designed the kit. Perhaps one of our august members can confirm that for me. One bit of good news with this kit is that it doesn't just come with Polish instructions. The bad news is that the only other language is German. I read German, so that's great for me, but perhaps not so great for the rest of you. Fear not, though, since the kit does include a sufficient number of diagrams to guide the builder to a finished model. Also, the model is not overly complex -- I think that anyone who has built V108 or any similarly simple kit, such as the ones available from Paper Shipwright, will be able to build this kit without too much difficulty. There are only two pages of printed parts, so the total parts count is low. Optional parts allow for the model to be built in either a full-hull or waterline configuration. The print quality is good. Here's where it gets a little more interesting. The kit is a "limited edition" offering -- a kind of deluxe kit that includes both laser-cut details and a laser-cut frames set. It costs only US$13.64, so it's a pretty darn good deal. One of the two pages of parts is laser-cut, which will save a lot of fiddly cutting, even if the laser-cut parts give a sense of being very delicate. Whether they will prove to be delicate during construction remains to be seen. A separate key for the laser-cut parts is provided. There is a separate laser-cut fret containing railings. The frames are cut from the standard "beer mat" used in Poland. At one time, metal gun barrels were also available, but they have been out of stock for quite a while. So, that's it in a nutshell. I think this is an intriguing kit, design-wise, and it depicts a very interesting and infrequently seen subject. The price is definitely a plus. Given my fondness for small warship projects, I may have to make room in the queue for this one sooner rather than later.
-
- 7
-
-
- GPM
- Scharfschuetze
- (and 1 more)
-
Fabulous, Glen! I'm now dreaming of a tropical getaway on some idyllic beach.
- 174 replies
-
- 6
-
-
- Waa Kaulua
- bottle
- (and 1 more)
-
Whenever someone asks about how Model Shipways kits compare to those of other manufacturers, a link to your last post should be provided. That's the sort of structure that would be built from laser-cut parts in most kits these days; MS provides the plans and some raw materials and says, "Here ya go -- build something like this!" You did a great job on your skylight -- getting all of those bars parallel is no easy task!