Chuck
-
Posts
9,390 -
Joined
-
Last visited
Content Type
Profiles
Forums
Gallery
Events
Everything posted by Chuck
-
 Not yet, When i make another batch i will announce. I just posted more rigging packages though. And i am making more of those too because they sold out in about an hour yesterday. The group will always remain open and its just a matter of teying to keep up with the demand.
 -
Malco saw has some great stuff. I have used them before. And i have used Thurston but honesyly, over the last year or so I have been very unhappy with tThurston blades. The last two orders i got from thurston forced me to leave and try Malco. The Thurston blades were so dull I figured they were used and not resharpened properly. In contrast, the blades from Malco were razor sharp and cut even boxwood like butter. I am a convert and very very happy with Malco blades. Wish I had switched years ago.
- 18 replies
-
- 11
-

-
Soak the parts in 90% rubbing alcohol until the glue softens. It will take a while.
- 10 replies
-
- 1
-
-
- 18th century longboat
- model shipways
- (and 1 more)
-
Even though you can probably get there about 90 percent with CAD, Each plank still needs adjusting and tweaking for a really good fit. At least with me, i like to adjust each plank for real life issues the computer would never pick up like the kerf of the laser cutter or adding a little extra width to compensate for creep and bevel. In fact, all of my pre spiled planks for the longboat were done without a computer at all. I used the method described in my build log for it. They were spiled the old fashioned way. Then it was scanned and traced into a vector program. Then i tweaked each one as described above.
-
For those who have been waiting...I have posted ten more longboat kits in stock and ready for immediate shipment. The masting and rigging kits will soon follow in just a few days if everything works out. Chuck
-
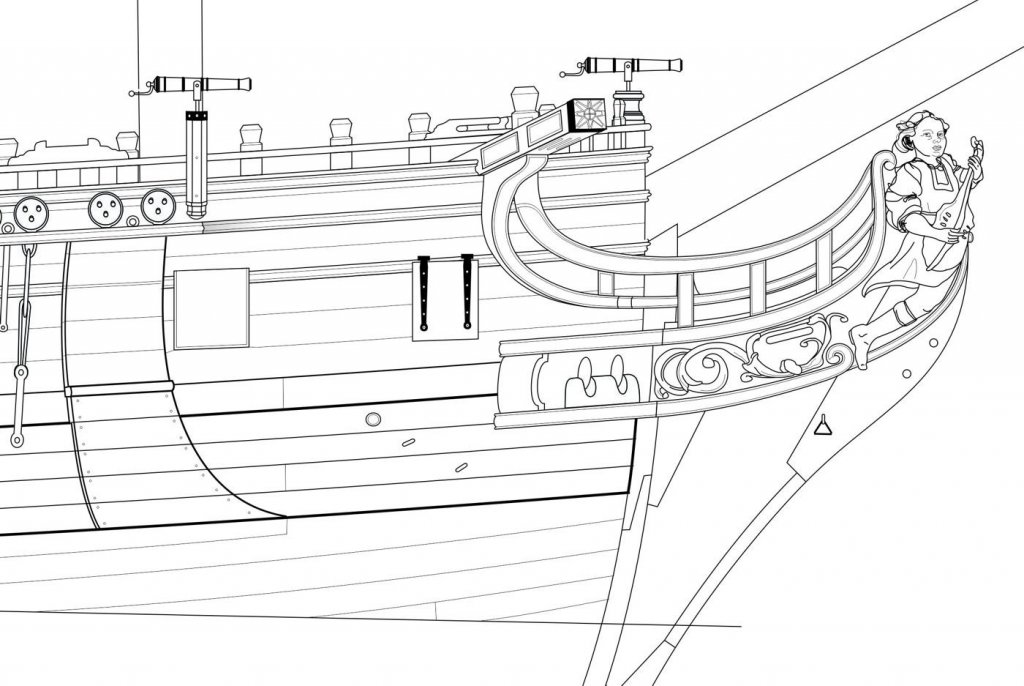
No bowsprit ring would have been used at the stem. This was only used when the bowsprit was NOT well contained under the cap rail. Because the bowsprit is very secure between the frames and cap rail no ring would have been needed. I had it originally but removed it after this info came to light. Looks good!!!
- 574 replies
-
- 4
-
-
- cheerful
- Syren Ship Model Company
- (and 1 more)
-
Indeed.....everyone needs to set up an album for their photos. One album per subject and only include photos of completed models. No under construction pics as they should be posted in build logs. A description of the project is also important.....what kit...MFG or if scratch, based on what plans and built with what types of materials etc. Chuck
-
Beautiful work Ben. I wouldnt have expected anything less!!! Really looks good with exposed frames.
- 64 replies
-
- 2
-
-
- medway longboat
- Syren Ship Model Company
- (and 1 more)
-
Boy she does look pretty. You did an absolutely masterful job on the Cheerful project. I do hope you enjoyed building it!!! One of the best Cheerfuls I have seen and I have seen a whole lot of them.
- 51 replies
-
- 1
-
-
- cheerful
- Syren Ship Model Company
- (and 1 more)
-
Queen Anne Barge by Beckmann - 1/24
Chuck replied to Beckmann's topic in - Kit build logs for subjects built from 1501 - 1750
Yes that stuff...but the matte finish. -
Queen Anne Barge by Beckmann - 1/24
Chuck replied to Beckmann's topic in - Kit build logs for subjects built from 1501 - 1750
One thing you might want to try is a spray fixative. I will spray the entire model with a light spray of matte fixative or dull coat. This really evens out the red paint. You should give it a try on those extra pieces. I spray from about 18 inches away from the model and it really does wonders for the finish. -
No not yet. I havent had time to make the new rope yet. I am still using the cotton/linen stuff. I am hoping to have more rigging kits in about a week. I am stuck working on a few things on the house now. I have to knock off a few on the honey-do list or I will be out on the curb. If you know what I mean....😂
-
Nicely done!!! That is some fine work. Chuck
-
Good to see you back Bill.....any updates on the SOS?
- 382 replies
-
- 2
-
-
- sovereign of the seas
- carving
- (and 1 more)
-
Be sure to text me if you go for lunch and I will meet you there!!!
- 261 replies
-
- 1
-
-
- Medway Longboat
- Syren Ship Model Company
- (and 1 more)
-
Looking Good Ryland...... I am also looking forward to the show next month. It will be great to see you guys.
- 261 replies
-
- 1
-
-
- Medway Longboat
- Syren Ship Model Company
- (and 1 more)
-
Queen Anne Barge by Beckmann - 1/24
Chuck replied to Beckmann's topic in - Kit build logs for subjects built from 1501 - 1750
That is looking excellent!!! Its good to see someone taking such care with their paint work. Very nice progress. -
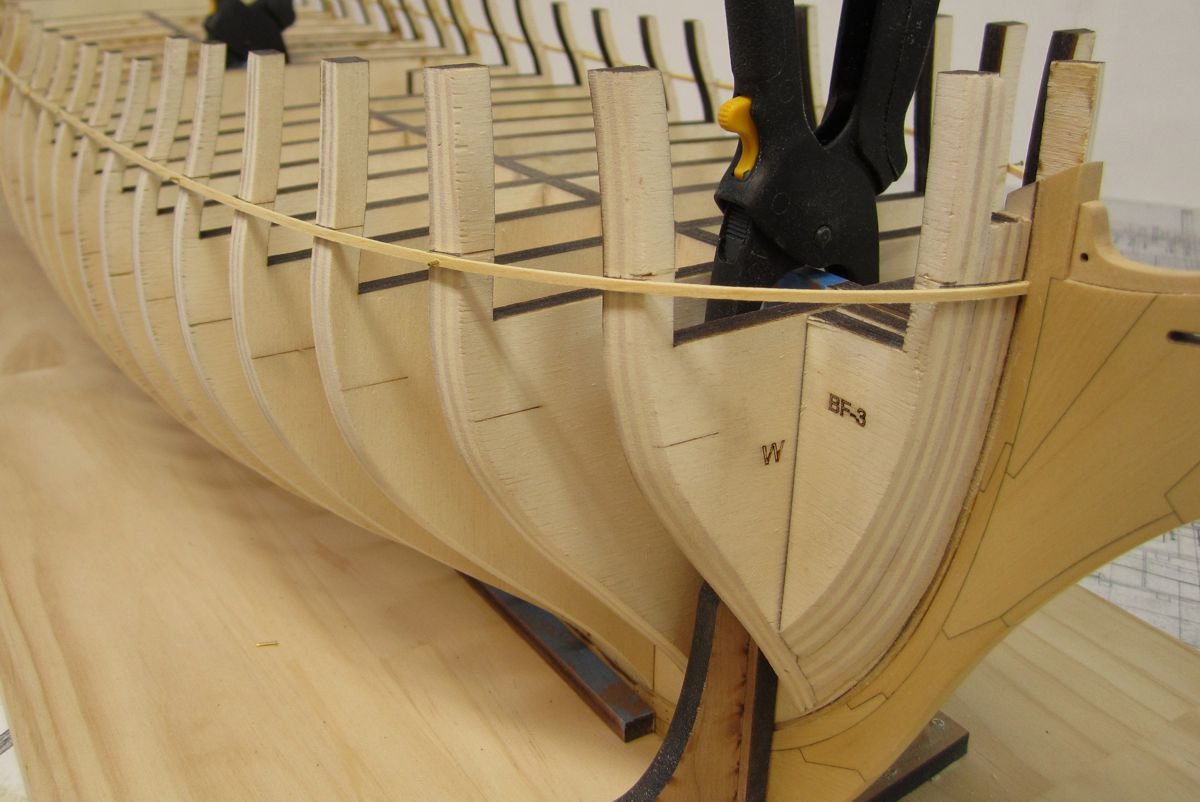
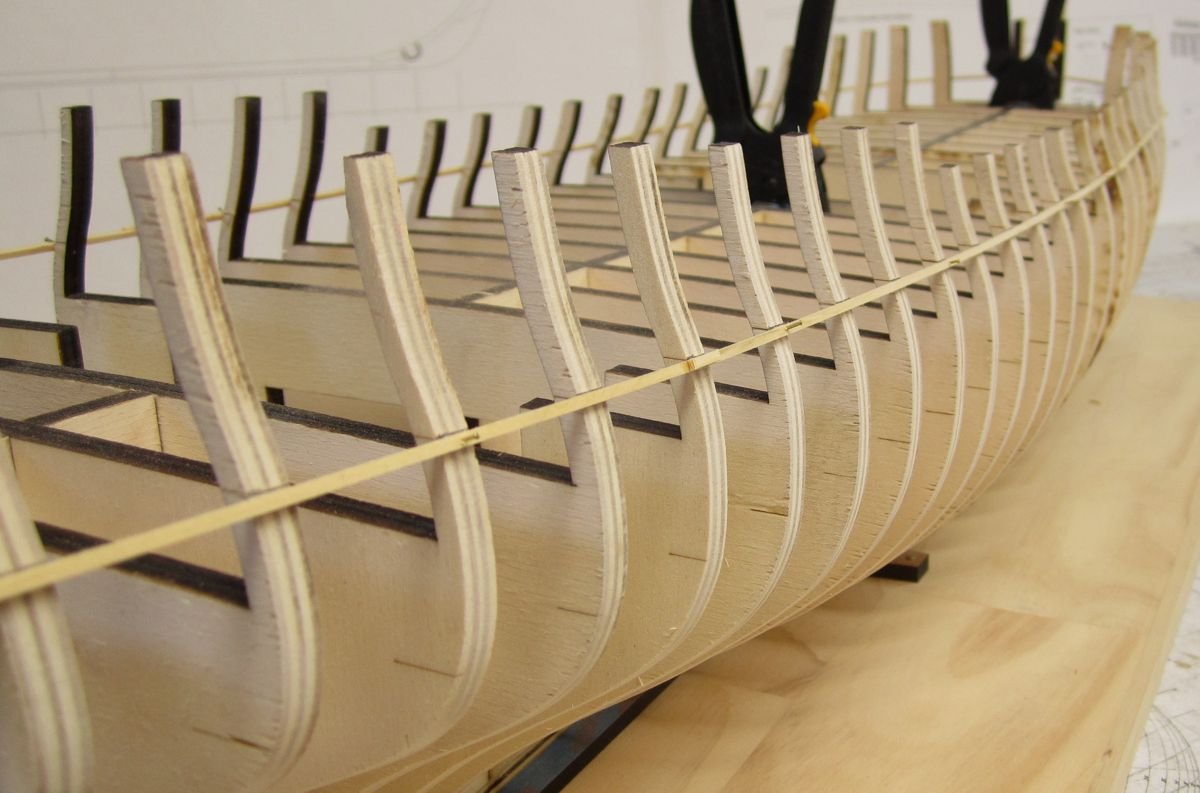
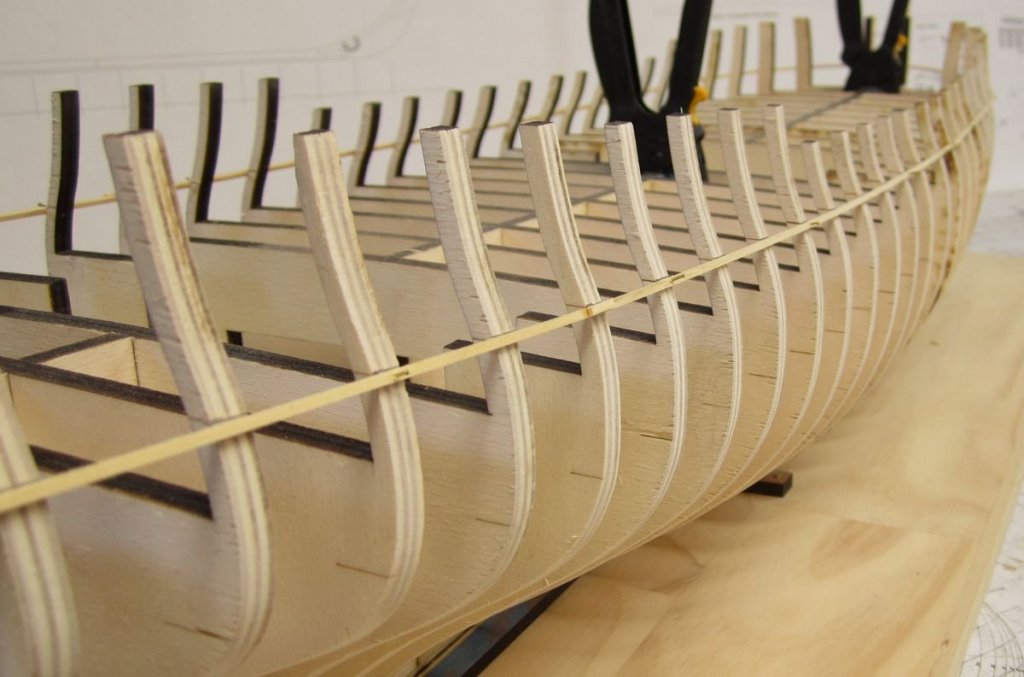
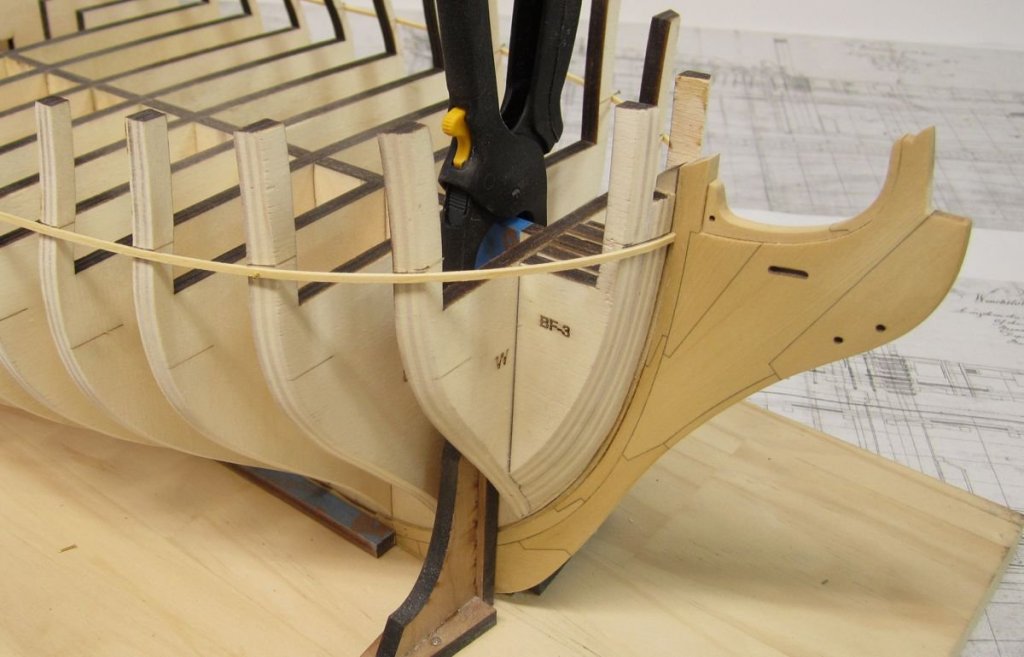
The hull fairing is now completed. Nothing unusual to report. I didnt break any bulkhead extensions and the binder clips worked out great. This is a big hull so it took a few days per side to fair. As is typical there is a fair amount of material to remove at the bow, especially close to the keel at the bottom of the bow fillers. I just took my time and before I knew it I was done. Once completed, I used a batten (scrap 3/32" x 3/64" strips) to locate a smooth run for the TOP of the gun port sills. The top of the batten was initially lined up with the laser-etched reference lines for the sills. Then after viewing it at many many angles I tweaked it untle I got a nice run from bow to stern. There are no dips and it matches port and starboard. Even though there are laser etched reference lines there are so many factors that could cause them to be higher or lower by just a hair. This will throw off the run of the ports so the batten is an absolute must. Its the only way to spot where the run of the ports needs adjustment. Then I used a sharp pencil to mark the top of the batten and then removed it. Next up I will start adding the port sills and then follow that with the remainder of port framing. You can check my run of those battens in the photos!!! I think they are almost good to go. I hope you can see the laser etched reference on the sides of each bulkhead and my new pencil lines on the outside and along the top edge of the batten.

- 1,784 replies
-
- 54
-
-
- winchelsea
- Syren Ship Model Company
- (and 1 more)
-
Thanks for the mention.... Rich, that "rope" that comes with the model shipways kit is not natural fibers. In fact its Nylon. Its plastic so using water wont do anything because it wont absorb. It just evaporates right off the surface. They really shouldnt have wrapped it so tightly around those little cards. The stuff they use is literally Griffin Nylon beading thread...see here. https://www.amazon.com/dp/B01HK928W6/ref=twister_B01HK928Y4?_encoding=UTF8&th=1 There is no getting the kinks out of that. The thick stuff is wound so tight around the large cones that it will literally flatten out and not have a round profile. Thats also why it wont hold a knot.....its too slippery because its nylon. You may want to replace that with some softer natural fiber rope. Chuck
- 1,135 replies
-
- 5
-
-
- model shipways
- syren
- (and 2 more)
-
Just to give everyone a really good idea of what this model will eventually look like....here is the first plan sheet. No worries about piracy as this one is just a pretty drawing. No part templates. Download a pdf.....Winchelseasheet1a.pdf
- 1,784 replies
-
- 30
-
-
- winchelsea
- Syren Ship Model Company
- (and 1 more)
-
Yes it will be made available if you want to upgrade to CNC milled boxwood carvings. There is a whole set including the stern decorations and drops. There will also be a less expensive resin set and I am sending these boxwood carvings out to be cast. So depending on which ones you want there are some options. Here are some of the boxwood carvings placed on a test stern transom for sizing. These beauties were created for me by Jack our fellow MSW member (HJX). He is also working on his own line of kits and they will be outstanding as well. I cant thank him enough. You guys will soon have some incredible kits to choose from made by companies that dont have a history of pirating others. And I failed to mention that a Cherry version of the Winnie will also be made available and that should look great with these boxwood carvings.
- 1,784 replies
-
- 37
-
-
- winchelsea
- Syren Ship Model Company
- (and 1 more)